adoyle88 wrote:
You are absolutely correct. We've already found many things we want to improve upon during my build and we aren't even finished building this car. I am sure we are going to find even more when we start driving it on the road and track.
What's the old rule of thumb? When the car finally moves under its own power, the job is half complete.

NOHOME
SuperDork
12/18/14 12:29 p.m.
Jerry From LA wrote:
adoyle88 wrote:
What's the old rule of thumb? When the car finally moves under its own power, the job is half complete.
Not heard it put that well. Consider that phrase stolen.
The creativeness in this build is awesome.
If you don't want to go out and tear something apart and rebuild however you want after reading this thread, you don't have a pulse.

4Msfam
Reader
12/18/14 7:14 p.m.
Such a great build! How are the rear springs going to mount? Do they mount under that T-piece that is holding the three locating links?

4Msfam wrote:
Such a great build! How are the rear springs going to mount? Do they mount under that T-piece that is holding the three locating links?
Your question leads right into my next log entry:
December 11
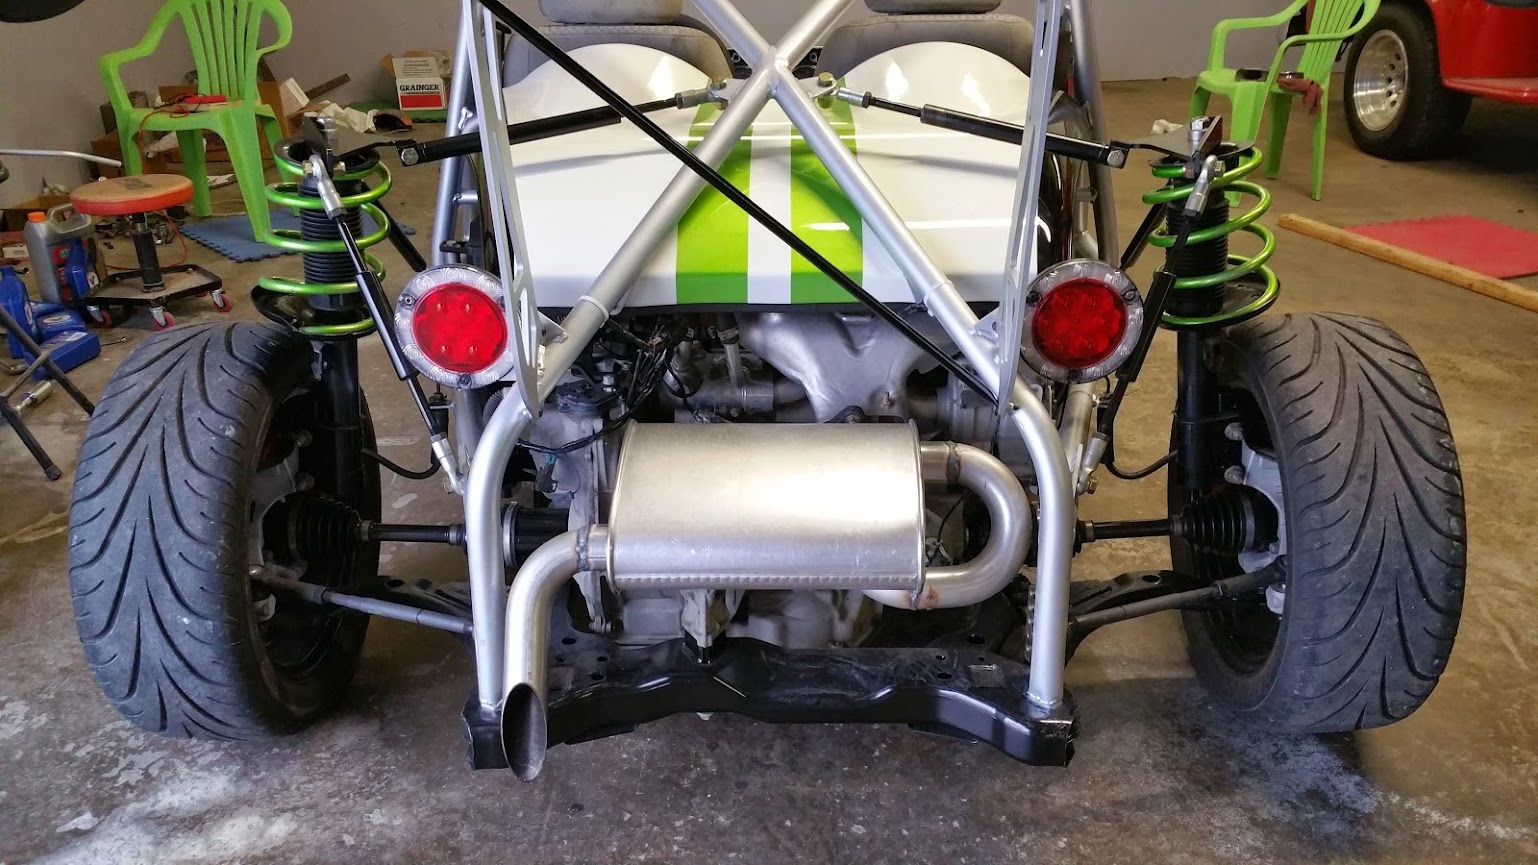
After we had attached the new tie rods on the rear of the car, we moved the suspension through its travel without springs, making adjustments as needed. We might have dialed in a little bit too much camber but we'll have to use tire temps from track testing to determine if that is true.
Once we got everything the way we wanted it, we removed the T shaped strut tower plates, slipped the springs down onto the lower spring buckets, put the stock Cobalt upper spring buckets on top and reattached the plates. Our T shaped plates mount just like the rubber mounts from the Cobalt, but they are a whole lot more rigid.
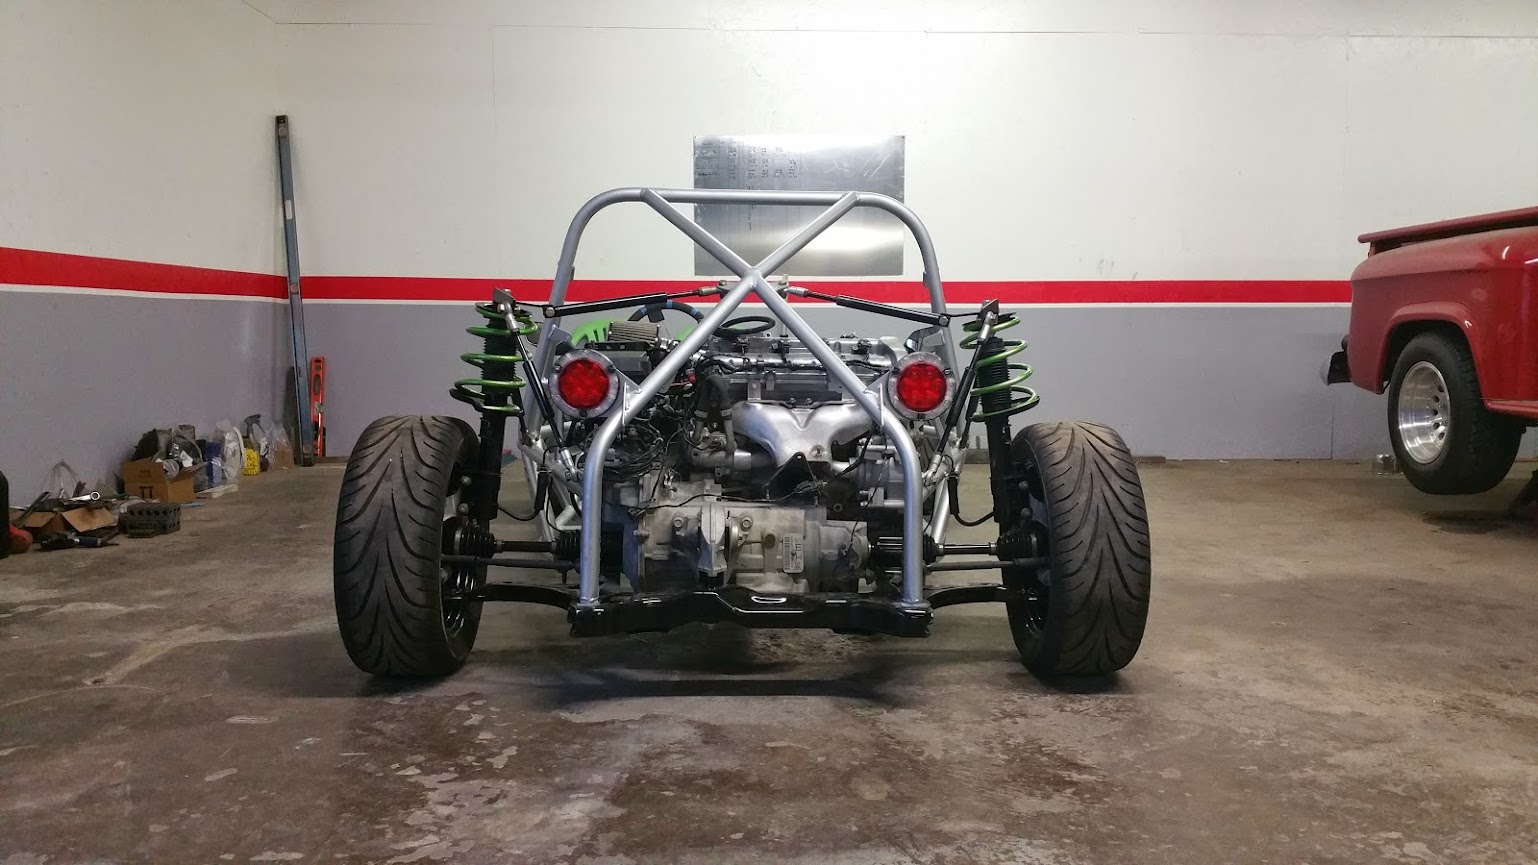
Next we installed the front coilovers and sat it down on its own four tires for the first time since disassembling it a few weeks ago.
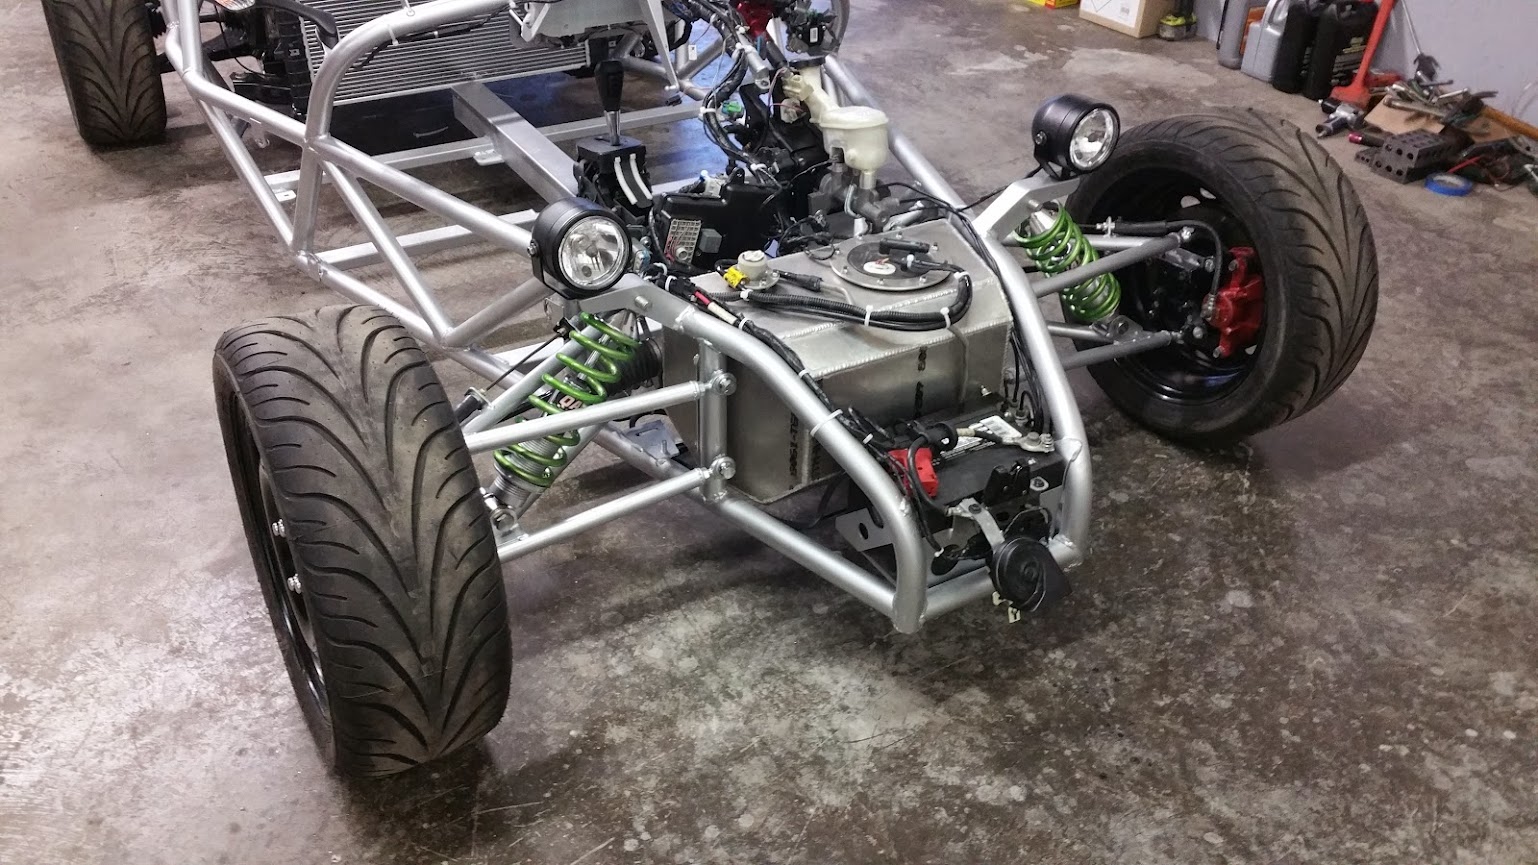
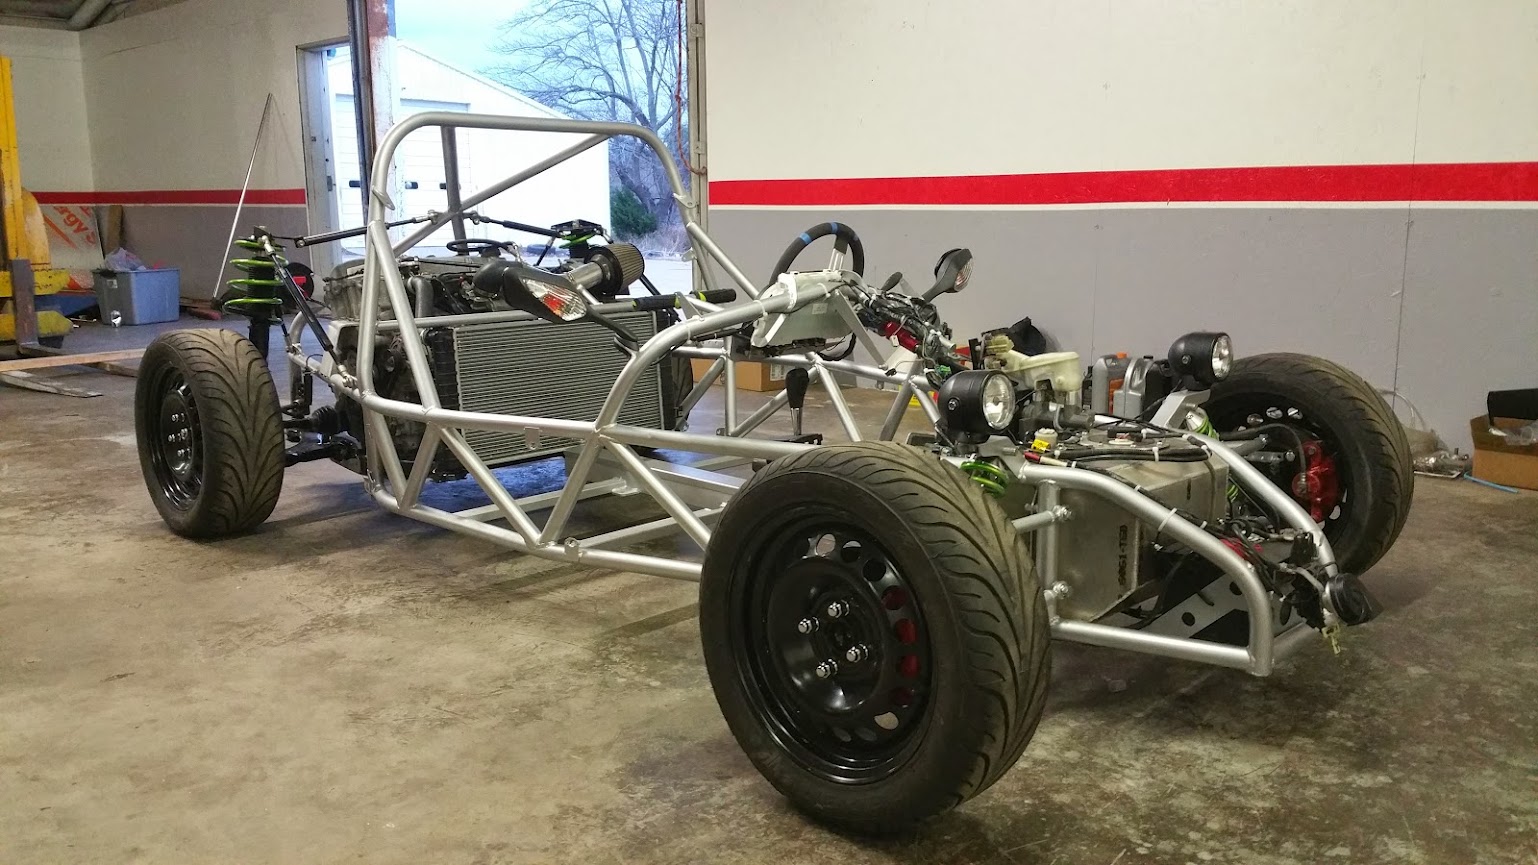
In the photos, the front end is sitting pretty high because we didn't want to adjust the height until the nose, floor and seats were installed. I'll be posting about that tomorrow.
NOHOME wrote:
I am fully aware that you are somehow running a business in the background while doing all this.
I wanted to take a minute to show you a little bit of the work we've been doing in the shop.
One of our biggest projects is making splined toggle links that are a part of an aircraft door locking mechanism. They start as blocks of stainless steel and get whittle down to some fancy looking pieces.

We quickly machine the bulk of the shape from one side then flip it over and machine the other side. Next we cut a big lobe shape and drill & ream a hole in the lobe.
Then we do something a little odd. We grab onto the part with a tool holder and put it up into the chuck of the mill. We spin the part and the machine moves it to several stationary cutting tools clamped to the table. We basically use the mill as a CNC lathe.


To do the toughest part of the job (the splines) we've mounted a rotary table to the mill pointing vertically. We put a part in and the mill moves a tool up and down to hobb the splines into the part. The rotary table is controlled by the machine so it rotates the part as necessary.

Next we tap the holes in the end of the parts and do a bunch of deburring. The parts come out looking very nice.

I've got to run at the moment so it will be tonight before I post the next portion of the car build.
NOHOME
SuperDork
12/19/14 7:45 p.m.
I love the out of the box machining. Using the mill as a lathe is a great idea. I was also wondering how you did the splines. My original assumption was that you had a high end multi axis milling machine.
Carry on, I am learning stuff.
NOHOME wrote:
My original assumption was that you had a high end multi axis milling machine.
Carry on, I am learning stuff.
Our machines are all relatively simple 3 axis machines but one of them has the rotary table as a fourth axis. It'd be nice to have one of the fancier machines with a pivoting head but we make do with what we have.
December 11 continued
We had cut the fiberglass nose to roughly the right shape after pulling it from the mold a few weeks ago. Now it was time to trim it to its final shape. With the nose hooked to the car and latched in the front, we marked the cut lines with masking tape. Then we took the nose off the car and used a sharpie to draw out curves connecting the straight cut lines.
We traced a plastic cup for each inside radius:
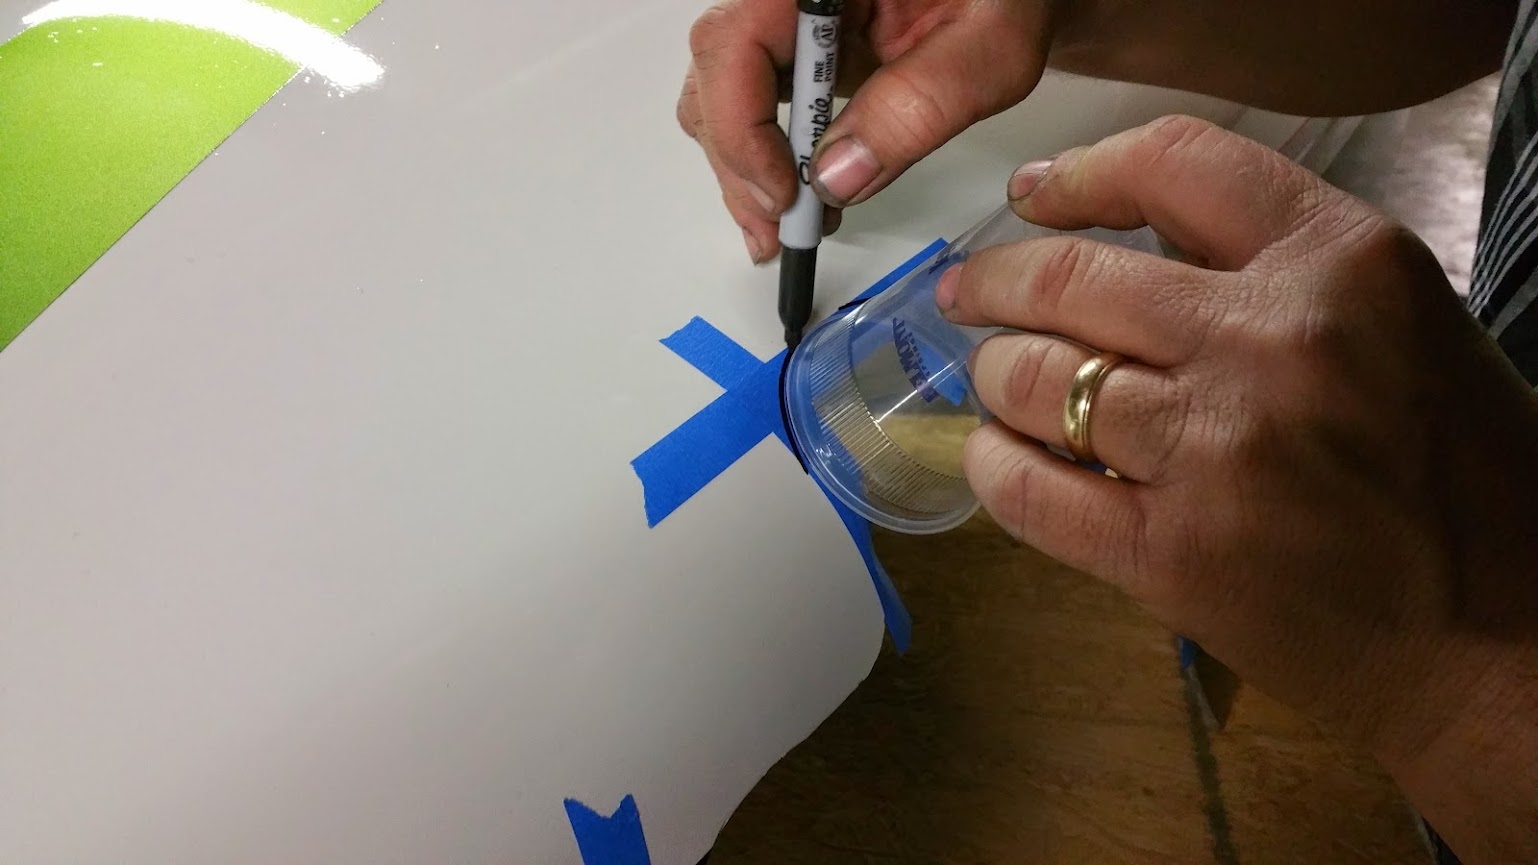
and a socket for each outside radius:

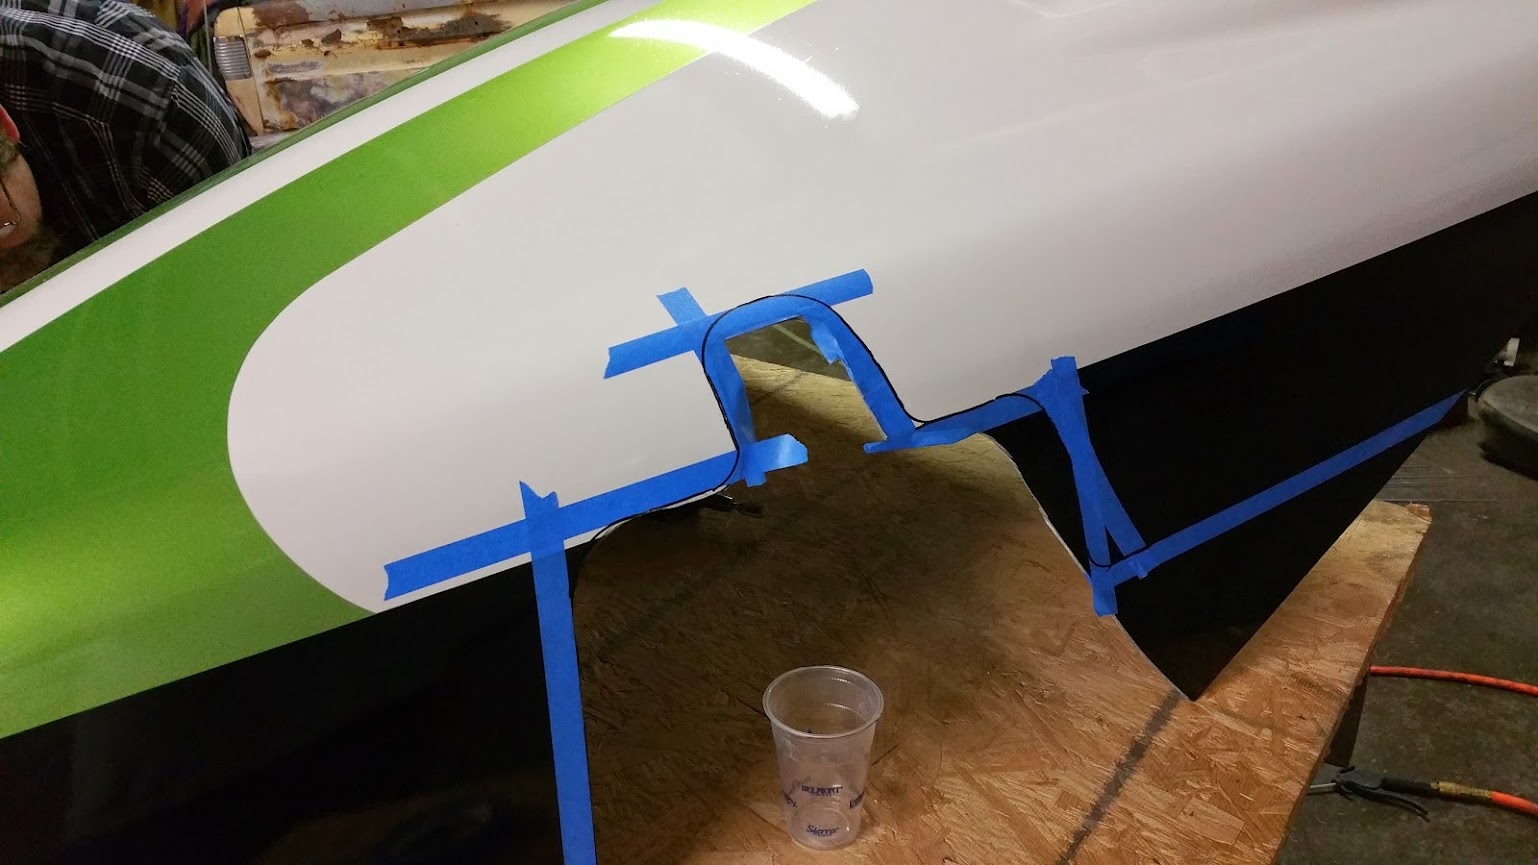
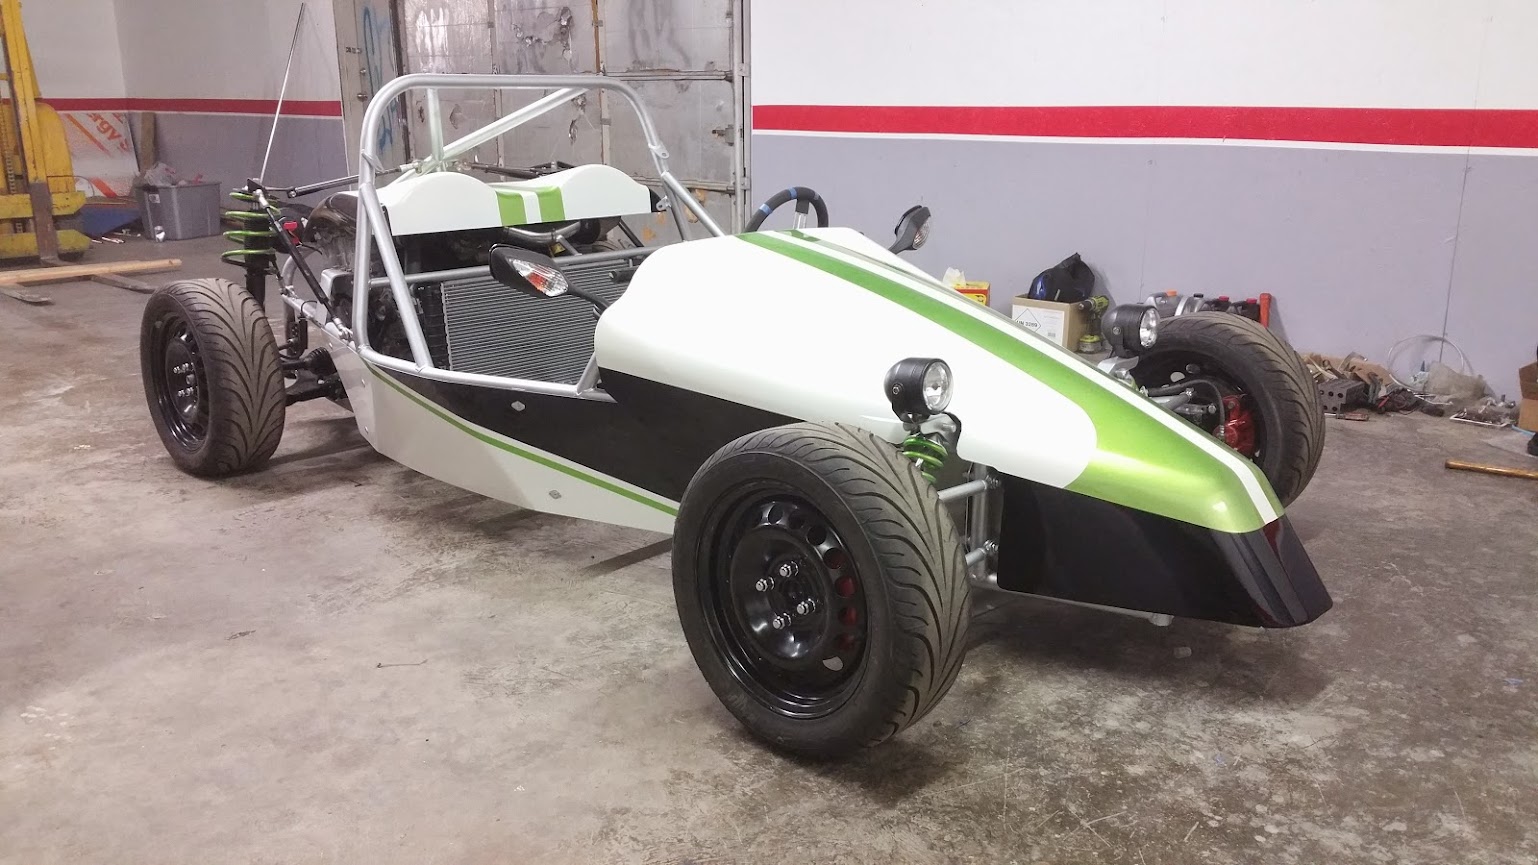
After some careful cutting and grinding, we had the nose cut. We put it on the car, along with the side panels and engine cover.
Notice that the lower edge of the front of the nose is cut higher than the frame. This is because we are going to put an easy to replace, rugged rubber/plastic piece extending from the fiberglass. This way, the front can touch the ground without cracking or shattering.

The_Jed
UltraDork
12/19/14 10:10 p.m.
What kind of programming software do you use?
Looks good. Im sad, you've built this whole car in less time than I have put into my chassis. I wouldn't be surprised if you have cooling difficulties with that radiator location. Belly scoop maybe?
This is fantastic. I'm super curious to see how it performs.
The_Jed wrote:
What kind of programming software do you use?
We use Surfcam. For the splines we programmed the paths for just one spline and duplicated it in excel, incrementing the B axis angle. That made it repeat the same paths for each spline.
bgkast wrote:
Looks good. Im sad, you've built this whole car in less time than I have put into my chassis. I wouldn't be surprised if you have cooling difficulties with that radiator location. Belly scoop maybe?
Keep in mind that there are two of us working on our build and sometimes my brothers pitch in too. It's easy to move through quickly when we have 2-4 people working on it. It also helps that we've built three dirt track cars several years ago.
We don't know how the cooling is going to work out but we will keep an eye on it. A belly scoop combined with side vents would definitely get enough air there if it is a problem.
Back to the build:
December 12
It was time to install the floor. As I explained earlier, we would just be riveting the two pieces in without any adhesives just in case we need to remove it to make modifications later. A couple of days earlier we had painted both sides black.
Next we dropped the seats in and bolted them down. The seats are very dirty, but we have seat covers that we will put on later. If we put them on right now, they'd get just as dirty as the seats. We are waiting until the work is done before we install them.

Sorry I don't have photos of us installing the floor. Sometimes I forget to take pics as we go.
Later that night we borrowed a set of scales to weigh the car for the first time. There were a few pieces we didn't have installed yet so we just balanced them on the car where they would eventually be mounted. The car had all of its fluids except for an empty fuel tank.
We were hoping the car would end up under 1500 pounds. As we lowered it down onto the scales, the number crept until it stopped at 1465. We think that's a good number. Also, the front to rear weight distribution showed to be 38-62. That seems a little tail heavy but we aren't sure if that will be a problem.
NOHOME
SuperDork
12/20/14 9:53 a.m.
Torn between wanting to see this run and drive and fear of not having any more updates.
Pete
38/62 is not un-manageable. your biggest problem will probably be front brake lockup. how do your caliper pistons and rotor diameters compare, front to rear?

pres589
UltraDork
12/20/14 11:59 a.m.
This build is fantastic. Not what I'm most envious of out of everything mentioned in this thread.
AngryCorvair wrote:
38/62 is not un-manageable. your biggest problem will probably be front brake lockup. how do your caliper pistons and rotor diameters compare, front to rear?
We used the original front brakes on the rear and purchased another set of front Cobalt brakes for the front, so we've got the same brakes all around. Do you think that will work out or do we need a little more on the rear?
Youll probably need an adjustable prop valve plumbed into the front brake circuit. Id alse reversr which way the master is plumbed from the factory as the weight is now reversed as well.

Skervey
New Reader
12/20/14 3:14 p.m.
Very cool build looks like a ton of hard work!! But I like the idea simplify and add lightness!
The brakes on a Cobalt are plumbed diagonally, meaning that the LF & RR and the RF & LR are tied together. Two lines from the master cylinder converge at a simple little block and then split to the diagonal pairs. We think all four corners get the same pressure. We assume front-rear bias was established by running tiny drums on the back with weaker wheel cylinders. We'll probably install a proportioning valve in the future if we do have a problem.
Bonus blog post incoming:
December 13
Prior to disassembling the car, we had tacked the exhaust together enough for basic testing. We put it back on the car and made a few modifications before tig welding it all together. We are thinking about having it ceramic coated later.
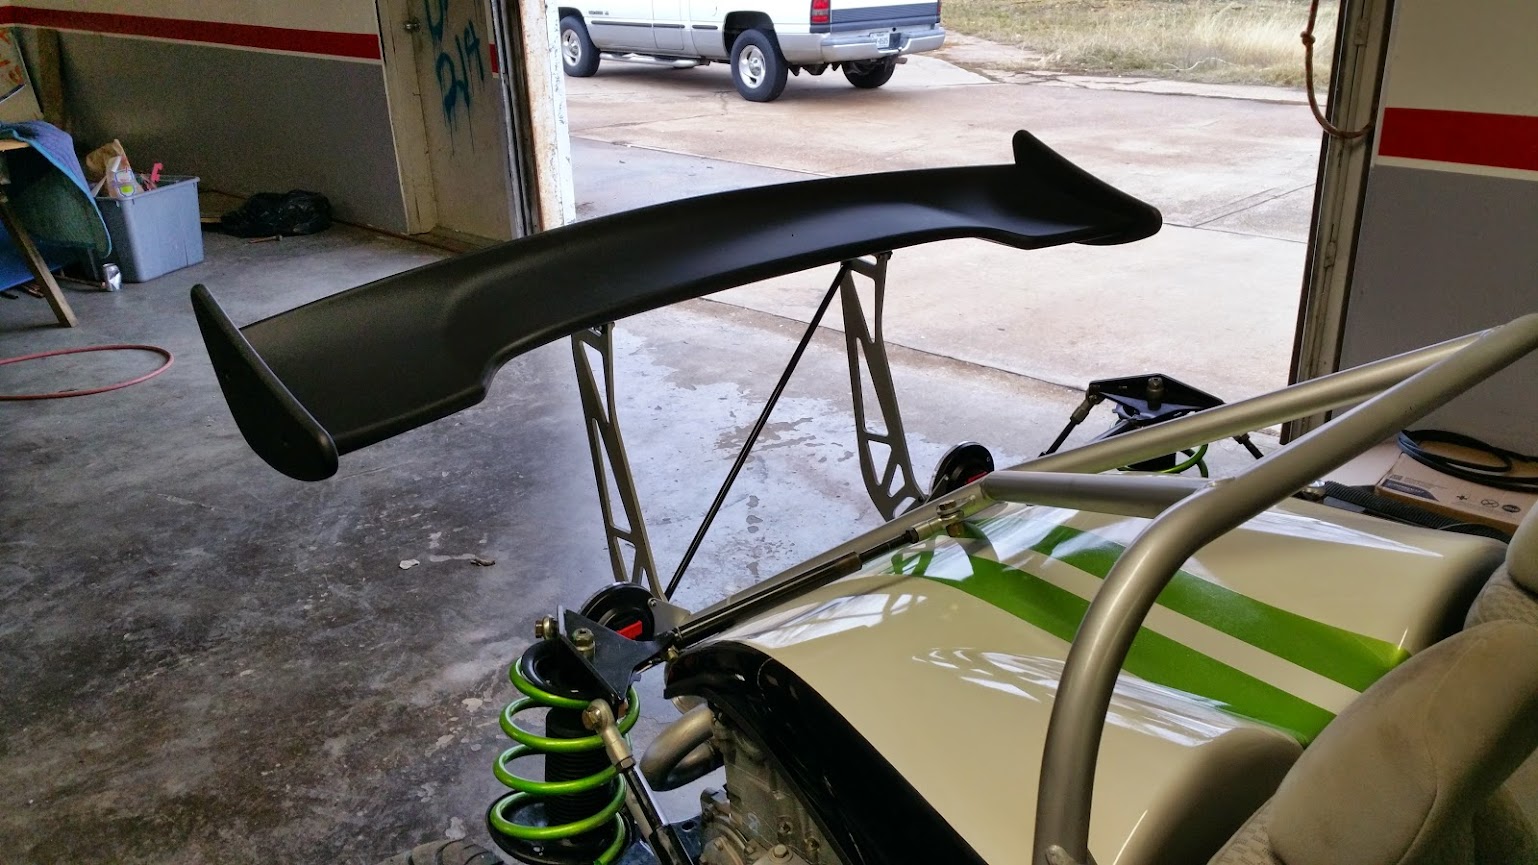
You may have noticed we haven't installed a front wing. At this point in time we don't want to go cutting into our fiberglass nose to make room for mounts, so we are only going to run the rear spoiler.
There was only one thing left to do before test driving the car: installing the seat belts. Four bolts later, we climbed in for the first test drive.
The car isn't street legal yet so we just made laps up and down the shop driveway for half an hour, getting braver as we drove. Long story short, ~150 horsepower feels like plenty in such a tiny car.
I don't know if anyone is interested in seeing it drive, but I put a very short video on youtube: first drive
you'll need to do some math to determine if your OE master cylinder has enough volume to feed two calipers per circuit, as it was designed to feed one caliper and one (much smaller) wheel cylinder per circuit. however, given the lighter weight of this machine versus the stock Cobalt, you'll be operating at lower line pressures even with stickier tires so will probably have plenty of volume. you can probably balance it out with more aggressive pads on the rear versus the front. i would not limit front pressure increase via prop valve.
since you've got a forklift, you can find your CG height with a set of corner-weight scales and a tape measure. tell me the wheelbase and CG height and i'll do some calculations for you.
or you can consult the article "Think Globally, Stop Locally" in the June 2008 GRM for all the equations you'll need.
oh, and congrats on first drive! very cool.
I was going to suggest to use a racing muffler so your car would sound as aggressive as it looks, but it already does!
NOHOME
SuperDork
12/21/14 7:13 a.m.
Where is the standing ovation icon?!


