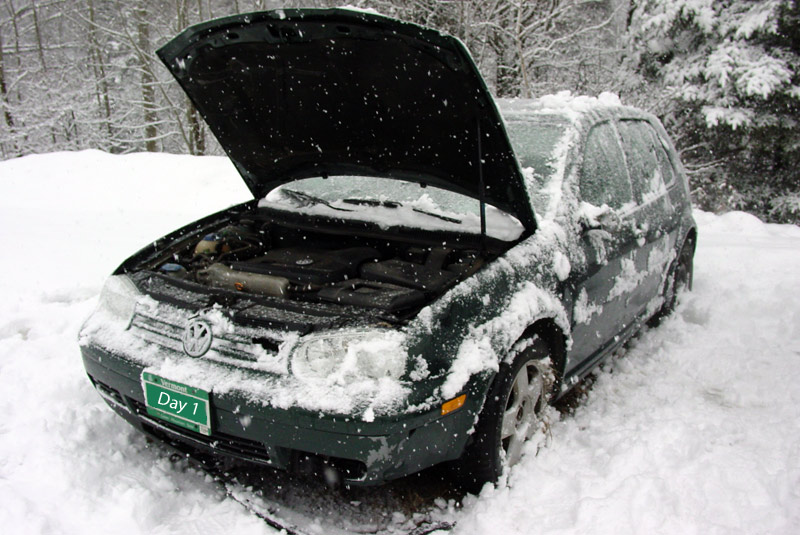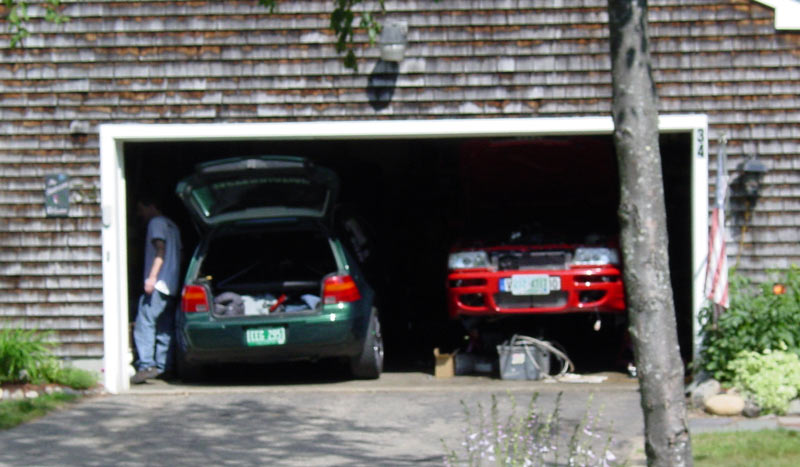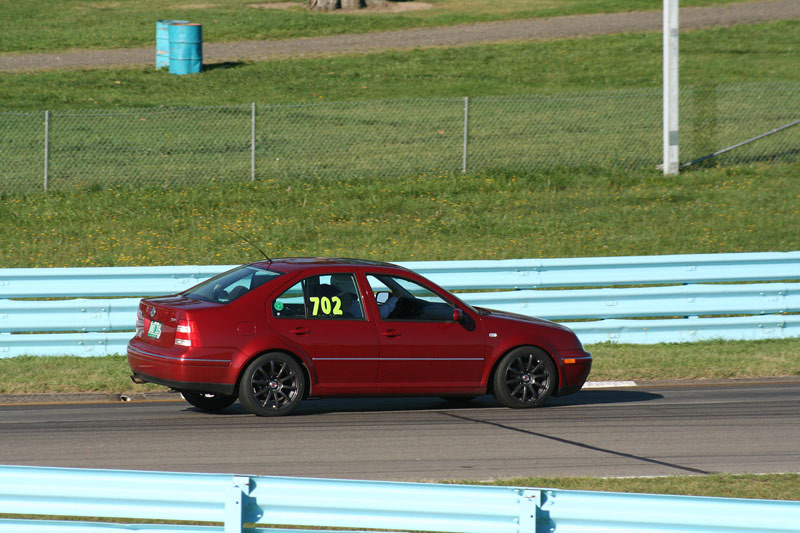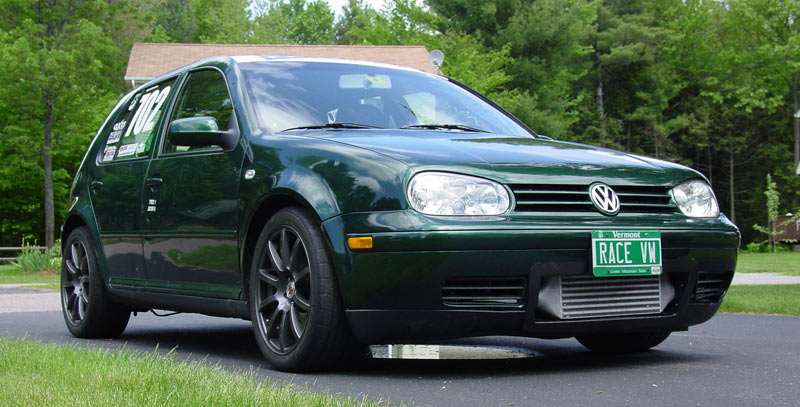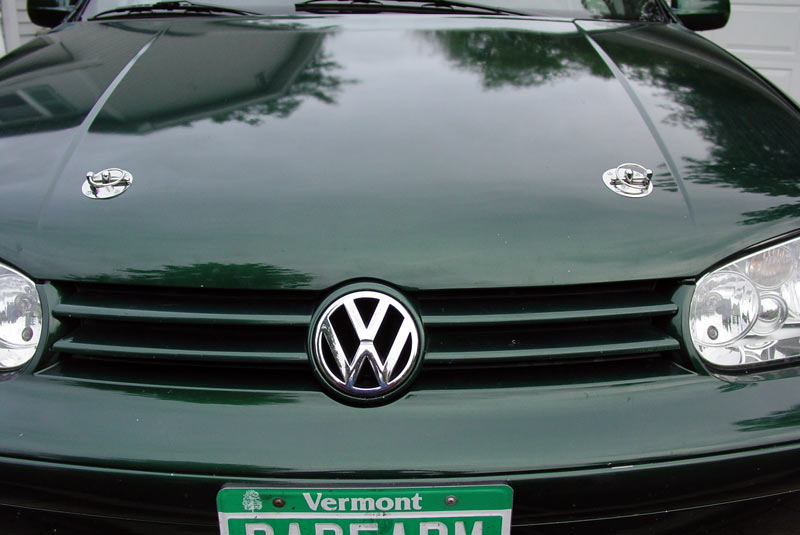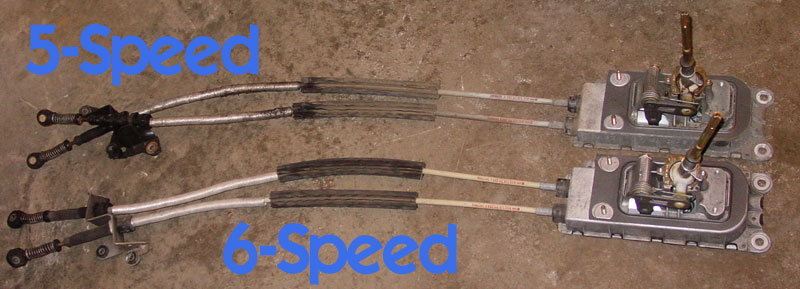
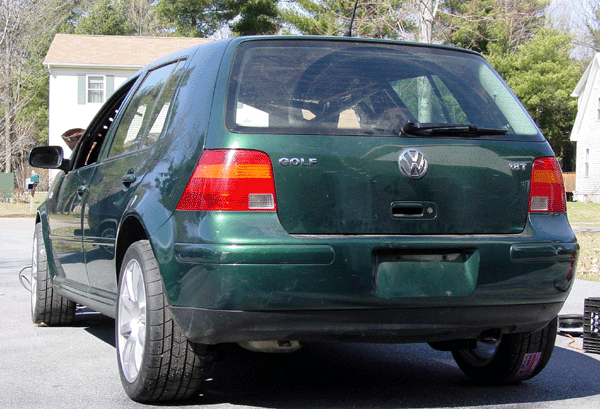
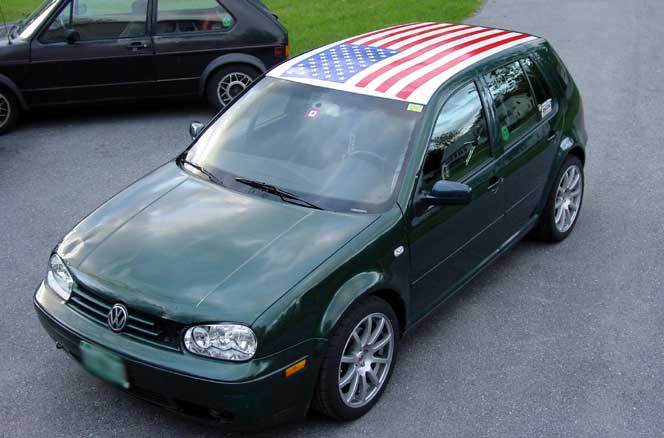
Summer 2006:
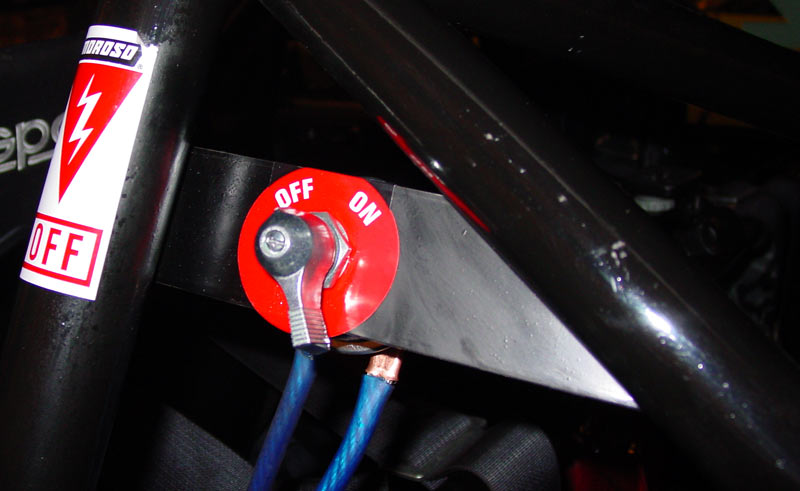
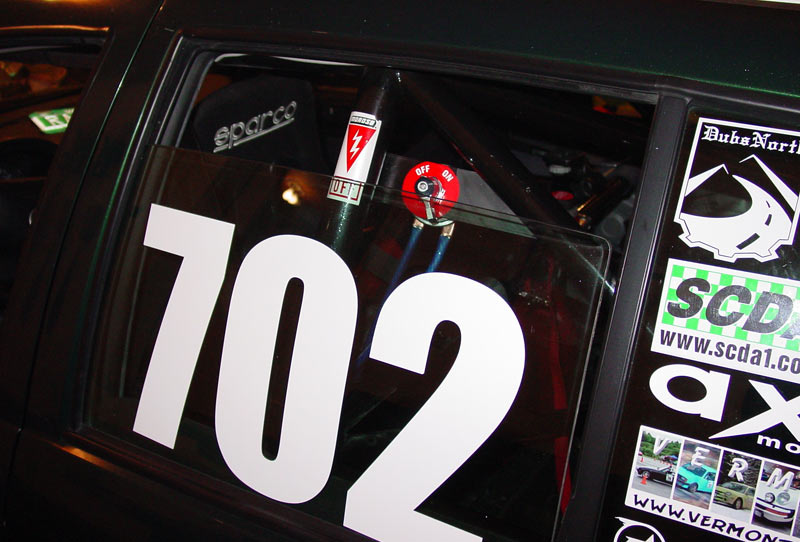
Safety
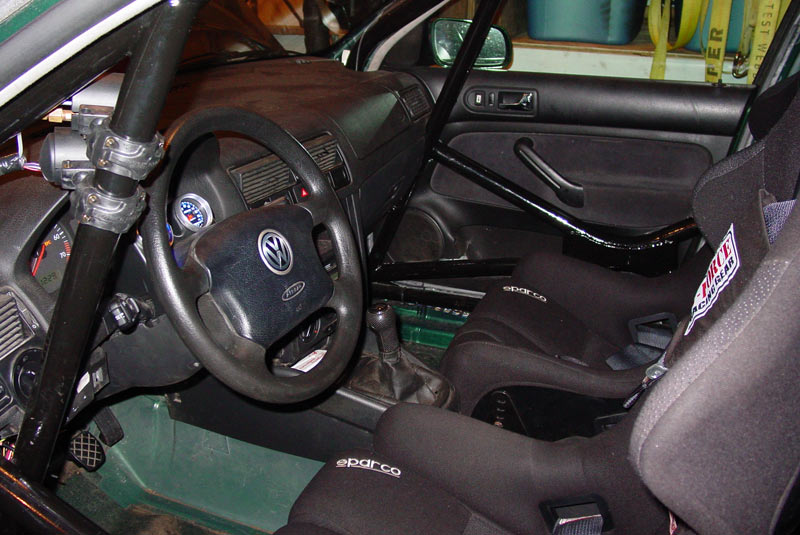
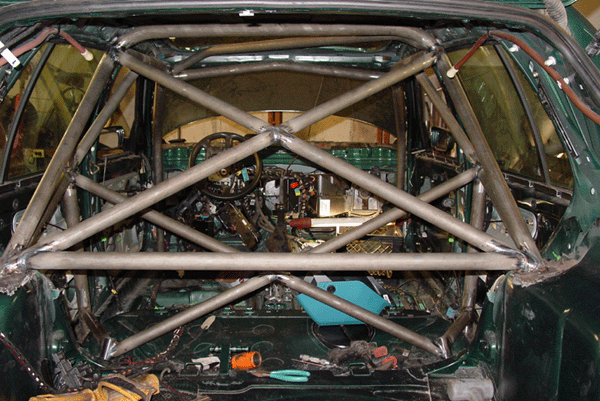
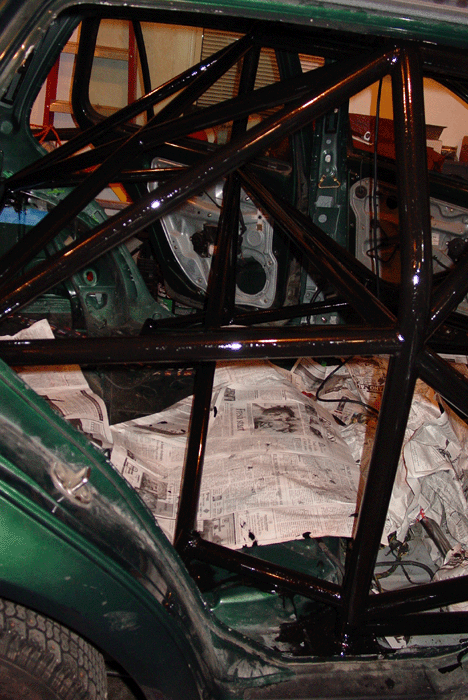
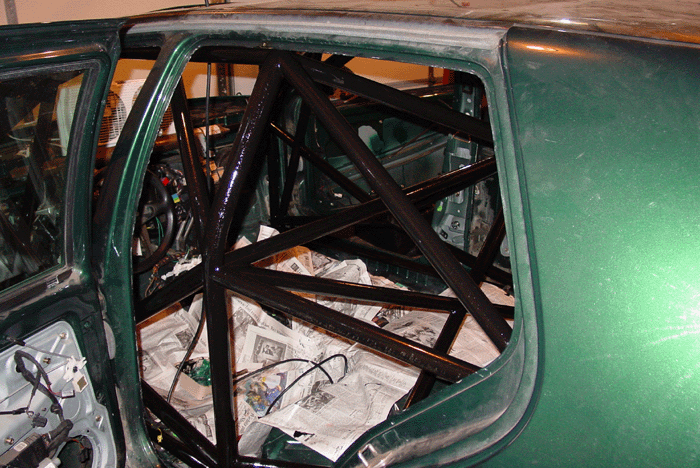
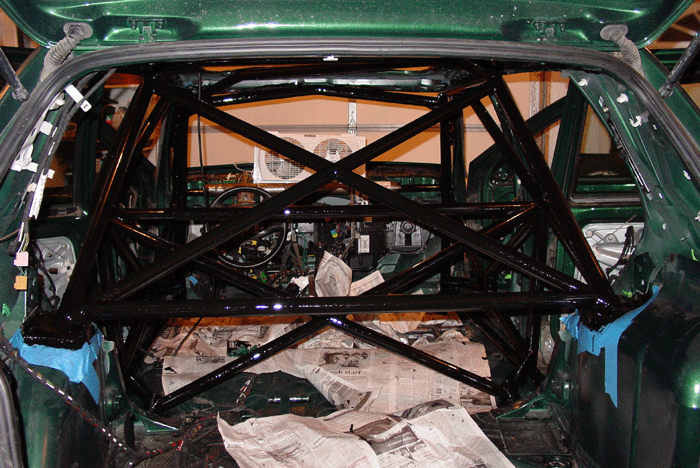
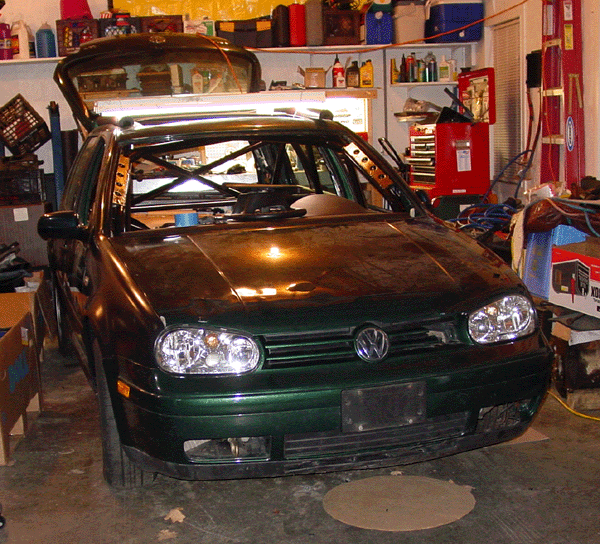
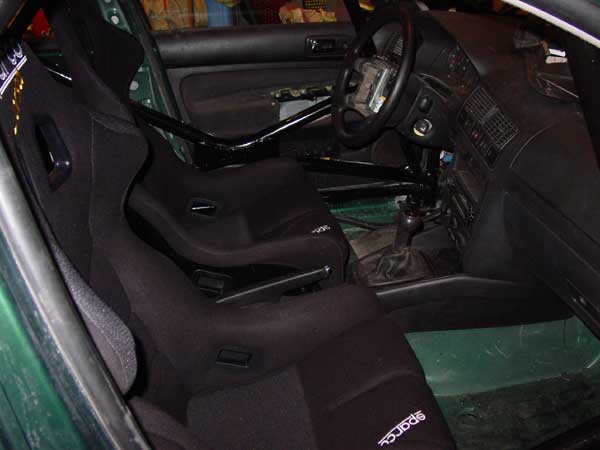
FIA Cage (Done)
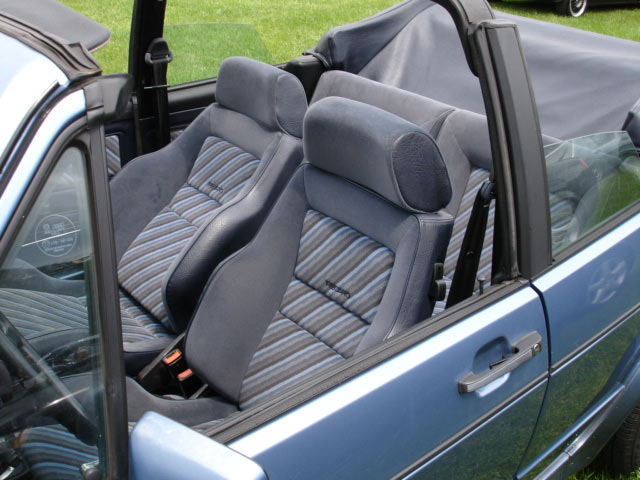
FIA Seats (Done)
5-point harnesses (Done)
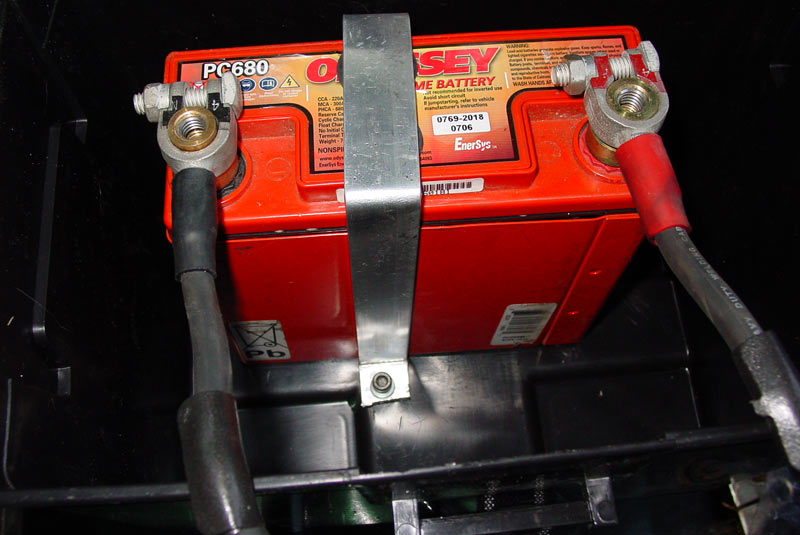
2.5 LB A-B-C fire Ext. (Done)
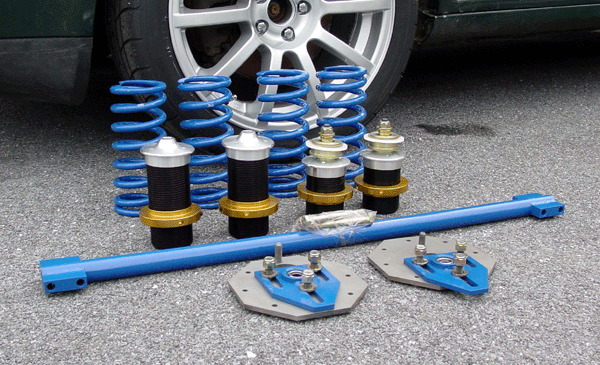
[b]Suspension[/b]
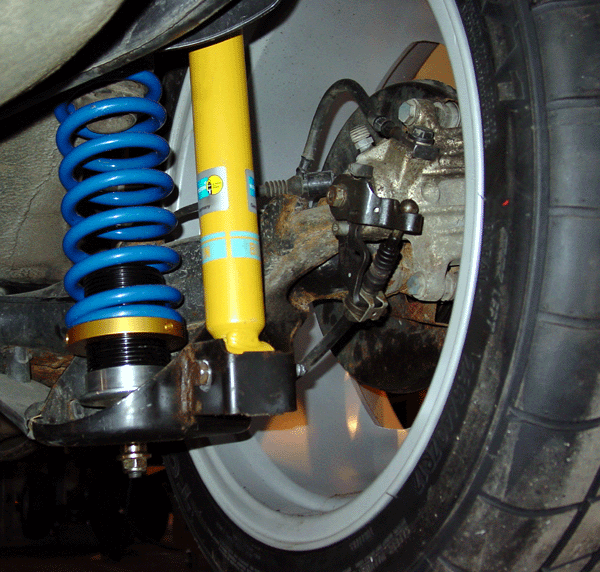
Bilstein Sport shocks/struts (Done)
Shine Racing coilovers and camber plates (Done)
Shine Racing anti-roll car (Done)
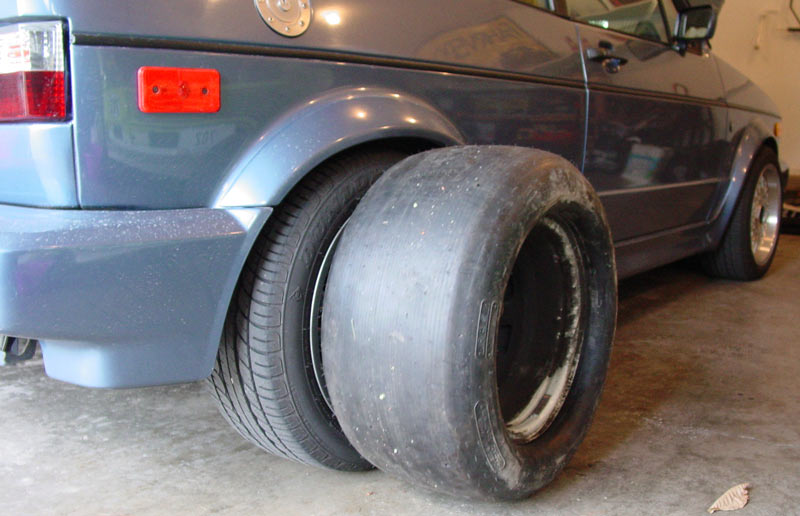
[b]Tires/Rims/Brakes[/b]
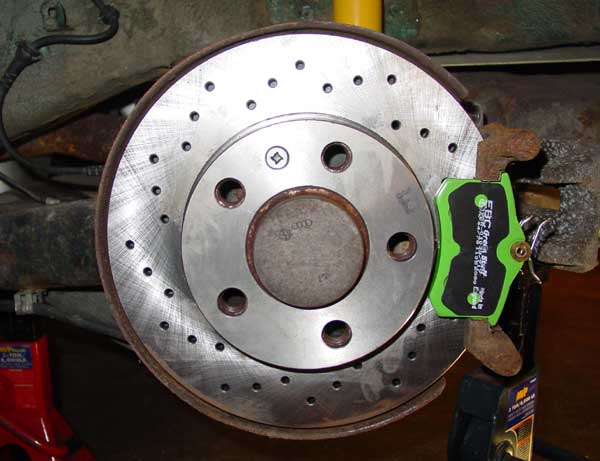
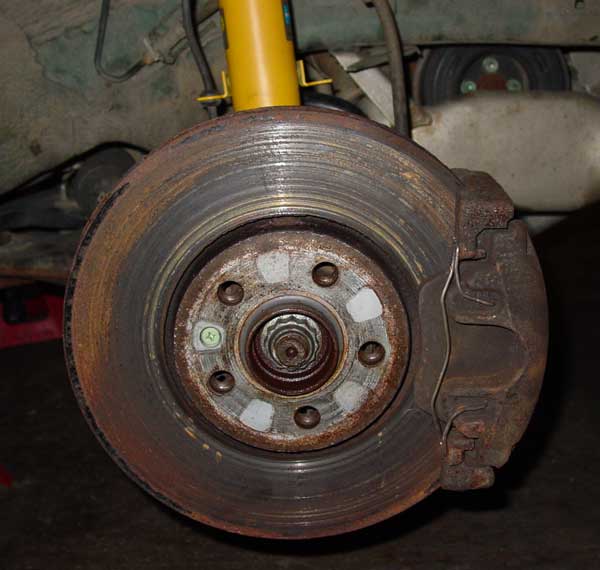
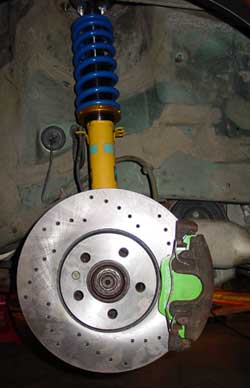
EBC Yellow brake pads all around & new rotors (Done, thanks to Fast Addiction)
Waiting for my Mintex pads to arrive.
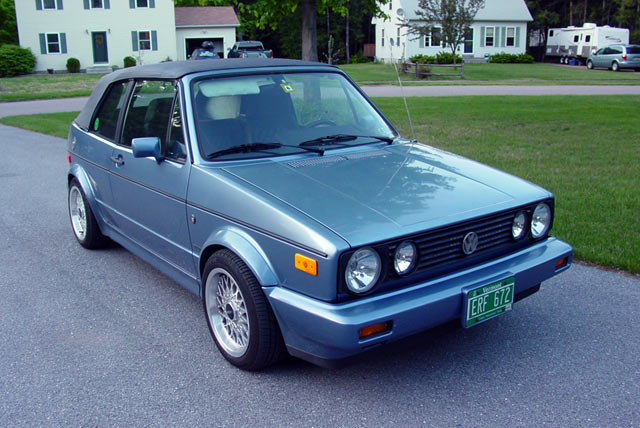
17x8"" rims (Done)
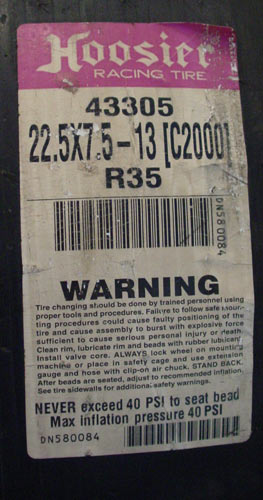
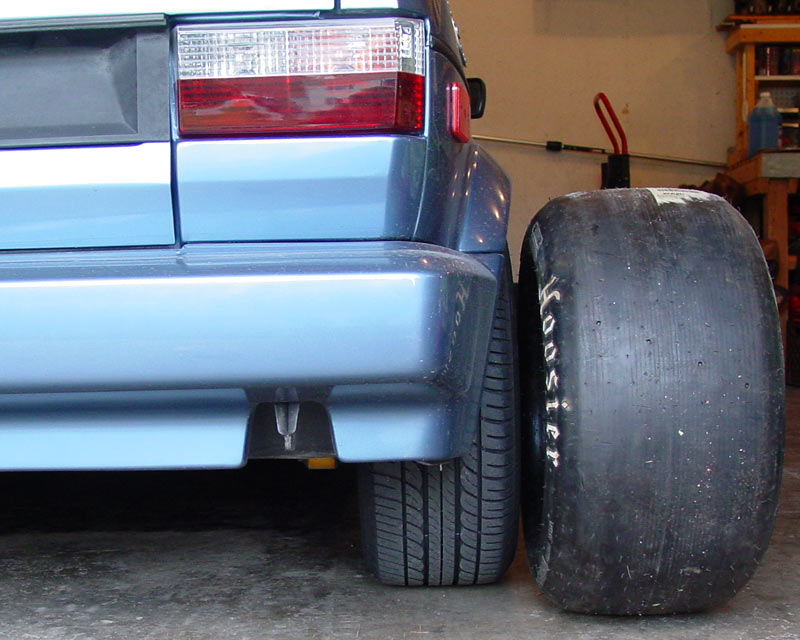
Toyo RA1s (Done)
Plans over winter 2006-2007:
[b]Engine[/b]
Turbo GT2871
Performance intake manifold
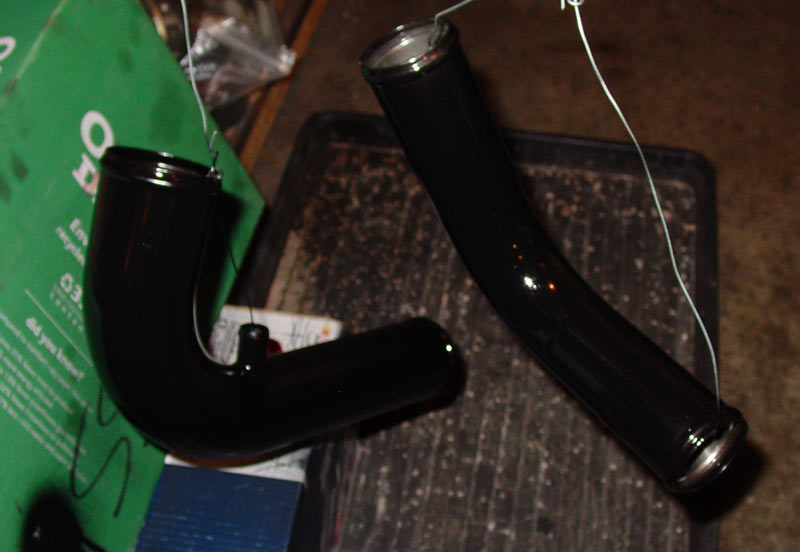
3"" downpipe and side exit exhaust
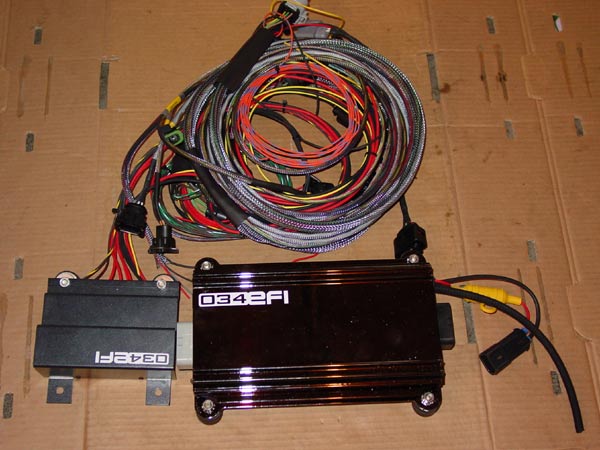
034EFI Stand-Alone Engine Management
APR fuel pump
57 lb injectors at 3 bar
Adjustable Fuel Pressure Regulator (FPR)
Cooler spark plugs
Might change oil pan (add baffles and trapdoors)
Fuel injectors
Cam shafts
FMIC
Sprayer for coolant radiator since FMIC will block some of its air flow.
Oil pan (trapdoors/baffle)
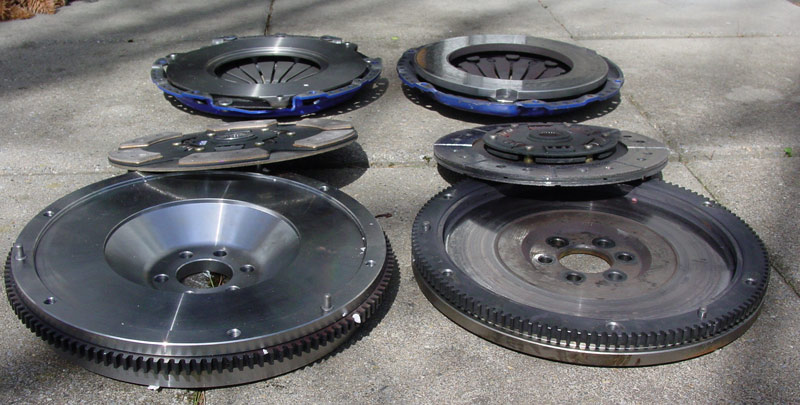
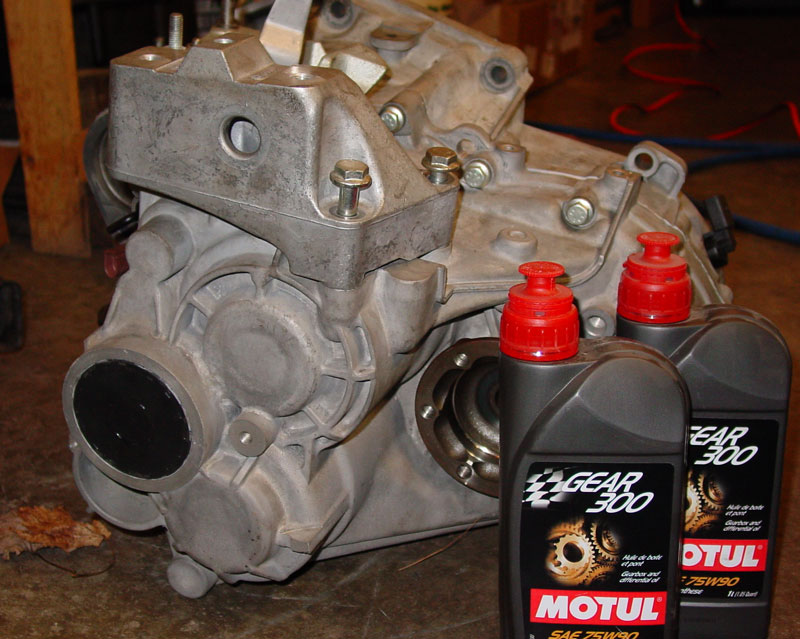
[b]Transmission/Clutch[/b]
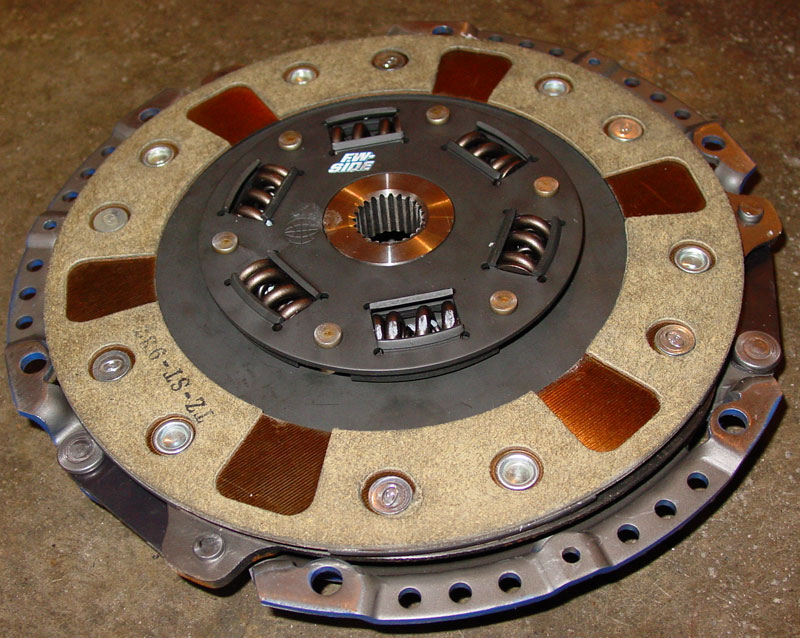
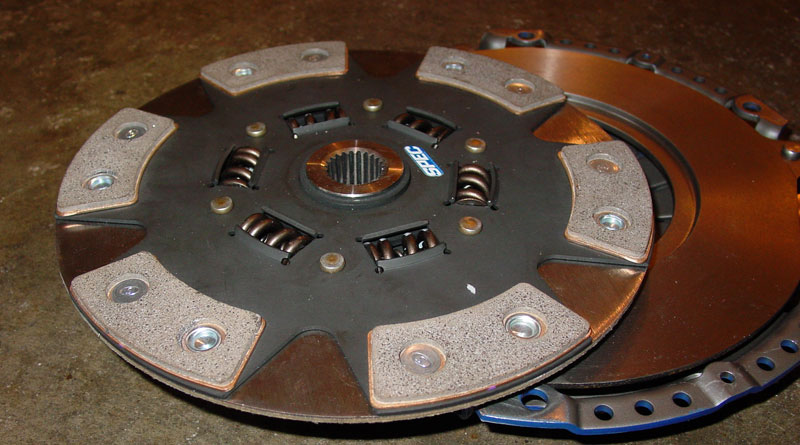
Lightened flywheel and performance clutch.
LSD
[b]Body[/b]
No plans other than some minor body work.
[b] ------------- Project Update ------------- [/b]
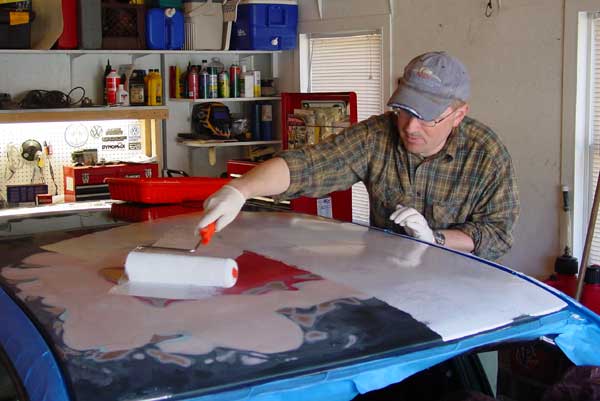
1st of two coats. All painted with a brush. (friend Nick helped tonight)

[b] ------------- Project Update ------------- [/b]
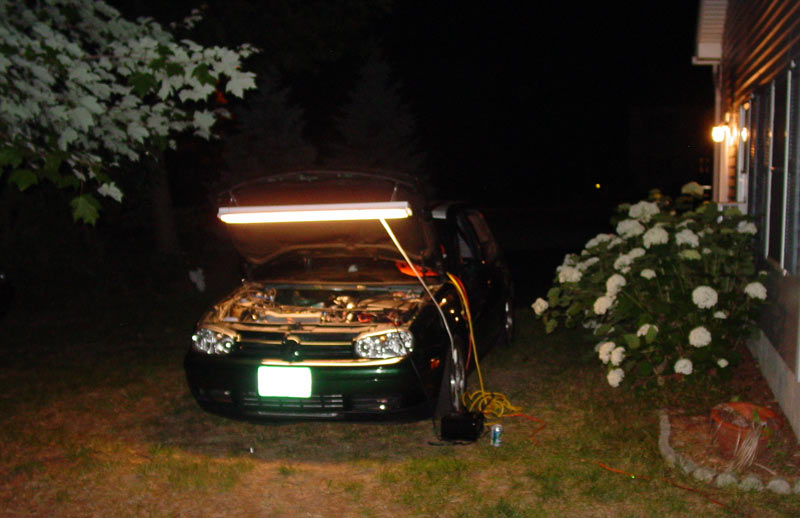
Burning the midnight oil....
A little progress this weekend.
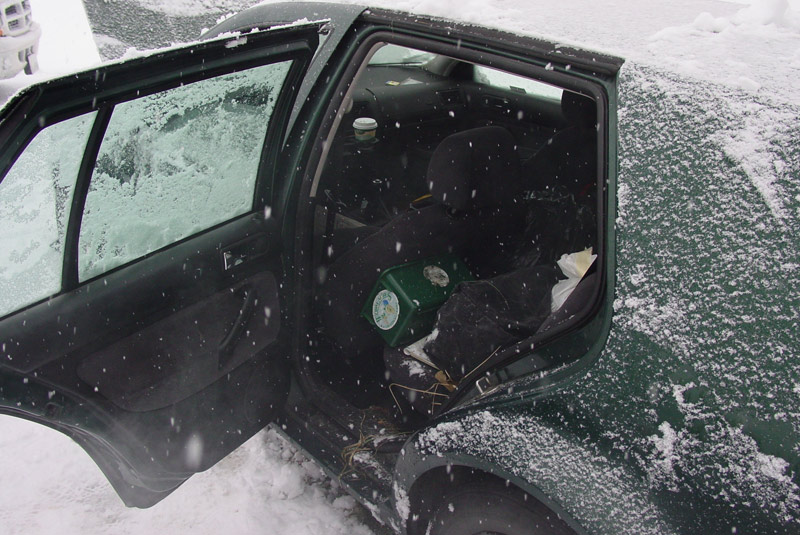
(1) Determined solution for sunroof hole. Going to Rathe's on Friday to cut some sheet metal from a Golf/Jetta III. This is just a temp. solution to plug the hole until much later when the body will be the concern. For now... getting it on the track/hill and going fast will be my priority. Won't look pretty for a while. :oops:
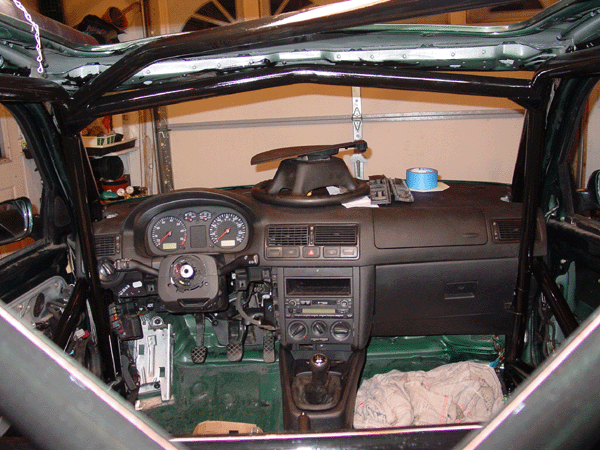
(2) Wiring: Just have to weld a tab in for the fuse box and then plug everything together that is on/around the steering wheel. Everything else is hooked up.
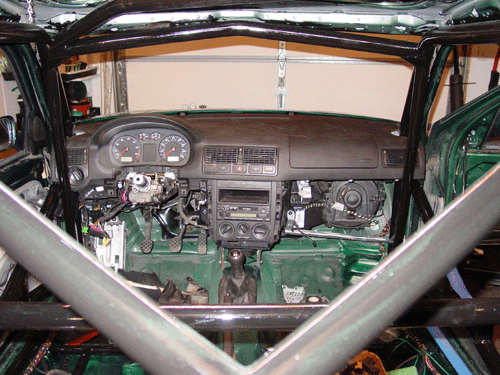
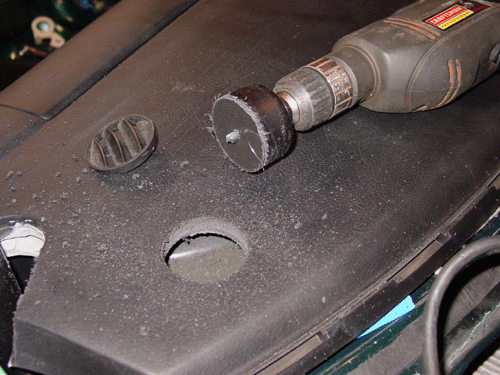
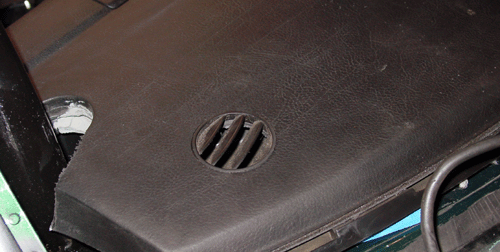
(3) Plug the air vents in the dash where the dash was cut for the cage and then installed the vents a little further up-stream. :D
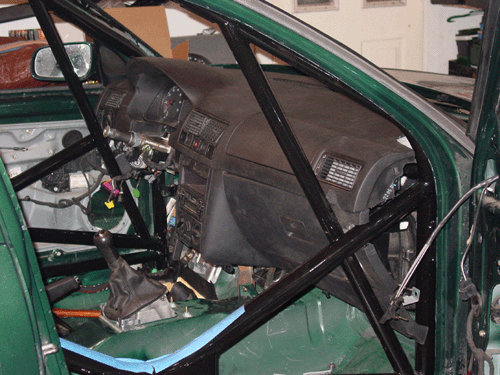
(4) Did some cutting of the dash and glovebox to make it fit. Still a work in progress.
(5) ""Fixed"" front bumper (essentially it looks like Frankenstein) and test fit bumper and fenders. Ordered part that was broken on fender (goes between fender and bumper). After the part comes in the front end body work will be done.
[b] ------------- Project Update ------------- [/b]
Another busy night.... finished a bit earlier than I had been this week.. midnight. :oops:
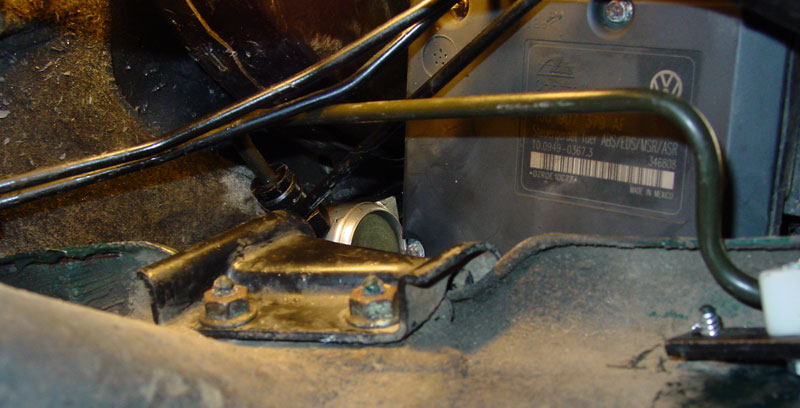
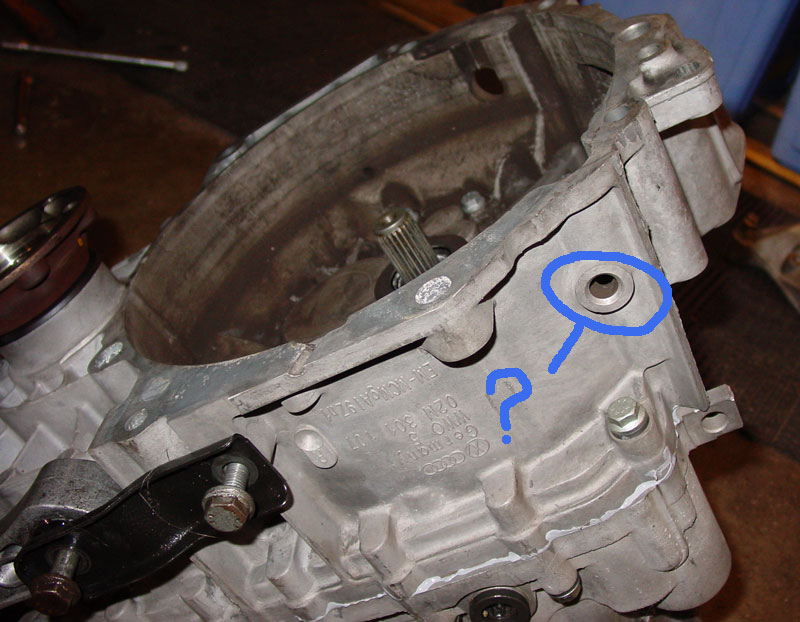
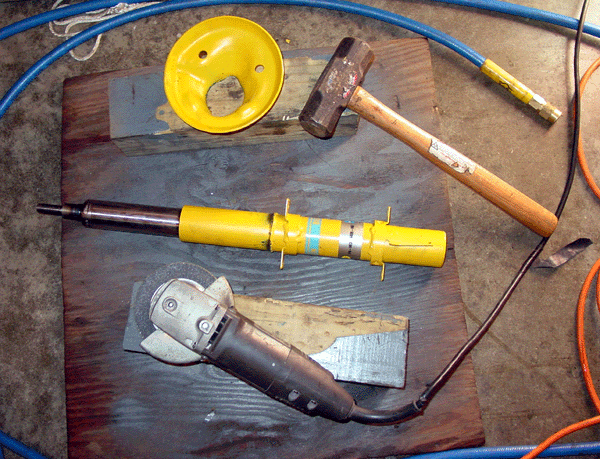
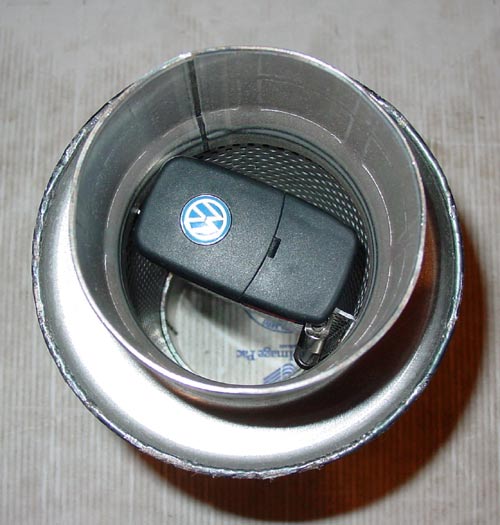
(1) Spoke with Pete down at VW to attempt to order little plastic tube that goes into the vacuum in the front right fender well... not really sure what it does, but it sucks air when the car is running so it must be really important. Anyway, Pete said that the little tube I need does not come separately and that I would have to purchase the entire tube for $50. :shock:
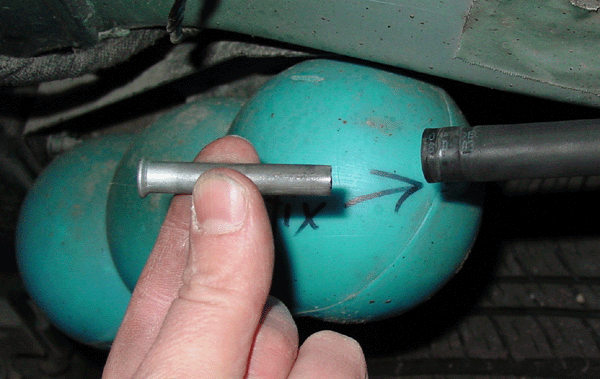
Here is the vacuum blue-ball thingy with the broken (half of broken tube is still in the flexible tubing) black connecting tube.

At lunch I decided to figure out what alternatives I had and came up with a brake line (the flared ends were a perfect fit)
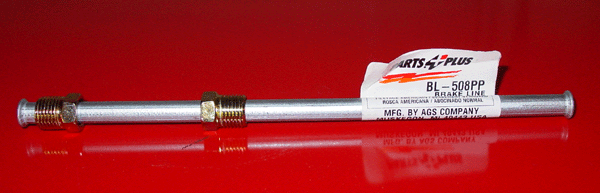
Did a little cutting and sanding...
And done!
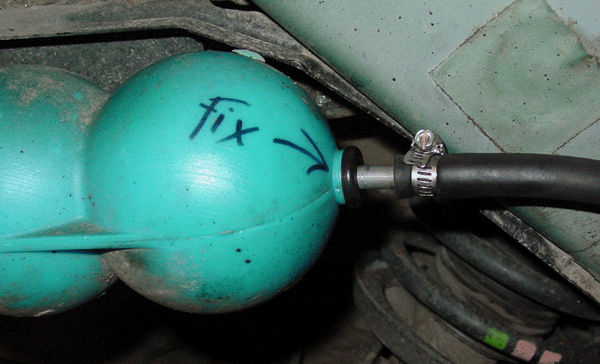
I did put tape between on the brake line so it could not slide inside of the blue-ball thingy (the lines are secure and shouldn't move around, but I still didn't want to take chances).
(2) Next, working with Eli at Shine Racing Services (http://www.srsvw.com) we are trying to determine the best suspension setup (done) and to see if camber plates will work on the strut towers with the cage there. Eli faxed an outline of the camber plate to test fit it on the car. Not looking good.

(3) Finished the dash with the exception of the trim at the driver's feet and steering wheel. Waiting on those until my brother Andy welds on a tab for the fuse box that is normally located at the end of the dash.
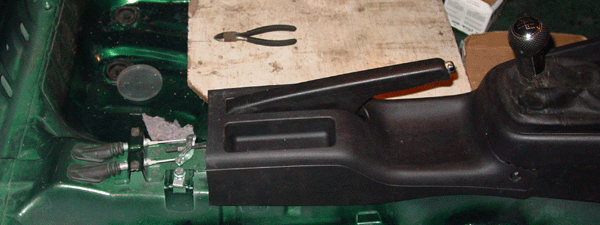
I cut off the back of the center section to make it easier to change/inspect the e-brake lines in the future. I don't want to have to remove interior trim.
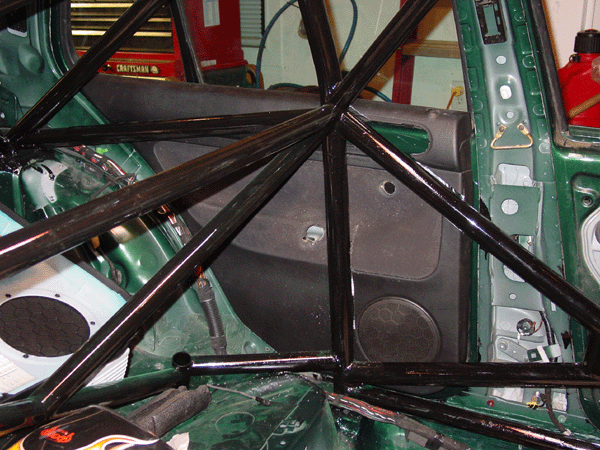
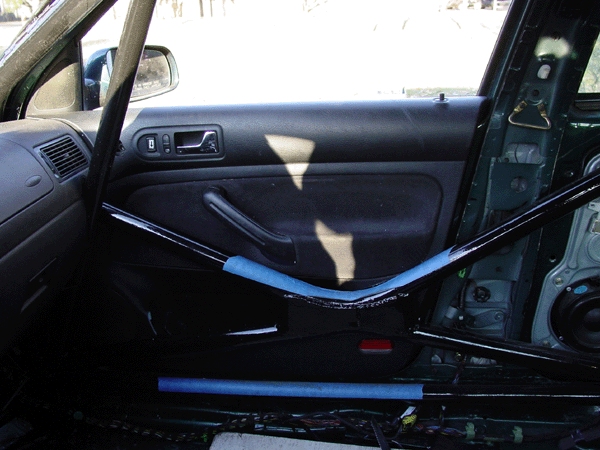
(4) Trimmed the door panel (just one thus far) to fit around the cage. Not perfect (need to slam door) so I will have to tweak a little more. I might use alum. sheet at a later date, but this is what I have for now.
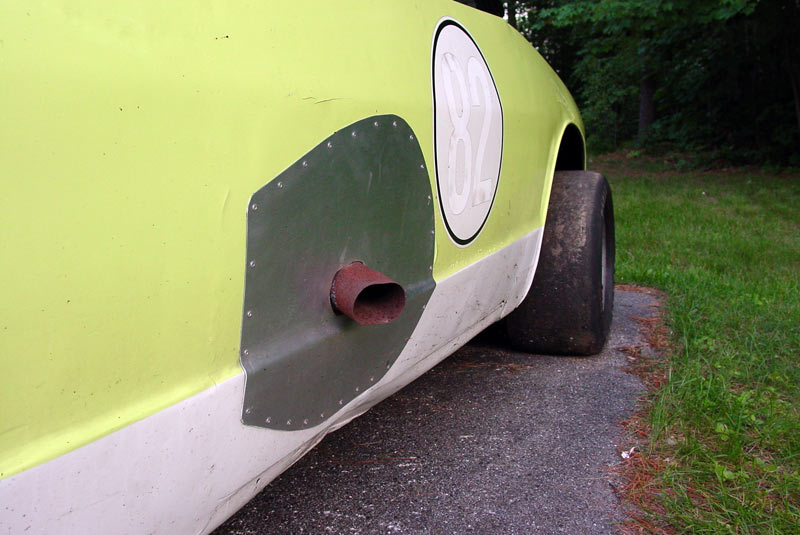
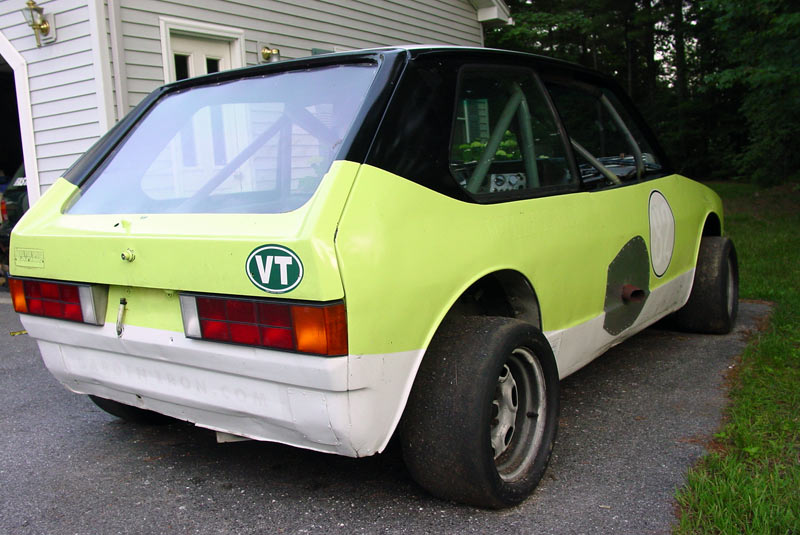
(5) Starting to look like a car. Fenders mounted, bumper mounted, broken grill mounted. All panels are a little bumpy, but body work comes later after the performance step has been completed. :twisted:
[b] ------------- Project Update ------------- [/b]
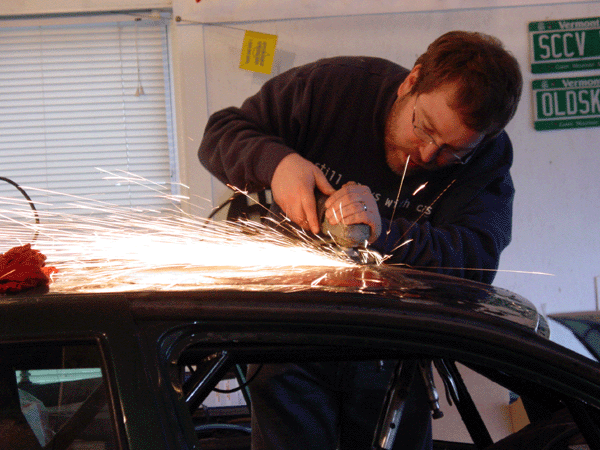
Andy (my brother) came over today so we could get to work on the roof and fuse box. HE can fabricate.... I can't even come close. If it doesn't involve cardboard, a couple of nails, pop rivets, zip ties or duct tape, then I'm lost.
Anyway, headed to Rathe's to cut off the roof of a MKIII Jetta. Thanks to Chris (vtGTI) for the loan of the cordless sawsall.
Short and quick.
Put the new roof on top of the old roof, traced the sunroof hole....
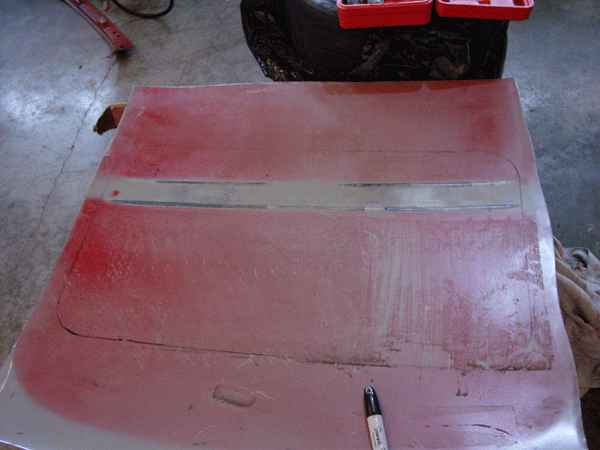
Andy (love his shirt!) grinds off the paint to prepare the surface for welding.

Cut out and grind edges to match new roof to old hole.
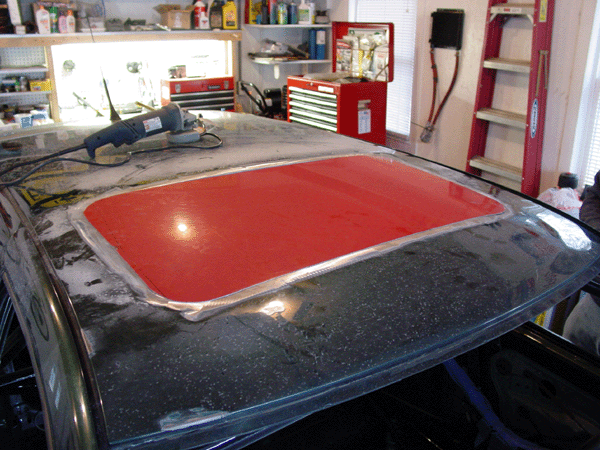
Weld in new roof (including one brace from the original roof). Didn't come our perfect (a bit of warping).
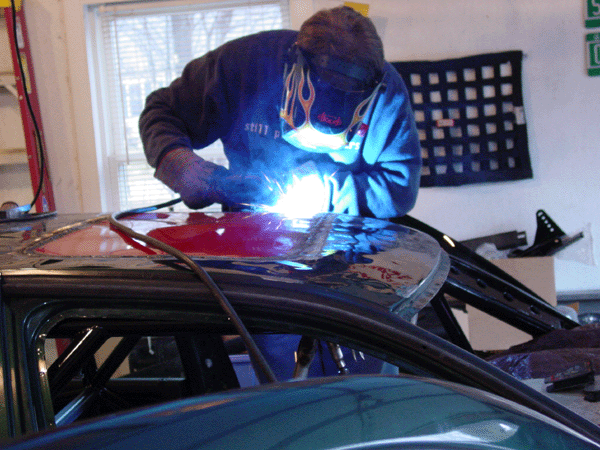
Grinding down the welds....
Later... filling the holes and painting the roof.
Welded in bracket for fuse box.
It is coming together.... slowly.
[b] ------------- Project Update ------------- [/b]
Spent all day on the car and didn't seem to accomplish everything I wanted.
Cut off the top of the glove box so that it could be accessed from above by going through the airbag opening on the passenger side. The glovebox won't open because of the cage, so I figured out a way to access the box another way. Of course, I suppose I could convert the airbag hole to the euro box and call it a day, but that purchase doesn't make the car go faster or handle better.
Anyway, Did another door today. Reinstalled window and interior door trim... cut the heck out of it to fit around the cage. I will take a picture of it with the door open so you can see all the cutting that was needed. My goal was to make it look complete when the door was closed.
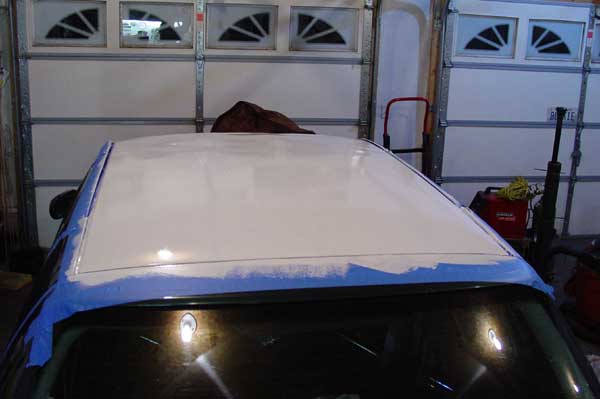
First coat on the roof.
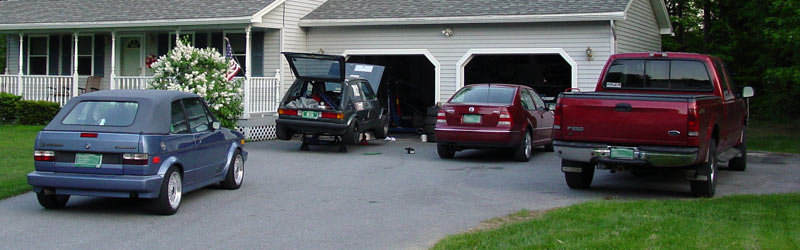
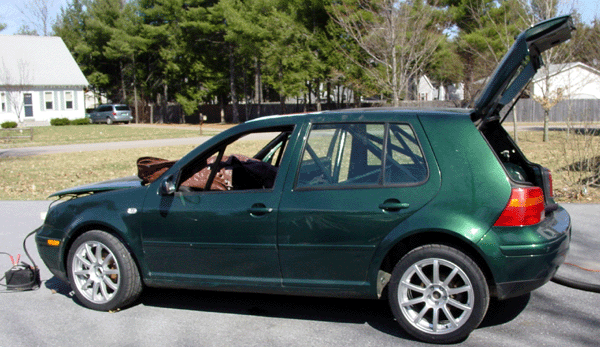
Some misc. shots (new wheels are on)... needs to be washed very badly:
[b] ------------- Project Update ------------- [/b]
Since the first event for the Golf is coming up very quickly, I took today off to work on the car.
A present arrived today.....
[b] ------------- Project Update ------------- [/b]
Well, I took enough pictures of the whole process and will make my own tutorial for the VermontRacing site.
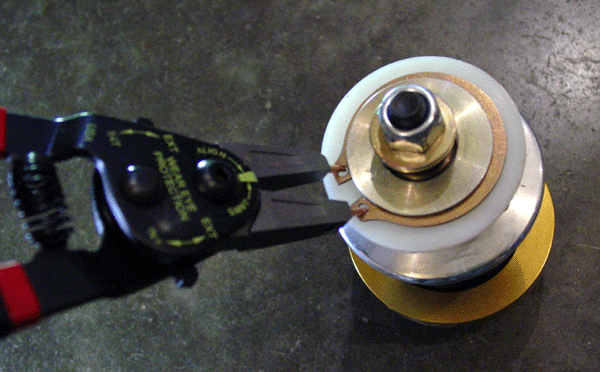
Rear shocks/springs are in. Ride height was reduced by only 1/2"", but I can lower it 1"" more. We will see how the front comes out. It is all about performance.
Here is the reason I couldn't figure out the rear... I had to remove the retaining clip and plastic washer, install the perch, and reinstall the washer/clip. I had to purchase a new retaining clip spreading tool (whatever it is called) since the one I had spent more time going sideways instead of spreading the clip. (junk!)
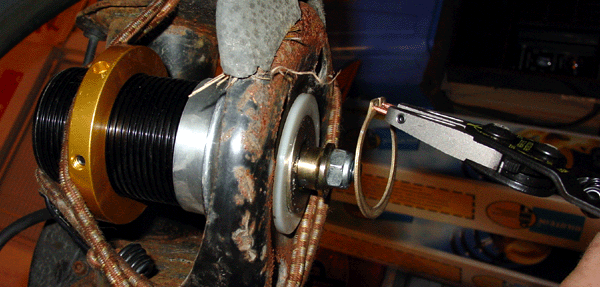
Installed....
Smoothed the roof out some more.... there are a lot of wrinkles.

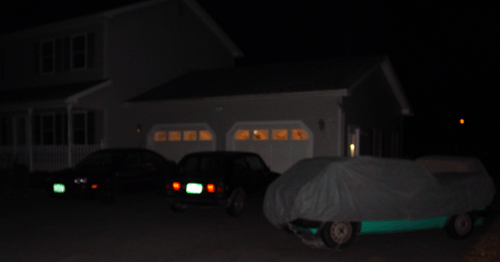
Life on "the farm"... too many projects, not enough time!

[b] ------------- Project Update ------------- [/b]
Took Sunday off because I worked on car from 9am (Sat) until 2am (Sun).
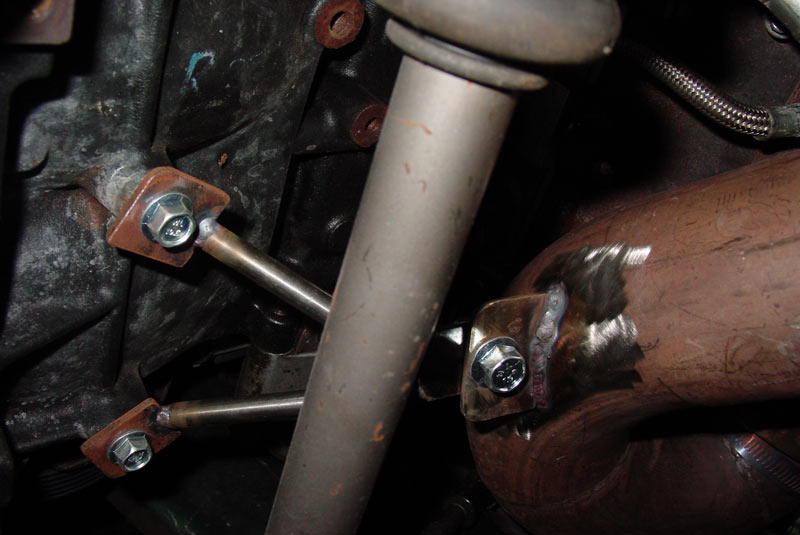
Had a real fight with trying to get the camber plates aligned. For now, they are held in with 4 grade 8 bolts per side until we can get it on an alignment rack to check the caster. I'm not worried about camber since the plates are adjustable, but caster is not adjustable once welded in. We will weld both the top of the plate and underneath to make sure it stays together.
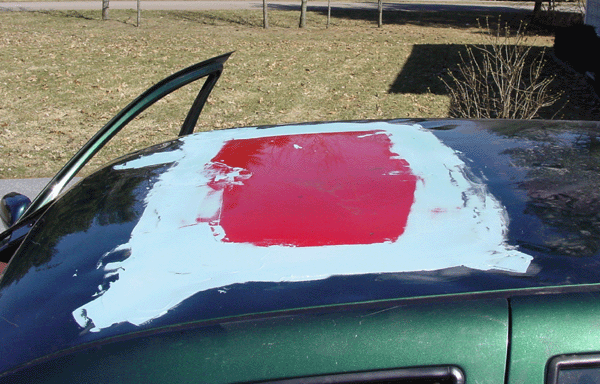
Did the finally smoothing of the roof and plan to try the paint method posted by Rob (Elmer Fudd) since it is just white and the roof. Bret at Rally Grafix will take care of the graphics for the roof. :wink:
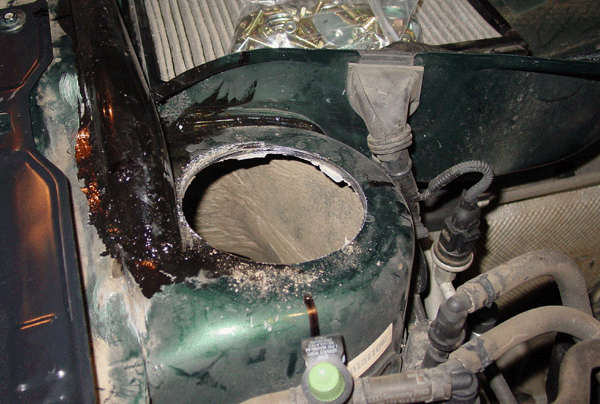
Anyway, Nick and Tim came over and helped with the drilling of the 4 1/4"" holes to remove the original strut towers. The drill was so powerful that it took Nick for a ride a couple of times when it caught. :shock:
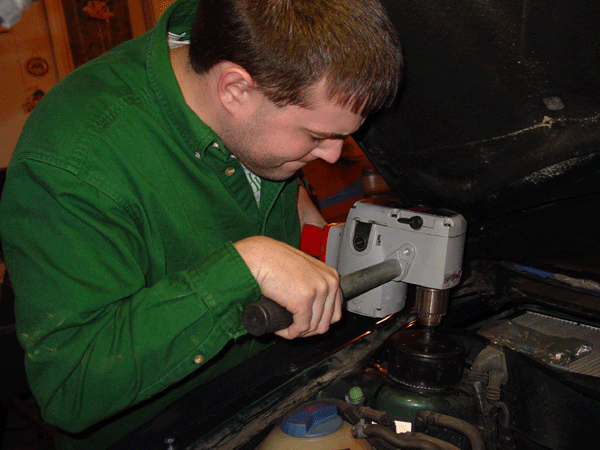
Hole in the strut tower.
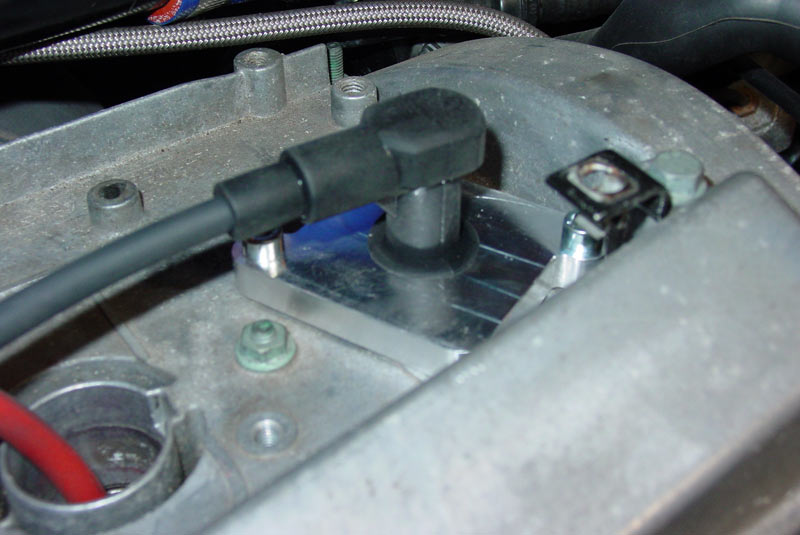
Camber plate installed....
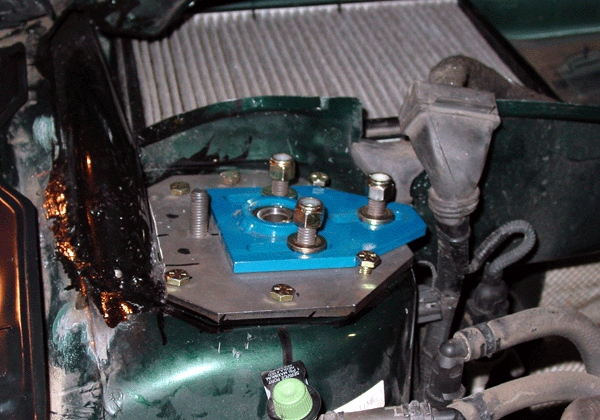
What it looks like underneath....

It is kinda of strange taking a cutting wheel to a new strut
Installed.
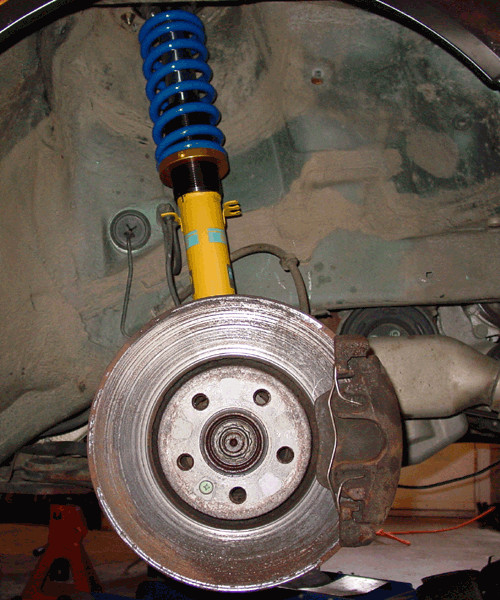
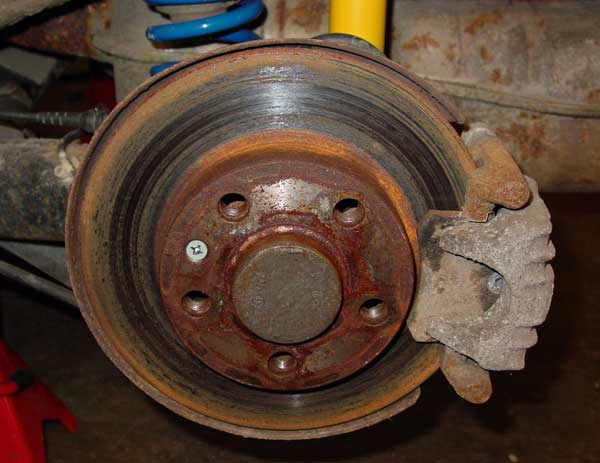
I am still working on sourcing the brake rotors, but put it together for now (the brakes are easy on this car!) so it is mobile.
Short and sweet. I'm really looking forward to getting this on the road.
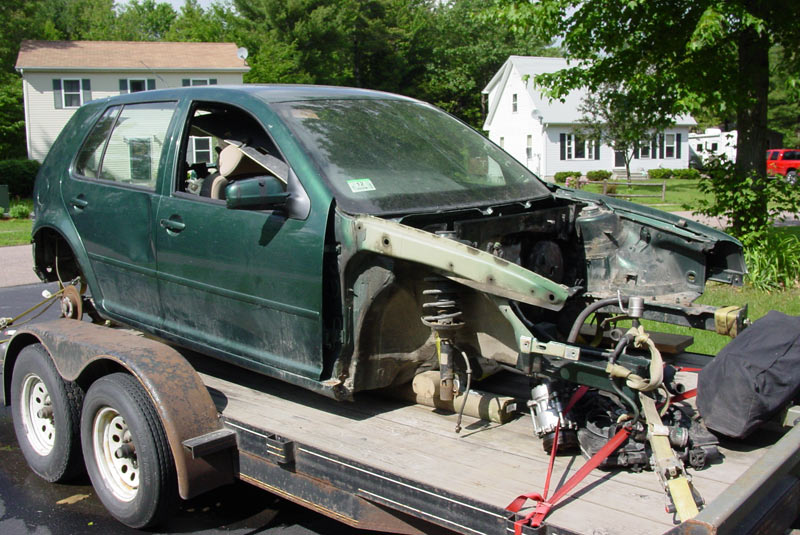
Dealer is coming over on Monday night to determine the actual value of the car for registration. NADA lists this car at $9700.... yeah right. Was that before or after it landed on its roof?
[b] ------------- Project Update ------------- [/b]
A big thanks to Casey for coming over tonight with a rear brake tool to reset the rear caliper, help put the car together, and get it down to the shop (and me back). Plus, he didn't show up empty handed. :)
Pictures as promised.
Chris scuffing roof to prep for paint.
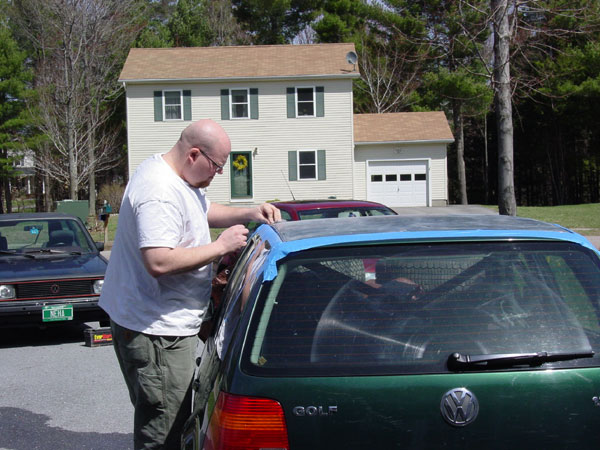
Me painting the first coat... unlike Chris, I had to stand on a milk crate to reach the roof.
Roof when done.
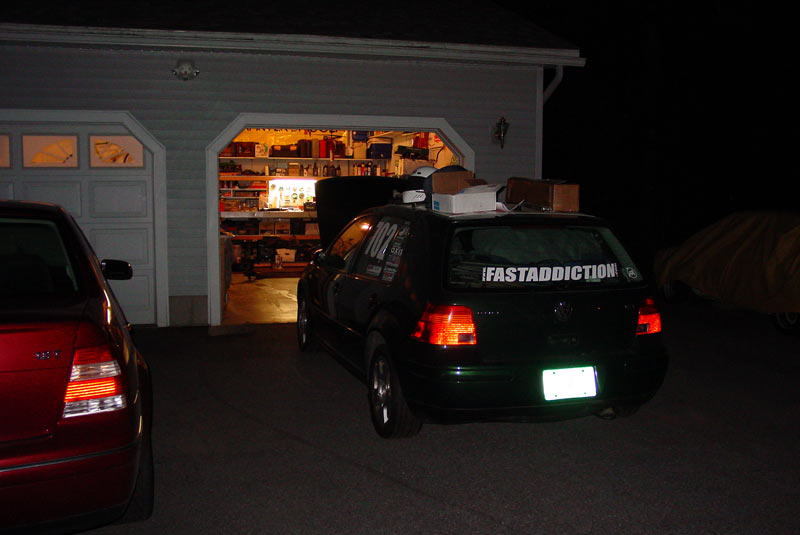
Present arrive from Fast Addiction!
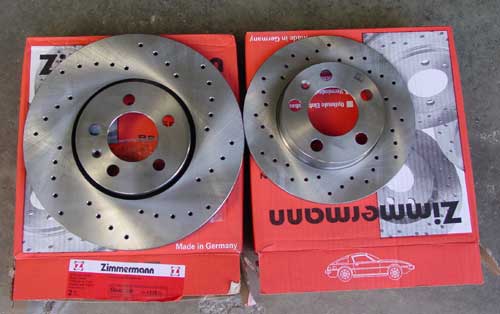
Rears before...
Rears after...
Fronts before...
Front after...
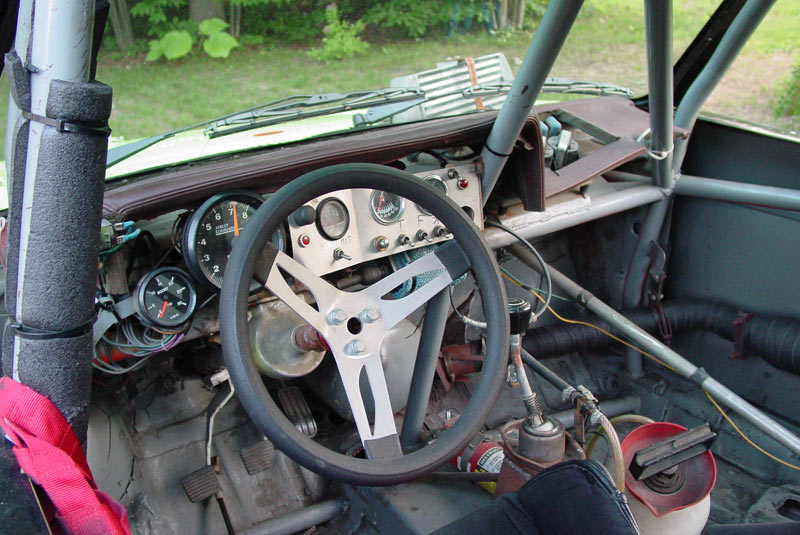
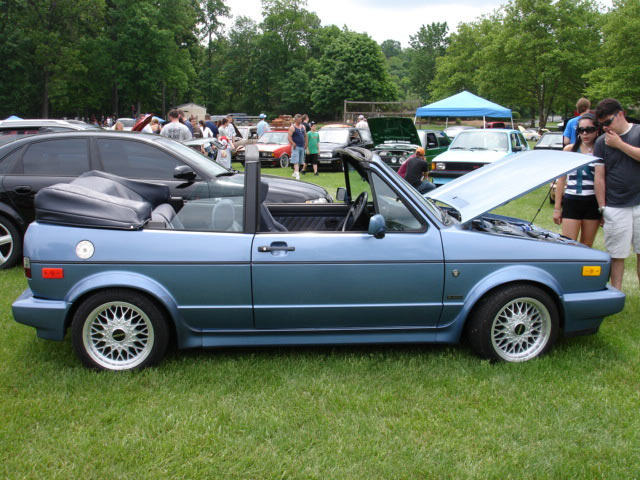
Seats are in. Harnesses are partially in right now.
[b] ------------- Project Update ------------- [/b]
Camber plates installed...
[b] ------------- Project Update ------------- [/b]
Thanks to Bret at RallyGrafix.com
(covering over a really bent roof)
End of 2006.....
[b] ------------- Project Update ------------- [/b]
And now you are all caught up. Welcome to 2007.....
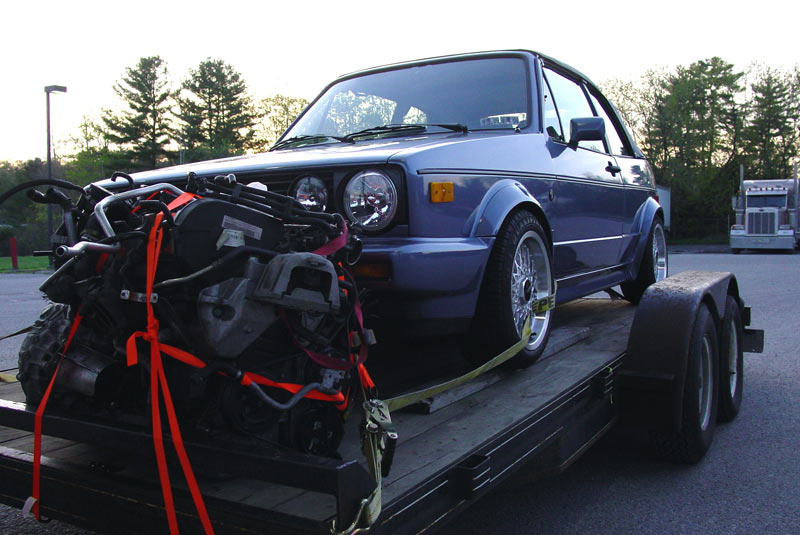
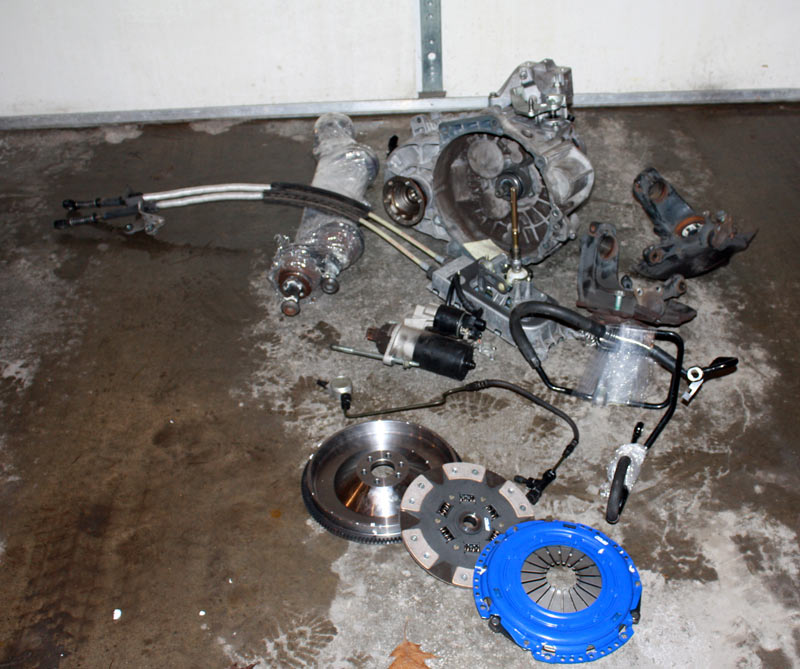
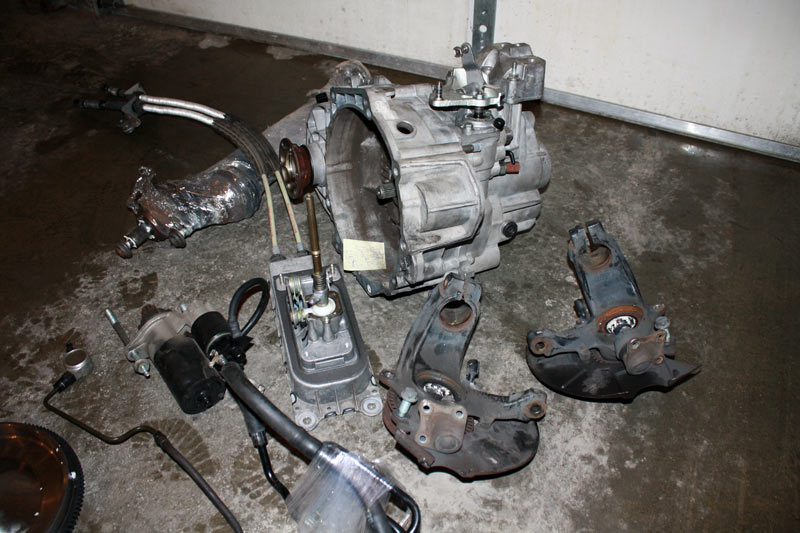
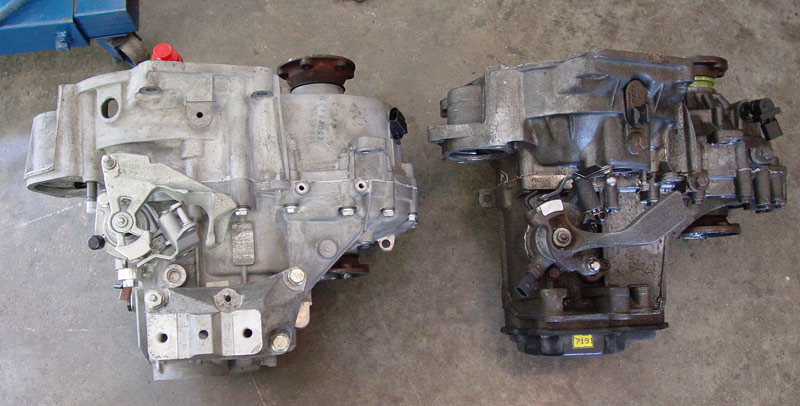
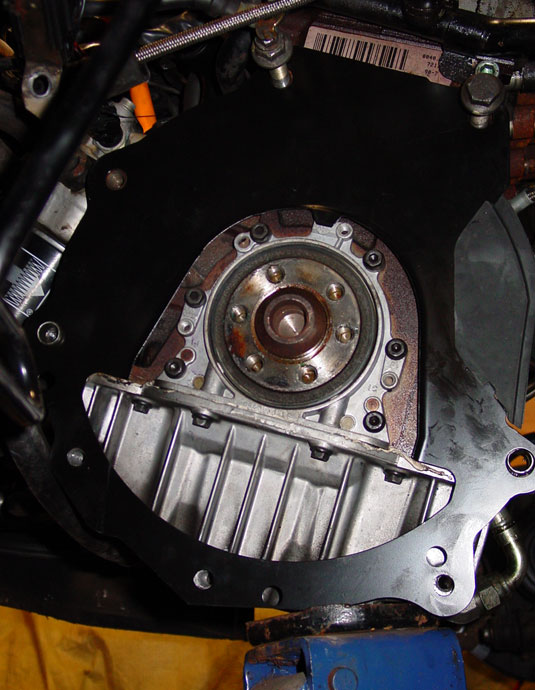
Tranny is out. What a pain. The actual removal of the transmission was easy. Big bolts on the axles, easy motor mounts, lots of big bolts all around the tranny (instead of those 10mm head bolts from the Rabbit that hold the sheet metal cover to the transmission to keep water out... and that little piece in the back/behind the passenger side tranny flange), easy to remove parts underneath, and it just slides out soooo nice. The pain was the hours we had to spend on the top of the engine trying to figure out how to remove all the crap.
Transmission goes to Fast Addiction tonight (11pm) to start its journey towards enlightenment (e.g. LSD).
The issue I did have with the removal is the bolt that holds the back of the dog bone to the subframe snapped off (I just barely started to turn it with very little force). The bolt looked more like chalk instead of metal. And, in my efforts to remove the dog bone (the bolt broke off leaving a stud still in the hole) it looks like I broke the back of the dog bone. So, I will need to get a new one. Doh!
This week: front bumper off, exhaust off, DP off, exhaust mani off, clutch/flywheel off, SMIC off, power window control in. That should do it. Then start ordering parts.
Still looking for a hood and front bumper. I believe I have a lead in NH for the front bumper, but local would be better.
No pictures... figured you know what it looks like to remove a transmission. I have to say that I do not like the Bentley for the MKIV. Funny part of the removal, there was one like that stated (in a nut shell) to go to the electrical section for removal instructions for the starter. Okay, looked at the section on how to remove the starter... zipped to the step near the end since all the previous steps were completed until I realized the ONLY step that I needed to follow in the starter removal process was to remove the lower bolt on the starter. Um, they could have told me that in the transmission removal section.
John at FastAddiction.com has the transmission and is installing the Peloquin LSD. Want a go fast modification? This is a great thing to get!
I recent purchased a MINT front bumper from a fellow Vortexer (I had to drive to the intersection of 89 and 93 to pick it up... and then on my way home stop by at FA to get some parts).
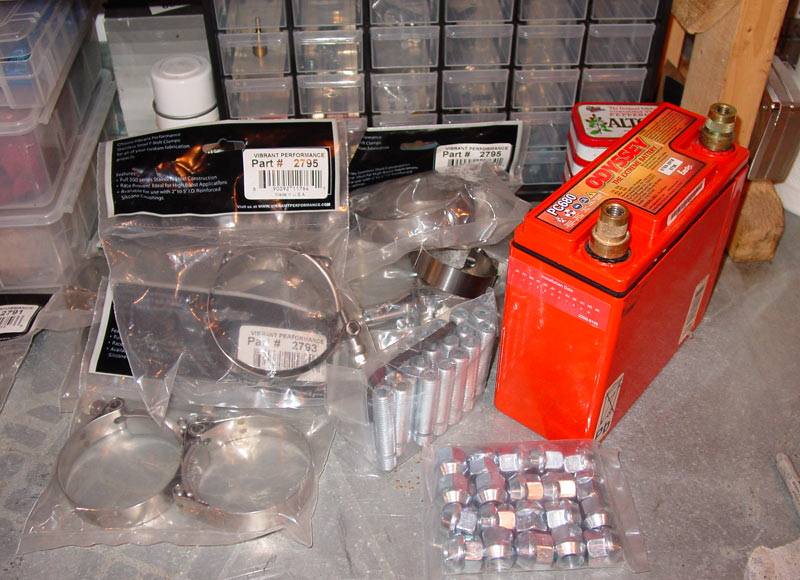
Here are the 'some parts'
I am still lost on what I should run for for electronics. I have an e-mail out to Unichip. APR is a no go. Revo is a no go. I can't find a product that will run a big turbo (short of engine management).
I finally got to dig into the engine today to swap out the plastic water pump with a metal one. Doh.. it already had a metal impeller. Such is life. I guess I needed the practice. 2.5 hours start to finish. :) It did make it easier with the fact that the transmission was out of the car so I could hang the engine more in the middle of the engine bay giving me more room to work.
[b] ------------- Project Update ------------- [/b]
Progress continues..... Car still isn't faster, but I now have all the body parts I need and the transmission is back in. I wanted to drive it around a little tonight to make sure everything was good (plus I'm supposed to put 450 miles on the clutch before any hard launches... I don't drive that much in a year with that car... LOL). But, since I didn't completely bolt the DP to the turbo it was loud as hell. Don't worry, it is just hooked up for moving the car around (get on the trailer, etc.) and the ol' foot won't punch the throttle creating a lot more boost that it can handle.
Anyway.... a little progress.
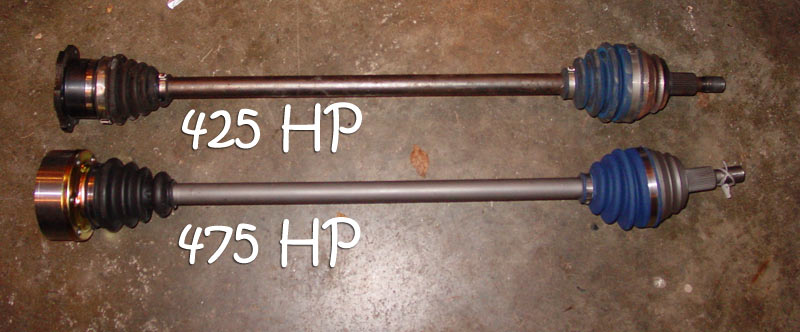
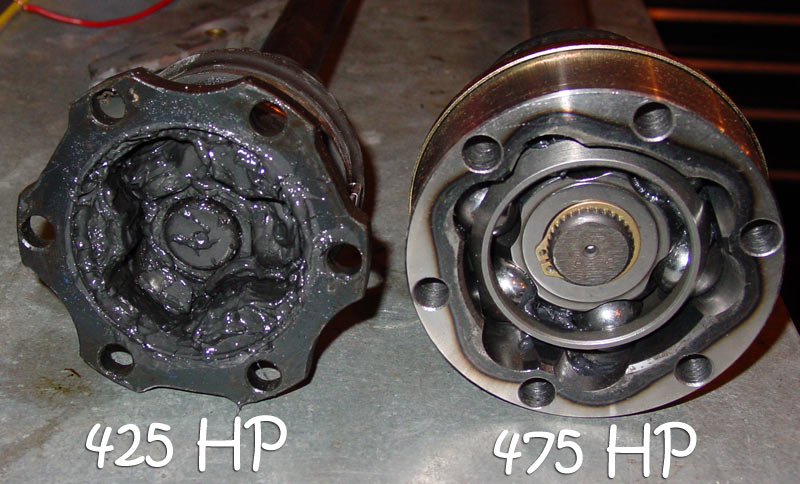
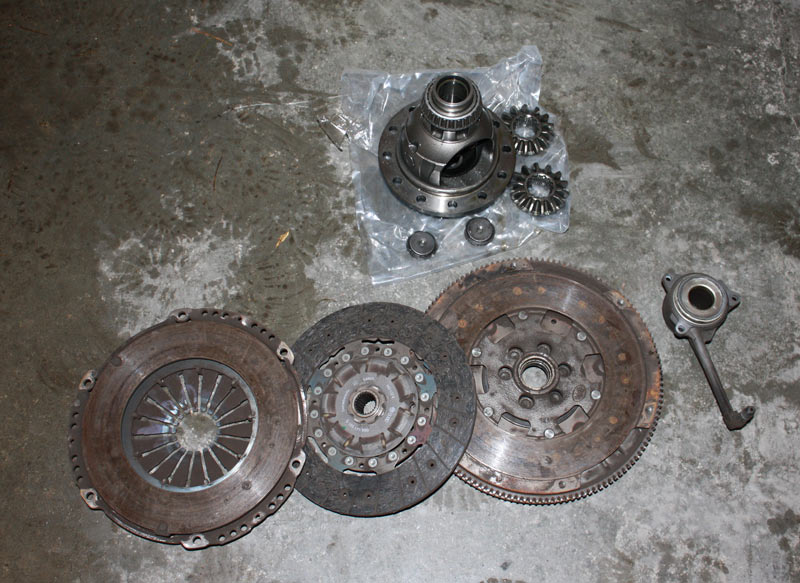
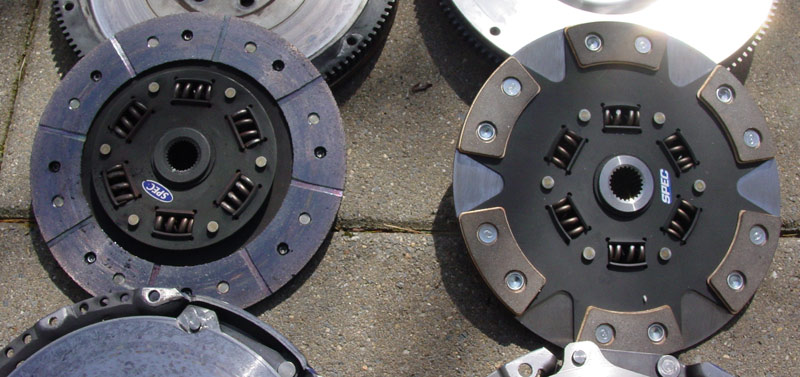
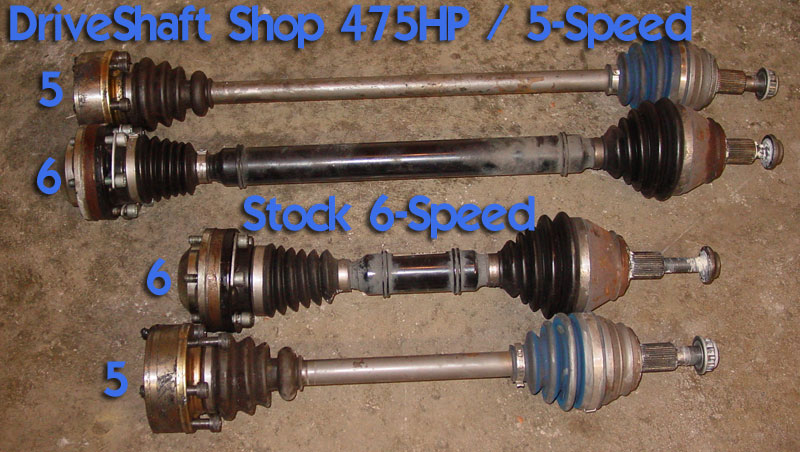
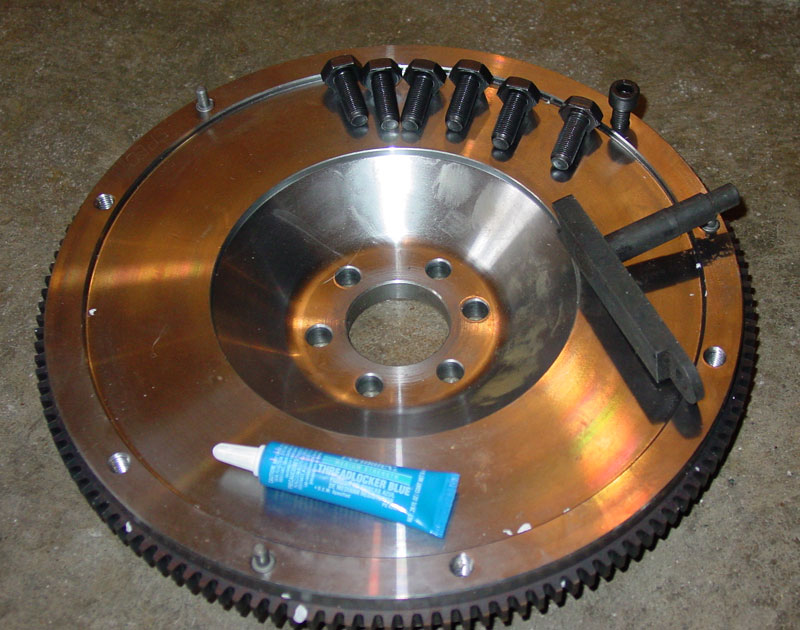
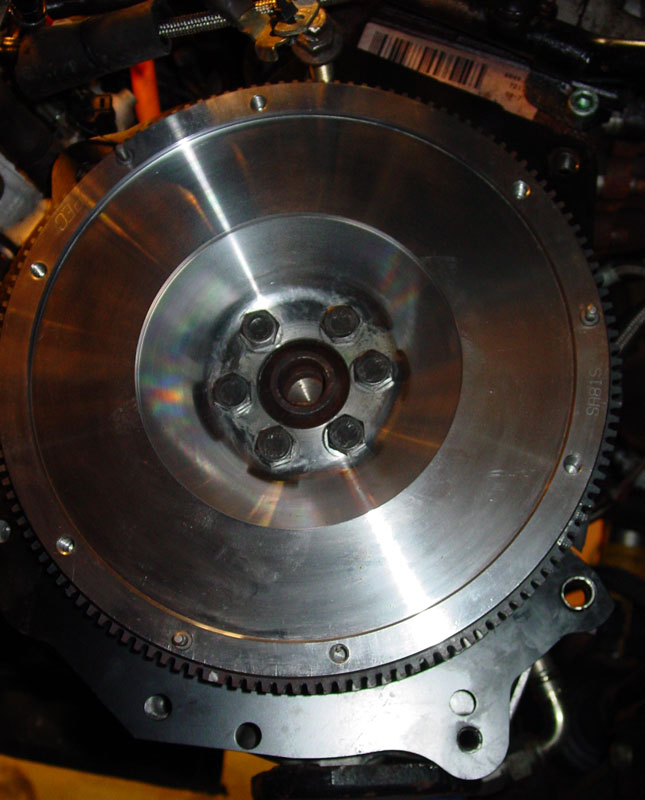
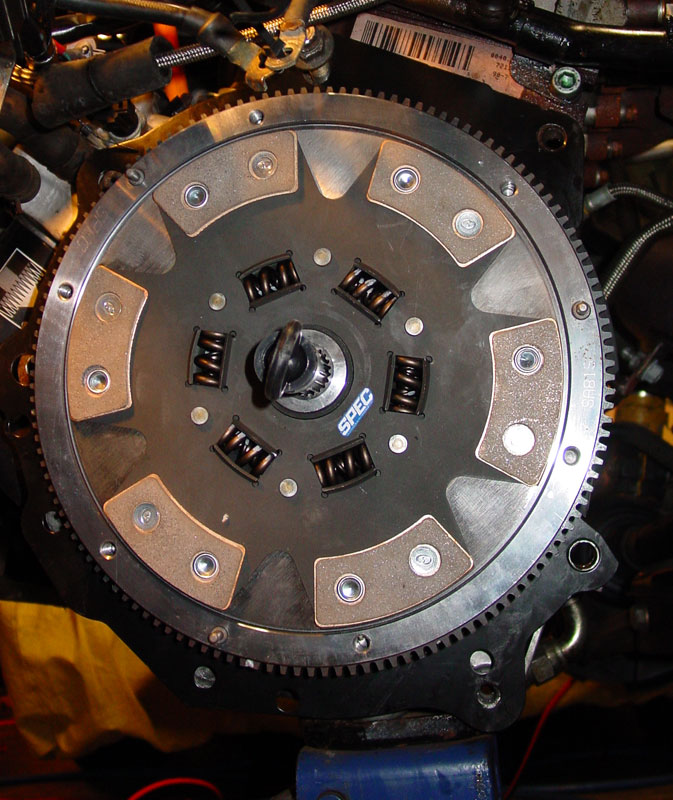
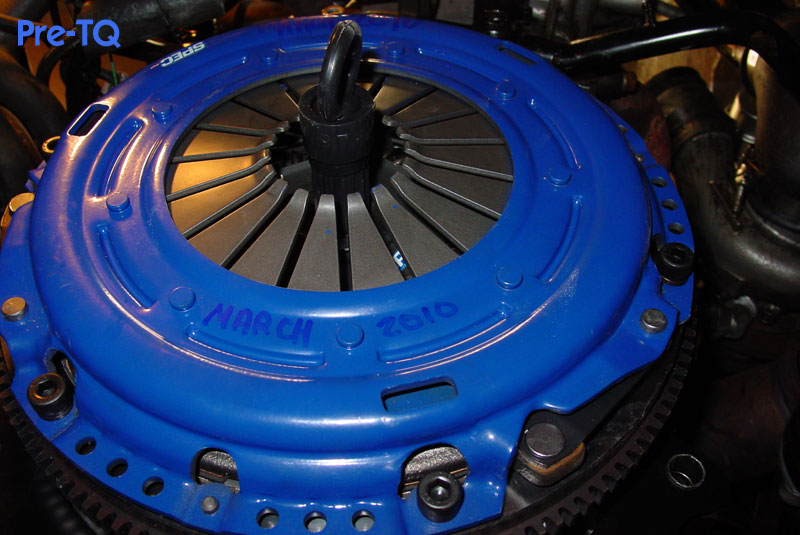
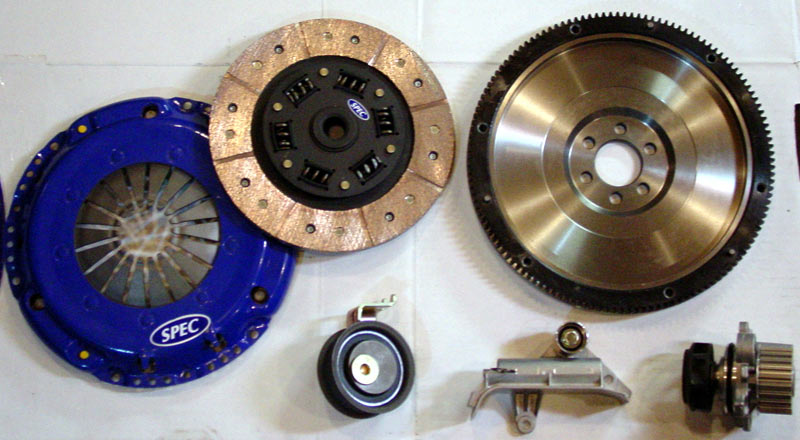
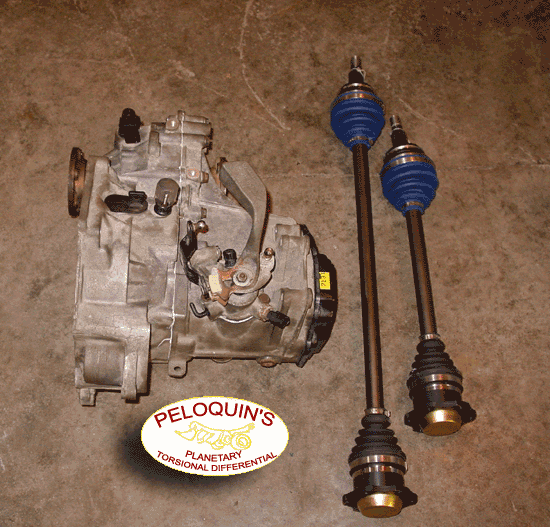
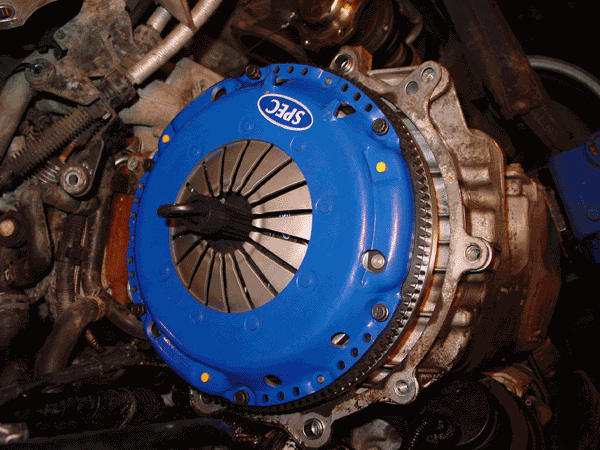
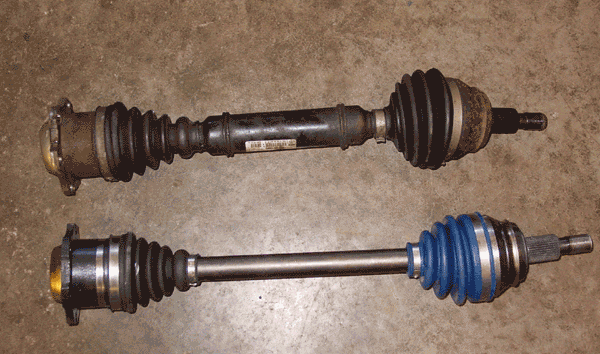
Thanks to John at FastAddiction.com, I now have my new flywheel, clutch, and pressure plate (I installed this on Saturday) and the transmission back with a nice toy installed inside. I also purchased a set of Driveshaft axles (good for 400 HP). The MK4 axles are soooo much easier than an MK1.
Clutch installed..... (bolts not tightened yet)
Something to keep me warm when the heater ran out of gas.... a little bit of apple infused vodka thanks to a friend.

The stock axle vs. the driveshaft axles.
Spent most of my time researching the internet for ways to make the car faster. Thanks to John at FA, he was able to give me some direction since I am new to the whole leaf blower mounted on an engine thing.
[b] ------------- Project Update ------------- [/b]
Spent the last few weeks making it look pretty. Waiting for go-fast parts to arrive.

[b] ------------- Project Update ------------- [/b]
Some assembly required.....
[b] ------------- Project Update ------------- [/b]
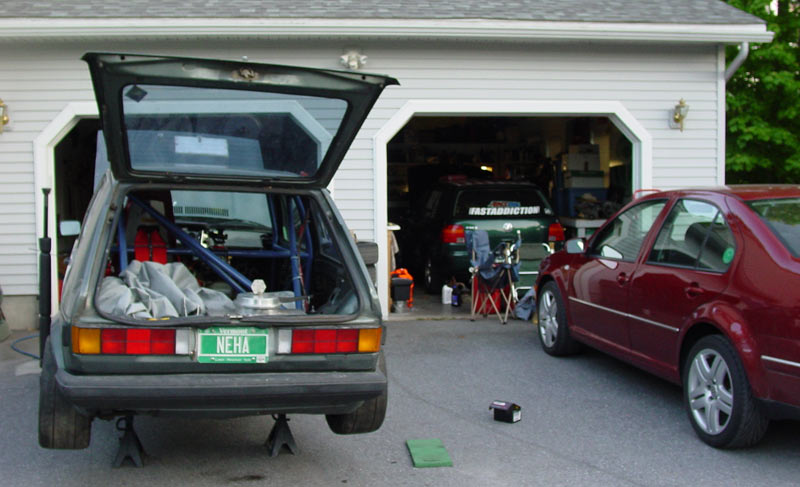
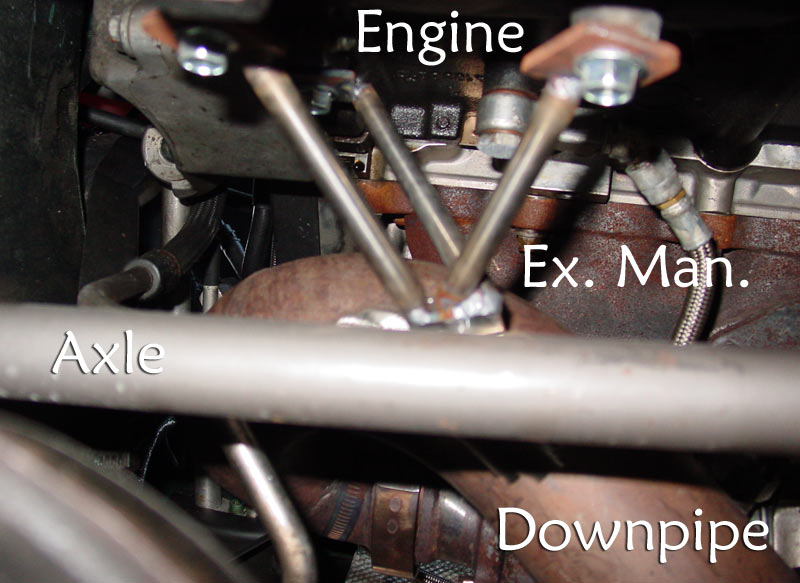
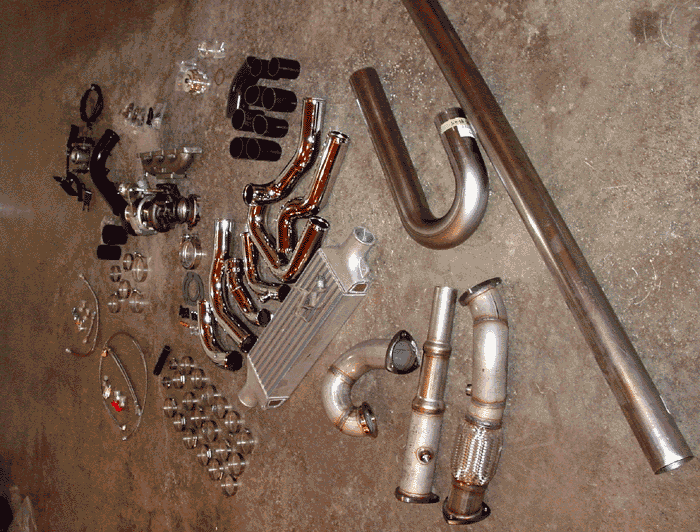
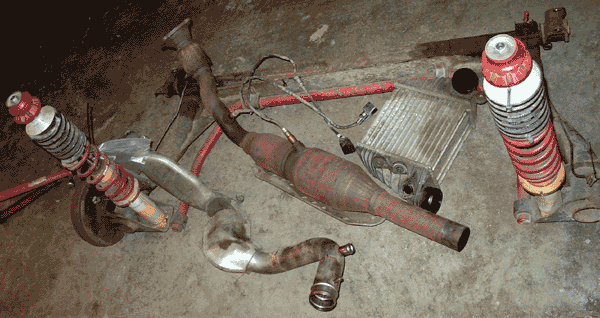
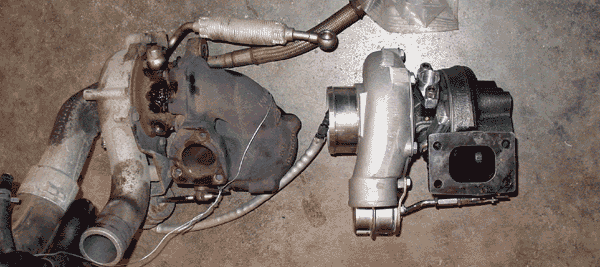
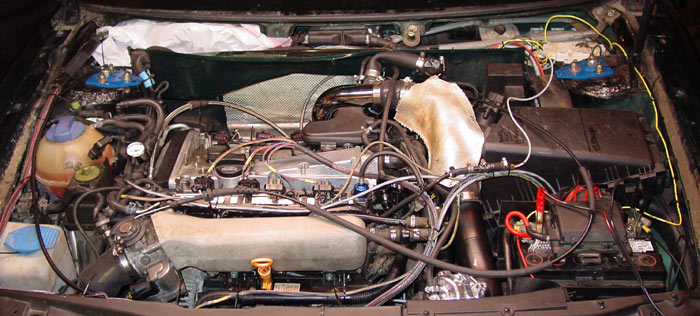
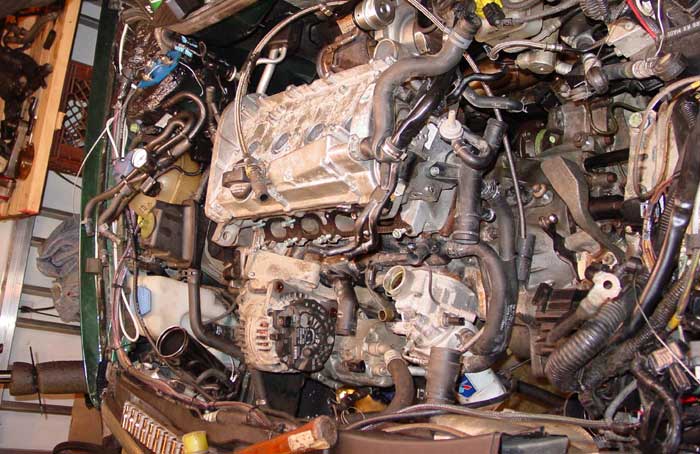
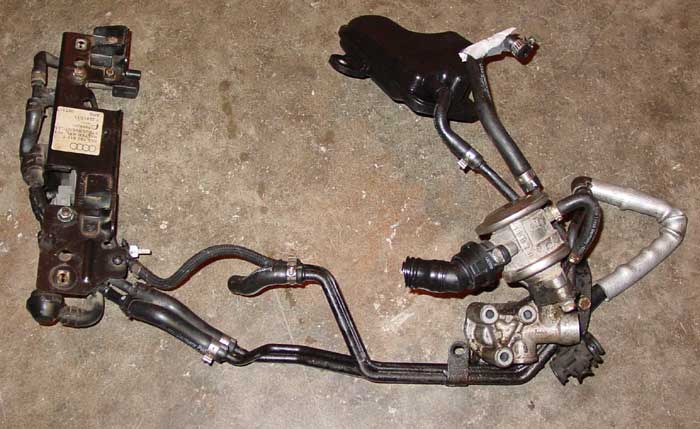
Some progress... all the big parts have been removed from the car so it is now time to put it all back together. The oil feed line to the turbo was the biggest PITA as it was impossible to get to.
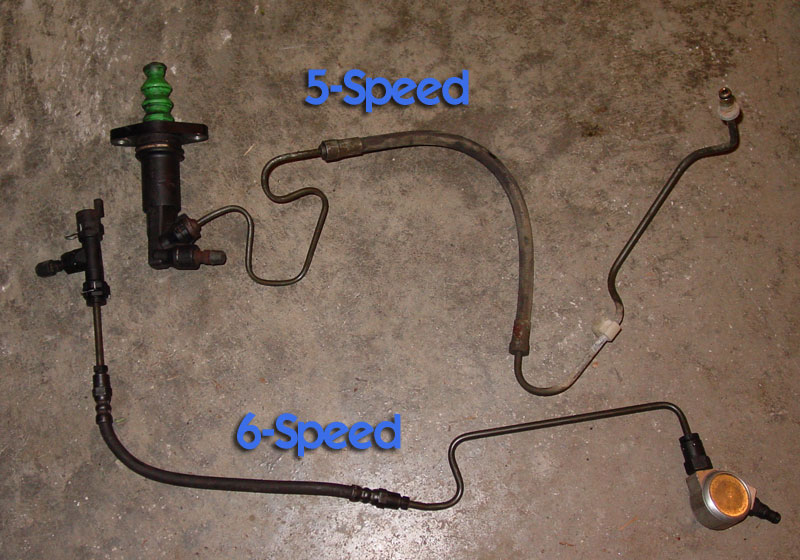
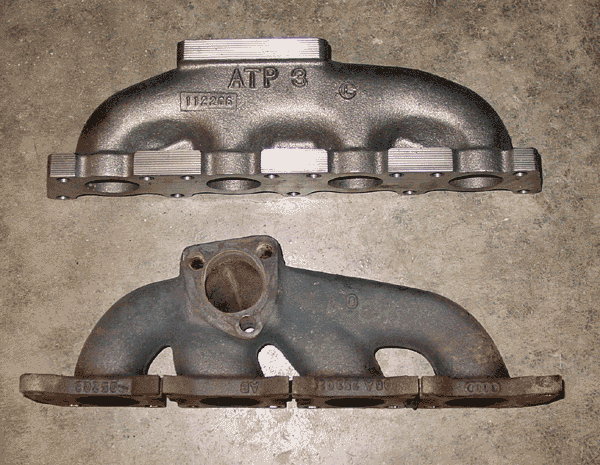
Anyway, some stock vs. go-fast parts side by side.
The pile of 1.8T parts I took out yesterday.... my green Rabbit suspension makes for a nice frame.
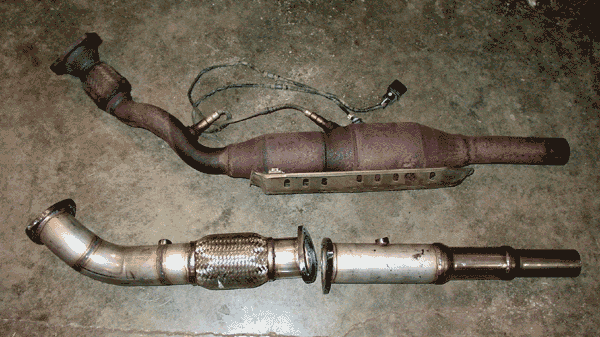
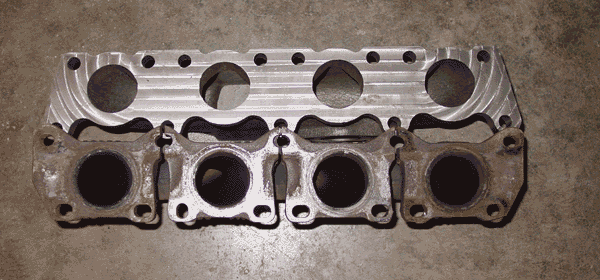
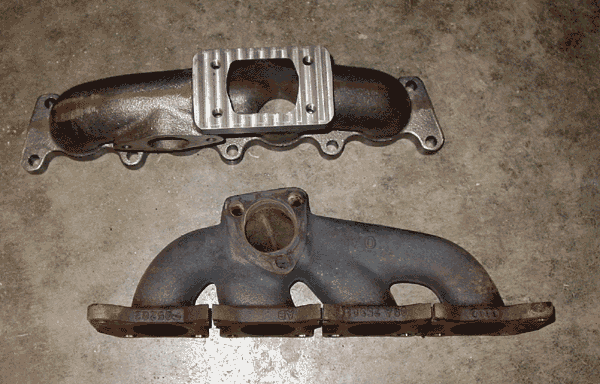
I think it is very impressive the HUGE difference between the stock exhaust manifold and the ATP setup. Stock is tiny.
[b] ------------- Project Update ------------- [/b]
The past two days were productive.
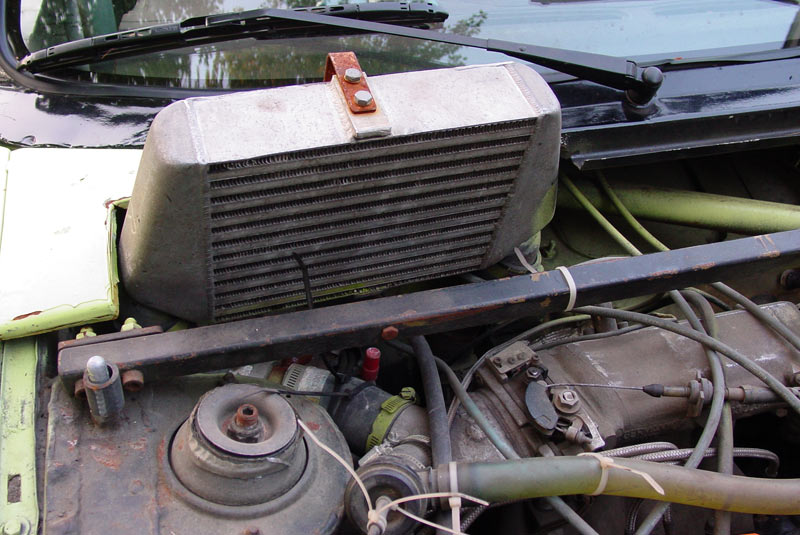
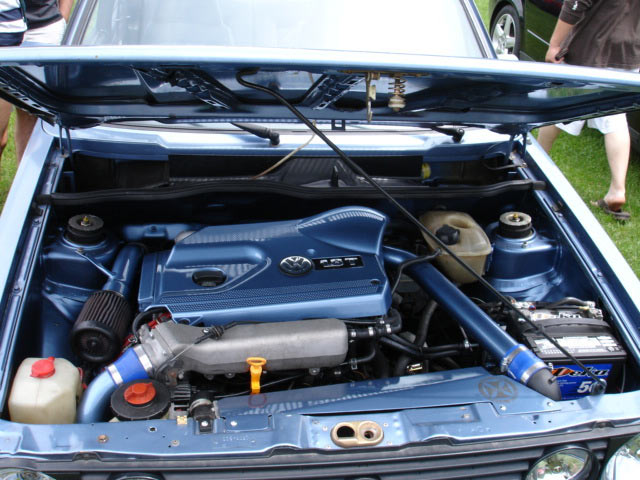
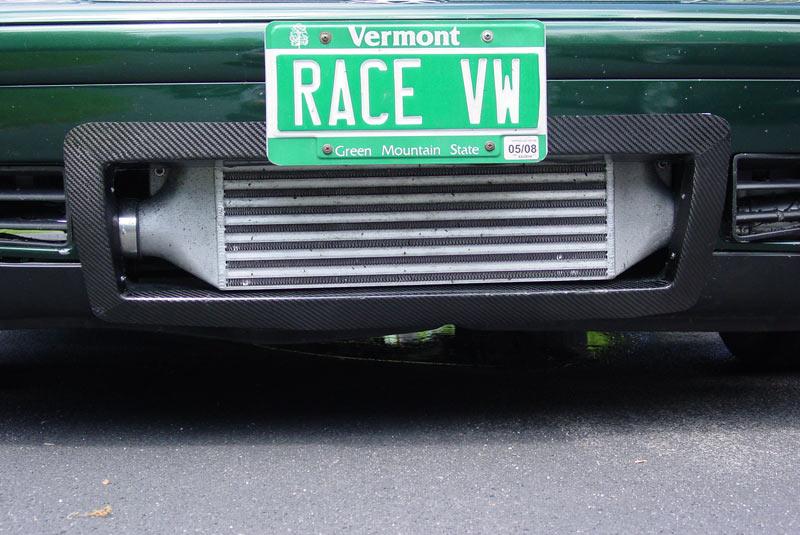
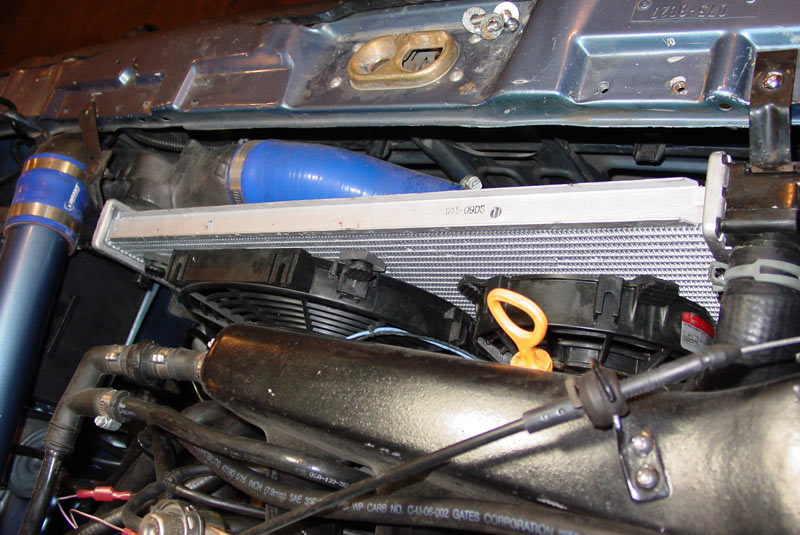
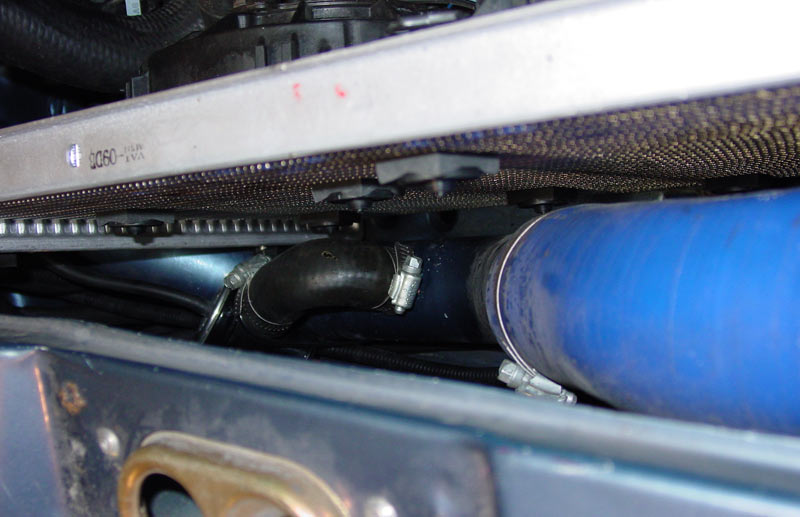
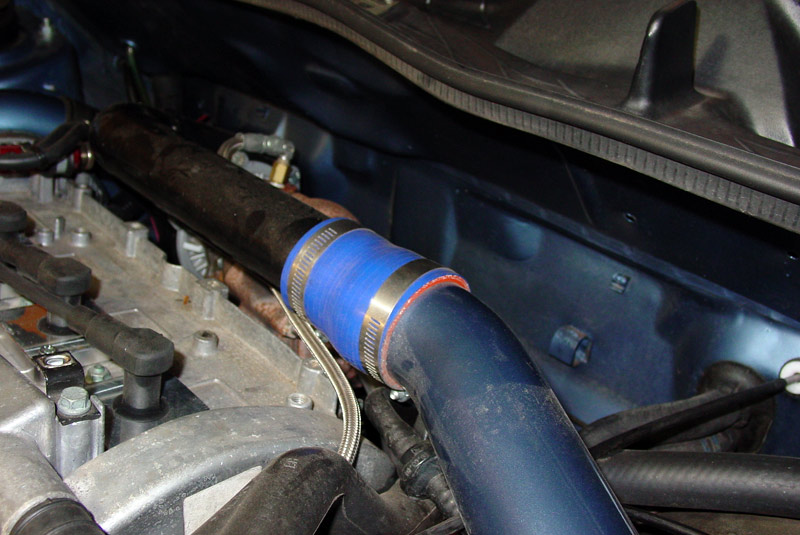
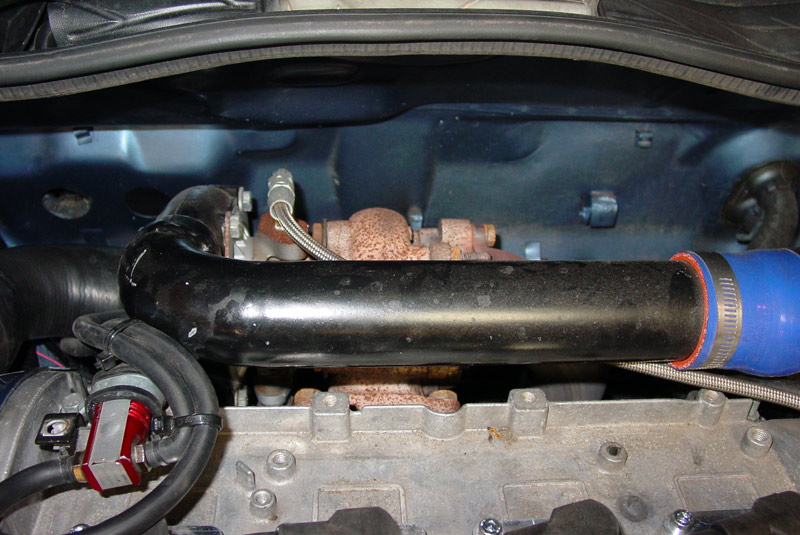
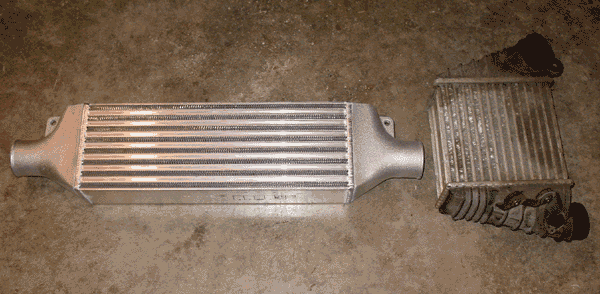
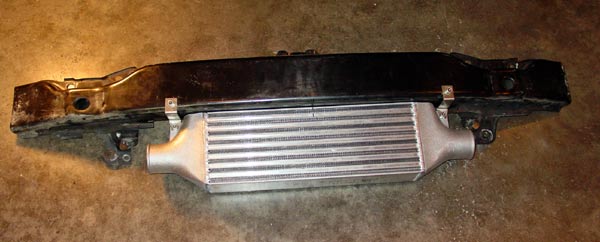
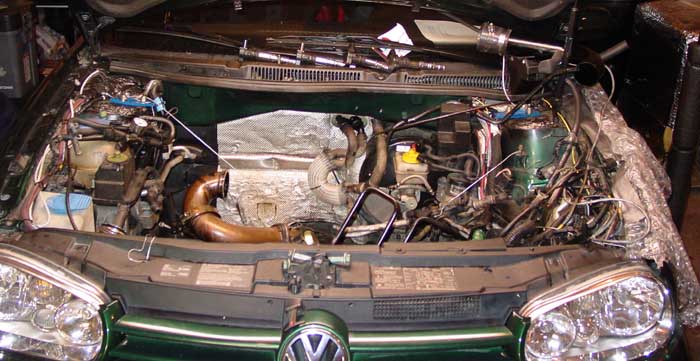
The FMIC has been installed and most of the plumbing is done. I did not connect the tubing to the intake yet as I need to change the throttle body from DBW to DBC. I have not installed the front bumper cover yet (will require some shaving). The installation was a bit of a pain.... I had to cut the lip of the bumper bar so that IC would sit flush against the bottom of the bumper. Per ATP's instructions, I had to cut the lower radiator support, but after I finished and reviewed the work, I have no idea why I had to cut it. The IC doesn't hang anywhere near the radiator support. Looking again at ATP's instructions, it looks like the IC in the directions is different than what I actually had to install. There was some wasted time. I cut part of the battery box base (I do not have the battery box anymore since it was a causality of the rollover) to make room for the pipes. I also had a little problem clearing the headlight (throttle body side), so I cheated by removing the back cover of the headlight for clearance.
IC mounted to the bumper/rebar:
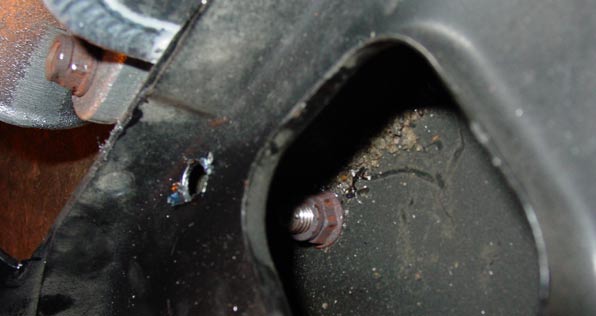
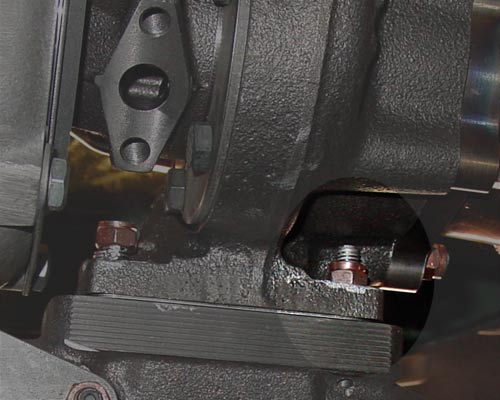
I had to drill a hole all the way through the second layer just so I could see. Then I worked an open-end wrench with the nut duct taped to it over to the correct position. The photo is at a sharp angle so you can see the nut.
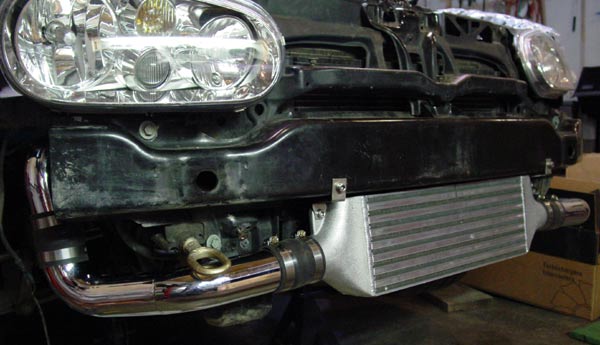
Mount on the car with the tubing. I had to put the tow hitch at an angle (I want to leave it mounted on the car)
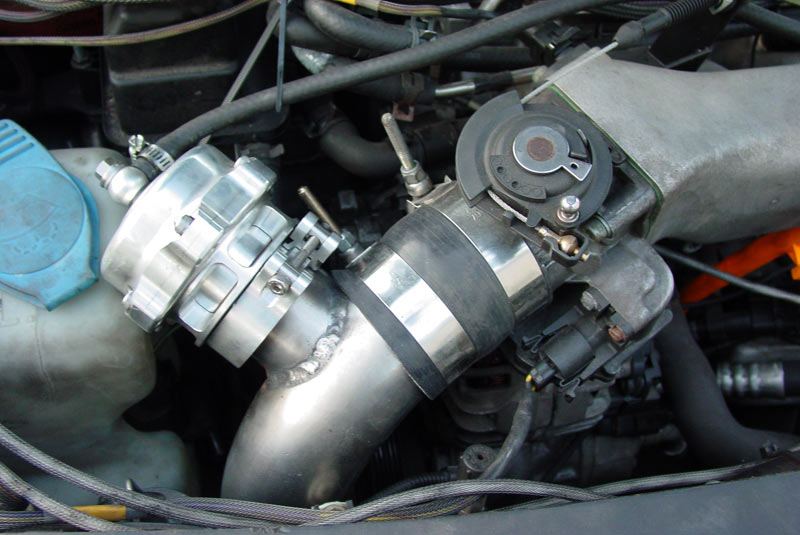
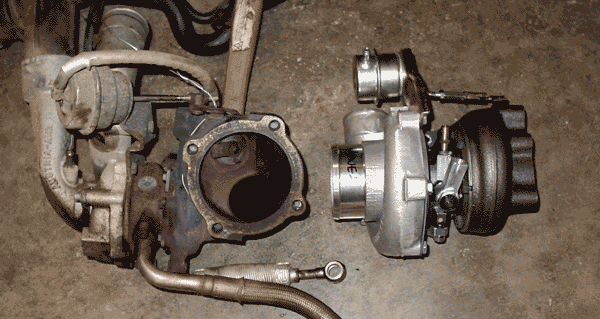
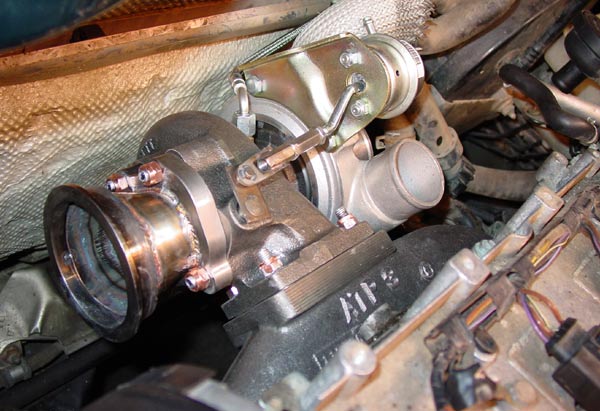
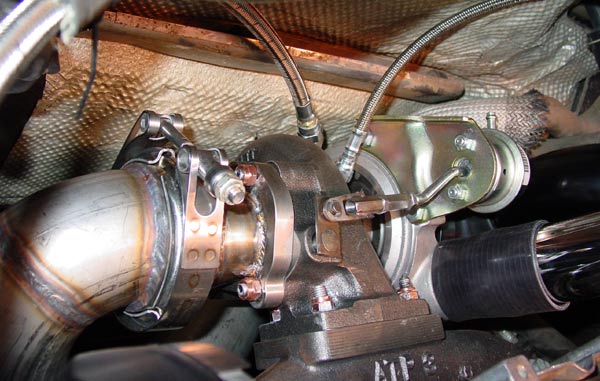
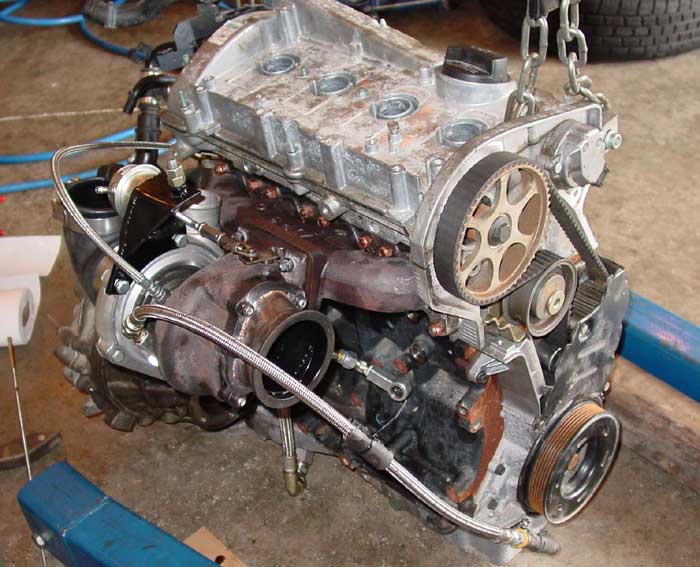
The removal of the old turbo was very difficult with the oil/coolant lines and miscellaneous bolts/nuts. Installation of the new oil/coolant lines looks like it will be much easier since I can see all the connections because the turbo doesn't hang below the exhaust manifold.
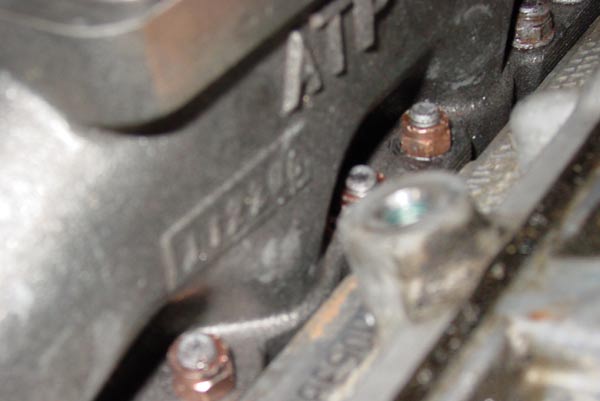
Installation of the ATP manifold was a royal PITA since it was impossible to see the nuts and even move impossible to (a) get an open-ended wrench on the nuts and (b) to be able to swing the wrench to tighten the nut. Well, I don't think Sears will take back my 12mm combo wrench after I shaved it down to make it thinner both in depth of the wrench and the thickness of the round part. I also bent the wrench to allow for the swing. It actually worked quite well. I wish I had thought of it before (as does my friend Nick) since Nick tighten (mostly) the hard to get nuts with the open-end wrench over the course of an hour. I just had to tighten them with the modified wrench.
Hard to see/work with nuts:
The fabrication:
I hung the turbo last night. Good thing I didn't start tighten the top nuts because one of the bottom nuts required the turbo to be at the end of the stud to be able to fit the nut between the turbo housing and the top of the stud. I was able to tighten all but one of the nuts since I needed a 12mm combo wrench. Hmmmm, somehow my 12mm got bent and didn't work here.
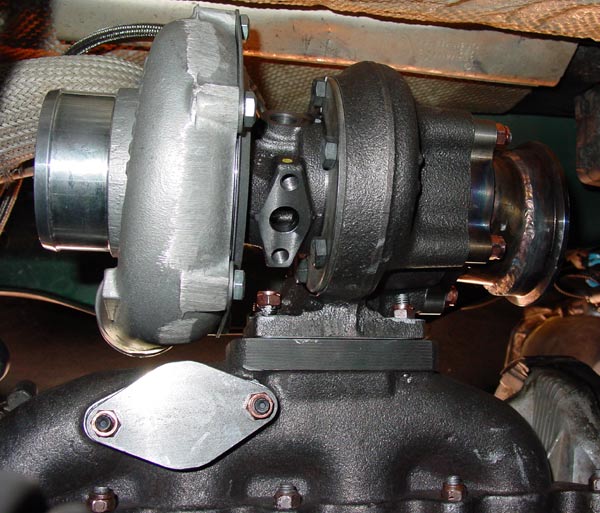
Turbo partially installed:
The nut that had to be installed first (lightened area) and the nut next to it (left side of image) that I couldn't tighten without a straight 12mm wrench):
The turbo from the bottom:
Hopefully tonight I will be able to install the oil and coolant lines and complete the intercooler pipes. That leaves Wednesday night to install the FPR, injectors, and BOV. If there is time, I get the exhaust completed.
EDIT: Didn't get a chance to work on the car tonight due to an SCCV meeting followed by the gym.
The engine management should be in the mail to me today. Hopefully I will be able to get that on by Monday (busy this weekend drinking that 1/2 barrel of Switchback).
I need to get to Fast Addiction to pick up some last minute items.
[b] ------------- Project Update ------------- [/b]
The saga continues.
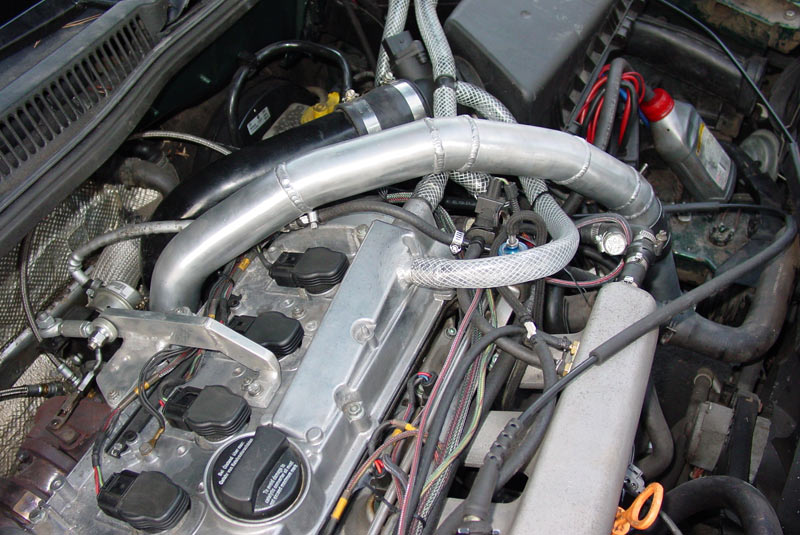
Big BOV... no idea where/how to install it.
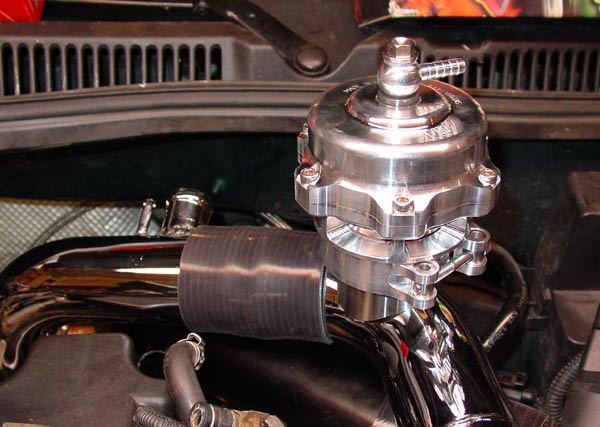
The hairdryer installed...
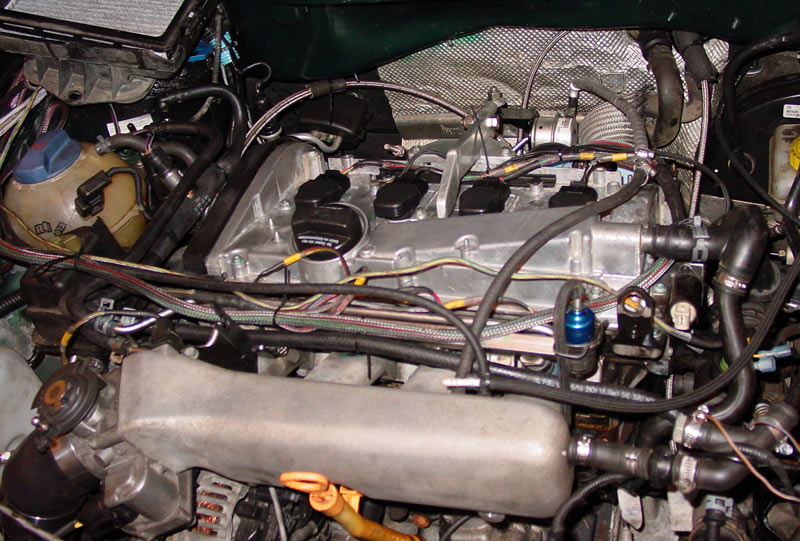
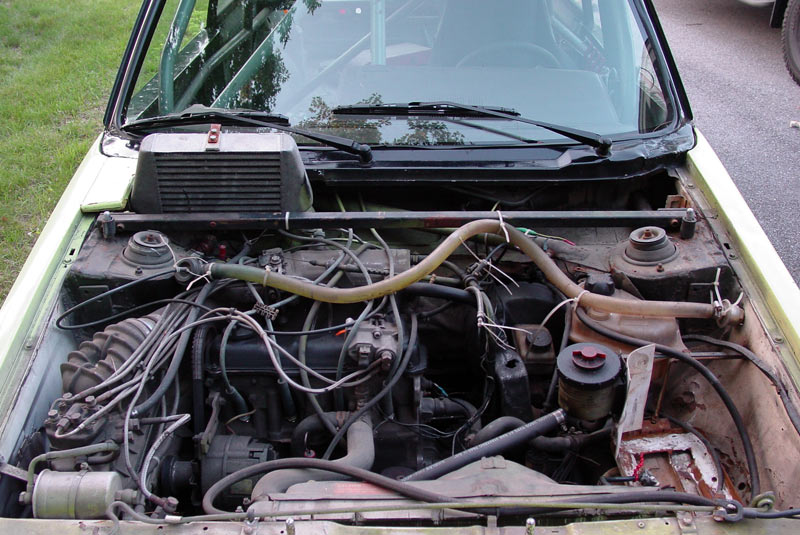
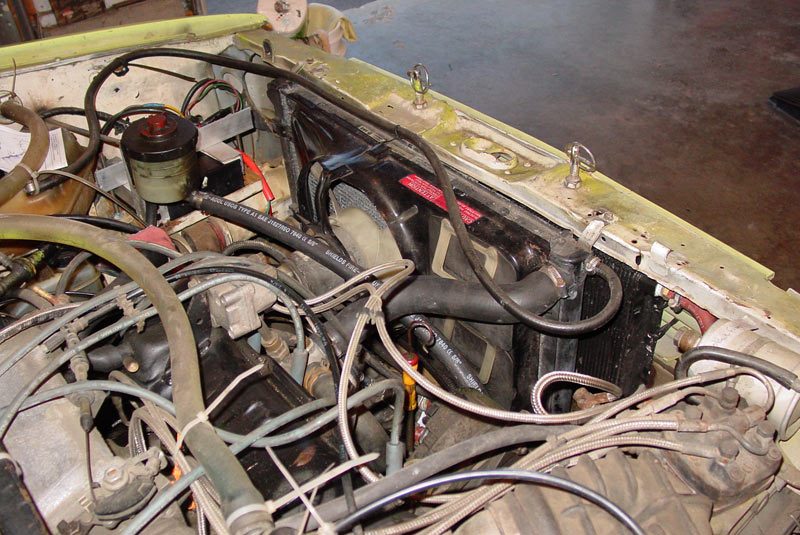
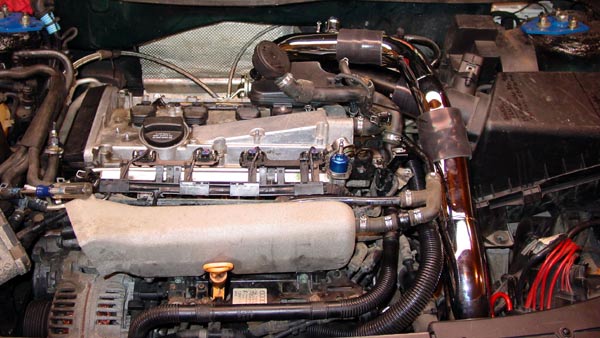
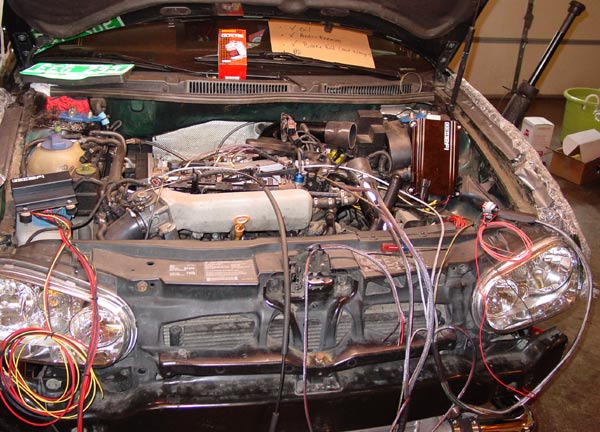
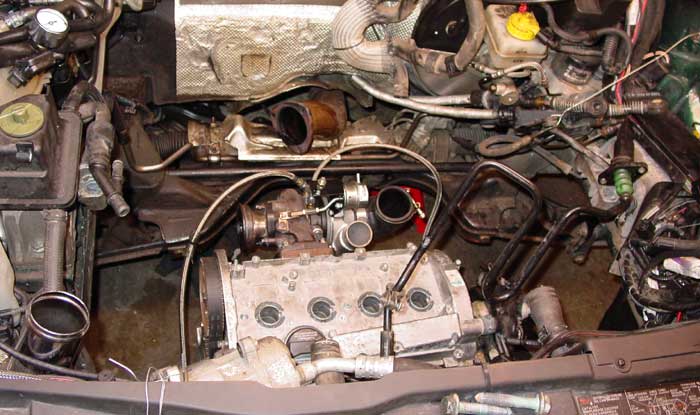
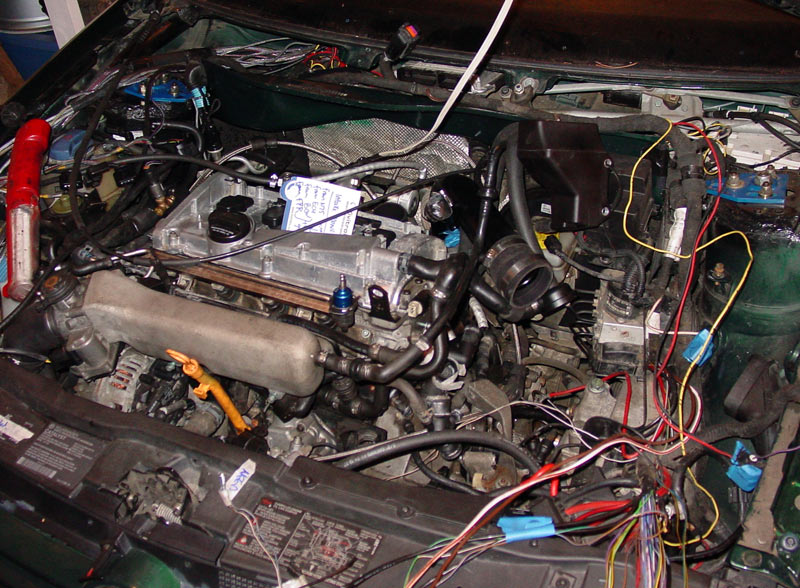
Engine... not all hoses connected yet.
[b] ------------- Project Update ------------- [/b]
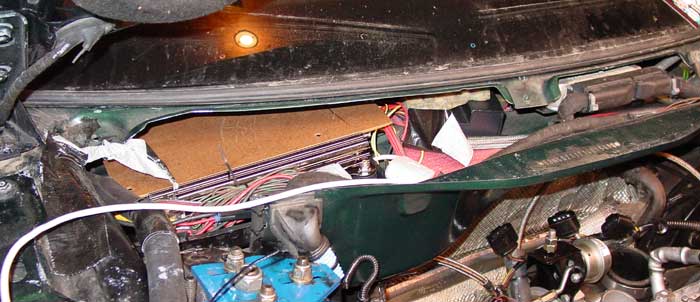
Now I'm above my head....
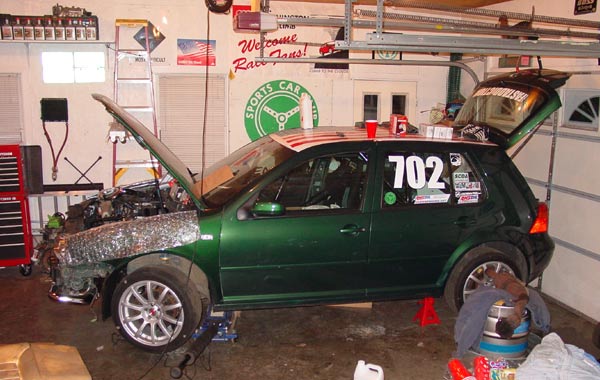
How the car has been sitting for 5 weeks....
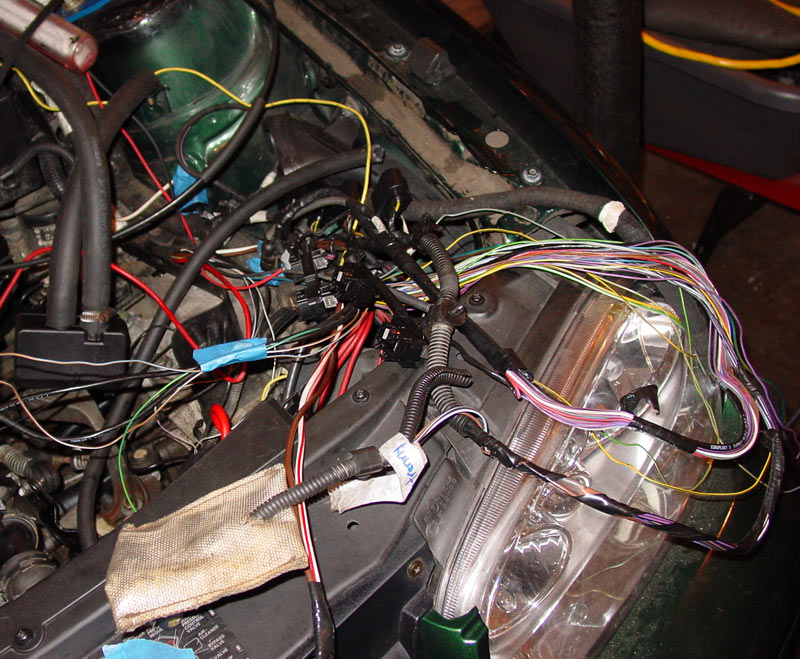
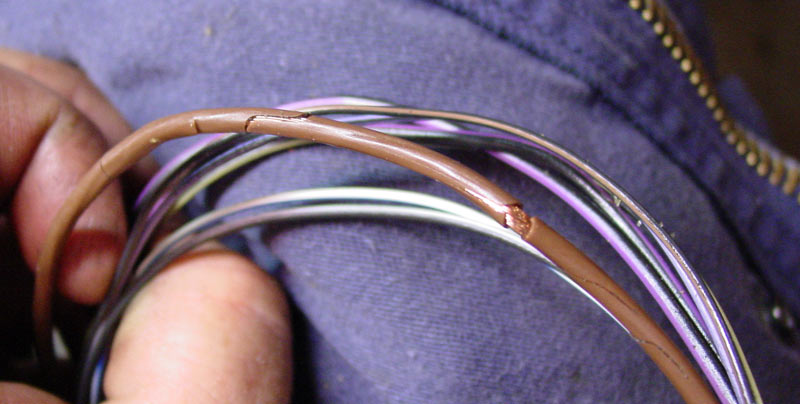
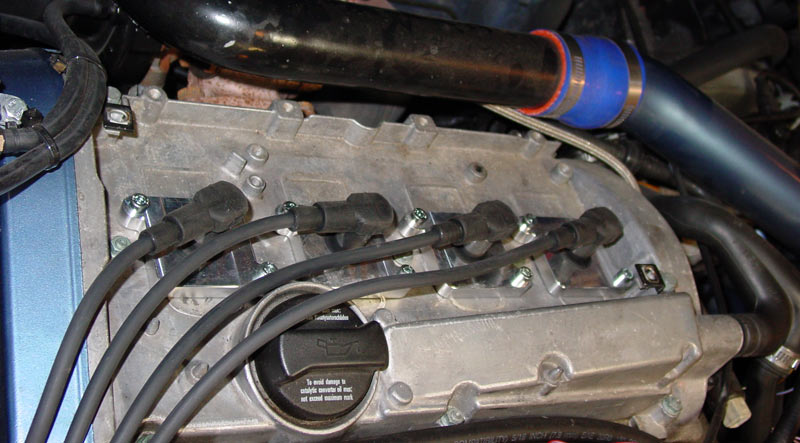
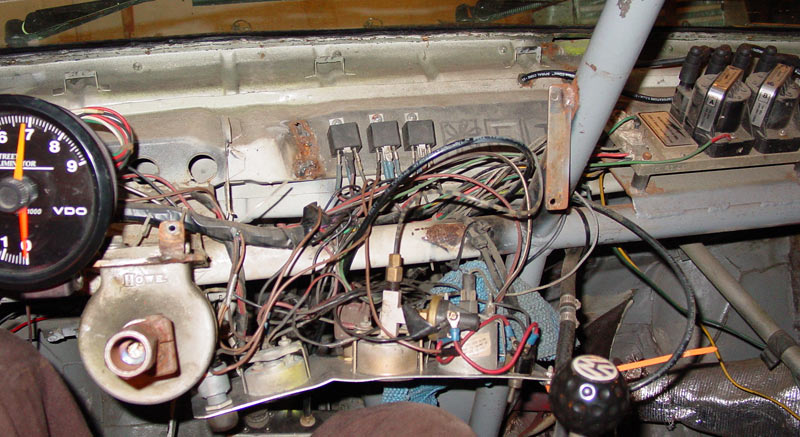
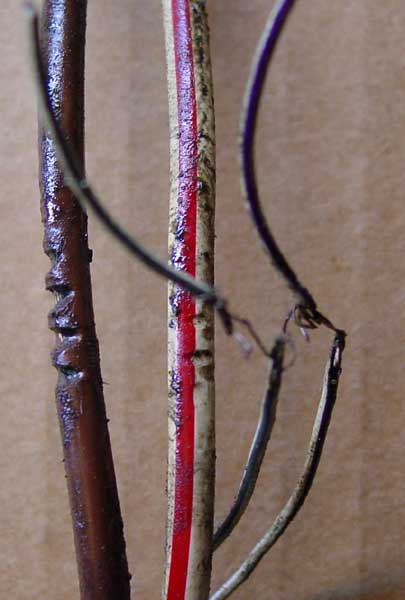
Package arrived today with some wires in it...
Starting to sort out/layout the harness. I plugged in what I could figure out so that I could determine the flow of the harness, and therefore, how/where to mount everything. A bit of a brick wall here so I have some deep thinking to do.
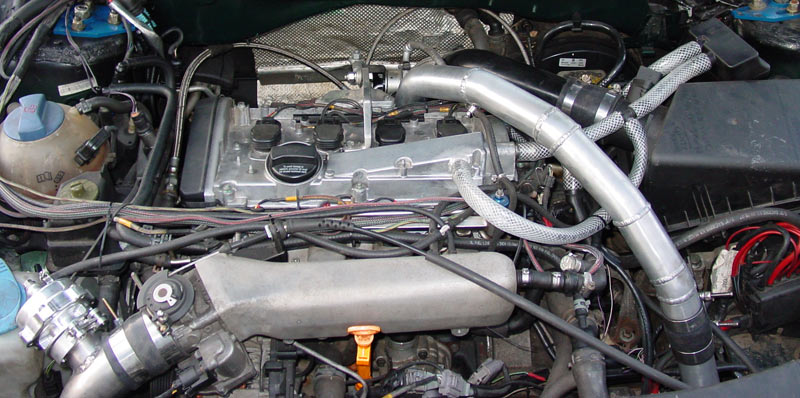
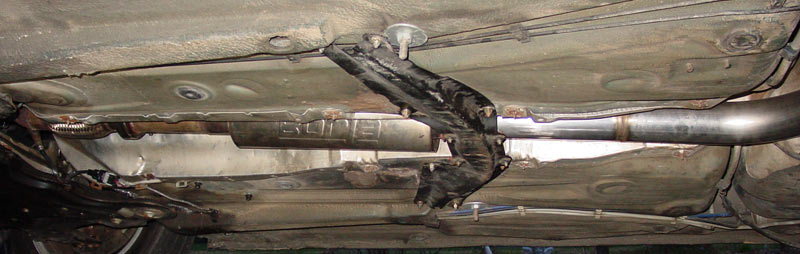
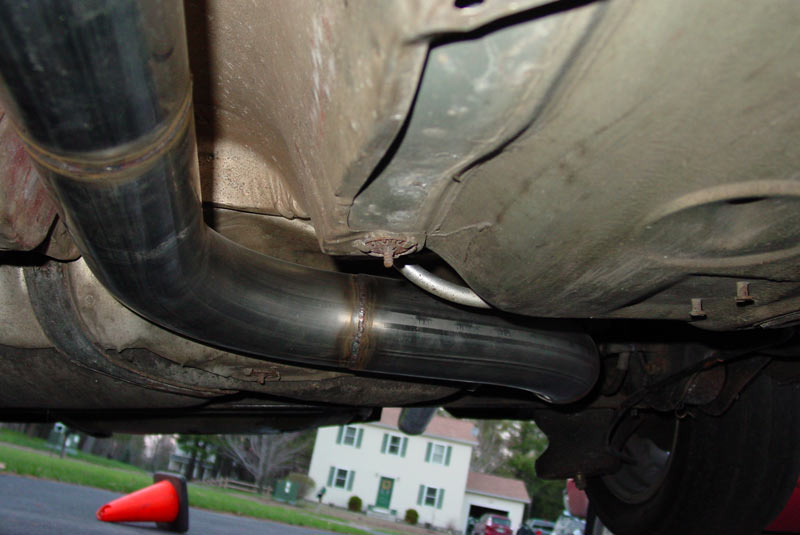
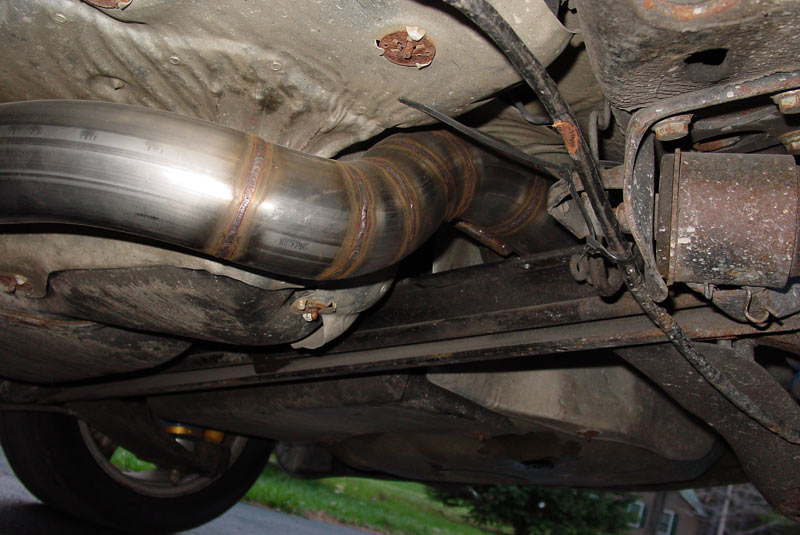
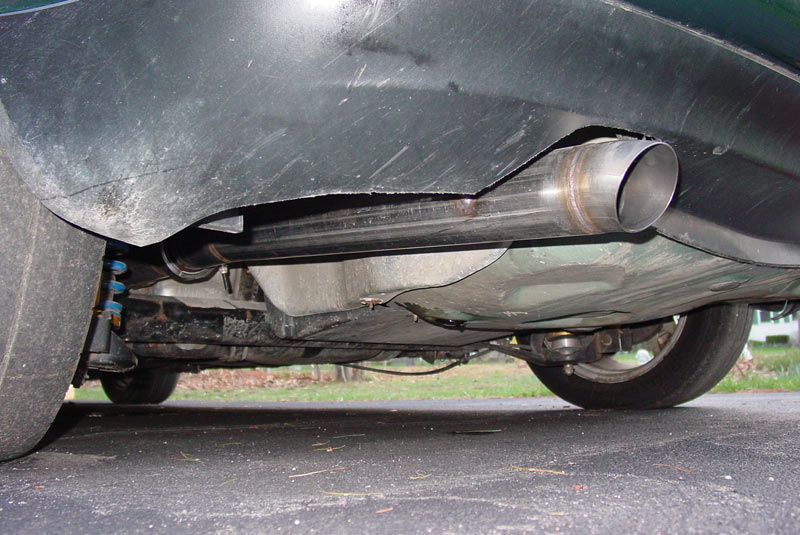
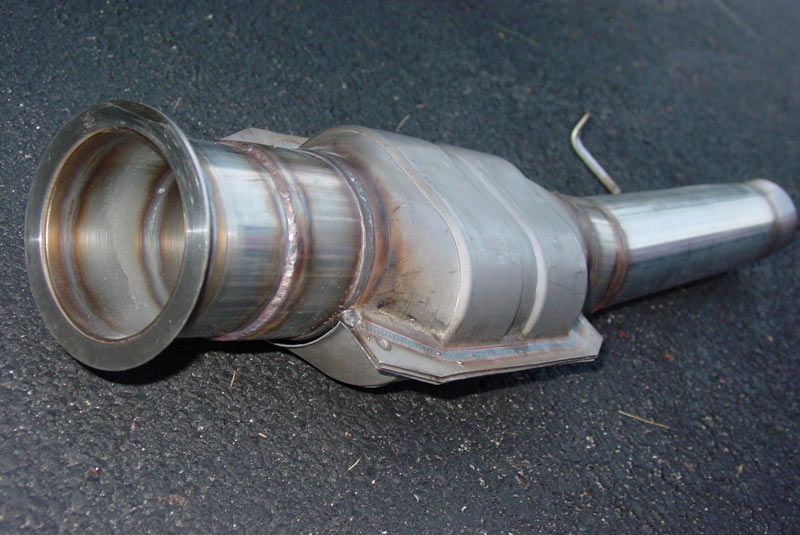
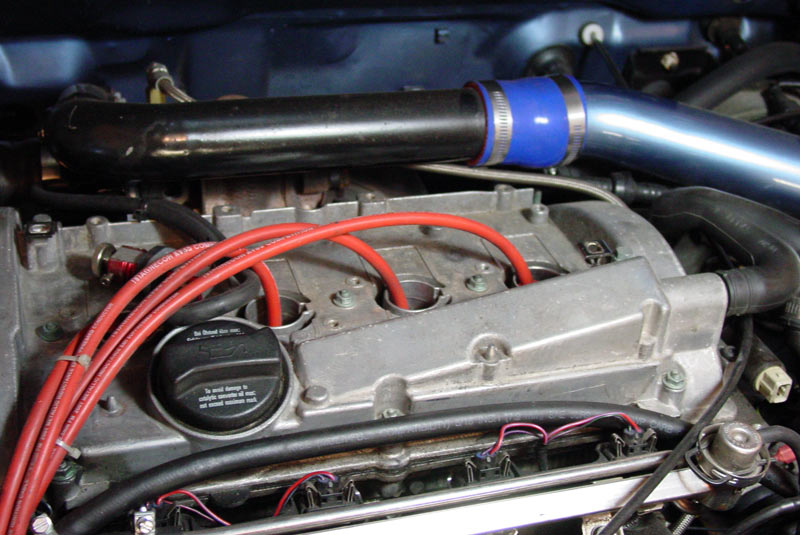
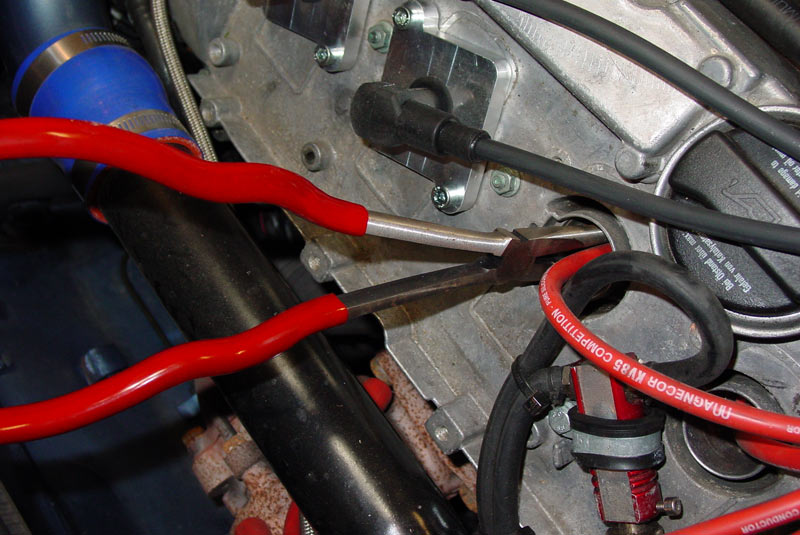
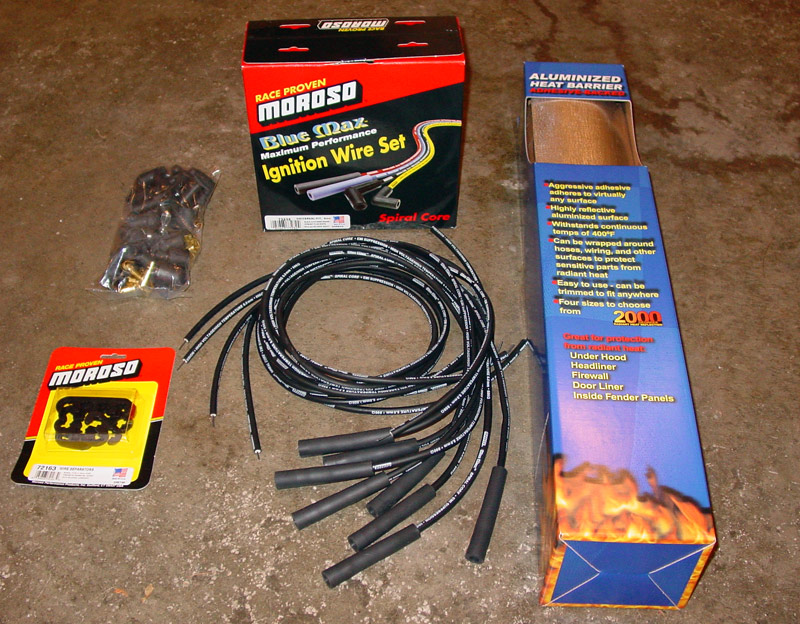
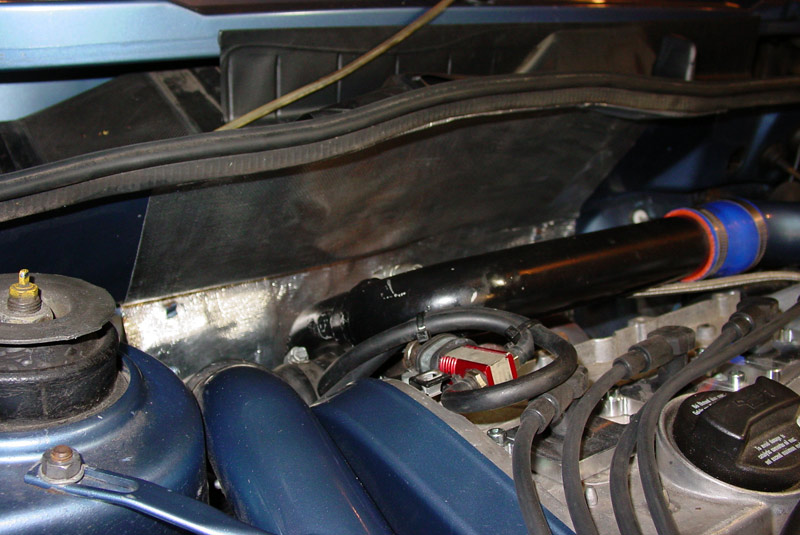
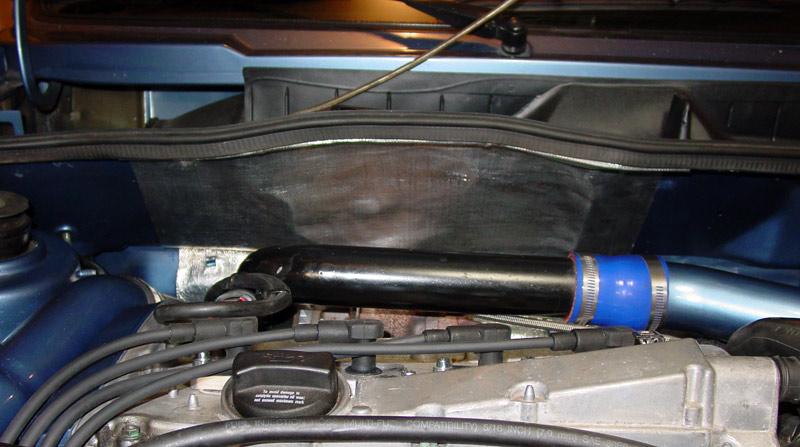
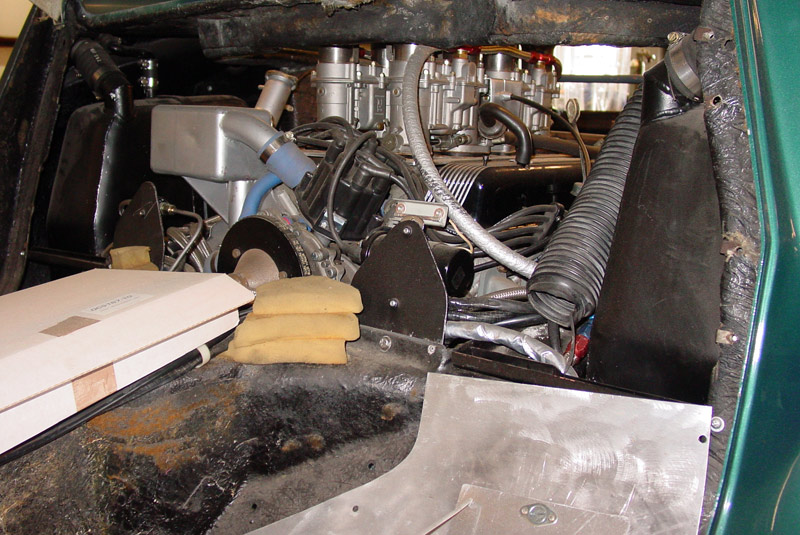
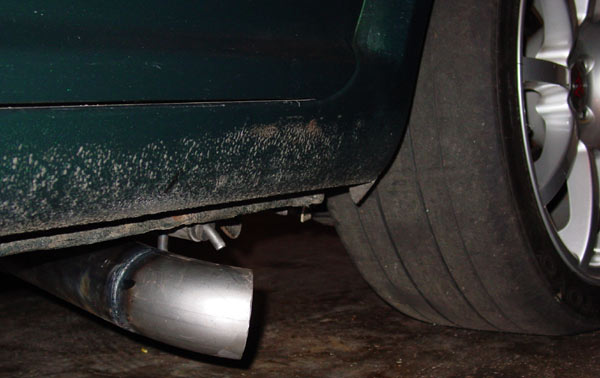
Letting the turbo breath with full 3"" exhaust. Chris Achilles is doing the side exit for me.
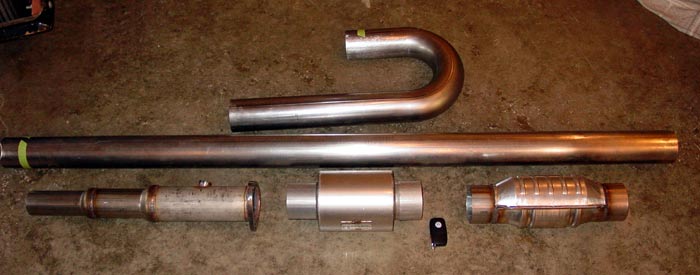
Split race muffler... the muffler is 5"" round and only 6"" long.
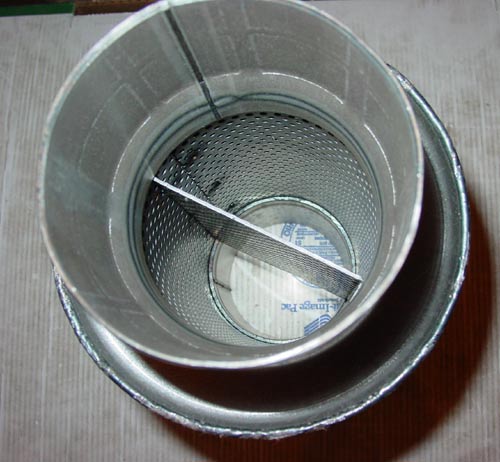
Bigger is better... :)
[b] ------------- Project Update ------------- [/b]
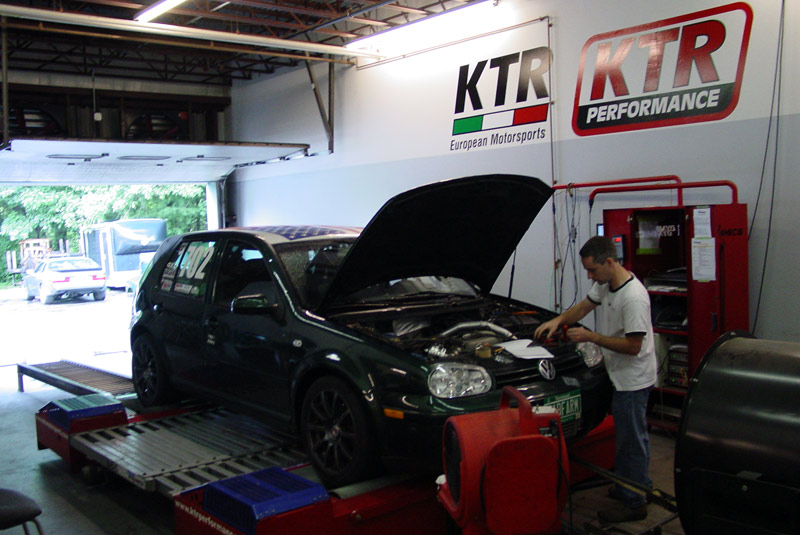
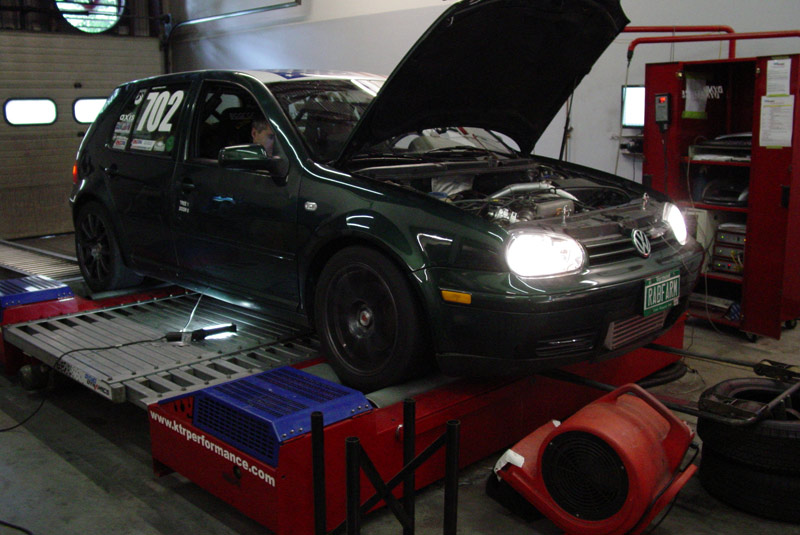
Done. Car is down at Quintin's Brothers in Williston to get dyno tuned. They may or may not get to it today. The exhaust system didn't do a very good job of making the car quieter.... I think it sounds nice.
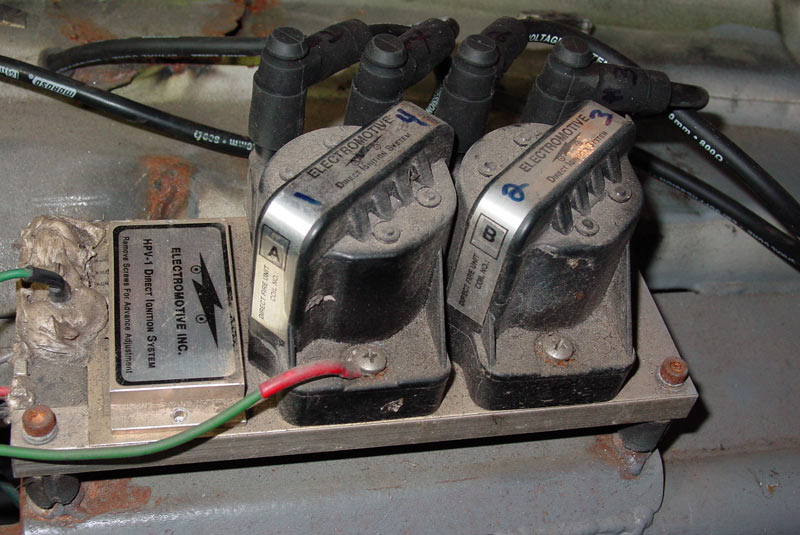
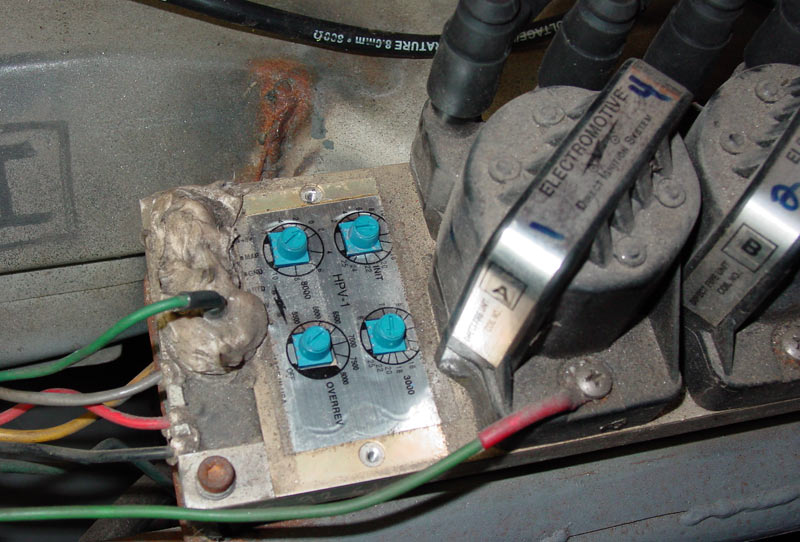
Joe from axismotorsport.com was making sure the 034EFI wiring harness was functional. It turns out that 034EFI did not include a mini-harness to allow the stock tach to work. Because the stock tach didn't work, the fuel pump wouldn't stay on and the oil warning light kept flashing.
Cyrus, Chris Marotti, and Chris Achilles came over later with the Achilles custom exhaust.
While Cyrus, Achilles and I worked trying to get the exhaust hung we got to listen to Marotti play us a ditty on the guitar. Much enjoyed!
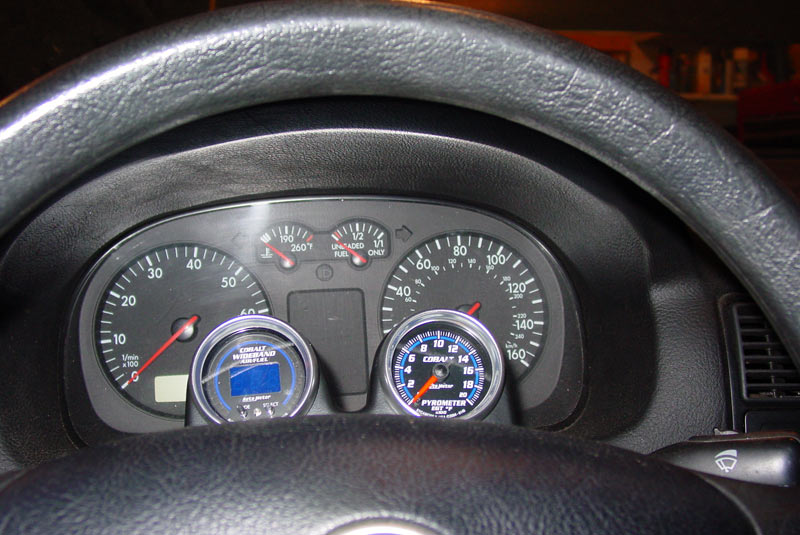
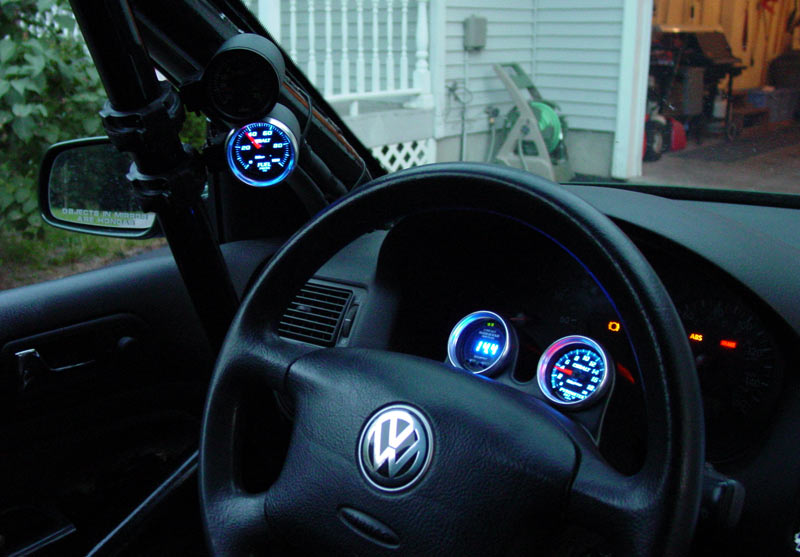
I still need to do a better job with the after-market tach (temp fix until I get the missing harness) and boost (hack!) gauge (hack!) install (hack!!), but I think I'm all set now. Oh, and finish hanging the exhaust.
I think I got a total of 10 hours of sleep over the past three nights.
Pictures....

[b] ------------- Project Update ------------- [/b]
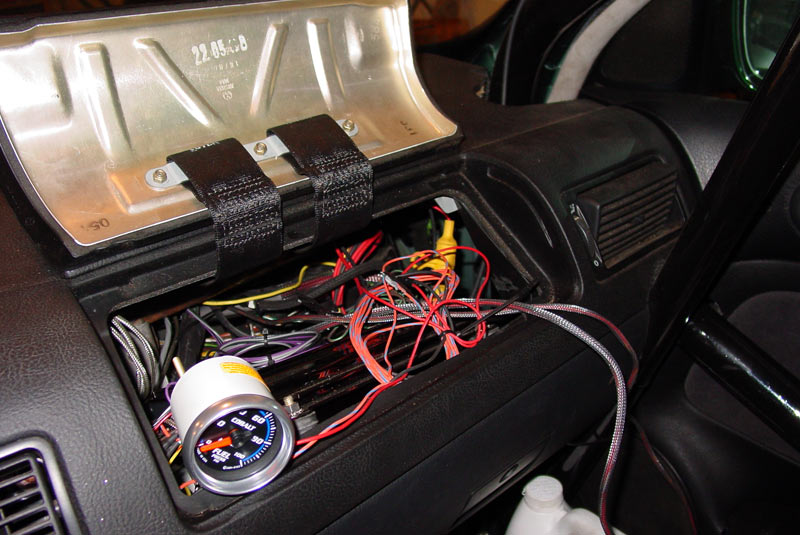
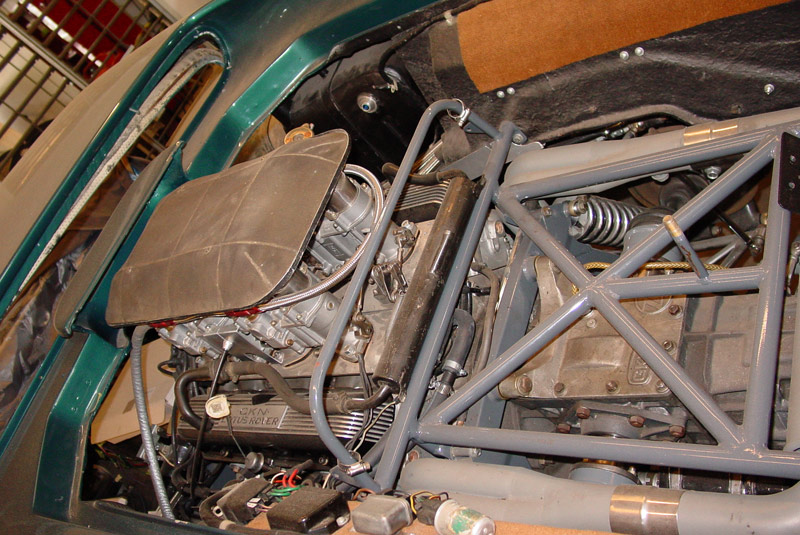
We still need to mount the ECU inside the car (it is in the rain tray at the moment), but this means I need to remove the wires on the left side of the car (driver's side for me) and relocate them along the right side of the car.
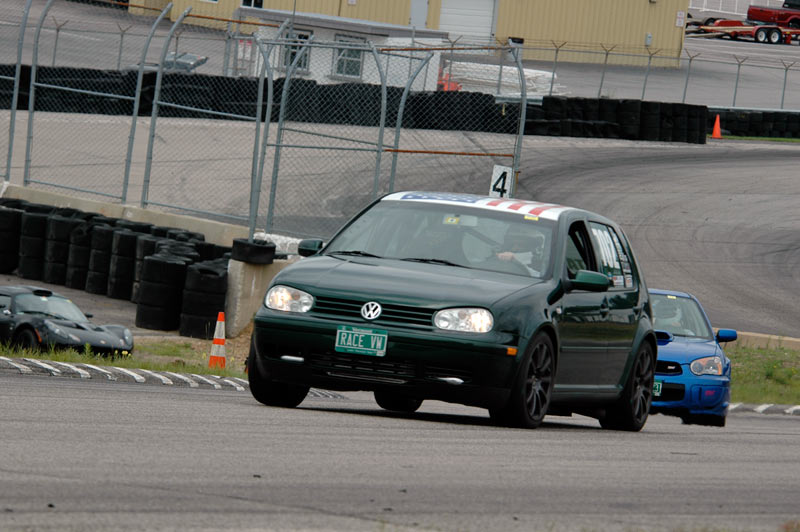
We had some problems with the car at Lime Rock (track event) where the spark plugs would foul (oil from PCV) and turbo would become loose. Issues that I will address this week as I have a hillclimb in two weeks. I also need to make it quieter.....
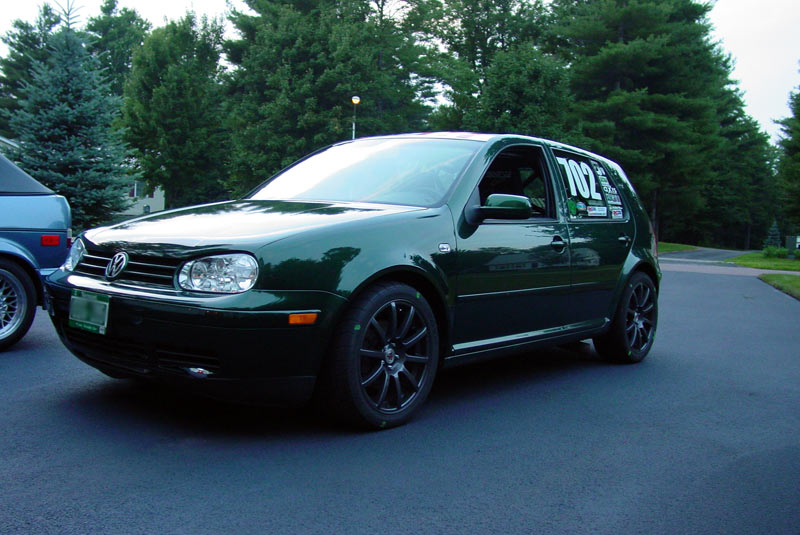
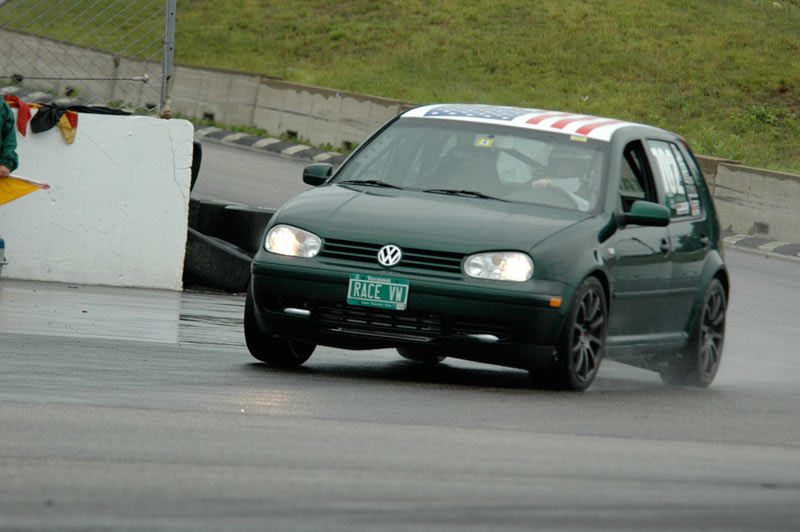
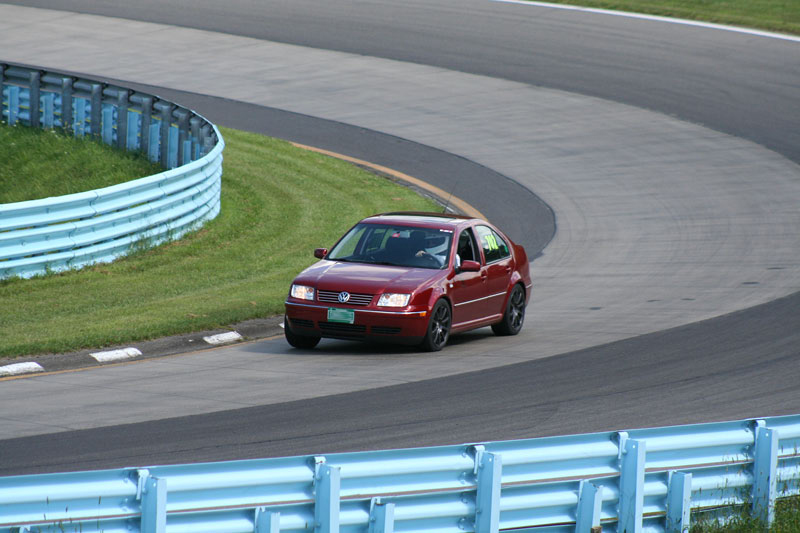
Photos and videos from its first track event will be forthcoming.
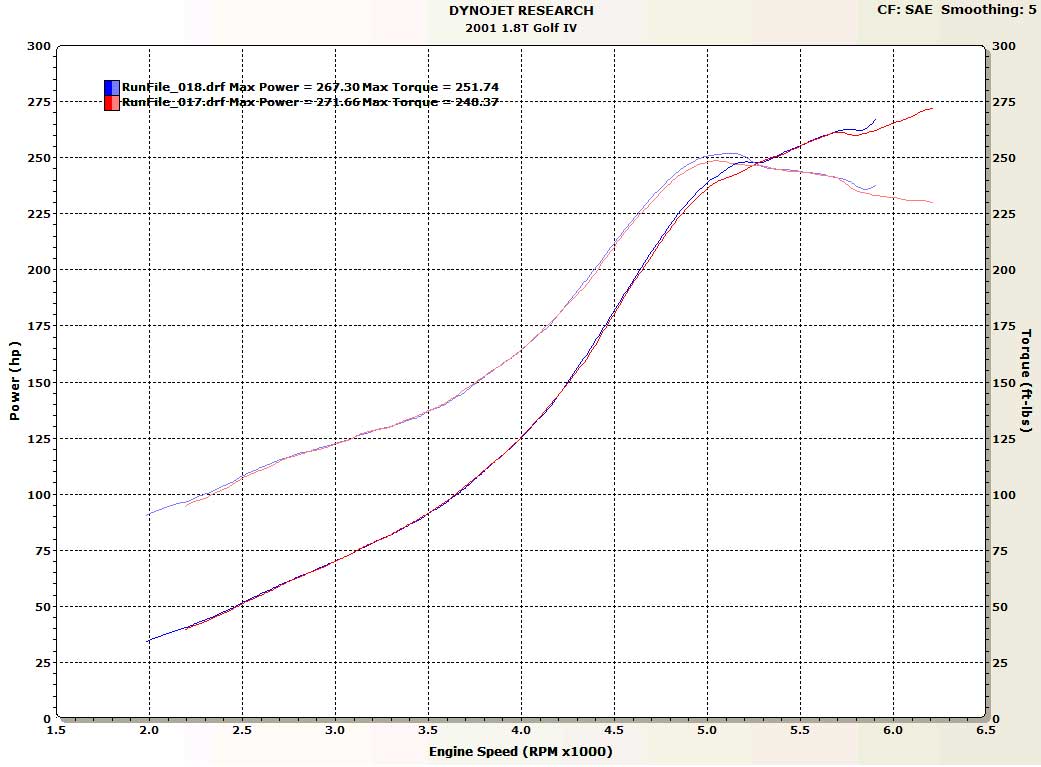
Due to the stock internals of the engine (building it over the winter), we stopped at 18 psi and got 277 wheel HP from it. The turbo can breath right up to 28-30 psi quite efficiently, but I want to keep the engine in one piece this summer. This will turn out an easy 400 crank HP when done and a GREAT power band (good low end and top end). Very pleased with the GT2871R!
Steve
[b] ------------- Project Update ------------- [/b]
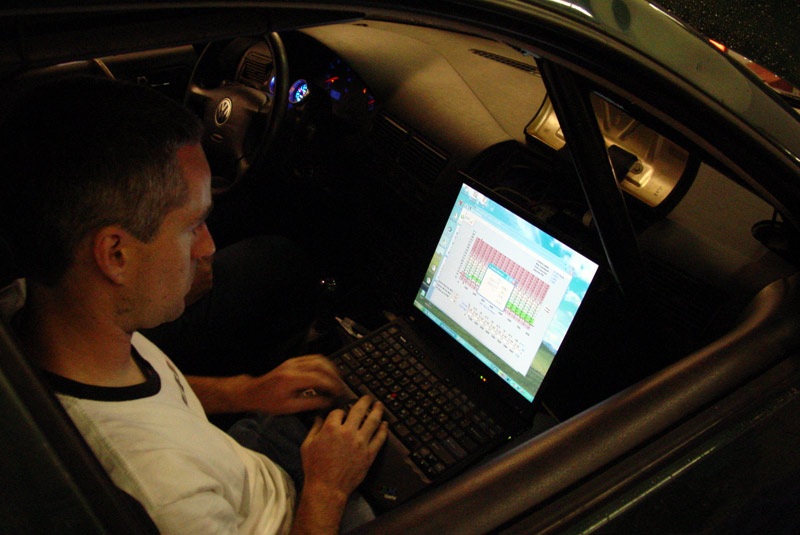
Brady at Quintin's (dyno shop) e-mailed me today to tell me how to use the program to view the results. I didn't realize that that graph x and y titles were clickable menus. I'm unsure which program I ended up with (both displayed), but it is a very conservative number (18 psi) to where we are going (28 psi +/-).
Fun for now and the engine should hold together just fine.
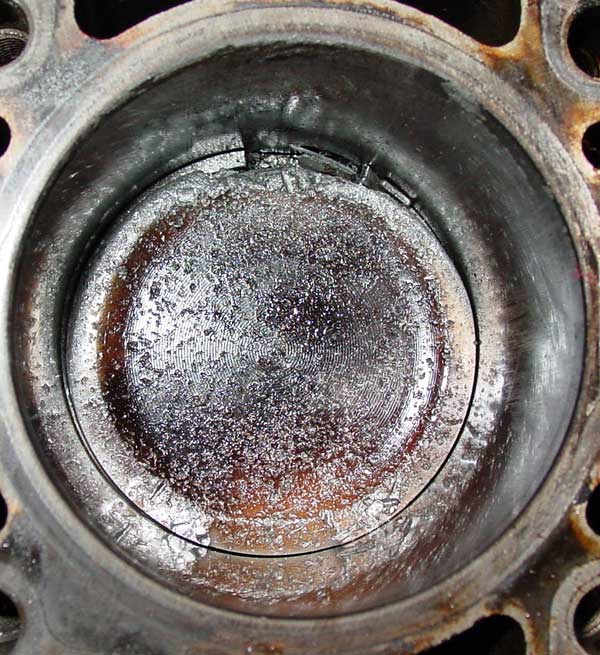
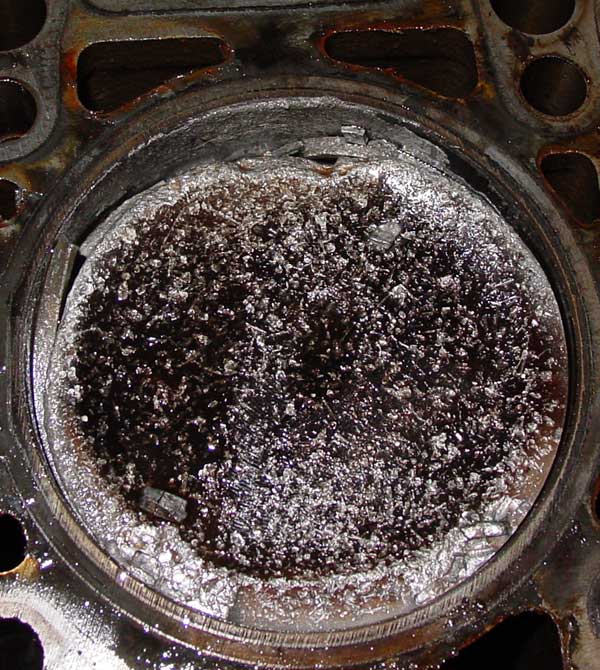
[b] ------------- Project Update ------------- [/b]
Stock piston gave up the ghost at the first race (it made it through the first track event just fine). I believe it was because the manual boost controller wasn't tight so it allowed for an over-boost condition."
"Time to rebuild......
Not to worried about the block as I can bore it out if needed. The head is my main concern.

[b] ------------- Project Update ------------- [/b]
Done. I might procrastinate, but I get things done (now, about that turbo single round headlight Rabbit I have been talking about for years....)
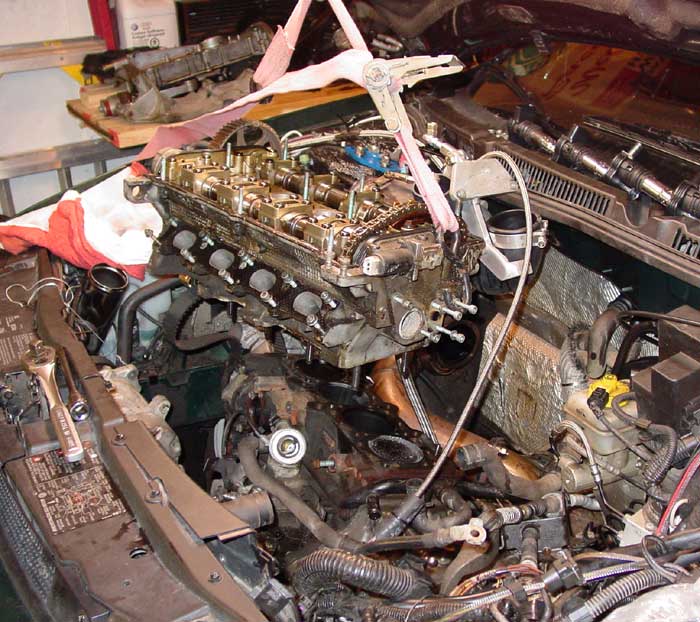
Anyway, a number of late nights and one weekend I was able to pull out the old engine, put together a new one (never opened the new engine.... should have only 40k miles). The whole process was not difficult, but it was time intensive. Surprisingly, everything went together... kinda intuitive. I did discover that almost all the parts on the NB engine (stuff bolted to head, valve cover, block) are different than the Golf. Right down to the hard metal coolant tube that runs along the front of the block (found that out [i]after[/i] I install all the tubes, wires, etc.).
Anyway, some pictures for those of you bored with the text (I know I am).
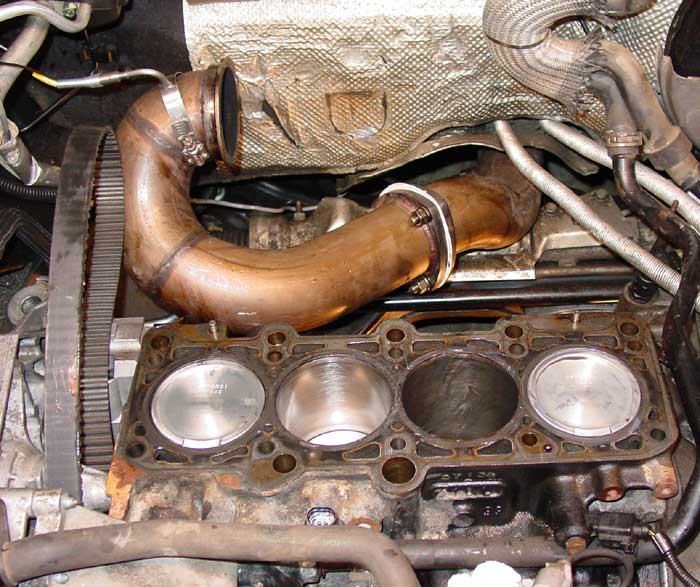
Engine out (removed head and then lowered block/transmission out the bottom)
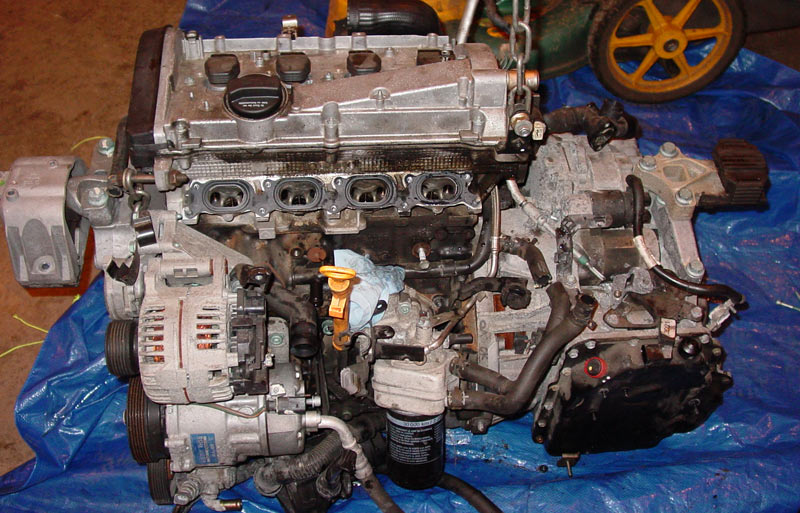
New engine with everything bolted on, Spec clutch, flywheel, transmission installed, etc.
How many 20-valves can you spot in 4 seconds? ...go!
I removed the DP and both axles and was able to (quite easily) bring the completely assembled engine up through the bottom. I had thought the turbo being bolted to the engine would prove to be too big for the engine bay opening. Good news!
Every wonder why VW's have some electrical issues? This is what the wire looks like that went to the secondary air pump and power steering pump. The power steering pump wires were also broken off. Of course, the damage could have occurred when I removed the engine, but honestly I have no idea how that could have happened.
I don't think that I need ANY of this. I already removed the secondary air pump from in front of the oil pan. Since I wasn't sure what I needed/didn't need and didn't have time to experiment, all the parts went back in.
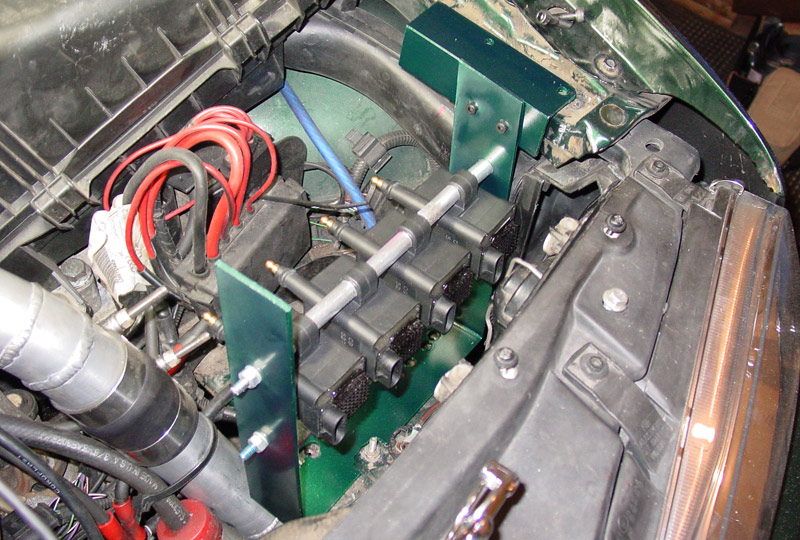
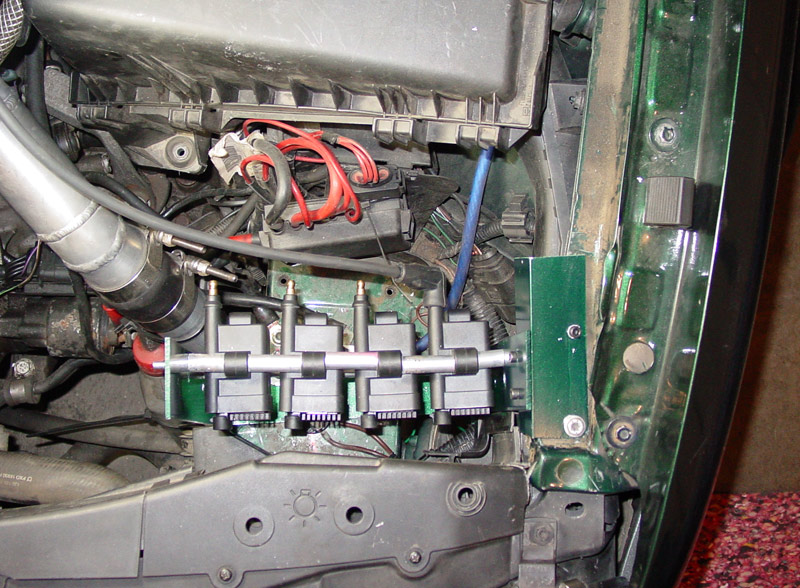
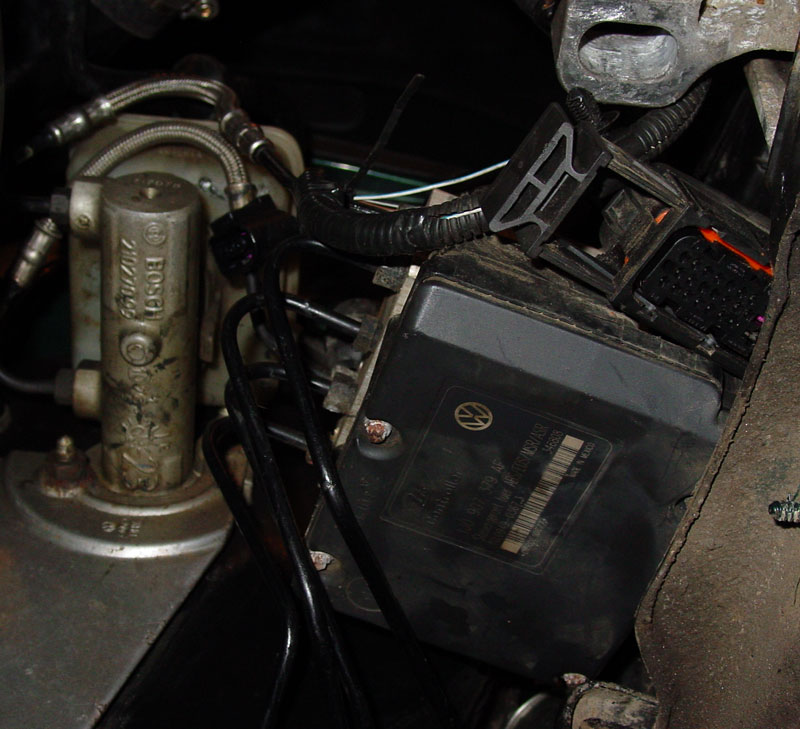
Location of 034 ECU and relay board. I took the time to remove all 034 EFI wires that ran along the driver's side (left side of car for those of you with the steering wheel on the incorrect side) and ran everything on the passenger side of the car. I took the ECU out of the rain tray, cut a hole through the fire wall with an air nibbler (love that tool!) and put the ECU where the passenger airbag was. In the future, I'll have to get it mounted better, but it will get me by for this season. No pictures of the changes yet, as I need some sleep.
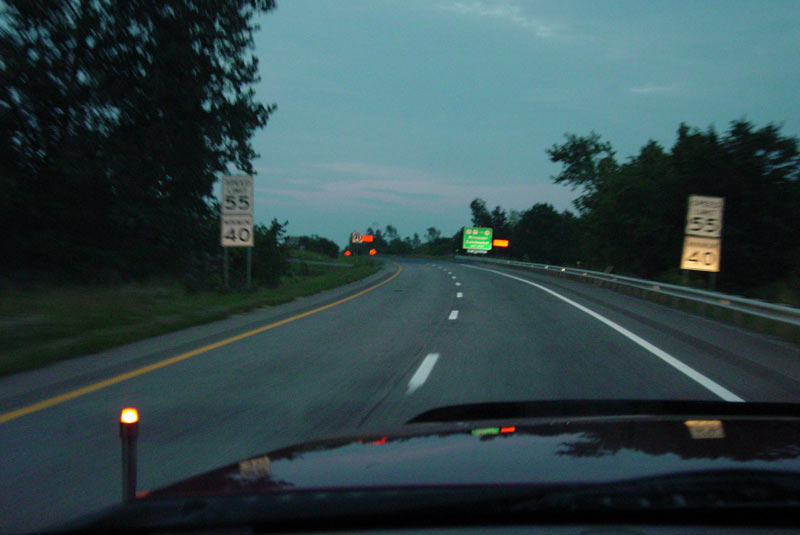
Heading to Moon Performance in NY at 2:00 on Thursday so that they can dyno tune the car to get it ready for Watkins Glen. Fingers are crossed that everything works.
[b] ------------- Project Update ------------- [/b]
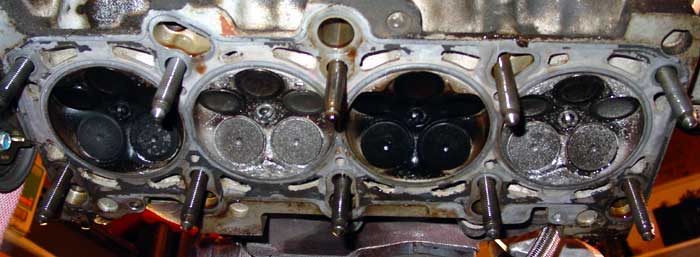
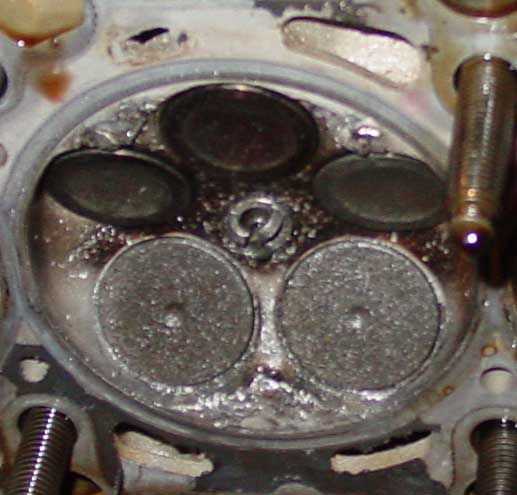
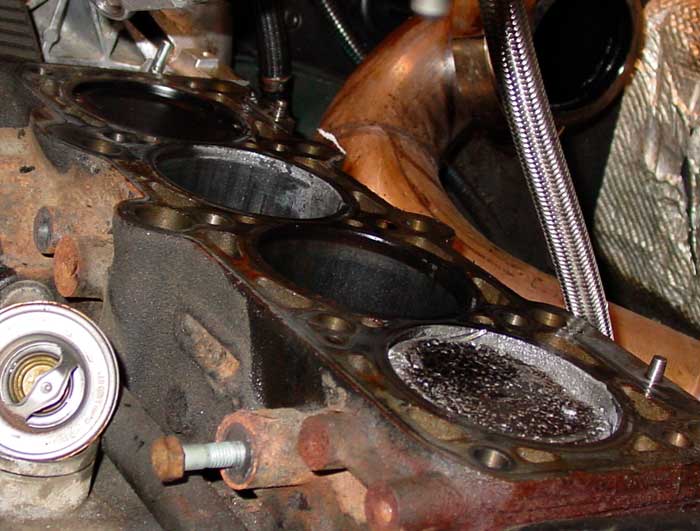
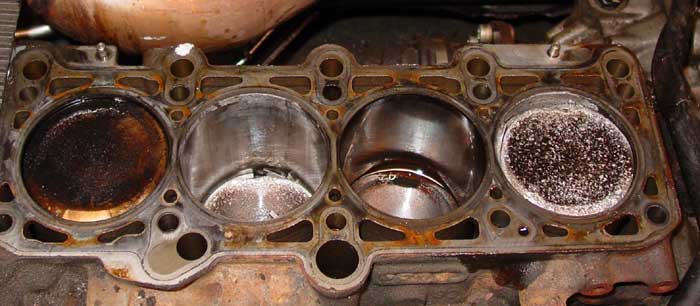
Son-of-a-Fahvergnugen-hatch-backing-knuckle-cracking-hub-capping-no-compression-valves-making-noise-pain-in-my-butt!
Engine makes noise when it runs. I will be getting new rings in the mail on Tuesday and changing them Tuesday night. If there is an issue with the head (which it sounds like this is the issue), then I have a real problem as I don't have any extra good heads to us. I have my $200 block/head setup, but that has bent valves and I have the old head that the pistons were throwing the rings against them at 6000+ rpms. I just might have to use that…
Picking up car from NY tonight. Bringing it back on Wednesday night assuming I have it together.
ACK! I am so sick of this crap!
[b] ------------- Project Update ------------- [/b]
22-Aug-2007
The rings on the stock pistons looked okay. There was a little peaning of the top edge of the piston that I had some concerns with, but it might have been okay. I just happened to get good pistons and rods in so I started on that last night since I couldn't go anywhere with the head.
[b] ------------- Project Update ------------- [/b]
23-Aug-2007
More progress... bottom end is done. I just need a complete head and I should be done in about 3 hours. (that's 3 hours on Thursday night)
Anyway... tired so here are a few pictures.
New pistons and rods finally arrived. Since I didn't have them the other night when I knew that I had to rebuild, John at Fast Addiction was nice enough to next day up rings and a head gasket.
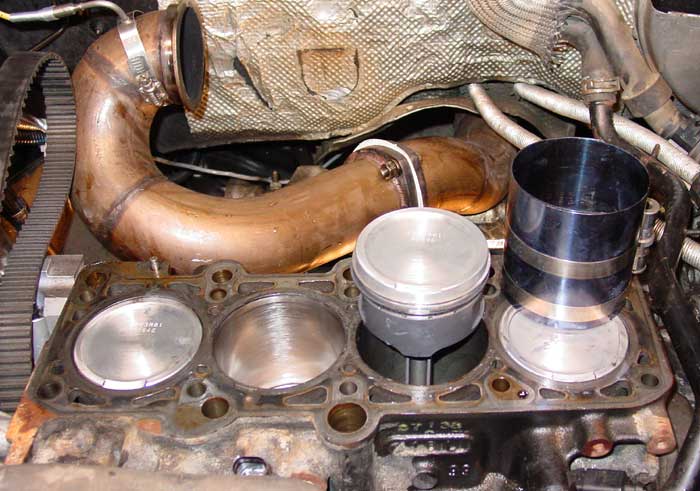
Compared... notice the location of the top ring on each piston. The new piston is covered with assembly grease, hence the dirty look.
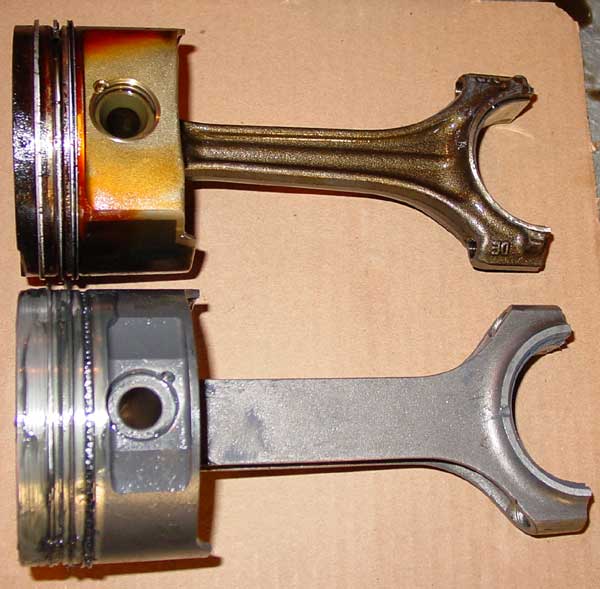
The old pistons. For some reason that had dents (old dents!) in the pistons.
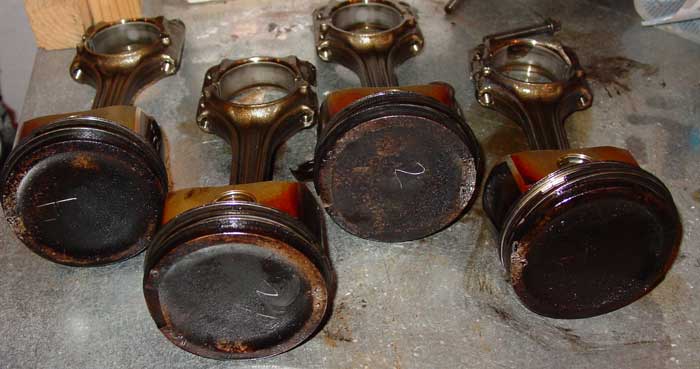
Three in so far... notice the new EGT sensor. :)
Bottom shot with hanging oil pump chain.
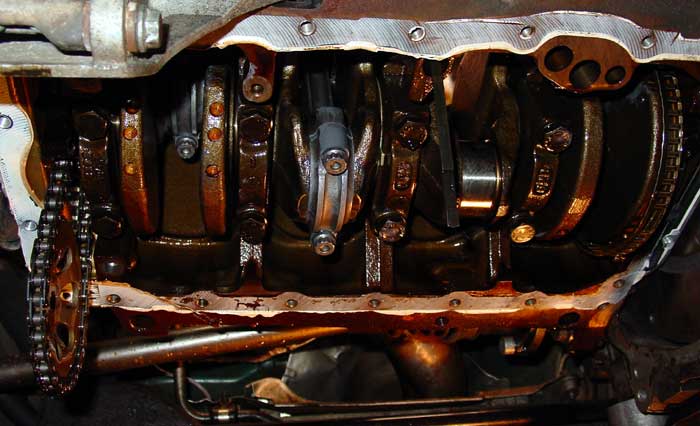
And finally the last one going in. Pump back on, oil pan back on, etc. Done with this step. One more night and then it is a trip to NY.
[b] ------------- Project Update ------------- [/b]
25-Aug-2007
Turns out the head I finally ended using was crap also. It dropped a valve inside the engine. It started and ran great... never sounded so good. Put it on the trailer at 6am (when I finally finished working on the car after an all nighter), took a shower (needed it!), drove to Moon in NY, started it (sounded great), it stalled, couldn't start it again. Tried starting it a number of times with the laptop hooked up to it to figure out what was going on and about the 6th time we heard a clunk. Took the plug out and the end of the plug was flat.... huh!?! Looked down the plug hole and we could see the face of an exhaust valve looking back at us. Thankfully the head failed during a starting instead of running action. So, the Golf isn't going to Watkins Glen and won't be rebuilt for a while as I plan to get a new head.. perhaps ported and polished and ready to bolt on. Hmmmm, maybe some new Cat cams while I'm at it. Snow will be flying before that happens, but I do plan on taking it apart sooner than later just to see what happened. Hopefully there was not damage to the new pistons. "
"It is March 2008 which is the month I scheduled to start working on this car again for the next race reason (tax refund comes in the mail in March).
Plans:
Getting new head (naturally)
Kevlar cord timing belt
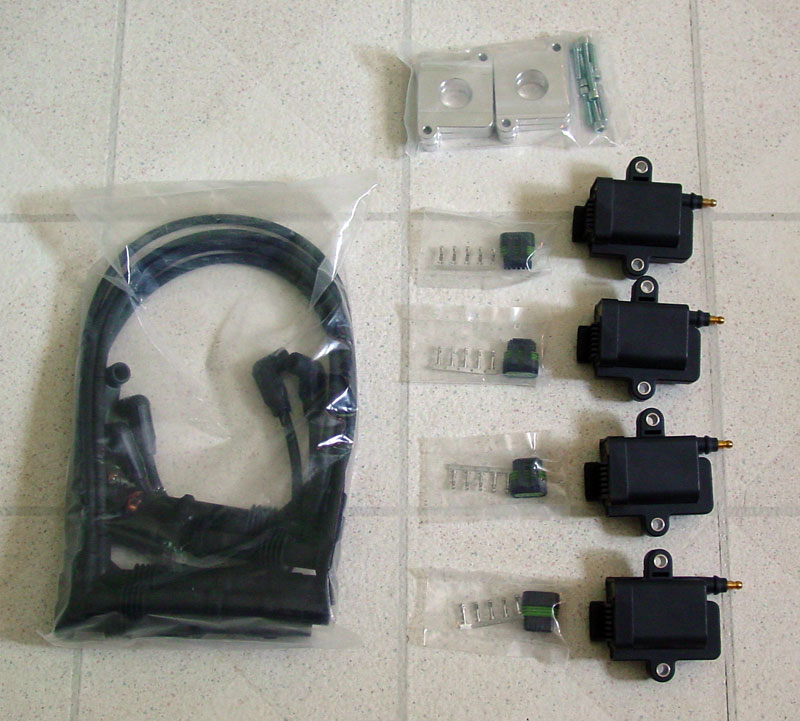
Perhaps getting rid of the coilpacks and going wired
Getting rid of OEM wires/tubes under the hood that aren't needed as I have stand-alone.
Electronic booster controller (controlled by 034EFI ECU)
Dyno tune with two maps (high HP and moderate for the rainy days)
That is it for March (I think).
Big brakes planned for later.
After running 100% with bigger brakes, I don't think I will be doing anything with the car for a while. I want to change the suspension to lower it more without changing the suspension geometry (read as "lowering the car with shorter springs or coilovers is not the best way to make a car handle"... I need re-engineering). For example, my other Rabbit (a 1980 Rabbit) is lowered in the front using heightened strut towers and modified mounting points for the front and rear spindles... the rear is independent suspension to boot!
Progress (and therefore photos) will start in a couple of weeks as I am busy right now shopping for parts and weighing options.
Steve
[b] ------------- Project Update ------------- [/b]
May, 27, 2008
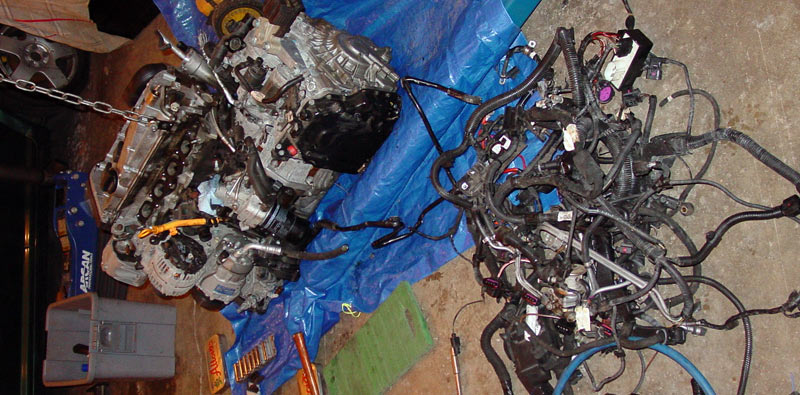
Progress.... picked up a complete 1.8t engine with transmission.... unfortunately it is an automatic with front end damage. (free auto tranny to anyone who wants it... it is just weight at the scrap yard to me... want to practice working on auto transmissions? Here is your chance. But wait... order the FREE transmission now and get a free under the hood wiring harness.)
Picture of disassembling "new" engine... and taking stock wiring harness out of the car so just the 034EFI will be there plus the 6 or so stock wires needed for sensors, etc. I will be working very fast on this in the next couple of weeks as I have a track event on July 14, 2008 that the Golf would be better than the Rabbit (5 hours of driving at the event).
[b] ------------- Project Update ------------- [/b]
June 20, 2008
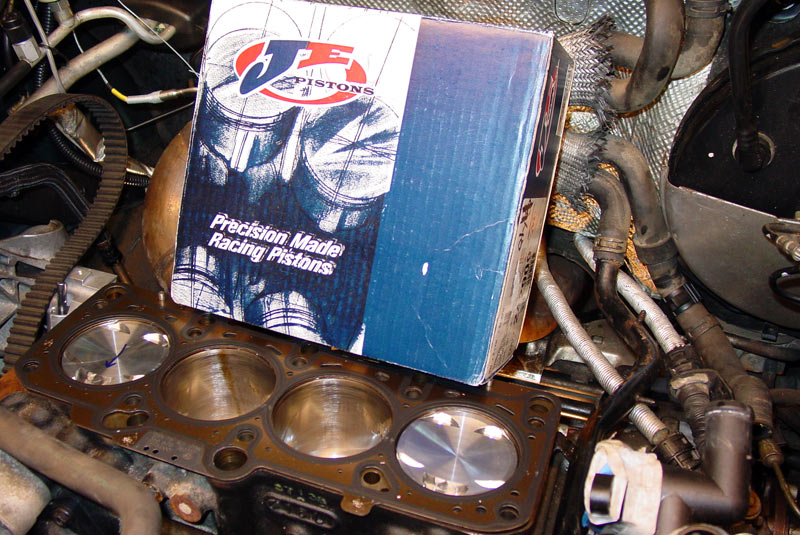
Progress.
Turbo/exhaust manifold is bolted to the new head. The broken valve damaged one of the pistons. I had two options: 1. get one piston and have it balanced to the weights of the other three, or 2. get a new set of pistons for now (JE pistions) and do the "get one piston to complete the set" for later engine builds. Anyway, new pistons will be here on Monday.
Right now I have all the pistons/rods out of the car waiting for the new pistons. Everything should be together by Saturday.
Now, time to work on the new Rabbit and the water pump on the Cabriolet. I need a vacation.
Steve
[b] ------------- Project Update ------------- [/b]
June 27, 2008
Well, I have been away in MI for a week (Sun-Fri). New pistons were in this AM and I started installing them around 3:00 PM or so. I bolted the head on around 10PM and ran into a little snag (one with two solutions). The 5mm x 50mm stud that is needed to compress the timing belt tensioner is way too short when the tensioner is already fully extended (i.e. the belt is not longer on the car). I plan to head down to SAC in Williston on Saturday morning to get a 5mm x 70, 80, 90, 100 (hopefully they have it). I could get a bunch of 100mm and cut them down, but they should be cheap enough to just buy the different lengths.
Plans are to fire this up on Sunday..... Saturday is busy with a BBQ at our place so time is limited on Saturday.
Boring photos to follow on Saturday.
Steve
[b] ------------- Project Update ------------- [/b]
June 29, 2008
Some progress today. It was a little slow since I took soooo much time just to get the timing belt on the engine. :censor: :censor: :censor:
Big thanks to Jodi Doyle for some help with the intake today (added some nipples for vacuum lines)
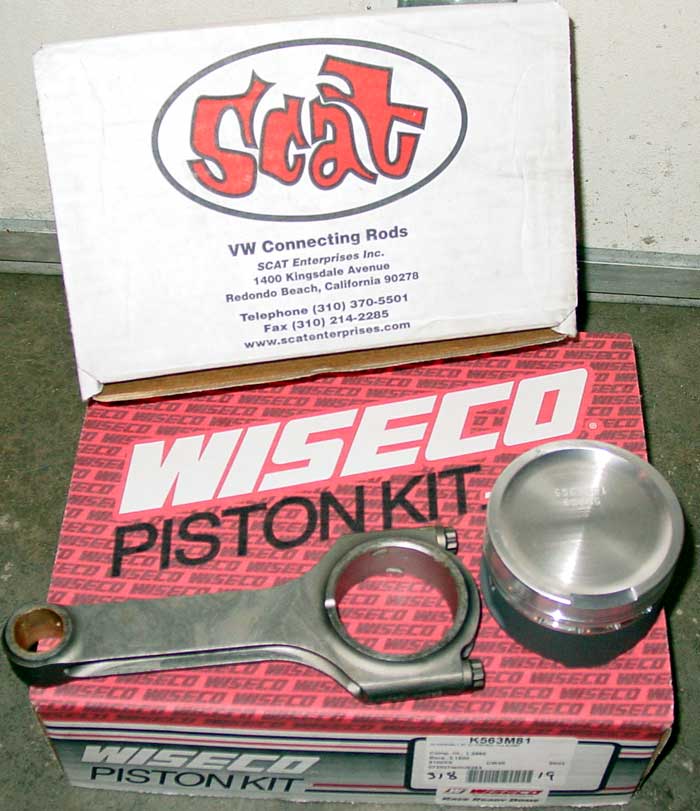
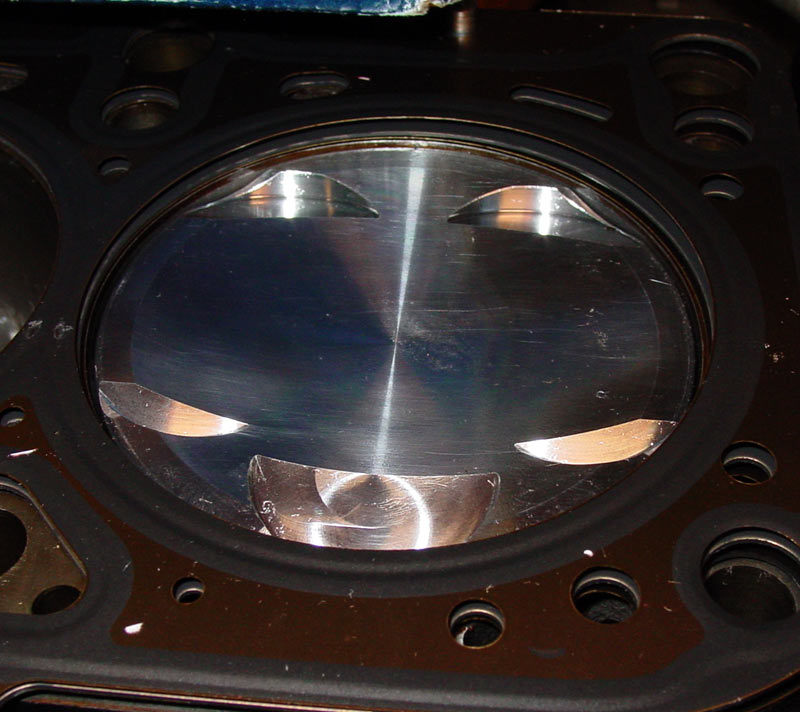
Anyway, new JE pistons are installed (still using Scat rods).
And them purty?
The turbo setup on yet another head. :censor:
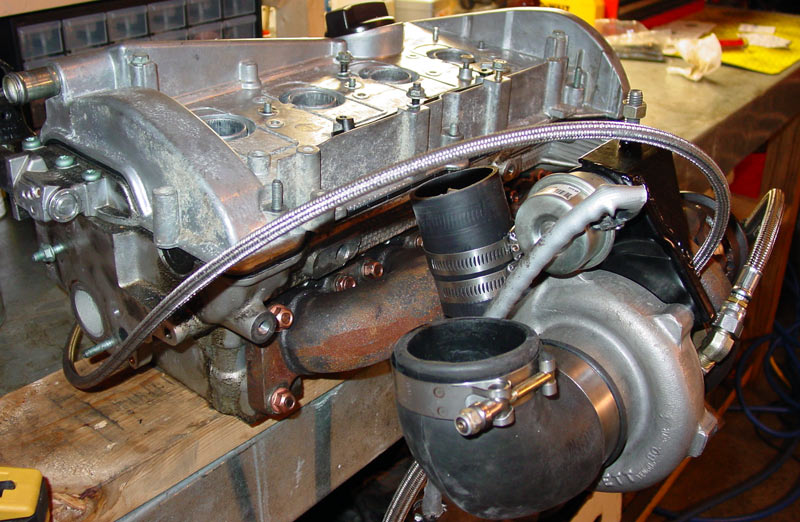
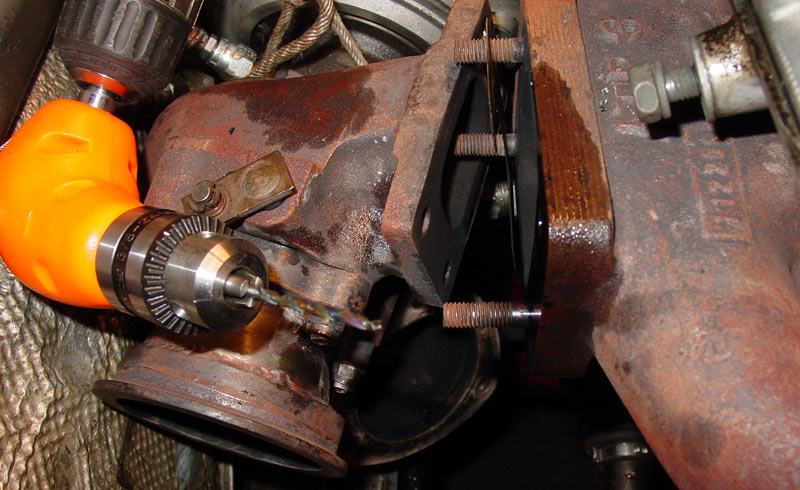
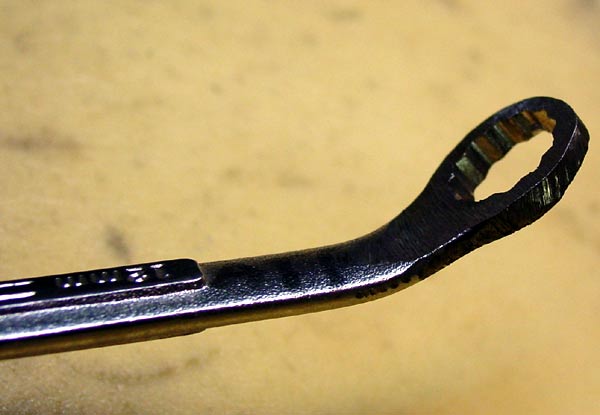
Those hard to get to nuts on the exhaust manifold.
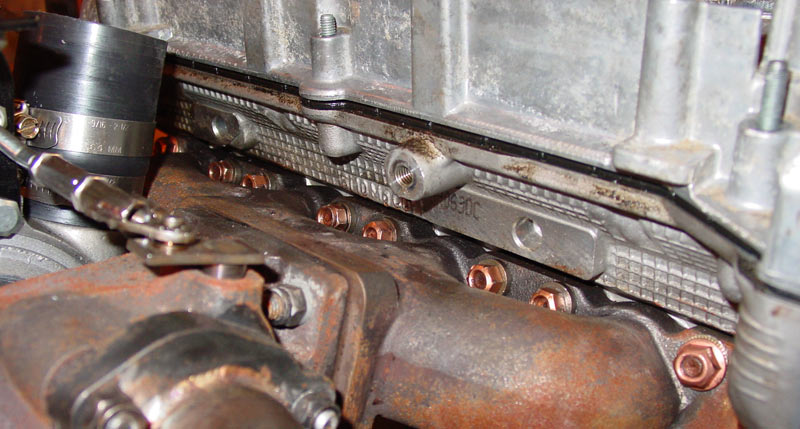
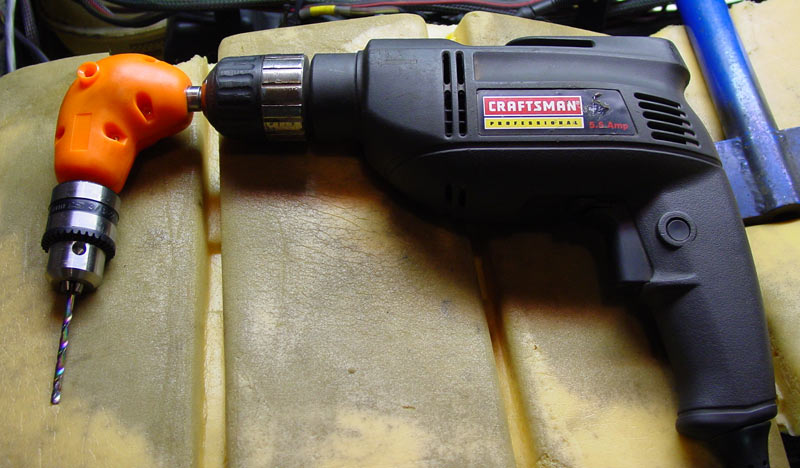
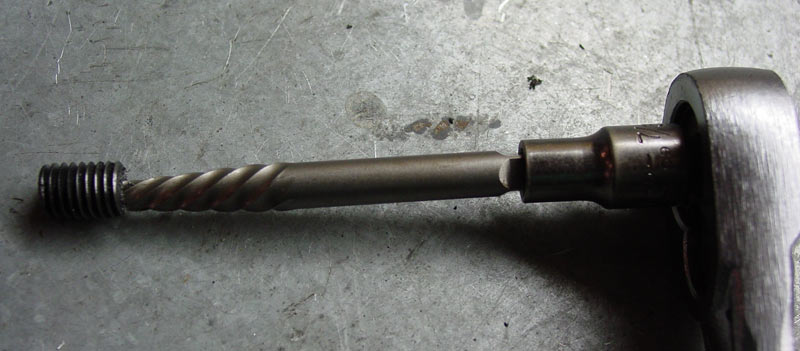
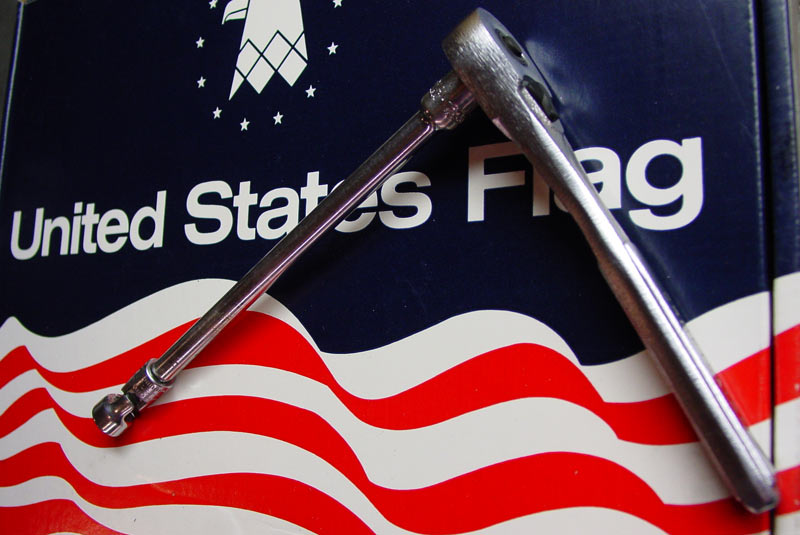
I bought a 10mm flex wrench years ago to be able to get those nuts in between the oil pan and transmission on my Rabbit. Well, it is the same tool that is needed for the Golf, but thankfully, only two bolts need this tool on the Golf.
Close up of the end....
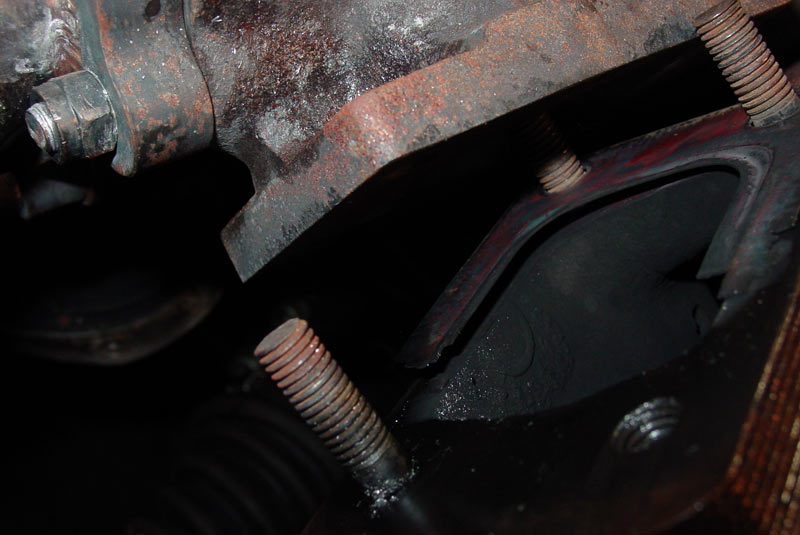
In between oil pan and transmission....
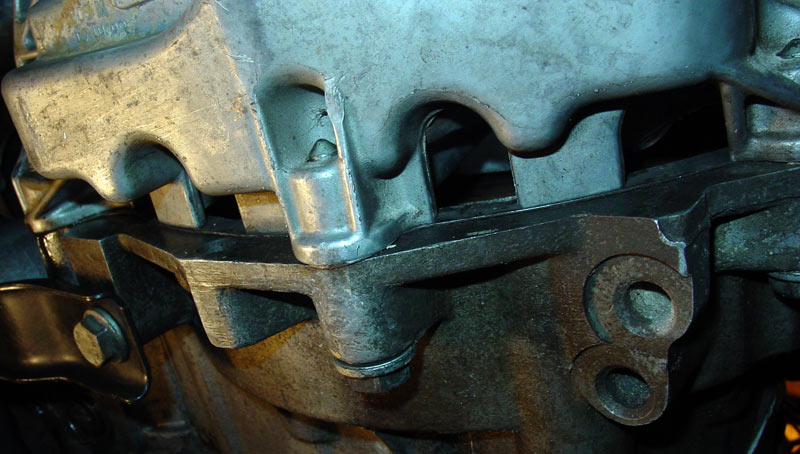
Close up of the bolt....
5mm x 50mm bolt with head cut off + standard thread connector + 5mm x 50mm bolt cut to 10mm + (nut+washer+washer) + brad (nail) = "tool" to compress the timing belt tensioner.
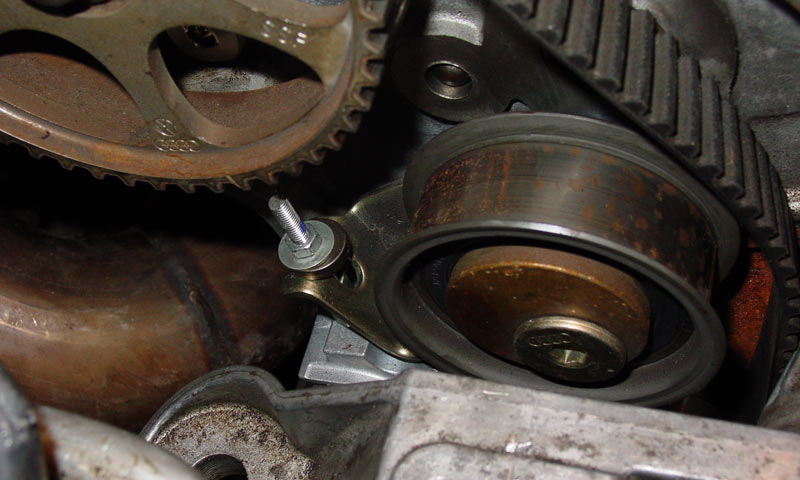
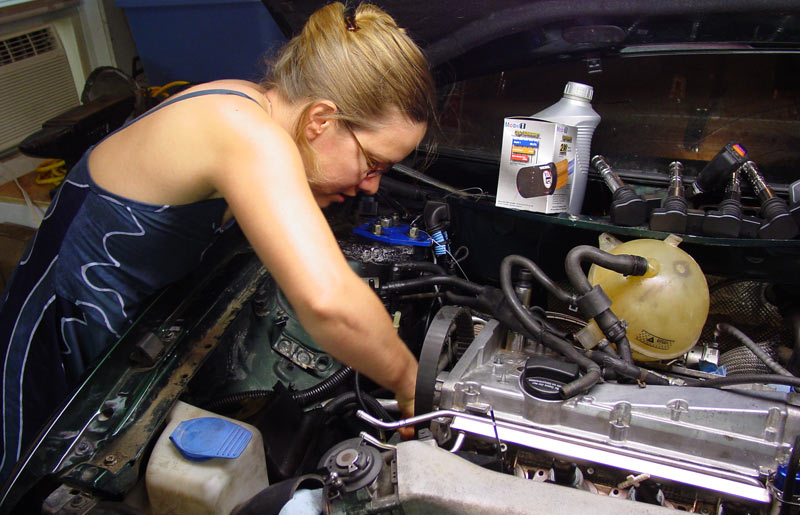
I had a hard time getting my hands into the tight spot so Julie gave it a go....
Next project is to replace the bearing on Julie's Jetta (and do the brakes also... it still has my track compound pads on the front).
Then finish fixing the Cabbie....
Then.... get the turbo Rabbit read for the next hillclimb.
Of course, around 11PM tonight I started to notice water coming under the garage door while it was raining.... so, I was outside in the rain cleaning the gutters over the front and back of the garage.
Steve