1 2 3 ... 8
WondrousBread
WondrousBread New Reader
12/15/21 6:06 p.m.

I’ve been reading GRM for a long time and finally decided to make an account, so I thought I’d share my Rx7 build here. Some Celica content will also be included, but it’s my daily so it will only be maintenance. I already have most / all of this information on the Rx7club, so my plan is to upload here as I have time until I’m up to date and then upload concurrently from there on out. I did consider just copying my posts over, but I decided to write this as a retrospective instead. The first couple posts will be a drawn out story about how and why I got the car. If you want to skip to the true “build thread” content it will be down a ways.


When I was 18 I decided I wanted to buy my first car. I lived (still do) two minutes from the high school and ten minutes from where I was working. I could have borrowed a parents’ car trivially but I was dead set on buying my own.

I was also dead set on getting an Rx7. My father used to own several (before I was born) and after reading about the unique engine and looking at all three generations I was totally hooked. However, I was completely convinced I would never be able to afford the upkeep or the insurance. To my surprise though, the Rx7 had the lowest insurance quote of any car I checked. I can only attribute this to some sort of error, since there’s no way a Civic or a Saab 93 should be 50% more expensive to insure than an Rx7. As an 18 year old male driving a 30 year old red rear-wheel-drive car, $160 was very fair. This was 2017 or so, rates would be much higher now.

My dad and I started looking at different Rx7s, specifically FC models. The first one sat in someone’s backyard for over a decade and was slowly returning to the dust from whence it came. Sitting on flat tires directly on grass had caused so much rust it was a write-off. We would later pick some parts from this car though before it went to scrap.

The second one had rust, a bad paint job, and was sitting in someone’s driveway with four flat tires. Allegedly had a Turbo II engine but never actually looked under the hood. Neither my dad nor I are good at bodywork and the seats were growing a nice healthy ecosystem of green moss, so we passed on that one too.

The third one had sat in the previous owner’s garage for at least three years. He’d bought it new, it had been brought to the United States at some point, brought back to Canada later, transferred in title to his nephew, transferred back, then parked in his garage and left to languish for awhile. It was a 1986 Series 4, in Royal Maroon Metallic. 5 speed, naturally aspirated.

Cons:

  • Missing interior parts.
  • 370,000 km on it. Engine allegedly replaced (we’ll talk about that later).
  • Base model. Somehow it acquired AC and power steering during its life, neither of which was originally installed on the car.
  • AC barely blew cool at all
  • Remaining interior parts were a blend of maroon and grey.
  • Torn driver’s seat
  • When driving, transmission tunnel got absurdly hot. Especially big problem since there was no center console.
  • Bad idle
  • Bad driveshaft u-joints made it feel like a rock tumbler over 40kph
  • Brakes semi-seized on all corners. Pads and rotors trashed.
  • Transmission very notchy
  • Minor floor rust (which is never as minor as it looks)
  • Bad engine mounts
  • Bad transmission mounts
  • Fairly bad battery
  • Stereo made only crackling noises
  • Cracked tail-light

Pros:

  • Included Haynes Manual
  • Is red.


So of course I bought it. That night I left a deposit and the previous owner gave me the service manual and keys to bring home with me. My mother refused to talk to me for three days when she heard I was bringing home a 30 year old sports-car.

A few days later my father and I went back down to pick it up. I drove my mum’s car back following him. I didn’t drive stick at the time anyway. Top speed was 40kph due to the driveshaft u-joints and the useless brakes. I followed him just down the road to the Canadian Tire parking lot where we proceeded to do some of the due diligence we SHOULD have done before buying the car.

This is where we found the radiator was empty (!) and the headlights were both burnt. Some distilled water and new bulbs fixed that. I also recall we randomly met another Rx7 owner in the parking lot looking at my car, which was pretty cool.

A few minutes after that I noticed that every time my dad pressed the brake pedal sparks would shoot out of the wheel well. Turns out the brakes were coming back around, and the rust was being ground off now that the calipers were moving. Then blue smoke poured out from the bottom of the car and I started panicking thinking my “new” car had a blown engine. Pulled over in the dark and inspected with a flashlight and we realized the alternator belt had snapped. We were way too far now to go back to Canadian Tire, but having me in my mum’s car following and a set of jumper cables we decided to just push through and get it home.

12 jumps later (illegally parking backwards on the shoulder so the cables would reach every time) we got it home. I could always tell it was about to need a jump because the running lights would go dim.

I don’t have any detailed pictures of the car at the time, but with my brother’s permission I’ll share this one of him sitting in it. Only one I could find:

You can see the stock phone-dial rims, grey seats, grey dash, maroon doors, etc. I was missing the center console completely as well as the dash vent grilles, center dash trim, etc (common on Rx7’s since they break super easily).

In addition to the cons mentioned above there were a few other things that cropped up:

  • Sunroof didn’t open without a helping hand
  • Weak shocks
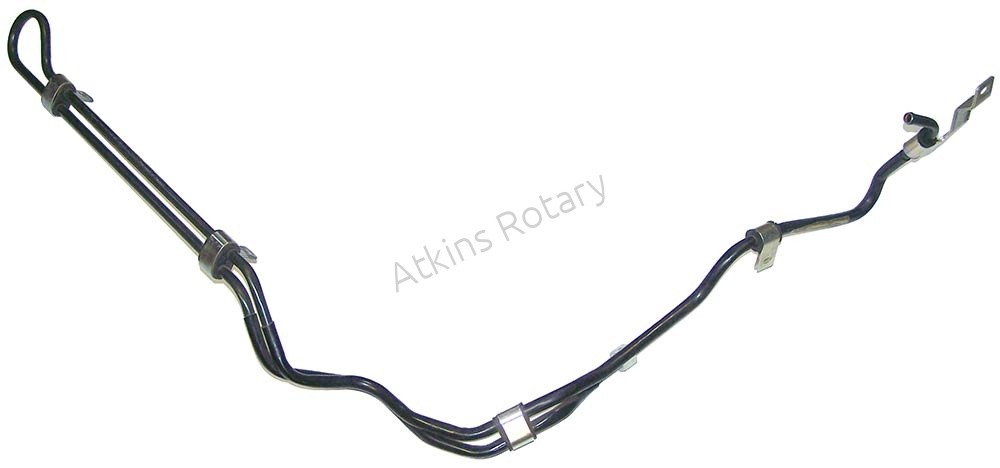
  • Bad sway bar bushings (also literally every other bushing, but only the sway bar bushings were bad enough to notice)
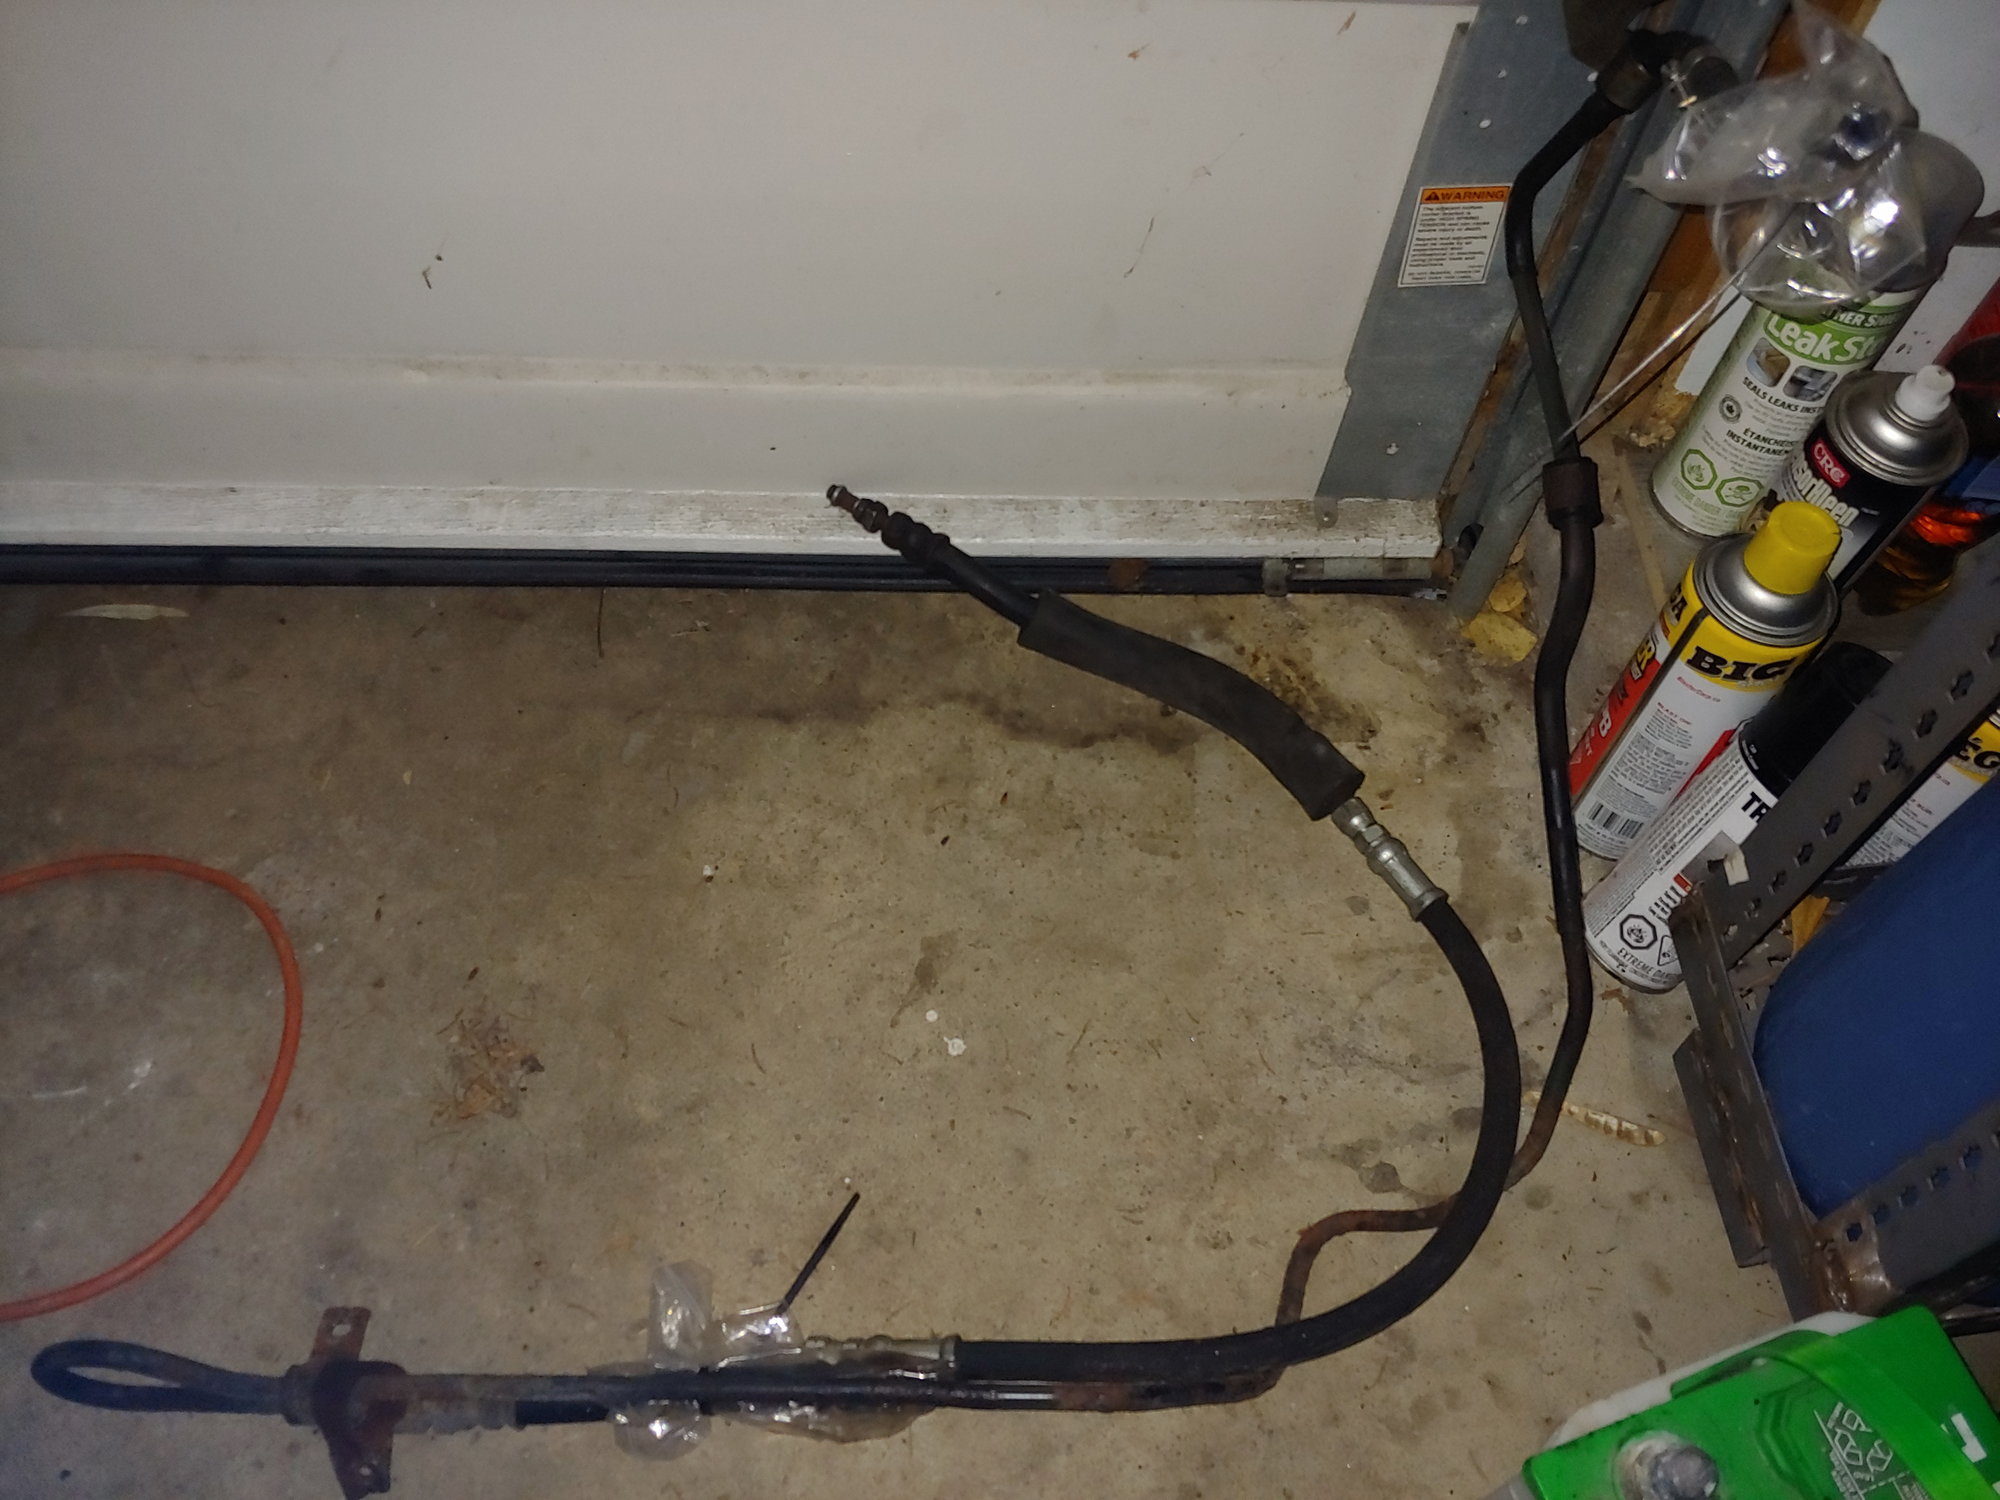
  • Exhaust leaks
  • Missing under-tray (necessary for cooling)


My dad and brother went to pull some of these parts from the first Rx7 we looked at, but he needed a set of seats (for some reason) so I got his maroon leather seats and we traded him my grey leather seats. My brother never lets me forget how hot it was holding up the hatch in direct sunlight while my father used a hammer to break loose the seat bolts in the parts car. Luckily for me I was working that day. The maroon seats have no tears but add to the interior mismatch.

Over the next few months my father and I did a lot of work on the car. My father is mostly self-taught and I didn’t know anything at all about cars. I’d never even changed the oil. Together we did the following:

  • All fluids replaced
  • Rad hoses replaced
  • Belts replaced
  • Complete brake job, all four corners
  • Rebuilt leaky calipers
  • Complete intake and throttle body rebuild, including new silicone vacuum lines
  • Injectors rebuilt
  • New battery
  • Stereo, amplifiers, speakers, homemade subwoofer
  • Reflow all the solder joints in the body computer (warning lights still don’t work right)
  • New [used] clutch fan
  • Power antenna replaced with normal antenna
  • Rear hatch replaced (another colour that doesn't match).
  • Driveshaft rebuilt with new U-Joints


And after just barely squeaking past the minimum Ontario safety inspection I was driving it! It was very loud, quite shaky, the transmission was notchy, and even at full throttle it wasn’t fast. I think most of my friends (except one) were just being charitable when they said they liked my car, but I loved it. What’s better for a teenager than a car that can wind out to 7000rpm, do donuts (in the snow at least) and make plenty of noise but relatively little power?

There were some other optional mods I did including steering wheel, shift knob and wheels / tires. In true teenager fashion the shift knob was not right for the car and the wheels were a bit tacky. Also had no-name stretched tires, of course. Here are a few photos I found:

Note the wheels I mentioned and the mismatched hatch colour.


One of the only old interior pictures I have. I actually did have the column surround and dash trim that’s missing in this photo.


Also one time I was in a cul-de-sac and I turned on the AC. I used to do that once a month or so to prevent the compressor seizing up. This time I turned it on and then a big cloud of white mist shot out from under the car in every direction and over the windshield. Nearby an older gentleman was watering his garden and he nearly had a heart attack seeing that. I pulled over and there was condensation covering the entire engine bay. I guess all of the refrigerant leaked out at once. This is the last time that the AC in the car has ever worked. The older gentleman was nice enough to offer me a glass of water and to use his phone, but since it was just an AC issue and the rest of the car was fine I politely declined and went on my way. He kept repeating “I have NEVER seen anything like that…”

I drove it for a year or so before the clutch started to go out. My original plan was to just do the clutch over the winter and drive it again the following spring. The fact that this past summer (four years or so later) was when it was on the road again should tell you how well those plans went.

I acquired a different car for daily / winter use (tried to insert a photo of my Celica here, but it just refuses to upload. I'll try again later).

And put the Rx-7 in the garage on stands:

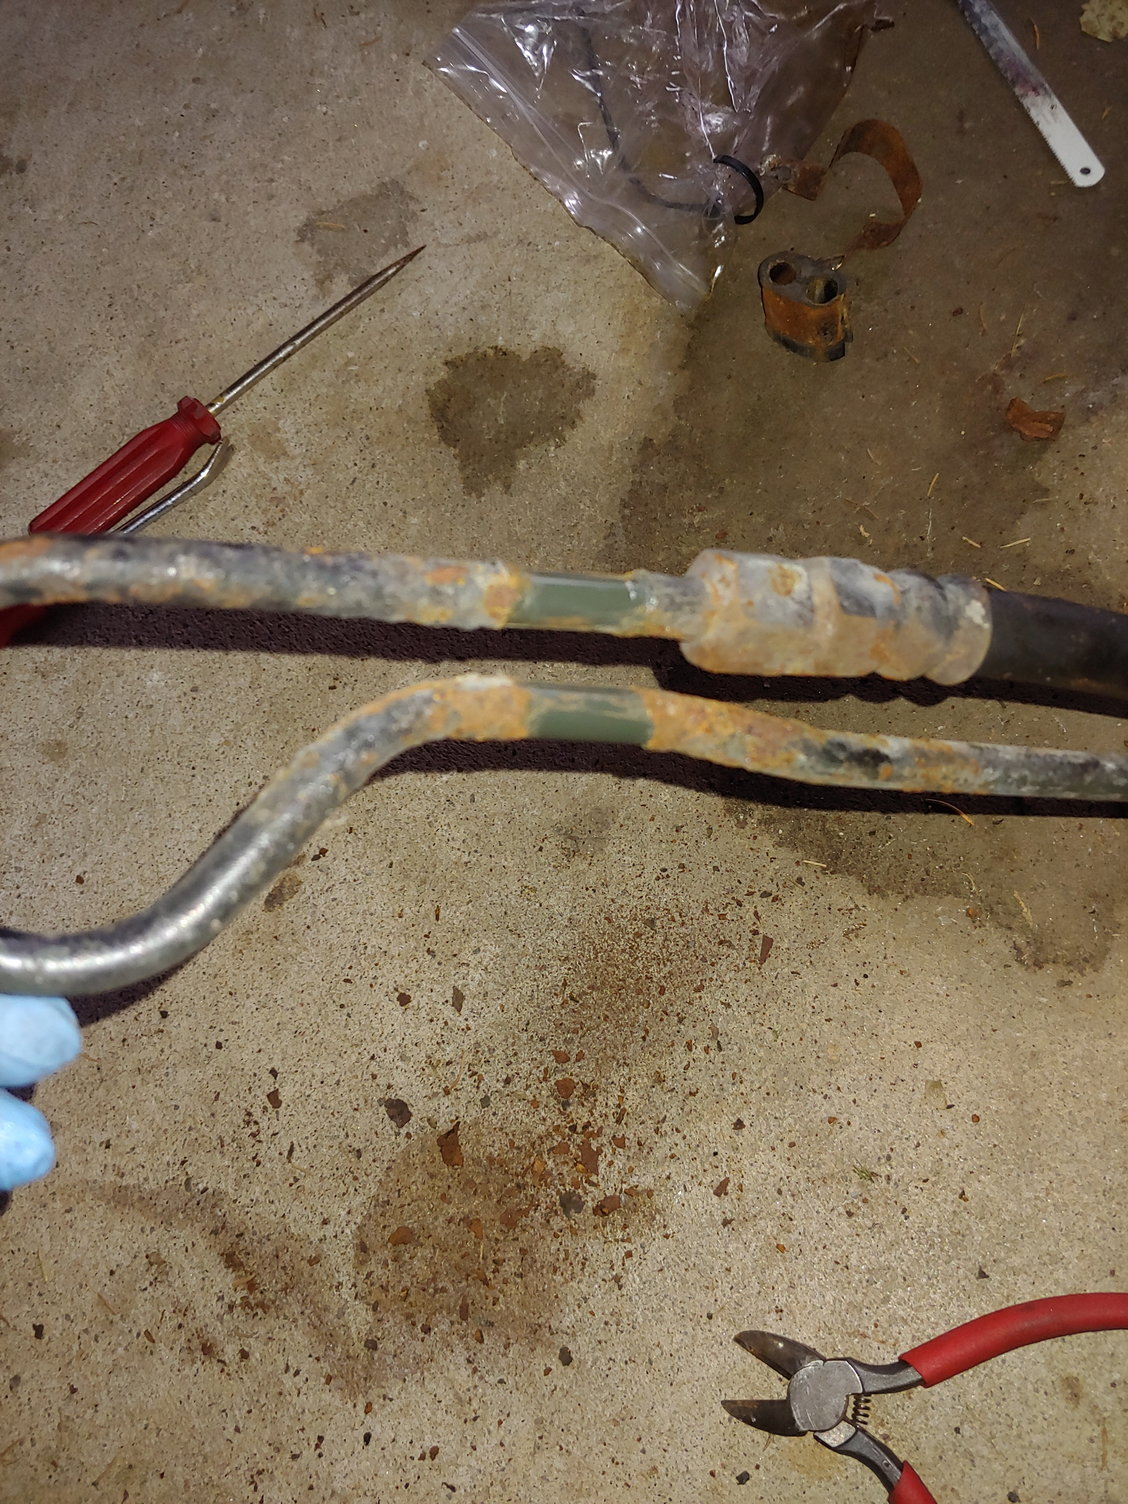
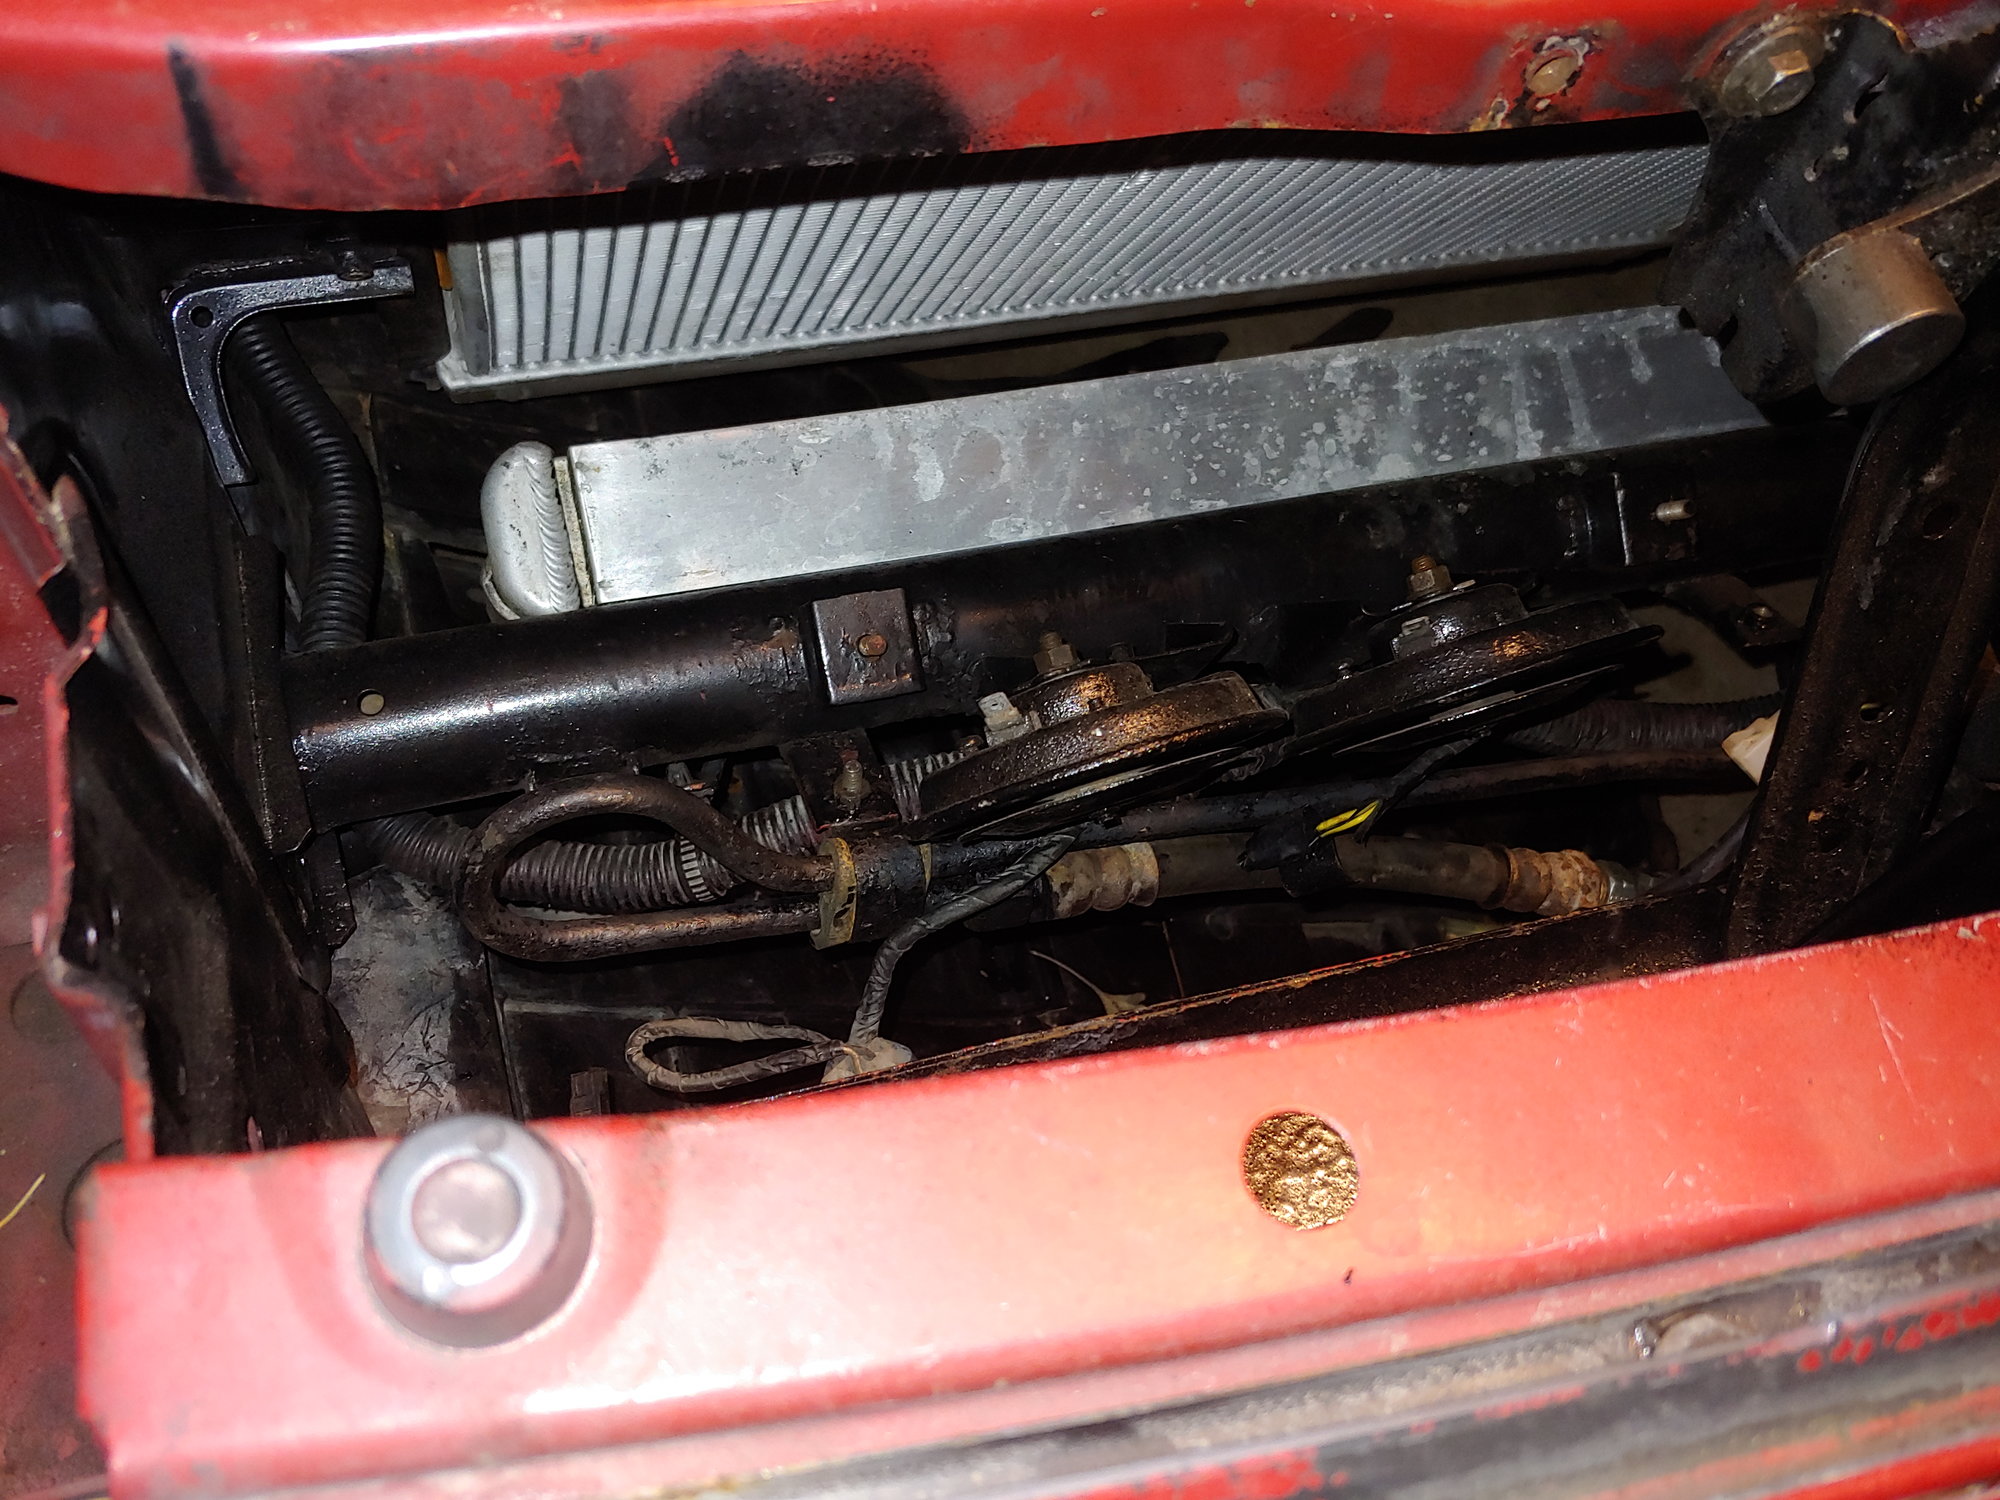
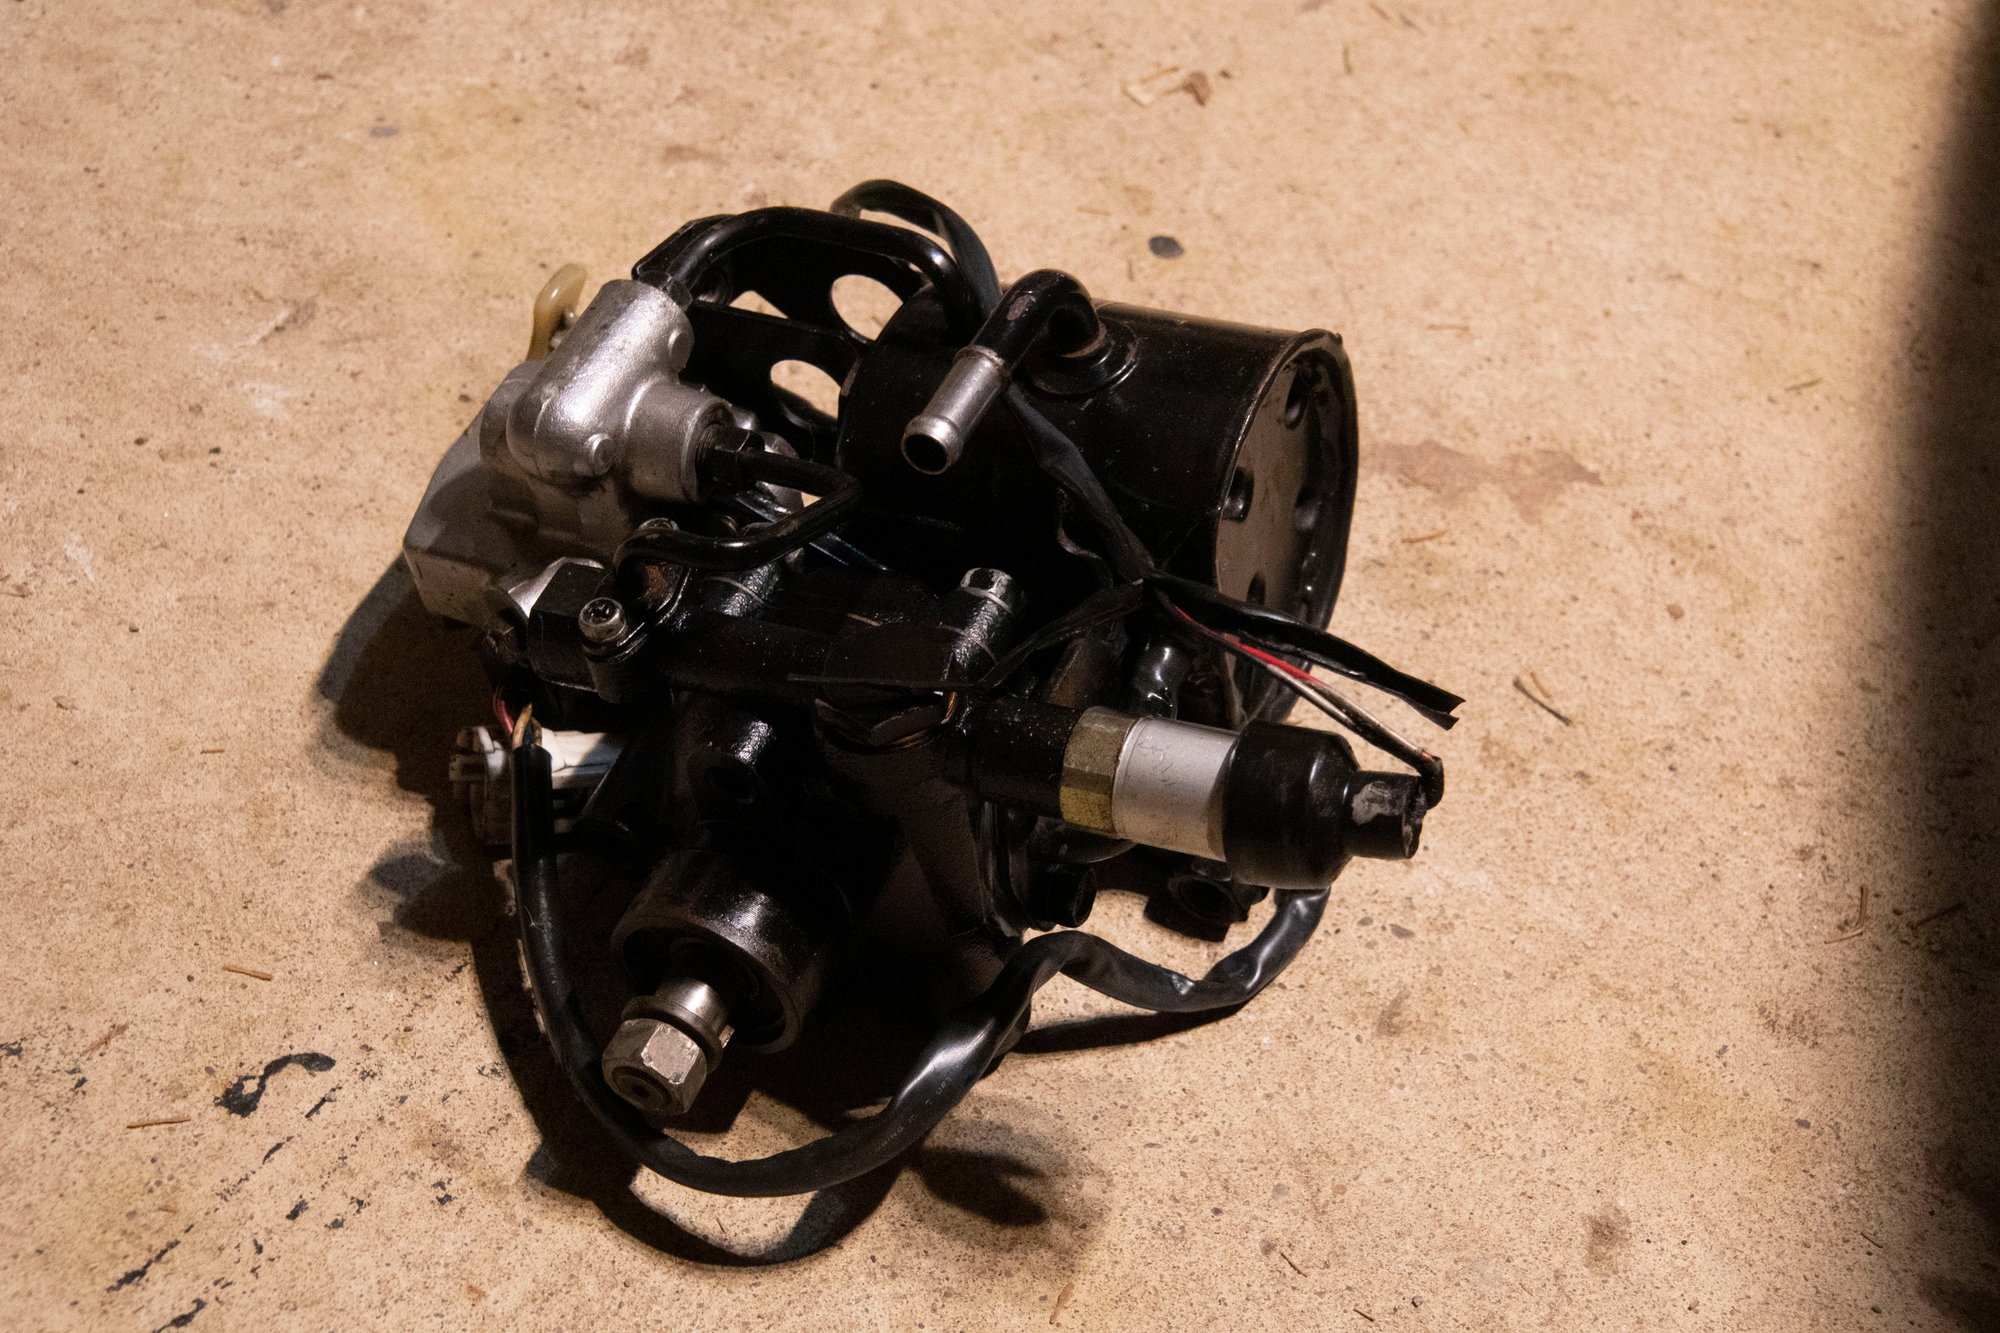
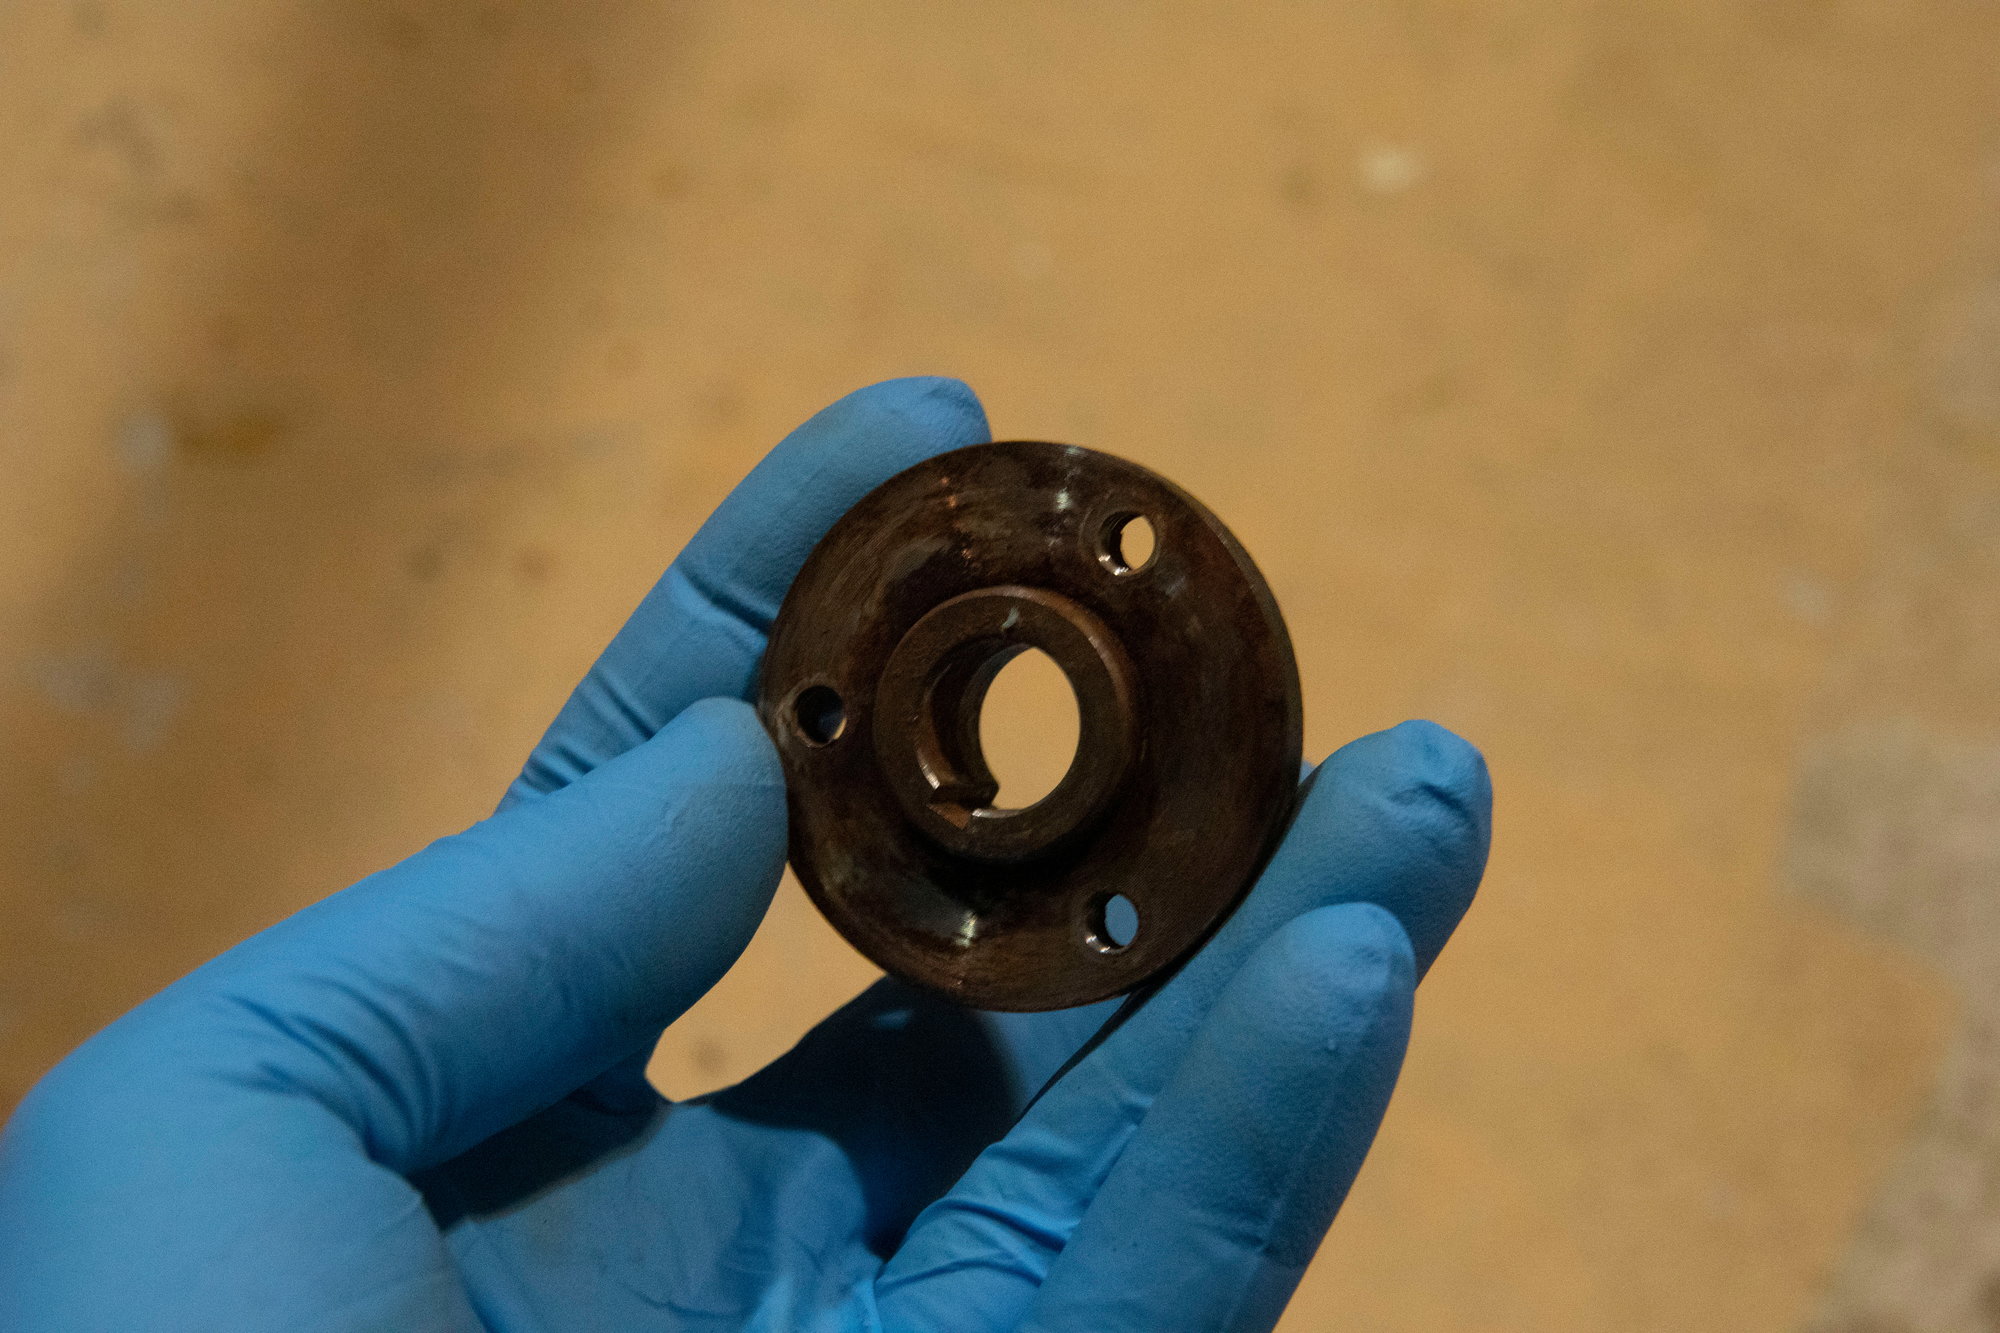
When I started taking parts out to do the clutch, it became apparent that there was a lot more work to be done than I thought. Blown shocks, calipers leaking again, a few small holes in the floor, etc. There were also other things I didn’t need but really wanted. Series 5 tail lights, a hatch that was the factory black colour, the upgraded brake system 5 lug cars got, an interior that was all one colour and complete. All the bushings were bad too.

What I should have done at this point was just fix the absolutely necessary things and then I could drive my car while doing the rest. Instead I decided to do everything at once.

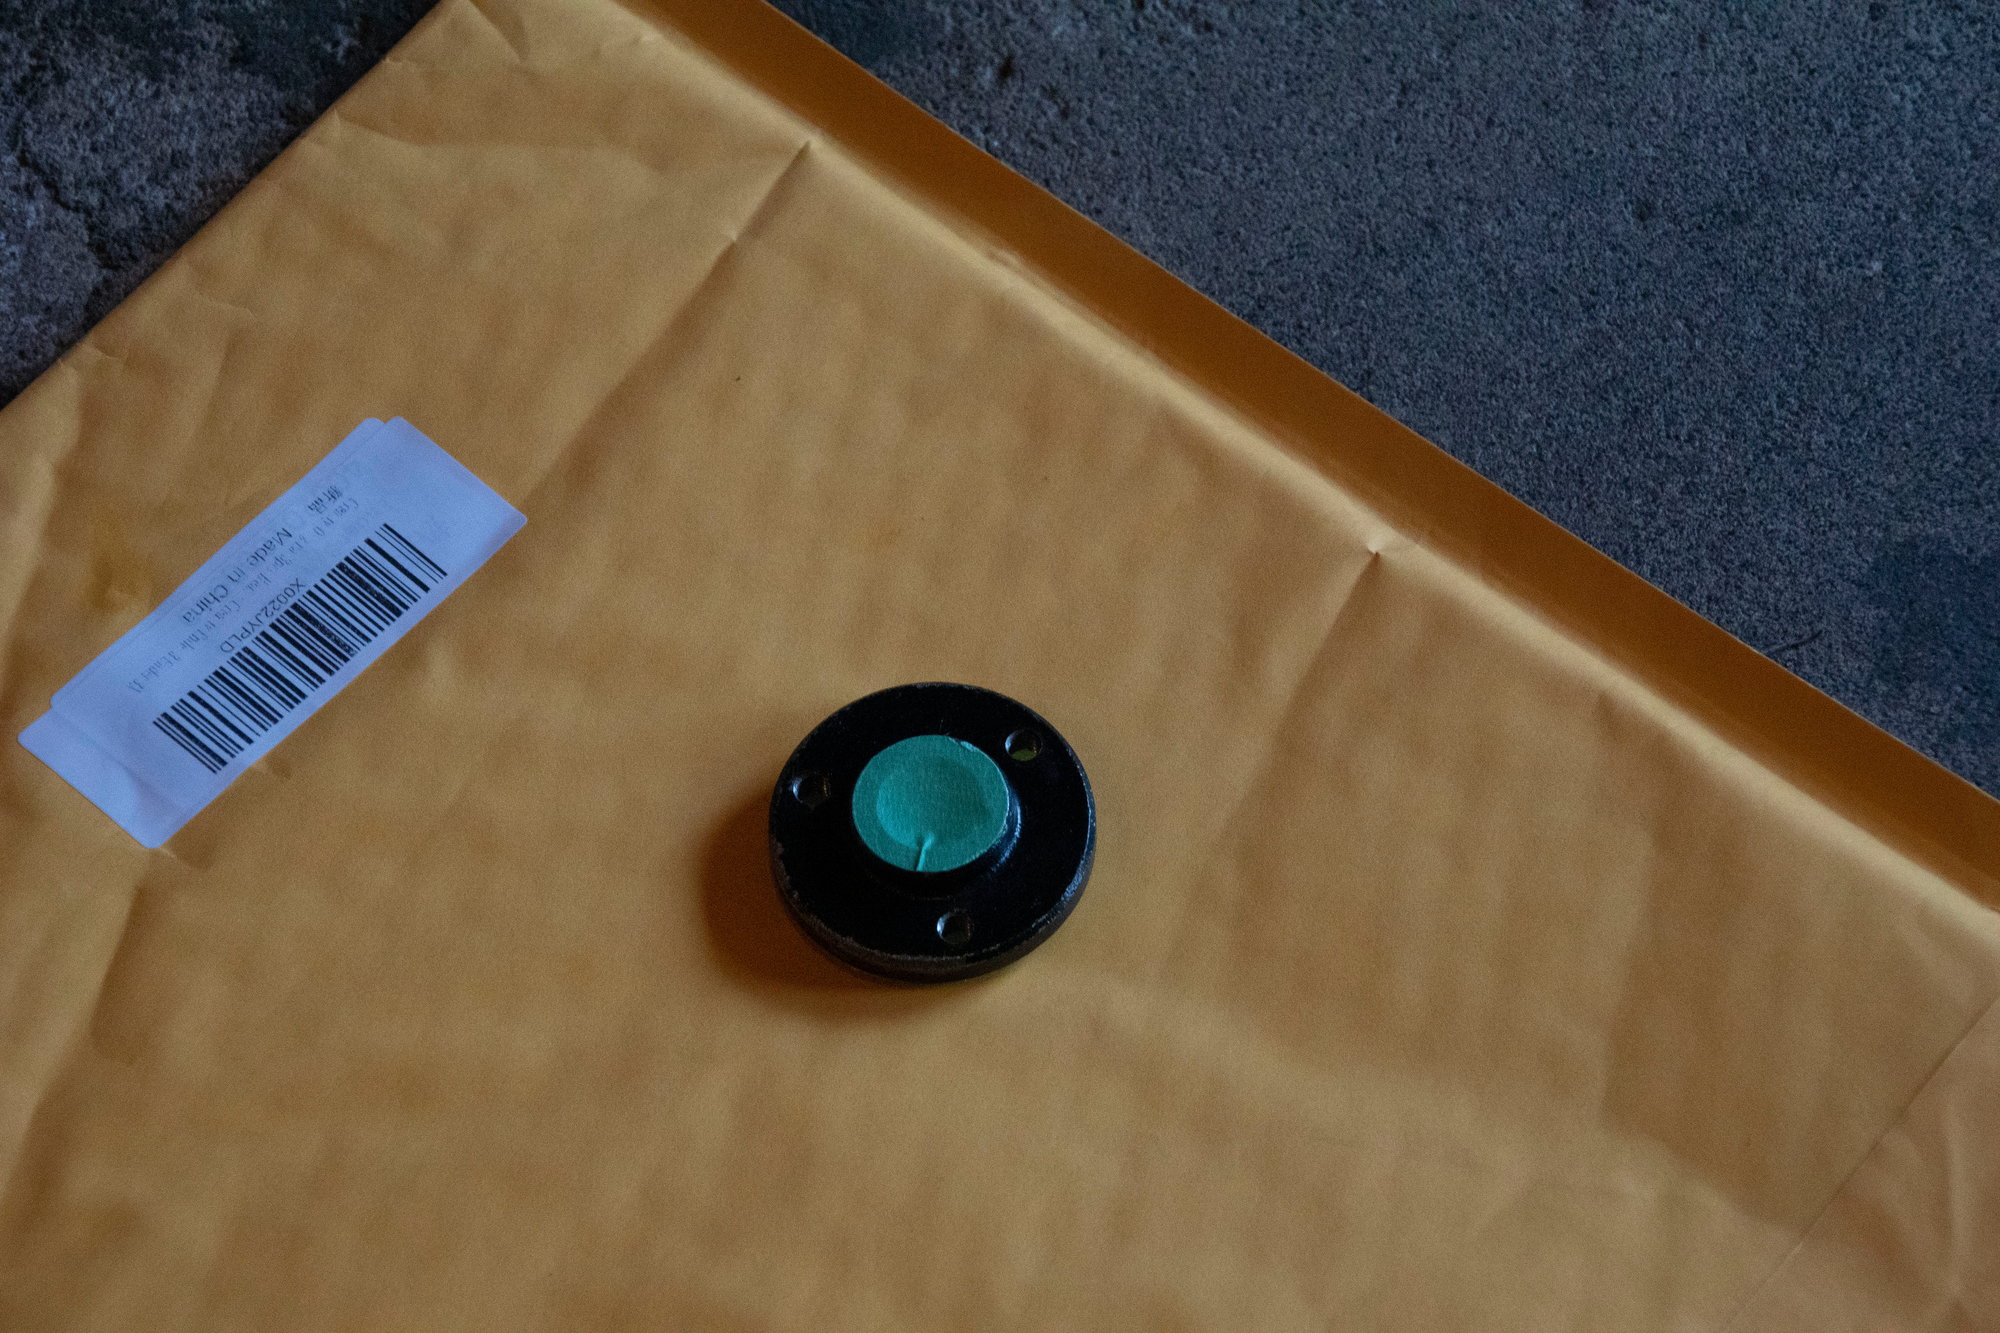
Here are some of the pictures I have from that time:

KYB AGX shocks for all corners. Replaces the old worn out stock shocks.


Limited slip differential from a GXL model. Axles are the same, but replaced them because every part of this car was thrashed and the original axles were suspect for that reason alone.


90s Nakamichi Head Unit. It has a Minidisc deck, which is not very useful in North America but it’s pretty cool. I do have several Minidiscs around, so it has ended up seeing some actual use. I mostly use an iPod nowadays to bring tunes in the car with me.

So this starts to approach the time when I actually have decent amounts of photos. I’m going to break up what I did into different sections and upload them one at a time. Trying to explain it chronologically would be a bit of a mess since it was all done concurrently and with no adherence to my original plans.

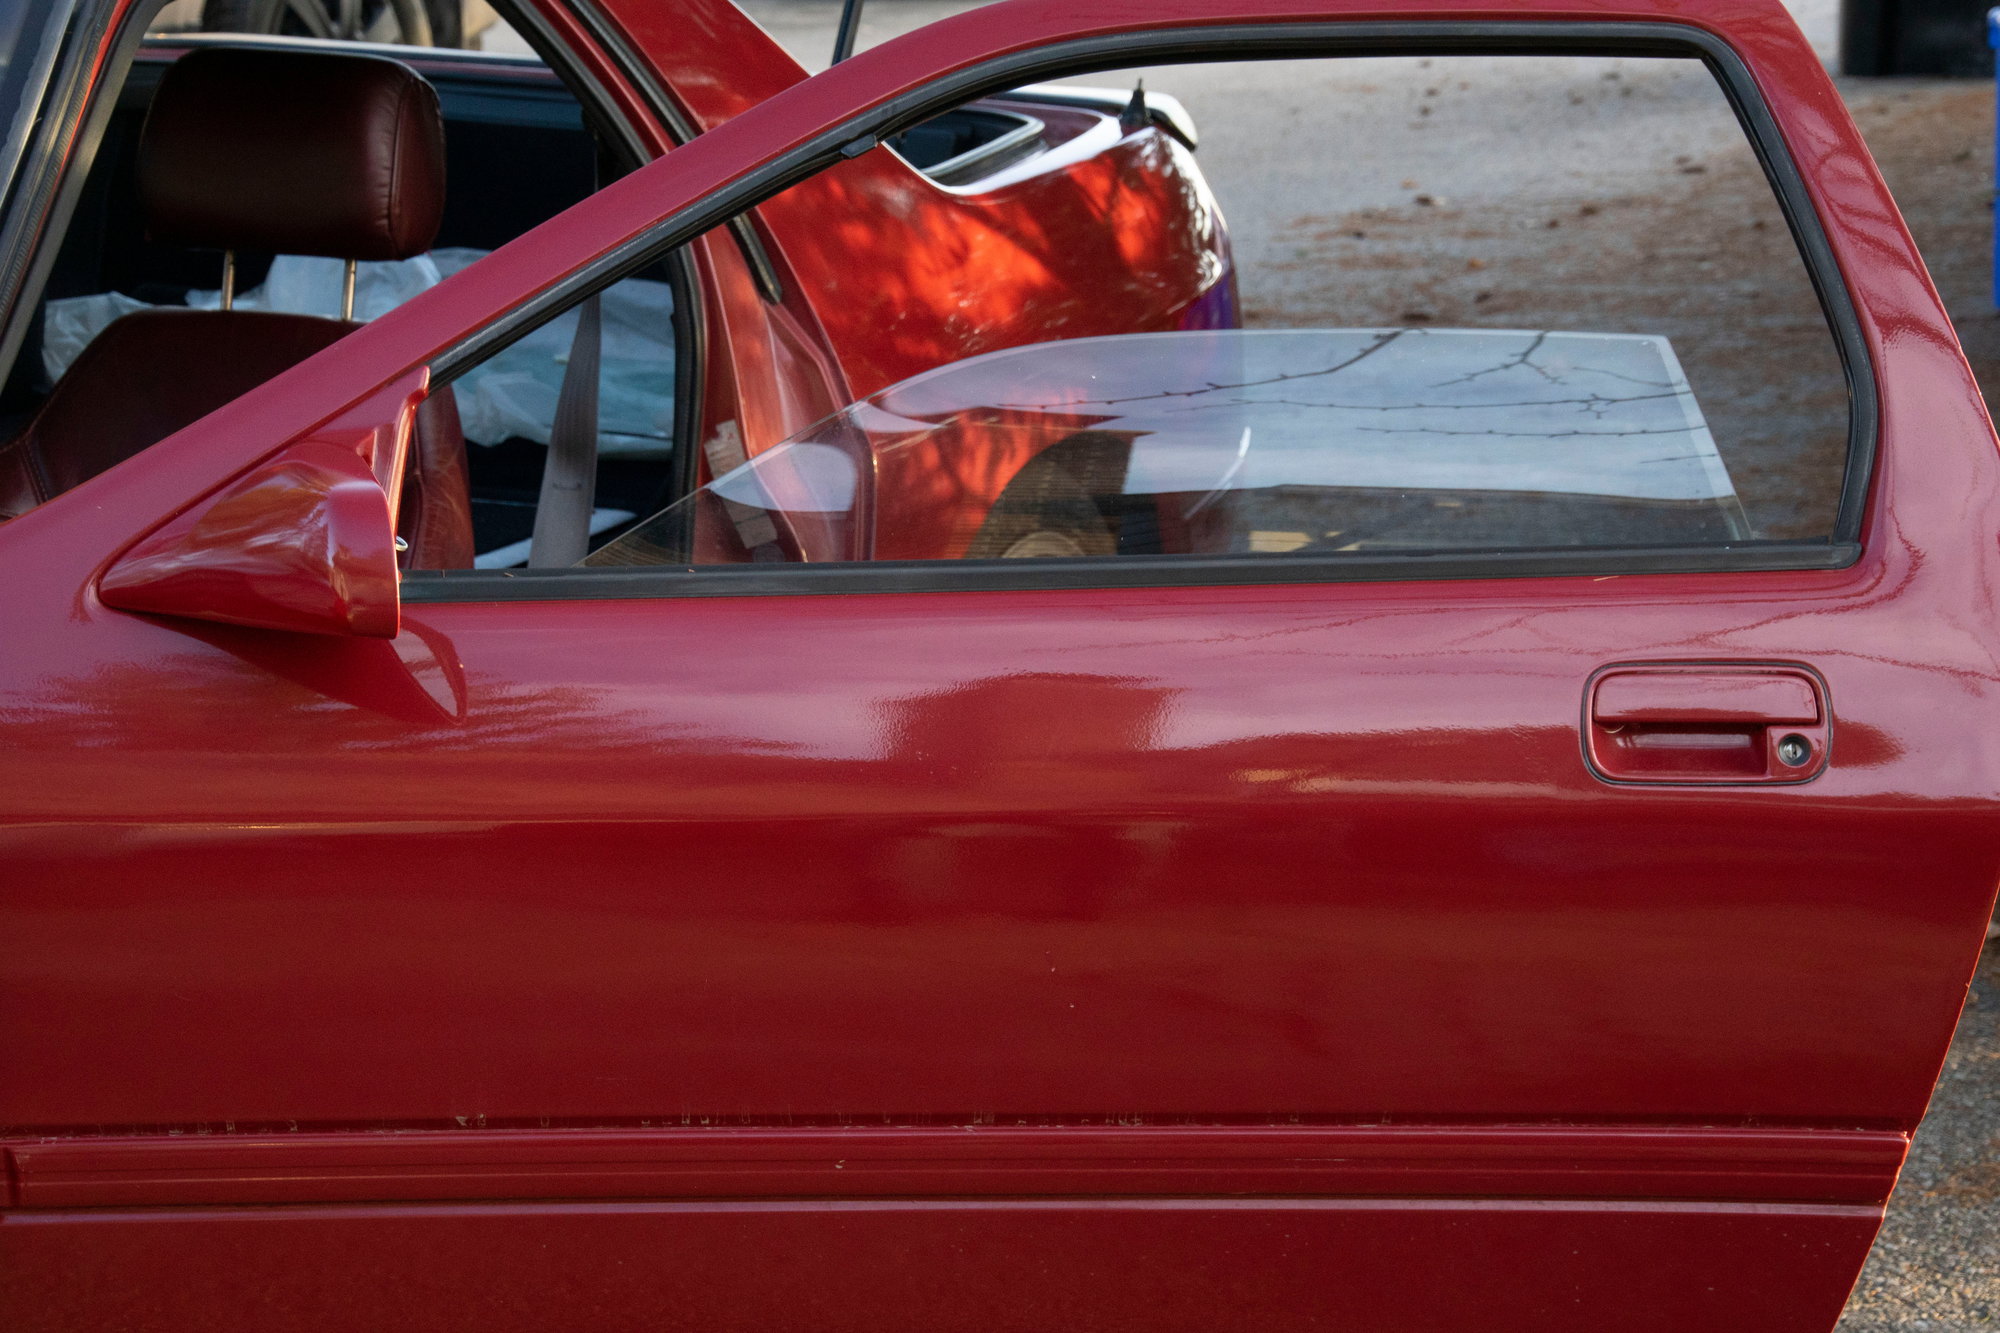
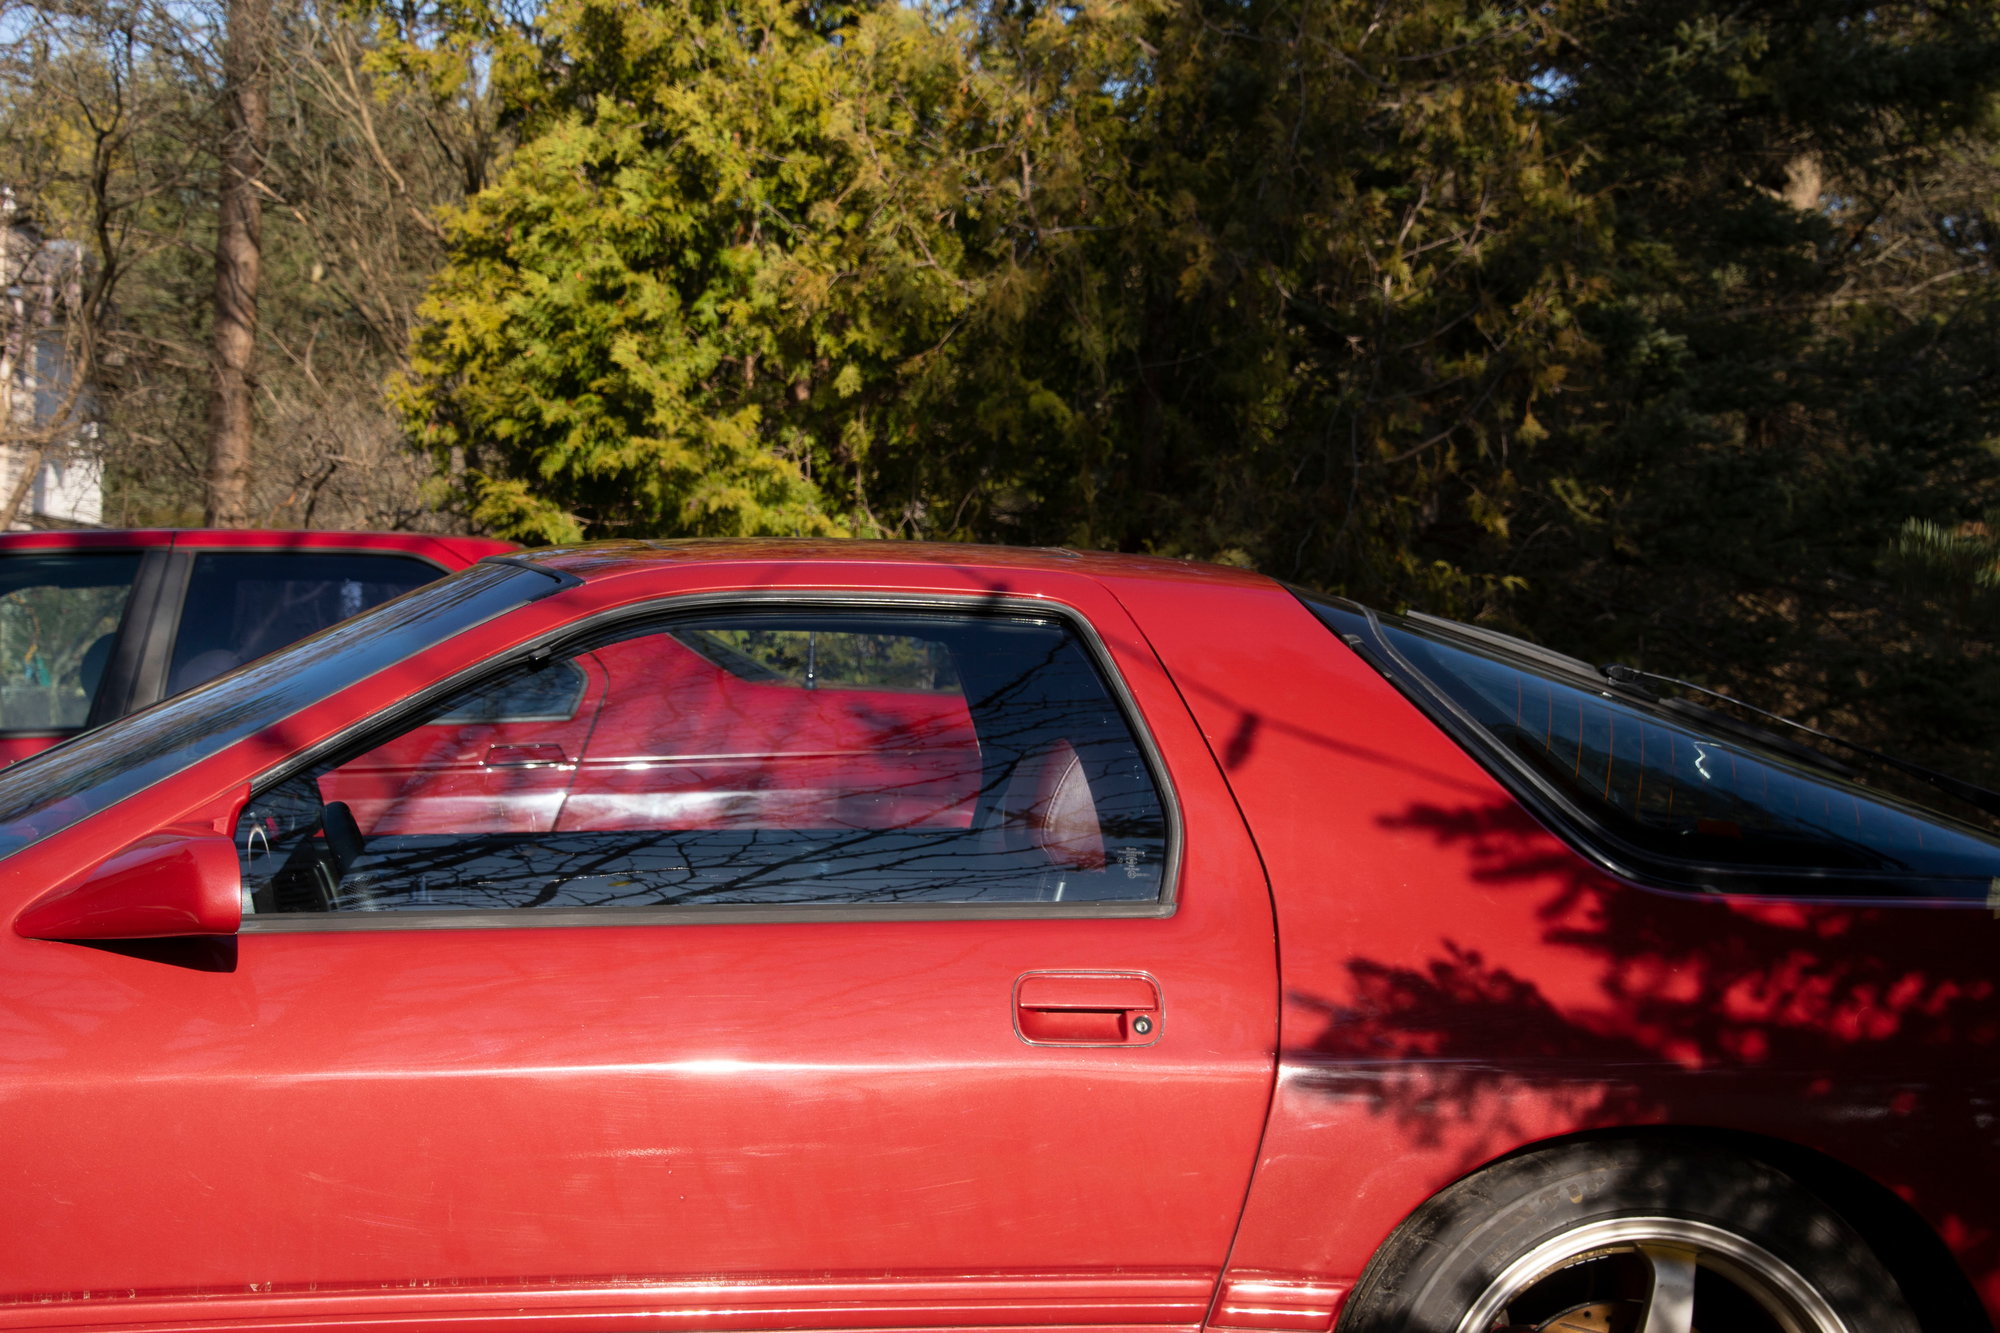
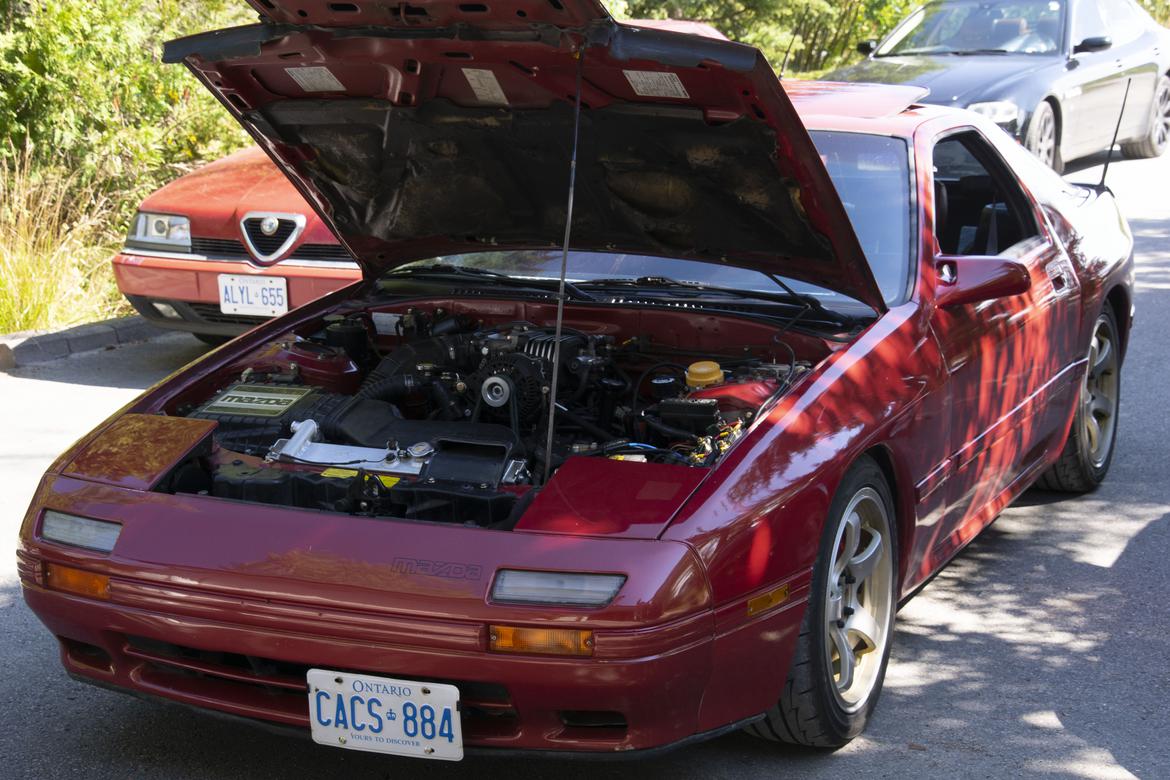
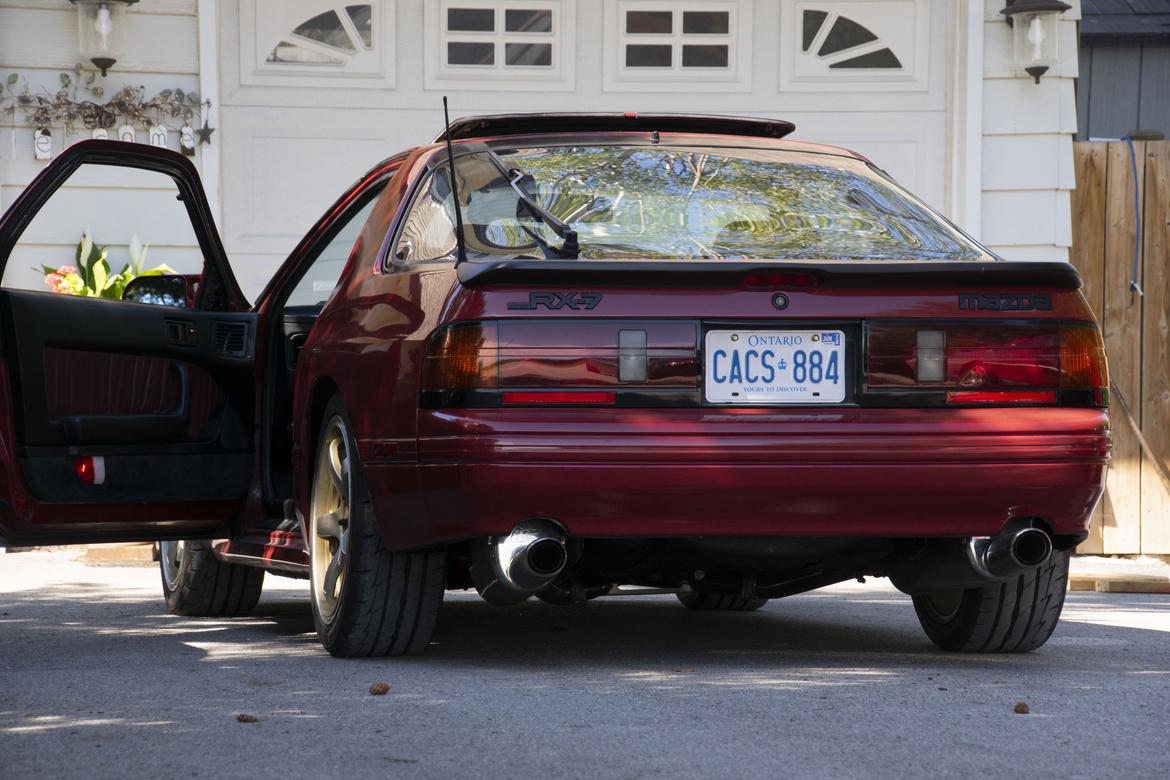
Since it’ll be awhile until I’m done bringing things up to speed, here’s how the car sits now:

I hope those photos come out okay, they look really strange in the editor due to the resizing. If not I'll need to figure out alternative hosting.


More updates to come as I have the time to write them. Until next time :)

chandler
chandler UltimaDork
12/15/21 6:10 p.m.

Looks fun

pimpm3 (Forum Supporter)
pimpm3 (Forum Supporter) UltraDork
12/15/21 7:36 p.m.

Nice, I am working on an FC of my own. 

Following along for inspiration.

adam525i
adam525i GRM+ Memberand Dork
12/15/21 8:02 p.m.

Car looks great, where are you in Ontario? Looks like there's a few other interesting cars in your household.

WondrousBread
WondrousBread New Reader
12/15/21 8:56 p.m.
pimpm3 (Forum Supporter) said:

Nice, I am working on an FC of my own. 

Following along for inspiration.

I've been reading your thread on it actually. Looks really good so far, especially after painting the engine bay.

WondrousBread
WondrousBread New Reader
12/15/21 9:02 p.m.

In reply to adam525i :

I don't usually get too specific with my location on a public thread, but I'm about an hour north of Toronto.

Yeah, we have / have had some unusual cars. In addition to my dad's old Rx7s, he also has a taste for Italian cars. He used to have an '87 Quattroporte, then he sold that later on and currently has an Alfa 164 LS and a newer Quattroporte. I have my Rx7 and an '04 Celica Tsunami GT as a daily.

My mum used to lecture us about having too many cars in the driveway, but then she got the NC Miata you can see in the background so she can't comment on our cars anymore :) It does mean she has a faster, lighter, better handling, rear-wheel-drive, red Mazda than I do though. Auto unfortunately, but still plenty of fun.

Then there are a few other more common cars that we use as dailies. The only one who doesn't have some sort of leisure / project car is my brother, but I wouldn't put it past him to get one someday.

dannyp84
dannyp84 Reader
12/15/21 10:39 p.m.

Always good to see another RX7 being cared for, keep yours blocked in by other cars in the driveway, my friend's FC was stolen and quickly recovered outside Toronto earlier this year. You might ask my friend if he has any extra interior parts, his Instagram handle is @toastermaster

WondrousBread
WondrousBread New Reader
12/15/21 10:52 p.m.

In reply to dannyp84 :

I do block it in, for exactly the reasons you mention. Unfortunately 1980s cars aren't known for theft resistance. I do have a few unusual anti-theft measures that would make it difficult to steal unless the thief was very determined or had a tow-truck.

I'll private message you one of them shortly that you can share with your friend, it costs $0 and would be really hard for a thief to figure out. If anyone else wants FC anti-theft tips, feel free to ask and I will PM.

My interior is nearly complete at this point after years of part hunting, but if I need anything else I'll definitely contact your friend

EDIT: Turns out you can't private message until you're approved by a mod or a few days have elapsed since account creation. I'll send you that message as soon as I am able.

infernosg
infernosg Reader
12/16/21 1:05 p.m.

Yay for more RX7s. Especially FCs. I've been playing with them for 12+ years now and I've had my current one for 8 (though it's only been running for 4).

iansane
iansane GRM+ Memberand HalfDork
12/16/21 1:31 p.m.

That looks good! Happy to read about more people playing with "vintage" 80s cars.

adam525i
adam525i GRM+ Memberand Dork
12/16/21 1:41 p.m.

In reply to WondrousBread :

That's a nice area, close to Mosport and Shannonville :) I'm on the other side of the GTA in Kitchener but get up that way often enough.

R32Jordie
R32Jordie New Reader
12/16/21 2:39 p.m.
infernosg said:

Yay for more RX7s. Especially FCs. I've been playing with them for 12+ years now and I've had my current one for 8 (though it's only been running for 4).

Its like that. Ive had my R32 for 11 years, on the road for 5 haha

WondrousBread
WondrousBread New Reader
12/16/21 4:53 p.m.

So first I’ll talk about the chassis, suspension, and brakes. Keep three things in mind:

1.            These were all done in random order as I had the time, money, and parts.

2.            I’d never worked on cars before I started this, so if you see something that looks wrong it almost certainly is.

3.            This was only supposed to be a simple clutch job


After putting the car on stands and starting the clutch job, it became apparent that basically the entire car needed attention. I started by dropping everything under the car:

One-piece exhaust system, courtesy of previous owner or whoever he paid to work on the car. 


Dropping the rear sub-frame. Almost every bolt was seized from rust or cross-threaded by the previous owner. The ones that weren’t seized or threaded were finger-tight though, so that definitely helped speed up the removal.

I disassembled the whole sub-frame assembly and burned out all the bushings:


OSHA approved bushing removal setup

Welded some reinforcement on the diff mounting tab on the sub-frame (known to tear under strain, not that my 148 crank horsepower was going to do that). Then I stripped and painted all of the control arms, links, and the sub-frame itself:


I got the parts to do a 5-lug swap from a few places. A bit of an explanation is in order; 5-lug FCs got the largest factory brake option. 4-lug cars have single piston front and rear calipers and solid rear discs. 5-lug FCs got larger front discs and four piston front calipers, plus larger vented rear rotors and wider calipers to match. My front calipers are for an FD but they are functionally identical. I got the front hubs and a garbage bag full of rusty rear calipers from someone on Kijiji (Canadian Craigslist). I was able to pick the best parts of all the calipers and rebuild them into one solid set. Then I just got pads and rotors to match. The rear knuckles came from another classified ad.

FC Rx7s also came with a passive rear-wheel-steering system from the factory. There is a bushing called the DTSS (Dynamic Tracking Suspension System) that causes the inner wheel to toe-out during a turn and the outer wheel to toe-in, causing a slight turn-in from the rear wheels. Plenty of people delete this. Some people say it makes the car turn better, others simply like the predictability of having a more traditional rear-end feeling. Nothing wrong with deleting them, but it isn't for me personally.

The DTSS bushings on the knucles I installed are in excellent shape. Even with lowering springs, stiffer shocks, and grippier tires I still like the way they feel when you really push it through a turn. I do have the delete bushings in a box somewhere if I later change my mind, but the DTSS bushings are NLA through Mazda so I can't easily go back.

After the front suspension received the same treatment as the rear, I decided it was time to fix the floor. It was just a few minor rust spots, so it got the usual routine of cutting out the rot and installing a new panel. For my early repairs I didn’t have a welder, so they got rivets paint and seam-sealer. Not sure how I feel about that now, but they show no issues so I’m going to leave it. I check them every so often for any signs of trouble. Later repairs were welded. Then I redid the undercoat for the whole car and installed V8 Roadsters Miata frame rail reinforcements.

Even though it’s a different car they fit like a glove. My frame rails were fine (just had the usual dimples from being used to jack the car), so after banging them as straight as possible the reinforcements were just for good measure. I may later install more bracing to tie the two sides together, but since my Rx7 is a street car it’s not like I’ll notice the difference very much.


The excess grease is because it’s Canada. My car will never drive in winter again, but rust never sleeps. It may be ugly but it works.

Stripped all the hardware clean and electroplated them with zinc. I don’t have in-depth photos, but here’s one I found of the brake line clips. Plated on right, un-plated on left:


At the same time I used the Eastwood rust converter + sealant on all accessible parts of the frame. It comes with a little tube you push down the frame and it has a tip on the end that mists the sealant. Then as you’re spraying the sealant you pull the tube towards you to coat everything you can reach. Everything under the bumper got a coating of paint as well, since there was some surface rust starting near the sides I needed to scuff off:


After installing polyurethane bushings on the control arms I started to reassemble on the garage floor. Braided stainless brake lines and adjustable camber links found their way onto the sub-frame as well, then my brother and I lifted it onto a pallet I made to reinstall it into the car. Before putting the sub-frame back in, I installed a snubber above the differential. The stock differential design causes the nose to try and jump upward under acceleration. The snubber is a bump-stop that sits above the diff facing downwards, to mitigate strain on the diff mount when this happens.

After that I was ready to put the sub-frame back into the car. My dad helped me pivot it back in:


In this photo I still have the original differential mount because I thought it looked fine. This proved to be wrong later, so I have since replaced it with a new factory mount. The differential is the clutch-type LSD unit from a GXL model. Axles are newer used. I reused the original toe links because they seemed fine and didn’t have any slack. Toe is factory adjustable using the eccentric bolt on the trailing arm.

This is with the 5 bolt swap and rebuild brake calipers that I mentioned before. Also the KYB AGX shocks and Tanabe lowering springs.

Some of the better photos I found of the front:

Ignore the 4 bolt arrangement here, I briefly had a hybrid setup with redrilled rotors.


8.8 hardware on the brake line clip was later upgraded to 10.9

Replaced all the brake lines. I bought the one that runs front to rear from Mazda, and I’m fairly certain they gave me one for a RHD model. It still works, it just bends a little strangely under the car. At the back I bent all the brake lines myself using prefabs from the local Canadian Tire because factory parts are NLA.

I replaced the brake master cylinder as well since it was leaky:

Hose clamp courtesy of previous owner too.

The steering rack started to make noise when turning, so after exhausting the other possibilities I rebuilt the rack. It turned out I hadn’t exhausted quite all the possibilities, because the noise reoccurred shortly after installing the rack again. It turns out the bushings that hold the rack in had turned soft and the steering column was hitting the sub-frame. Meaning my steering rack didn’t need a rebuild at all. It was an interesting learning experience though. I found some new poly bushings sold online:


I also rebuilt the power steering pump before deciding not to use it. I currently have de-powered steering and I’m still deciding whether I want to re-power it.

On the cosmetic side I painted the hatch. The replacement hatch I bought was sunrise red, stock hatches are black.

Before:


After:


Polished the marker and signal lenses:


Installed the series 5 tail lights I mentioned:


You can also see in this photo how awkwardly the stock exhaust hung after all the previous owner’s welding. This would later be replaced by a Racing Beat exhaust. This is a REV TII unit, meant for a Turbo II model. I welded up a little adapter to allow me to bolt it to my existing catalyst (even catalyzed the exhaust smells abysmal, so I don’t want to find out what un-catalyzed Rx7 exhaust smells like):

Like most of my welds, ugly but functional. To be fair this was my 2nd or 3rd welding job, so I don't feel too bad about it. The downpipe section also had a flange installed so my exhaust isn't so unwieldy to remove.

Later I bought a replica spoiler on eBay. It was supposed to be a fiberglass replica of the spoiler that came on Sport model Rx7s. It’s rare and the originals are rubber / urethane or something, so lots of them are in need of restoration.

The eBay seller sent me a spoiler that was warped and then gave me the runaround on returning it. Paypal refunded me and told me to ship it back, which I did. Then the seller must have refused delivery because it came back, albeit super beat-up. So I took delivery and decided to try my hand fixing it:

There used to be a large gap between the spoiler and the car. I filled it with fiberglass and then sanded the high point back down to shape. Then hit it with SEM Trim Black and used some 3M mounting tape.

I also added those badges. The car came with no badges / decals anywhere on the body at all, so I felt I should install some. The front got a factory decal:


I relocated the driver’s license too:


This post is getting really long, so I'm going to break it in half here. More to come.


WondrousBread
WondrousBread New Reader
12/16/21 6:23 p.m.

Picking up where I left off:

One time someone backed into my car in a McDonald’s parking lot, crushing the plate and holder into the bumper. After the repairs were done I realized two things: I hate the stock center location for the plate, and if the plate were off to the side it would have been significantly less damaging to the bumper cover. I relocated it using an off-cut of aluminum, two rivnuts, and the stock license plate holder bent and flipped upside down.

I also found a bubble expanding on the driver’s side rear quarter. I started digging out the bubble before realizing the whole quarter was covered in Bondo. As in, 1/4” to 3/8” of Bondo. I dug down to find a small patch panel with some pinholes in the weld which allowed moisture to penetrate the Bondo from behind. I filled the pinholes and then I was faced with either removing the Bondo from the entire panel and needing a paint-job or trying to refill the Bondo I’d removed and paint with colour-match to get by. I can’t afford a paint job so I refilled the Bondo I'd removed and blended with the existing contours as best as possible:

You can see the inconsistency on the left? That’s the area I’m talking about. It’s better than it started but in the long term I need to have a body shop do the work and then paint the whole car, since the Bondo extends up past that body line. I’m not happy with the way it looks, but it’s all still solid so I’m not terribly worried about it. Nobody has noticed it in person yet.

I’ll keep telling myself that until I have the funds to pay a professional to do it right.

Small spot on the sunroof:

Filled, primed, and sanded

Colour match paint

Blending single-stage metallic paint is a challenge, but I’m getting better at it. At this point I skip the sandpaper entirely and go straight to rubbing compound; it gives far better results without sanding down into the flake.

The other thing I wanted was a set of Turbo II mirrors. Series 4 TII, specifically. They got this really nice set of aero mirrors that match the body colour of the car. Meanwhile the other S4 coupe models got black plastic mirrors. A set popped up on Kijiji and the guy was willing to ship. He said they were “undamaged.” I’ll let you decide:

Crack on the side, missing corner, bad spray-paint job, and the glass was delaminating. Also the motors were barely moving. I decided to disassemble and restore them completely.

Drilled out the ends of all the cracks, then put a groove in the biggest crack. Filled it all with fiberglass reinforced filler before sanding and priming. Lastly I hit it with colour match:

Fresh glass.

The motors were simple to fix, all they needed was grease. That took care of the mirror situation.

In some of these pictures you can see silver multi-spoke wheels and spacers. I bought those thinking they were 5x114.3, but they were actually 5x100. The spacers are wheel adapters designed to let you run 5x100 wheels on a 5x114.3 hub. I tried a few different solutions but nothing worked to my satisfaction. At a certain point I realized that I would have to modify the hub to make it work and I wasn’t that attached to the wheels. I ended up selling them along with the original wheels from the car and the set I bought when I was a teenager.

The proceeds of the wheel sale were used to buy the interior carpet (to come later), and then I put the excess aside. I was going to save up and get a nice set of RPF1s, but then something else popped up that piqued my interest and was significantly cheaper:

Lighting isn’t great because it’s in the garage, but a they’re a slightly faded gold colour. $400 for the rims with bald tires, then I got a set of Firestone Indy 500s to wrap them in.

The lenses on the front of the car below the headlights are called “flash-to-pass” lenses. Basically Mazda decided that you should have clear lenses in front of the headlights in the closed position so that you can press the high beam button to blink someone even if the lights are down.

In JDM cars, these were small reflector housings with bulbs inside to satisfy their daytime-running-light requirement:

Now all the mount points on my lenses were cracked and the lenses were cloudy (even after polishing). That and I just plain like the JDM lenses more. So I got a set awhile back and then made a little harness to install running-lights switched to ignition:

I later swapped to LEDs to make them actually visible.

One other upgrade I did is the master cylinder / brake booster from a 1996 Subaru Legacy. When I first pulled the car out of the garage and onto the road this spring, I realized I had no vacuum boost. I tried a few obvious repairs before deciding to just nuke the problem with a complete swap. Clokker on the Rx7club had posted a few times about using a Subaru Legacy cylinder and booster. It’s a 1-1/16” bore vs the stock 7/8”, and a dual-diaphragm booster vs the stock single. I did a whole guide on it if anyone is interested but other than shortening the pushrod, swapping over the FC clevis, and some custom lines it is a drop in replacement:

Then I still had no vacuum assist. So I took off the vacuum hard-line that runs along the firewall and found that it was blocked with a big clot of rust and oil (no idea where it came from since the brakes worked fine when parked). After using lots of brake cleaner and pressurized air it broke free, and I had brakes again. A completely unneccessary upgrade, but the brakes feel way better so I would do it again.

That takes us to more / less where it is today body-wise.

Engine and interior work coming next. I'm trying to strike a balance between providing enough details and photos to make this interesting to read, and keeping it coherent. I didn't actually realize how much I've done to this car until I started compiling all these photos to write this. There are parts from no less than 30 cars combined into this one, some of which aren't even Rx7s.

Until next time :)

birdmayne
birdmayne GRM+ Memberand Reader
12/16/21 9:15 p.m.

Keep the posts coming. I, for one, am enjoying the transformation. 

Props on a job well done

WondrousBread
WondrousBread New Reader
12/19/21 8:50 p.m.

Interior:

None of the following has anything to do with performance, but since it comprised a lot of the time and effort I put into my car, I think people may find it interesting.

Series 4 Rx7s had three interior colour options: Maroon, Blue, and Grey. I had a nice mélange of Maroon and Grey. 10th Anniversary Rx7s got a factory black interior in 1988:


Then Series 5 Rx7s all had a black interior option. There are a few 1991 convertibles that got a really nice two-tone interior (tan leather seats and door inserts on an otherwise black interior):

These are like hens teeth. I kind of like the idea, but the tan they used is too light IMO. Maybe one day if I get the seats and door cards reupholstered, I'd go for that colour scheme.

In my case I decided to use vinyl dye and do an interior conversion. It certainly wasn’t easy, but trying to find all the parts to swap to a factory black interior would have been very difficult and expensive as well. I also don’t have the space for a parts-car, so that wasn’t an option. Plenty of manufacturers use similar methods now, so as long as you do the appropriate prep it can work very well. I also had lots of parts that were already sun-faded, so I wasn't too worried about dying them.

I planned on making a post eventually on the Rx7Club with detailed information on what is and isn’t practical to use the interior dye on. I’ll give a brief rundown on what I’ve learned so far just in case someone comes across this thread in the meantime:

-              The plastics take the interior dye fine

-              The grey vinyl (dash) took the dye just fine. No issues so far.

-              The red vinyl (door panel) was less successful. Going to try again in the spring, making sure to lightly sand this time. This was one of the first parts I tried, so I suspect user error. I’m getting the start of a  tiny flake near the door handle opening.

-              I found SEM Colour Coat (Landau Black) and Duplicolor Gloss Black about equally sturdy. I am using Duplicolor Matte Black because I like the colour better. All things being equal, the gloss adheres better and seems to be a bit more resilient than the matte. I have also noticed this trend with paints (makes sense, since the dye is effectively a very thin paint designed to adhere to plastic and vinyl).

Anyways, the process was to disassemble everything into its base parts and then clean them super thoroughly. After they were completely cleaned, the next thing to do is to lightly sand. I didn’t do this until the later stages and those parts have been much more durable. I also used adhesion promoter early on. I don’t recommend this at all, I had better results just using the dye.

The best example is the doors since they have plastic, vinyl, and leather. I actually hybridized some factory black series 5 door panels with my existing inserts because I wanted the factory door speaker grilles. What I ended up doing was a two-tone interior similar to the one above, except with maroon leather. It was going to be temporary but it’s been growing on me so I will probably keep it:


Original door card


Taken apart


Took apart and sprayed the vent. I would later use a factory black vent just to avoid any possible wear, but it was a learning experience.


Door cup part way through spraying. I found the best thing to do is to use light dusting coats while rotating the part 90 degrees at a time. After 8-10 coats let it dry outside for awhile in the shade (on a non-windy day, I learned that the hard way). Then buff it with a blue shop towel until the shop towel comes away clean and let the part sit somewhere for 2 weeks before you install it in the car. This stuff takes awhile to off-gas and it smells awful. Once the 2 week period has passed it is basically like a factory black part.


The vent after reassembly. Again, I would later replace this with a factory black piece. The red under the adjustment wheel is light coming from the other side of the card.


The maroon vinyl after the dye. It isn’t as shiny as the factory black vinyl, which is nice because I hate a shiny interior. Here is a comparison (factory black on right):


And the completed piece:


Dyed maroon top and handle. Factory maroon leather insert from the original door trimmed to accommodate the new bottom piece (it’s not quite so orange in real life, the lighting in basement causes that effect). The bottom piece is the factory black part I mentioned; door speakers in that location were only an option on series 5 cars.

I don’t have in-progress photos of every part anymore, but they all received the same treatment: clean, clean, clean, adhesion promoter, dye, buff, dry.

I do however have photos of the dash:


Factory grey dash my brother and I wrestled out. The little switch on the bottom left above the hood release is a really cool feature I have never seen on another car. It switches the vent that integrates into the door card. One position is connected to the HVAC system as normal. The other is a direct line to an intake under the wiper cowl. This way you can have air blowing on you at speed (as if you have a window open) without the noise of having the window open.


I stripped everything removable out of the dash and then zip-tied and masked any wiring. One key to getting interior dye to work is that everything must be disassembled. This sounds obvious but you don’t realize just how many little clips, screws, and panels are in a car until you disassemble the whole interior. I can see why someone who was feeling impatient would try cutting corners on the disassembly, but the results would be disastrous. Always take it as far apart as possible.

I scrubbed the dash all over with Scrubbing Bubbles Fantastic, which is my favourite cleaner. Stronger than detergent but less harsh than purple degreaser. My grandmother loves it too, she always says “E fantastico!”. After wiping it clean a few times with a damp cloth I gave it a final wipe with a microfiber cloth and some isopropyl alcohol just to get rid of any residue.

I did exactly as before: spray many times from many directions. Turned out really well:


I did try dying the interior carpet as well. This turned out to be a failure and I later replaced all the carpeting, but I’m documenting it for the experiment:


Original. Normally I would have tried to sell the carpet (I was skeptical on dying it from the start) and just find a factory piece. However between the rust stains, missing clips, and multiple shades of grey I decided to just give it a shot.


The pile on the Rx7 carpet is too tall for the dye to really soak in (even if you scrub), and it also doesn’t stick well since the Rx7 carpet is 100% synthetic material. It did work pretty well for the hatch carpet:


However, it left the carpet a bit stiff. So later on I would decide to get a replacement carpet.

There were complaints from other Rx7Club members about the quality of the ACC carpet. The carpet itself is good, but the fitment on Rx7s is just a bit off. I can safely tell you that their complaints are 100% accurate.


First up though was to pull everything from the interior and clean it:


The transmission tunnel got so hot at some point that the insulation had melted into the jute backing on the carpet and started turning crumbly:


I cleaned everything and removed any loose insulation before giving everything a wipe-down with brake cleaner. This was in preparation for the sound deadening I purchased. I got Noico stuff off of Amazon, since I don’t care about real Dynamat branding on a part I will never see.


Left half done. On to the right half:


Left the bolt heads for my frame rail reinforcements exposed. I also did the spare tire well, rear wheel arches, storage bin area, door skins, etc. I know I’ve added some 50lbs but I’m fine with it if it makes the car cooler and quieter. Not that I would call it “quiet”.


I wanted to use the original carpet insulation, but it had a really weird smell to it:


The ACC carpet has much thinner insulation though:


The smell of the original foam wasn’t noticeable while it was in the car but I decided not to take the chance. Instead I used some adhesive backed closed-cell foam to take up the space:


Carpet in


After that it’s all about patience. Slowly lining things up and cutting to size. Tucking it up under the dash in the appropriate places. Making cuts for seat belts, seat mounts, etc. I did make one unfortunately visible error:


The piece on the right tucks up under the plastic trim, hiding the red paint behind. But you can see directly below the left side of the trim there is an area I had to put in a backing piece. Basically, the ACC carpet molding is wrong. The angle of the place where your feet sit in relation to the floor is too acute (or obtuse, don’t remember which since it’s been a long time since I installed this carpet). You need to cut down on the corner until it flexes appropriately to tuck behind the trim, and even then it’s a little lumpy. Floor mats hide most of my error but I still feel stupid every time I look at it.

I nailed the driver’s side though:


(Please don’t judge the wiring that 18 year old me added. It has since been cleaned up and properly insulated.)

I had to request a replacement hatch carpet from ACC. The one that came in the original order had a really inconsistent bead around the edge. Here’s one example:


Loose loops, and the outer stitching vanishes and reappears. The eBay seller from whom I bought the carpet handled it for me and got ACC to send me a new hatch carpet and side pieces, but then the nap on the carpet was different. Take a look:


ACC has a couple options for carpet. Regular, high quality, and then an optional mass-backing. I opted for the regular carpet with mass-backing, but they originally sent me a high quality one with mass backing. Then when I ordered the replacement piece they sent me what I originally ordered. I couldn’t very well request another replacement; Do I ask for a regular quality floor carpet to match the new hatch carpet, or another replacement hatch carpet to match the upgraded floor when I paid for the regular carpet in the first place?

I decided I cared about the stitching on the high quality carpet a lot less than the difference in the nap on the regular carpet. I tried not to notice it, really! But it was just too much. So in went the original ACC carpet with the slightly inconsistent seam.

I also dyed and then reupholstered the factory storage bins:


Completed hatch area. The boxed 6x9s will later be replaced.


This is how it looked at the time. This picture is still mostly accurate, although I got factory black door handles and a different shift knob.


Going to break this post in half here, other half to be posted shortly.

WondrousBread
WondrousBread New Reader
12/19/21 9:27 p.m.

Speaking of the shifter:


Top is a stock Rx7 shifter. I dug it out from the TII transmission in my shed, but TII and NA shifters are identical. Bottom is an eBay short shifter designed for a Miata. I bought it a few years ago advertised for a Series 4 Rx7 before putting it on the shelf. It sat for so long that the return period expired, before I realized it is for a Miata.

The ball on the bottom is larger on the Rx7 shifter. Something had to be done about that:


Now it fits in the car, but I had another issue; the shift knob thread is M10x1.25 vs the stock M12x1.5. While waiting for a shift knob in the mail, I used this for a good month or so:


A bit tacky, but it was good fun for awhile.

Now when the shift knob finally arrived, the thread was correct but the threaded section wasn’t long enough to engage the threads in the knob. So I had to extend the threaded section:


This means that realistically I could have just used an M12x1.5 bolt initially and avoided the shift knob change. But I like this knob better anyways, so it’s fine.


It sits a bit higher than I’d like. I’m thinking I may cut it and weld it shorter, since the longer threaded section has added height to the whole shifter.

The coolant gauge in the background is zip-tied to the place below the new head unit. The original is a non standard size slightly larger than double DIN. I only have a single DIN stereo. I did 3D print a plate to fill that area, but have yet to decide what my permanent gauge setup will be, so for now the zip-tied gauge is staying.

The steering wheel was changed back when I was daily driving the car in high school. One quirk of the Rx7 is that the little cam that controls the turn signal cancel function breaks easily. It sits under the steering wheel and when you crank down the mounting nut it cracks. It’s NLA, but conveniently others have had this issue and DC5Daniel on the Rx7Club provided an STL file:


I removed and re-greased the whole assembly. The black cam in the center is the part that broke –  The updated part is also slightly shorter to prevent it being squeezed so hard when you tighten the steering wheel. The two nubs on top engage into the NRG short-hub, and there are matching nubs on the bottom that engage into the turn signal assembly. This also senses steering angle, because the Rx7 is equipped with speed-sensitive power steering that takes into account speed and steering angle to vary assist for best steering feel. With all of this fixed my turn signals now cancel again.

At this point I decided to install the door speakers I mentioned. This needs some explaining, so I’ll copy directly from my prior thread on Rx7Club:


“The speaker and amplifier situation in this car has frustrated me since I purchased it. It's frustrating because from the factory the S4 speaker system has potential but just isn't that great in my opinion. Now since it's a factory speaker system I don't expect it to be amazing, but there are a few confusing choices that bother me because they're frustrating to work around. Here are my main grievances with the system:

- Poor speaker sizing. The factory speakers are 4" under dash on both sides, 4" in the rear shock towers both sides. Never mind that the shock towers are sized to take 8" speakers, they decided to use a little box with a 4" speaker in it. And they're also paper cones.

- Integrated amplifiers. There are three of them, one under the dash (with a speaker in it) and one in each of the boxes in the towers. I don't hate them in principle but it means more work when you want to replace them, which you will at 15W or whatever their rating is.

- Poor speaker placement. You have the 4" under dash speakers, where they are pointed directly at your knees. Then you have the shock tower speakers where they are pointed straight up into the glass hatch. This means that the high frequency sounds go straight into your knees and vanish, or straight up into the glass and vanish.

Now one could mitigate the issues with a speaker replacement and restoring the factory stereo, and it would probably sound pretty good. But this still leaves you with the speaker placement issues and the anemic amplifiers. IMO the only good part about the factory stereo is that it matches the interior and looks really cool. However, I already have an aftermarket stereo that matches the interior well.

Since shortly after I purchased the car I have been using an amp in the passenger storage bin and a set of boxed 6x9 speakers in the hatch area, but this still isn't ideal placement and doesn't really have enough presence. But way back when I grabbed a set of S5 interior door cards and grafted them with some of my S4 parts to make my current door cards, which have the all important speaker placement I want; door speakers. Now it was time to make everything come together.

As far as speaker sizing, I originally wanted 6 1/2" door speakers. However after some experimentation I realized it just wasn't going to be practical to do that without relocating the bottom bolt where the power window track mounts. I was able to squeeze a set in there but only 1/3 of the speaker surface area ended up in front of the opening. So I ended up deciding on a set of 5 1/4" Infinity speakers, which fit much better. I'm guessing that S5 doors can fit larger speakers since they're actually designed to have them installed in this location.”


This is the area behind the speaker cutout on the door card. On Series 5 cars there is a factory speaker here, so in my case I needed to clearance the support on the right hand side with a large hammer. It felt weird taking a hammer to my car, even in a place that no one will see. The limiting factor for space is the bolt on the right hand side, since that’s the lower mounting point for the window track and relocating it would be a project in itself.


Looking through the speaker cover, you can see I managed to get the 5-1/4” woofer mostly in the door opening. Unfortunately it’s only a half-opening from the factory too.

I did have to do some work to the maroon leather insert obviously, to prevent that obstruction:


Crossovers mounted inside the door, tweeters on the door triangle. Tweeters to be shown later.


For the shock tower location:


Twin 8” subs to fill some of the bottom end the door speakers can’t satisfy. Fits like a glove in the stock rear location.

Then I needed the amp. I already have a 340W Alpine that I was using for the boxed speakers. I bought it for $2.50 at a garage sale a few years ago with water damage and it's served me well ever since. I decided to re-purpose that amp for the 8" subs, then in keeping with my tradition of cheap used (and abused) amplifiers I bought one on eBay for the front speakers:


You can tell how much the previous owner cared about it by the way they packaged it (exactly as shown), and how they thoughtfully included the RCA pigtail they sliced from the previous install. But it works and it's enough to power the 5 1/4" speakers, so that's all I'm concerned with. It isn't going to blow the doors off or anything, but the Infinitys aren't terribly demanding and they sound as good with this amp as with the previous one.

I wired it up:


It’s electrically acceptable (has a breaker, appropriately sized wiring, etc) but not remotely acceptable as a final product. One of my winter tasks is going to be making some mounting brackets, then wrapping all the wiring into simple harnesses with interior tape and adding some hold-downs.


With my sins sufficiently hidden under the storage bin lid, I turned to the tweeter mounting:


Also not okay. At the time I was waiting on parts for my 3D printer. Now that I have the parts I realize the whole door triangle is concave, which means I can’t print it. Aluminum replacement triangles are made by LRB Speed (you can see their excellent vent grille in this photo), so I will probably just buy those and mount the tweeter to that with a small receptacle.

The head unit is the Nakamichi MD-45Z that I showed in the first post. I hope this one never breaks because I certainly can’t afford another at current prices. I also have the matching Nakamichi MB-9 CD changer, but I’ve taken to using an iPod so it sits in the basement until I decide if I really want to install it.


I uploaded this originally but it turned out blurry. This is the current state of the interior, which is far from perfect (and far from done) but way better than how it started. The floor mats are from Phase 2 Motortrends. They’re pretty good, albeit slightly too short. I contacted them about it and they are going to make them longer and apparently send me one of the first sets, although it’s been awhile so I’m not sure what the status of that is.

I also don’t know if it would look better if I dyed the plastics on the side of the seat. I’m leaning towards yes, because there would be no maroon plastics left. I can’t undo it though. Decisions, decisions.

That’s all for the interior to date. I still have some small things to take care of, and next up on the list is gauges. The stock oil pressure gauge is not very accurate, often reading low. But the readings from the previous engine to this one are identical so I’m assuming it’s the gauge. The coolant gauge works fairly well... sometimes. The voltage gauge reads two volts low at any given time. The factory spec on the tach is that up to 500rpm off is acceptable, but I guarantee it's further off than that.

My plans go beyond troubleshooting and into a modified instrument cluster, but I have a good amount of progress made on the problem so I will upload that all at once in the future once it's done.

Until next time :)

infernosg
infernosg Reader
12/20/21 2:21 p.m.

Everyone breaks the turn signal cam when attempting to install an aftermarket steering wheel. I did the same, but many years ago so I was able to buy a new clock spring assembly new. The issue is the factory steering wheels have a little spacer/collar on the backside that keeps the wheel from crushing the cam when the nut is torqued down. Every aftermarket wheel hub I've seen excludes this spacer because they all assume it's the same as a Miata. I cut the little spacer off a scrap factory wheel and installed it between the cam and aftermarket hub and have had no issues since. No worries torquing everything to factory spec.

WondrousBread
WondrousBread New Reader
12/20/21 7:12 p.m.

In reply to infernosg :

The new 3d printed part is slightly shorter, which helps account for that missing collar.

Interestingly I had no issue when I first installed the wheel, only later after removing and reinstalling. I'm wondering if maybe the nylon cam was more flexible back in the day and could take the compression.

WondrousBread
WondrousBread New Reader
12/25/21 4:40 p.m.

So now for the last catch-up section, the engine. I’m being a bit loose with my definition of “engine” so I’m also talking about general under the hood, some electrical, some cooling system, and whatnot.

I mentioned before that when I first put the car on stands in my garage it was just to do the clutch. This was because at the time I was under the impression my engine was still healthy. So for the first three years of working on this car, the engine received almost no consideration at all. It’s worth noting I also replaced the transmission with a lower mileage unit.

Anyways, the previous owner told me when I bought the car that the engine had been replaced around 300,000km. There were no receipts and considering the low price (and that I was 18) I just took him on his word. And when I started driving it daily for the first year, the car worked fine. Kind of crappy idle, but nothing major. We’ll get back to that later.

There were a couple modifications I made to the car before the project started, back when I was daily driving. These included a coolant temperature gauge (stock gauge is a bit wonky), a 3 core aluminum radiator, and a Ford Taurus alternator. I would change the gauge, cooling setup, and alternator later so I will show pictures as I come to that.

Otherwise my car’s engine was stock-ish, and I intended on keeping it that way until the rest of the car was perfect. There’s no point in spending time or money on your engine when your suspension is blown and your brakes are leaking.

However, one project I wanted to tackle was converting to an electric cooling fan. The stock setup is a thermo-clutched cooling fan. When the rad gets hot, warm air flowing over the clutch on the fan causes the fluid inside to become more viscous and lock the fan to crank speed. When you start moving, the cooler air reverses the process and the fan freewheels. Above about 3000rpm, the fan freewheels all the time (probably to prevent it exploding at 7000rpm). There is also a very bulky shroud designed to channel the air through the rad. Here’s a picture I found (I dug it out of a write-up I wrote on how to rebuild the intake, so forgive the arrows and circles I added):


You can see the shroud at the front, with the fan just barely poking out. Mazda designed the whole front of the car around this: The shroud bolts to the rad mounts, then you have the intake snorkel come from the airbox across the top of the rad. A gasket on the hood seals to the top of the ram air intake to make sure it’s only inhaling from in front of the rad. Meanwhile the upper rad hose does that weird little dip to go under the snorkel, and the hose from the coolant expansion tank on the driver’s side runs across the rad as well to meet the rad cap on top of the thermostat housing (near the alternator).

I don’t have any issue with this in theory, but I could reach out with the car running and hot and grab the fan with my hand and it would stop (I tested with a piece of cardboard first, don’t worry). This means it was time for a replacement fan clutch. Replacement parts are expensive and an electric fan was alluring, so that’s what I went with. The electric fan also has a few extra benefits:

-              More precise control over when I want the fan to run

-              More space in the engine bay

-              In the future, control the fan with a standalone

The Ford Taurus fan is a tried-and-true upgrade. They’re readily available, flow a ton of air, and the shroud matches the radiator core really well. All I had to do was add some rivnuts to the rad mount brackets and then modify the shroud a bit to clear the hoses:


Width and height wise, the fan is perfect. Even the hoses are fairly close. I just cut out the corners near the hoses, then swapped them into the opposing corner and used JB Weld to fill:


At the same time as I was doing that, I had to find a place to put the temperature switch. The top of the thermostat elbow seemed like a good location since it had an existing boss. After drilling it and tapping for 3/8" NPT:


And then while I had everything apart, I decided to move my coolant temperature sensor from its original place in the upper rad hose adapter to the back of the water pump housing:


It’s a bit tight for space but I was able to tap for 3/8” NPT. Then with an adapter the 1/8” NPT sensor fits right in.


There’s the water pump and related assembly altogether on the engine at the time. You can see the sorry state of my engine bay – wires everywhere, oil leaking from a few places, rusty hardware, etc. Later this would be rectified but at the time I was just worried about getting it back into driving condition.


This picture is terrible, but you can see the Taurus alternator. The stock Series 4 Rx7 alternator is rated at 60A. In practice it probably didn’t produce even that much. This makes it adequate for a stock car, or maybe for race use in a car with no accessories. In my case I wanted to be able to run a stereo with amps, and now use the electric fan. Since the electric fan alone draws 40A when running and 70A on startup, an upgrade was necessary.

The Taurus alternator is an established swap just like the radiator fan. All you need to do is fabricate a simple bracket to allow you to bolt the alternator in place and then use washers to achieve the correct spacing. Then it’s just the wiring (to be shown later) and swapping to a v-pulley. Other popular swaps are the Series 5 alternator (80A), or an FD3S alternator (100A), but the added output from the Taurus alternator is well worth the time spent making the bracket in my opinion.

Around this time I also found this random relay:


To this day I have no idea what it was for. It didn’t connect to anything anymore, so there was no harm in tossing it out.

After I finished with all of the suspension and brake work the car was rolling again. So I pushed it out into the driveway and started to prep it for startup. I had put some oil in each rotor spark plug hole once every so often for the three years the car was sitting, so that was fine. I had replaced all the fuel lines preventatively, and then on the first crank it ran momentarily before pouring copious amounts of gasoline from the lines at the tank.

With a slightly narrower line and more clamps the fuel leak was fixed, and I got the car to start and run. However the idle was still terrible and it had the occasional misfire. Since it had been 4 years since the previous start I wasn’t able to remember whether it was always that way or if it had worsened, but it was time to rebuild the intake (again). This time I documented the process to create an instructional to put on the Rx7Club for others to follow, so as mentioned above I have edited the pictures to include arrows and circles on the relevant parts. I can link the full-write up in case anyone is interested, but here’s the cliff-notes version with some added info about how the intake works

It’s also worth noting that the Rx7 falls prey to people deleting a bunch of parts to “simplify” things, when in reality these parts are often very important for daily drivability. I don’t know why this is the case. I’ve never seen another car community that has people deleting the idle valve, the VVT system, the cold start system, etc. I’ll point these things out as I go, but I’m keeping nearly all of them.


First thing is to remove the intake tube that goes from the MAF under the airbox to the throttle body.


Then I disconnected the OMP linkage. GRM has a fair number of threads on Rx7s, but for anyone not aware the Oil Metering Pump is designed to address an engineering obstacle in rotary engines. The apex seals can’t be lubricated like piston rings, where oil is scavenged. Instead they are lubricated by oil being misted into the combustion chamber. TCW3 two-stroke would achieve this, but Mazda simplified things for the driver by adding a gear driven pump that sucks up crankcase oil and injects it into the engine. This small linkage varies the amount of injected oil with the throttle opening.

A lot of people get rid of this system in favour of pre-mixing their fuel. Nothing wrong with that, but the OMP is a perfectly functional system so I like keeping it. Also, people forget that under deceleration injector duty drops to zero, and therefore so does apex seal lubrication. This isn’t an issue with a standalone because you can tune around that, but for now I’m working with the stock ECU.

I do premix at a lighter ratio just in case, as a lot of people do. This provides peace-of-mind in case the OMP fails. It shouldn't be necessary but it's cheap insurance.


This is another bit of weirdness; the FC is the first generation of Rx7 that was fuel injected (except 1985 GSL-SE models). As a consequence of being an early fuel injection era car, it has some quirks to it. One of them is that the cold start system is partially mechanical. This is what Mazda calls a “thermo-wax”. A little coolant passage runs along a wax pellet with a piston.  When cold the throttle is cracked open by a small spring loaded cam. The piston on the thermo-wax extends as the coolant heats and pushes the cam off a little roller and the throttle is no longer propped open.

Strangely the car DOES have an idle valve. So it’s a bit confusing as to why Mazda chose to implement the high-idle mechanically. This is another part people frequently delete. A standalone can use the idle valve for the same function, but on the stock ECU this leads to you having to bump the throttle manually with your foot.

The next three photos are where the Rx7 intake gets pretty interesting:


These are a set of actuators driven by exhaust back-pressure. At about 4000rpm, exhaust back pressure causes the actuators to retract. This causes the rods in the intake runner to rotate.


On 6 port 13B engines (13B-DEI I think they’re called), you have… well… 6 intake ports. The two center runners are the primary ports, and they are always open. On 4 port engines (12A, earlier 13B, 13B Turbo, 13B-REW) there is a single larger outer port on either side. In the case of the 6 port you have two smaller ports on either side. The bottom is the secondary port that is always open, but the top port has a valve inside that rotates according to the actuator:


When below 4000rpm the closed side of the valve faces the intake port. Above 4000rpm the actuator rotates the valve, and the open side faces the intake port.


The rotor moves clockwise through the chamber, and the intake port arrangement controls intake timing. The upper port is only open at high rpm, which basically gives the Rx7 a sort of VVT, keeping the intake open longer. This system is apparently good for about 20 ft-lbs torque at low rpm (compared to having the ports open all the time), or 20 HP on the high end (compared to having only the small secondary ports and no auxiliary ports.

People often wire the ports open and delete the actuators, which makes sense on a race car that lives above 4000rpm constantly but is a pointless “mod” on a street car. I don’t know why anyone would purposefully delete their VVT system in favour of running the maximum intake timing at all RPM. Interestingly mine were completely gone courtesy of previous owner, so I picked up a set from someone I know semi-locally and installed them.

4 port engines are generally better for all-out power because they flow better. However, those parts are getting very expensive and tougher to find since they are used in turbo builds as well as higher HP NA builds. So for the time being I have no plans to build an engine with a 4 port setup, unless I come across them at a crazy good price somewhere.


The DEI in 13B-DEI refers to the “Dynamic Effect Intake”. The length of the intake runners is tuned so that as one rotor passes the edge of the intake port and the ports are closed, the pressure wave from the port closing bounces back up the runners, through the plenum (called a Dynamic Chamber) and down into the opposing rotor’s intake ports. This causes positive pressure at the intake ports at higher rpm. I believe I read somewhere it was about 2psi.

Turbo engines get all the attention (not that they don’t deserve it for having vastly, vastly more potential while remaining streetable), but the 6 port engine has some really fascinating engineering going on.

So after the intake was rebuilt, I was working on other things for awhile. I’d start the car and let it warm up, but I didn’t drive it (other than around the driveway) due to the trash tires and other project stuff I was working on.

I think it was just after I finished installing the REV TII exhaust I showed in a previous post that my engine blew.

In the least dramatic way an engine can blow, I was sitting in my driveway at idle. I blipped the throttle slightly and just as it passed 2000rpm I could feel something “let go”. Then the idle was super rough, it was reluctant to start, and no power.

At first I was hopeful that something else was wrong, but fuel started POURING from the exhaust manifold. I knew I had a leak at that gasket, but there was so little compression on the rear rotor that there was no combustion going on and fuel was pouring out like crazy.

I made a few efforts to diagnose other possibilities but after finally facing the compression test it was obvious. Rear rotor 0 – 0 – 20 psi.

So after moping around for a few days I started on pulling the engine using the hoist mounted on the cross-beam in my garage:


The Cusco under-brace I have on my front control arms gives me a very convenient way to hold my transmission up when there’s no engine in front.

I found a little cart with four casters, and built a small square pallet for the engine. After taking off the oil pan and pickup tube it sits happily on the cart:


I wanted to disassemble it properly using a stand, but I didn’t have a stand. And at the time any extra money came straight out of the “new engine” fund. So instead I removed the flywheel (with an impact wrench and an absurdly large 54mm socket) and took the tension bolts out from the back. Then I used a dead blow hammer to knock it apart and inspect what happened inside:


Both housings looked like this, but the rear was worse. The brown staining is not unusual and mostly wiped away, but the silver gouges at either end are a problem. I still to this day have yet to actually measure the housings with feeler gauges, but my fingernail tells me they’re out of spec.


Strangely the rotors look fine. No visible damage, so I don’t think they contacted the housings themselves.


This is slightly unclear since I didn’t have a macro lens, but basically on the right hand side you can see a raised bump. This is the apex seal (part of it), and the bumps appear on either side. I’m not quite sure how to interpret this, other than to assume that before this engine was installed by the previous owner it lived a hard life in a previous Rx7. Presumably long term lack of lubrication caused uneven wear.

This is pure speculation, but since all the seals are present and not cracked or broken it’s the only assumption I can make.  The other possibility is maybe it was assembled with really worn parts, but I'd be surprised it ran normally at all in that case.


To add insult to injury, the coolant seal groove on the front rotor has corroded and broken off. The seal itself is broken in that area too, but strangely I didn’t have cooling issues or anything. Especially since it’s on the combustion side of the chamber. Weird.

Also notice the brown buildup in the coolant seal grooves. What does that mean? Ding ding ding, tap water. Not from me, but the previous owner (or the previous previous owner of the engine).

So I had some parts that were probably usable. I also had a complete (but disassembled) 13B in my shed. So between the two I had all of the hard parts I needed other than a front iron. After that I needed about $1200 CAD for the rebuild kit, and then a few optional extras:


-              Rx8 hardened stationary gears (I really only needed bearings, but the Rx8 gears include them and the price difference is negligible).

-              Rx8 e-shaft (they’re relatively cheap and a bit lighter, also measuring e-shaft runout requires v-blocks I don’t have so I can’t measure mine)

-              Porting templates for a street port (intake and exhaust)

-              Lightened and balanced rotors


And other assorted bits and bobs. I needed some measuring tools too. I’m fortunate enough to have inherited some good brand name micrometers, but I don’t have a complete set and good mics are expensive.

I started saving up but finding that front iron was proving difficult. I found someone parting some Rx7s semi-locally. He didn’t have a front iron but he did have a complete engine and transmission. But it had unknown mileage, it was coming out of a 10th Anniversary FC (which were all Turbo models, so this NA engine was not original to that chassis), and he wanted $1000. He could have that if he parted it so the price wasn’t unfair, but it was more than I was looking to pay for a mystery engine.

A few weeks later I saw an ad for an NA transmission, driveshaft, differential, axles etc. Everything someone would sell if they had just done a Turbo engine and driveline swap. So I decided to shoot my shot and just ask the guy if he had an engine he was willing to part with. I offered him $400 and he said he wanted to keep the engine because it gave him a convenient way to keep all the accessories together.

So I offered him $500 and a Rubber-maid bin, and he accepted. My father and I went down the next day and paid for the engine, then we lifted it onto a tire in the back of my dad’s SUV and brought it home.


It’s a bit oily, but it’s an engine. All of my big engine plans went on hold, even though I do eventually want to fulfill them. This engine does something much more important than the engine I was planning to build; it lets me drive my car sooner.


Going to break the post in half here. More to come as soon as I have some time to upload it.

WondrousBread
WondrousBread New Reader
12/25/21 7:43 p.m.

Continuing:


In the meantime I had dealt with the sorry state of my engine bay. Pulled everything out to clean it:


This is my oil cooler after a day’s scrubbing (covered in spray paint for some reason).


You’ll notice the lines are leaky. That’s from this abrasion:


There was a similar problem with the AC refrigerant lines:


Not sure what caused it (possibly the ATF leak from the steering pump), but neither could be reused. So I pulled the entire AC system (minus the interior parts) and boxed it up. It remains boxed up, until the time everything else is working and it becomes a priority to fix it.


The power steering pressure lines (the two traditional ones, anyways) were in good shape. However, the Rx7 uses speed-sensitive power steering and also employs a third line on the rack. This line runs through a hard-line out to in front of the rad, then up to a return line on the pump. I don’t know the technical reasoning behind this, but it’s used for steering feel. My hard-line that runs in front of the rad is corroded beyond saving, and a new one is expensive.

So for the time being I also have de-powered steering. If and when I decide to re-power it, I’ll probably get a generic barb fitting for the rack and then use a generic power steering cooler instead of the OEM hard-line. I doubt the original hard-line actually does much cooling since it has little surface area and isn’t a proper cooler, so I suspect its purpose is actually to increase the fluid capacity of the system.

Then I scrubbed the entire engine bay and sub-frame. I stripped back all that rust on the frame rail, and thankfully it was all surface rust. Then I hit it with rust converter, primer, then colour match paint. After that I polished and waxed everything in the bay. The wax won’t last forever but it will help.

These photos are a bit obstructed, but you get the idea. (Imagine the engine isn’t there yet):


The polyurethane mounts in this image would later be replaced with Rx7 Convertible mounts – 10% stiffer than stock with no appreciable change in NVH. Transmission mounts are also FC vert mounts.

Before I installed the engine I degreased it in my driveway. Allegedly it was out of an 80k km Rx7, and original to that car. Under the grime I found a few things:

Markings on the housings, and they aren’t factory. Also notice the grey RTV on the legs of the irons.


 Exedy replacement clutch, in relatively new shape.


In addition to the marks on the outside of the engine, there were also marks on the oil pressure regulator inside the oil pan. This leads me to believe the engine wasn’t an original 80k km engine as I thought, but a replacement engine. Even better for me I suppose. I assume it’s still stock ports because reaching into the ports with my finger I felt what seemed like the stock casting. Normally with a port people smooth out the flash in the runners and try to make a smooth transition in the bowl area. (It's worth noting that my most recent compression test was something like 110psi when hot, which is very healthy, although of course I didn't know that at this time).

I also decided to run the Exedy replacement clutch since it looked almost new and I like the feel of the Exedy replacement in my Celica.

I installed the engine shortly after degreasing. The intention was to just degrease the engine and install it another day. But then I thought “maybe I should just put it on the hoist”, then “maybe I should just reseal the oil pan”, then “maybe I should just position it in the engine bay”.

Then 8 hours later the engine was installed.

I also unwound all the tape on the harnesses and degreased them. They had been so permeated with oil and ATF that most of the tape was gooey, and whatever wasn’t gooey was crumbly from heat and age. I would later re-wrap them with silicone self-fusing tape.

Since my original oil cooler lines were in need of replacement, I was going to grab O.E.M lines. The quality is unparalleled. Unfortunately so is the price, so instead I got adapter fittings and -10 AN line:


I still want to add a hold down for the rear line since it goes under the steering column, but they’ve been working fine since. Less than $200 for the kit, and I still have 6 feet of line and a bunch of swivel fittings.


This is actually the extra harness I made just for the charging system. The panel on the right is a breaker panel I made to handle the upgraded alternator and the added e-fan:


Unfortunately, breakers also pop from heat and not just from over-current. So I found that when driving both of the breakers would pop after the engine bay got hot. I later replaced them with fuses:


On the right is a 150A fuse for the alternator, and on the left is a 60A fuse for the cooling fan. There’s a heavy wire going from the alternator positive to the fuse (4 or 2 gauge, don’t remember which) which used to be the main ground from my dad’s old ’87 Quattroporte. Not sure why we kept it so long but it lives on in my Mazda. The stock alternator wire is 8 gauge, so I didn’t trust it with an alternator that has double the capacity. Then on the other side of the fuse is the wire going to the battery and the one going to the starter. Meanwhile the top of the 60A fuse has doubled as a distribution block. At this point the whole area is getting congested (since I added 10 gauge wires for the amplifiers and a rewired fuel pump). I have an actual distribution block ready to go in soon, but since the car is living outside right now and it’s cold out, I’ve been procrastinating.

I ended up rebuilding and eventually replacing the alternator due to a charging issue, which turned out to be the belt… I was using a rubber belt and a single pulley, when I should have been using Kevlar belts and a dual pulley. Slippage was causing smoke and heating up the alternator, which kept tripping the regulator. My completely rebuilt alternator is now 170A though, so I got another upgrade out of the whole fiasco. I also painted the casing wrinkle-black to match the intakes and water pump assembly. Speaking of which:

Water pump, housing, and thermostat neck all painted. You can see the intake runners in the background also painted in wrinkle-black.


Lower intake painted as well, also the runners were polished to 80 grit.


I didn’t port match since Mazda has so much engineering going on in this intake that I didn’t want to mess with it. I understand the lips have anti-reversion properties as well. I did however decide to grind that big nub in the smaller runner down to flat. I think it’s to give the Air Control Valve stud on the other side more meat to thread into, but I am not worried about it. I didn’t go for a mirror polish because I’m told that some turbulence at the surfaces helps fuel atomization.


Dynamic chamber got the same wrinkle black as everything else, and then I polished all of the fins back down with 2000 grit sandpaper. I spent some time with VHT caliper paint (gloss black) repainting the inside of the lettering in the casting.

All of the hardware was replaced with fresh metric 10.1 hardware, in that nice fresh gold zinc colour. The only thing I am not happy with is that it all has 13mm heads instead of the stock JIS 12mm or 14mm. I don’t know how I feel about 13mm hardware on my car. I tell myself I don’t care, but I definitely care.

I didn’t paint the throttle body because it would need to be completely disassembled and that’s a pain to do. Instead I just cleaned it as best as I could and polished off any obvious oxidation.

Along the way I got all new oil metering pump lines (and rebuilt the pump again for good measure), new fuel hoses, new vacuum hoses, etc.

Since the original fan shroud is gone, the original coolant expansion tank location no longer makes sense. It originally sat where my fuse panel now lives. So I got a generic tank on Amazon and relocated it into rear passenger corner by the charcoal canister:


This greatly reduces how far the tubing has to run and this location isn’t used for anything (other than the stock cruise control) so I don’t have to lose any other features to put it there.

I poked a hole in that vacuum cap since the stock tank is vented.

After that the engine bay looked something like this:


The other thing I wanted to do is retain the stock airbox and intake. From the factory Rx7s have a cold air intake already, so unless you put some serious engineering into it any custom solution will fall short. I notched the end of the snorkel slightly so that it fit around the aftermarket radiator (which has a 60mm core). Then I took out one of the mount points in the center (curiously the radiator has provisions for this mount point, but it doesn’t actually fit due to the increased core depth).

Much better than a cone filter sucking up hot engine bay air.

I also replaced the injector leads and some other damaged connectors. Then when I re-wrapped the engine harness I used fabric TESA tape, which I like better than the silicone tape: 


The incongruity with the silicone tape I used on the body harness bothers me. But I also don’t want to pull the body harness again to re-wrap it, so for now I’ll live with it.

After that I took the car for its first drive in four years (this June), and it was terrifying! First thing was that I couldn’t stop, because of the brake booster situation. I already explained how I swapped the Subaru Legacy MC & booster earlier, so I don’t need to go into that. But I also had serious hesitations from the engine, no power, etc. I had a weird situation occurring with the timing. I could only get it to time properly at the extreme of the adjustment on the crank angle sensor, and also when I got on throttle it would drop a few degrees and the engine would bog before picking back up. I’ll copy directly from a previous post I made on the Rx7Club:

(note: Rx7s have two spark plugs per rotor, one Leading Spark and one Trailing Spark. Leading is a waste spark setup on Rx7s, so they always fire at the same time. Timing is measured relative to the leading spark on the front rotor, or L1. Then you measure T1 to verify the “split”, which is the number of degrees between the firing of the two spark plugs. On a stock engine there are two marks on the main pulley, so when you align the leading mark the trailing mark should self align.)


"I realized that L1, L2, and T1 were firing at the same time. Meaning that the ECU was locking timing at zero split. The fact that it was way at the extreme of the adjustment suggested it was also changing from the usual 5 ATDC lead timing.

I dug into the training manuals (Foxed.ca), and found a page that describes what the ECU does with timing under various conditions. Most are related to the Automatic models but there are some for when the AC is running and when the Power Steering is turned.

When the AC is on, split becomes zero and both Leading (L1 and L2) and Trailing (T1) are locked at 10 degrees ATDC.

So I pulled up my carpet and back-probed the ECU. Pin 1E is supposed to be below 2.5V when the AC is ON, and around 12V when the AC is OFF.

My pin 1E is constantly below 2.5V. Come to think of it, back when I had the little condenser fan for the AC it was also constantly running. Presumably there's a switch someplace that tells the ECU when AC is on and mine has failed in such a way that the ECU is always told it's running (and presumably it's been this way since I got the car, four years ago).

The reason for the weird bog I had when getting onto the throttle was this: The ECU only does this adjustment at idle. So at idle I had adjusted the CAS all the way to the left to make it fire at the "stock" time (albeit with zero split), but the moment I got on throttle it would detect that I wasn't at idle and drop like 5 degrees of timing before advancing properly.

I added a temporary jumper for pin 1E to give it 12V and my timing now works as expected, with the CAS landing right in the center of its adjustment. Split is normal, advance works."


Like most temporary solutions that jumper has become permanent, at least until I end up finding what switch or relay is causing it to think the AC is on all the time.

So with that weirdness sorted, the bog coming off of throttle was fixed. But I still had the issue with hesitations throughout the RPM range. Since I was back-probing the ECU, I started checking all of the pins. They all came out properly except something seemed weird about the MAF reading. It was in spec but something felt funny to me.

I removed the MAF and started measuring all the pins as per the FSM. Again, it all seemed normal. But that wasn’t enough for me so I cut through the silicone sealant and uncapped the MAF:


I don’t have a macro lens so this may not show, but all the solder joints are cracked. I can’t see how this would’ve happened normally, so probably courtesy of the previous owner trying to remove the connector on the MAF for some reason? I tried to reflow the joints but like every other solder joint on this car it didn’t want to co-operate for some reason.

I remembered I had a spare in the shed somewhere though, so after 20 minutes of digging and lifting boxes full of 13B parts I had my solution. After installing it the car drove really well. Since then I drove my car on and off throughout the summer. I would later replace the transmission and diff mounts with new, which helped the ride immensely.

So now that brings us mostly up to date with the engine. I still have a lumpy idle since I’m waiting on seals for the 6 port actuator shafts. Without them I have a minor vacuum leak. They’re NLA, but someone on the Rx7club has been kind enough to mail me some seals that may work and I’ll be the guinea pig that tests them out.


You may be thinking that’s a lot of work to end up with a stock-ish Series 4 NA Rx7, and you’d be right. But I’m working towards getting everything else on the car to work perfectly before I start trying to make more power. And since turbo is the easiest way to do that, I’ve been slowly accumulating the necessary parts to go turbo. I don’t know what exact form that will take, but a standalone is necessary so that will be coming first.

This brings us more or less up to date. Future updates will come as I do more work, or possibly as I find more old pictures of things I have already done :) Until next time

dannyp84
dannyp84 Reader
12/27/21 10:44 a.m.

Can you hook your starter up to the new engine to compression test it?

Run_Away
Run_Away GRM+ Memberand Dork
12/27/21 12:55 p.m.

I love your attention to detail! Keep it coming

WondrousBread
WondrousBread New Reader
12/27/21 1:39 p.m.
dannyp84 said:

Can you hook your starter up to the new engine to compression test it?

Well at this point the new engine is in. I could (and should!) have done that, but I just installed it and hoped for the best.

I'm getting 100-110PSI on all faces now, so it seems to be very healthy :)

WondrousBread
WondrousBread New Reader
1/1/22 5:21 p.m.

(I've never tried this before, but I'm directly copying and pasting the update I made today on Rx7Club straight into the post editor here. It looks like everything is working but if the photos don't copy over I'll delete this and manually upload).


So a few weeks ago I ended up picking up an extra set of windows, and I finally installed them. Now I have all un-tinted glass, so even if I do prefer tinted windows at least everything matches.


You can see the border on the edge where the tint meets the bare glass.


I actually prefer the un-tinted glass in terms of looks, but the heat and light rejection of the tinted glass is hard to beat. Especially since I currently don’t have air conditioning.

I also started on the restoration of the power steer system. I don’t actually mind the feel of the de-powered steering, but I have some safety concerns.

With a manual rack it’s obviously easier to steer because of the 20:1 ratio vs the 15.2:1 ratio. This means the power steer rack is harder to steer at any given time. People say it’s a pain in the ass to park with a de-powered rack but honestly it isn’t that big a deal.

What is a big deal is that you are required to maintain a really solid grip when cornering, especially if you’re braking hard or accelerating out. There’s one particular corner on the way to work that comes to mind, where I need to come off a road with a left-hand bend and make a tight ( <90 degrees) right turn onto a narrower road that is immediately followed by a right-hand bend. This leads to a very uncomfortable experience because you need to use both hands and maintain a death-grip on the steering wheel, while also slowing down drastically compared to a power-steer car where you can throw it into the corner a bit more. This also leaves me concerned about the possibility of having to stop suddenly or swerve around an obstacle and not having a good grip on the wheel.

Basically, the de-powered steering conspires to make the car slower under similar conditions than it was with power-steer. This probably isn’t an issue on a race track, but on a road where anything can happen it’s really not worth it to de-power Series 4 steering IMO. The Series 5 17.4:1 racks are probably a better candidate.

The trade-off is that the engine bay gets more cluttered and I have another fluid that can leak. I didn’t care too much about the ~10 pounds of weight difference, but the added clutter in the engine bay is unfortunate. Oh well.

The FC also has a really advanced (for the time) power-steer system. It uses a sensors to detect steering angle, engine speed, and wheel speed. It has a third connection on the rack for something called a “reaction tube” that goes back up to the pump. The pump meanwhile uses a computer controlled stepper motor (and other stuff I’m certain I’m forgetting) to vary the amount of assist based on all the above sensor readings.

I’m not about to pretend I understand 100% of what it’s doing, but the end result is the best steering system of any car I’ve used (the NC Miata is close). While parking or at low speeds you get 100% assist to make driving easy, then as you pick up speed the assist decreases so you get better feel. Meanwhile it also uses the steering angle to determine when you’re throwing the car into a curve, so that small quick inputs are easy but larger inputs decrease the assist to give you better feedback.

Anyways, that’s the sort of thing I love about this car. A check-engine light was completely unimportant to include, but one of the most advanced (for the time) power-steer systems using a bunch of sensors and a computer was imperative. Mazda put a lot of effort into making this a driver’s car.

Apologies in advance for the flash-photography to follow. It’s pretty cold out so we swapped cars around so I could work in the garage. The trade-off is the terrible lighting.

I originally pulled the power steering pump because I needed to replace the front cooler line. I wanted an OEM line but they’re now NLA, and also something like $350 USD. It’s a quality piece though, so I wouldn’t have been too upset about paying for it if it were available:


So I decided to take a look at my current line:


First off, you can see some repairs have been made. The soft-line at the top (which comes from the rack) is factory. The shiny fitting it connects to is not. There was originally a fitting there where it connected to the hardline, but instead it now connects to another hose. This is a repair I had done because that section of line was very rusty and started to leak. At the end of THAT hose is ANOTHER hose, which was there when I got the car. So I have a hose connected to a hose connected to a hose connected to a hardline (which did not originally have a flare and fitting there). Then the line is fairly rusty and loops back around to go back into the engine bay. One of the factory mount points is completely gone. When I removed the other mount point, you can see what the line is supposed to look like:


The correct thing to do is to replace this line. However I don’t have the correct diameter of line. So I ended up just scraping all the rust I could from this line and inspecting for any holes. Finding none, I decided to just rust-convert & paint the line before giving it a try. This is a low-pressure line and none of the rust was too deep, so I’m not terribly worried about it. If it leaks then I’ll investigate other replacement options.


I'm glad this area is hidden under the cooling panel ducts, since it's ugly to look at.

I grabbed the power steering pump, and strangely the pulley was missing:


I can’t imagine what would’ve possessed me to store the pulley separately but apparently I did.

I dug through all my parts and couldn’t find the original pulley. However, after looking through the extra car’s worth of parts that I keep in the shed, I found this:


It’s in need of some cleanup, but it will do. First I separated the center hub from the pulley and inspected it:


Rusty, but nothing too bad. Popped it into some CLR along with the other pulleys I’ll be installing. After removing them and scuffing off anything loose they were ready for paint:


Top left is the power steering pump pulley. Bottom left is the AC pulley that goes on the front stack, bottom right is the power steering pulley for the front stack. I’d like to leave out the AC pulley for the time being to avoid having it on there while not driving anything, but that would mess up the spacing. For now I’ll install it. Not pictured is the tensioner pulley.

I also masked off the little hub for painting:


Everything got Duplicolor flat black engine enamel:


This little toaster-oven is really convenient for baking parts. The top gets warm enough to dry the paint first, then I can pop the parts into the oven to cure them at full temperature.

To be continued shortly.

1 2 3 ... 8

You'll need to log in to post.

Our Preferred Partners
Q3Nuj51DLT8eWnN27O74KGId0d21X5SMrvIYBA7qIC8JCQZYLfFr4eFMzENZJx9G