Since this forum is now here and since I was about to embark on a major rework of my race car, I thought perhaps I could post some progress reports. I will need to set up a photo bucket site I suppose as I don't think I can post pics here directly from my computer?
The back story is that a have a Hornet mini stock, which is an entry level circle tracker that I mostly race on my local 1/4 mile oval, with the odd excursion to Washington state for some outlaw road races. Two weeks ago my engine let go spectacularly coming out of turn two. I havent pulled the pan yet but there is an impressive collection of small parts falling out of the hole in the pan. I dropped all my oil right there and most of the 20 cars behind me hit it. It was carnage.
So I decided to rebuild it as a proper mini stock, which is the class above me, and which I have raced as a sort of demonstration event once. My car has a decent cage and a fuel cell, but other than that it is pretty stock. Changing classes let's me make suspension and some engine mods, and run in a much cleaner class. Along the way I want to try some sanctioned road races, so I am hoping some of you road racers can tell me what I should aim for in that regard. I have posted a link to my new rules below.
I plan to start now, since the engine is out anyway, and take the rest of the season off. There were only 4 races left.
http://www.agassizspeedway.com/miniprint.pdf
Can't say much for your class specifications, but get a photobucket account, yes, and hotlink. I want to see the damage soon, so take lots of pictures.
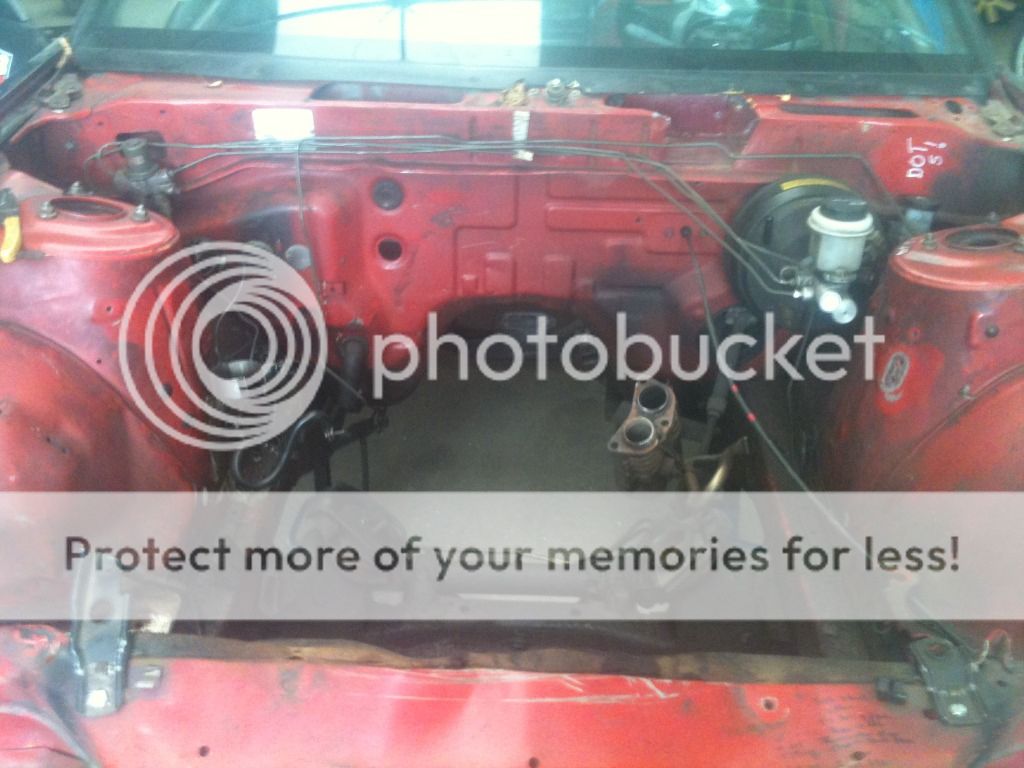
So I yanked my motor and found as I expected that I threw a rod. All the hornets do that eventually because we throw in a $150.00 junkyard motor with no attention at all paid to the bottom end, and the rods eventually get starved for oil and give up the ghost. I am going to have to build this next one properly.
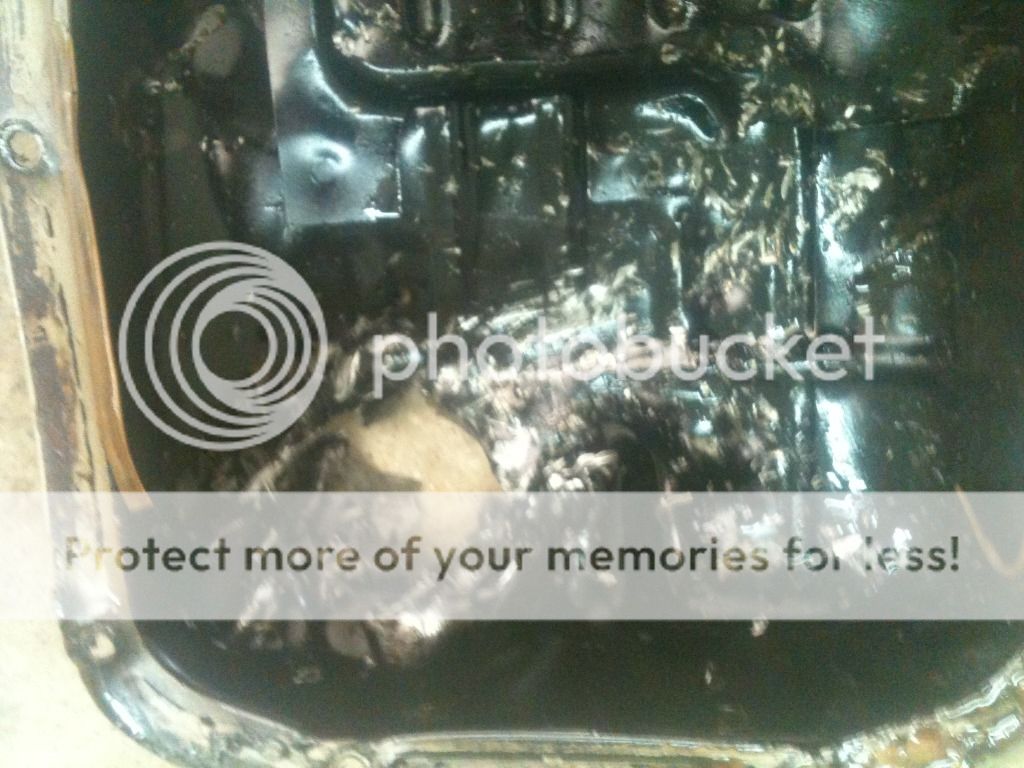
Here is my well ventilated pan
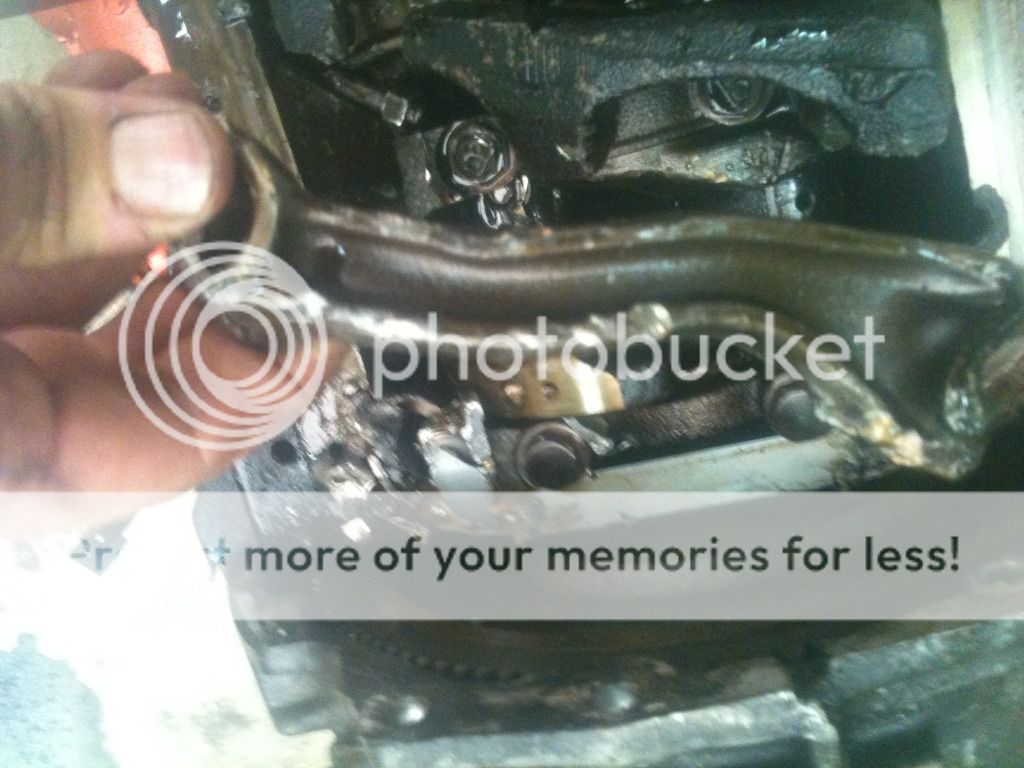
Nicely reworked number 4 rod
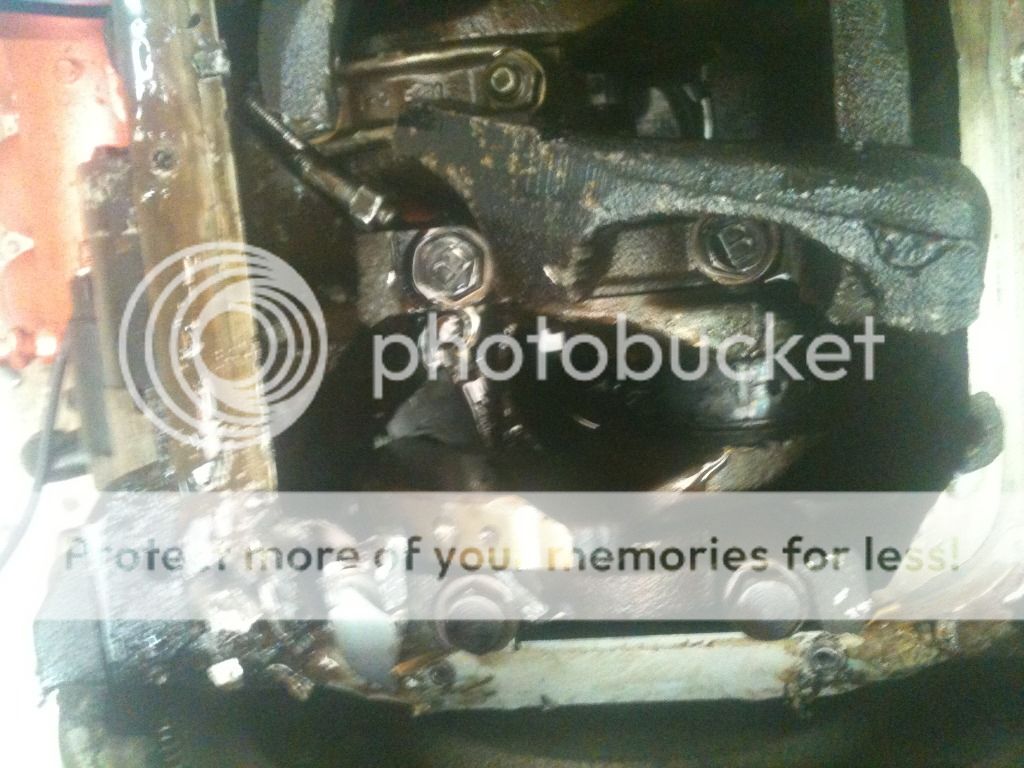
And a large chunk of crank girdle removed along with the piston. If you look closely you can see the blue blue crankshaft
This is going to be slow because even if I did not have a family and a business, I have broken my golden rule of projects and taken on more than one for work and one for play. Work would come first you would think, but I have just been walking around those two. (high speed aggregate thrower and a trencher rebuild)
So I went and bought the bus and I have a list as long as my arm of mostly small stuff, but still time consuming. And then I am also picking away at my vintage racer as well as now starting on the mini stock.
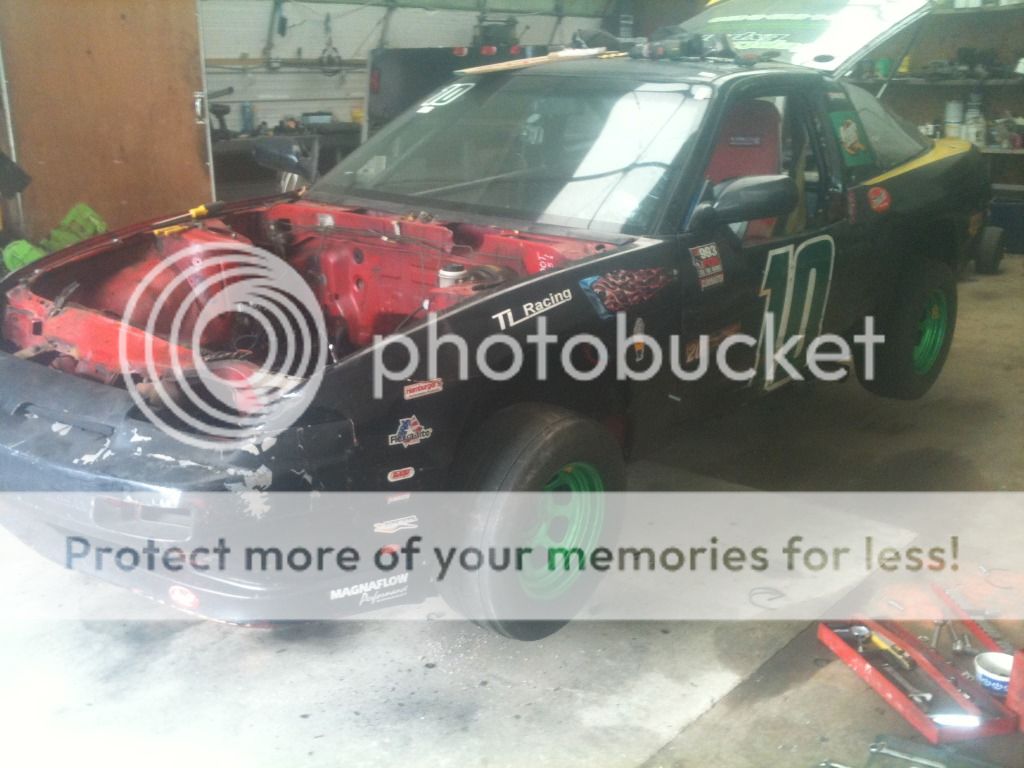
But since I have a poorly developed grasp of priorities today I went out and finished stripping all the wiring and the rest of the under hood accessories like air box, power steering etc from the mini stock.
Notice my shiny new wheels. The plan is to paint the new car white with my green company logos to match the wheels.
Some evening next week I am going to pull the fuel cel and then pressure wash the engine bay and underside and get started on the rest of the frame tubes. I think I have decided to scale the surgury back a bit to maybe keep the car somewhat eligable for the Chump type races.
I will be following this thread!
I finished stripping my car out and got to work with the sawzall.
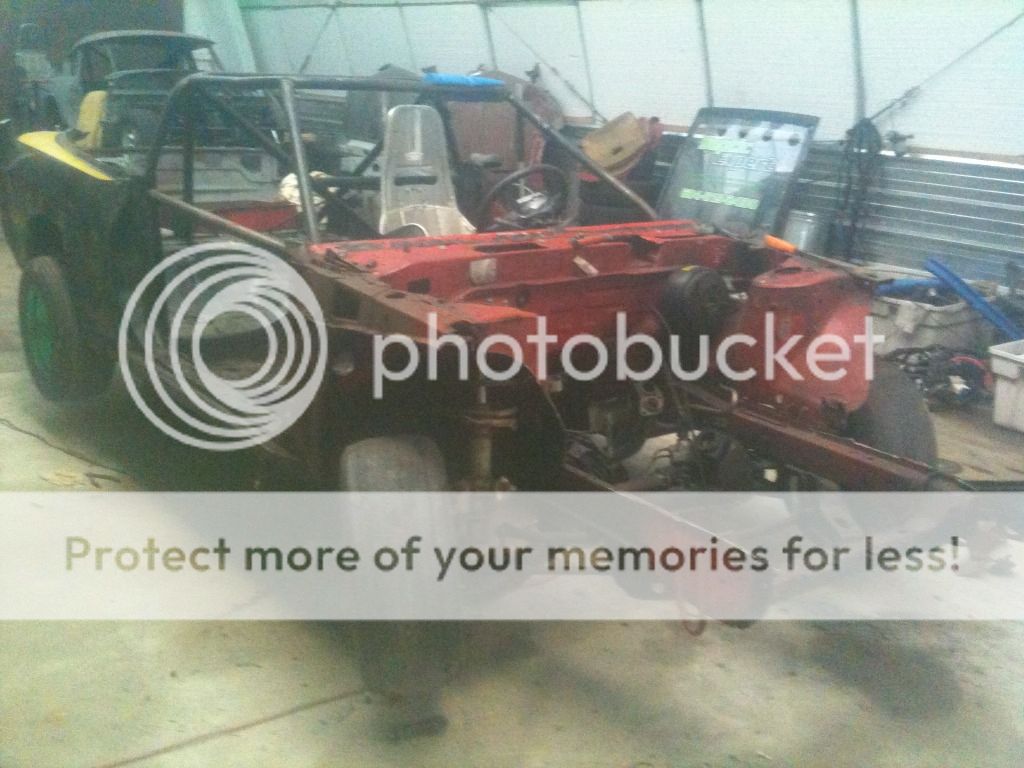
Stripped a few pounds of unsightly fat from the front end.
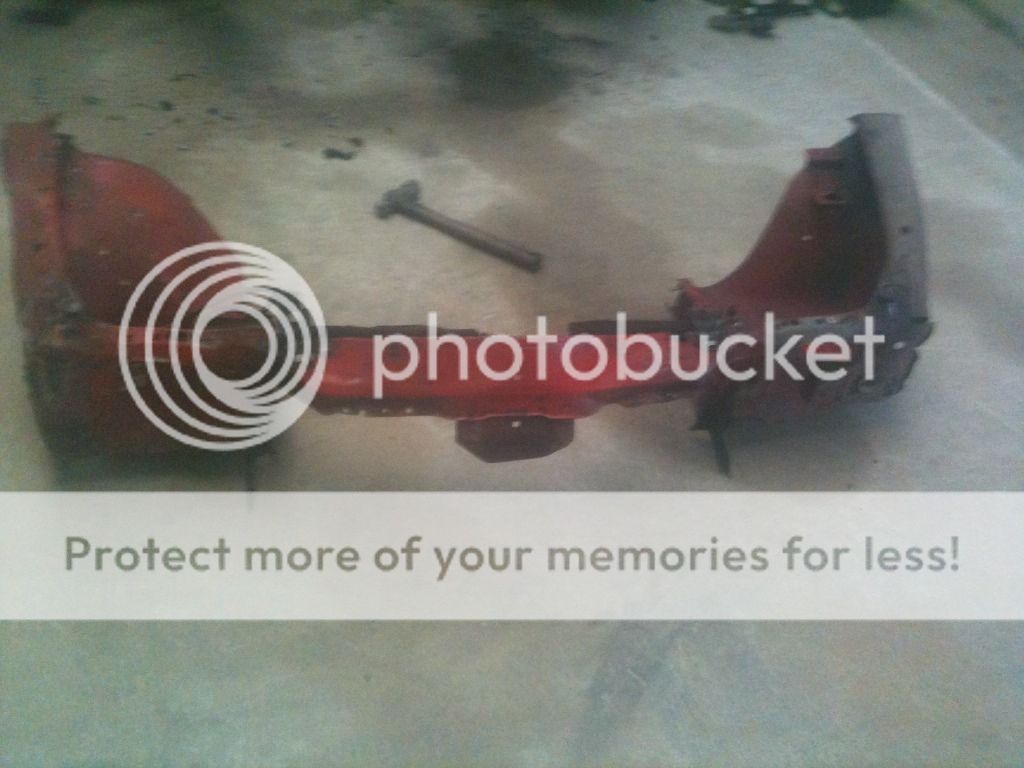
Here is the result of using the tie down loops on the frame regularly. I guess Nissan never figured anyone would do that...
Next step is to weld up the frame and add two new tubes to tie the front end together.
Sorry about the crap photos. Time for a new phone.
Meh, I can see the pics and I am using a phone to look at them.
finally, someone uses a S13 for a good reason!
DukeOfUndersteer wrote:
finally, someone uses a S13 for a good reason!
My thoughts exactly. Looking forward to see this finished/reworked.
I had to push this to the back of the shop for a couple months while I built a new service truck for work, but I am back at it again.
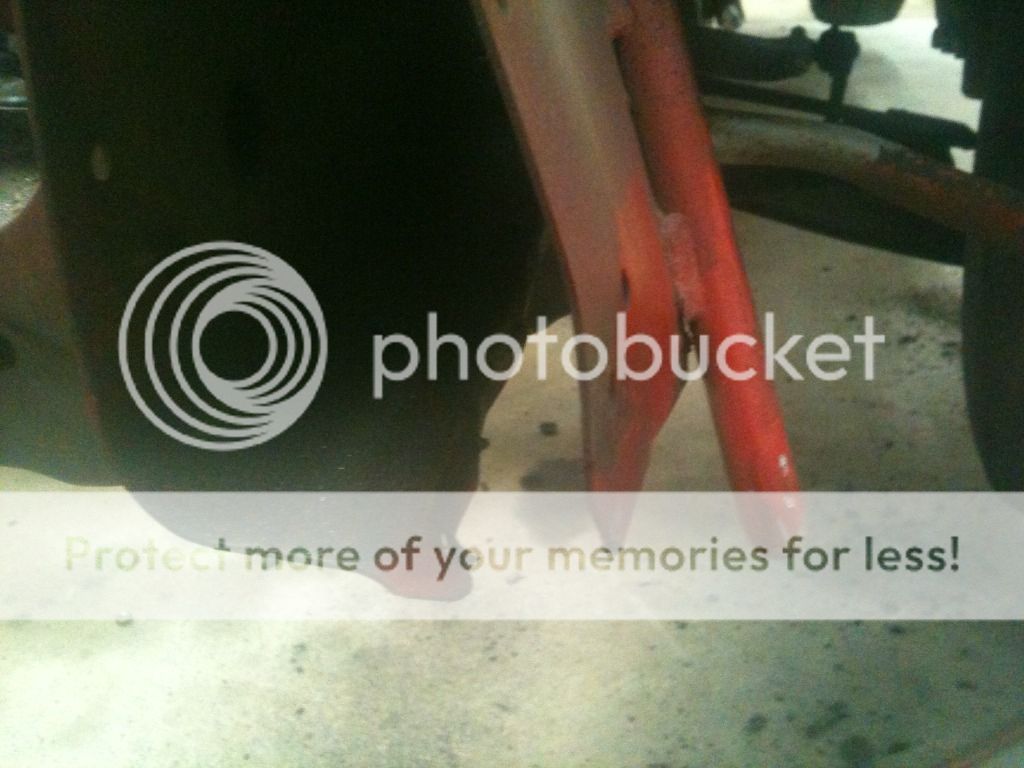
Bent up the new front down bars which I ran through the shock towers back to the front hoop. The front will become the mount for the radiator.

Welded the tubes in after I cut off the front of the fenders and shortened them
 I cut off the front of the frame rails because they were pretty chewed up and boxed them in. I am spending very little money on this car. Most of the steel is just what I have lying around, and I still had a few lengths of DOM tubing. I have bought a new radiator, and I need a larger fuel cell , a reprogrammed ECU and a header. Hopefully thats it other than tires.

 Lifted the car up and patched all the rust holes in the frame. This was never what you would call a show car. It was actually abandoned in a parking lot and a friend bought it from the tow truck driver who hauled it away. True $500.00 chumpcar.


Cut the trunk floor out and boxed in the frame
Our rules make us bring the rear down bars from the top of the hoop to a point behind the fuel cell. So I tied in the rear shock towers into the middle of the X. Not really sure if that was the best way. I might do a horizontal X as well from the front suspension to the back like a late model, but thats a lot of extra steel, so I am mulling that over.

I threw a motor in to see where it would sit so I can figure out the front end and the rad. The nose is a cast off from a friends late model.

We are using this car for a crap can enduro in March, so I decided to make it look more stock, at least for now. To that end, I built a highly engineered cruchable bumper to fit the original nose. I have also bent up some extras so I can quickly make my car look as if it never rammed another car or a concrete wall at high speed.
Tied the two tubes together with a bar that will double as a rad support. The nice thing about doing it this way is pulling the motor is a breeze now.
 " />
" />
Finished up the forest of door bars that I am required to have for the mini stock class.
<img src=" " />
<img src="<a
" />
<img src="<a
<img src=" " />
" />
Gusseted some of the main corners
<img src=" " />
" />
Now that the cage is done, I have painted the interior. Lipstick on a pig as they say. A fifty footer at best.
<img src=" " />
" />
<img src=" " />
" />
Picked up an old street stock fuel cell from a friend to use in the enduro we are doing in March. Used my mini stock cell last year and we had to fuel up every hour. With a five minute mandatory fuel stop, that cost us 2.5 laps every 60 minutes. Hopefully this year we can go a full 4 hours.
<img src=" " />
" />
Built a mount for it. Looks heavy but its all thin wall tubing.
<img src=" " />
" />
More lipstick.
<img src=" " />
" />
Now comes the fun stuff. Wiring, engine(see first posts) dash.....
looking good! Hard to tell from the pics - is that a VQ motor in there? SR? KA? Inquiring minds want to know!
Its a KA24DE. The car is a 1989 which came with a SOHC KA24E but I blew that one up almost immediately. I can run any NA Nissan motor I want, up to 2.4 liters, but the KA twin cam seems to offer the most bang for the buck.
Nice to see some progress. Cage and fuel pump cradle look great!
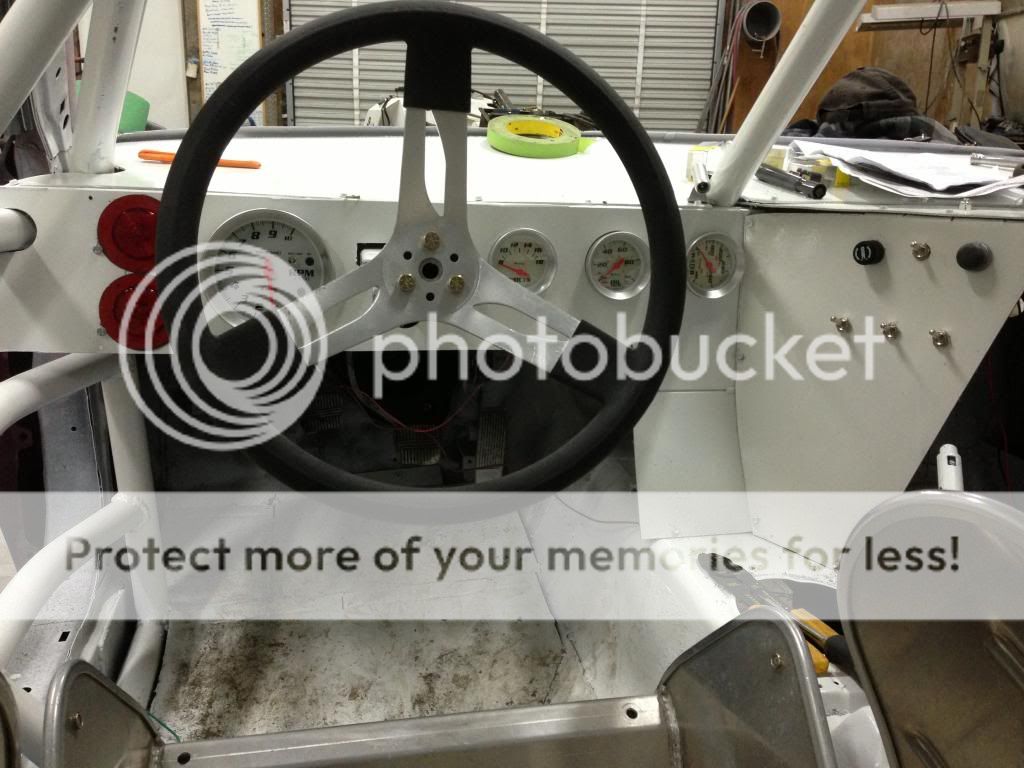
Started work on the dash and steering. Picked up a detachable steering coupler with all the hardware and aluminum wheel for $75.00 on Ebay. No idea how they do that.

I solved my concerns about not having a collapsible steering column by adding this telescoping section. I realize now that the car didn't have one anyway. I think Nissan just relied on the 3 U joints folding on impact. I kept two of the three and the rack is positioned quite a bit lower than the column so I guess things should just crumple under the car on impact. Hope I don't find out.
And now we can adjust for different drivers as well.


Built a dash out of some scrap aluminum.


Cheapo Autometer knockoff guages.......

Nice work, I love circle track cars for their simplicity, will be following this one!
Nice work so far. One thing I would do is bend at least a 90 deg lip on the bottom if the instrument panel and the center piece facing you. God forbid you hit something hard you don't want you legs to go flailing into that edge. I had a friend do that and luckily just damaged his firesuit.
I actually had the same thought. I moved the dash closer to the front of the cabin and I will put a return on the sharp edges and some padding.
Wally wrote:
Nice work so far. One thing I would do is bend at least a 90 deg lip on the bottom if the instrument panel and the center piece facing you. God forbid you hit something hard you don't want you legs to go flailing into that edge. I had a friend do that and luckily just damaged his firesuit.
Built a steel battery box out of a trashed heater and some lawnmower parts
<img src=" " />
" />
Some rattle can red and it actually looks not too bad! I plan to mount it behind the drivers seat when the paint is dry tomorrow.
<img src=" " />
" />
Also finished the dash today. More scrap aluminum courtesy of an old beverage truck that I put together as a work truck.
<img src=" " />
" />
Nice work, you don't see many mini stocks done that clean around here
Spent some time installing the guages and switches. Big red lights are the idiot lights for oil and water. They are only 2 inches and should be in a rubber grommet, but I used the wrong holesaw bit. Crap. So I JB welded them into a couple of big washers to take up the space. They are painted red because that was better than the previous rust color, and because I still had the red paint can on the roof from doing the battery box.I have them on the far left because this is mostly a roundy round car and I spend a lot of time looking in that direction.
Speaking of the battery box, here it is in its new home.

If you look on the dash the top left knob is the brake bias control. I had this adjustable unit on the shelf since forever, so I put it to use.
<img src=" " />
" />
Its not meant for installing in a dash so I took a drill bit extension to move the control knob and bolted the valve to the underside of the dash.

Picked up this neat little relay box from a guy on another forum to simplify the wiring. It is pretty much plug and play with the Nissan engine harness.
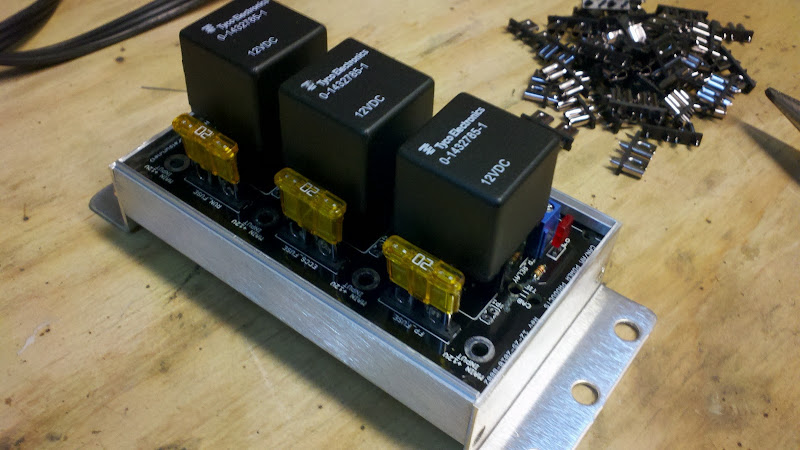
Means I don't have to wade through this mess and figure out what goes where. Not sure I would have survived the exercise.

Here is the new box and ECU in their final resting place. No more laying upside down under the dash trying to trace a wiring issue.

Re-bearinged my best second hand motor. I have a race in three weeks so I don't have time to build one up. After the one road race I plan to pull it and build one properly.

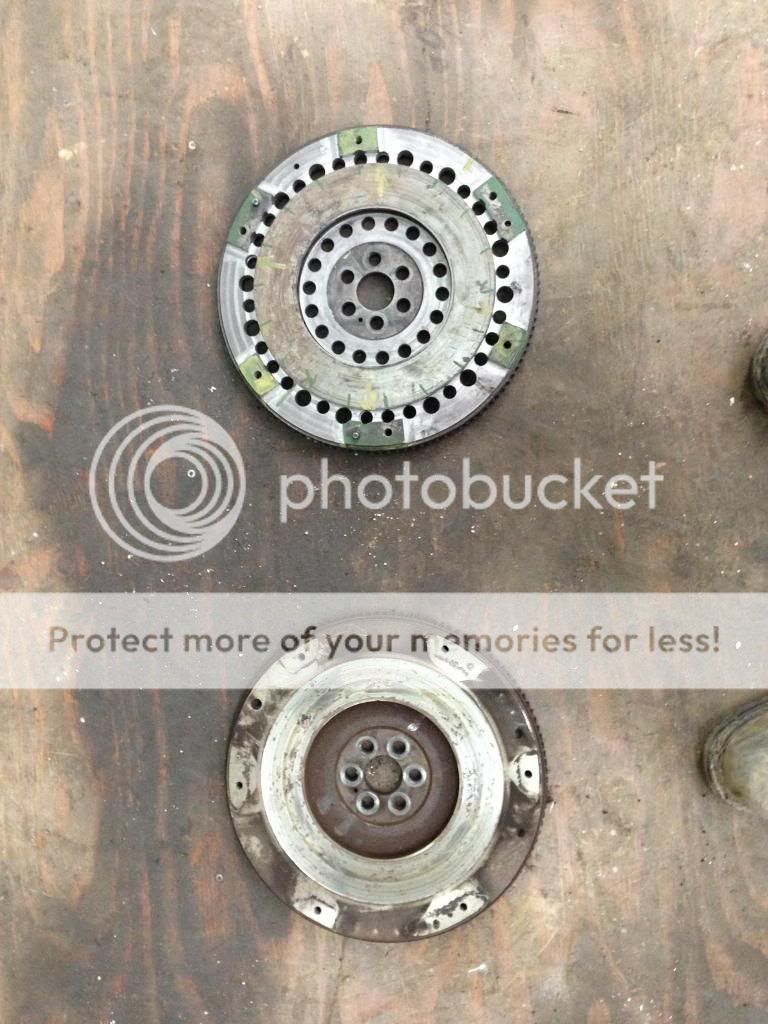
Dropped the stock flywheel off to a machinist for him to lighten. He went to town on it and this is the result. Haven't weighed it yet, but I guess around half of stock.