I have my Starcraft Supersport in the garage for some winter upgrades and part of that is filling all the excess rivet holes in the gunnel and painting it. What method would you guys recommend for filling a dozen or so ~1/8" holes in .08 aluminum? I'm not 100% sure on that thickness but that's what I saw in a quick google search for aluminum thickness on this boat. It's around there, anyway. My current idea is to back the hole up with aluminum tape and use something like Hy-Poxy H-450 Alumbond to fill in the holes. Wait for it to cure then sand and paint. Reasonable? Or sure to fail? It doesn't need to be perfect and if it lasts 10 years I'll be thrilled.
In reply to dculberson :
I would use a closed end pop rivet, possibly with a little epoxy around it.
In reply to TurnerX19 :
My hope is to have the metal be smooth and paint it without any excess rivets. I don't mind them if they're doing something but a scattering of rivets with no function bothers me - at least on the top side of the boat.
If you sand smooth, I'd be worried it would have nothing to attach to and would just kinda pop out. Especially with the boat twisting on the trailer or water, or the metal expanding in the sun.
Find someone that tigs and bribe them with beer?

mtn
MegaDork
2/21/22 12:51 p.m.
Our '82 Lund has Bondo on the gunnel, done by the prior owner. He did a lot of questionable things though, so I'm not sure I'd recommend it, but it has held up for at least the 20 years that we have owned it. Looks like E36 M3 though.
I don't have a ton to offer than to say I would avoid welding in this case and lean towards an epoxy or composite based solution.
Where are the holes located on the boat? I have welded a boat hull before but the repair turned into a recurring repair due to the strength loss in the HAZ (heat affected zone). Take the already low strength of a 5000 series aluminum which is what the boat is likely constructed out of and cut that in half. That is your new tensile strength where ever you weld and the surrounding HAZ.
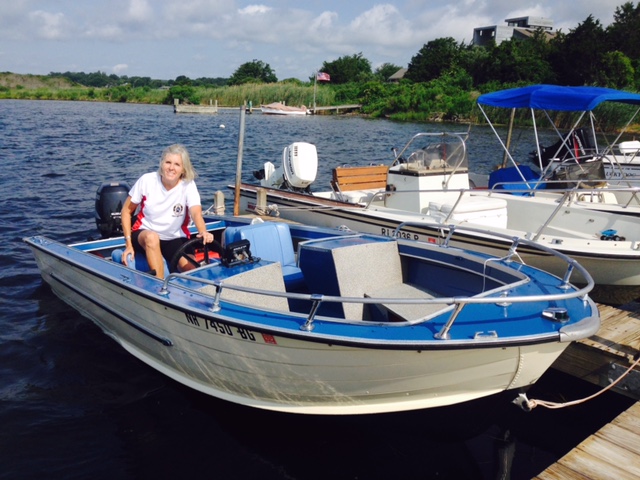
The holes are all on the top of the gunnel, or gunwhale, the top of the sides of the boat. Where you would attach things like bimini tops and cover supports. I don't know how much flexing the gunnel does but it's only about 4" across. It's the blue area on this boat, pic shamelessly lifted from the web:
What about using aluminum flashing, make a bubble in it, and taping that to the underside of the gunnel? That way the epoxy would make a mushroom shaped fill that I could then sand flat on the top.
Can you make lemonade out of lemons and turn them into something functional? Maybe rivet some diamond plate on top as a step or something like that?
In reply to dculberson :
Some sort of tape may work, yeah. I'd make sure I scuffed the hell out of the underside before injecting the epoxy (or pouring it, or however you plan on doing it.
How many holes? Could you take it in and have them welded closed?
How about some of that low-temp brazing stuff they advertise? I have used it with hideous results, but someone with half a brain might be better at it than I. You've probably seen them at some expo where someone stabs an ice pick through the bottom of a soda can and then patches it with a MAPP torch and one of these brazing rods. They sell those rods at HF.
I was trying to braze aluminum that was too thick, I think. It was 1/8" aluminum I-beam and it was wicking the heat away too fast so I stepped up to an acetylene torch. If I got enough O2 that it wasn't sooty, it was too hot and it just destroyed the aluminum. I got one good bead only to realize that the I-beam was now a hockey stick.
If you can get to the bottom of the hole, I wouldn't hesitate to epoxy something under it, then bondo or epoxy the hole from the top. I think if you just epoxy the hole it won't have enough meat to hold and it will eventually vibrate loose.

You guys started a thing.
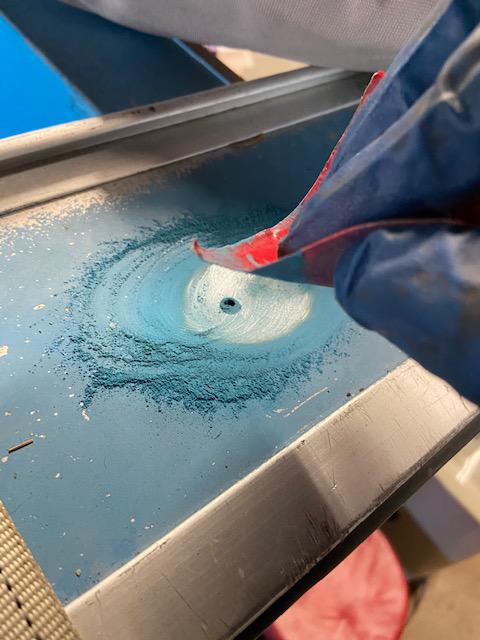
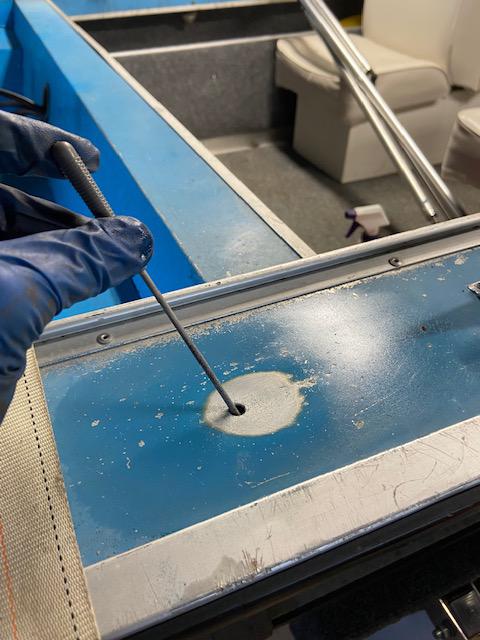
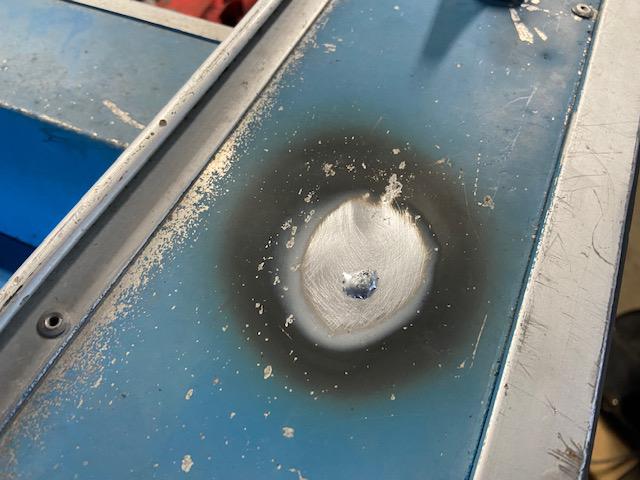
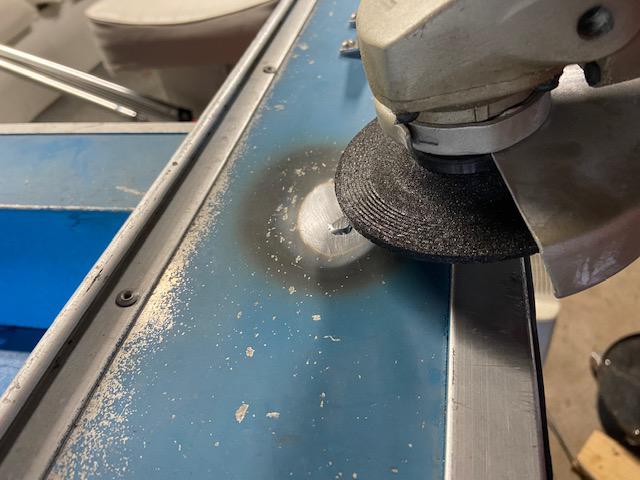

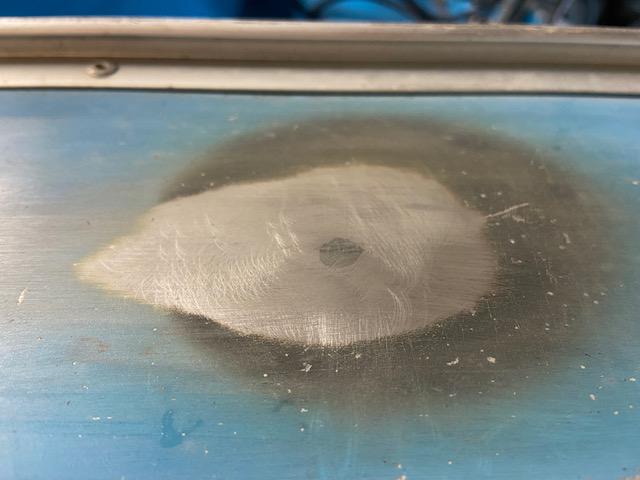
I bought the highly rated Bernz-o-matic brazing rods, and gave them a shot. It's a challenge being able to back it up so the brazing material doesn't fall through, but I made a tool to back it up by using two different diameters of steel tube and a smooth headed bolt trapped in the top and a couple springs in the bottom to force it up into place. It works well but can be a bit fiddly. After that my biggest issue is the warping - the sheet aluminum gunnel is confined by extruded aluminum on the inside and outside, so it warps pretty badly and I don't seem to be able to get a handle on that. I can hammer it flat-ish but it isn't as flat as before. At this point I've filled 14 holes and have 33 more to go. I also have some Hypoxy aluminum repair epoxy and tried it on one hole. It's pretty nice, not without its own challenges, but I think at this point I'm going to try it as the warping with the brazing is significant and it doesn't look great afterwards. Given that the whole reason I'm doing this is so it look better...
I'm happy to have the brazing practice, though. It's a cool material and seems to have some great applications out there.
I'll report back on how the epoxy filling works. I bought some glue syringes and am planning on prepping all 33 holes at once and trying to do them all in one go.
Hard to argue with epoxy in the hierarchy of adhesives, but I'm half wondering what the crazy world of modern adhesives has wrought for something tenacious and durable.
I've been assembling some stressed-skin garage doors with urethane construction adhesive, and while I wish my joinery was all fine-cabinetry-perfect, I have to settle for being happy that the adhesive sands to a nice flat surface along with the wood.
Give Permatex a call?
My new to me old Crestliner didn't seem to leak when I bought it, but it sure was the first time I took it out. Upon a much more thorough inspection, I found two hairline cracks about 4" each about where the trailer would hit the bow if you missed. It was smoothed over with some kind of white filler and after rough sanding that out of the way found two big dents with cracked welding repairs. I cleaned everything out with lacquer thinner and acetone, and JB Welded on 1.5x6" 1/8" aluminum plates after drilling 1/8" holes at each end of the cracks to try and stop the cracking. I then built-up the area with multiple layers of more JB W which is actually kind of runny. Has held up well for 3 years on a large lake that can develop large waves a long ways from home.
I would dimple the holes a little so there is something for the JB Weld to grab onto and scratch the aluminum with at least 80 grit paper and also glob JB on the underside of the holes. 3500psi
If the material is thick enough you can also use solid rivets in a double flush manner. Just countersink the hole on both sides, when you drive the rivet it will fill the countersink on the back side, then grind it flat.
Dimple the holes and shoot a countersunk solid (AN426) rivet in the holes. That should get you a basically invisible repair once painted. I've done the exact thing on airplanes when some clown drills a hole where one shouldn't be.
Cousin_Eddie (Forum Supporter) said:
Dimple the holes and shoot a countersunk solid (AN426) rivet in the holes. That should get you a basically invisible repair once painted. I've done the exact thing on airplanes when some clown drills a hole where one shouldn't be.
This seems like a great solution if the sheet metal is thick enough to cut the countersink
I like it and also need to do that (but not 30). What kind of tool do you need to install them?
OHSCrifle said:
Cousin_Eddie (Forum Supporter) said:
Dimple the holes and shoot a countersunk solid (AN426) rivet in the holes. That should get you a basically invisible repair once painted. I've done the exact thing on airplanes when some clown drills a hole where one shouldn't be.
This seems like a great solution if the sheet metal is thick enough to cut the countersink
Not countersunk. Dimple it with an aircraft dimple die. Works on thin material where a countersink would not.
Quick youtube video showing the process


