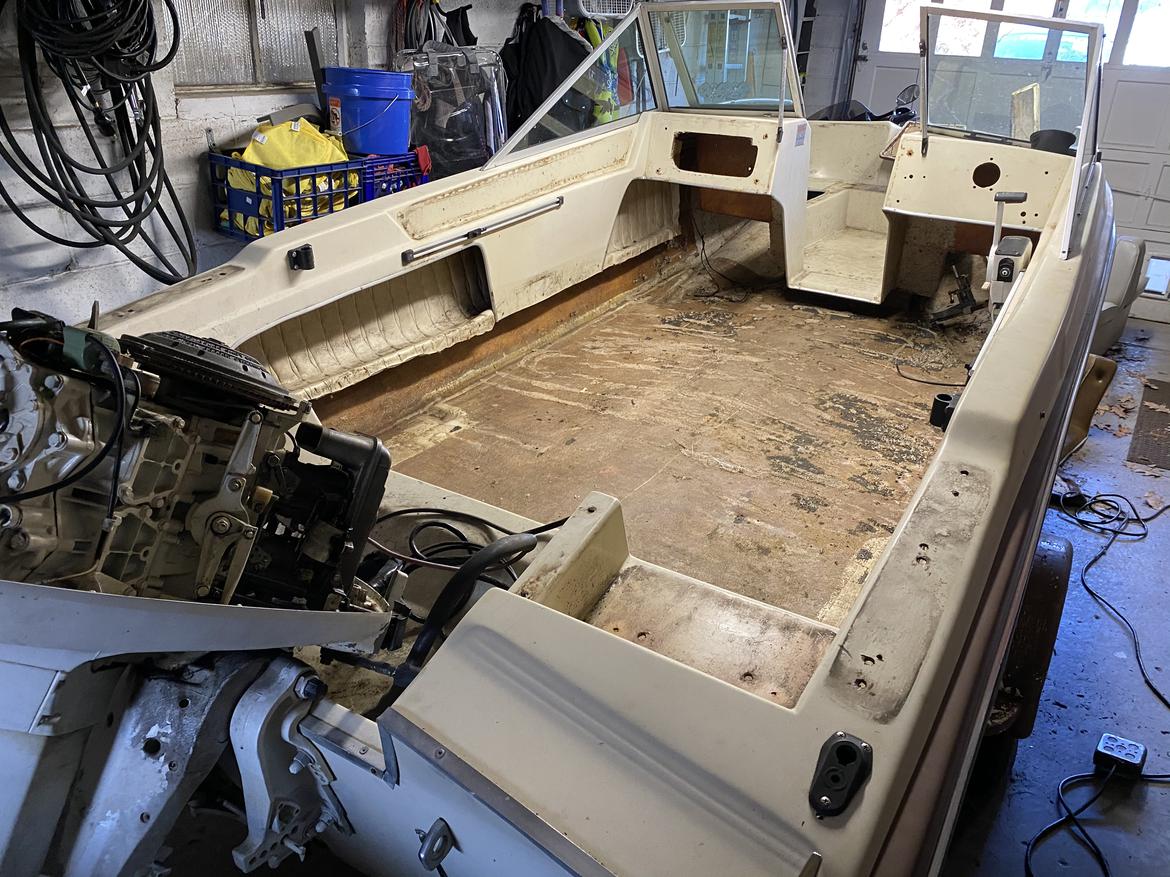
Got everything stripped last night. The transom needs work (shock! Surprise!) and the lift assist cylinders are locked in place. I'll pull the engine and sort all that, have to figure out a stand.
Spending my evenings watching boat repair on YouTube. Oddly, not scared yet. I also have to decide if I will replace the wood trim, or just use grip-tape or non-slip plastic panels. Same with the side trim, I can cut new wood and cover with vinyl, or just use a solid material. Hmmmmmmm.
This guy is probably my favorite boat repair YouTuber. He actually uses a lot of fiberglass resin instead of expoxy. He is also meticulous about paint. Very skilled. https://www.youtube.com/channel/UC0kDqq-pSzdqFUk3oTaHBuA
Do the transom from the inside if you can and leave the outside skin in place.
The lift cylinders might not be stuck. The top pivot pin may be. It will go up instantly but not come down even though the pump is running. If that's the problem, hold the trim down button long enough it will pull in the trim cylinders and then pull the engine down. Having someone sit on the foot while trimming it down should also force it down. That top pin is steel and they rust in place. I never did fix my Johnson 70 because digging that pin out looked to be a nightmare. I just dealt with it. Once it's down and in the water, forward propulsion will push the engine down.
Oh, and buy some tyvek suits and gloves. When cutting, grinding or sanding glass, wear them. Tape the wrists and pant legs. It can save you a whole lot of itching.
I really enjoy doing fiberglass work except for the itching part. Unfortunately it's a necessary part.
In reply to Toyman01 (Moderately Supportive Dude) :
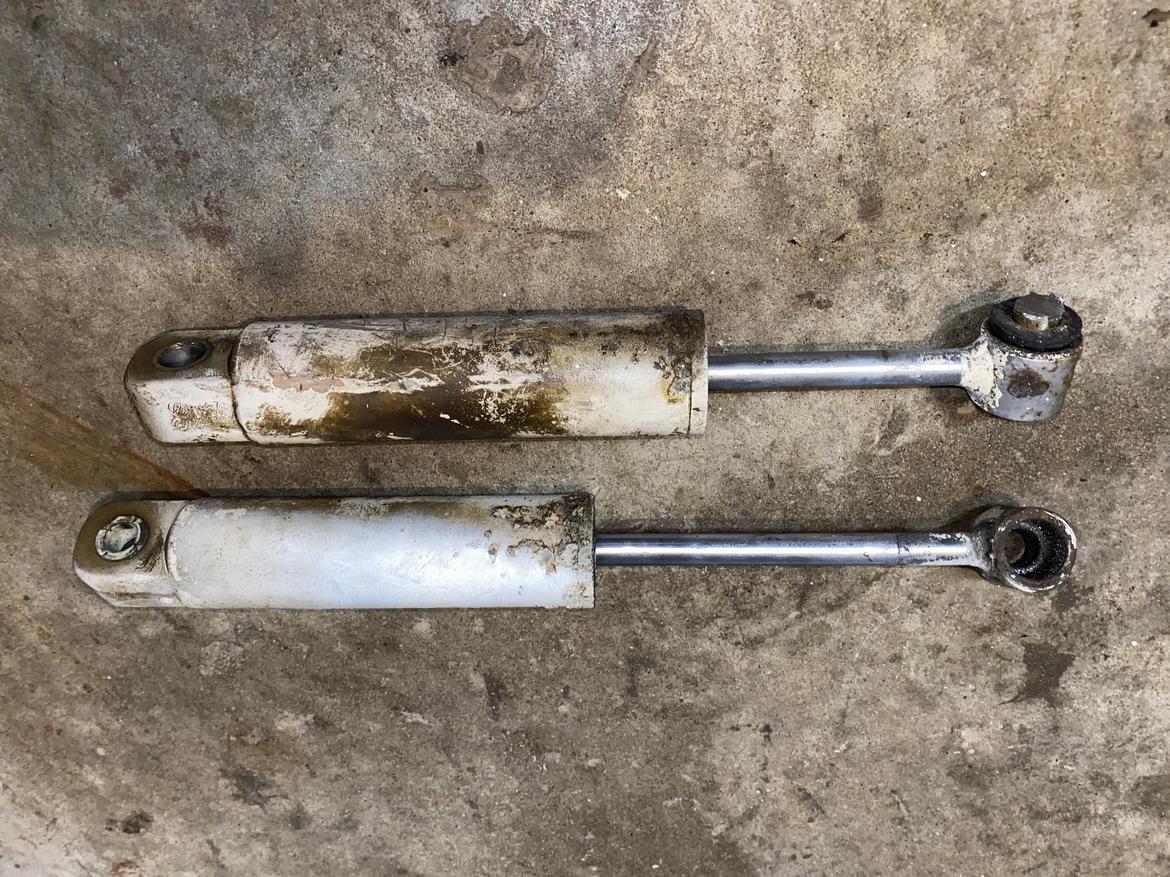
Thanks man, but these are just lift assist, not power tilt. Just like the struts on a hatchback, they help you manually lift the weight of the engine and dampen the lowering. Frozen pivot pins may still apply however, so I will check that out. I have a stand on the way, hopefully I can get it worked out. I will PB blast the pins and inject some lube at the grease nipples and hope for the best.
In reply to Toyman01 (Moderately Supportive Dude) :
I put in attic insulation a few times, I know the misery. I will look like this when I am glassing:

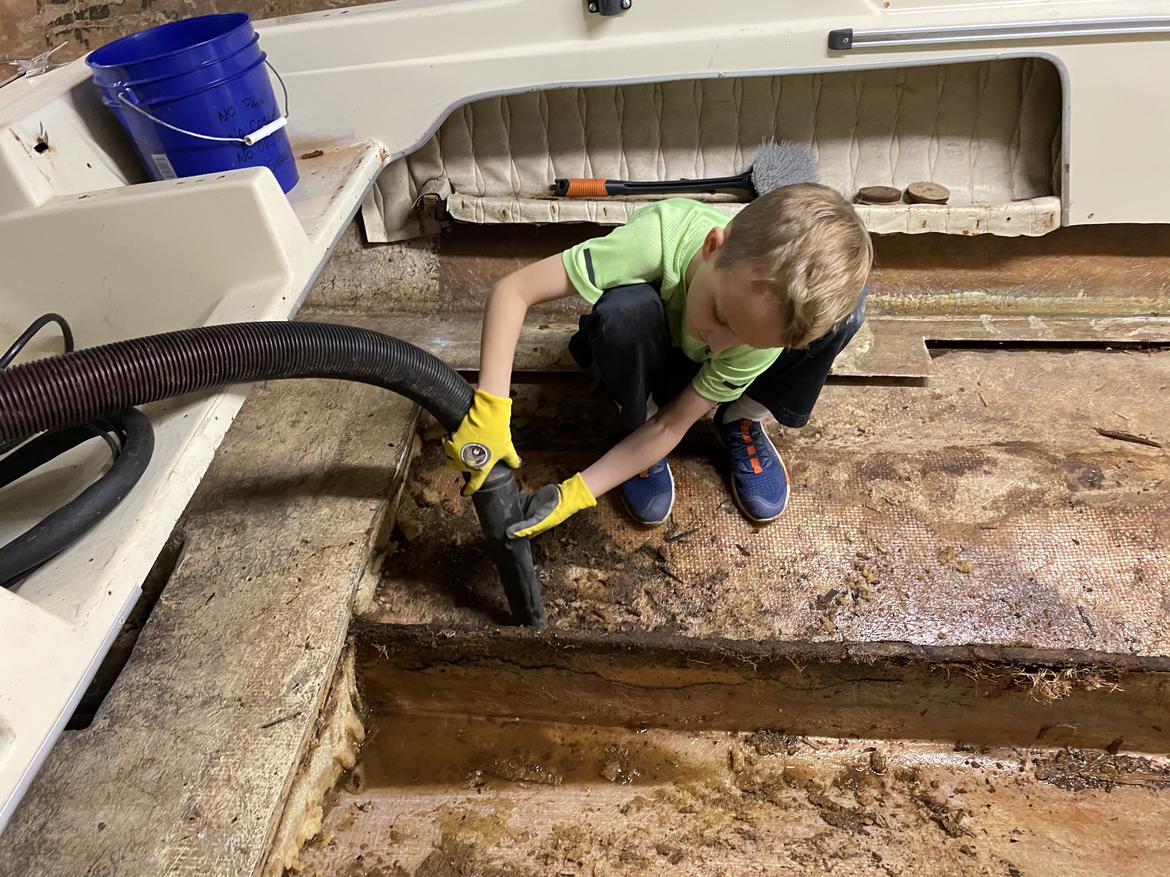
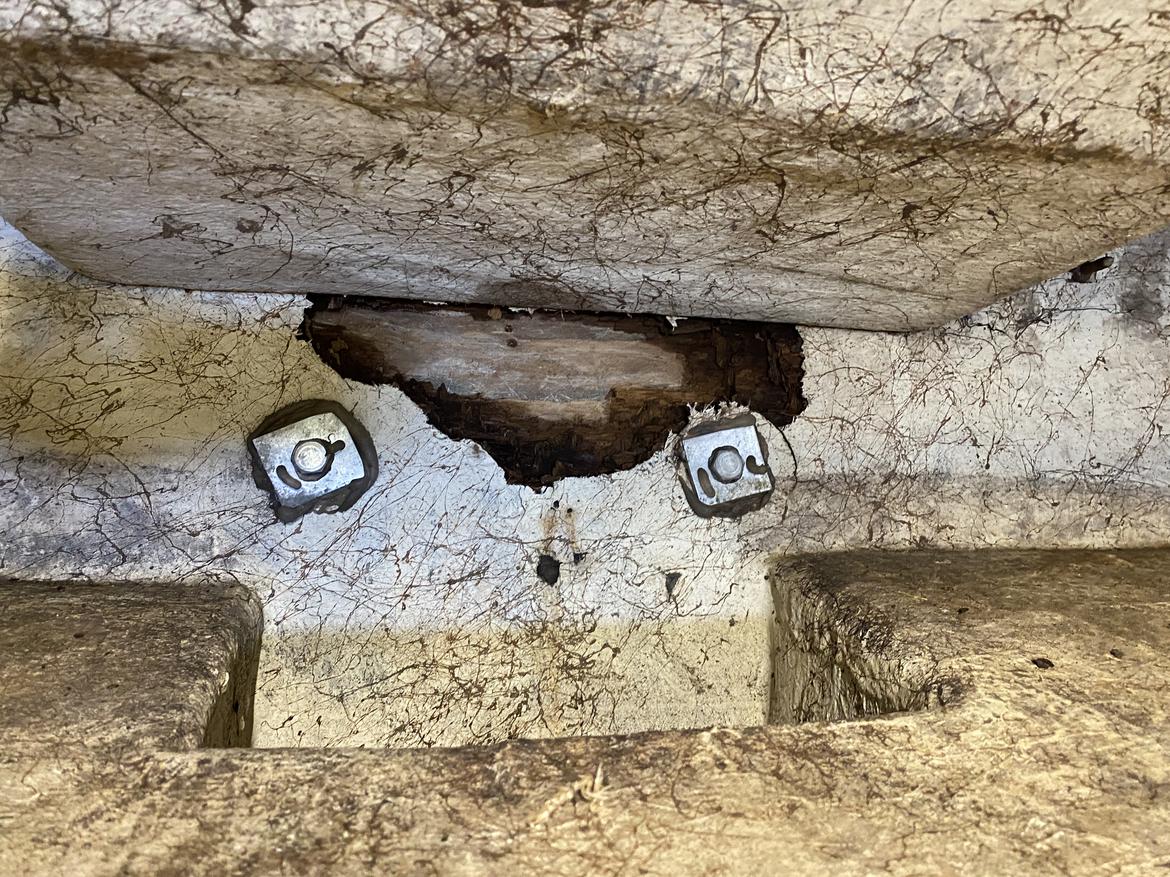
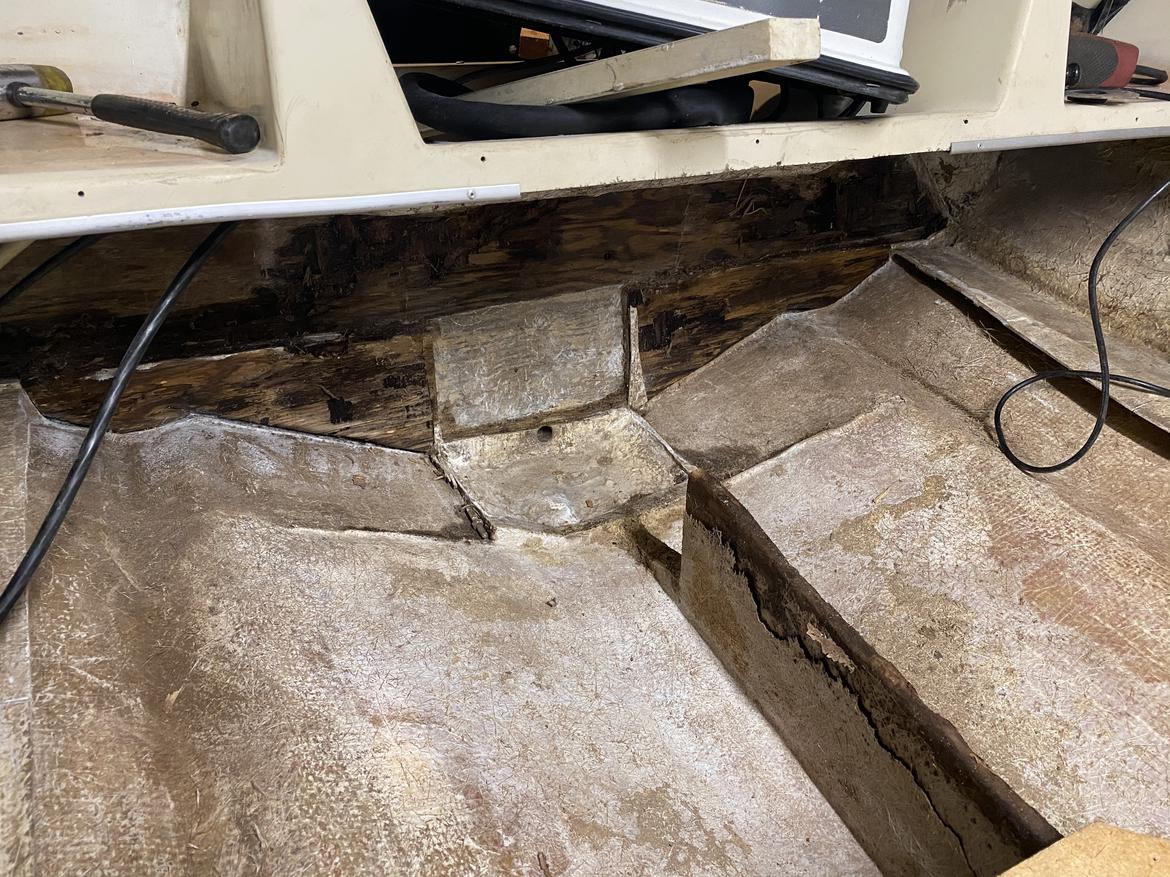
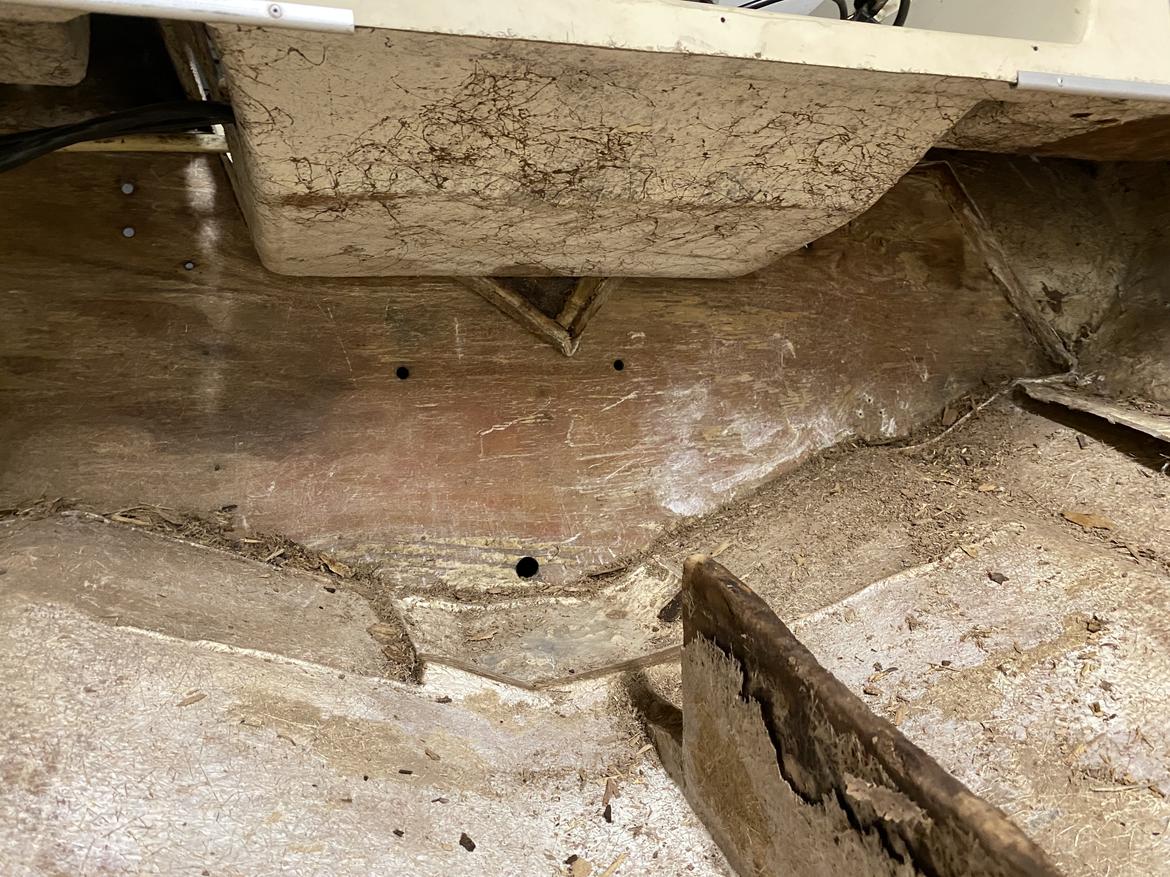
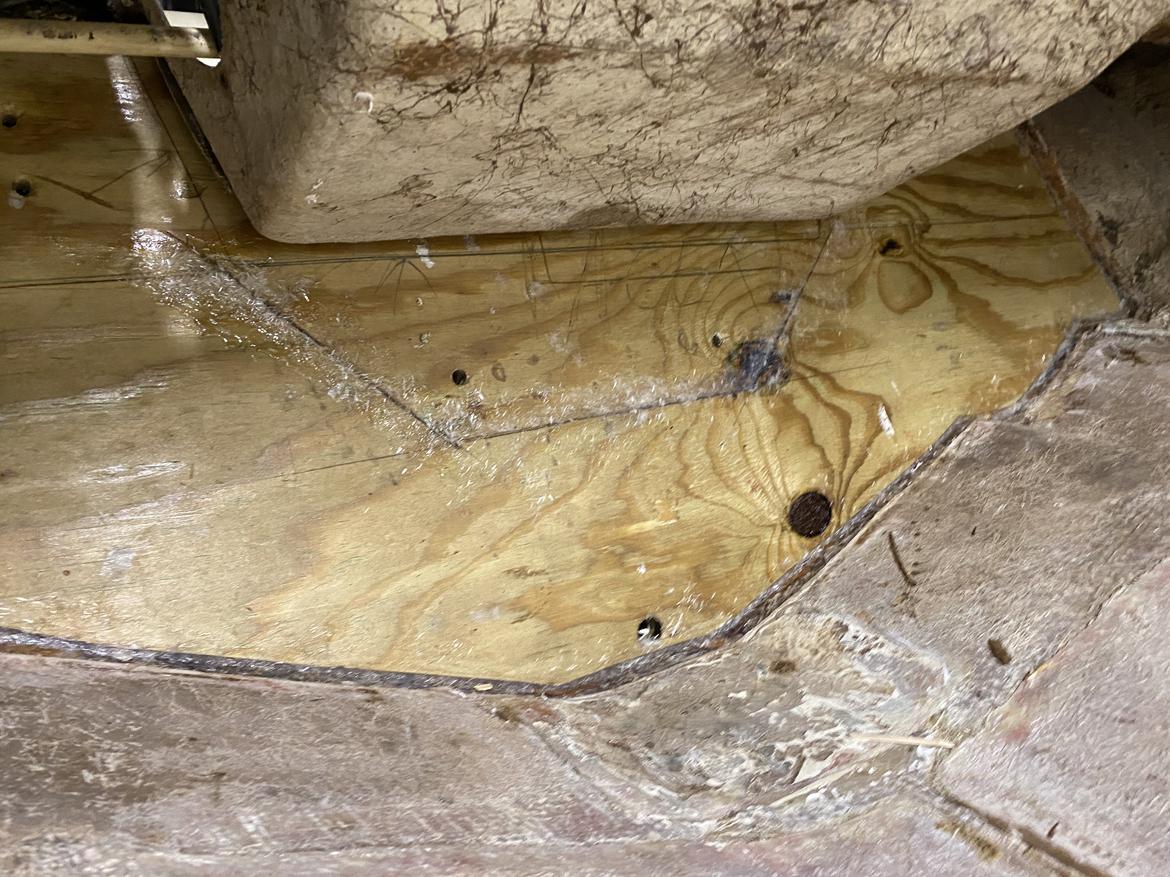
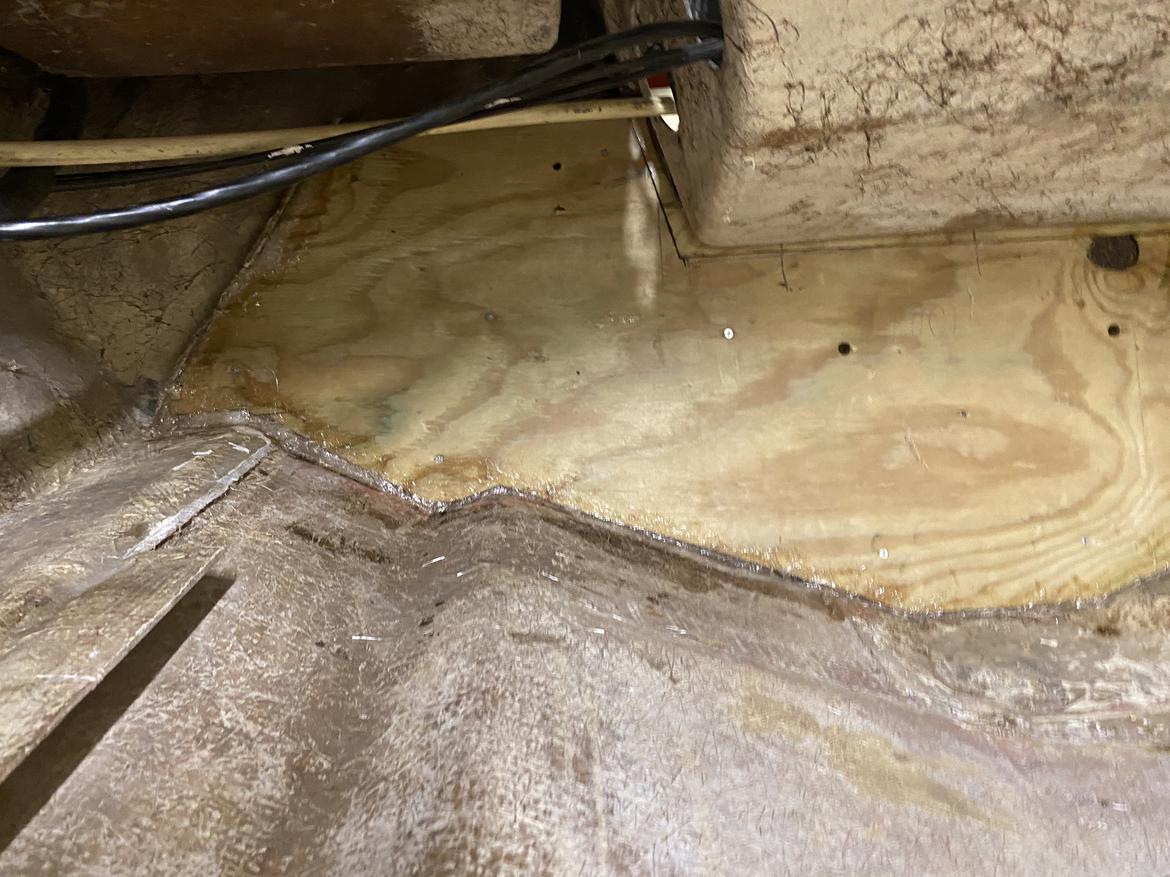
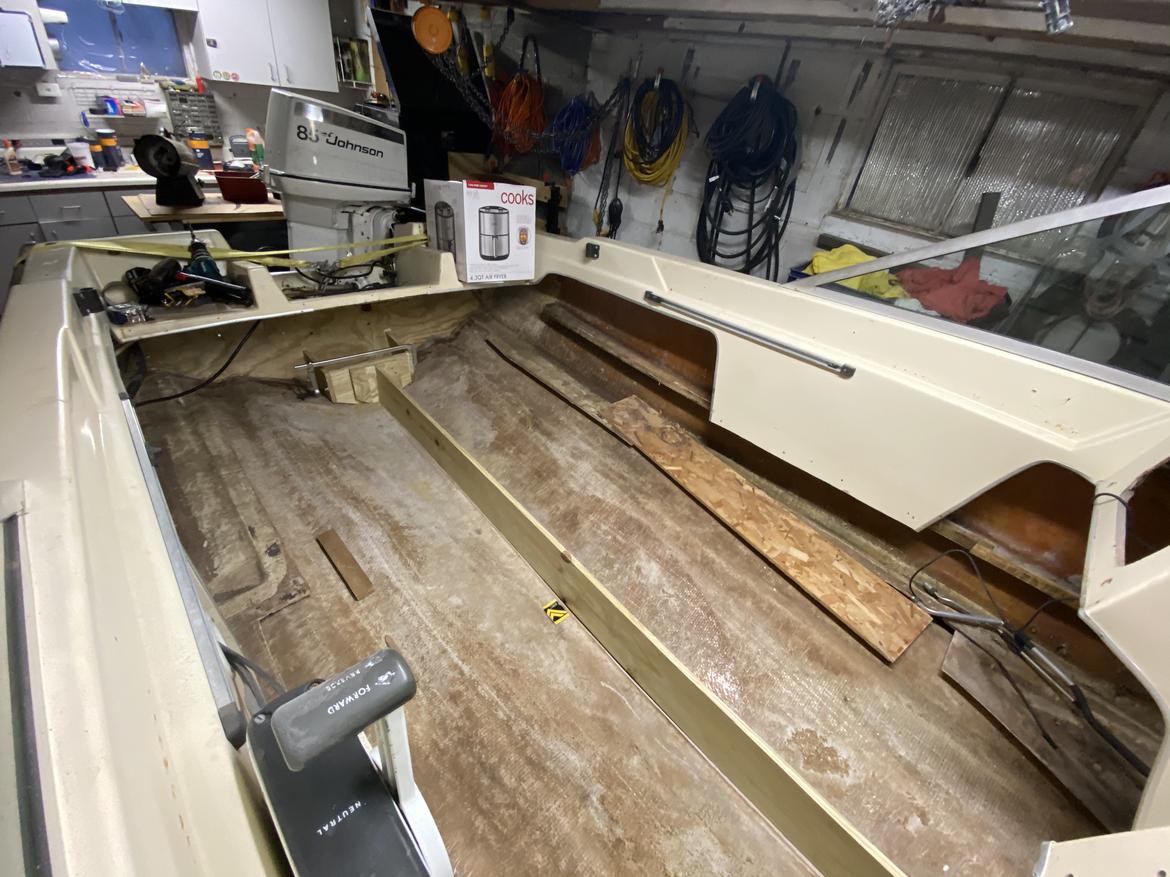
I called in an expert to help with the floor and foam removal. The center rib is solid, but wet. I'm considering options, will probably replace because why not.
The odd thing is that there is no way for water to drain from beneath the floor. The builders assume water would never get in there, but clearly it does. There is a sump pit at the rear of the boat where the bilge pump sits, but it's only for water that drains off the top of the floor. I'm thinking I may add some holes to let water drain from under the floor, but I may only be introducing a way to put more water into this area. Will have to do some research.
I found a good source for marine grade plywood, but shipping is $500. It's a 3 Hour drive, so it looks like I've got a road trip in my near future.
Some older boats used to have two plugs. One in the transom to drain the interior of the boat. One inside the sump box to drain the inner hull.
The other option is to close up the sump box and run the deck all the way to the transom. Drain the deck through the transom at deck height and add another drain through the transom to drain the inner hull.

Thanks for the input, I've been watching a lot of youtubers!
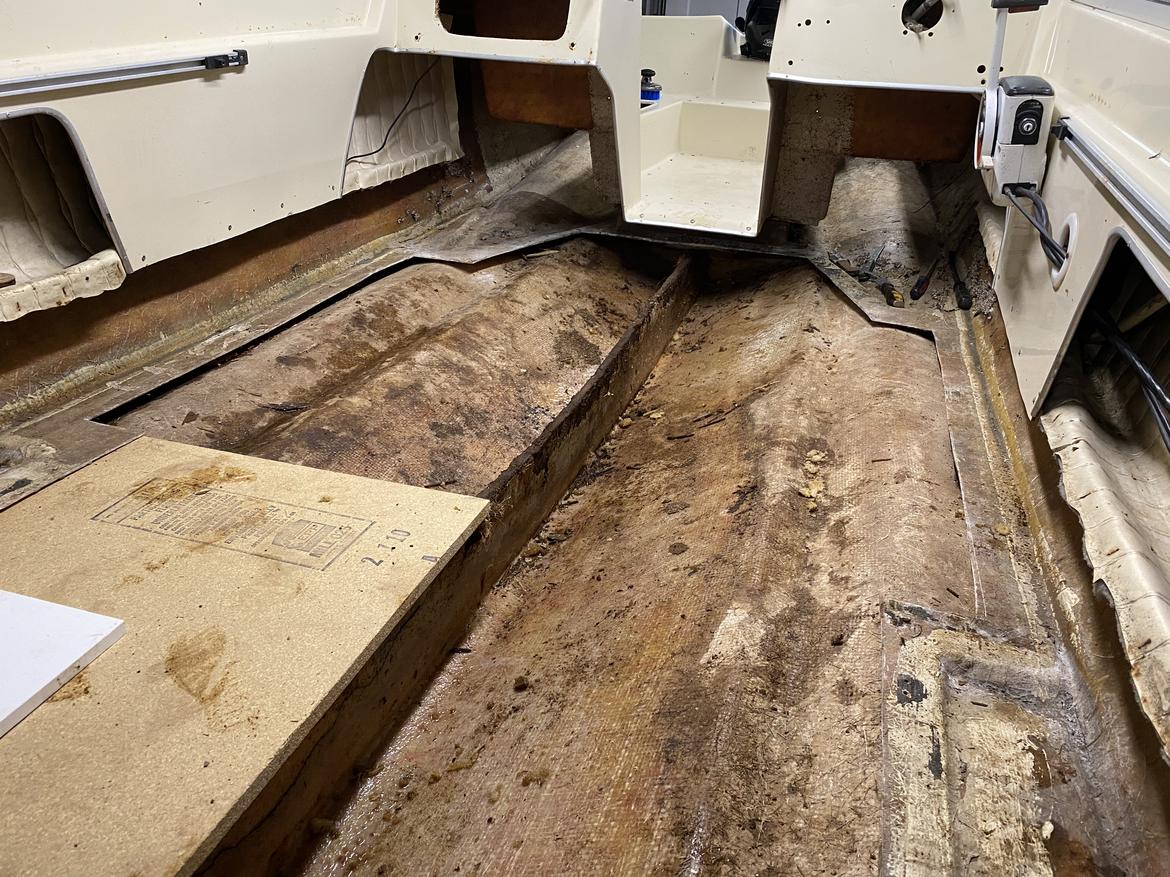
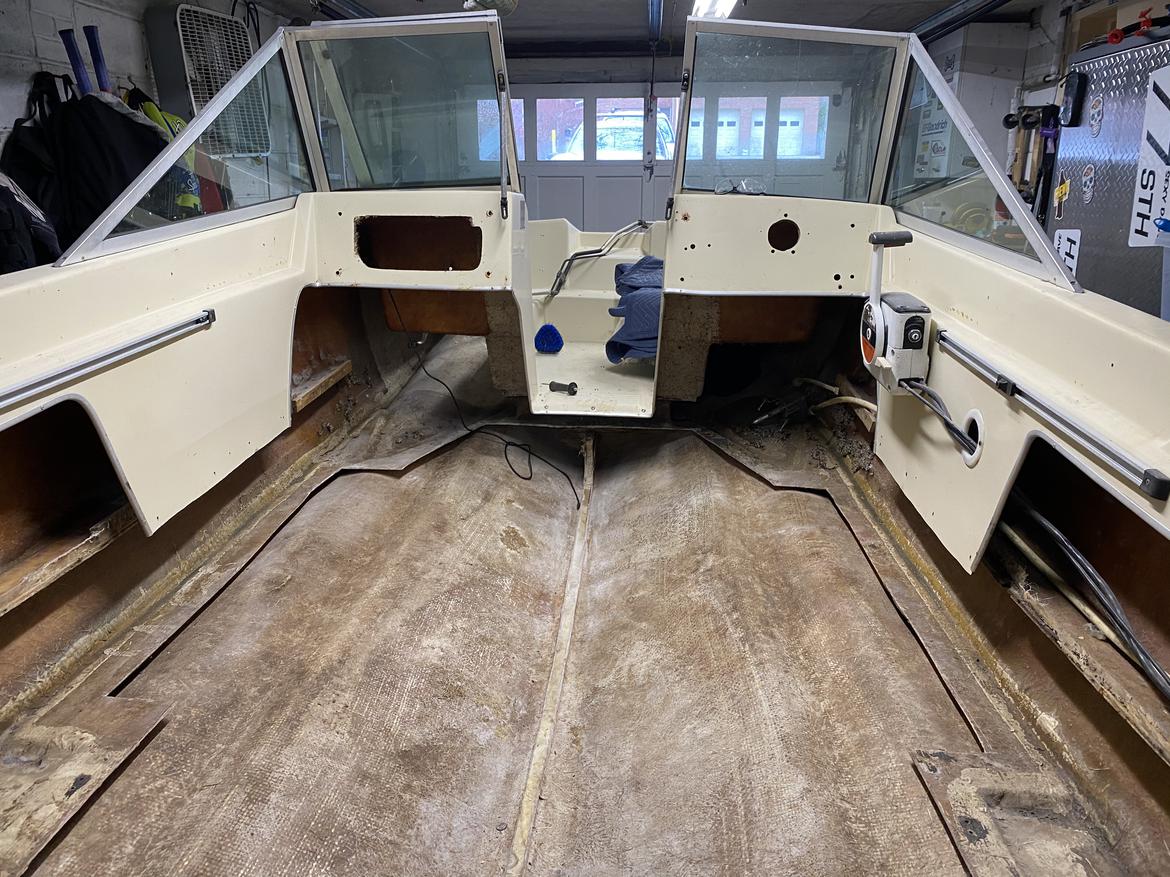
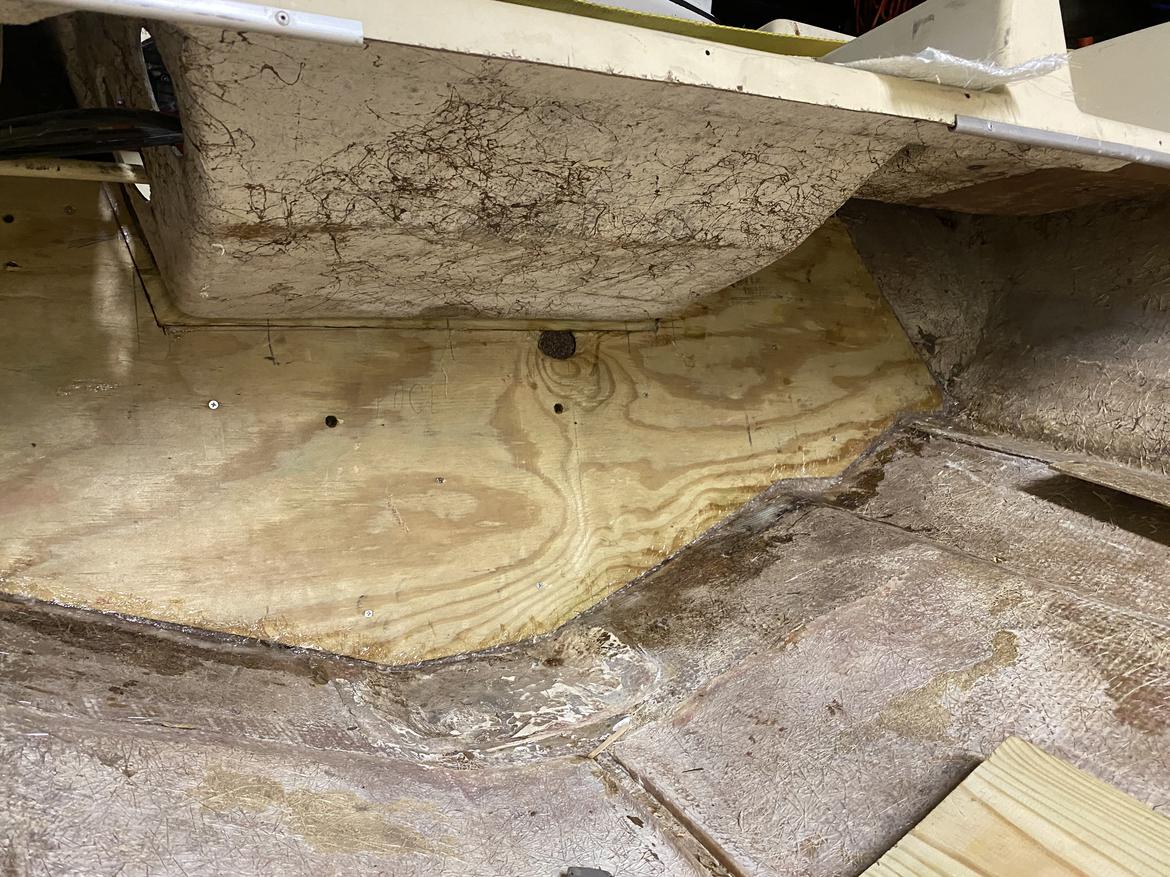
The transom was made up of two layers of plywood with a layer of fiberglass in between. I started cutting out the inner layer and it was completely rotten. I thought the outer layer may be salvageable, but it was crap too. So I took out the rest of the floor and the bilge. This will allow me access to the entire transom and I'll replace both layers of ply.
I will rebuild the bilge similar to the way it was but with scupper valves to help with drainage. The center rib is coming out, But I'm saving that for later because I want to protect the fiberglass at the floor.
it's more than I wanted to replace, but I'm happier knowing that all Rotten wood is gone. Plus I have six months to learn how to fiberglass.
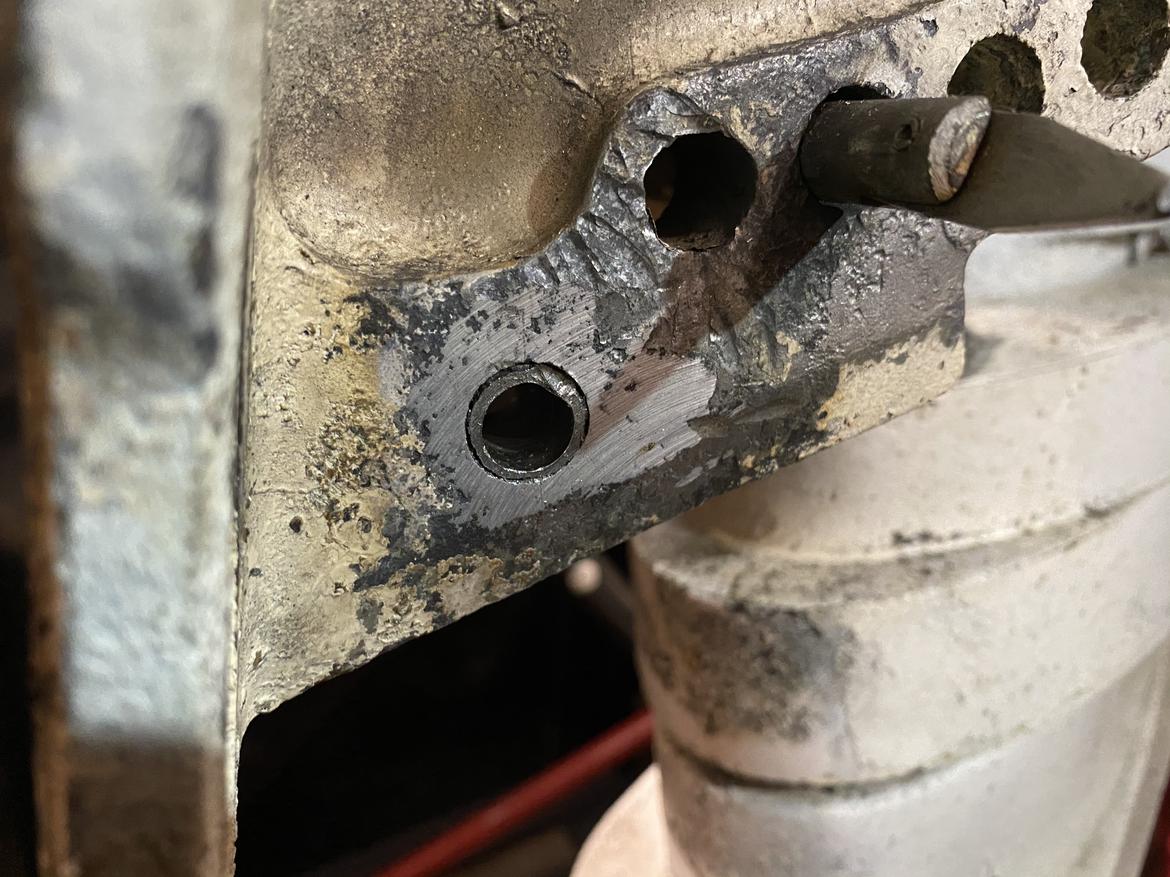
as for the motor, the pin that held the lower end of the assist pistons in place was rusted into the mounting brackets. I had to cut the pivot pin into pieces to get the struts out. The top pins were free, but you had to raise the motor all the way up to get enough clearance to slide them out.
With a torch, I was able to get the left side out but not the right. I used successively larger drillbits and eventually got it out to a half inch hole. when I ordered a new lower pivot pin I realized that replacement brackets are 20 bucks, DOH!

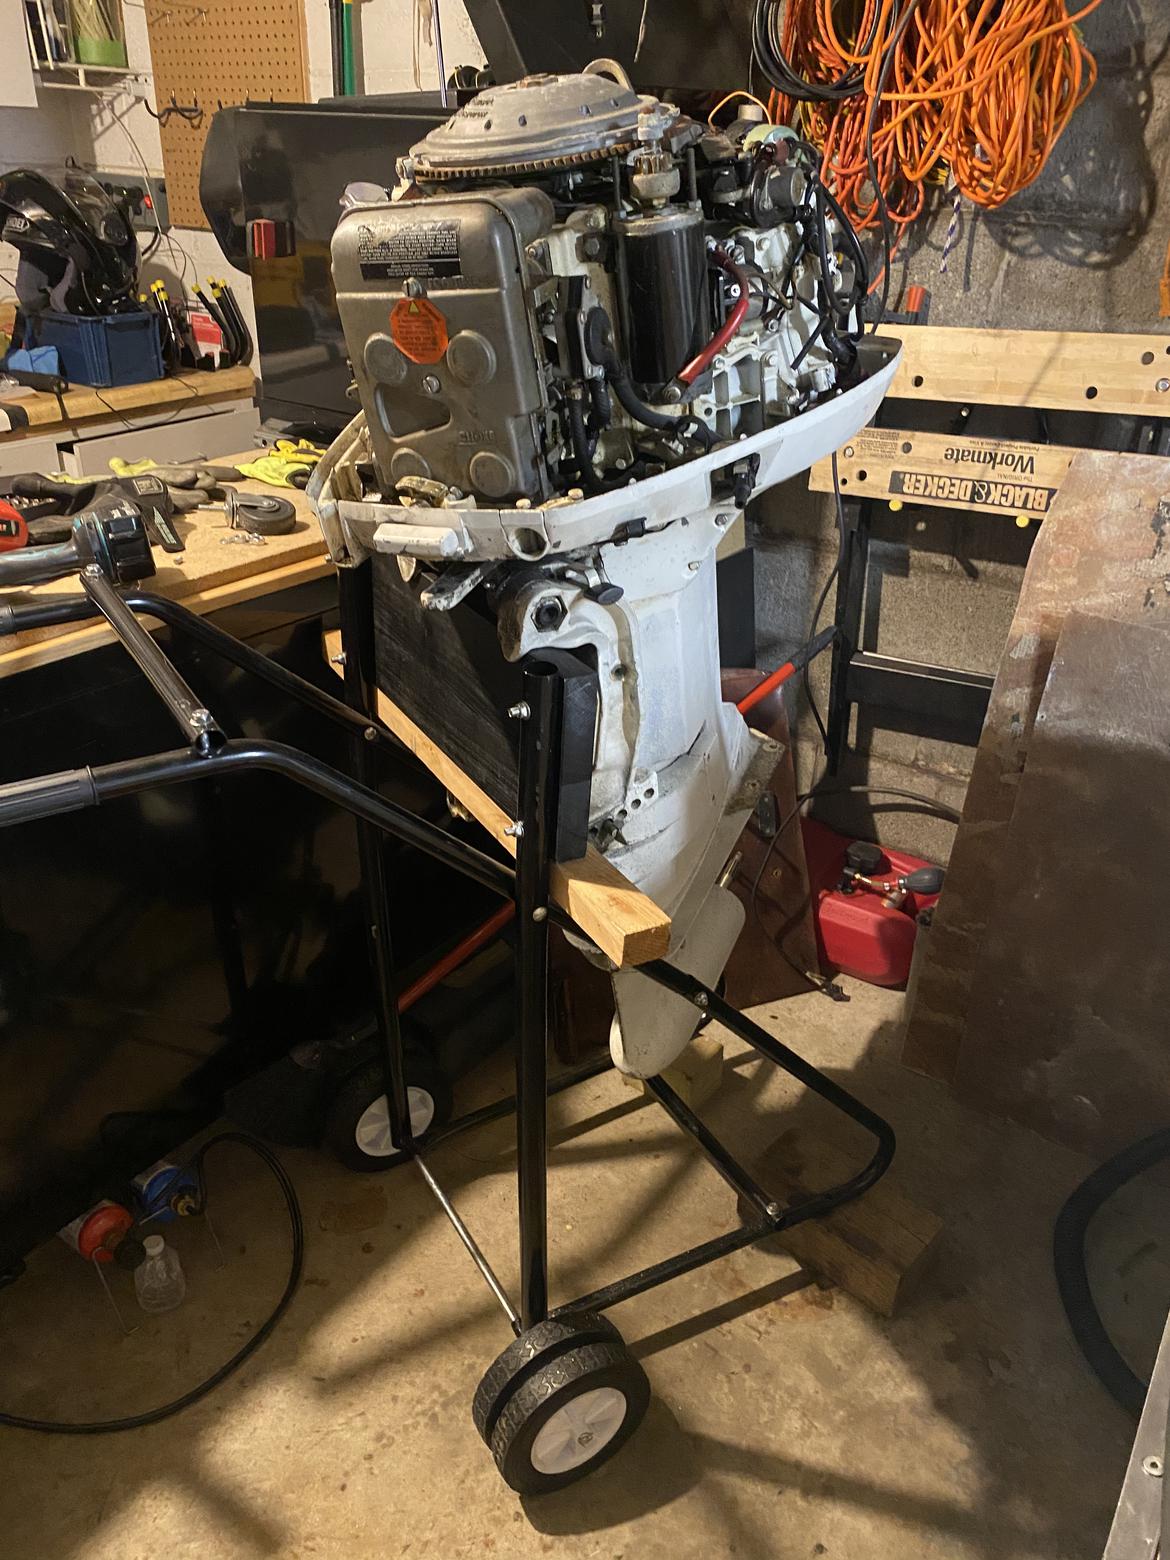
I also purchased an engine stand rated for 350 pounds for $85. It's worth about $25 and is pretty sketchy with a 250 pound motor on it. I'll be hanging the motor from an I-beam shortly for safety.
Looking good. You should have a stout hull when you get done.
You might do some digging and see if you can find a power tilt kit for it. They were a option on the older engines. Someone, somewhere has to have a scrap engine with the parts you would need.
Quick question. Do the trailer bunks extend beyond the transom. If not, when you get everything back together the bottom of the hull may have a permanent set or hook to it that can be impossible to trim out using the engine trim. It can make for a weird handling boat.
Basically, make sure the hull bottom is well supported and as flat as possible before you start glassing parts back in. Particularly the center rib.
Thanks man, they are about 3 inches short of the transom, so I'll have to be sure to support it properly.
I was able to do some more work on the transom and got all of the wood out. It's tough work because you have to lay down and work under the rear deck. my ribs will never be the same after hours of work.
I love the idea of a power trim, my father said the same. This motor was more commonly sold with than without, but OEM units are pretty dear. I may look at an aftermarket unit.
In reply to pinchvalve (Forum Supporter) :
I found a good source for marine grade plywood, but shipping is $500. It's a 3 Hour drive, so it looks like I've got a road trip in my near future.
I saw a diy boat repair site, looking for advice, where they said that expensive marine grade plywood uses the same glue as cheaper exterior grade plywood (not the pressure treated stuff), just does not have any "voids" like exterior grade searching does. If it's not the stained finish "let's try" you need, they claimed there was no advantage. YMMV.... Must be true ,I heard it on the web!!!
Curtis, or someone with a lot more experience will need to confirm or deny that roumor. I've never bout any of the expensive stuff
The cheapest used power tilt n trim unit I found on Craig's in The S. E. , was still $300. And I don't need one that will support over 100HP. Smallest new was over 600, but would support 100HP; they go up from there.
Same glue, yes. The lack of voids is the main benefit, especially when everything in a glass hull is practically a structural member...
I would pony up the extra cash.
I found a place that will deliver for free, long lead time but I can wait.
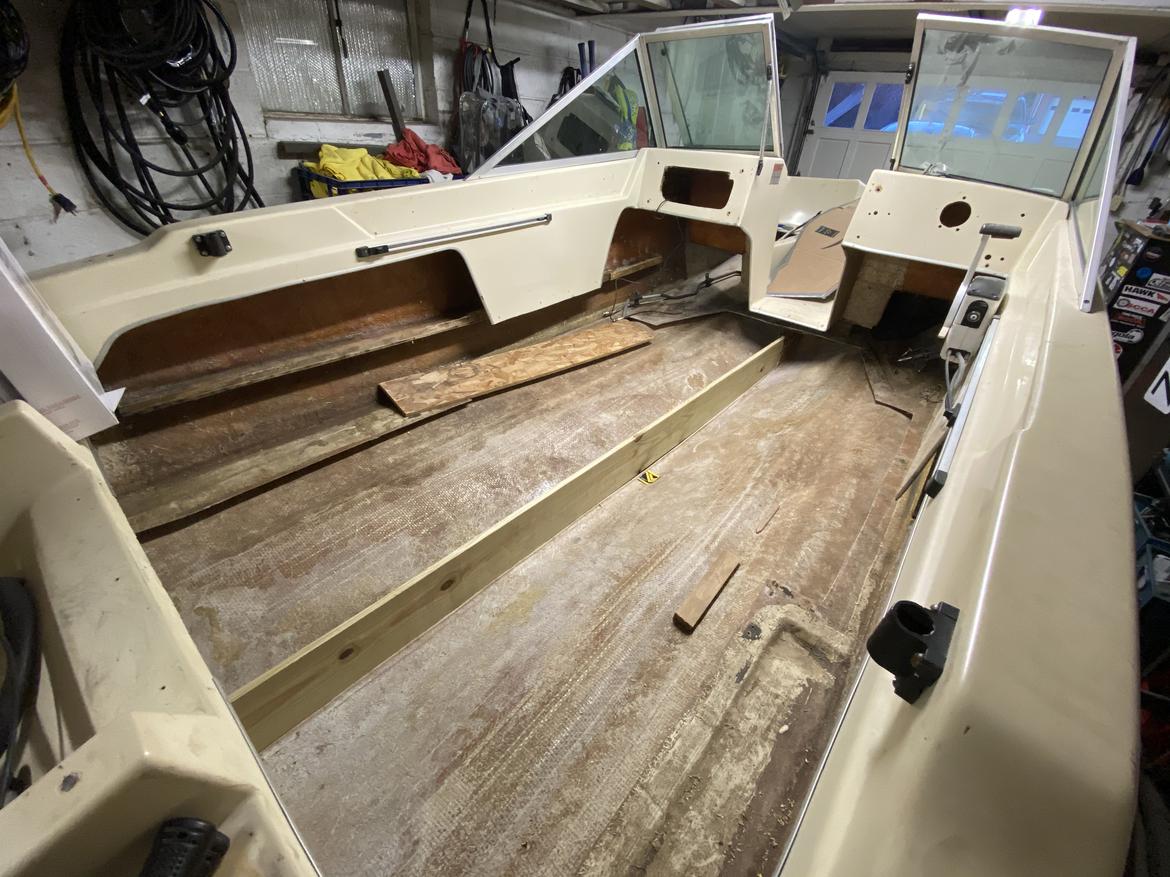
Took some time today to remove the center rib. Not easy chore because you're down in the bottom of the boat and you don't want to cut through the hull. it wasn't as easy as just cutting it off flush because of the V-shaped bottom and it wasn't even left to right all the way up. I ended up leaving a small bit of wood, but it was so saturated with resin originally that it's in good shape. I will build upon this, and add some extra stringers to be sure.
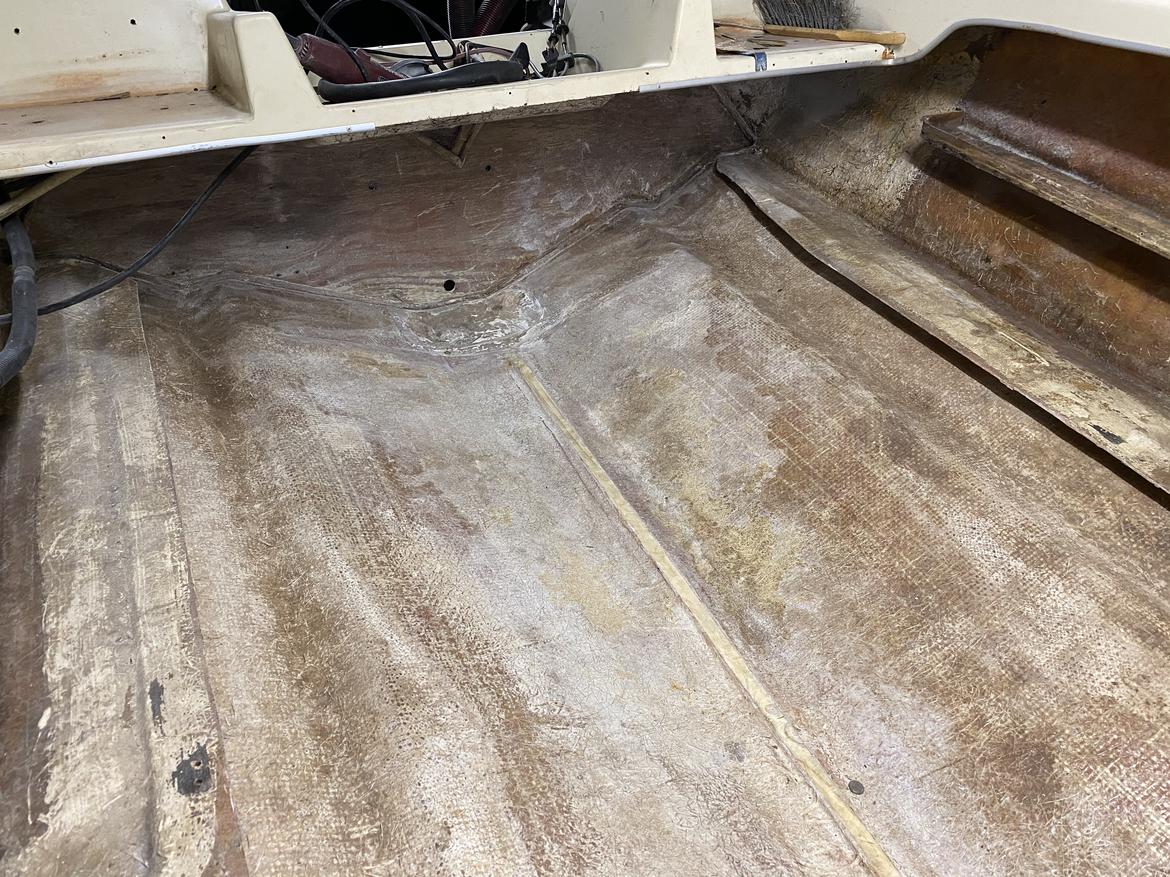
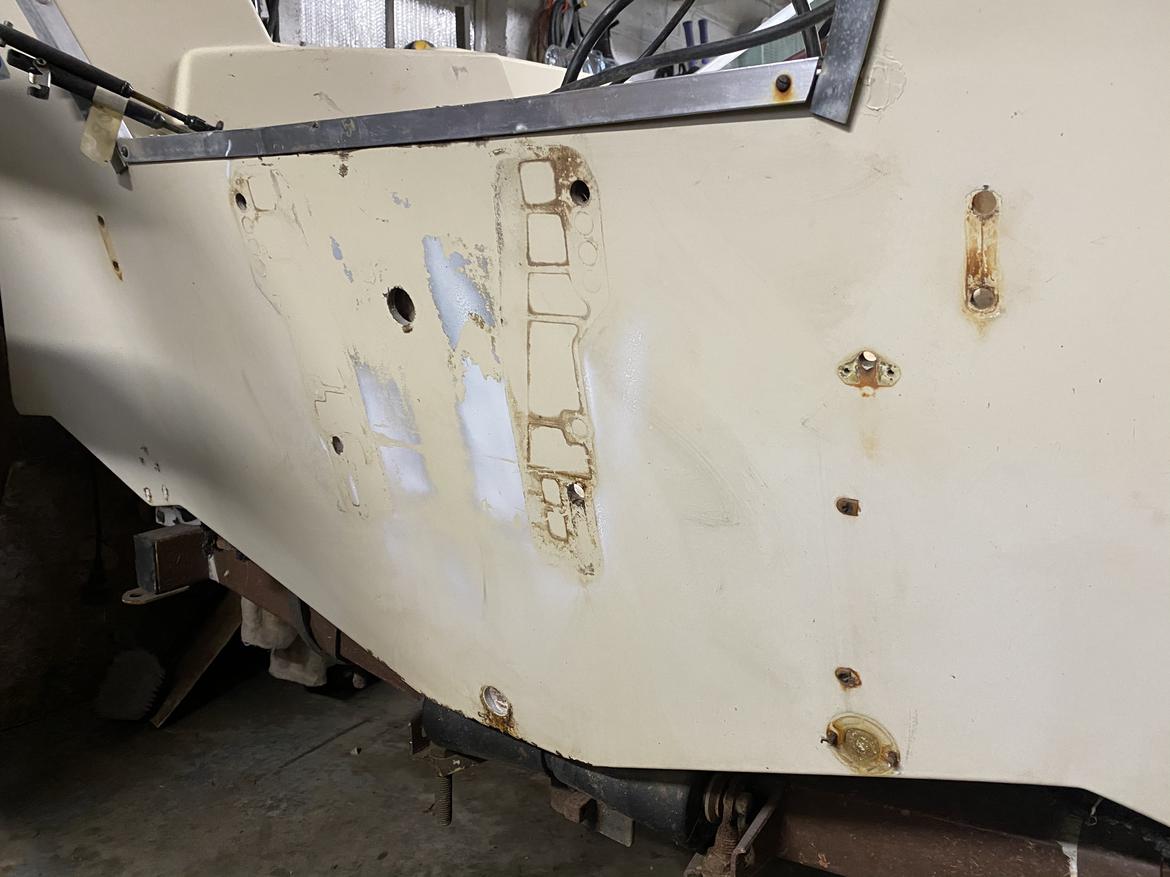
While I wait for wood, I think the next step will be filling holes in the fiberglass that I won't be re-using, and removing old stickers. Then I'll make cardboard templates for the transom, and do a tune up on the engine.
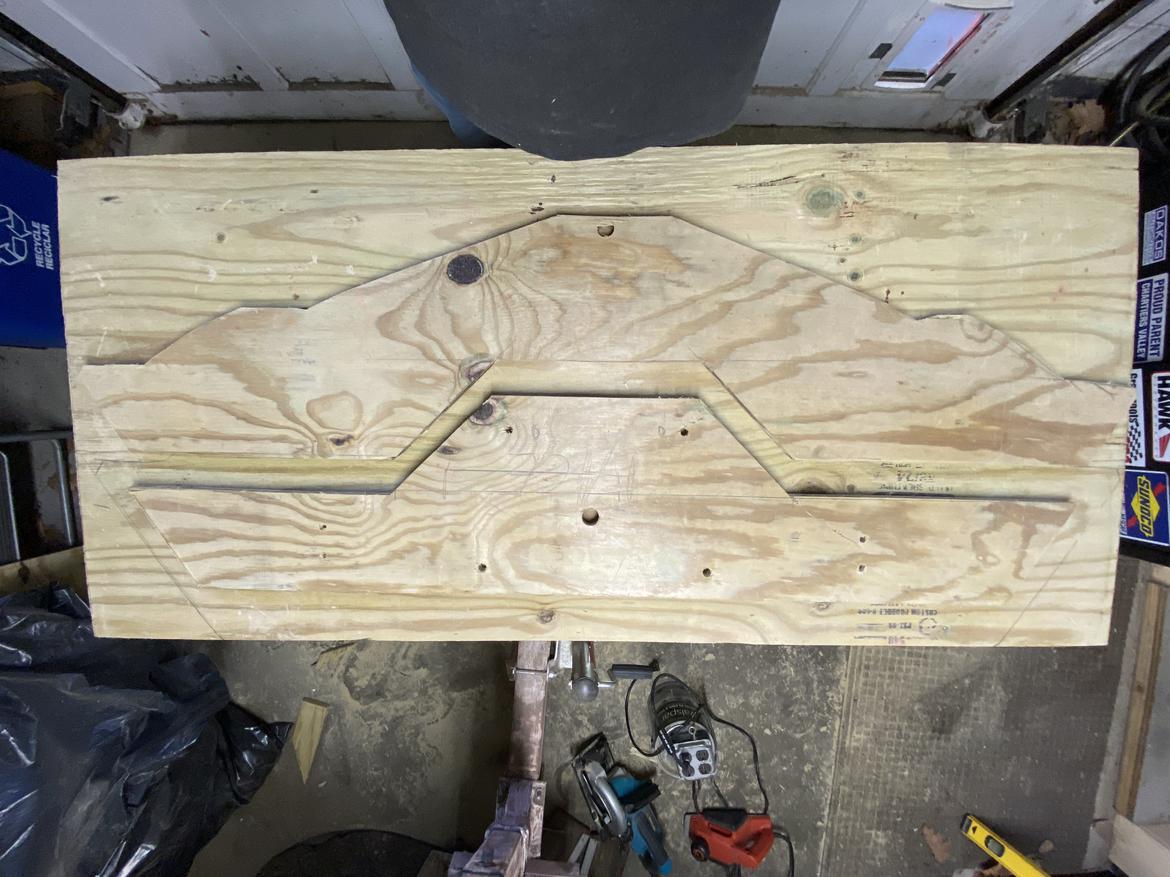
I have not had an opportunity to update in a while, but I have been making progress. The first thing to tackle was the transom. The issue is that I could not use a single piece of wood due to the top section of the hull being in the way. Yes, I could have split the hull and removed the top, but I had no desire to get into all of that. So YouTube led me to the idea of a 2-piece transom. The inner piece has a top section that slipped up under the outboard "deck" and contained all 4 holes for the outboard mount.
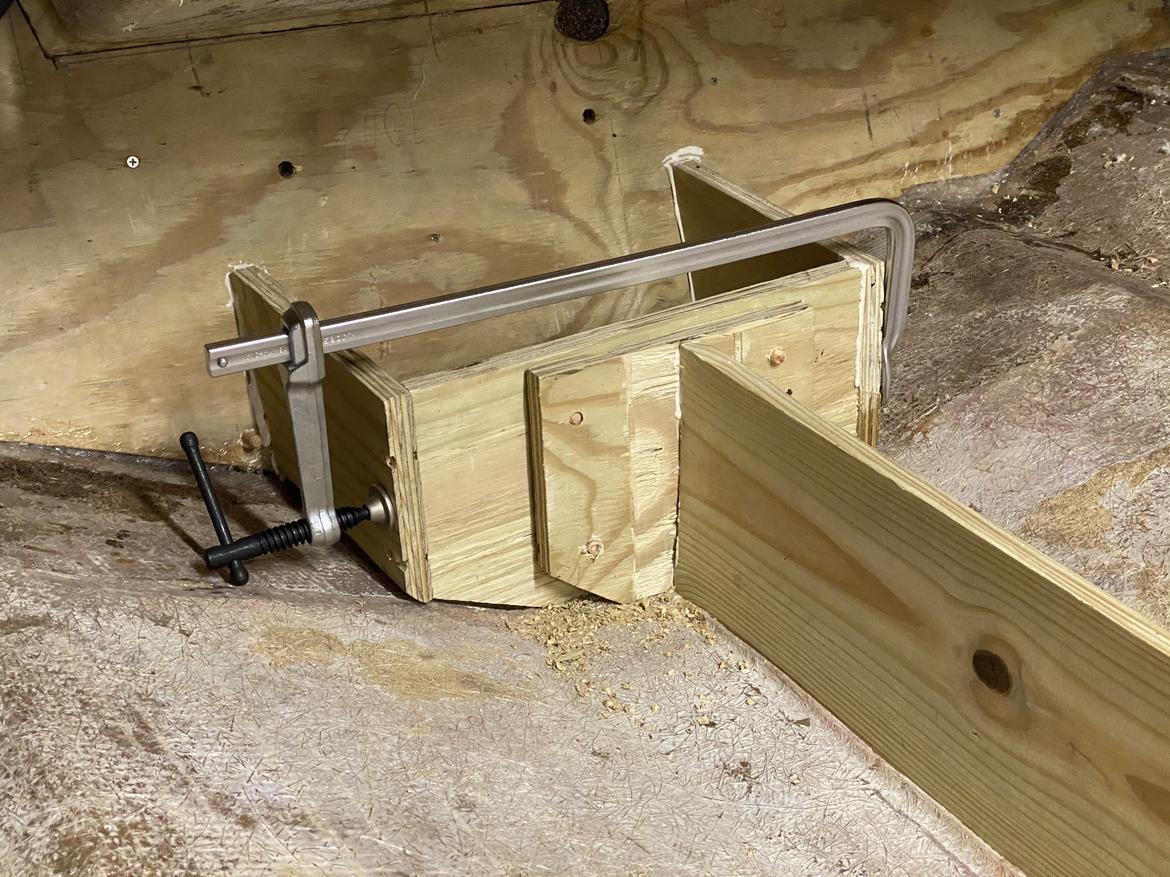
This was glued to the fiberglass hull, and I bolted it in place using all of the holes that I had to drill through anyway. I also braced it from the inside to keep pressure on it until the glue cured.
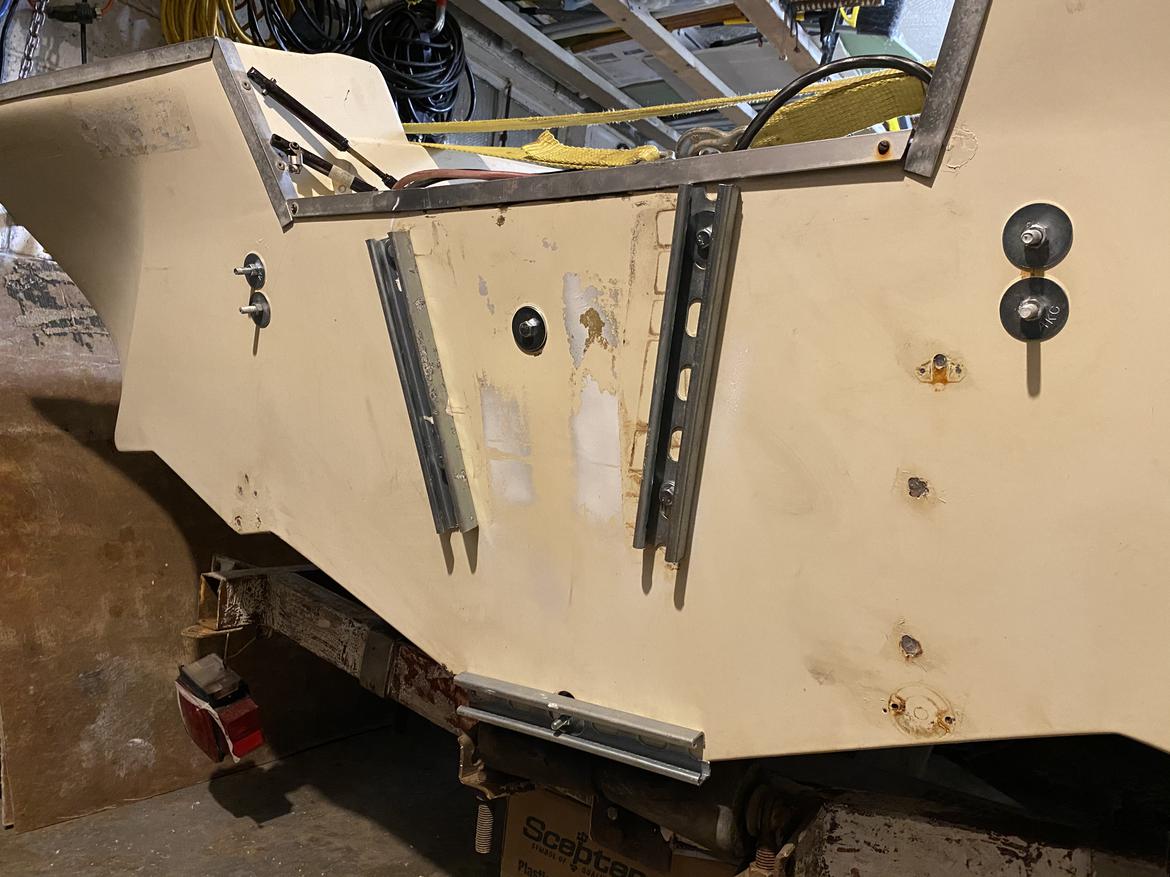
I then filled in any voids with a mixture of resin and cut strand and thickener. I added a layer of fiberglass sheet over the board to encapsulate it. Overall, I was very pleased with it.

For the second layer, I made sure that there was no overlap in the seams on the first layer. All I had to do was cut out a smaller section to clear the deck section and then it fit nicely. I then painted the inside face with resin and used stainless steel screws to marry the two sheets together. I was hesitant to add metal to the mix, but YouTube says that it was OK and all screws will be completely encapsulated in resin, so I am not afraid. Here too, I was happy with the outcome.
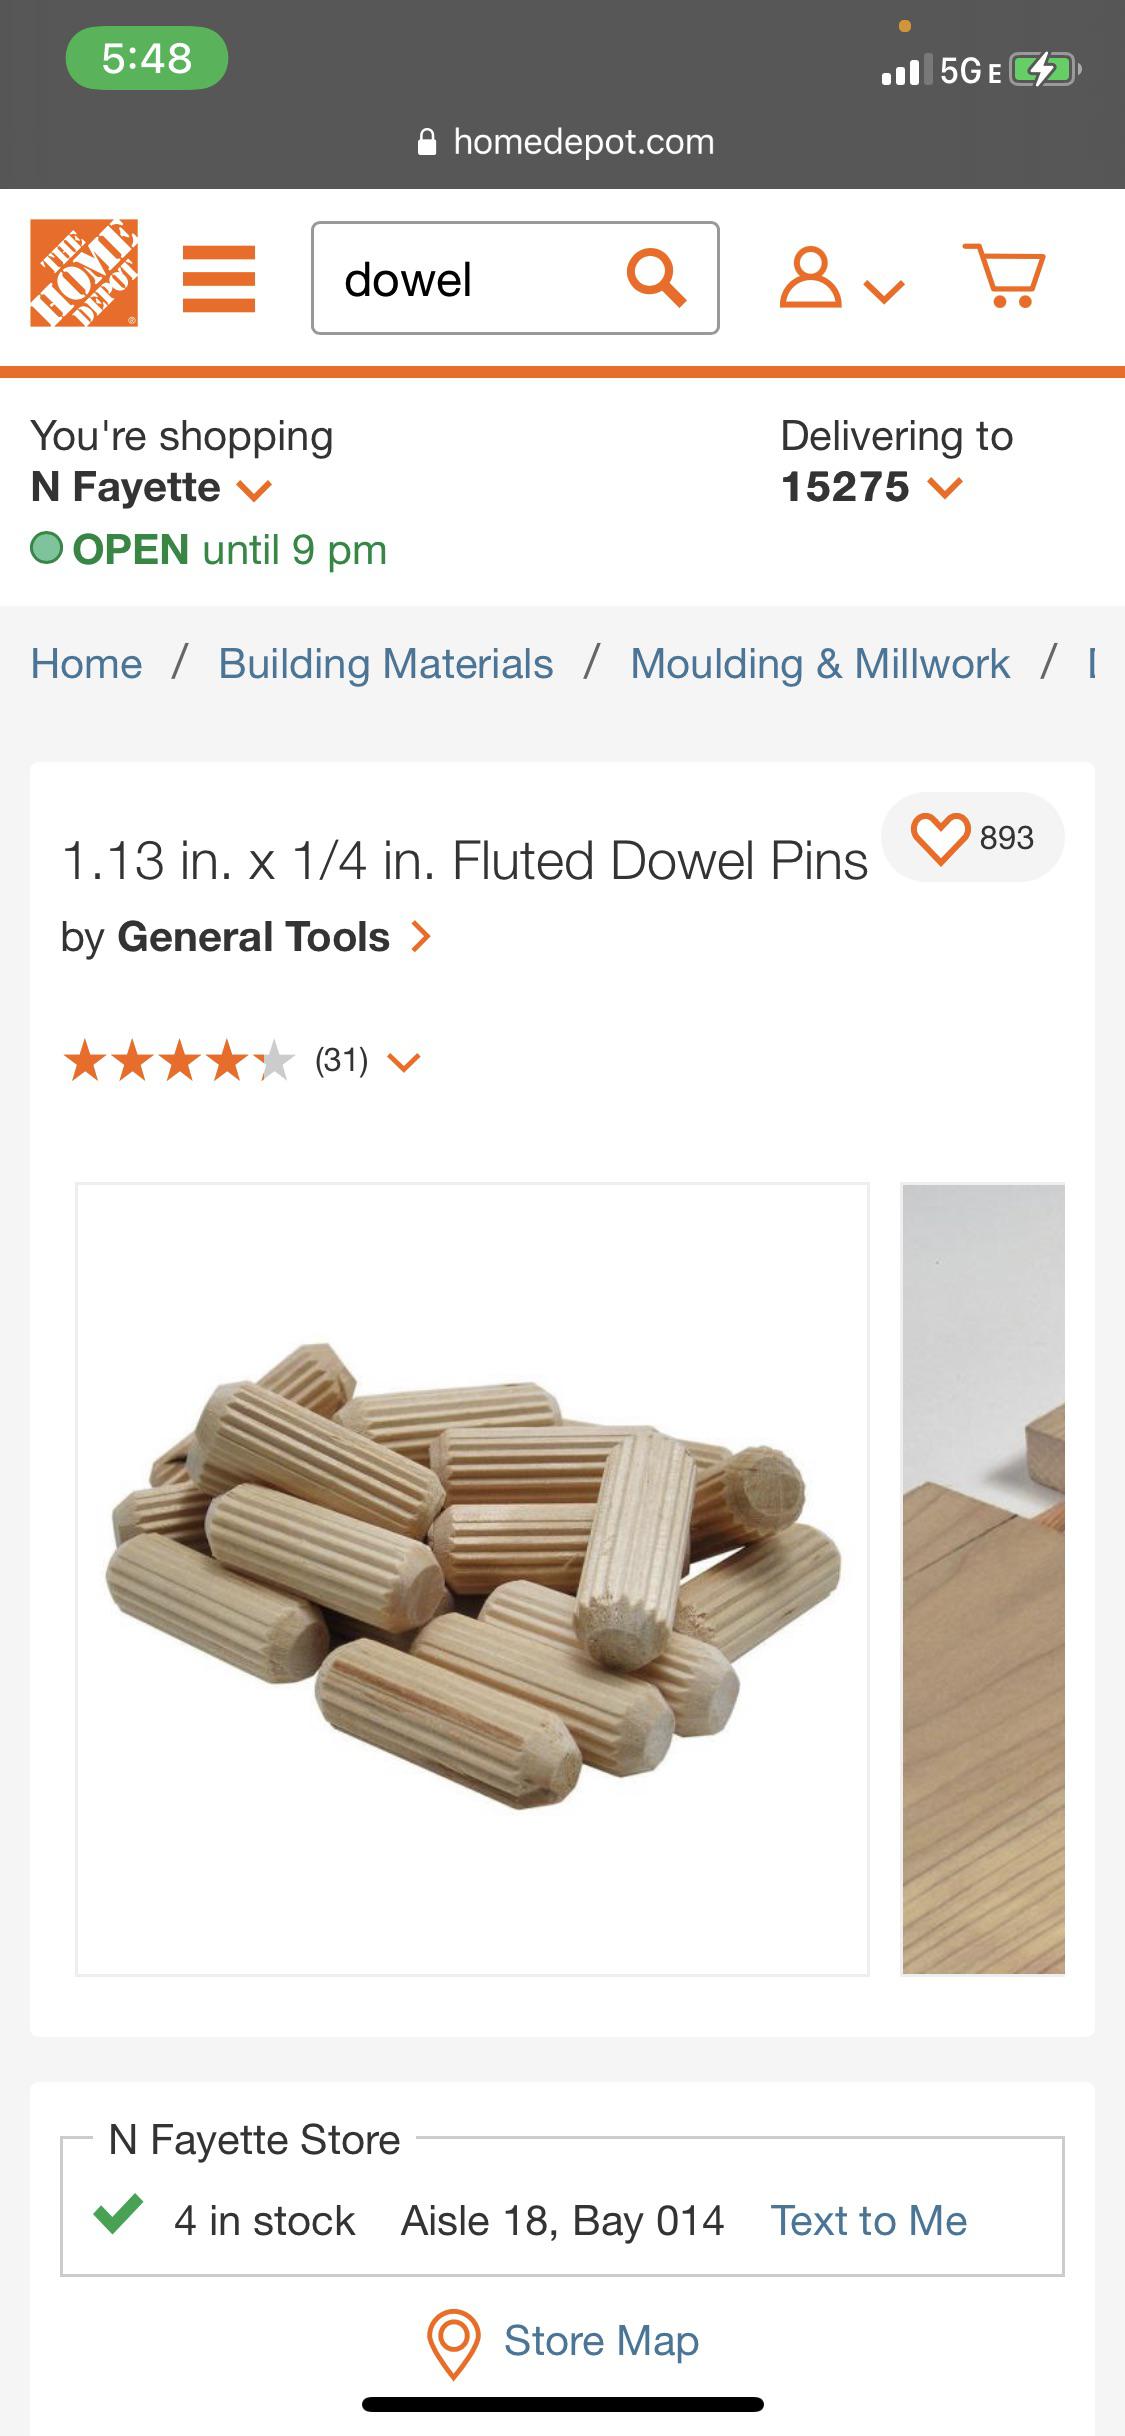
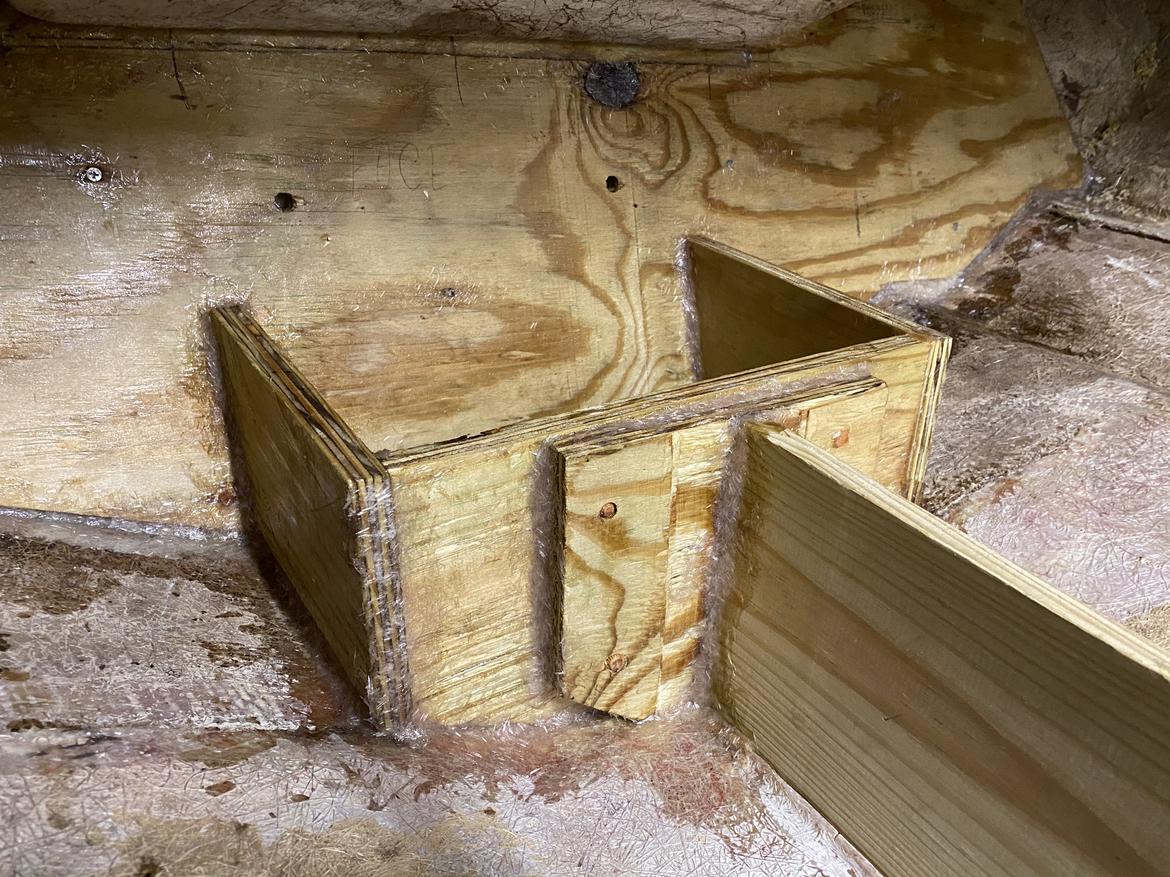
The next step was to rebuild the bilge. This also meant that I had to get the "spine" into place as well. The issue that I had was how to hold all of this together. I did not want to use more screws, even though all wood would be covered in fiberglass. Then it hit me: dowels. I could dowel everything together with waterproof wood glue. That would hold it all in place so I could wrap it in fiberglass.
The next step is major fiberglass work then the floor goes in. Looking at the weather I hope to get in there soon. To keep it properly ventilated I have to have open doors and fans, so 17 degree days are a no-go.
03Panther said:
In reply to pinchvalve (Forum Supporter) :
I found a good source for marine grade plywood, but shipping is $500. It's a 3 Hour drive, so it looks like I've got a road trip in my near future.
I saw a diy boat repair site, looking for advice, where they said that expensive marine grade plywood uses the same glue as cheaper exterior grade plywood (not the pressure treated stuff), just does not have any "voids" like exterior grade searching does. If it's not the stained finish "let's try" you need, they claimed there was no advantage. YMMV.... Must be true ,I heard it on the web!!!
Curtis, or someone with a lot more experience will need to confirm or deny that roumor. I've never bout any of the expensive stuff
Biggest thing for me for Marine Grade Plywood was that you can often still find it using CCA for the anti-rot compound, not the newer and crappier types.
I went with Aqua-Ply for my flooring.
Aqua-ply looks pretty awesome, but in the end I went with ground-contact rated ply from the local big-box store. (OK, not actually my local store, I drove 1 hour to Ohio to find a HD that had the ground-contact stuff.) Actual marine-grade ply is hard to find anywhere around the 'Burgh, and I don't plan on having this boat for 60 years. The ground-contact ply is rated for wet environments, and anything that is not encapsulated in fiberglass will be additionally protected against water with resin. Should hold up for many more years than I plan to keep the boat before moving on to a newer toy.
In reply to pinchvalve (Forum Supporter) :
Ohio might be closer to you, but for future reference, Foundation Building Materials, off of 136 in hempfield township Greensburg, should carry Marine grade. They did when they were Westmoreland Supply at least.

11GTCS
HalfDork
1/28/21 5:21 p.m.
In reply to pinchvalve (Forum Supporter) :
I guarantee you put more time and effort / better materials into that than the original manufacturer did. It looks good and will be just fine. Extra points for innovative use of unistrut for clamping the new work in place BTW! 
Mr_Asa said:
Biggest thing for me for Marine Grade Plywood was that you can often still find it using CCA for the anti-rot compound, not the newer and crappier types.
I went with Aqua-Ply for my flooring.
I've never used any marine plywood myself, and have not messed with any jon boat decking builds in 30 years!
At the time for just a carpet wrapped plywood deck, 1/2 pressure treated from the local box store did what I needed.
This year I will be getting rid of the overlayed floor in the bass boat I bought in the fall, and replacing the existing glass floor, but weight will be a factor, and 1/2 will be too much. It will be glassed top and bottom, with lotta support, so 1/4 would prolly do. Ill look into the aqua-ply. What is CCA, and what are the current crappier types?
In reply to pinchvalve (Forum Supporter) :
Very nice looking work.
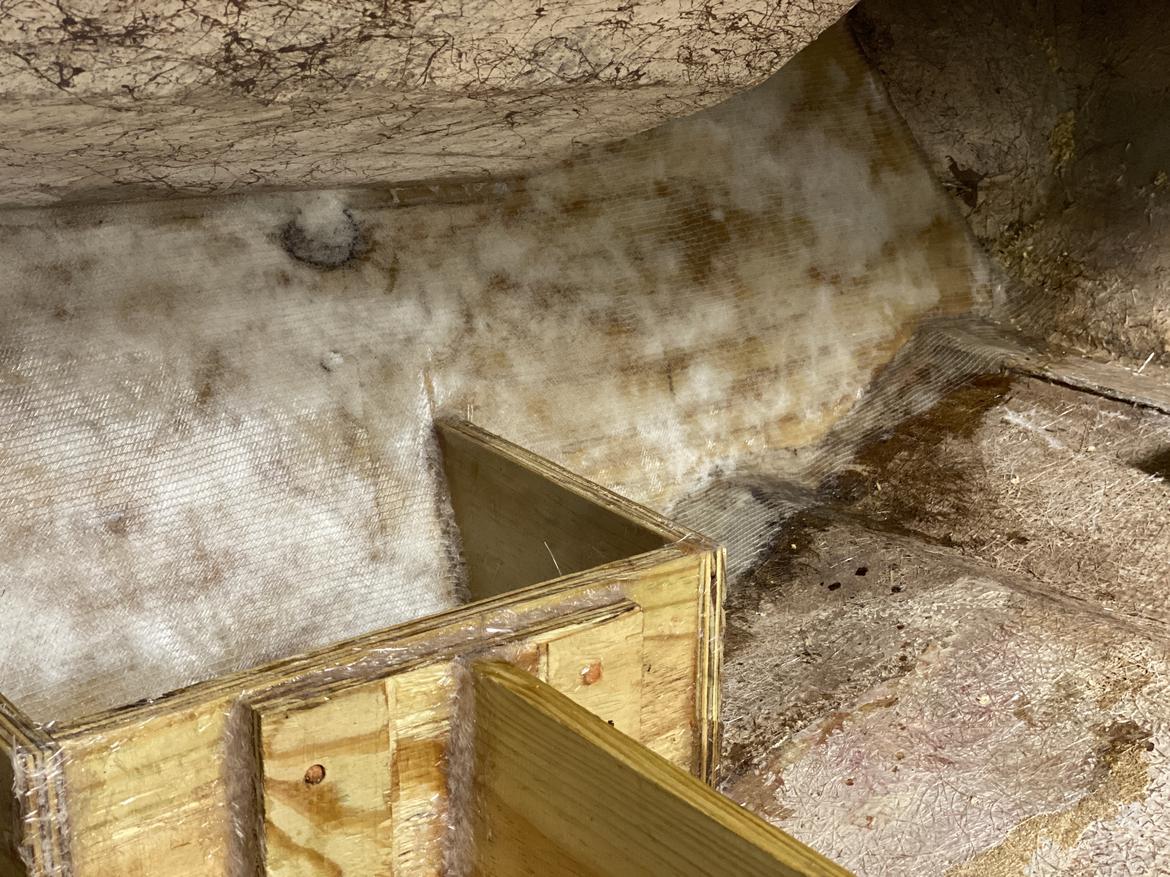
The next step was to mix some cut strand with resin and thickener to fill in any gaps and radius all 90-degree angles. This might be overkill, but I want zero voids where water could collect
Once that was done, I prepped the transom for a layer of fiberglass sheet and let it dry for 2 days (it's cold here) Then I put on the largest single sheet so far.
This sheet is thick, with chopped strand on the reverse and a weave on the front. It was impossible to get uniform resin translucency, but I got pretty close. It's drying slowly because of the amount of resin involved, I may have to add some heat to it. I think it worked OK and I'm glad that everything from this point on will be smaller sheets, unless I decide to do a second layer on the transom. Even at that, I'll probably just use a single-ply sheet.
I must say, I hate working with fiberglass.


