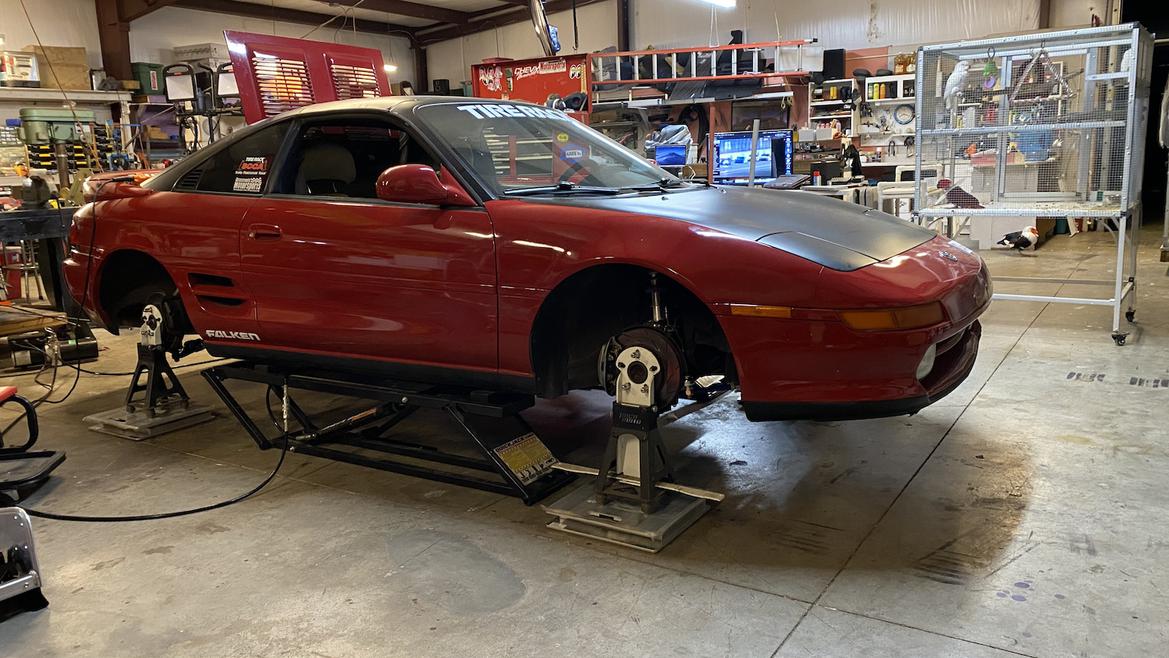
In a previous update on our 1991 Toyota MR2 Turbo, we detailed the many shortcomings of the SW20 chassis’ suspension. Essentially, the chassis was great as long as it didn’t move or articulate in any way. At that point, the tires started pointing in lots of unhelpful directions, encouraging the car to do some not-so-fun things.
The primary culprits of the notoriously evil MR2 handling traits, as we discussed in that update, are dynamic toe change and roll center movement.
With toe change, remember that the tie rods controlling the amount of toe are fixed at the chassis, so the articulating end describes a circle with the fixed point as its center as it moves. While the moving point moves along the circumference of that circle, the total distance between the points stays the same, yet the horizontal relationship along the x-axis changes. This is what controls the toe, and why the toe shifts as that arm articulates.
And because the curve of a circle becomes more horizontal the further vertically you get from the x-axis, it’s a problem that just gets worse with more movement.
So the key is to orient the toe control links at rest so that the horizontal arrangement of the ends changes as little as possible as it travels through its range of motion—or, at least, to ensure that any changes that occur are as beneficial as possible.
In the case of the MR2, Alex Wilhelm at Wilhelm Raceworks has already done the hard work of analyzing the dynamic shifts that the suspension makes during articulation and has designed pieces to mitigate it.
His Suspension Geometry Kit consists of key components that correct dynamic toe changes. Parts include custom rear toe links, relocating brackets to connect those links to the rear uprights, custom tie rod ends for the front, and spacers to properly distance them from the steering knuckle. The result: toe links in the front and rear that are nearly perpendicular to the ground at rest instead of angled up toward the corners of the car in stock form. And they're even more dramatically angled if the car has been lowered.
The Wilhelm kit also includes spacers to correct the extremely low roll centers of lowered cars by adding distance between the bottom of the knuckles and the ball joints, spacing the outside portion of each control arm downward.
Installation of nearly everything is a snap. The roll center spacers simply bolt in between the ball joints and the control arms using the supplied extended bolts, and the front tie rods and spacers should require nothing more complicated than a ball joint press to remove the old tie rods before they bolt in place.
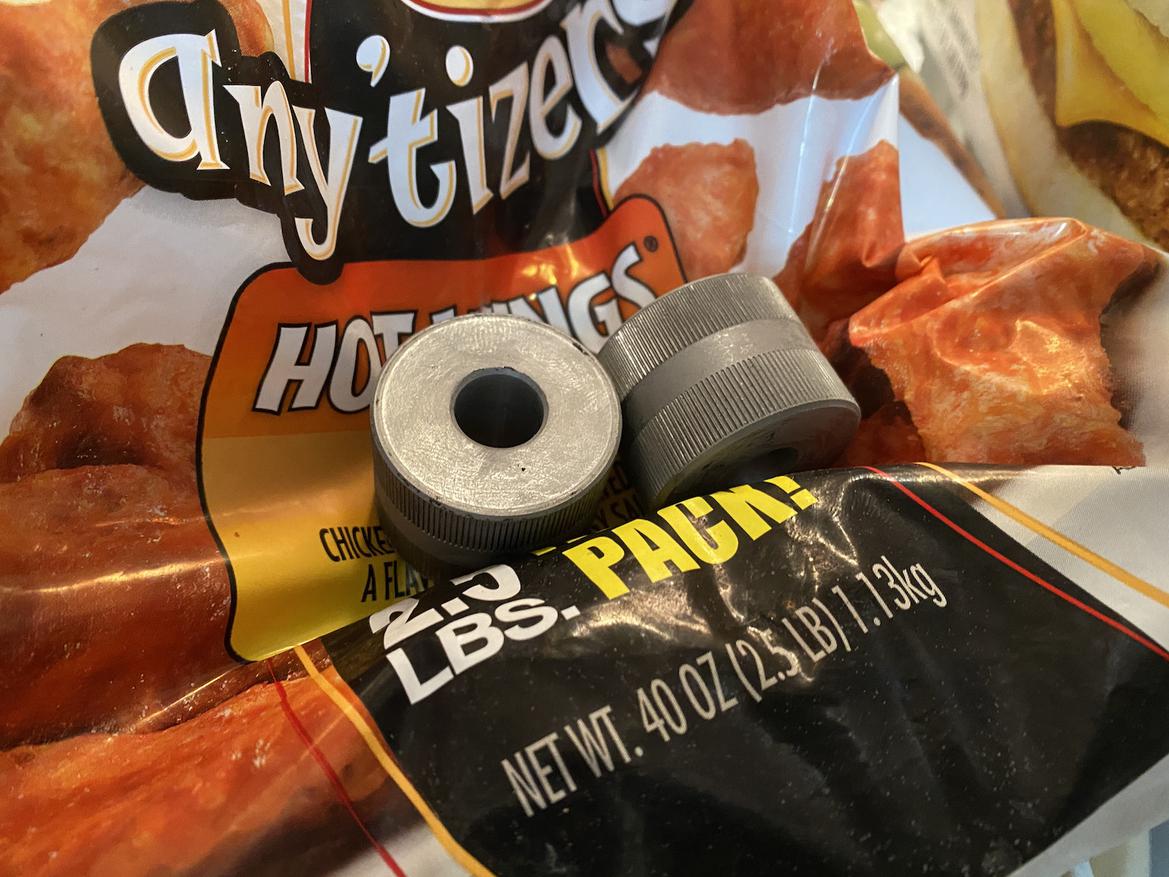
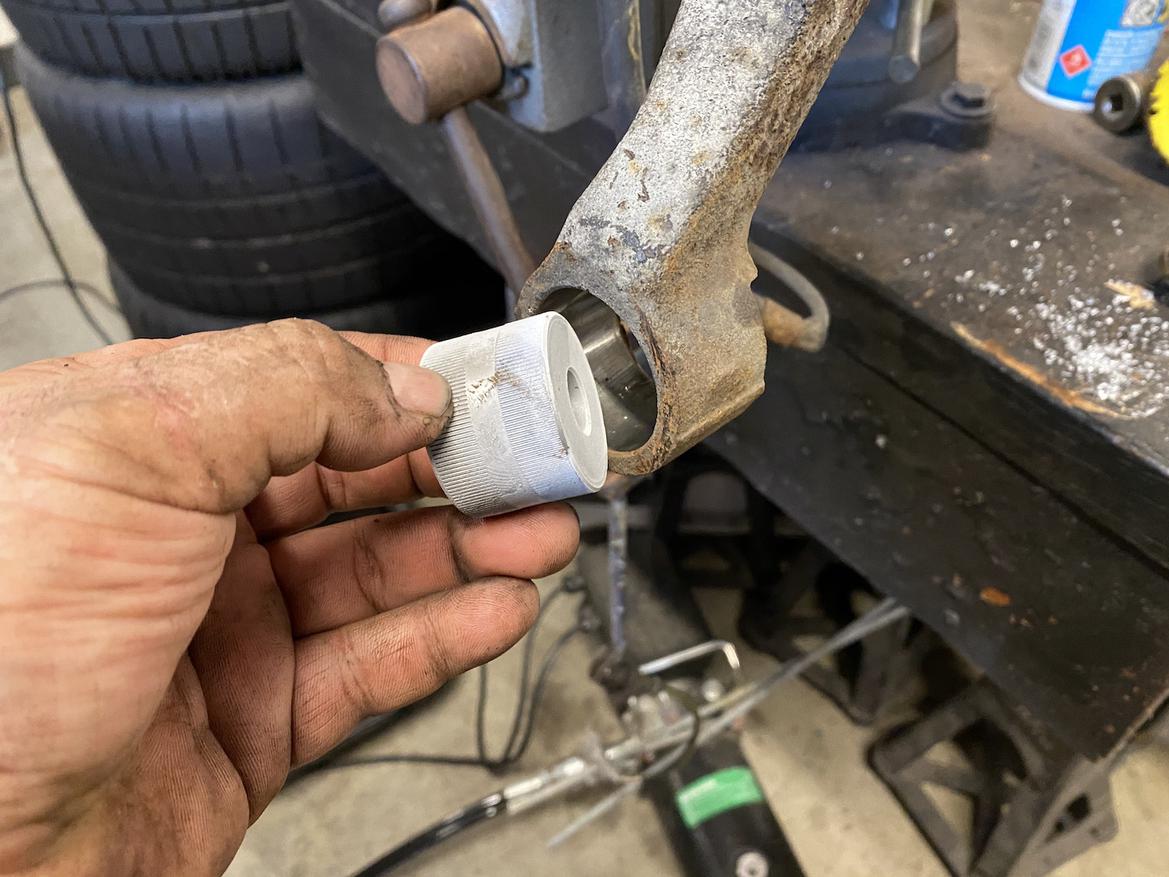
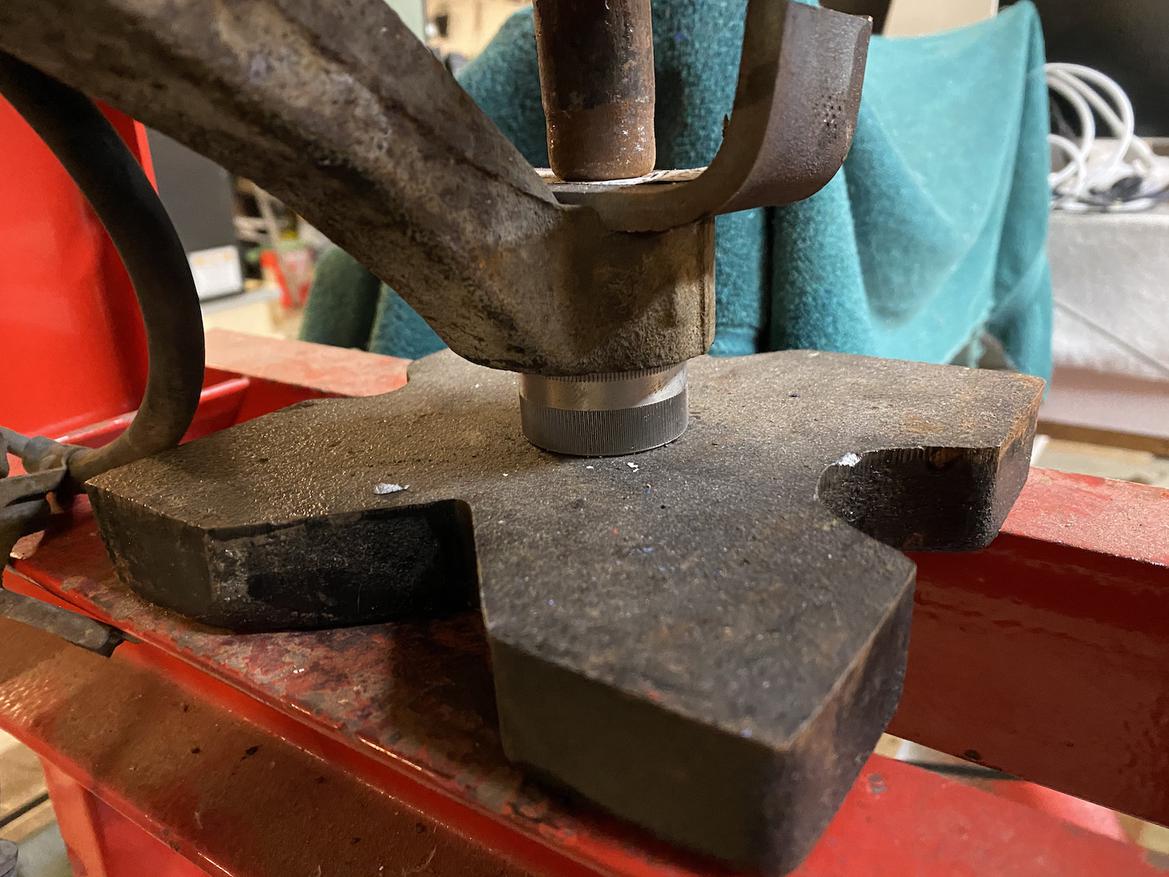
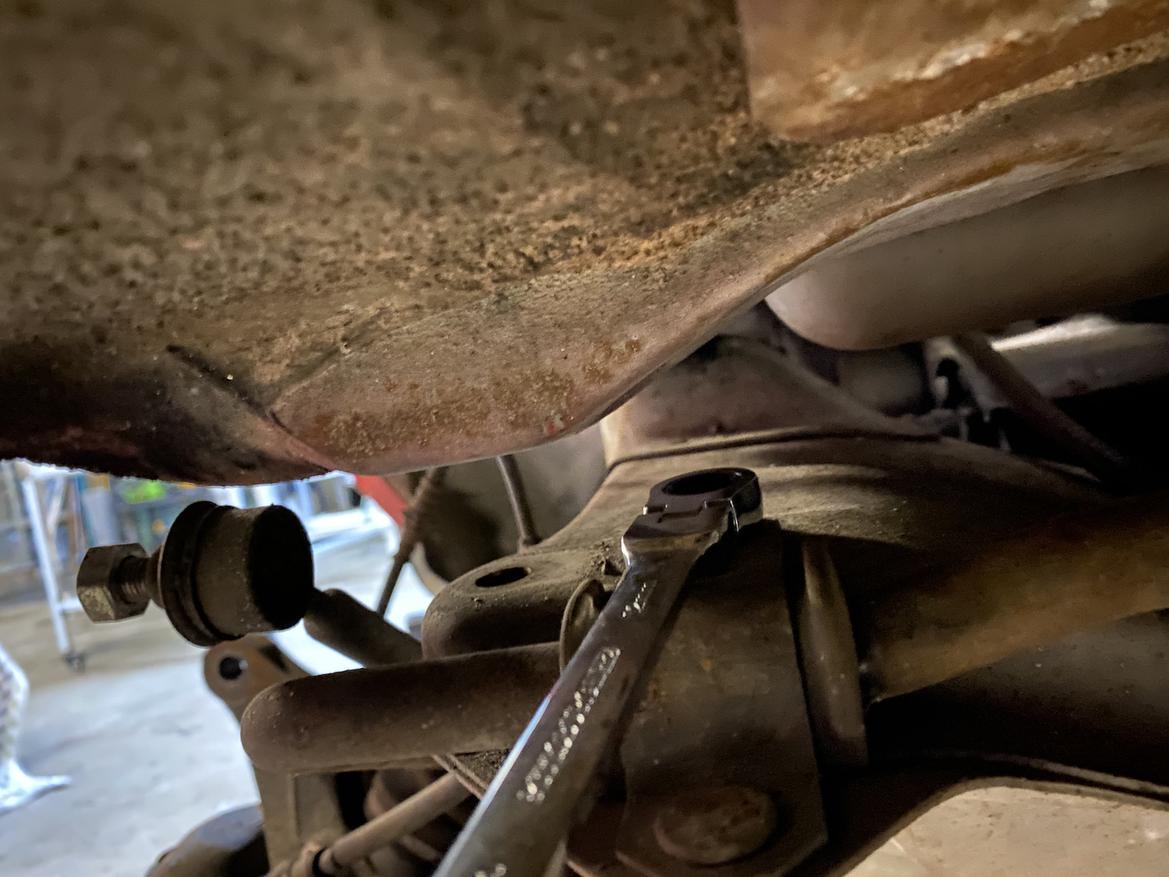
The trickiest part is installing the steel inserts that replace the rubber-isolated bushings that secure the new toe links. Removing the old bushings is fairly easy on the car with a ball joint press or even a C-clamp and a big socket, but the new bushing is a tight press fit.

Ultimately, we found that removing the knuckle completely and using a hydraulic bench press was the right solution. Chilling the bushing on a bag of frozen chicken wings and heating the knuckle with a torch helps as well.
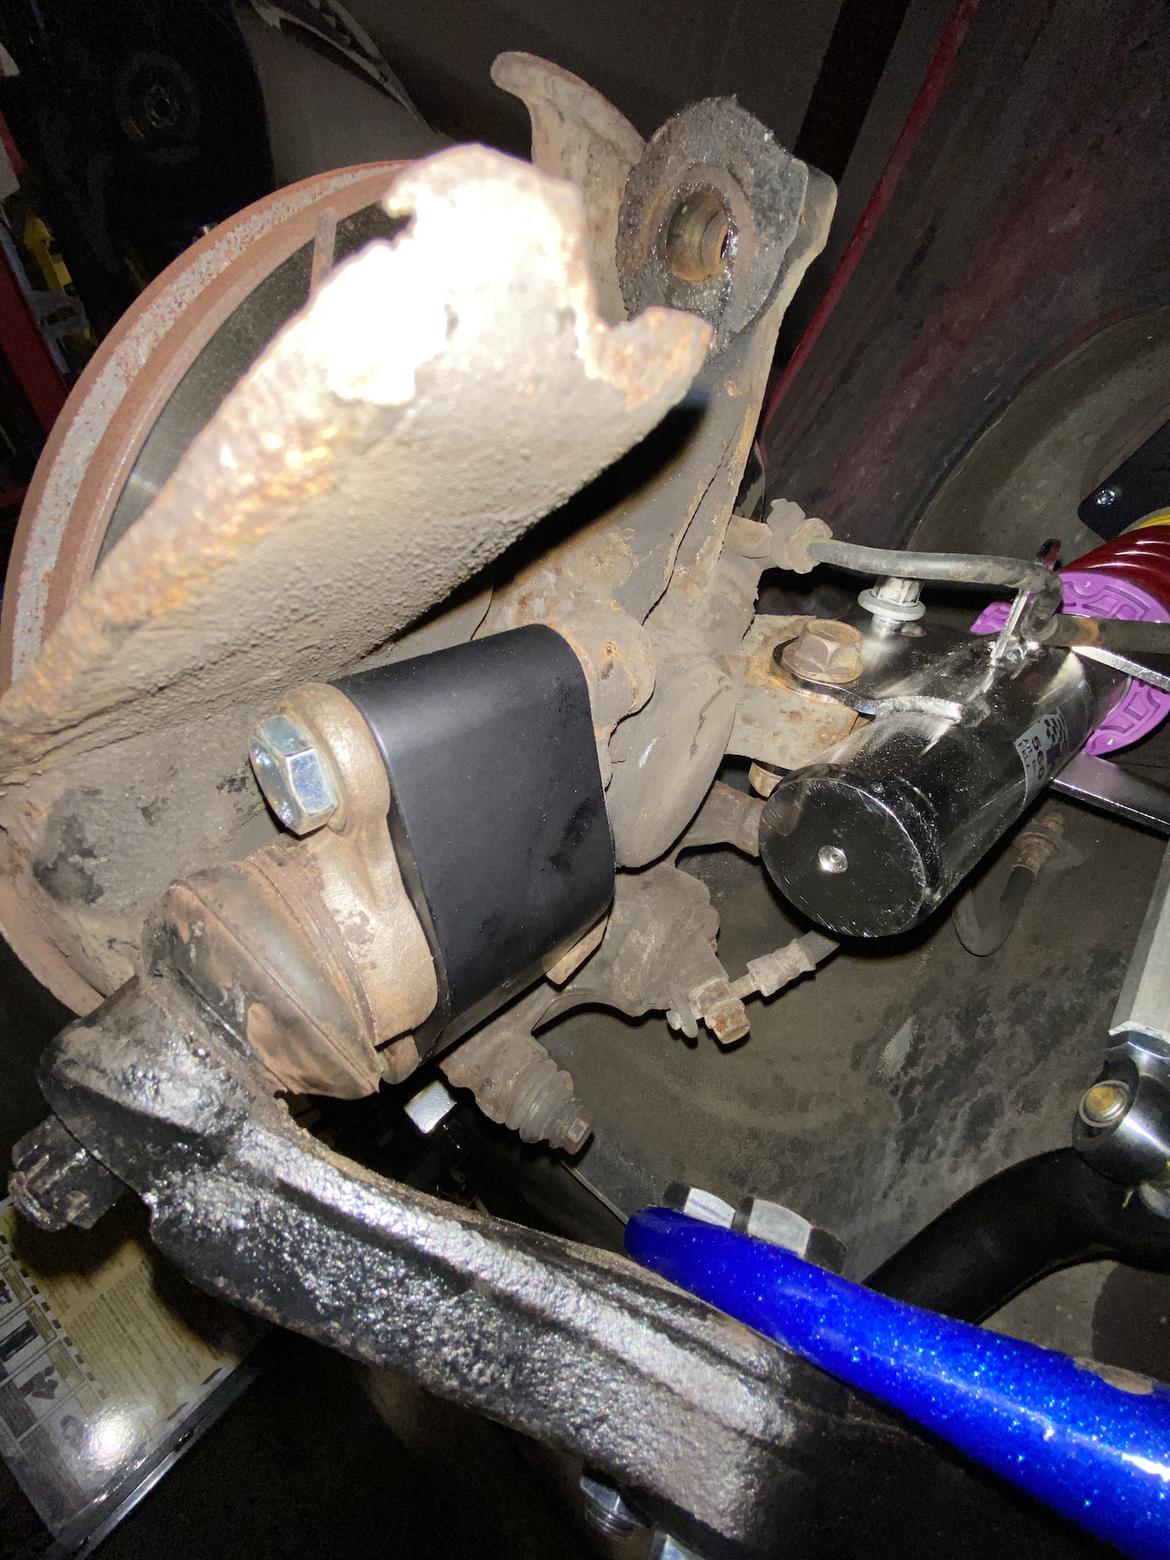
To remove the knuckle, you’ll need to undo the two bolts holding the ball joint to the lower arm (which you have to remove to install the roll center correction kit anyway); remove the brake caliper, rotor and pad bracket; unbolt the axle; and disconnect the ABS sensor.
Our ABS sensors were rusted in place on the knuckles—a common MR2 affliction—but removing them at the connectors inside the engine bay is simple and only requires the removal of a couple extra bolts in the wheel well. Ultimately it’s not that tough, so don’t be like us and get suckered into thinking you’re saving time trying to do it on the car.
Once installed, the Wilhelm geometry kit heavily mitigates much of the unwanted roll steer characteristics. It also adds about 30% more anti-squat to the rear, effectively pushing the rear wheels into the pavement on acceleration. The most noticeable characteristic is how much earlier and more controllably the car takes power inputs on corner exit. In fact, during our first test, we were convinced that the car was down on power. Then we looked at the data and saw that the car was pulling as hard as ever.
The other notable affect is how benign the car behaves at the limit. Previously, it would transition from momentum-killing understeer to snap oversteer with little warning and little hope of recovering while maintaining any momentum.
Now the car is extremely manageable at and even past the limit. Any corner-exit oversteer is now easy to deal with through a slight steering correction, and mid-corner balance feels very neutral, even over track imperfections.
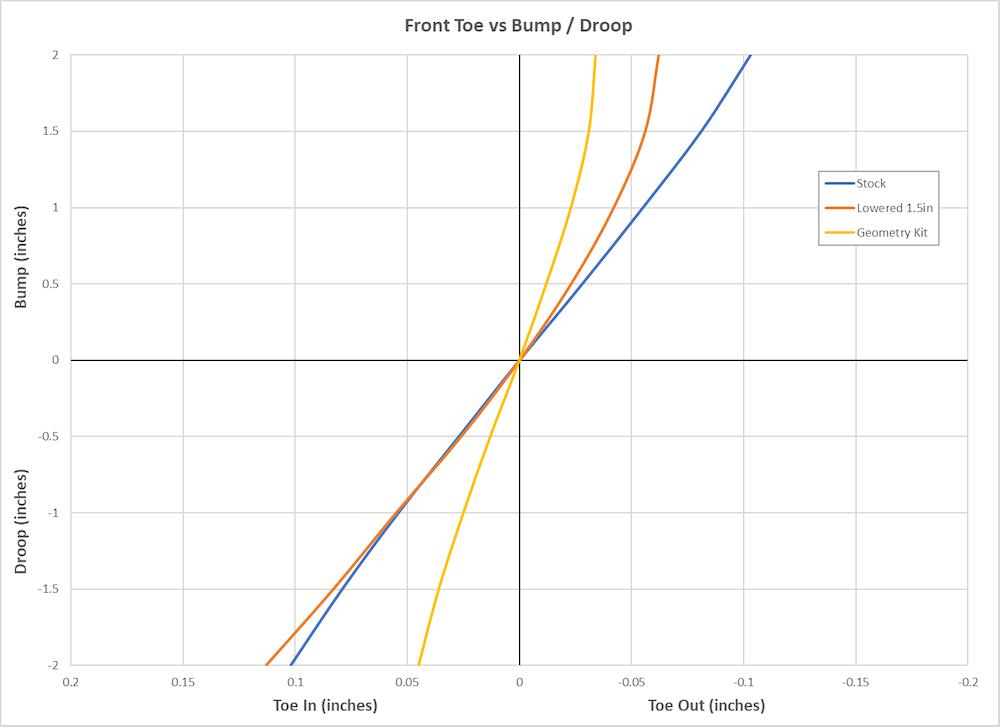
The chart Wilhelm provided shows why the kit works, too. In this first chart, we can see the amount of toe change in the rear suspension as it articulates.
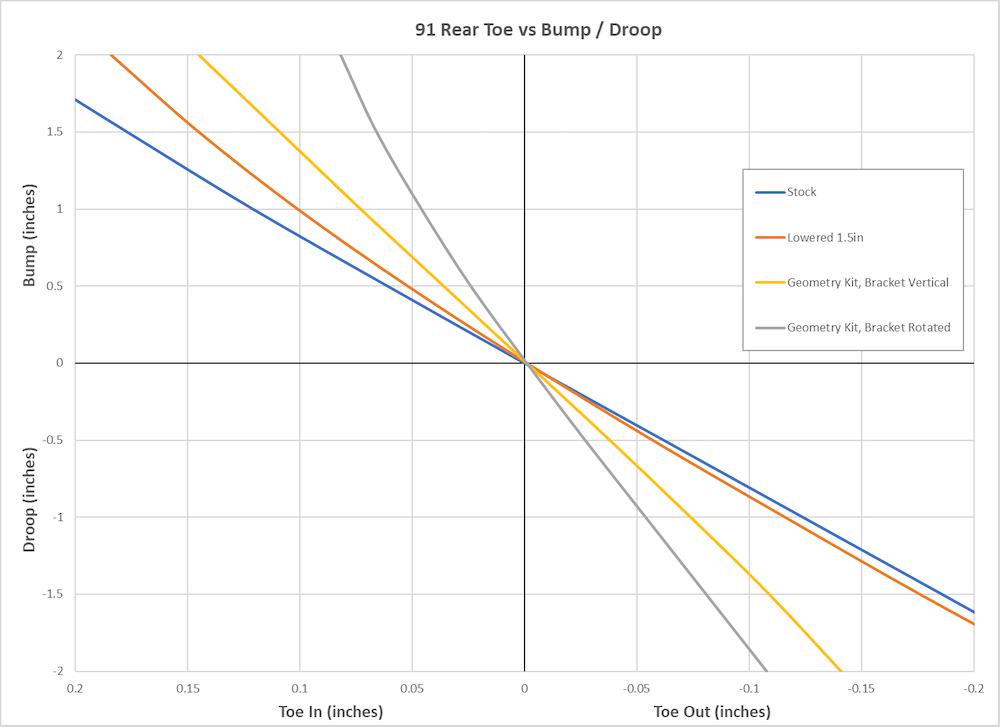
In stock configuration, under compression of just 1.5 inches, the outside-rear wheel has toed in almost 0.2 inch. With the geometry kit installed and the bracket in the rotated position (which is now Wilhelm’s recommended setting), that toe deflection is reduced by 70% to around 0.06 inch. Likewise, front toe deflection is cut by more than 60% at similar compression ranges.
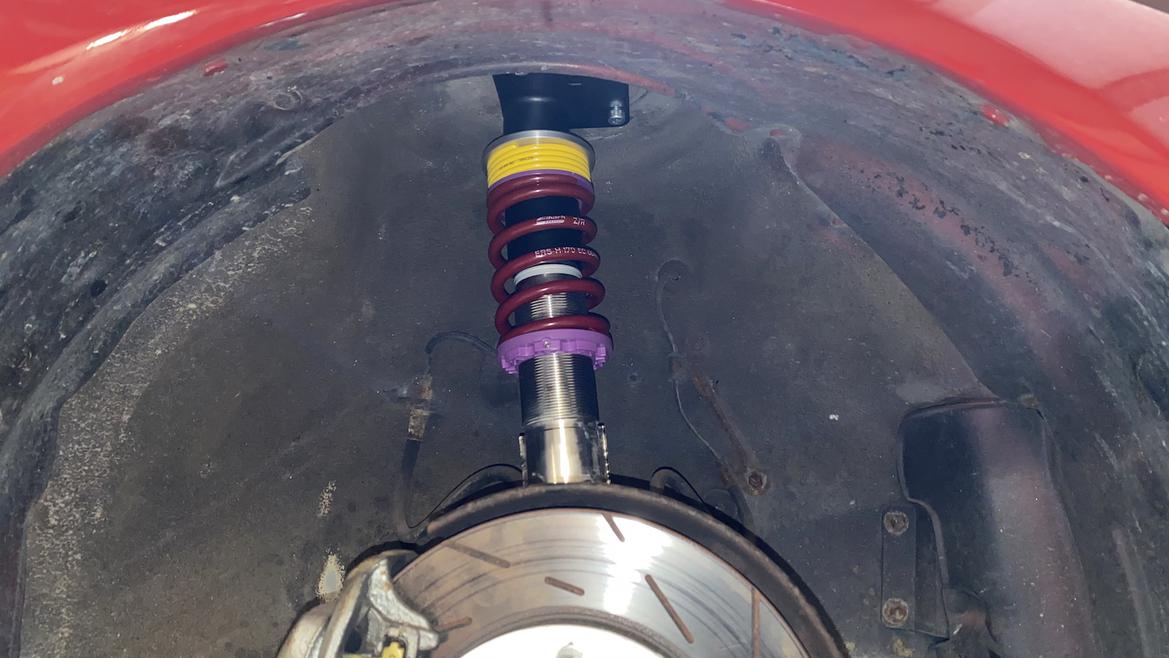
To help our newly geometry-corrected suspension live its best life, we wanted to surround it with a cast of qualified supporting characters. That meant upgraded springs, dampers and anti-roll bars.
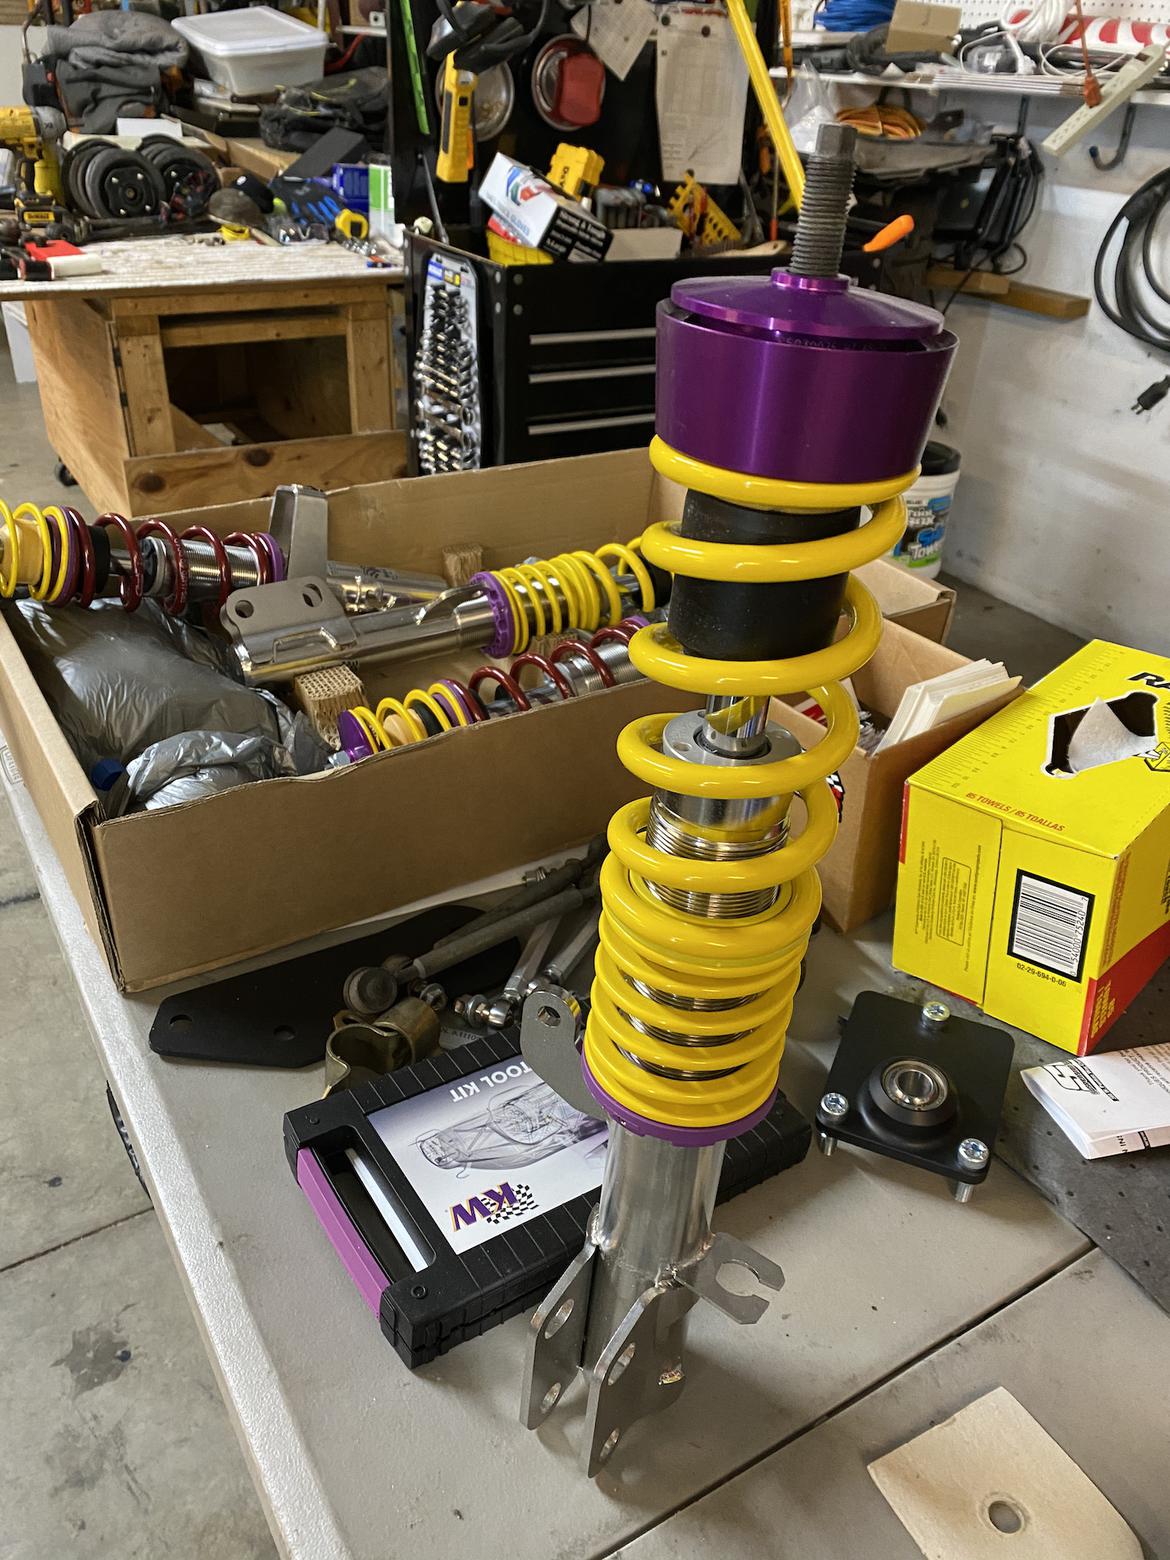
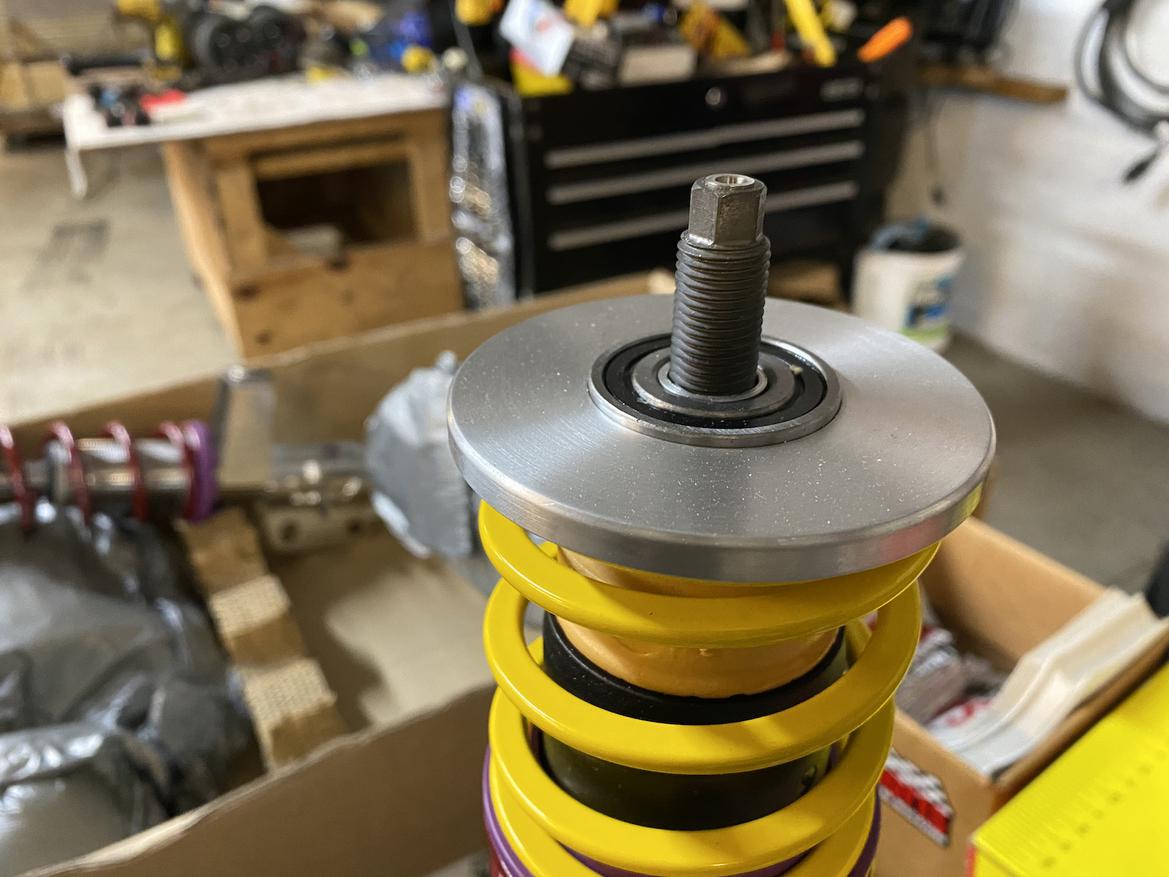
KW Suspension was our choice for dampers: the brand's double-adjustable V3 series. These struts are designed to be adaptable to OEM upper mounts, meaning they’re fully streetable while also featuring ride height adjustment and two-way damping adjustment (both compression and rebound).
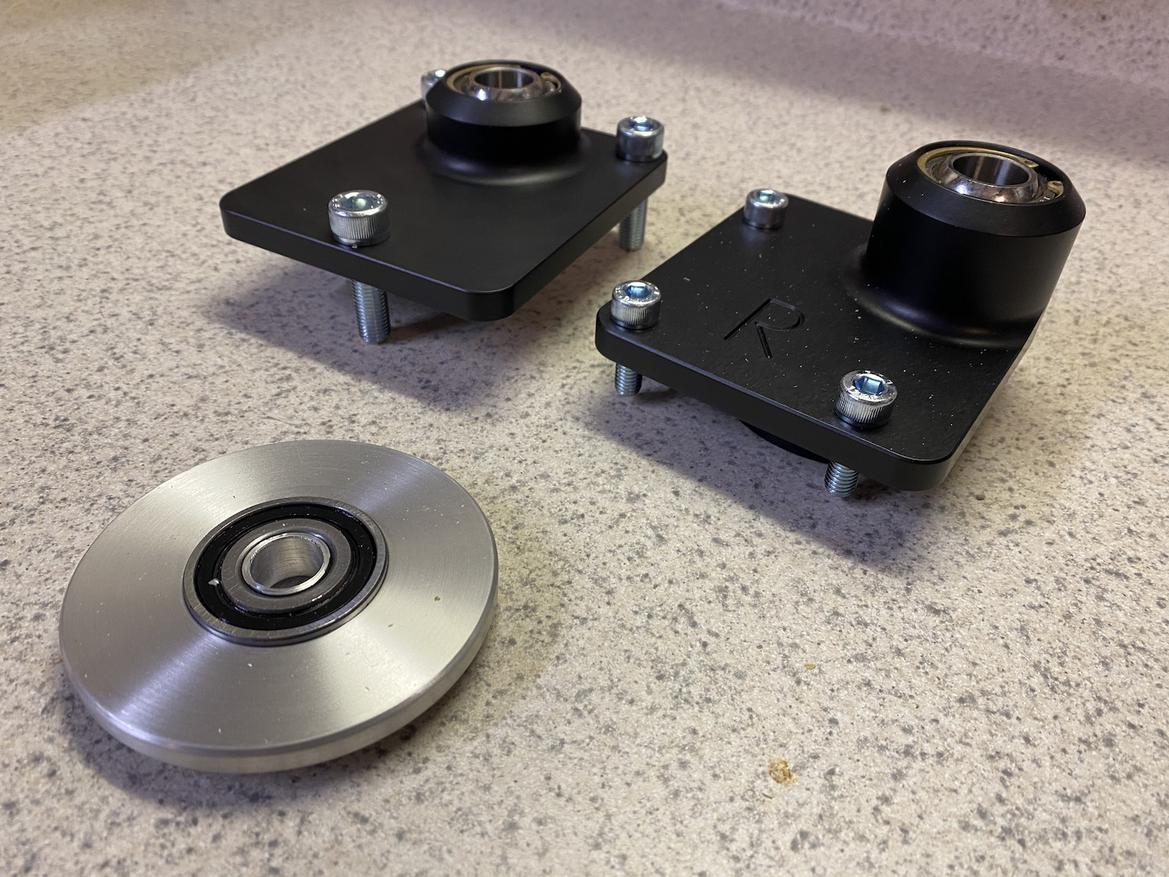
In our case, we wanted a little more performance from our upper mounts, so we opted for a set of Wilhelm Raceworks offset top mounts. They provide additional camber front and rear, along with additional caster in the front.
KW supplies a fixed top spring perch that's designed to be used on the front struts, under the stock upper bearing, but we substituted a set of roller bearing upper perches from Wilhelm. This freed up those top perches to be used on the rear, under the Wilhelm mounts.
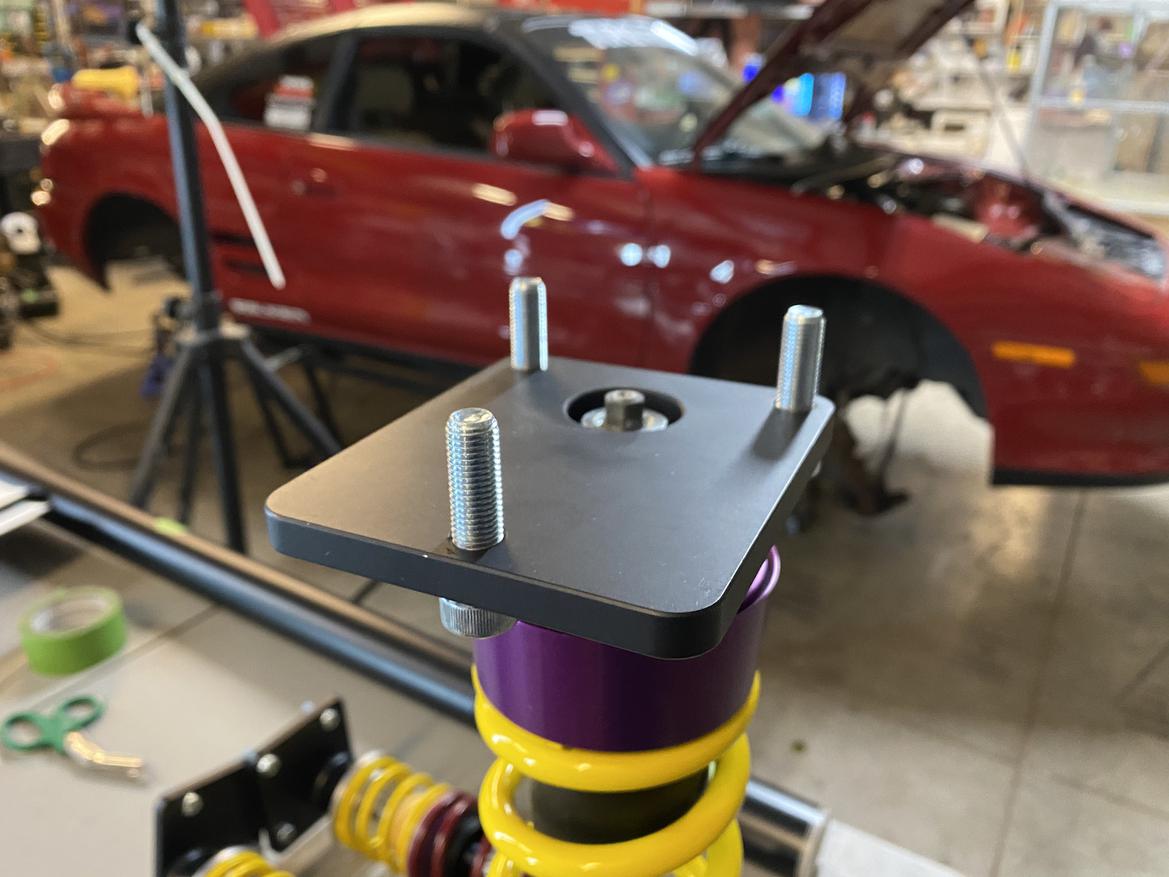
Again, if you’re using OEM top mounts, the KW struts will bolt right up without any additional hardware, but if you're using aftermarket top mounts, you only need to add a pair of steering-capable top mounts for the fronts.
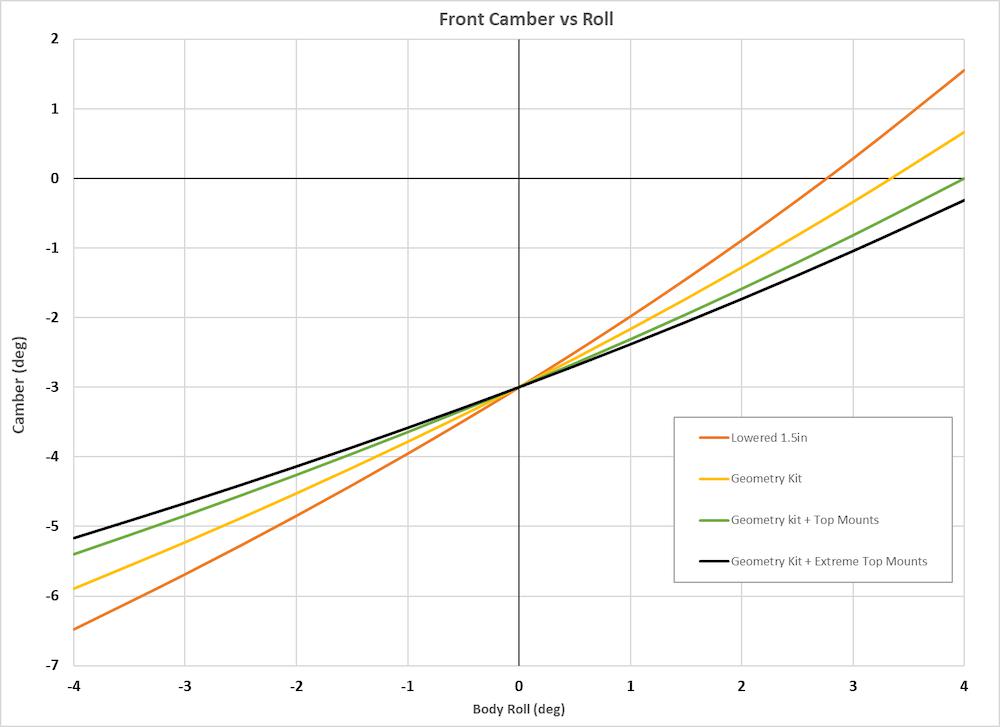
The Wilhelm top mounts provide another function besides just static negative camber, however. Leaning in the tops of the struts provides a much more desirable camber curve throughout the range of motion of the suspension. So not only do you have the proper amount of static negative camber, you get to keep most of it as the suspension articulates. The angled strut and smaller lower spring perch also provide a little more space for taller tires in front, which is always a difficult fitment for the space-limited MR2.
While KW offers a set of custom-wound springs, we wanted to adjust the rates a bit from the supplied 170 lbs./in. units at the font. Luckily, Eibach has an entire catalog full of the proper 170x60mm springs that fit the KW kit. We chose a 228 lbs./in. pair for the front to match with the 400 lbs./in. set that KW supplies in the rear.
One of the great things about coil-overs is the near-infinite variety of spring options, and Eibach lists no fewer than 19 different spring rates with the appropriate size for our coil-overs. With a retail price of only $70 per spring, they're a great resource for fine-tuning.
Likewise, the adjustability of the KW struts—not only in ride height but in compression and rebound damping, too—will be a great tuning tool. KW is the supplied damping system on the factory-built AMG GT4 race cars, and if it’s good enough for them, it’s certainly good enough for our 30-year-old Toyota.
As a mid-engine car, the MR2 always seems particularly responsive to rear rebound adjustments to fine-tune transitional behavior, so that’s where we’ll initially concentrate our tuning efforts. As such, we’re starting with all of our rebound and compression adjustments in the center of their 14-position adjustable ranges, and we’ll work out from there to find the spot we like the best.
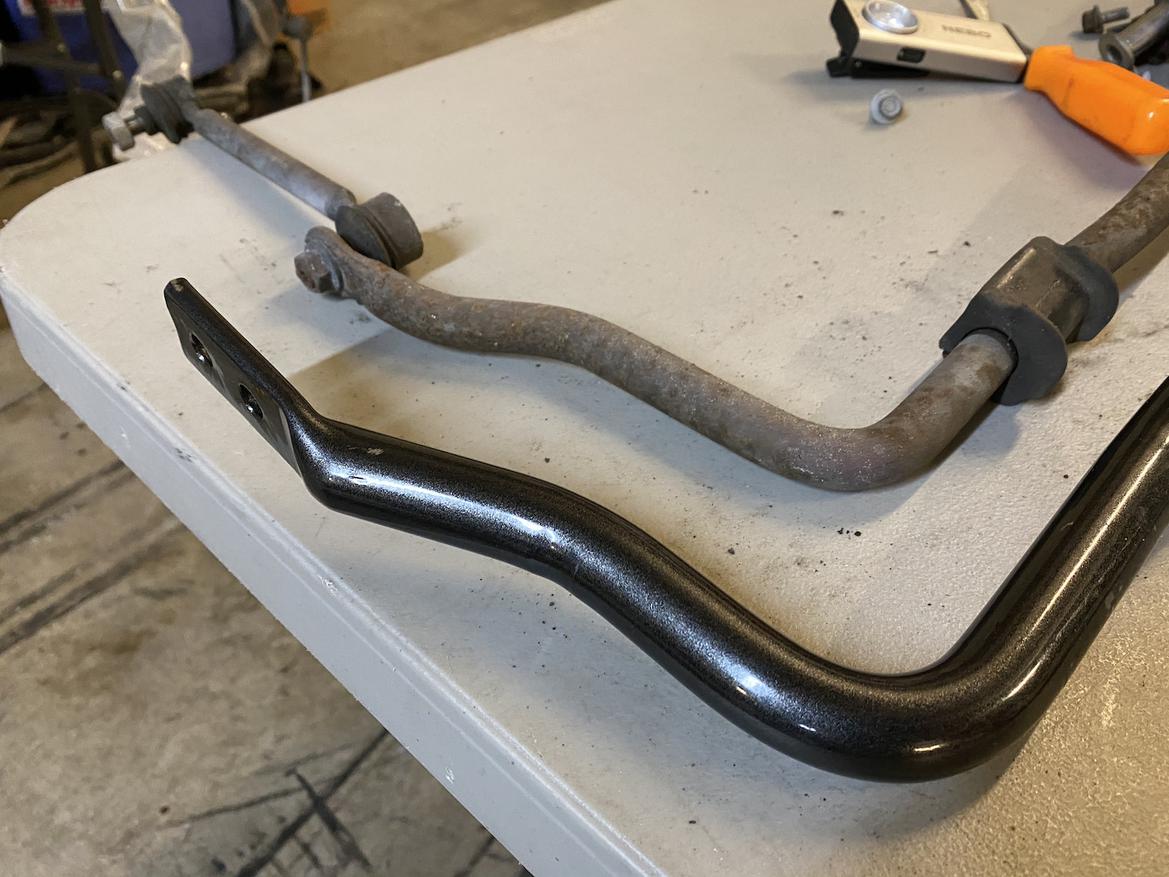
Finally, we replaced the stock anti-roll bars with a set from ST: solid bars measuring 25mm in diameter in front and 22mm in diameter in the rear, with a two-position mounting option out back. These replace the stock 19mm front and rear bars and increase roll stiffness by more than 150% in the front and roughly 130-150%, depending on position, in the rear.
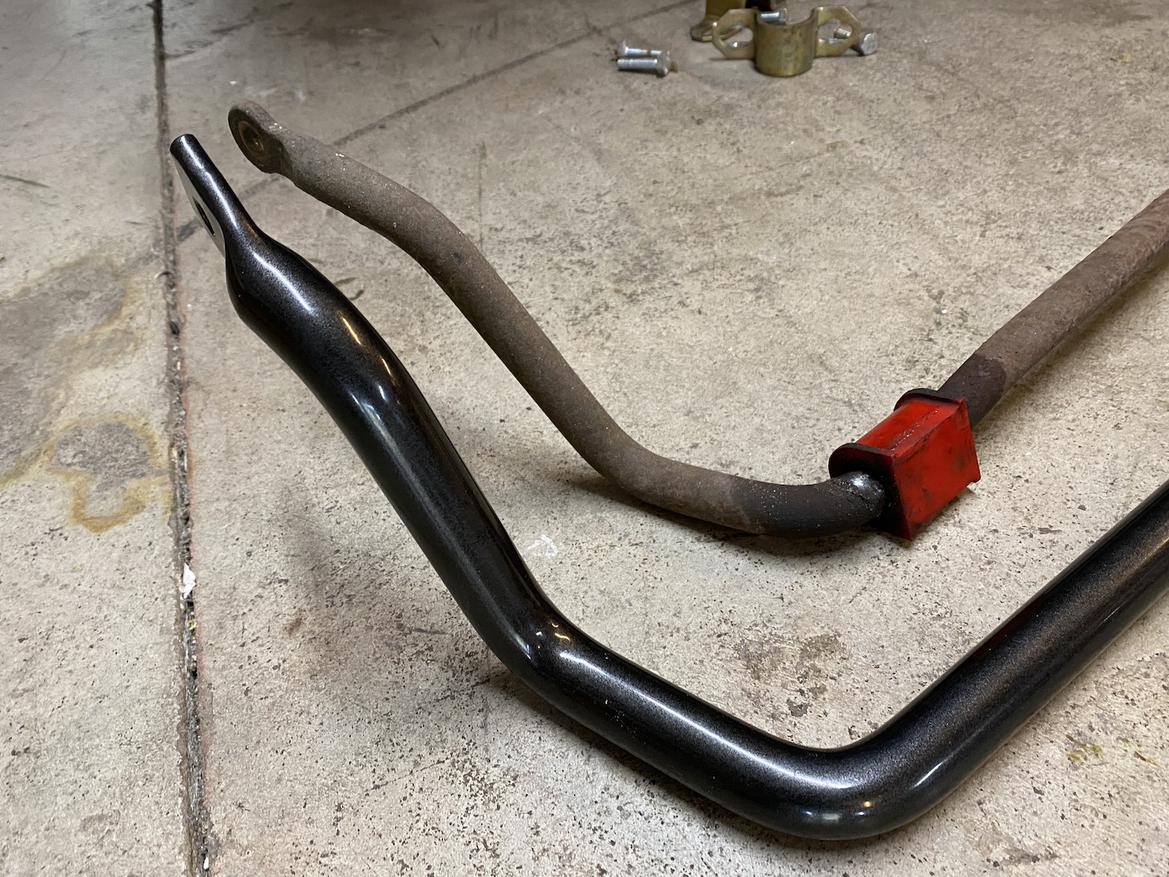
In practical terms, stiffer anti-roll bars create additional roll couples between the left and right side of the car, keeping tire contact patches on both sides more heavily engaged during cornering.
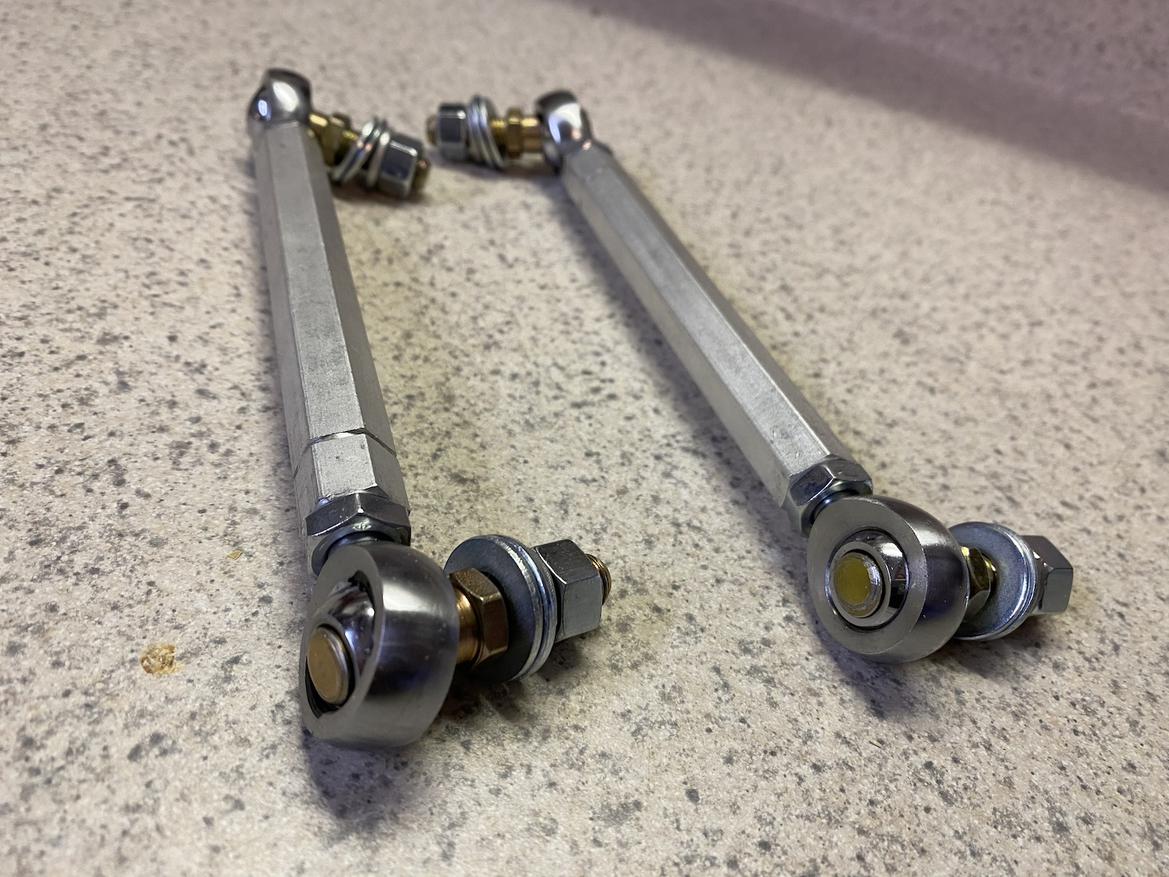
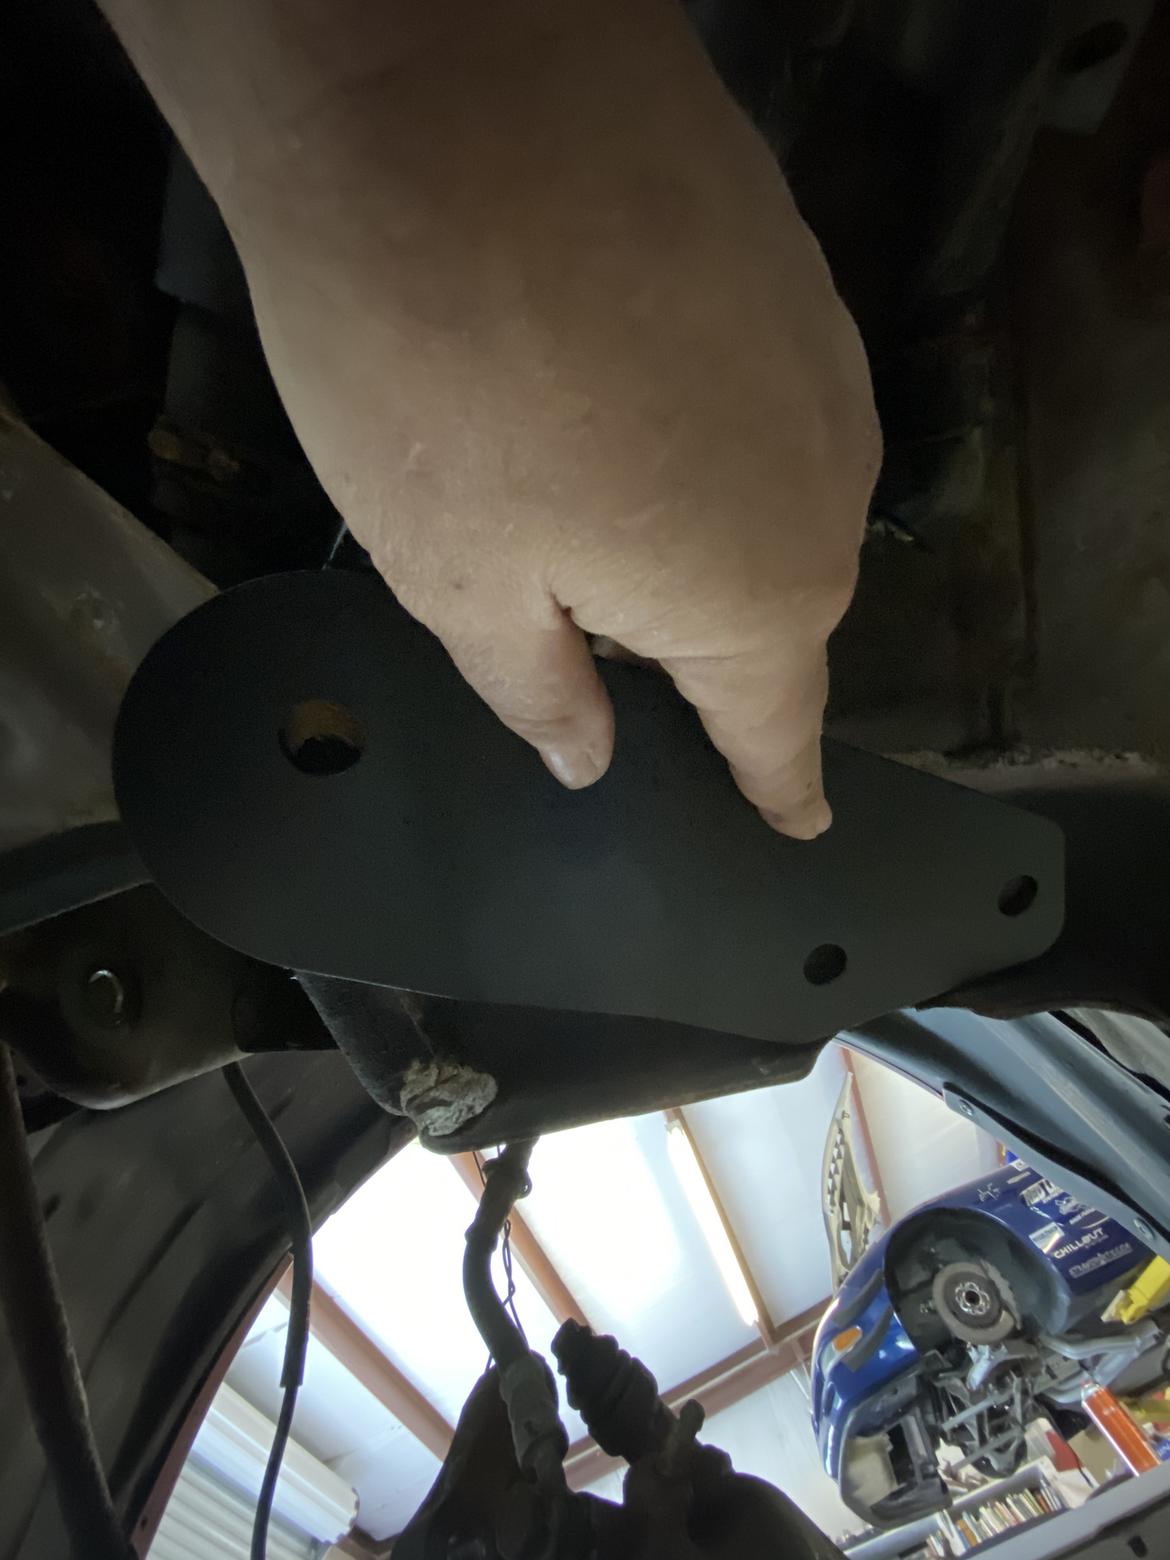
Installation of the front bar is simple. Four bolts, two end links, install the handy supplied chassis plates that help stiffen the mounting points under the support bushings, connect the new end links (ST supplies high-quality fixed end links, but we opted for an adjustable set from Wilhelm), and you’re good to go.
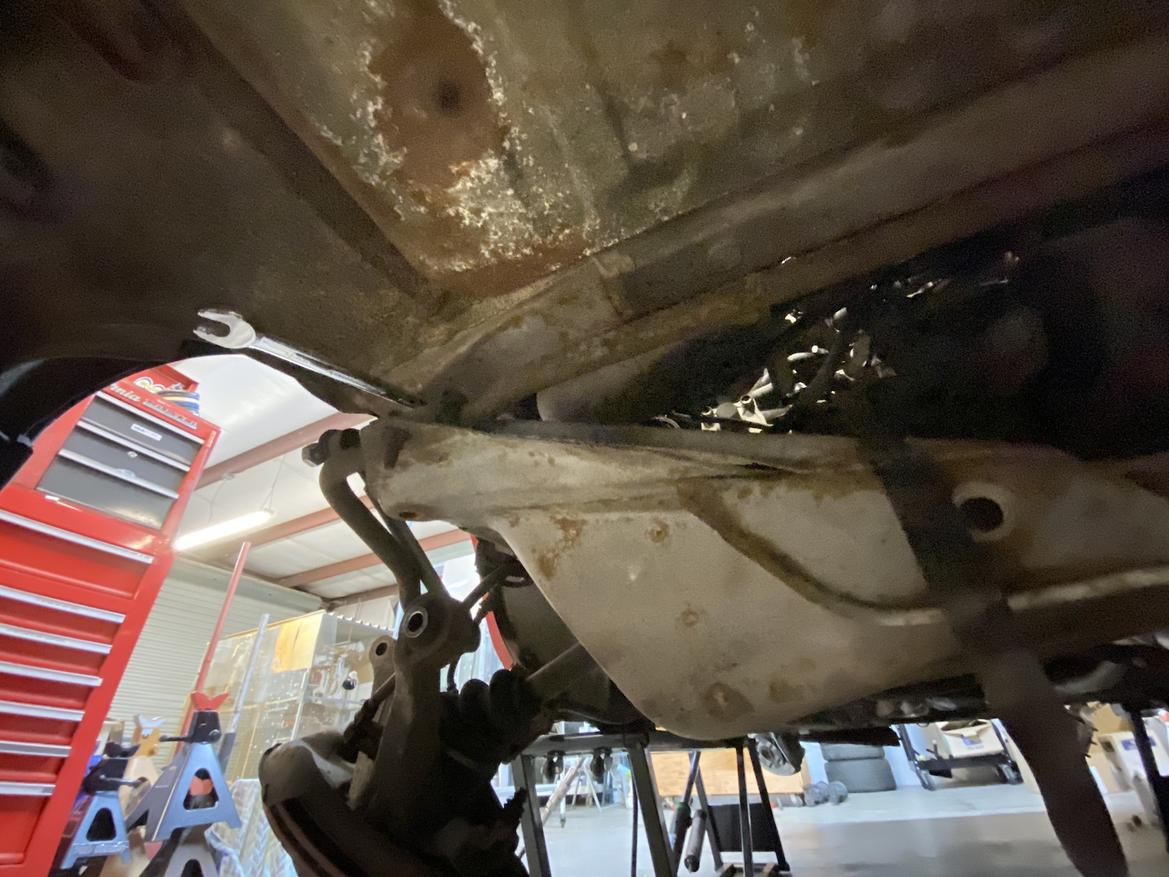
In the rear, it's not so easy. The rear anti-roll bar attaches to the top of the rear subframe for reasons known only to Toyota and God, and neither of them are talking. So you’ll have to take down the subframe—or take it off—to facilitate installation.
To lower the subframe, remove the exhaust, loosen (but don’t remove) the four bolts holding it to the chassis, then remove the fasteners affixing the rear motor mount to the subframe.
This should give you enough clearance to get a gear wrench into the gap and undo the anti-roll bushing bolts. If you round off one of those bolt heads, though, or you can’t get enough torque to break it loose, that subframe needs to come all the way out. Sorry. Luckily, a generous application of CRC Knock’er Loose and a few prayers from various denominations let us remove our bolts relatively easily.
We media-blasted and cleaned all our hardware before reinstalling it. The last thing you need here is a cross-threaded fastener.
Our initial driving impressions were overwhelmingly positive. We set our front suspension to 3 degrees of negative camber and zero toe, and the rear was set to 2.4 degrees of negative camber with 1/8-inch of total toe in. We broke out our Intercomp scales and did a quick and dirty corner balancing—something now easily in reach with the adjustable spring perches on the KWs—and headed to the SCCA’s first ProSolo of the year.
The car had an amazing ability to put power to the ground, even in the wet, and it felt nimble and recoverable, no longer surprising us with sudden understeer or oversteer. This set of modifications was hugely transformative even on a purely subjective level, and we’ll be heading to our regular test track soon to see what the lap times and data think about it.
Comments
I'll be honest, I always looked at coil-overs as an "easy button" for making your car handle better.
I now see that there's a lot more to it than just slapping on a set of coil-overs—they need to be dialed in, too, or you might end up making your car handle worse.
Displaying 1-1 of 1 commentsView all comments on the GRM forums
You'll need to log in to post.


