

Photography Credit: Per Schroeder
There’s an oft-told bit of wisdom for those looking to buy a car: Avoid a rusty one at all costs. Sure, that’s easy for us to say from behind a keyboard, but when you’re out there roaming used car lots and surfing the Internet, you'll find that rusty cars are the norm in most parts of the country. Salty roads, wet climates, proximity to the ocean and even just time can turn a bright and shiny car into a rusted hulk before your very eyes.
Rust is often compared to cancer. If caught early, it can be stopped in its tracks. Allow it to spread, and the prognosis isn’t so good.
The process of treating rust is pretty straightforward, and we’ve found it to be one of the most enjoyable parts of a restoration. In our minds, it’s loads better than the wearisome steps that follow: body work, paint and filler.
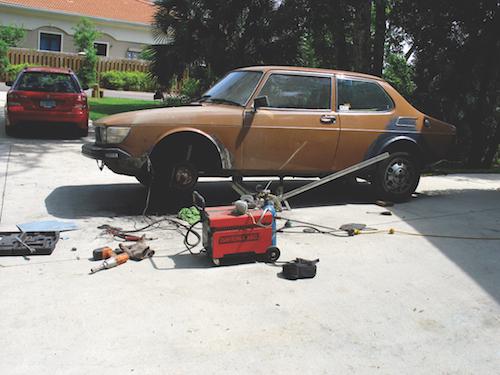
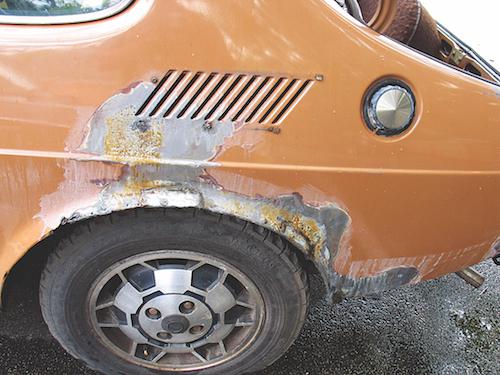
To dispel some of the common fears of working with rusty sheet metal, we’ll detail how we repaired some holes in the fender lip of our 1977 Saab 99 rally project. Tin worm often attacks the fender lips of the Saab 99 as well as the manufacturer’s later 900 models. Luckily, this is mostly a cosmetic area, not a structural one.
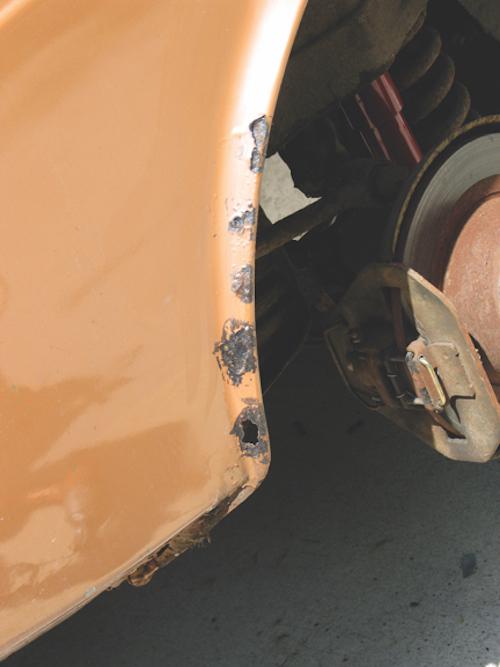
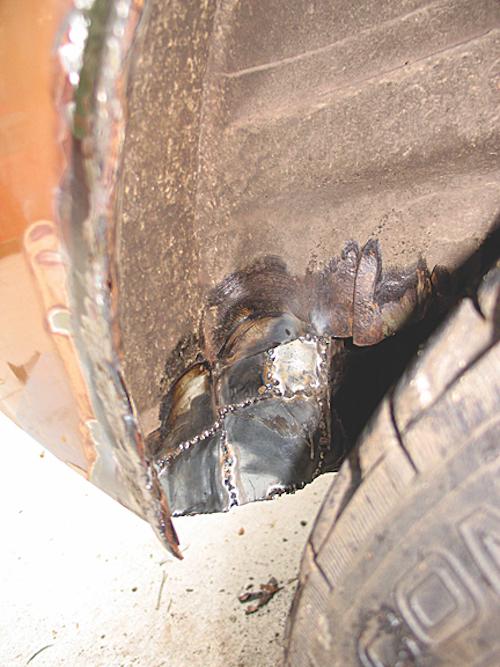
This is what we found on our 1977 Saab 99, and it's what typical fender lip rust looks like. Photography Credit: Per Shroeder
The first step in fixing a rusty panel is to determine if the panel should be replaced entirely or simply patched. Bolt-on parts like sunroofs, fenders and doors are prime candidates for straightforward removal and replacement.
If the panel is welded to the car itself or if replacing the entire panel is not an option, then the question becomes whether to use a patch panel that is specific to that application or to fabricate one from generic sheet metal stock. If a repair patch is available, get it. It’s often a lot less time consuming to go with a preformed replacement panel than to cut, bend and form a new one.
In our case, no one in the U.S. offers sheet metal patches for our Saab’s wheel arches. They’re available in the U.K. at a reasonable cost, but the shipping fee would have been prohibitive. So we'd need to fabricate a patch.
To get the process started we purchased a 2x3-foot piece of 20-gauge sheet metal from our local paint and body shop. For $20 we got a nice section of virgin sheet metal that’s easy to weld on and comes with a rust preventetive coating. Okay, time to get started.
Photography Credit: Per Shroeder
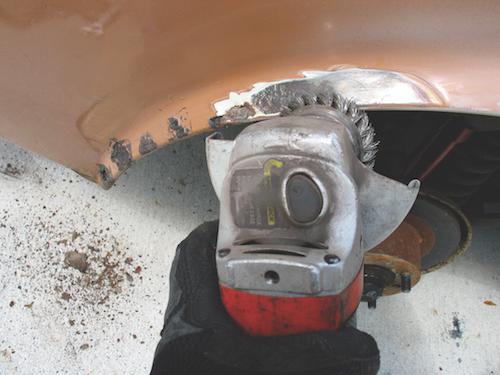
Now that you’re ready to get to work, you need to clean off all of the old paint, filler and rust that’s surrounding the hole. We use a wire cup brush fitted on an angle grinder for the majority of this cleaning.
Unfortunately, what started out looking like a small hole in the fender lip quickly grew as we removed layers of paint, Bondo and fiberglass filler from the fender. (Which reminds us: don’t forget to wear eye and respiratory protection for this and most other steps of the process.)
Photography Credit: Per Shroeder
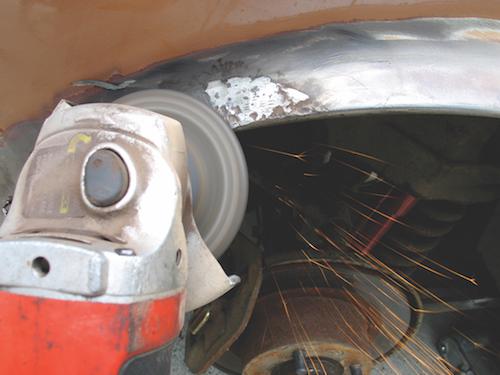
After we removed most of that nonmetallic filler with our wire brush, we mounted a grinding wheel on our angle grinder for the next step. This setup removes the remaining rust and would allow us to cut the hole to an easily patchable size and shape. A plasma cutter, reciprocating saw or die grinder can also be used for this step. Cut the sheet metal back until all of the rust around the hole’s perimeter is no longer visible.
Photography Credit: Sarah Young
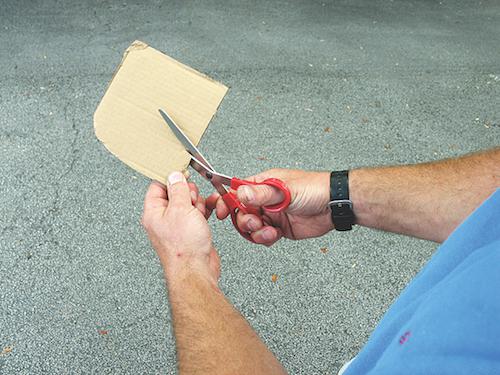
We have found that initially cutting the patch panel from your sheet metal can be a little tricky. Cutting a template out of cardboard is a great first step. Some trial fitting and trimming will make it pretty obvious when the cardboard patch is the correct size and shape; then you can trace the shape of the cardboard onto the sheet metal and cut out the patch panel.
Photography Credit: Per Shroeder
Time for tool selection. Depending on where we’re working, we’ll use either a Daytona MIG 140-amp, 110-volt MIG welder or an HTP 160-amp, 220-volt MIG welder for our sheet metal repairs. We used the Daytona MIG machine this time.
We set the power at 2 out of 4 with the wire speed about a third of the way from the minimum. Note that these settings will vary depending on the welder and materials. To determine the correct settings for your application, it's a good idea to do some practice work on an old fender panel or other scrap metal.
Photography Credit: Per Shroeder
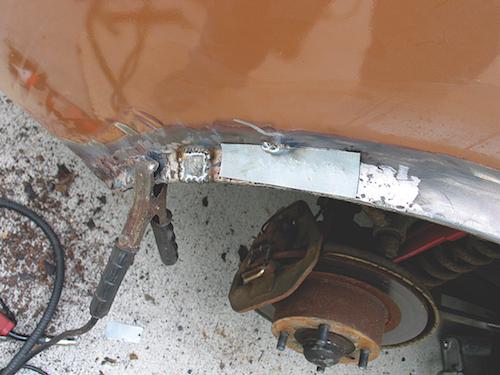
While wearing protective gloves, hold the patch where you want it and use one good tack weld to secure it in place. Check that the patch is in the correct spot and give it another tack weld. Apply a few more tack welds around the perimeter of the patch, bending the sheet metal to shape if necessary.
Photography Credit: Per Shroeder
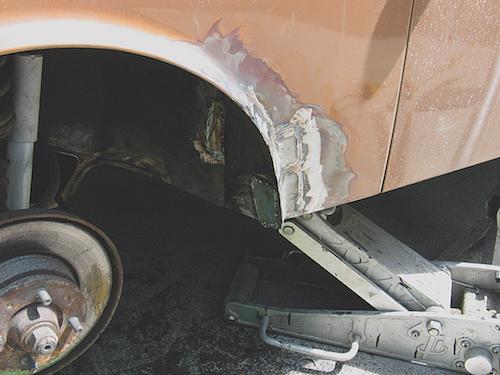
Now that the patch is on there, you can start stitch welding around the perimeter. To limit the amount of heat that one area sees, jump around a bit and avoid laying one continuous bead. This method lessens the chance of warping and the amount of body filler you’ll need later.
Photography Credit: Per Shroeder
Once the the patch is welded on, you can pick up an angle grinder and start cleaning up the welds. You should knock off the tops of the beads and clean up the area in order to minimize the amount of polyester filler you'll need during the paint process.
Photography Credit: Per Shroeder
All of that bare sheet metal should be covered up so that it doesn’t start to rust. Typically, we first apply a phosphoric acid metal treatment like Ospho to the area. We follow that with an etching primer.

Photography Credit: Sarah Young
When dealing with an injured body panel, most of us have a key decision to make: Repair or replace? After the fender on Editorial/Art Assistant Sarah Young’s Honda Civic got a bit friendly with a cement column in a parking garage (she claims it came out of nowhere), the answer to her dent dilemma came from Virtual Body Shop.
This Web-based company offers prepainted replacement parts for dozens of marques, models, model years and paint colors. The parts range from hoods and doors to grilles and trim pieces. Unlike our Saab, Sarah’s car is bread and butter on wheels, and it was no struggle to find a brand-new fender on the Virtual Body Shop Web site, virtualbodyshop.com. The panel’s coat of silver paint was a spot-on match for the rest of the Civic’s body.
So, what was the advantage? Well, for one, using Virtual Body Shop was dirt-cheap compared to other options. If we had taken the car to a body shop, we would have paid something like $600 for the fender, paint and labor. Meanwhile, the complete replacement panel from Virtual Body Shop cost about $350.
This route left us with only an hour’s worth of wrench turning before we were on our way. As a result, we didn’t have to deal with the body shop. We didn’t have to go in for an estimate and we didn’t have to leave the car for a week. Also, making the fix ourselves allowed us to bypass making an insurance claim, saving us from a possible future rate increase.

The prepainted fender from Virtual Body Shop fits nicely into place on our Honda Civic, and the color is a perfect match. Photography Credit: Sarah Young

Avoid overlapping sheet metal, or putting a patch over existing metal. That's going to fail, and it will require a sh-t ton of bondo to ever look like it wasn't repaired. Ideally you want to do the metal work so that if someone strips the paint off later, they can't tell that there's any repair there at all. There should not be any sign of a restoration attempt. It takes a lot of skill and some time to make a proper patch, one that fits so well that once its welded in it disappears. In order to do this, take a piece of deep drawing steel (AKDS) and form it exactly to the shape of the original panel using a shot bag and nylon hammer, shrinker / stretcher, bead roller, and English wheel if necessary. I cut that patch to a nice shape with ROUND corners, no square corners or angles, everything rounded and smooth. If your patch is square or has corners, the panel will pull into those corners and you'll never get it straight. Laying that patch over the area to be patched, I trace its outline with a fine sharpie or something similar. Then I cut on that line with a sawzall as accurately as possible. The patch should fit right into place with a consistent gap that is the kerf of the saw blade. Then I tack it in, hammering each tack to prevent it from pulling the panel out of shape. No matter how much you keep the heat down, the weld itself will shrink so you have to hammer each weld with a dolly on the back to keep it from pulling. I keep doing that, tack and hammer, and if I need to I use a piece of copper bar shaped to the inside of the panel to keep the welds from bubbling through the back, so I have less grinding to do where it's hard to reach. One thing that will warp a panel for sure is welding like it's plate. Don't lay a long heavy bead on it. If you can TIG thin sheet properly you can do much less grinding.

What ever happened to Per, as in, any idea what he went on to do next? I miss his articles.

In reply to einy (Forum Supporter) :
Per moved to Ohio to be with family, and now works for Stoddard Porsche parts. We've kept in touch over the years.
einy (Forum Supporter) said:What ever happened to Per, as in, any idea what he went on to do next? I miss his articles.
You'll probably would run into him this weekend(Aug. 28-29) when Stoddard is having their swap meet and car show at their Highland Heights(Cleveland) location. Check stoddard.com/news for details.
This just popped up in my feed for some reason - anyone know about that Virtual Body Shop option? I assume they didn't make it or are at least absolutely terrible at GoogleFu but it could be a great resource if its the latter.
Typed in virtualbodywork.com go daddy offered to sell that site. I'd prefer to contact the company listed. Thanks!

In reply to NavyNGLO :
I used to have an old English wheel. I learned how to shape metal, get it to move where I wanted to.
I started out with a big ball peen hammer and a sand bag. Just pounded on that piece until it was roughly the shape I needed and then put it through the wheel to smooth it out.
The trick is the wheel only stretches. If I over stretched someplace I'd have to pull out my shrinking hammer and go to work. Too much ( and boy is it ever easy to shrink too much because you know the wheel will stretch it back out) and at some point you'd hear a crack.
Now cut that piece out and weld a patch panel in? That maybe the only way. But the temptation is to throw it in the trash and start over. I've learned to not smash it up because a couple of tries and maybe the first one is the closest.
If you're working with Aluminum one of the best tools I ever had was a bunch of spoons. Silver spoons various sizes shapes etc. I could roll dents and hand prints out in a few minutes. One hand working the spoon the other hand feeling the metal reacting. Telling you to switch shapes or angles. More or less pressure. You can actually feel if the paint wants to crack or flake. Just close your eyes and let the top hand tell the spoon hand what to do next.
Plated or stainless won't work. You need both the mass and pliability of solid silver.
Displaying 1-7 of 7 commentsView all comments on the GRM forums
You'll need to log in to post.


