How far are you willing to travel? Ive got a guy here in albemarle NC that is berkeleying meticulous. Everything's perfect when he gets done.
How far are you willing to travel? Ive got a guy here in albemarle NC that is berkeleying meticulous. Everything's perfect when he gets done.
JoeTR6 wrote: No call from the paint guy this week about coming by to just look at the shell. It's been 6 weeks, and I'm getting tired of being ignored. Time to find a new paint guy. If this keeps up, I'll paint the damn thing myself and live with a sub-professional job.
Very typical of painters. I blame the fumes. One of the reasons I painted the Bugeye myself and might also do the Molvo.
Well I can't blame someone too much for not wanting to do stuff beyond what they do day in day out for a living. I write code all day long and am quite frankly getting tired of it. But when I promise to do stuff on the side, I damn well do it. I can borrow a trailer, but would need to rent a truck to take this project outside of the NoVa area. We'll see. There's another guy that works out of a local car dealer that can get paint cheaper and has access to good facilities. I'll give him a call and see what he says. If this falls through, I may need some contacts.
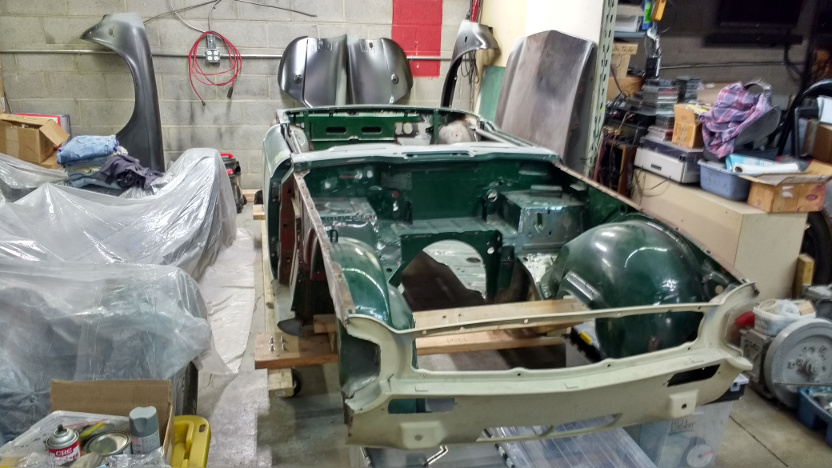
At least I can say the shell is ready for paint again. It's lined up as well as I can make it. I think (hope) the shell is sagging down in the back from over 20 years of not being supported by a frame. The door gaps still open up towards the top. If I can close them down once on the frame, I'll move the doors forward a bit and have some really nice (for a TR6) door gaps. Otherwise, c'est la vie.
I pulled the oil cooler off of my other TR6 while I was changing the oil on it today. When it was restored, I was considering moving to Texas and wanted all of the cooling I could get. That's pretty unlikely now, so the cooler will help keep temps down on this car between autocross runs. I may need to make up new lines as these have been in service for 20+ years.
You can't organize things enough on a project like this. I'd like to replace the right side bonnet hinge as the one I'm using now is fairly worn. It allows about 1/16" of vertical movement. While looking for a better hinge, I found the accelerator pedal and more front suspension pieces. Plus two more rear lever shocks. But the hood hinge remains elusive.
I busted my butt getting panel gaps to look good on the TR6 that I did. Only afterwards did I realize that TR6 panel gaps are huge and variable right from the factory.![]()
In reply to JoeTR6:
I know a guy in York, PA who does good work. Last I heard he is very busy with restoration work, but from my experience, when he says he's going to do, it'll be done as he works solo and only takes projects when he's ready to work on them. PM me if interested.
I spoke with another local paint guy today. He wants to take a look at the car, and as a bonus lives close to where it's located. So we can hopefully meet on Saturday.
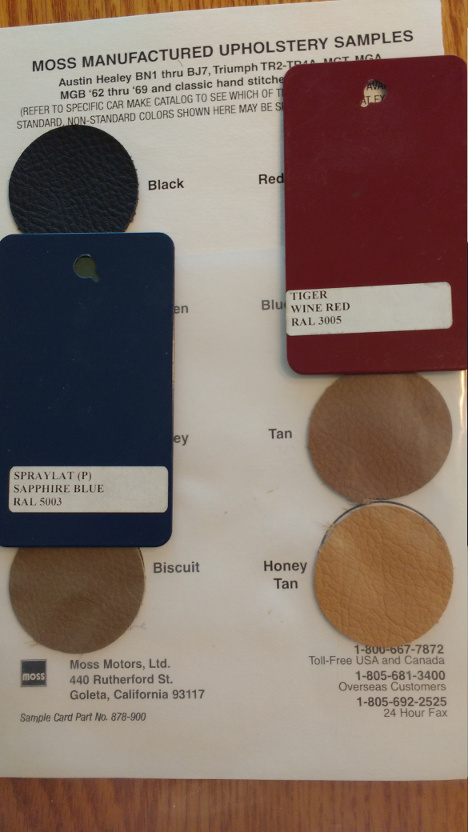
My procrastination is showing in picking a paint/interior color. Here are the leading choices.

On the left we have Sapphire Blue w/ Black interior. On the right is Damson Red w/ Tan interior.
Looking at this now, the Sapphire w/ Biscuit interior doesn't look bad either.
Dusterbd13 wrote: Sapphire and biscuit. All the way.
This
(added bonus, biscuit wouldnt be as hateful as black on a sunny day)
I have to endorse the Saphire Blue and Biscuit since it is pretty much the color scheme for the Molvo.
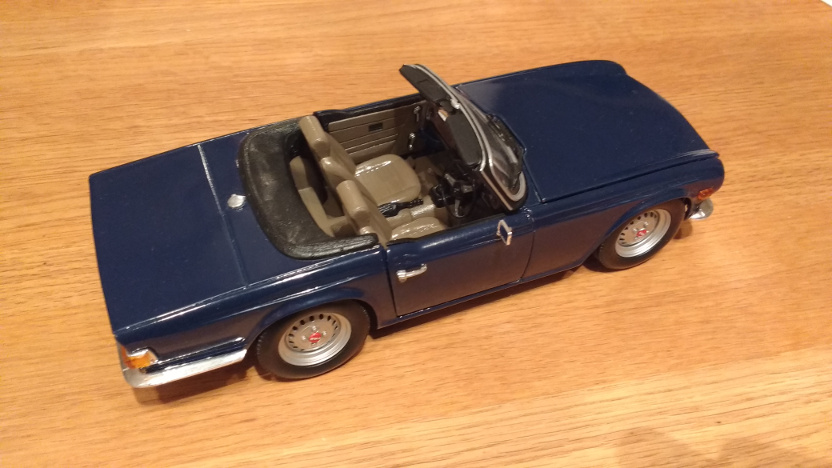
I was starting to tilt back towards the Damson/Beige combo because every time I look at the model I painted, it just looks dull. So you guys have convinced me. Tomorrow I'll find some Biscuit colored paint and try that out on the model. If I stare at it for a week while at work, I'll know if it works.
OK, we may have a winner.

That looks a lot more interesting than a black interior. I think the black top boot, along with the black trim pieces on top of the interior door panels and the dash frames the interior well. The biscuit paint I mixed up is slightly lighter than the interior sample, but it's pretty close.
Even better is that the new paint guy came by to take a look at the car today. He's nice, responsive, and seems to know which end of the paint gun to hold. I'm ready to get the tub stripped and take it to his shop. So I spent the rest of the day going over the tub cleaning up a few welds and removing the remaining stuff from the shell.
The paint guy is ready to get started. The only issue is that we're both out-of-town in late June and he can't leave the body where he works while he's gone. I need to call the people doing the stripping/priming of the tub and get that rolling. I also need to decide how to prep the bonnet/doors/trunk lid. The doors and trunk should withstand plastic media blasting, but I'm not so sure about the bonnet. It may be better to spend some quality time myself with it and a stripping wheel. I also ordered a new right bonnet hinge to replace the one with almost 1/16" of play. The trunk lid with seal in place fits great after a little bending/tweaking.
" . . . . but I'm not so sure about the bonnet."
Be CAREFUL ! The hood has a large enough semi-flat expanse that the media may well warp it or distort it in areas. Easy enough to chemical strip and sand out. When I had my '71 TR6 restored the shop blasted the hood and just ruined it, to my eye. I was so thrilled with the over-all result that I didn't notice any of the details until later on.
Never got the hood fixed (too expensive after spending so much on the car as a whole) but always regretted it.
I am going to be spending hundreds of hours dealing with sandblaster damage to the Molvo bodyshell. The Moron who blasted it really did not have a clue.
What is interesting is that the sandblasting process seems to shrink the metal by compressing one side of the panel. Popular belief is that it stretches the metal due to excess sand pressure.
Thanks for the warnings about the bonnet. I'll strip it myself. It's the only factory paint on the car and is pretty easy to strip. The respray on the tub and doors didn't adhere so well, but it's thick and I'd rather have someone else save me the misery of stripping those pieces. The place I'm thinking of going to uses plastic media which should be gentle enough for those parts. My wife is recovering from rotator cuff surgery, so I'm going to be delayed in getting this done.
The wife's shoulder is healing well so I may get back to this project soon. Unfortunately, I've missed the window to get the tub painted before the paint guy goes on vacation. No big deal, I'll get it stripped while he's gone and be ready to drop it off soon after he gets back. In the mean time, I fitted the new bonnet hinge, but need to do a little grinding on the front valance for clearance to move the hood forward a smidge. I'm also going over the car knocking out small dents with a body hammer and improving some of the filler on the fenders.
NOHOME wrote: I am going to be spending hundreds of hours dealing with sandblaster damage to the Molvo bodyshell. The Moron who blasted it really did not have a clue. What is interesting is that the sandblasting process seems to shrink the metal by compressing one side of the panel. Popular belief is that it stretches the metal due to excess sand pressure.
And here I thought it was from heat/friction plus instant cooling.
FWIW, there's a rumor that the dustless blasting systems don't cause the same sort of warpage. As in I know a quasi-local shop that recently invested $8k in a dustless setup for that reason.
Edit: That wasn't supposed to sound as rude as it does. I've just never heard either of those theories before.
Not to worry....I might be the only person to believe that theory of sandblast damage. But it is something I have been giving a lot of thought to over the last years. One of the reasons this rust free shell was going unloved was due to the amount of damage the blaster did.
Have you shared your plan of attack for the distortion remediation? I'm interested in how you approach it as the roof and hood of Uncle Ben have ripples that need addressing eventually.
It looks like things are falling into place to get the shell painted in July. I spoke with the paint guy about the schedule. I'll get the tub stripped while he's on vacation and have it ready for when he gets back. In the mean time, I'll strip the bonnet by hand (or rather with paint stripper and a scraper).
While the shell was still bolted together, the leading edge of the fenders were improved with filler to better match the hood. The door seams were cleaned up as well. Today, I disassembled the body for the last time and secured the tub to the transport dolly. It's ready to roll.

You'll need to log in to post.