
MichaelYount wrote: The 2 things that would concern me are 1) is the child car seat connection designed for the kind of load an adult can put into it in an accident; and 2) spinal compression injuries from the shoulder straps attaching at too acute an angle.
LATCH hardware has a weight limit of something like 45 or 50lbs child plus the weight of the carseat. That's a long way off of an adult man. Not sure I'd want to risk that. 200lbs of human in a barely-survivalbe crash (100G) is 10 tons of force on the anchor. Ok, it's way less than that with the belt stretch, but still...yikes.

The requirement for the child anchorages is something like 5,000-10,000N (depending on type/type of test) whereas the requirement for seat belt anchorages is 13,000-22,000N (again, depending on type of belt/type of test)
See 571.210 and 571.225 here http://www.ecfr.gov/cgi-bin/text-idx?SID=e0247773b675f988e674bf5f260cca89&tpl=/ecfrbrowse/Title49/49cfr571_main_02.tpl

I won't be using the harness on the street; only in autocrosses. If I do a track day, I'll come up with a better mounting point back there prior to the event.
For track days, you're required to provide your instructor with the same protection you provide yourself anyway, which means lap belts for both of us, unless I purchase a second harness.
I understand the spine compression concern too. I guess I'll just be taking my chances on that. The good news is that the seat back is pretty high, so after a nice crash I'll only go from standing 6'-3" to stooping 6'-0" and not all the way down to an accordion-like 5'-9". ;-)
Pics are on the way.
In reply to Mr_Clutch42:
I'm going to keep it in Street class. I won't be changing the springs... just the rear shocks (done) and the front struts (working on it). More to come on that. The steel I'll need for that project arrives later this week.
In reply to ppddppdd:
More like 250 lbs of human. :-(
You're both right, the anchorages back there aren't very beefy. I definitely wouldn't depend on them on the track.
Would suggest that you have the harness AND wear the stock seatbelts over the harness for autocross so that if something did happen and the mounts let go you would still be restrained.

Apexcarver wrote: Would suggest that you have the harness AND wear the stock seatbelts over the harness for autocross so that if something did happen and the mounts let go you would still be restrained.
This. Better put a condom on while you're at it. ![]()
I'm sure I'm not the only one who's done this, but when auto crossing I would put the seat all the way back (like you, at 6'3" it was there anyhow), recline the seat back, pull the shoulder harness to 'lock' it against the stop, then put the seat back up and move the seat up until I was quite literally wedged into the seat against the stock harness. I liked to be a bit closer to the wheel anyway for leverage, especially in auto-x, and this approach locked me in pretty well. Airbags/restraints were all designed to work together -- I'd rather have them protecting me than a 'system' that's, well, not really a system at all. The whole point of all of this is protecting yourself against that thing that NO ONE could see coming. Yes - even on the auto-x course.
So I think I've addressed everyone's concerns.... at least you guys should know I'm listening to your advice. Just remember that there is risk involved in motorsports, and not all risk can be eliminated.
The seat back stay that the seat back latches into is VERY beefy. It's actually thicker than my lifting shackles. They're built to hold the seats up (and any cargo in the back) in the event of an accident. I think it's a much better option than the flimsy kid seat stays.
The other benefit, MichaelYount, of using the seat back stays is that the angle at which the straps attach to the driver's seat back is within the acceptable range that was in the documentation that came with the harness.
Connecting the lap belt to the passenger's receiver means I can wear the stock belt on top. Honestly, I probably won't. But it's possible if someone decides to give me a lot of crap about it. I like to take passengers, so using my own receiver is a must in that case.
connecting the shoulder straps extension:

connecting the extension to the seat back stay:

A view from the back showing the fairly subtle offset:

The connection of the outside lap belt to the stock connection point. It does not interfere with the stock belt connection's ability to freely swivel:

All connected up. I can plug the harness's inside lap belt into the passenger's side receiver and use the driver's side stock seatbelt completely normally on top of the whole arrangement. Condoms not included:

The shoulder straps. When I'm strapped in, I pretty much can't breathe. I'm glad the belt fabric is as wide as it is:
I'm going to add some safety wire to the shackles to be sure they don't back out.
I almost missed posting the picture illustrating the acceptable angle of departure... My shoulders really don't bring it much higher than this, if at all.

Better. I'd still do a bit more research on the strength of the seat back latch/stay. What is the load limit on the lifting shackle you're using?
According to apexcarver's link - here (I think) is the gov. regulation regarding the rear seat's restraining device - copied below.
"S4.3.2 Performance of restraining device.
S4.3.2.1 Static force. (a) Once engaged, the restraining device for a forward-facing seat shall not release or fail when a forward longitudinal force, in newtons, equal to 20 times the mass of the hinged or folding portion of the seat in kilograms multiplied by 9.8 is applied through the center of gravity of that portion of the seat.
(b) Once engaged, the restraining device for a rearward-facing seat shall not release or fail when a rearward longitudinal force, in newtons, equal to 8 times the mass of the hinged or folding portion of the seat in kilograms multiplied by 9.8 is applied through the center of gravity of that portion of the seat.
S4.3.2.2 Acceleration. Once engaged, the restraining device shall not release or fail when the device is subjected to an acceleration of 20 g., in the longitudinal direction opposite to that in which the seat folds."
Can't speak for the seat latch at the moment, but the shackle is a 5/16" bow shackle with a 3/4 ton working load limit and a 4.5 ton break strength.
22000 newtons (the top of the range mentioned above for seat belt anchors) equates to just under 2.5 tons of force.
These shackles, with a break strength of 4.5 tons, exceed that by a safety factor of nearly 2 (not including whatever safety factor is engineered into them to meet their nominal break strength).
All things considered, I think I'll start working on something else now. I do appreciate the input and your concern.
Edit: wow, that sounded snarky.
Ok, here we go, "something else"!
A while back my tap arrived, but the donor struts walls were too thick to accept the tap. I was sad. And I thought I would need a lathe to make it smaller before tapping.
Turns out, 2" od x .083 wall thickness Dom steel tube is just the right inner diameter ( approximately 46.5mm, which is the tap drill size for a 48mm x 1.5mm pitch tap. ( on any metric thread, the drill size is just the diameter minus the pitch... Nice to know, eh?)
Amazon doesn't list it as an available size, but I found it at speedymetals.com.
Today my steel arrived.
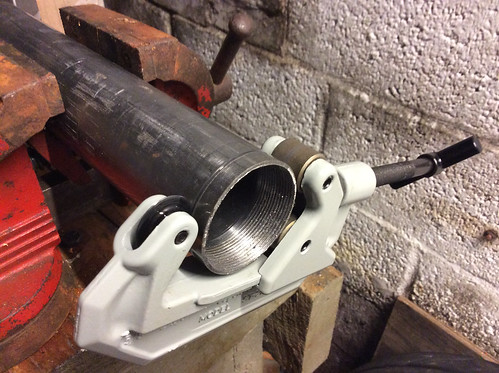
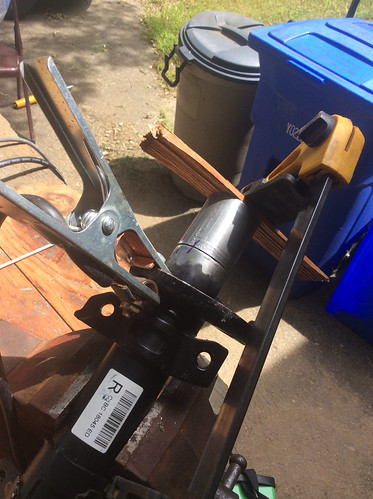
And I got right to work, even though I didn't have all those vises around today. I didn't care. I wasn't waiting any longer. I got out the monkey wrenches and just hoped the tube wouldn't crush.
First a good look at that $100 tap:
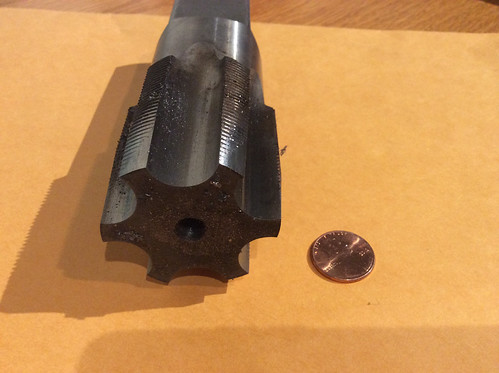
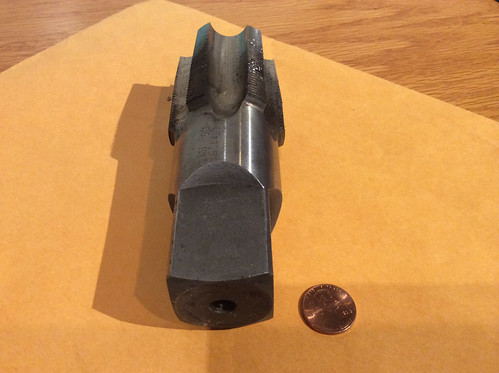
Now, I don't remember when I got it, but it must have been for some task related to the Triumph Spitfire I had in high school, but I have a lone 1-1/4" combination wrench which happened to fit the tap's flats. Talk about good fortune...
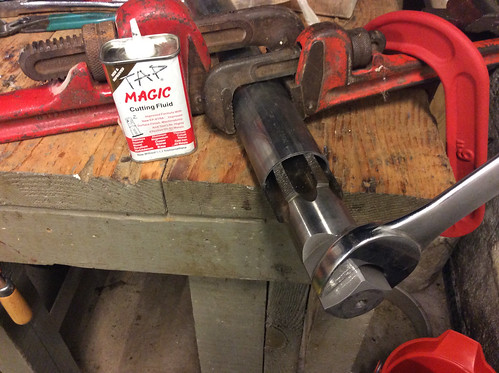
The tap started in a little roughly, and I didn't like the fact that the shavings couldn't drop out of the way. It looked at first like I was going to make a real bunged up mess of it. But the further in it went, the nicer the threads started to look.
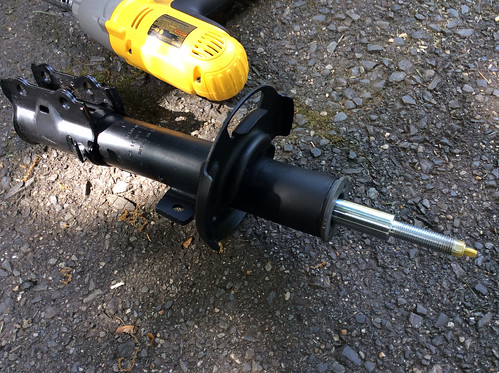
The Koni nut now spins on like a top! Here it is next to my reward. It was actually quite a workout!

Next I just have to cut the appropriate length off and weld it to my stock strut! It's pouring outside, so that's not happening until the weekend, probably.
Hooray!

Oh good lord it's the safety patrol. Go watch some roadkill on YouTube and feel like a safety king for even having seatbelts ;)
Cool build, I love the fiesty fiesta.

I prefer a nice brown ale for cutting threads, but pale ale works too. Nice work.
You're giving me bad thoughts about selling my Miata.
mazdeuce wrote: You're my hero. This is exactly what I wanted to do on the 2.
Feeling more and more like a hero!
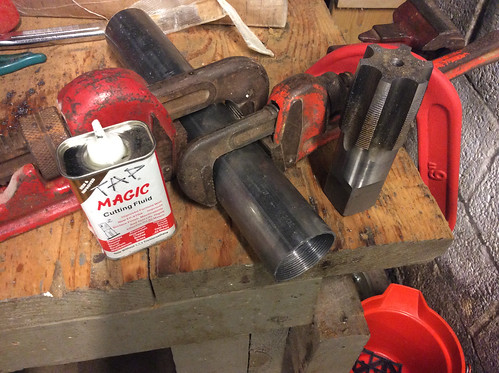
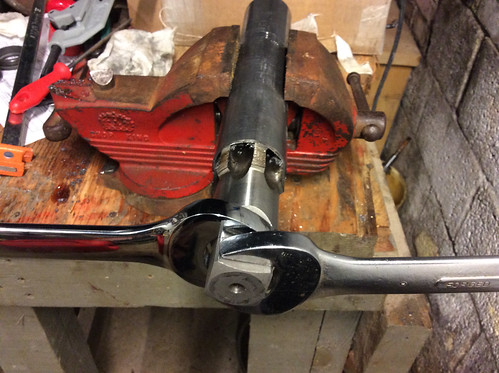
Today I got two more tools (yeah, it's getting a little ridiculous... Or typical... I'm not sure which). Another open-end wrench so that I can turn the tap in a more balanced way, and a pipe/tube cutter that handles the 2" steel tubing. They were both good ideas, it turns out.
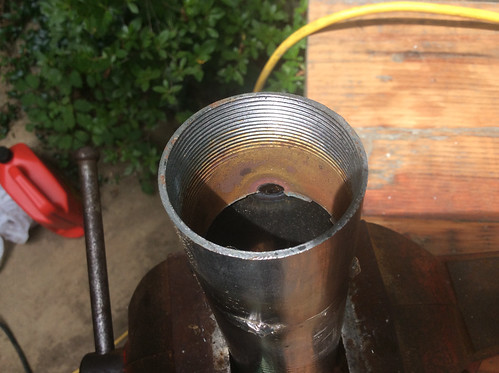
I used the cutter to make a nice clean, relatively square cut (relative to the way the stock was cut when it arrived, actually). Then I started some threads. Then, because the tap wanted to bung it all up at first, I cut it again to remove the messed up threads, while leaving some nice starter threads. That worked out pretty well, leaving all my threads true and sharp:
Then I used the two wrenches to turn the tap until I had enough threads to accommodate the Koni nut:
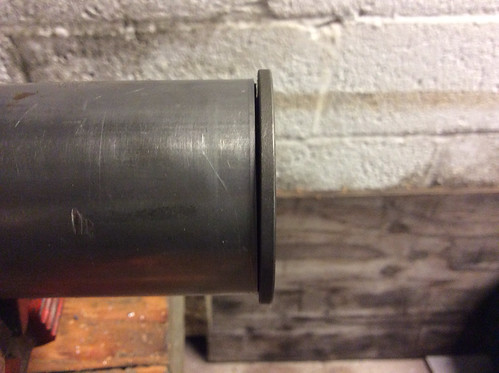
The nut wasn't perfectly square, but it is really close. It won't actually be bearing on that surface. It'll do just fine.
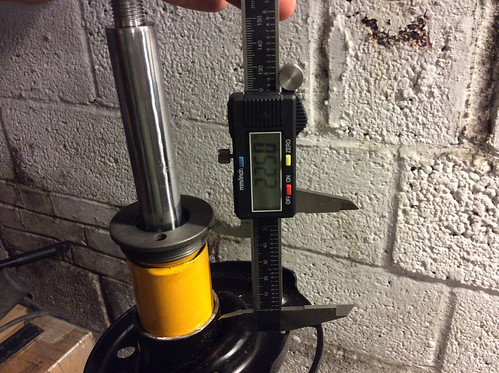
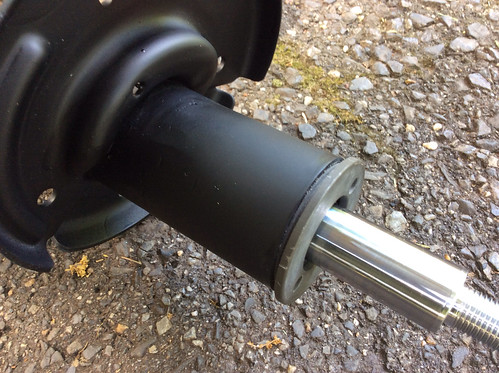
Now I needed to know how much of this tube to cut off. With the insert fully inserted, and the Koni nut seated on the shock, I measured from my strut to the top of the threads on the Koni nut (about 1/8" from the flange of the Koni nut). On this strut, it happened to be 2-1/4".
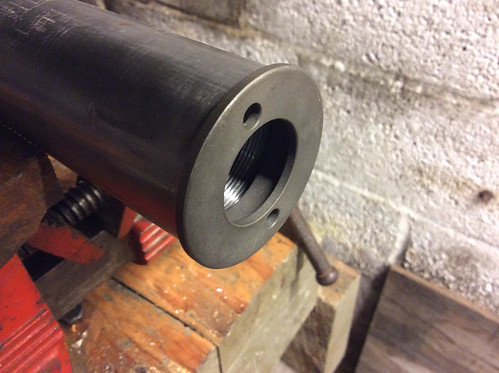
So I set up the tube cutter again, and made a beautiful cut that mated perfectly to the strut:

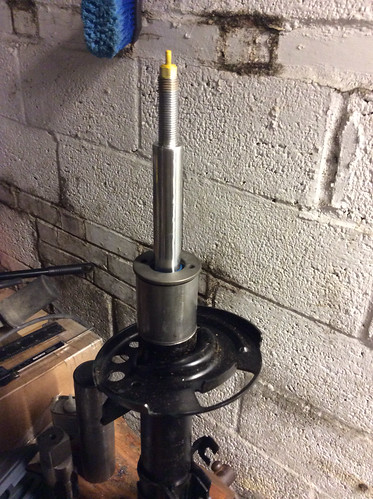
Ready for welding! I'm liking that fitment.

So it's another pale ale tonight for this hero. I'm hoping to get both struts ready for welding this weekend. Stay tuned!

Be a hero on the struts please!
But the seat belts unless you have hundreds of thousands in R&D in safety i would not mess with known results.
So this weekend I started welding and I wasn't really intent on getting the inserts installed by Sunday's autocross, but I finished up the welding by mid day on Saturday and decided to go for it.
Here is the first tack weld:
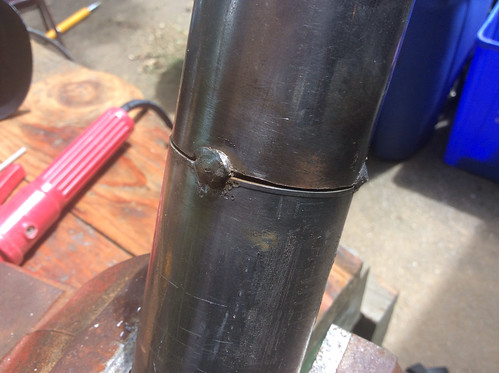
The penetration looked pretty good on my test piece.
This is how I set up the real thing:
Now most guys aren't going to show you their welds unless they're pros, especially when they look like this... but I'm keeping it real:
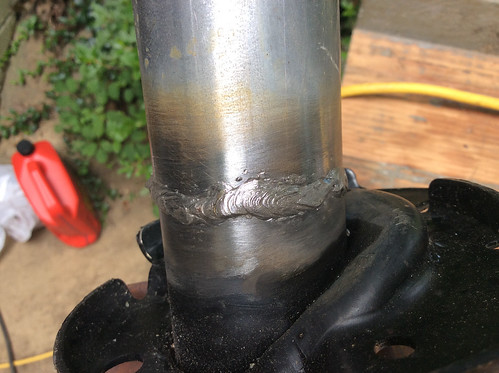
This section wasn't the worst I could show you, but I got a little better by the second strut. They all looked prettier after they got ground down. All I was concerned about was getting good penetration yet not blowing it out.

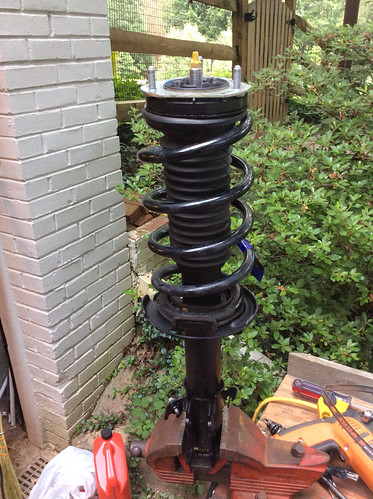
Two struts primed. I considered painting them yellow. But I didn't feel like cleaning and degreasing the entire strut, so I just stayed with black and painted the bare steel.
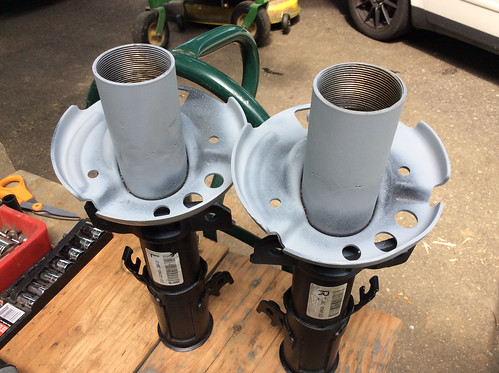
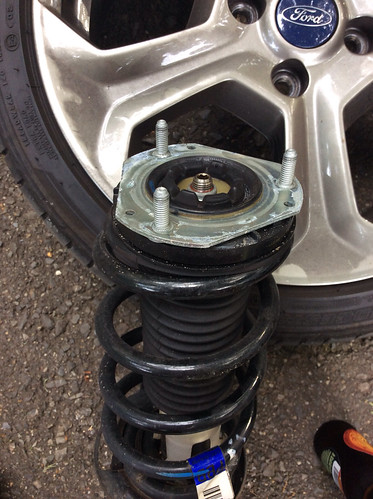
Painted and assembled. I put a few dabs of red loc-tite on the threads. Will I ever get it apart again? I hope I never need to.
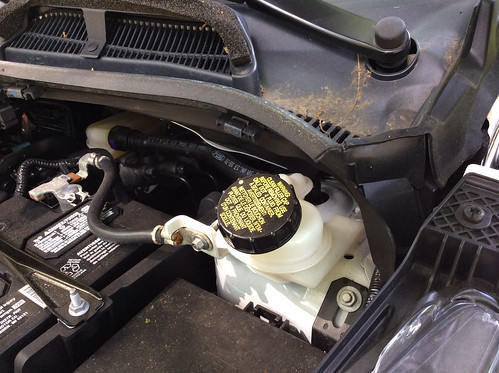
Stock strut on the passenger side.
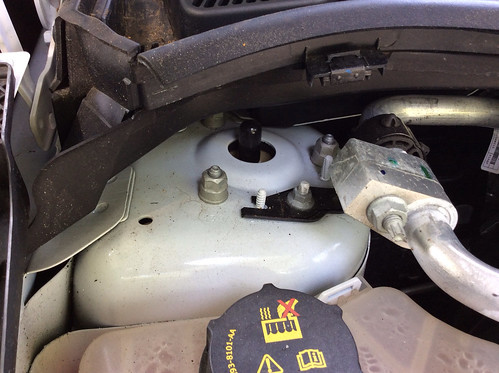
On the driver's side:
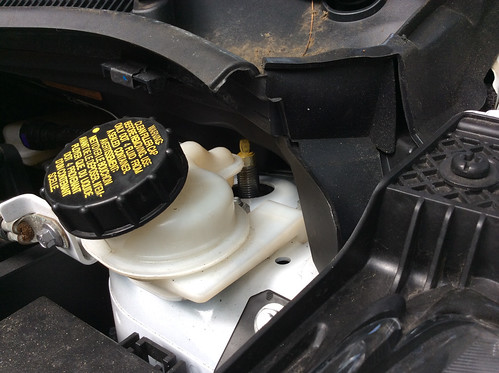
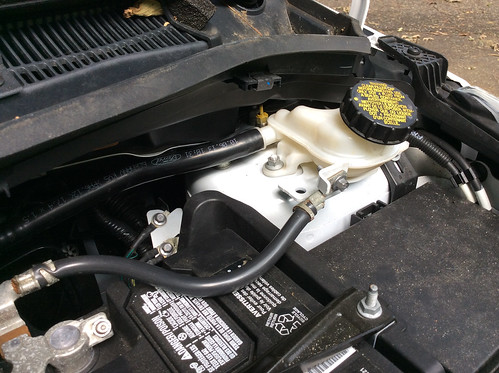
The brake fluid filler was a real pain to remove. Actually, everything was, way back under the windshield overhang. I ended up purchasing some ratcheting wrenches (13mm removed the tower screws) to make things go faster. Even with the 10mm wrench, the right-hand nut on that fluid filler piece needed to be done completely using the open-end wrench.
Stock strut assembly out:
I had a few choices: one, I had to choose between the Koni-supplied bump stop on the right and the stock bump stop on the left. I stuck with stock.

Assembled tower:
Koni supplied a plain nut and a slightly thinner jam nut. Why not a nylon locknut? Seriously lame. At this point I felt like I was turning my car into a rattle trap. I went out and bought a 22mm tall socket (the chrome kind... not the black impact kind, because the outer diameter of the heavy duty ones won't fit within the strut tower's bearing plate cup.)
I needed this, because you know the tool you would need to tighten the nut and hold the 11mm hex at the top of the insert's pushrod at the same time? It doesn't exist.
The advice I got from a fellow autocrosser was to be sure the springs were compressed and out of the way, and just zip that bad boy on with an impact wrench. Well, that worked. I then added some dabs of loc-tite and followed that up with the jam nut. Hopefully that will hold without becoming some kind of rattle from hell.
Finally this is the kind of access I have to the adjustments at the tower tops:

I guess I won't be using those iconic Koni knobs for adjustment.
Does anyone have any tips on adjusting Koni's where overhead access is limited? What is the perfect tool for the job?

A small adjustable wrench works great.
Those adjusters have only two flat faces, correct? If so, you could fix a hex nut onto the adjuster (JB Weld?) to make turning them a bit easier. Then one of those ratcheting box end wrenches would work pretty well.
Nice work on the struts.
So as I might have mentioned here or elsewhere, I feel like I'm turning the car into a rattle-trap. Quickly.
And there are enough rattles that I better start doing something about them so that I will actually notice when something's really wrong.
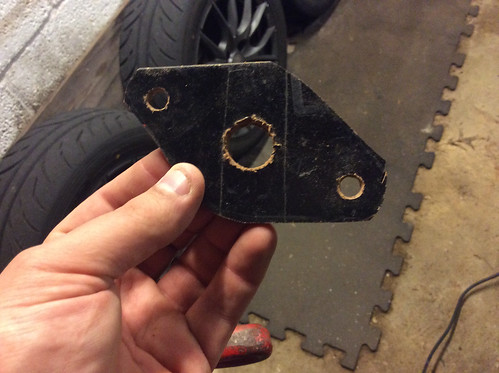
Back to the rear shocks. The guy who tried this before me discovered that the nut of the Koni shock at the top bracket is larger than stock. And it ever so slightly and annoyingly interferes with the opening in the body that accommodates it. It happened to me, too, sure enough.
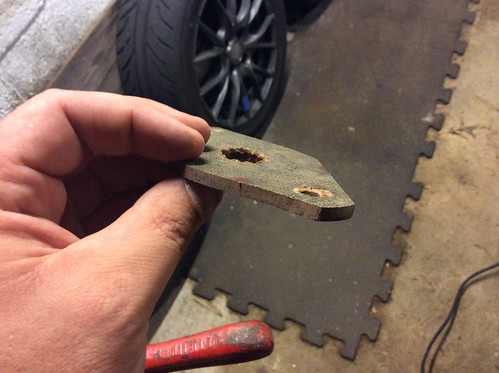
To quiet it down, He stuck a piece of leather up there. As I documented above, I put some rubber sheet in between it. But less than three days later, it got noisy again. Here's why:
You can see that the nut and the opening in the body make a really nice circular shear/hole punch.
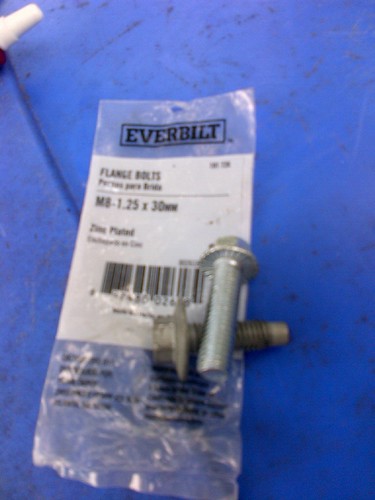
So I had the idea of making up a spacer to pad out the bracket from the body, thereby eliminating the interference. The material I fabbed this from was only going to be temporary... I would eventually make something that wouldn't deteriorate or rot, but you get the idea:
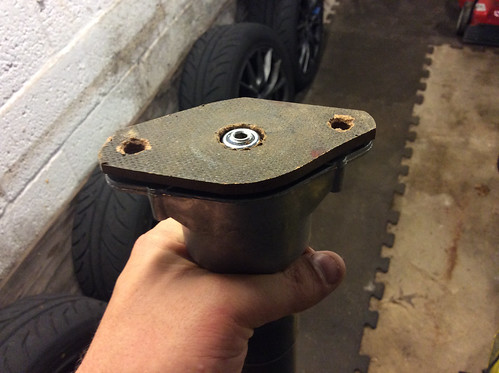
I ran into a problem, though. The bolts that hold the bracket to the body aren't long enough to grab the threads anymore. They would need to also be about 1/4" longer. And they're pretty specialized... With a smooth threadless section at the tips and a flange on the hex head so that a socket driver can push it home blindly, it would be tough to find something like that. I wasn't going to find that in my stashes of nuts and bolts, that's for sure.
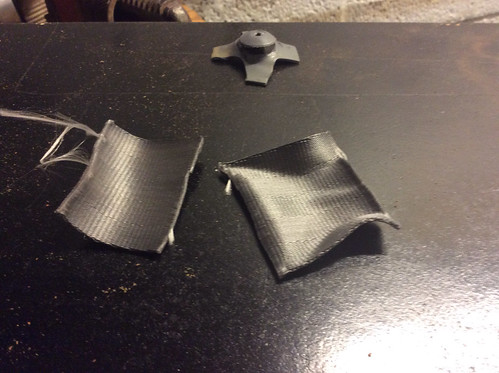
So I just gave up on that for now, and replaced it with something a little tougher... The little pieces of discarded webbing from my harness project:
That was quieter, but I can still hear every bump and I can even hear the swishing of fluid on one of the sides as the damper is compressed and extended. I'm not sure that's even a sound it should be making normally.
Is a squishing sound on compression & extension a sign of a bad shock? The shock seems to work. It's just noisier than the other one.
Thanks in advance for all your advice on Koni single and double adjustable shocks!
I believe my final fix for this will be to hit that body opening with a step drill to widen it enough to clear the Koni-supplied nut. And then a couple shots of rustoleum paint for insurance before putting it all back together.
So the front struts have been in for a few weeks, and they've remained quiet, tight, and adjustable. They seemed to settle the car relative to the stock ones, but again, I'm not the type of driver that can jump out of a car after a run and say, "Needs more rebound" or "could use a stiffer rear bar". In any case, I'm calling the front shock design and execution a success.
The rears were still noisy so I have addressed them by using the masonite spacers I made (see above). The webbing I had put in there in the mean time (also above) was holding up pretty well... it was still noisy, though. They're really quiet now.
I just couldn't bring myself to cutting into the body in a place where the boss/opening that's stamped into the body is what gives it the strength it needs there. So I went with the masonite, which I'll replace with something less affected by water before winter comes (or after). I sprayed a heavy coat of Krylon on them to try to seal them a bit before installing them.
I had to use longer bolts to fully use the blind threads of the car. I got those from Home Depot, in the same grade/strength as the originals. It's a crappy image, but the shiny one has at least 5mm more threads than the original one.
The rears are set to 1/2 stiff (there are 4 possible turns and they're 2 turns in).
I've done two autocrosses since I installed everything, but I couldn't easily adjust the front rebound because I have no way of turning the tabs. They're tucked under the windshield overhang, and if I were to cut into the drainage troughs, I'd likely reduce the life expectancy of the car by allowing all kinds of water right into the engine compartment (and onto the shock adjustments).
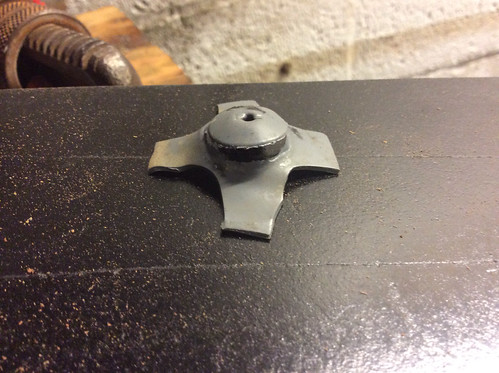
So to even be able to turn them at all, I had to make a tool for myself:
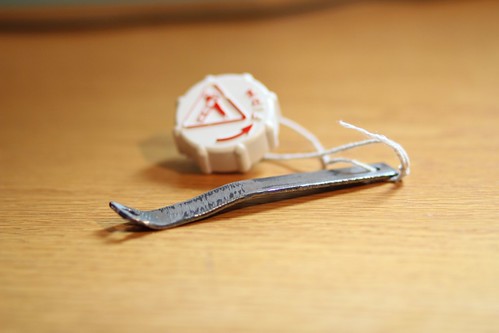
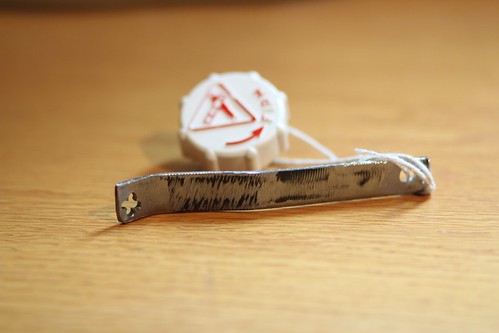
The little X is just what I need to be able to turn it 1/4 turn, and the bend in the piece lets it clear all the crap that's in the way.
And I took the leftover adjustment knob and tied it to the tool so it won't be as easy to lose (or drop into the engine). I also just realized that it will remind me which direction is -->FIRM.
As far as adjustments go, so far I've done a couple events with the rears at 1/2, and the front bump at 1/2 stiff, and the rebound at full soft. Tomorrow I'll be able to try just about every combination if I want to.
I really don't know what I'm doing, so this Saturday's Test n Tune at the Washington DC Region may help. I hope to get some opinions from some of our other drivers (Danny Kao, Andy Thomas, Mike Moran, Brian/Julian Garfield, etc.). Some sort of data logger will be in the plan for next year.
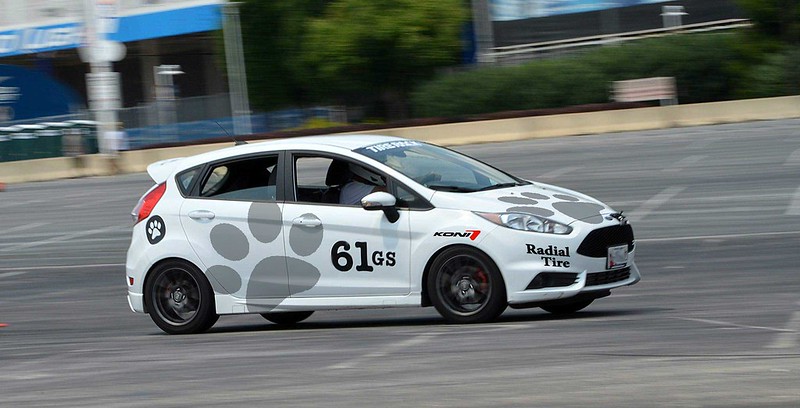
Also today, I mocked up my "Dogpark Racing" livery for Nationals. Big, easy shapes to cut out. Hopefully the vinyl arrives in time and there's enough nice weather to get it done.

For the rear strut can you have a custom but machined to provide clearance?
I had a good friend machine down a solid Gorilla brand lugnut. Bought the one with the threads that matched the Bilstien damper threads and he lathed some and milled a hex to a size I needed.
You'll need to log in to post.


