1 ... 4 5 6 7 8 ... 12
NOHOME
NOHOME UltimaDork
2/24/19 11:07 a.m.

The pace is pretty impressive. 20 hours a week is  lot of time to take away from other things in life!? The Molvo is 5.5 years in at 10 hours/week, and I find that requires a supportive spousal unit.


Nice to hear that it is one piece; big milestone in the project. 


Pete

Crackers
Crackers Dork
2/24/19 1:00 p.m.

I'd be worried about the longevity of the plastic parts on the eBay fender rollers, but as Uncle Bumbleberkeley would say, "For the home gamer, it will probably last you forever." Otherwise they're pretty much counterfeit copies.

When will your next video be out?

jnoiles
jnoiles New Reader
2/24/19 8:44 p.m.
mannydantyla said:

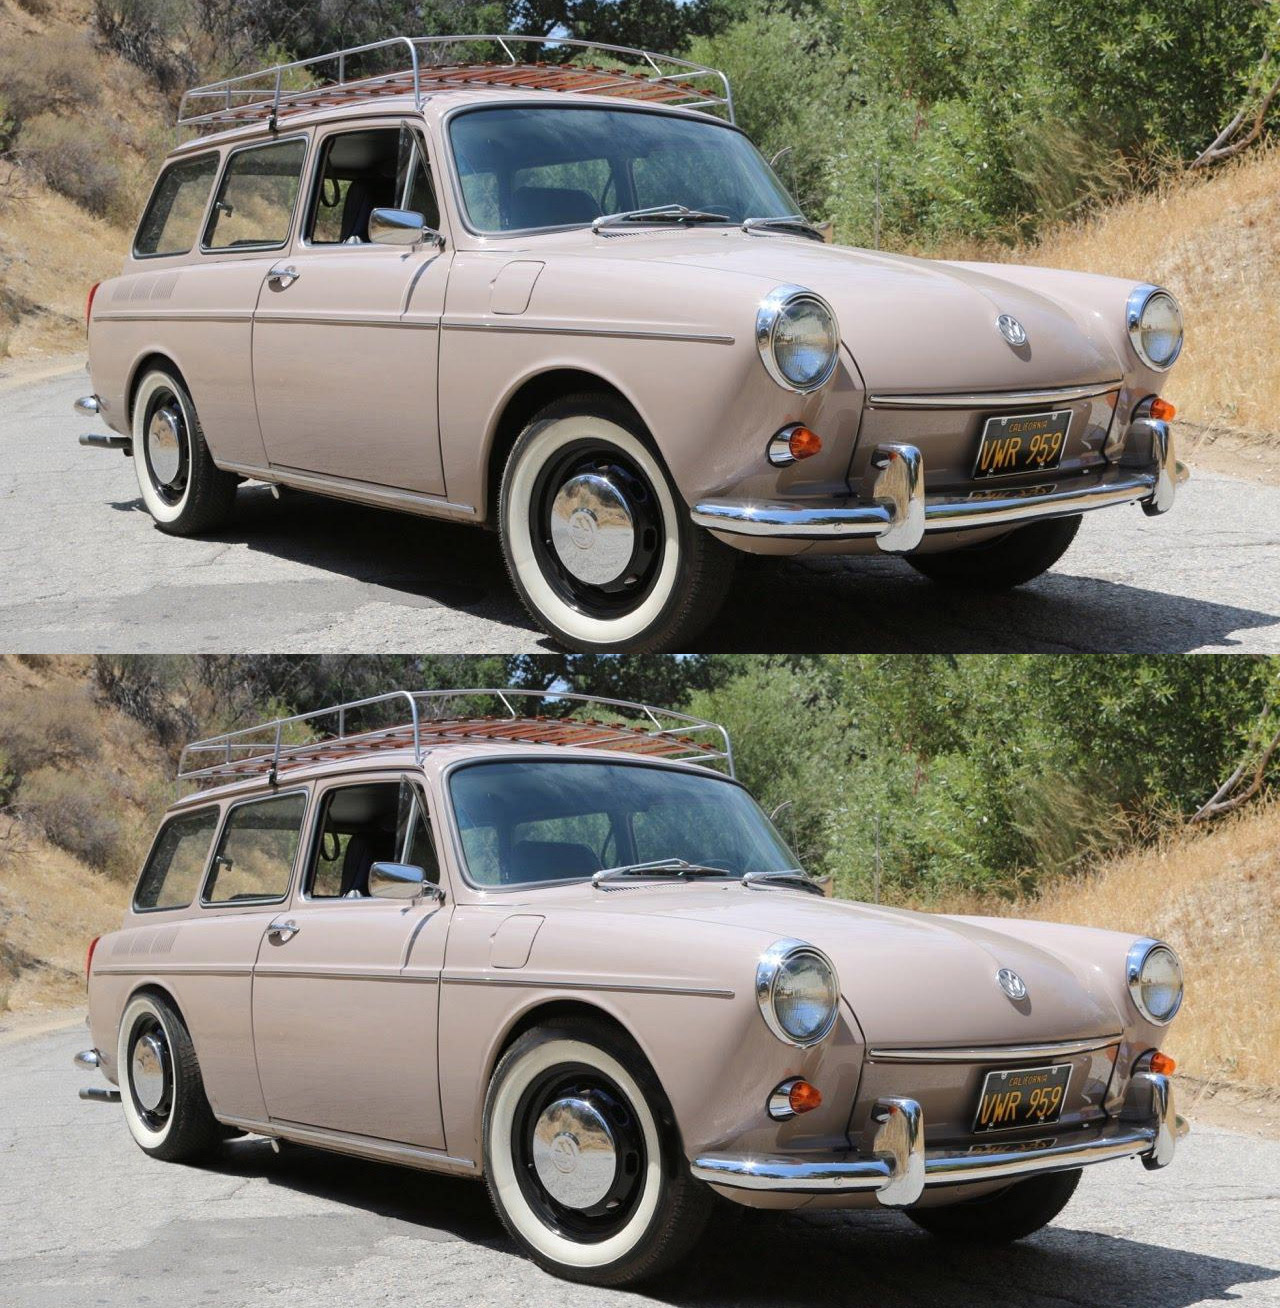
A little photoshop fun. Normal on top, chopped and raised fenders on bottom


I've stared at this for 10 minutes and I honestly can't see a difference between the two?  Can you highlight what areas are different?

Very confused here.

therealpinto
therealpinto GRM+ Memberand Reader
2/25/19 5:48 a.m.

I have a fender roller just like that (bought from Wish), and compared to the "expensive" one I borrowed 15 years ago I can't fault it really. For the price I think it's OK.

The biggest issue for me is that the car I have been using it on (the Sierra A-tractor) has double skinned fender lips on the rear that are just too hard to roll. Will try it on the endurance racer (Nissan/Infiniti Primera/G20) soon.

Gustaf

DeadSkunk
DeadSkunk PowerDork
2/25/19 6:57 a.m.

In reply to jnoiles :

Look at the gaps between the top of each wheel well and the chrome trim strip. The 2nd picture has been photoshopped to show the car lowered.

Somebeach
Somebeach Reader
2/26/19 7:29 p.m.

Keep the you tube videos coming. Just watched #13. I have really been enjoying them. 

NOHOME
NOHOME UltimaDork
2/26/19 8:43 p.m.

Was watching the welding on the A-pillar, and knowing that this was a running car, I was wondering if you have thought about the wiring on the other side. Guess not!surprise

The wood floor in that garage makes me nervous. I have a half hour "no welding before we leave the shop" policy that might be a good idea in your shop to make sure nothing is smoldering in a corner.


Pete

mannydantyla
mannydantyla New Reader
2/27/19 7:57 a.m.

Looks like some of you have already seen it but I uploaded a new video! https://youtu.be/nXk434kHBww And thank you guys for the encouragement with the videos, sometimes I wonder if producing them is worthwhile but I have fun making them :)

Yeah, so there was a little fire. It was the electrical tape wrapped around the wiring harness on the inside of the metal panel that I was welding to. What I should have done was sprayed the wires inside there with a little water or something first. I'll make sure to do that in the future. I'm really lucky that it was only the electrical tape that burned and that the fire didn't grow. And I was even more lucky that I even saw or noticed it because it was totally out of sight and it wasn't crackling or making any noise, and it was already so smokey in there that more smoke wouldn't be noticeable. I saw just a little flicker of light through one of the burn-through holes in my welding. If I didn't see that then it could have grown much bigger before I noticed. 

And about the wooden floors. I've been using a welding blanket but I admit that I've relaxed a bit on using it. I have it covering the gas tank now but I'm going to cut it into smaller pieces that I can spread around the project as needed. I got the biggest one I could find at HF, 6' x 8', I thought I would just spread it out over the garage floor under the car but its still not big enough to do that. When welding in the PS rocker panel, a fairly large MIG berry fell and landed on the plywood floor and I sat there for about 20 seconds and watched it to see how the wood would fair. It charred a pit in it but that was it. But if that part of the floor had some oil or wd40 soaked into it or something... who knows. Yeah I gotta be more careful. 

NOHOME said:

The pace is pretty impressive. 20 hours a week is  lot of time to take away from other things in life!? The Molvo is 5.5 years in at 10 hours/week, and I find that requires a supportive spousal unit.

yeah my wife Logan (our 6 month anniversary is coming up) is starting to refer to the project as my other wife, lol. But I made sure to get her blessing before starting the project, and she at least pretends to be interested in my videos and sometimes she even enjoys watching them, haha. I told her I'll build her a car next, she wants a murdered out '67 Lincoln Continental, "like the one in Entourage." But I think she'll be happy with an old Cadillac haha.

Alright here's the pics!

I want to share this one first, but note that this is not be the actual ride height because the body was still sitting on jacks when the pic was snapped, and therefore the weight of it wasn't sitting on the suspension. I wanted to hang the fender to make sure the wheel was in the center of the wheel well before welding the body to the chassis.
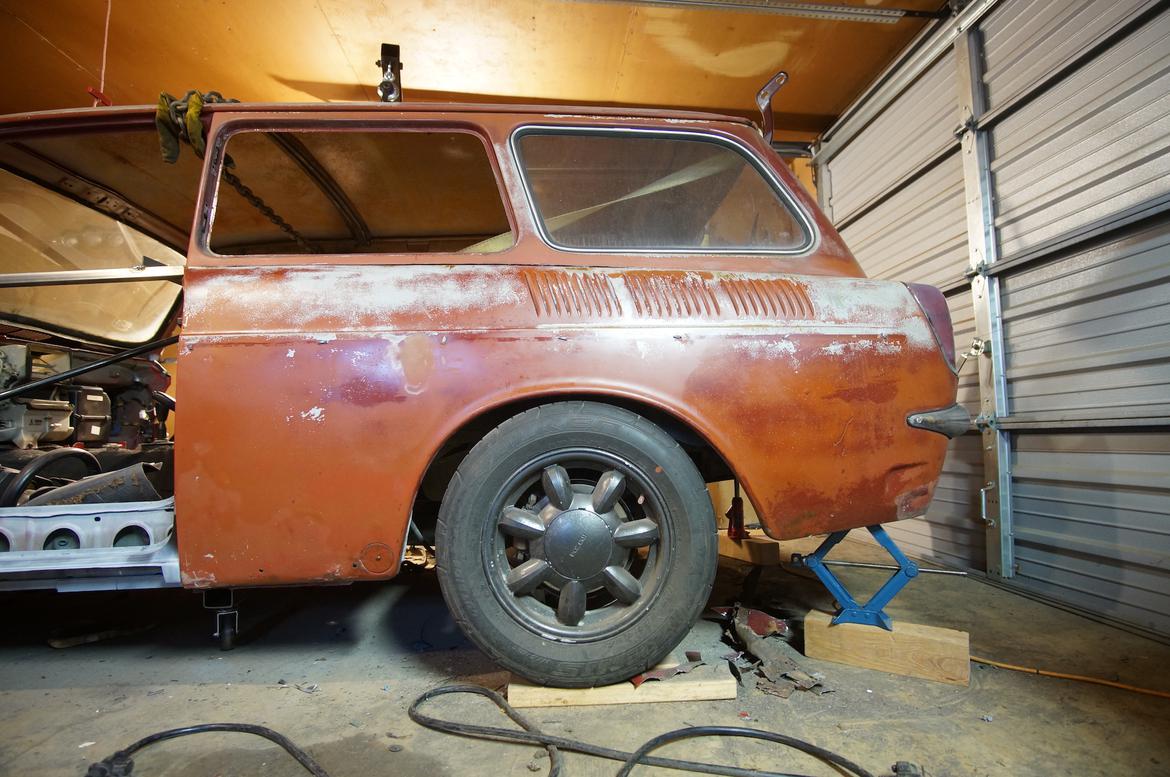
I should have took a pic of how far the tire was sticking out but I was in too much of a hurry I guess. But I measured how far the tires stuck out past the fenders and it was bout 3/4". 
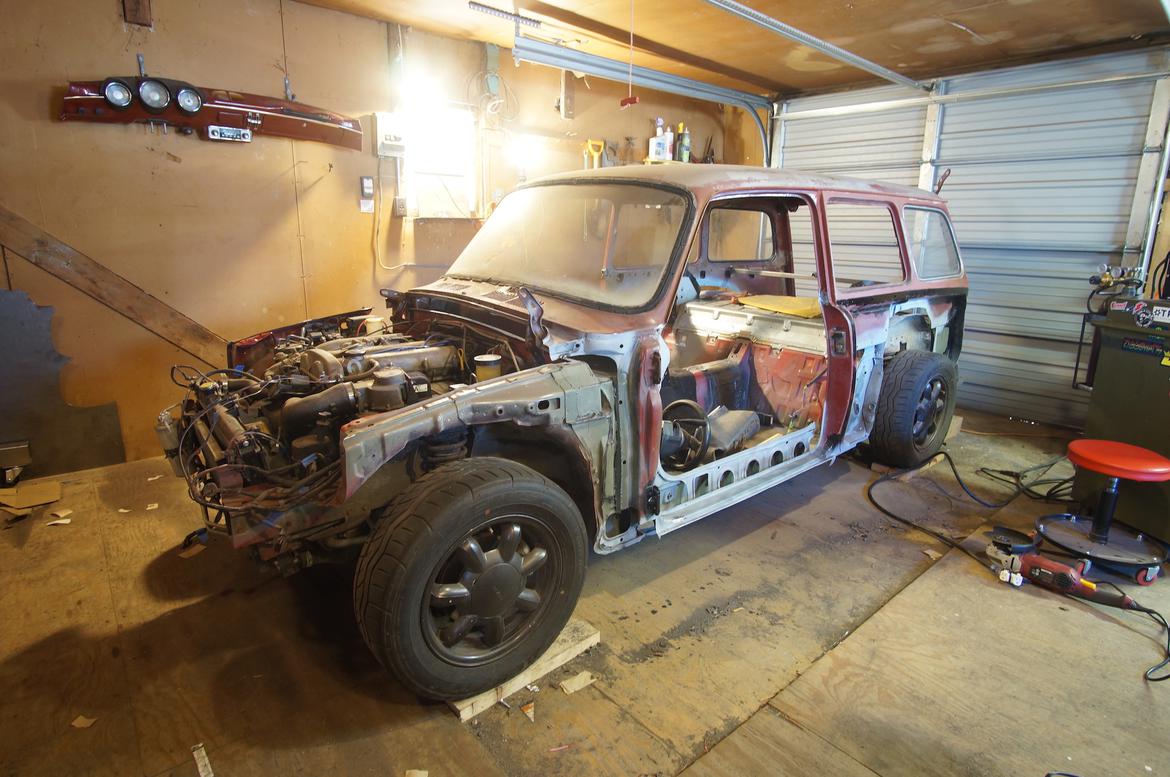
Notice anything different? No more braces and no more hoist holding it up.

This is a screenshot from the video:
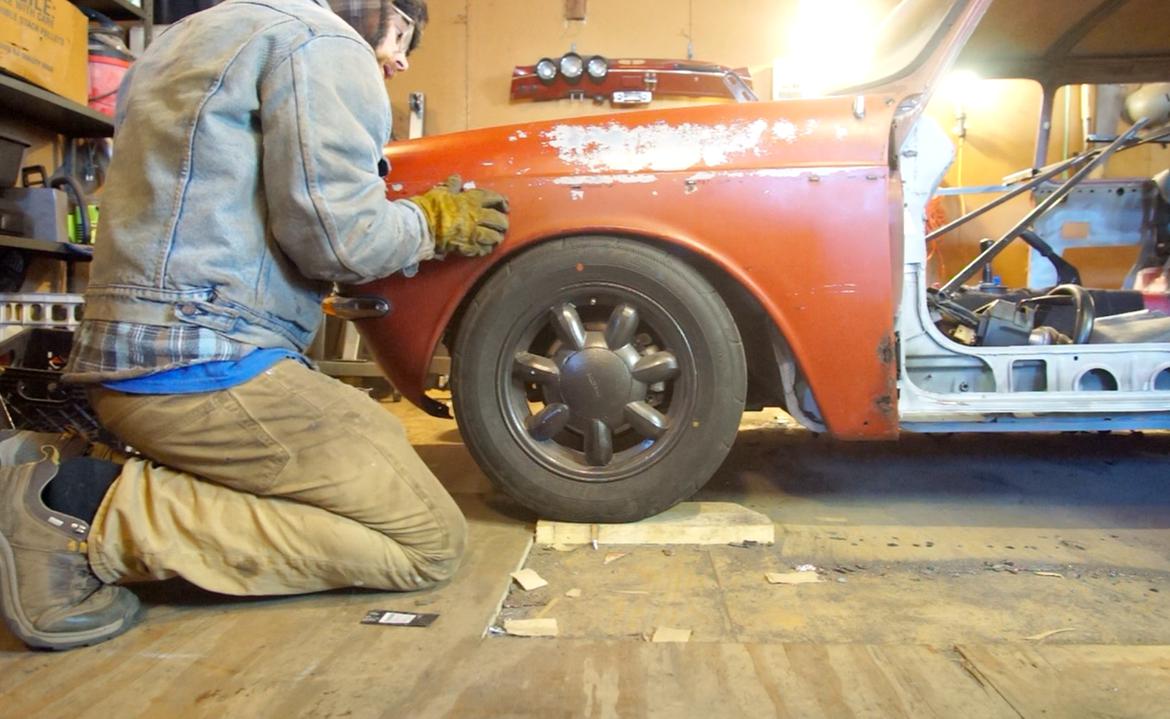
Umm, do you guys think the front wheel looks a little forward? Maybe it is but it doesn't look too bad. I'd rather it be too far forward than too far back! I knew that the wheelbase would be 3/4" too long, I guess this is the result of that. But I can definitely live with it.

And this is with the body on the weight of the suspension, so that's the actual ride height. I didn't have enough hands to measure it and hold the fender at the same time, but it looked like the tire was sticking out past the fender only about 1/4".

Then I put it up on jack stands:
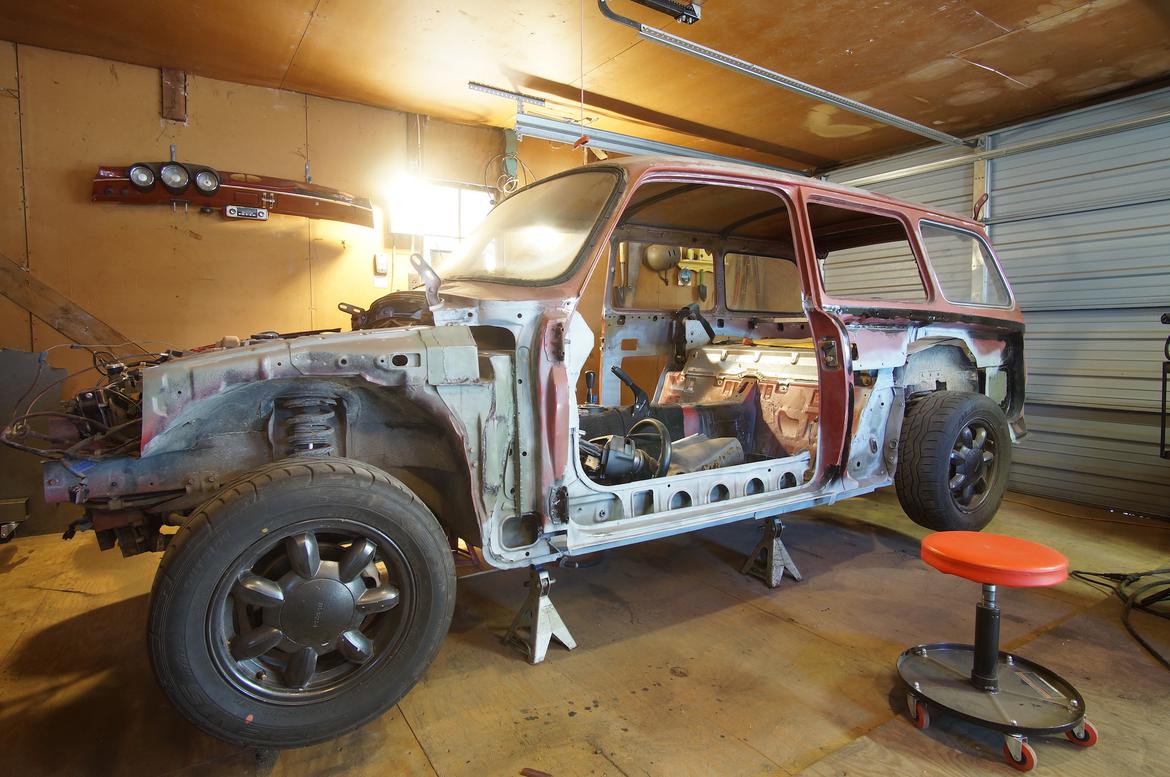
I'll get some shots of the new rocker panels and of the burn damage today so you guys can see that too.

mannydantyla
mannydantyla New Reader
2/27/19 3:12 p.m.

Here's the fire damage. Very tricky to get some pics of it, had to use a little mirror. 

Here it is before. Maybe I should have wrapped some foil tape around it or something.

All I can see is that the rubber surrounding the wires is extremely charred. I'm not sure what I should do. It's possible that the insulation around the wires melted, the wires shifted around, and now several of them are shorted. Pulling the wiring harness is the very last thing that I want to do. 

Here's the driver side rocker panel:

And here's a little patch on the passanger's side under the B column:

Will for sure need some fiberglass body filler, but that's ok with me. 

Crackers
Crackers Dork
2/27/19 3:15 p.m.

Your progress is making me feel bad about the state of my wagon. LOL

Be careful to not let that grinder get hot. They have lots of melty plastic bits and will self destruct. I use them for a novel (non-metalwork) purpose at work, and burn one up every summer. I have one that I cobbled together from a couple broken ones I use for sanding off paint, but they're not capable of doing more than that for prolonged periods. 

You're rushing your sheetmetal bends with the hammer, that's why it's turning out so wavy. Make more passes in smaller increments.

Try making your bends over the back of a piece of angle iron. (Or an actual anvil) Using a dolly with a crown like you are is going to pinch and stretch the metal and make the warp in the panel worse. 

mannydantyla
mannydantyla New Reader
2/28/19 5:41 p.m.

Thanks Crackers. The outside temp being 10*F will help keep the grinder cool ;) and yeah I'm still learning a lot about shaping sheet metal. Ironically, I made the passanger side rocker without any of the problems I had with the driver's side rocker in the video.

I just bought these rims, they were only $106 each, brand new, so I couldn't resist any longer. 16x5 with +45 offset. Should look pretty sharp. They're made by Toyota for the Scion iQ smart car. I'll need a set of 175/60r16 tires, giving an overall diameter of 24.3", and they should stick out ~10mm less than than the 195-wide tires I have now. Not enough to clear the fenders in the rear, but probably enough for the front fenders especially with a fender roller tool.  But they'll be taller so who knows. I'll just have to massage the fenders until everything fits.

There's not a large selection for that size but there's some cheap imports out there. I know don't know much about the subject, but I don't think they would make for a very good set of wheels for the track because the rims are not wide enough (right?) but I can keep my 195/60r14's around. I'd like to try autocross at least once. See what all the fuss is about.


mannydantyla
mannydantyla New Reader
3/2/19 11:31 a.m.

Good news, it starts and runs and everything still works after the rubber around the wiring harness burned up :)

Damn I'm a lucky berkeleyer

But for the ~10 minutes I was trying to start it before realizing that the ECU was disconnected, I was struggling to remain calm. I always manage to forget to plug in the ECU or the fuel pump or the ignition on the steering column or the battery ground cable, or any combination of those. 

Oh and I ordered the tires this morning. Can't believe I bought a set of tires for less than the price of one tire for my truck. 

mannydantyla
mannydantyla New Reader
3/4/19 10:44 a.m.

Time to start thinking about a grill. 

Anybody have any ideas?

Here's the "fresh air vents" off a Beetle hood (near the cowl). I think that would look really good for my application. Thankfully I don't need a front license plate, either. 

How bad do you think it would look if those holes were cut out rather than punched at a factory?


Indy-Guy
Indy-Guy UberDork
3/4/19 12:34 p.m.
mannydantyla said:


How bad do you think it would look if those holes were cut out rather than punched at a factory?


I think there are some fabricators that can pull if off, and not look like crap.  Are you one of them? 

Only you can decide that, but if I were in your position, I would 100% weld in a nice looking factory solution.

Crackers
Crackers Dork
3/4/19 2:06 p.m.

You'll need a jig to build the lip on the openings. Without a lip you'll end up with a floppy panel.

A jig for low volume is really only practical if all the holes are the same size/shape, and in a row. Otherwise you'll spend a week making a jig and still be subject to slight (but noticable) variations between holes. 

A jig for a custom grill would make for some awesome bragging rights, but only if the finished product comes out show-car-nice. 

No grill is better than a poorly made one IMO. (Ironically crappy notwithstanding.)

Crackers
Crackers Dork
3/4/19 2:11 p.m.

I spent forever trying to find the video that went with this picture, but it looks like pretty much all the guys videos have been pulled. (Probably a music copyright thing.)

Same basic concept though. There's another half circle hole under the area he's working. Make the flanges over the hole then locate it in the second hole so they stay consistently sized and spaced. 

If that's all Greek to you, just cut something out of another car. 

NOHOME
NOHOME UltimaDork
3/4/19 2:19 p.m.


Made a couple of grills with this stuff. Its a stainless mesh used to screen gravel, but I am sure it can be found for other uses.


Pete

mannydantyla
mannydantyla New Reader
3/4/19 2:27 p.m.

In reply to Crackers :

A few months ago that would have all been Greek to me but I've been reading this long thread on coachbuilding (warning: time sucker). A die could be doable for sure, maybe two of them - one that's a little shorter than the other for the slots at both ends. Like how VW did the hood vents near the cowl on the Beetle. I just like that look. Maybe I could make the dies out of oak or another hardwood, so I can use a router bit. Not sure if the bits would hold up on aluminum. It would be a fun project! Or 1/4" steel and use a file to shape the inside of the slot on the die. Hmm..

Crackers
Crackers Dork
3/4/19 2:44 p.m.

The only kind of sheet metal work that wood is suitable for is dishing. It breaks down or deforms too quickly for repeatability.

There's probably some other novel uses, but generally your tools should always be as hard or harder than your workpiece. 

Something to consider as well, if making slots fairly close to each other you'll need a top die to clamp the metal down so it doesn't just twist when you start hammering. 

Crackers
Crackers Dork
3/4/19 2:47 p.m.

Also, keep in mind, for straight edges are almost never 100% straight. Your holes will want to follow body lines or it will look pit of place. 

NOHOME
NOHOME UltimaDork
3/4/19 2:53 p.m.

Dimple die grille?

Do two dimple dies and join them with a straight line cut  to make a slot? The  That takes car of the tricky metal shaping around the round ends of the opening and just leaves the straight bit to fold over. That would be easy to do with a female form to hammer into and a wooden tool to pound from the top.


Pete

edit


another option is to use a router and carve a slotted mold out of wood. Then glass over the slots to make the openings. Easy to trim the backside and I wont tell anyone it is not metal.


Crackers
Crackers Dork
3/4/19 3:30 p.m.
mannydantyla said:

In reply to Crackers :

I've been reading this long thread on coachbuilding (warning: time sucker). 

Scanned through the first couple pages. Dude definitely has some chops. 

Had to laugh about the "donut dolly" though. Panel beaters have been using that trick for decades. Usually just a second set of dollies with holes drilled/machined/ground into them. I have a cheap heel dolly with a hollow back that I use for this. 

Alternatively, using an all purpose dolly on it's side nets a very similar effect. 

mannydantyla
mannydantyla New Reader
3/4/19 4:10 p.m.

Where I'm at in the project: 

Stage 1. driveable miata with stretched wheelbase
    X frame rails
    X floorpan
    X driveshaft
    X fuel lines
    X brake lines
    X PPF
    X emergency brake cable
Stage 2. miata with Type 3 body
    X braces
    X chassis swap
    X rust treatment
    X rocker panels
      sheet metal
      front grill
      weld the "nose" back on
      fender stretching, or fender flares
      all body panels hung and fitted
Stage 3. daily driveable frankenwagon
      wiring & exterior lights
      battery cable
      muffler
      dashboard
      AC, heat
      windshield wipers
      power windows
Stage 4. the restoration
      rust repair
      exterior rubber
      rebuild the doors
      paint job
      interior
      wheels and tires
      radio
      accessories

And I've spent over $6000 so far, including tools, and not including the Super Beetle. The final stage will be the real expensive part. 

Crackers said:

Had to laugh about the "donut dolly" though. Panel beaters have been using that trick for decades. Usually just a second set of dollies with holes drilled/machined/ground into them. I have a cheap heel dolly with a hollow back that I use for this. 

Alternatively, using an all purpose dolly on it's side nets a very similar effect. 

I was using a large (~40mm) socket for this purpose trying to get the dents out of the roof caused by the chain I was lifting from. Yeah, the chain wrapped around the roof wasn't such a great idea. Two of the dents will need body filler. 

mannydantyla
mannydantyla New Reader
3/4/19 7:35 p.m.
NOHOME said:

Dimple die grille?

Do two dimple dies and join them with a straight line cut  to make a slot? The  That takes car of the tricky metal shaping around the round ends of the opening and just leaves the straight bit to fold over. That would be easy to do with a female form to hammer into and a wooden tool to pound from the top.


Pete

edit


another option is to use a router and carve a slotted mold out of wood. Then glass over the slots to make the openings. Easy to trim the backside and I wont tell anyone it is not metal.


The dimple die grill looks good but I'm not sure it would work well in this application, but I do like your idea about using them to get started on the slots, that would look pretty sharp. Honestly, that is a really good idea! It should be just the right amount of work. Walking that line between half-assing it and doing it the hard way. And, to fold over the metal between the holes, instead of hammering it how about I use some metal seamers with the jaws cut to the right length? Alright, that's the plan right there! 

Creative solutions are the best kind of solutions. 

I've done fiberglass before, successfully, but it's been many years. However I have a feeling that, umm, that could change soon. Especially around the dashboard. 

mannydantyla
mannydantyla New Reader
3/8/19 1:57 p.m.

Still working on filling all the voids and gaps between the VW and the Mazda.

Here's one of the more complex pieces, it's the part of the rocker panel that is hidden behind the fender. 

Oh, and the inside of all the patch panels get sprayed in weld through primer before they get tacked in. Then afterwords, if there's access, I hose them down with more paint. 

Then I started working on the area below the B column. 

It's not pretty, but I plan on smothering it in seam sealer, followed by some sort of paint with a textured build, like truck bed paint or rubberized undercoating or something. I'm not trying to win any car shows here. 

And the new rims and tires are getting mounted and balanced as I type this. They're so shiny! It's weird to see something this shiny bolted to this pitiful looking franken-vehicle. 

1 ... 4 5 6 7 8 ... 12

You'll need to log in to post.

Our Preferred Partners
lm4lMzN09WcfoF37wf2zNELLqwOqhbBF0LOOksP5Gu2pfdrRv2sn2tFC61QyGoe1