Don't try to block sand with the da. Don't end well. Wish someone had told me that.

Buy a set of these.

Understand how blocking works:
Coarse paper knocks the high spots off and makes everything one level
Fine paper makes the one level smooth.
Worn out paper makes smooth waves.
Using a fine grit paper when you still have high spots, makse for very smooth wavy panels. VERY common mistake.
Guide coat is your friend until you start to hate your friend for telling you the truth too often.
I like the Featherfill high build primer sanded to 400 grit with a final sealer coat sanded to 600 grit.
Then I like to ruin the hard work with my mediocre home spraying skills!

In response to several.
DD, Yep, I see orange. Weren't Dominoes colors always Red, White, and Blue? Doesn't matter, but weird.I can't find the blue I expected, either.
Duster Check, and thanks.
N.H., I have a similar plan, perhaps minus the top notch prep. It will be my level best, which is cool by me. I get blocking, but only recently. I've done tons of crappy bodywork, and a good bit of HVLP spraying. Do you wrap those blocks in sandpaper, or do they have stakes and voids into which you tuck the paper? Also, do you mind elaborating on "Worn out paper makes smooth waves"?
N.H., I have a similar plan, perhaps minus the top notch prep. It will be my level best, which is cool by me. I get blocking, but only recently. I've done tons of crappy bodywork, and a good bit of HVLP spraying. Do you wrap those blocks in sandpaper, or do they have stakes and voids into which you tuck the paper? Also, do you mind elaborating on "Worn out paper makes smooth waves"?
The durablocks use a stick-on paper that you buy in a roll. These and the featherfill high build primer upped my game when I did the bugeye.
Dull paper wont cut the top of the peaks off as efficiently as new sharp paper. Dull paper starts to follow the waves and while it will make the overall surface feel smooth, it will leave a wavy surface.
In reply to NOHOME: Thanks for the clarification. I'm not starting in earnest on the bodywork phase yet. I just needed a mindless thing to do for a while. Wax on, wax off Daniel San.
BLACK FRIDAY update. The weather was nice today, so I got on with it.Shop vacuuming, blowing with air nozzle, 6" opening of 2 car garage door with exhaust fan cranked to max. Roll car, repeat. Next came the POR-15 metal prep (basically phosphoric acid). Let sit, and rinse with water. With the "design" of my rotisserie, this of course, called for extensive squeegieing. Advice I'll give, but not take; build your rotisserie with wheels, so you can roll it outside for this sort of foolishness. Speaking of advice, I'd like to take an aside, and say thanks one and all for any input. If I don't happen to follow it, it is certainly not because I ignored said advice, just trying to make sense of all the info in front of me.
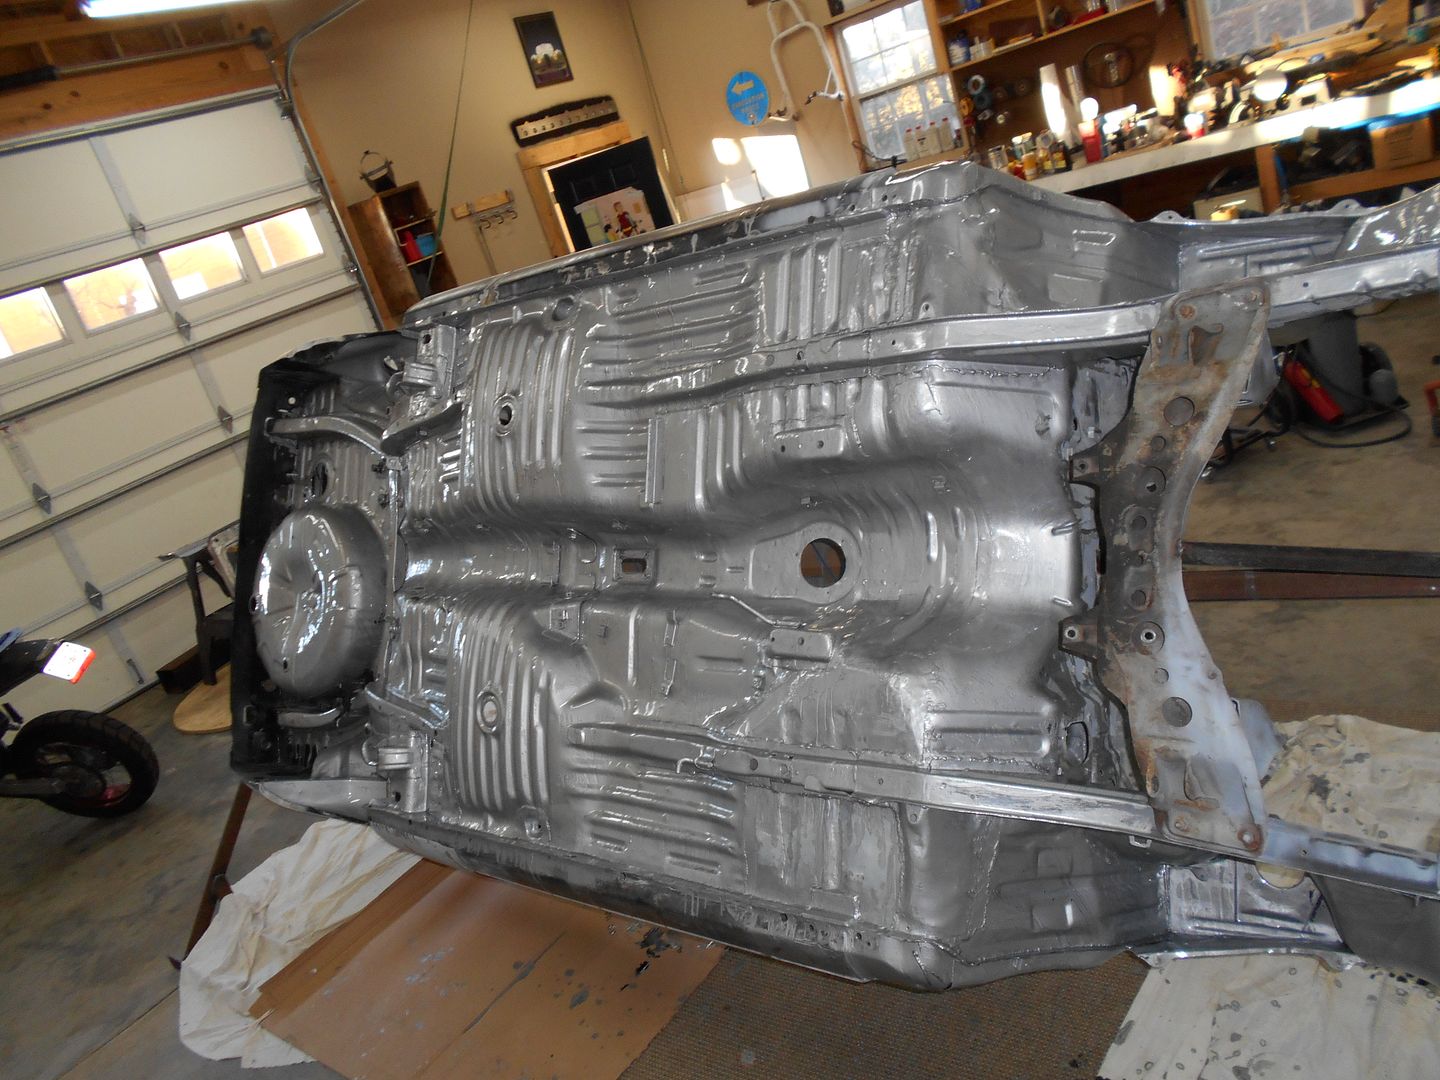
An example of the above is what to do about all this metal that I've been repairing, then rusting. Right now, it is drying after the phosphoric acid ate away at the rust that I intentionally fostered so the Por-15 would bite. You could go crazy with this. Here's what I have decided, and what I will work towards this weekend: it is now metal prepped, and rinsed. I'll wait til tomorrow for it to dry, apply POR to the rusted areas, staying away from galvanized, and non-rusty metal as best I can. Once that is cured, seam seal, then hit it with the old paint and rust stripper wheels, staying mostly clear of POR areas. Then, primer (Eastwood self etching), followed by some general scuffing. This will, in turn be covered with Rustoleum flat black, thinned with acetone, and applied with foam rollers, and disposable chip brushes. Thank you for your patience with that long-winded post. How about some post metal prep pics? This stuff was pretty rusty before. 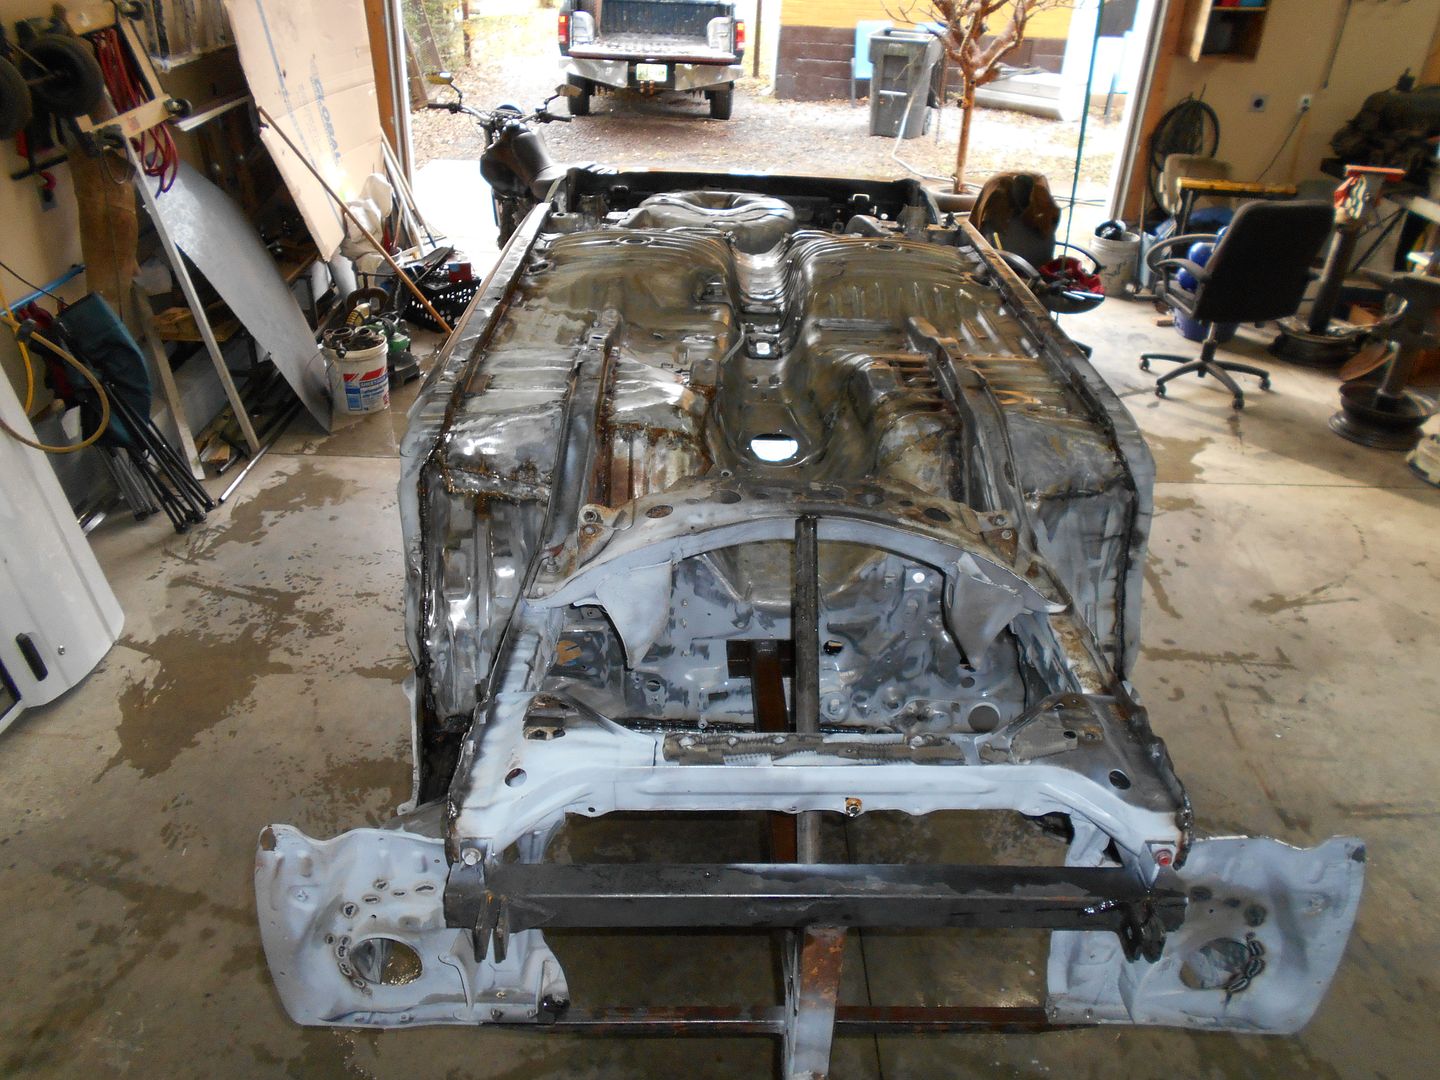
 This is also where I officially introduce a build thread within a build thread. Meet our tired Ingersoll-Rand 5hp compressor.
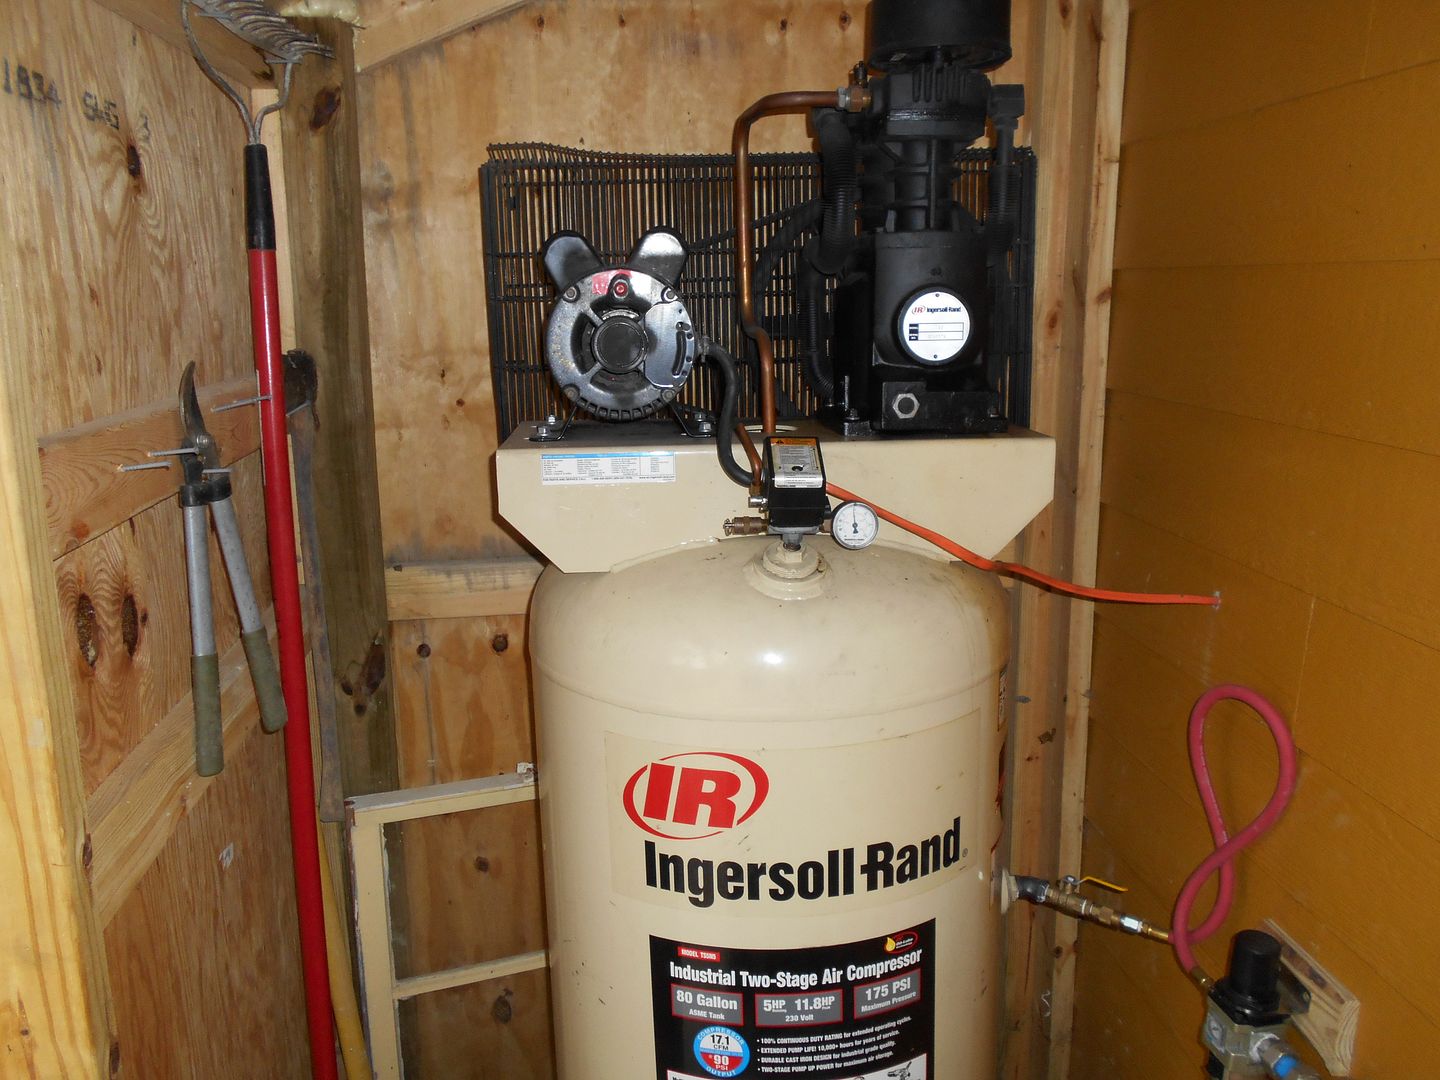 I decided to leave it together another day or so, as I just might need it for something. There is an Ingersoll dealer 30 miles away, so that should help. a replacement pump is nearly a grand-not much less than buying the whole thing, so rebuild it is. I've got some tricks up my sleeve on this. Stay tuned...
As long as I'm taking the compressor motor to my local electric gurus, I thought I'd see if they can fix the blown motor for this thing. If not, scrap pile, here we come.
BING, and just like that, I could use some advice...the metal prep leaves a chalky residue. Is this what the POR likes, or should I scrub it off? If left to my own devices, I figure scrub it off? Anyone know? POR website isn't helpful. Lots of info there, though.
Well, I started today scrubbing with a brillo pad. The chalkiness remained. Wiped it down with acetone, the chalkiness remained. So, I figured that must be how metal that is ready for POR must be. So, first, I got my implements together: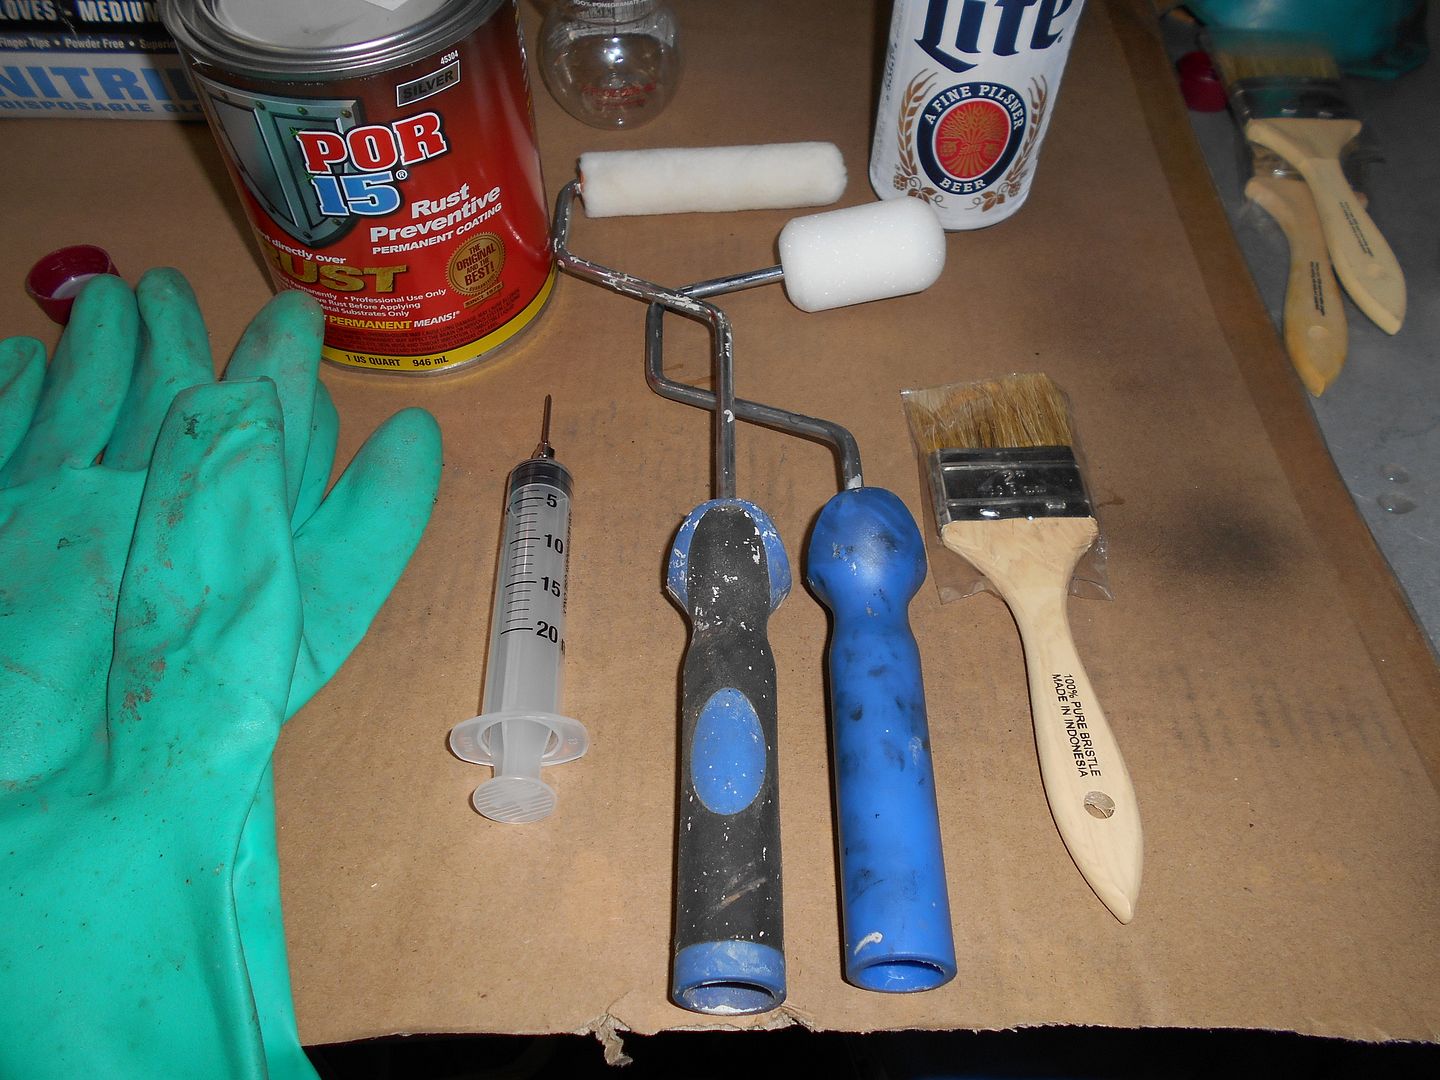 The girl at TSC looked at me funny, and asked what I was injecting with a 16 ga. needle. I explained to her it was like a Godsmack fan's dream back there, what with the tatoo guns, needles, and dog collars. The plan was to use it to inject the crap into the tiny recesses. Turns out its so thin, it mostly does this itself. I then just about messed up. I had been shaking my quart of silver vigorously for some time, and started to paint, but it wasn't acting right. Edit-the website says STIR, do not shake POR! Doh! I fought the lid off the can to find a lot of the good stuff settled in the bottom. Lesson-stir this stuff, kids! Once I had made a mostly homogeneous suspension, I got with it.
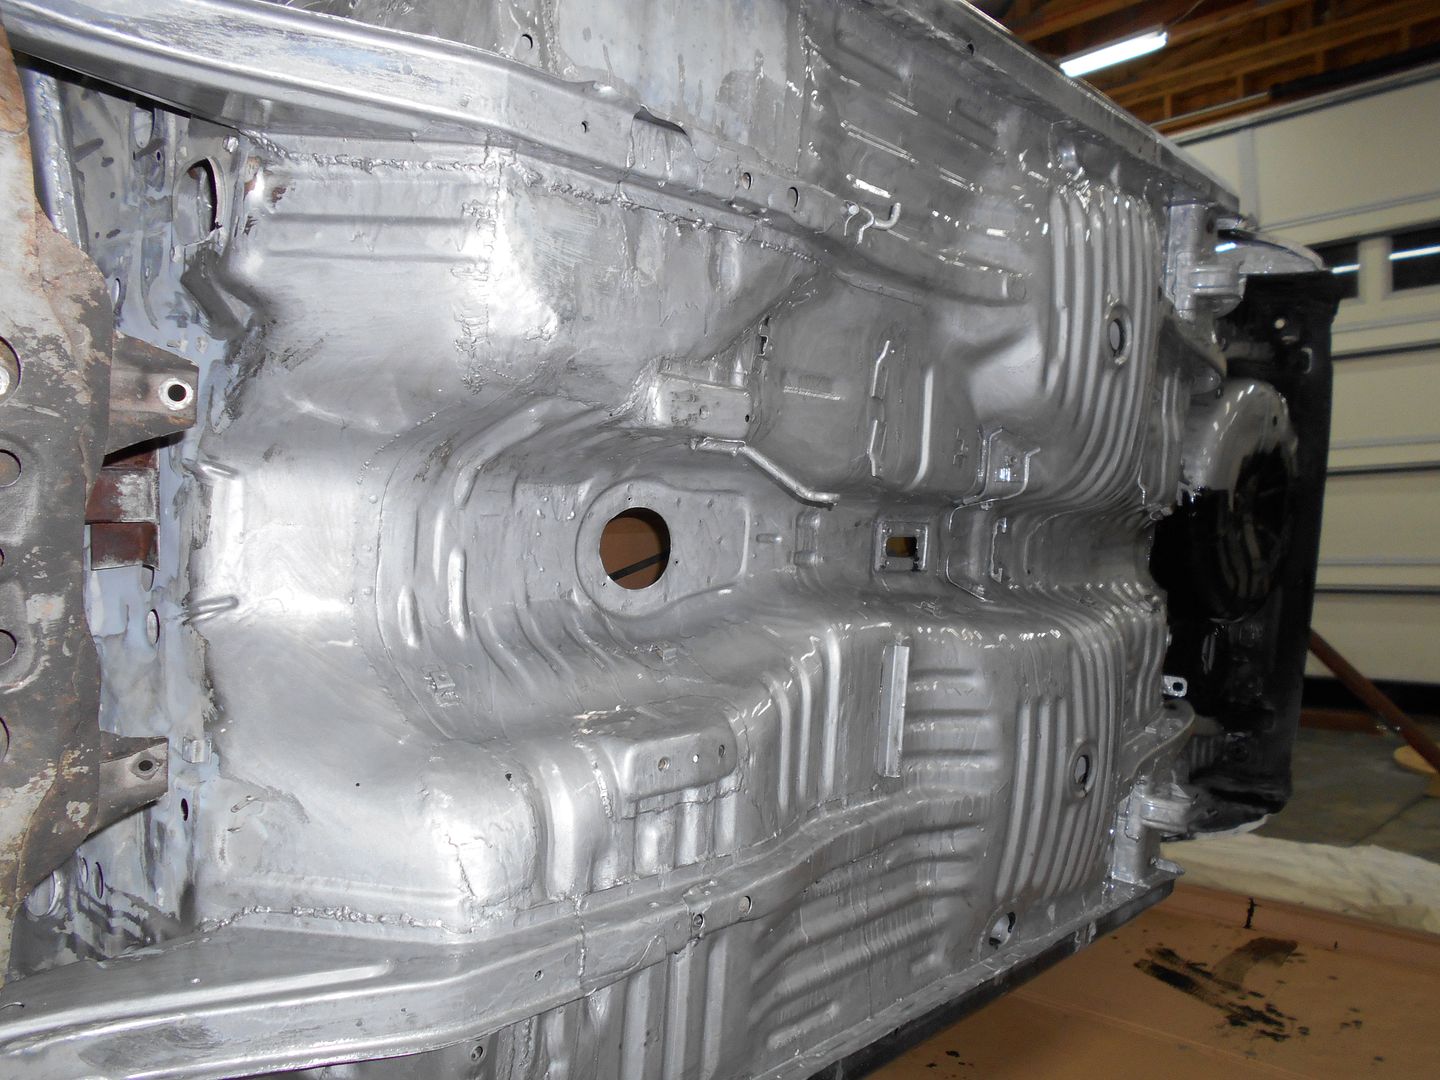 I ran out of silver, but had a pint of black that I figured was good for the interior, as well as the last bit on the spare tire well. I didn't exactly follow the plan outlined in my earlier post. Once paint started flying, I just kept going.
 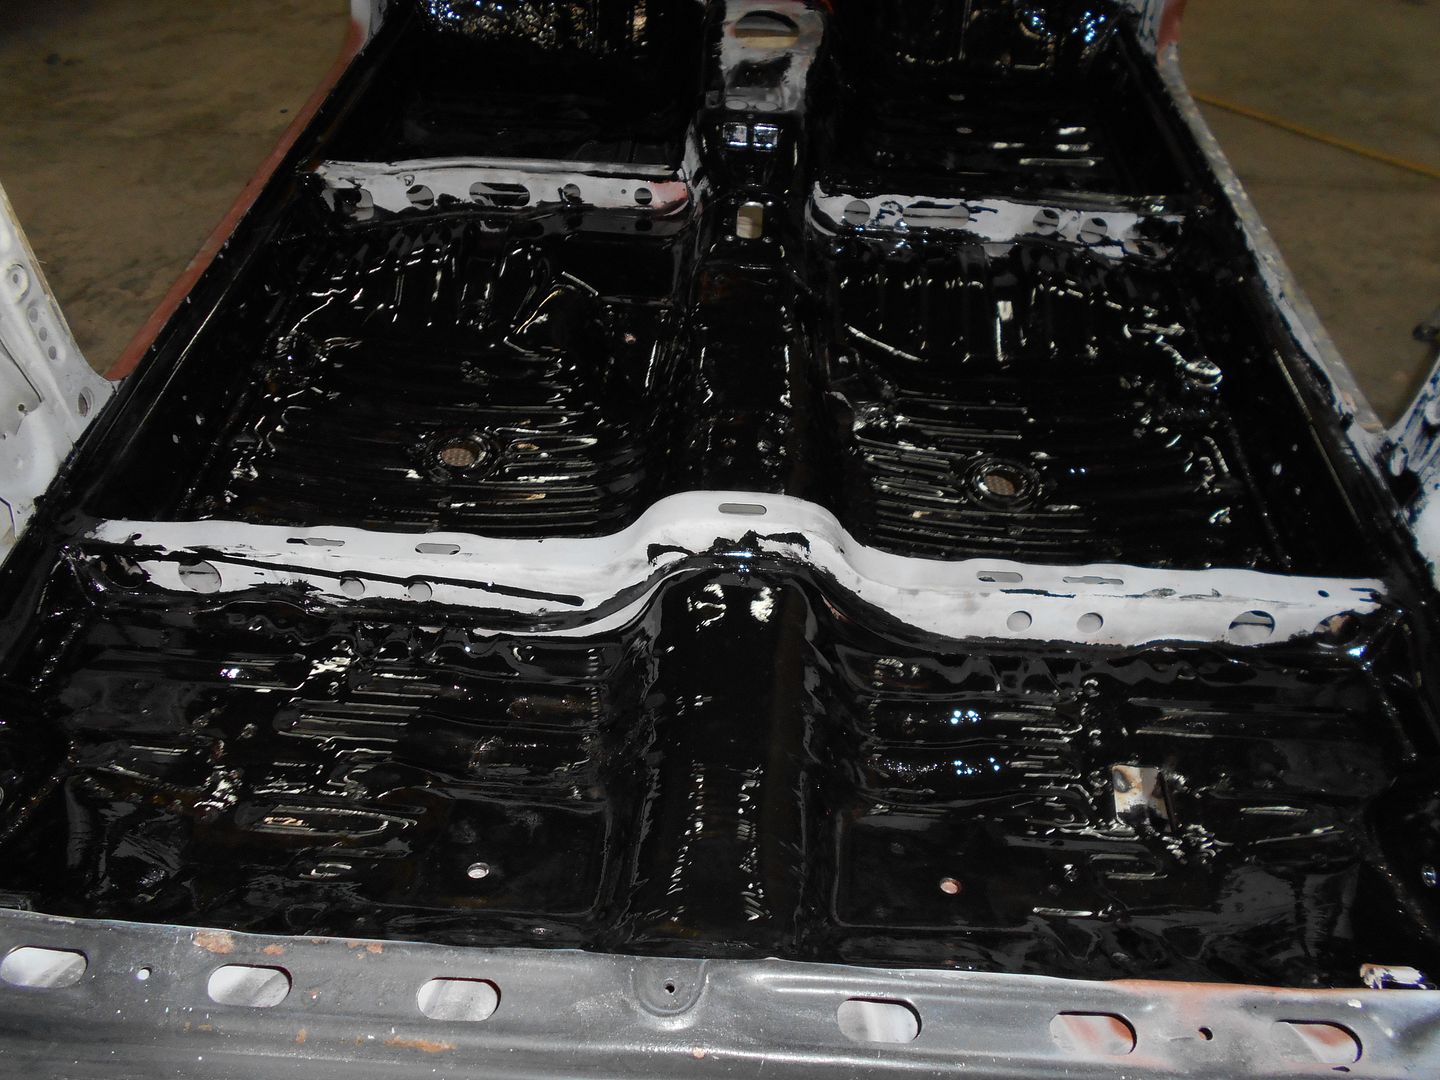 Gotta pick up at least another quart, then a second coat. I learned a bit at the POR website. Silver is the bad boy of their line up, black being less aggressive, and clear being still less aggressive. So there's that.

Is that because the silver POR contains aluminum, or is it something else in the composition?
In reply to ssswitch:You got me. I prefer to work with the black.
Yeah, I also prefer to work with the black. When I first read your post I thought maybe you were referring to aggressiveness in terms of preventing corrosion, but now I think you just meant it's a bearcat to deal with.

NOHOME wrote: Then I like to ruin the hard work with my mediocre home spraying skills!
I use the same technique.
ssswitch wrote: Yeah, I also prefer to work with the black. When I first read your post I thought maybe you were referring to aggressiveness in terms of preventing corrosion, but now I think you just meant it's a bearcat to deal with.
From the website, the silver does contain "metal", and thus, if there is also a need for a filler, it is the best to use. Yes, harder to work with, but according to the manufacturer, more effective against rust.I just looked at the car, and damn, it looks fantastic. Too bad everything I'm so stoked on will be covered in flat black.

Hey man, I just got a chance to check up on the build and saw the 'sploded dif. I feel terrible about it. I didn't take a close look at it, but was assured it was in good condition when I got it years ago with another AE86. Anyway, shoot me a PM - I'd be happy to refund some of your money. Will be going your way again in a few weeks.
In reply to JohnyHachi6:
PM sent, but I take full responsibility for not checking it out better, and hold no ill will. These things happen.
So, I couldn't find POR-15 anywhere locally. Got some more silver on the way.
I decided to jump on the compressor, and see what's going on. Basically, this thing is the old one from work. I limped it along, working way past its capabilities for a couple of years, until it became too problematic, and we replaced it. The boss sold it to me, and I changed the oil, filters, etc, and built a small shed behind the shop to house it. It was kicking off, probably due to getting too hot, but it sounded awful, what with its rattling and carrying on. Well, I pulled it all apart today, and the pump looks astoundingly good. Note: Reverse threads on the pulley bolt on the compressor pump.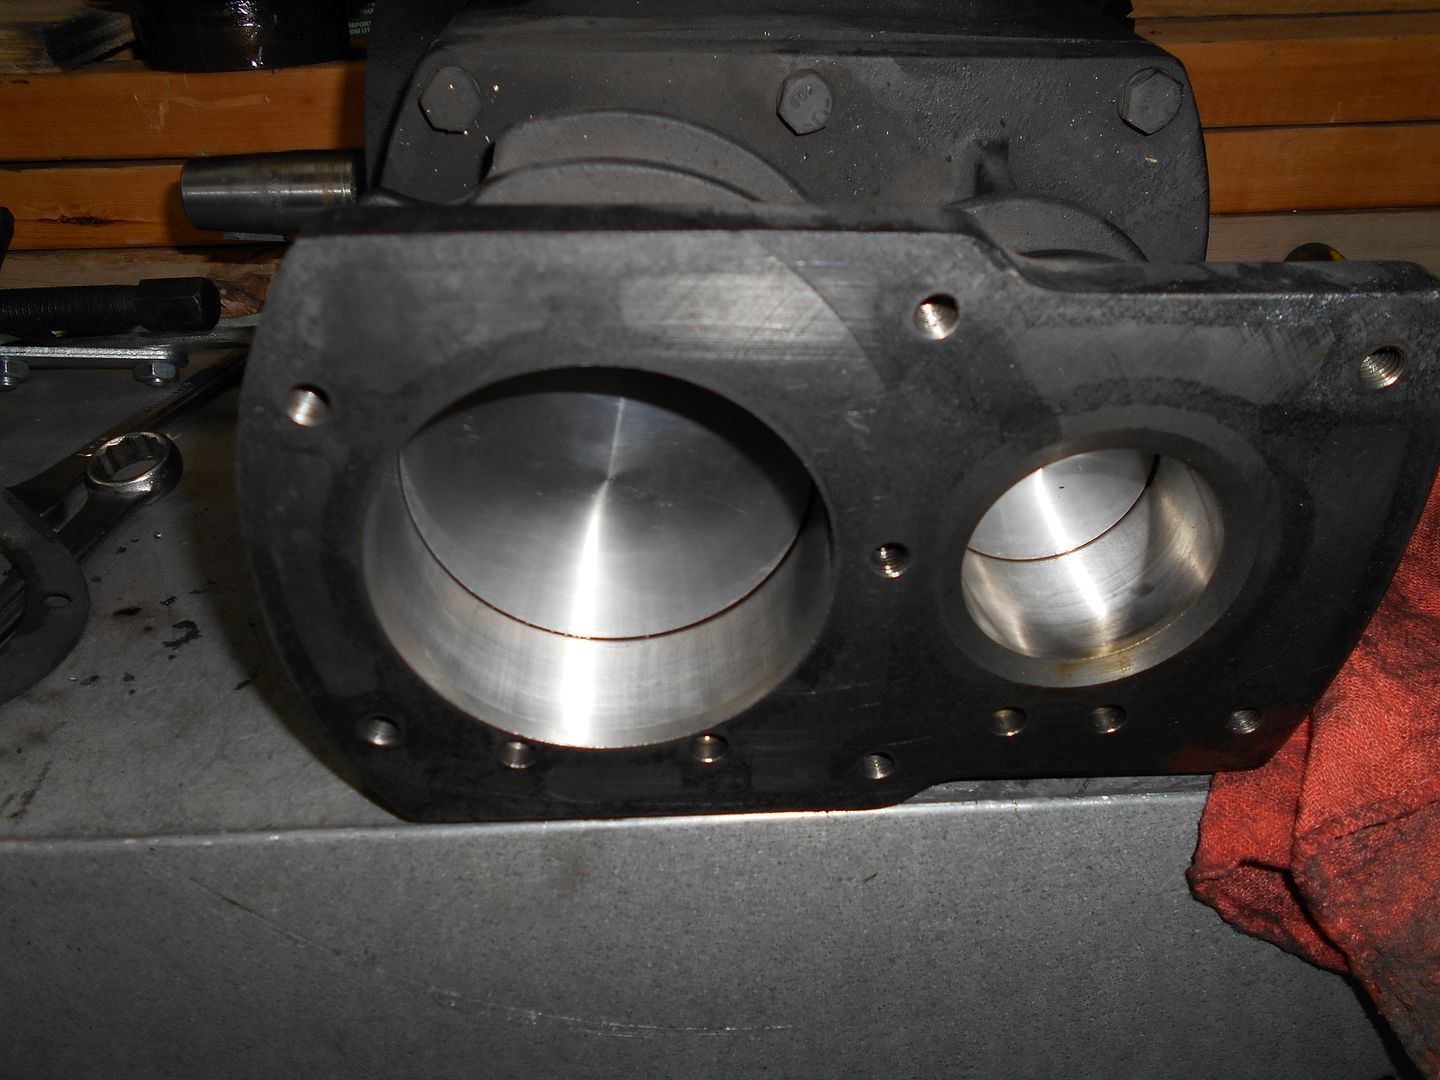 I can still see a little cross hatching in the cylinders, and can feel no play in the crank. Maybe its as simple as the darn thing is getting too hot in that little space. The motor will go to my guys tomorrow, and see what's going on there. I think I'm going to just throw some gaskets and possibly new reeds(valves? whatever) at this, slap it back together, and maybe put a box fan on it.
It was a heck of a week at work, but I still managed to make some progress on things. Lots of running around, playing phone tag, etc. on the compressor front. I'm still waiting for gaskets, but I'll do a wrap up/ thoughts and observations post once it is up and running.
I did some more POR today. 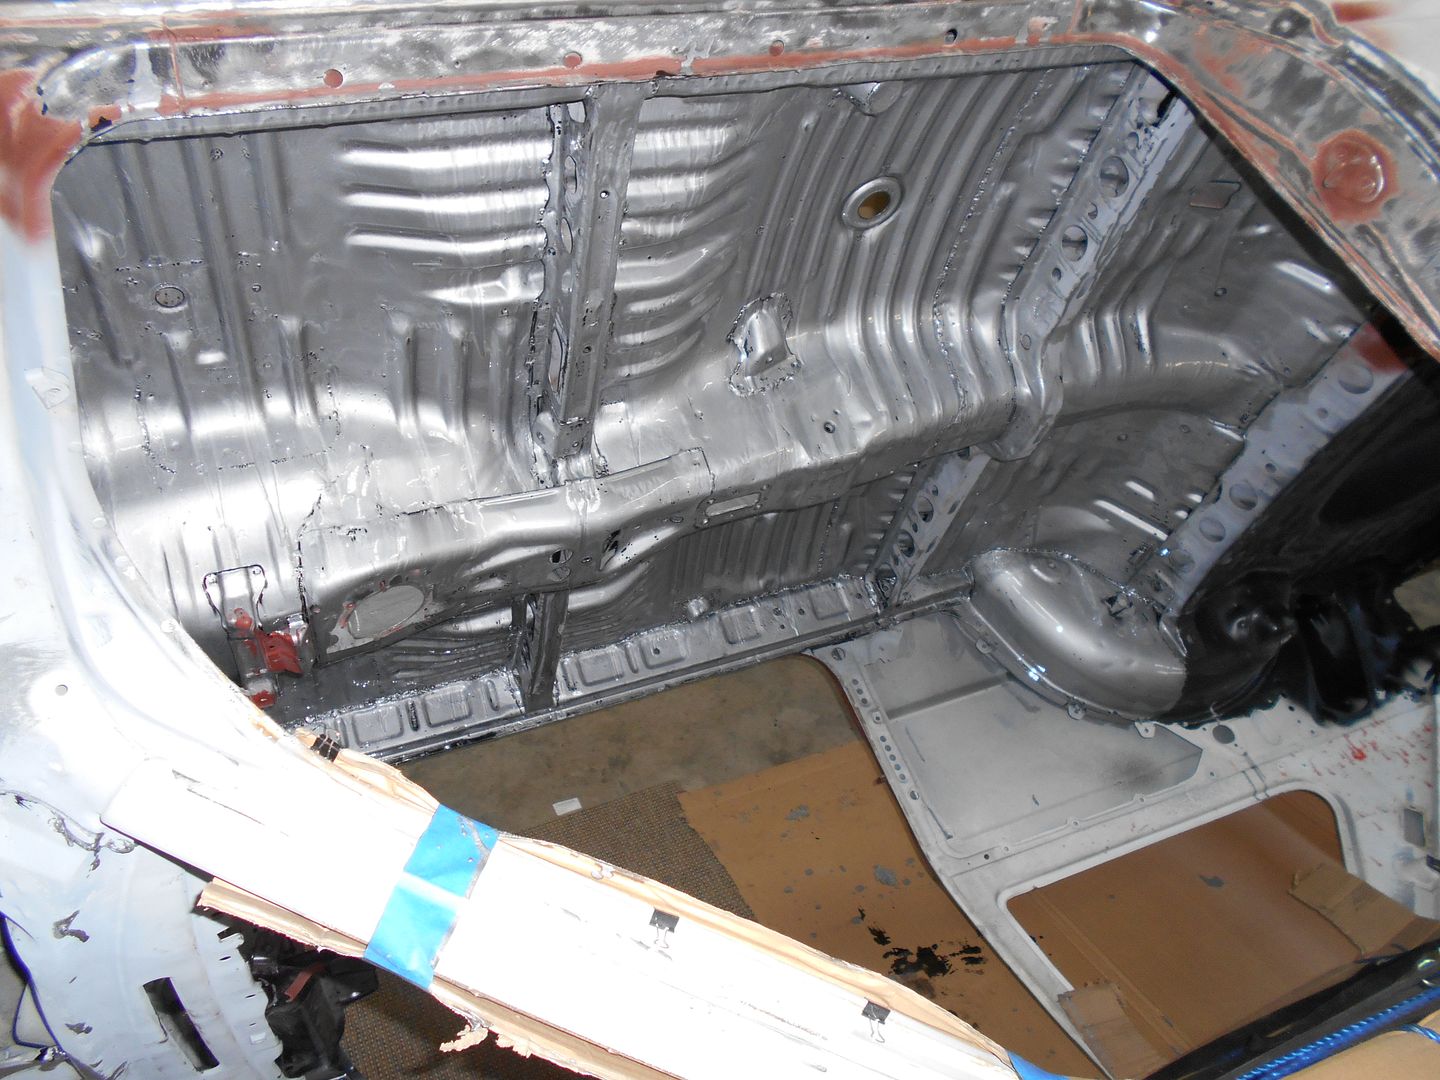
 Let's pretend I like the bottom of my cars like I like my eggs...Runny.
While I was at it, I got at the backsides of some previous repairs. I had to get into my last quart of POR, and use about half. I've got what's left in smallish jars with saran wrap pressed into the POR, then tightly capped to hopefully keep them from drying out.
We'll That's about all I've got to say about that

Loving this the great work and explanations in this thread. I've read through it probably 4 times and I'm rather amazed that you were able to get some of that body work done so cleanly. Glad to hear that you're doing better and still making headway.

Looking good! I'm still enjoying following the progress and I am impressed by your efforts to save this car. Must be gratifying to see the shell without rust holes.
mazdeuce wrote: I see this thread pop to the top and I usually purposely avoid it.
Because NOID, right! ...I KILL me.
Primary target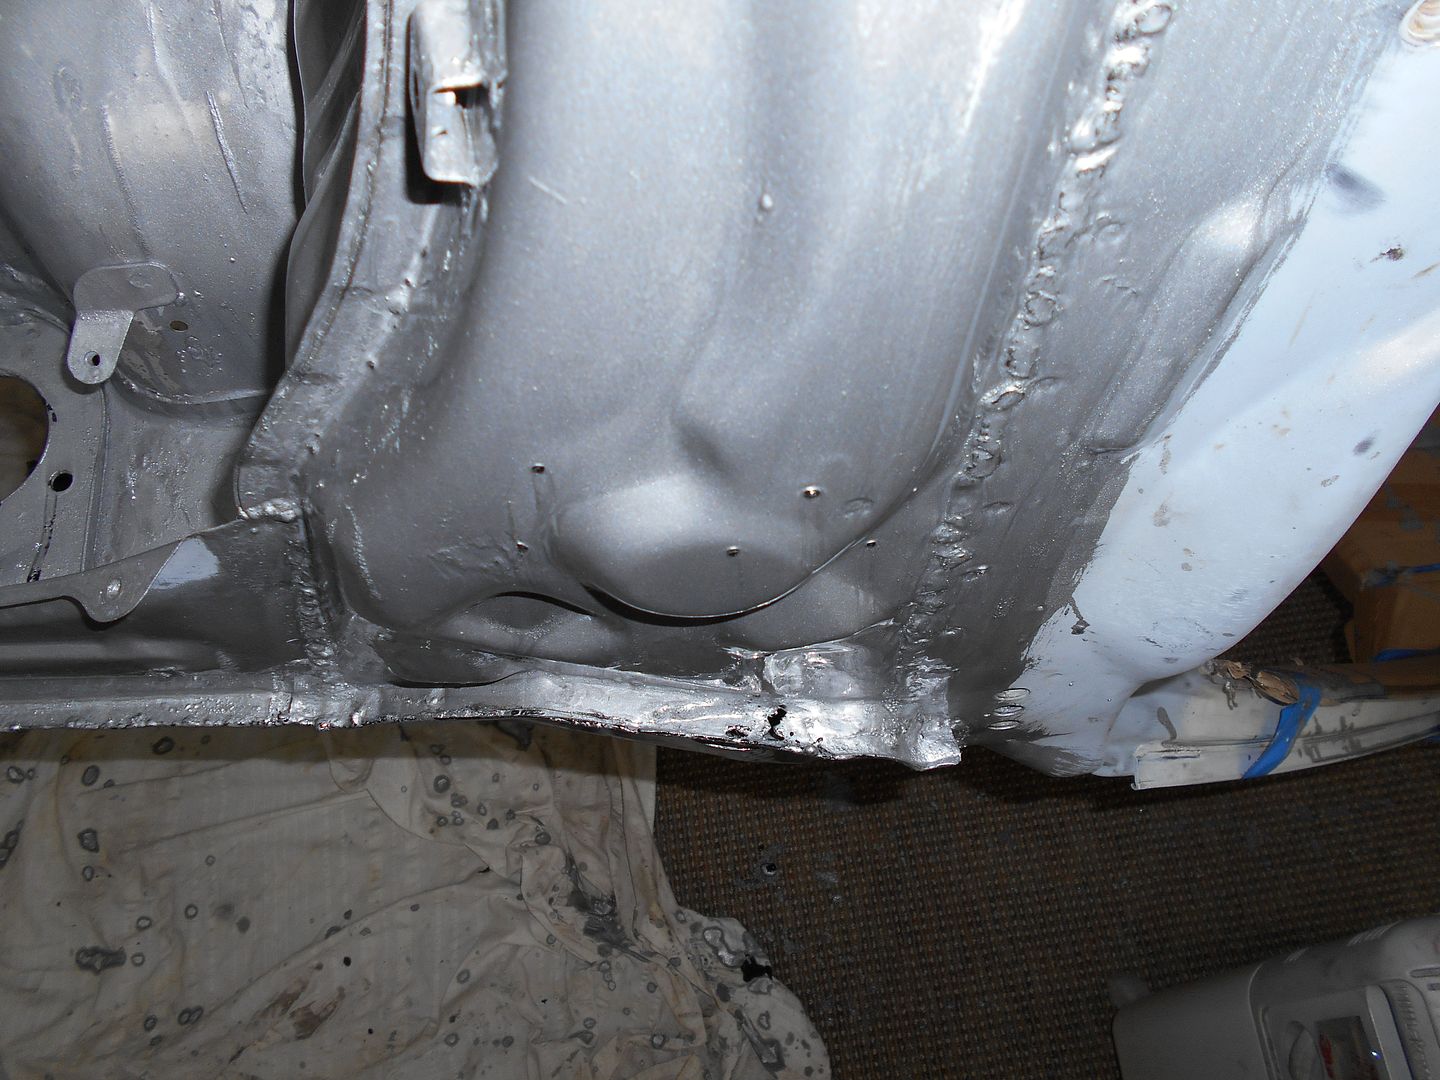 Secondary target
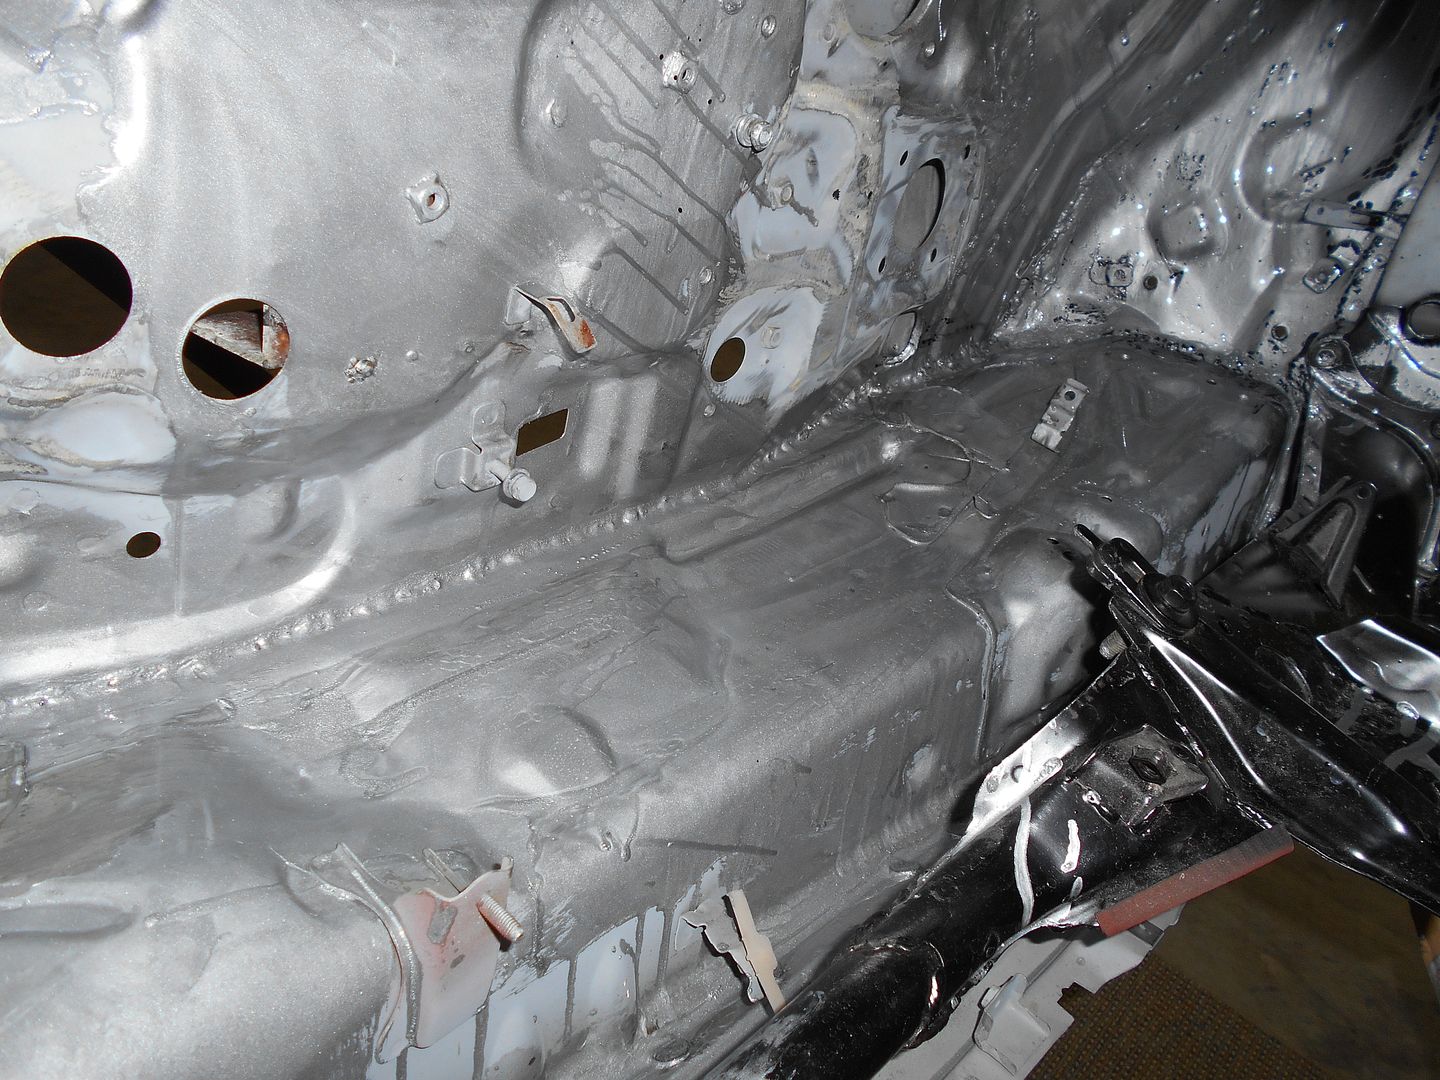 Basically, there was still some weak metal around the corners, etc in the cowl.The POR was yesterday, then scuffing, then fiberglassing over the corners, and misc. little pinholes. That stuff that looks like rust is it. This is the underside of the cowl with the car upside down
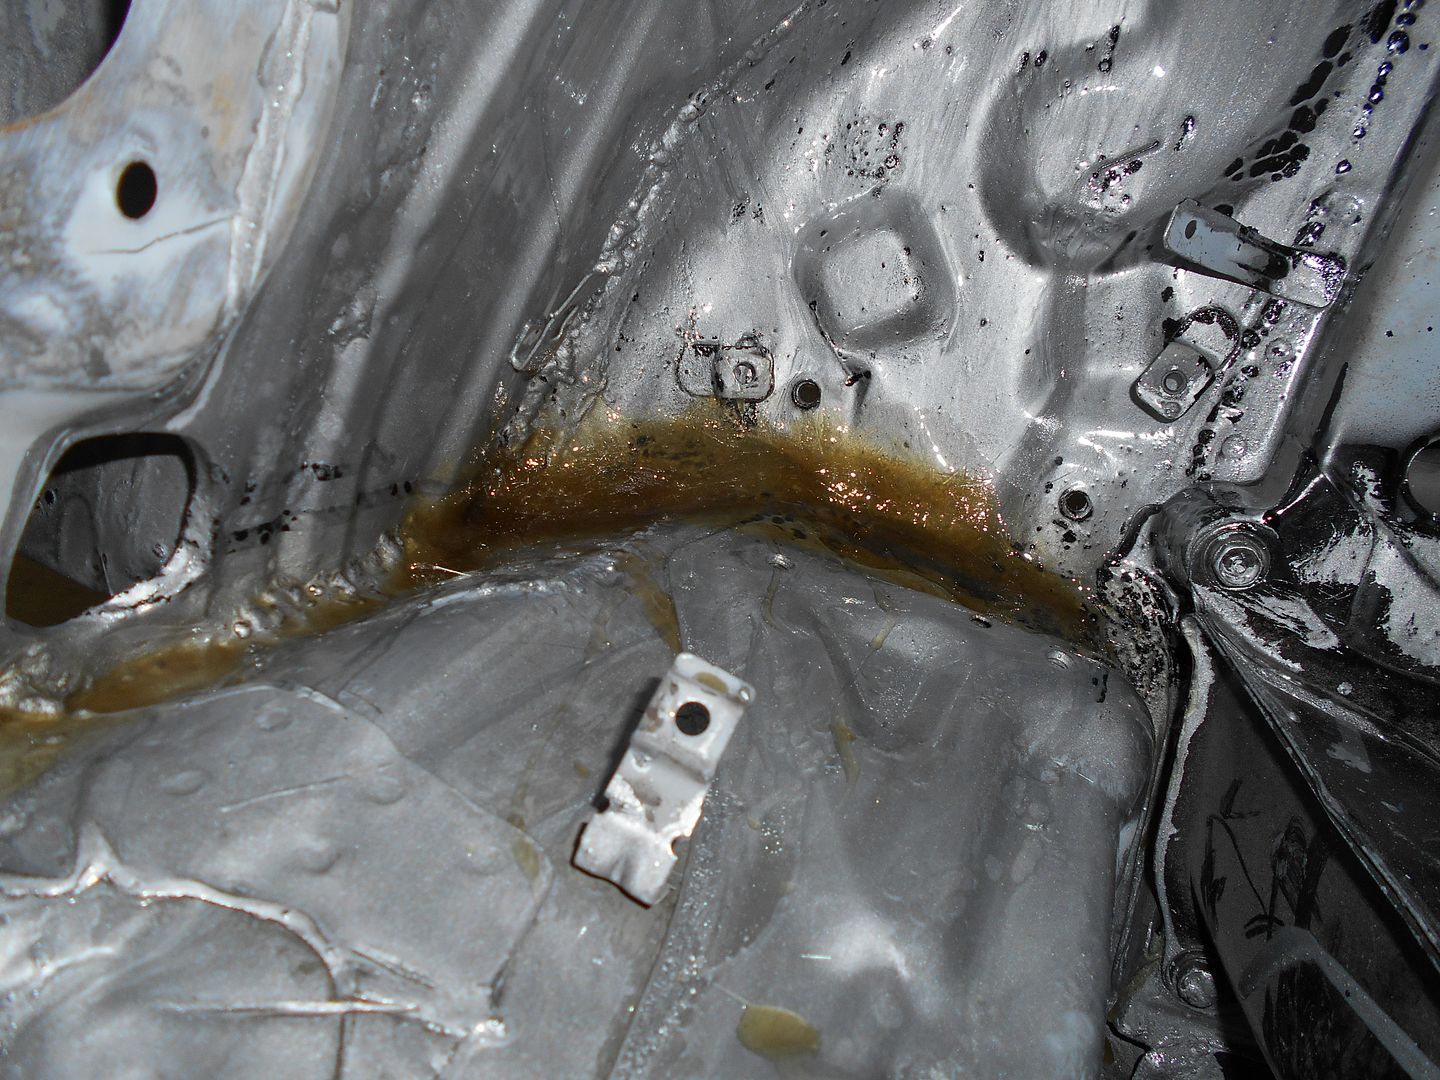 Some of the POR runs swelled up, and got a bit porous. I read this could happen in very high humidity, which I no doubt have.I figure I'll treat it like a house-Knock off the loose stuff, sand down trouble areas, prime, and paint.
I mixed the resin a little weak, so that's about it for now.

This thread is making me happy. Subscribed. ![]()
If I'm honest, not much going on here, despite a beautiful day, but it makes me feel like I'm keeping my momentum when I post, so here we go.
Today,I did some more under cowl fiber-glassing. Again, mixed for a slow kick, so that's done for now. I'll post pictures when there is something interesting going on. I also rough sanded some body filler on the hatch. No pictures-boring, but this last bit is kind of interesting, I think: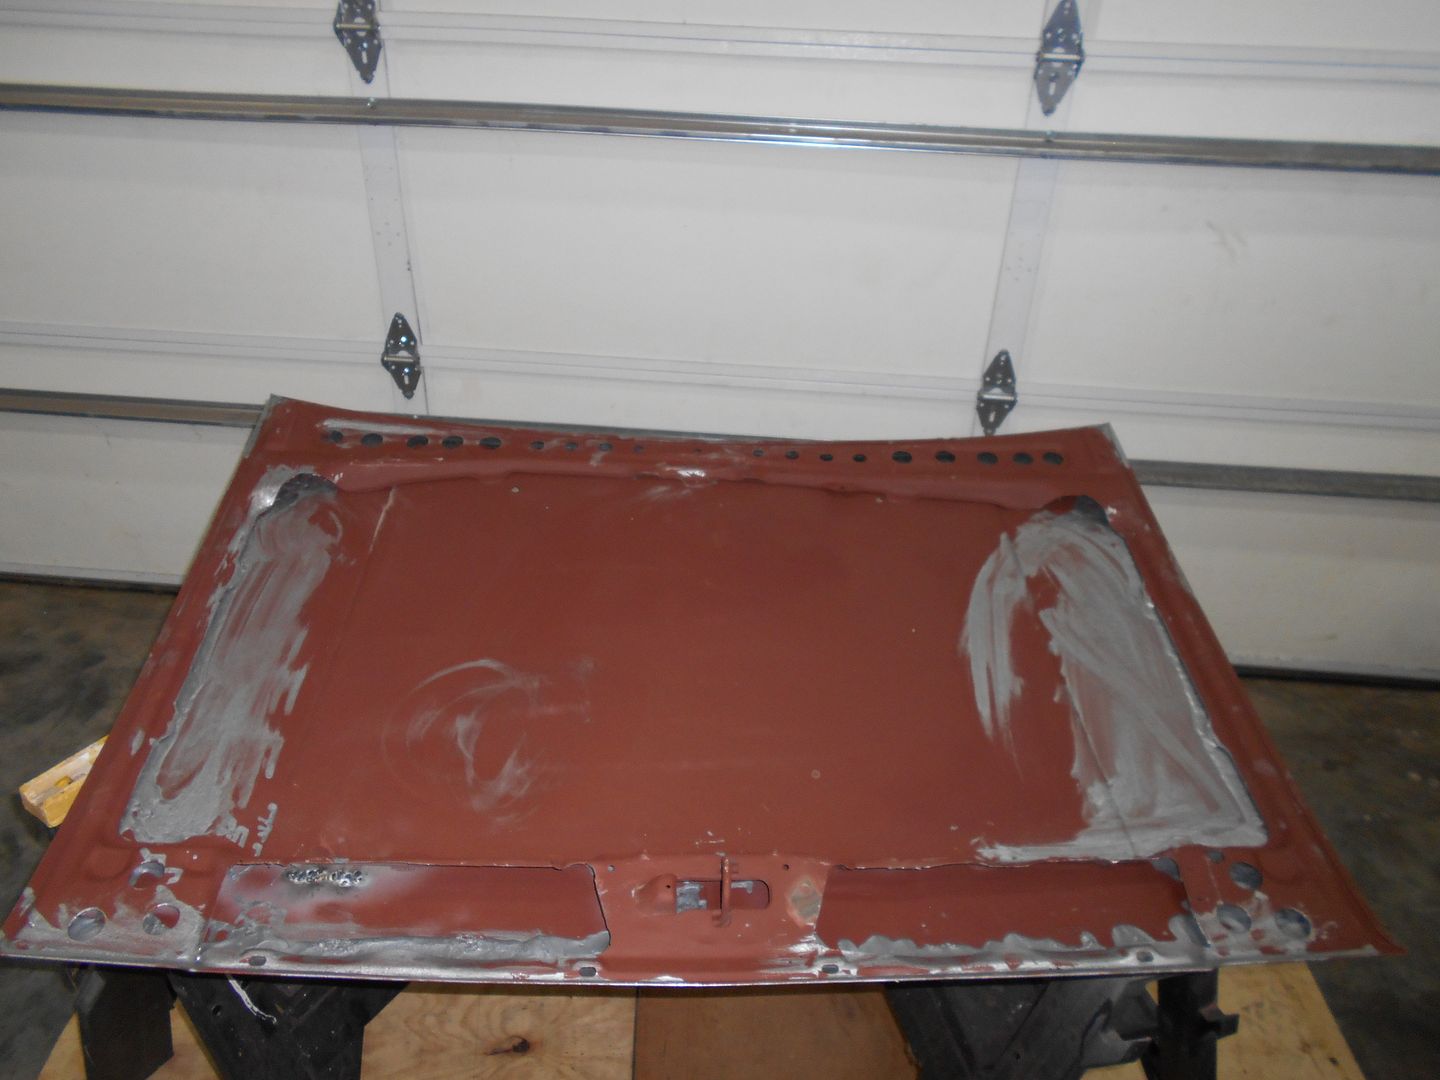 Looks awful, I know, but I figured the less full jar of POR was done for one way or the other, so I got out another trusty syringe, and squirted it into every nook and cranny I could on the hood, and rolled it around a bit. then wiped up the excess. This time I left the actual syringe off, and just used the plastic tube and plunger. Much better. Cheaper, too.
Still waiting for compressor gaskets.
Its a balmy 72 degrees here in Middle Tennessee this December Twelfth, so I figured I'd get some work done.
First off, yesterday, I sent an e-mail after waiting a week for gaskets that were supposed to be here in three days...Ingersoll lost my order, it was never processed. It has been placed again, and the nice lady assured me it would arrive sometime.
Next, I spent a good bit of time cleaning up the exterior cowl panel I repaired, and PORed earlier. That crap gets everywhere.
Next, I started doing this: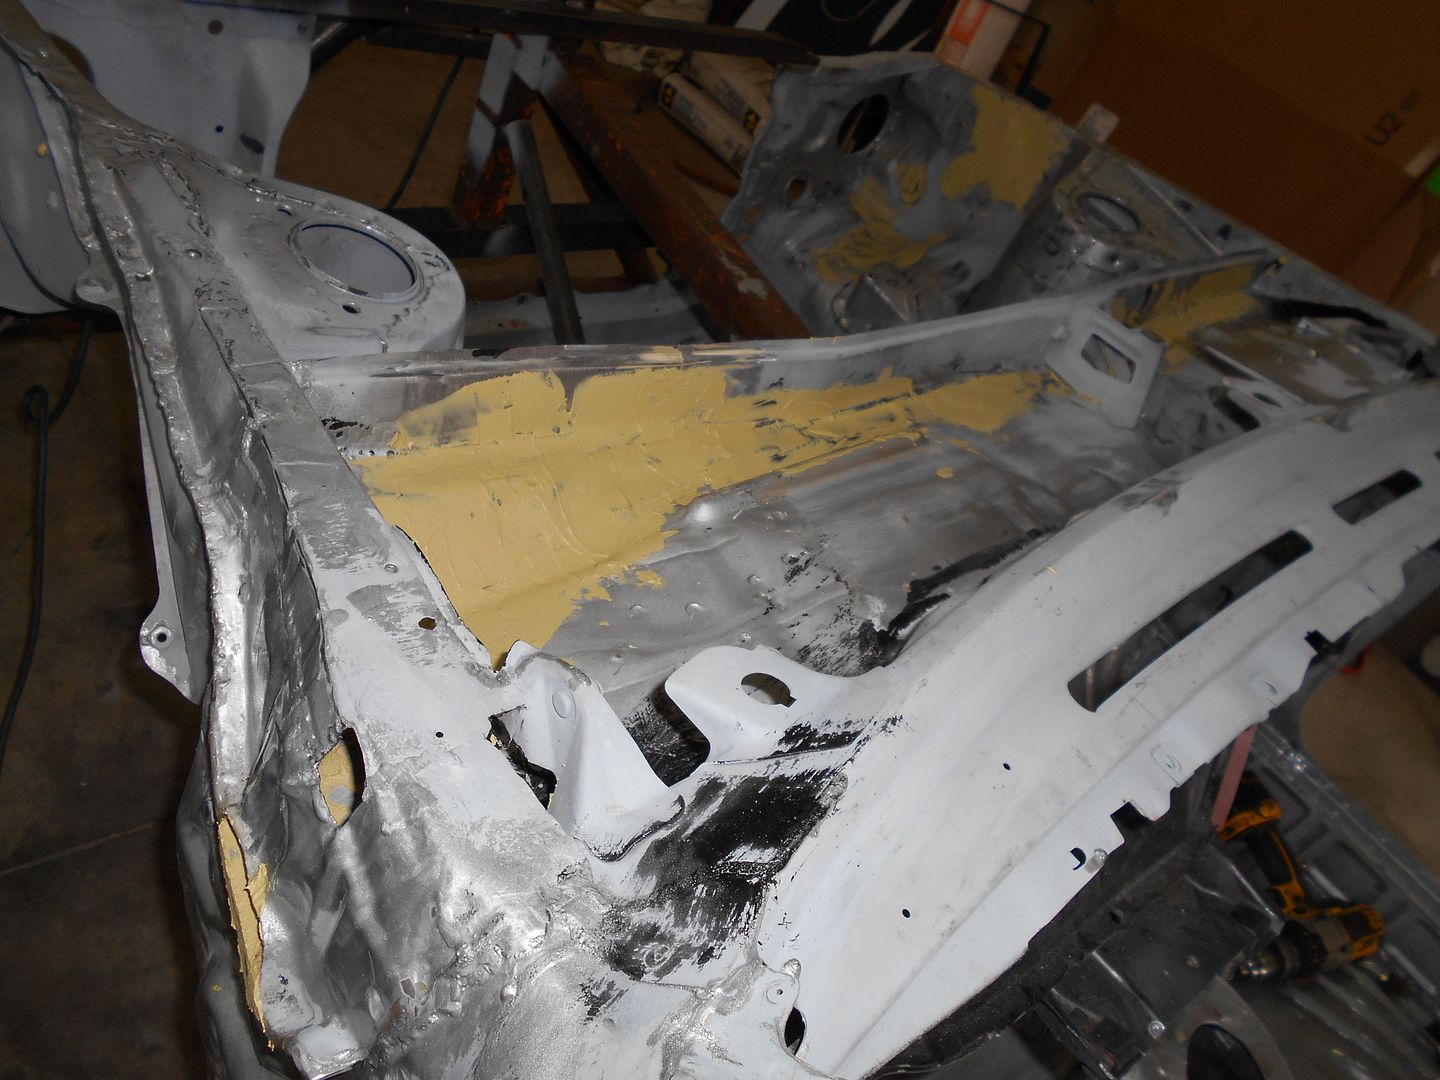 and this:
 The lower corner of each picture where you see body filler, is the top of the underdash parts I was fiber-glassing earlier. This whole part is basically a rain gutter, with the two exits in those corners, instead of onto the floor. Being as water needs to flow well, and exit those two parts, I'm going to spend some time here. I equate this car as having come to me with a sucking chest wound, and now I'm sealing up the incision, trying to not leave my wedding ring in there, and keep the stitches small. I'm even contemplating getting some gloss clear to put over this part to ensure no water sits anywhere.
Also, if you will notice, the "cabin filter" in the second picture looks plenty clean![]()
In other news, I've just been picking at the POR, scuffing, retouching, getting rid of runs and blemishes that I just consider too awful to live with, and that sort of run-on sentence type stuff. Cheers!
Arguably, two posts in a day is kind of obnoxious, but when it's 75 in December... I really have to rub it in.
First off, how about a product endorsement. 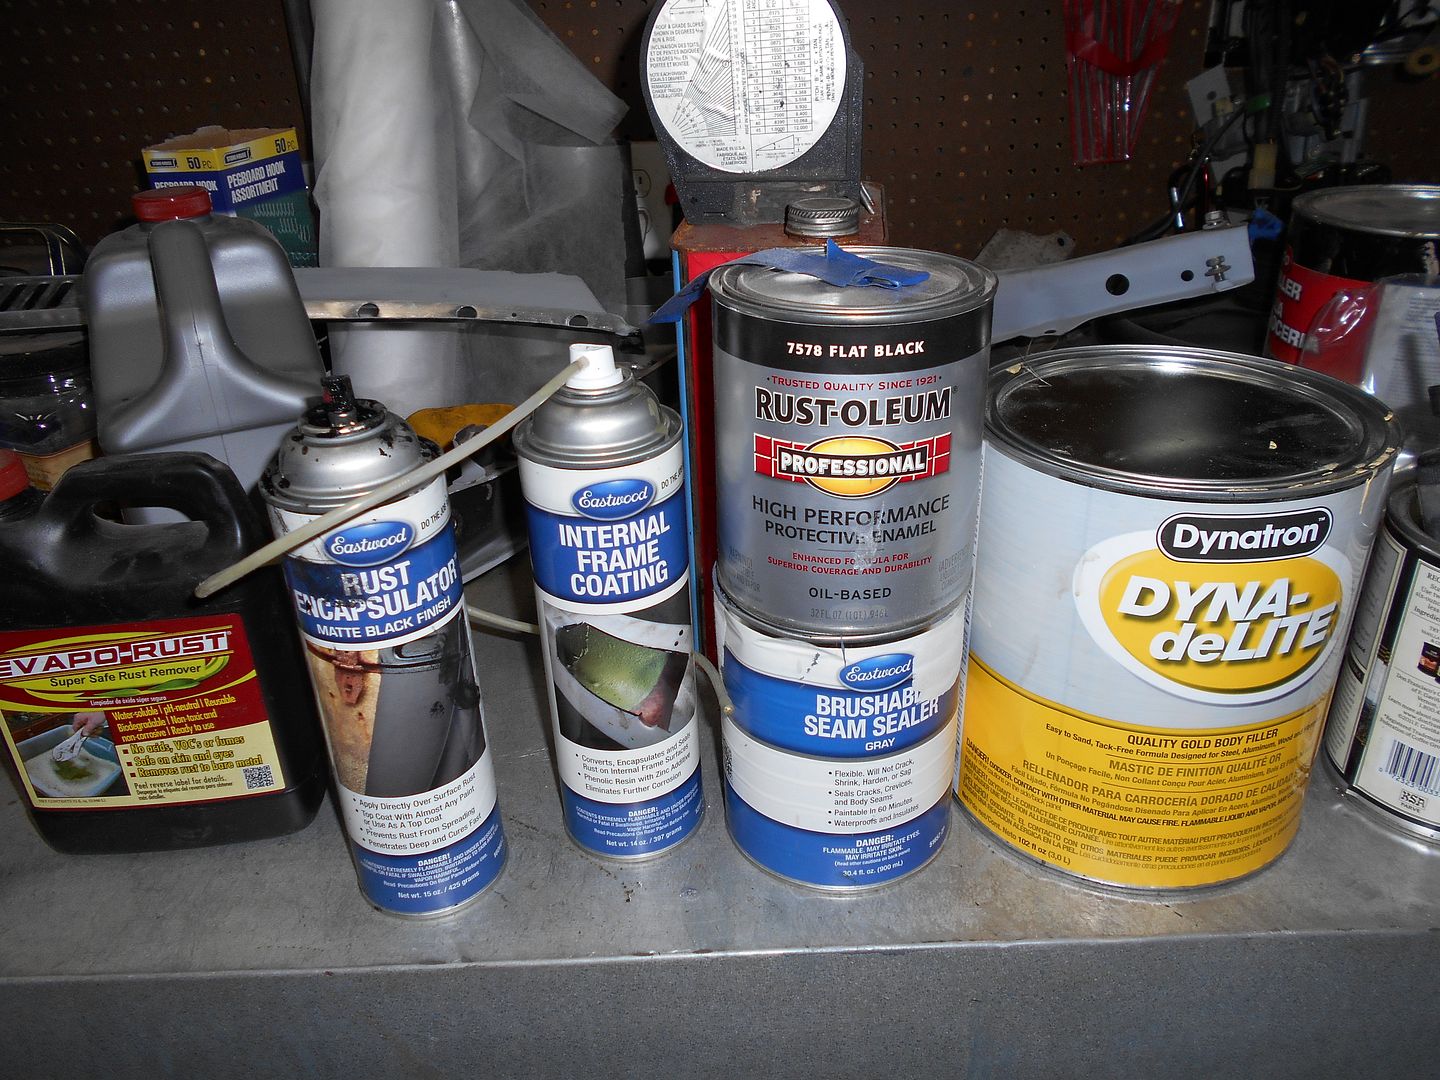 I like all the things you see in the picture. Eastwood makes some great products, the Dyna delite is comparable to the old stand-by, Evapo-Rust works as promised, and is less caustic than anything that eats rust has a right to be, and good old Rustoleum is as ubiquitous as they come.
After the last post, I had some time on my hands. Here's why. Having started using Bondo at maybe 12, and using it, shall we say, generously for a great many things, I have never, until this project, mixed it as per the directions. According to them, one tube of hardener equals one container of gunk. Well, Recently, I've been experimenting with doing things the right way. I'm not saying it will become a way of life, but maybe some of the time, I'll do stuff by the directions.
All that to say, I went back out, and my body filler wasn't yet ready to be sanded, so I started seam sealing.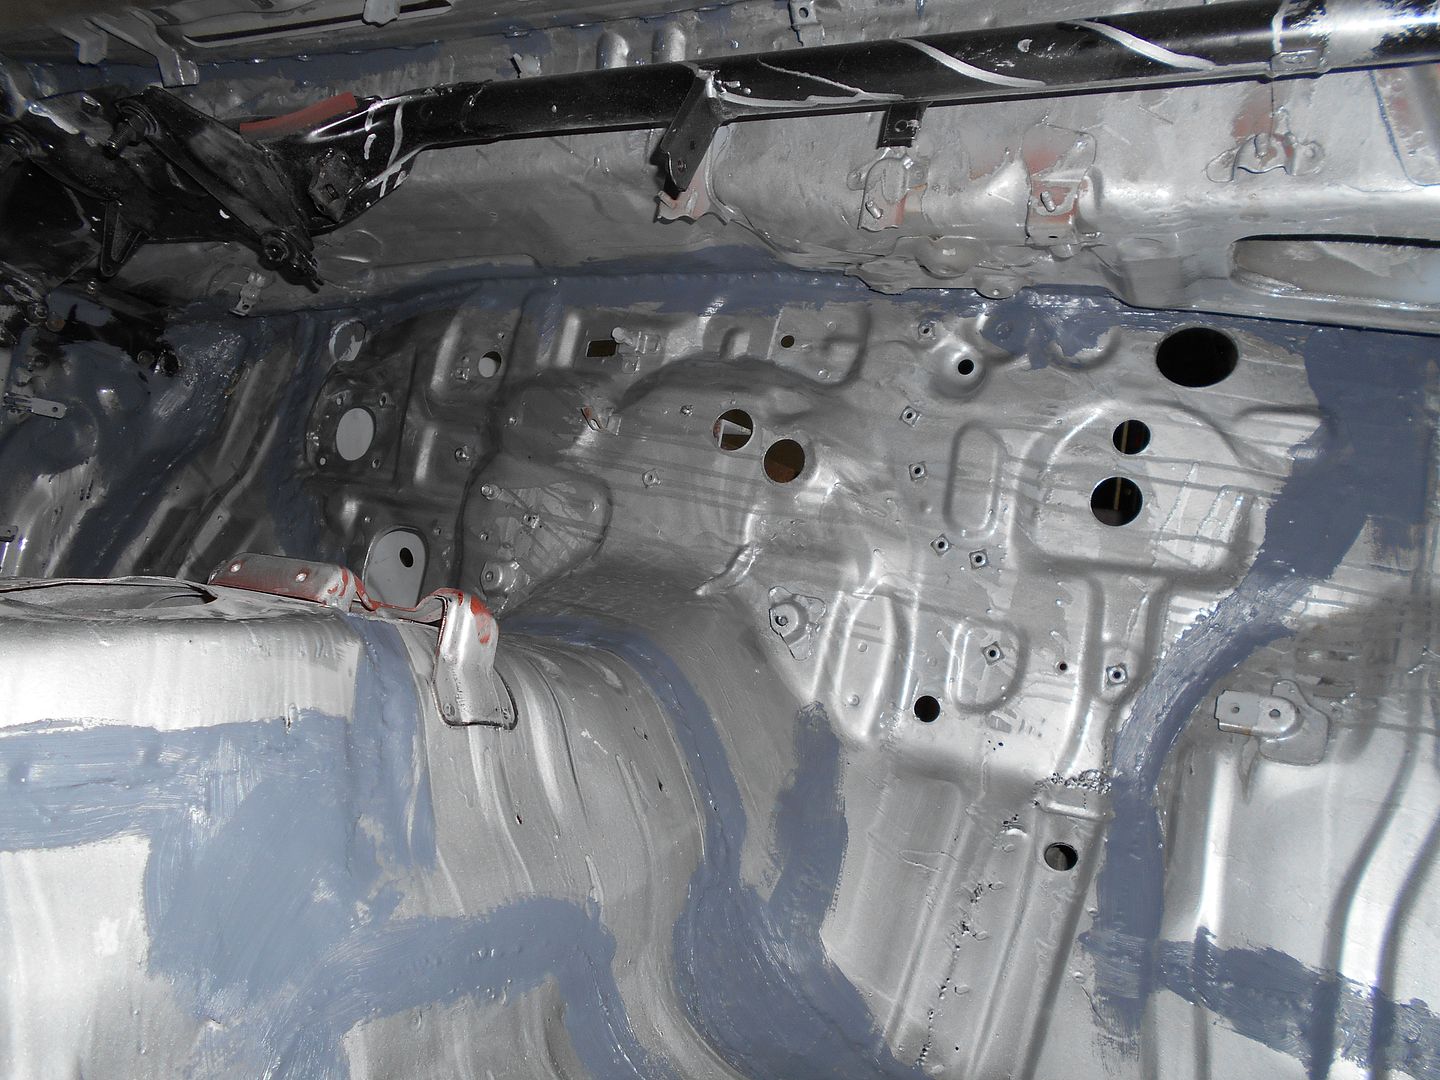 I did quite a bit more than pictured, but I wanted to post a couple of observations.
To whit: POR fills those little pinholes in welds wonderfully. I am not so sure seam sealer is necessary. The Por just glazes over all those imperfections, and leaves a beautiful surface. We'll see how it lasts...
And then, there's that Eastwood seam sealer. I got the grey brush-on, and what a pleasure it is to work with. Even more so than the POR, it fills those gaps, goes on easy, and stays in place so nicely.
The Eastwood frame rail rust encapsulator worked nice. Tube goes in frame rail, pull as you spray, and, in my case, roll the rotisserie a couple of times.Nice, nasty greenish stuff. Anything that nasty must work great.
Keep in mind, I am new to a lot of this, and as such have little to compare all this to. After a lot of angst-filled prep work, the stuff today was an absolute joy. Again, the proof is in the pudding, but today seemed...good.
You'll need to log in to post.