1 2
apex_attack
apex_attack New Reader
4/9/19 5:35 p.m.

First post, thought I should make a monster one.  Let's see if this all works.

When I moved to the Pacific Northwest 6 years ago, we moved into a pretty cool little house outside of Seattle. My girlfriend at the time (now wife), lived in Seattle and did all of the rental hunting. My only necessity was a garage, which in the Seattle area are surprisingly scarce. When she showed me our future home, it had a dinky one car garage, but I loved the rest of the house, so we signed a lease.

Over the next few years I made due with what I had. We loved our place, and like everyone does, we dreamed of what we would do “if we owned the joint.” For me, number one priority was making the garage larger than a glorified shed.

About a year and a half ago, we made an offer to our landlord, and he graciously accepted. We were homeowners! We’ve made small improvements here and there, but eventually we needed to tackle the elephant in the room (or garage).

The car work is obviously going to be on hold while this project starts, so if you only are interested in MR2 stuff, sorry, the topic is changing a bit. If you’re into something cool and built by the average Joe, stay tuned, I’m very average!

IMG_0263.jpg

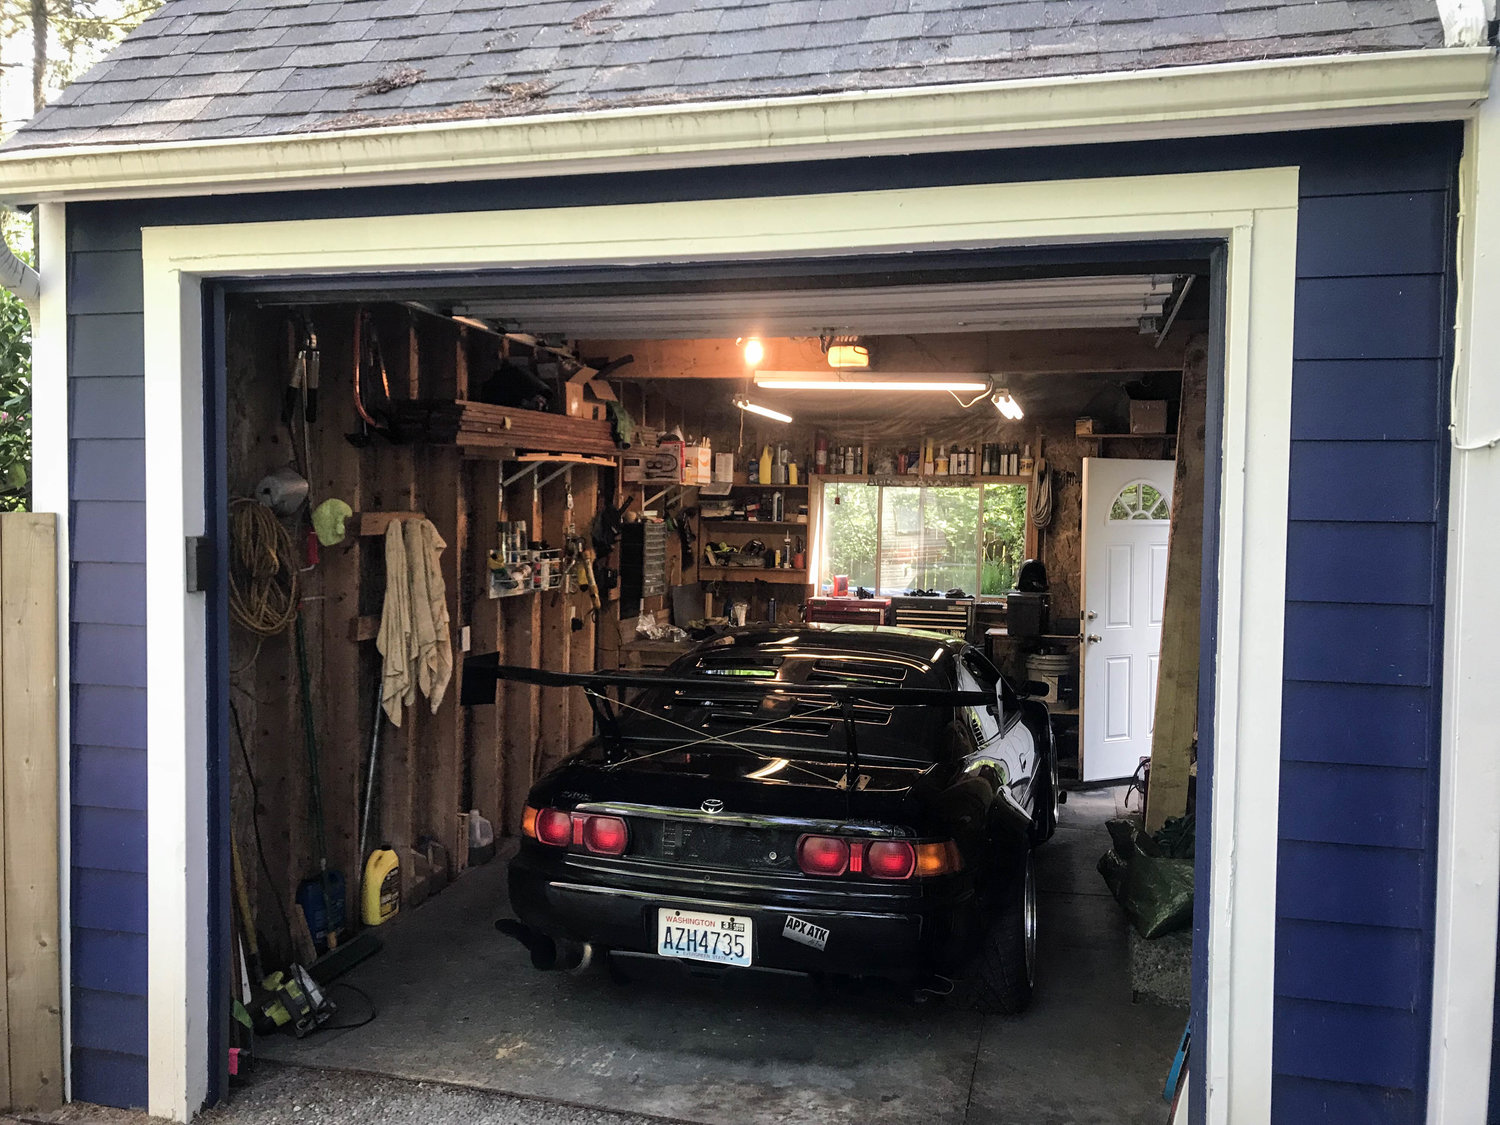
With only 240 square feet, you have to be VERY organized and efficient with your space. Yes, that above picture is the perfect example of “organized.” I have crap stuffed into every nook and cranny of this space. Friends called it the “knees-and-elbows garage” because all I ever did was bump into stuff while working in there. When working on the car, I had to be very space conscientious. One time I pulled my transmission, and realized I couldn’t get it physically out of the garage with the car still up on jackstands.
IMG_1849.jpg

With the car in there, it’s amazing I could get much done. Two tool boxes, a workbench, shelves anywhere I could fit, a 60 gallon air compressor, welder, fluids, tools, and a stereo. Hard to believe I’ve done body work, motor swaps, tranny pulls, and even paint work in there.

We needed to add more space. That was priority number one. Luckily, we had some room on the side of the garage to expand to.
IMG_1841.jpg

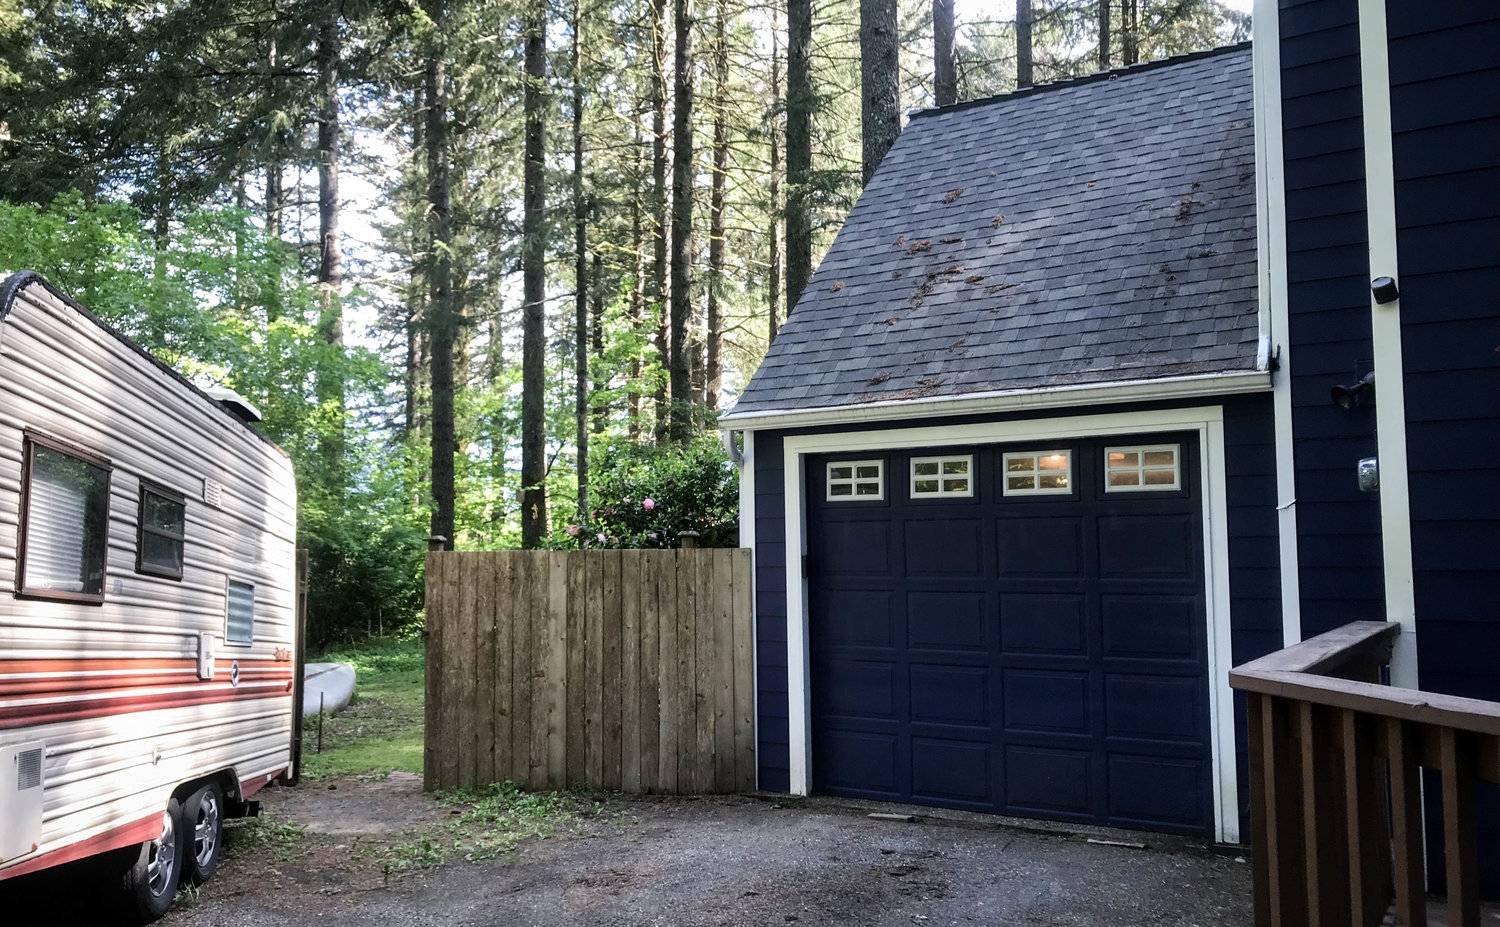
As you can see, to the left of the existing garage we have a very handsome Camper Trailer. Affectionately nicknamed the “Mold Tube,” I picked it up for a measly $800. News flash, I paid too much. But, it’s perfect for our weekends up at the ski resort all winter.

If you look a little past the Mold Tube, you’ll see some primo area to add some elbow room.
IMG_1847.jpg

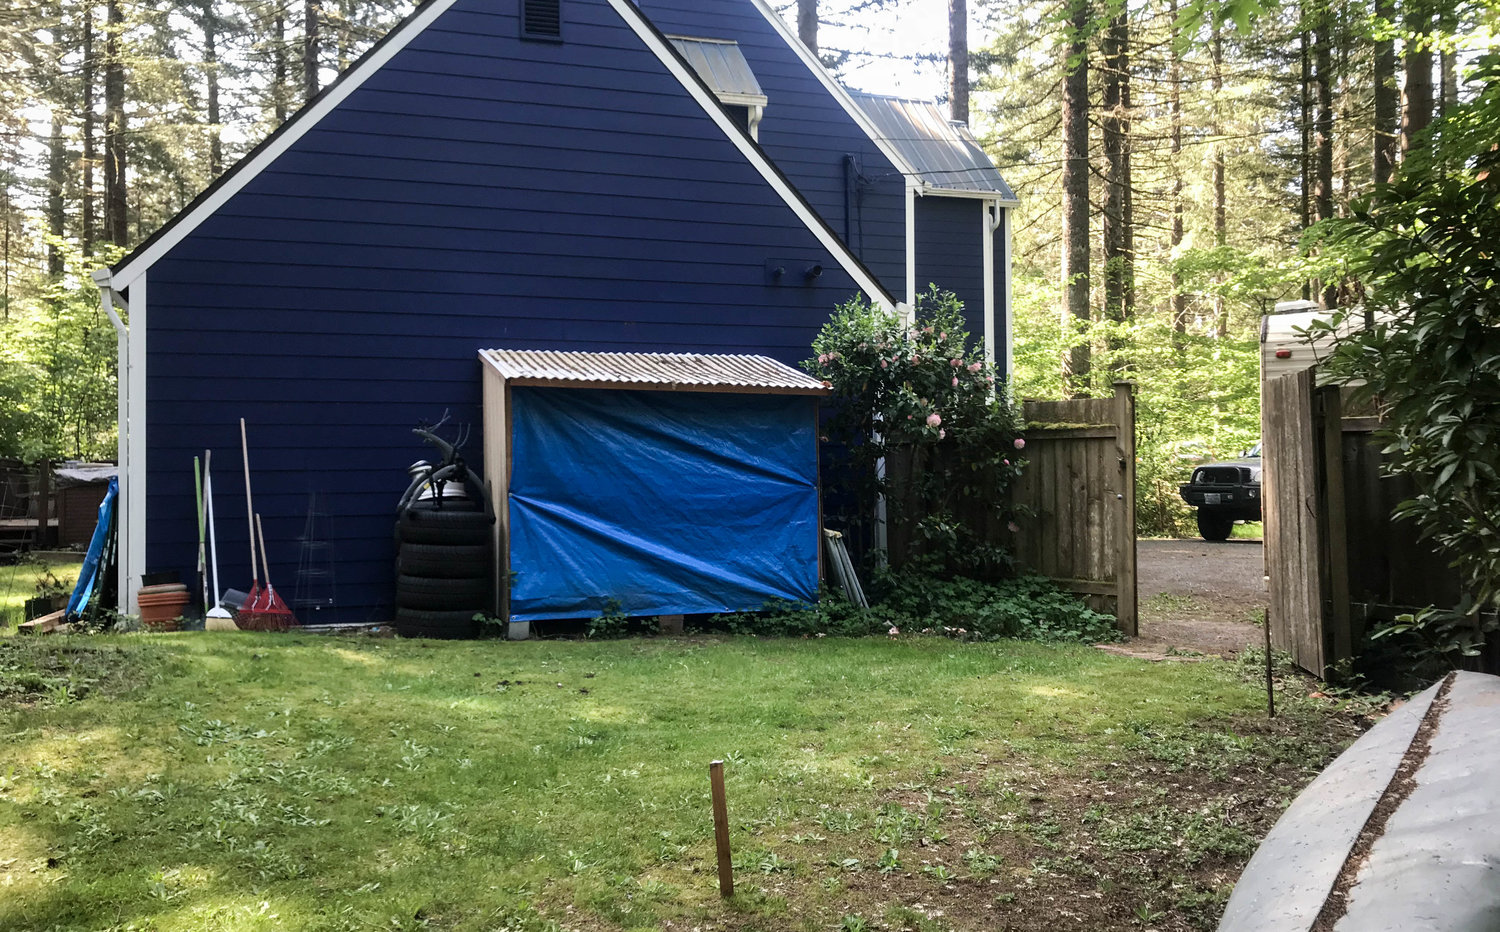
Left of the fence, you’ll now see the junk pile and my $100 shed that usually houses $2000+ in car parts. I built it on a whim, and have been very surprised my hasty craftsmanship has actually held up for 3+ years.

You will also see some wooden stakes marking the approximate location of my planned addition.

Now, if you live in King County, the permitting process is pretty much a nightmare, and expensive. The fees for a complex home addition are the same for a simple unheated garage addition. Basically consider what you think is outrageous for a permit fee, and triple it.

I also had to have very thorough and detailed plan for the addition. Since I’m currently taking drafting classes for my career, why not draw them myself and save money over hiring an architect.

IMG_3112.jpg

My new floor plan! So much room for activities! Basically we’re adding another larger single car garage, at an angle to match the driveway. This also gives us an additional pie slice of floor space.

IMG_3114.jpg

Simple front elevation.

IMG_3117.jpg

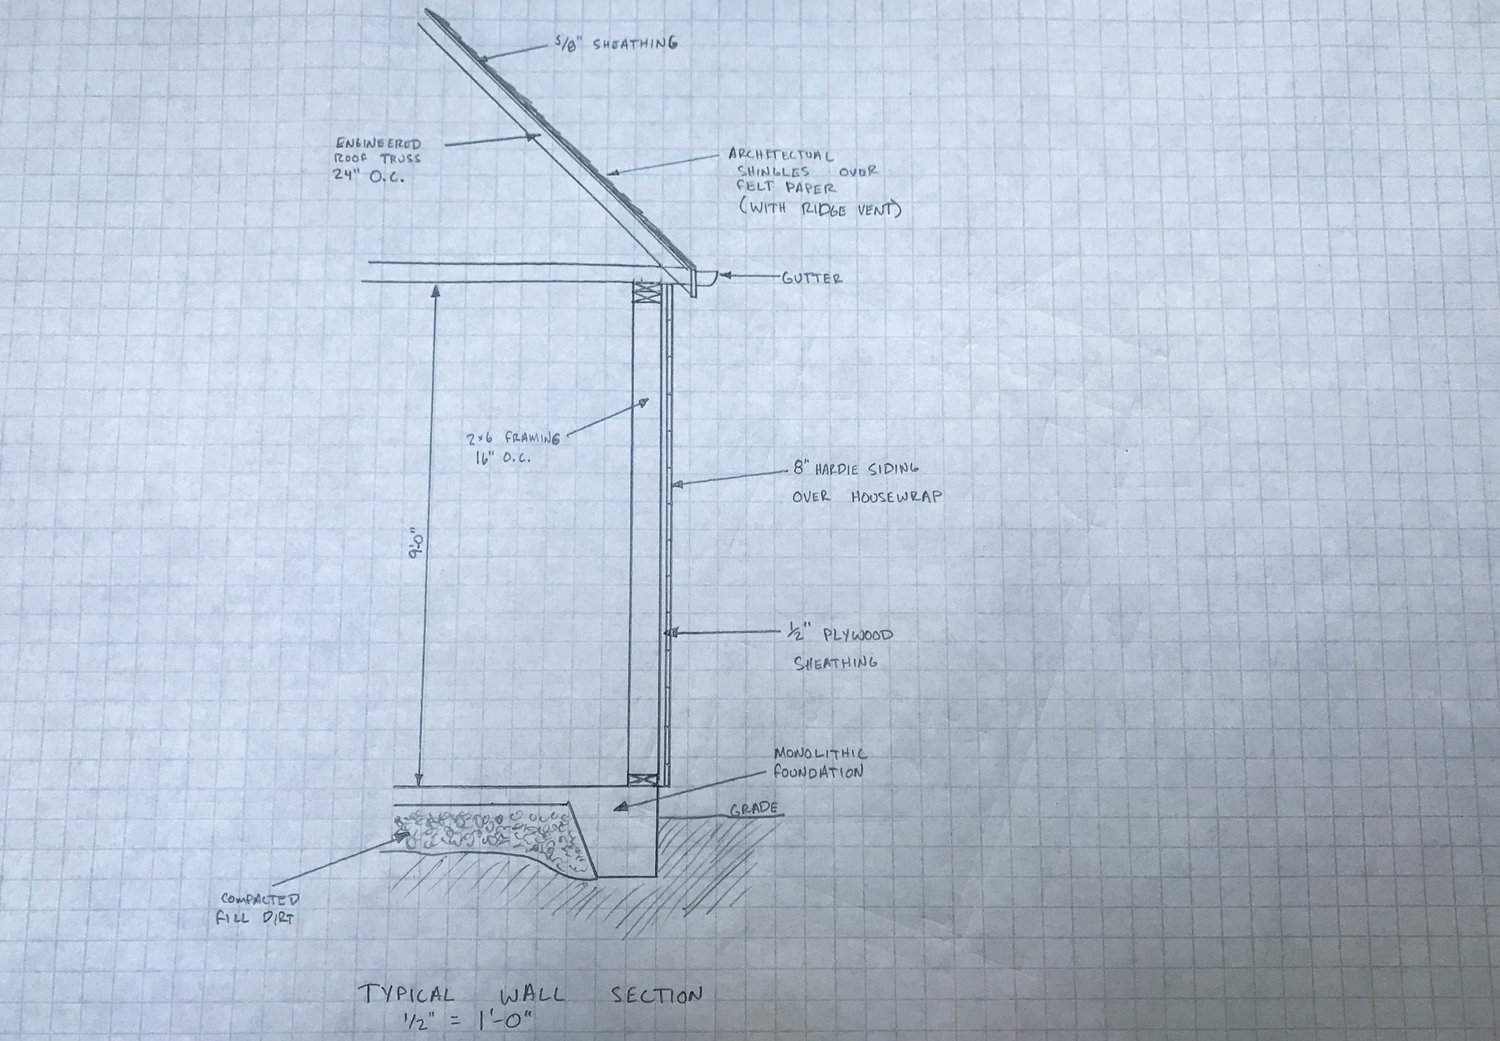
And your typical wall section. Here you can see the foundation plan as well. I’m planning for a 9’ ceiling, and if we have enough money leftover… should be enough room for a two post lift! (squeals like little girl)

So, while I’m waiting for my permit to be approved (4-8 week process here), I figured I’d better start on what I know I could accomplish. Breaking stuff, demolition!

IMG_0264.jpg

Let’s start with the floor. The original garage was actually a carport. For some reason they poured this stupid aggregate style floor instead of smooth concrete. It’s so rough I couldn’t even use my jack on it safely. So, I improvised and laid down some plywood to build a pseudo-smooth floor. It worked, but wasn’t perfect. The boards moved a bit and jackstands dug into the wood when loaded. Cleaning up spilled fluids was a mess, and it’s made of wood, so durability was lacking. With the addition, we are also going to skim over this floor with some concrete to make it match the new floor, nice and smooth.

IMG_0266.jpg

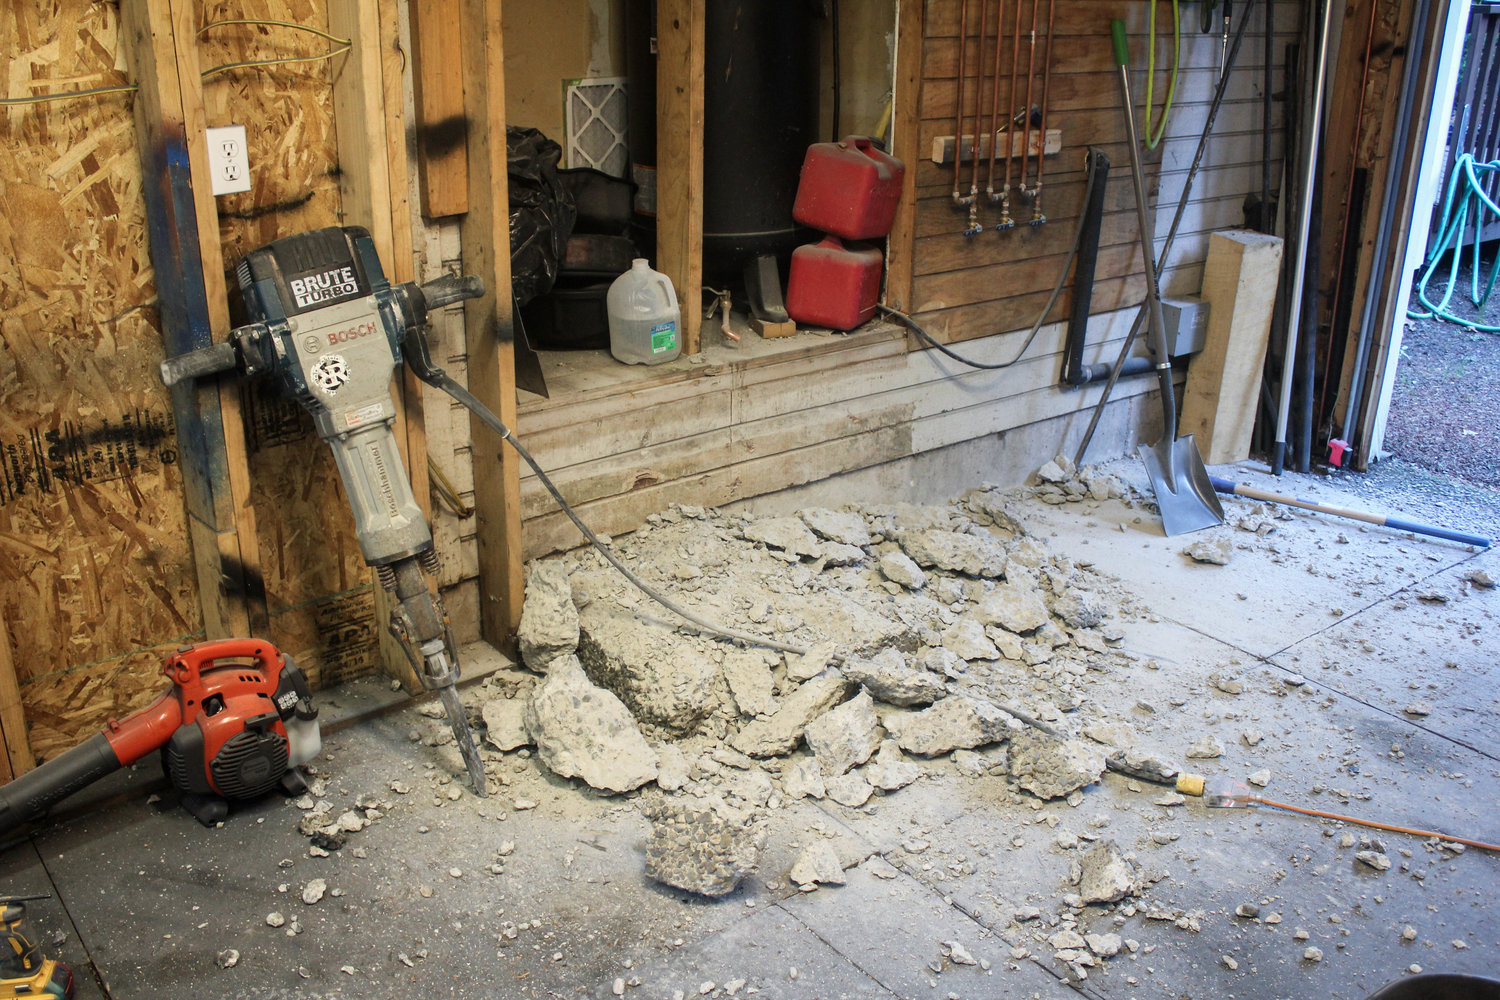
There used to be a door here which would lead into our laundry area/mudroom. I’ve banged my shins on this stupid stair to nowhere so many times. Time to remove it.
IMG_0267.jpg

I rented an electric 60 pound jackhamer for the job. Thinking this would make it a breeze. HOLY CRAP. It was literally the most physically demanding thing I’ve done in years…and I climb volcanoes for fun.

P.S. If you ever demo concrete with a jackhammer WEAR A FACEMASK. The amount of dust you’d inhale can cause serious health issues. Silica dust is no joke.
IMG_0268.jpg

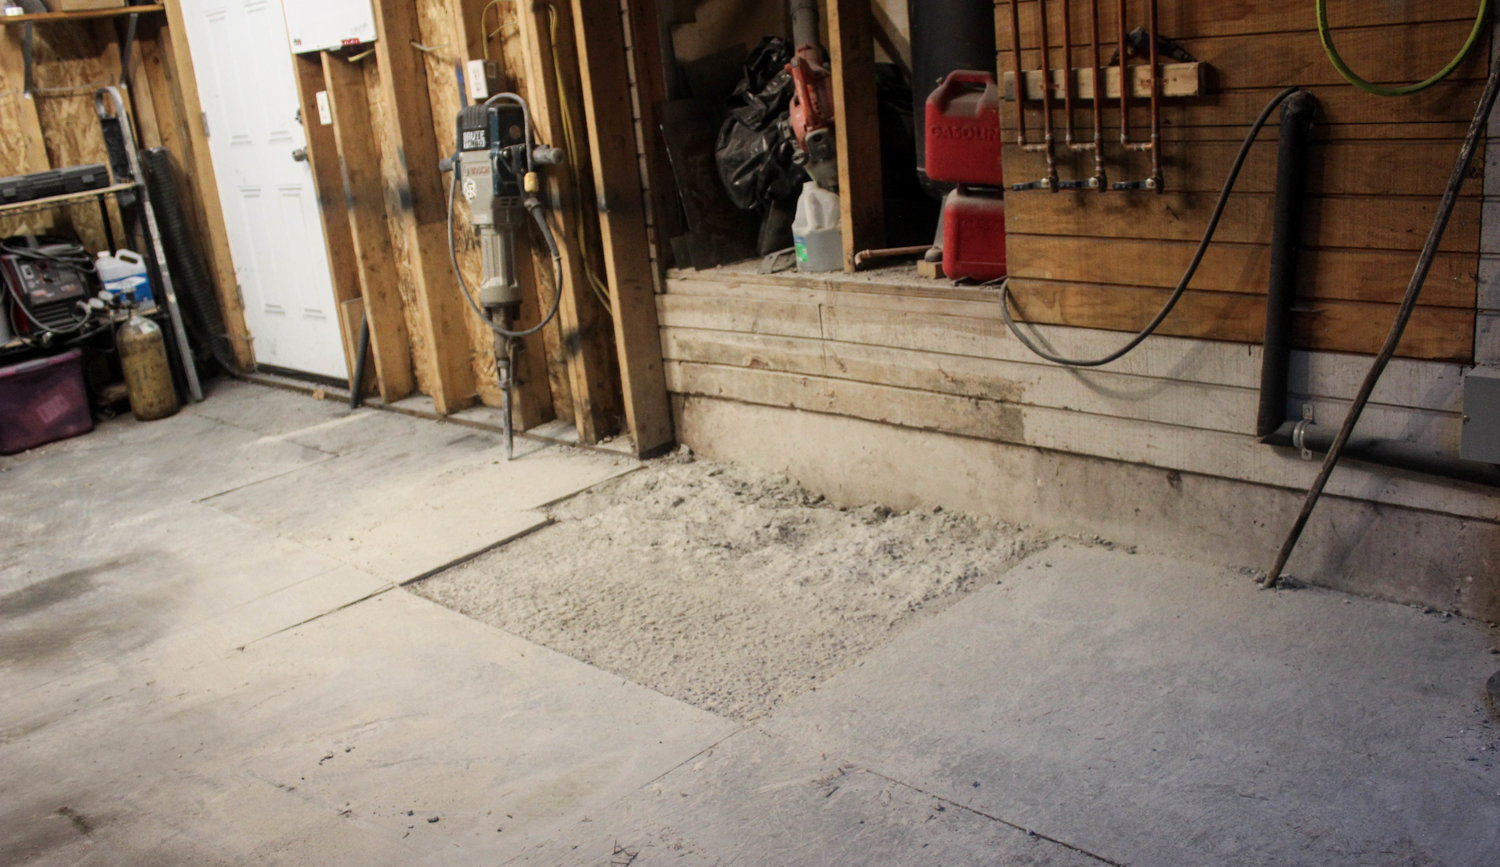
After a few long, hard, and loud hours, the stairs were mostly gone.
IMG_0269.jpg

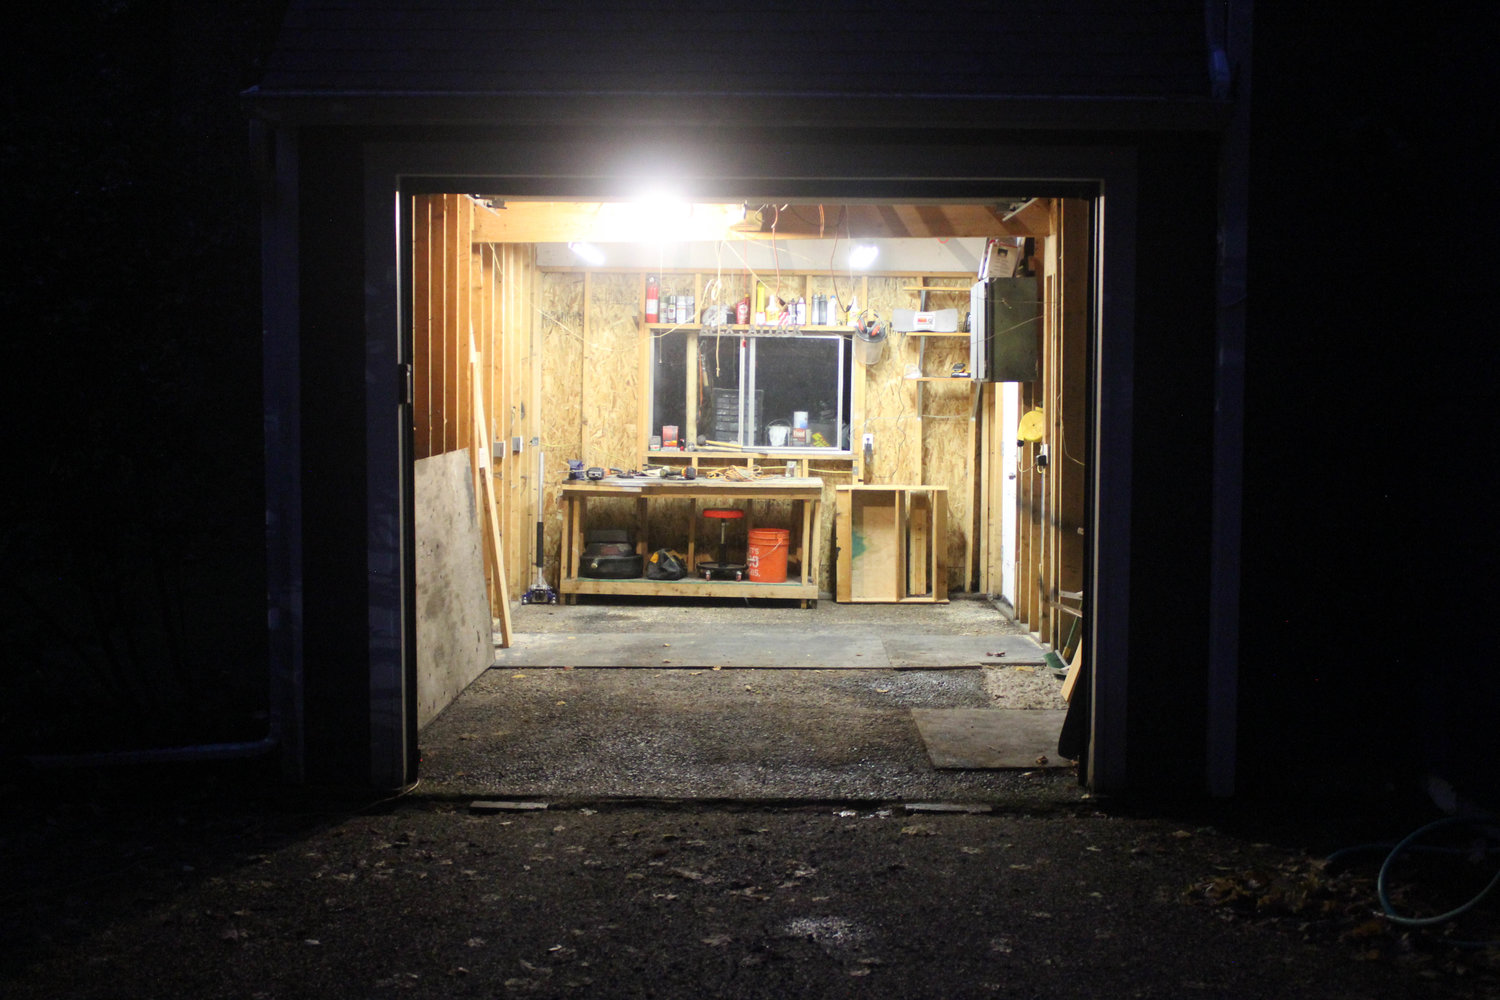
A few weeks later, I had moved my ghetto shed to the backside of the garage, demoed the attic space in the trusses, and cleaned out more stuff than I ever thought was possible to fit into a 240 square foot garage. What was left was just the necessities, tools, workbench (ready to go outside whenever), and shelves on the walls we’re keeping. I also cleaned out the entire left side wall that will be going bye bye.

IMG_0273.jpg

Taken the last night before demo really began. Saying goodbye to the original Apex Attack garage.
IMG_3347.jpg

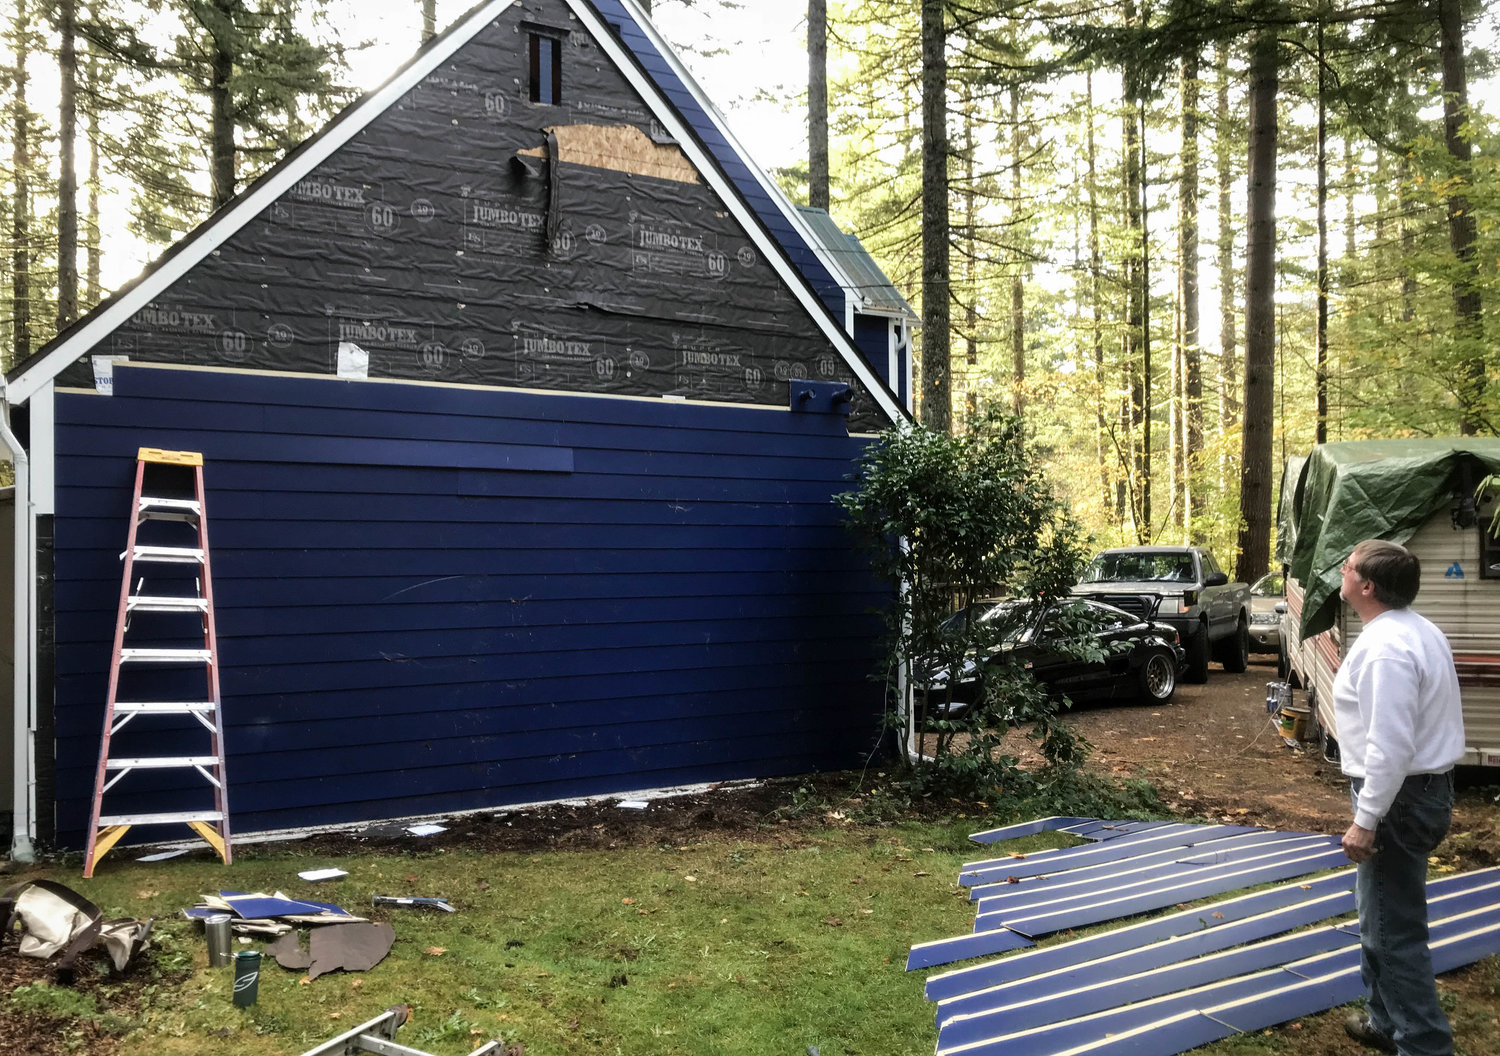
The next day, my father-in-law came over to start pulling down the exterior wall. One of the Apex Attack mottos is “powdercoat dreams on a spray paint budget.” I will be performing pretty much all the labor myself, with help of friends and family whenever they can be bribed by pizza and beer. Without everyone’s help, there’s no way I could build this without killing myself.

With the budget being modest, I need to at least attempt to save money where I can. Our home is sided with Hardie board, which is pretty expensive and very durable compared to regular siding, so I wanted to save as much of the siding as I could. It made the demo process take longer, but we (hopefully) saved a bunch of money in buying new siding later on.

IMG_3349.jpg

A few hours later we were down to the bare bones of the wall. Remember, this used to be a carport, so this wall isn’t load bearing. It’s unnerving, but totally OK to pull these studs out.

IMG_3391.jpg

Where we are now. I’m leaving a few studs in just for insurance as we’ve had some real windy storms here the last few days. Maybe I should make the new bay see through?

The best news though, is my permit is officially approved! We have a concrete pour date on the calendar, and I have a ton fo dirt work to get done before that, so stay tuned!

TJL
TJL Reader
4/9/19 6:07 p.m.

Congtats on the new toy space, that is awesome, but were gonna need more info on that car. That thing looks amazing!

mazdeuce - Seth
mazdeuce - Seth Mod Squad
4/9/19 7:17 p.m.

Went back and read all the words after looking at the pictures and not seeing a lift in the drawing. Glad to see it's in your head at least. 

You've got to tell us about the MR2. At least a little bit. 

Slippery
Slippery GRM+ Memberand SuperDork
4/9/19 8:42 p.m.

Looking great. 

I see you noted 4” floors, shouldn't you at least have a couple of sections a little thicker in case you install the two post??

TurnerX19
TurnerX19 HalfDork
4/10/19 8:08 a.m.

Thicker floor is expensive, but you will benefit from 11" far more than you realize. Full thick all the way, not just at the lift anchors. It will remain level and un-cracked.

Gearheadotaku
Gearheadotaku GRM+ Memberand UltimaDork
4/10/19 11:06 a.m.

A 9' ceiling isn't tall enough for lift if you want to walk under the car, you need 12'. Just use scissor trusses and you should be fine.

apex_attack
apex_attack New Reader
4/10/19 5:11 p.m.

In reply to Slippery :

So, I have a confession to make, the garage is actually about 90% done.  This is more or less a big recap on the build to share with you guys.  We did pour the slab 5" thick in the middle area to accommodate a lift.  

apex_attack
apex_attack New Reader
4/10/19 5:14 p.m.
TJL said:

Congtats on the new toy space, that is awesome, but were gonna need more info on that car. That thing looks amazing!

Thanks!  It's a 93 MR2, and I've modified about everything on it.  Currently a gen 3 3sgte, but that's changing soon.  Mostly a track car, and I've done all the work on it myself (much like everyone on this forum I assume).  I'll post about the car seperately at some time.  It was actually featured in print last year as the "Internet Hot Rod of the Month", I think july?

wheelsmithy
wheelsmithy GRM+ Memberand SuperDork
4/10/19 5:38 p.m.

Very Nice!


apex_attack
apex_attack New Reader
4/11/19 5:45 p.m.

Here's another large post for ya'll.  We started the garage build last spring.  The GRM article about building their garage was a huge inspiration.  

The garage is turning into a BIG project. However, strides are being made, mostly in the right direction! We’ve had some setbacks, and learned a lot from our mistakes.

It’s freaking December, which means we get about 7 hours of daylight this time of year. I usually have about an hour of light every day after work…so a lot of this garage has been built by headlamp… making photos more difficult. I apologize for the lack of quality and detail with this thread, consider it more of a “broad strokes” documentation.

With my sparkly new permit burnin’ a hole in my pocket, it was time to officially start this garage!  Before I could build walls, I needed a foundation.  Before I could build a foundation, I needed a hole in the ground. 

IMG_3491.jpg

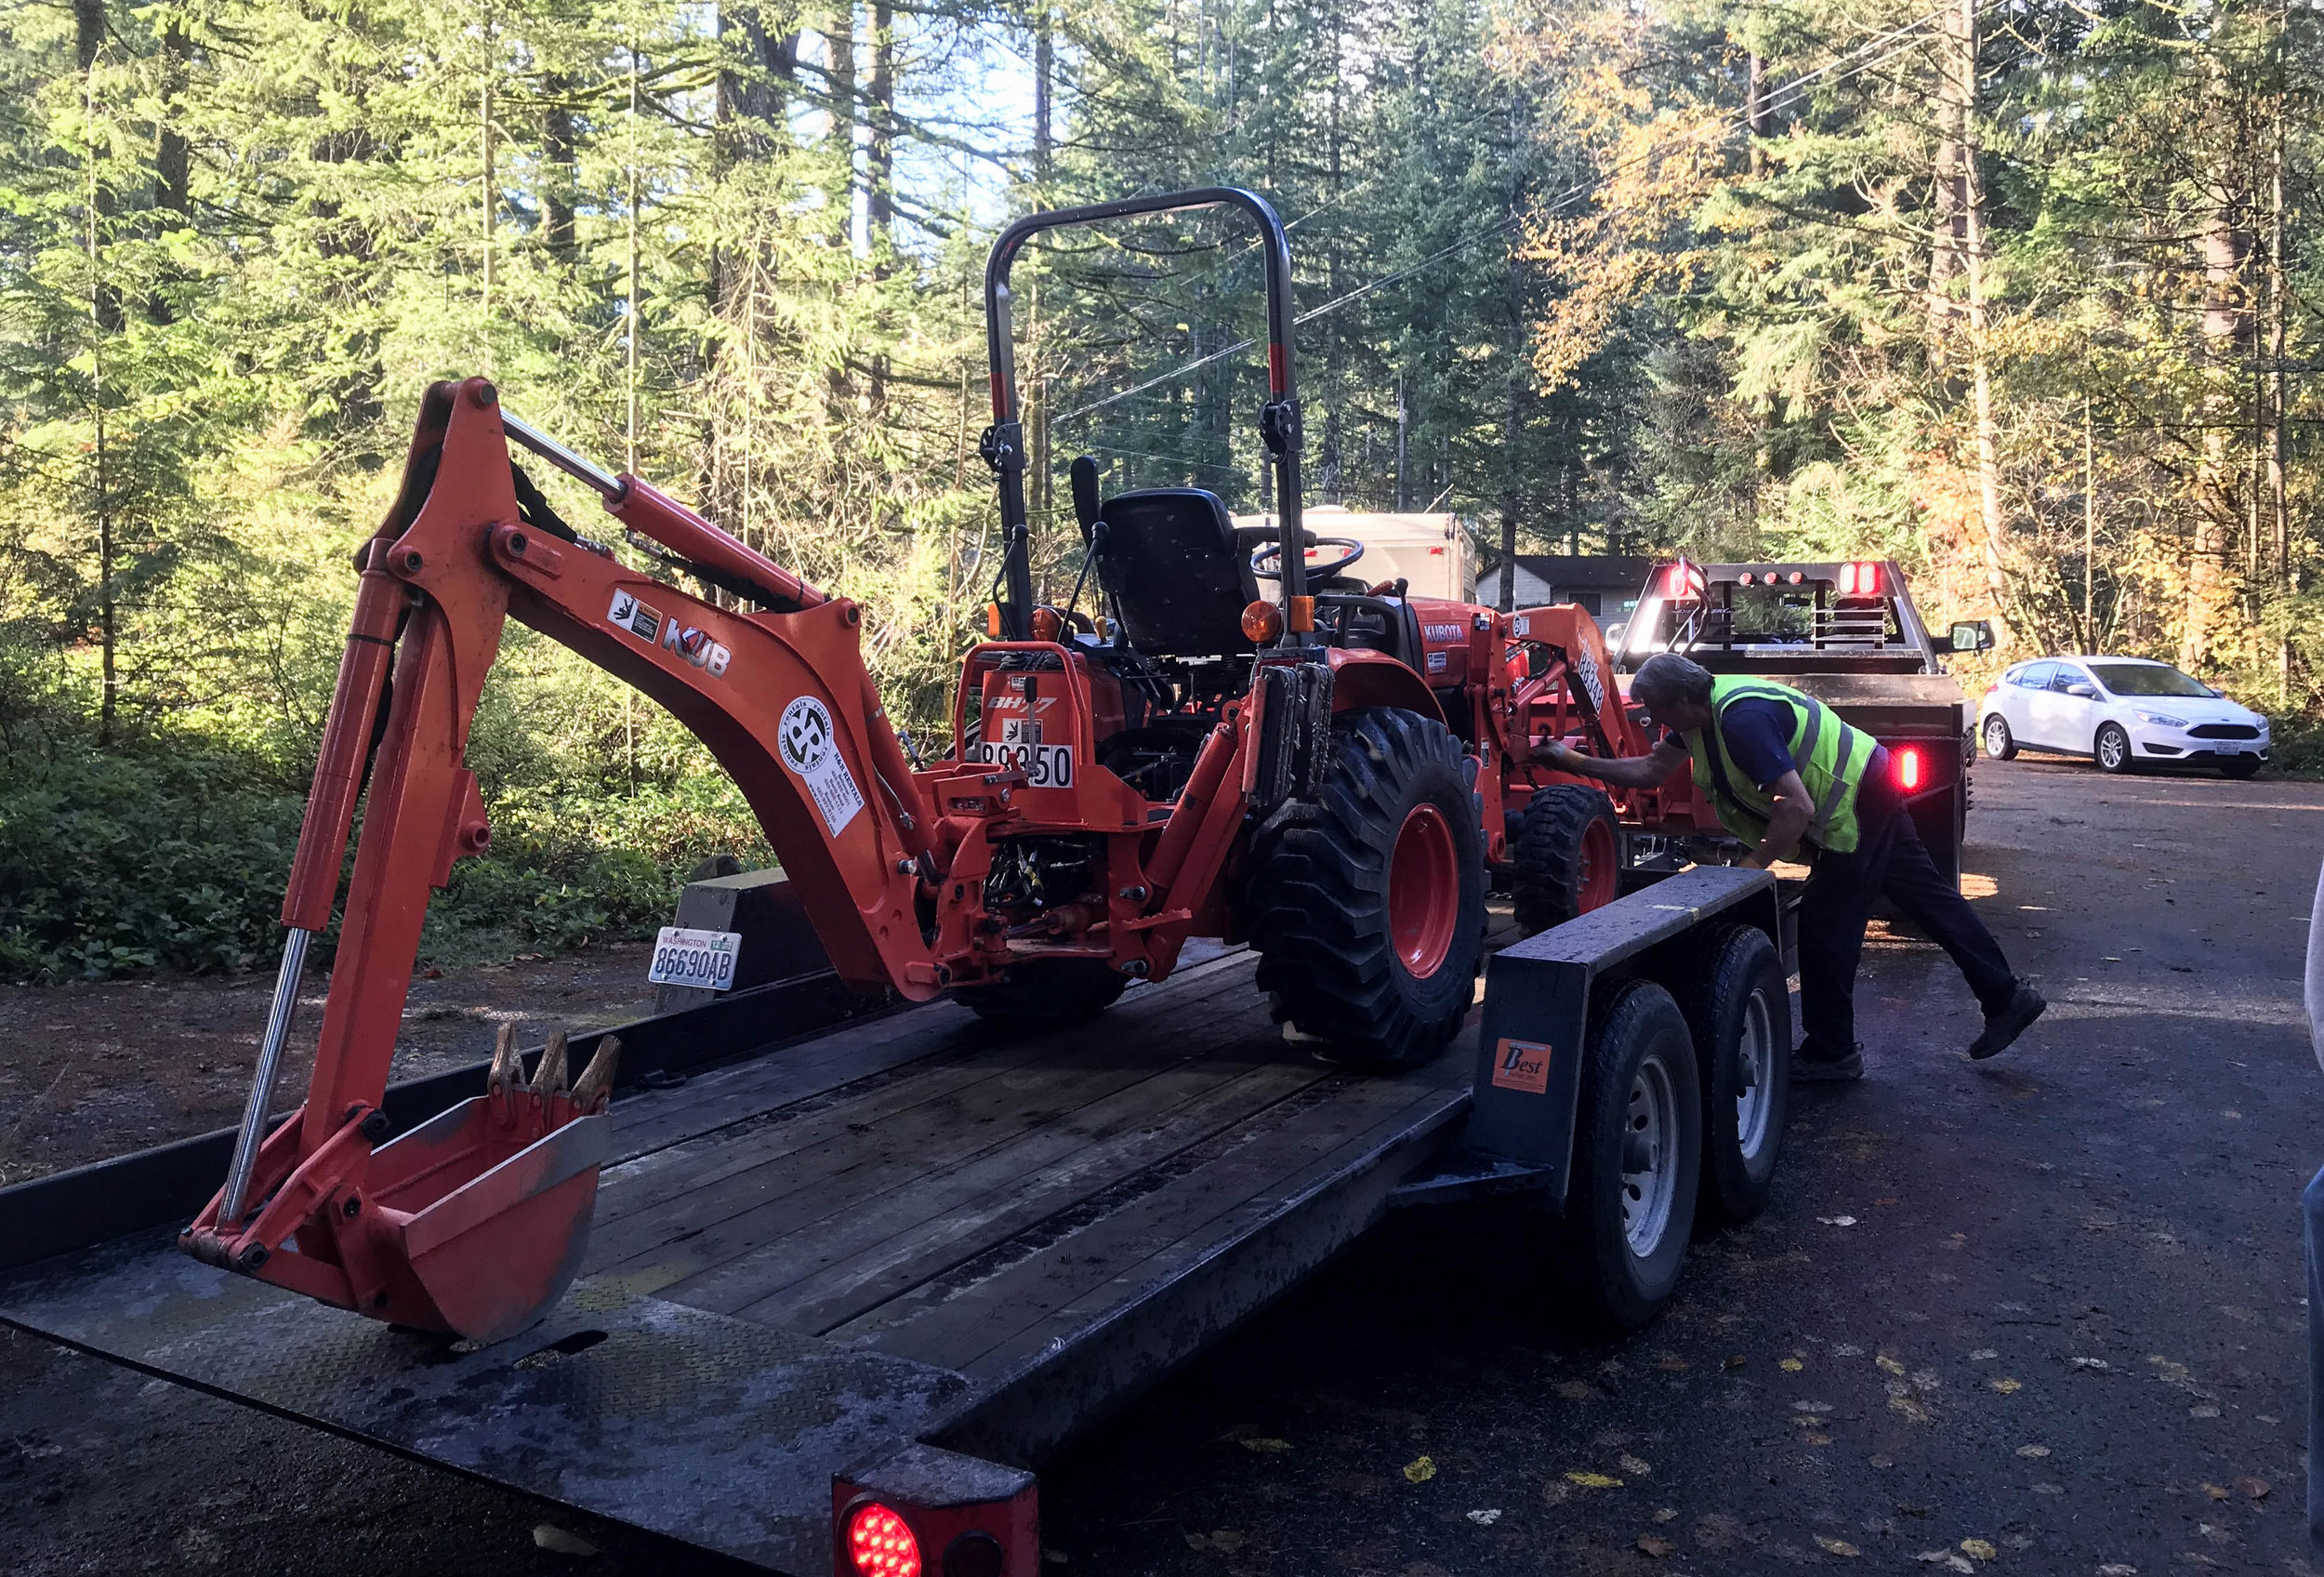
A call to the local tool rental shop in town had this arrive the next day. 


IMG_3495.jpg

I’ve never driven a tractor before, I’ve never operated an excavator before, so what better time to learn than now?

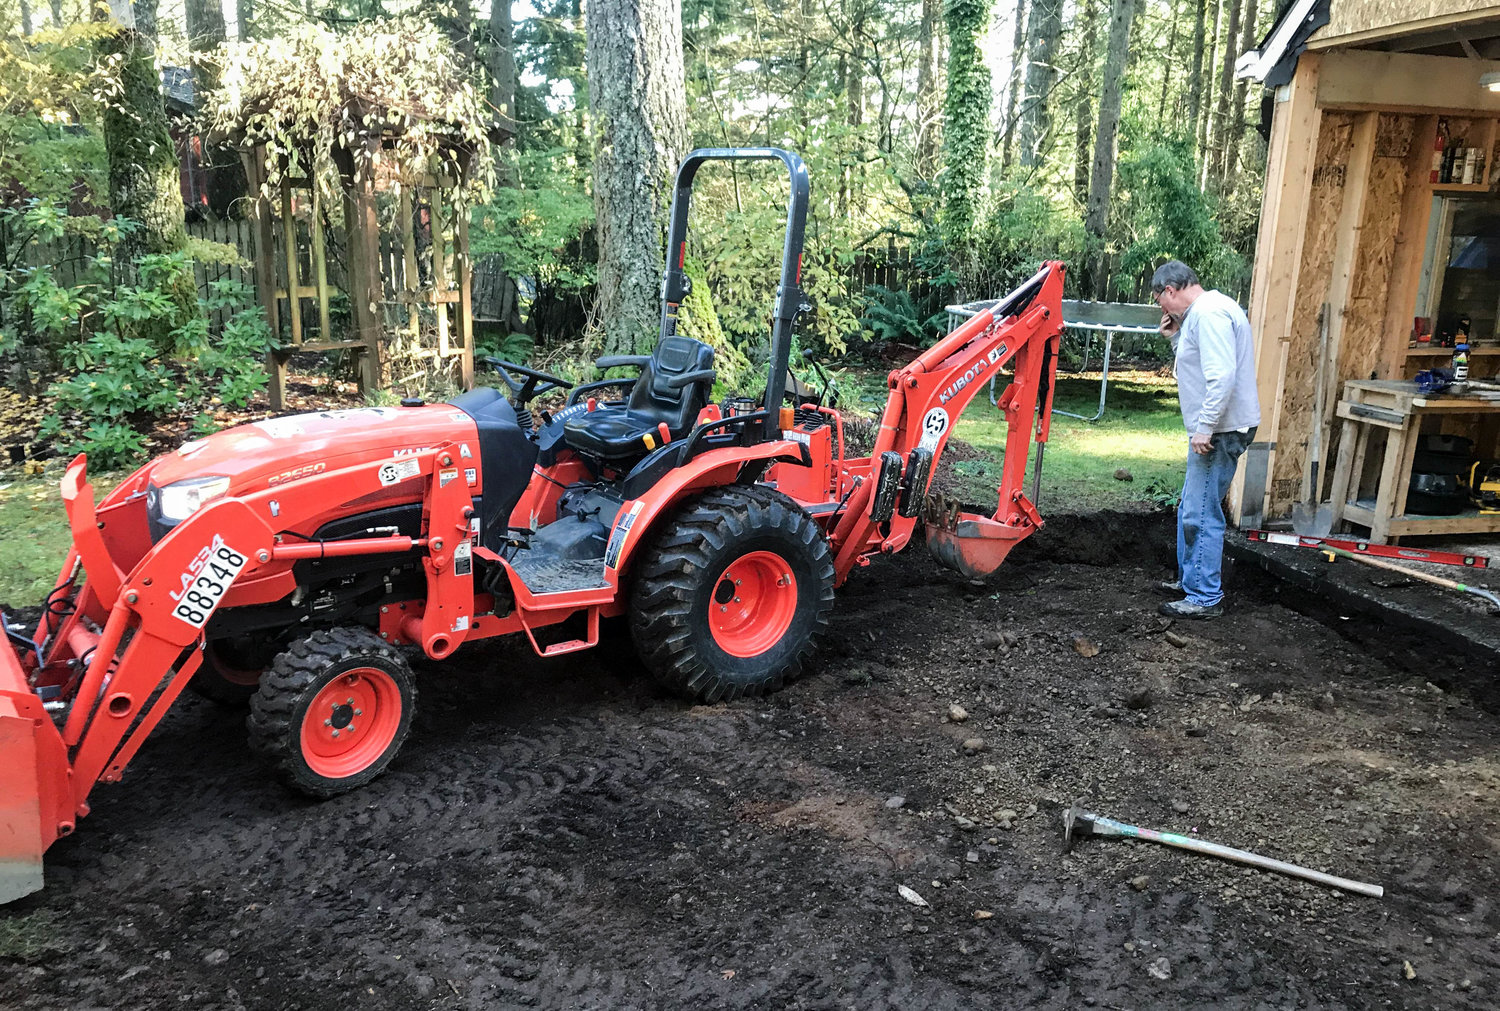
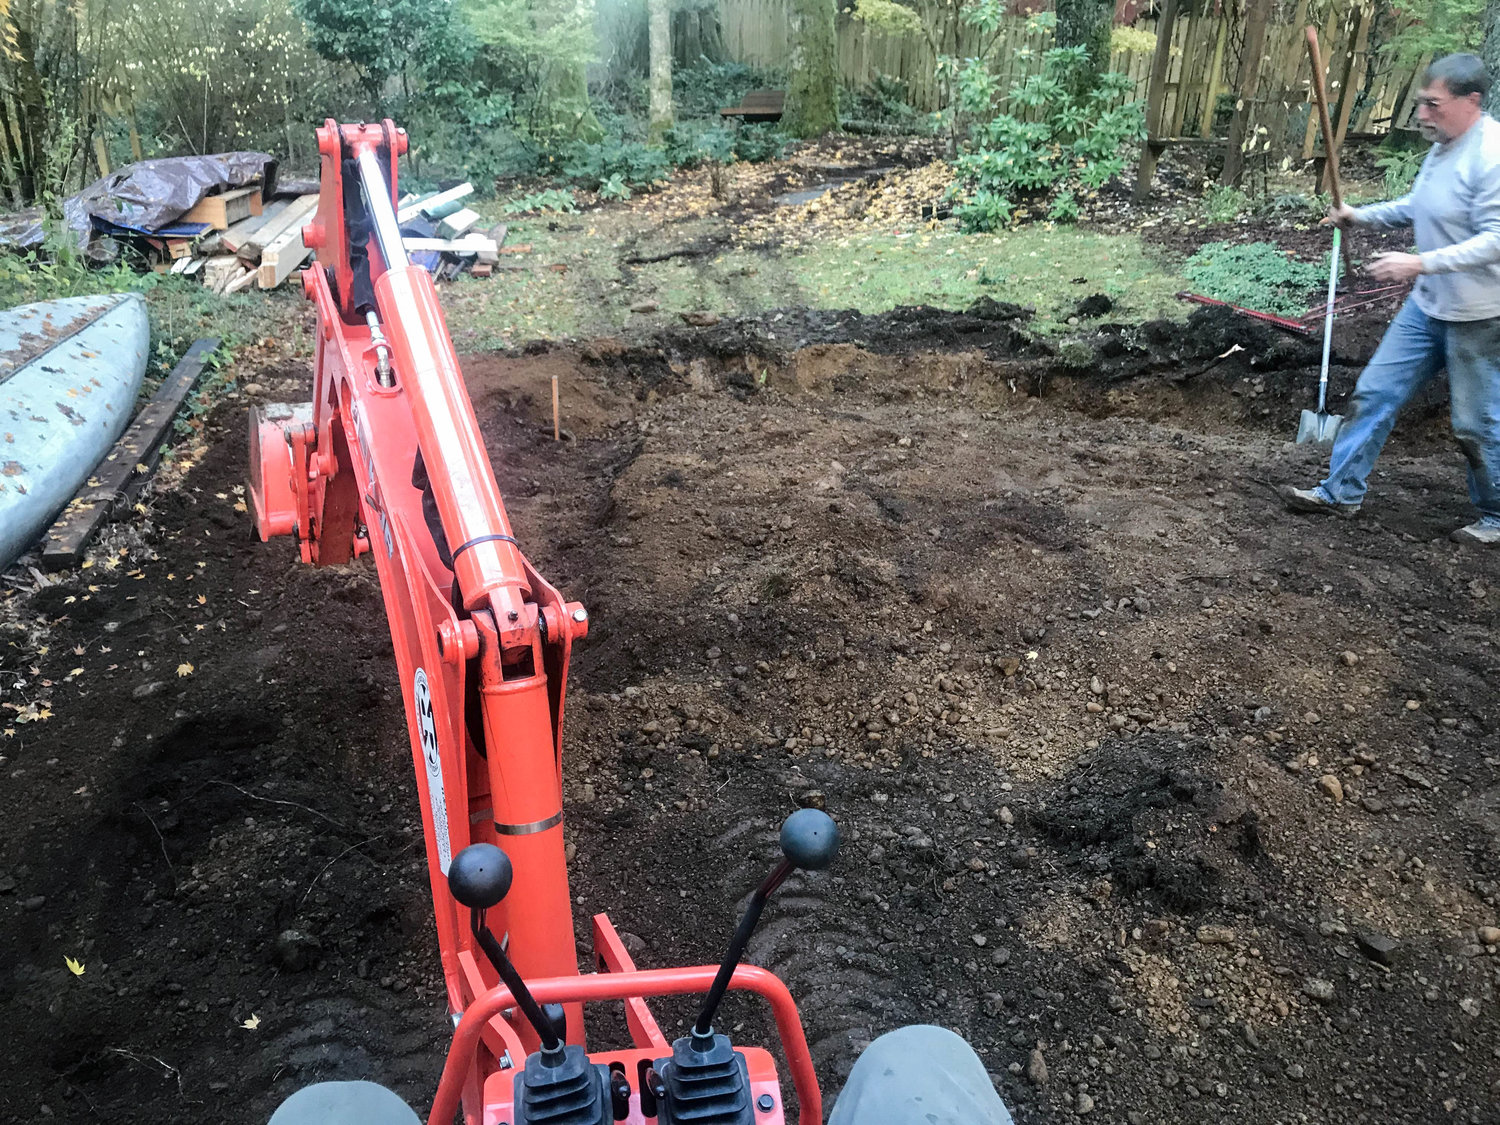
After some practice, my father-in-law and I started scraping the grass up and getting the footing dug around the perimeter.  Plans called for a 12” wide, 18” deep footing around the outside of the new garage, and a 4” slab for the floor.  This is known as a “monolithic” foundation.  The nice part, is you can pour all the cement in one go.  Meaning: cheap.


We later added a deeper trench through the middle part of the slab, about 5".


IMG_3498.jpg

Running the tractor wasn’t too different from a forklift, which I’ve operated in the past.  The backhoe part… let’s just say I didn’t kill my father–in-law. 


IMG_3500.jpg

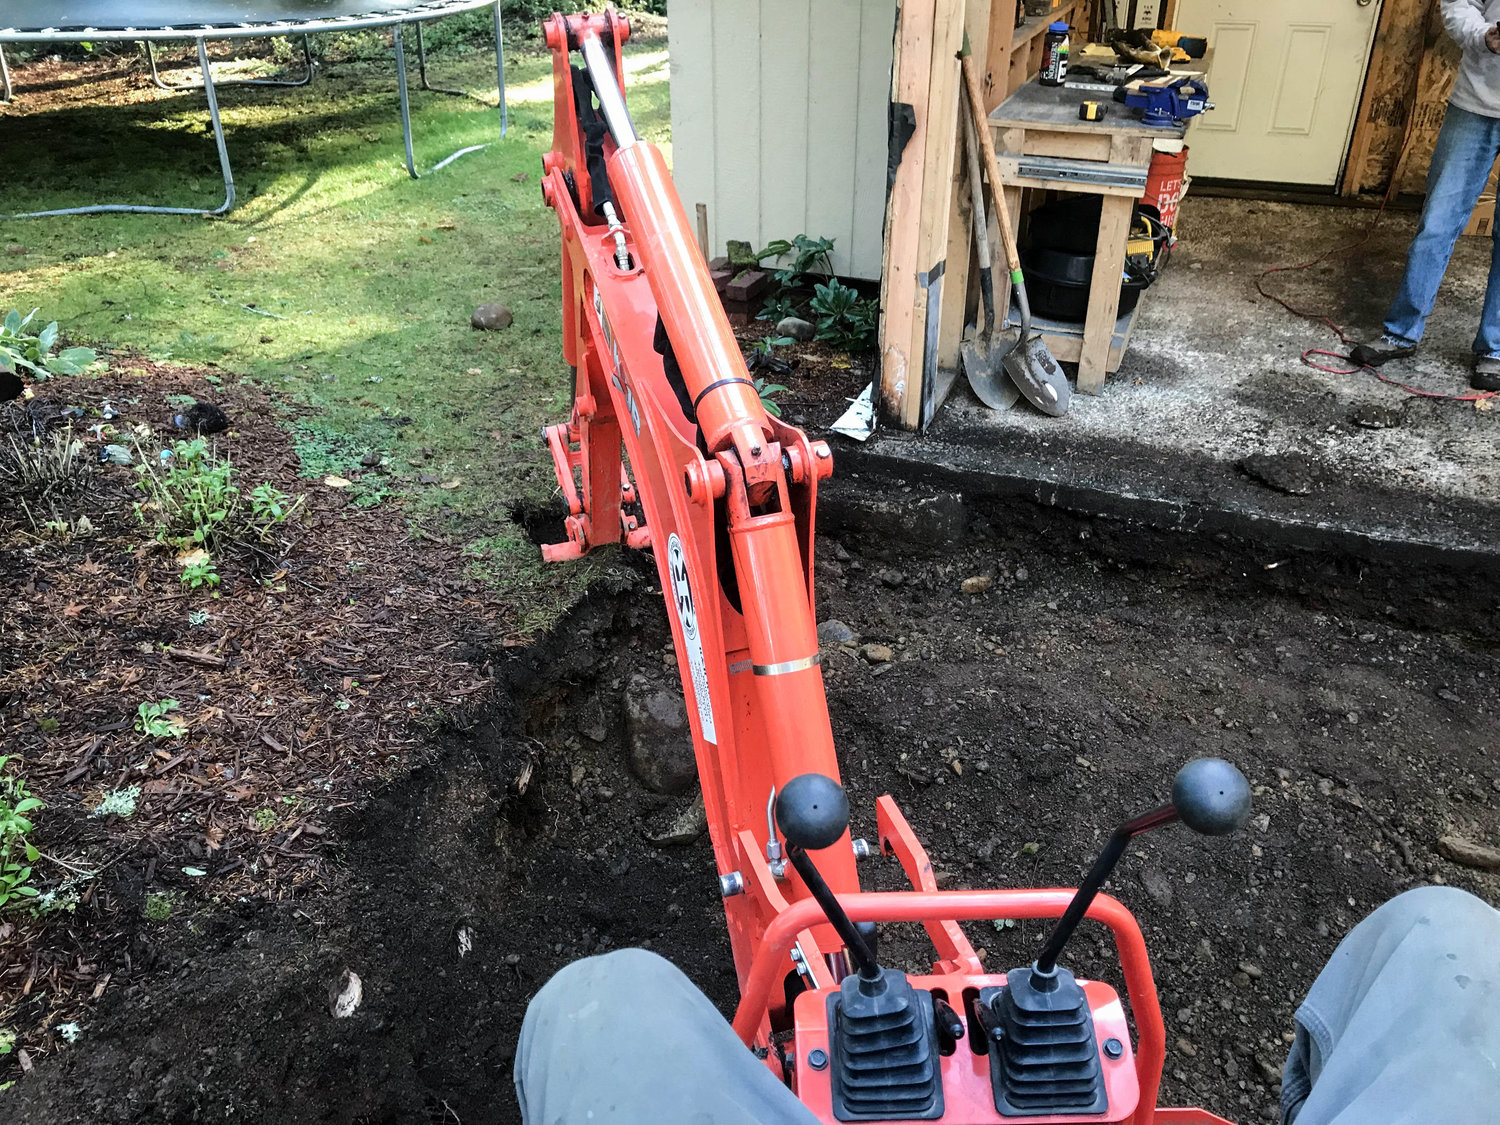
Digging the footing trench.


IMG_3502.jpg

By lunch, we had made a pretty decent mess of my yard.  The good news however, dirt was being moved in the right direction.


IMG_3504.jpg

Finishing the footing trench.

We were under a time crunch with the dirt work.  The only part of this entire project I hired out was the concrete pour and finishing.  I’m all for learning new skills, but if you screw up concrete, it’s VERY difficult to fix.  So, I was OK getting a contractor to come in and build the forms, pour, and finish the concrete.

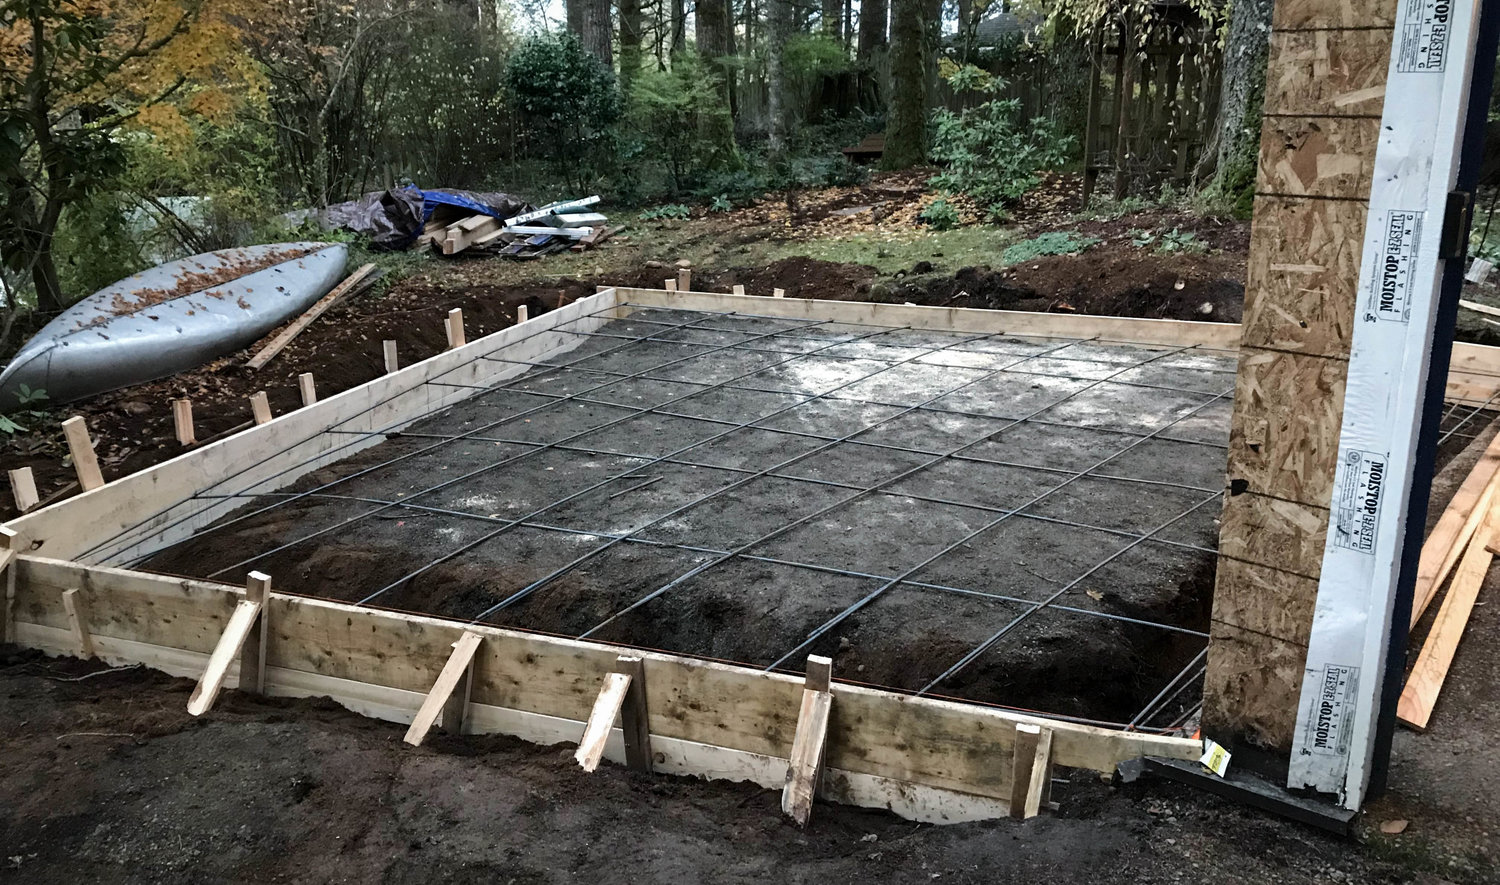
Back to the time crunch… the next day they were coming over to build the forms and lay the rebar.  So we had to be ready.


IMG_3513.jpg

When I got home the next day, voila!  Starting to look like a floor.


IMG_3516.jpg

Being a side job for my contractor, the pour had to be the following weekend.  Over the week I tidied the rebar work up by adding rebar chairs (they elevate the rebar off the dirt), cleaning up the footing, and most importantly, getting it inspected. 

The good news was I passed the inspection; the bad news was there was a few corrections to be made prior to pouring. Mostly simple things, like…

IMG_3550.jpg

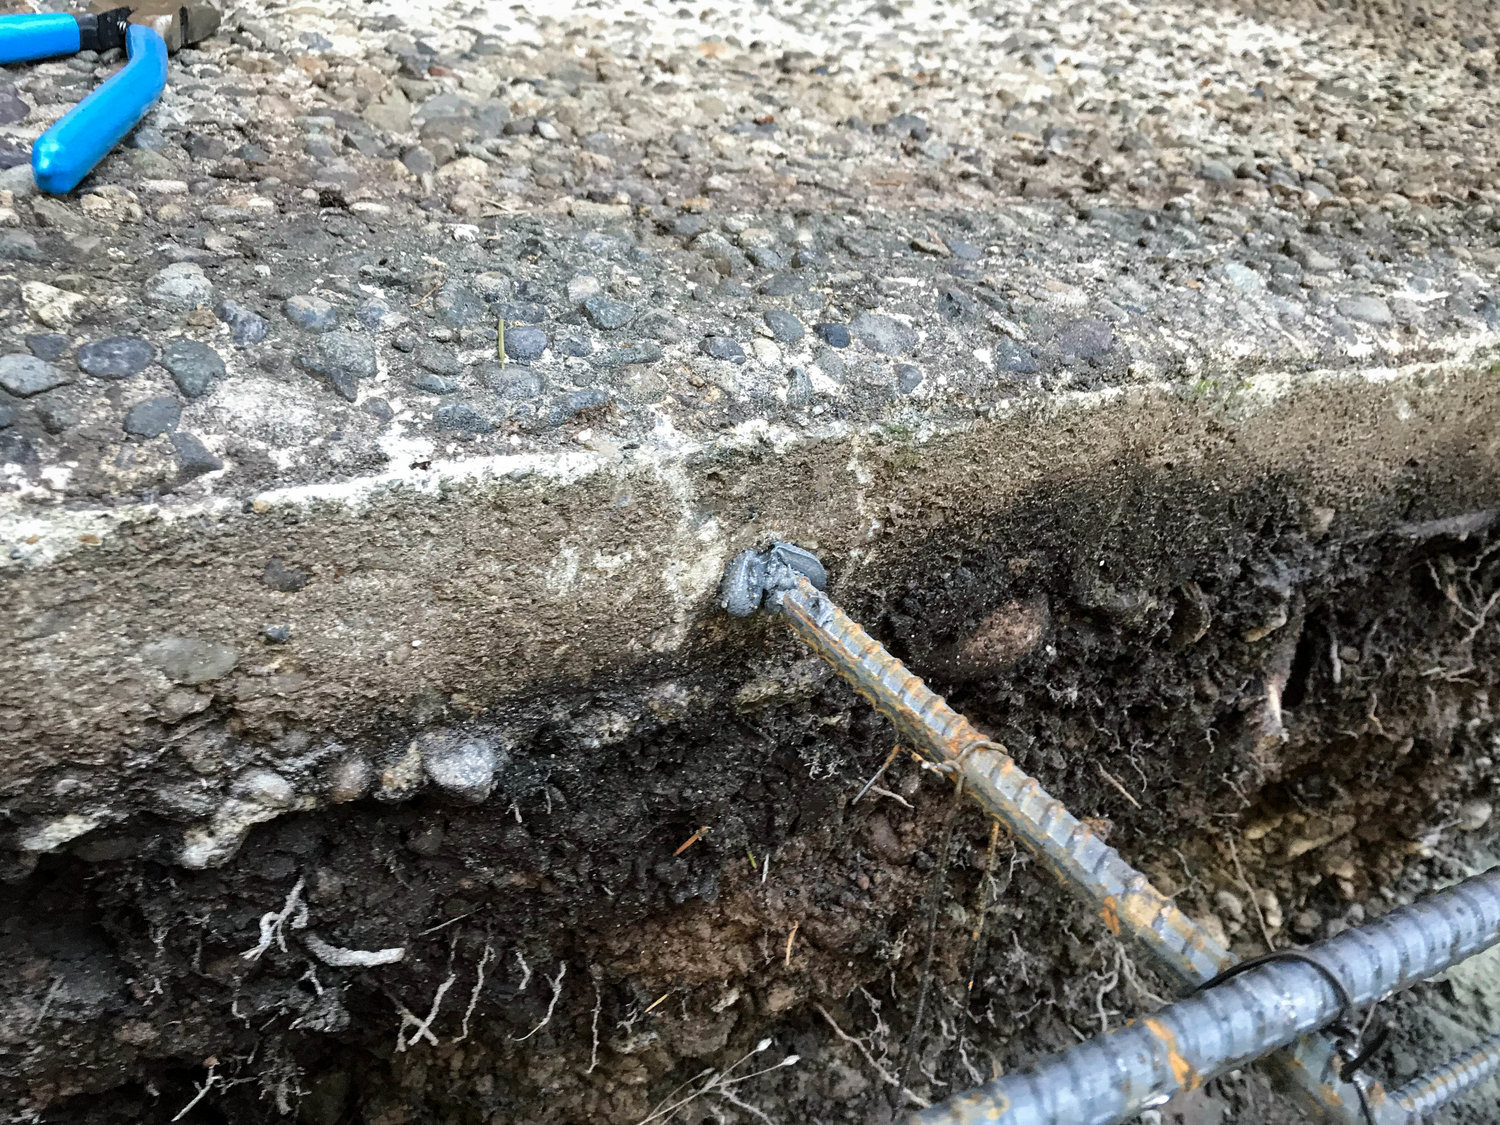
Epoxying the rebar into the old slab to tie it to the new slab.  Not sure it was a code requirement, but it was in my plans so they called it out.

IMG_3534.jpg

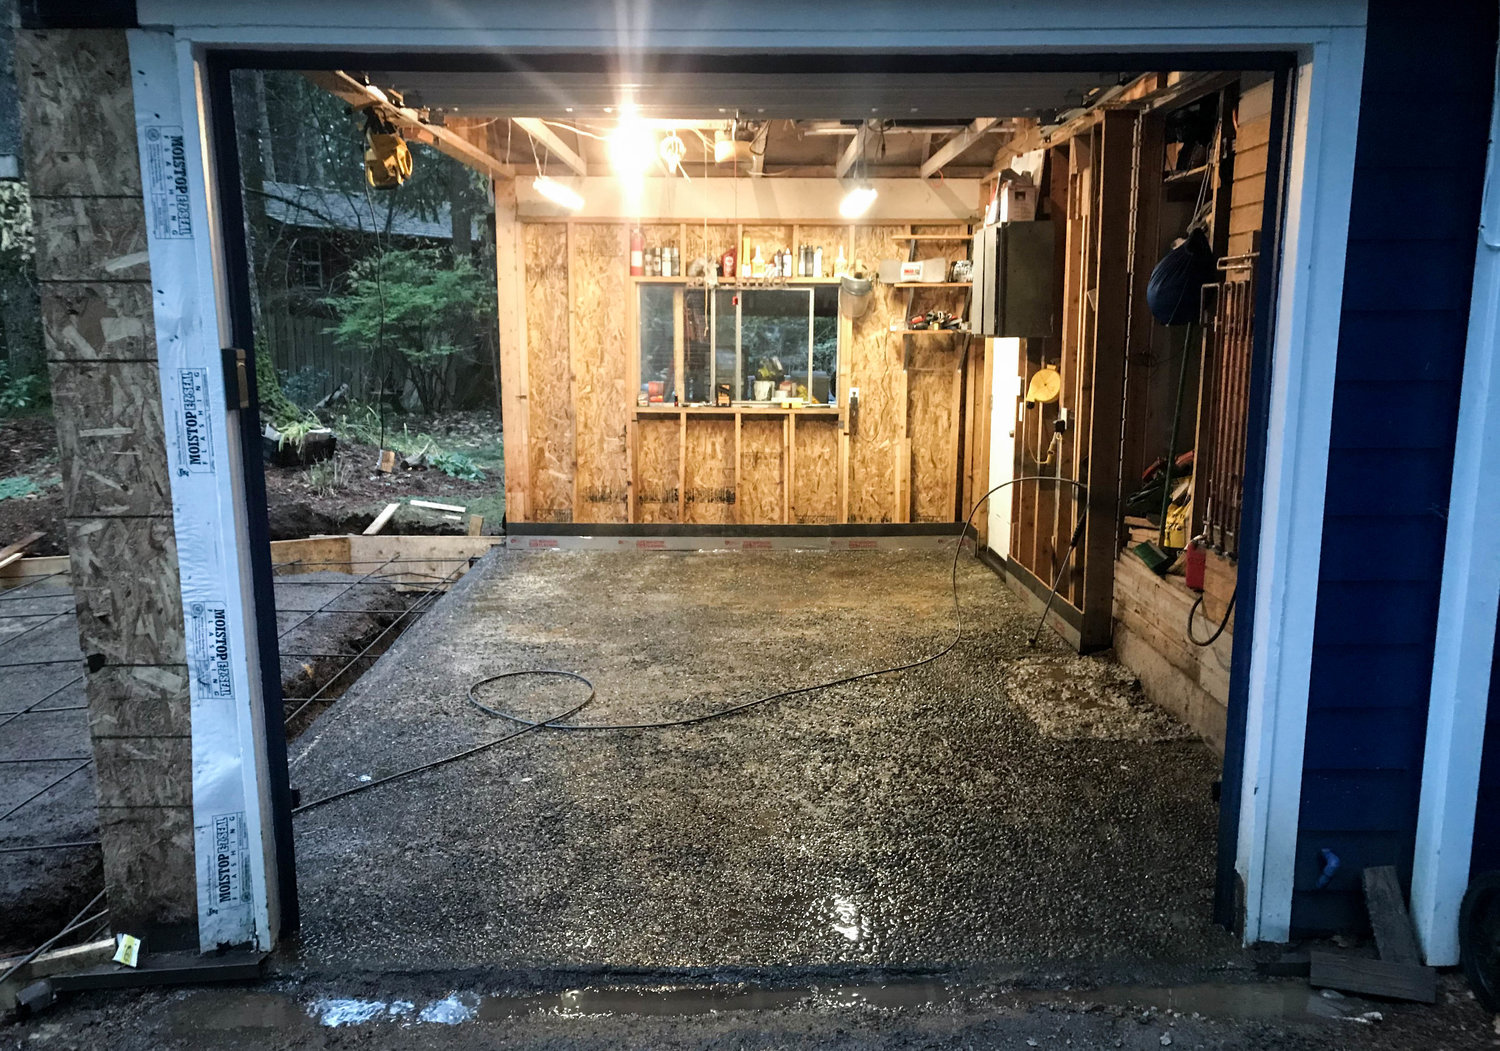
I also spent the week prepping my old existing garage for the new concrete.  I powerwashed 38 years worth of crap off the old slab.

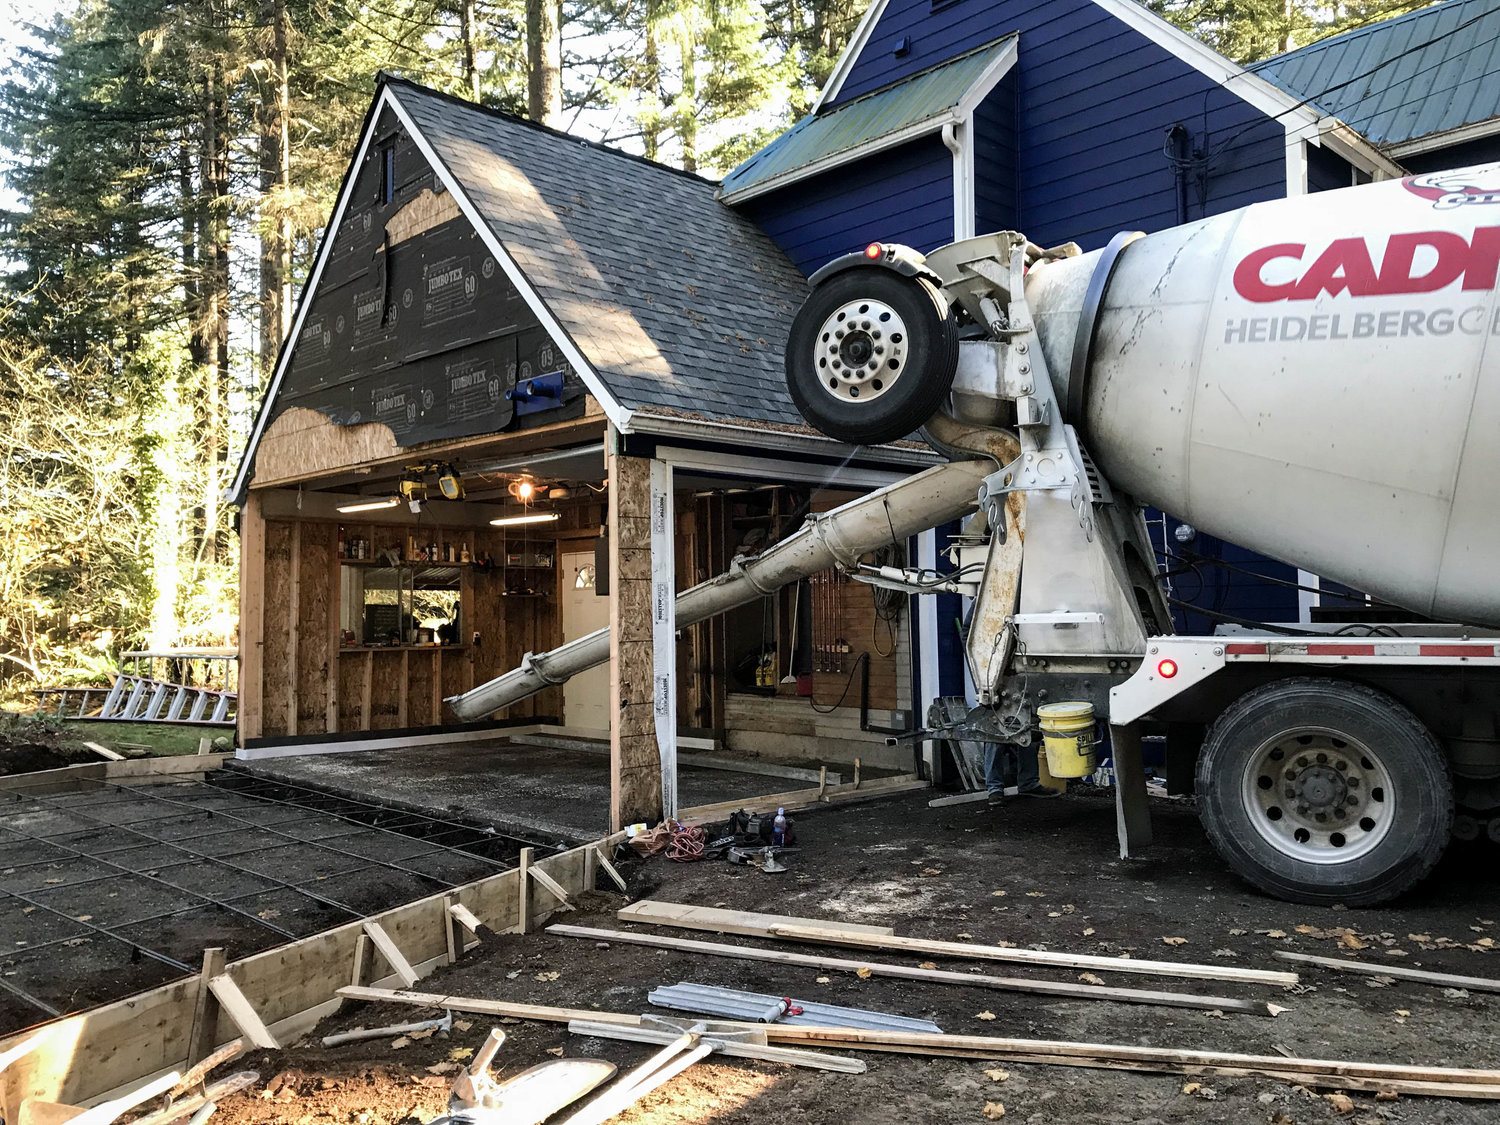
The next Saturday finally came (with sunny days in November in the PNW, I was VERY LUCKY), and with it a cement truck showed up.

IMG_3568.jpg

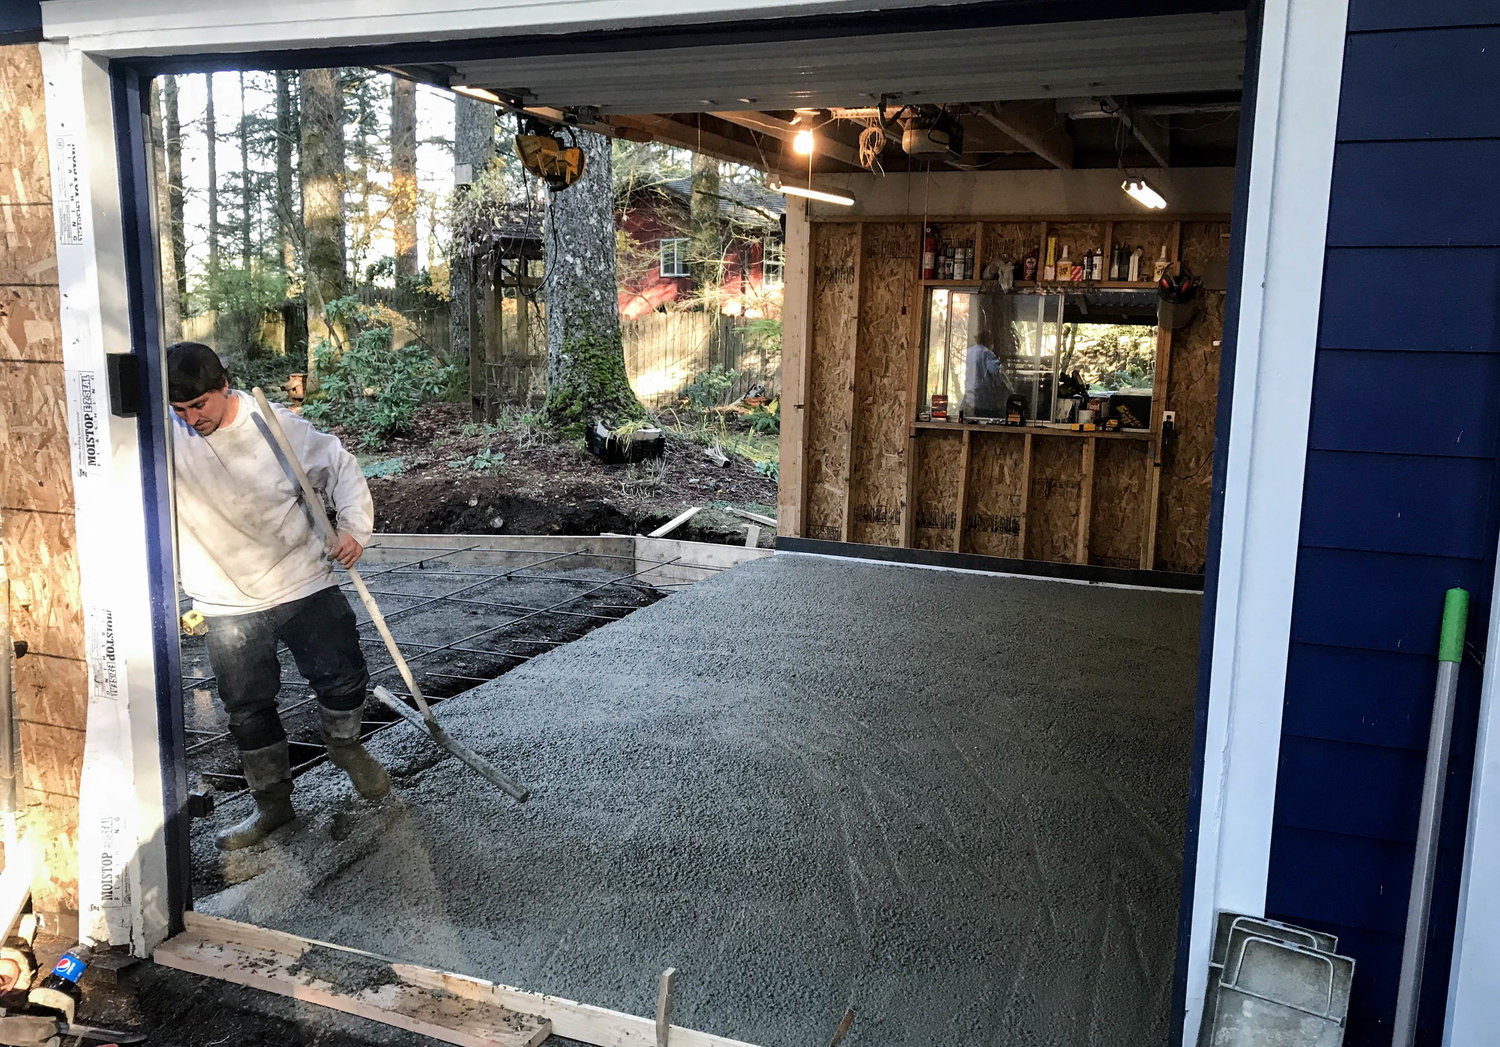
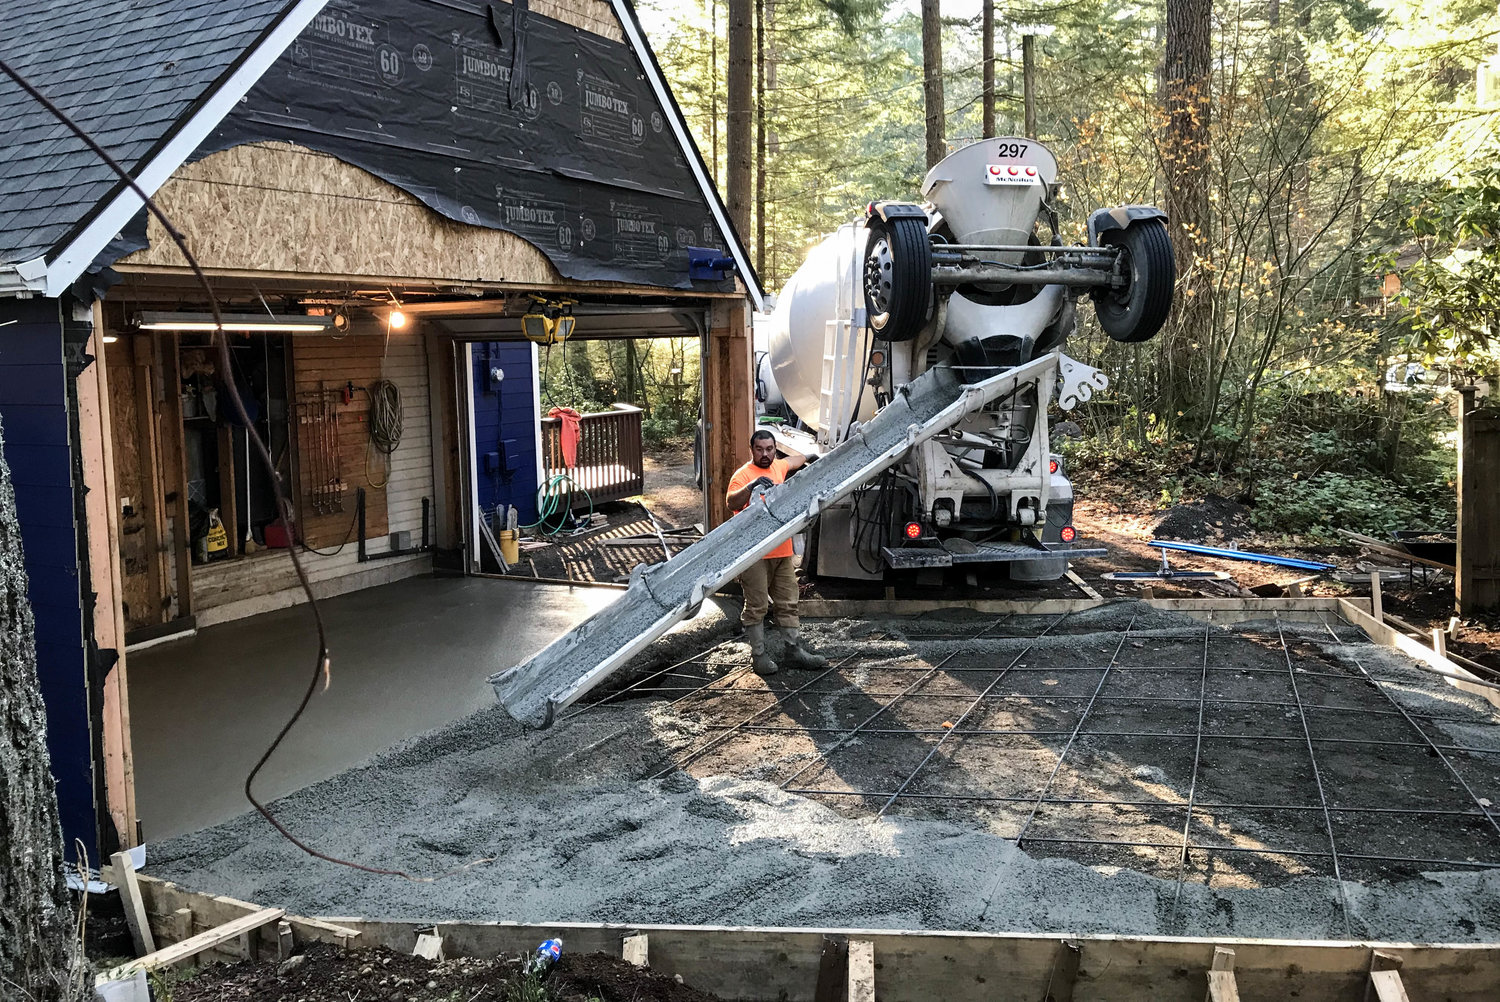
The guys started with pouring the old garage slab cap first.  Goodbye aggregate crap floor!

IMG_3572.jpg

Then, onto the main event.

IMG_3573.jpg

IMG_3574.jpg

IMG_3576.jpg

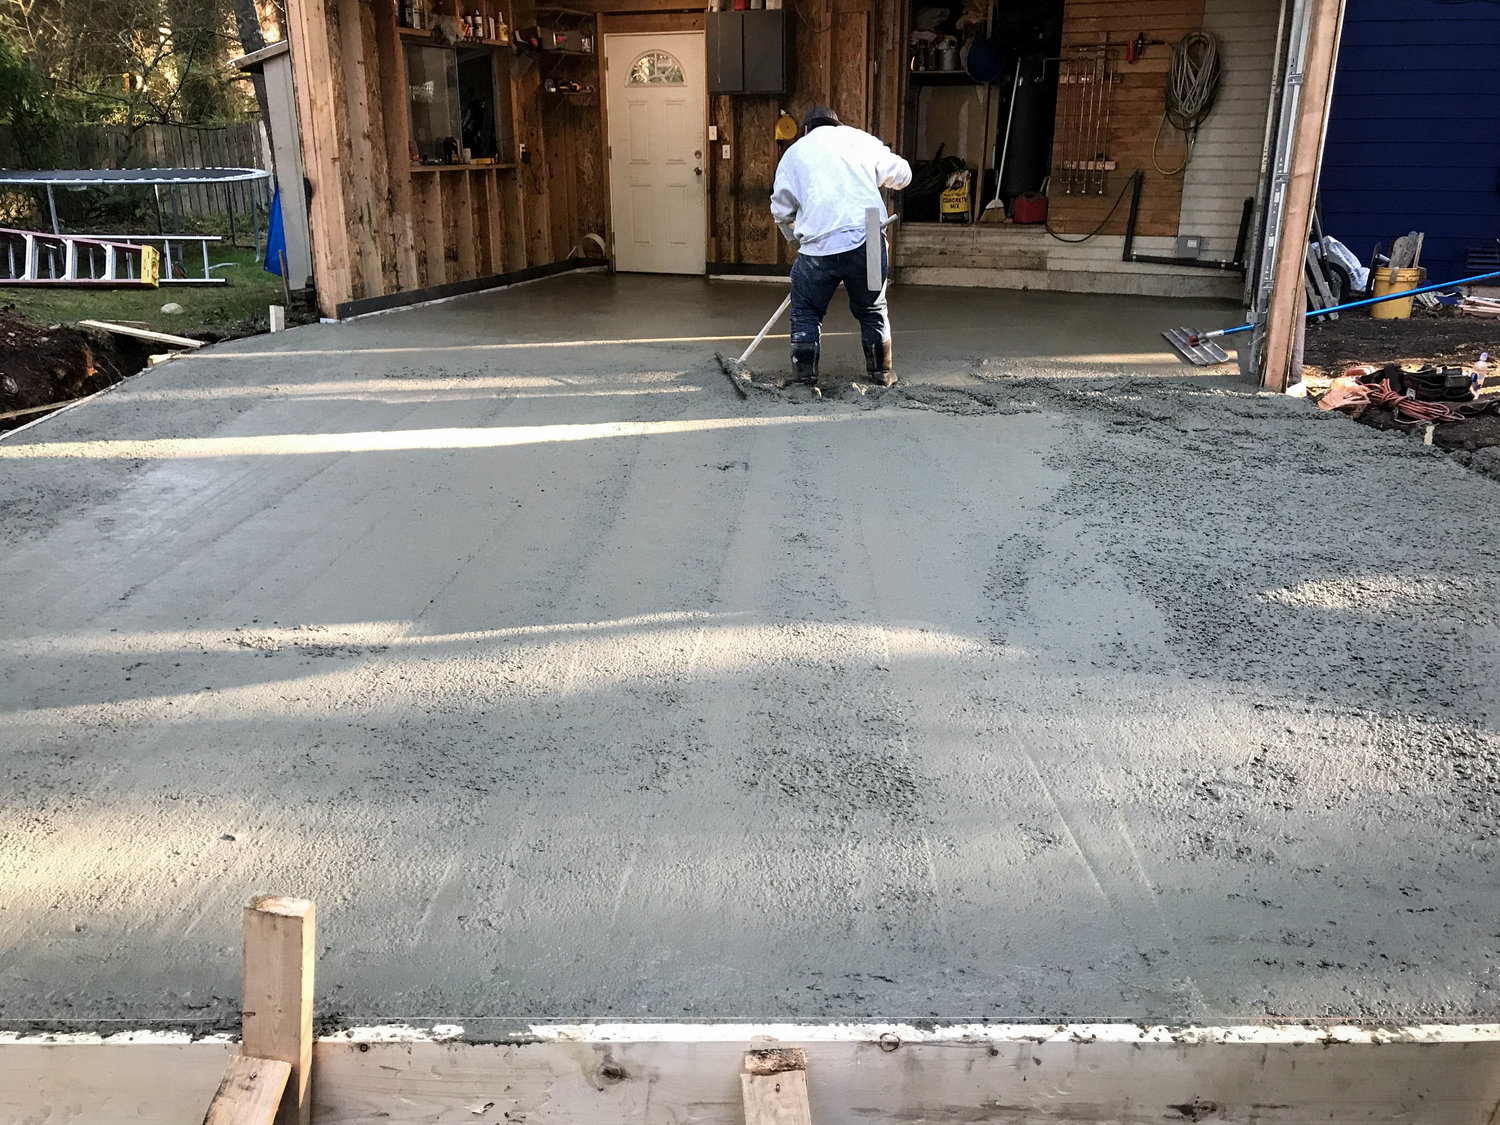
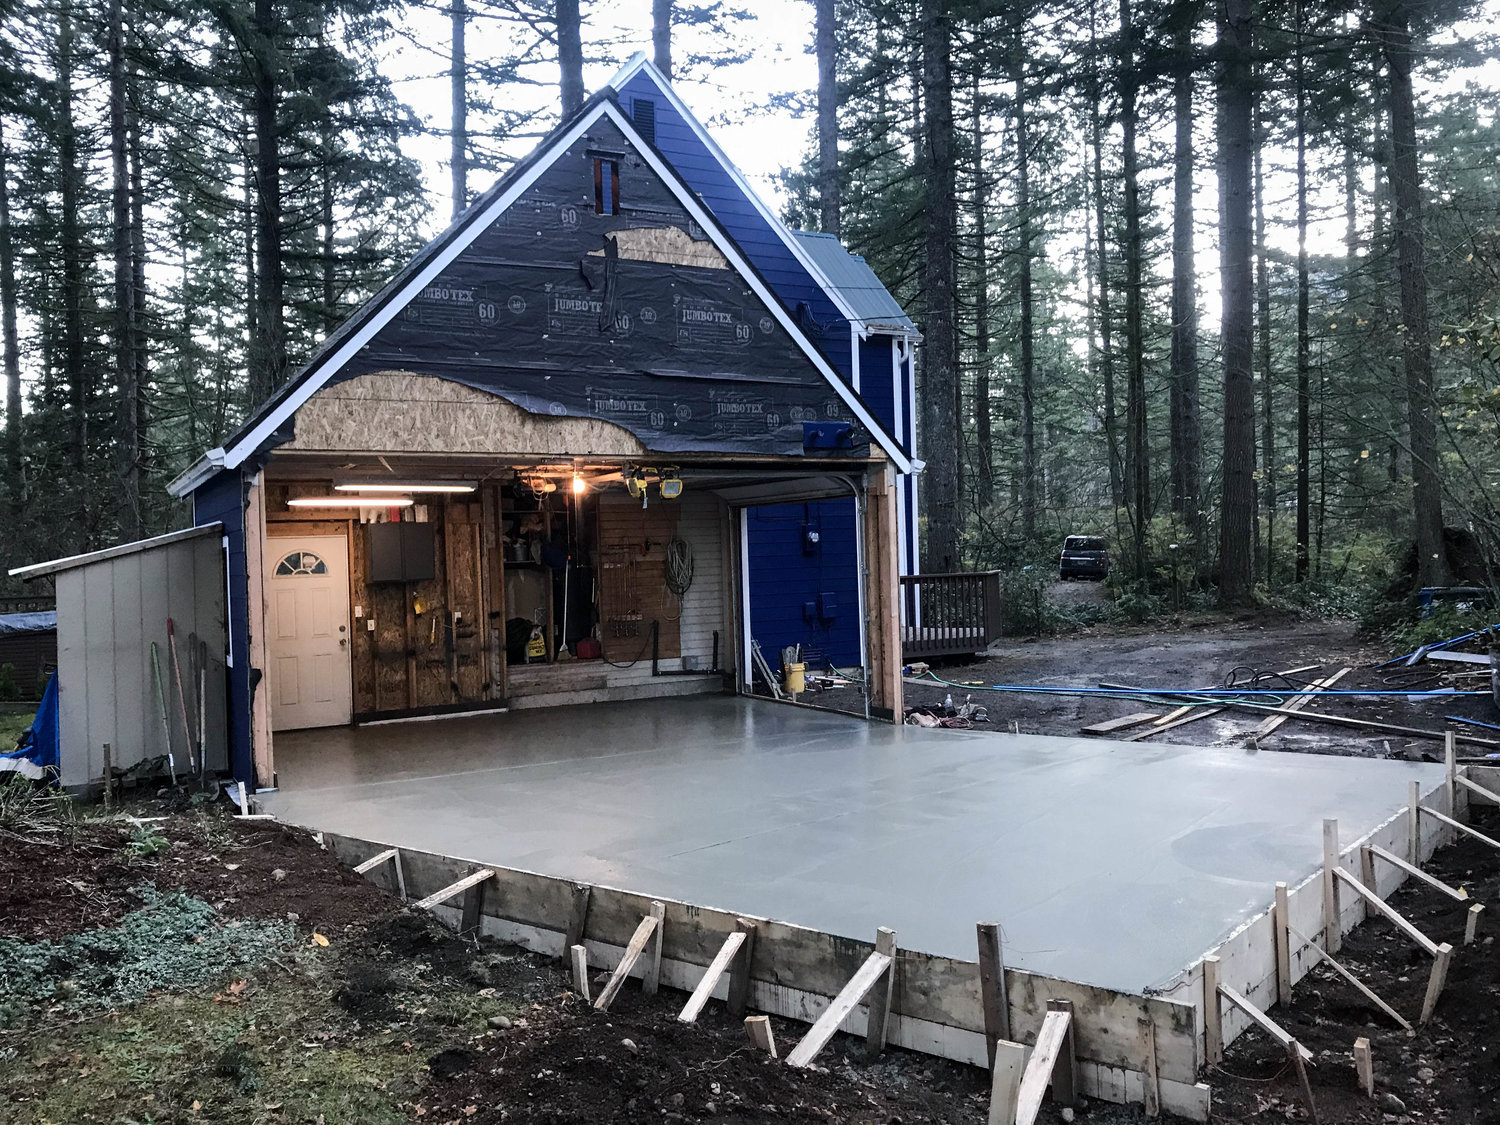
The concrete guys stayed until after 9 pm finishing the floor by hand.  Overall, I’m happy with their work.  The next morning I was able to walk on my new garage floor.

Timing was about perfect.  They poured and finished on a Saturday, the cement cured on Sunday when my dad arrived to help and on Monday while I was at work, he started on framing.

IMG_3599.jpg

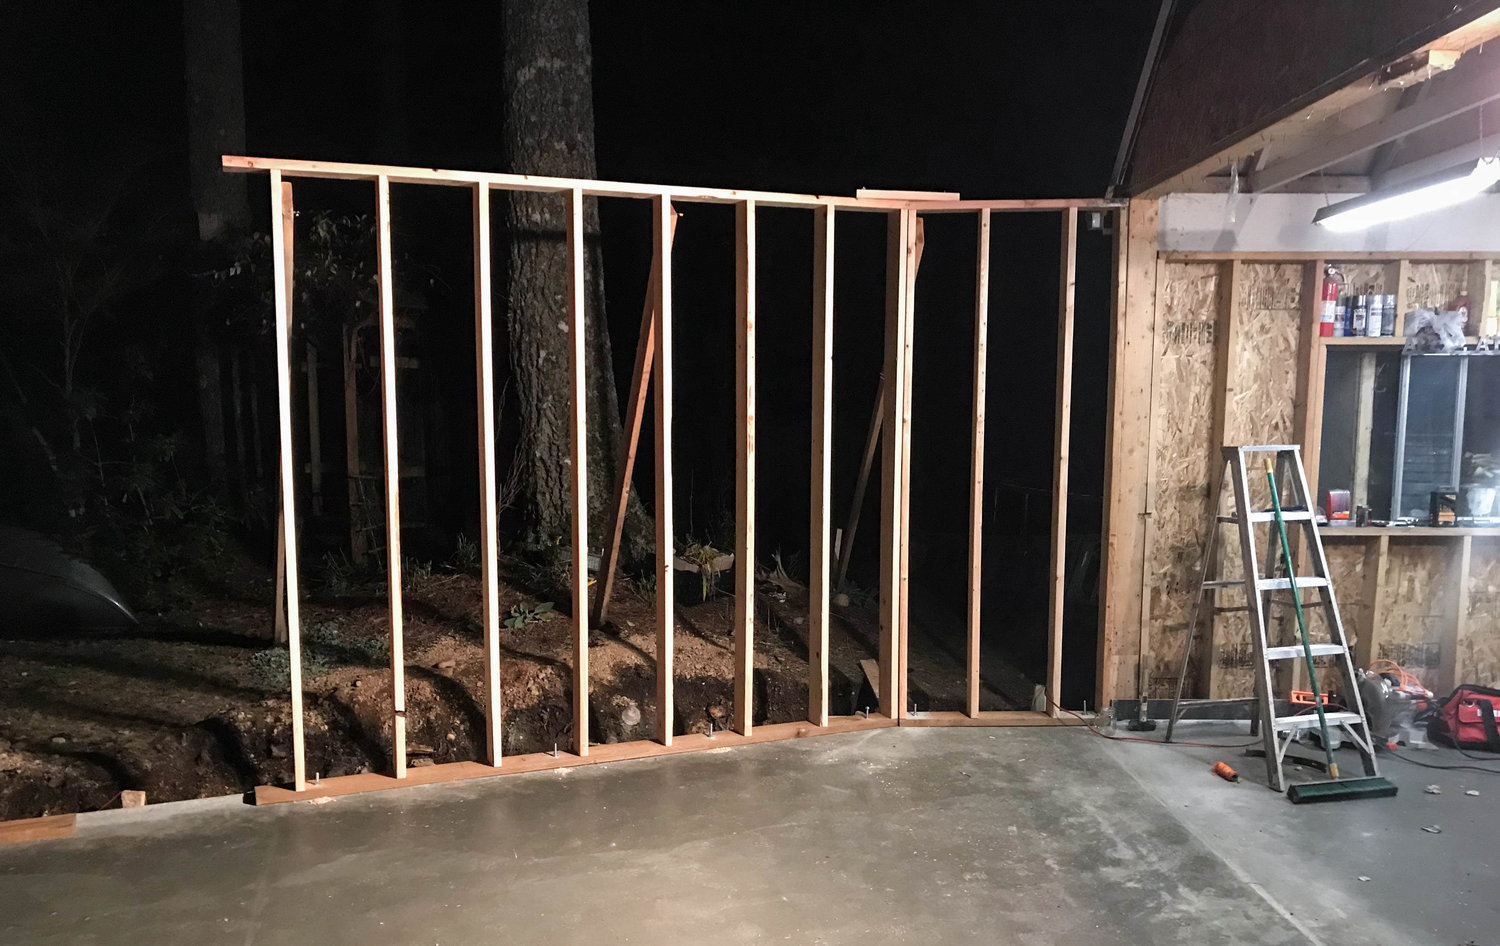
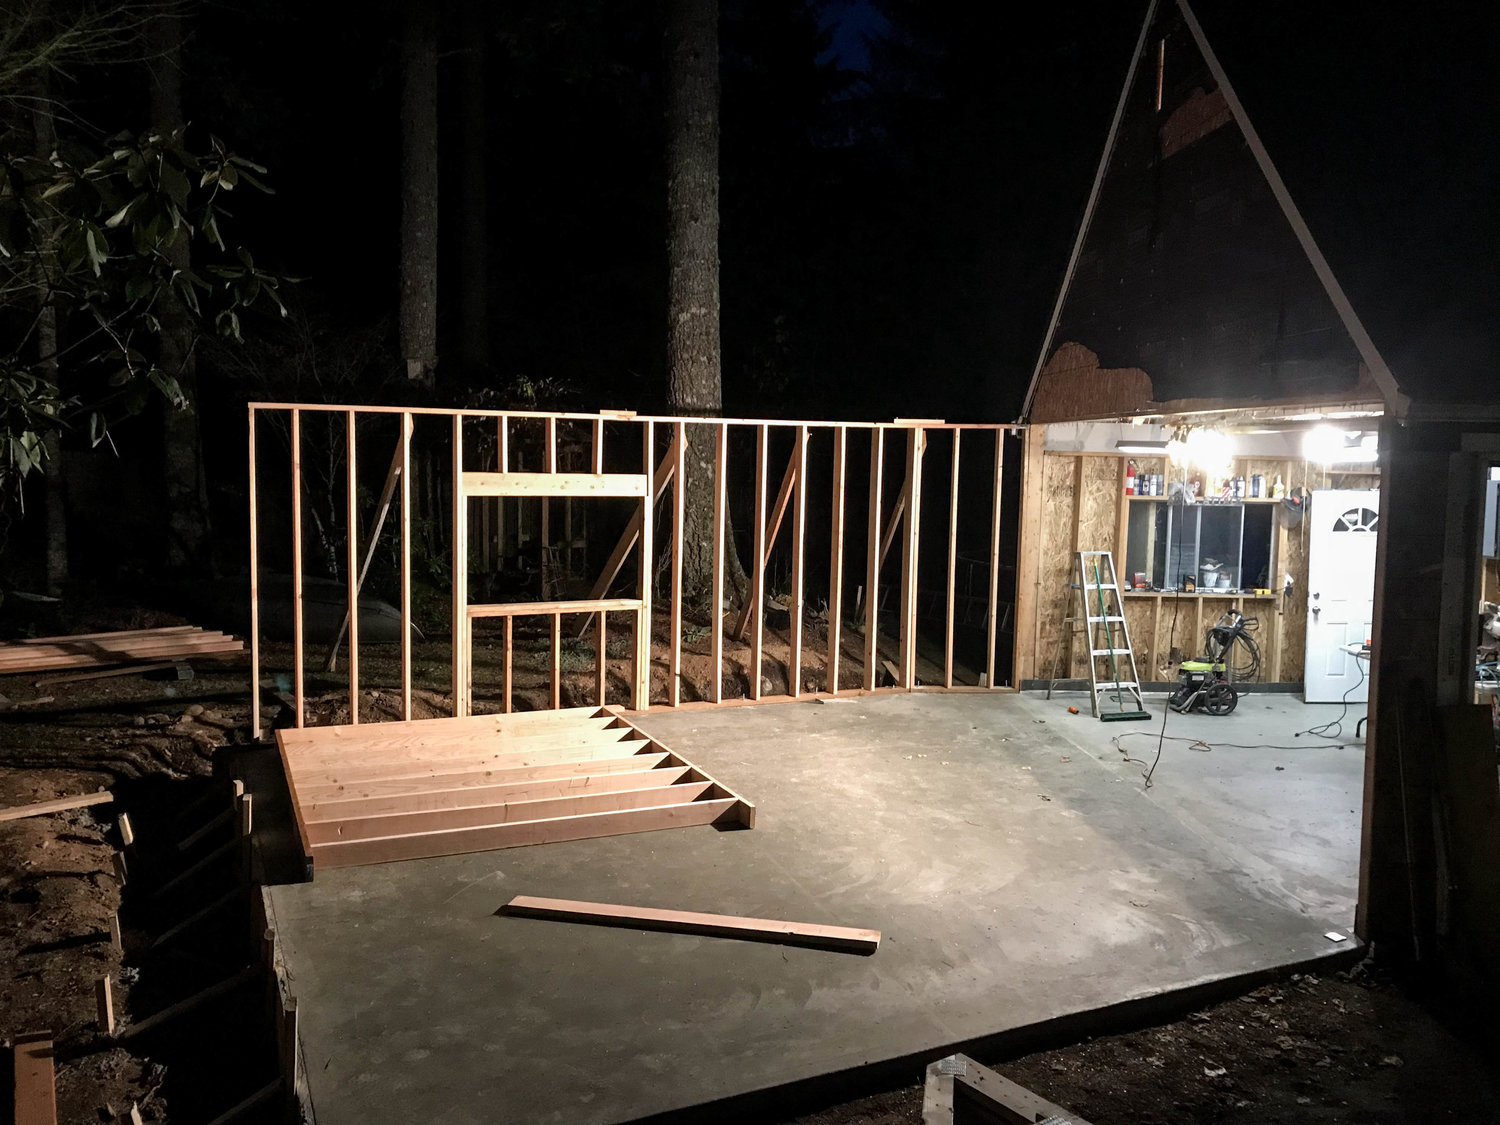
Over Thanksgiving week we worked late into the evenings (after my regular workday) on the framing of the main walls.

IMG_3608.jpg

Back wall up with my fancy window in.

IMG_3612.jpg

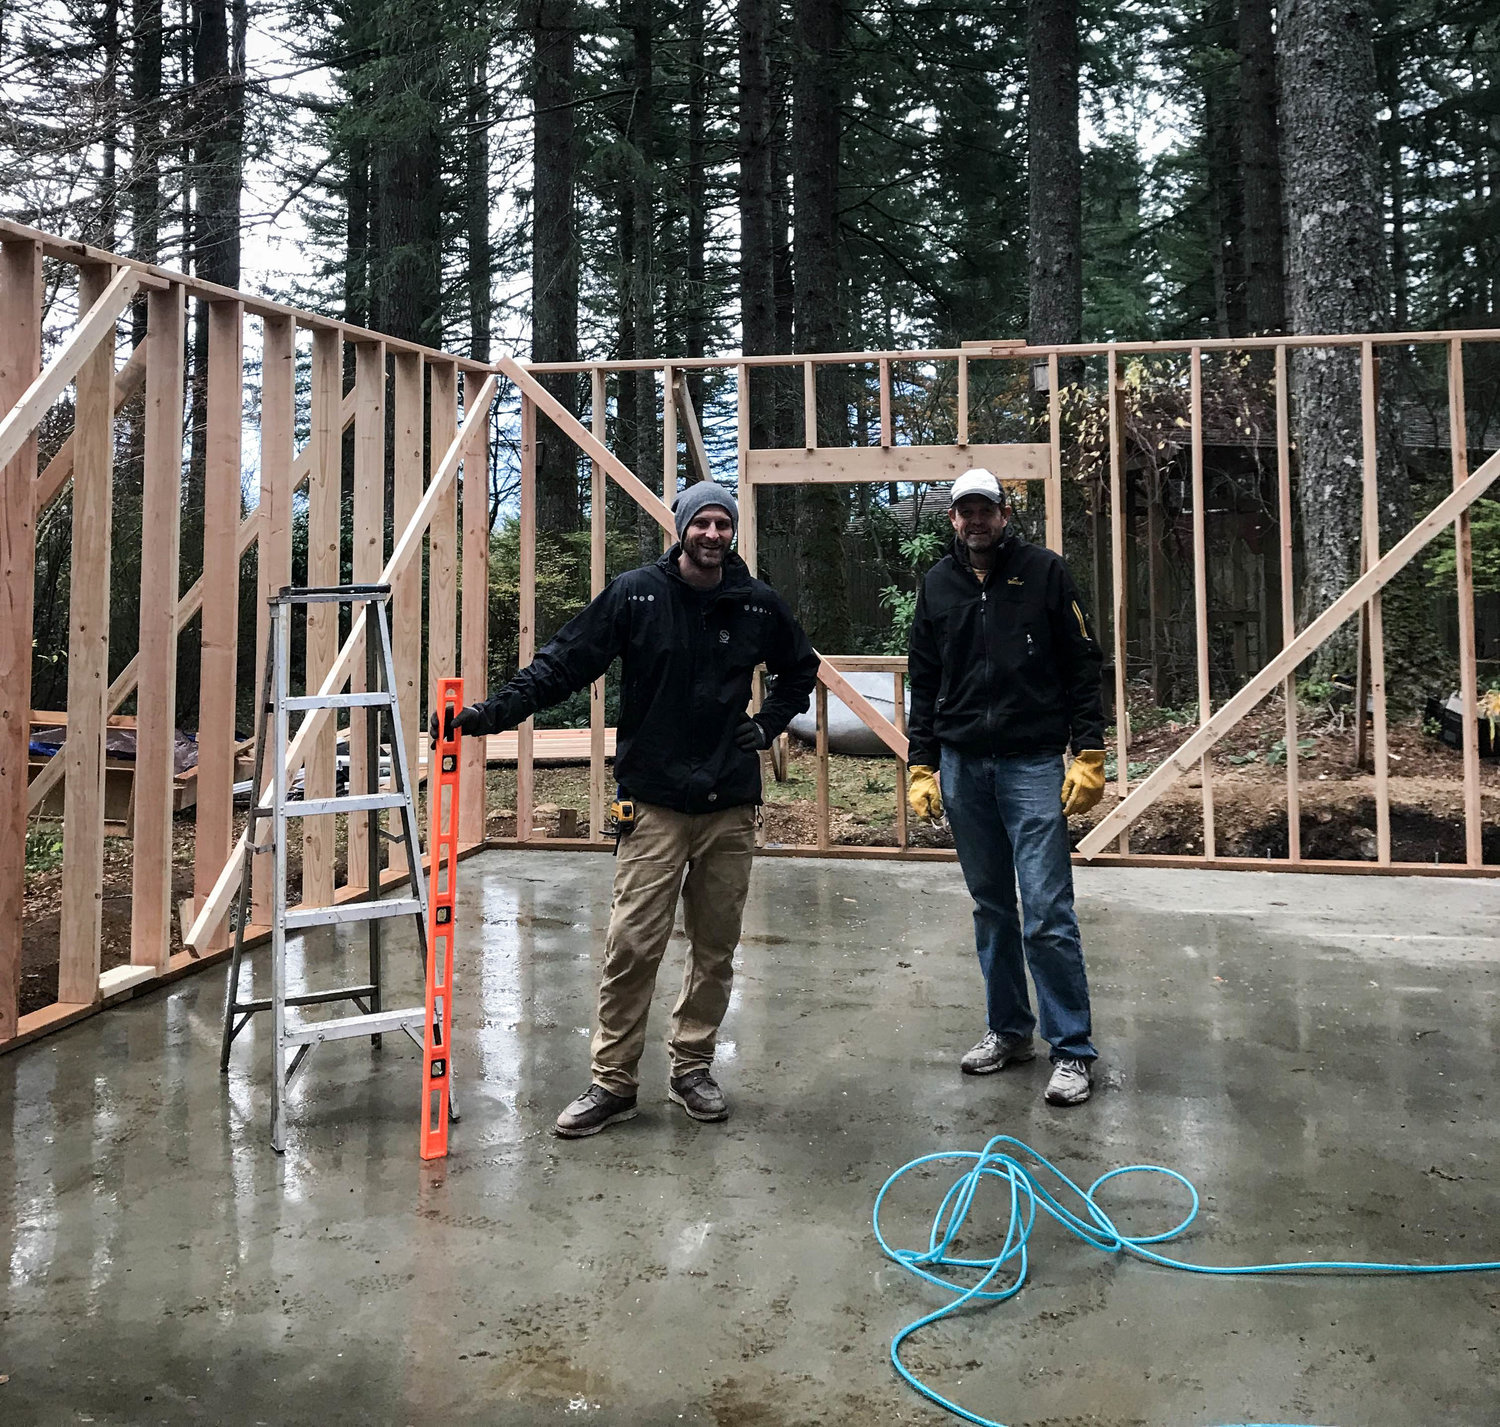
On a rainy Thanksgiving day, we got most of the walls up!  This was good news, since the roofing trusses had been delivered earlier that week and were ready for install next. 

IMG_3627.jpg

Our framing methods were basic stick construction.  The framing nail gun was a HUGE help in making things go quick.  Sometimes too quick and you have to pull the wall apart to fix something.  We built the front garage door opening three times before it was finally “done.”  The crowbar got as much use as our tape measures for awhile.  Insider Tip: Follow your plans, refer to them as much as possible.

IMG_3646.jpg

Once you’re ready for trusses, most sane people will have a crane of sorts to help place them on the walls.  It makes life much easier.  Since us here at Apex Attack like to do everything the hard way, it meant muscling these f**kers in place the good ol fashioned way, with our backs. 

So, the weekend after thanksgiving we started, in the rain.

IMG_3650.jpg

IMG_3651.jpg

After the first day, we had a few up in place!  These required a lot of planning ahead, and thinking on the fly while heavy things were being held up by grunting old men.  We did get a system going by the end of the first day.


IMG_3652.jpg

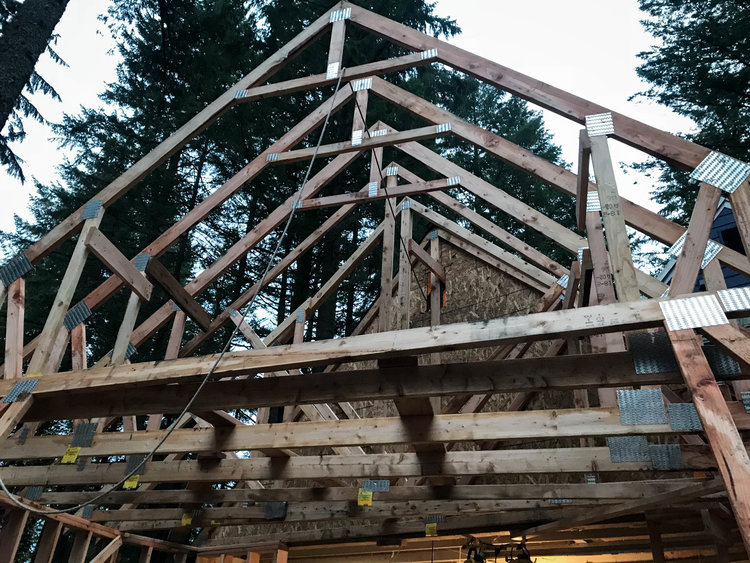
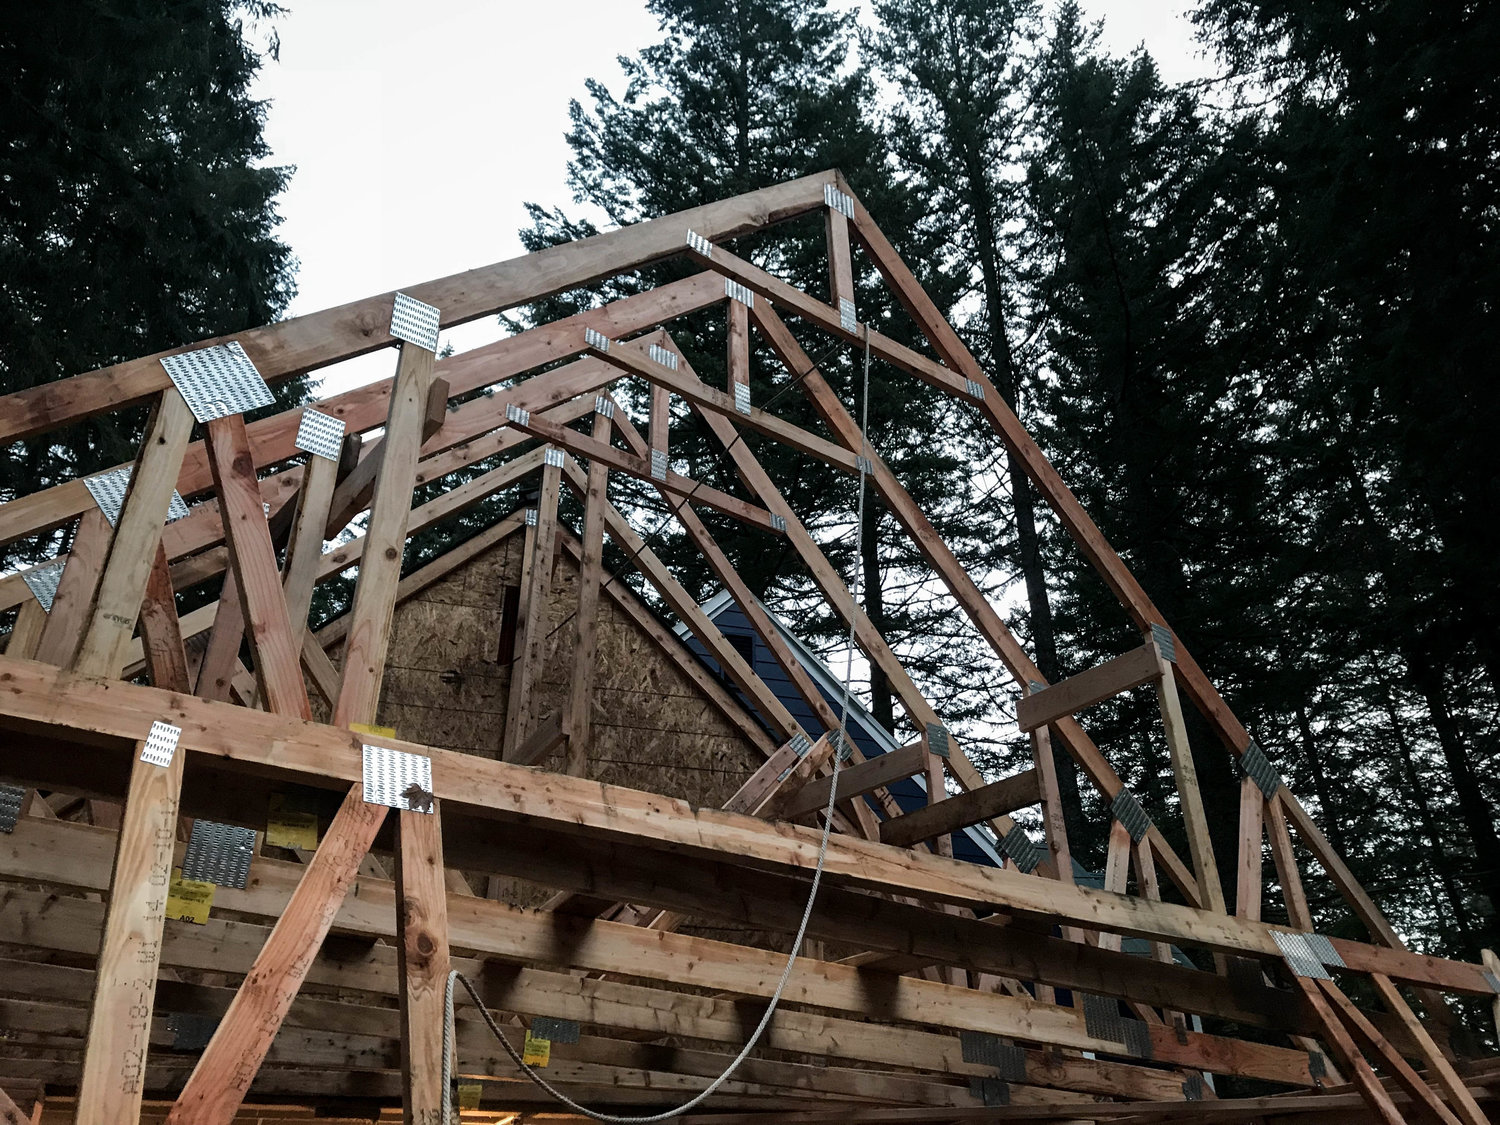
Using the rope, we would tie off the top of the truss being installed.  Then, we would pick up each truss, get it on the walls upsidedown, and flip it into place with the rope.  It was tricky… we did drop one!  Luckily no one got hurt. 

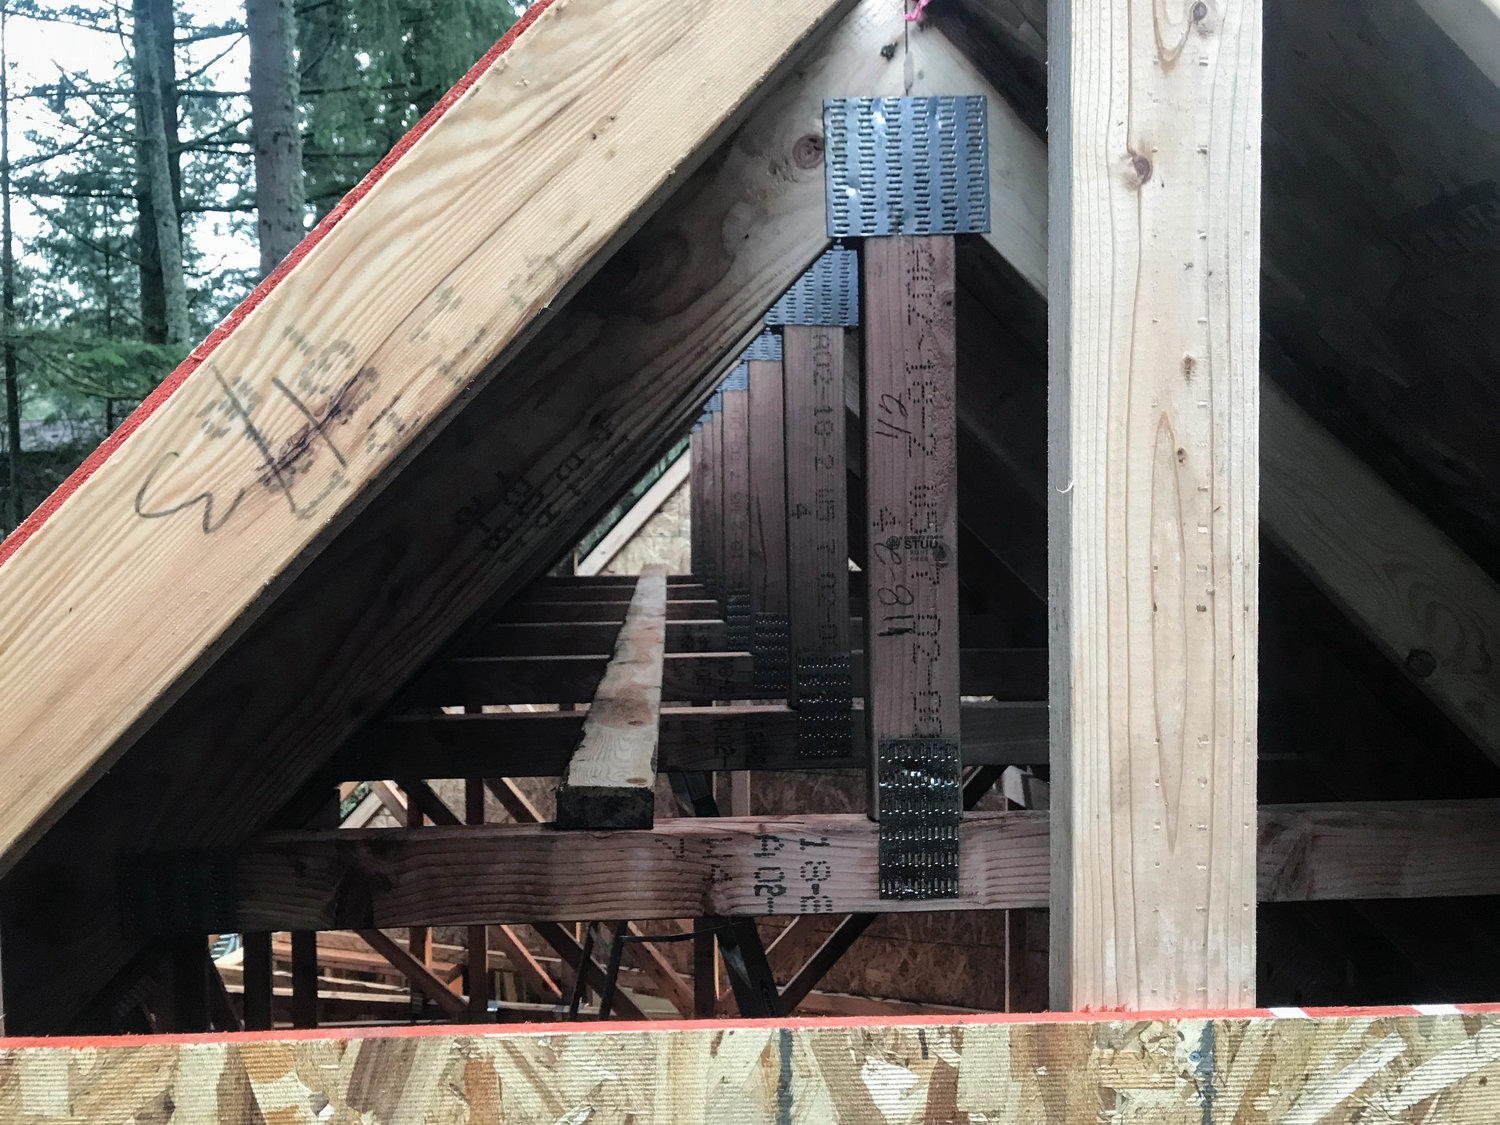
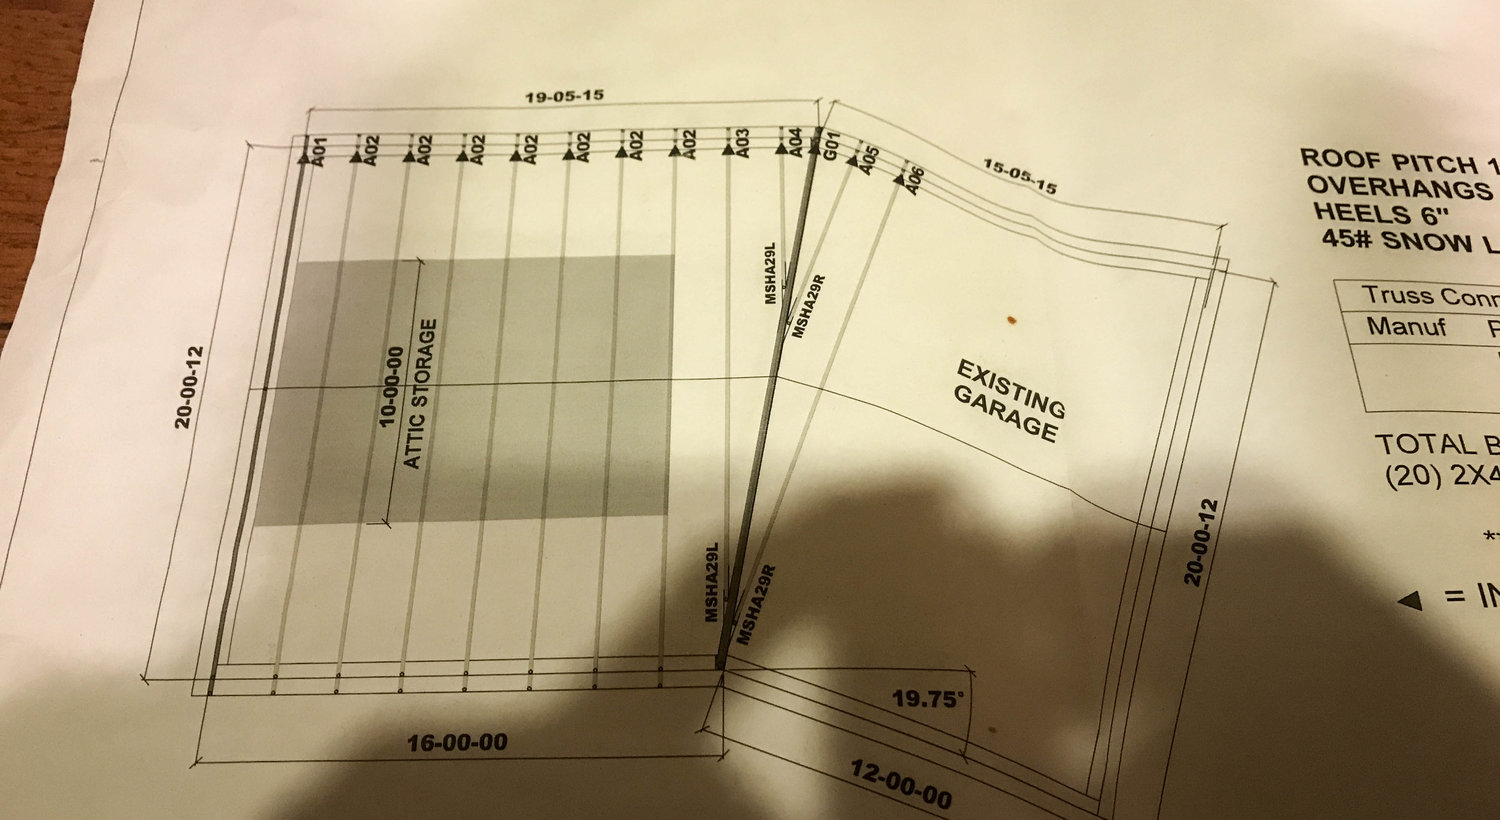
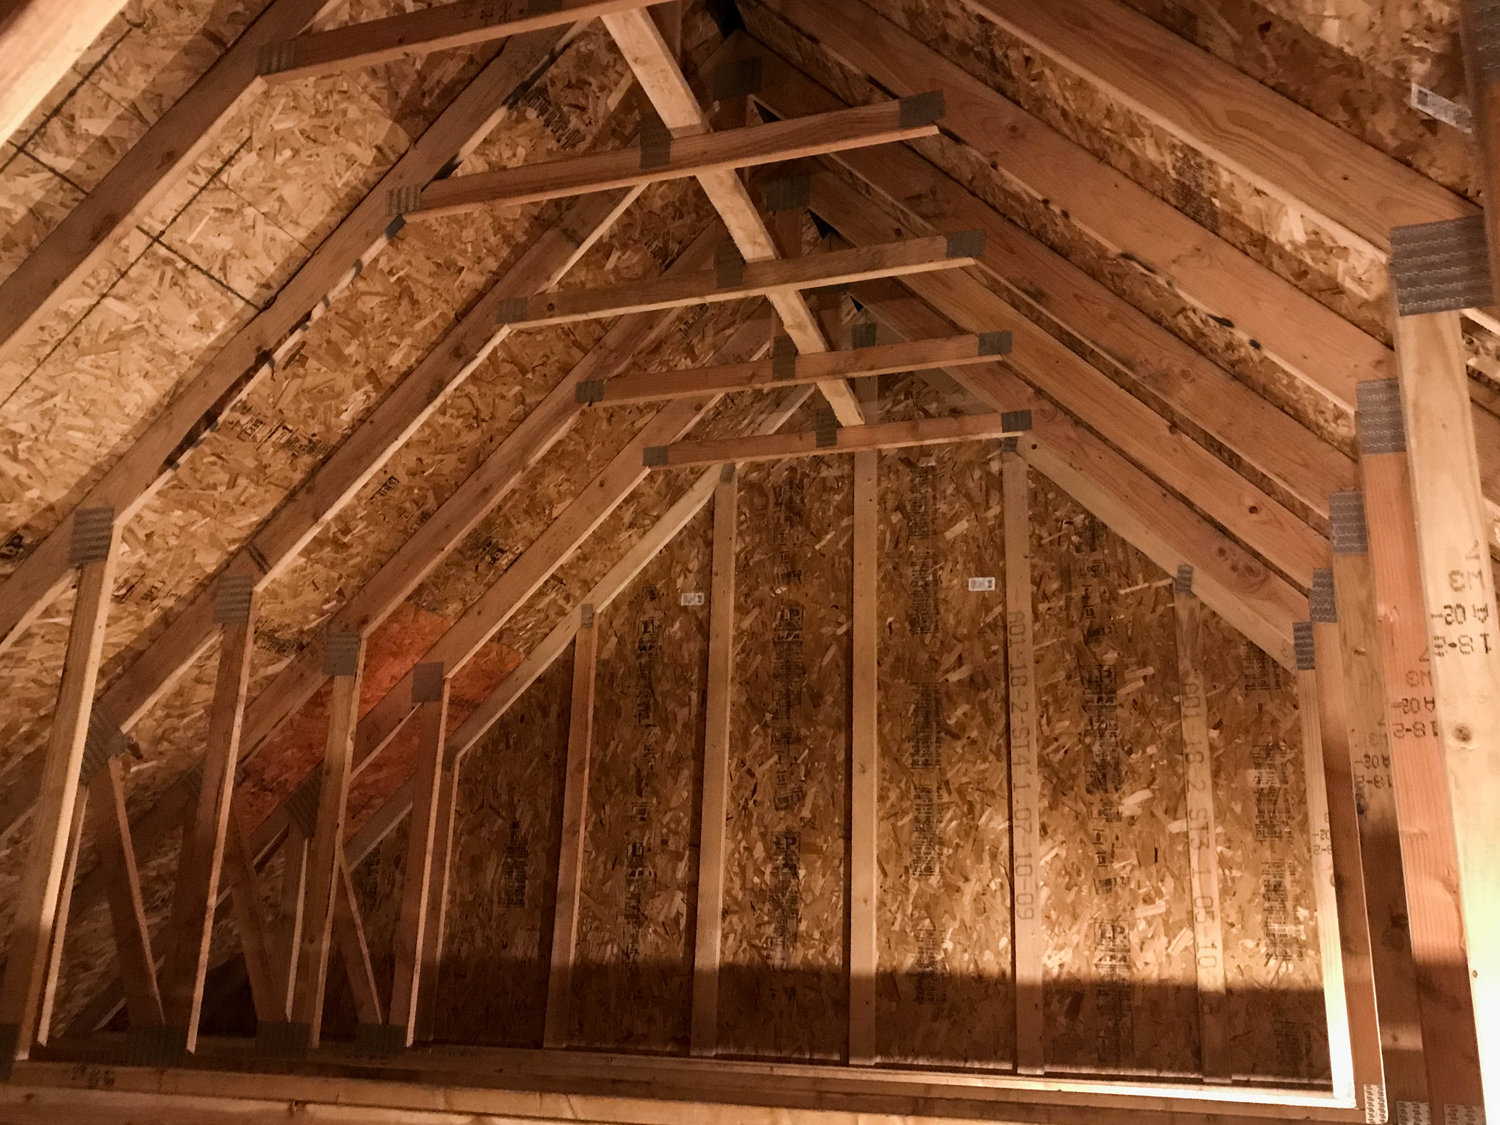
You’ll also notice the huge opening in my trusses.  We’re adding an attic!  With a roof sloping 12:12 (that’s literally 45 degrees), you have a TON of space in the truss system, so you should really make use of it.  The truss company designed my attic space to be 10’ wide, 14’ long, and 7’ tall.  This’ll give my wife and I all the storage space we could ever want.  It’s also designed to hold 40 pounds per square foot, that's 4800 pounds!  I could hide another MR2 and a half up there!  Unfortunately my wife would probably notice while getting the Christmas decorations down.

The second day of truss erection, we really got a lot accomplished.

IMG_3657.jpg

Most of my day was spent in the attic as we hoisted each truss into place.  My family did most of the heavy lifting while I tried not to fall and tacked the trusses in place.


IMG_3659.jpg

The skeleton is ready for some skin.


IMG_3660.jpg

After a very long day, we had sheathed the front half of the roof. 

“Mike, that sheathing is crooked as E36 M3!”

I know.  Unfortunately, I didn't do a good job laying out the initial slab and let’s say things are a bit out of square with the garage.  Instead of a rectangle, it’s more of a parallelogram.  It’s not the end of the world, but to keep the trusses lining up properly and sheathing seams correct, the sheathing had to run a bit downhill.  We will trim the roofline to square and it’ll be our little secret.

IMG_3669.jpg

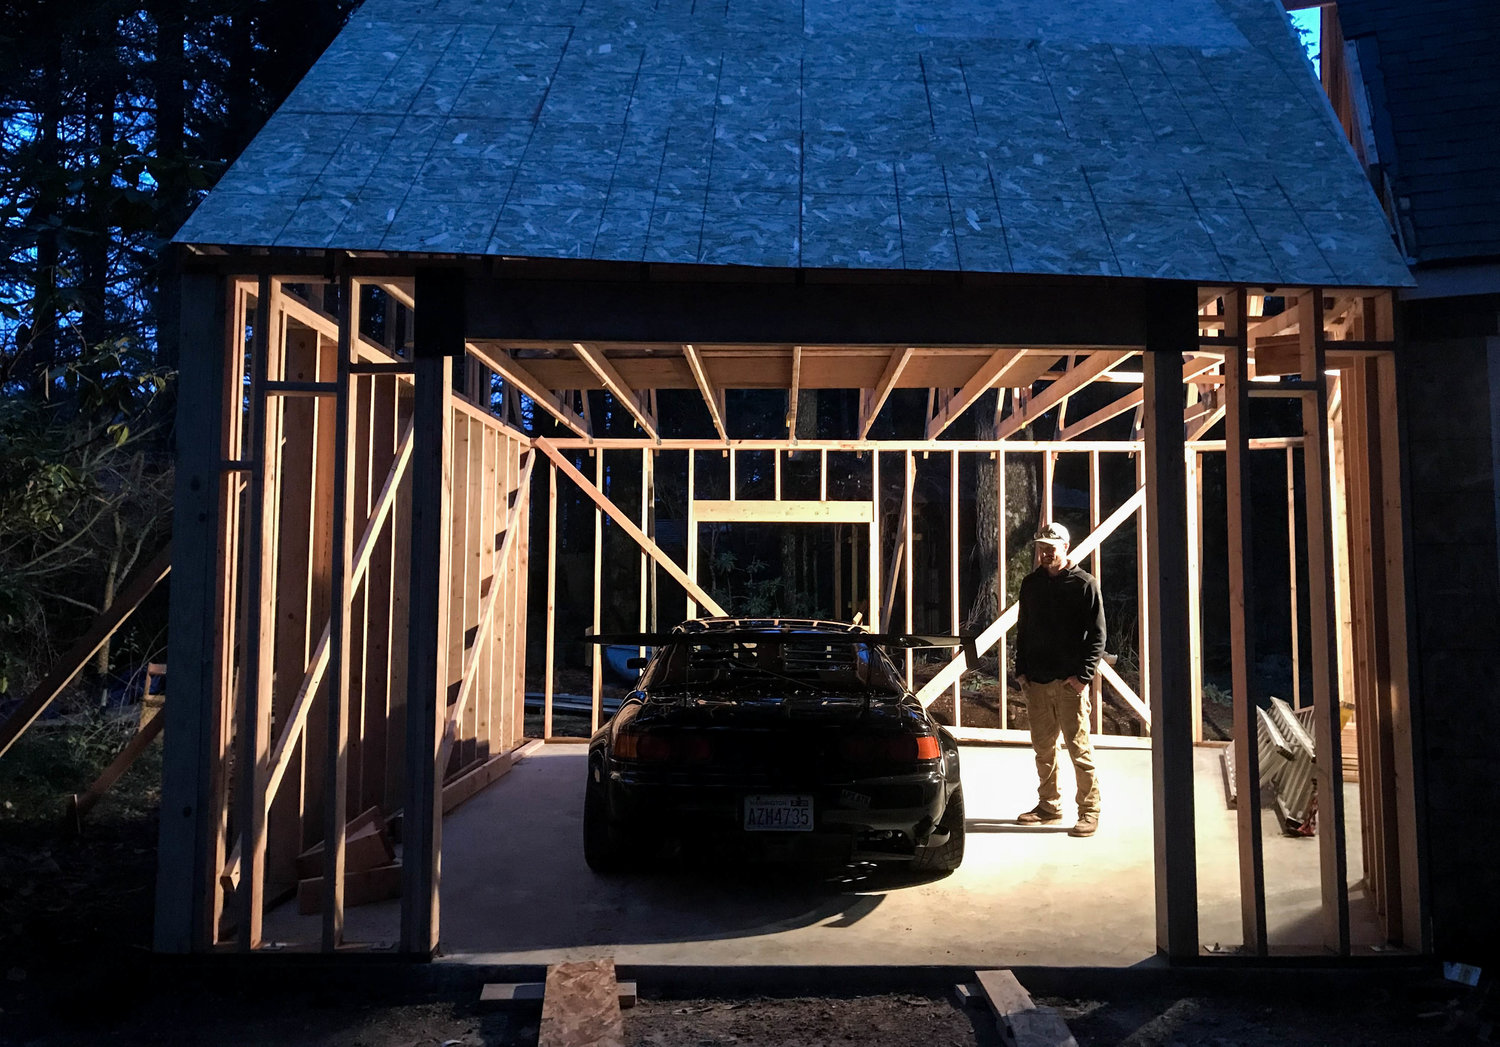
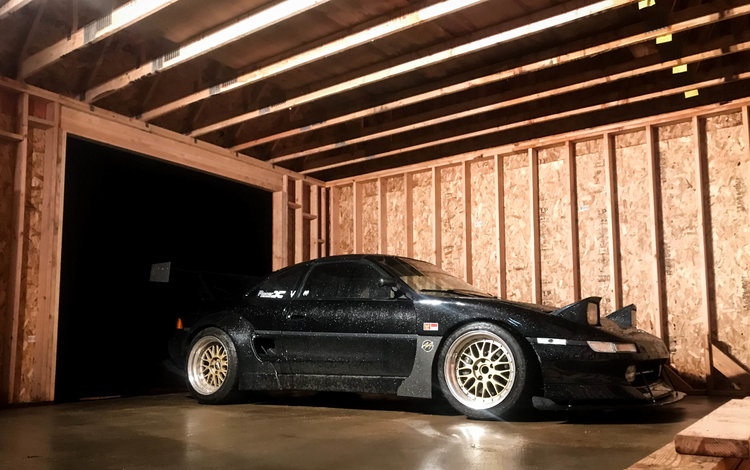
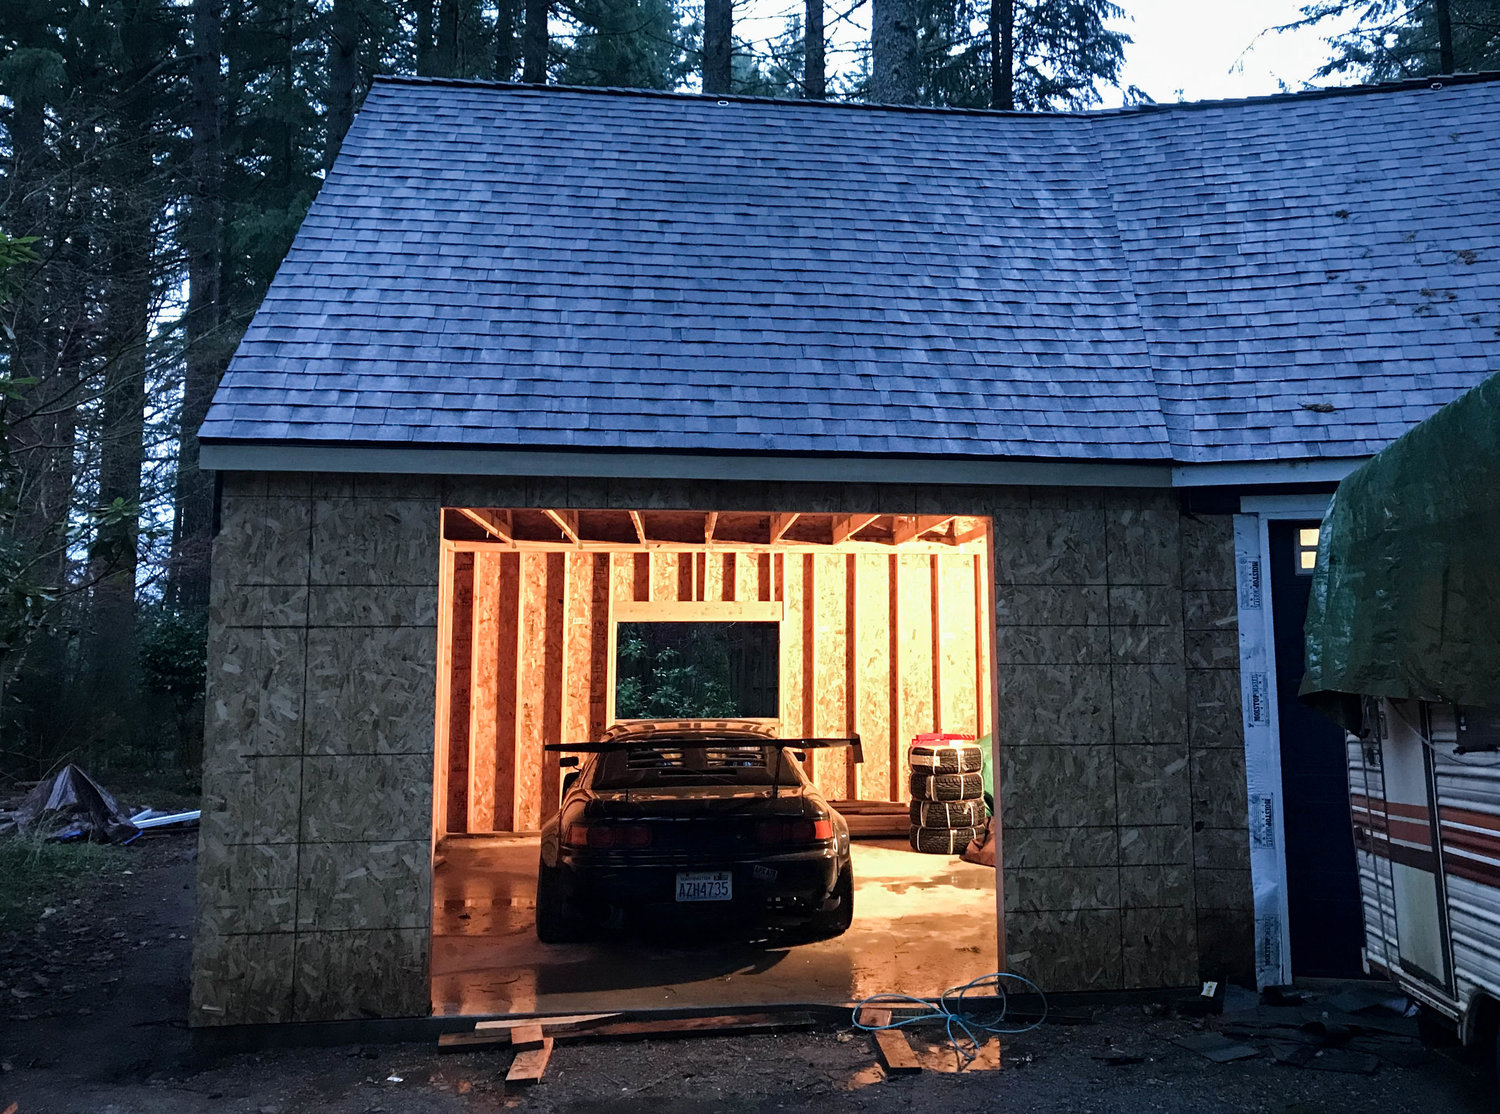
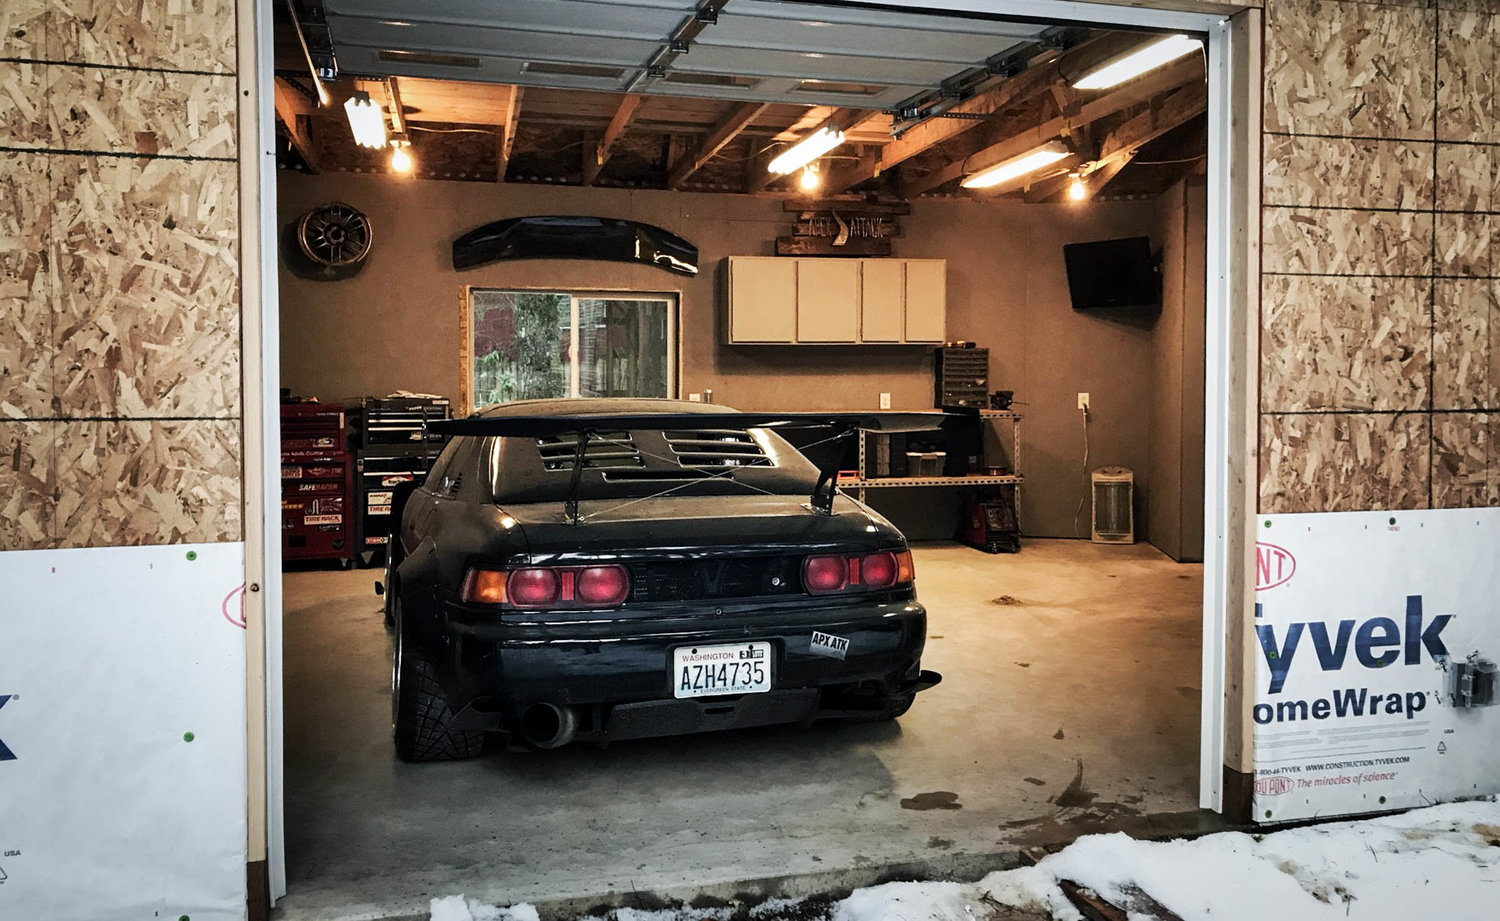
That night I couldn't resist.  My poor car had been sitting out in the rain for almost 2 weeks, I wanted to see if it’d fit in its new home. I didn’t even run over a nail!

 With your typical Seattle winter rain coming, we kept working the following few nights my dad was in town and got quite a bit of the walls sheathed in the dark. 

IMG_3683.jpg

Thanks a bunch pops!   

After he left that week, I kept chipping away at the sheathing through some pretty crappy weather.

IMG_3688.jpg

IMG_3700.jpg

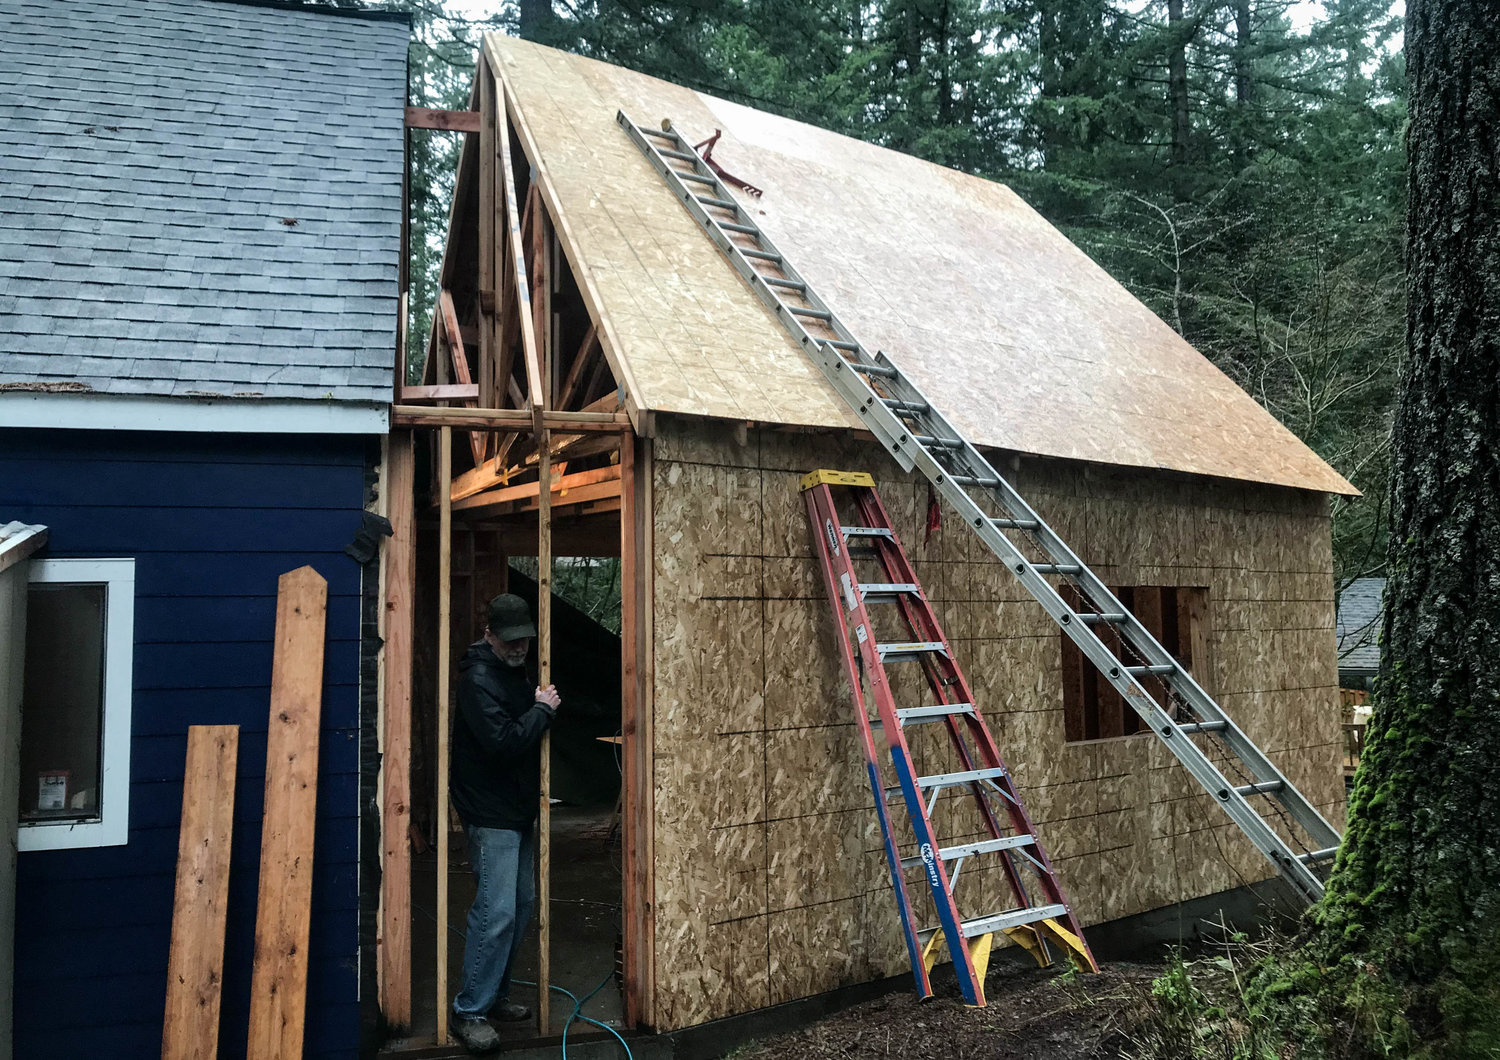
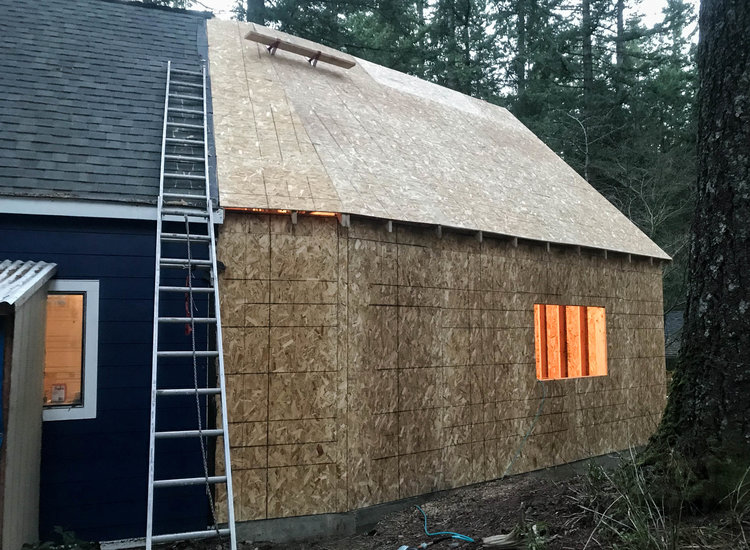
Eventually, all the easy stuff was sheathed, so I moved onto the back roof.

Hauling 4x8 pieces of OSB up a ladder can be sketchy at best. I did make one evasive maneuver (read: jump/fall) when a wind gust caught me wrong.

The following weekend, my father-in-law made it out again to help finish the sheathing.

IMG_3721.jpg

IMG_3724.jpg

Once the back was tied in, onto the gable end!

IMG_3726.jpg

Before sealing the top of the gable end up, I luckily thumbed through the truss paperwork and noticed I needed a 2x4 brace on the upper attic.  I was able to toss that in while I still had room to get it in. 

Once again, opposite to my most manly urges, reading the instructions helped!
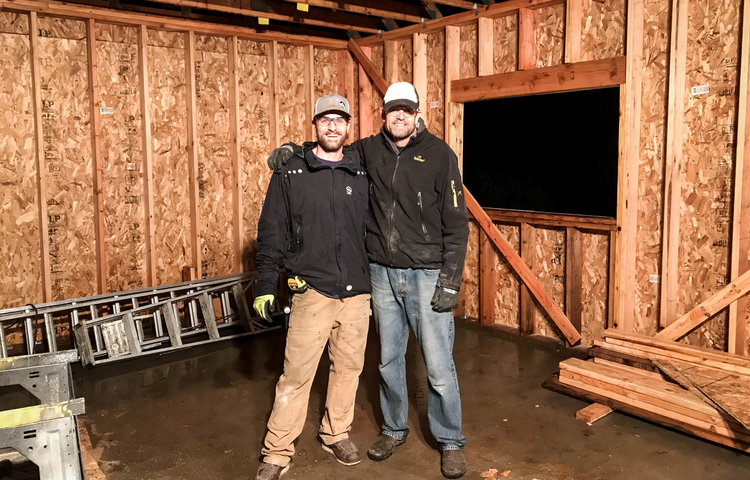
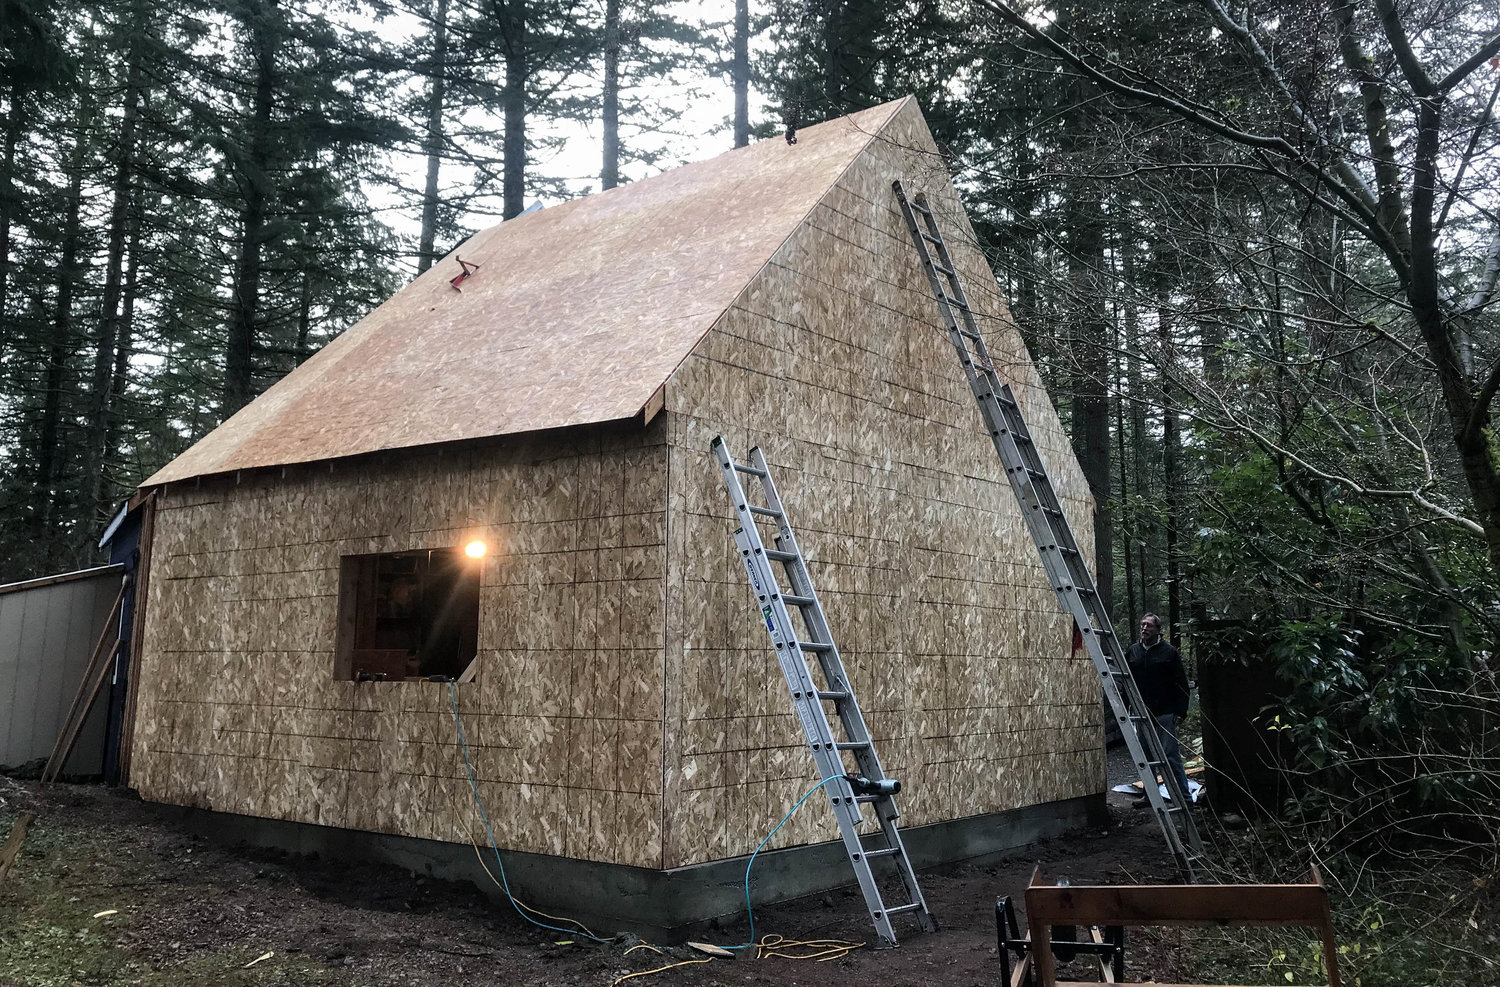
Later that day, we had the gable end closed in.

IMG_3727.jpg

Holy crap, that’s actually looking like a garage!

IMG_3733.jpg

IMG_3792.jpg

To celebrate the sheathing completion, the car got it’s permanent spot.  The roof still had a big vent cut in along the top ridge, so it wasn’t waterproof by any means.

IMG_3793.jpg

My sheathing used was OSB, or Oriented Strand Board.  OSB is an engineered wood made from wood chips glued together.  It’s not as good as real plywood, but half the cost.  The big downfall of it is not being waterproof…like at all.  So I needed to keep at it and get the roof on the following weekend. 

During that week, I prepped for shingling.  The crooked roof sheathing needed to be trimmed square, fascia trim boards installed, driprail and felt paper put on.

IMG_3797.jpg

Fascia on the gable end.  Way back when I was trying to figure the cost of the garage I thought “fascia board… $80 oughta cover some 1x4 wood.”  Nope.  It’s more than you’d think it should be.  $200 later I had enough in the right size.

IMG_3800.jpg

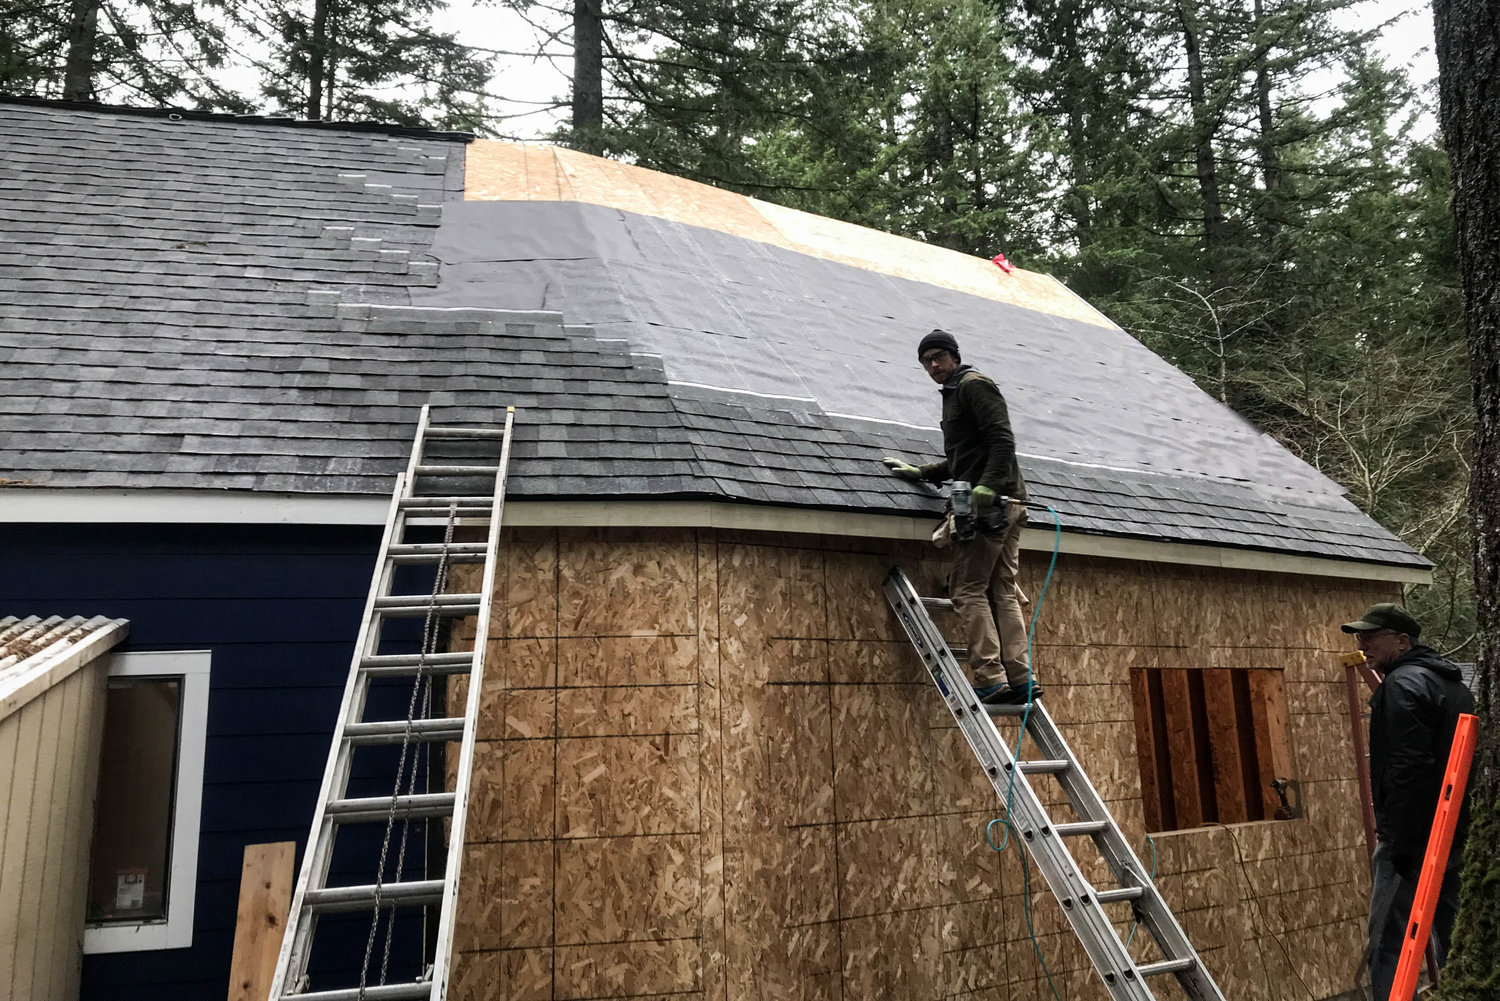
After a couple of windy and rainy nights with a sketchy ladder and stapler, I had the felt paper on and we were ready for shingling with my in laws.

IMG_3804.jpg

I thought we would knock out most of the roofing in a day or two.  What I didn’t account for was tying into my existing roof.  Why not re-roof everything?  Because we just had the old garage roof done last year and I was dumb and naïve about keeping it in place.  Hindsight is 20:20 and I probably should’ve paid for metal roofing like the rest of my house. 

Anyway, tying into the old roof took quite a bit of time. The ridge needed to be cut on the back, the rental roofing gun broke half way through the day.  All these setbacks meant we only finished the back of the roof in one long day of up and down a shaky ladder on a steep roof.

IMG_3805.jpg

IMG_3807.jpg

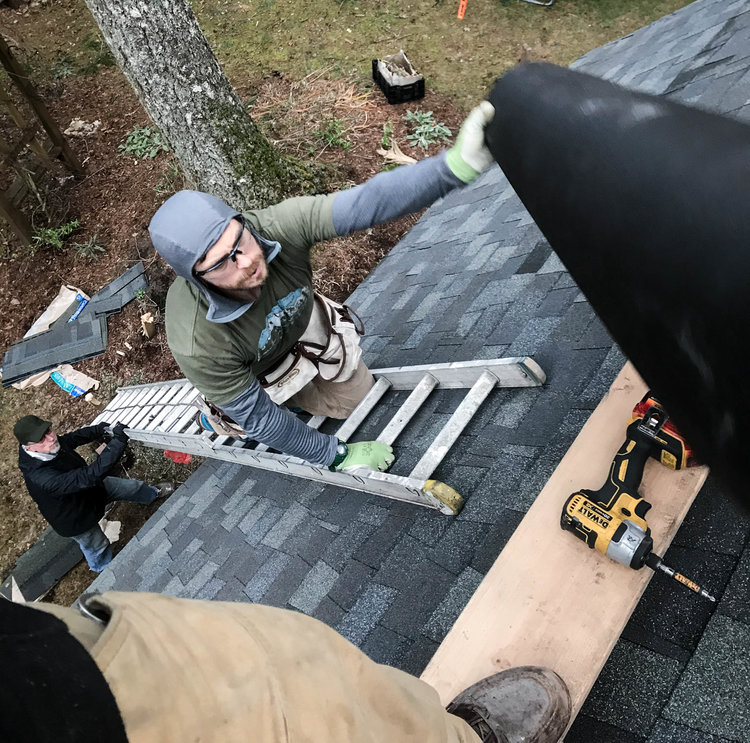
Being the “foreman” of this operation also meant I was the guy doing the mostly sketchy stuff.  This was my view most of the day as my brother and father in law ran material and cut shingles where they could.  Again, I can't thank them enough!  Cody also got into some “unique” situations on the ladder on his tippy toes with a nailgun.  Luckily OSHA wasn’t around. (and no one fell off the roof!)

IMG_3825.jpg

Just a plain ol’ roof to most, but to me, a bunch of hard work and accomplishment.

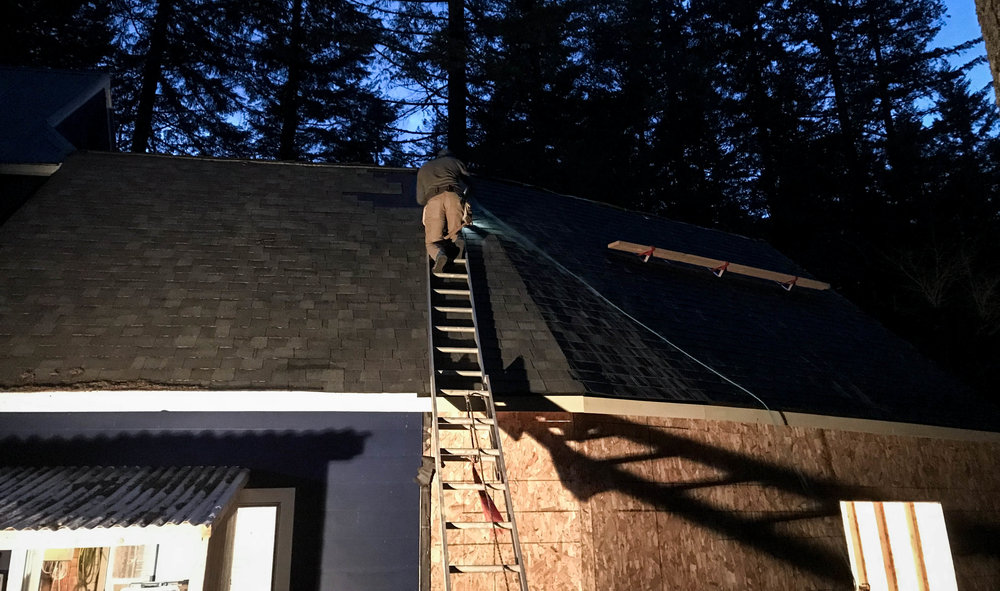
After renting a nail gun didn’t go too smoothly, I knew I was going to be chipping away at the front roof myself on weeknights.  Renting a gun at $30/day wasn’t going to work well, so harbor freight to the rescue!  $100 out the door, I now own a roofing gun that’s good for…roofing!

IMG_3852.jpg

Fighting more rain and a big ass tarp, I made progress.  Eventually I was at the tipping point and the tarp was yanked and I made a big push to finish.

IMG_3855.jpg

On a Sunday after some early season skiing, I found myself with the roof literally a pain in my ass, putting the top vent and ridge cap on!

IMG_3871.jpg

IMG_3872.jpg

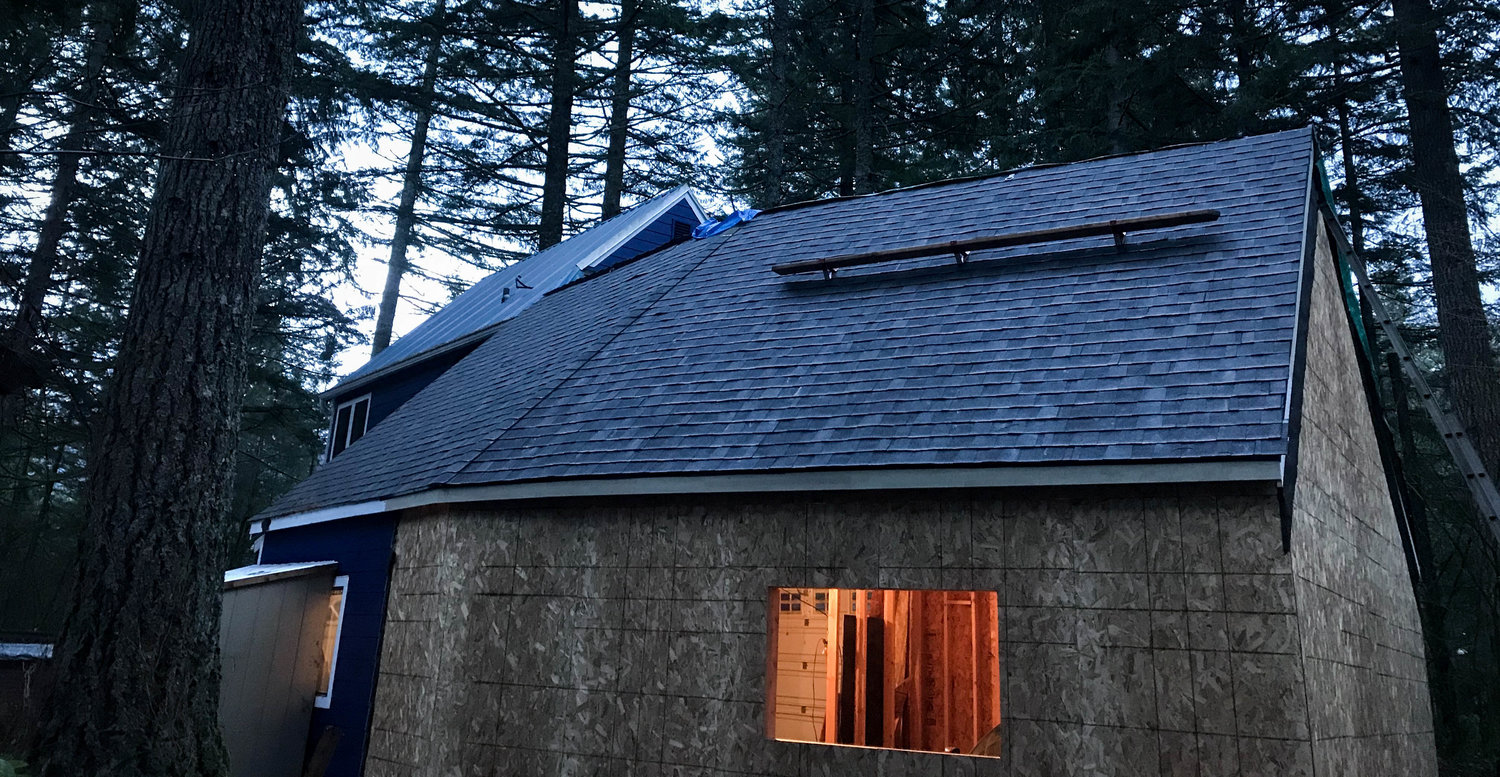
A roof!  Holy crap!  We’re like 90% dried in! 

My next big inspection is framing.  Naming it “framing inspection” is a little misleading.  The structure should be dried in, roof on, rough in electrical, windows and doors on, etc.  Next we needed to install the back window!

IMG_3894.jpg

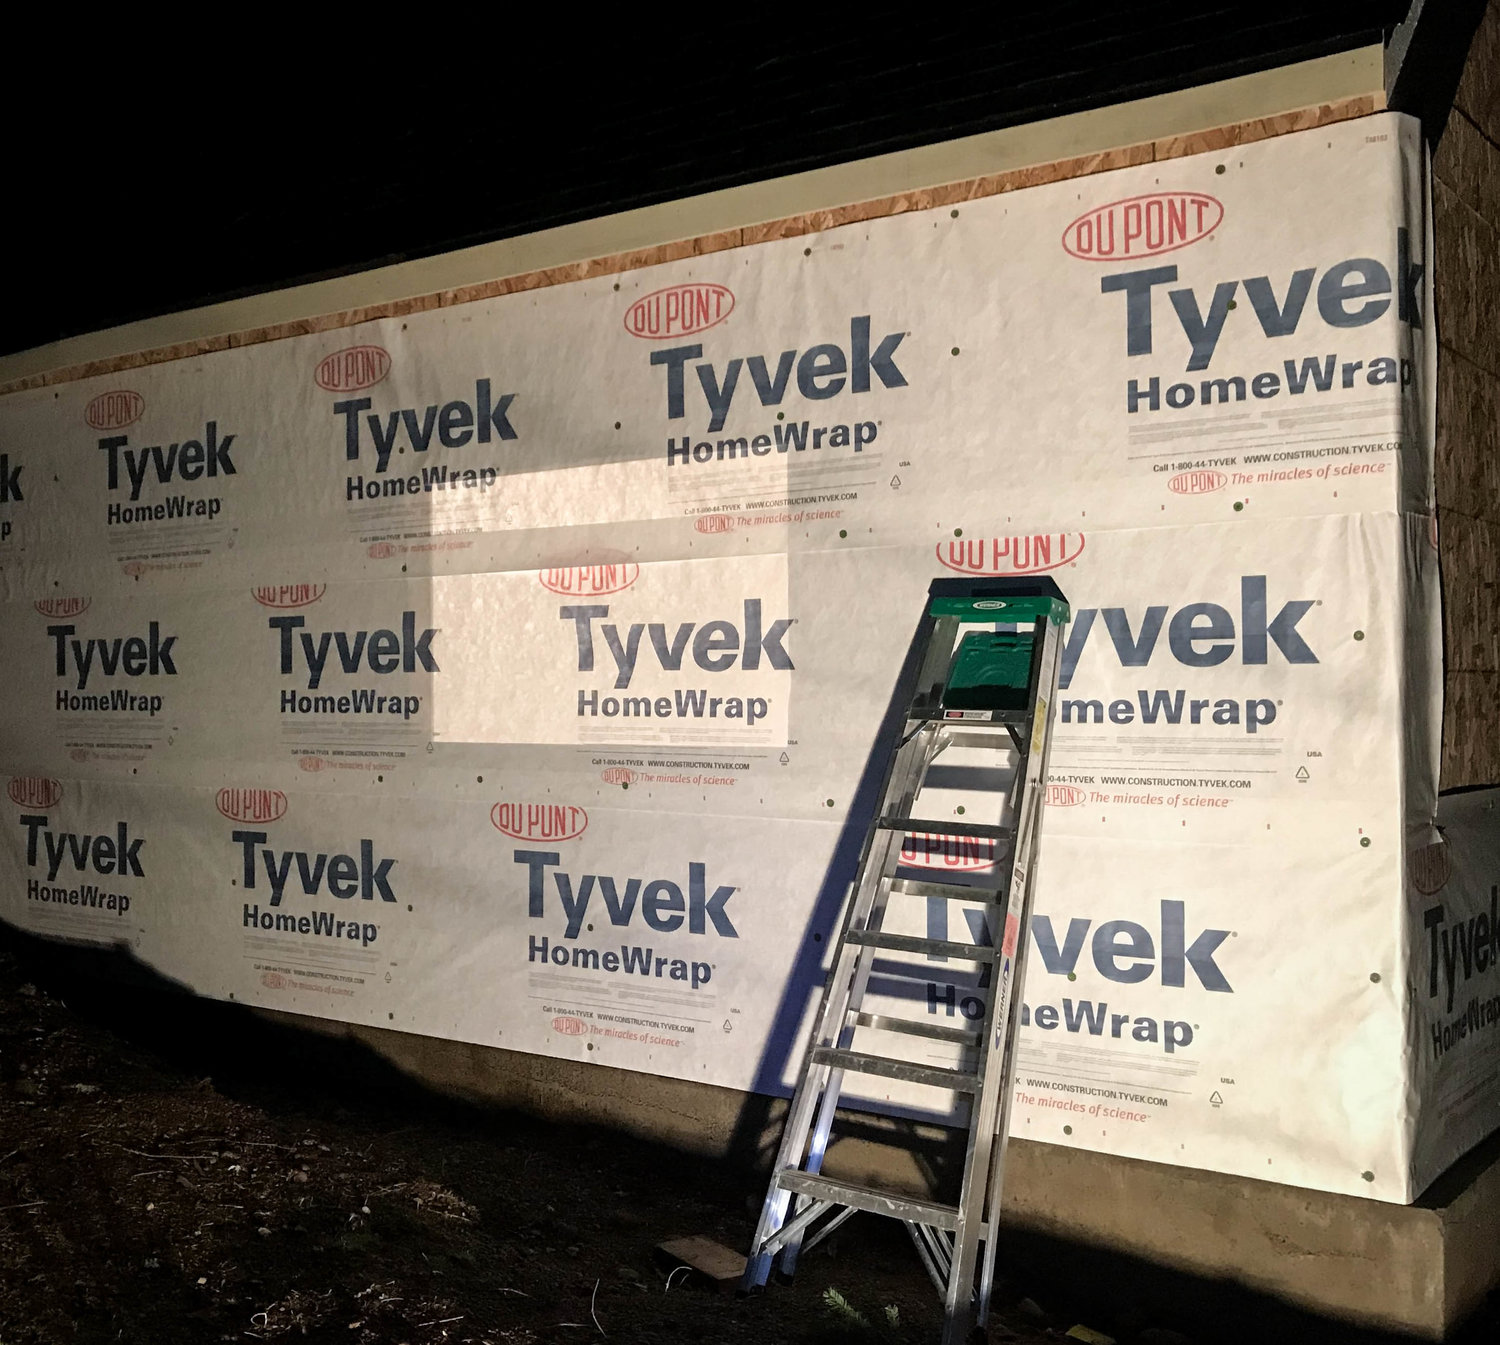
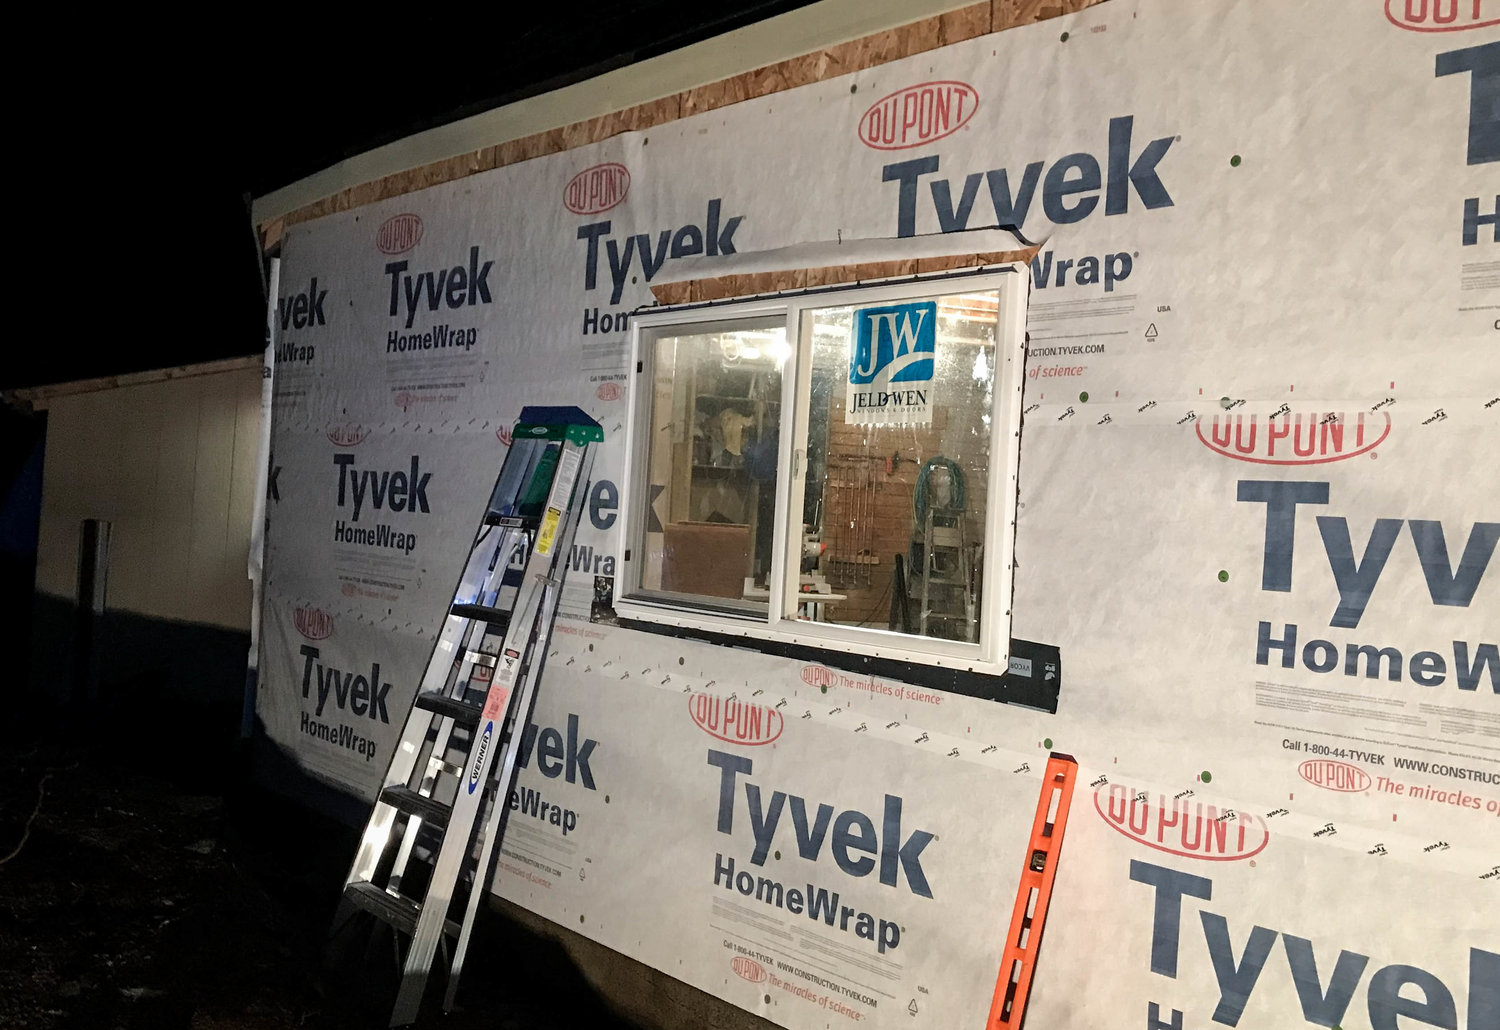
First, the housewrap.  Then cut your window hole, apply a fancy (and expensive) waterproof tape, and hope your window fits the rough opening still!

IMG_3895.jpg


Wow, that was pretty easy!  Once in, a lot of caulking helped seal everything up.

We are making big strides now.  The garage door is on order and arrives soon, but since it is no longer raining inside the garage, we can start rough in electrical.

With the interior work starting, the fun part begins, setting up my shop!

Slippery
Slippery GRM+ Memberand SuperDork
4/11/19 7:00 p.m.

Amazing work!

mazdeuce - Seth
mazdeuce - Seth Mod Squad
4/11/19 7:56 p.m.

Building a building when building isn't your job is very satisfying. Good work.

apex_attack
apex_attack New Reader
5/29/19 10:49 p.m.

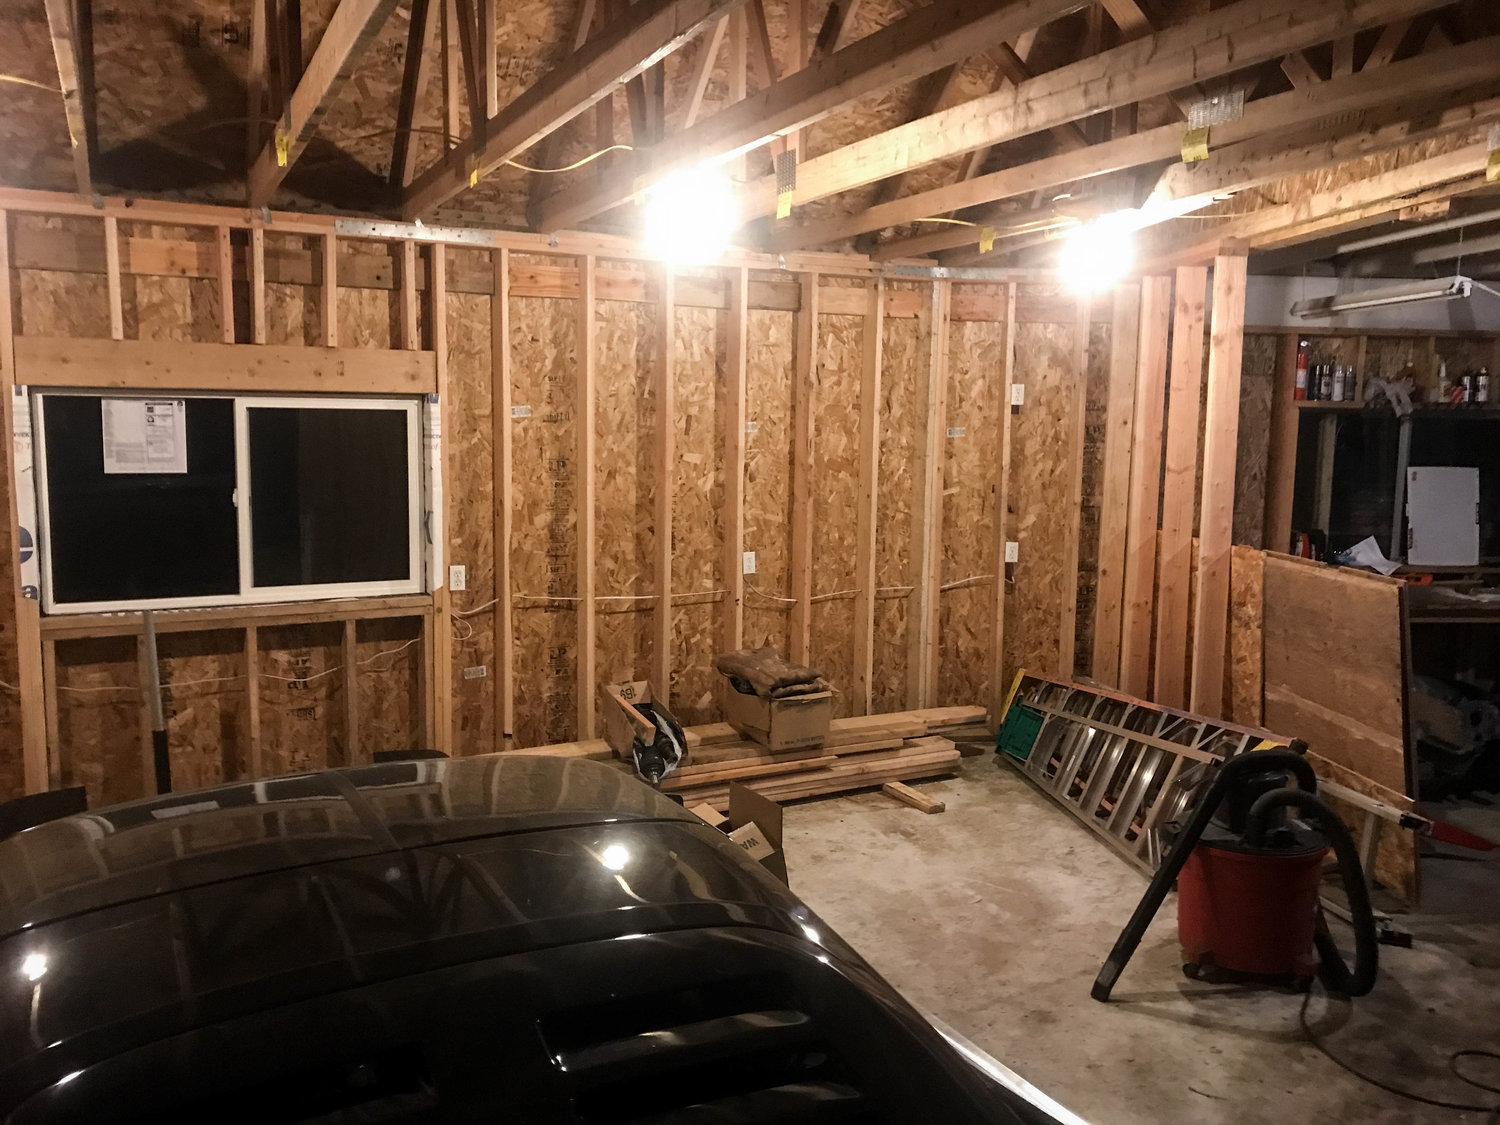
With the garage mainly dried in, we needed to start electrical rough in. I had a very basic idea of what I wanted. Extend the main 20 amp outlet circuit, and extend the existing lighting circuit. Simple. Even for a guy with no residential electrical know-how.

A quick google search and youtube showed me the ropes. Kill power at the breaker (test the outlet!) and start adding onto the existing outlet circuit.

56886993369__39B22D5B-A598-4F06-8F15-755998141A59.jpg

Over about 3 nights, I was able to run all the outlets I wanted and add the basic lighting fixtures. Eventually we’ll be adding a 220 circuit for welders, compressors, light sabers, etc. But for now, let’s keep things simple. Unbelievably, I hadn’t shocked myself once!

Once the electrical was “complete”, I had it inspected… and passed! The inspector was more into my car than the wiring, he’s a big drag racer.

With the electrical bought off, I still needed to pass my county building framing inspection. I took a lot of time wrapping up loose ends. He was VERY close to signing it off… but then noticed my shear wall seams needed to be backed by 2x6s. I had a few other punch list items, but nothing too complicated. Over a few weeknights the garage was once again inspection ready. This time, I passed!

With the framing inspection complete, I could really focus on building out the interior. The exterior siding could wait til spring.

This leads us to one of the big additions to the garage, an attic!

56886953744__473202AA-EA8E-4689-9D80-72FD0897BB06.jpg

The truss package I originally ordered were attic style. For a mere $400 more, the trusses are built with a large opening in the middle that you can finish into an attic. A traditional truss wastes this space with bracing running through it. Remember my roof is a crazy steep slope? (12:12) Well, that means I can build an attic room 14‘ by 10’, with 7’ ceilings. Pretty good value for the extra price in the truss package!

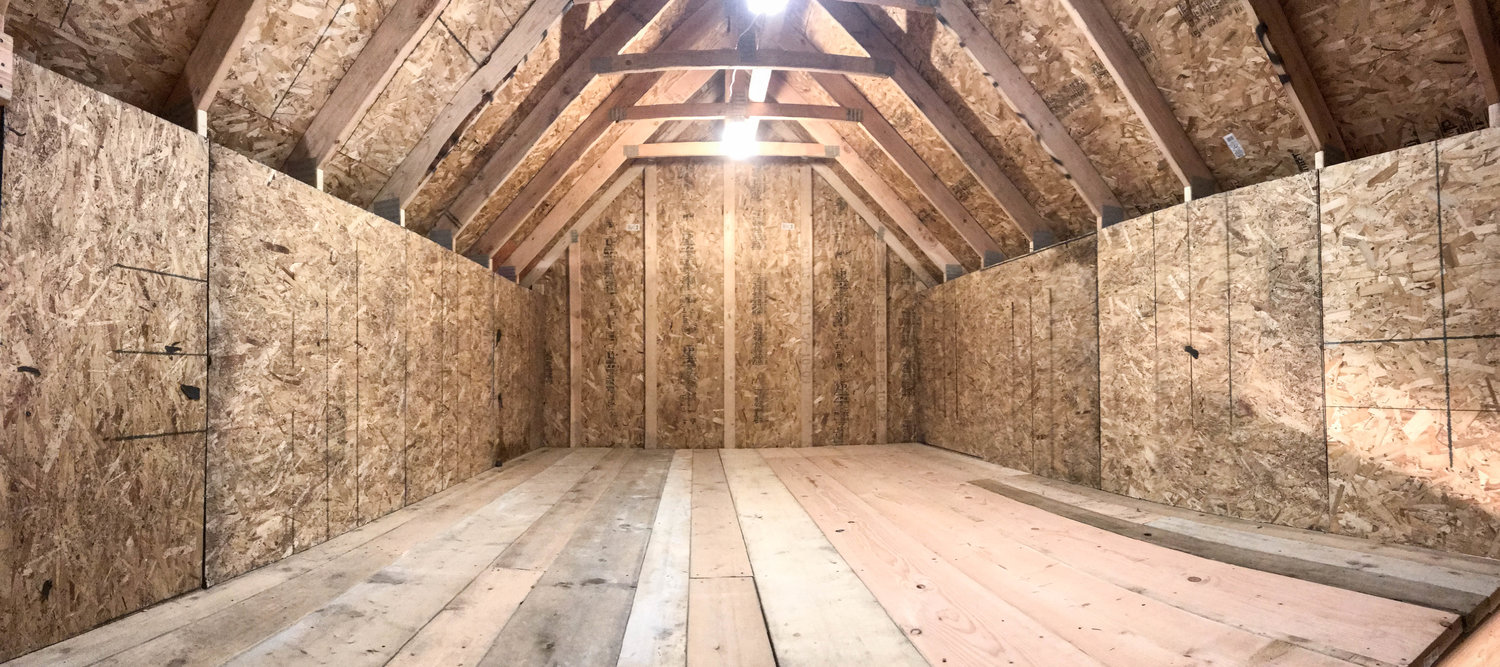
I had a bunch of leftover 2x6s, 2x10s, 2x8s leftover from the framing, so why not use those as the floor. They’ll be MUCH more stout than some 3/4” plywood floor.

56887000851__714C0F40-A1FC-4E95-9FA5-D77D79F4390B.jpg

IMG_4174.jpg

In the end I only had to buy 3 2x12”s to finish the floor. The framing gun was very handy here. 3” nails driven with 100psi of air secured everything, all of a sudden the entire garage felt much stiffer.

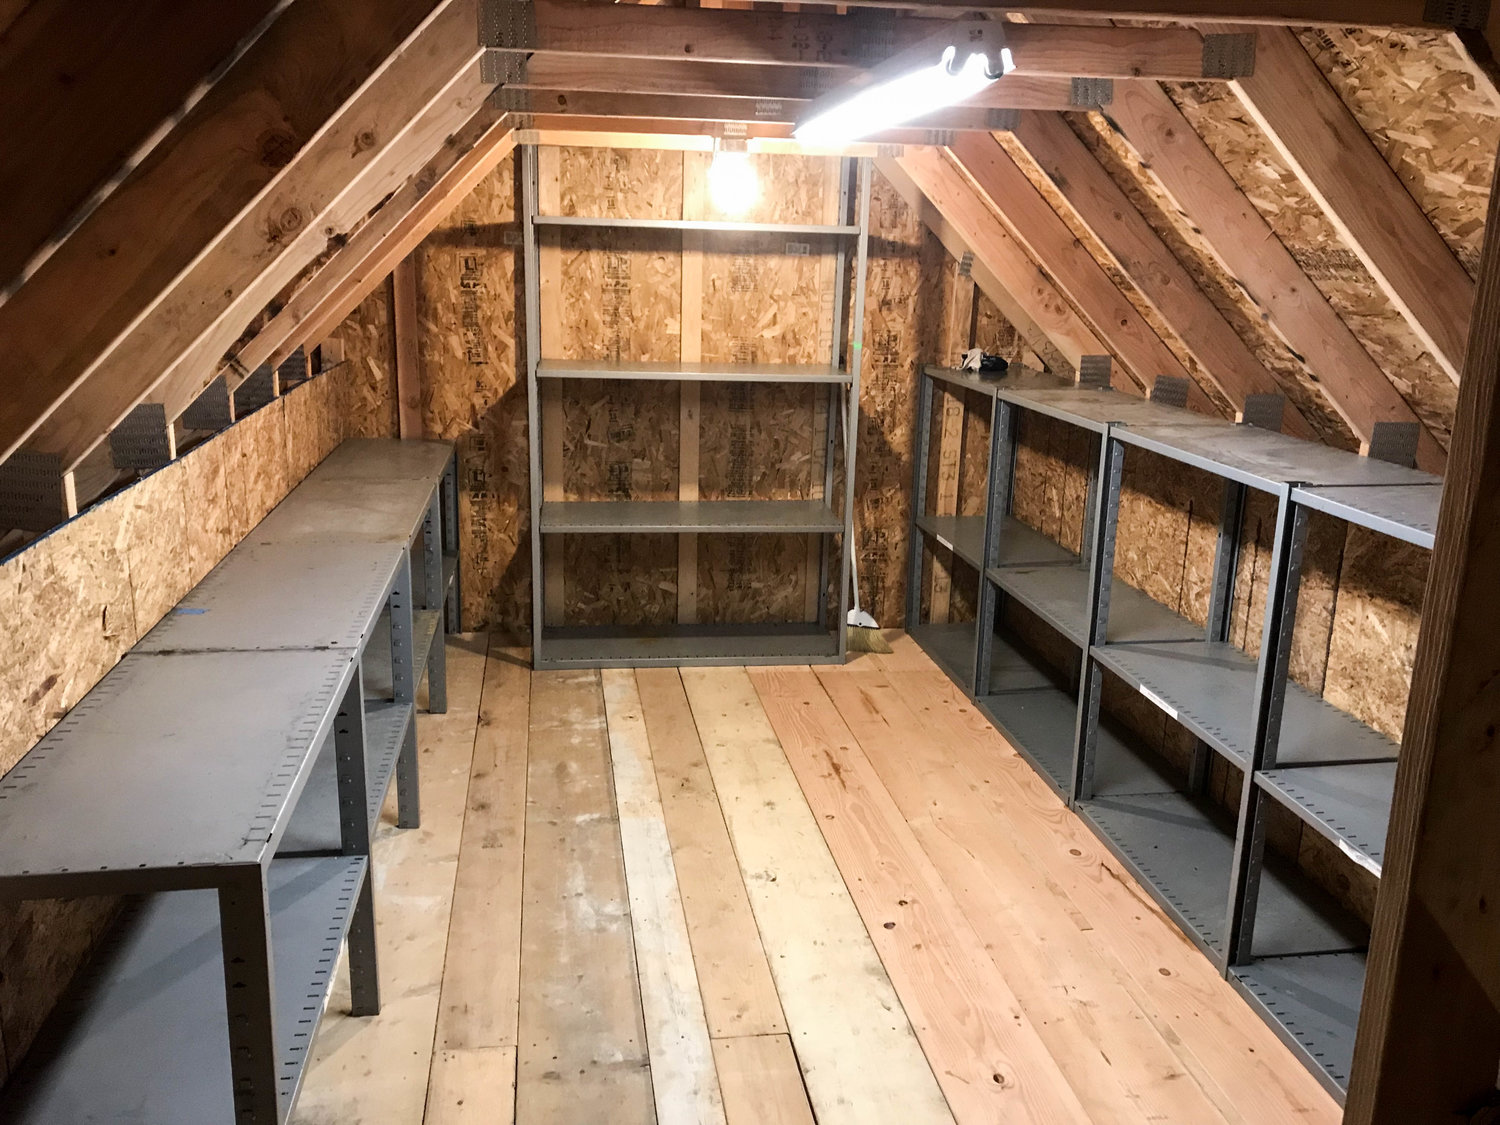
I also added one of my florescent lights, and the walls were built with the sheathing of my old exterior wall we tore down months before. All in all, a cheap attic, that can hold 4400 pounds! That’s right, I could add a whole ‘nother MR2 and a half up here.

Sometimes, you get lucky. Sometimes, you’re a hoarder. My apprenticeship school was remodeling some classrooms, and we were helping with the demo. My instructor wanted to throw out a bunch of industrial shelving. So, we threw them directly into my truck.

IMG_4189.jpg

SO MUCH ROOM FOR ACTIVITIES. We immediately filled this up with all sorts of crap. Car parts, skis, camping gear, tools, christmas decorations, the kitchen sink, you name it.

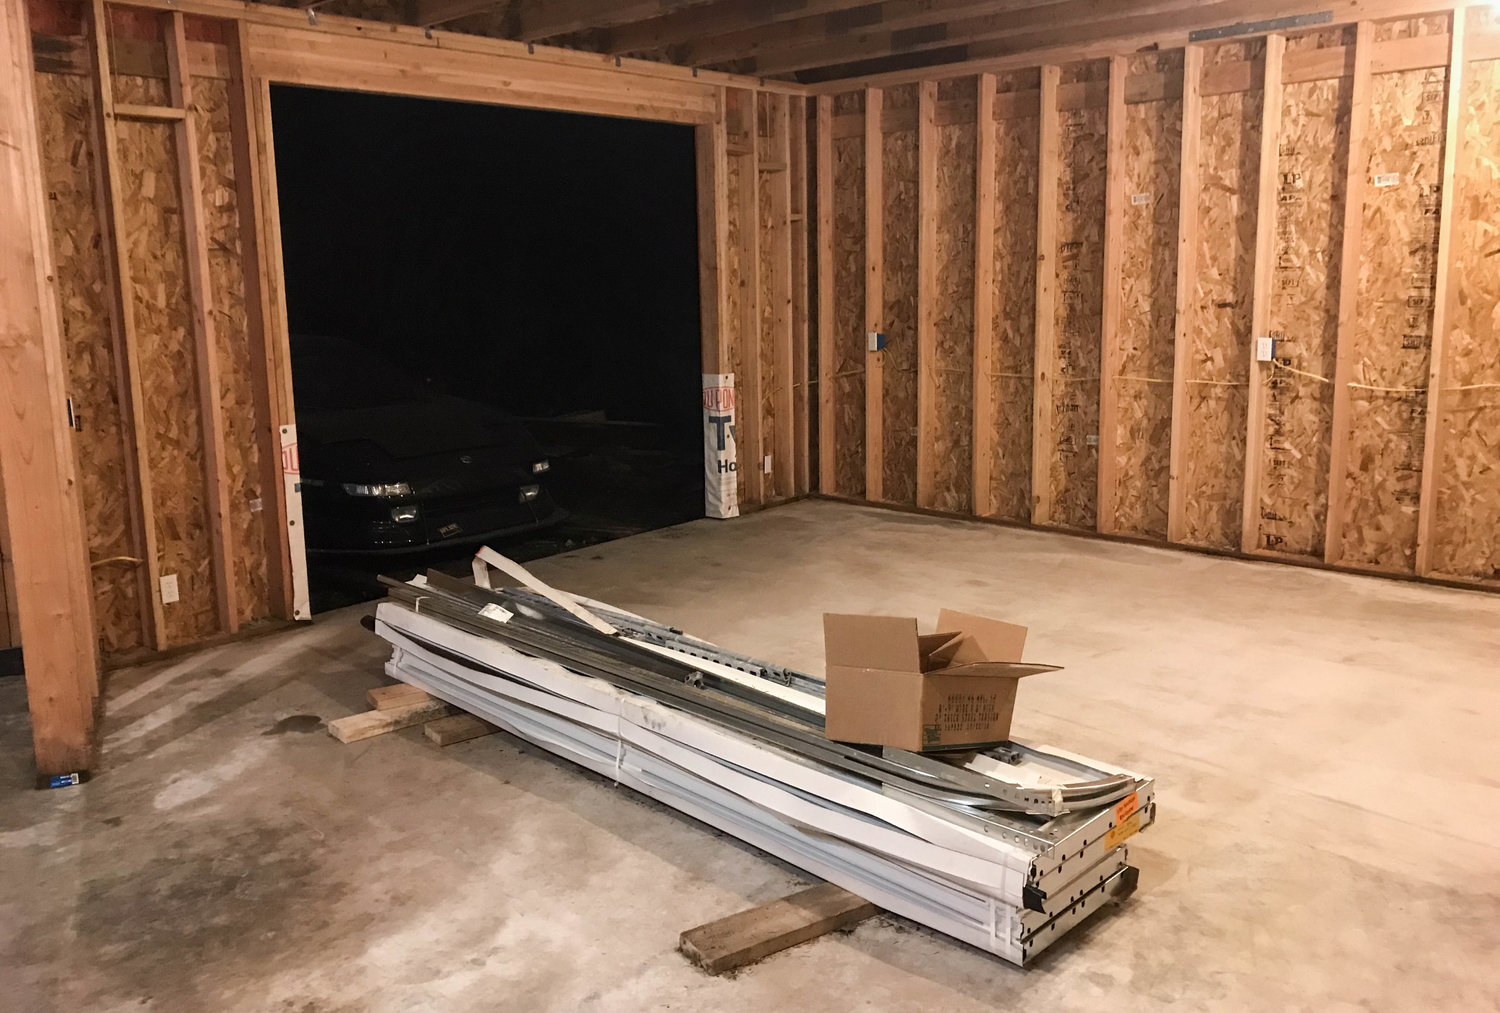
While wrapping up the attic, I got notification my garage door was ready for pickup. One oversight I made with this garage build was the door. When originally figuring out pricing, I assumed it was your everyday 9’x7’ door. I wanted to match the existing door in the old garage bay. Turns out, it was a custom 9’x8’ door. Yeah, we went from a $300 door to a $800 door, and 3 weeks to build it. Bummer.

So here it is. When picking it up, the warehouse guy asked who was putting it together. He made a funny face when I said I was.

IMG_4257.jpg

…he might have been right.

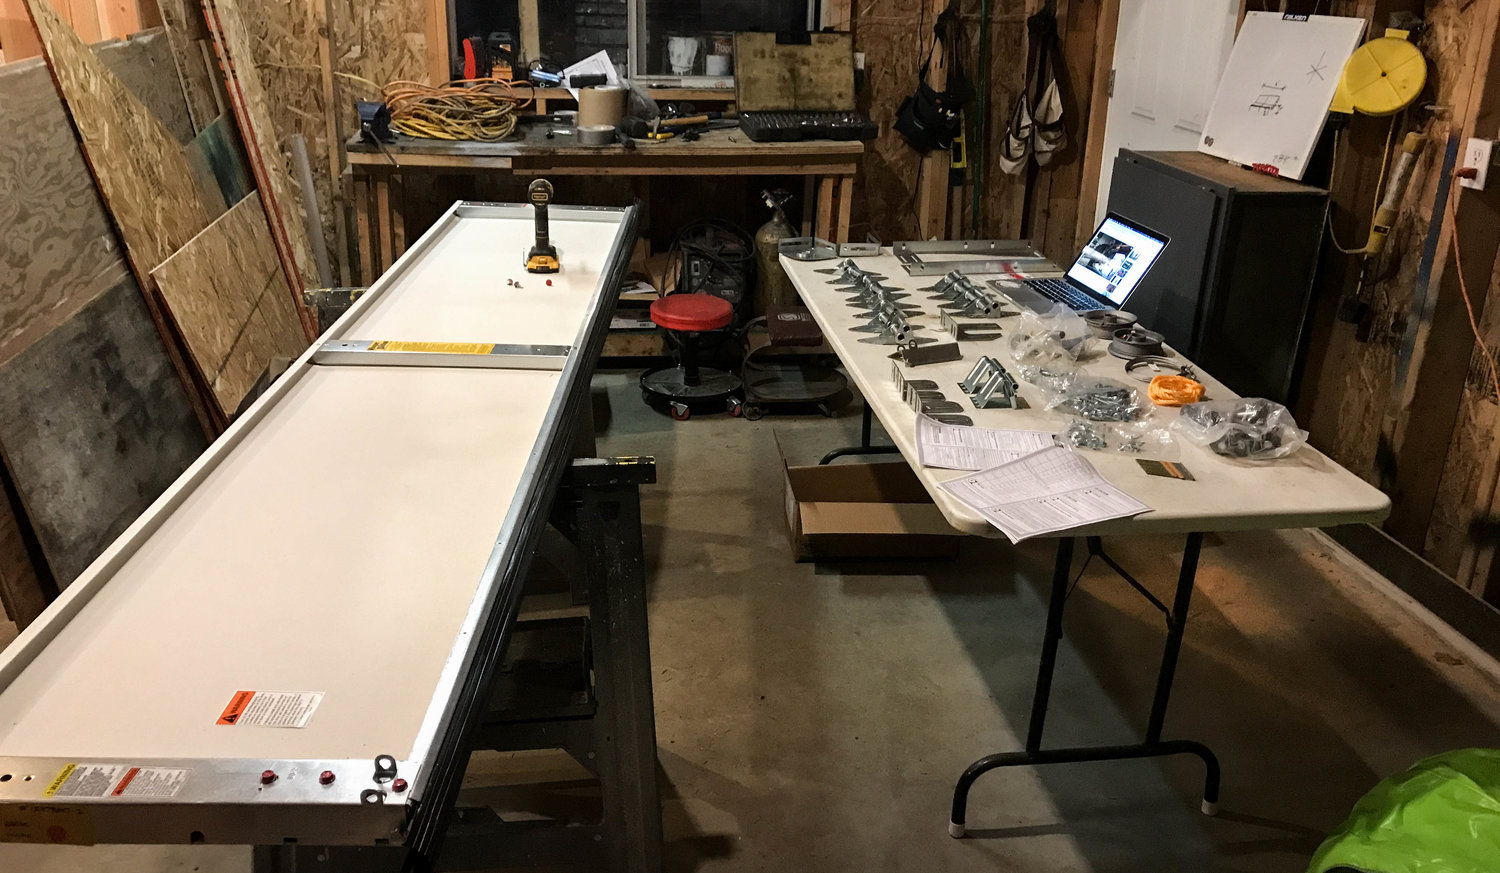
57041811006__76DFB08B-1534-4243-B083-D7657F4DBDCA.jpg

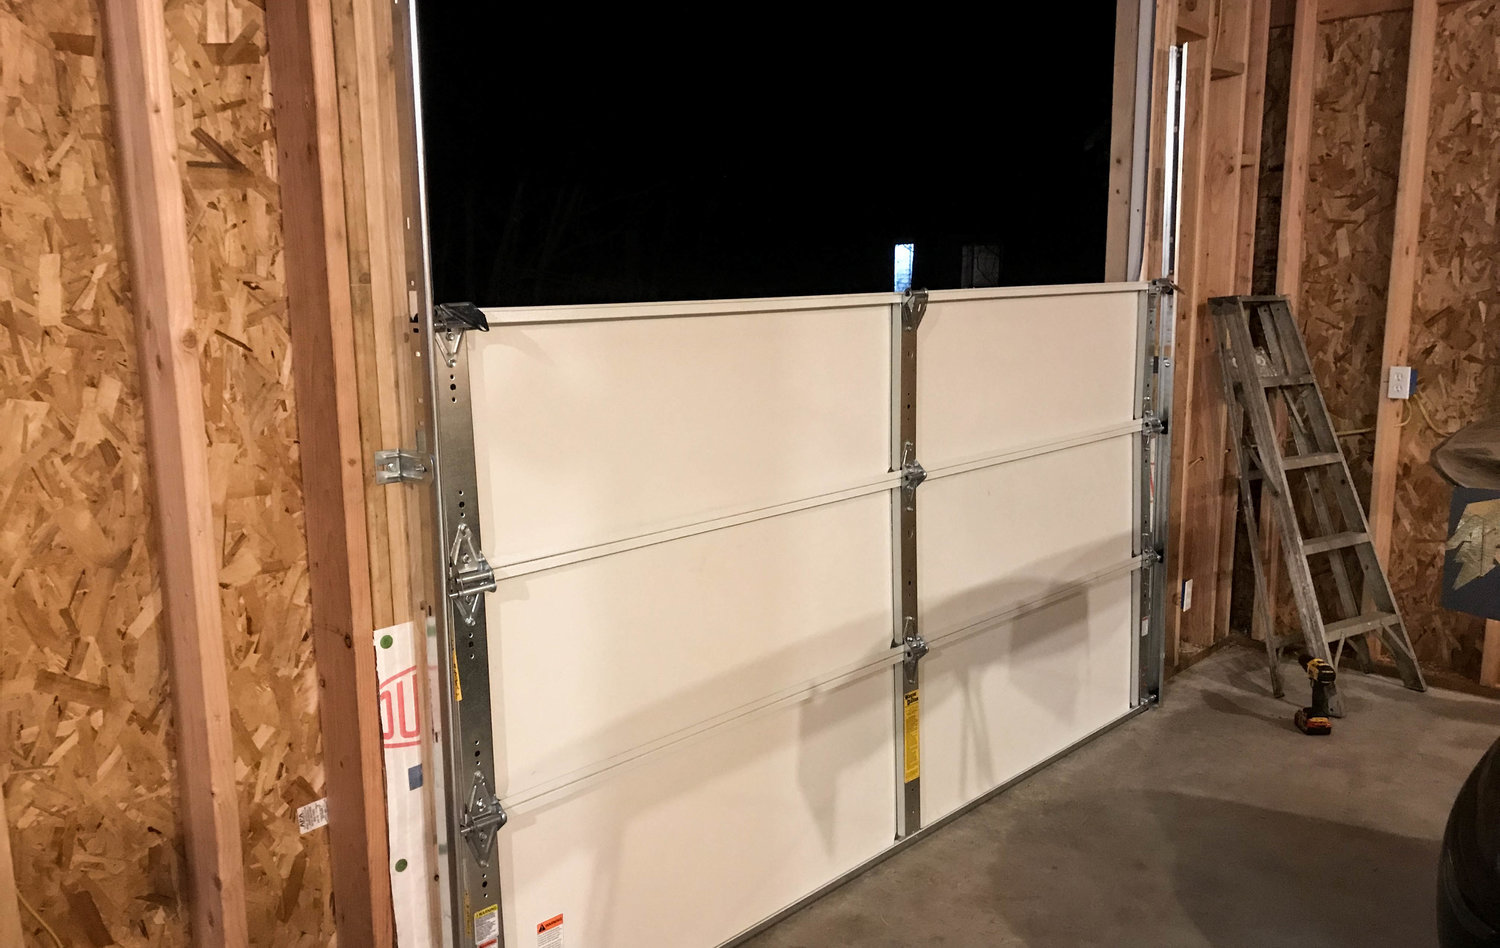
Lots of parts and pieces. So, I turned to the sacred texts of our society, Youtube. Over two nights the door slowly turned to reality.

IMG_4272.jpg

IMG_4275.jpg

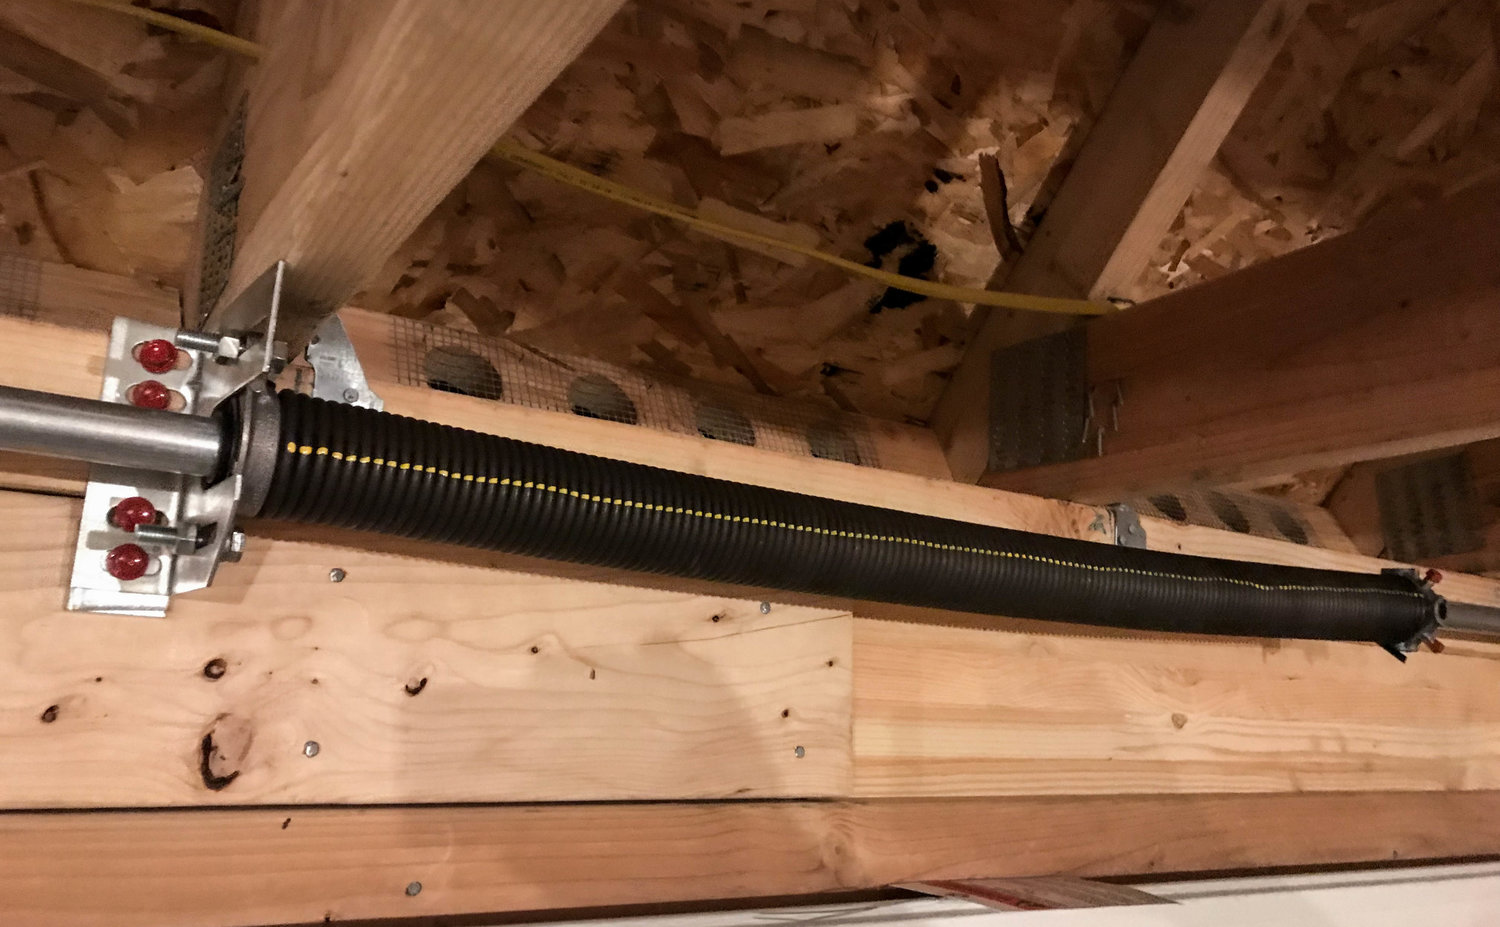
Installing the spring. Easily the most dangerous part of the ordeal. You have to spin it once for every foot of door height, 8 times around. They suggest using 1/2” round stock as your handles, and I highly encourage you to follow their directions! If you lost control of the spring at 8 revolutions, it could be very dangerous.

IMG_4283.jpg

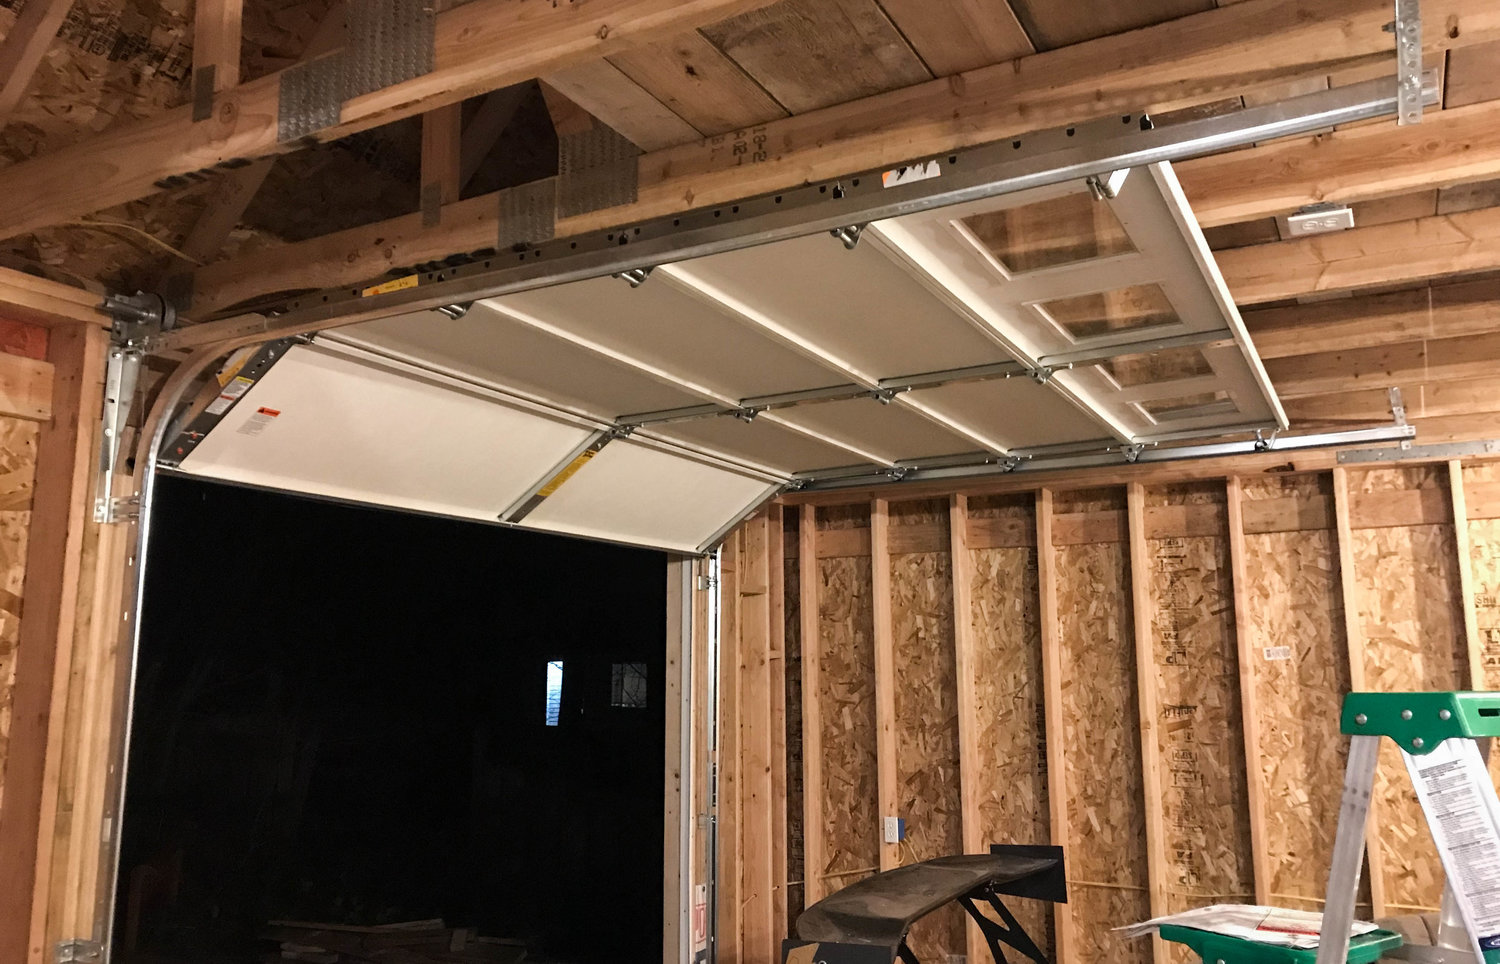
With the spring ready, let’s see if this thing opens, or falls onto my car.

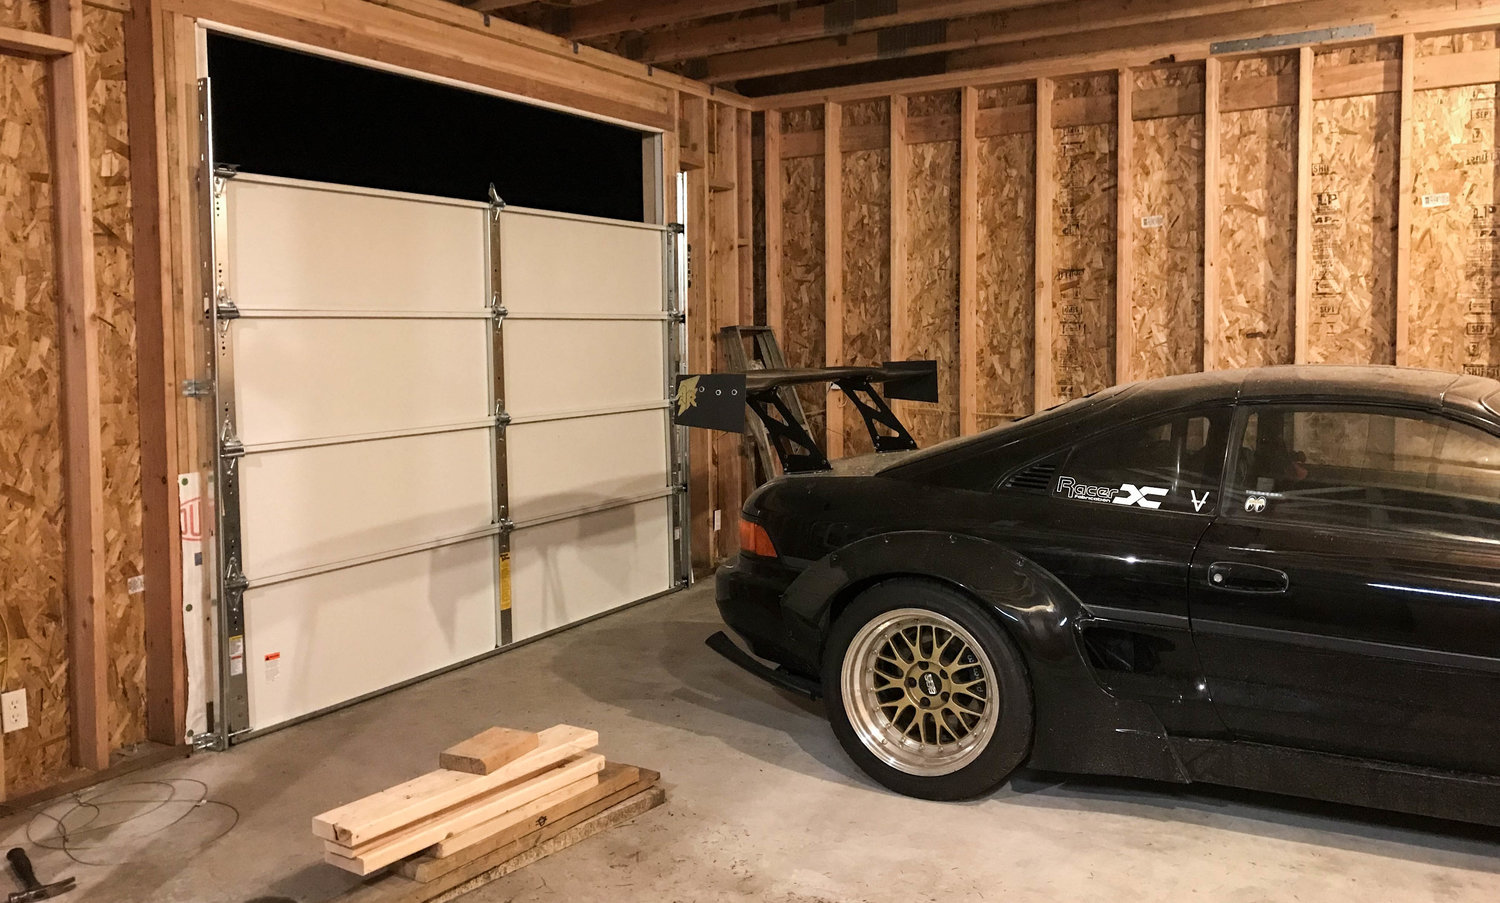
IMG_4288.jpg

Success! It actually opens astonishingly easy. My old door will need a tune up to hold a candle to this one. Butter smooth and very little effort. The garage door opening will come later this spring.

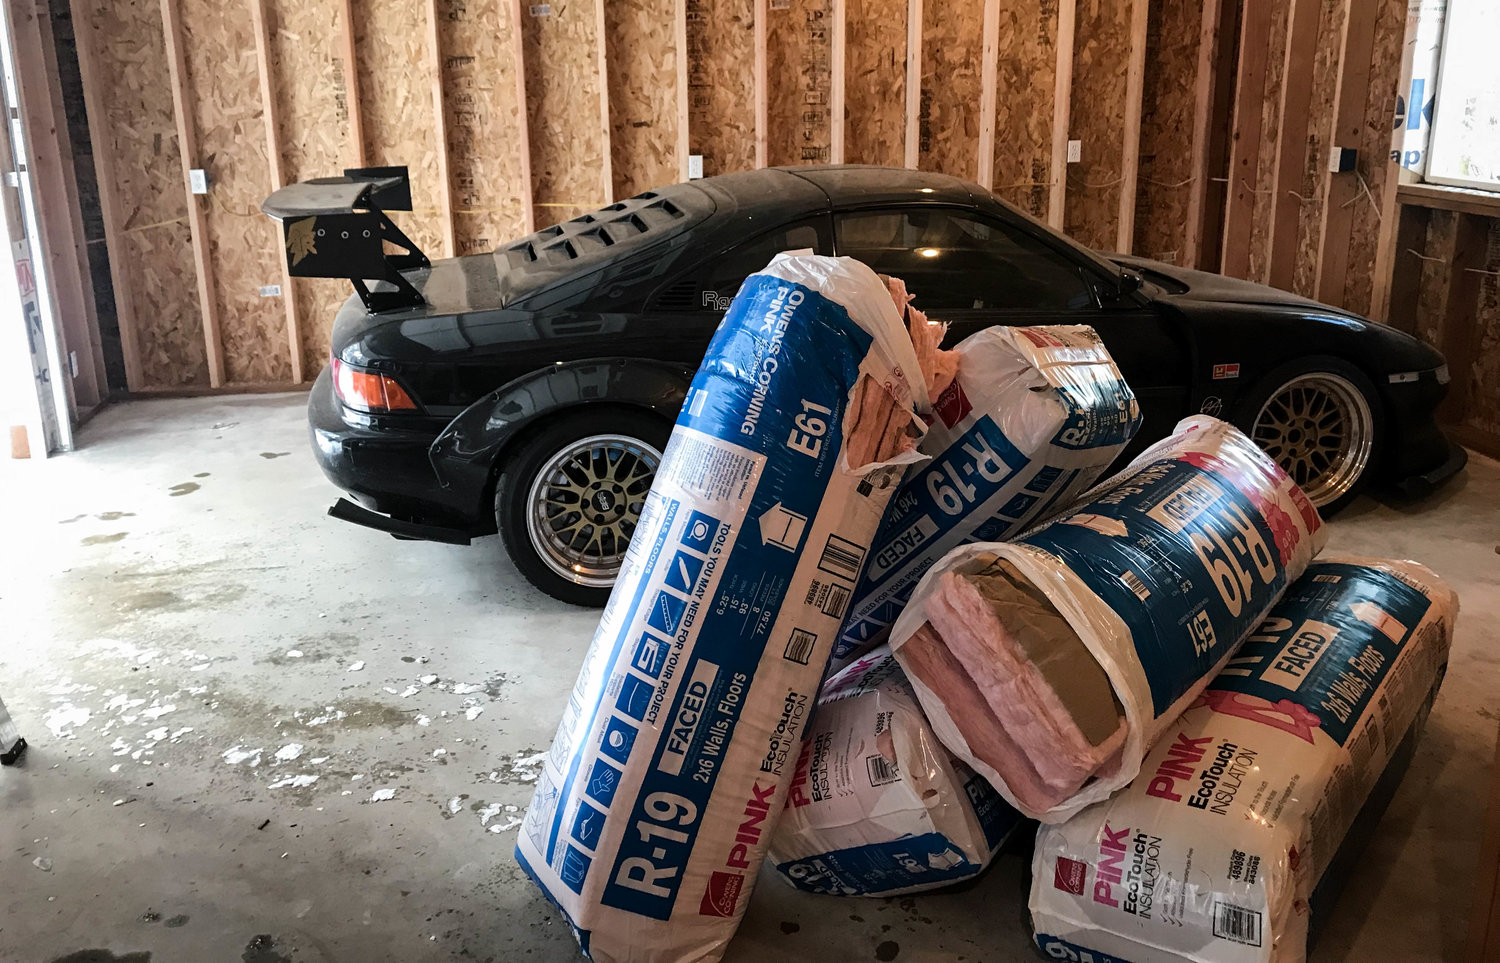
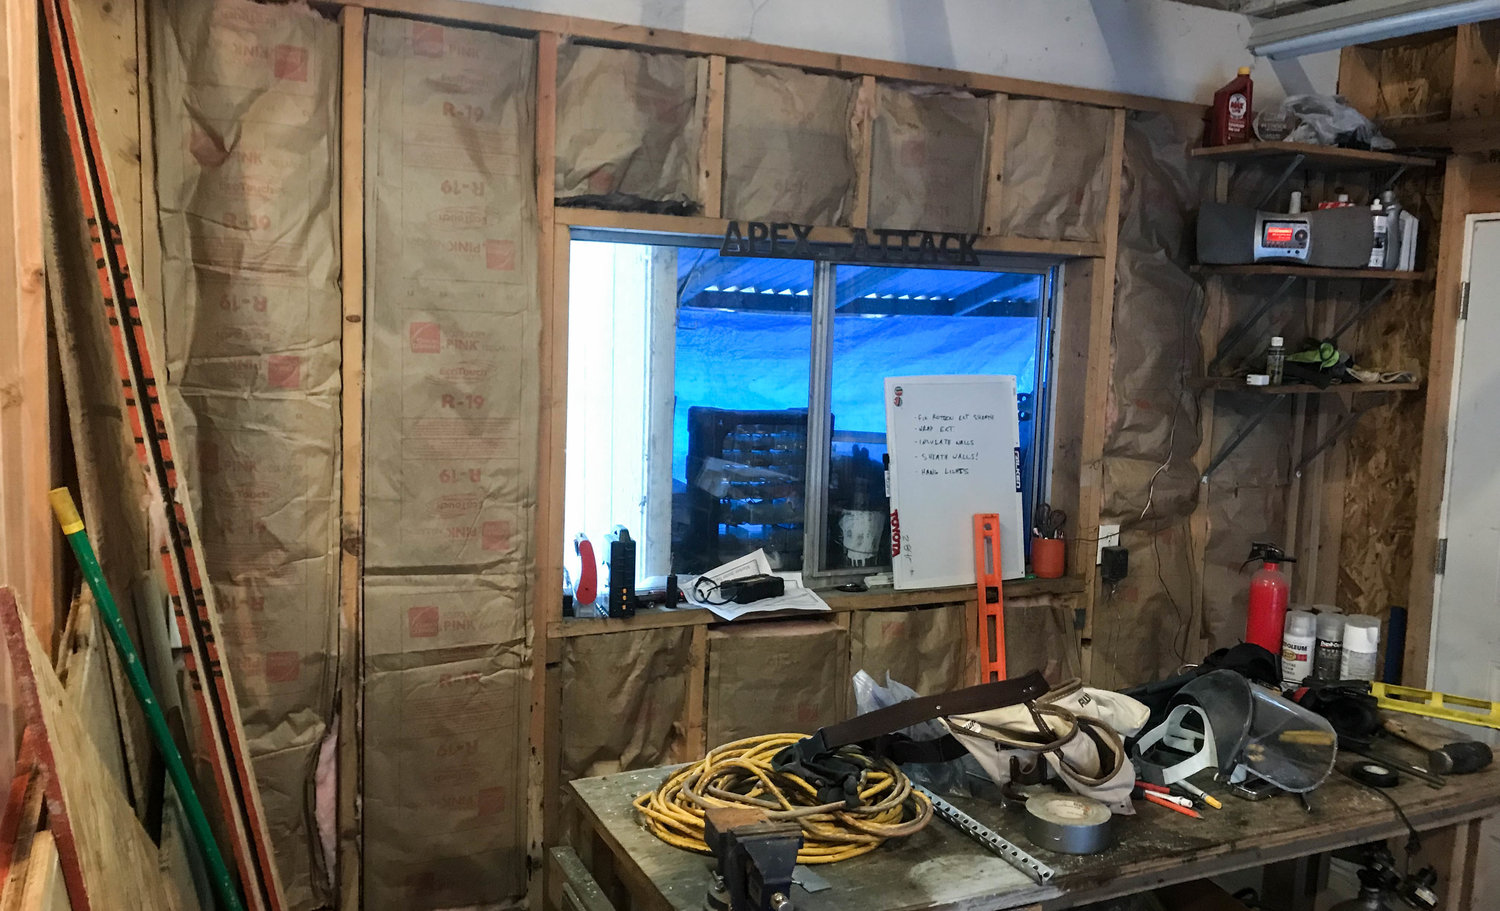
With the door hung, we were ready to really start on the interior. Eventually I plan to add some sort of heat in here for those cold winter nights. Turns out, insulation is expensive.

IMG_4334.jpg

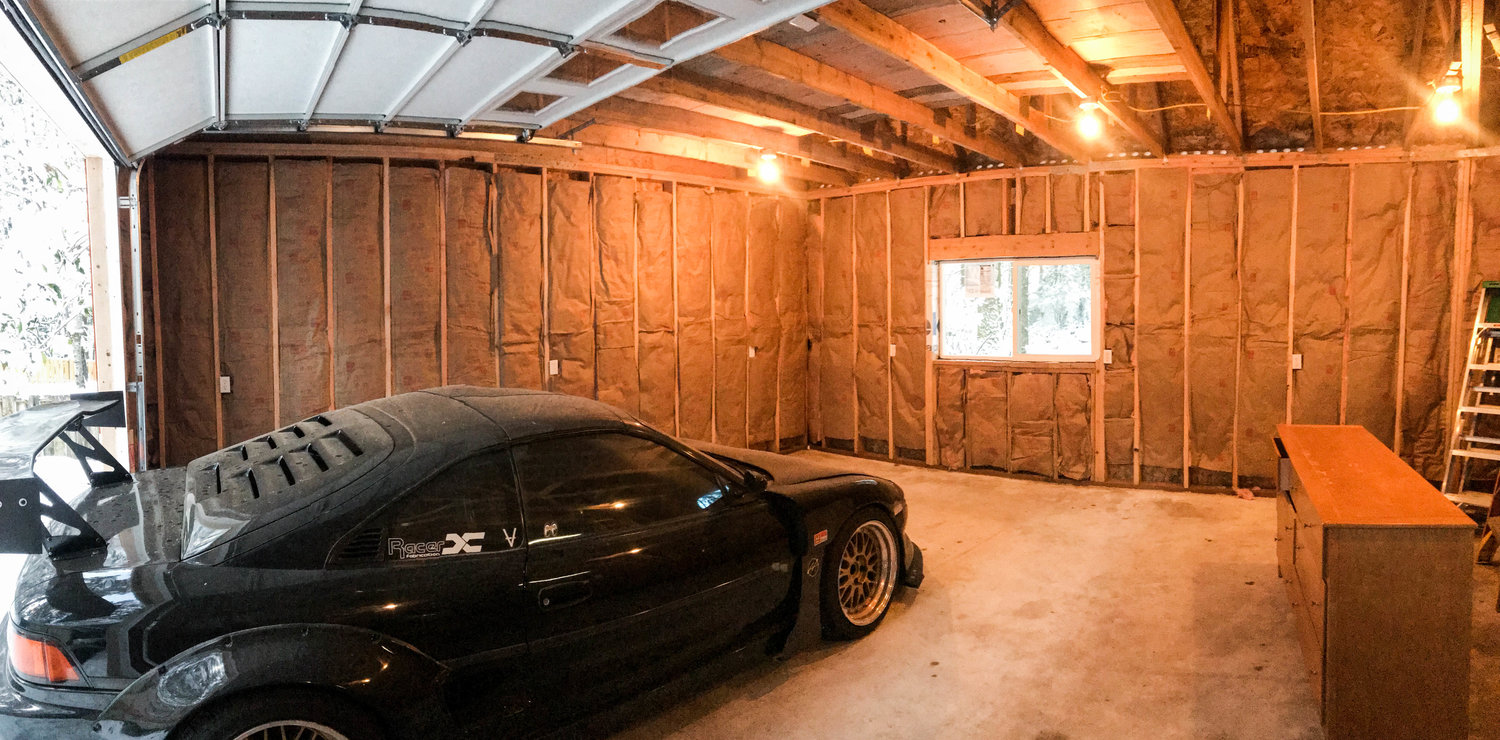
$300 of insulation. Only took 2 hours to install. By install, I mean cram it into the space between the studs.

IMG_4336 2.jpg

IMG_4335.jpg

Nevermind all the garbage. Building a shop requires lots of garbage.

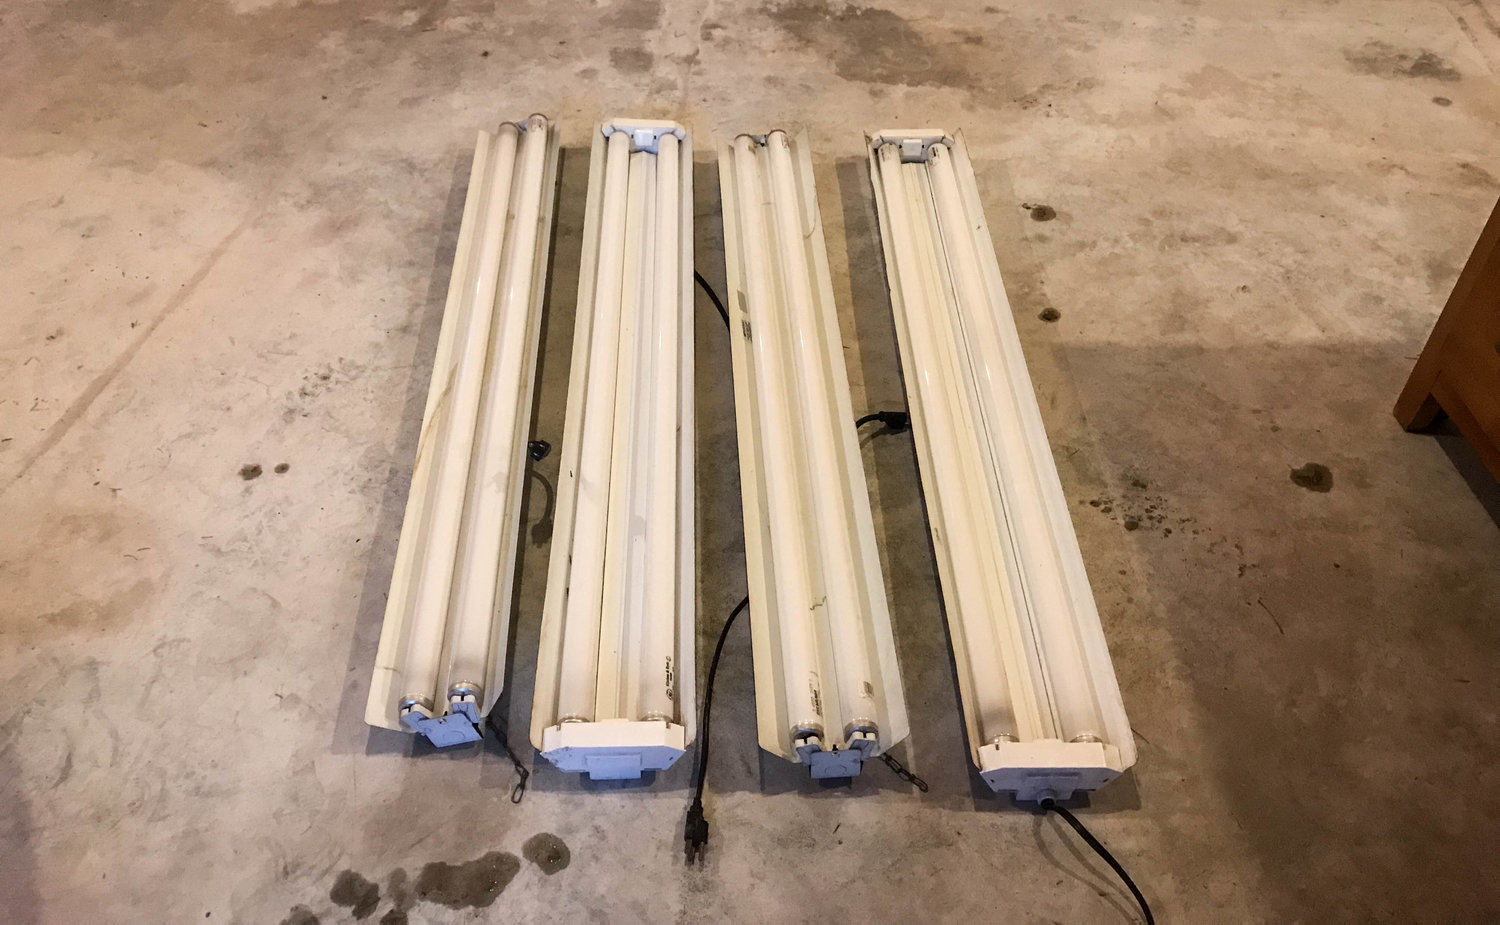
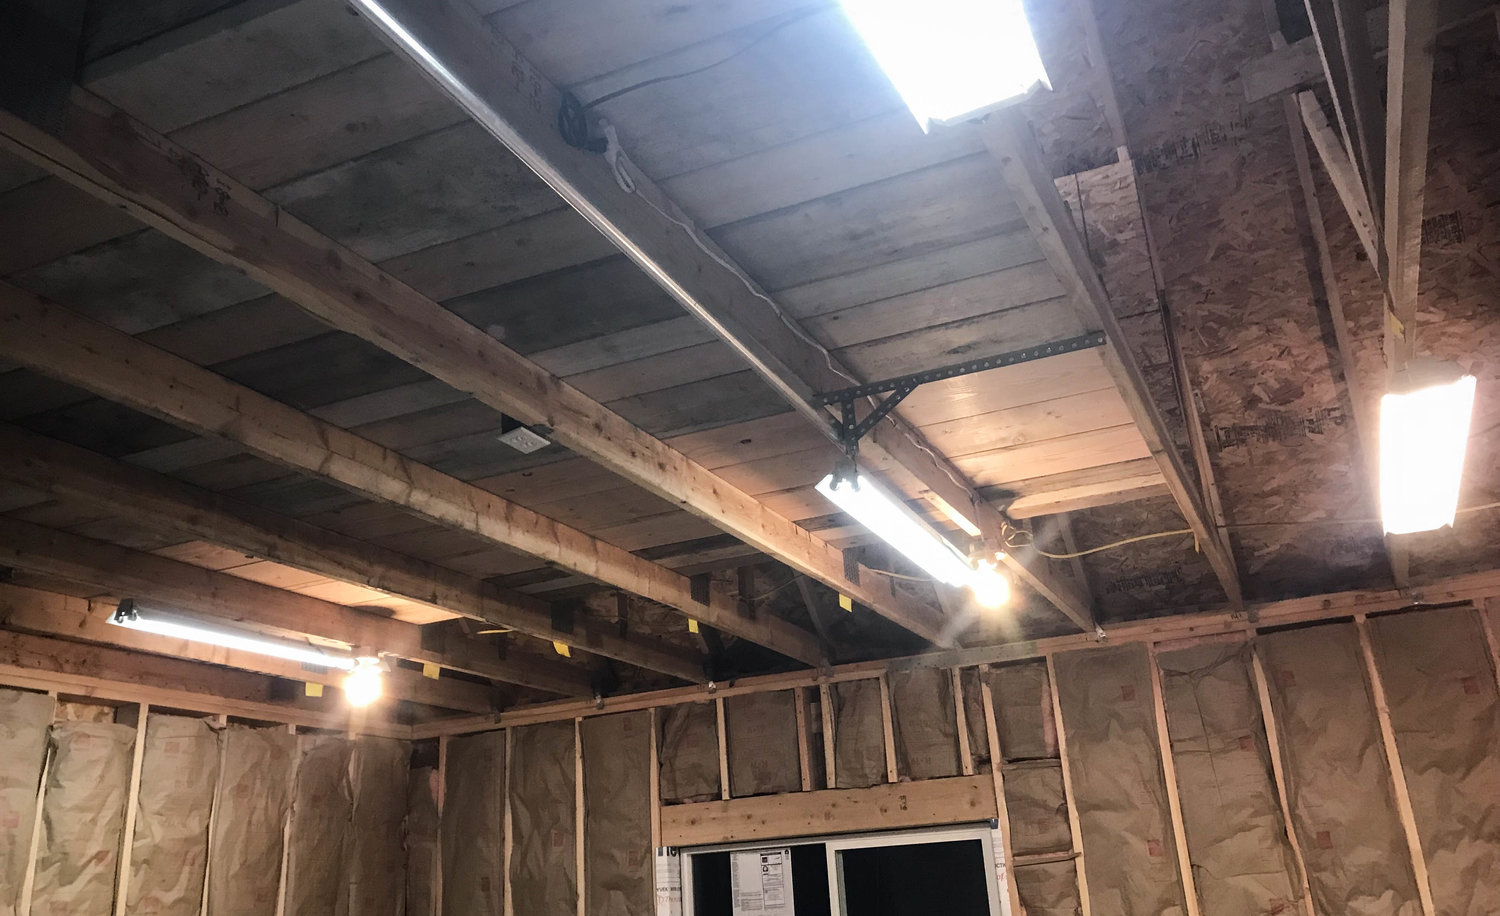
With the insulation in, it was time for more lighting. months ago, a friend gave me 4 florescent lights. They were beat up, dirty, and very free. I cleaned them up and installed some new bulbs. They all run off a typical 110 plug, which plugs right into my basic light fixtures I installed with the electrical work.

IMG_4337.jpg

IMG_4338.jpg

All in all, I have 6 lights hanging so far, and will add more as the need arises.

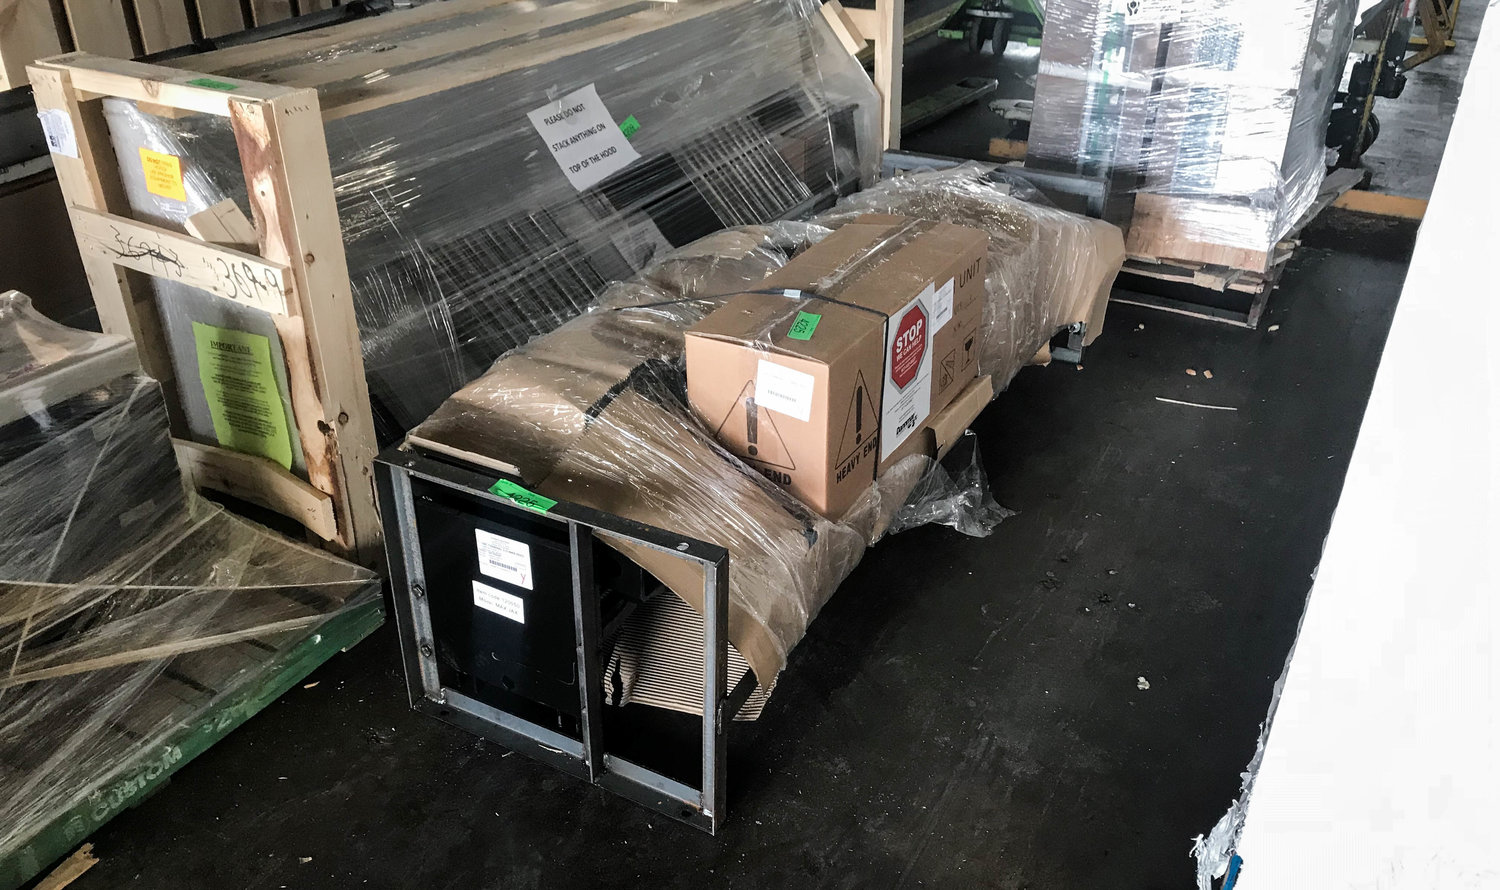
When that finished, I received another call that another very special piece of the shop had arrived. I had to pick it up from the local shipping depot.

IMG_4355.jpg

This was a VERY exciting thing for me, something I’ve dreamed of for years, and never thought I’d actually own.

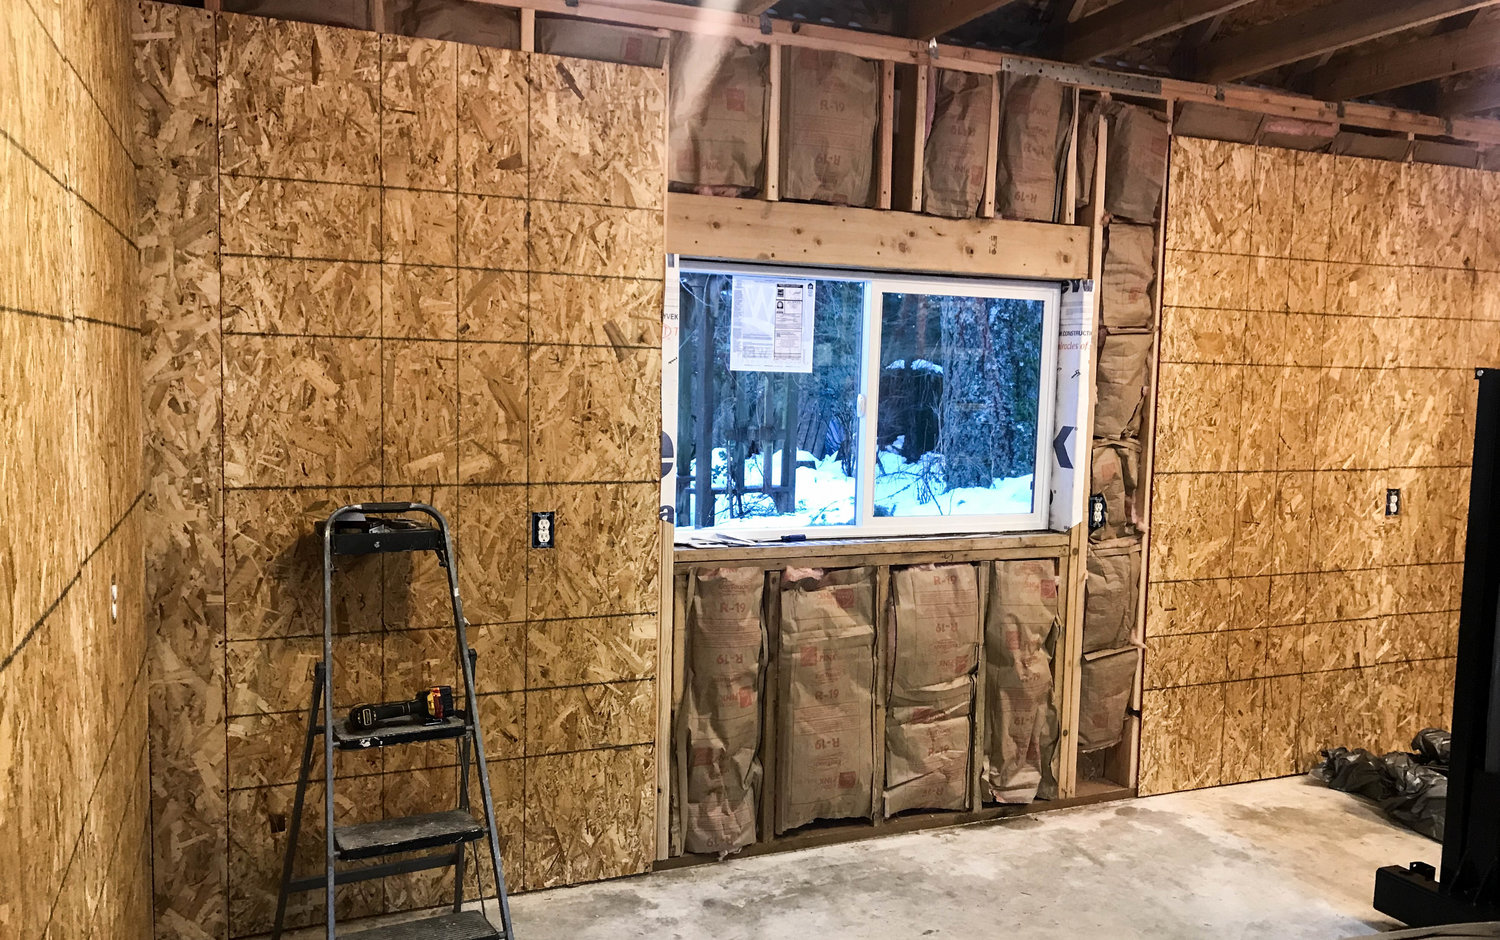
With that special package back home, I also bought 20 sheets of 7/16” OSB. I had a few options for the interior walls, drywall, or sheathing. I chose sheathing. In the PNW, it’s only $9 a sheet, its sturdy (you can mount almost anything directly to the sheathing and not worry about hitting a stud), and for a garage, it’ll look just fine. This is a working garage, so fancy finished drywall isn’t needed.

I chose to install the OSB sheathing with drywall screws. This way, if I ever want to add more electrical/gas/air lines, I can pull the sheathing down easily compared to busting holes in drywall.

IMG_4716.jpg

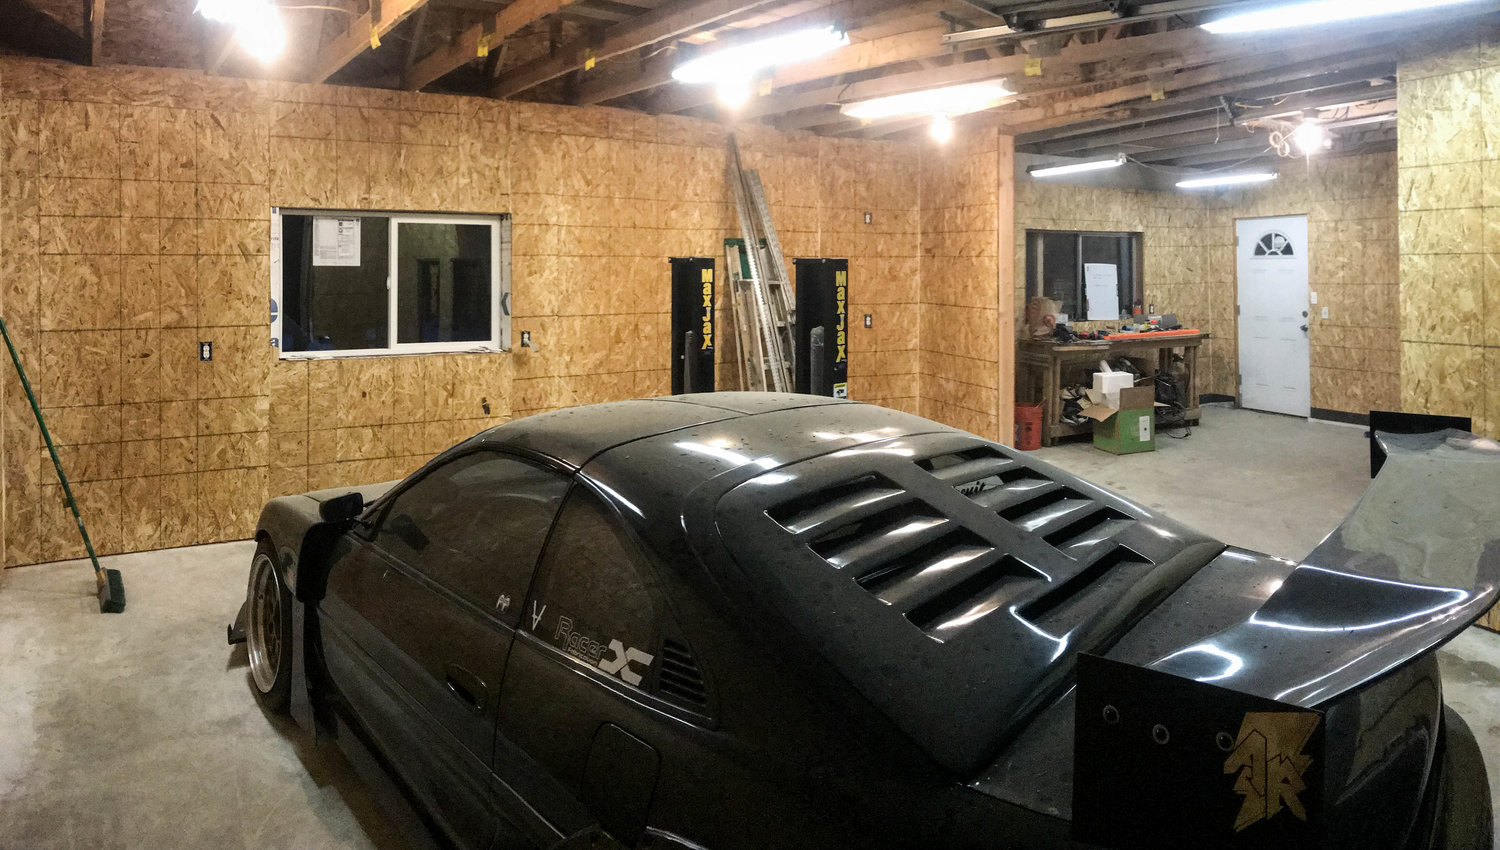
Over the next week I hit the sheathing hard. Lots of cutting, I had a 5 gallon bucket full of sawdust when I swept up at the end.

IMG_4815.jpg

IMG_4817.jpg

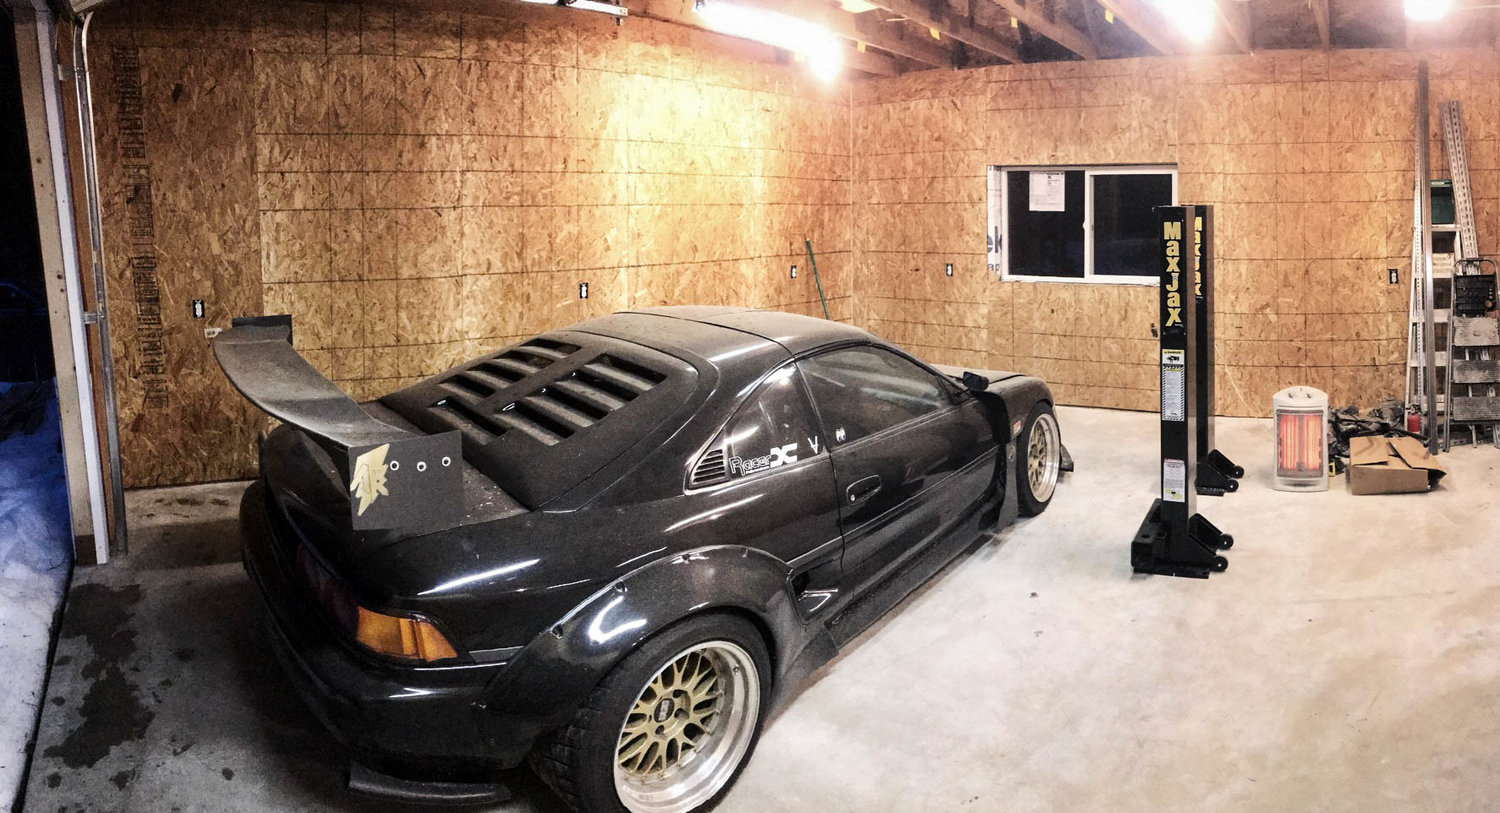
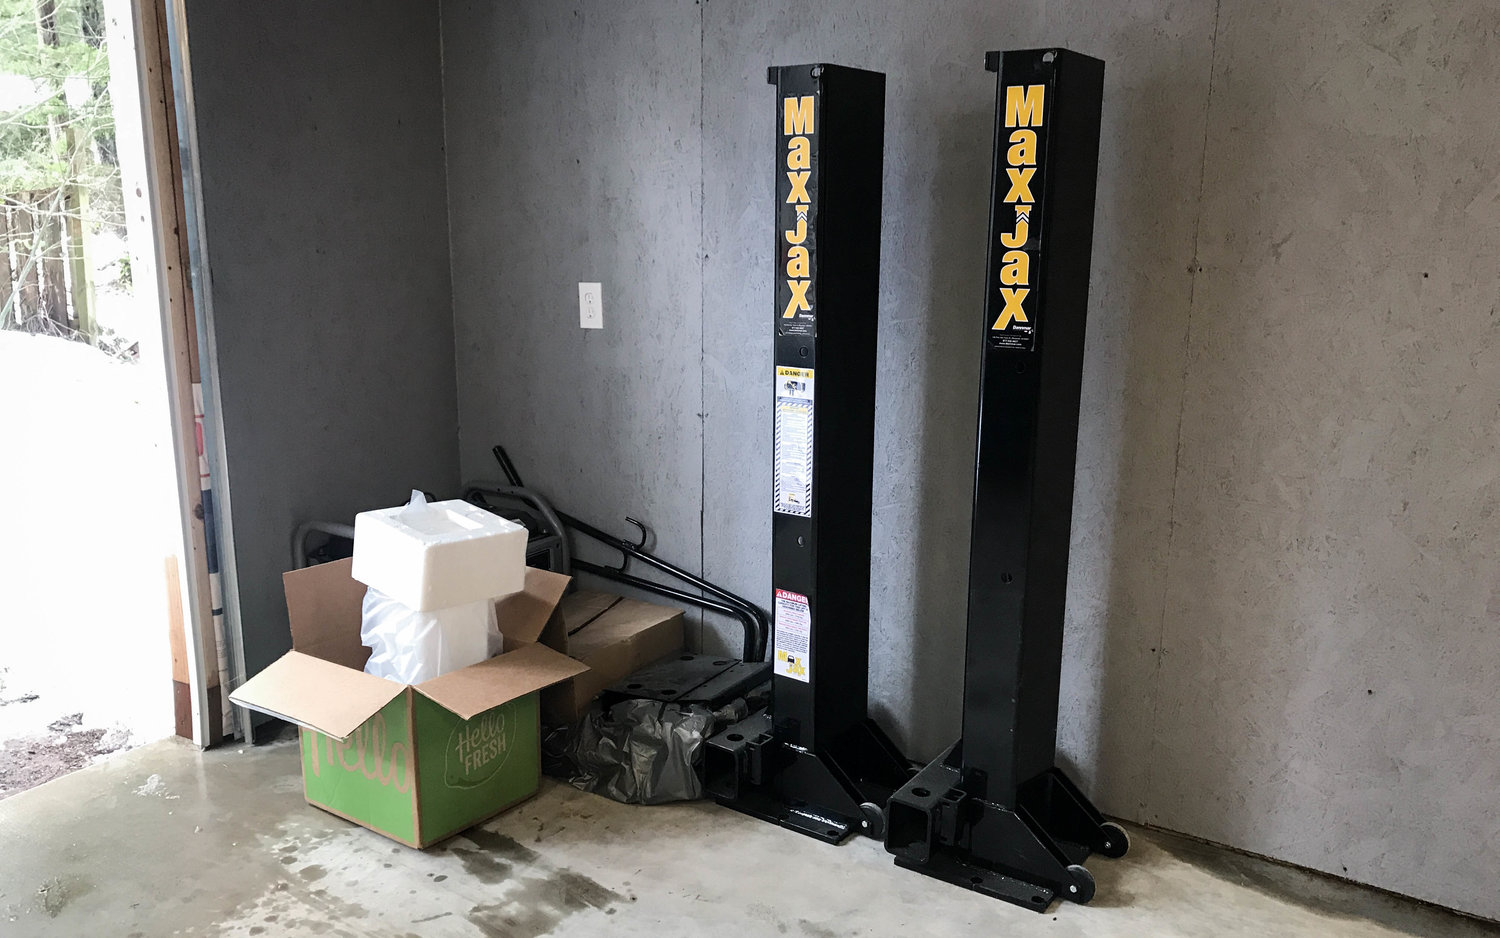
Looking good! Also, I guess the cat is out of the bag, that special package… was a MaxJax two post lift!

I researched lifts heavily. There are cheaper ones out there. There are bigger, taller ones out there. But, I only have 9’ ceilings. Most lifts go 9’-6” and above. The big pro, this lift is removable in about 15 minutes. All other lifts are pretty much permanent. I don’t always want the lift there.

The biggest con of the lift, it only goes about 4’ high. I figure using a badass stool/laz-e-boy to wheel under the lift will be better than jackstands. Anything is better than jackstands. Anything.

Want more on the lift? Check it out here: https://www.maxjaxusa.com

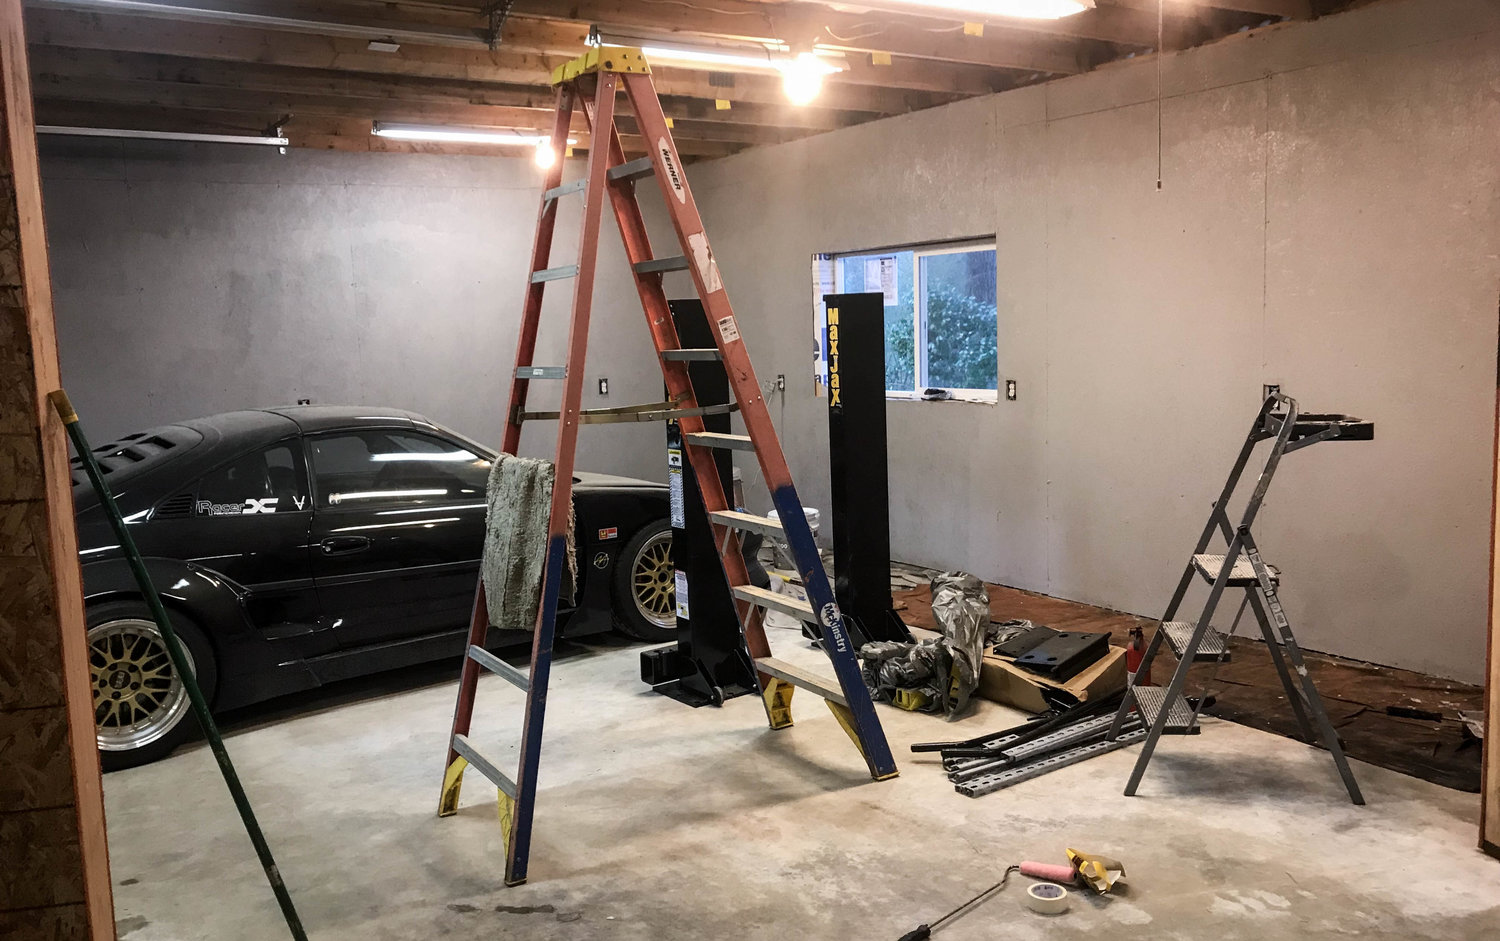
We’ll cover the install later. Let’s get back to finishing this shop! After the sheathing was finally complete… I wanted to finish the interior look. So, off to Home Depot we go for their cheapest interior paint!

IMG_4828.jpg

IMG_4832.jpg

Remember I used to own a painting company? This was the first part of this project I actually knew what I was doing.

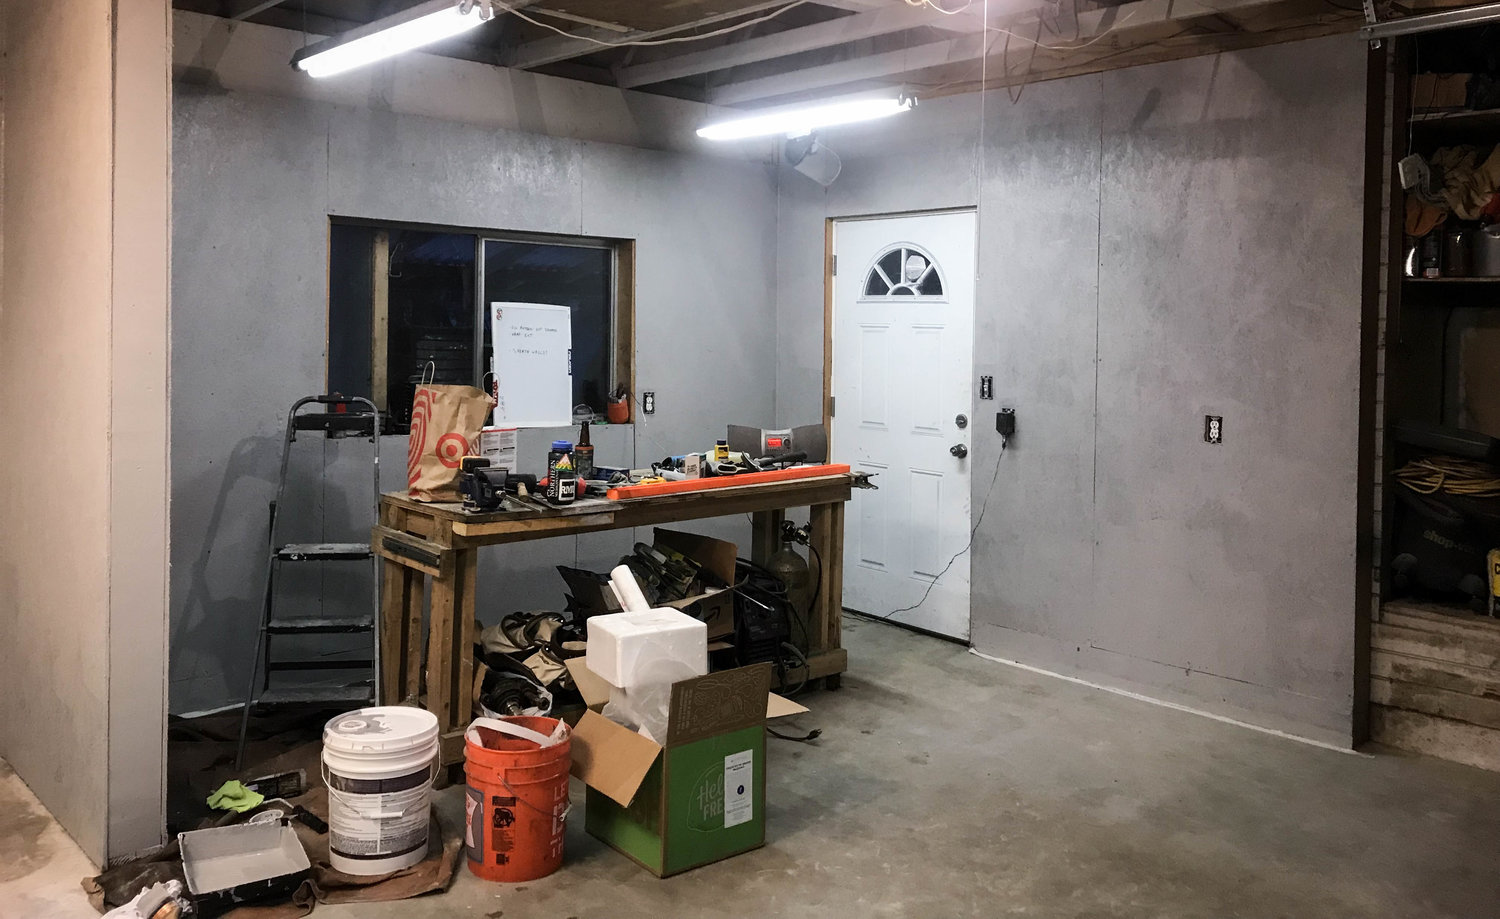
Once the paint had dried, we needed to build a decent workbench. My old bench would still be living in the old portion of the shop, the new shop needed a new shiny bench.

IMG_4849.jpg

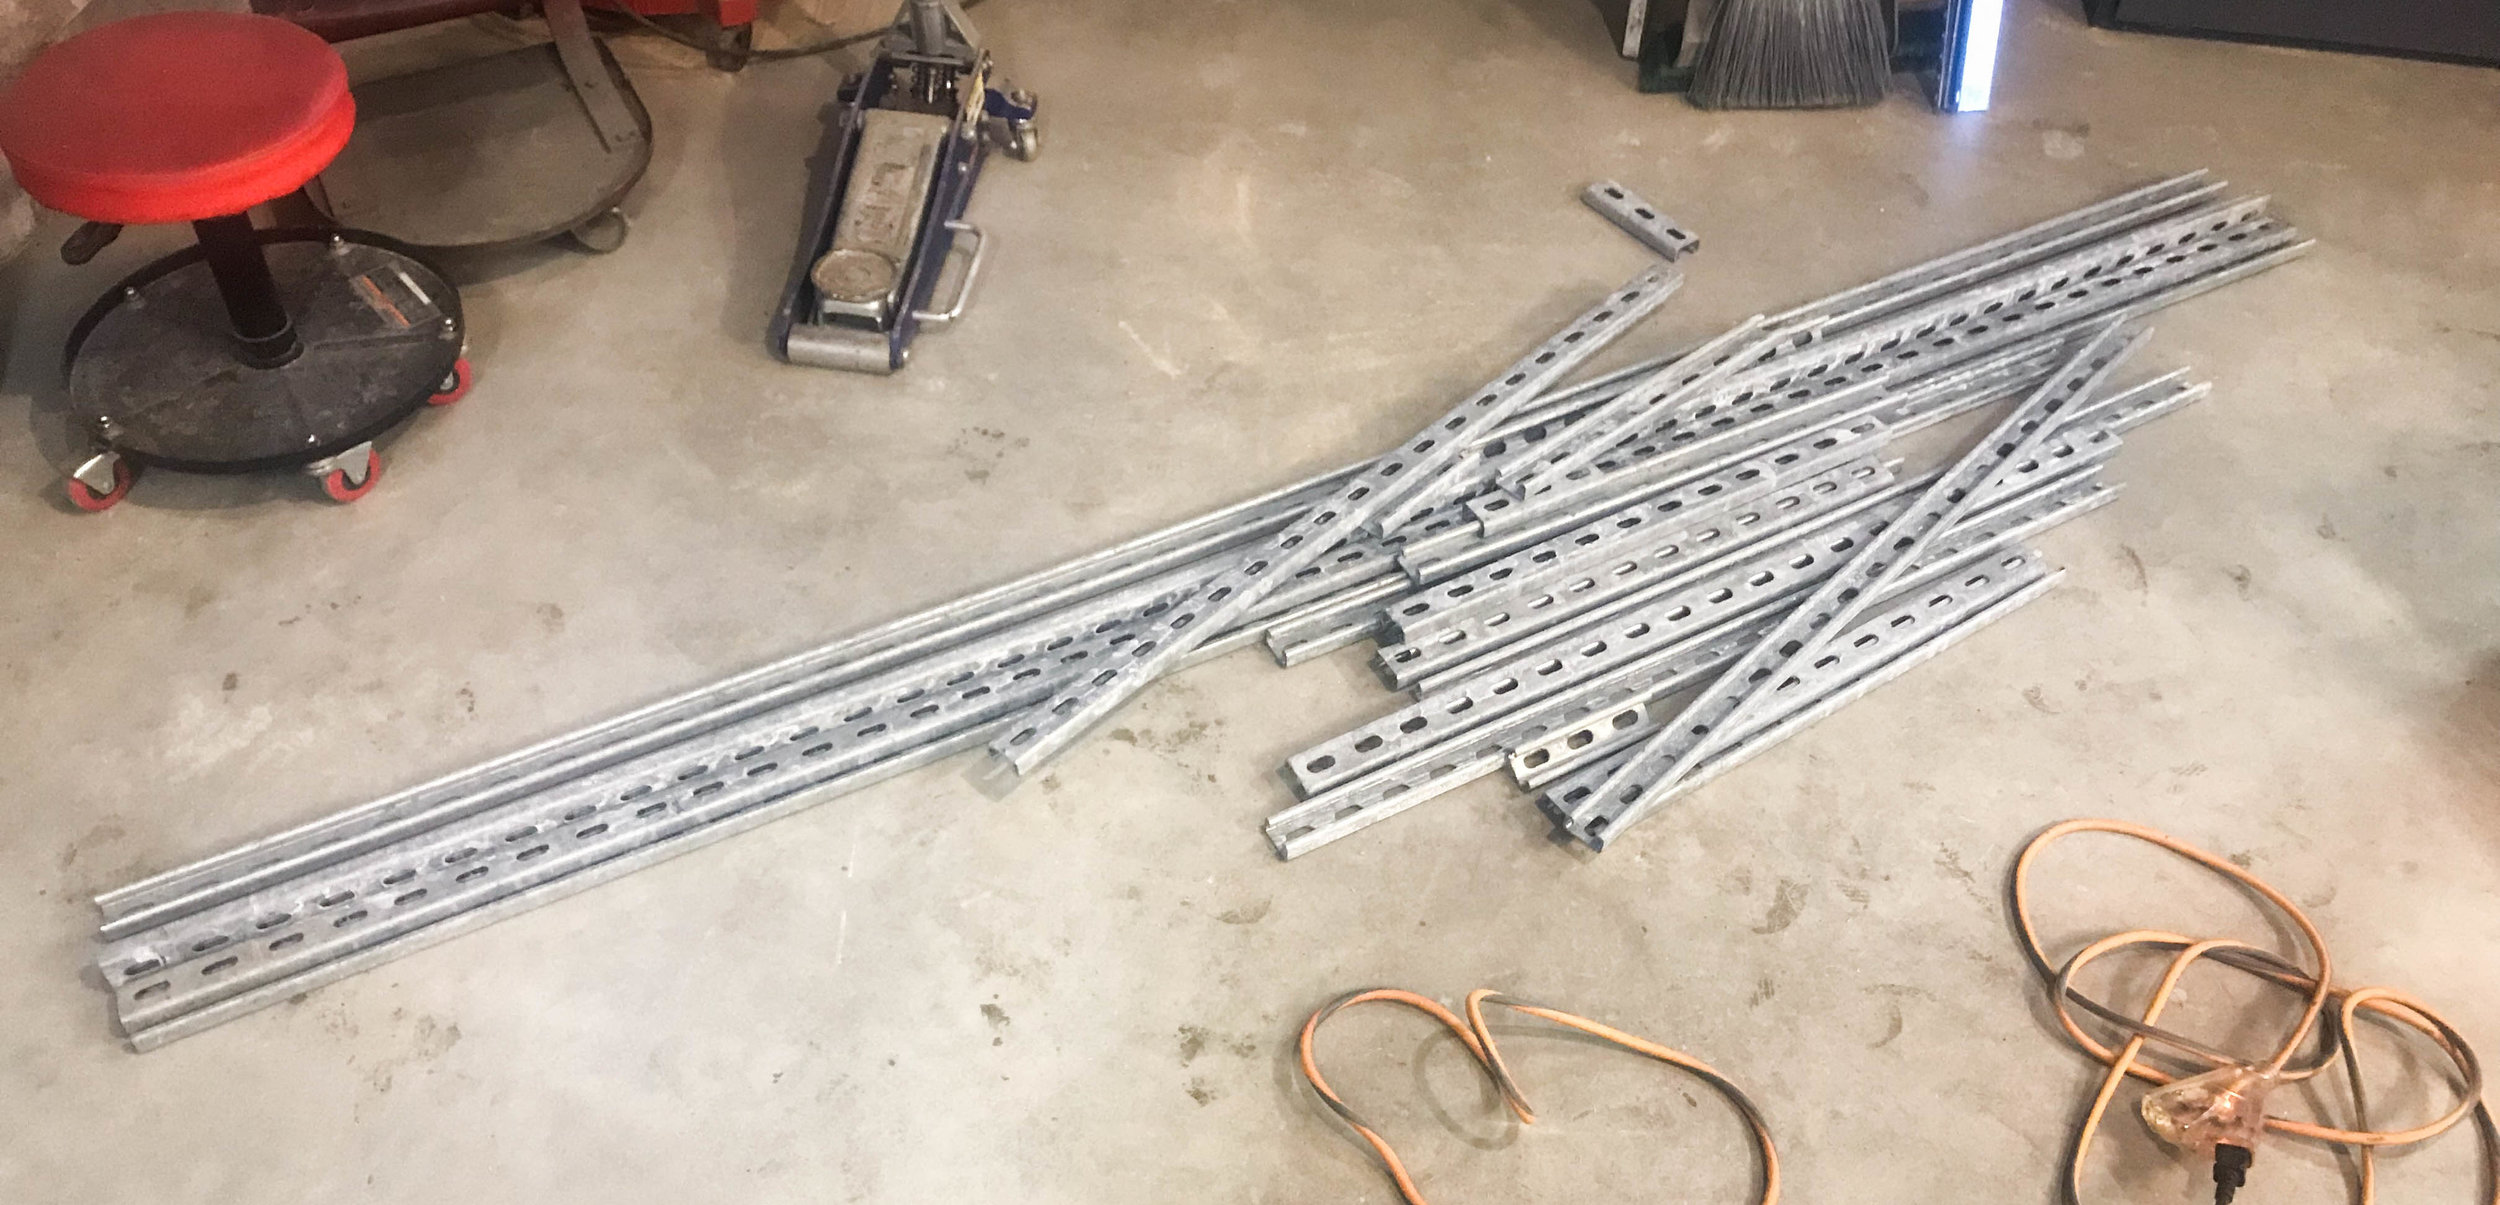
When you work in construction, your boss generally tends to “over order” material. Somehow this unistrut found its’ way into my truck one day. Crazy, it’s all cut to build a bench…

IMG_4850.jpg


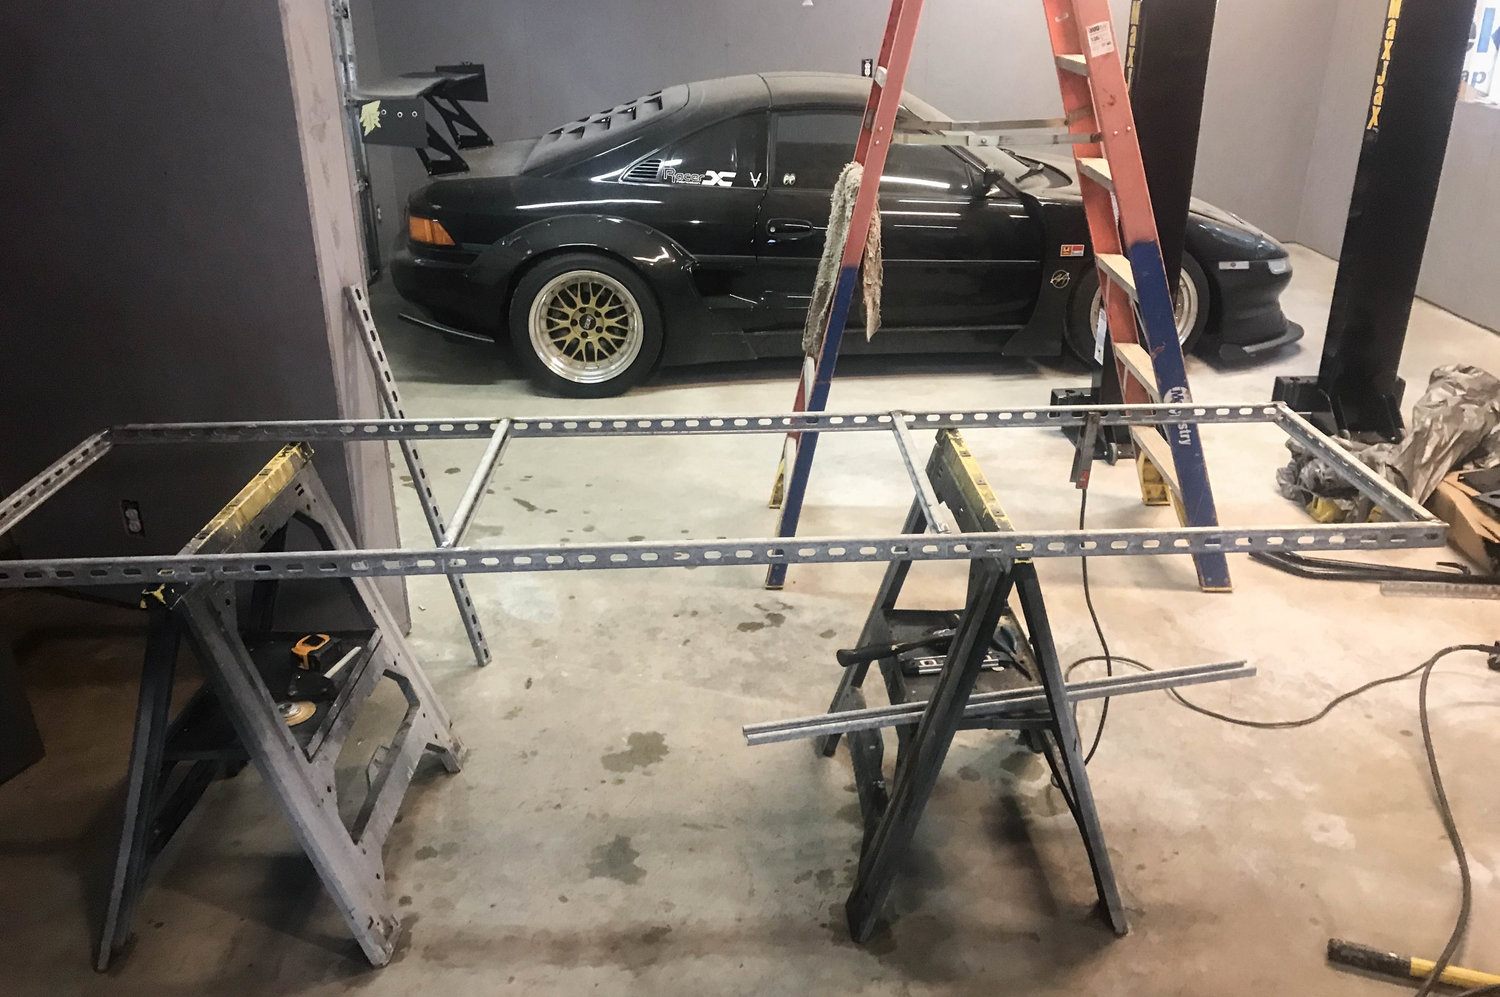
Since I had a welder, I welded it together. Here’s the top of the bench.

IMG_4892.jpg

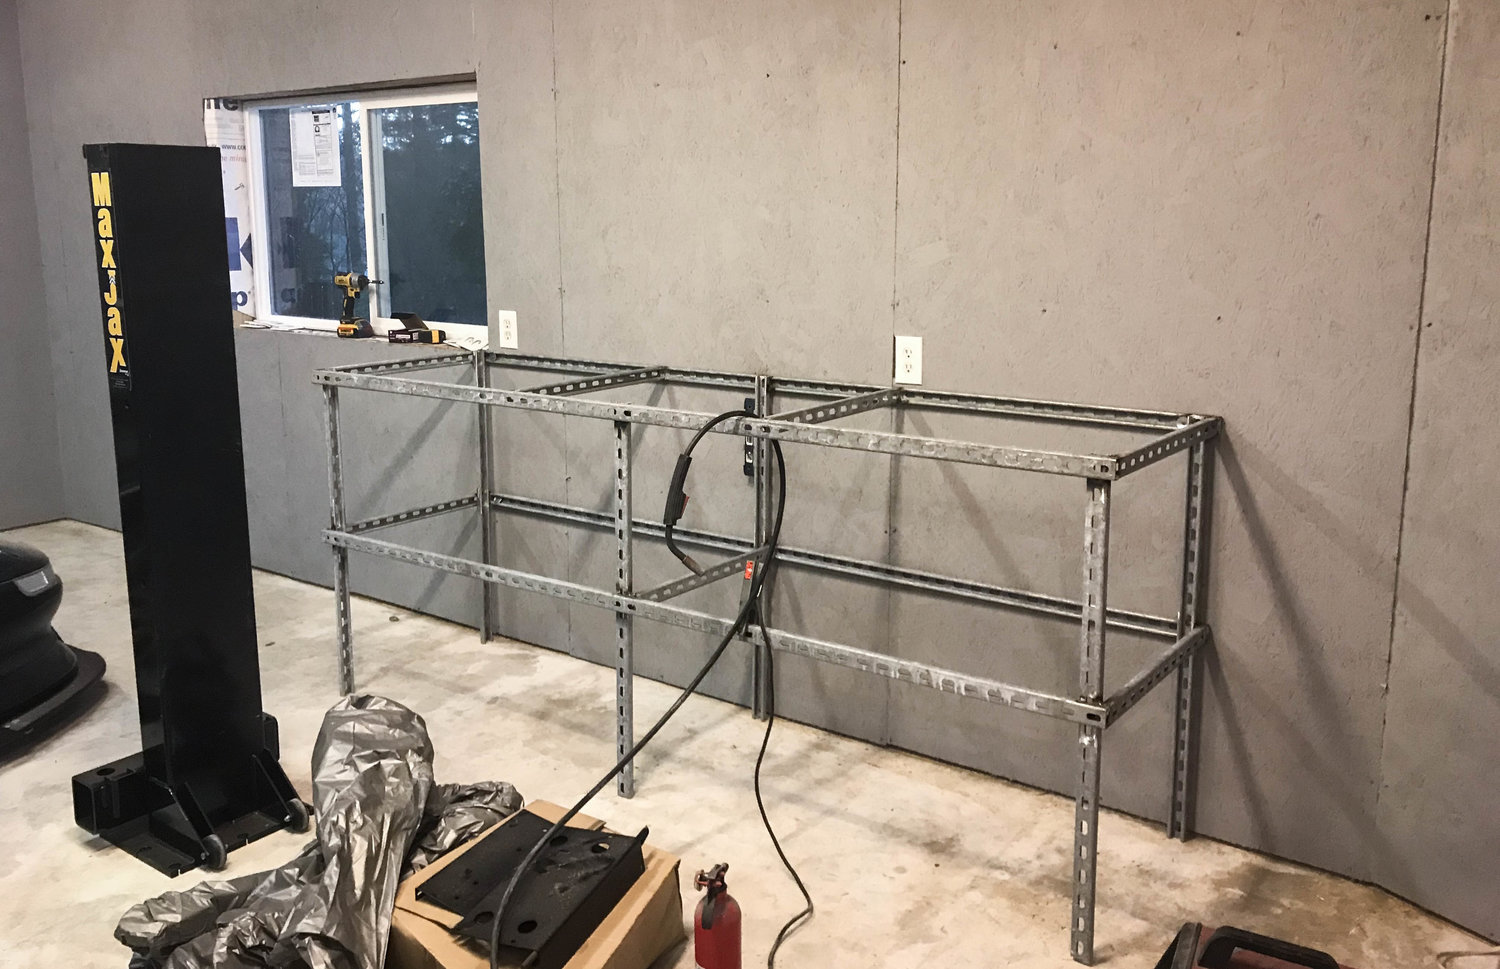
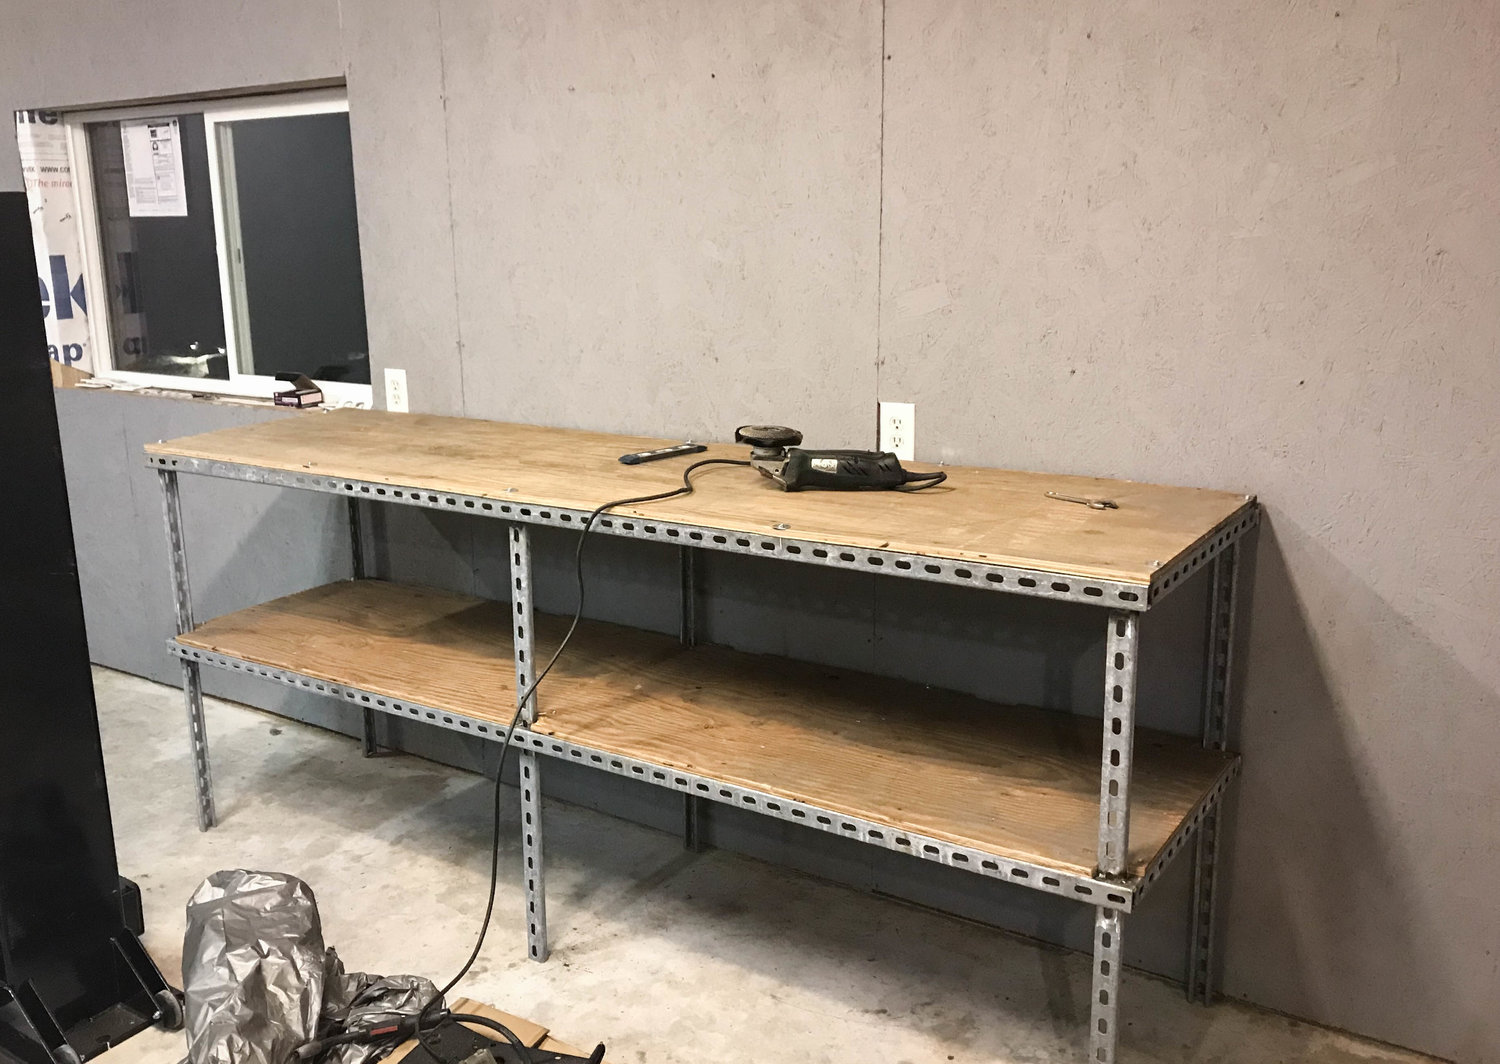
Some legs added, and a lower shelf on the bench. 8’ long and 2’ wide, she sits about 40” high.

IMG_4894.jpg

Using some leftover 3/4” plywood, they made the perfect tops. Pretty easy project, built over two nights. I eventually want to also build a more welder friendly fabrication table, ideally on wheels to move about the shop… just need more time and preferably, money.

IMG_4897.jpg

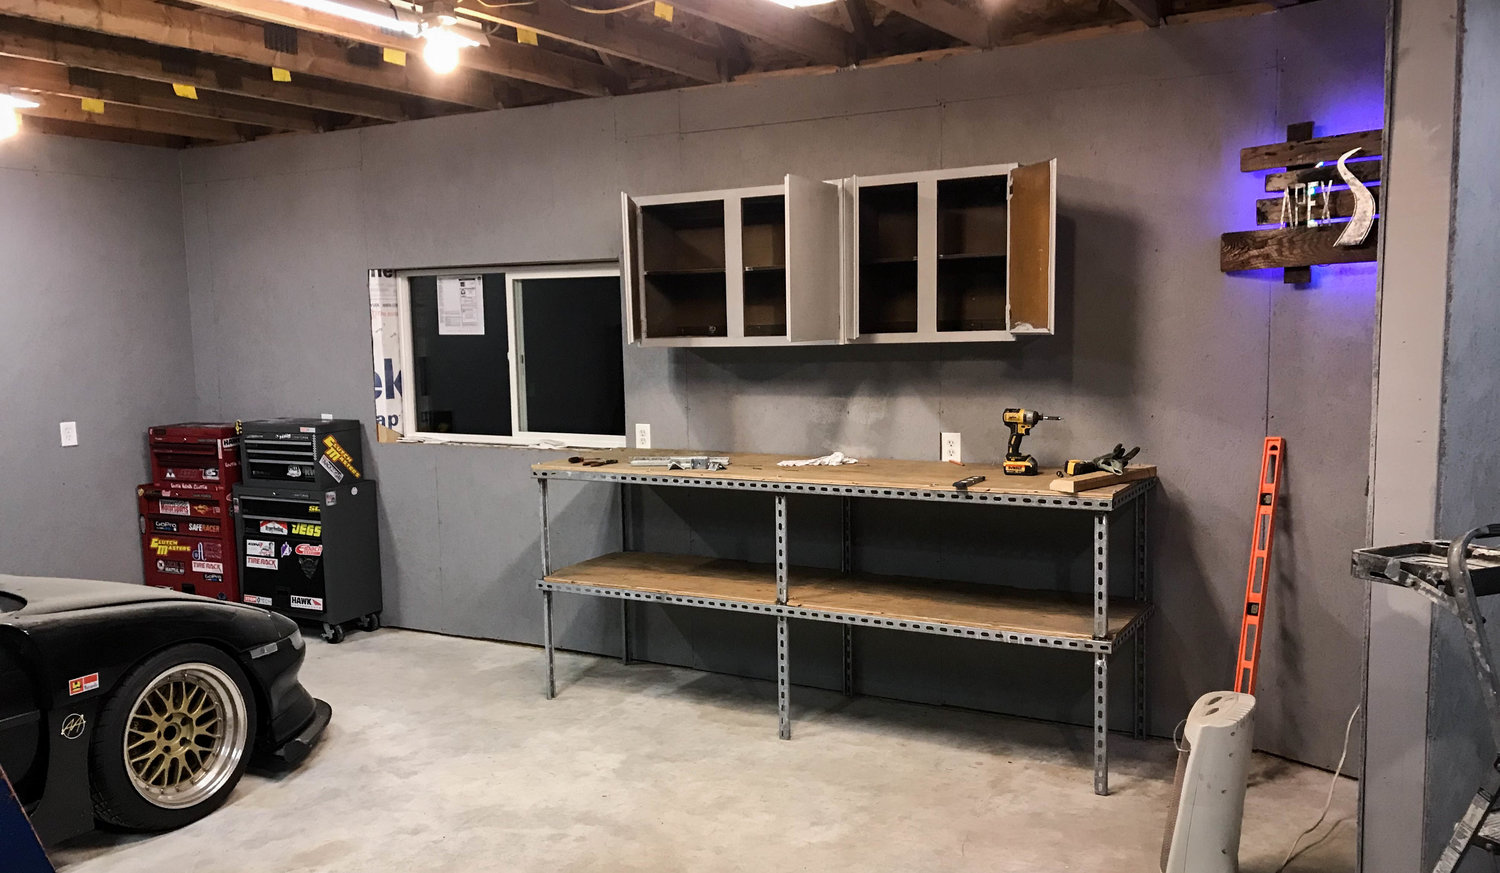
To keep my morale up, I hung this amazing sign that was made for me by a family member as a great Christmas present. The LED can change to any color, and shows my original logo for the site. It’s an awesome finishing touch for the shop.

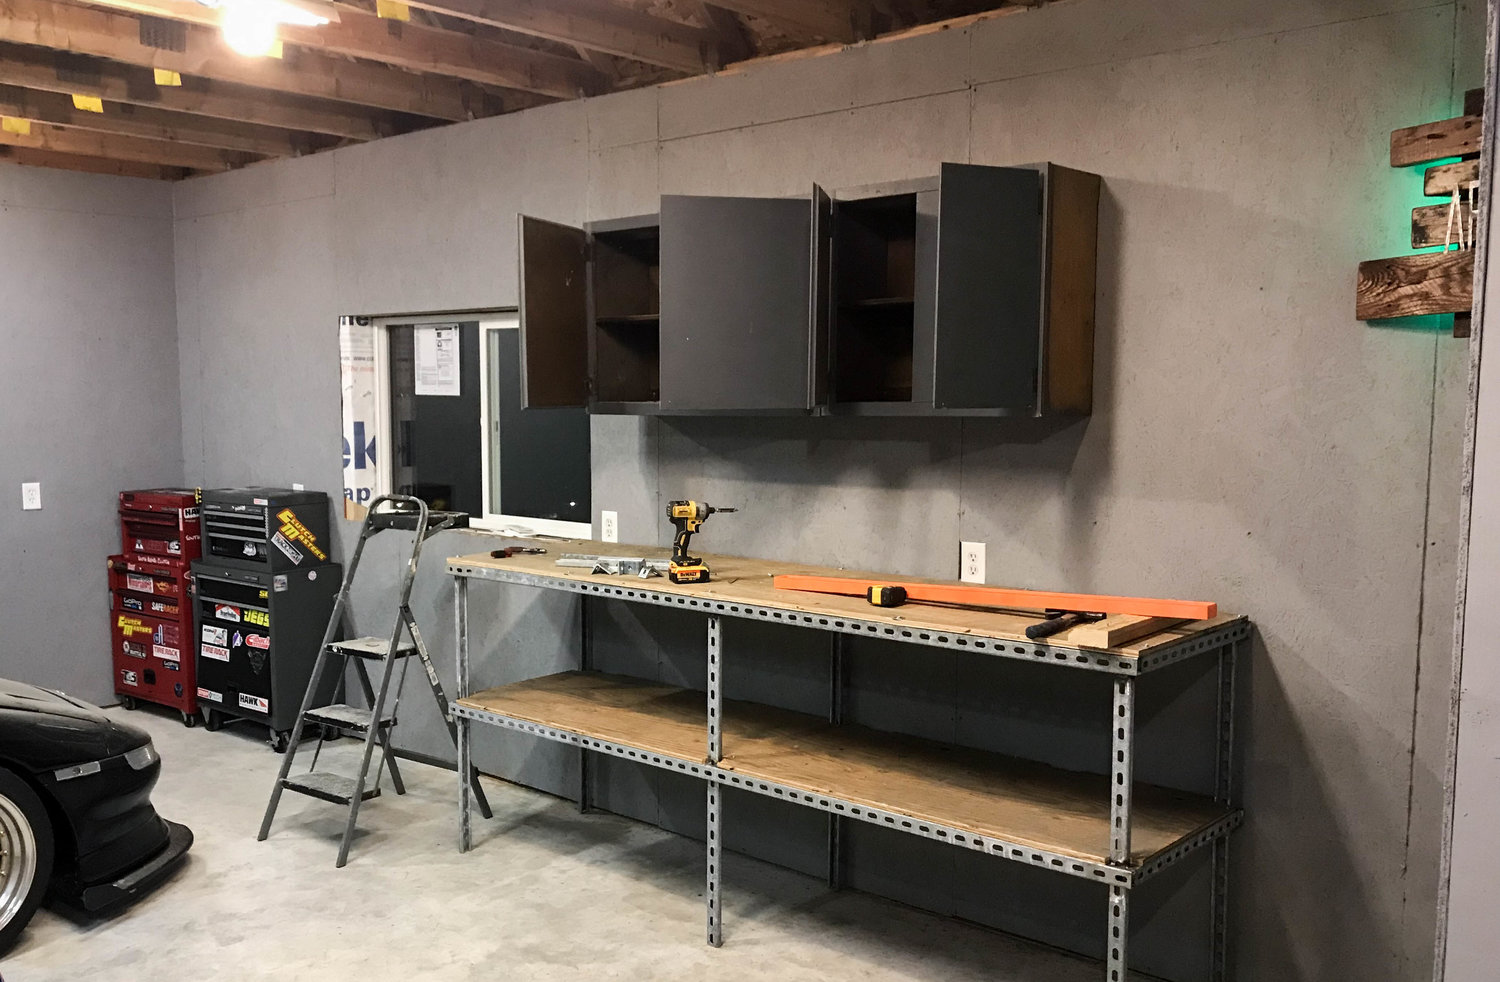
We live in a pretty cool neighborhood. Often people are getting rid of stuff, and I end up with it for free. About 6 months ago someone was tossing out a few old kitchen cupboards. I took them, and stored them in my crappy shed. It all paid off, as I can FINALLY use them.

IMG_4906.jpg

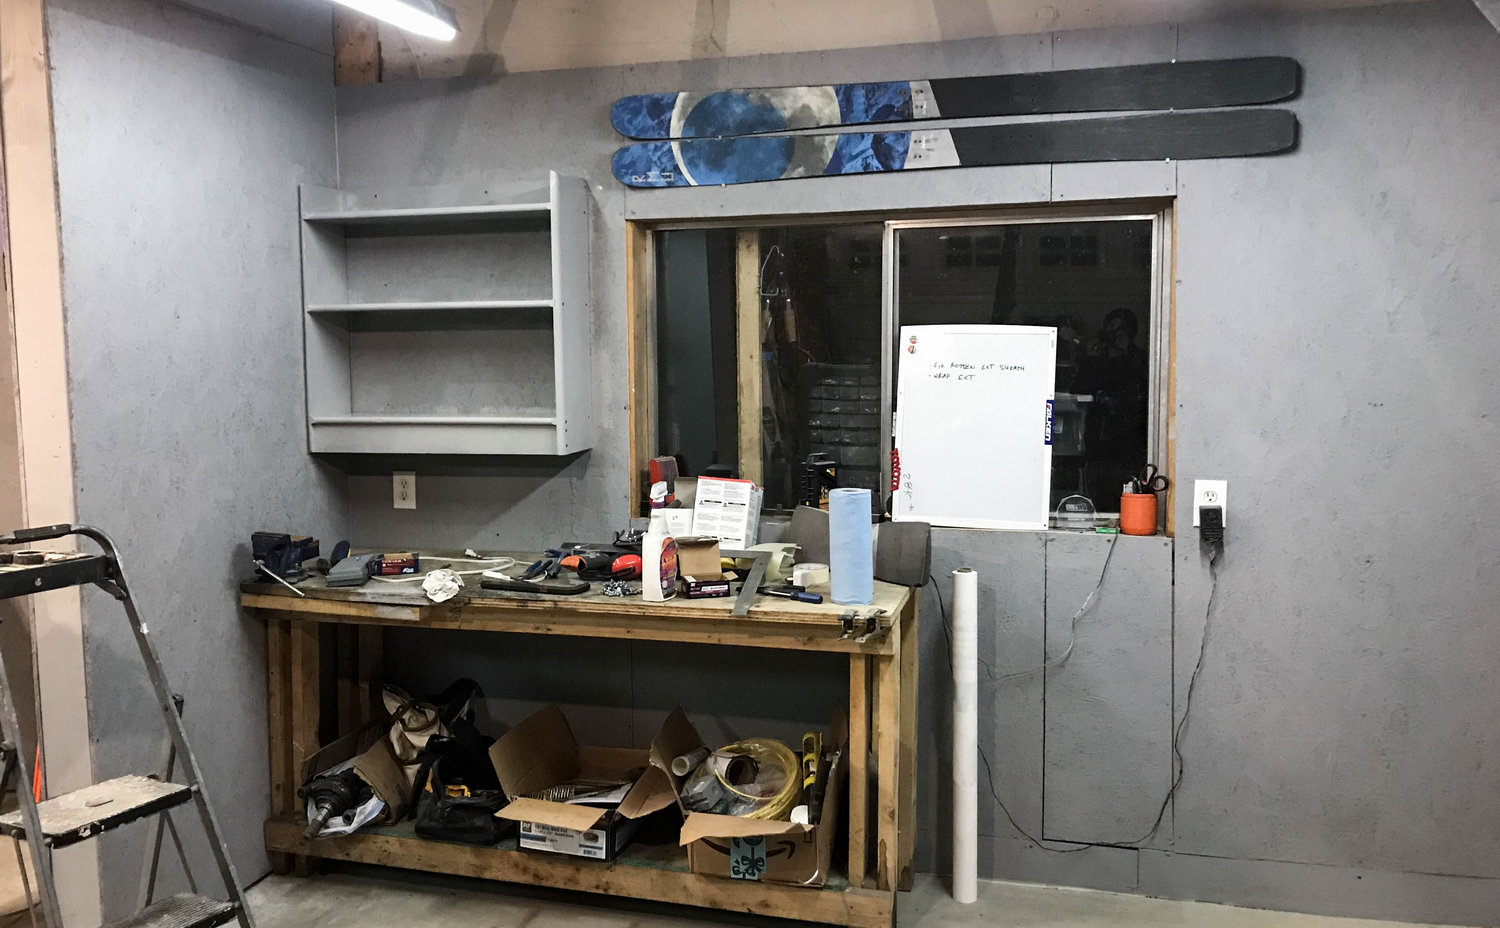
And in the old shop I hung and painted some shelving, and some old skis. I will likely mount and tune all my own skis on this side of the garage. It’ll be the catch all space for all the home projects, and anything not related to the car. So, it needed some old skis on the wall.

IMG_4908.jpg


Holy crap, the garage is almost… FINISHED?! A couple punch list things here and there, and of course, some decorating.

IMG_4909.jpg

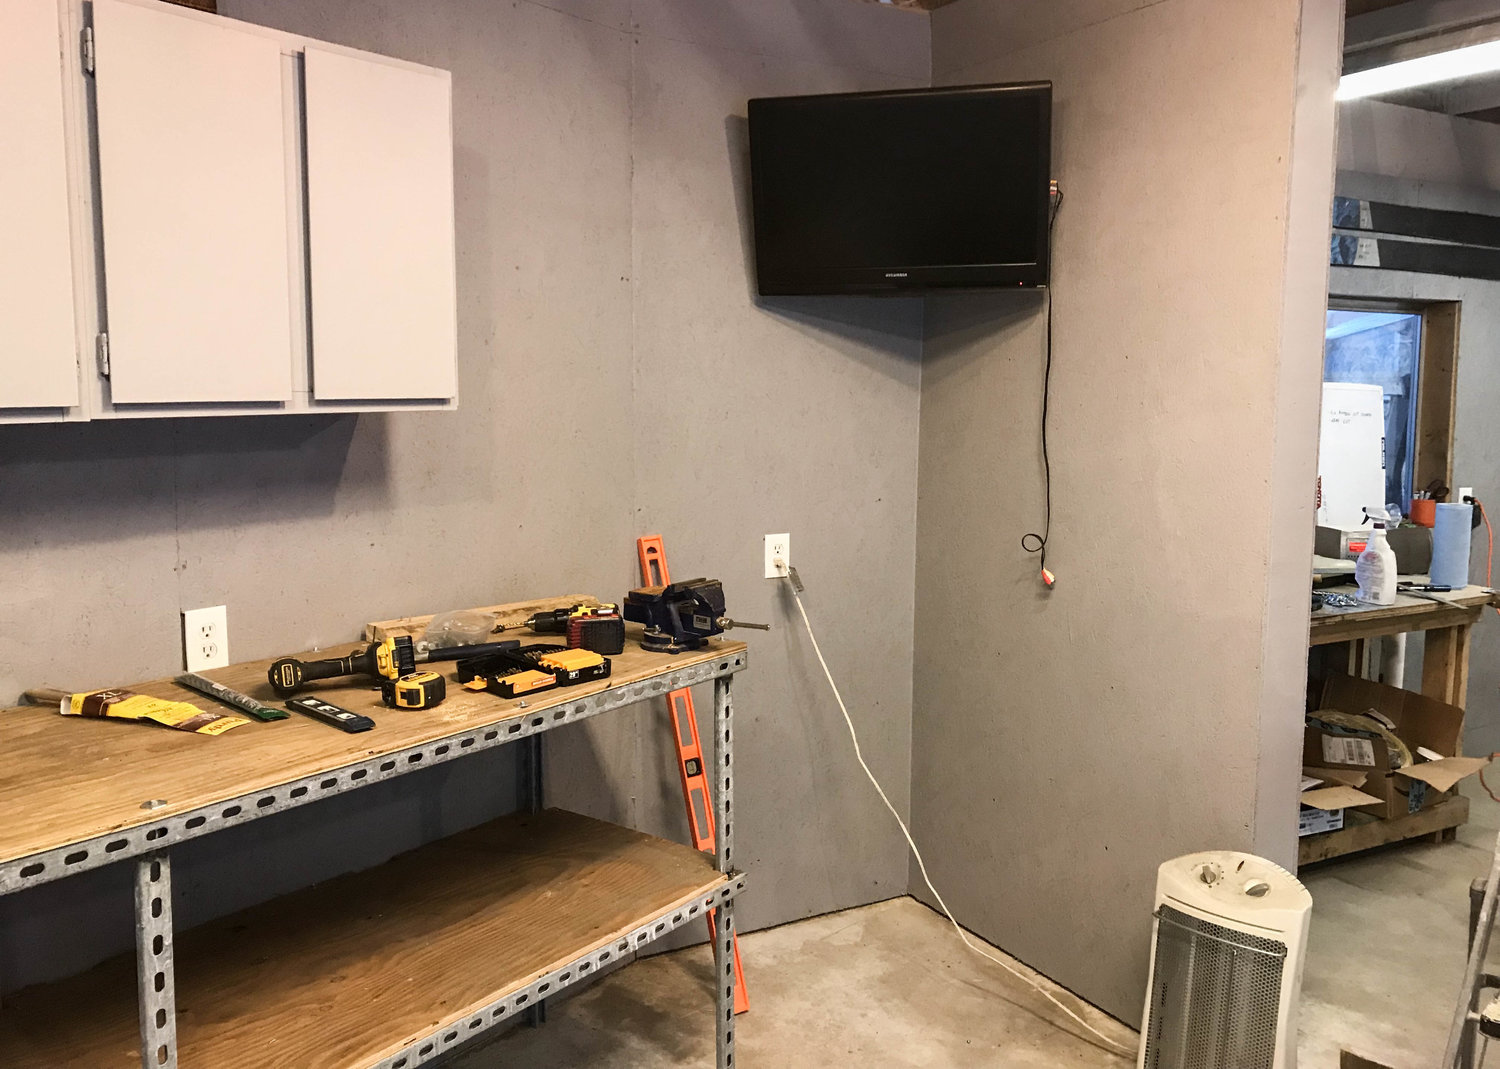
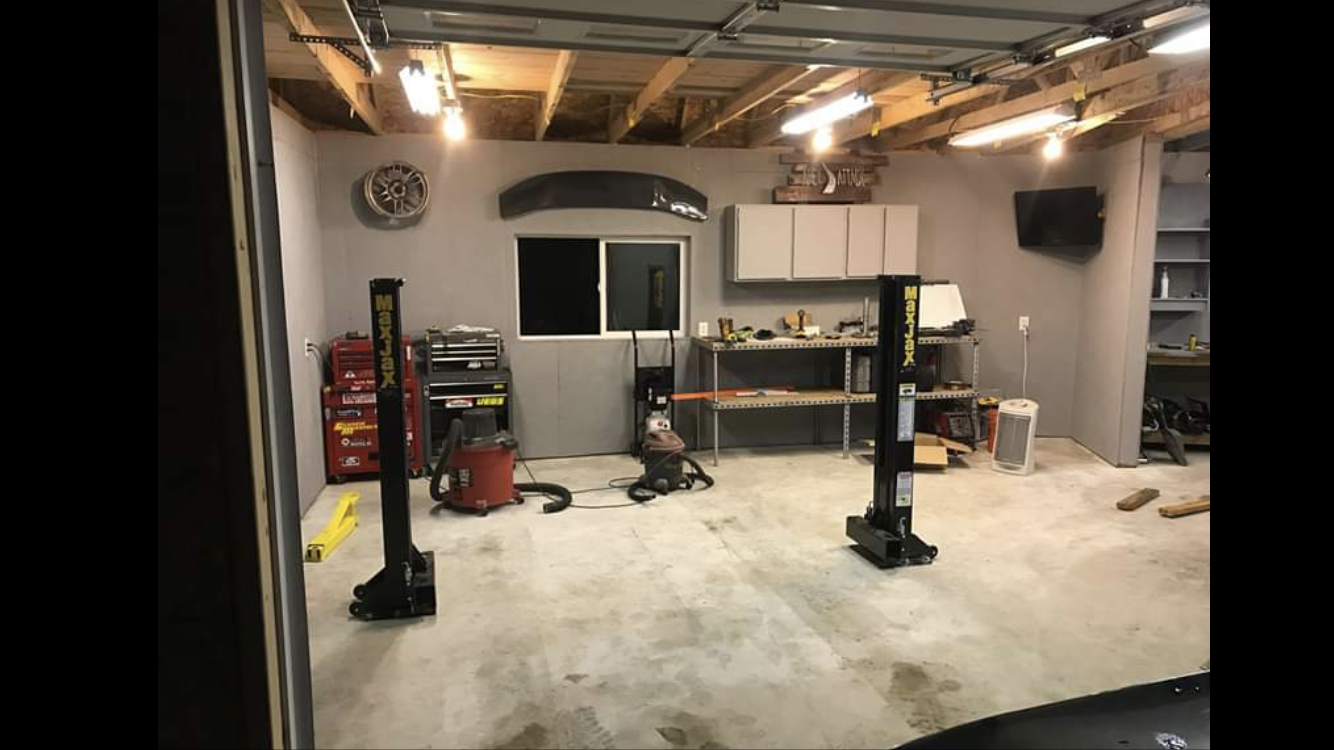
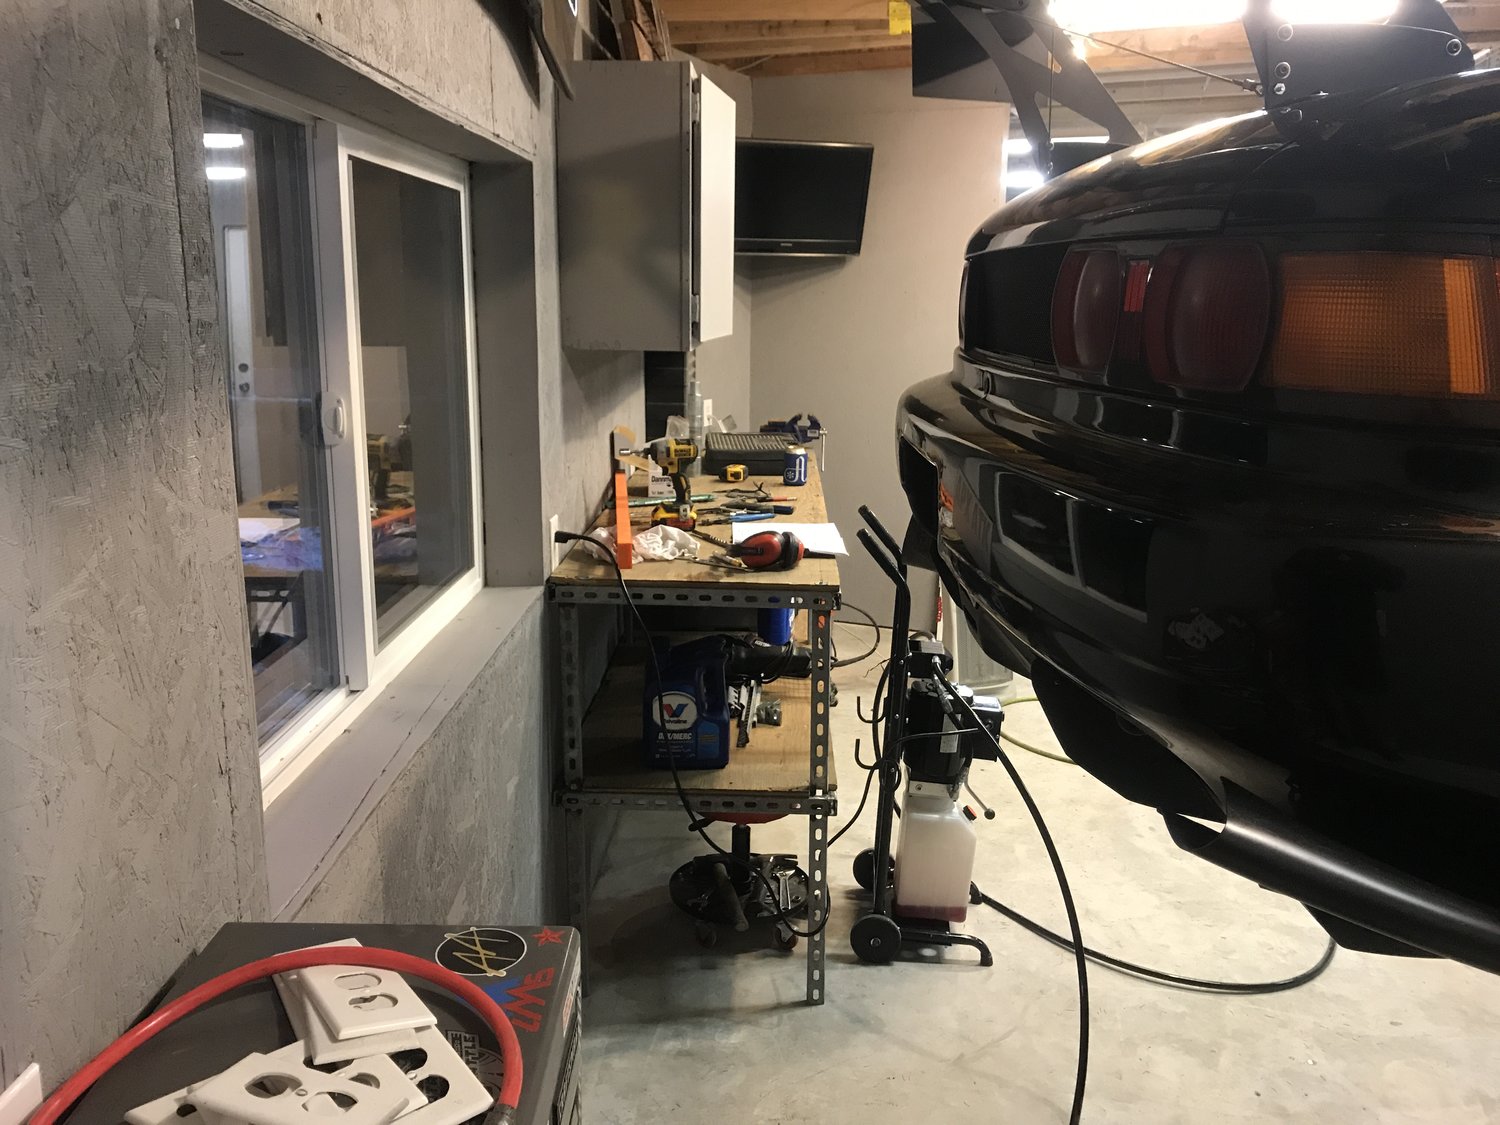
Cabinets painted, toolboxes in place.

IMG_4914.jpg

We’ve also saved a few TVs for the last few months. Why not hang one up? Will I ever watch it? Probably not. Maybe just loop all the FnF movies on it?

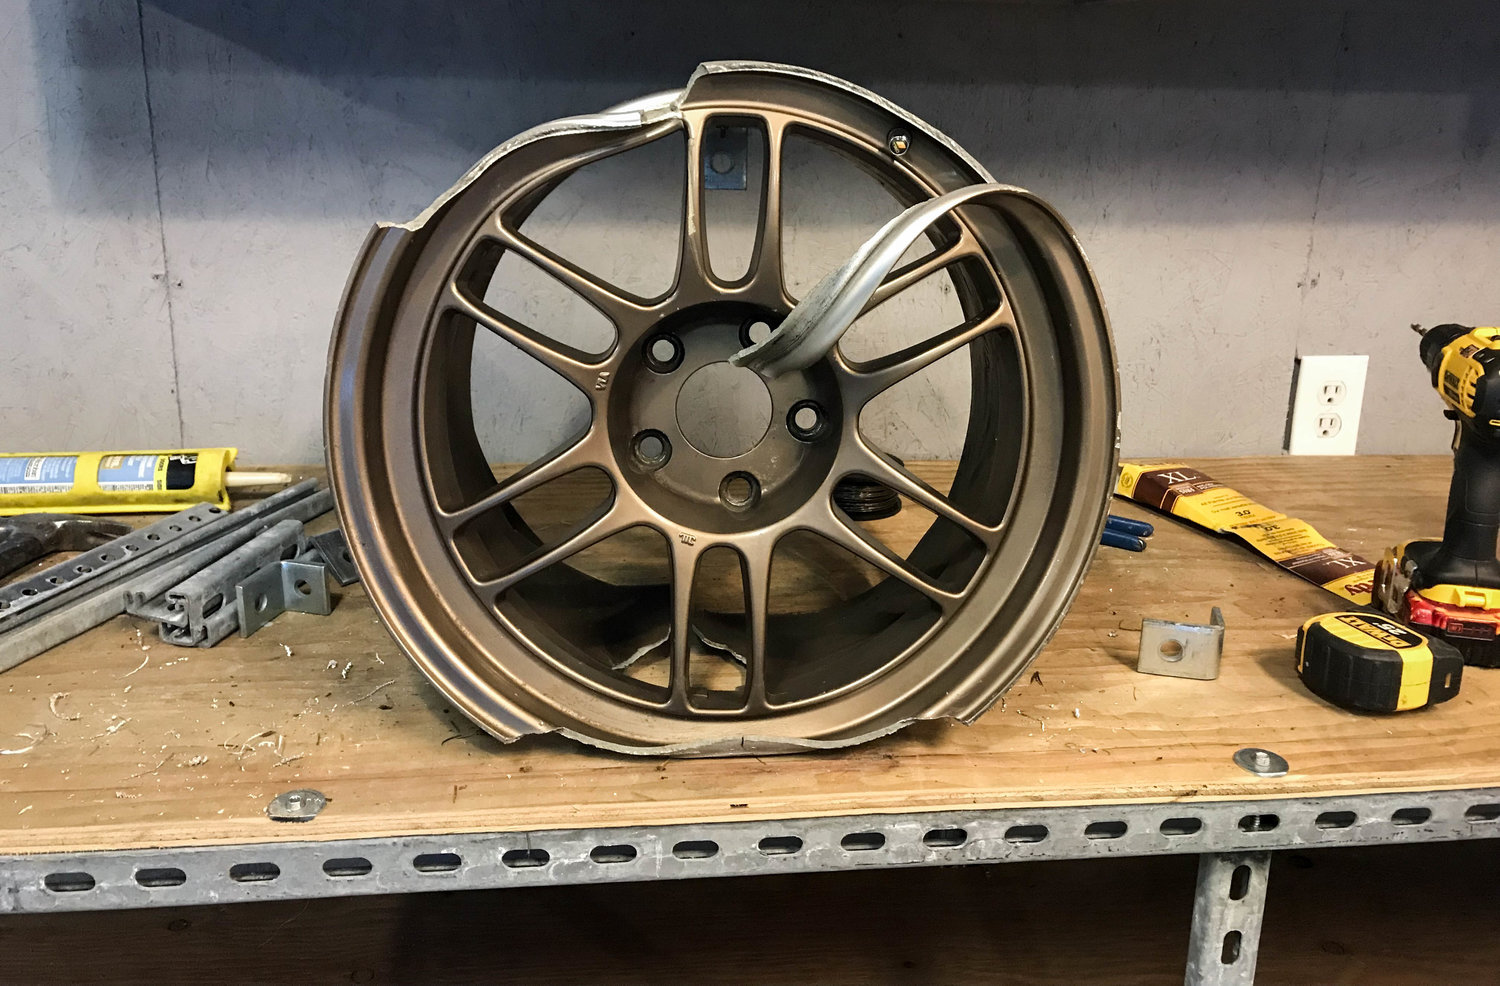
That brings us to the wall of shame. I’ve saved one of the wheels from my first MR2 (ya know, the one that hit the wall at 50mph). It’s so destroyed it’s cool. On the wall it goes.

IMG_4915.jpg

IMG_4916.jpg

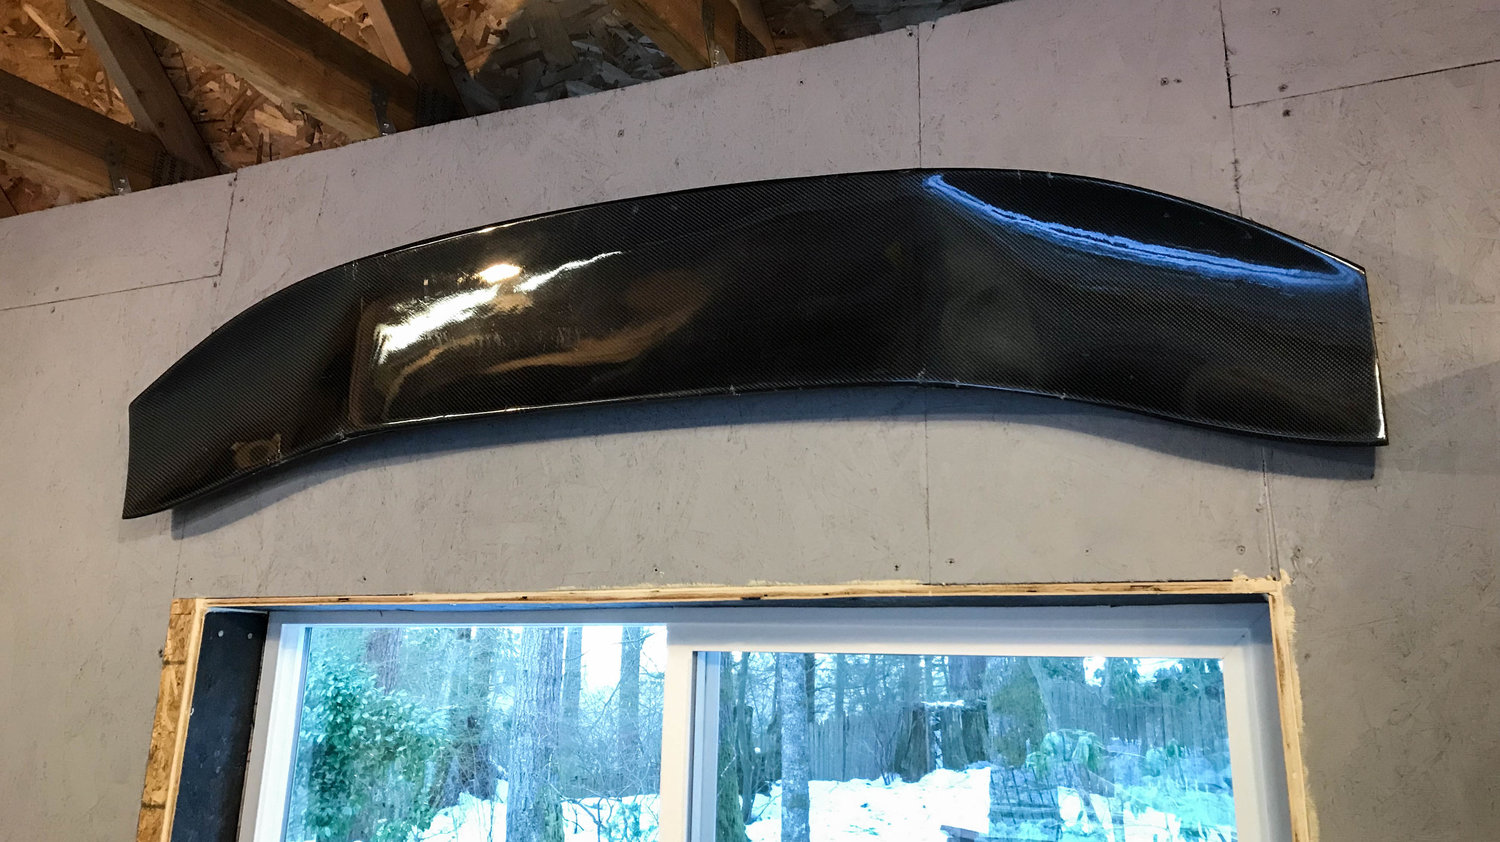
Remember when my F40 engine lid took out my GT wing? Here it is, in it’s delaminated and cracked glory. My wall of shame is done…. until I add more broken parts to it.

IMG_4928.jpg

Truly starting to feel like a real shop. I still have plans for the corner below the TV for a drafting/workbench to dream up my ideas. I also have room to add some other tooling in the future. This really is starting to feel like a great place to build my dreams.

So, let’s install that lift.

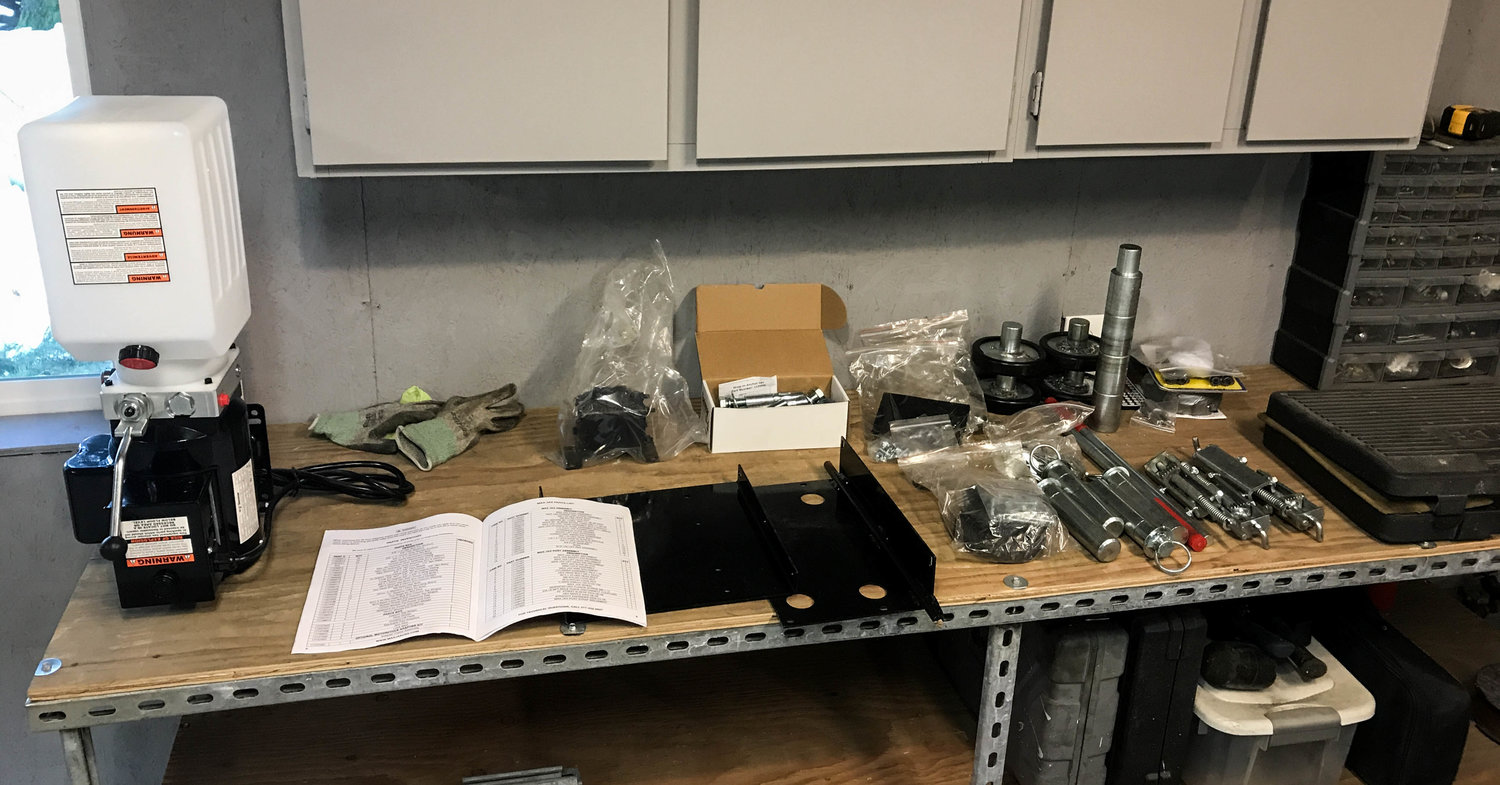
The MaxJax comes with a rather large instruction manual, and a lot of parts in baggies and boxes.

IMG_5007.jpg

IMG_5008.jpg

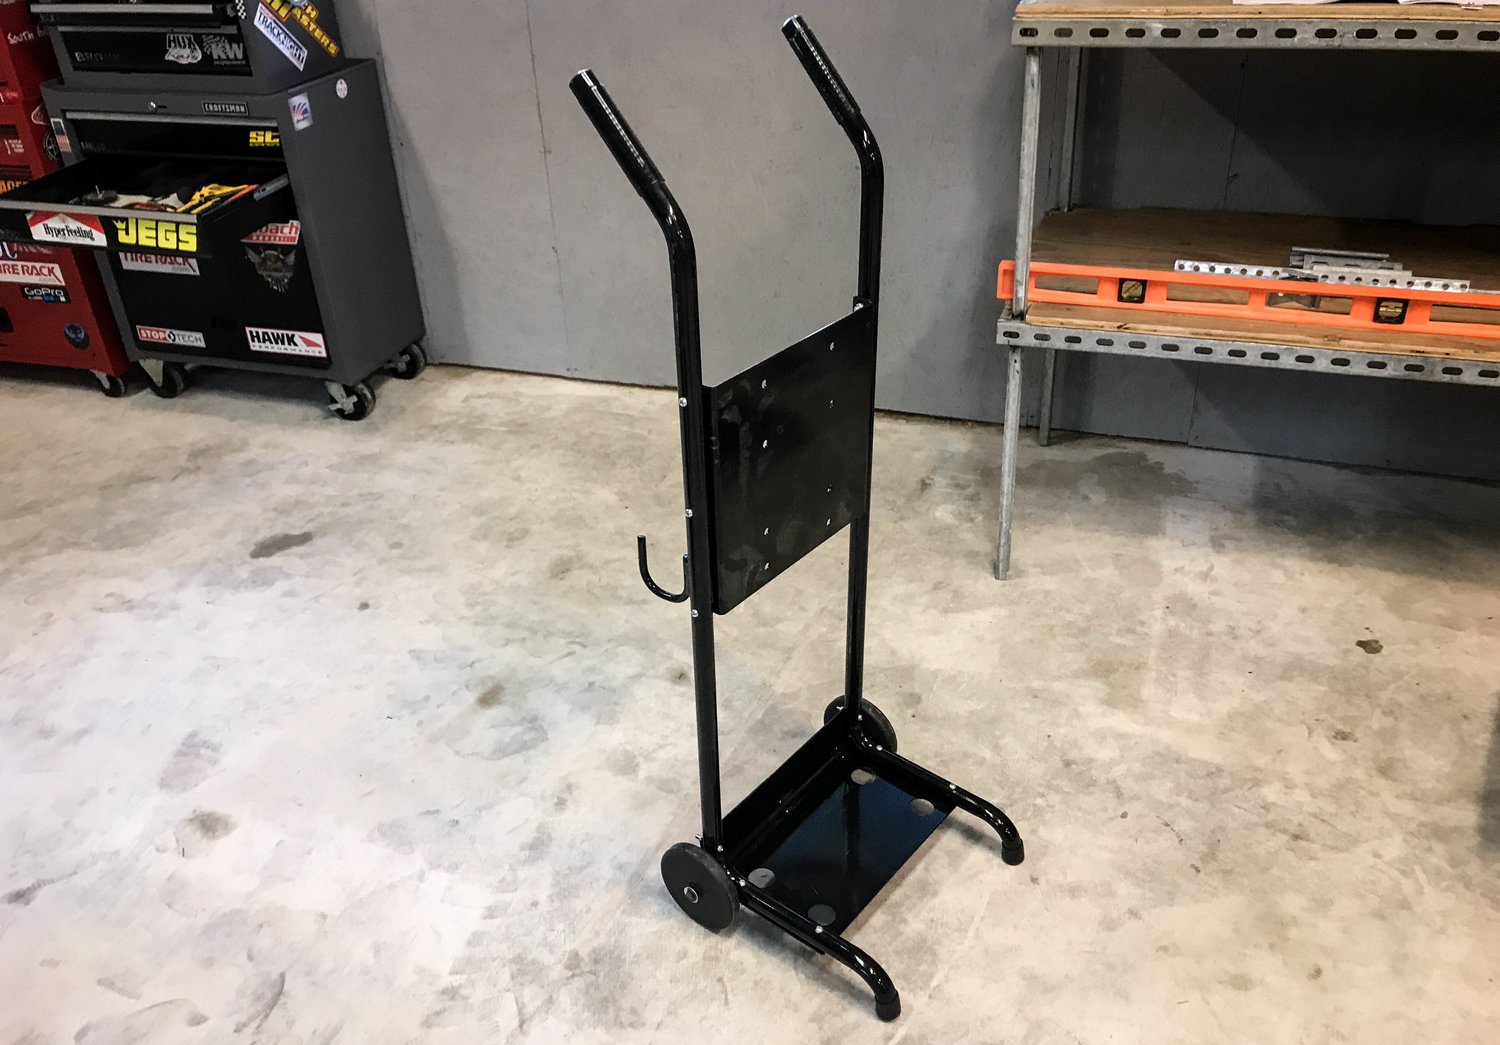
First, I built a cart.

IMG_5010.jpg

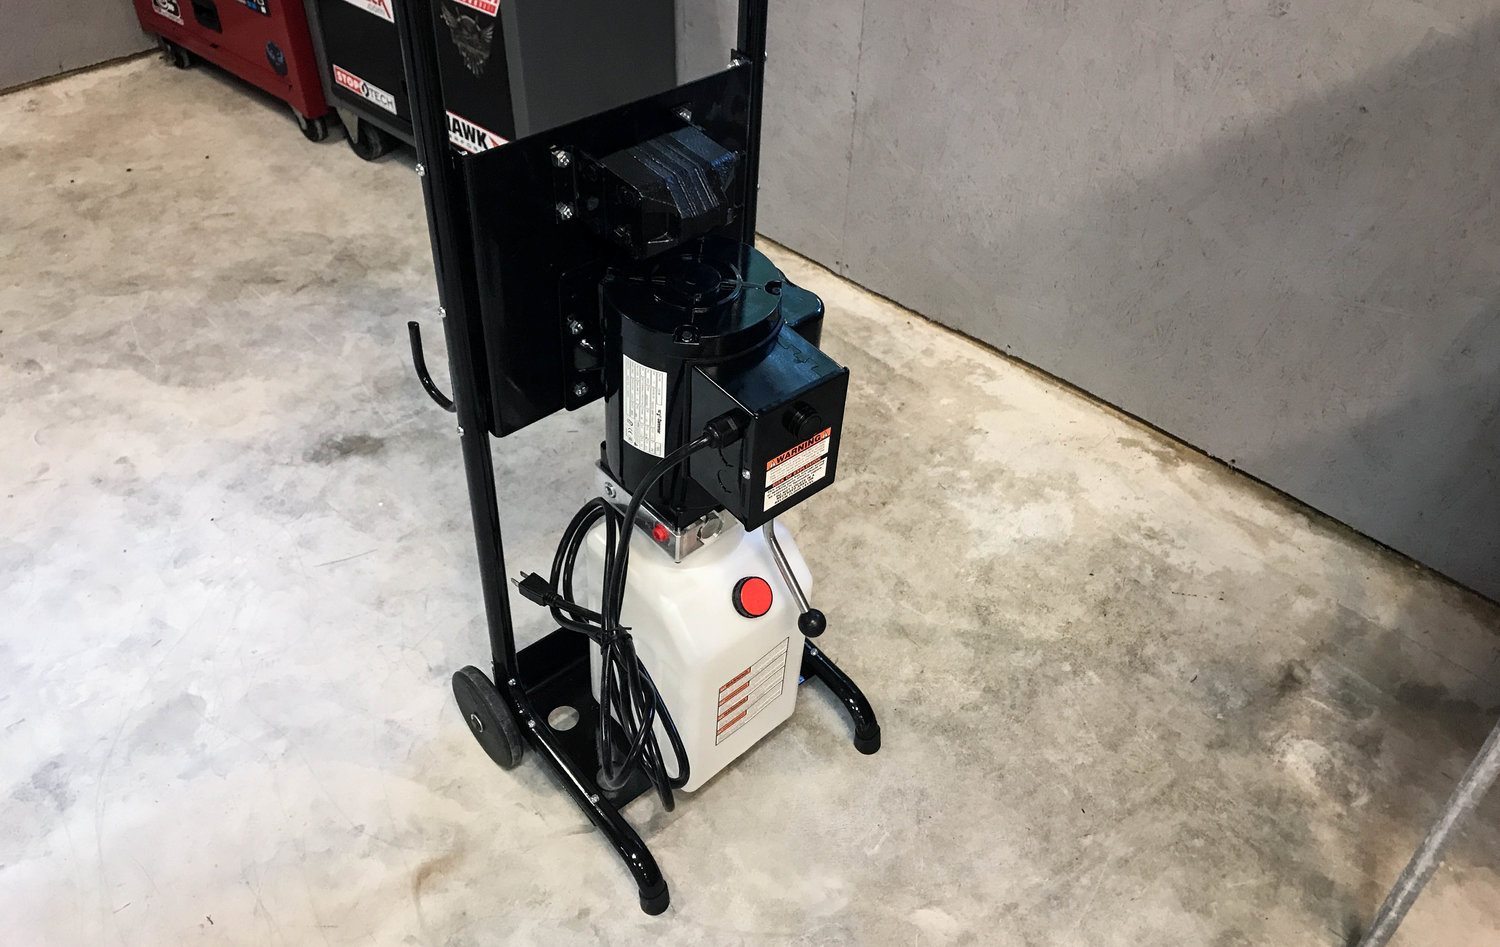
Then, I added the hydraulic pump and fluid reservoir to the cart.

IMG_5011.jpg

Then it was time to space and layout the posts.

IMG_5016.jpg

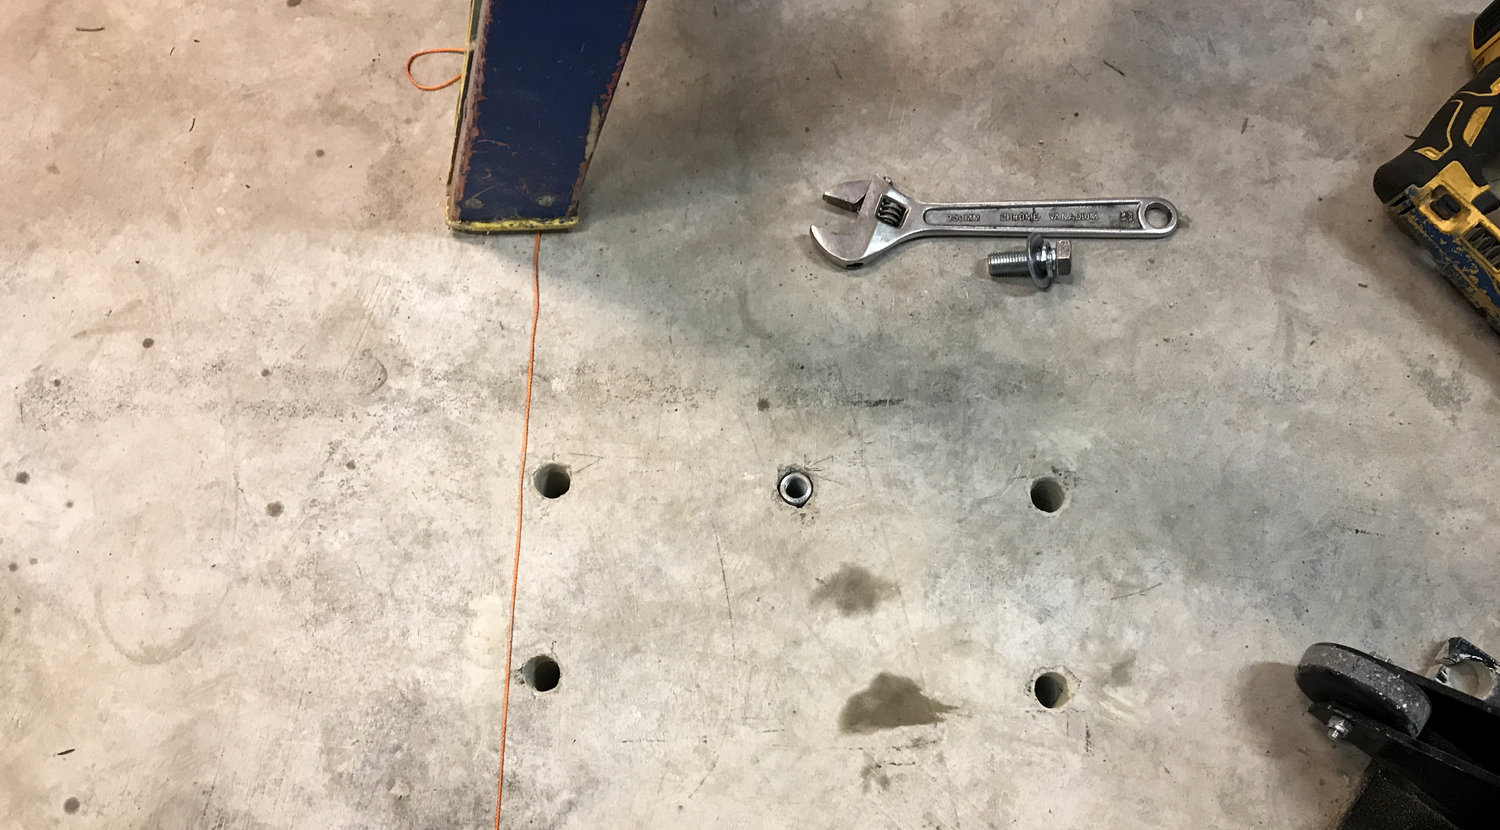
The blue chalk line is used to find the center of the shop in relation to the garage door. The orange string keeps the posts square to each other. I went with a 130” spacing between the posts…. but should’ve gone bigger.

IMG_5017.jpg

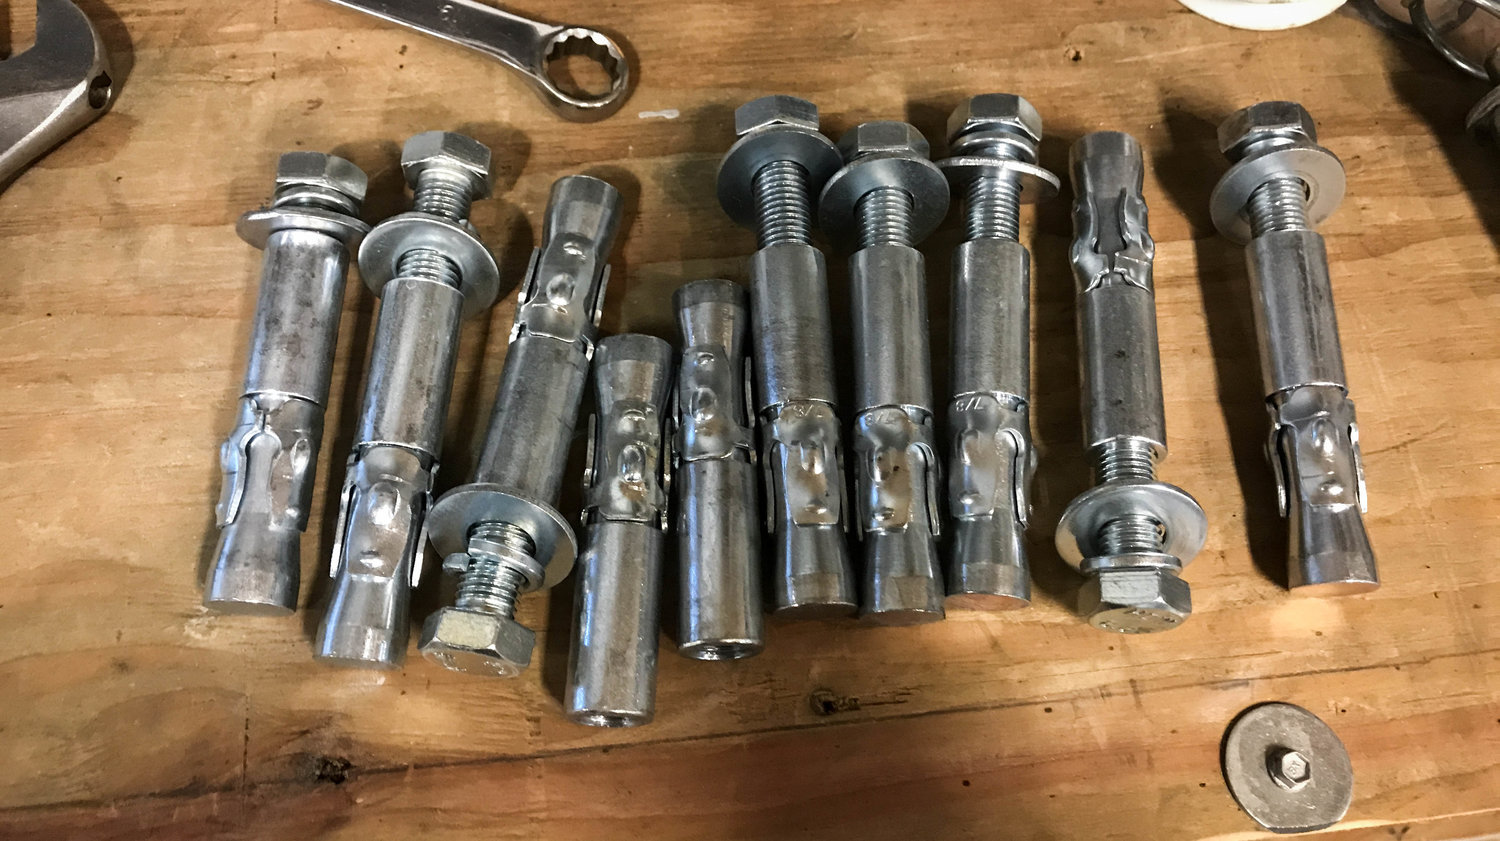
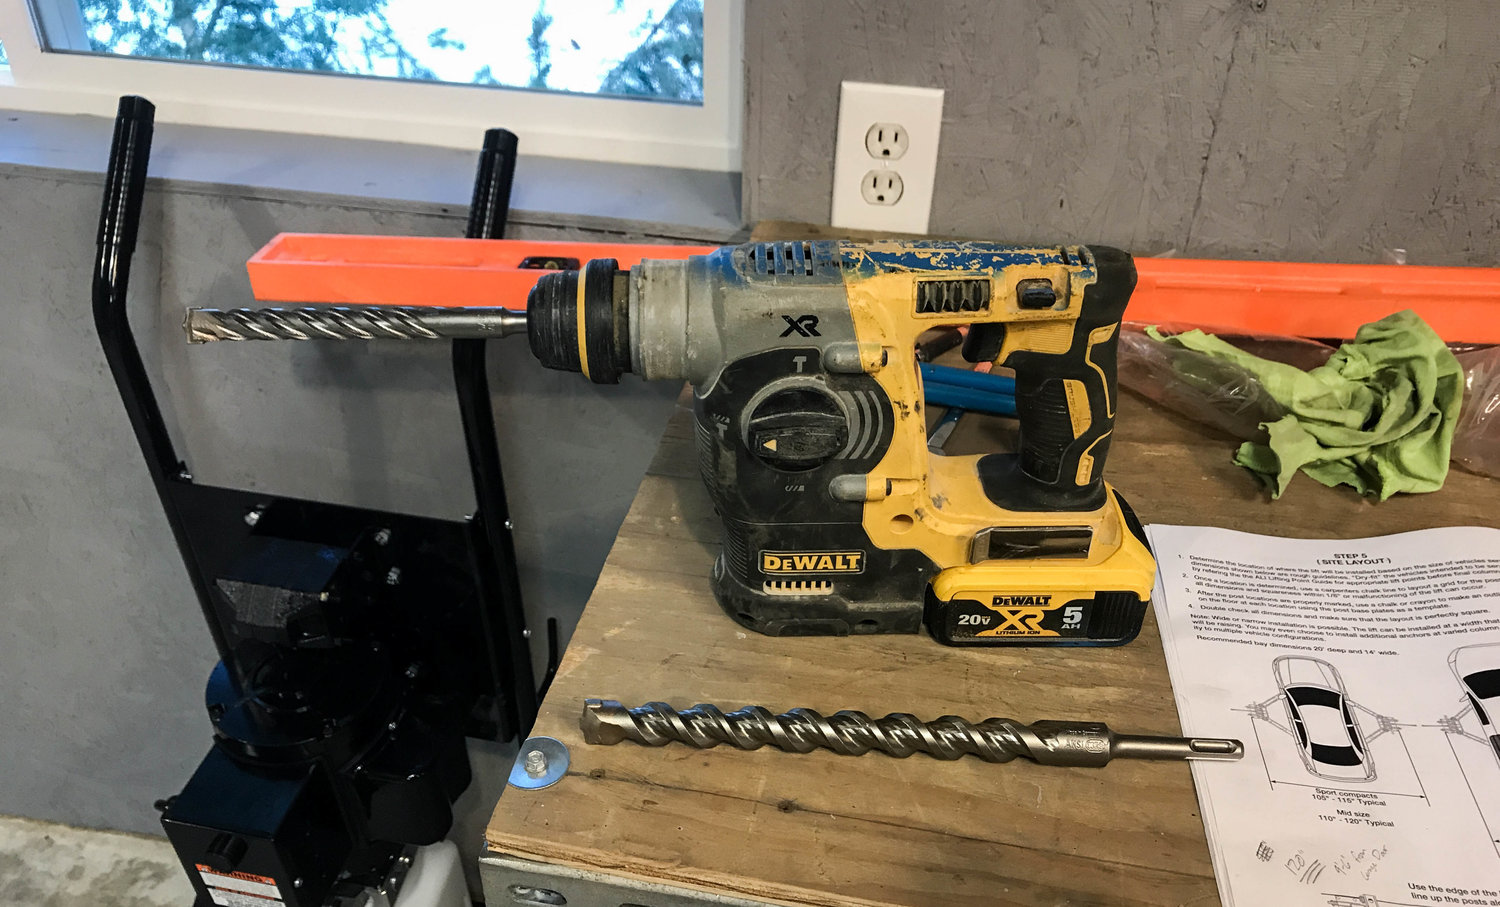
Borrow a rotohammer from work. Hopefully you work somewhere that uses rotohammers. You’ll need a 5/8” bit and a 7/8” bit….which also came from work.

IMG_5018.jpg

Once your first pilot hole is in, enlarge with the 7/8” bit.


IMG_5019.jpg

These are the collared female drop ins that go into the floor. They need to be at least 4'“ deep.

IMG_5020.jpg

Drill baby, drill.

IMG_5022.PNG

Posts installed!
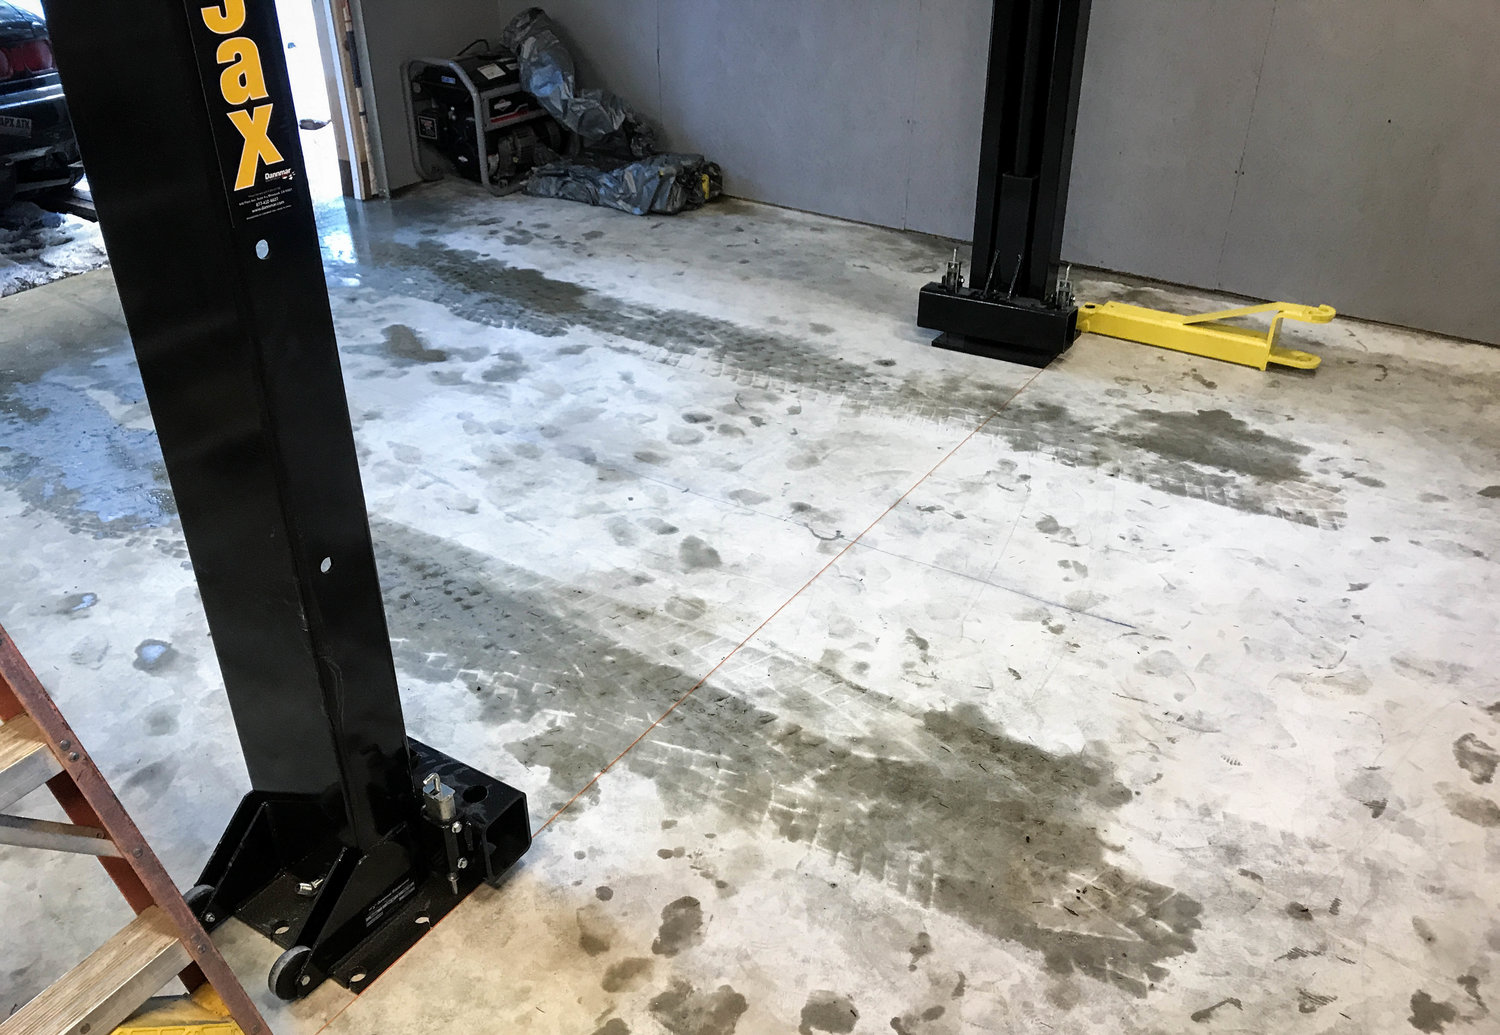
The lifting arms install easily. Hook up the hoses, add 9 quarts of hydraulic oil, and start testing and bleeding the lift.

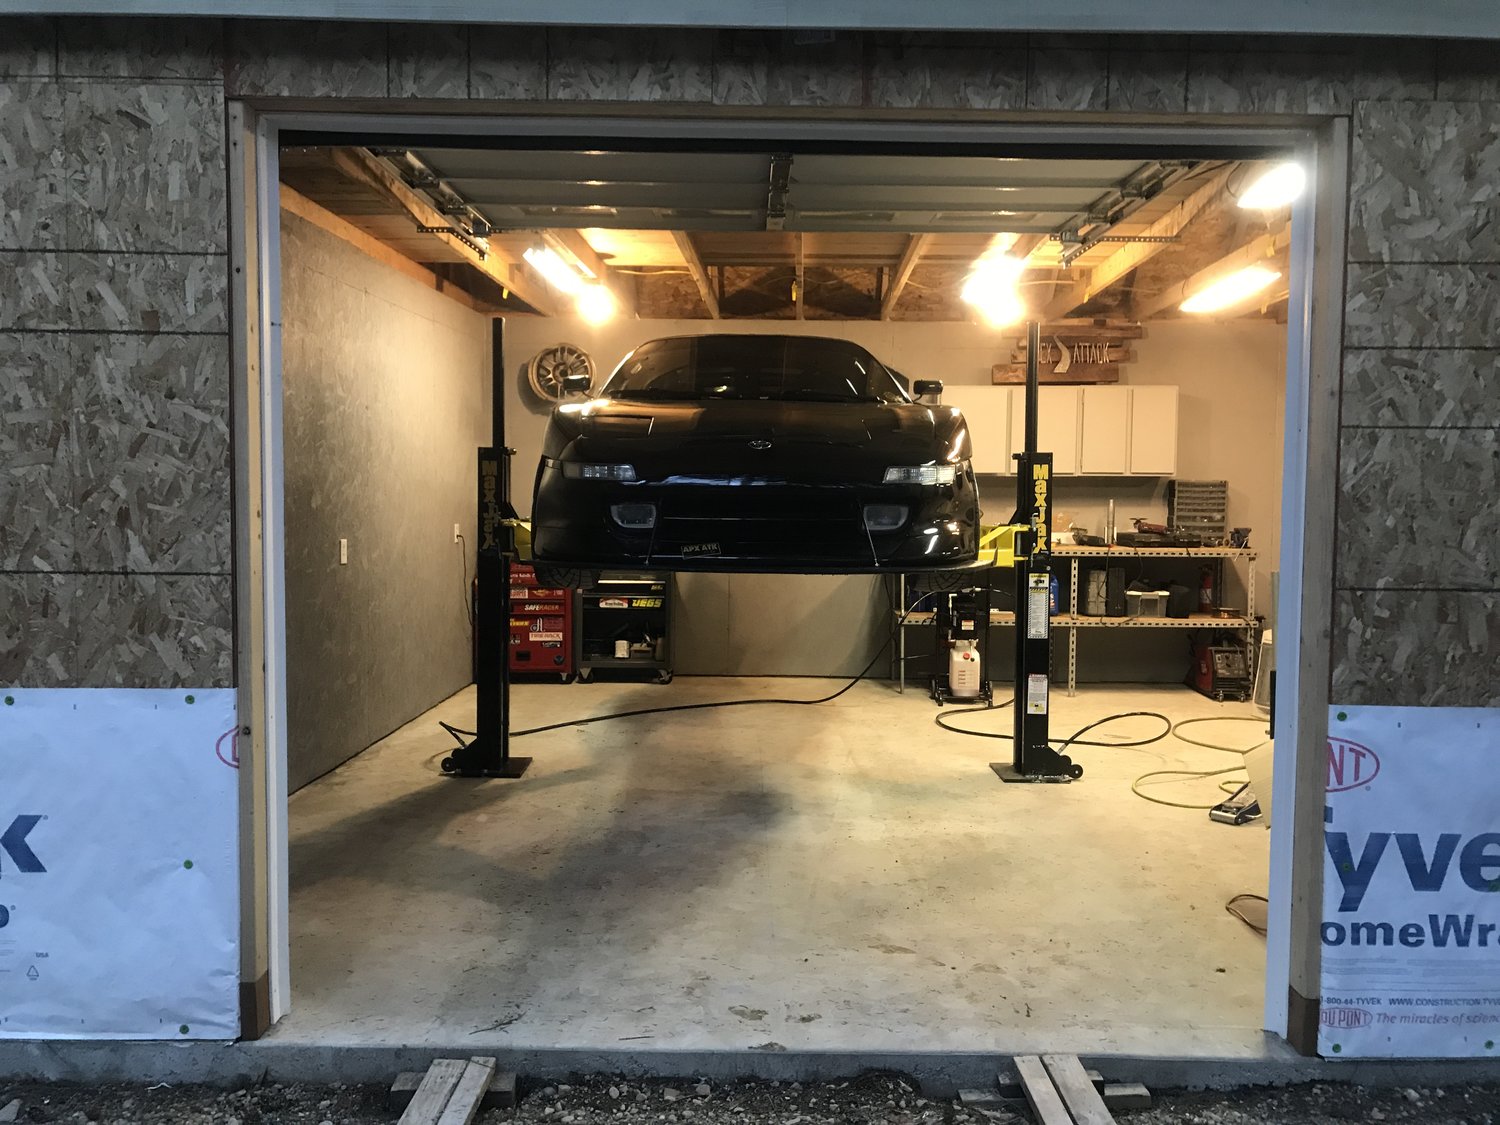
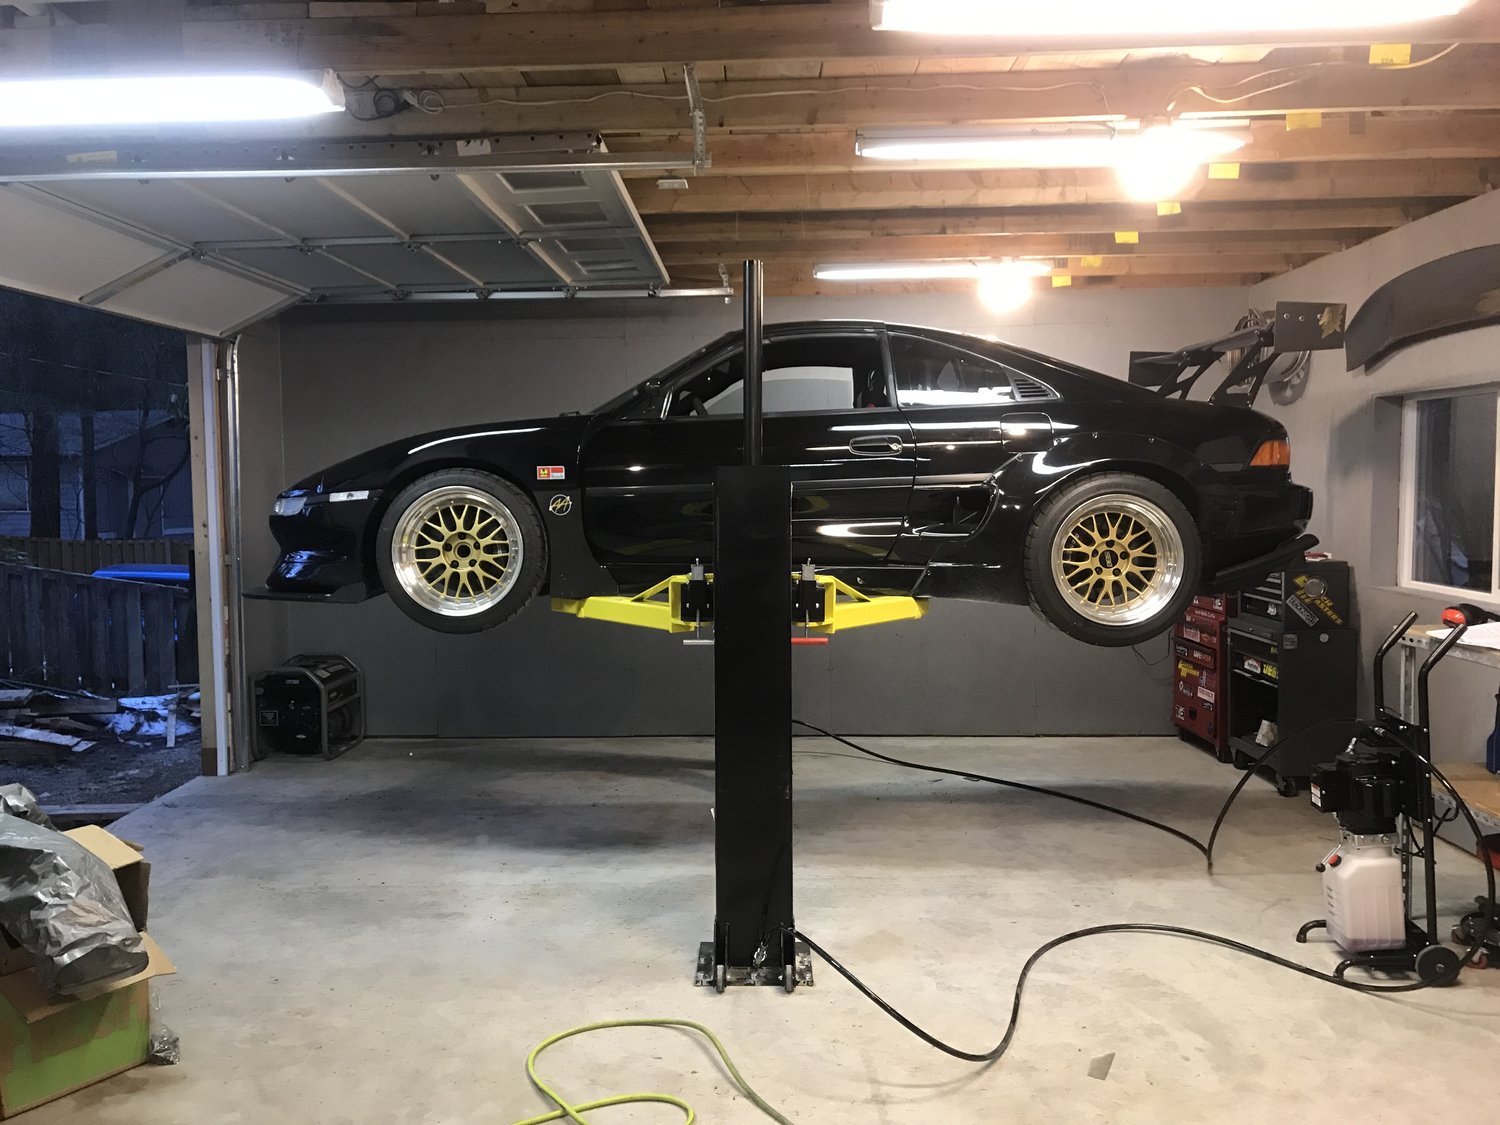
When things seem good, I brought the car in for its first lift. Getting the lift arms to hit my pinch rails was an extreme pain the first time. Turns out, I might have installed the posts too close together and too far back in the shop. The car fits, but has to be lifted pretty far back in the shop. My original goal was to have as much room as possible in the back of the shop, where I’ll primarily be working. Instead, we have the opposite. It can be fixed with more mounting holes in the floor. But… it works! Car is in the air! I can easily glide under the car and work from a stool comfortably. I’m psyched!
IMG_5067.JPG

IMG_5072.JPG

Yeah, eventually I’ll need more room.

The overall picture though, dreams coming true.

IMG_5070.JPG

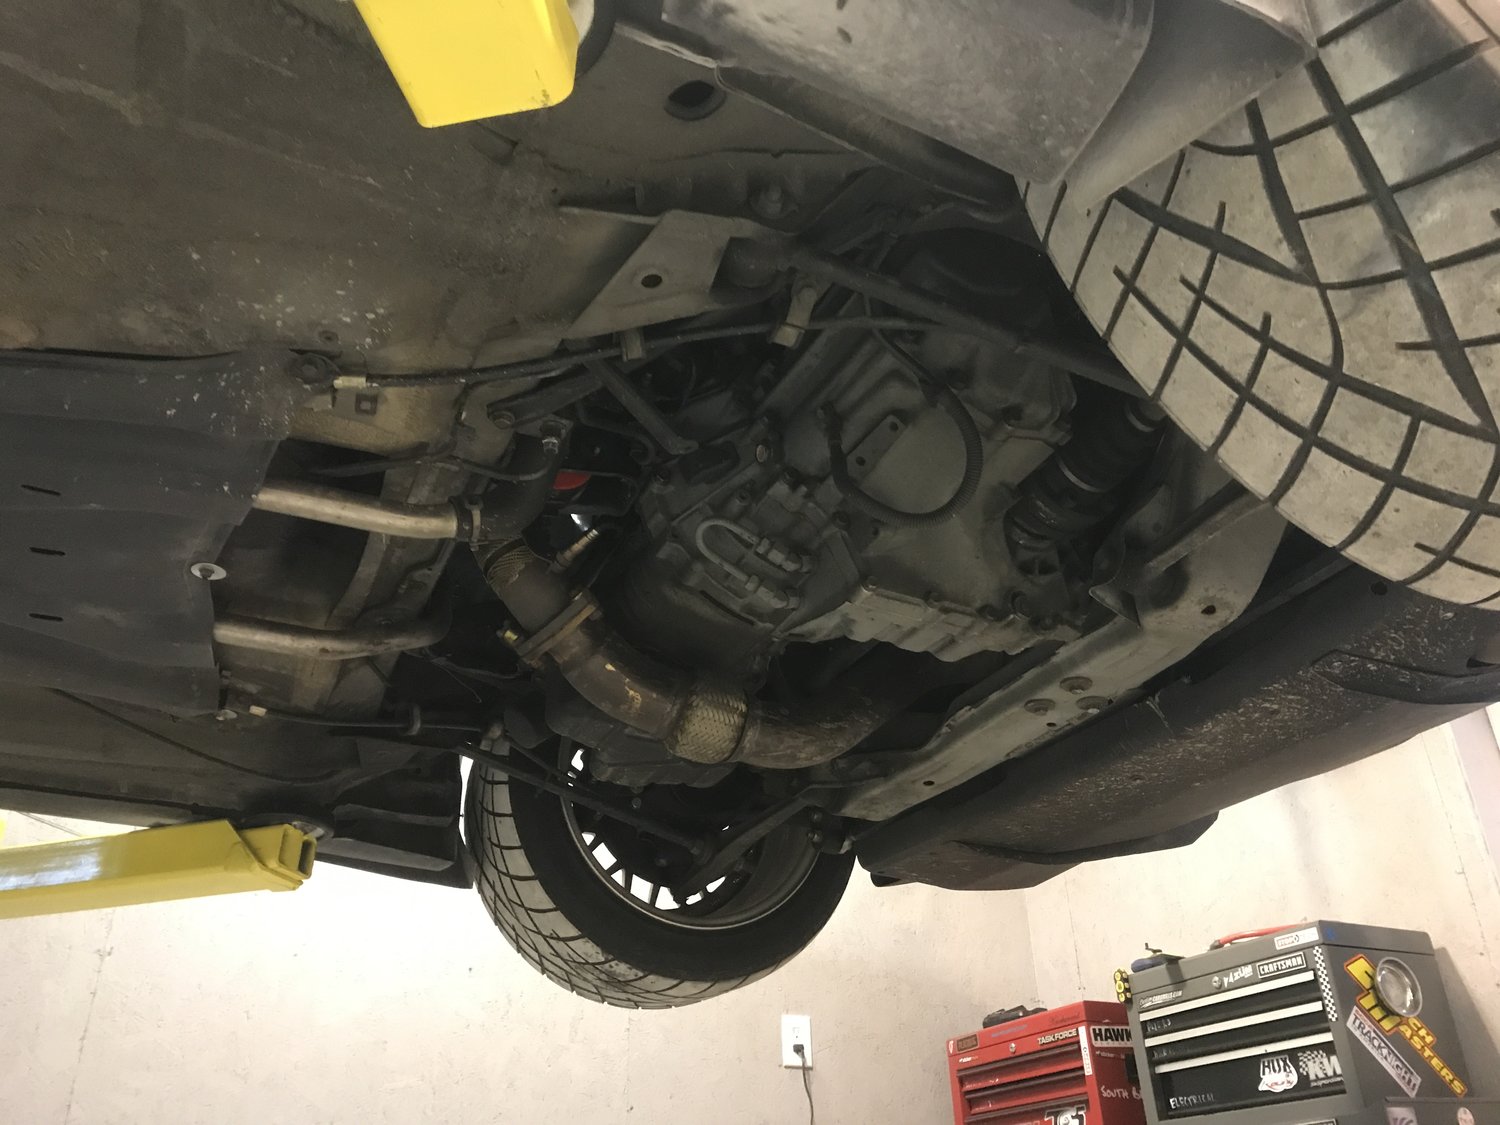
All that access, no more creeper life.

IMG_5071.JPG

To celebrate, I gave the car its first wash in almost 6 months, and went for a little cruise to blow the cobwebs out.

IMG_5060 2.JPG

akylekoz
akylekoz Dork
5/30/19 7:09 a.m.

You have inspired me to finish the inside of my garage, nice work.

chandler
chandler PowerDork
5/30/19 8:12 a.m.

My new stuff starts being built in August so I’m glad this thread came back to the top. Looks awesome!
Lof8
Lof8 GRM+ Memberand Dork
5/30/19 8:45 a.m.

I love it.  looks beautiful.  Nice work!

apex_attack
apex_attack New Reader
5/31/19 12:04 p.m.

Thanks guys!  This is a recap of most of my shop build over the last year, so it's not entirely up to date.  It was built mostly over the fall/winter of 2018.  We're wrapping up the siding and exterior finish work this spring, so I'll get you another update on that soon.  I'm also using the hell out of the shop, the car has been on the lift for 2 months now undergoing a 2grfe v6 swap, ditching the old 2.0 liter 3sgte for the same power, and much better reliability and drivability.  

jfryjfry
jfryjfry HalfDork
5/31/19 2:04 p.m.

First off, great work!   A lot of effort and time distilled into a quick easy read. 

It seems that your car isn’t balanced on the lift - that looks like a better position for a Fwd car....   I could be wrong but might be worth finding the balance point and trying to get that lined up with the posts

java230
java230 UltraDork
5/31/19 3:06 p.m.

Very nice! We must be similar folks.... ski bum in campers, DIY garages and have MR2's in the PNW.... scary!

apex_attack
apex_attack New Reader
6/6/19 4:31 p.m.
jfryjfry said:

First off, great work!   A lot of effort and time distilled into a quick easy read. 

It seems that your car isn’t balanced on the lift - that looks like a better position for a Fwd car....   I could be wrong but might be worth finding the balance point and trying to get that lined up with the posts

You're not wrong.  When laying out my posts I put them too close together and too far back in the garage.  It's stable for now (I've even stood in the trunk and the car didn't move), but I plan to drill one of the posts wider so I have more room to manipulate the arms of the lift.  

apex_attack
apex_attack New Reader
6/6/19 4:31 p.m.

In reply to java230 :

No way, where do you live?  I'm in North Bend, WA, ski Alpental pretty much exclusively.  

java230
java230 UltraDork
6/6/19 8:24 p.m.

In reply to apex_attack :

Kenmore! We follow the snow around, but haven't been to Alpental in a long time! 

Gaunt596
Gaunt596 Reader
6/7/19 7:56 a.m.
apex_attack said:
jfryjfry said:

First off, great work!   A lot of effort and time distilled into a quick easy read. 

It seems that your car isn’t balanced on the lift - that looks like a better position for a Fwd car....   I could be wrong but might be worth finding the balance point and trying to get that lined up with the posts

You're not wrong.  When laying out my posts I put them too close together and too far back in the garage.  It's stable for now (I've even stood in the trunk and the car didn't move), but I plan to drill one of the posts wider so I have more room to manipulate the arms of the lift.  

While your drilling, since your gonna end up making dust anyway, drill a couple extra sets of holes spaced 3-5" or so, if your pad allows it. This will leave you some flexibility if you change cars, or suddenly get an itch to work on a truck/suv etc. 

Agent98
Agent98 Reader
6/7/19 1:17 p.m.

X2 on the kudos and the great write up. How do you plan to get up in the attic with an armload of stuff? (I've been looking into spiral stairs, or ship's ladders for my attic/above my garage). Using a ranch ladder is getting really old.

engiekev
engiekev Reader
10/17/19 1:25 p.m.

Wow, awesome execution and planning!

What are you planning on using for the ceiling, OSB again?  I'm trying to weigh options on garage wall and ceiling coverings, seems like OSB is the cheapeast (drywall is cheaper for material but not when you factor in all the mud!). For ceiling metal sheet would look very nice but is the most expensive,  easy to put up though.

1 2

You'll need to log in to post.

Our Preferred Partners
d00luyyqaMglxfBUEc9Bnj7FfegheY9ceNTNsJX0mSdlJNHODXCsEazEAOu7f0HH