1 ... 48 49 50 51 52 ... 159
volvoclearinghouse
volvoclearinghouse Dork
2/28/14 1:00 p.m.
wvumtnbkr wrote: What kind of car parts are you buying with that money? I bet NOS parts for an old Volvo are pricey!

It's gotta go back to pay off the charge card that paid for the springs.

So says wifey.

I have enough old volvo parts at this point I can pretty much drive an Amazon for the rest of my life. And then my kids will inherit them.

solfly
solfly Reader
2/28/14 2:09 p.m.

date nights = brownie points brownie points = garage time garage time = progress

therefore:

date nights = progress

bgkast
bgkast GRM+ Memberand Dork
2/28/14 2:41 p.m.
tuna55 wrote: I let you down yesterday! Sorry. I also have a date night planned for next Saturday, so plan ahead on no progress then, too.

volvoclearinghouse
volvoclearinghouse Dork
2/28/14 4:11 p.m.

I just double checked the receipt for the springs- $491 and some change. Somehow I seem to have more than that now in my paypal account. WHAT IS WRONG WITH YOU PEOPLE? WHY DO YOU KEEP GIVING ME MONEY?

In light of the previous comments, I'll send the extra 37-odd dollars back to Brian to fund his MIG wire and sandpaper budget.

Again, thank you to everyone.

EDIT: Money refunded.

EastCoastMojo
EastCoastMojo GRM+ Memberand Mod Squad
2/28/14 4:39 p.m.
solfly wrote: date nights = brownie points brownie points = garage time garage time = progress therefore: date nights = progress

Yes, by transitive law date night does equal progress.

NOHOME
NOHOME Dork
2/28/14 5:09 p.m.
solfly wrote: date nights = brownie points brownie points = garage time garage time = another fish in the school! therefore: date nights = trouble!

FTFY

This guy has a track record!

tuna55
tuna55 PowerDork
2/28/14 10:46 p.m.

So I am in the garage with the lappy tonight.

So I can listen to more metal stuff on Pandora, because I really like Metallica but the radio never plays it. Stupid Pandora, forcing me to branch out. Nirvana? I always that they sucked until now. Also, am I the last person in the world to realize that the Offspring is really a good band? What the heck?!

Back to work now, folks.

Ransom
Ransom GRM+ Memberand PowerDork
2/28/14 10:57 p.m.

In reply to tuna55:

I'm pretty sure my fondness for The Offspring trashes my punk cred, but I have been enjoying my copy of Smash for, uh, almost twenty years now...

tuna55
tuna55 PowerDork
3/1/14 12:23 a.m.

I am not sure if I ever had any cred whatsoever. What kind of fool will listen to Metallica, Garth Brooks, Neal Diamond, Rush and Crosby Stills Nash & Young with equal fervor?

Tonight did not go exactly as planned. For starters, despite Tunawife wanting to go to bed early, she went to Target to get lots of diapers and returned after the Tunakids were in bed, giving me about an hour less in the garage. Also, to be extra cautious and detailed, the swaybar took a lot longer than expected.

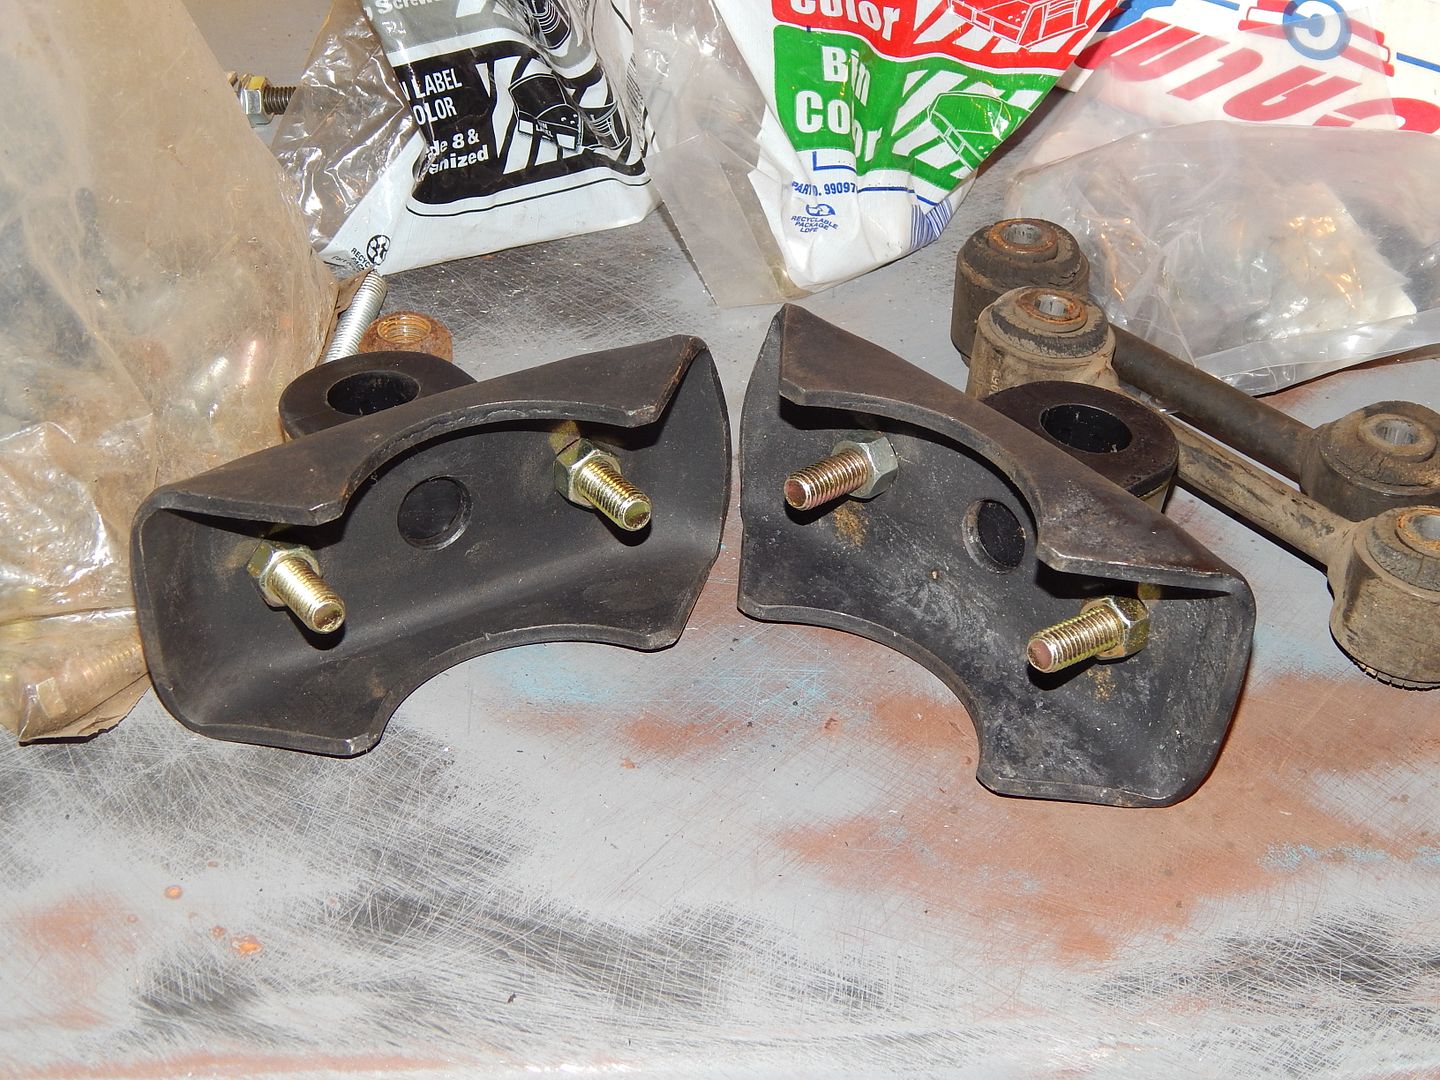
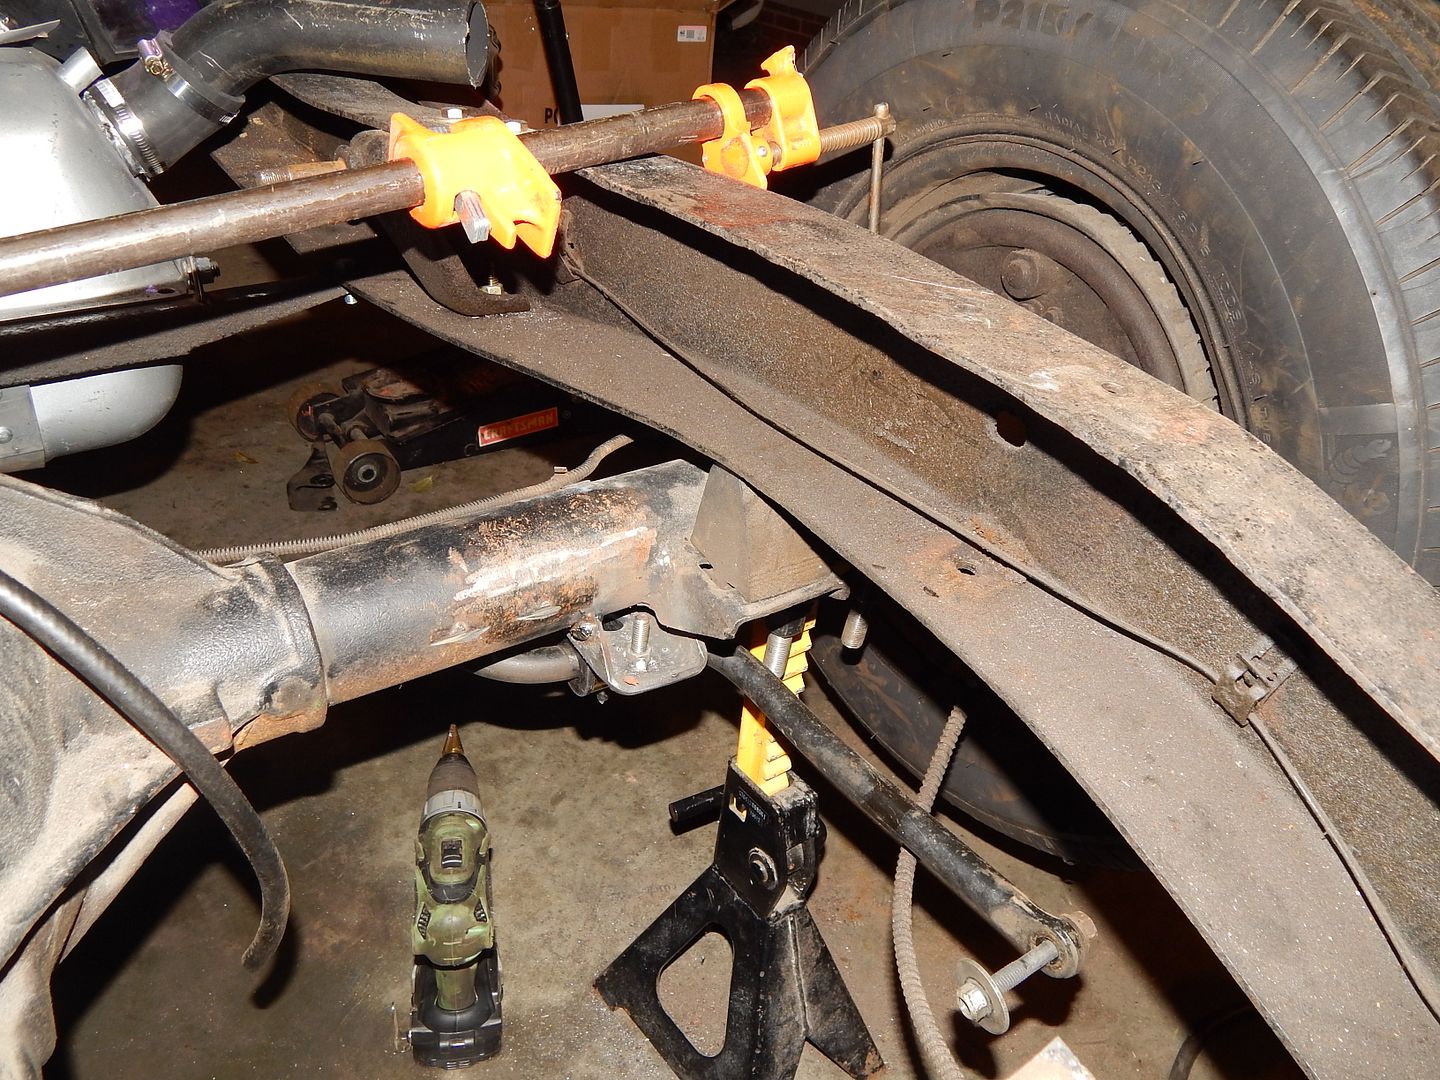
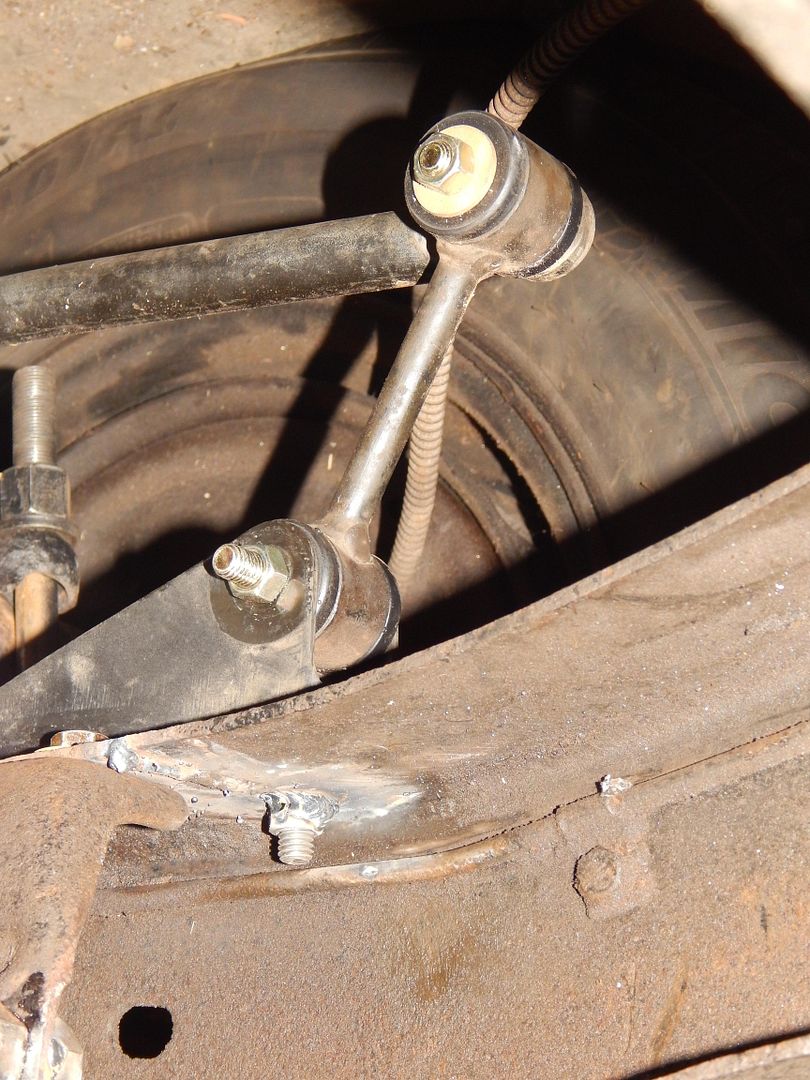
Here is the beginning, the swaybar brackets on the new perches.

 photo DSCN4878_zps24001b40.jpg

I welded that nut on there and then removed the rubber bushing. I did this so I could weld the perches on the axle. Unfortunately, the swaybar is not exactly straight where it mounts, so I had a hard time clamping the bar to the axle in such a way that the bar rotates through the bushing. Once I did, I tacked the perches in place and fully welded them, which was obscenely difficult. I kept blowing the breaker in the garage until I looked over and realized that the Leaf was still plugged in. That did the trick. I had to grind off and reweld like four times.

Then the trouble started. Not trouble, exactly, but complications. I first had to jack up the truck and also clamp the axle to the bumpstops. Then I had to reinstall the bushings and the bar and aim the shock mounts. Unfortunately, the mounts had to move. The one on the passenger side has to move inboard. I decided this after staring at it for a while. I drilled new holes in the frame and played with it for a bit. It will work, and work well. The next step is to attach the new shock mount stud on the bracket that I am moving, and fill the holes and reinforce the frame in that area, seeing as I am drilling new holes closer to the edge of the frame.

The other side is going to require the same treatment. Not too bad, really, but it's after 1AM and I know that Tunawife's health is going to keep her in bed late tomorrow morning, and the Tunakids wake up around 5:30 to 6:00, and I was shivering because it was 38 in the garage. I felt pretty good, but it's important to get at least 4 hours of sleep, I guess. Call it beauty sleep but I am still not beautiful.

Tomorrow I'll attach the frame brackets for the swaybar, which will be very easy, and handle the shock mounts. Additionally, I'll try and get to the end link bushings, but that probably won't happen.

It doesn't sound nearly as 'kickass' as I was hoping, but it will have to do for now.

Not what I had wanted, but it's progress nonetheless.

Here is what it looks like now:

 photo DSCN4879_zps21939300.jpg

(note the stud is just a 3/8" bolt sitting there. For now.

 photo DSCN4882_zps2f79b2dc.jpg

 photo DSCN4881_zps31d8bf5d.jpg

SkinnyG
SkinnyG Dork
3/1/14 11:42 a.m.

On other projects, I've used muffler clamps, with the threaded end of the u-bolt becoming the "stud" for the sway bar mount. Easily undo-able.

tuna55
tuna55 PowerDork
3/1/14 1:25 p.m.
SkinnyG wrote: On other projects, I've used muffler clamps, with the threaded end of the u-bolt becoming the "stud" for the sway bar mount. Easily undo-able.

I saw that, but was not willing to do something that temporary on this truck, this is a "OEM style restomod". In addition, the swaybar is not straight along the axle tube, so the perches are not perpendicular to the axle. Something that forced itself perpendicular would not allow to bar to rotate properly. As it was, I probably could have redrilled the perch for an angle to mount the bushing, but it only made sense at the time to mount the two together squarely and take up the angle with the welded joint. Anyway it works great now, I can easily rotate the bar with one hand.

tuna55
tuna55 PowerDork
3/1/14 11:05 p.m.

As expected, getting to sleep around 2 and waking up around 5, then 5:30, then 6 for good, made me a bit tired. So we played it slow today. Just a trip to Lowes and Tractor Supply to get edging, pots, hardware, PVC (irrigation for the gardens), soil, peat, cutoff wheels, flap wheels, and a few extra things. I was ready to head out at around 7:30 with the Tunakids, but Tunawife woke up finally and decided to come along.

When we got back home, Tunawife began kicking ass in the gardens. When the Tunakids went to nap/rest/quiet time, I went to help, and we cleaned up the whole front landscaping. Then the now-awake Tunakids and I "washed the cars". Many of the Tunakids either splashed in the new sudsy puddles or dug in the fresh, after some homemade pizza, we worked on the RC car (see that build thread).

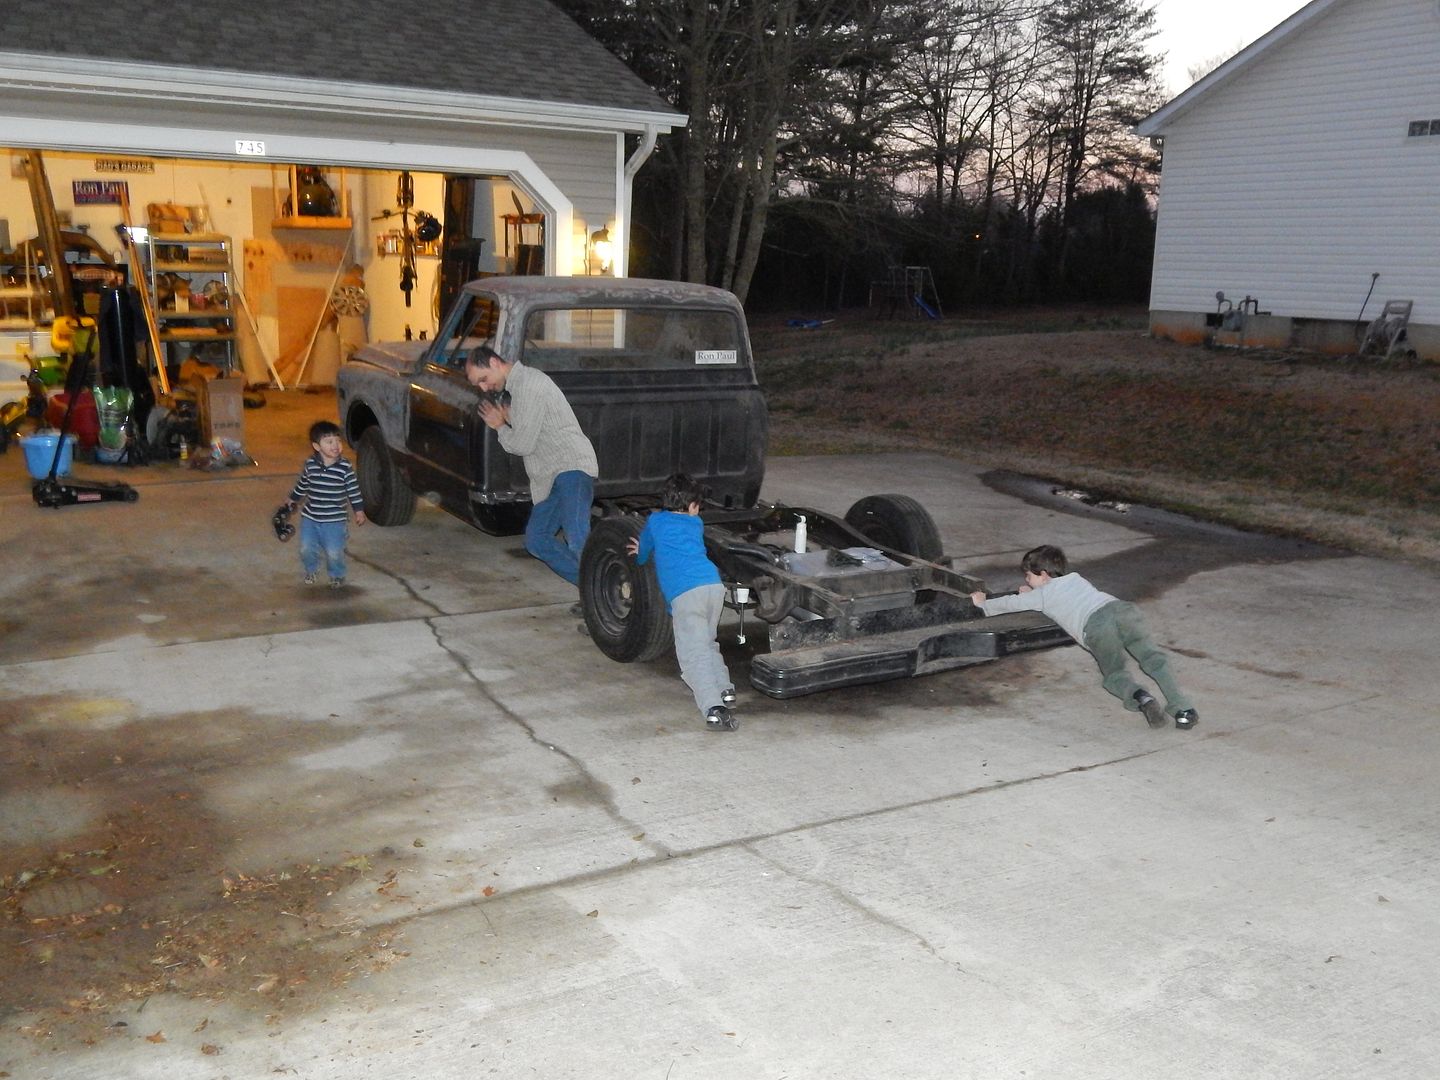
Tunawife then reminded me that Alan wanted some pictures of the truck outside, which is quite the ordeal. Here ya go:
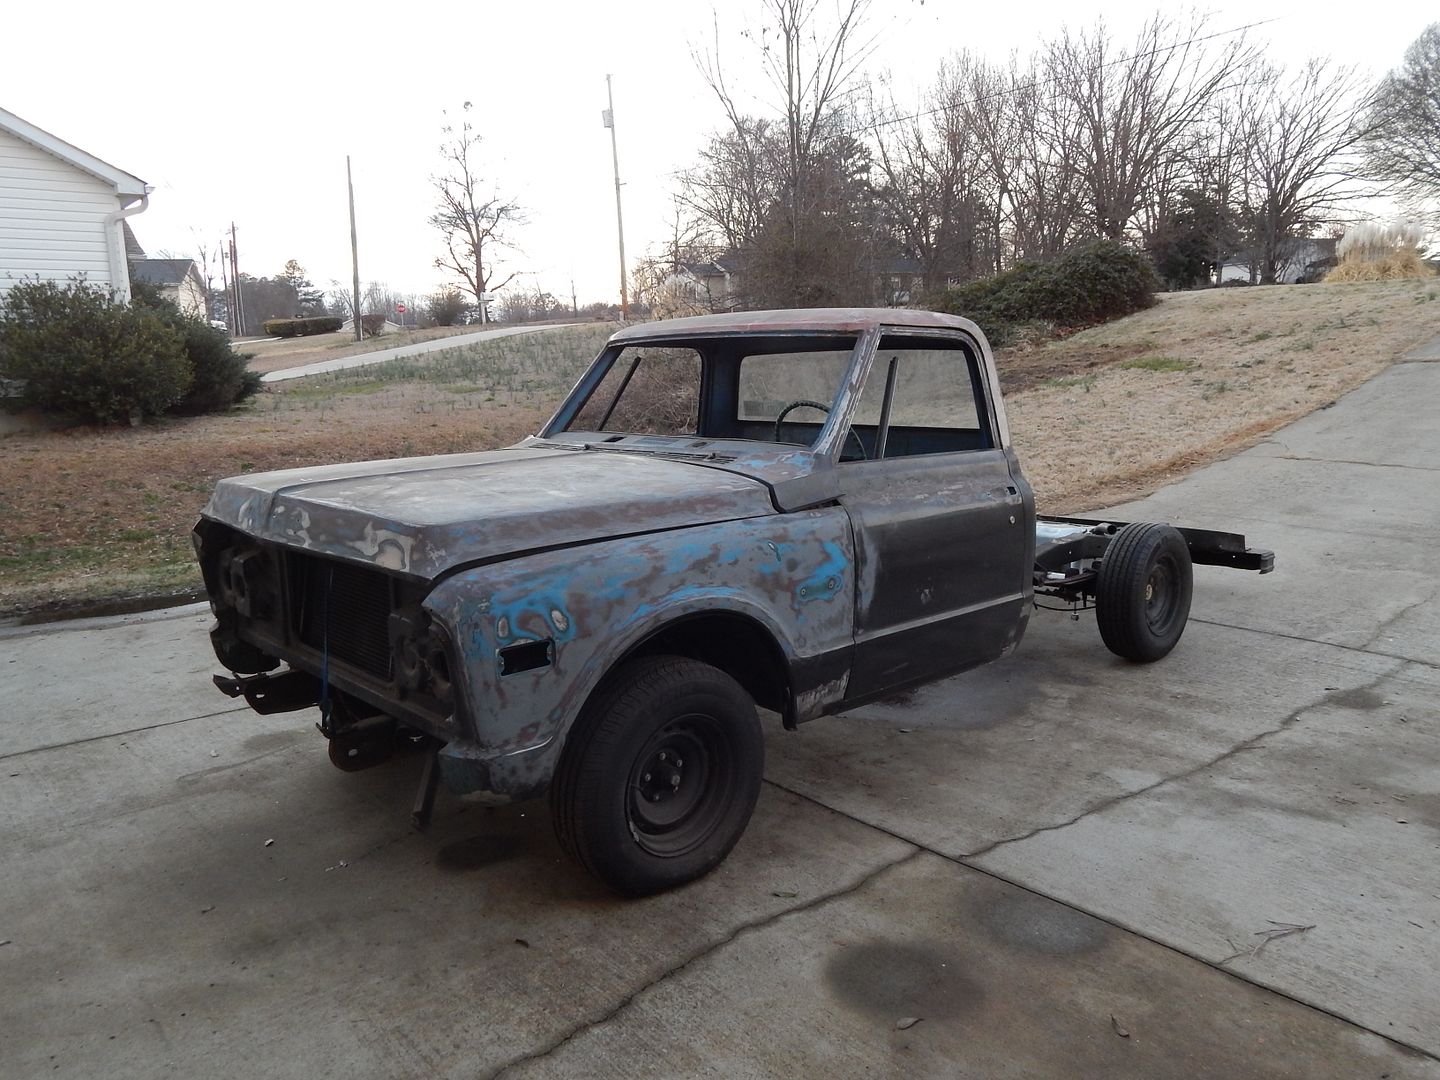
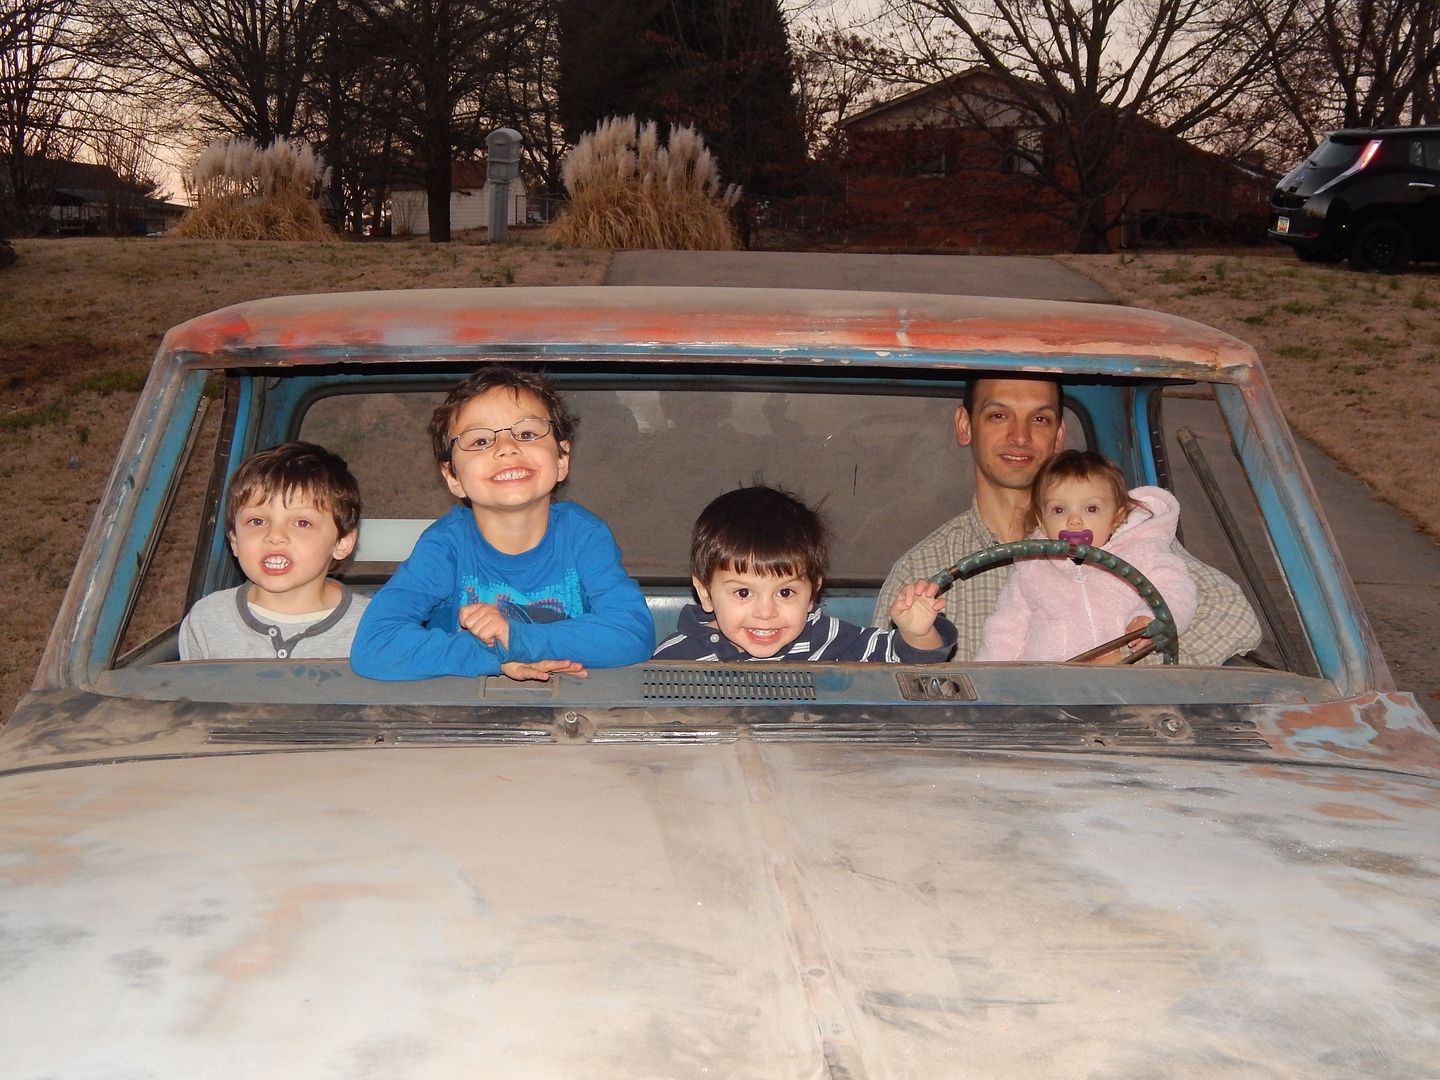
 photo DSCN4892_zps2ef92930.jpg

 photo DSCN4922_zpsb1ae48a2.jpg

Pushing it back is WAY harder. I had help, though.
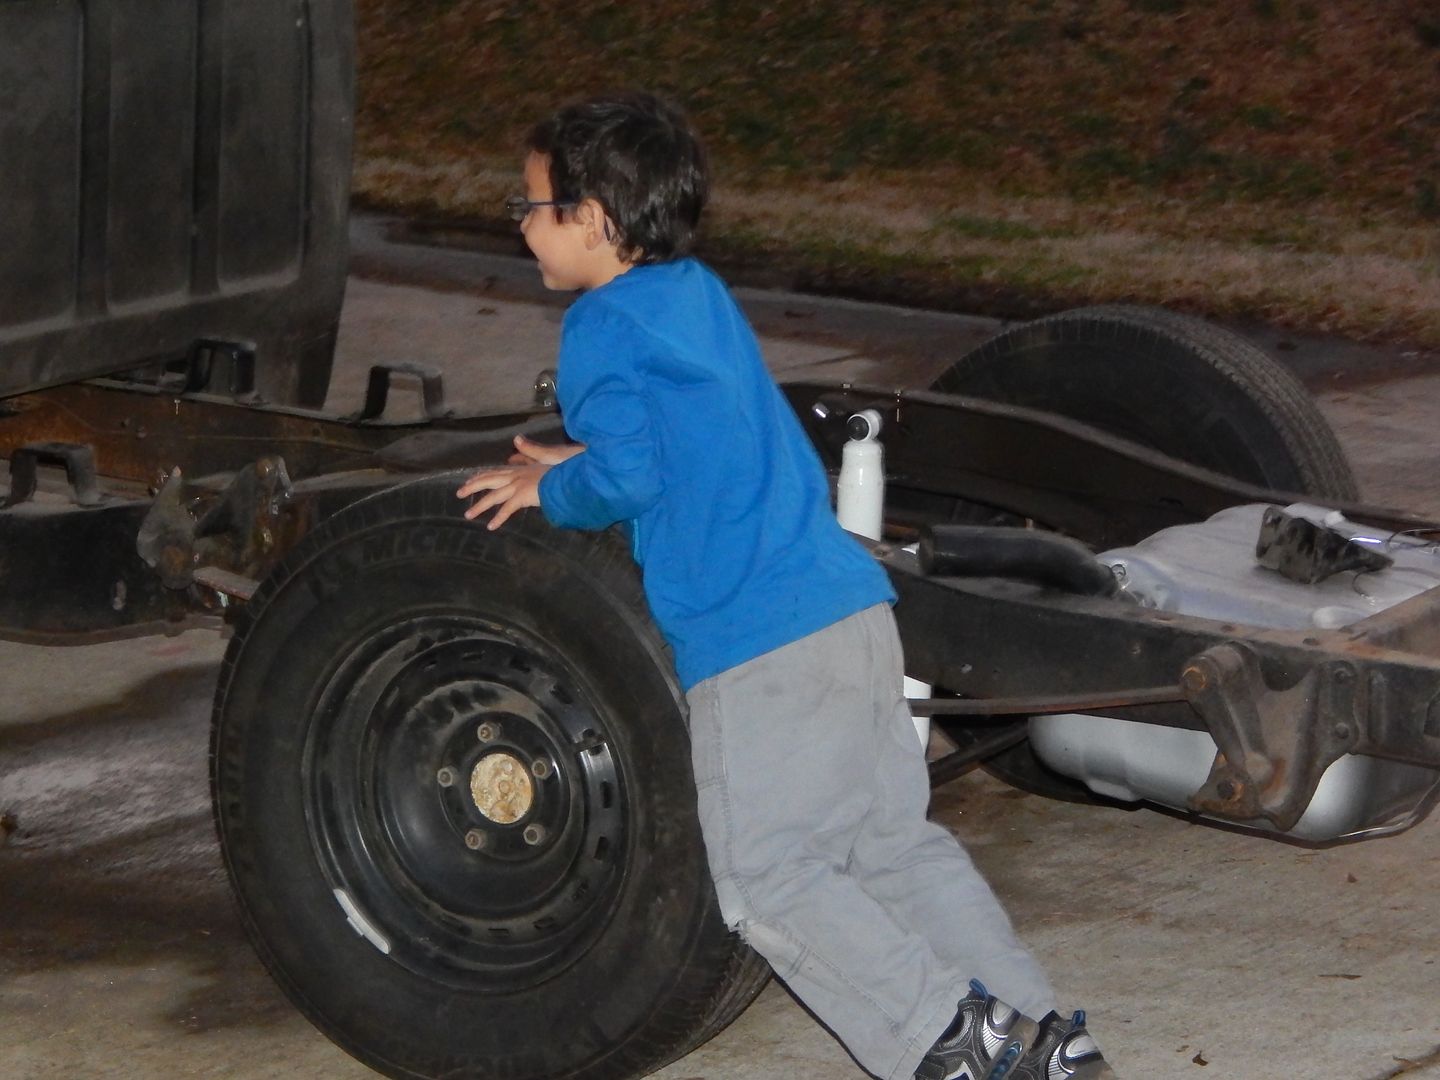
 photo DSCN4934_zpsa8ef627c.jpg

 photo DSCN4935_zps3178e572.jpg

I eventually enlisted the help of Mr. John Deere. The poor lawn mower needed a running start to get it over the step into the garage.

You can see how, after a day like that, I decided to stay in tonight.

.
.
.
.
.
.
.
.
.
.
.
.
.

Yeah right. You guys know me better than that. I went ahead and relocated the upper damper mount bracket inboard by 1 1/8". I then welded up the old holes (and the old holes on the other side), and reinforced the mounting location with a weld bead nearby. I came up with this clever arrangement for welding the holes where I used an adjustable wrench's weight to hold a flattened piece of copper pipe against the back side of the hole, making filling it easy, even for a hack like me.

During all of this, I mounted the new stud to the bracket. A VERY nice piece. Stover nuts, washers of all ID/OD combos for you, big honkin stuff. I was pleased, and to make sure, I put a few tacks on the backside of the nut. Then I installed it.

The trouble is that, I can't really firmly locate the lower damper mount until the bar has a home. For it to have a home, I need to locate the arms, which have those nifty brackets on the frame that I grabbed from the 'burb. I have a few choices here, but the problem is that I really want to put the new bushings in before I fit the end links.

I'll spare you the gory, but the recipe is a 30mm socket on one end of the link, a 3/8" bolt with a 9/16" socket on it on the other. Place in vice and heat with gun. Continue applying pressure with vice until rubber begins to melt, then wiggle end link until the rubber gives up. This worked like a charm and left no residue.

I love Energy Suspension bushings. Here they are, all completed.
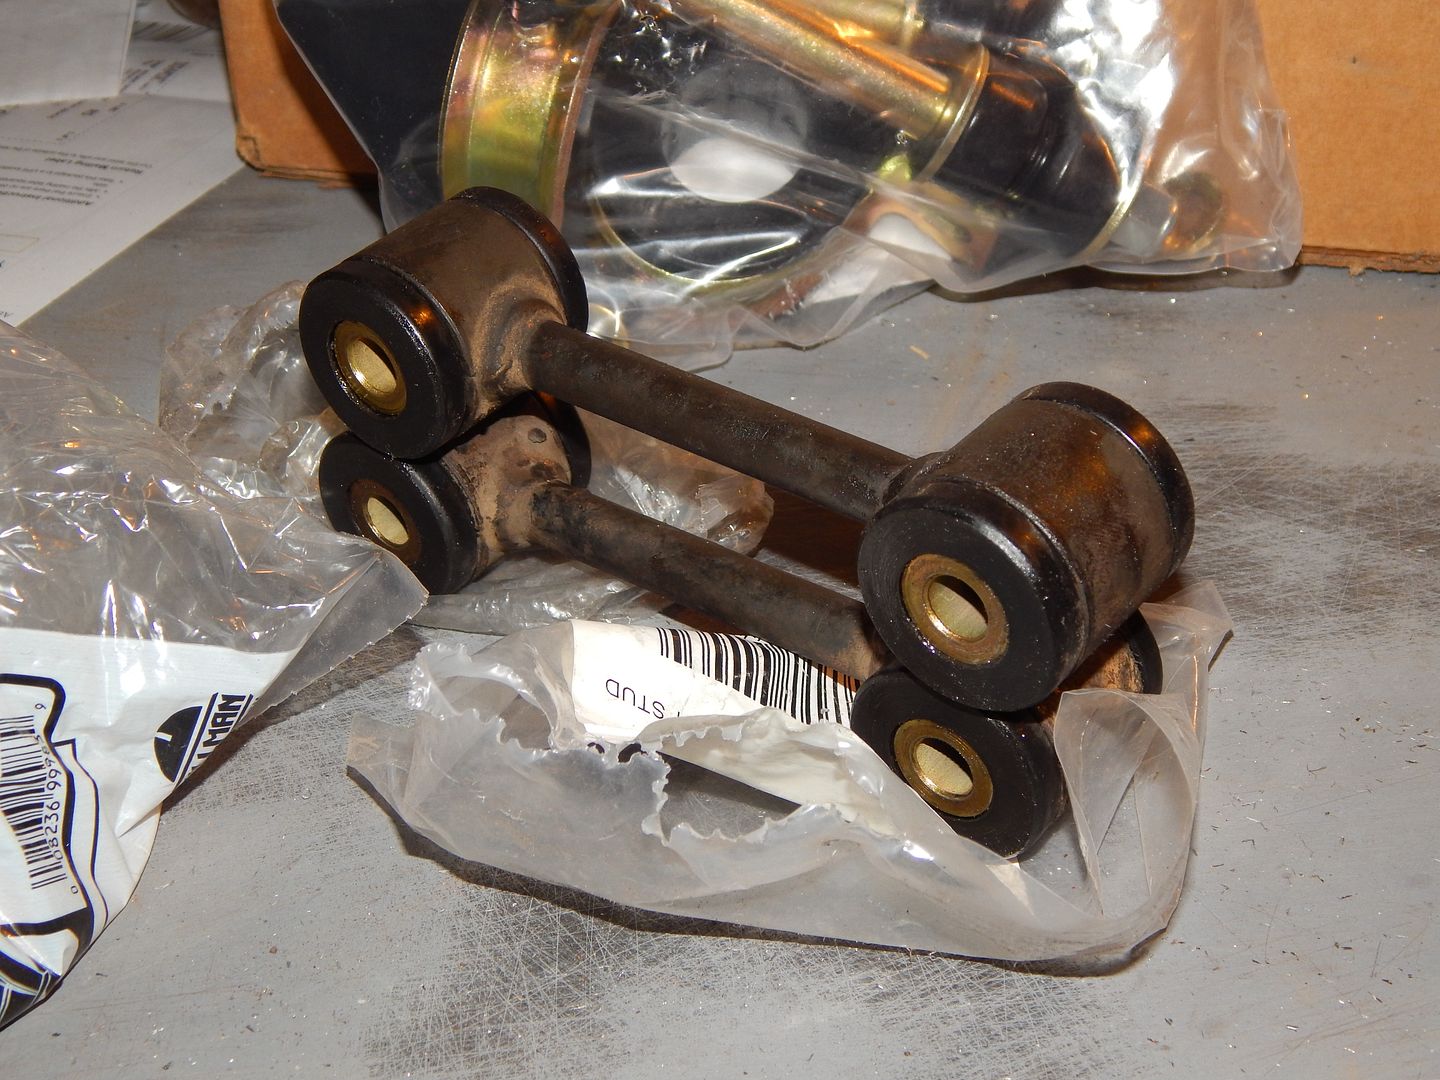
 photo DSCN4947_zpsf6e5ddae.jpg

The kits fit perfectly, the grease is great, the result is a squeak-free, reliable and responsive joint.

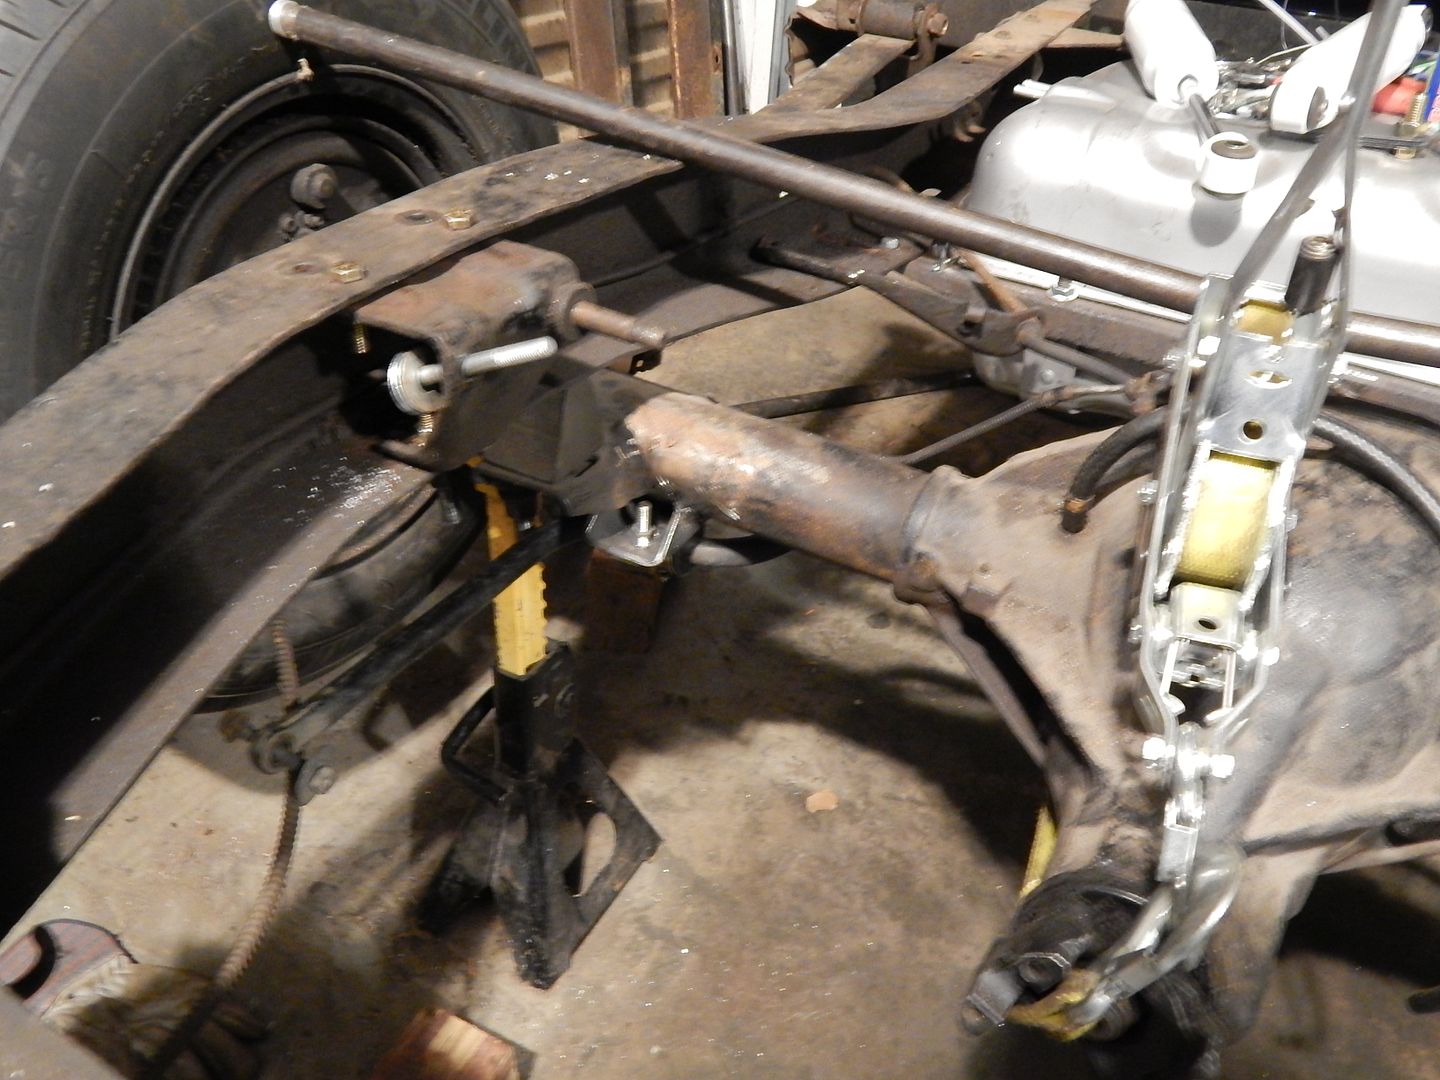
I bolted it all in and began playing with the mounts. I have angles to adjust, and fore/aft. I decided to mount them such that the bracket is extending rearward of the bar eye. This enables me to use the wider part of the frame for more strength. Here is what I've decided on.
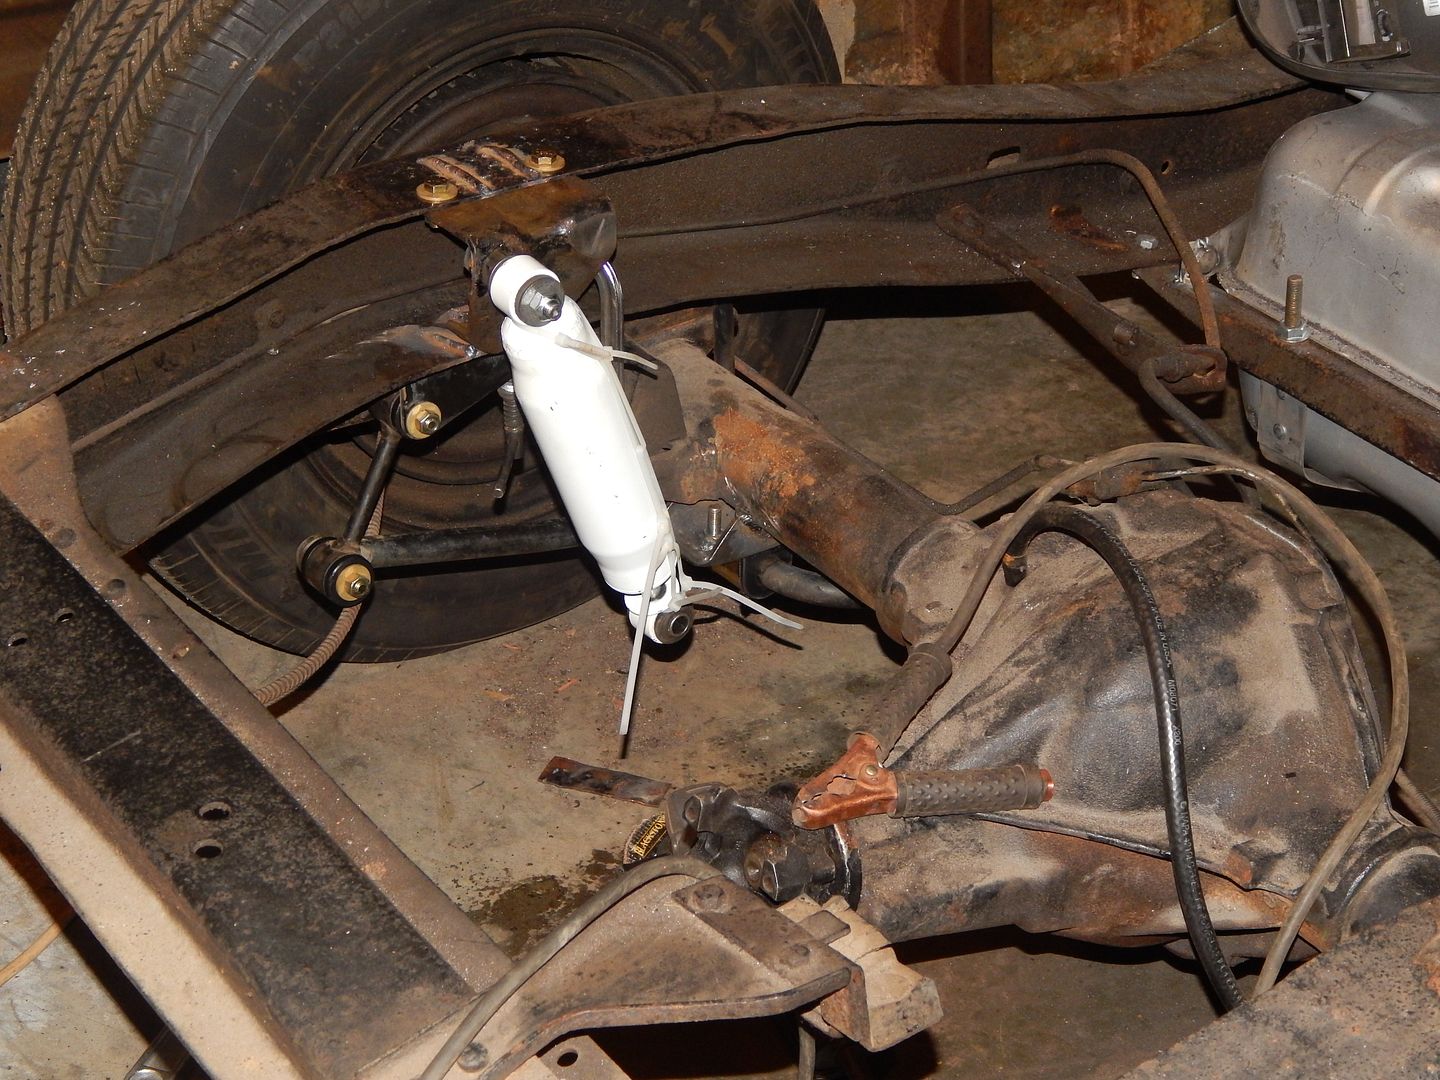
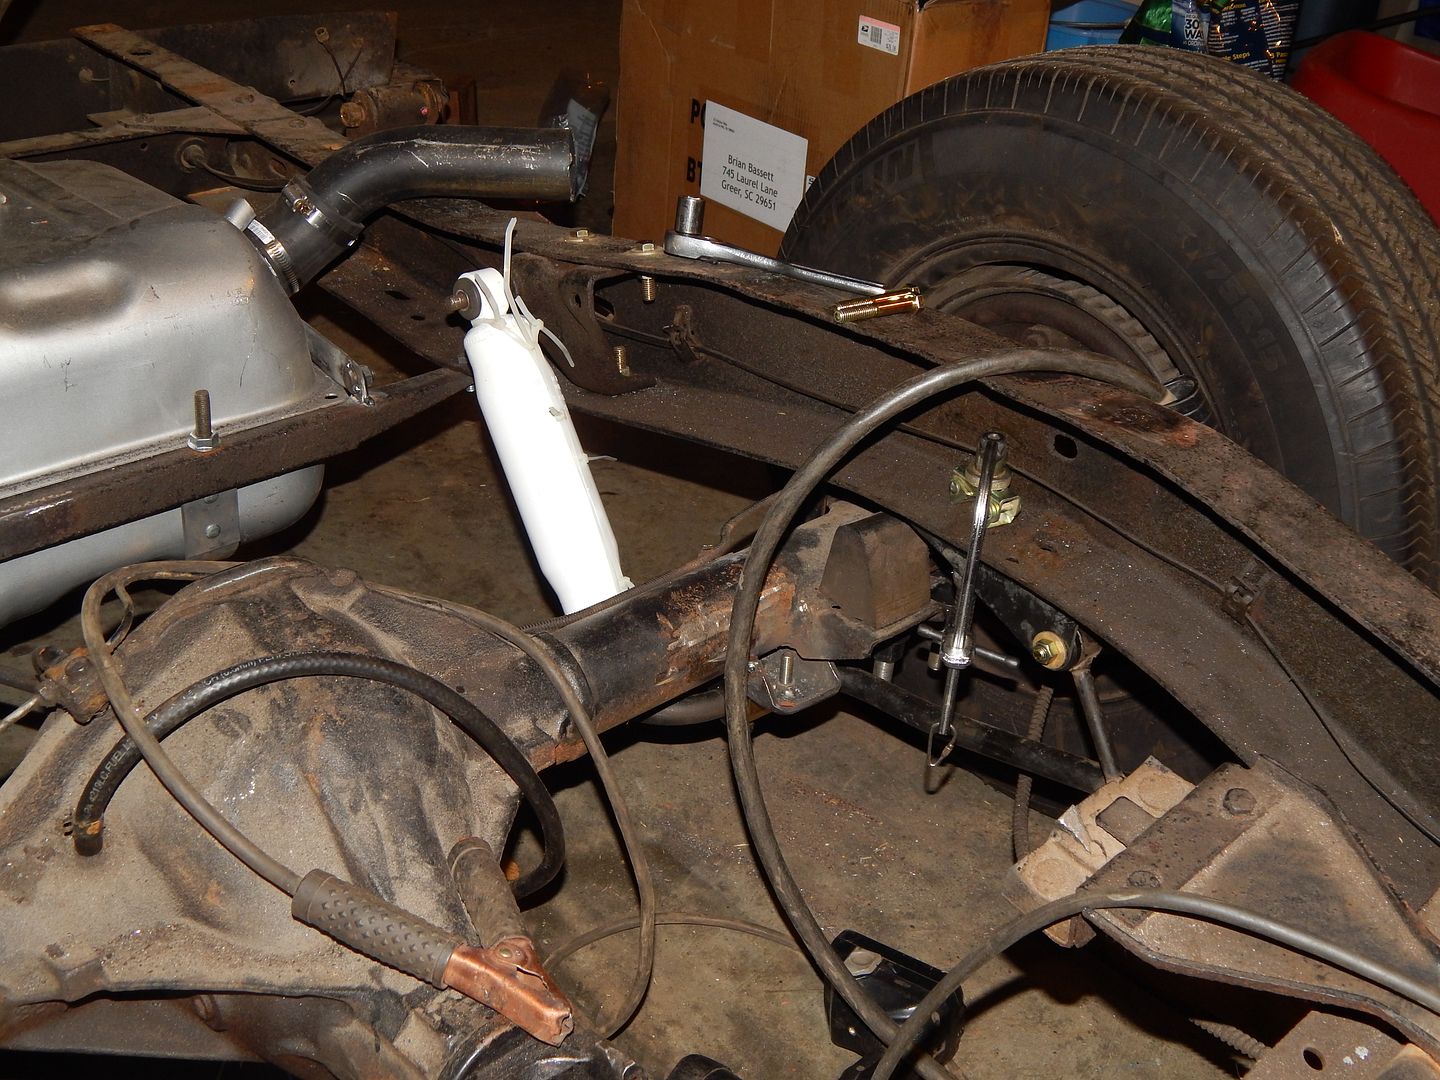
 photo DSCN4948_zps6b84e0a6.jpg

 photo DSCN4949_zpsc6c7d8ae.jpg

Unfortunately, that's where I stopped. Tunawife popped her head in the garage with Tunadaughter, who was crying and having a bad night. Tunawife, despite literally getting double the sleep I got, needed hers as well. Hence writing this at midnight instead of 2AM like yesterday.

mazdeuce
mazdeuce UltraDork
3/2/14 6:12 a.m.

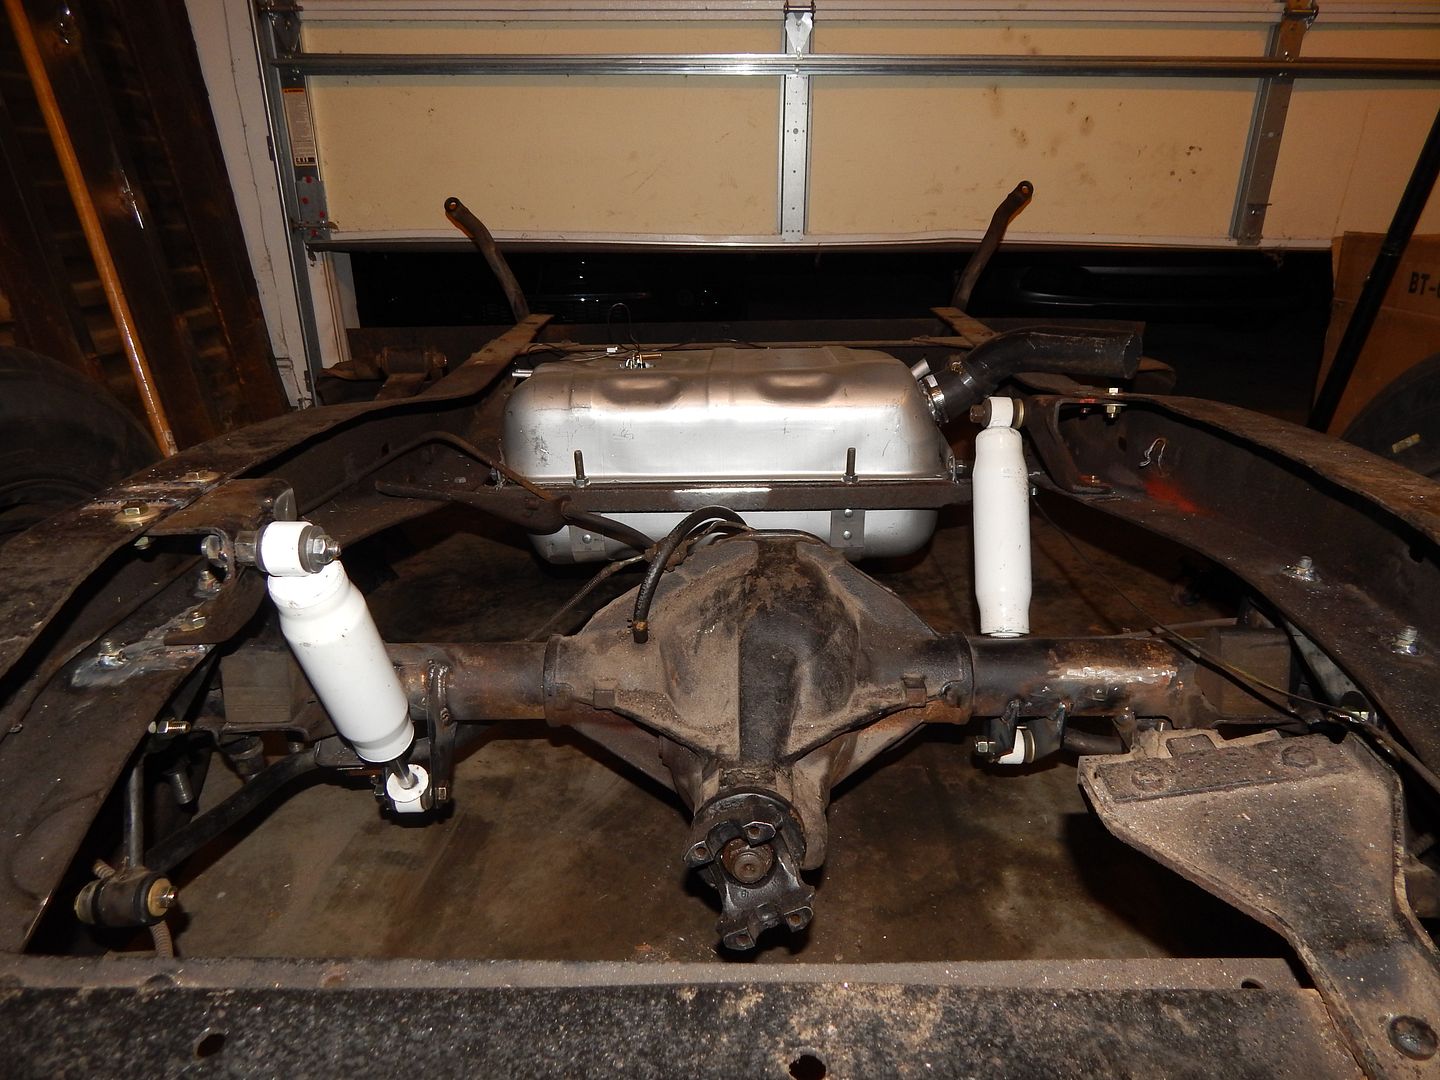
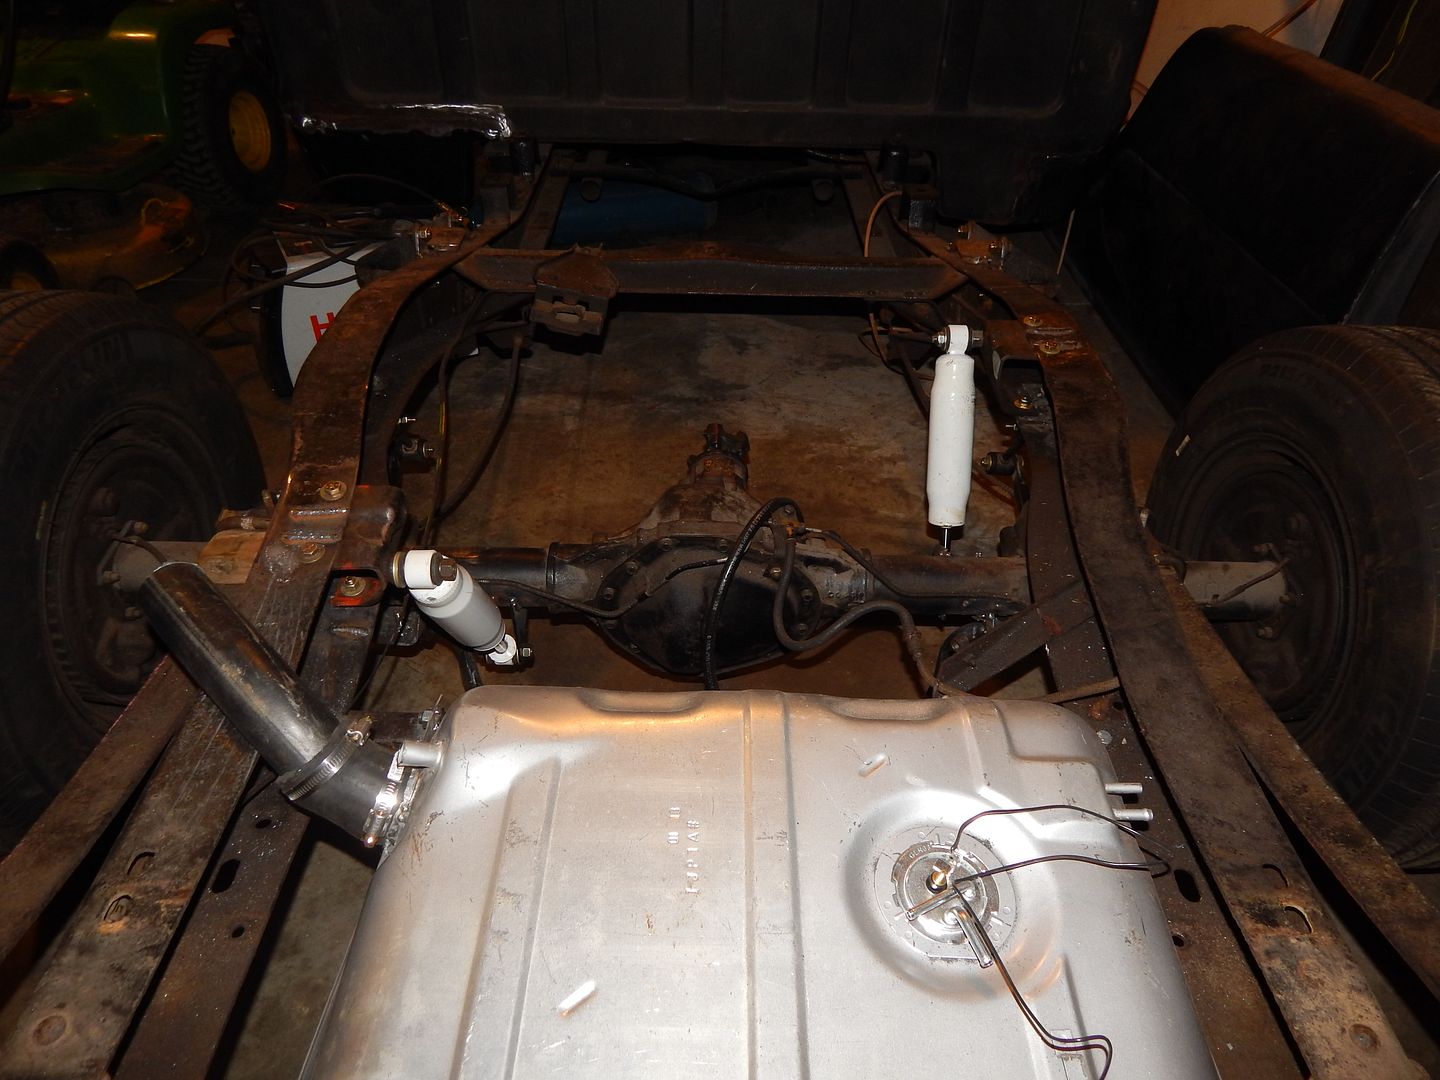
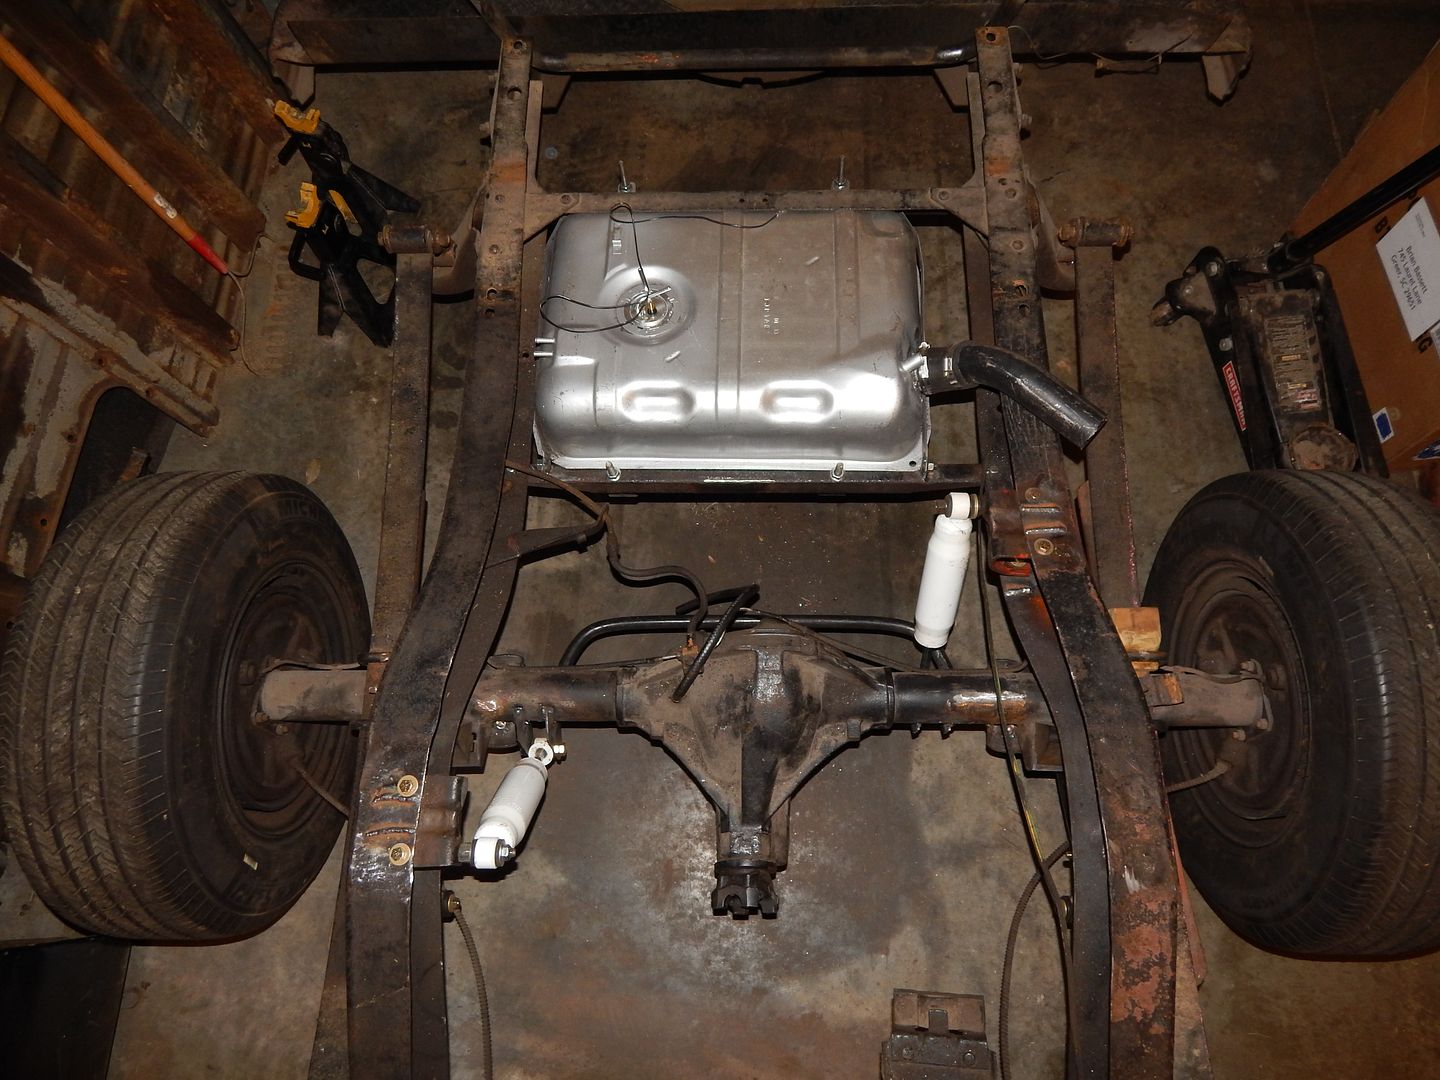
That last picture. Tank, sway bar, shock, this thing is starting to look like a real truck! Good job.

NOHOME
NOHOME Dork
3/2/14 6:28 a.m.

Priceless

Can't be sure, but judging by the hair sticking up, kid in the middle might have a bad ground!Might want to look into that

tuna55
tuna55 PowerDork
3/2/14 10:18 p.m.

I didn't get much accomplished today. Once I got outside, I had to clean the lint screen on the side of the house, and then move the bedside (which was standing up against the freezer, precariously). Much like the bed floor, it weighs something like 30 tons, so that was tough.

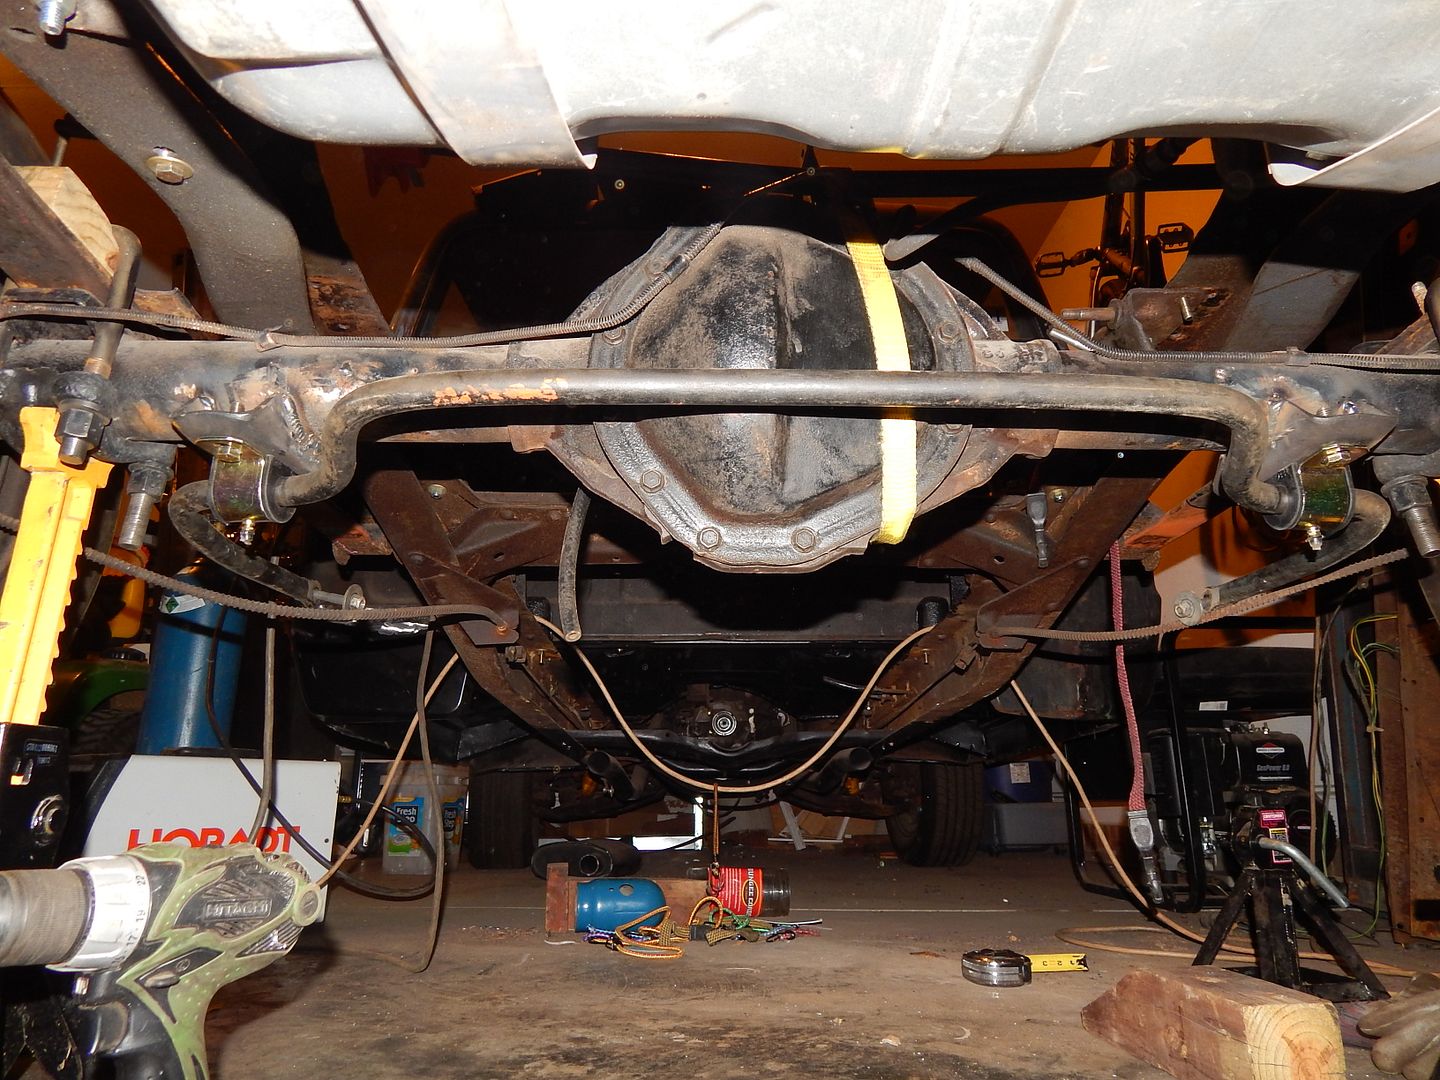
I drilled holes and mounted the swaybar frame brackets. It looks GREAT, and I even welded the nuts to the frame rail so you can actually bolt things on without three hands. See?

 photo DSCN4991_zps06392401.jpg

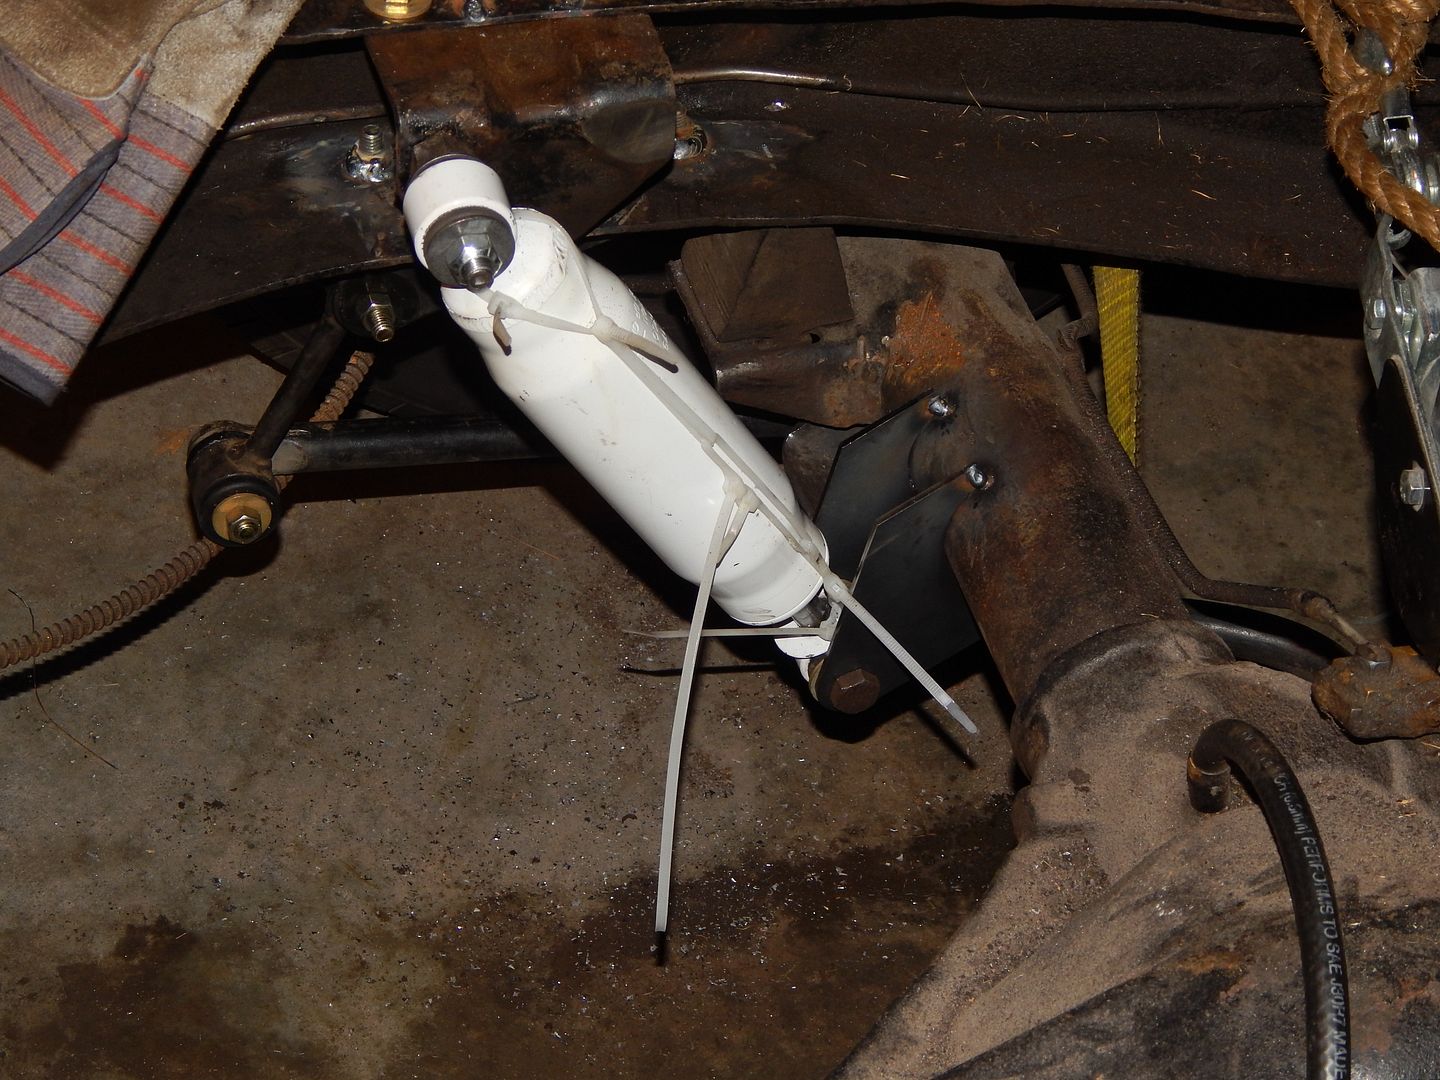
And I then bottomed out the frame again. That's harder than it sounds. Before I tried using a ratchet strap around the axle tube with a black pipe over the frame rails. It made the pipe into a "V". This time I was more clever, and wrapped it from the bottom of the spring to the top of the frame. Once I did this I could really mount the lower shock eye. The drivers side has that new stud that I loved, so I started there. Happily, I found a way to use the mounts that I originally designed and had John waterjet for me. I don't know about you guys, but I have no real tool to make the outside of a cut look decent. Or consistent. So, here is that:

 photo DSCN4990_zps66158743.jpg

Just tacked into place for now. I want to relocate the upper damper bracket on the other side inboard in much the same way the passenger side is. That takes some time, and it was after 10:30, so I'll get there tomorrow, plus finish weld the bracket. Once I get the stud I'll swap it out and be done with the rear suspension. Well, except for the springs. If they fit without any tweaking, then I'll be done. That's pretty sweet.

bgkast
bgkast GRM+ Memberand Dork
3/2/14 10:47 p.m.

Nice! Looks great. I better get off my butt and go do something too!

volvoclearinghouse
volvoclearinghouse Dork
3/3/14 7:43 a.m.

Those pictures with you, the kids, and the truck, have to be the best pictures I've seen in a long time. Thanks for adding a smile to my morning.

tuna55
tuna55 PowerDork
3/3/14 10:31 p.m.

Thanks, Mike!

Tonight I was forced to use the old upper damper mount. Prime messes with my head sometimes, and in the two days since I installed the other side, it was no longer carried at all. I had to order it from somewhere else and hence it will be a while. In the meantime I used the existing setup to mock everything up.

I was able to get the lower mounts all in place and fully welded tonight. They look pretty good, although the welder could use some practice.

Here is the end result:

 photo DSCN4994_zps62827576.jpg

 photo DSCN4995_zps793fd604.jpg

 photo DSCN4993_zpseb4056e1.jpg

There you have it, a 1972 GMC with splayed, more upright dampers, that have enough travel to handle the bumpstops and full droop alike. Once the new springs arrive, I'll feel a lot better, but for now, this is very nice. A happy Tuna here resides.

SnowMongoose
SnowMongoose HalfDork
3/3/14 11:56 p.m.
tuna55 wrote: A happy Tuna here resides.

I'm just glad that the truck didn't roll back and reduce the number of tunakids by one.

bgkast
bgkast GRM+ Memberand Dork
3/4/14 1:45 a.m.

New avatar?

volvoclearinghouse
volvoclearinghouse Dork
3/4/14 11:33 a.m.

We have that on the side of our LTD, only he's holding a manhattan in that outstretched, um, fin.

tuna55
tuna55 PowerDork
3/5/14 7:46 a.m.

Bad news. We're having a yard sale on Saturday. This means my garage is completely filled up with boxes of crap to sell, all cleaned up. I am not sure I'll be able to get out there until that's over. We have lots of crap.

I am buying U bolts and top plates today, some bed bolts soon, and I'll use this week to make some stylistic choices that will be important in a couple of short months.

wvumtnbkr
wvumtnbkr GRM+ Memberand Dork
3/5/14 8:47 a.m.

I have a hopefully dumb question....

Why is teh axle not centered in the hump that the frame rails make?

In other words: Is the axle too far back?

Rob R.

tuna55
tuna55 PowerDork
3/5/14 8:54 a.m.
wvumtnbkr wrote: I have a hopefully dumb question.... Why is teh axle not centered in the hump that the frame rails make? In other words: Is the axle too far back? Rob R.

Everything is back where I found it in terms of locating the axle, for now. Same main leaf springs, same perches, same same same. If anything, relocating the front mount may have moved the axle forward by less than an inch, but nothing more. I am not sure why it was designed like that, although I expect that the bed cross sills have something to do with it.

tuna55
tuna55 PowerDork
3/5/14 1:31 p.m.

Well I spent $110 getting new U bolts and top plates sent to me. Does that count as progress? I have had it getting the old junky RM pieces work with the "square" U bolts that never really were, and now have stripped threads so much that I can't even torque them down. It should take 15 minutes to bolt the axle to the springs and right now it takes better than an hour.

Plus, round U bolts are way better from a technical standpoint.

1 ... 48 49 50 51 52 ... 159

You'll need to log in to post.

Our Preferred Partners
nRXuKo8yKFsFkINQoWb5xU3caVPTXKigo7Lo8Zj9DisnHVGgFT1Az0YWSotfoZCU