The engine is a bit farther into the truck. It is actually sitting on the driver's side mount properly, but the passenger one is not lined up enough. I think there is enough slop to get them lined up. Which takes me to why it isn't yet. Most 1988.5-up S10s are not supposed to require moving the steering column to the left to clear the exhaust. I took a gamble on mine being one of the majority. I bet wrong. Tonight, I will be attempting to adjust the location the steering column mounts to the firewall, with the engine in, which is not advised. If it doesn't work, the engine will have to come out. ![]()
I have the swap manual that came with my mounts. There are several spots that need to be "massaged" with a sledge to fit the engine correctly.
pimpm3 wrote: I have the swap manual that came with my mounts. There are several spots that need to be "massaged" with a sledge to fit the engine correctly.
Yup, did that part, at least the ones for stock engine location on an 88.5-up truck. Very glad it's not an older model, as there was a lot more to be done on them.
EDIT: Which mounts did you end up buying, the ones that connect to 2.8 V6 chassis mounts? I went with the V8 style ones, as the consensus on the v8s10 board is that they are way better. Both are supposed to be miles ahead of the ones for the 4.3 style mounts.
Disconnected the steering shaft from the column, and decided to tackle the engine mount issue. After several hours of fidgeting with it, I got the engine mounts all bolted up.
In my inspection, though, I noticed there is no clearance for the passenger side exhaust manifold, one of the studs is rubbing the firewall. That, plus all the other issues I've had lead me to believe the engine is sitting higher and farther back than it should be with the V8 mounts. The V8S10 forum tends to support using the V8 mounts as being the strongest, plus putting the back of the engine on the same plane as the V6 is in a stock truck. I don't know if tolerances are just stacked unfavorably in my truck, or I did something wrong (not as far as I can tell), but its just not working. Guess I should have believed the manual I bought instead.
The engine is going to have to come out, but I don't know when, as that will probably require a weekend that I am home, and has good weather, since I need to pile a bunch of crap on the driveway. No idea when that'll happen. ![]()
Also need to decide if I can stick with these mounts and maybe modify them, or just give in and order a set of 2.8 style mounts like the book prefers.
Thinking I may attempt pulling the engine today after work, just to keep things moving. I figure I screwed up almost everything putting it in, I should be able to know and avoid all the pitfalls when removing it.
Engine is back out, and on the roller stand in my garage. Turns out its a lot easier when you snagged everything possible on the way in, so you know what could go wrong on the way out. Although if the distributor wasn't damaged before, I'm pretty sure it is now. ![]()
I'll spend a little time evaluating the situation this evening (and cleaning up the garage), but I think I am inclined to switch to the 2.8 style mounts, and follow the book, instead of believing anything on the forum.
Ordered the 2.8 style mounts shortly after the last post, and got the chassis mounts from Rock Auto. I need to check the numbers, but I think that they'll actually save me some money in the budget. Parts arrived on Friday, and I started in on the truck on Friday afternoon. Weather was bad, so I couldn't open up the garage and get more work space.
Since I had problems trying to do a hybrid of the JTR instructions and forum build, I'm trying to stick closer to the book build now. First thing I did was a little extra bashing in of the firewall near where the passenger exhaust manifold will go:
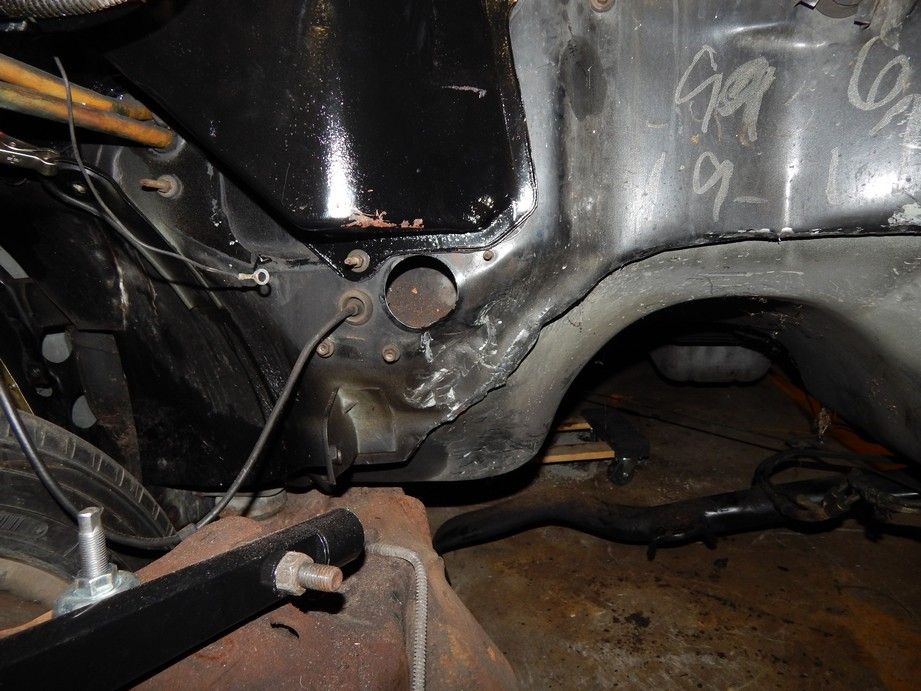
That should allow the exhaust to fit fine.
Saturday was a bit more productive. First things first, one of the local junkyards had a 50% off sale, and I still have some parts I'm looking for, in addition to maybe needing a few things I may have broken. Met up with Ashyukun, and we set off in search of parts for our respective challenge cars. I lucked into an old pre-refresh square body S10 there, that had the grill/bezels/lower grill trim mostly intact, so I snagged them, since I like them better then the later grill. May or may not show up at the challenge, but it's nice to have them in my stash. I also found a 350 TBI air cleaner lid, which will allow for a larger air filter, and grabbed a distributor off the same truck, in case mine was broken in the earlier engine removal. Ashyukun found some decent wheels, and some really ugly ones, too, thankfully he didn't buy those.
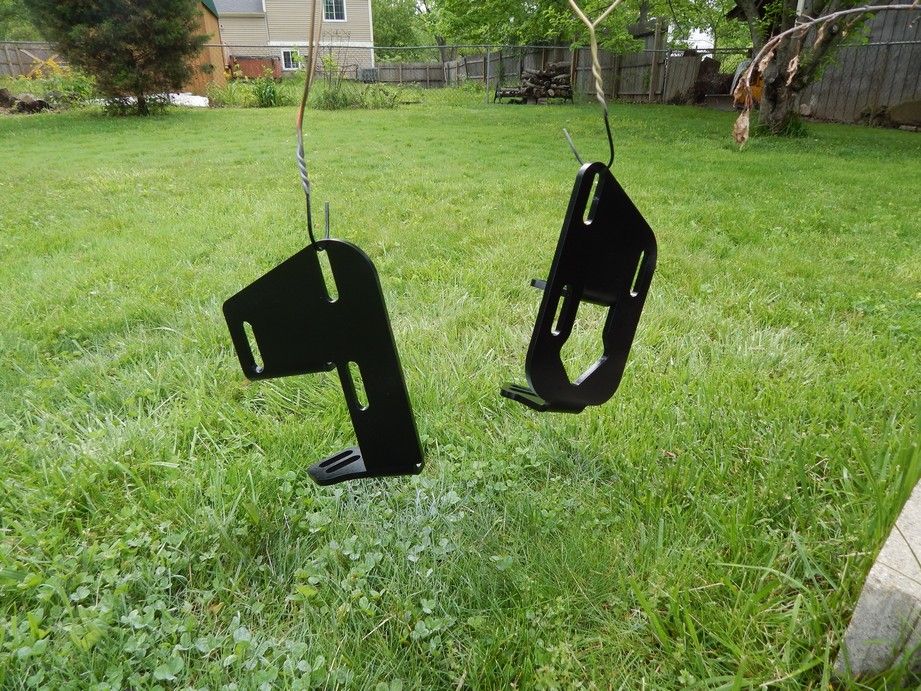
The mounts were unpainted, so I cleaned them up and rattle canned them in the backyard:
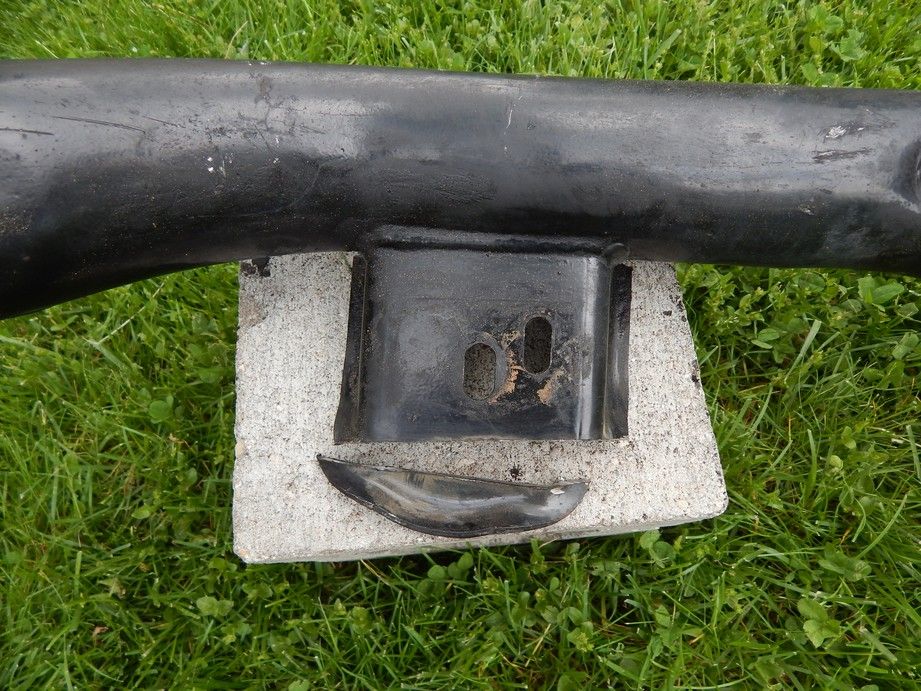
I also started modifying the transmission cross member, first removing the lip at the front of it:
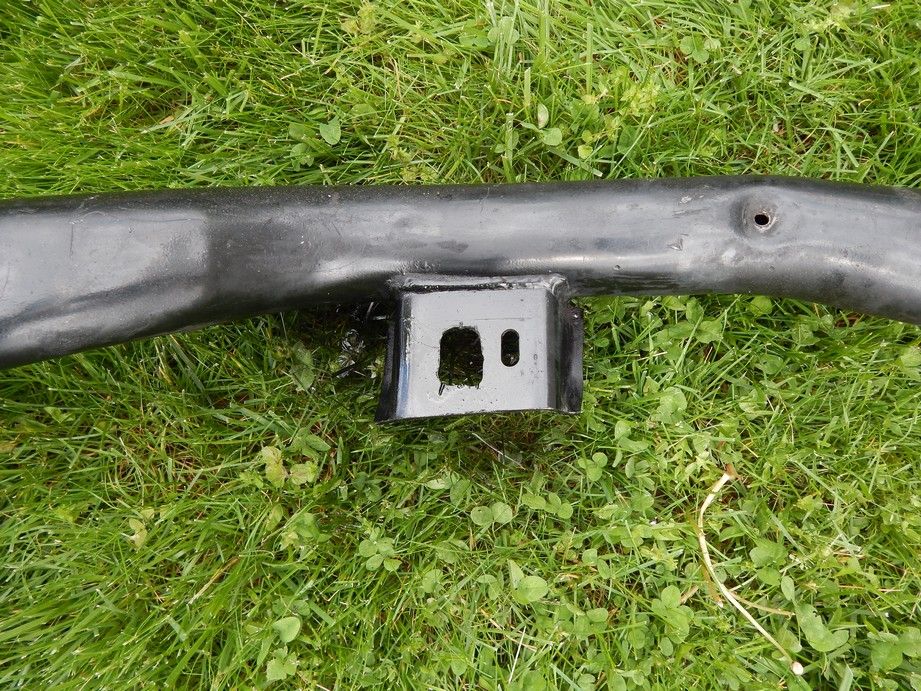
Enlarged the hole the trans mount goes into, to allow for the drivetrain to be shifted backwards and/or towards the passenger side (and quickly spray painted it):
While the paint was drying, I attacked the original V8 mounting plates. To install the passenger mount, I had removed the front right suspension. This time, I passed, and took a 1.5" hole saw to the crossmember. It worked excellently at allowing access to the hardware holding the mount in.
Sunday was time to get the engine in, come hell or high water. Still had a few little things to wrap up before it could go in. The firewall needed a new hole for the engine harness:
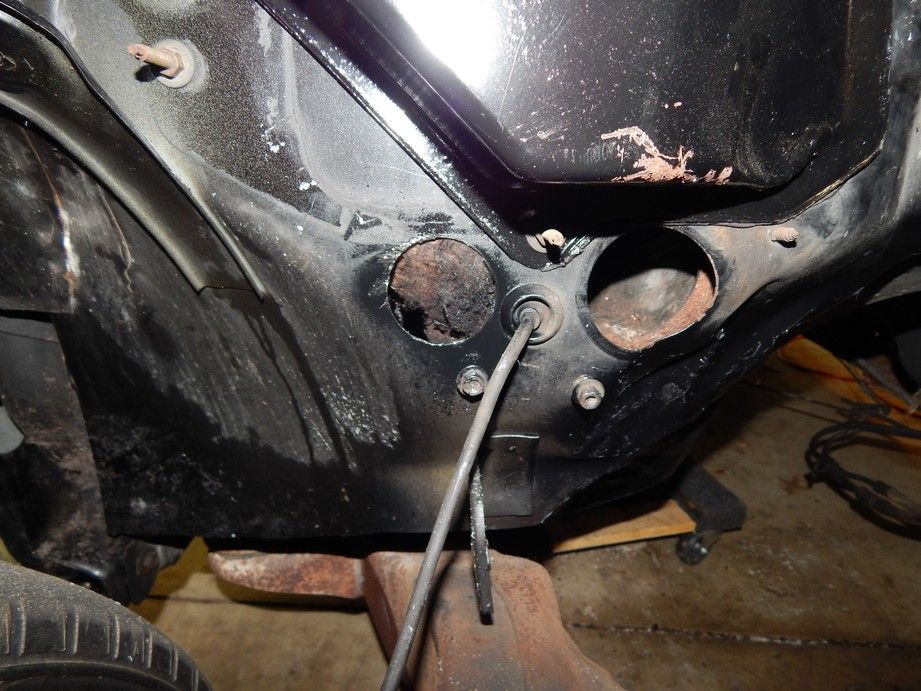
Later, I'll use some metal from the fireturd's hood to close up the original hole.
I debated moving the steering column a bit, and decided to leave it in the stock location for now (more on that later)
The 2.8 mounts went on fairly easily, especially with the newly drilled hole in the crossmember. The holes for them were in the exact same place as the 4.3 frame mounts were:
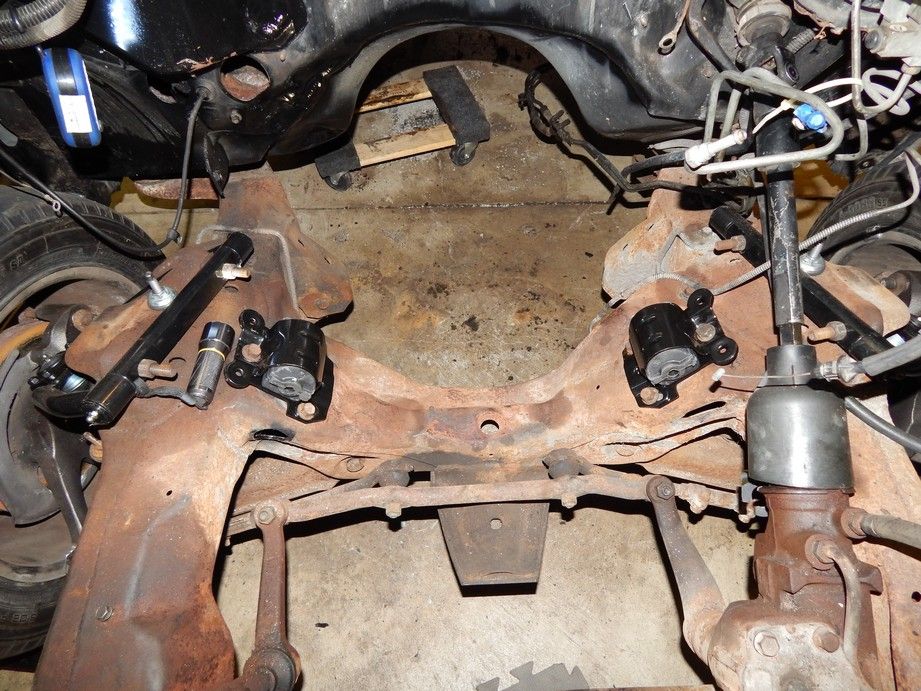
The adapter mounts simply bolted up to the 2.8 frame mounts. They are at least .75" shorter than the V8 mounts were, with the 45 degree angle they should drop the engine at least half an inch from where it was, and probably more:
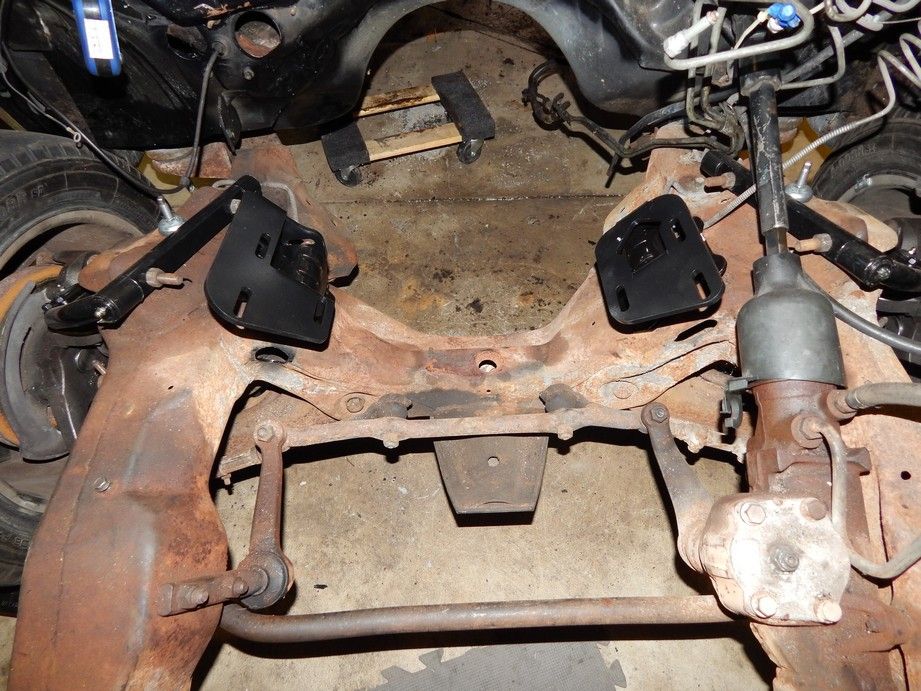
I don't think they are as strong as the V8 style mounts, but the added adjustability is worth it. Strength should not be an issue on an engine as low powered as mine.
To prep the engine, I pulled the knock sensor, inspection cover, and starter, in order to get a little more maneuvering room, then got to work. Here's an engine's eye view:
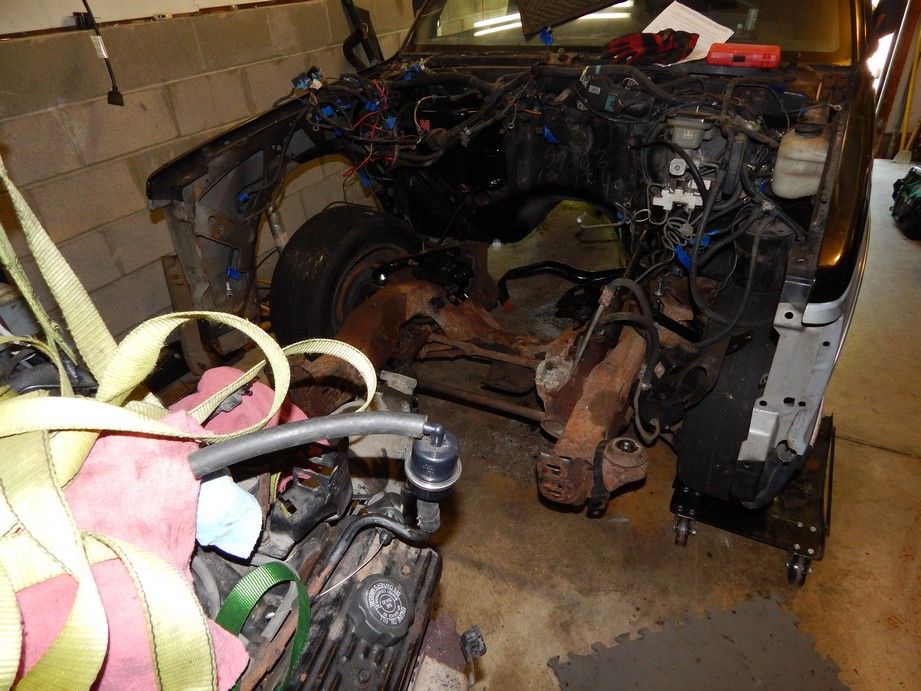
It took some help from my wife, but we managed to get the engine installed:
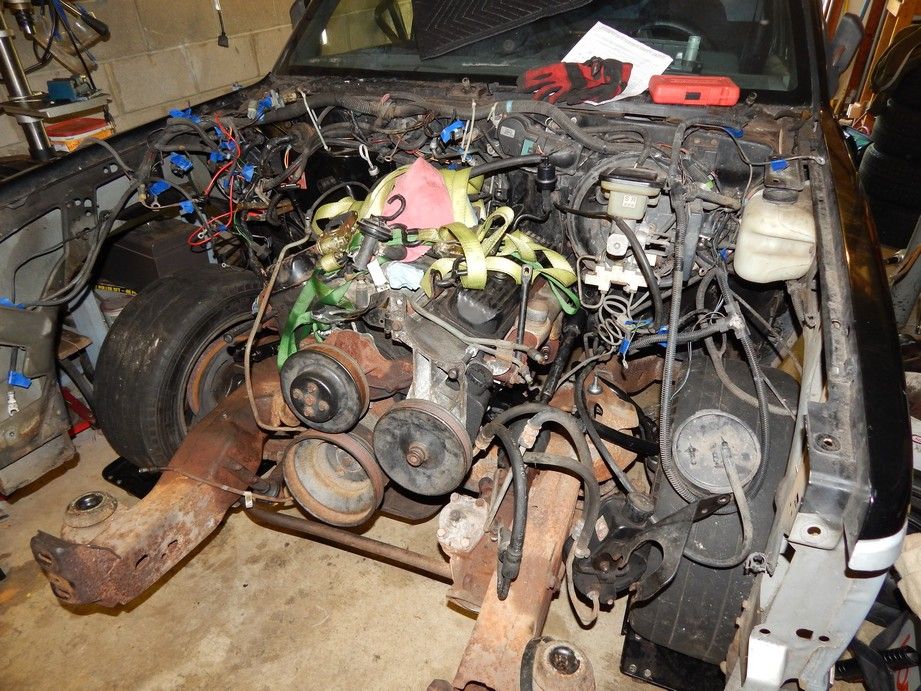
In order to make adjusting the whole assembly easier, I reinstalled the transmission mount and crossmember (though the driver's side bolts need to be tightened, I'll consider this a reminder). We adjusted it so everything should fit, but the oil pan is very close on the passenger's side, and the steering column is closer than I'd like it to be. From reading, I can probably still adjust it over at least 1/4"-3/8" just notching the bolts that hold it to the firewall, and will probably do that. Also, some people shim the front bolt of the power steering pump in order to get a little more space. If I do either of those, I might slide the engine over a bit more too, to help the oil pan clearance.
Next steps will be to do a rough toe alignment, so I can drop the front end off the cheap harbor freight wheel dollies. They do fine moving the front of the truck around when it's just a roller, but the added weight of the engine makes them a lot less useful.
After that, weather permitting, I'll pull almost everything out of the bed, start cleaning and organizing the garage, and get everything to where it can be worked on as needed. Tons more to go, but it's nice to finally feel like I've made some progress.
You're really making me want the pull the awesomely powerful 2.2 out of my 2003 and substitute a V8 now, Mav ... thanks a lot, like I need yet ANOTHER project ![]() !
!
einy wrote: You're really making me want the pull the awesomely powerful 2.2 out of my 2003 and substitute a V8 now, Mav ... thanks a lot, like I need yet ANOTHER project!
Do eet!
...but wait until you don't need the truck for a while, so the inevitable problems that crop up won't cause any trouble.
In reply to einy:
I'll probably have a work day sometime in June, to see if I can Tom Sawyer some people into helping clean up and paint the fender liners and core support :)
Great job!. I am using the JTR brackets and 2.8 mounts like you. I have been completely swamped at work and have had no time for car stuff. Hopefully will get back on it this month...
pimpm3 wrote: Great job!. I am using the JTR brackets and 2.8 mounts like you. I have been completely swamped at work and have had no time for car stuff. Hopefully will get back on it this month...
Cool, will be neat to see yours, especially since it'll be a lot faster than mine. BTW - Do you have any sand left in Jacksonville? I'm pretty sure it all came up here on this truck ![]()
Did get out to the garage last night, and did a very rough alignment. The truck still doesn't want to roll when I push it, but maybe two people will be able to do it.
Also, scattered parts all over my driveway, and put them back in the garage in an order that should allow me to start getting everything reassembled. When weather is permitting, I'll start chopping up the core support to hold the fireturd radiator, but until then, I should be able to start working on putting stuff into the engine compartment, including swapping out the steering box, once I get a hold of a pitman arm puller, assuming I don't already have one in my hoard.
The last few days have seen some progress, and a few steps back. I tried to hook up the fuel lines to the TBI unit, and screwed up the threads on the return fitting. A 14x1.5 die is on its way to see if I can fix it, instead of having to hack it up. I adjusted the steering column over a smidge towards the drivers side, maybe 1/4" at most, but it does help the clearance with the exhaust manifolds. I went ahead and reinstalled the passenger side accessory bracket, even though I won't have AC or a smog pump. I've ordered an AC bypass pulley, and found the way to route the serpentine belt with the accessories I still have.
I went after the steering next. Removing the original leaky steering box wasn't too hard, but it turned out I do not own a pitman arm puller, or if I do, it is well hidden. After tracking down a pitman arm puller and a 1 and 5/16" socket to remove the pitman arm nut, I was able to swap the S10 pitman arm over to the fireturd steering box. Installation was a bit of an issue, as the center link stud mostly spun until I clamped the center link to the pitman arm. Unsurprisingly, there was play in the center link when everything was reinstalled, so I've ordered a replacement. I also know this record well, so I've ordered inner and outer tie rod ends, tie rod adjusters, and an idler arm, as there's usually a cascading failure of ball joints, especially on something with this many miles on it. Sucks to be putting more money towards remedial work, but I should still be able to fit it in the challenge budget, just might have to sacrifice some performance. ![]()
Once the steering box was back in, I hooked up the power steering lines, and reinstalled the alternator. The engine is looking a bit more dressed:
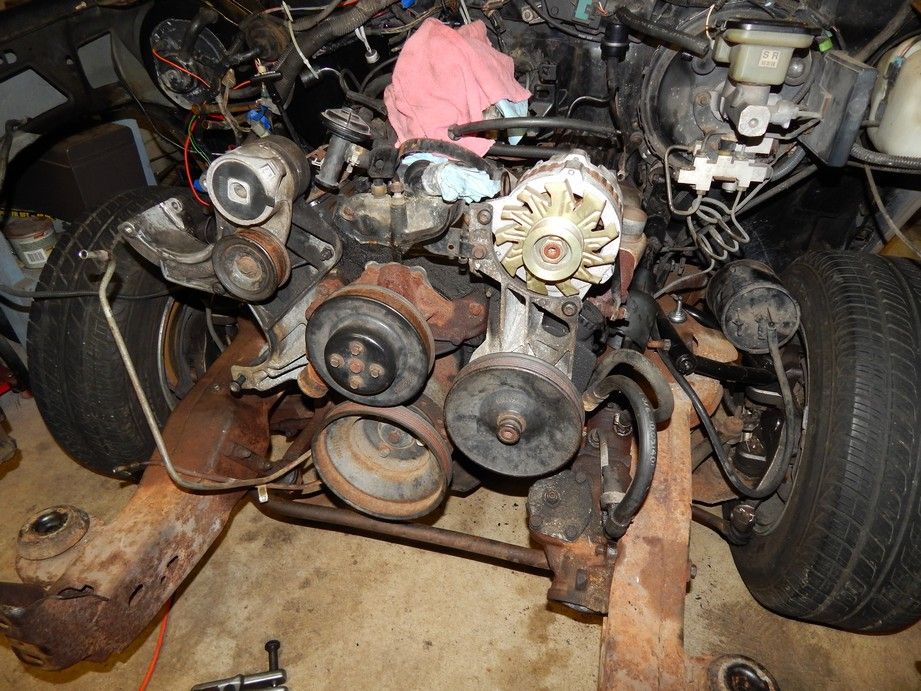
I also measured the setback on the engine, and its about 1/2". Stealth conversions makes 1/2" rear axle adjustment shims, and they are cheaper than paying to have my driveshaft shortened, so I'm going with them. Bonus is they lower the rear of the truck 3/8", too.
I'm in a bit of a quandary over the radiator situation. To use the fireturd's radiator, I either need to go with pusher fans, or hack up the core support way more than I am currently comfortable with. I scrapped the 4.3 radiator, since it looked like it was in pretty bad shape. I've ordered a cheap Corvette radiator to try out, as it can be installed where the condenser normally is, with some custom brackets (that I'll try to make instead of buy), and a single hole cut in the core support where the fill cap goes. A 92-95 3.8 Taurus fan is supposed to fit the radiator, so I'll need to dig around a while in junkyards. They are getting old enough that it may take some work to find one.
Once a few more things are attached, I'm going to try to attack the engine wiring. I'm really hoping the fuse box connections are the same between the 4.3 and 5.0 TBI harnesses. If so, it may be almost a plug and play swap, with a few extra wires (and a resistor) to make VATS happy. If some wiring work is needed, I'll probably beg wae to come over and figure it out for me. ![]()
I'm a little concerned my ride height is still higher than it should be for the challenge, but I'm trying to balance the challenge vs. the real world on this build. To help cut costs, if I get a new rear end, I may pull one from a 4WD blazer, just to get the extra width.
Looks like you're making good progress. I did find the mixing bowl, so the next time I'll see you remind me to bring it...
Ashyukun wrote: Looks like you're making good progress. I did find the mixing bowl, so the next time I'll see you remind me to bring it...
I will try to remember to mention it. BTW, don't know if you've been checking, but the LKQ got another Riviera in last week.
eastsidemav wrote:Ashyukun wrote: Looks like you're making good progress. I did find the mixing bowl, so the next time I'll see you remind me to bring it...I will try to remember to mention it. BTW, don't know if you've been checking, but the LKQ got another Riviera in last week.
I haven't really been checking- but there's also not much off an actual Riviera that I think I can really use at this point. It also looks like it's a '96, which means it will have a bit less compatibility with mine on some things. I really need to get the tire situation figured out and do my initial AX/drag testing before I start making more serious mods...
Ashyukun wrote: I really need to get the tire situation figured out and do my initial AX/drag testing before I start making more serious mods...
I heard that. I'm getting a little concerned as the project drags on that autox/dragstrip time could get severely limited if I don't get this project moving along faster.
The thread die and the AC delete pulley showed up today. The pulley is weak enough looking that I think I'll hold off on installing it until I'm ready to install the serpentine belt. I'll see about trying to fix the fuel fitting threads soon. Project time will be limited, though, as I'll be crewing at the Southern Ohio Forest Rally later this week. May not get any serious garage time in until Sunday.
No work on the truck over the weekend, since I was at Southern Ohio Forest Rally (Our driver did great, btw, at his first ever rally). Today is the first day I feel pretty much recovered from that, so I installed the new steering components. Thankfully, the old idler arm appears to be in good shape, so that's one item that won't have to go into the budget. The inner and outer tie rod ends and adjusters were pretty bad though, so I replaced them along with the center link.
I'm seeing a bit of a light at the end of the tunnel, but there's still a lot to do just to get it up and running.
I have been cheering on this truck since the start. I really want to see it running soon and at the Challenge. Keep it up!
I've got the week off, so hopefully there'll be multiple updates, and even a slim chance of it moving under its own power before I head back to work.
Yesterday, ran out to the junkyard with Ashyukun for the 40% off sale, and scored a rear end that should hit the budget for less than $80. G80 axle with 3.73 gears. It's off a 4WD Blazer, so its 4" wider than my current rear axle, but that may work out better (or at least safer) in the autocross. The ratio is going to limit my tire choices, as I had been considering tracking down some used 14" R comps to put on the S10 wheels, but I will need to have a different set for the drags if I do that, as third gear will top out below 90 MPH, and the 700R4 won't be able to handle wide open throttle in fourth, unless I throw some parts at it.
Today was drivetrain day. Since I'm in a bit of a rush to get this up and running so I can start testing it, I stuck with the open 3.08 rear for now. First job was to put these axle relocation blocks in.
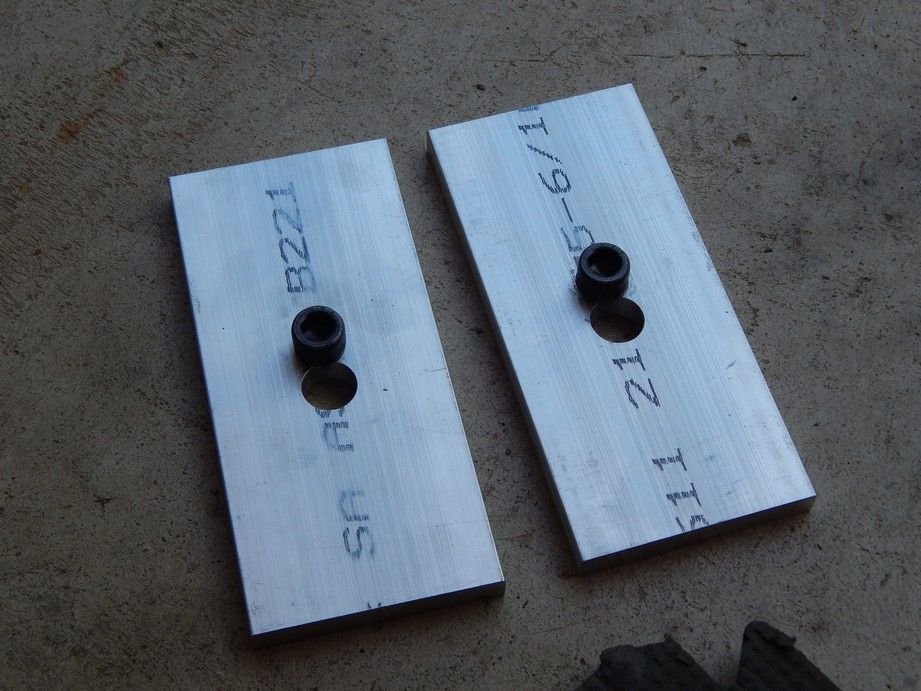
They move the axle back 1/2", so I don't need to shorten the driveshaft. I may have been able to get by without them, but there's a chance I'll set the engine back a bit more, so it seems like a good idea to use them. They also lower the rear by 3/8". Because the plate under the springs is set back 1/2", too, a few adjustments had to be made to the leaf springs in order for there to be clearance. The extra threads on the bolt that holds the spring pack together need to be removed, and the nuts on the underside of the spring needs to be turned to have one of the flats facing forward, then chamfered, in order to let the plate sit flat against the spring:
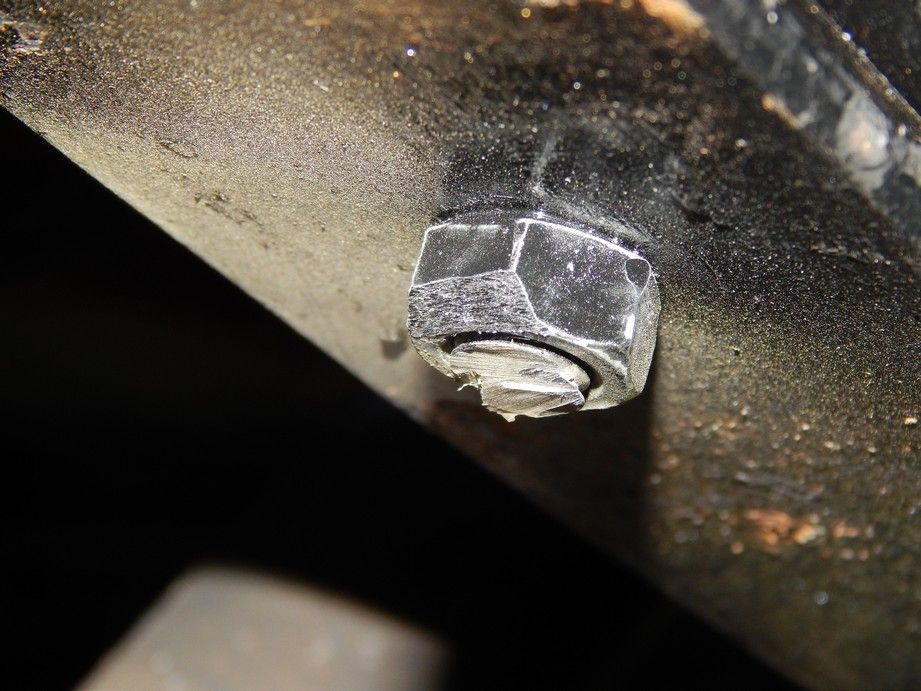
From there, it was a matter of lifting one side of the axle at a time, and fitting the blocks in place:
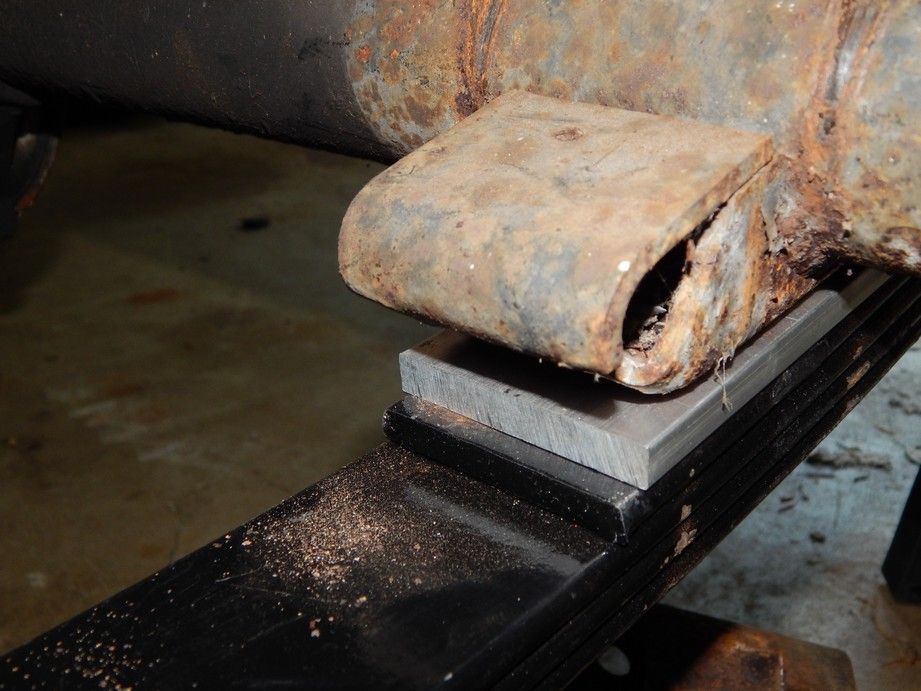
Then I just reinstalled the u bolts. After that, I reinstalled the driveshaft, then pulled the bag of transmission linkage parts out. It took some digging through old photos to see how it went together, but I was able to get it assembled, and tested the column shifter. It works fine, but the gear indicator is slightly offset, and I couldn't figure out a way to adjust it into position. I can live with it for now.
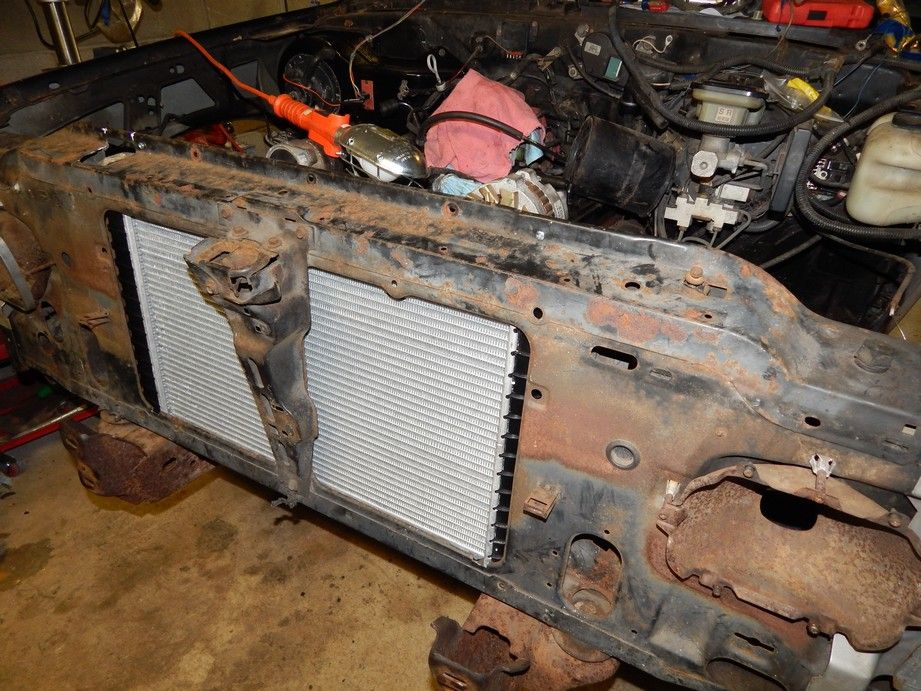
Next it was time to start modifying the core support to fit the radiator. I could have made some extreme modifications to fit the fireturd radiator, but at least for now, I'm going to run the Corvette radiator. If the budget gets too close, I'll switch it out. For the vette radiator, some of the lower and upper parts of the core have to be cut out and brackets need to be made to hold the top of the radiator it. Here's a shot from when I started working on the bottom part, I know it's rusty, I'll go back and clean it up later in the year if I have the time. I'd rather have time in making sure it's reliable now, rather than taking the time to pretty it up:
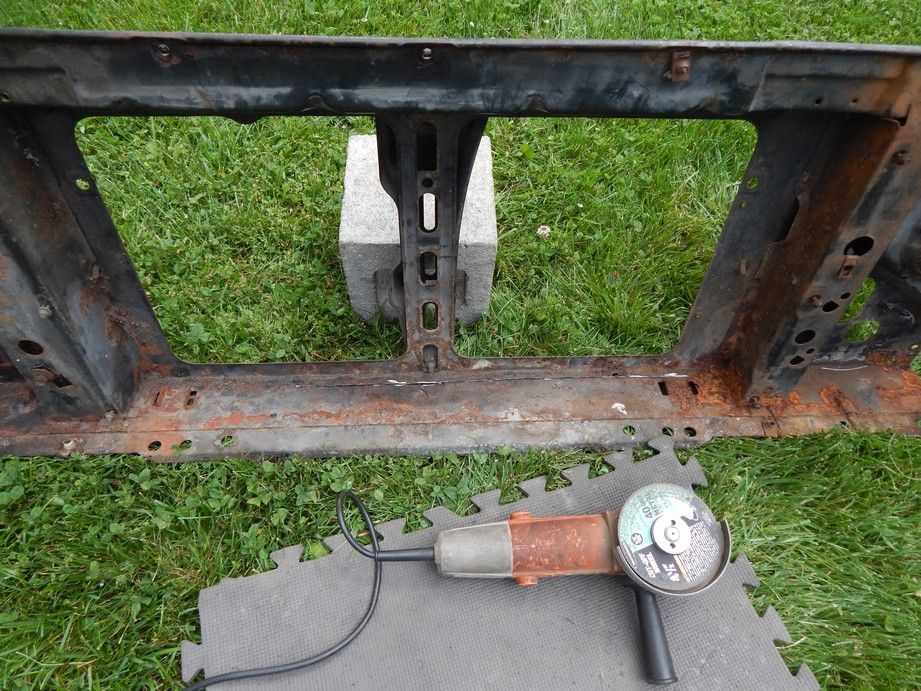
I did finish the lower cut, but it rapidly went from sunny skies to heavy rain, so I had to pack it in for the day. Tomorrow or Thursday, I should be able to get back to it.
eastsidemav wrote: .... chance of it moving under its own power before I head back to work.
Looking forward to a video of the first burn-out ![]()
I was being way too ambitious when thinking I'd have it running before my vacation ends, but that's alright. I've made more progress than I normally would have in the last week.
On Thursday, I got back to working the core support. Here it is with most of the cutting done, I made a few minor adjustments after this photo.
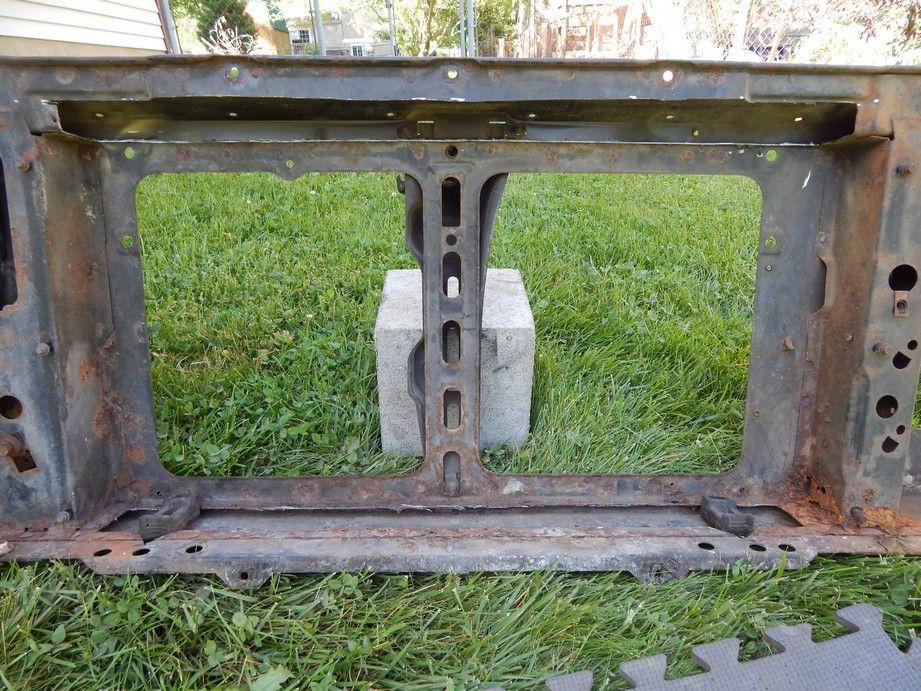
A quick test fit with the radiator in place:
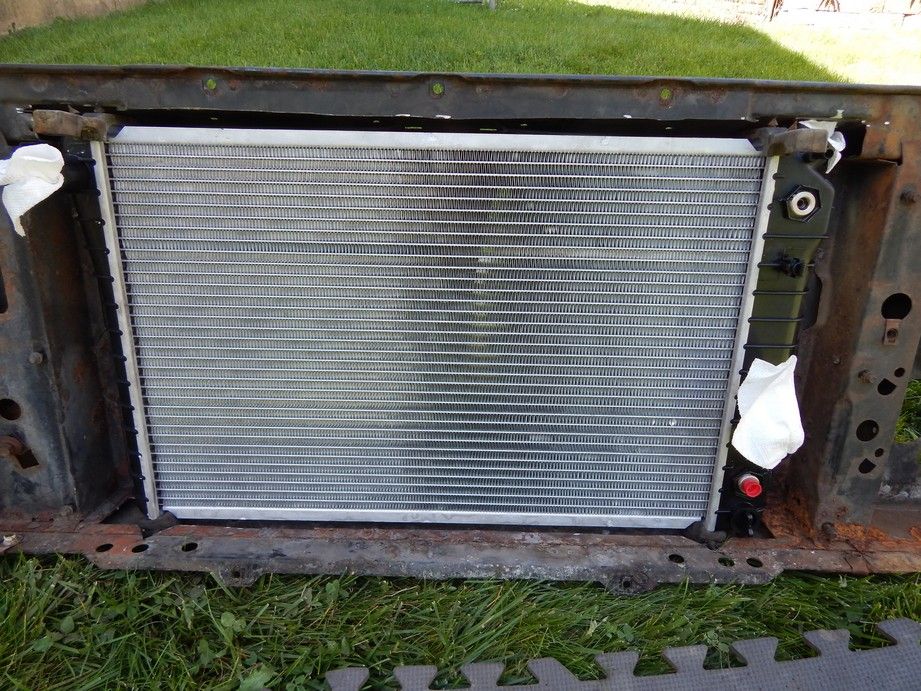
I also had to cut a hole in the top of the core support for the radiator cap, which lost me the bracket that holds the hood prop. Will need to figure out another way to hold it in place. When it gets closer to finishing, I'll also split some vacuum line up and use it around where I cut for the cap, so I don't slice my hand up on sharp metal.
The radiator fit snugly using the rubber mounts, but there way no way to keep it in place. I dug through my scrap pile, and grabbed some 1" square tubing.
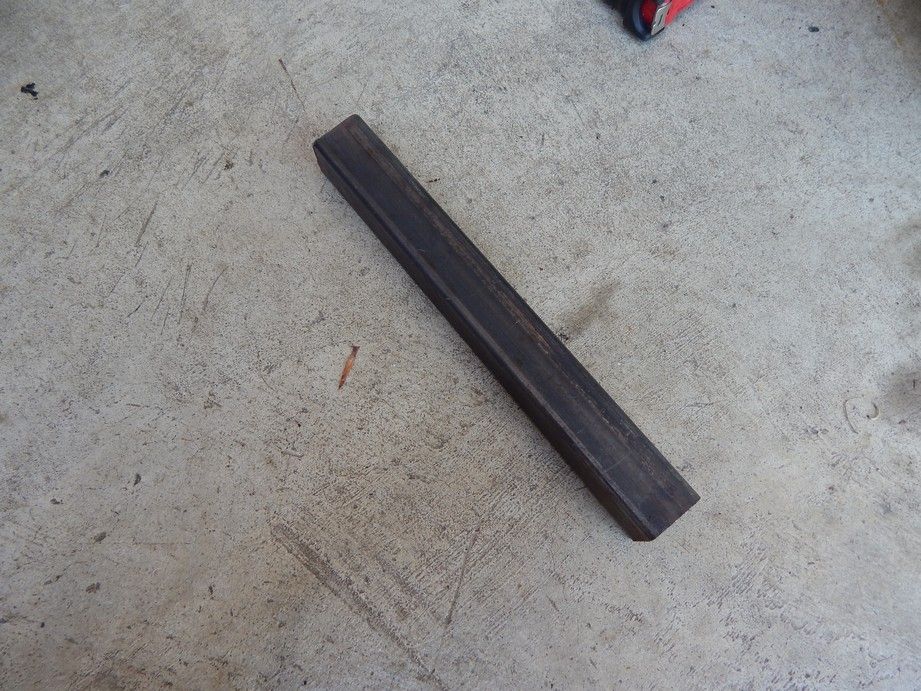
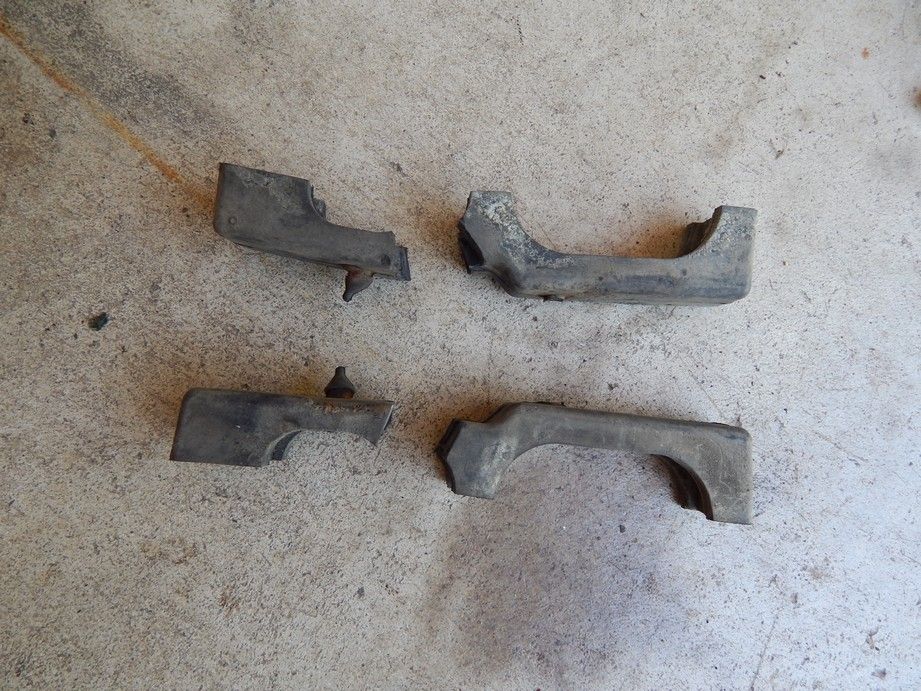
Then I cut off the A/C condenser portion of the rubber radiator mounts:
Did some work with an angle grinder and a dremel to get these:
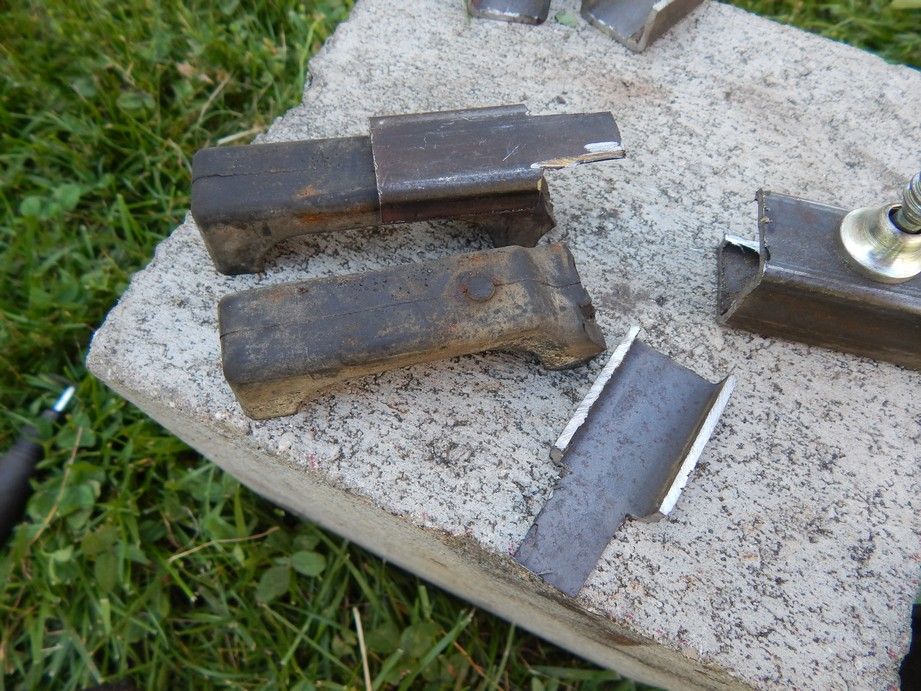
Bent them up:
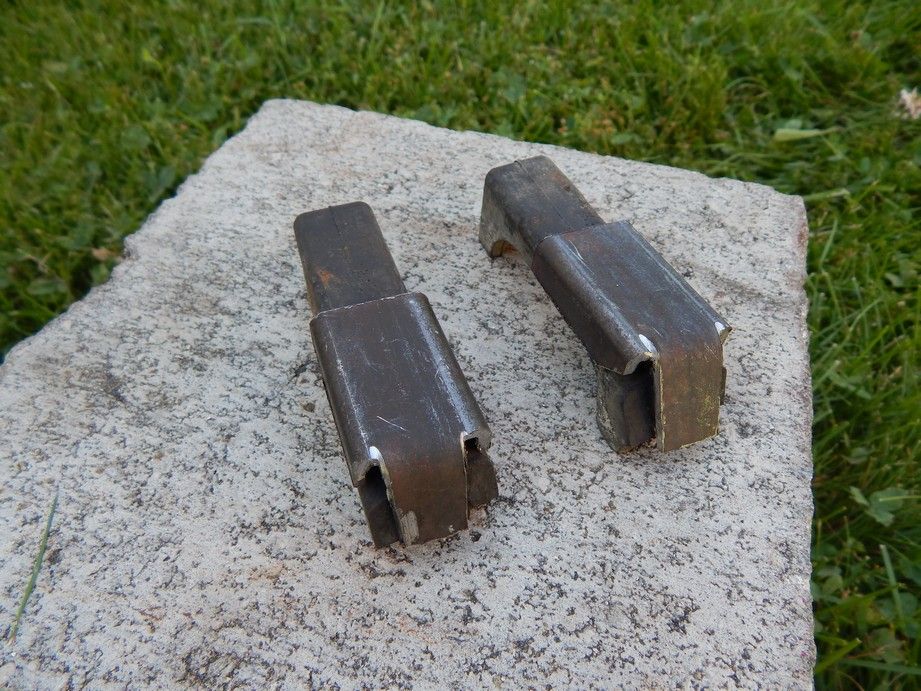
Welded a mounting tab on to them:
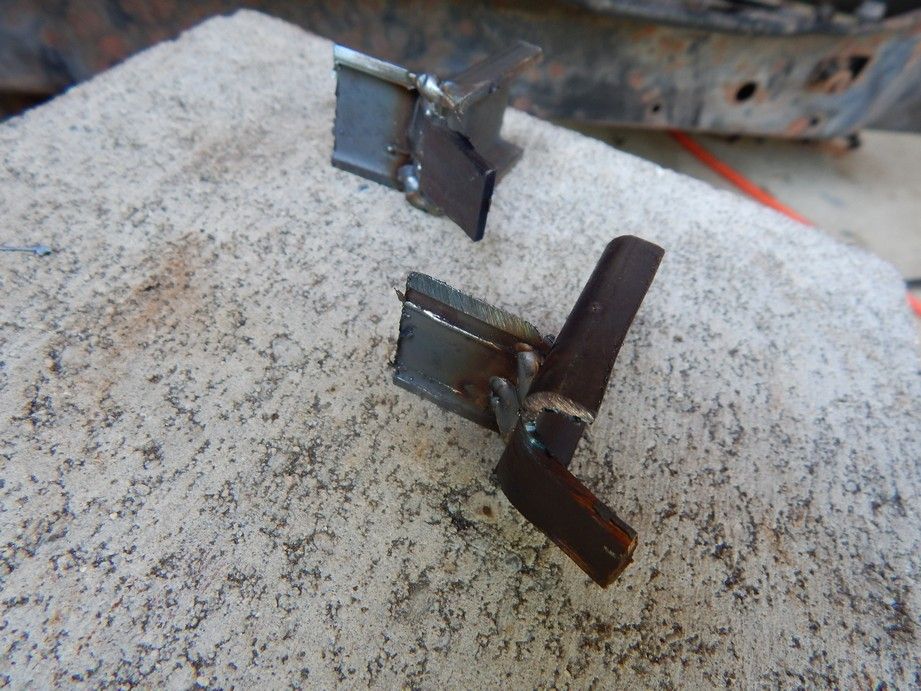
Drilled them (and the core support), and painted them. They've been drilled with a 1/4" hole, while the core support has a 3/16", so there is a bit of adjustability.
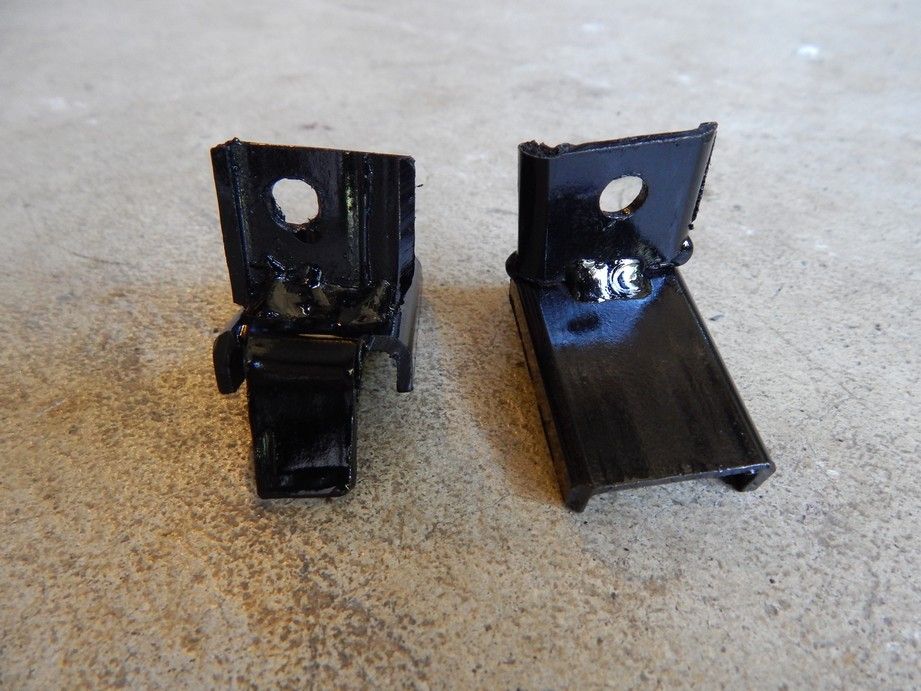
The core support is back in place, at least with its lower bolts attached. Feels like progress when parts go back on the truck ![]()
On Friday, I hauled off the fireturd's cat convertor to the scrapper, and have officially zeroed out the donor car. No wiring or exhaust work has been done yet. I am going to try to do a little investigation on the harnesses before wae comes by to help with the wiring, and I've decided the exhaust is enough labor that, rather than throw something together, then redo it I later, I am going to take some measurements, and try to build the y-pipe once, so I don't have to go back and redo it later.
Still have some household work to be doing this weekend, so I'm not sure if I'll be getting anywhere with this in the next day or so.
You'll need to log in to post.