Wanted to see if I could repin the ev6 connectors with the original pins. The answer is no. So cut and splice is happening. In the meantime I followed the Neons swap guide and moved the pins around for the 2.4. Went ahead and removed the egr wire too.
I checked the extra injectors from my recent NV project, but they don't work. 
going in search of some connectors.
Auto parts store only had one connector for too much money and red and black wires. I went to the junkyard and they charged me $10 for the injector harness from a random PT cruiser and a set of plug wires. 
I am stoked that the wire colors match the Neon harness too. I spliced in the new connectors and did some wrapping. 
How it is now. 
close to getting this thing into the car.
Today I got the engine off the wooden stand and onto the creeper. Lifted the Fiat from the hitch bumper. 
rolled it under set the car down and hoisted it up into the mounts. 
I got a 2 out of 10 fuel bath replacing the return hose from the regulator. The header installs easily on this setup maybe even better than with the 2.0. New filter on the engine and 6 quarts of oil in it. I gave it a crank but the starter made some noise without spinning the engine. Seems charged enough and I was perplexed until I recently realized that I forgot to add a ground strap. Maybe it will get to stay in. I do have to revise and modify the water pump inlet tube. It was aimed at the subframe and only 20mm or so away. I hoped to remove the bracket and aim it differently, but it needs to be extends some as well. Decent access through the original distributor access panel. 
Aside from the ground strap and whatever else pops up these two things are what is left of the fabrication.

Yesterday:
I found some 34.9mm .035 4130 that should make a good section to lengthen the water pipe.

I made a couple of grounding straps for the engine and it turned over when I cranked it. cranked it over a bunch to get some oil pumped into the engine. I did get an oil leak at the filter housing gasket, so a new one is on the way. It didn't leak bad enough that I wouldn't fire it once to be sure everything is good to go.  Fingers crossed and first start...
Nope. Not even close. A backfire or two. Daaang! What did I mess up. Went back through my photos. Confident on the timing. Could I have screwed up the wiring ? 
Double and triple checked. As outlined on Neons.org. Where's The Fault? (WTF). I spent the evening last night scouring the internet for some info.
Let me share what I have learned:
2.0 and 2.4 cams physically interchange.
the orientation of the cam sensor magnet is different between 2.0 and 2.4 intake cams.
There is a different cam magnet for the 2.0 and early 2.4 and the 2003+ 2.4. (Okay- got the right one.)
Neons.org swap guide covers how to use the 2.0 cam by reorientating the magnet. I did not do this step because I bought SRT-4 performance cams. They make it clear that using 2.4 cams you don't need to change anything.
Here is the aha! moment: The SRT-4 2.4 has the same magnet orientation as the 2.0 Not the one used by 2.4 engines prior to 2003.
I went to bed thinking that this may be okay after all. This morning I moved the cam magnet orientation 90• clockwise. 
Aaaaaaaannnndddd...
YESSSS!!!
With that done I set out to make some more parts fit. Welded the water pipe.

While that was cooling off I started on the throttle cable. Took a measure of the length required using a spare shift cable. My throttle cable is a tandem brake cable currently and the cable end on the engine side is a dropper post actuator end. (Bike parts).
Measured and marked the length to the car cable. Shortened up the loop a little and that was way more work but ended up better. 
The throttle return was unacceptable. The springs in this TB are not as strong as the Neon one. I added in a return spring from the Fiat, I think, and made a mount for the end by using a longer bolt in the lower intake so that the threaded portion sticking out could house this double nut contraption. The upper nut has a captive rotating washer that I drilled and ground. Works.
More mods to the water pipe. Didn't like the way the heater line was aiming at the starter. 
Welded on a delete and chopped a 90 out of the PT heater hard line to add to the proper side of the water pipe. 
Made it black and into place. 
With the assortment of hoses from the original swap and the fresh PT pieces I was able to make all the connections. Cleaning spray to help with all of the numerous test fits.

I ended up with hoses that all seem like they will go. 

Might be able to get some more time in tomorrow as well.
Did some work on the car; got exhausted.

I used pieces from my bin of exhaust tubing. I am stoked to have it V-band now. The flange was annoying. 
I did have to make another part that I didn't remember. The under engine cradle had ends but needed a middle. I did the first one too low so this should hit less. 
black and installed.
I remembered why I ordered new rear brake hoses. Yikes. 
I need to get a 10mm brake wrench and rent the stupid spinning retract tool. Called it a day early to go to the Roller Rink this afternoon.
That bracket is a complicated bit of kit worthy of Binky!
In reply to MiniDave :
High praise! The bracket does do a few things. The front is the mounts for the shift cables from the shift rods coming out of the car. The center should scrape the pavement before the oil pan and it ties together the drivetrain opening. The back holds the torque mount and the circle is my jack lift point. Here it is in its natural environment. 
Mostly did Promaster engine retrieval things today but got a little bit farther on the Fiat as well. I got a 10mm brake line wrench and the piston retraction tool so I started the brake hose and pad replacement. The last day or so I have been shooting more PB Blaster into the junction of the hardline and flex line to better my odds of success. The passenger side broke free nice and easy. The driver side, less so. 
Not sweet. The real issue is that I know it's a weird metric bubble flare on sae brake line. I crossed fingers and grabbed the nut with vice grip pliers. It worked. The picture above is actually from after that so it looks not great, but I think I can live with it instead of dealing with the hard line replacement. Took the caliper free and on to the bench. Got the piston retracted and the hose out. Worked the parking brake lever with some WD and it seems much better. 
new pads in and high temp grease for the sliders. Other side up next. 
progress
Brake madness today. I thought my head might explode a couple times. First, when the cable stop pivot on the passenger rear brake "came loose" but actually was shearing off. 
There is a roll pin that I tried to drill out. It didn't work. At some point it was just spinning. Tried to zap some weld in there to pull it out. Also no go. Went ahead and drilled out the remaining shaft. 
That actually worked. Found a scrap rear MTB axle that was a good fit. 
Welded the axle to the cable housing retainer and ground the weld. I drilled a new hole for a retaining pin next to the original one. Tapped the hole for a little m3 screw and ground a slot in the axle to allow it to be captured and still rotate. Assembled with grease. This all took way too long but I would like to have a parking brake. It's never worked and always been annoying. 
new pads to replace these super unevenly worn ones. 
Caliper back together and went on the car after I installed the struts and control arms. 
Had to do a bit of unplanned fabri-modification to the engine to trans bracket. The steel bands I got for the cv boots don't get small enough and the heads of the zip ties I am using hit the bracket. The proper clamp probably would too. Chopped and welded it to fit. 
Got the other side together and called it for the night. 
Needs a bit more. Hopefully it will transition from driveway ornament to functional vehicle soon.
I can't catch a break on this brake situation. Went to bleed today and endless bubbles... needs more of time and effort.
Junkyard trip! 
Took rear calipers, brake reservoirs and a wiper from this, the only x1/9, in the yard. 
There was a cool 850 next to it. 
never had a wiper before! Would have gotten two but the donor had only one to give. 
replacement caliper gets a minimum rehab. The park cable stop is stuck and I can't find the cares to do anything about it. Changed the park system o-ring, installed a better boot and that junk is going on the car. I will have a pair to possibly rebuild in the future for now hopefully it will work. 
Will attempt to bleed after lunch. Hope it works.
GoLucky
HalfDork
3/11/25 12:54 p.m.
Brakes bled. The parking brake works now too. Win. I would like to do some more upgrades to the brake system but for right now it's great if it will work enough for me to drive it around for a while. Jumped into wiring the oil pressure and coolant temp senders for the dash. I was not able to use the chosen pin location for the oil sensor for some reason. It wouldn't go in and click into place. No big deal, I moved it to another spot and it was fine. The connector comes apart pretty easily and I made a special hook tool out of a cut down bike spoke. Silver thing in below picture. 
I ran the new wires up through the firewall and into the cab and this would have been much easier with a little more room. Maybe like when there was an empty engine bay for the last couple of years. Anyway they made it up to the dash area and I took the display out. 
Uh oh. The wires look pretty at risk! The digital dash is something that was done by my Kid when he briefly owned the car. I don't want to talk trash. I will need to change some things about it. It didn't really work like it was supposed to and there may be several factors to that. Anyhow it got pulled out for a revamp. 
The wires say what they do, which is nice. 
I was also able to look up an online user manual, so hopefully that will help too. First up I wanted to make the mounting plate not a guillitine for wires. And when the wires are not keeping the board away from the plate the backs of all the components can touch the alloy and that cannot be good for electronic function. 
I also wanted to add in a connector so that the dash display can wire in like a car stereo. I opened up the area by the wires and added some plastic stand offs held on with 3M trim tape. Used my leather punch to make the holes and liked them up with the mounting bolts. I added another piece between the two dash buttons to keep the dash from bending down to the metal when pushed. 
With the d mounting plate good enough for now I went looking for a connector. I found a 12 pin Deutch bulkhead connector that came with my turbo C10 project. 
I don't really want the bulkhead part and I definitely don't own the special crimp tool. Maybe I'll use it anyway. Nein! Verboten!! It actually works fine and just takes a long time. Un-bulkheaded the connector and started adding pins to wires. 
I thought about soldering them Nein!!! Das ist nicht gut!!! But it wasn't needed, with the crimps done I couldn't pull the pin off the wire even trying. 
Do I think the special tool is better? Yes. Would I buy it if I was using these connectors frequently? Yes. But this is the only one I have and it might be the only way be I ever use too. I fumbled my way through getting the pins in the correct side of the connector and the valley blocks correct. I dug through my box-o-wires and matched the colors to the other side of the connector, like a stereo, to facilitate an easy install. And I seem to have stopped taking pictures but with the help of the xweb electrical wiki I was able to get the wires connected, soldered and heat shrunken. Shrinked? I also made vehicle side labels with my labelmaker for future reference. The Fiat has only one turn signal indicator light, so both are going to flash like hazards on the dash when I turn. The prior wiring also had the fuel level wired to the seatbelt light. Hopefully with that sorted I can find the correct combination of dip switches to have a gas gauge. Today I will install the battery and see how things go.
Some gauges seem like they will work. Interesting how it looks different in the picture. The temp showed the same temperature as my phone. The fuel has a number at all, there are dip switches to get that into range think there's hope. Oil pressure says 99. I got a Chevy sender, but Intellitronix specifically calls out their own unit and makes a point of it needing a good ground. I tried adding a zip tie to hold the ground strap against the sensor body, no change. Tach doesn't seem right at all and the button to set it up doesn't cycle through the setup how the manual says it will. This unit may be trash. Seems pretty likely parts of the circuit board have already been in contact with the alloy backing plate and who knows what that could cause. There is also a chunk of the front plastic that has been cut and that doesn't look amazing. I'm not sure if I want to deal with this setup? Maybe send it in for repair? I doubt there is a proof of purchase and it seems like even if they built it perfectly the damage could be from the install. For now I have the OBD2 display that can do temp/speed whatnot and it is pretty lame but okay for the moment. 
Moving on, I put the rear wheels on and inflated all the tires. Looks more like a car than it has for a while. 
Set the wheels on the ramp stands to tighten the control arm bolts down. Filling the coolant with water instead of antifreeze turned out to be the right call. Too soon to call the welded sections of the water pipe good, but the o-ring is definitely not sealing at all currently. Seems like it might be inserted too far. Action shot of the water leaving the engine in a hurry. 
Went for a bike ride since it was nice out and will come back to it tomorrow.
Sooooo... That leaking gasket was actually a cracked filter adapter. I have no idea how but it was. 
That meant another junkyard trip today. I pulled the adapter from this gem. 
Then I cut apart and re-welded the water pipe 4-5 times. I added another tang on the other side so they would make the pipe straight. Hose clamp for the welding fixture. I ended up adding more thickness to both sides so the o ring would end up in the right spot. Lots of coolant mess today since the temps are above and below freezing for the next week or so. 

That's right! It's sitting on wheels on the pavement. Got the coolant bled.
Forgot they this is actually low-ish. I am so used to it being up so much higher. Current plates on. Insurance storage policy transfer to active use at midnight. May have to go around the block.
What do you think of the 2.4?
In reply to Dusterbd13 :
It is so good! I did only drive it for a few minutes but they were all smiling moments. The stage 3 cams are mellow at idle, likely since this engine has multiple more compression points than a SRT-4. Feels strong throughout the range until I hit rev limiter. Really need a tachometer, the cheap-obd2 thing is a small display and to slow to be helpful shifting. May have some TPS issues, need to check on that, but the car gets up pretty quick.
It has been so long since I've driven the car at all that it is tough to do a before and after comparison. I don't remember it being so easy to put into a slide and that's just fun. NEEDS more brakes, goes way better than it slows.
GoLucky
HalfDork
3/13/25 10:24 p.m.
There is snow and rain forecast for the next couple of days. I wanted to get the engine cover on before then. I chopped down the intake tube so the filter would fit and be near the inlet vent. For the breather connection I pulled the plug from the end of the filter and found an elbow from the PT with a plastic connection that fit. 
A couple of layers of heat shrink and the plastic goes nicely with the breather hose. 
Got the engine cover back on and wanted to check on my suspected TPS issue. Looks high full closed. 
And looks low at WOT. 
I really thought my measurements and whatnot were going to make this work. Nope. Checked a Neon TPS plugged in and run from full closed to full open. Closed.  open.
open. 
That means it is time to make some more changes to the throttle body. I unhooked everything from it and removed the bolts. Things for me got way off track when I didn't drop 3 bolts. 
Fourth bolt? He went in here. 
Yeah, I can't see it and I know it went in there. I fished with a magnet; no luck. I took off the flywheel inspection cover. Can only see flywheel. Tried blowing some compressor air to maybe move the bolt to be visible. No dice. Engine turns with a wrench, so it's not jammed in the ring gear. Yet.  Decided to walk away and hopefully come back with inspiration.
Wow! That was stressful. I got it with the help of my super cheap endoscope. 
It was not straightforward or easy: I ended up pushing the bolt with welding rod through the flywheel gap and was able to slightly bend my extension magnet to get the bolt. The stainless is barely magnetic so I was slowly removing it and holding my breath. 
I need a break. More when I have recovered.
You need a break, and a rubber boot over that bellhousing opening! Glad you stuck with it and found it....


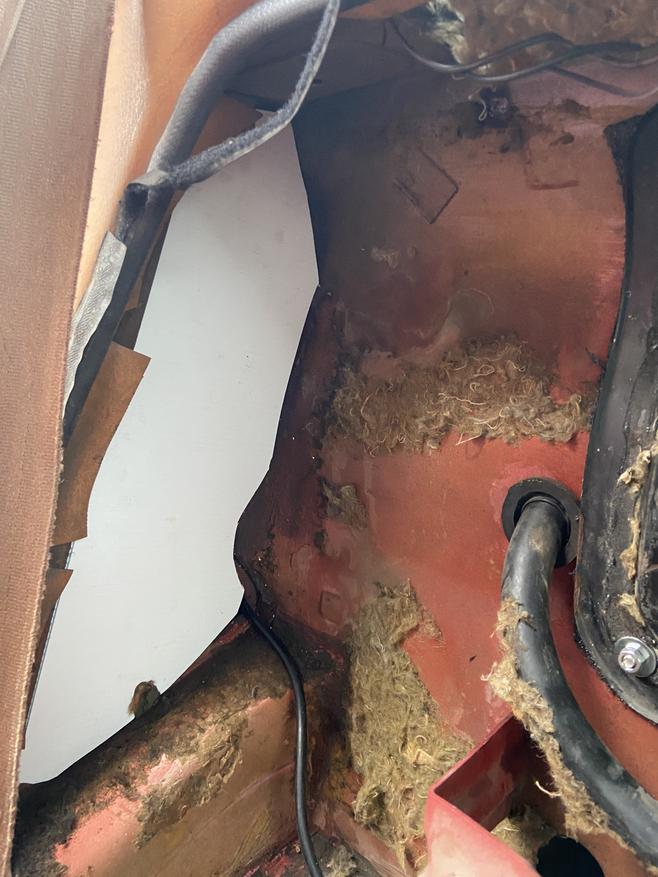
 My plan: use the cover that used to come out on the engine side and make it come out from the passenger side of the firewall. First the extension cord needs a new route. After removing the inside and outside duct it can easily fit and there is plenty of room for the cord.


 happy with how it looks I traced it out onto some plastic signboard and cut it out. This stuff is super light and cuts beyond easily. Should be fine for what I need it to do. Smile!