Kenny_McCormic wrote: If you want to go really wild, you could hack up an old spark plug for a grease zerk, put a few thousand PSI to it with a grease gun, or do a similar thing with a porta power pump. It will either move or break something that way. In reply to Mad_Ratel: Not sure why, (in the flat 4 world) aside from some of the Porsche engines with pressed together roller cranks (quad cam only?), and that's a don't crank on it in either direction deal. Newer engines with timing belts and chains are a different story.
I dont recall either only that my dad freaked when he thought he'd done it backwards. Somethign to do with the timingchain and backlash of it upsetting the timing I guess.
In reply to Mad_Ratel:
VW and Porsche flat 4s use gear drive cams, including the 4 cam engine (shaft drive).
Awesome project, I love anything with tracks. And as it has already been stated, talk to your local conveyor belt supplier. They will cut and splice it for you if you have the specs. If you can't find anyone PM me and I will ask my guys for a quote, though you will have to tack on shipping.
Exercise your patience by thoroughly building the Trax before you touch the motor again. Diligent patience. Conveyor belting can be cut with a razor knife and laced on a garage floor but it takes a good blade and a steady hand.Gator lacing is a start for a search to lace the belt,use stainless.Are the track tensionerS loose? Bogeys float ? Edit: Flexco gator lacing xj12NC if it is 12" wide, .12 calls out width.
Good advice from everyone. I let it sit while I was out of town for a few days, added some acetone when I got back and still nothing. Kinda worries me a little since I did get some movement out of it once and it stopped while I was going backwards. ![]()
Once the holidays are done I will be starting the literally looooooong process of cutting conveyer belting.
As I said before I have all the parts, just need to cut the belting lengthwise at least 6 times ![]()
well I held out as long as I could
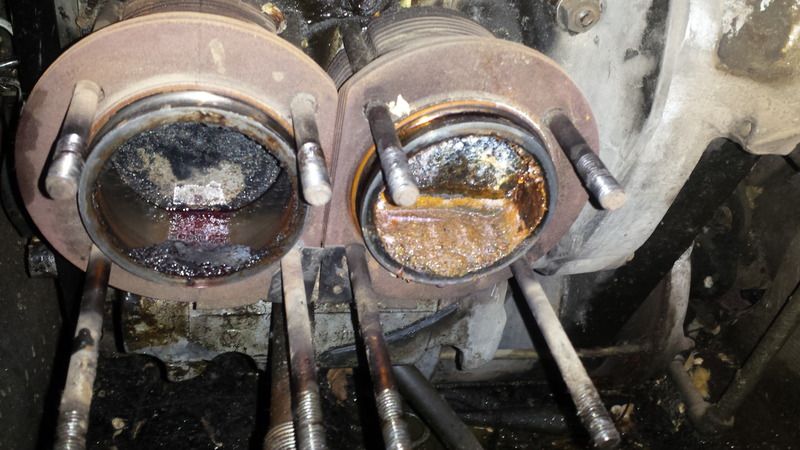
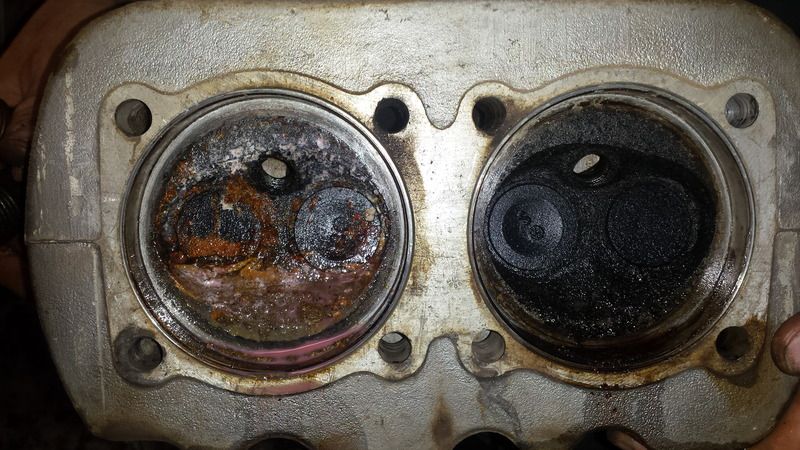
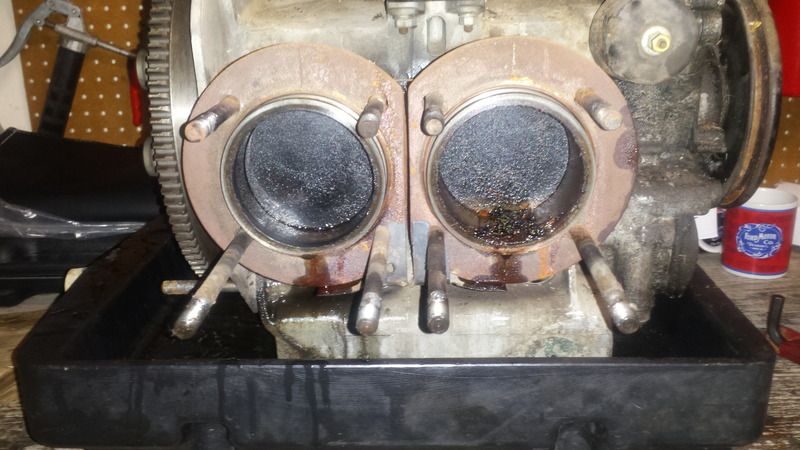

I kept worrying about the missing air cleaner when the real problem was the exhaust. Weston came over and we started pulling the dog house and cylinder tin so we could get a better look. once we pulled the exhaust each was holding a substantial amount of dirty water. that's when the decision was made to pull the heads. once we got the front cylinder head off and realized the back head didn't have enough room to slide off the studs we decided to wrestle it out with a 2 man hoist. not bad once the front head is off ![]()
only one cylinder is stuck but it feels like all four. its tight enough that I bent 2 pushrods at some point, probably the day I got a slight amount of movement ![]()
Oh well. it just wouldn't be my project if there wasn't an engine rebuild involved ![]()
Seems the rain caps on the stacks were circumvented by not being mounted upright, though they aren't perfect even when upright, hence the coffee can you see on parked tractors. Probably good idea to fix that during the rebuild.
So the bad news seems to get worse. Weston was talking to friends at KCW about a single port rebuild kit when Franz clued us in to the effects of standing water in a magnesium case. We pulled one cylinder and it doesn't look good in there to say the least.
I wanted to keep the original engine because it's just that, original numbers matching. But if the case is crap I might as well sell the usable 1200 parts to the formula vee guys and build a torque monster dual port on MS1.
Objections?? ![]()
If you want to keep it looking original under the hood, put in a 1600cc single port engine. It will be a nice torque boost.
In reply to Type Q: I have considered that for high elevation reasons. Smaller intakes tend to do better up here
ya it sucks that jay and i found what we did, but at least we know now what the issue was. once we got the motor tore down to basically a long block, the motor came out fairly easy. i think next jay needs to get the case split and truly asses the damage done to the case. once we drained the oil, there was about 3 qts of water that came out so its just not looking good for this motor. but i say best case, i think that throwing in a new set of pistons/ cylinders could get this motor running again.
Still working on the stubborn cylinder. It's beginning to look like I'll have to spit the case if I want to separate the piston/cylinder in order to atleast save the rod. The inside of the case looks to be decent. A little corrosion but not bad. Rod bearings and journals look & feel fine though I haven't measured a damn thing yet. What worries me most is what looks like jb weld on half of the case nuts. Half as in all on one side ![]()
Looking at a rebuild vs. A craigslist 1600 right now. Cost wise it's a close push if I can rebuild the heads myself. I'm personally leaning towards a rebuild just because that's the way I always do it. I guess the only thing to do today is split the case and see.
Yesterday was productive. Cleaned all the sludge from the bottom of the engine compartment. A mixture of leaves, sticks, dirt and gear oil. Then I finished removing all the heat insulation from the firewall since it was falling apart and looked like a fire hazard.
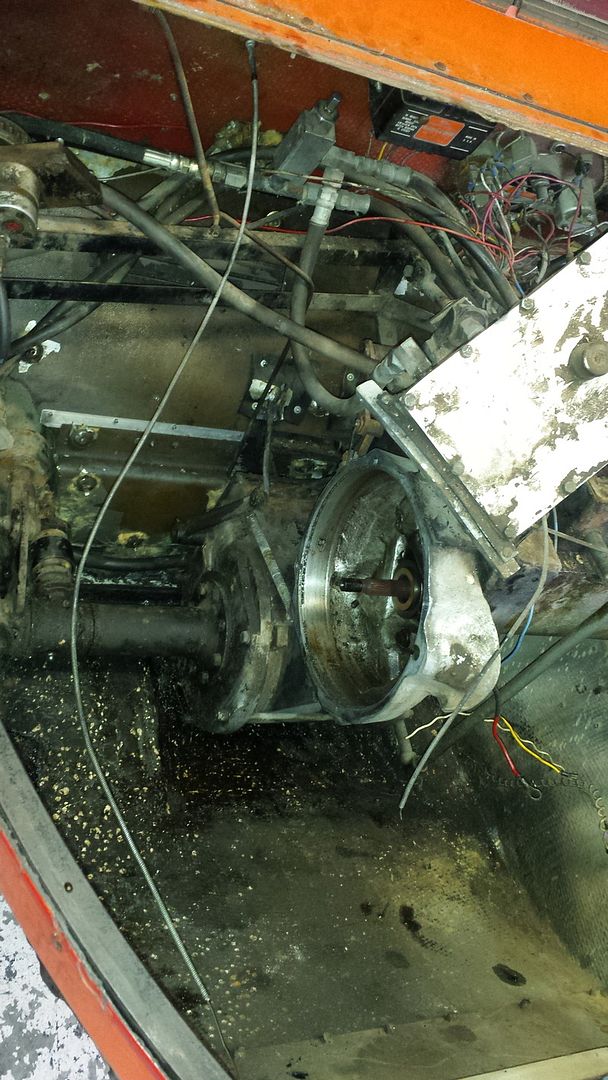
Then I tackled the engine. The strainer looked like it had never been cleaned and it appears to have been sucking down rust even when it last ran.
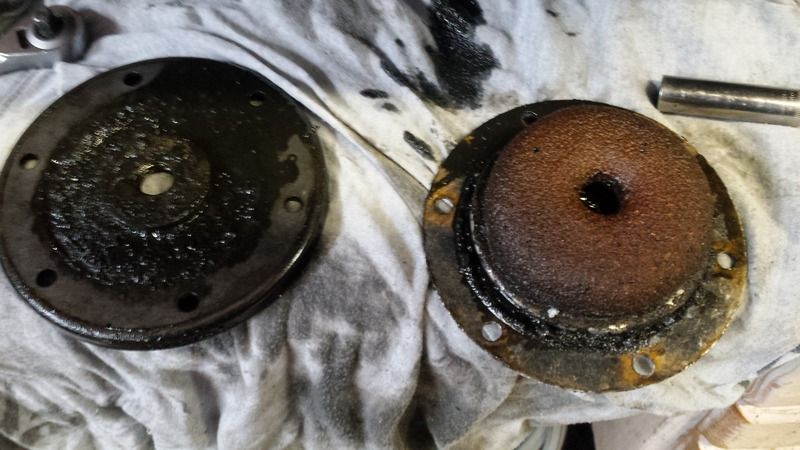
Suprisingly the case is in great shape and still measures out standard. Crank journals all measure standard size and look great considering the rust on it.
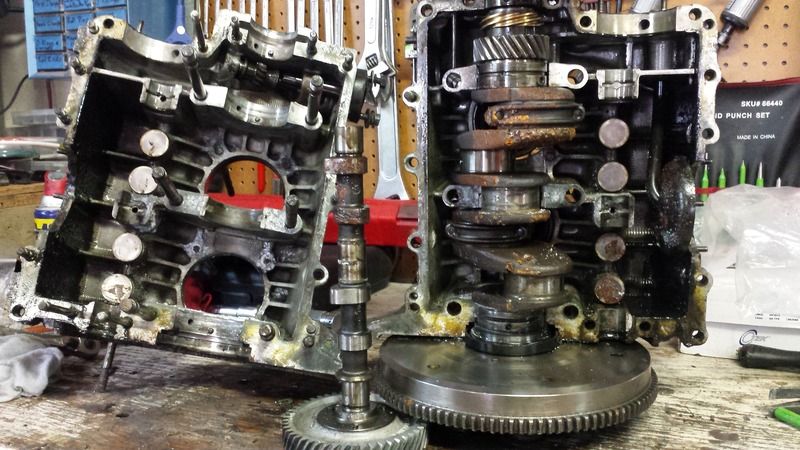
Cam is toast but no seized lifters. Looking forward to building my first flat 4 ![]()
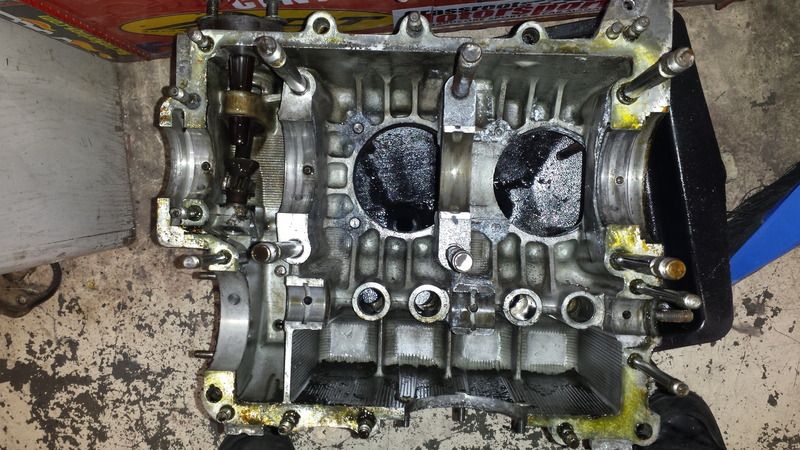
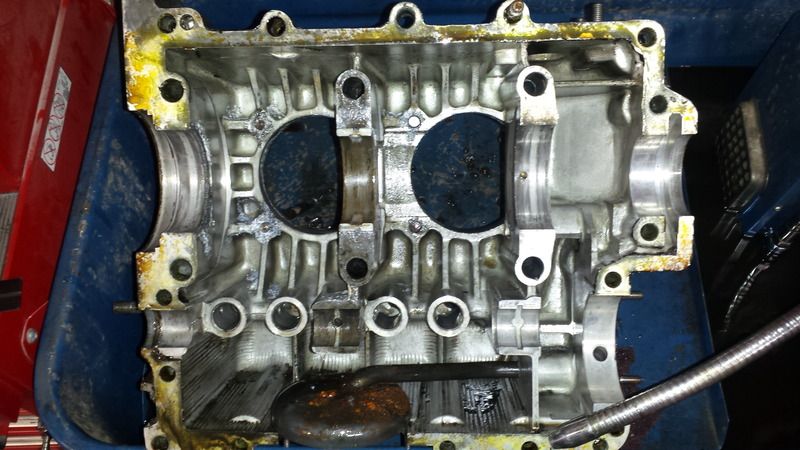
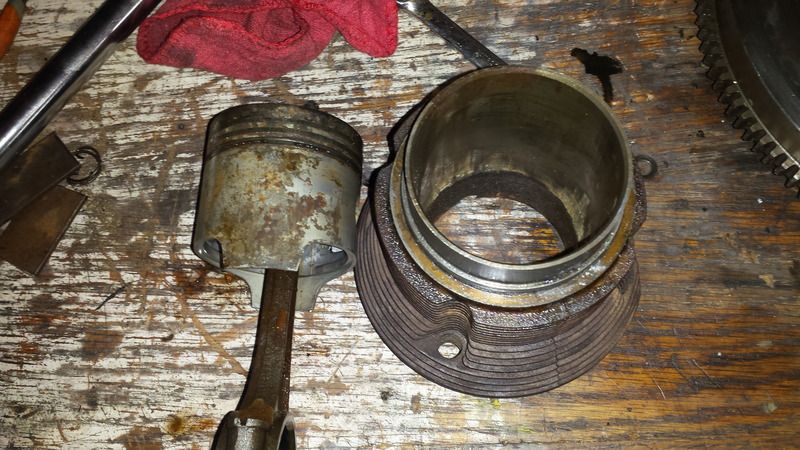 After splitting the case I was finally able to loosen the rod bolt and hammer out the stuck piston in my vice. Could have been worse.
Because the case looks fine I decided to rebuild. This morning I ordered a piston/cylinder kit from texas aircooled that will bump it up to a 1384cc and I'm going with the Engle W-90 cam. Should be a decent gain over the stock 1200 and I can still say that it's the original engine with the documentation to prove it. Mine is such a time capsule I'd like to keep it as original as I can for some strange reason. Usually I'm the guy who couldn't care less about all that. Guess I'm getting old ![]()
In reply to java230: I just started on them this afternoon. ![]() Decided I could either waste time making a jig that might work, or I could just cut the belt as straight as I could by hand and give it a go. It's not perfect but I think it will work just fine. Here are the 4 inner drive belts cut length wise. On the left is an old section of track
Decided I could either waste time making a jig that might work, or I could just cut the belt as straight as I could by hand and give it a go. It's not perfect but I think it will work just fine. Here are the 4 inner drive belts cut length wise. On the left is an old section of track
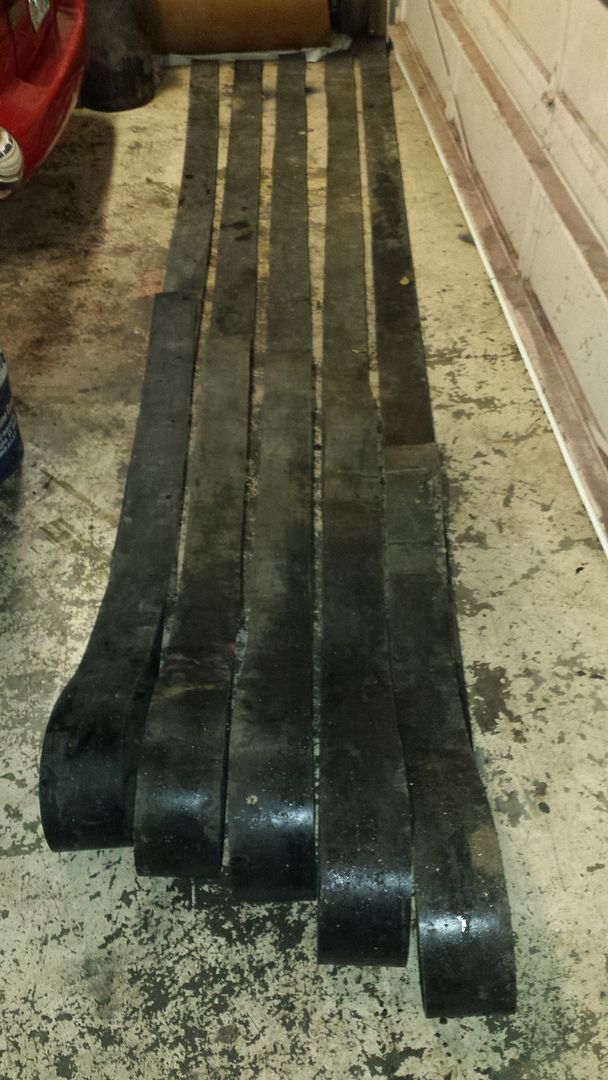
Tomorrow I will cut the outer floatation belts. Should go quicker since it's about .100 thinner.
Here are some technical specs that I will be following for the most part
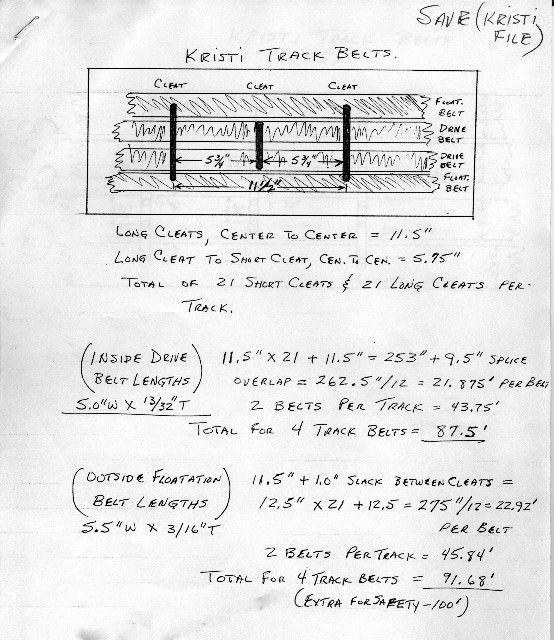
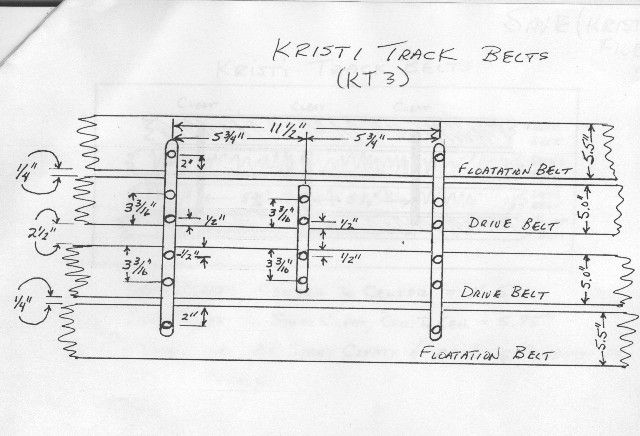
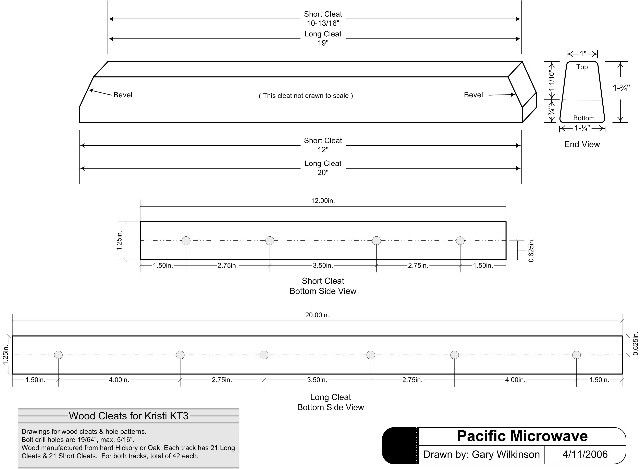
I'm leaning towards aluminum angle for the cleats. I can understand why it's more the industry standard on the big cats nowadays. Plus I'm betting it's cheaper than treated hickory and way less fab time. Not to mention stronger. Seems like the smart thing to do.
You'll need to log in to post.