Huge milestones today, honestly. The only control system left to sort is the throttle pedal and cable. The drivers seat is two tabs from done. Passengers is getting closer, and almost done. All holes in firewall and trunk are used for something. All tube damage repaired. Column only needs triangulation. Then some tin work for closeouts and a foot rest on passengersside, a couple heat shields, exhaust, and blow it apart for paint.
Im freaking stoked.
Dusterbd13-michael said:
Huge milestones today, honestly. The only control system left to sort is the throttle pedal and cable. The drivers seat is two tabs from done. Passengers is getting closer, and almost done. All holes in firewall and trunk are used for something. All tube damage repaired. Column only needs triangulation. Then some tin work for closeouts and a foot rest on passengersside, a couple heat shields, exhaust, and blow it apart for paint.Im freaking stoked.
I've thoroughly enjoyed this thread so far, so cool to see it starting to come together!
More large steps. Made an aluminum shield to mimic the one nascar built, started exhaust, primed all the bare metal. Made new trans crossmember, finished seat mounts, engineered a fas pedal solution, and began to formulate plans for the next steps.
All day in a picture
Made kick panel filler
Made passengers floor plate
Made throttle pedal
Made throttle cable
Made clutch pedal clevis
Mojed up all controls and masters to make sure everything fit and worked like it should
Modified and straightened the dash to be flat again and bolt together
Drilled the fuel bulkeheads and brake bulkheads

Have to make ecu mount, passengers footrest, the bias mounts, battery hold down, fill a few more holes, and blow the chassis apart for paint.
Its getting close to a MAJOR milestone. Im trying not to rush it, but also trying not to make it perfect instead of finished....
759NRNG said:And we hang Duster body panels next?
Yes-ish. Ill probably do all the plumbing before putting it on. Just easier having less in the way.
Previous budget was 4912.02 with 415 recoup
new money:
bike brake cables: 4.49
½ inch heims: 11.98
2x strap steel: 12.72
4x exhaust 90s: 39.96
2x exhaust 45: 19.98
new total: 5001.25 with 415 recoup
so, a month has passed. Started my new career, been working on family as well. So not a lot of progress to show (at least in my mind)
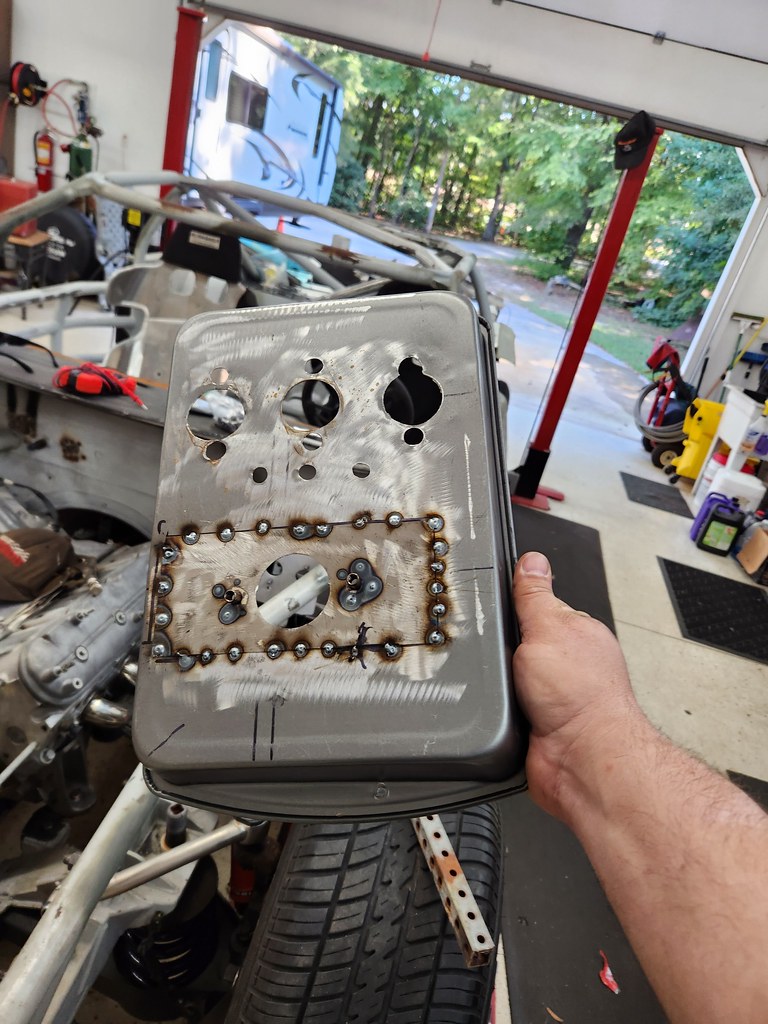
first up, lets talk about fishing the firewall kickout. To so do, I had to finish the steering. This was accomplished by using a hodgepodge of leftover dirt track stuff and the nascar stuff. A firewall support bearing was out into the kickout with weld nuts, and the previous column drop heim joint was purposed as a middle shaft support bearing. It works nice!
 20220924_141158 by Michael Crawford, on Flickr
 20220924_102031 by Michael Crawford, on Flickr
 20220924_141212 by Michael Crawford, on Flickr
the column still had quite a bit of wiggle in it. So a couple pieces of re-purposed square tube, a used 2.25 exhaust clamp, and a scrap of angle iron later, its rock hard
 20220925_115049 by Michael Crawford, on Flickr
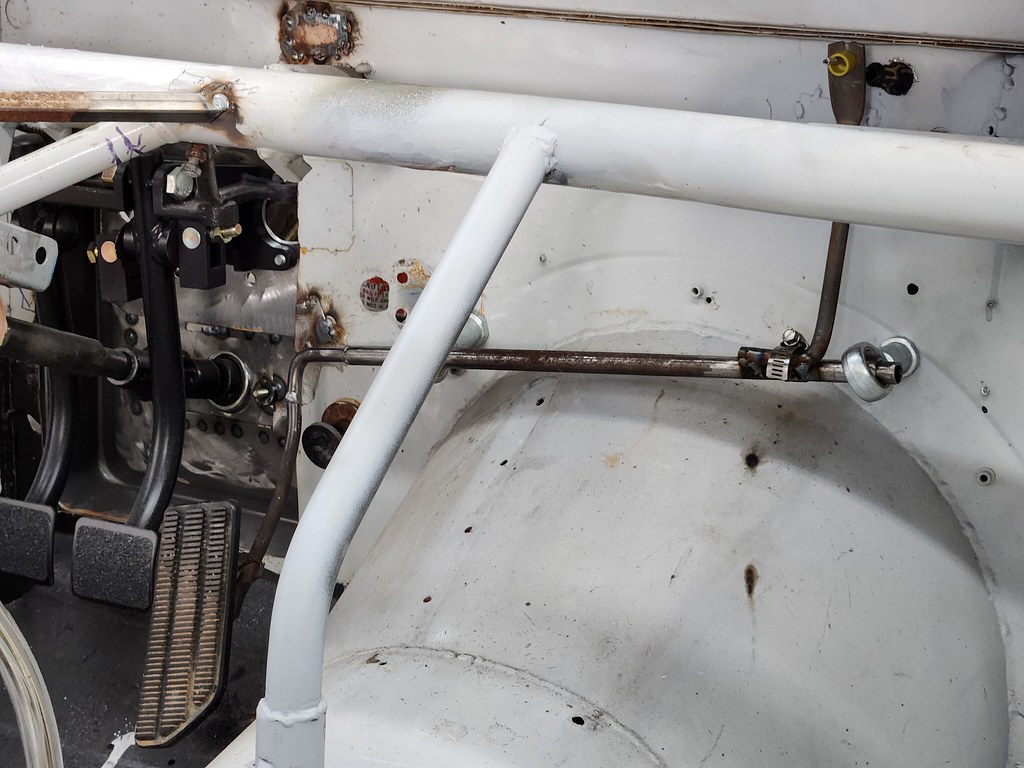
then, it was time to get a gas pedal in. the last control surface to sort. It took some head scratching, but ultimately I took a free gmt400 vortec gas pedal and cable, and cut them up. I extended the gas pedal horizontal part with some ½ rod, and slid it through a pair of heim joints to mount to the firewall. Then, I clocked everything to make sure I could use the throttle stop and still get WFO. Cut down the cable housing, and used a bicycle brake cable to replace the frayed inner cable that came with my free stuff. Like I said, lots of head scratching.
 20221008_111618 by Michael Crawford, on Flickr
 20221009_111503 by Michael Crawford, on Flickr
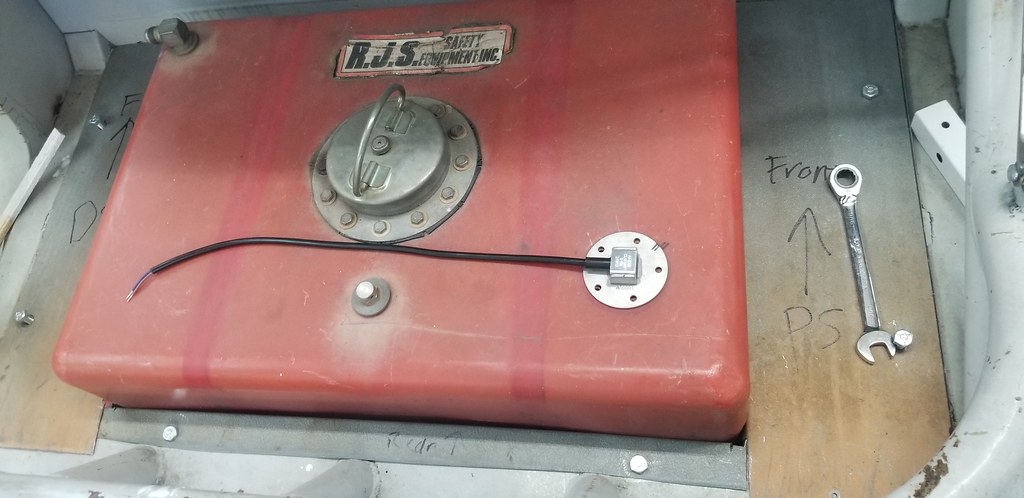
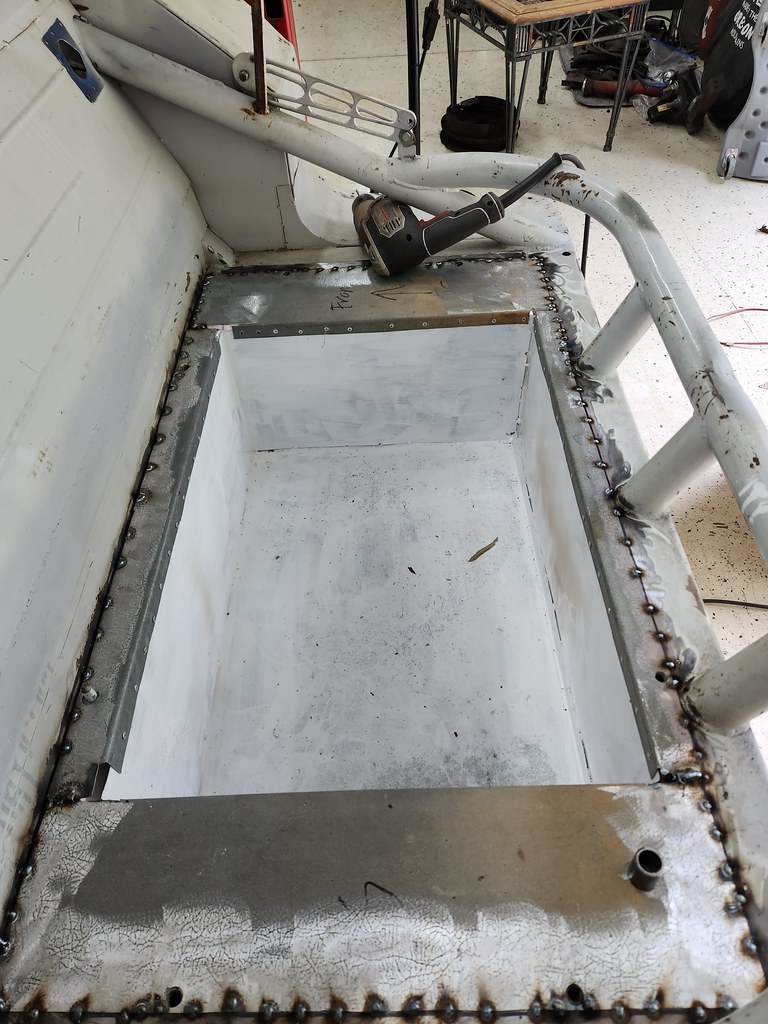
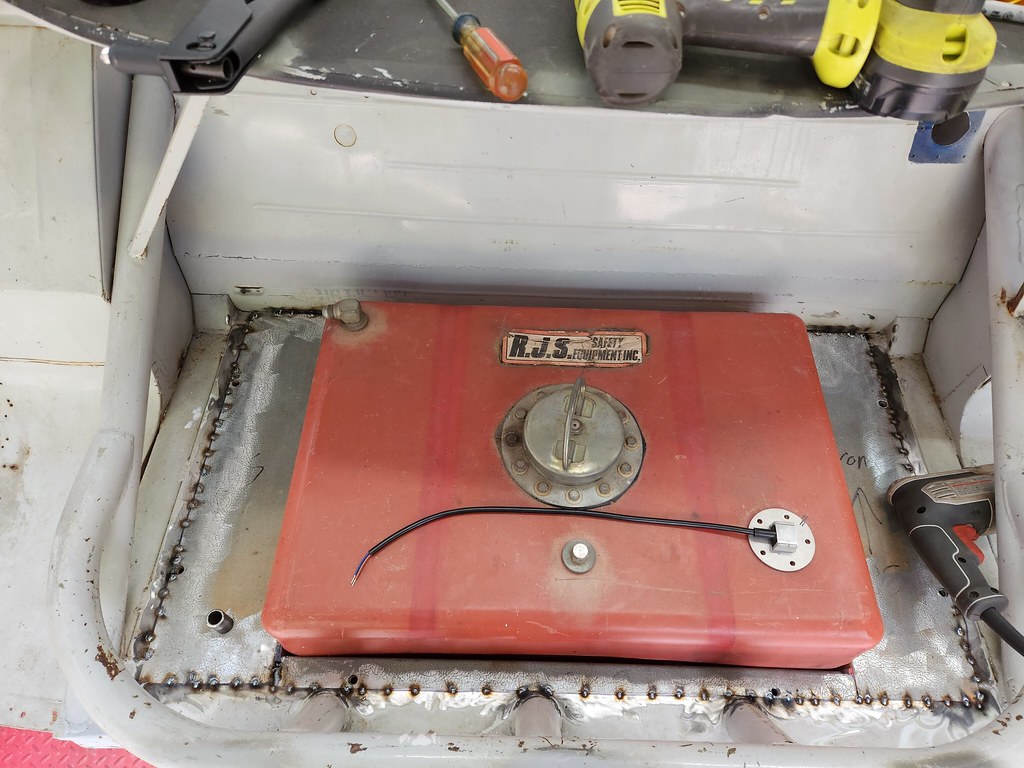
lets next talk about the fuel cell. When we left, I had the box made, but nothing else. So I centered the box, and bent up some pieces of galvanized metal to reach the maximum points possible in the trunk pan, and one inch down the box. Used a sharpened bolt to mark the welded in mounting nuts and transfer through the galvanized. I also spaced 1/8 holes at one inch intervals on all the floor to box flanges for rivets. Thought being that they will have a less sharp head than ground weld, and therefore present less risk to the cell integrity over time.
 20220911_143304 by Michael Crawford, on Flickr
 20220911_143242 by Michael Crawford, on Flickr
trimmed up the floor pieces, spot welded every inch and ran the rivets after a base-coat of white rustoleum.
 20220924_141309 by Michael Crawford, on Flickr
 20220924_141227 by Michael Crawford, on Flickr
finished by bending up some straps. Quite happy with how this turned out. Still have to clean the cell, re-gasket, install the fuel pump module, etc. but its damn near sorted!
 20220925_104638 by Michael Crawford, on Flickr
next lets move onto finishing up seat mounts, grinding welds, etc. lotta work, and brother dallas came to help. It was a good time with a good friend. The seats grew a pair of mounts at the rearmost section, braced from the mounting frame, to the seat, then through bolted through the floor. Really stiffened things up.
 20221001_091757 by Michael Crawford, on Flickr
 20220910_173053 by Michael Crawford, on Flickr
 20221002_094839 by Michael Crawford, on Flickr
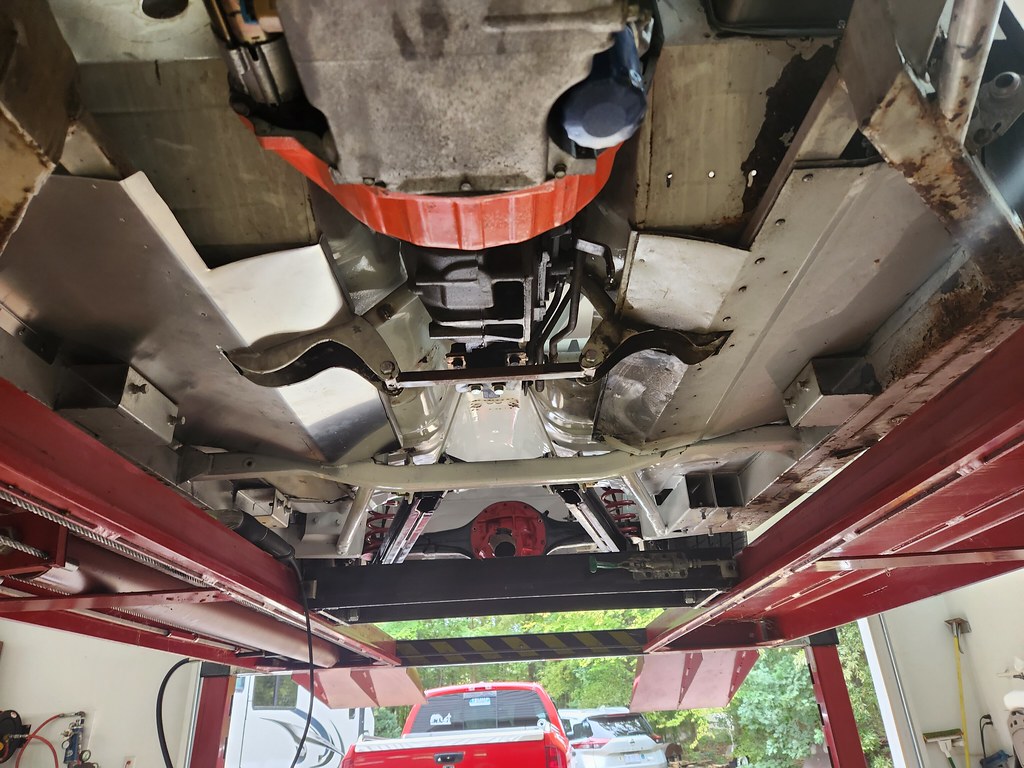
next lets talk about the aluminum work. My plan is to build in as much heat shielding as is realistically possible. NASCAR used an under floor heat shield with some fiberglass sandwiched, the aluminum floor liner on top with fiberglass sandwiched. I decided to replicate this on the passengers side, using some 16ga aluminum. Starting with CAD, I made a model.
 20221002_110816 by Michael Crawford, on Flickr
took it out to Walden (my sheet metal brake in the woods. Anyone know the reference?) and bent it up. Then fit it into place.
 20221002_113348 by Michael Crawford, on Flickr
 20221002_135322 by Michael Crawford, on Flickr
looks right! I also rebuilt the trans mount to fix the drop issue as you can see here
 20221002_135328 by Michael Crawford, on Flickr
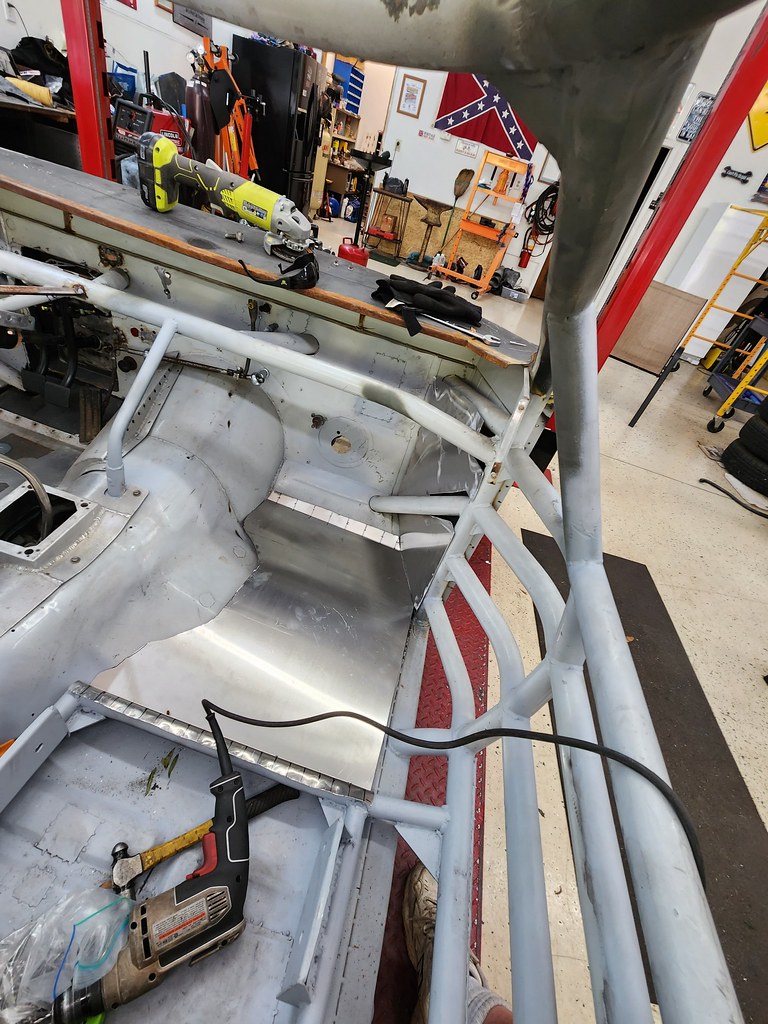
while I had the cad fired up, I used another sheet of aluminum to make the passengers side kick panel closeout and upper heat shield. The fuel lines will run under and behind there as well, and wiring foir the engine will come out of the big hole in the firewall. Still in prigress is a kick plate for instructor to brace against and protect the stuff. Ecu will be buried above the dash bar, mounted to it. Out of the way but serivicible.
 20221008_144135 by Michael Crawford, on Flickr
next, I got to thinking about line mounts, batter kill switches, brake bias stuff, fire suppression control, etc. I have a general plan somewhere between these two vintahe nascar pictures I found
 218788_Interior_Web by Michael Crawford, on Flickr
 1982-Oldsmobile-Cutlass-NASCAR-IMSA-For-Auction-004-Interior by Michael Crawford, on Flickr
I really like the trans tunnel mounts. Simple, light, accessible, and elegant. All the solutions should be.
Step one is the gross adjustment for brake bias, which due to the caliper choices I have I will have to dial in first. It should be a set it and forget it, but I want it acessible in case. It wobbles way more than I would like, so I will probably box it in.
 20221009_111518 by Michael Crawford, on Flickr
next, seeing how the batter box works. I had a 75 series core kicking around from where the battery in my truck crapped out. It fits like the box was designed for it, but its heavy and im not quite sure how to make a hold down for it. Im planning to try a lawnmower battery next, as smaller and lighter and cheaper. However im open to ideas, feedback, and more vintage nascar battery box information than I currently posses.
 20221009_095718 by Michael Crawford, on Flickr
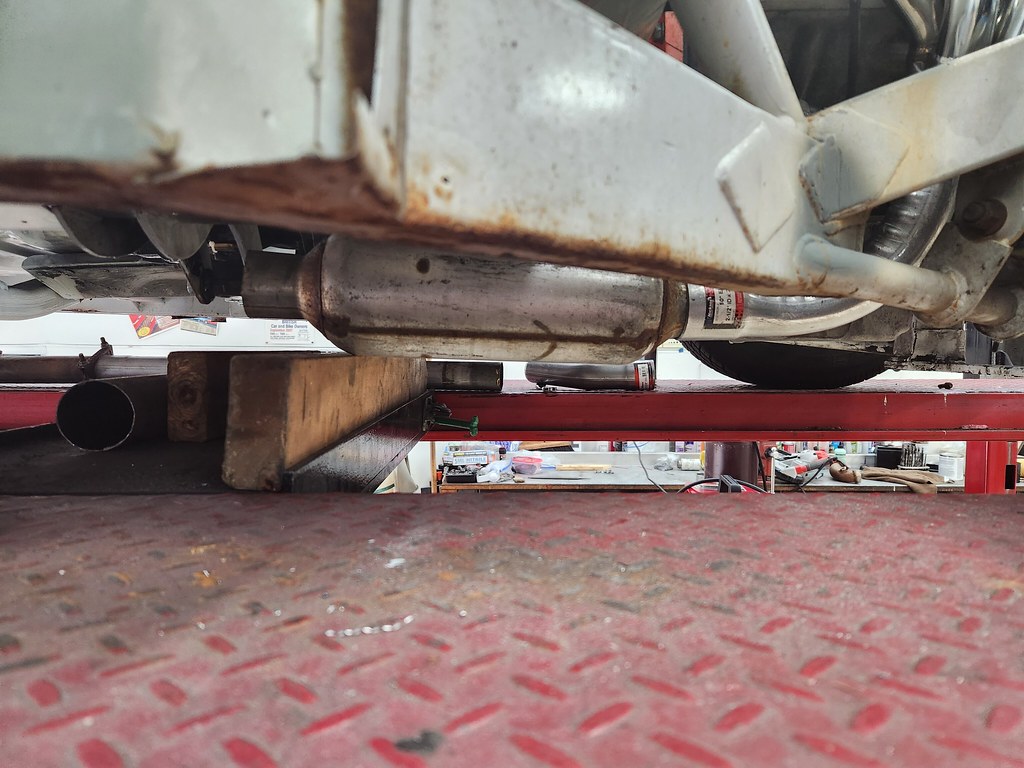
lastly, I started on exhaust. I have the shorty headers, a pile of 2.5 exhaust sections from a camaro, a pair of jones performance chambered bullet mufflers (I think) that stampie gave me, a welder, a portaband, and no fear of failure.
Started with a pair of 90s right off the collectors, tucking as close to the block as I could and still clear the oil filter and starter. The only place that the mufflers will fit is right at the bell housing. There's just no other room anywhere to put them. Ideally, id run the dr gas spin muffler boom tubes with longtube headers, but right now I need to stay low buck. After all, a $20k pay cut has to come from somewhere. This exhaust will do just fine for now with a stock 5.3. and hopefully sound good. The mufflers have 3.5 inches of ground clearance. Again, not ideal, but serviceable. The x pipe and ovalized sidepipes will come next.
 20221002_154849 by Michael Crawford, on Flickr
im really running to the end of my “do before painting chassis and mounting body” list. I believe two more weekends of effort will see it blown apart and ready for paint prep. My buddy art owes me, and im calling in part of that and having him to the prep and shoot. While hes doing that, ill retrieve my duster body and get it ready to become a hat.
Until next time
 20220615_202235 by Michael Crawford, on Flickr
I'm trying to remember the battery situation on my car, since it's been about almost two years since I changed it, but my recollection is that for my car they had some high density foam that was custom cut fill any voids and to hold it in place, and then all the foam was held in by the bolt-on battery box door. That may or may not be an acceptable level of retention for SCCA/NASA though...
Edit: this was the only picture of that day I could find.

High density foam is not a solution i ever would have thought of! That's really sli k, honestly. Ill need to see if it meets spec, but i doubt it having never seen it before. It may be part of the solution though. Would help brace the battery in the box....
We use sfi roll cage padding around our battery in the battery box and never had an issue in tech with champcar or lemons.
Clean and simple exhaust. I (weirdly) prefer non-crossed-over duals, but I'm sure they give up some power.
I never liked the straight ls exhaust sound. Im hoping the two chamber muffler and h pipe will make it not crappy.
All the piping i used was off a scrap camaro ss exhaust from the body shop, mufflers were from stampies scrap, and two 90s from oriellys at 20 bucks.
So a 20 dollar exhaust. I dig it.
Dusterbd13-michael said:
chassis, motor and trans are ready for paint.
74 duster delivery arranged.
Im tired.
Can't wait to see the Duster shell going over
You'll need to log in to post.