


Dad came over and helped me get some more precise roll bar measurements

Dad came over and helped me get some more precise roll bar measurements
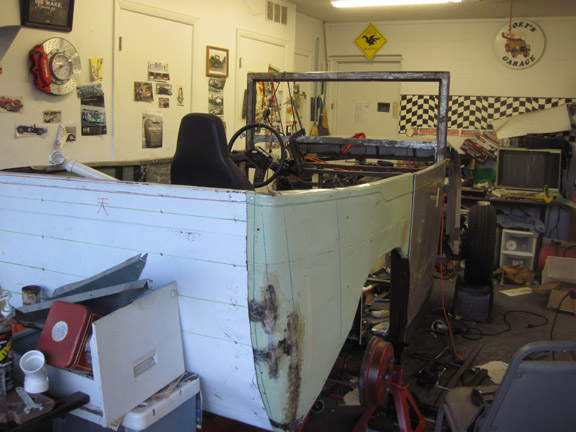
The windshield frame is pretty much complete.


Why build one? Just buy this one.....
http://cgi.ebay.com/ebaymotors/?cmd=ViewItem&item=150834081676#ht_500wt_948
Ooh! Thank you for the heads up. I bet I know whose car that is...need to contact him.
Yup. Exactly who I thought it was. He has an account here, never posts, though. Other GRMers know who I'm talking about.
job related stuff has kept me busy lately, and will for the foreseeable future. The datsun won't be ready for the challenge, and the whole project has been pushed to the back burner. I'm still going to work on it, but this will be happening at an even slower pace than before. ![]()
The practical upshot is that today I was back in the garage for the first time in a few weeks....I ripped some tubing with an angle grinder and welded it to the leading edge of the frame for the passenger door. I didn't take any photos during the process, but will try to take some "after" shots.
I still need to do a little welding after unbolting the door frame from the hinge. Then I'll paint the frame and add the door skin. That's the last major body panel to form. (...although the rear seat area can't be riveted into place until the roll bar is done.) After the steering is worked out, I can install the cowl and start figuring out the radiator mounts.

I was just wondering yesterday how this project had been going. Replying so I can find the thread again.
you can also add a thread to your favorites by clicking on the heart below the comment box. That's how I keep track of LOTS of threads with car building info
I took the day off from work. I've finished welding up the leading edge of the passenger's door, ground everything smooth (it would not do to have lumps under the thin sheet metal of the door skin), and brushed on a first coat of rustoleum. This paint doesn't need to be pretty - it will be under the door skin - but it needs to protect the metal.
just brushed a little more paint on in a few spots where it was thin. With luck, I can skin the door tomorrow.
No rivets yet, but the door skin is bent into place around the frame.
Shimming the door.

Previously, when I made the driver's side, the door frame swung freely, but when I wrapped the skin around the bottom, it rubbed. (I still need to decide how I'm going to fix that.![]() ) I wanted to avoid that issue on this side, so I bent the bottom edge of the door skin first, then put metal shims between the bottom of the door and the door jamb.
) I wanted to avoid that issue on this side, so I bent the bottom edge of the door skin first, then put metal shims between the bottom of the door and the door jamb.
bending the top flange

I expect that the right way to do this (i.e. the way that Trans_Maro would do it when he restores 1930s cars) is to bend a 90 degree flange and then use a shrinker to gather the metal at MANY spots so it follows the curve of the door frame. My cheap HF shrinker/stretcher is broken, so I need a different method. I cut a few slits into the metal so I bend it in separate pieces, each one clamped to a section of the door frame.

The beads on the door and the rear quarter panel line up nicely.

JoeyM wrote: you can also add a thread to your favorites by clicking on the heart below the comment box. That's how I keep track of LOTS of threads with car building info
Oh, haha, wish I'd known about that before. GRM's forum software gets me every time.

Bumping this so we can move it to the new build thread zone.
I just changed the title from saying
"1932 datsun"
to saying
1932 datsun replica
As per the rules, I was going to add Type 11 or Type 12, but I'm not sure which model it better resembles (long story involving "The Brown Car" and "The Stupid Green Car") PM me if you want to waste a few hours reading about irrelevant minutia regarding two different pre-war datsuns.
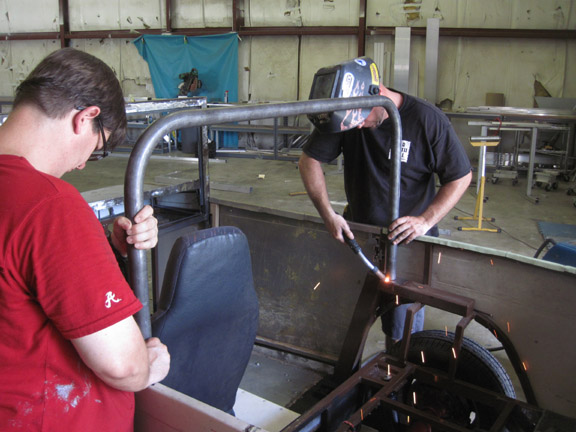
Today the datsun got a roll bar. Dad trailer'ed the car to Trikchop's shop. On the trip up I-4 and back, several times we had people slowing down to check it out. One guy even stopped to talk to me about the car when we were getting gasoline.
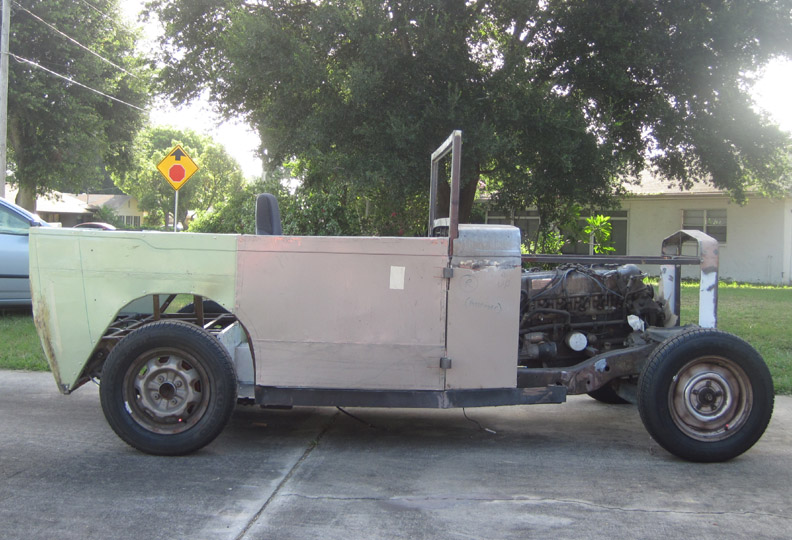

I'm very happy with the roll bar he made.

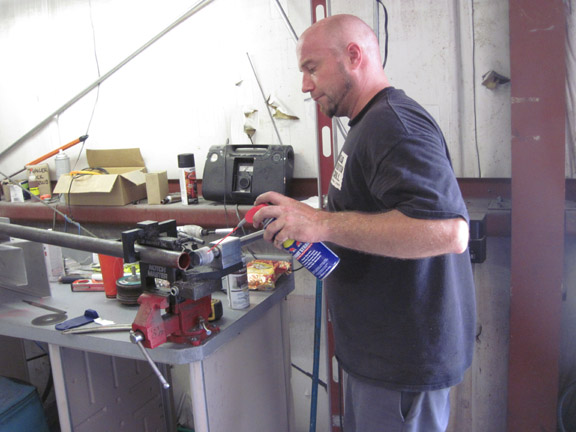


I just wiped the bar down with acetone and rattle canned it to keep it from rusting.

any updates? It's been a month.
Thanks for checking.
No, nothing new. I have a new job, and it is really taking a lot of time (working a morning and evening split schedule), so I have not been in the garage in quite some time. The next easy part will be fitting the sheet metal for the back seat area of the floor.
After that, I may do the junkyard crawl and look for another steering column from a dodge pickup.....I'm guessing it will be easier to hook a dodge column to the dodge steering rack I'm using than to use the datsun column.

Hey Joey,
I just took a look at my '95 Dak parts truck. It's 4WD, but the 2WD column setup should be similar.
The shaft between the steering column and steering box has two U-joints. The shaft in between the two joints has a slip shaft in there. The upper shaft has a square tube that is exposed going down to a boot. The lower half looks like it's a female double-D. I suspect the square tube is welded to a section of double-D.
If that's the case, you probably can take the lower half from the stock Dak setup and modify the upper to use whatever steering column fits best in your build.
Thanks, Rob. I'll definitely try using at least the lower from a Dakota. (possibly the entire thing.)
I just want to thank everybody at the Challenge who stopped by to look at, and talk to me about, my unfinished project. (...and an especially BIG thanks to Tim for giving me the diecast model of the car I'm trying to build. That is too cool.)


It was really great to see so many people interested in what I've been doing. I have decided that I MUST get back into the garage.....the new job has made it impossible to spend an entire afternoon working on the car, and that's what I'd done in the past. Now, I'm going to have to find tiny chunks of the project that I can complete in an hour or two and focus on them.
OK, the stalled project thread made me want to get back out to the garage again. I don't have much time, so I needed something simple.....I went with trimming some metal to fit around the mount points for the roll bar. That should not take too long, since I already have the rough shapes cut into metal, and just need to notch them to fit around the bar.
My method was to trace the metal corners onto posterboard. I then used the posterboard pieces as easily modified/cut stand-ins for the metal while I was figuring out where to cut and how far to accommodate the roll bar.


It was good to be back in the garage, but before I can mount those pieces, I need to modify the gas tank straps, grind/paint lots of stuff to get rid of/prevent rust, drill holes for rivets, etc.
Last weekend, I spent my little bit of car time on rust removal and rattle cannning etching primer onto the resulting bare metal to protect it.
Today, I tried to fabricate a wheel well. It took longer than expected, and didn't turn out as well. This is firmly in the "screw it, I'll use it anyway" class of car parts. After all, the only purpose is to keep the wheels from throwing dirt and rain into the interior.
Pics when I find where I put my camera today after taking some pictures.
The neighbor has given me a bunch of metal scraps that normally would have been placed in the recycling bin.

I am using a few of those to build the wheel wells

Here are a couple of pieces before they are riveted together

I spent most of today working on school stuff. I did get into the garage for a little while, though, and used the time to make some posterboard patterns for metal parts. I then cut some sheet metal (twice ![]() ) for the wheel well on the other side (i.e. the passenger side.)
) for the wheel well on the other side (i.e. the passenger side.)
You'll need to log in to post.


