Project LS2 S14 at present:
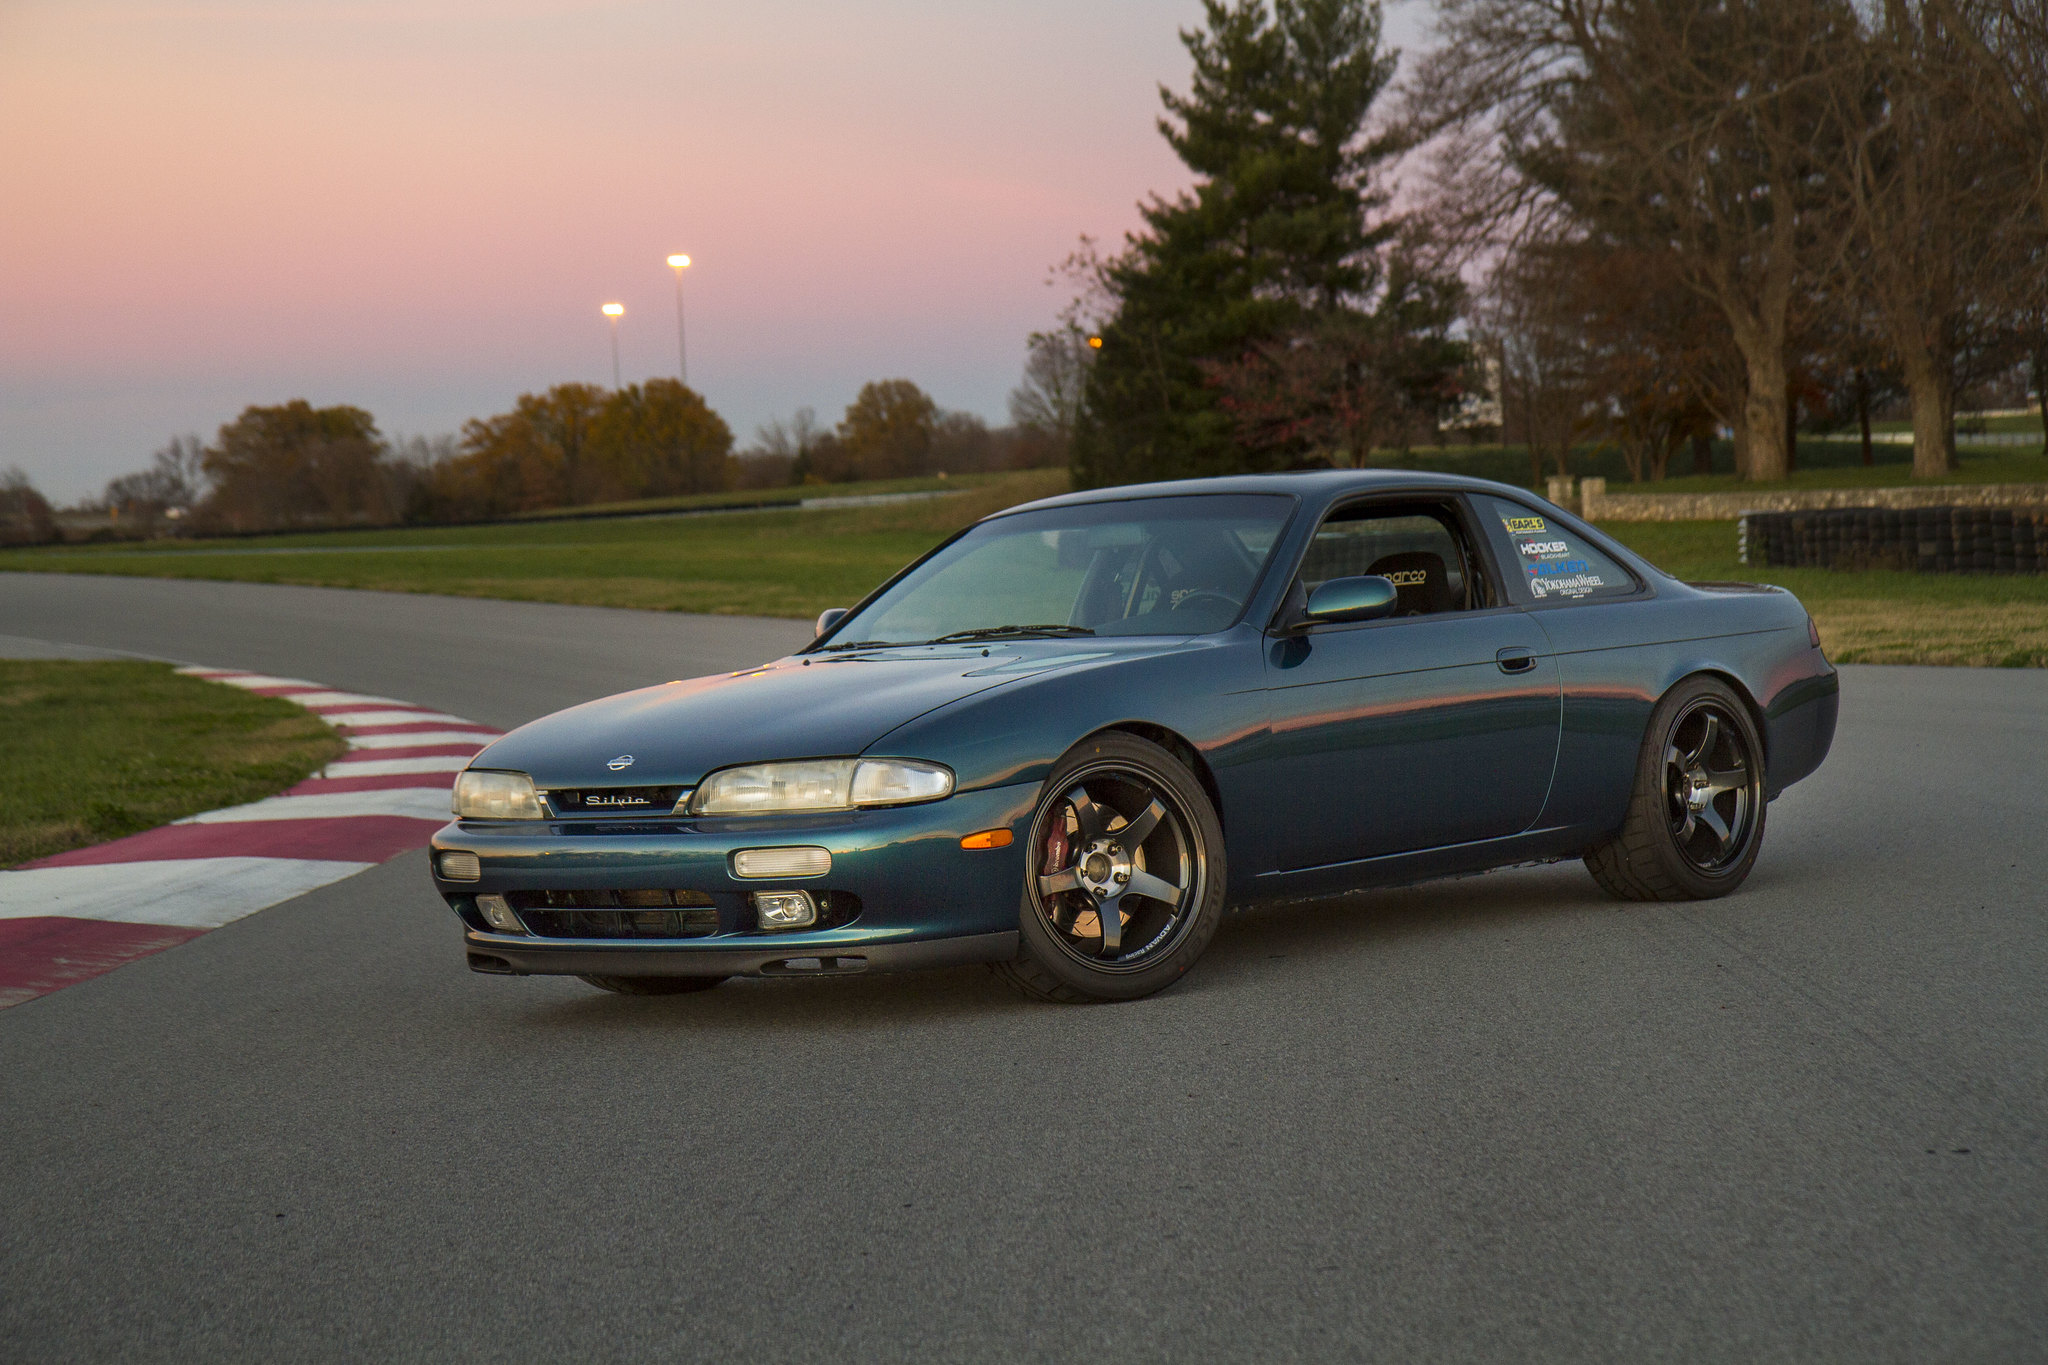 img_4303 by eric.burnett09, on Flickr
Current mod list:
Powertrain: -LS2 engine rebuild by Richard Holdenor out of Cali-forged pistons and rods from CP and Carillo -Brian Tooley Racing Camshaft-Hooker S14 Engine Mount Swap kit-Hooker Stainless S14 LS 1 7/8'' swap headers, Y into 3'' single out with Hooker Aerochamber Muffler-OEM LS7 clutch/pressure plate from Scoggins Dickey -RAM flywheel (19 lb) -Engine Management: Holley Dominator EFI - Holley Billet LS Fuel Rails -Hurst T56 Shifter -CTS-V Front Drive Accessories-Street Elite Performance Clutch Master Adaptor Kit--K&N 4'' open element air filter-
T56 trans was recently rebuilt by American Powertrain with a race tolerance spec, it is now fortified with carbon synchros, billet fork pads, and heavy-duty slider springs. Torque is transferred through an OEM LS7 clutch mated to a 19-pound Ram flywheel.
Power Steering: -KRC LS Power Steering Pump- Earl's power steering cooler and Earl's lines and fittings.
Cooling: -Hinson LS S14 Radiator kit- Custom fan shroud fabricated by Level 7 Motorsports out of Marion, IL. Single 15'' SPAL fan. Earl's oil cooler and Earl's Ultra Pro hoses and fittings.
Suspension: -Driftworks Geomaster 3 drop knuckles front and rear - SPL tension rods- http://www.splparts.com/chassis-S14.html-SPL outer tie rods- -SPL rear eccentric lock-out -Feal 441 Single Adjustable Coilovers-Extended Travel version-Circuit Sports rear toe rods and traction bars (will most likely be going SPL on these before all is said and done. I had these laying around from my last car). New Setup: -Advan TCIII wheels Front: 18x9''+25mm with 10mm spacer. Rear:18x10''+35mm -Falken RT615K tires, square setup: 275/35/R18 Old setup:-275 section width Nitto NT-05's mounted on 17X10 FNO1R-C's in the rear 235 width NT-05's on the 17x 8 FNO1R-C's
Interior/Safety: -Autopower roll bar with bolt-in harness bar, welded extra material to floor to bolt it to for more roll over strength- http://www.autopowerindustries.com/rollbars.asp -Sparco Evo 2 seats with Planted Engineering seat brackets-Willans harnesses -S15 steering wheel (always like how nice those looked) -Racepak IQ3S dash behind steering wheel- Holley EFI touchscreen to monitor engine parameters, etc. installed where radio previously resided. -Racepak's solid state Street Smartwire PDM (power distribution module) unit has replaced the entire OEM body harness, reducing weight, removing the need for fuses and relays, and increasing the car's reliability overall.
*Read on below to see how things have progressed since the genesis of this project.* I've been scouring this site for quite some time, posting and learning as I go. I have finally reached the point it's worth showing what I've been working on for the last year or so. I've taken the time to take quality pictures of everything I've done so if what you see here doesn't take care of a question let me know and I'll see if I can help you out. It's been slow but I've been trying to build it the way I want it instead of what would've been more affordable. This car will most likely be the only car that I build for quite some time to have fun in so I want to enjoy it. I'll be using this build thread to show you all some new S13/S14 swap products from Holley as the build progresses. I had a white S14 for a while and it got totaled. I replaced it with the S14 below. It's a '96 and came with a S14 SR20DET swap in place and ran great until I pulled it out. Got it an hour and a half away down in Murfreesboro, TN. Owner reported it to have a broken trans. I had a spare, so I bought it, trailered it home, and discovered it was missing the bolts connecting the axles to the diff. Pulled them from the parts car and I had a perfectly running S14 SR car. After driving it for a while and dealing with multiple exhaust leaks due to the less than stellar intercooler piping job, and having to cross-reference parts with Nissan Sentras to get replacement parts I was ready to take the plunge on an LS swap. The plan is to end up with a car that can hold its own on the drag strip, road course, autocross, and still be relatively comfortable on the street for events such as Hot Rod Power Tour, Somernites Cruise, etc. I started working at Holley Performance Products after college and the bug for more displacement bit me even more. I found a buyer for the S14 motor which gave me what I needed to start the swap.
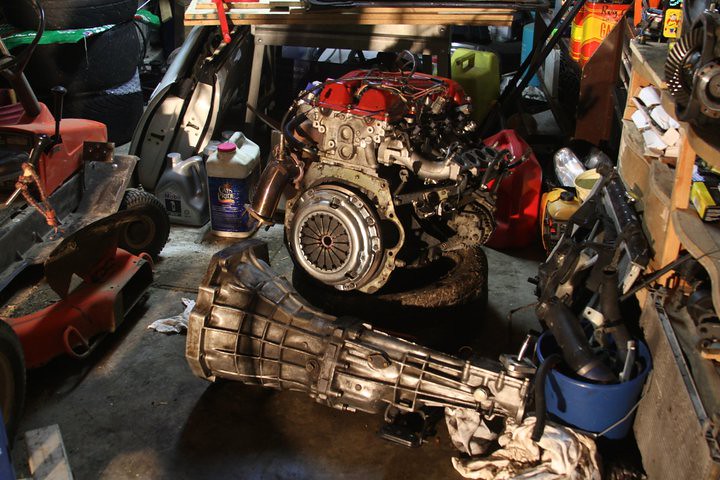 64447_724470857842_7953205_n by eric.burnett09, on Flickr
An LS2/T56 was sourced out of a wrecked 2005 GTO and the powers that be were gracious enough to let me use an area of the shop at work to get everything installed and running.
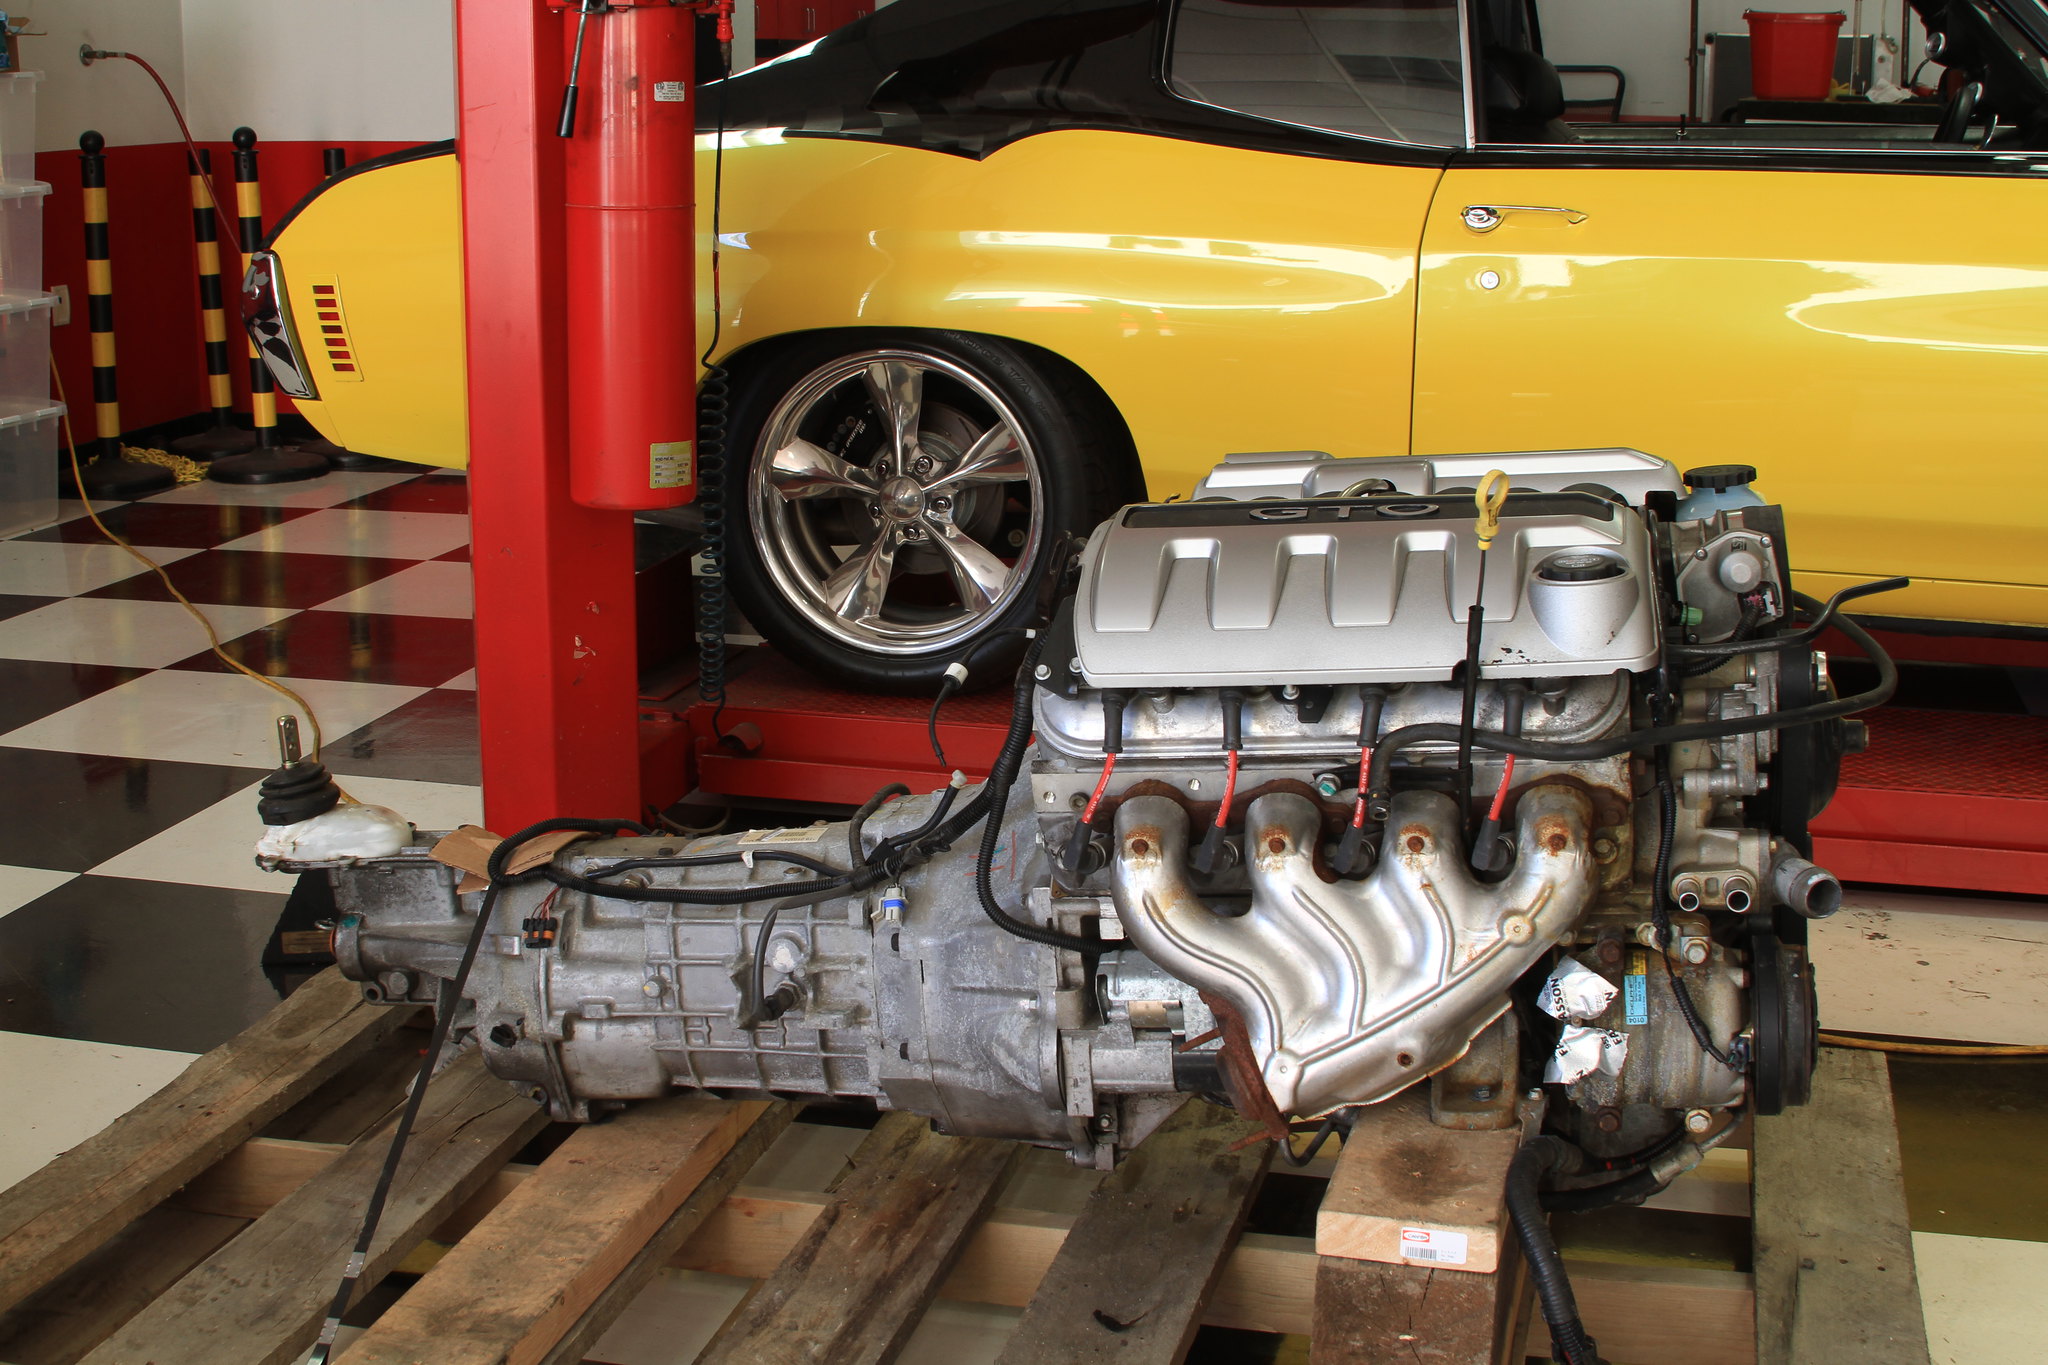 IMG_5703 by eric.burnett09, on Flickr
Before test fitting the engine it is necessary to remove the shifter. A good idea is to fit it with masking over the top of the mating surface so you don't scrape it on anything underneath the car. I also discovered that you can use an F-body shifter on the GTO transmission as long as you swap out the shifter receivers inside the rear of the trans as pictured below (this forum has awesome information). I got mine from www.thegearbox.org.
Here's the part # you'll need:
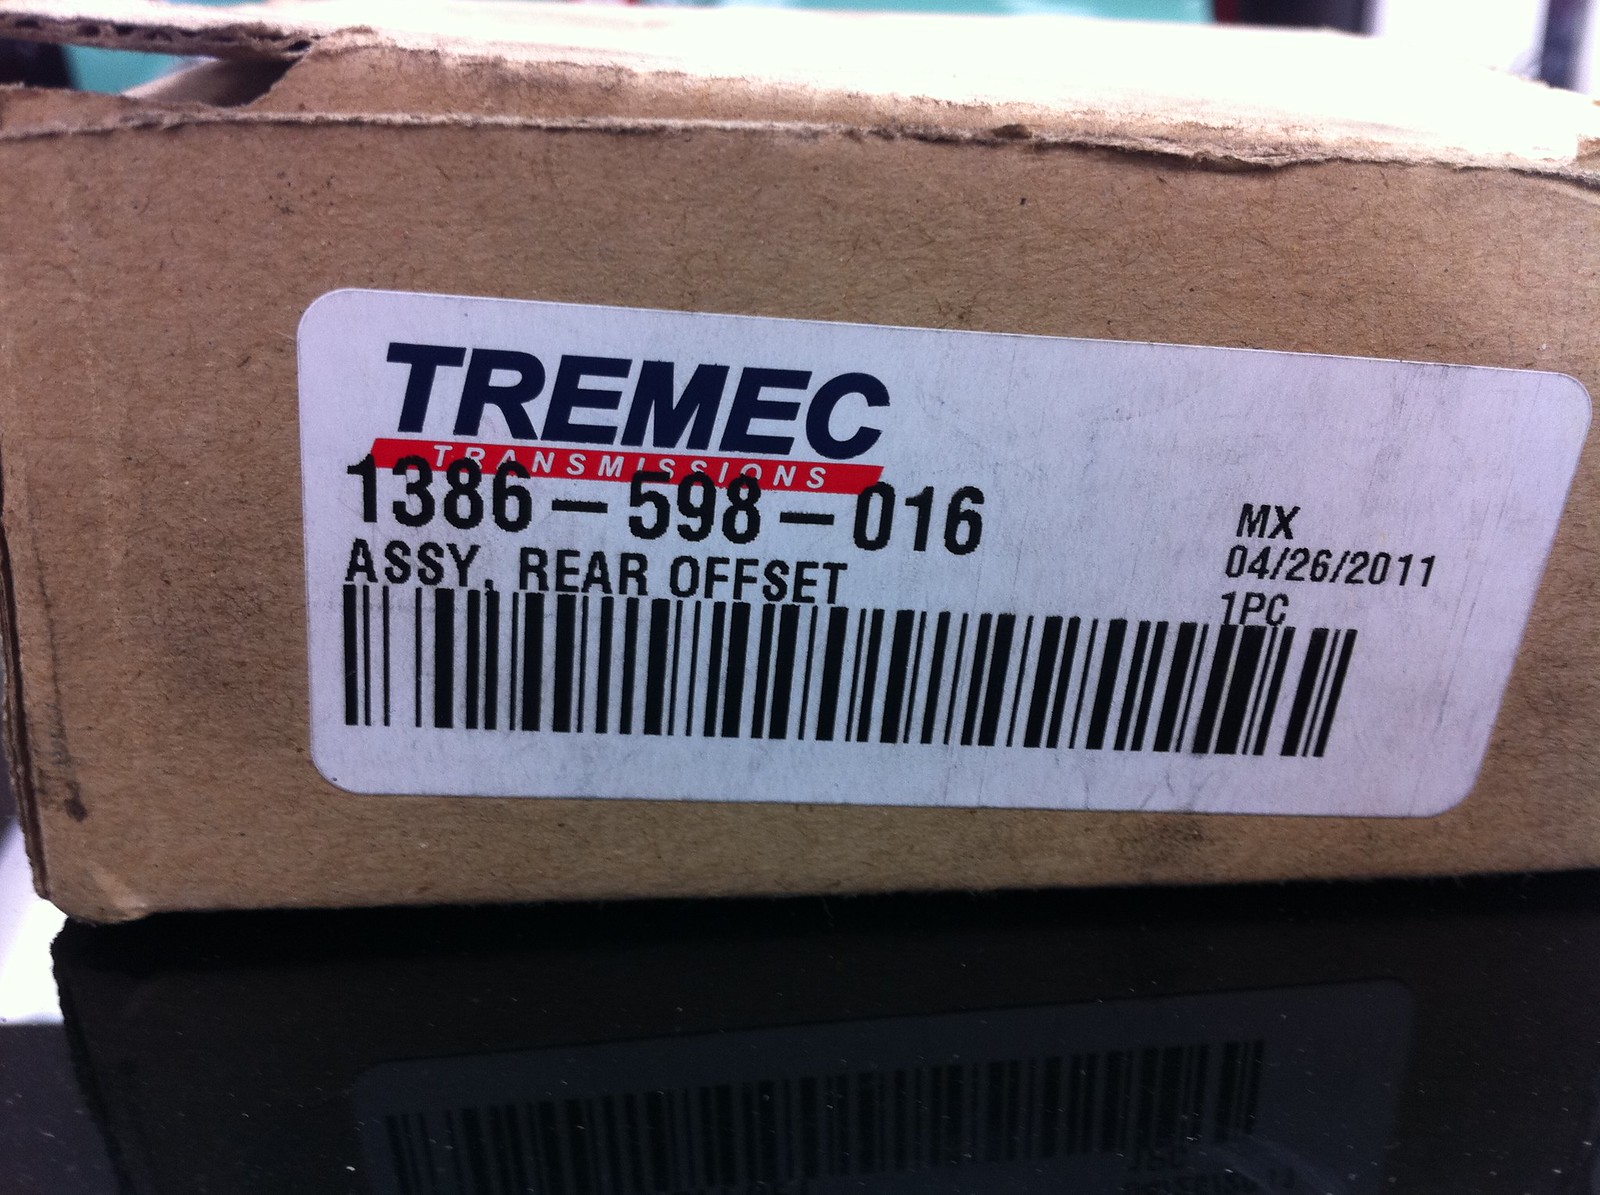 IMG_1635 by eric.burnett09, on Flickr
Old vs. new: 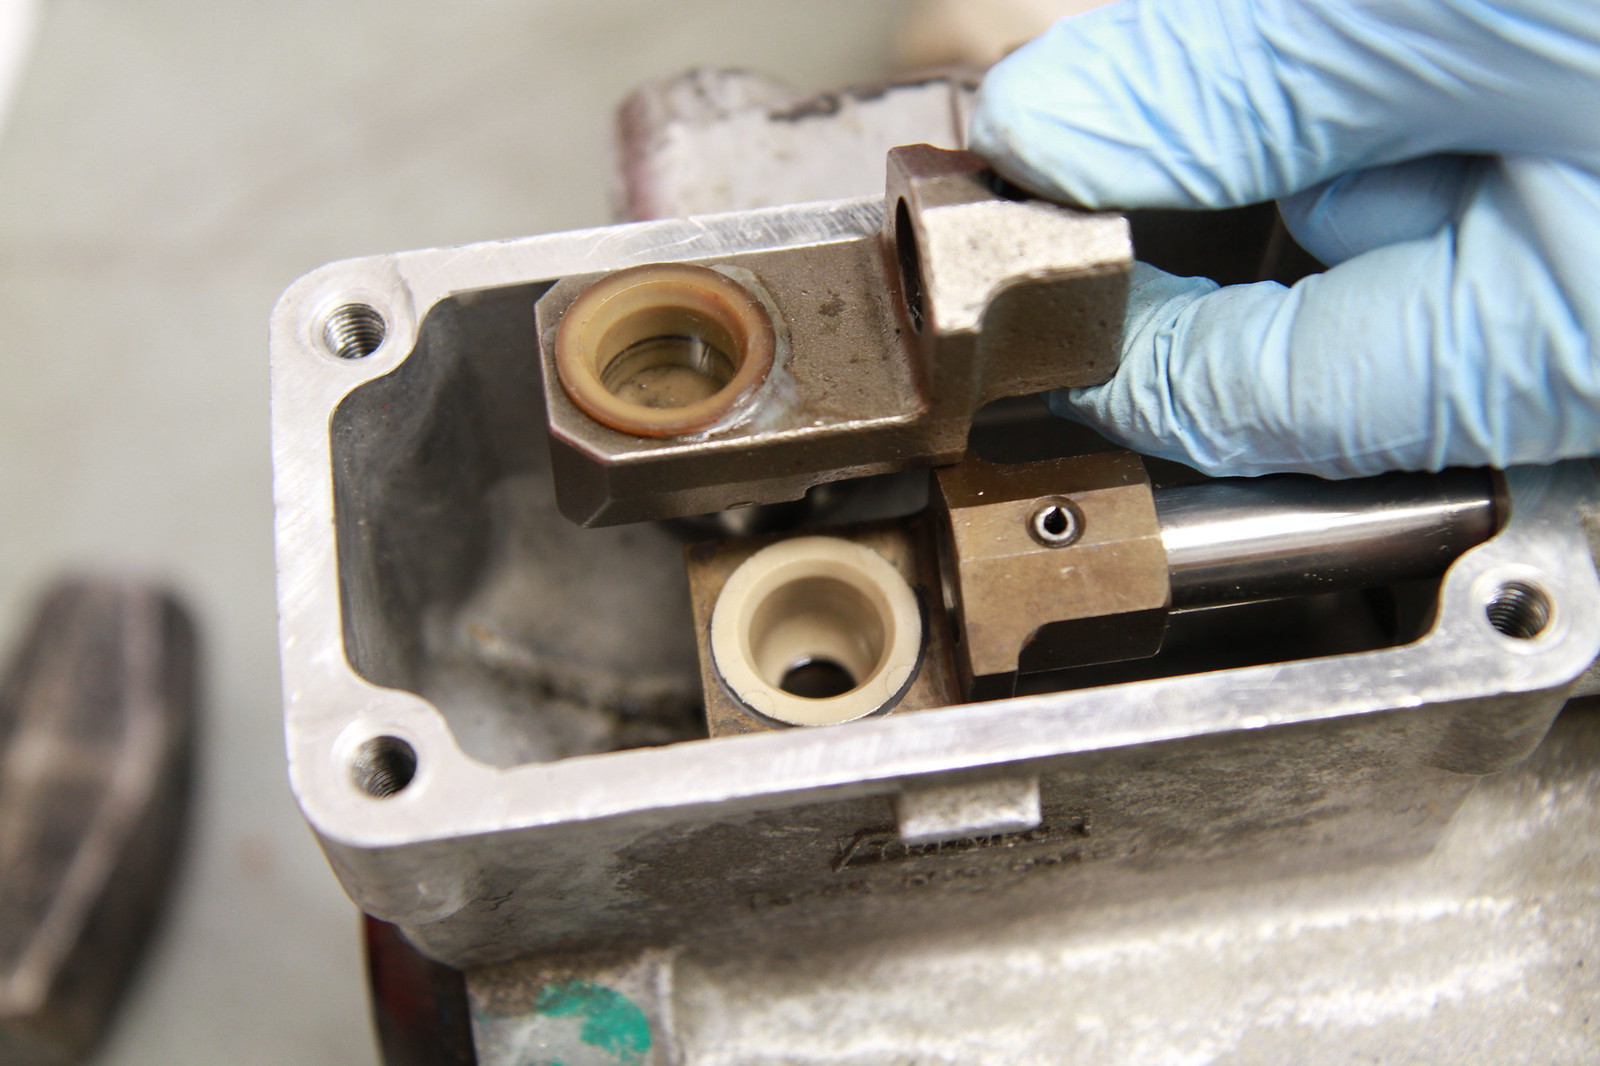 IMG_9506 by eric.burnett09, on Flickr
Hurst F-body shifter vs. OEM GTO shifter
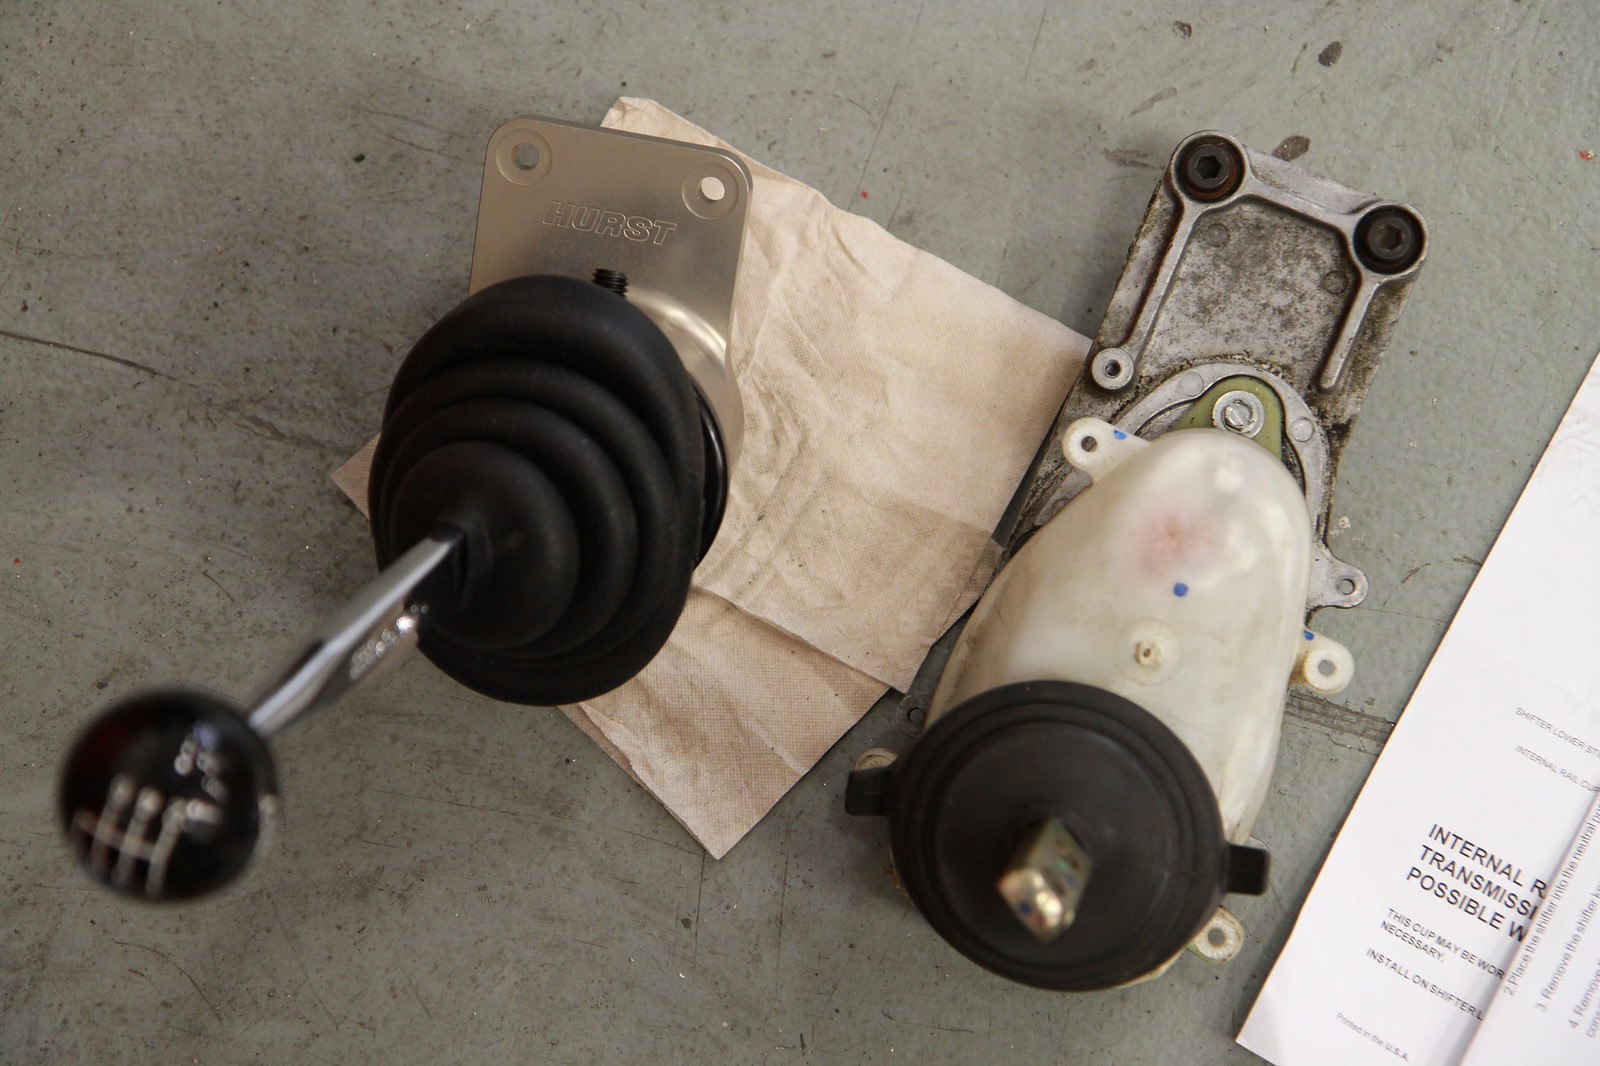 IMG_9511 by eric.burnett09, on Flickr
While the trans was out I went ahead and installed some new goodies I got from www.sdparts.com. LS7 clutch kit with RAM 19.2 lb. flywheel. 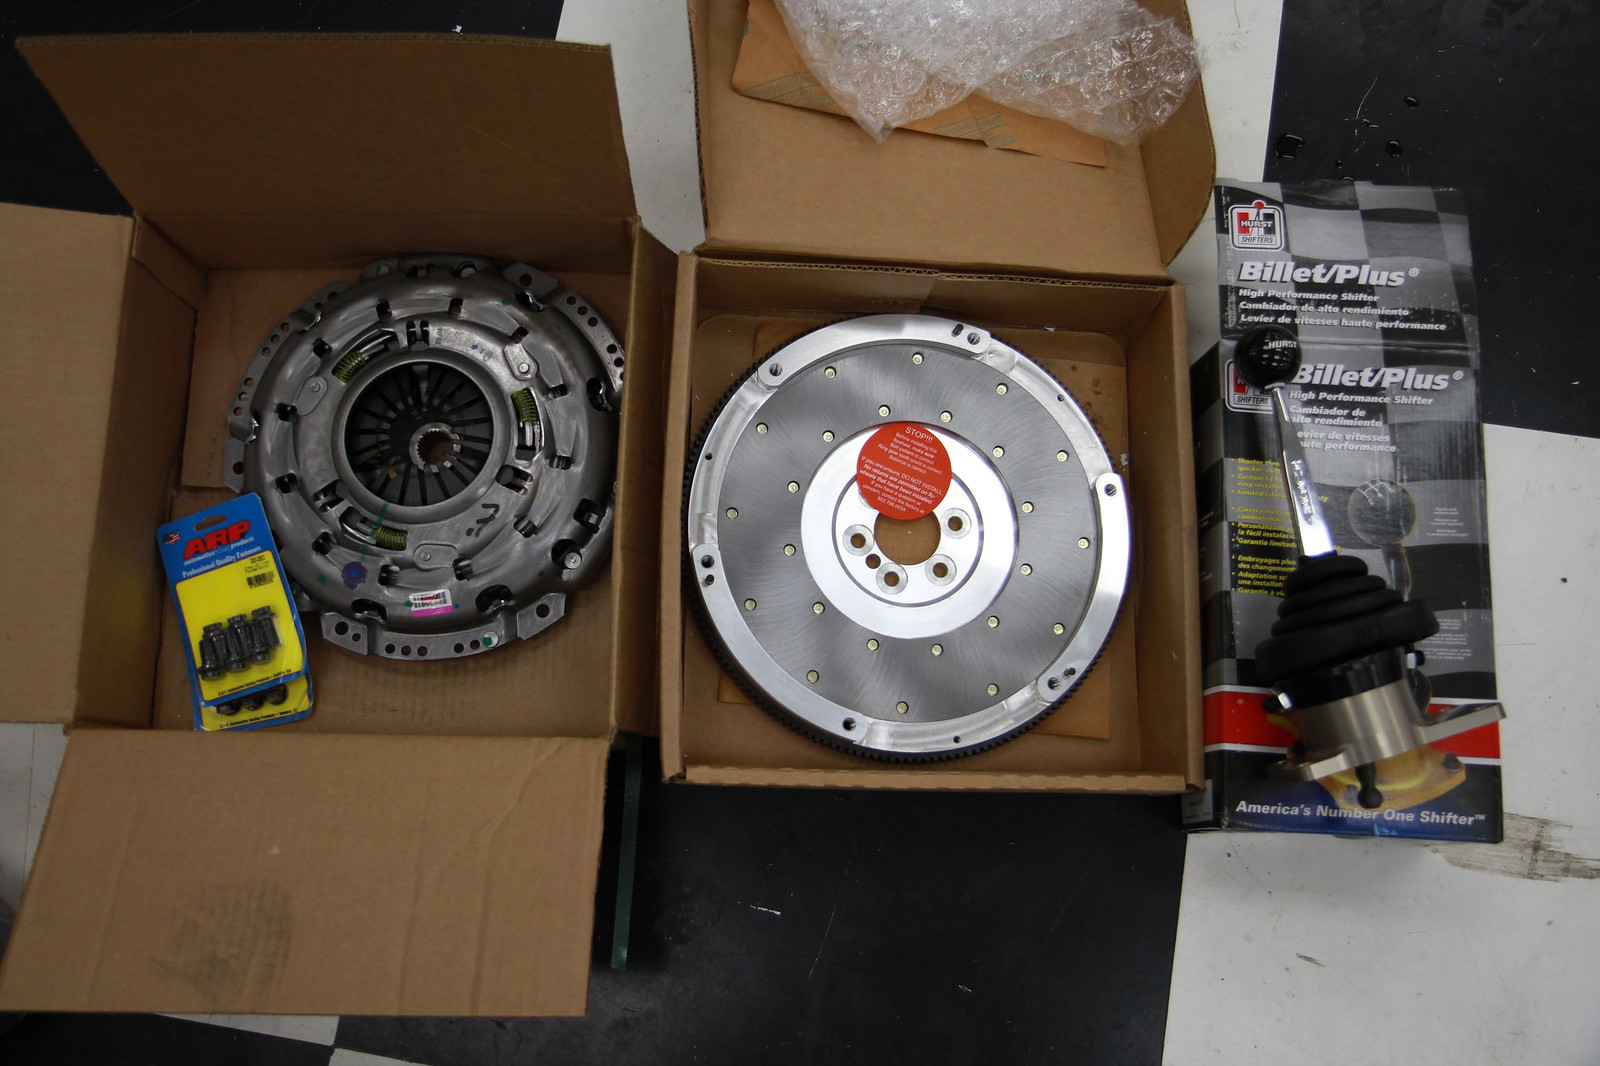 IMG_9420 by eric.burnett09, on Flickr
I removed the old pilot bearing with the following tool from AutoZone: 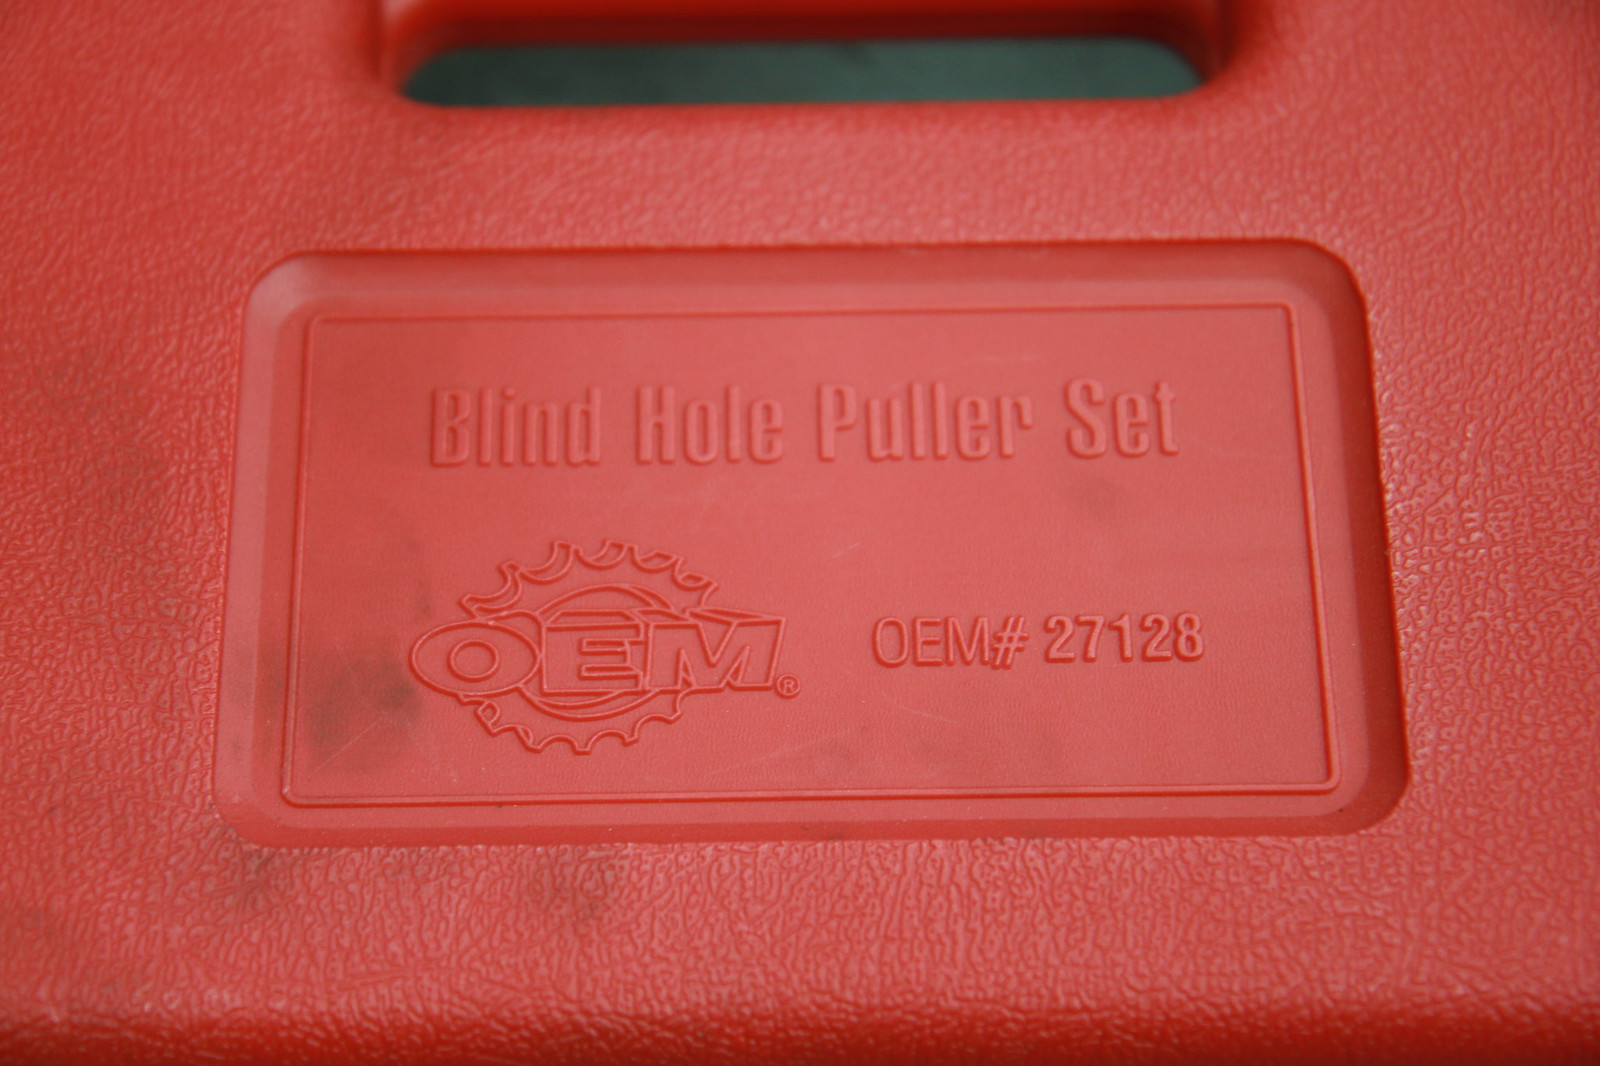 IMG_9529 by eric.burnett09, on Flickr
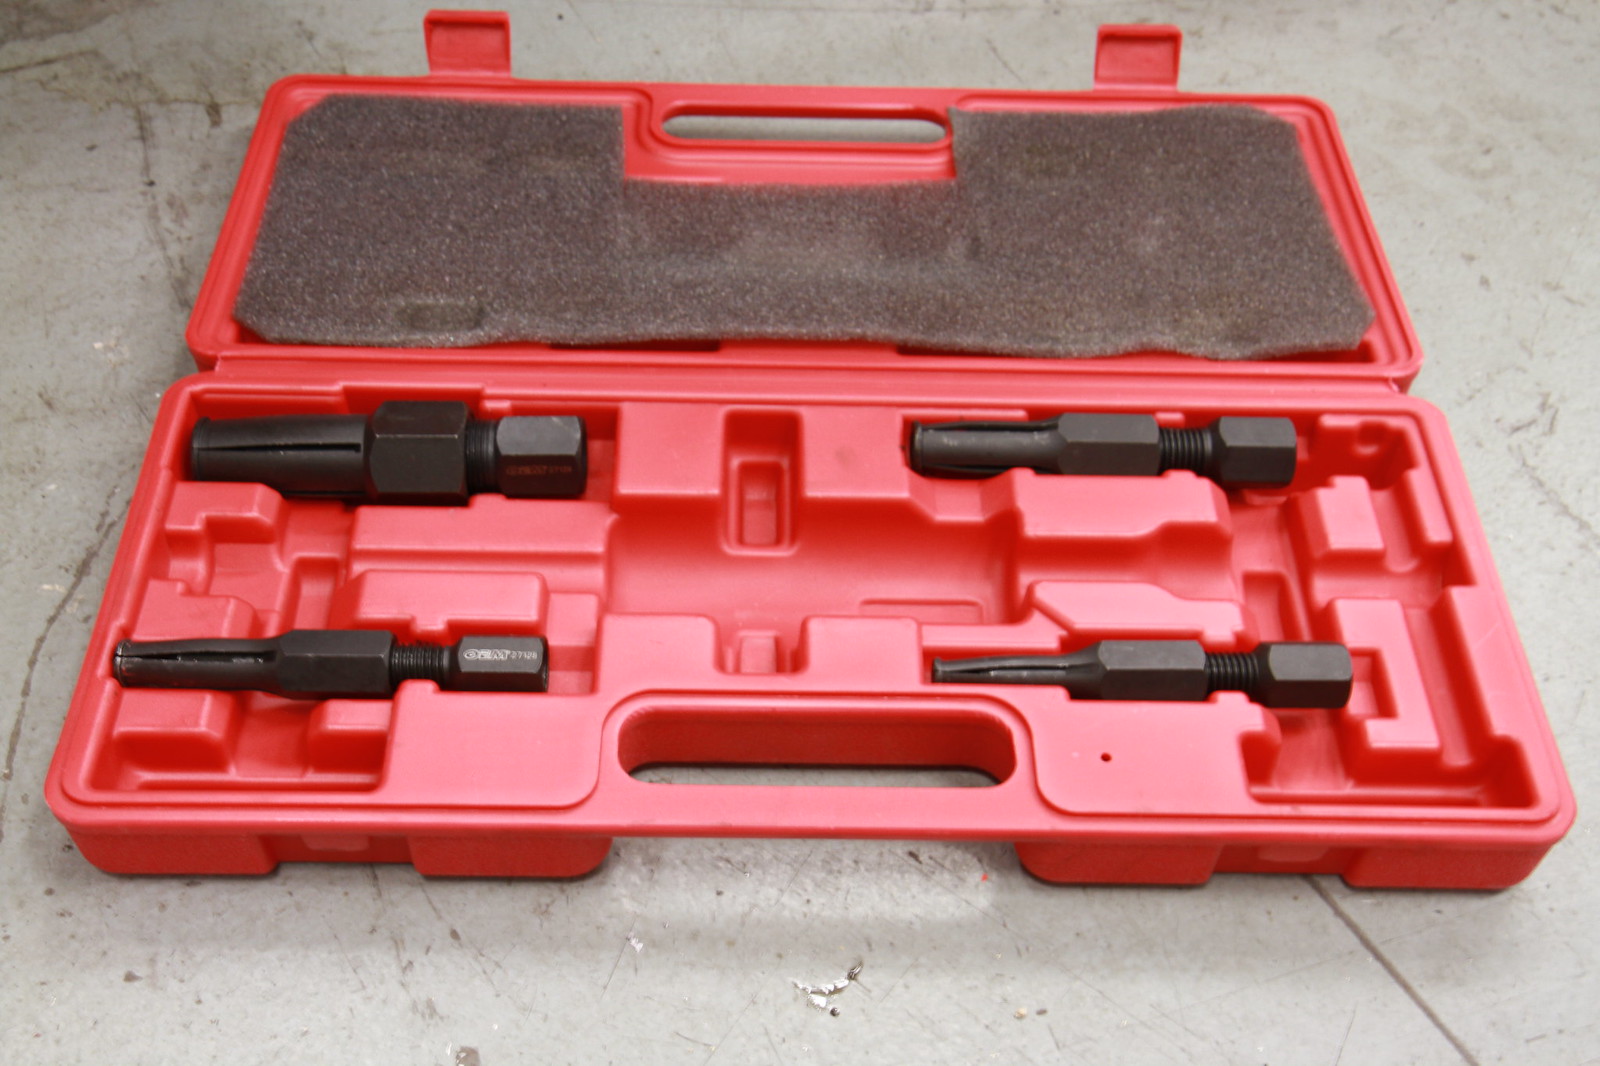 IMG_9527 by eric.burnett09, on Flickr
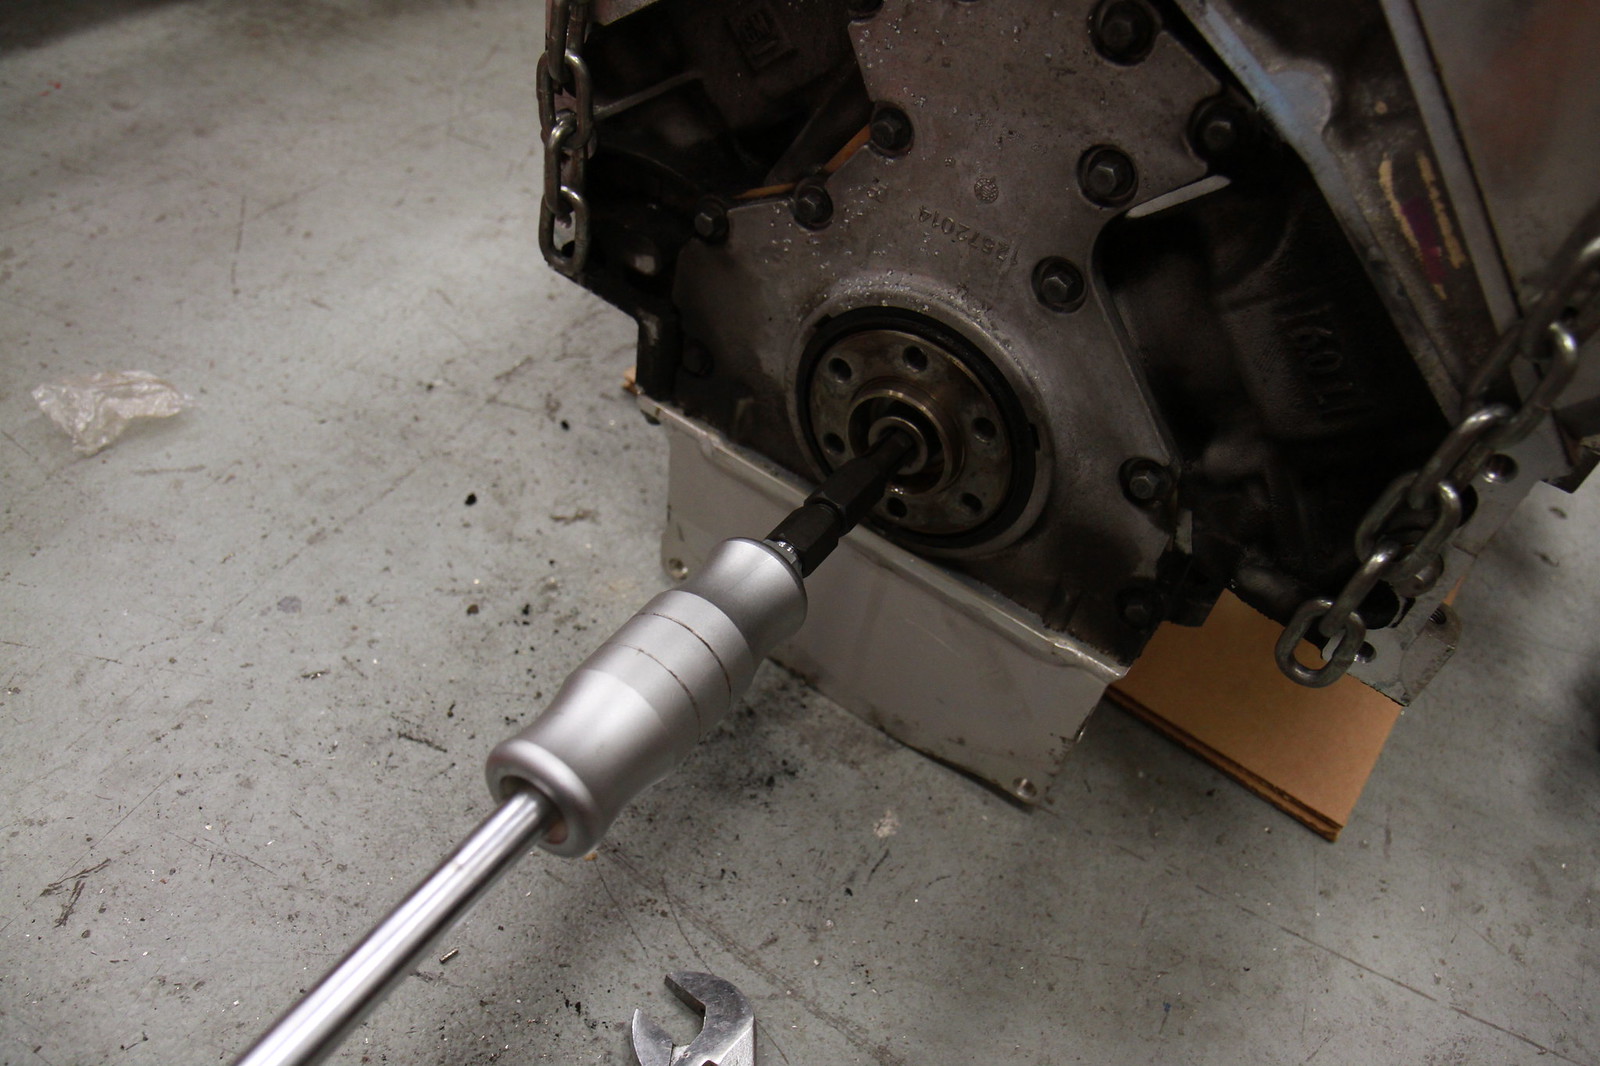 IMG_9513 by eric.burnett09, on Flickr
IMG_9527 by eric.burnett09, on Flickr
Then installed the new pilot bearing with this kit from AutoZone: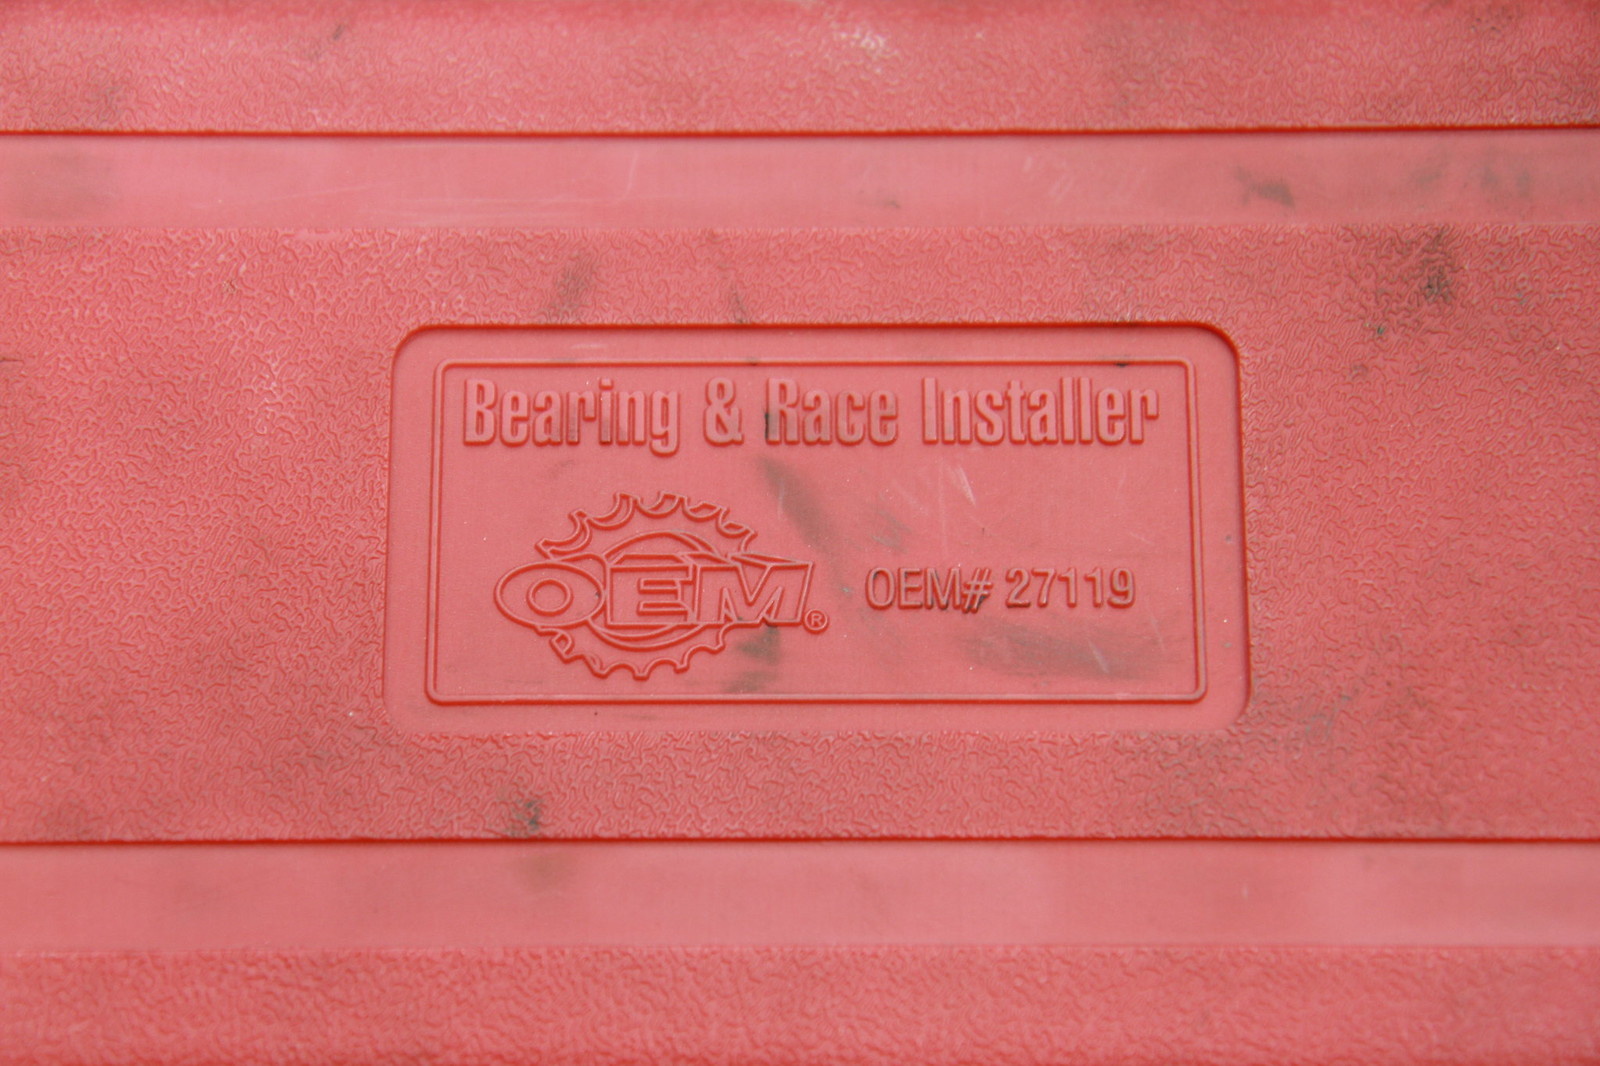 IMG_9528 by eric.burnett09, on Flickr
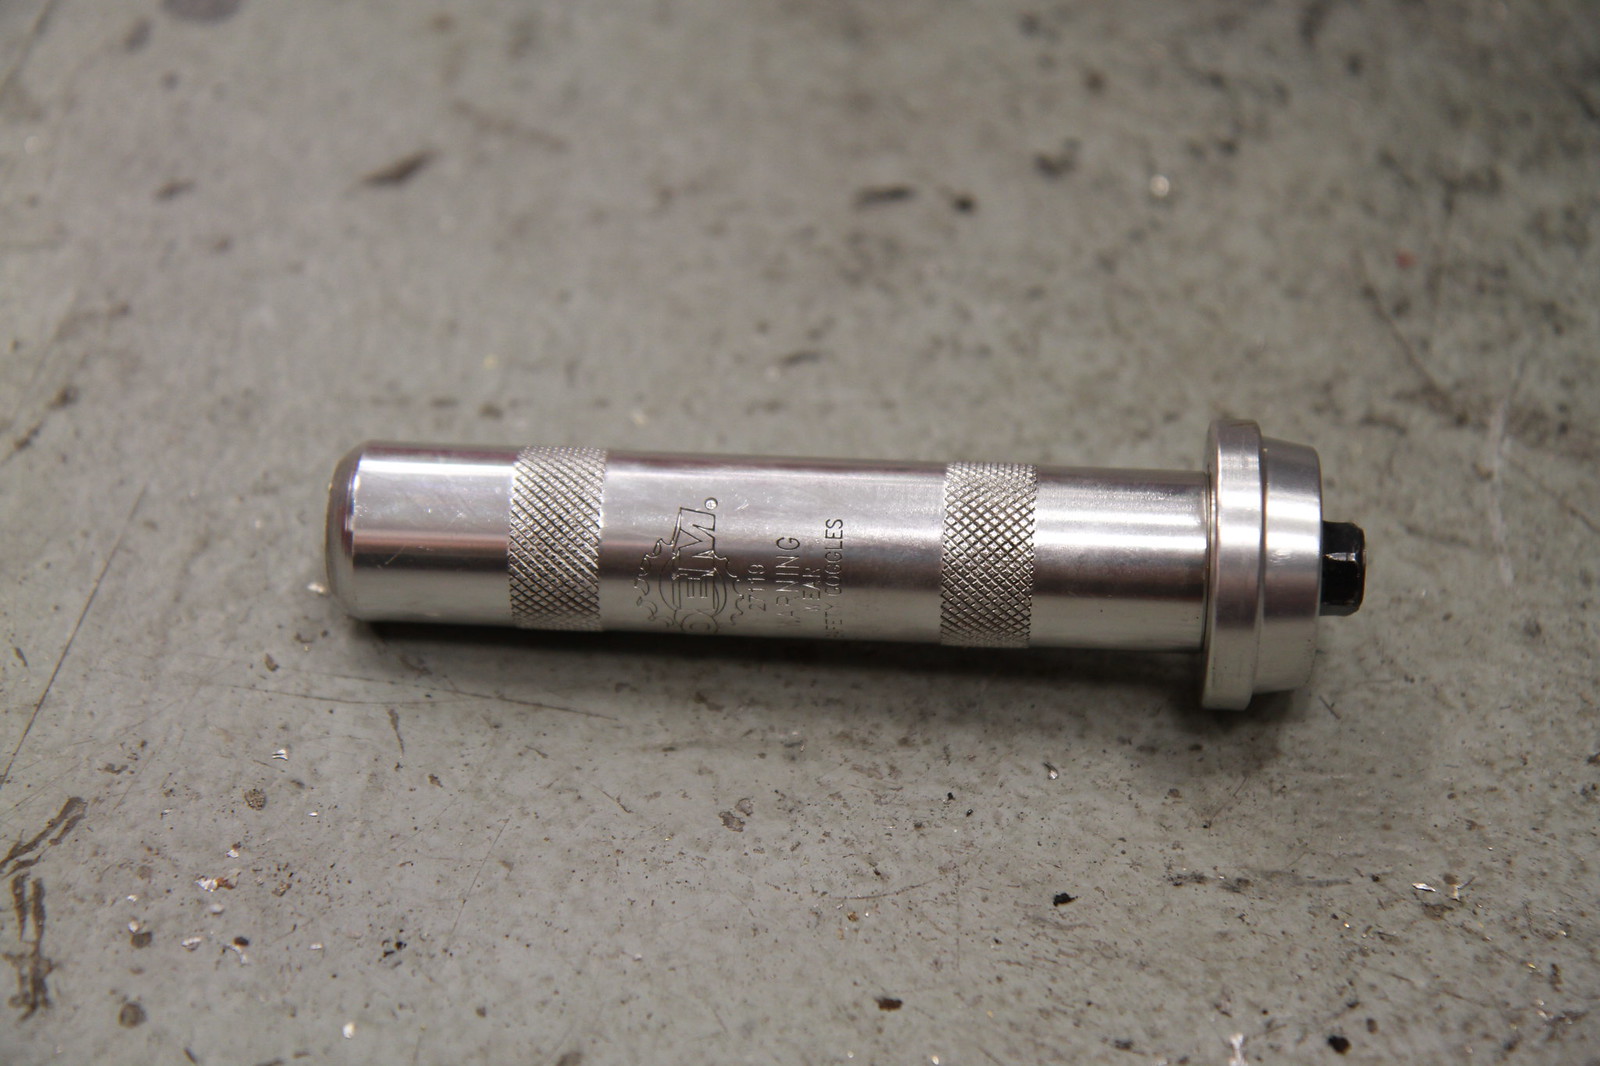 IMG_9536 by eric.burnett09, on Flickr
Flywheel installed and torqued to the these values: 1st go round: 15 ft.lbs 2nd: 37 ft. lb. and 3rd: 74 ft lb.
 IMG_9538 by eric.burnett09, on Flickr
Pressure Plate torque figures are: 1st: 7 lb ft. 2nd: 18 lb ft 3rd: 30 lb ft. 4th: 52 lb ft. Then you're done. If you're concerned about torquing the bellhousing back on correctly the torque spec is 37 lb ft. 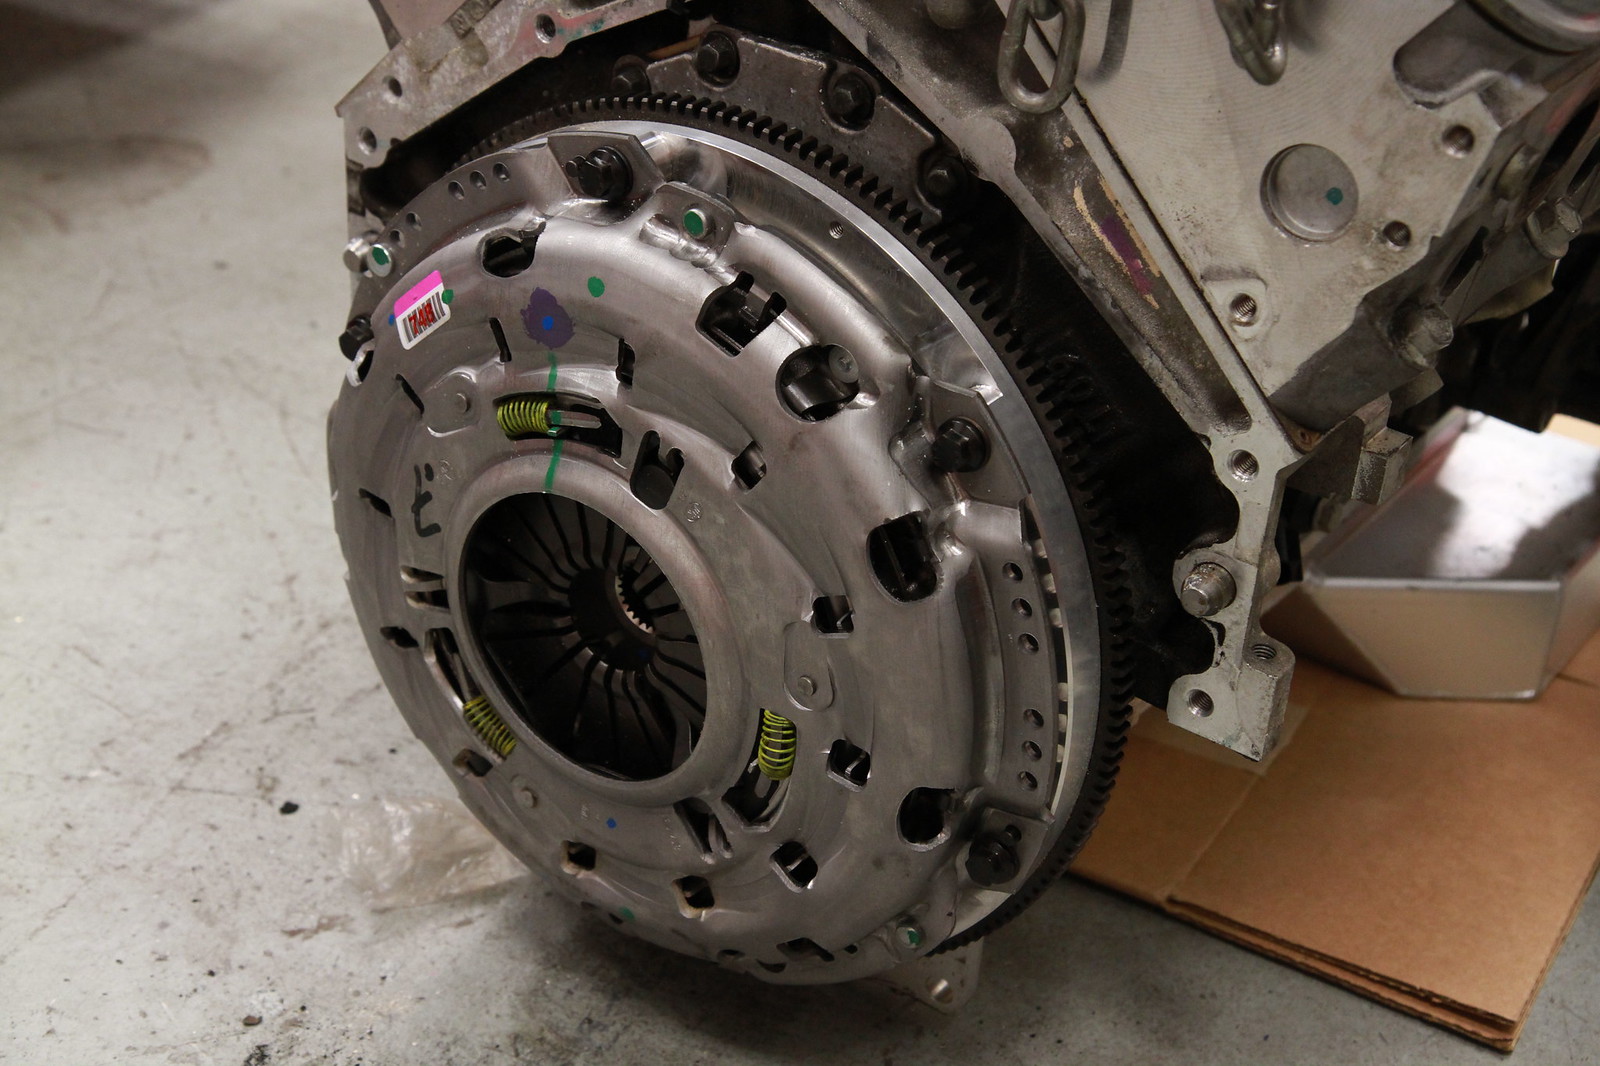 IMG_9540 by eric.burnett09, on Flickr
The Clutch Master Adapter Kit from Street Elite Performance: 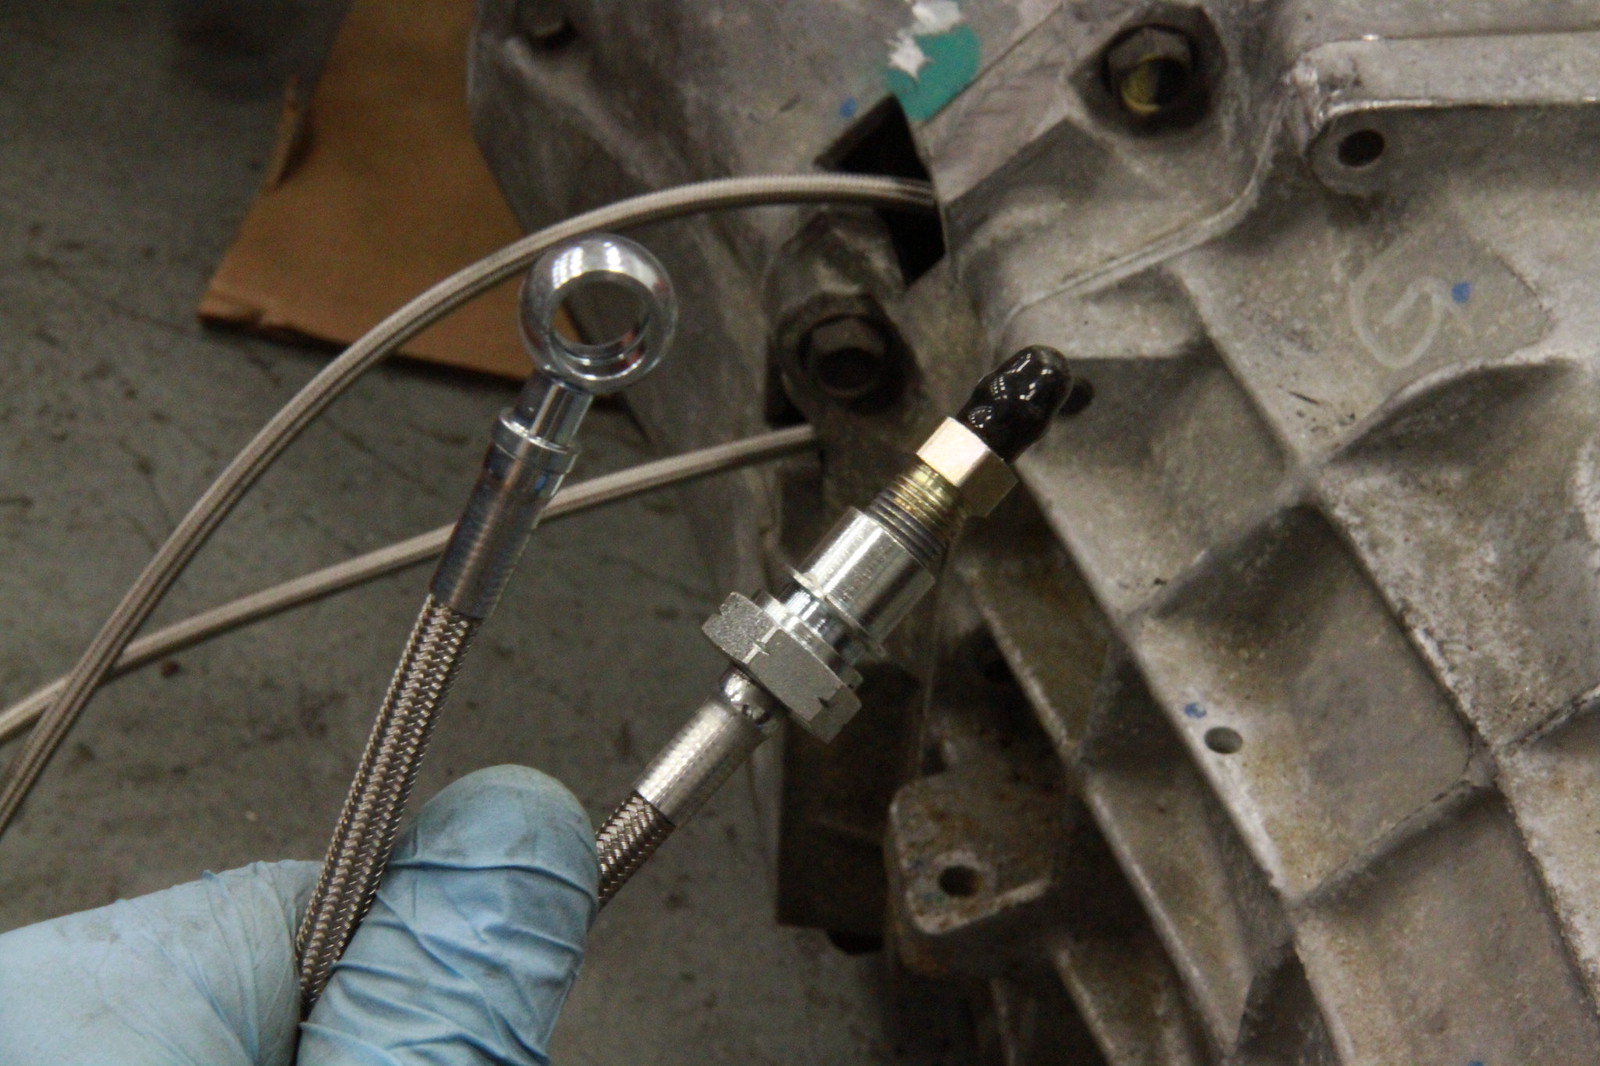 IMG_9850 by eric.burnett09, on Flickr
I took the opportunity to replace the throwout bearing with a new one (not pictured) while installing these lines. Make sure you get the lines tightened up enough because it's a pain to have to take the trans back off later and re-tighten them...say after you notice a leak and fluid from bleeding your clutch all over the shop floor....OOPS!!!:cry:
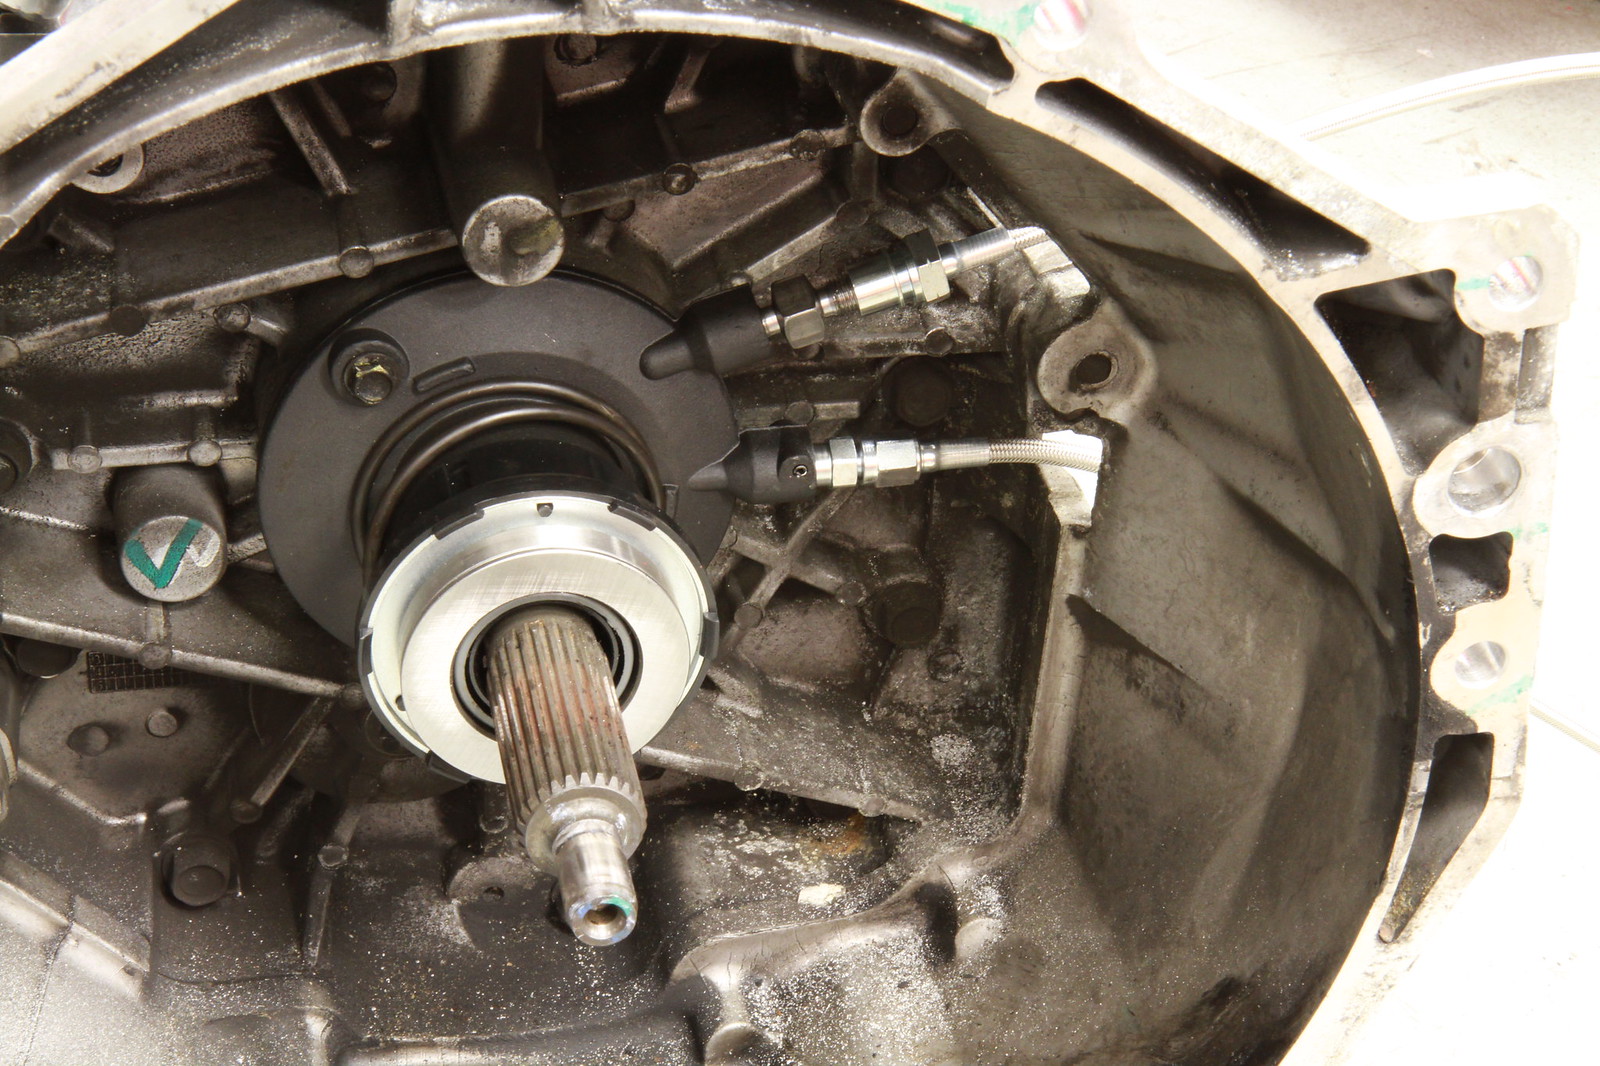 IMG_9808 by eric.burnett09, on Flickr
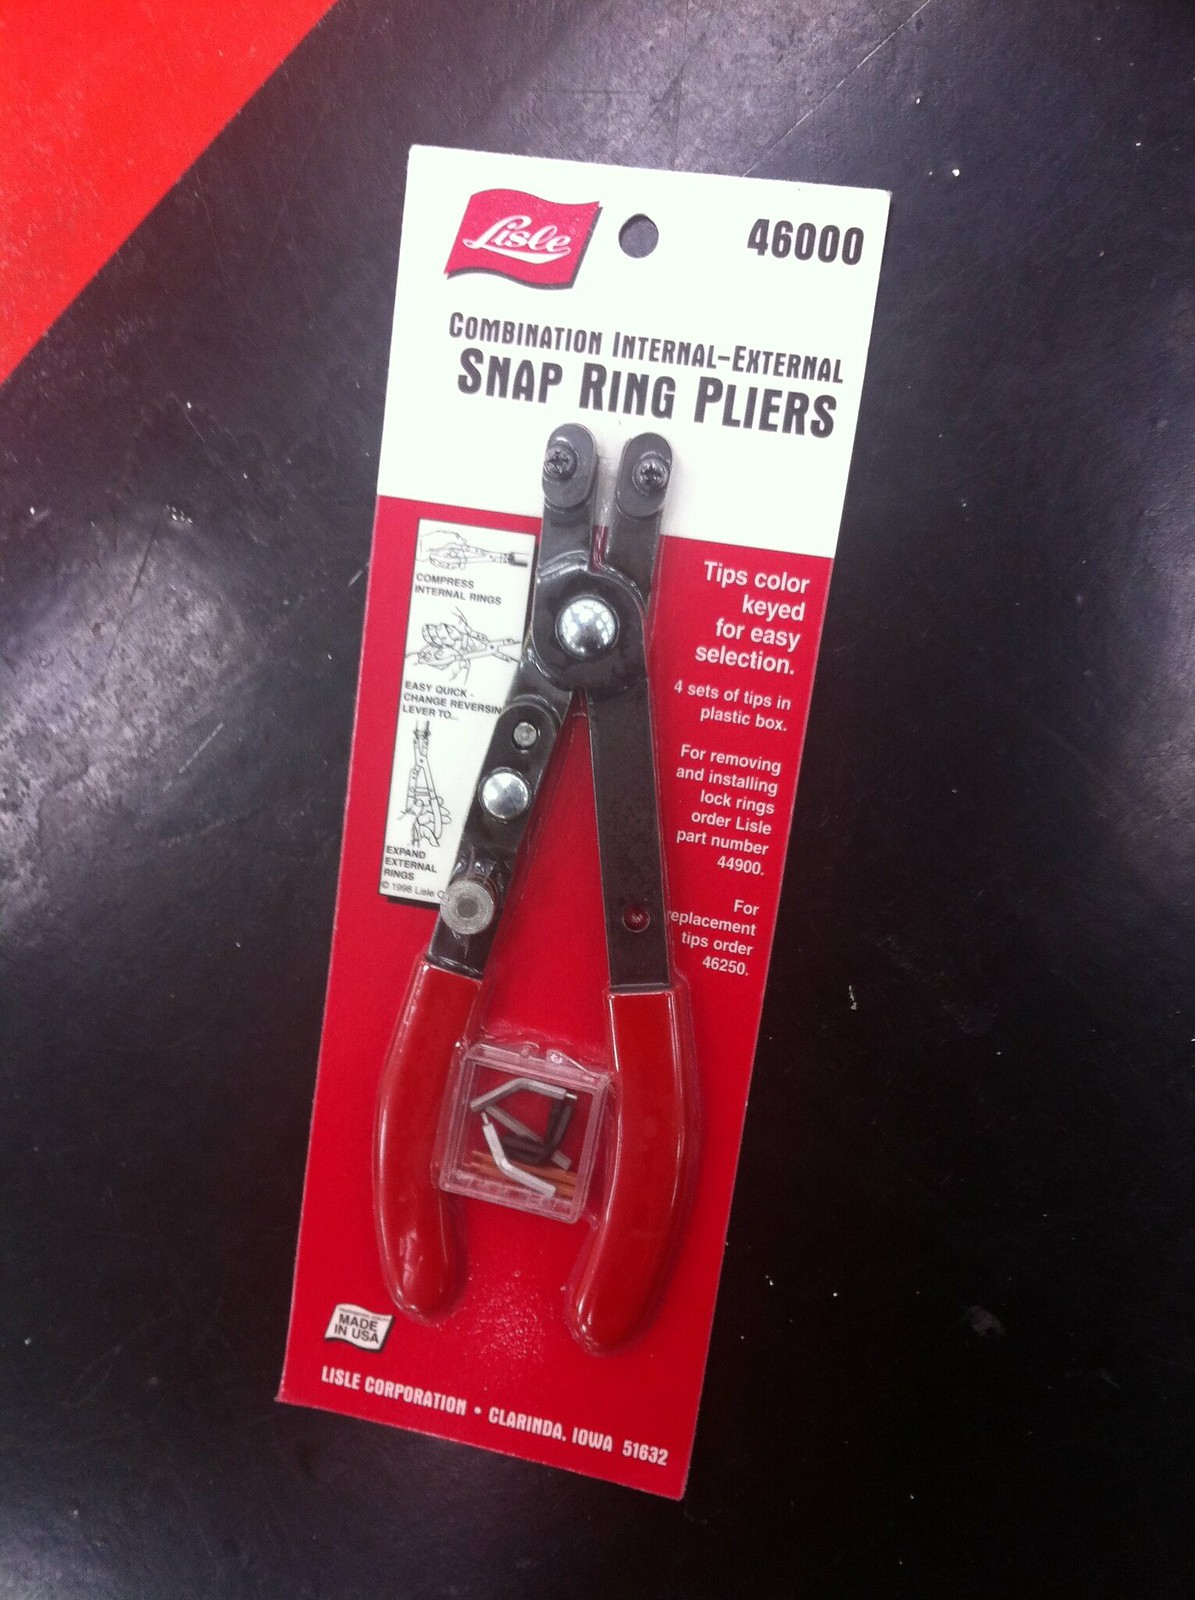
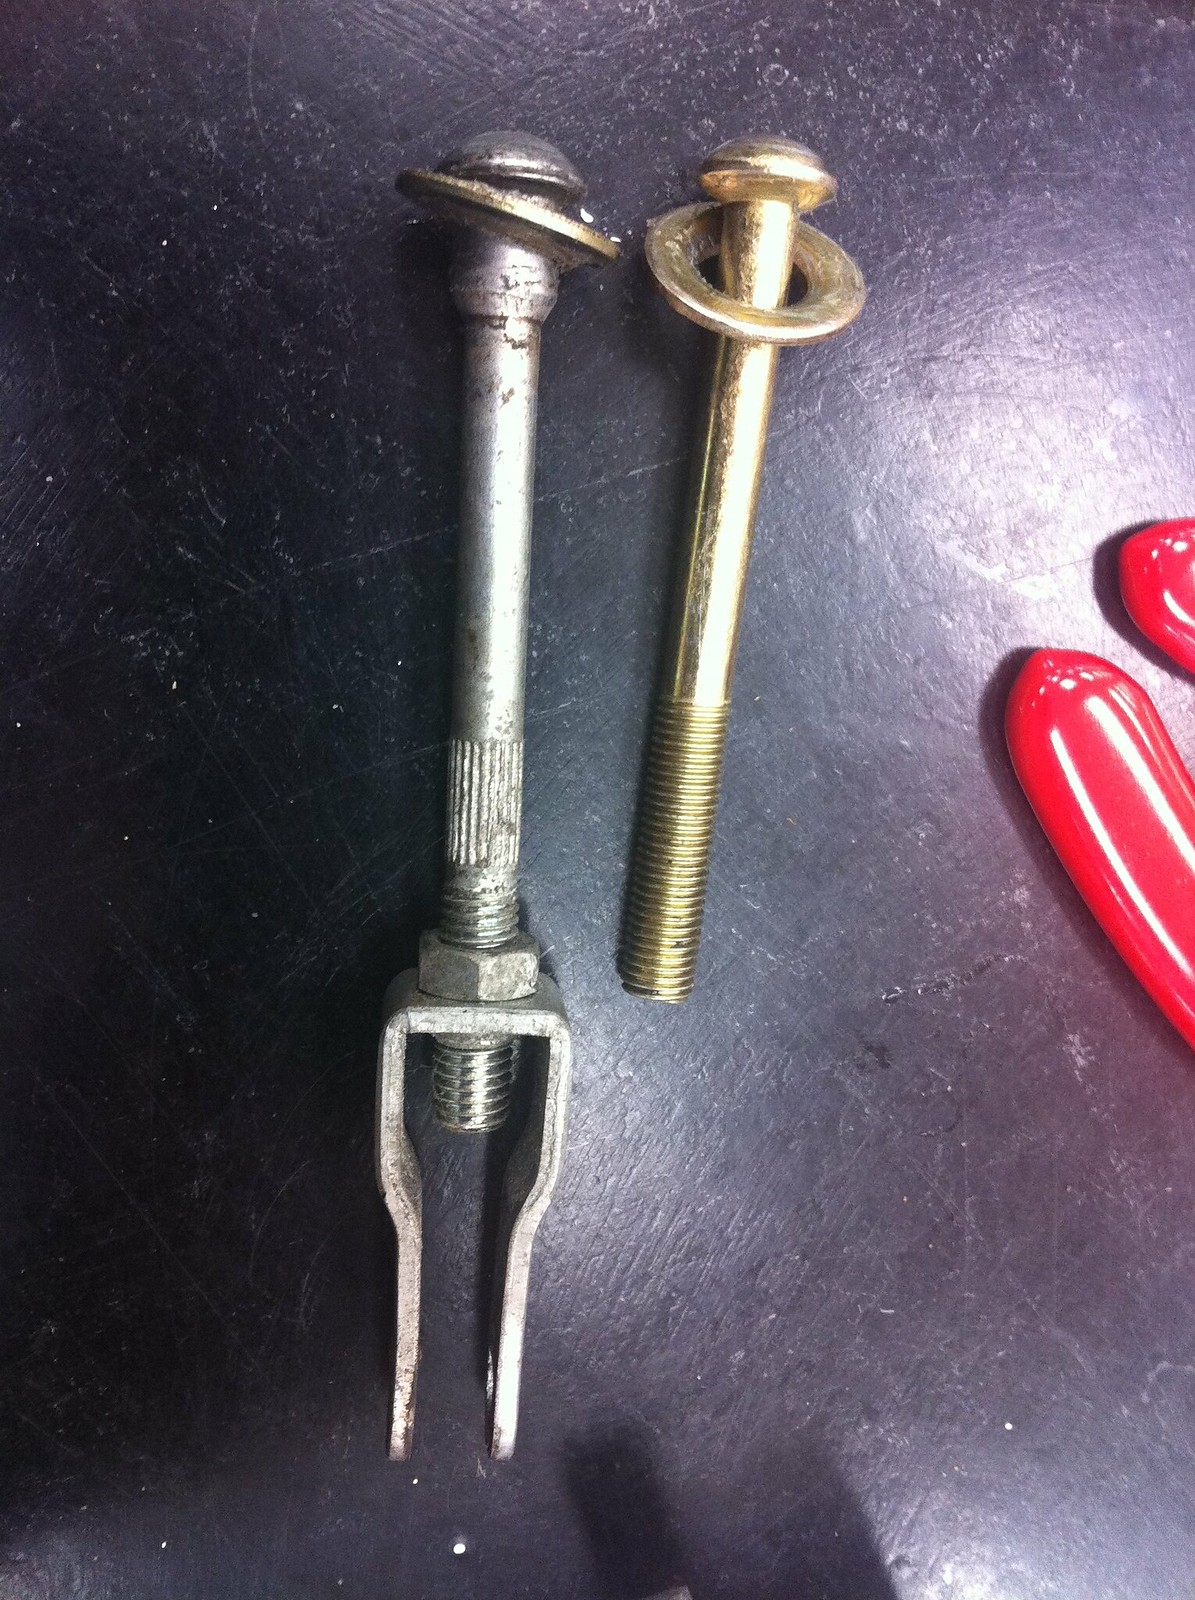
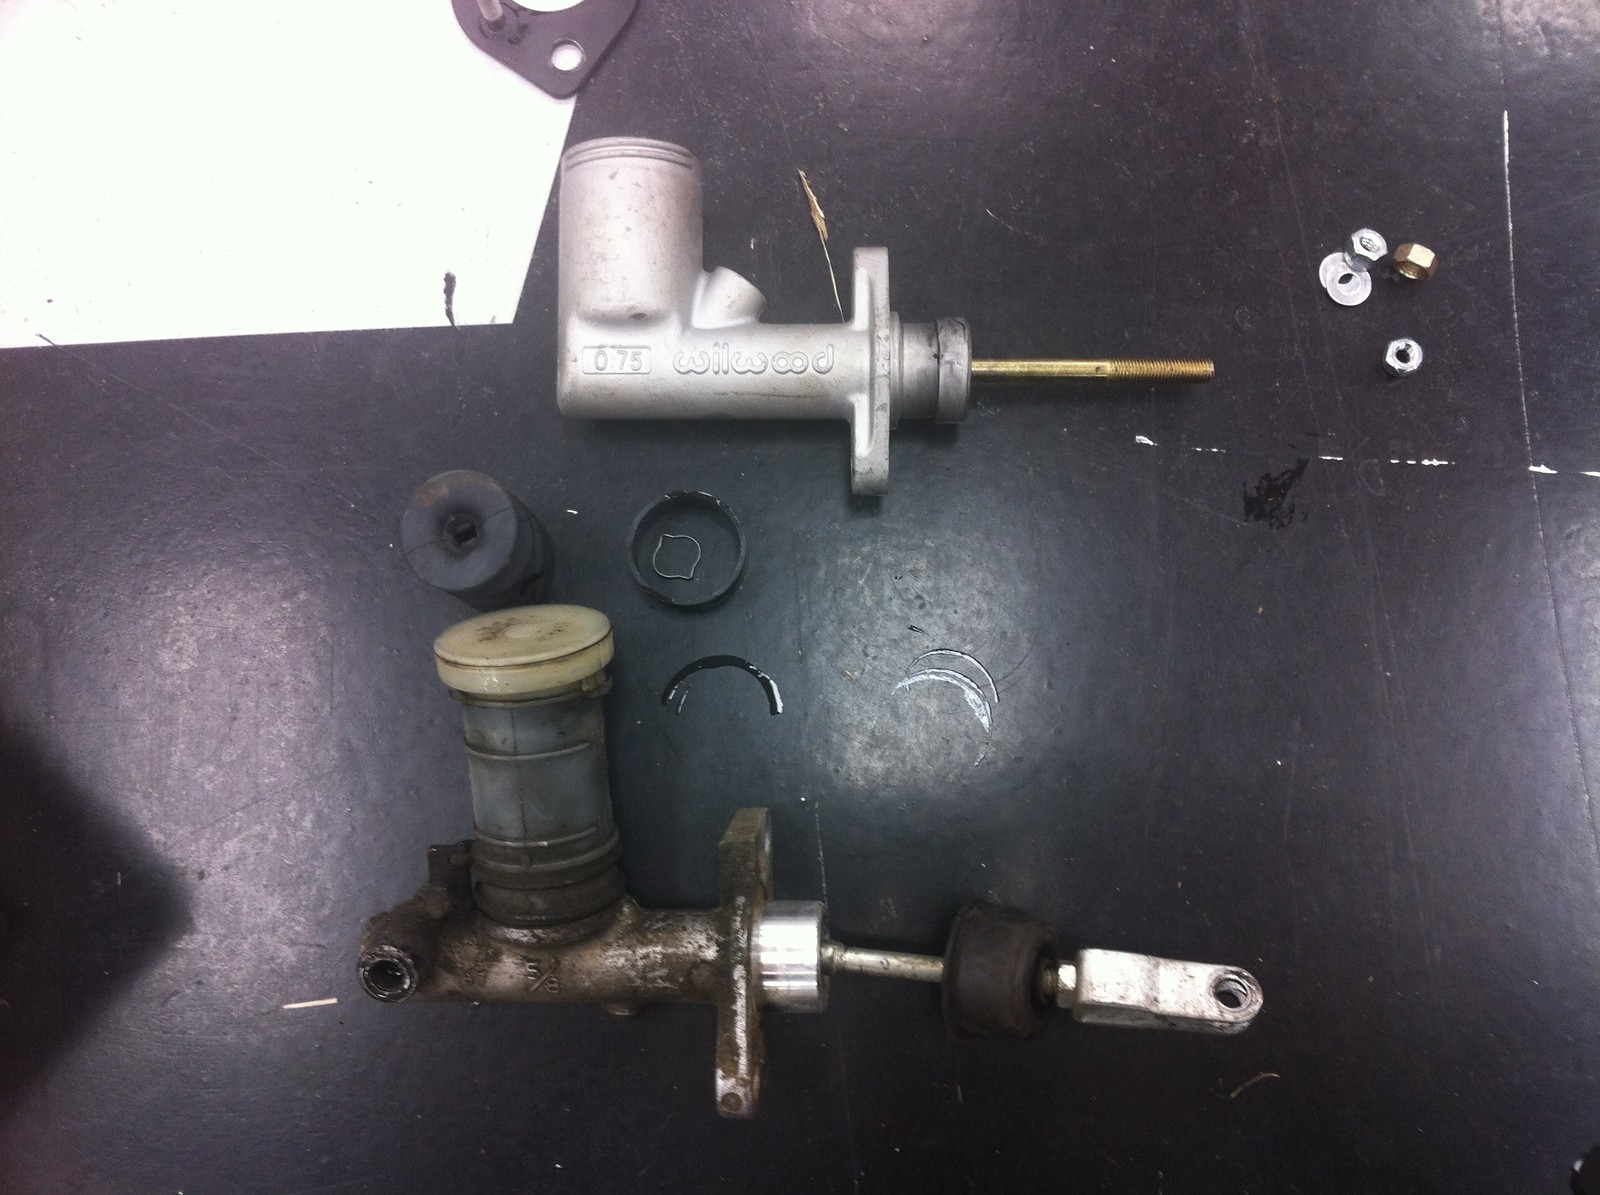
Next you have to transfer the rod from the OEM Clutch master over to the Wilwood piece because the new one is too short. Using snap ring pliers (hopefully better ones than I purchased), remove the snap ring holding the rod in on both masters and swap the rod out of the old one into the new one in the reverse fashion that you took it apart.
Do yourself a favor and purchase better snap ring pliers than these:
 IMG_2599 by eric.burnett09, on Flickr
 IMG_2601 by eric.burnett09, on Flickr
 IMG_2595 by eric.burnett09, on Flickr
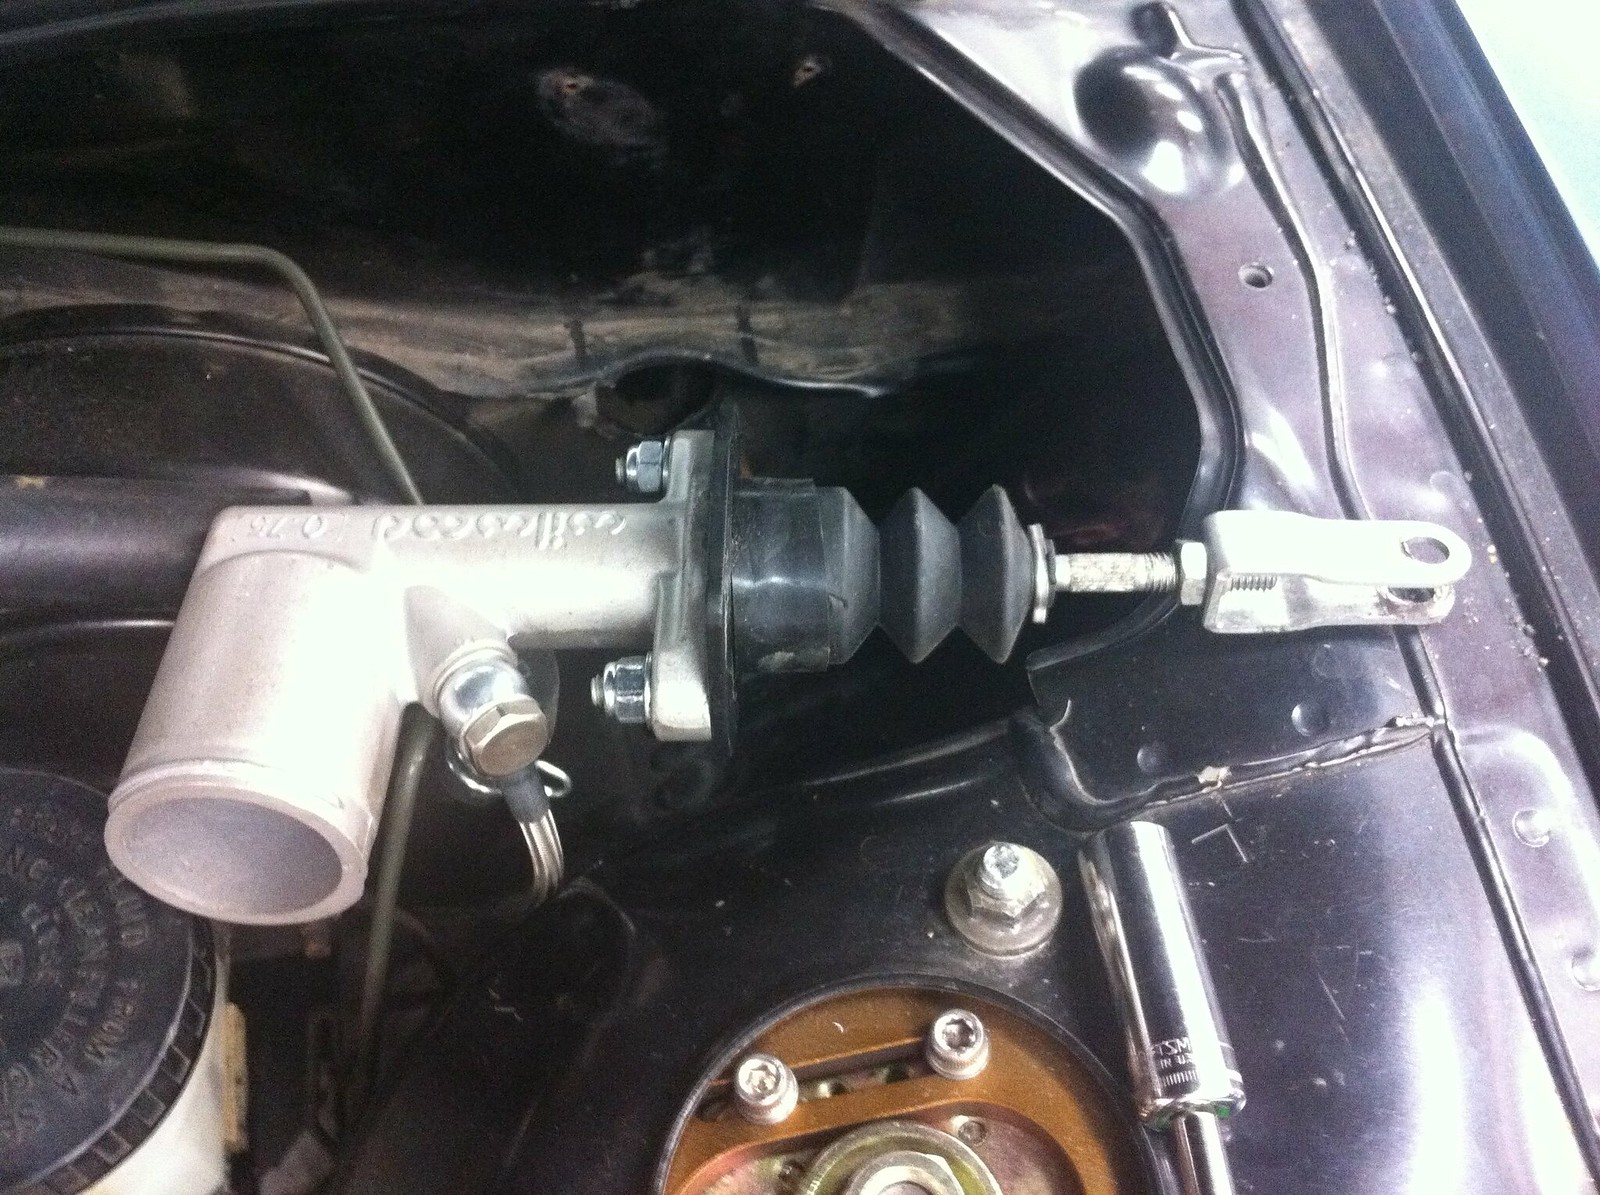
You should have something like this when you're done:
 IMG_2606 by eric.burnett09, on Flickr
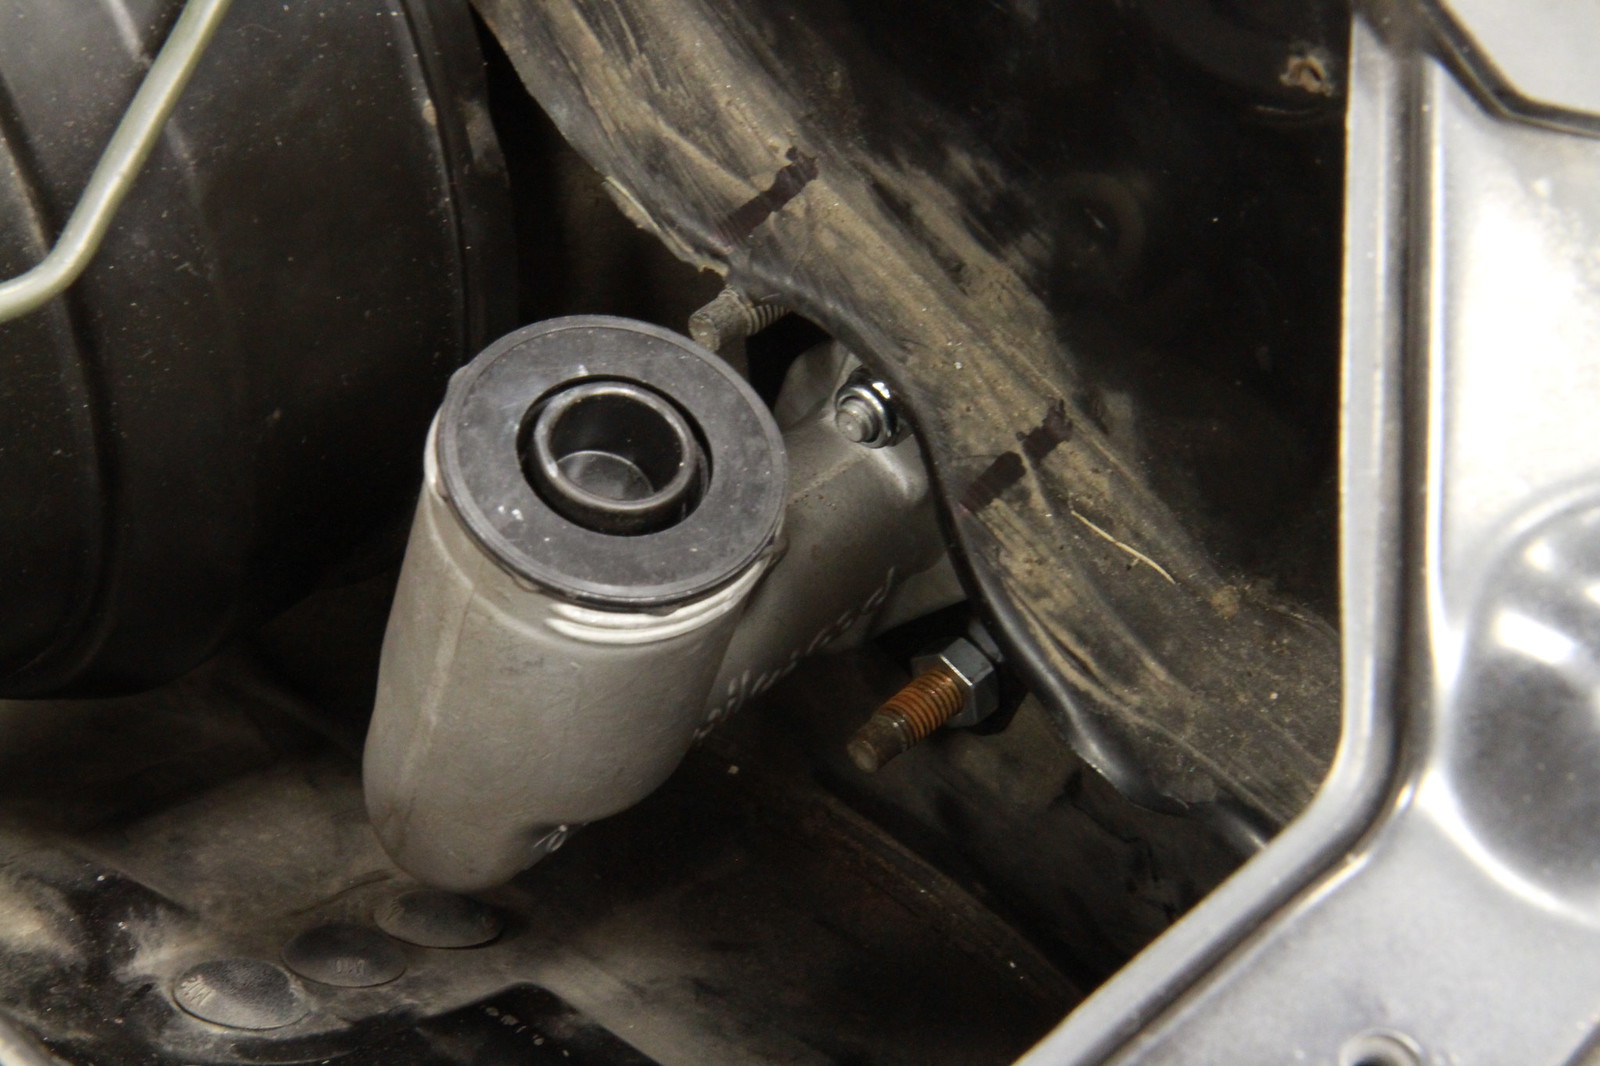
Wilwood Clutch Master Cylinder (included in Street Elite kit) installed:
 IMG_9829 by eric.burnett09, on Flickr
That's all I have for tonight.
Excellent my man, excellent.![]()
....you are my hero................
http://www.youtube.com/watch?v=c9ZMDPf9hZw&playnext=1&list=PL61A8DC2C19DF9319&feature=results_main
It was missing the bolts connecting the axles to the diff? Scary! Did you find any other interesting issues related to the previous owner?
Looking forward to seeing it burning rubber soon!
OctaneNation wrote: It was missing the bolts connecting the axles to the diff? Scary! Did you find any other interesting issues related to the previous owner? Looking forward to seeing it burning rubber soon!
I did indeed find some other irritating things about the car that I'm going to have remedied before the car goes to paint. My schedule is to have the car done and ready to get sorted on the autocross at our third annual Holley LS Fest here in Bowling Green, KY September 7-9.
The main things that I have discovered are as follows:
-I'd like to smack whoever decided to it would be wise to drill out holes for the previous intercooler piping by simply drilling holes in a circle and then hammering the hole out. It looks fugly for sure.
-The car was an automatic in it's former days and when I took out the clutch master out to swap for the Wilwood you saw in the intial post and they had done the same thing there.
-Aside from the typical wiring snafu's from a half thought out alarm installation (which I've already removed) that's about it.
Thanks for the interest!
Found some time to post the cooling upgrades to better support the LS2 during not only track time but commutes as well. I made the decision to keep A/C which will be more work but be worth it in the end. The A/C will not be on the car until after it's up and running. There is a place in town called Bowling Green Rubber & Gasket that makes hydraulic hoses and fittings, etc. I'll be driving the car over there with the lines for the GM compressor and the old lines from the 240 and let them put them together. On to the radiator debacle: Two boxes comprised my Hinson LS radiator kit:
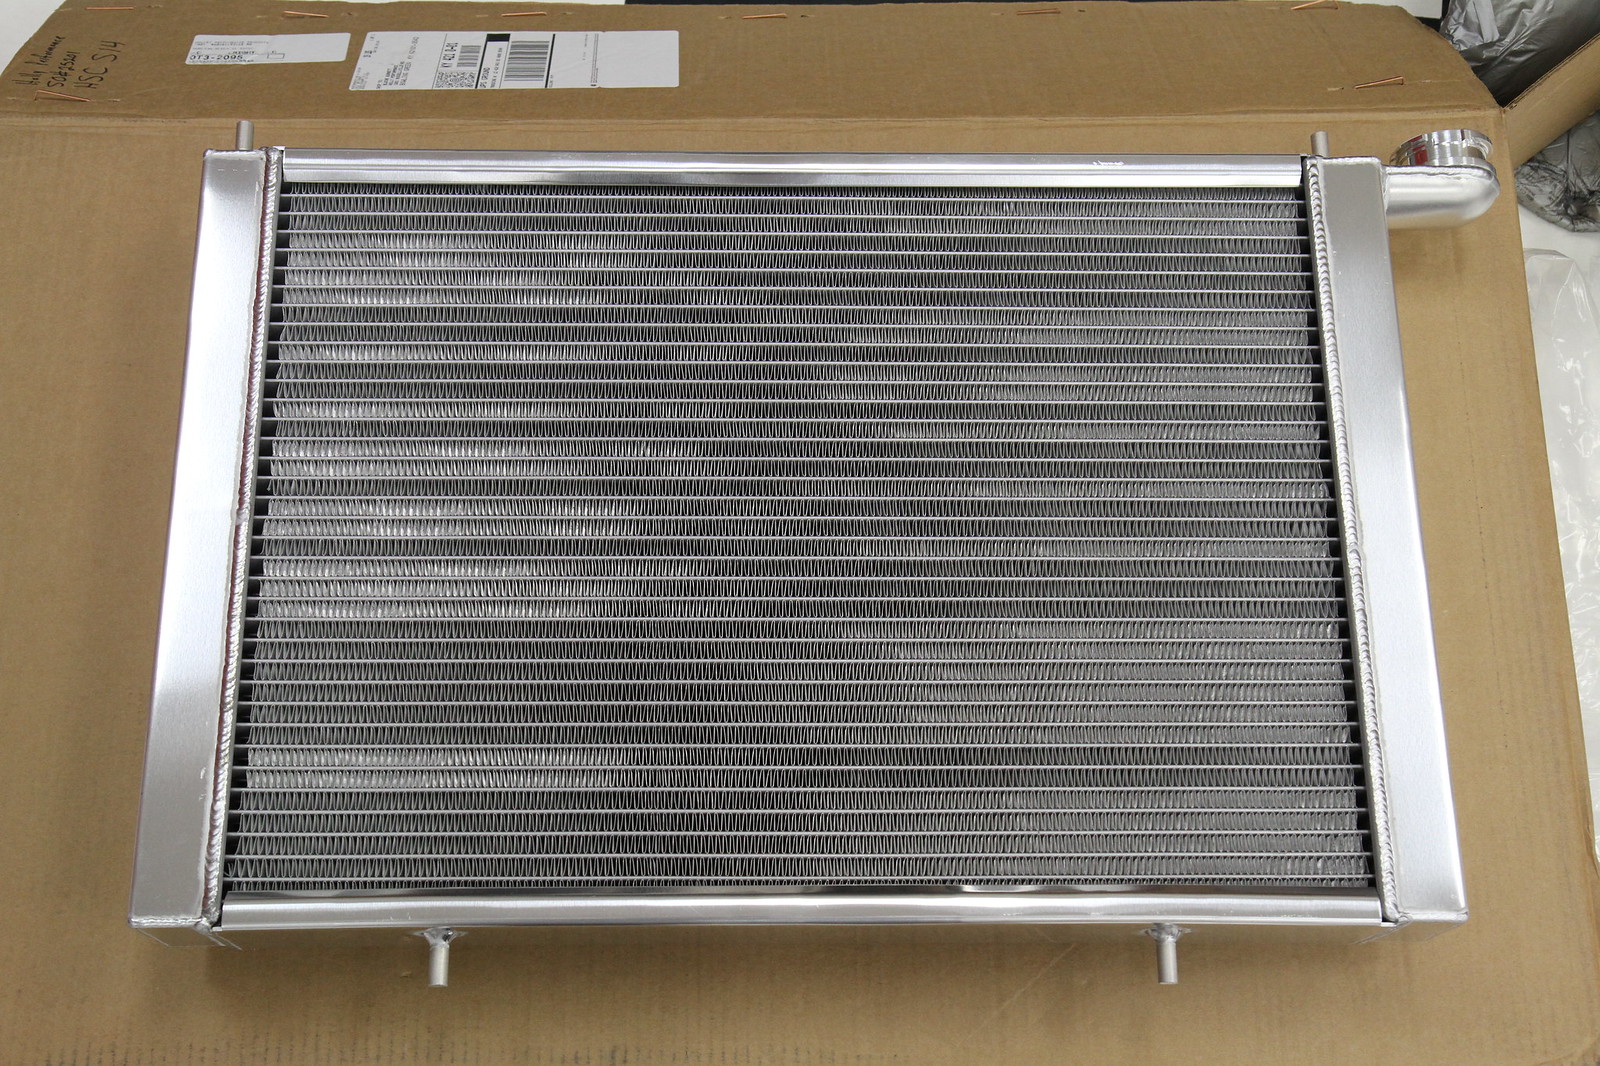 Front by eric.burnett09, on Flickr
And something I was surprised to see:
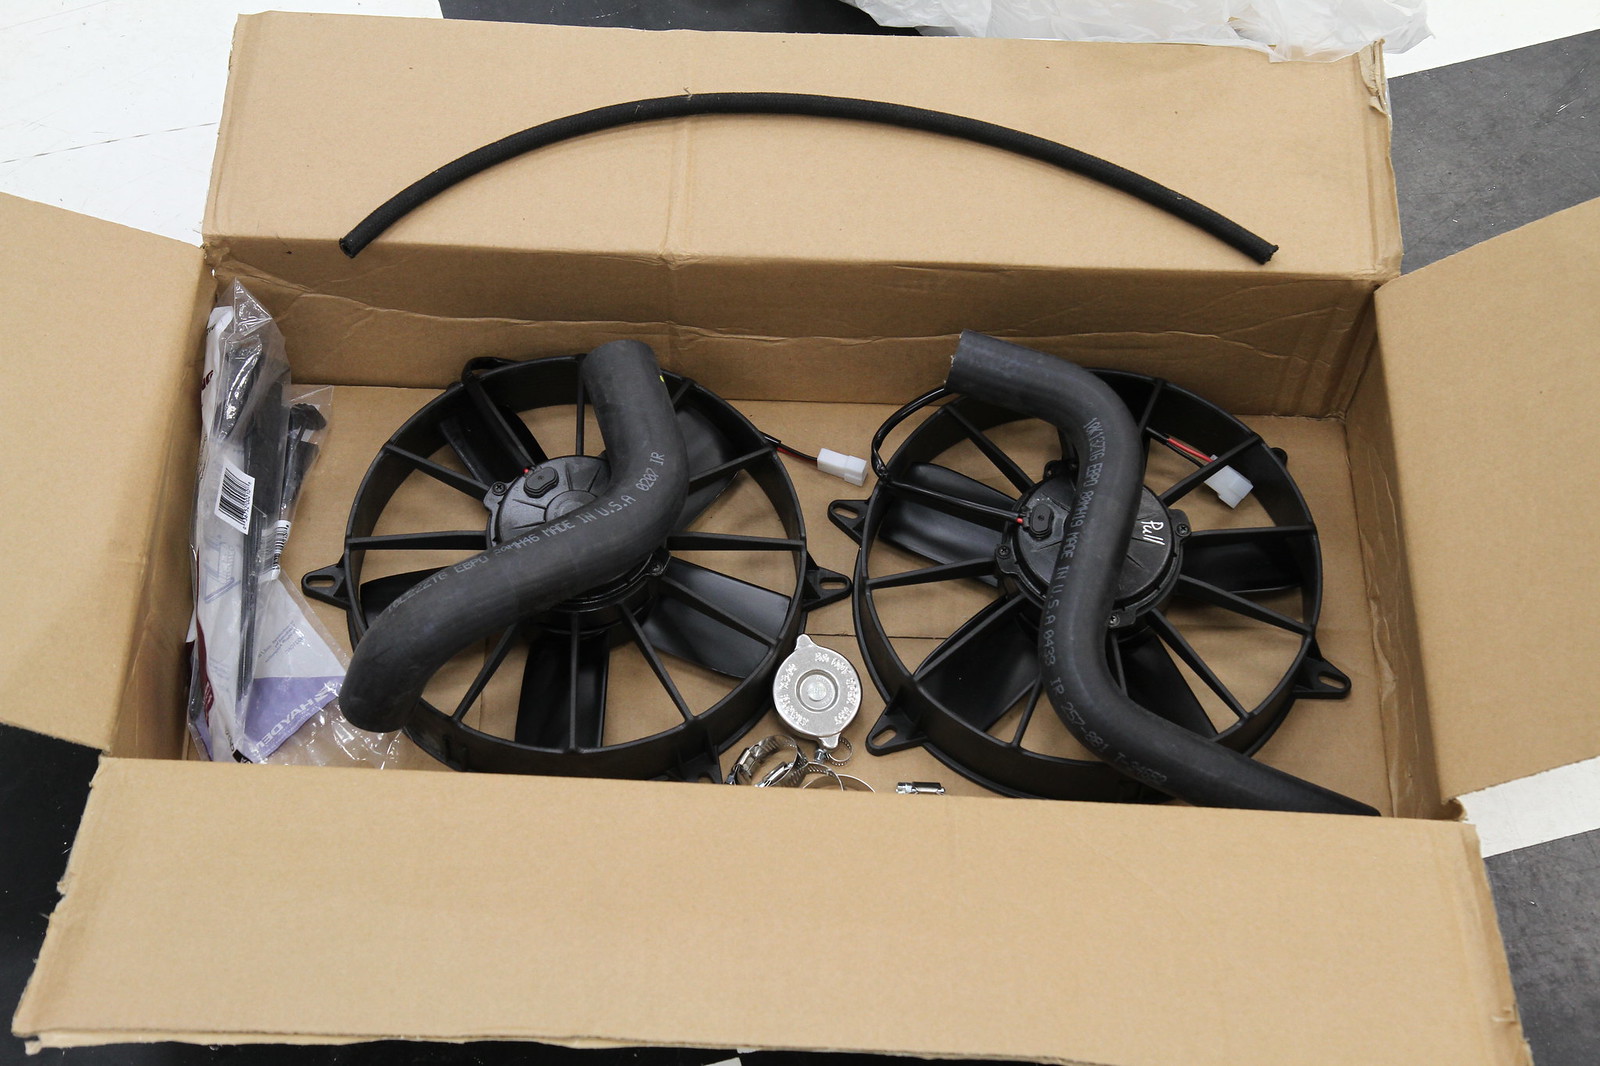 kit fans-much too large by eric.burnett09, on Flickr
The SPAL fans were a nice touch and all, but proved much to thick with where we ultimately decided to place the engine. I'm assuming the Hinson kit places the engine farther back (?) making these fans useful.... (I think I'll end up utilizing the SPAL fans on my 4runner to increase cooling and get rid of the clutch fan it has now.) Overall the radiator included in the kit is great though. 3'' double pass through radiator and I've elected to keep it. If I had the chance to do it over again, and this is probably what some of you are needing to hear, I probably would've went with another solution that came with a shroud and fans included. What I ended up doing is temporary but will work for the time being. Clearance with GTO accessories intact:
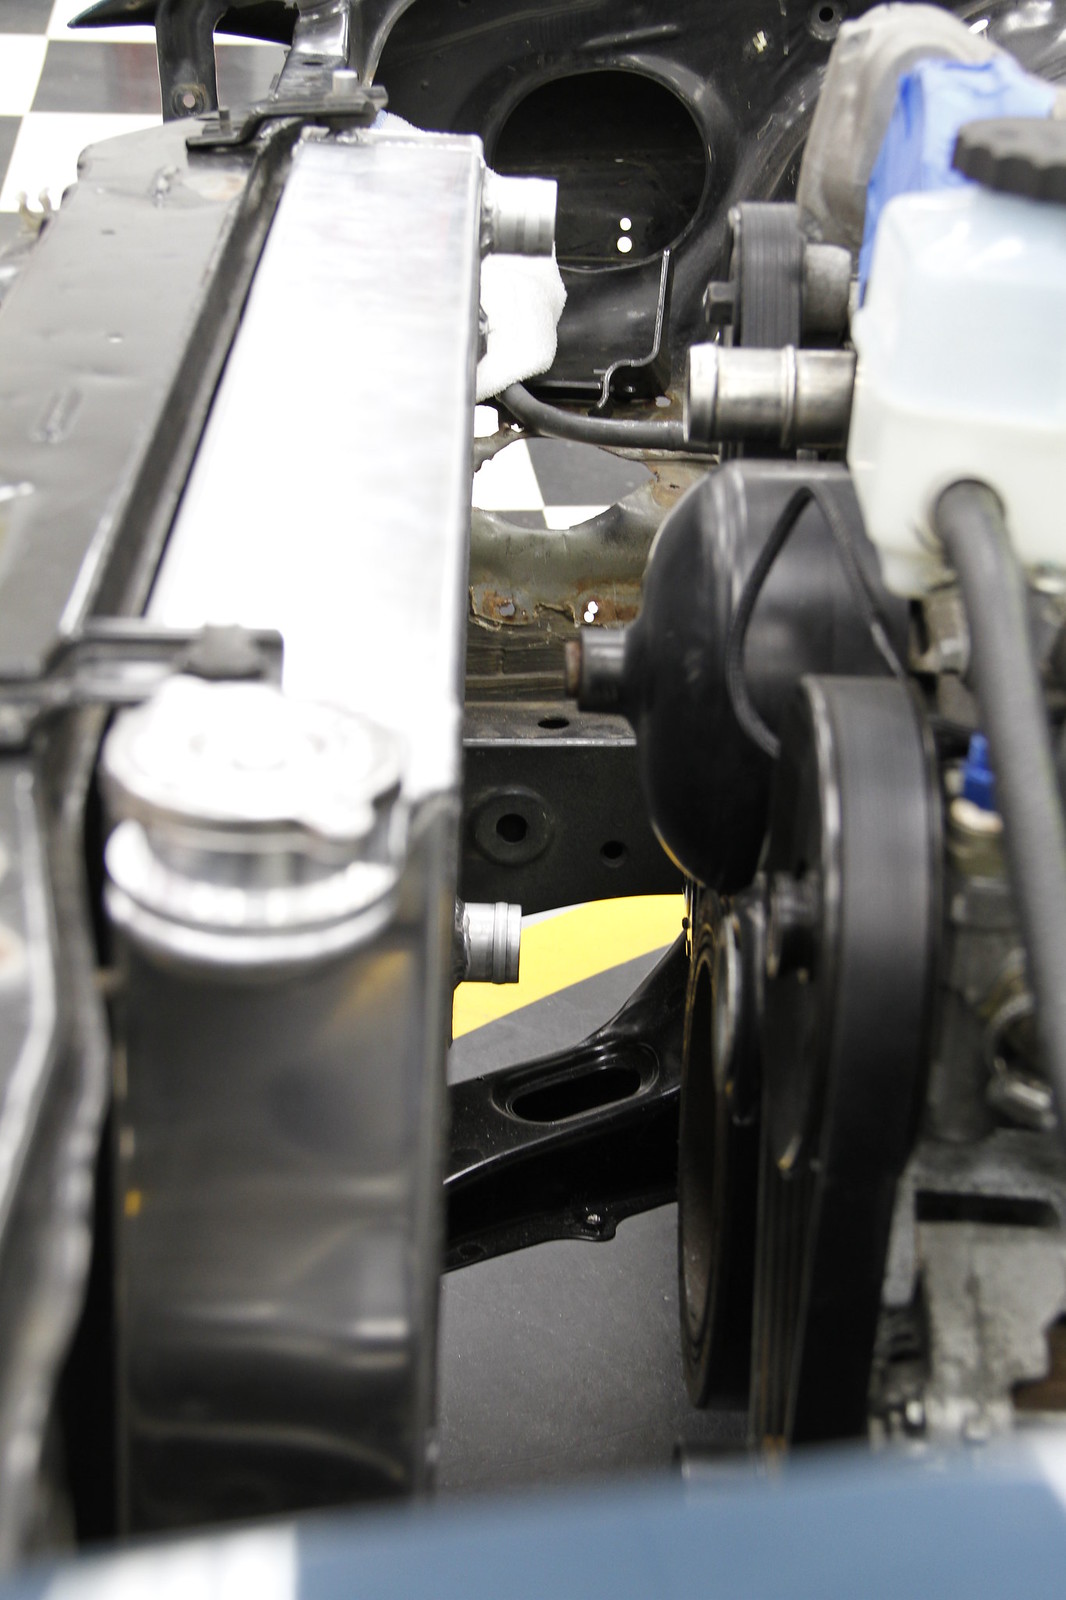 _MG_4524 by eric.burnett09, on Flickr
After seeing the lack of space in between my accessory drives and the radiator for fan placement I jumped on the CTS-V front drive accessory kit which gains you another 3/4'' by pushing the accessories closer to the engine. I work with a well respected drag racer in the industry named Robin Lawrence or as some know him "Uncle Robin". He helped me source a LS2 harmonic balancer and water pump from a fellow drag racer. Those parts coupled with the CTS-V kit are what is needed to successfully gain clearance in this area.
Side by side comparison:  IMG_1915 by eric.burnett09, on Flickr
Crank pulley removal tool installed and pulley about to be removed: 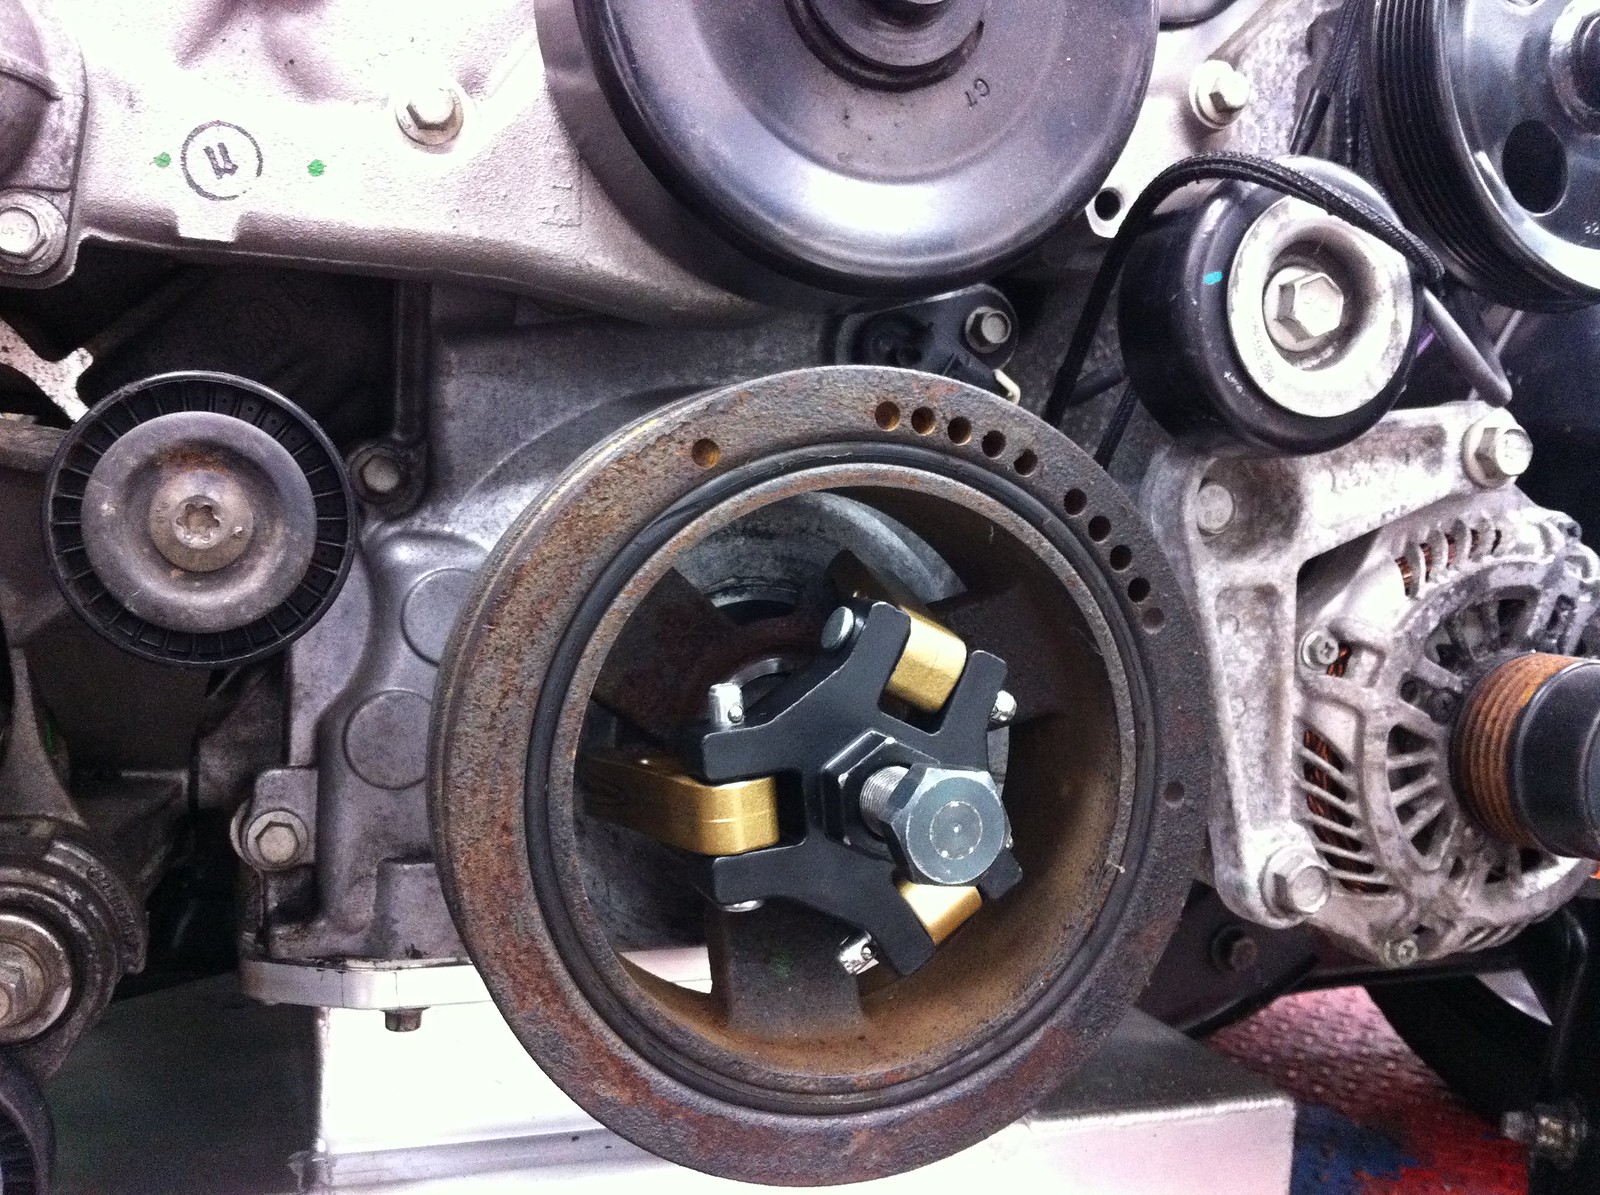 IMG_1914 by eric.burnett09, on Flickr
Balancer removed:
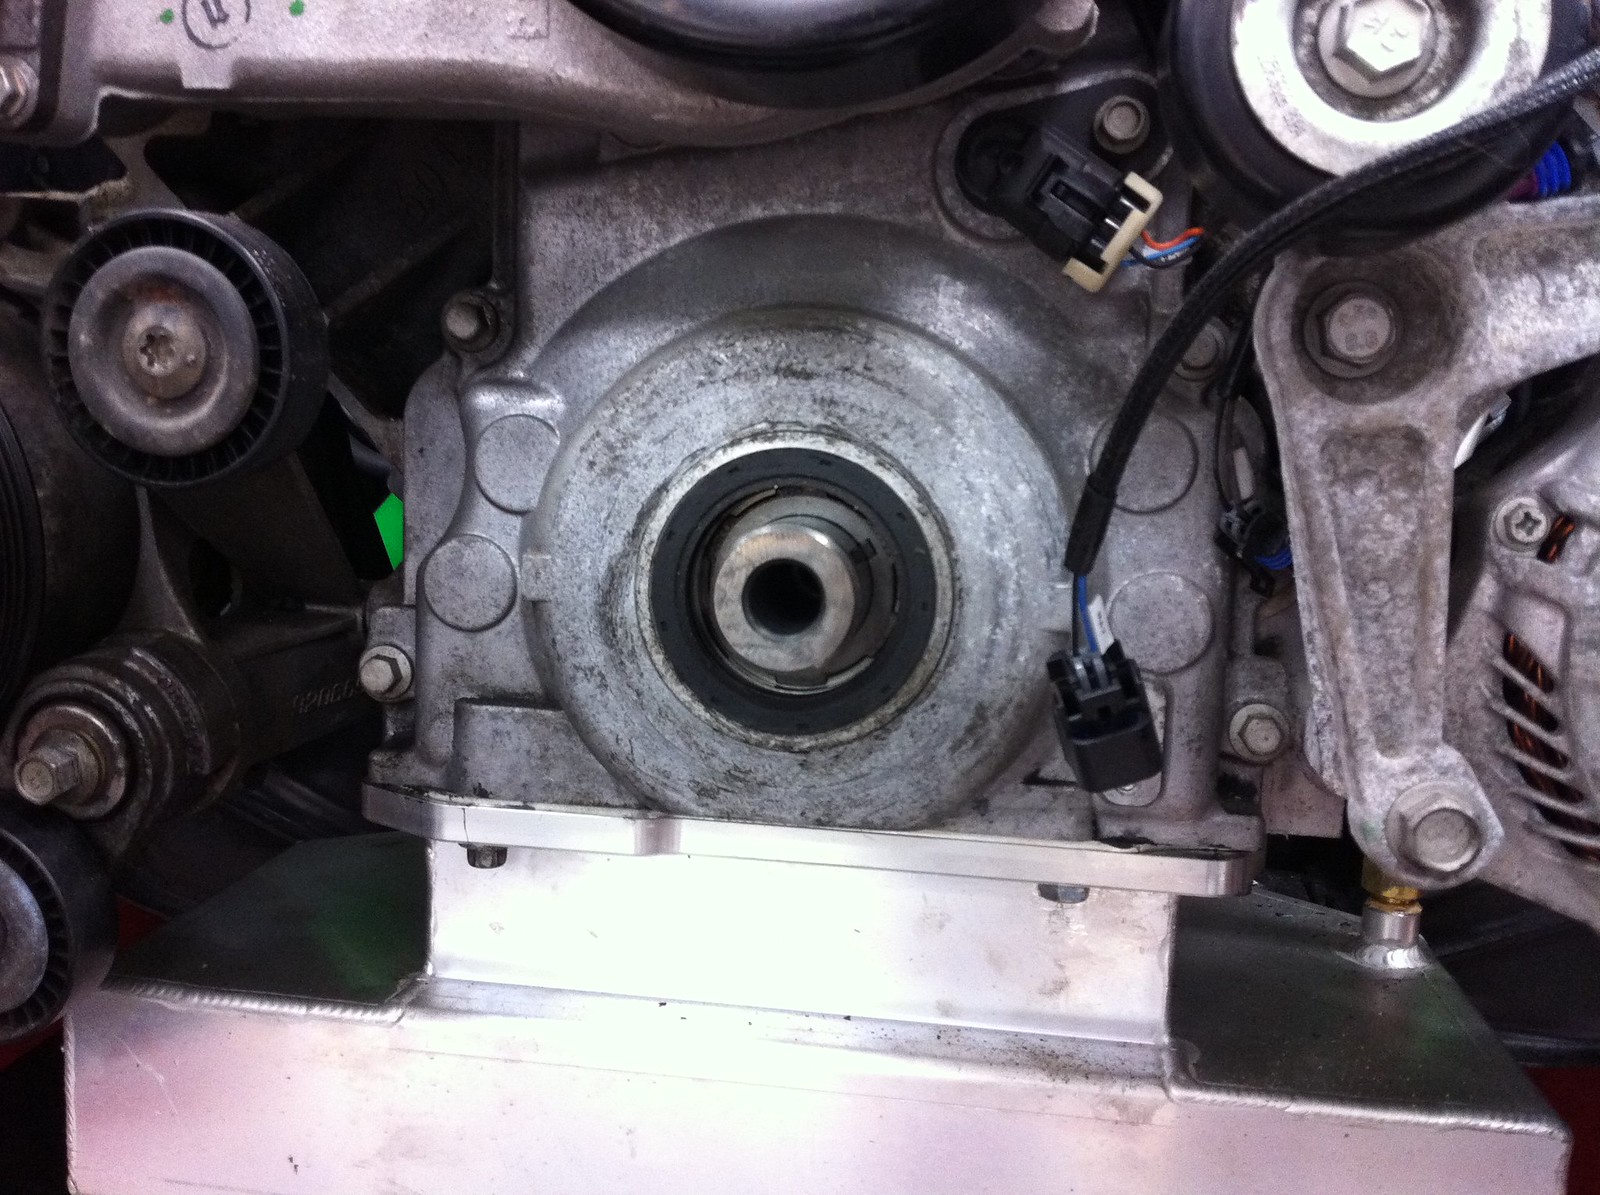 IMG_1916 by eric.burnett09, on Flickr
Installing the new balancer is kind of involved. First off, the balancer bolts for LS engines cannot be reused (unless you buy an ARP unit). The reason is because they are a torque-to-yield configuration and stretch when torqued. That being said DO NOT throw your old one away just yet. It plays its part in installing the new balancer. You have to put the new balancer on and then seat it by reinstalling the old bolt. Sometimes the old bolt will not be able to help out but since I was using a harmonic balancer with a shallower depth it worked fine. I basically eyeballed it and had a friend check it with a set of calipers after the fact and I was within clearance. After seating it you need to torque the OLD bolt to 240 foot pounds. A pry bar on the flywheel can take care of keeping the engine from rotating while you torque the balancer bolt. I was scared of breaking a tooth on my new RAM aluminum flywheel. You shouldn't be. After torquing it, remove the old bolt and install the NEW bolt to 37 lb. ft. Then turn the bolt 180 degrees from it's current orientation and you're done. Jon Sams (one of our engineering technicans) had one of these, which allowed us to get the bolt installed to the exact spec. I'd never seen one of these up until that day.
Very cool tool.
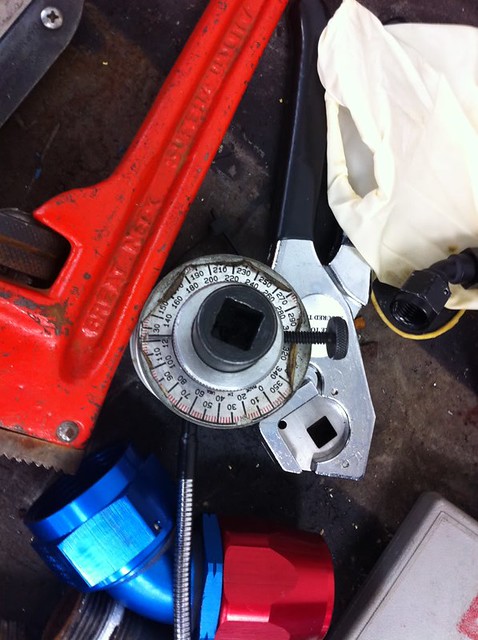 IMG_2608 (1) by eric.burnett09, on Flickr
GTO accessories: 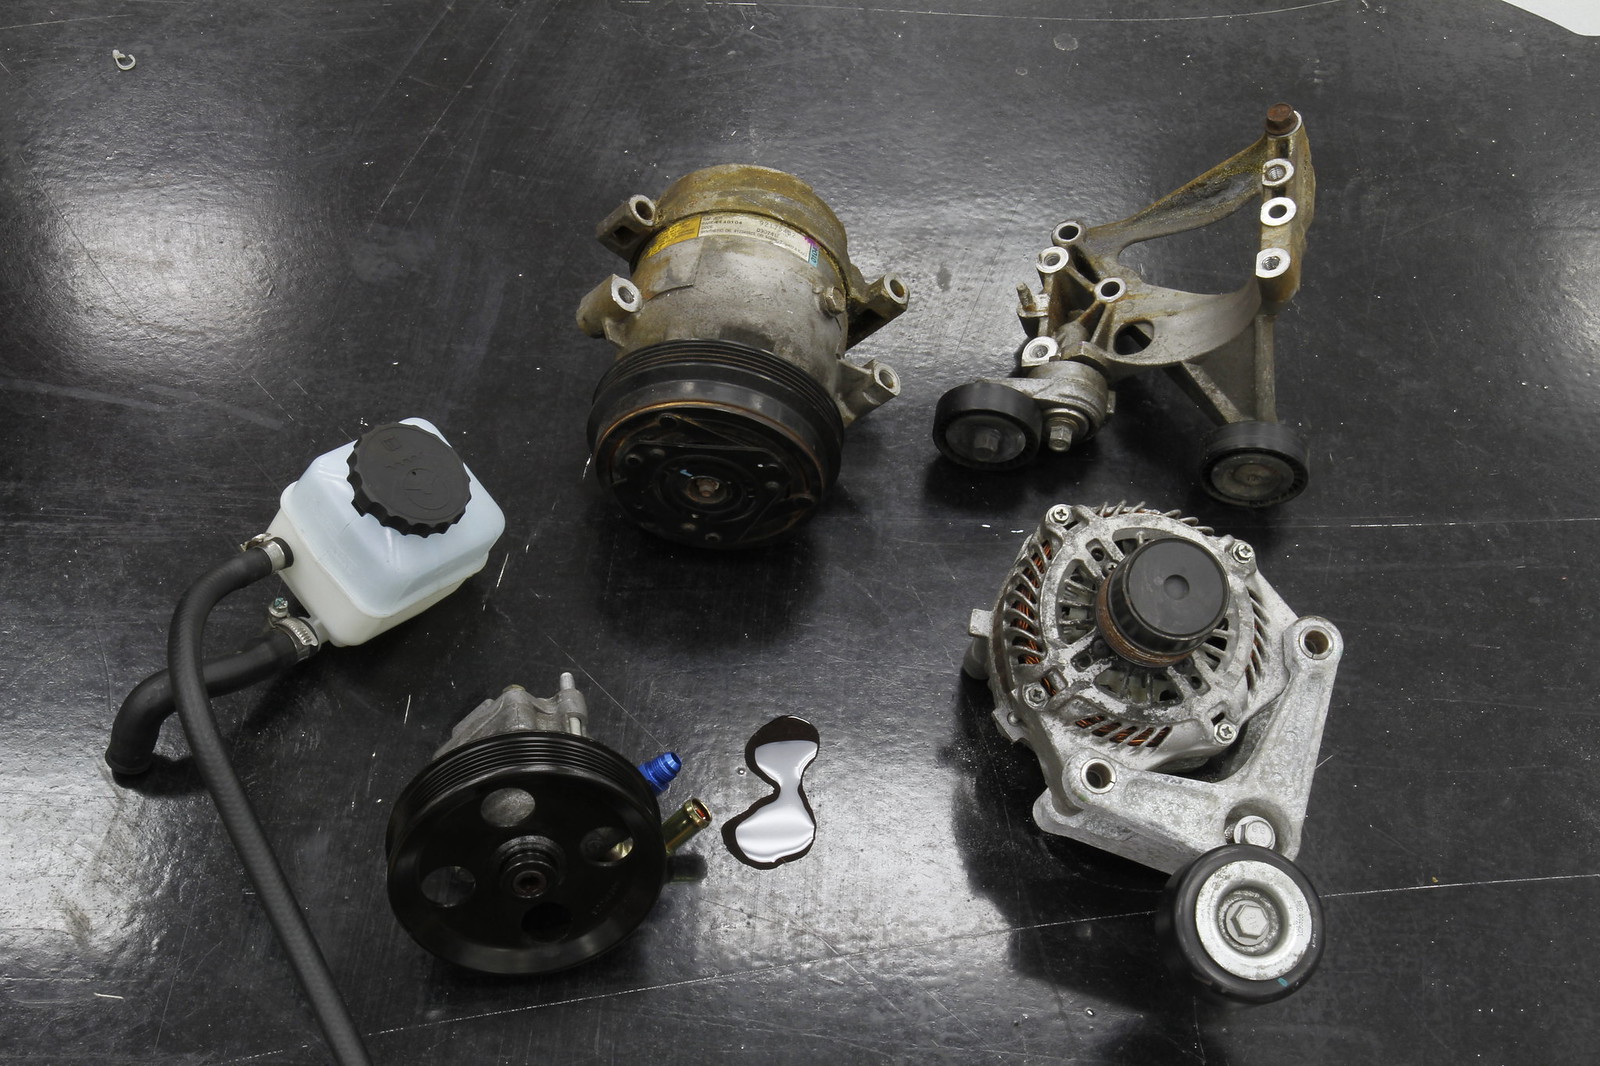 _MG_9854 by eric.burnett09, on Flickr
New CTS-V accessories: 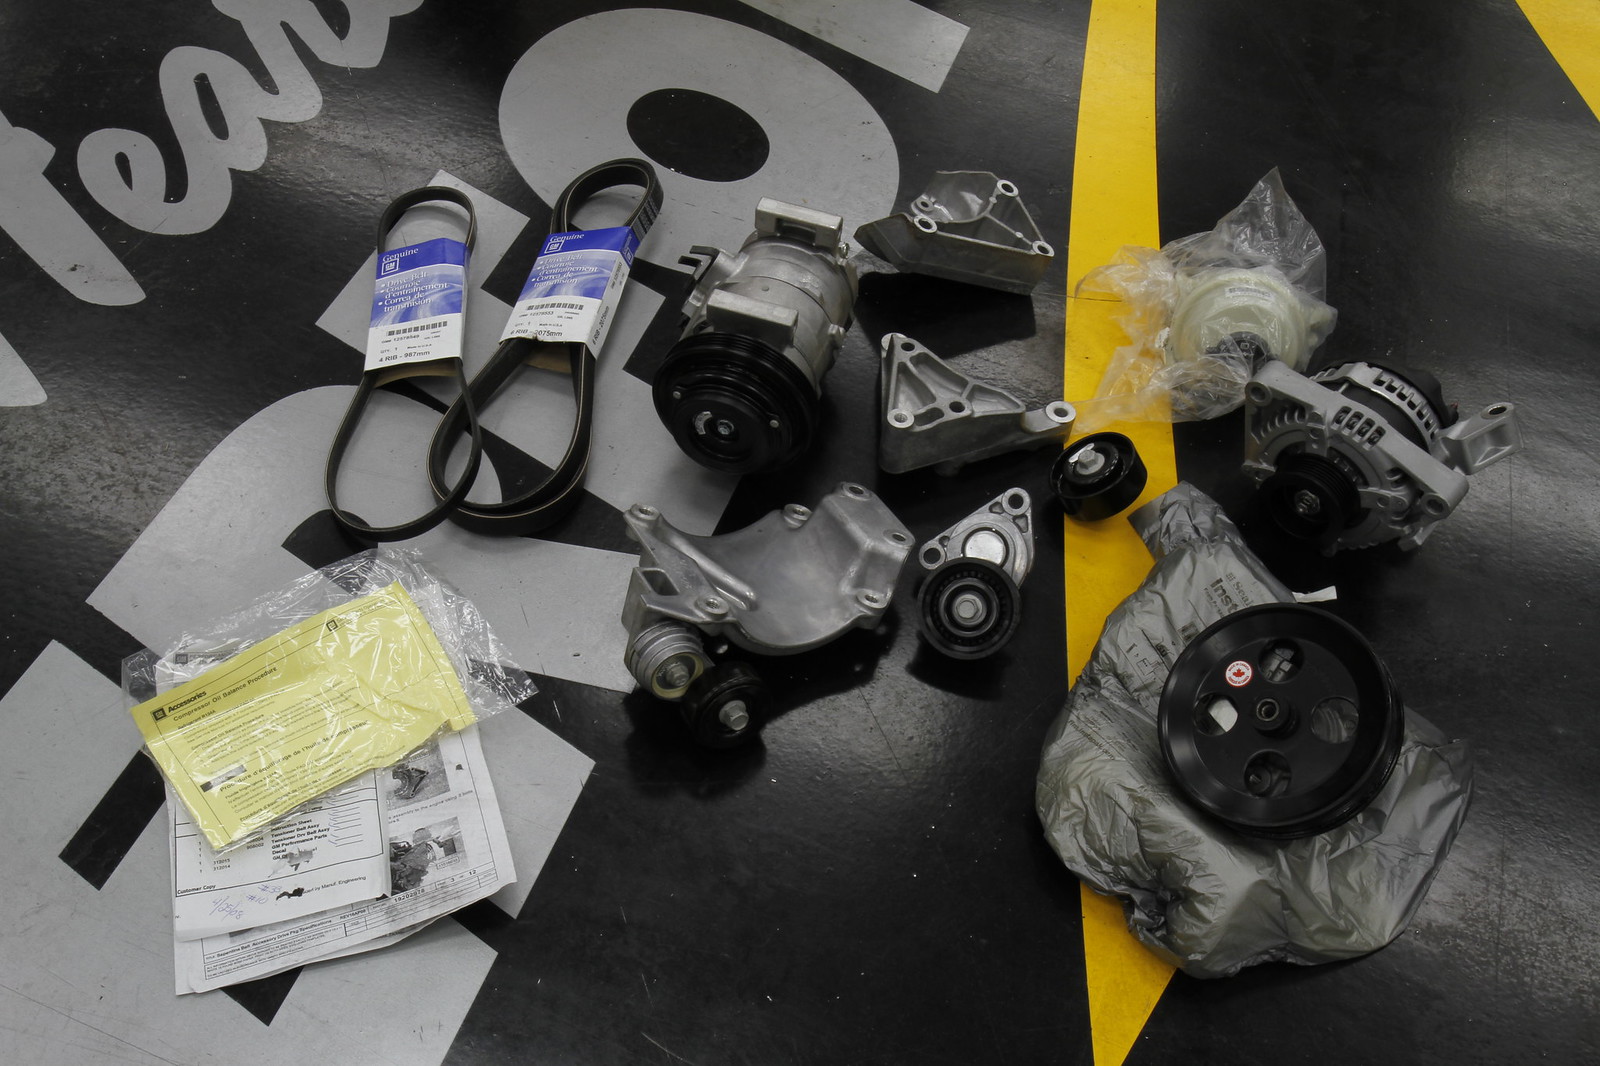 _MG_9846 by eric.burnett09, on Flickr
3/4'' made a noticeable difference:  _MG_9972 by eric.burnett09, on Flickr
I ended up grabbing a Mishimoto shroud and fans and had it adapted to the Hinson radiator. Not the most "baller" way to do it, but I couldn't exactly afford to spend another $500 bucks on an alternative at this point.
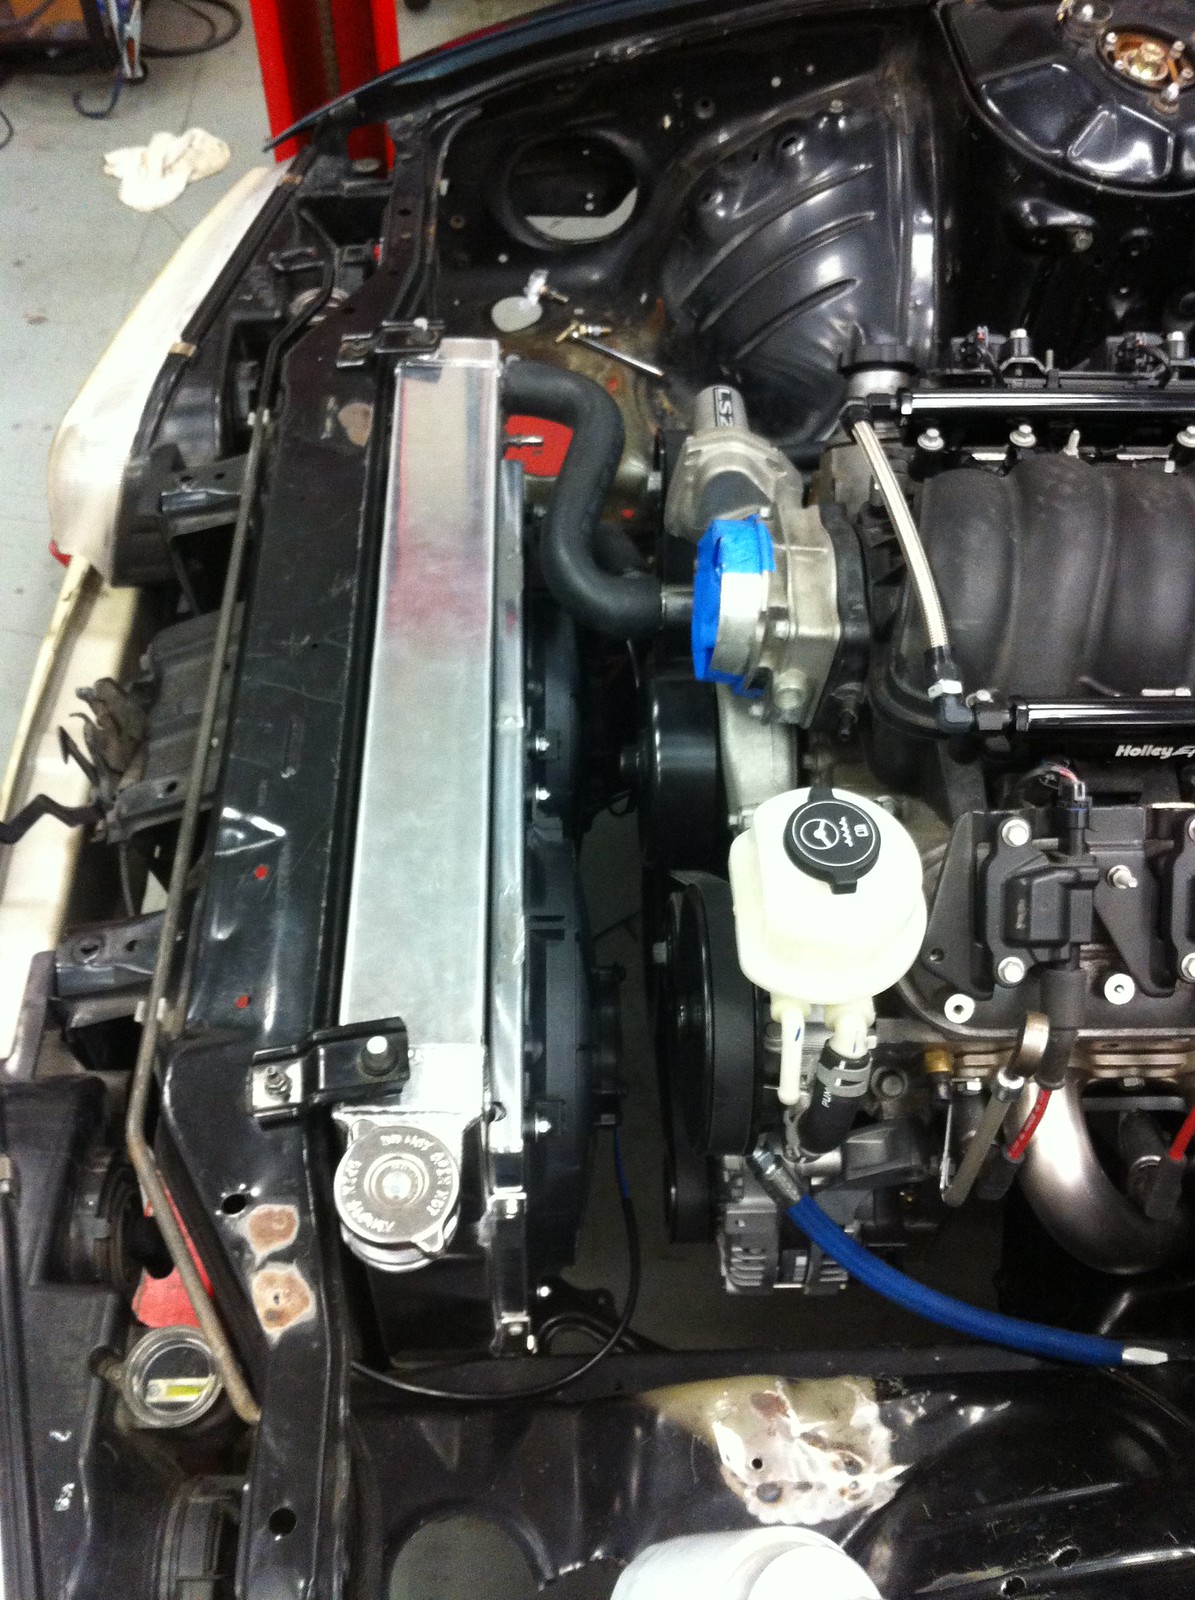 rad by eric.burnett09, on Flickr
http://en.wikipedia.org/wiki/Nissan_240SX
With a 99.5" wheelbase and 2700lb starting weight, this car has my project car antennae self-adjusting.
Thanks for checking out the thread everyone! A while back I started getting the suspension up to par on the car. As stated up top, the plans were to utilize Stance GR+ Pro coilovers with SPL suspension arms throughout. I’ve also purchased new steering rack bushings and boots for the car as well to keep leaks at bay. I’m also powder-coating most if not all of the factory suspension arms and brackets that will be remaining for a uniform look throughout.
 IMG_7408 by eric.burnett09, on Flickr
I had suspension arms off of my last 240sx so I took them and got them powder-coated before I needed to take the other ones off so they would be able to be replaced in one day. Here are some of the parts from the powdercoater:
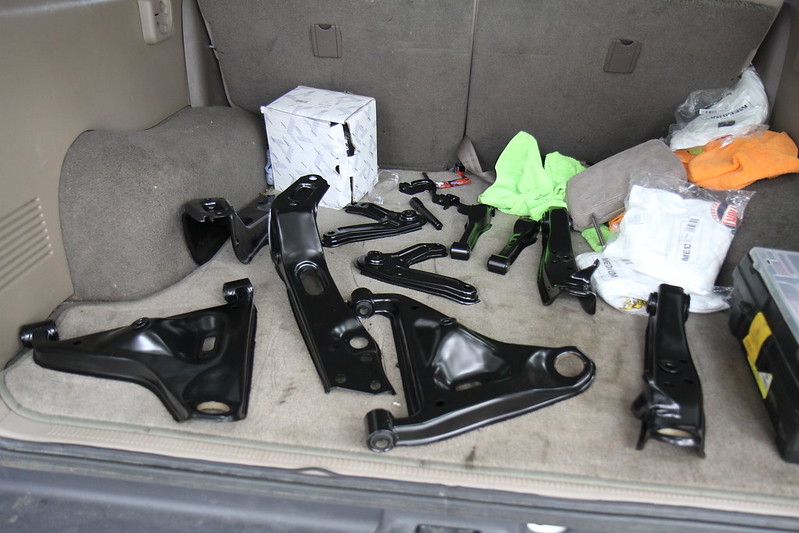 IMG_0084 by eric.burnett09, on Flickr
In wanting to replace everything that was showing age in the suspension, I opted to change out the ball joints in the front. Can't go wrong with Moog!
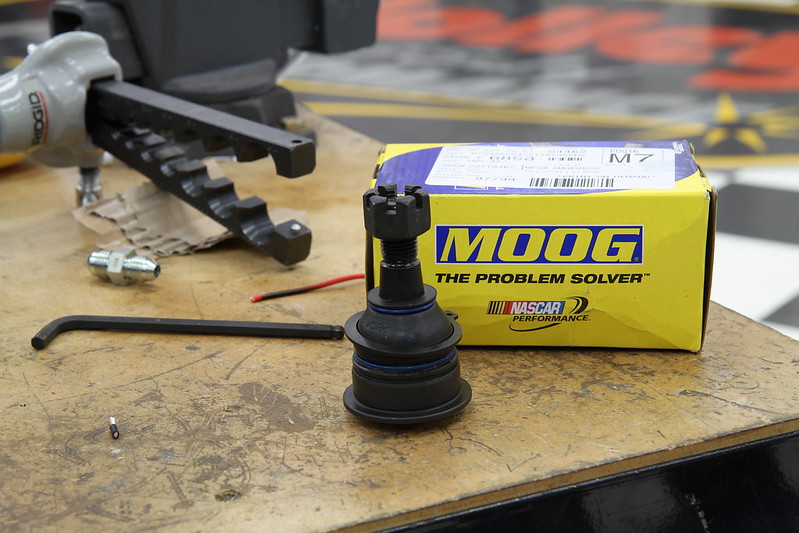 IMG_8963 by eric.burnett09, on Flickr
The passenger side was in a sad state: IMG_8977 by eric.burnett09, on Flickr
Drivers side outer tie rod looked like garbage too. Pretty typical for a chassis with over 150,000 miles.
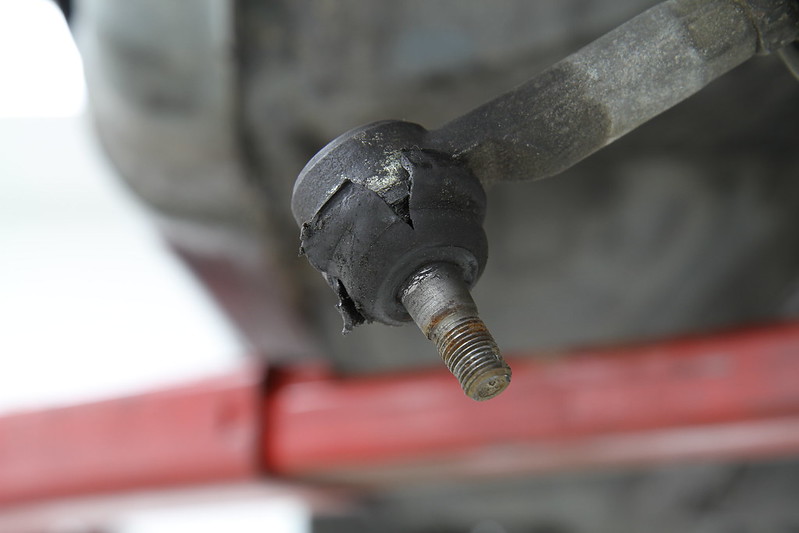
IMG_8961 by eric.burnett09, on Flickr
Since I was using SPL's outer tie rods, I had to use Z32 inner tie rods (specified by SPL). To start, make sure you have the steering rack positioned neutrally, tires pointed straight. This way you keep from getting the rack WAY out of alignment while you continue. To remove the whole tie rod assembly you have to remove the boots covering the area where the rods screw into the rack. Then you have to remove the clamp/clip holding on the inner tie rod on with a hammer/screwdriver combo. I then took a crescent wrench and removed both driver and passenger side assemblies. The new SPL units come with replacement clips so installation is the opposite of removal.
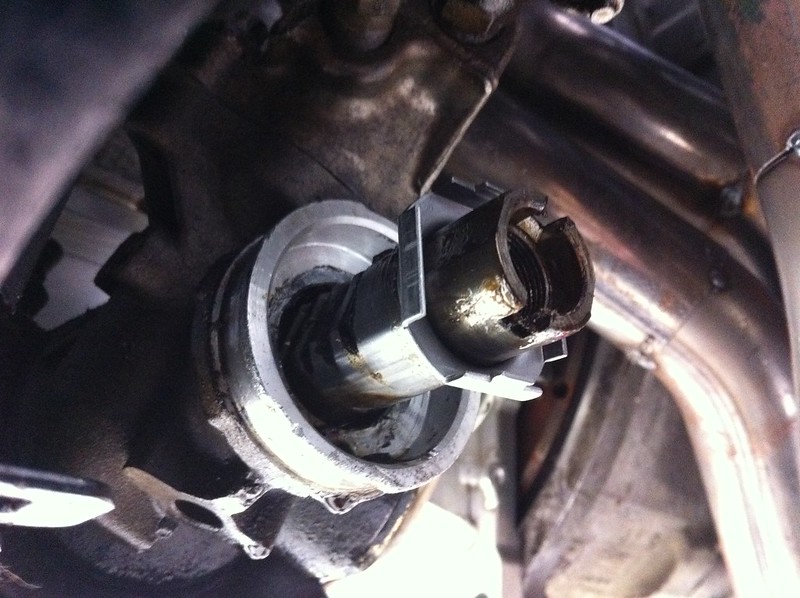 IMG_1461 by eric.burnett09, on Flickr
Old vs. new comparison: 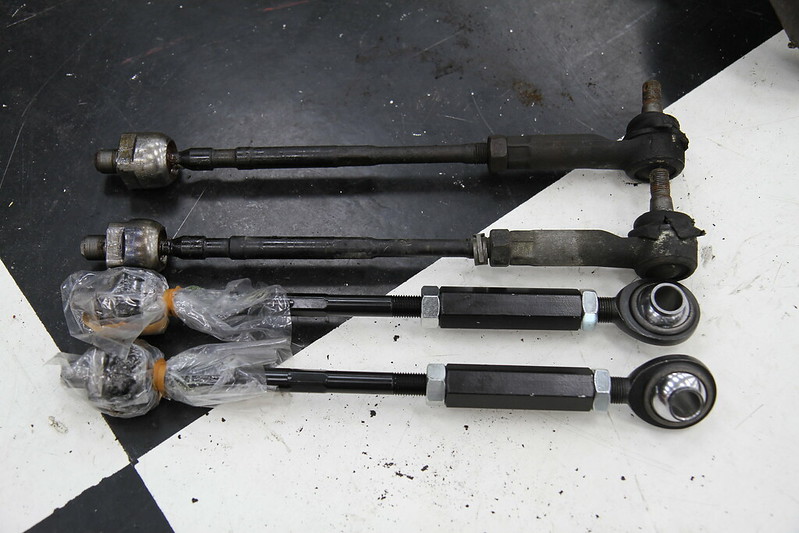 IMG_9119 by eric.burnett09, on Flickr
Threadlocker before installation: 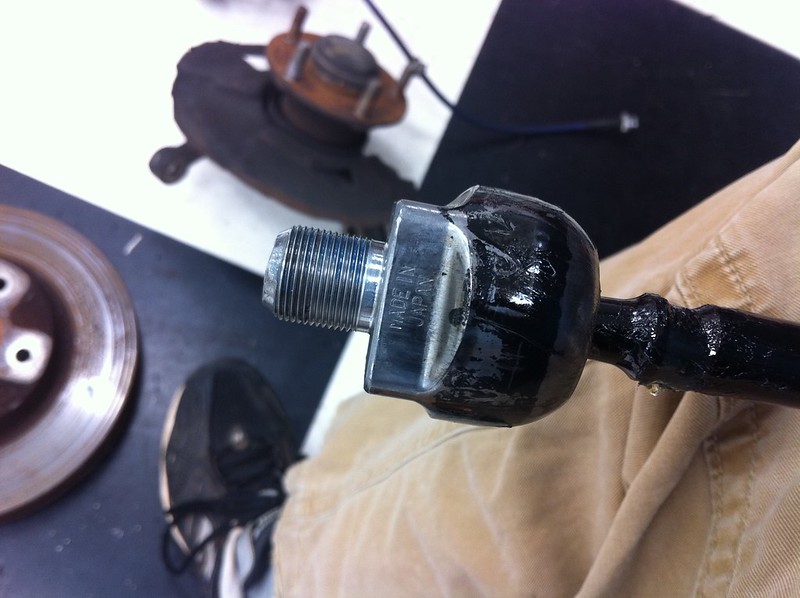 IMG_1552 by eric.burnett09, on Flickr
New inner going on: 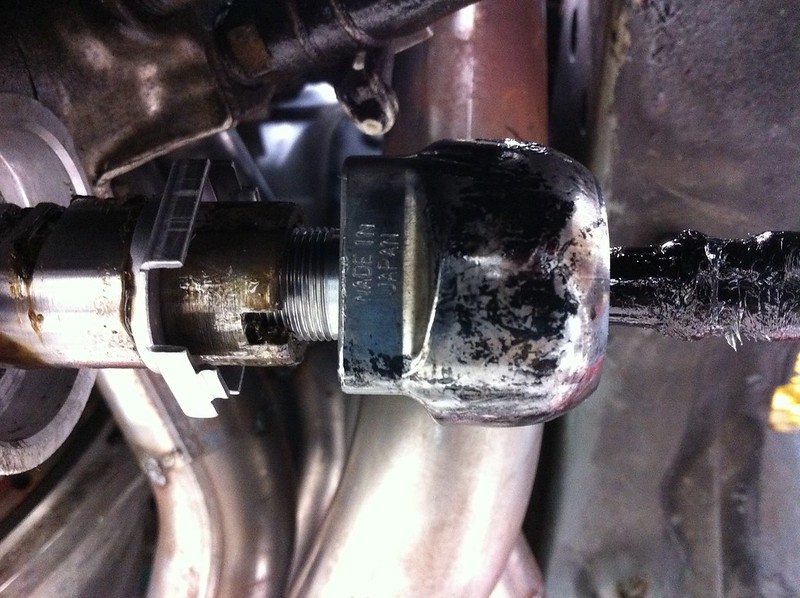 IMG_1611 by eric.burnett09, on Flickr
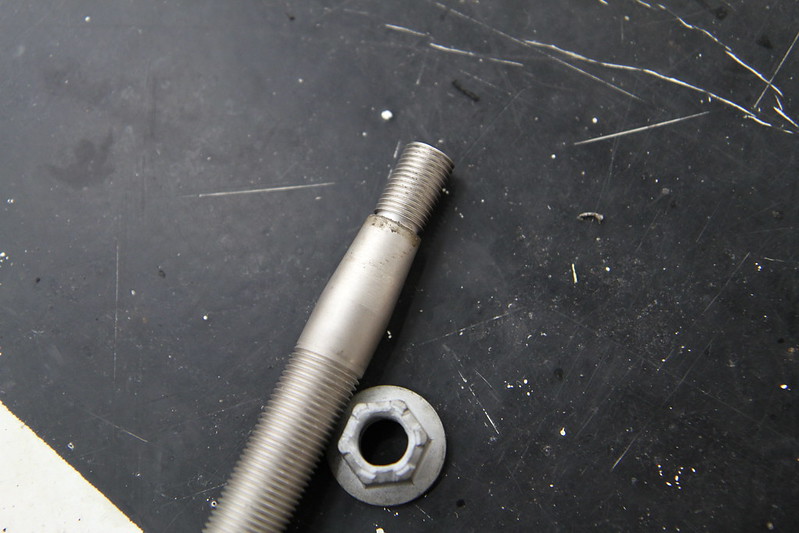
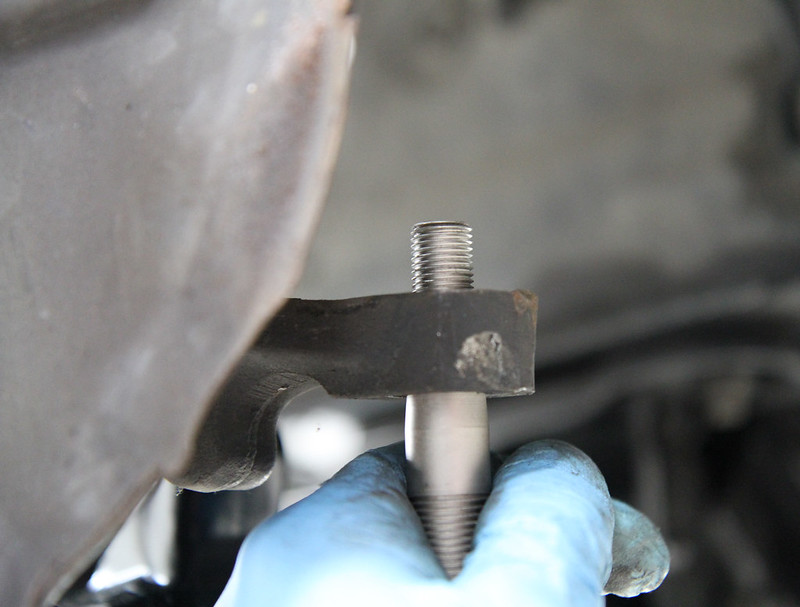
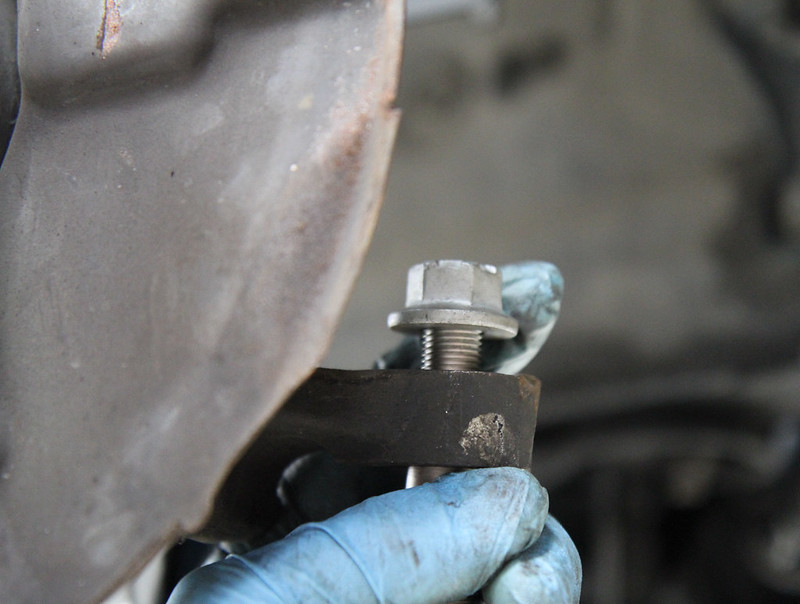
Installing outer tie rods. As per SPL's tech section: Insert the below shank into the spindle. Take the two supplied nuts and tighten them together at the bottom of the shank. Tighten them together and torque the nut on top of the shank to 40 ft lbs. and then remove the two nuts.
 IMG_0097 by eric.burnett09, on Flickr
 IMG_0098 by eric.burnett09, on Flickr
 IMG_0099 by eric.burnett09, on Flickr
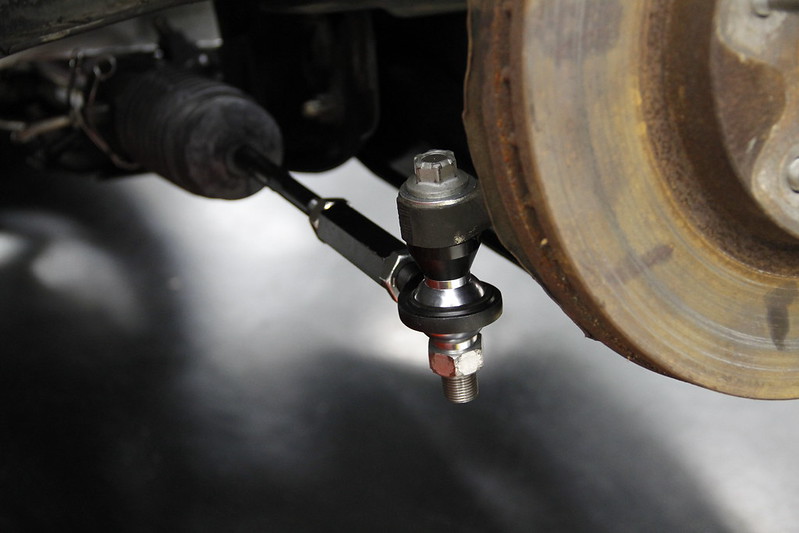
Then remove the two nuts that you locked together and slide the included bump steer spacers and then the tie rod on to the assembly. There are two kinds of bumpsteer spacers that the tie rods come with; 1 adjustment spacer (ring spacer) and 1 misalignment spacer (large cone shaped spacer). For those using stock knuckles SPL recommends using 1 misalignment spacer and no adjustment spacer. Here's what I ended up with after installing the bottom nut and torquing to 30 ft lbs. It's natural for this nut to take some torque to thread on as it's a crimping or locking nut. Looks like someone could use some new rotors....
 _MG_4553 by eric.burnett09, on Flickr
My initial impression after opening and checking these out was very positive. I definitely expect these to tighten up the front end. I'll let you know how the steering feel is improved after the car gets on the road. When I got the car, it was my daily and I wanted an even ratio of looks to ride quality so I went with Tokico Blues and Eibach progressive rate lowering springs. I had them on my last 240SX as well as they were great for what the car was used for. Most of the bolts holding the suspension components on the car came off quite nicely.
Except for this guy…. Spent quite some time on this one. There’s always one in every bunch!
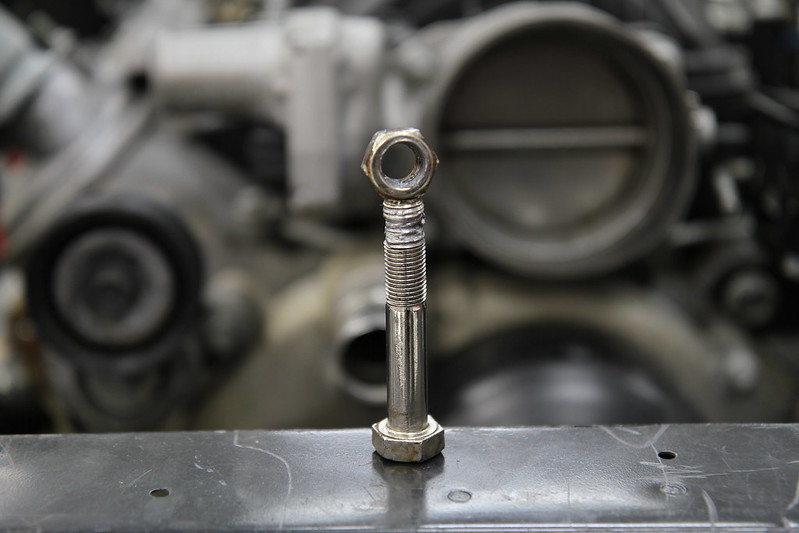 IMG_0537 by eric.burnett09, on Flickr
IMG_0522 by eric.burnett09, on Flickr
Out with the old: 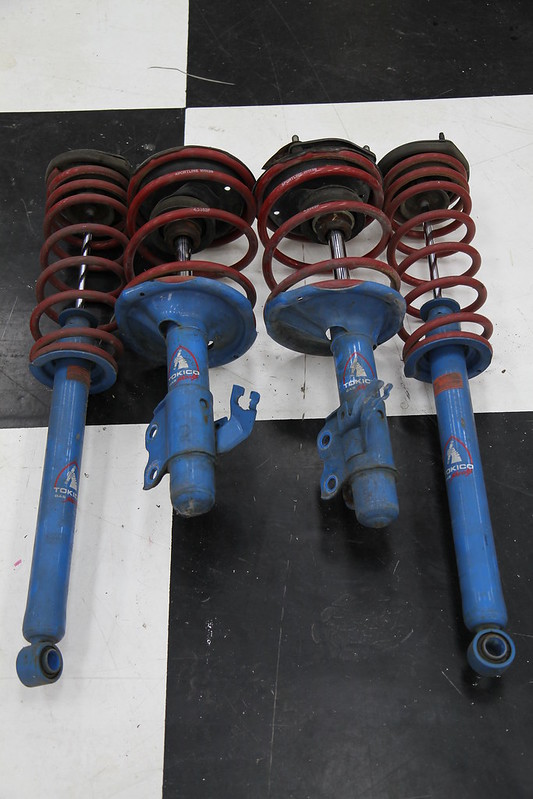 I
I
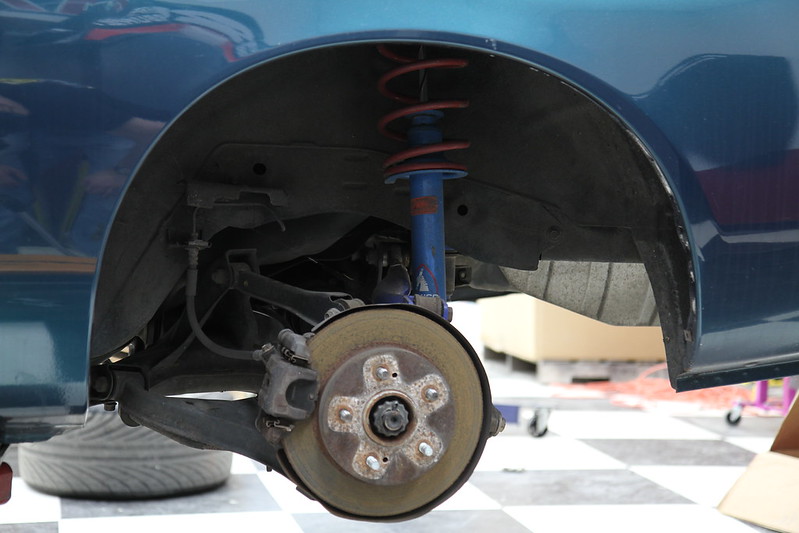 IMG_0518 by eric.burnett09, on Flickr
MG_0535 by eric.burnett09, on Flickr
In with the new: 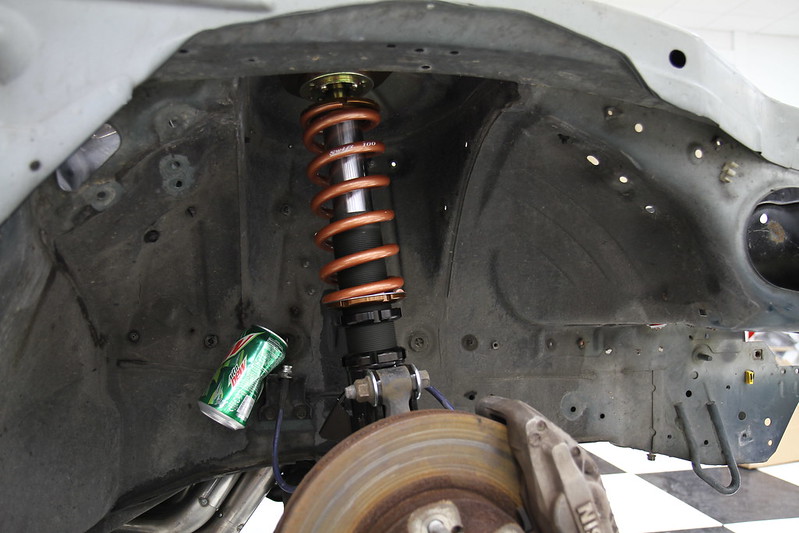 IMG_0534 by eric.burnett09, on Flickr
Comparison of front Tokico beside the GR+ Pros: 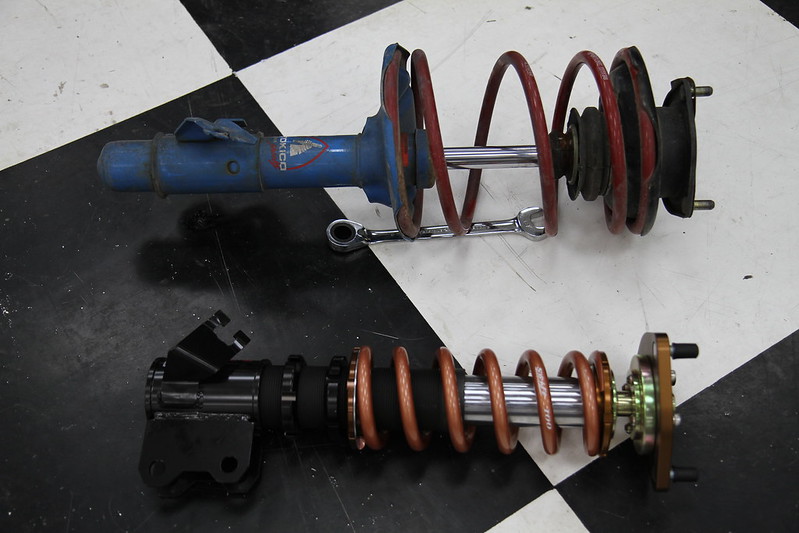 IMG_0527 by eric.burnett09, on Flickr
Rear comparison, much shorter shock body.  IMG_0529 by eric.burnett09, on Flickr
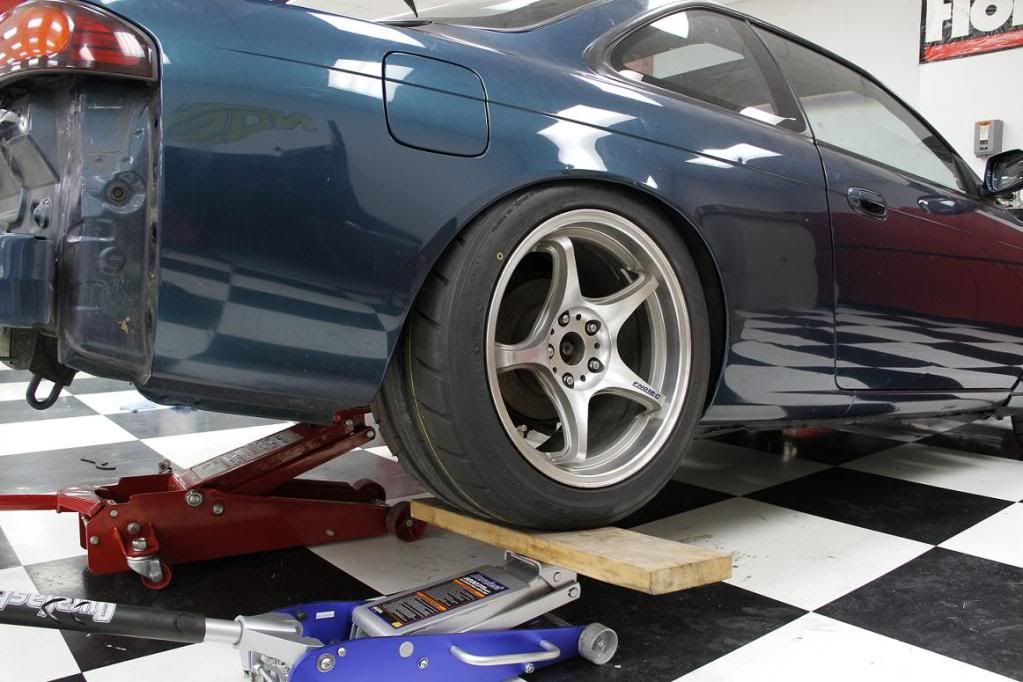
I’ve had my 5 Zigen FN01R-C’s for quite some time. They look good and I’ll be using them on the car until I can afford the wheels I really want…..ahem….ahem….Forgeline…ahem…..Ray’s…. They had 265 section width tires on them when I got them which gave them that stretched look that some people find attractive, but that’s not my style. It’s amazing what an extra ten millimeters will do for the look of a tire/wheel combo so I rolled my fenders with an Eastwood fender roller and a heat gun and bought some NT05’s in 275/40/17 in the rear and 235/40/17 in the front (will definitely be going wider in the front when other wheels become a reality). 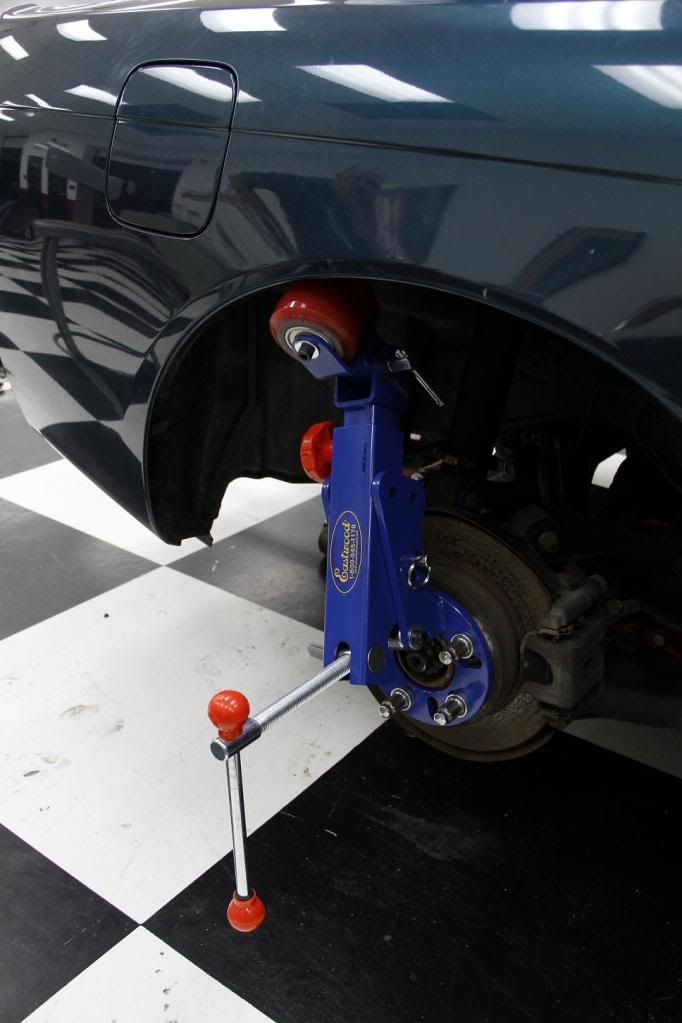 It wasn’t long until that ten millimeters fit just fine. These wheels are a +35 offset all around for anyone who’s curious. The main concern with rolling fenders is that you don’t want to crack your paint. It’s best to use a heat gun and a friend (father in this case) so that you can heat an area and then roll it. Repeat the process until you’ve completed an entire side. Then move on to the next. Just take it slowly and you should be fine depending on the condition of your cars paint and your ability. Testing for clearance throughout suspension travel after roll:
  And a couple of shots before I headed home. Cannot wait until it's on the road!
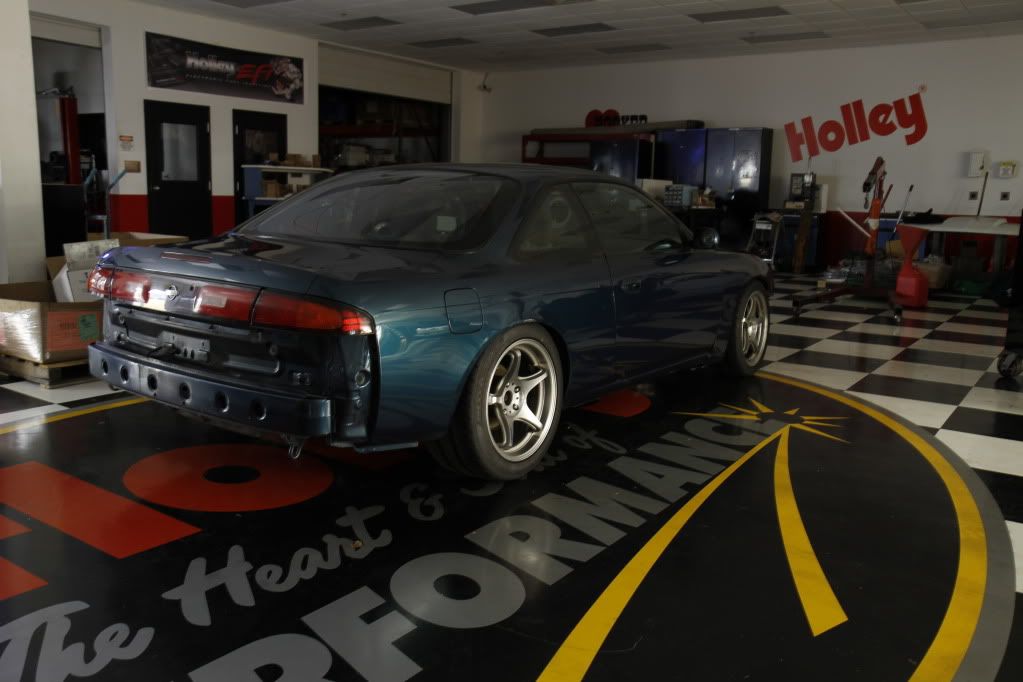
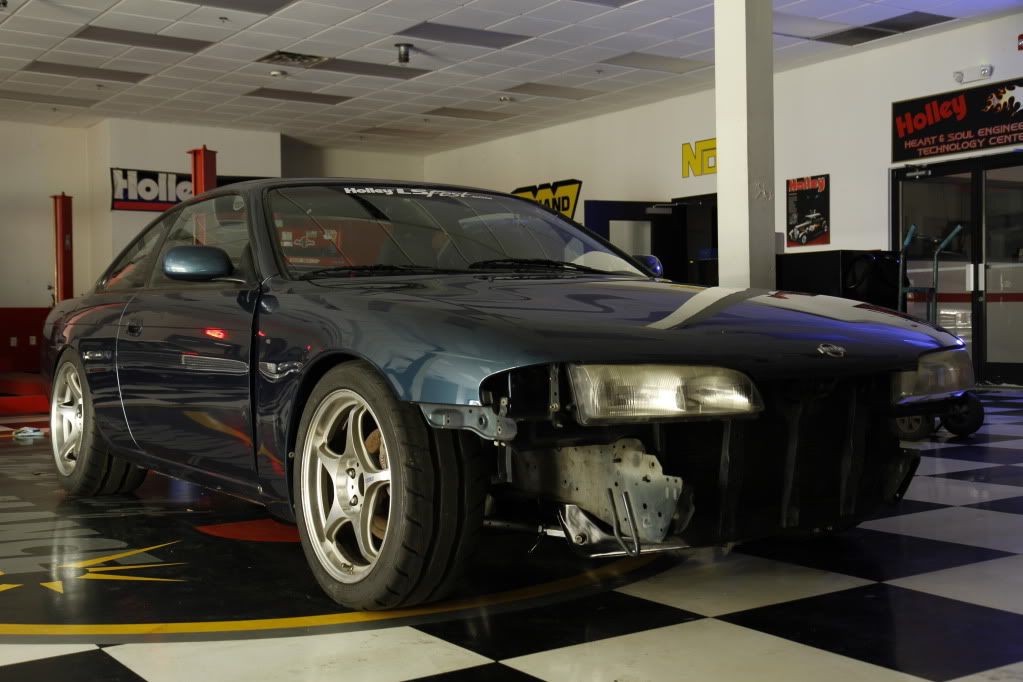
I really like this build. Thats some meaty rubber back there, looks good! I hope you have a plan for that passenger fender though...woof!
Conquest351 wrote: Awesome build, and an absolutely INSANE shop!!!
Thanks, wish it were mine......lol.
Fitment looks good. I have that exact same roller (made more sense to own it, with all the people that want to rent one around here, I might as well be the one making the money on that) and you're right on point.
mndsm wrote: Fitment looks good. I have that exact same roller (made more sense to own it, with all the people that want to rent one around here, I might as well be the one making the money on that) and you're right on point.
No argument there. I agree. Now that the suspension is actually settling from some use (the car is actually moving under it's own power currently, I just need to get the rest of the build thread put together), taking turns creates a small rub on the passenger side. So I'll need to do something about that really soon. Stay tuned for more updates. Just picked up this Q45 diff this afternoon to put in the car. The stock rear end gear on a 240 of this generation is a 4.08 and that is much too short for the GTO transmission that is in the car currently. I'll have to get some Infiniti J30 axles in order to make this diff bolt in. Stay tuned for an in depth update on that. I'll be swapping that out after it's wire wheeled and painted. Then first gear will actually be put to good use.
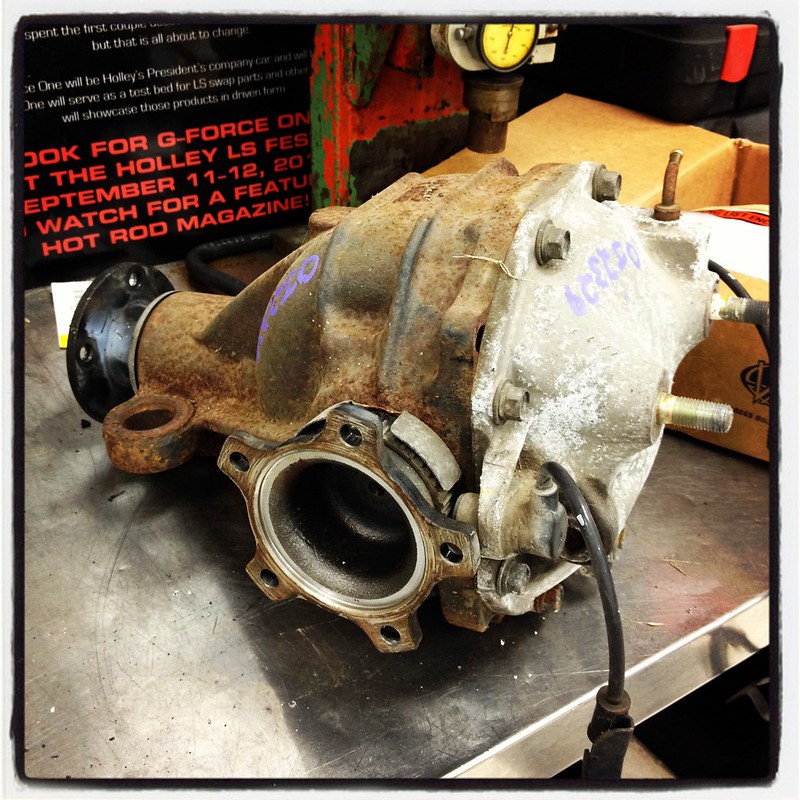 IMG_3414 by eric.burnett09, on Flickr
You'll need to log in to post.