efahl wrote: ... you should leave those pins on the front to discourage subsequent damage. ...
Yes! this! Plus, they provide support for troweling on 'inches thick' layers of bondo ;)
efahl wrote: ... you should leave those pins on the front to discourage subsequent damage. ...
Yes! this! Plus, they provide support for troweling on 'inches thick' layers of bondo ;)
I did get the carbs back together. Managed to fix the float pin tab with a well placed 1/16" roll pin
New damper diaphragms, gaskets, float levels set. All but the o-rings on the jet holders.... Which of course leaked the moment I pumped fuel into them. Not really an issue since there isn't a radiator in it right now.
This weekend was spent primarily in parts acquisition mode. Got pieces coming from as far as England and as close as the wrecking yard down the street. Hopefully bits start trickling in soon.
Body guy says more to come this week.
amg_rx7 wrote: Cool looking car. far cooler than the Falcon.
Wash your mouth! Eerrr - keyboard, I mean... ![]()
Boneyard sourced calipers are broken down, blasted, ultrasonic cleaned and awaiting paint and the rebuild kits. I need to decide on a color ![]()
Rotors got here this morning. Damn near 11 inchers!
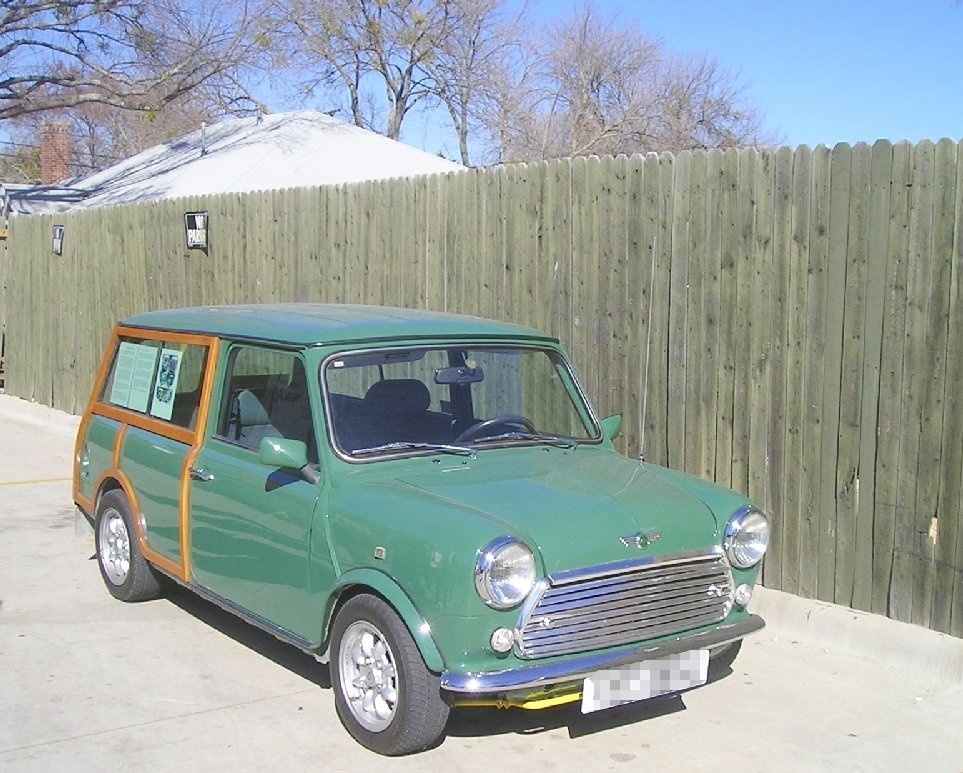
Car color has been decided and the painter said "Cool! that will be easy" Almond green from the 60's BMC color palette.

Total so far.
My split of the car and shipping $400
Calipers $ 44
Rotors $ 25
Caliper piston $ 5
Caliper rebuild kits $ 2
Brake pads $ 5
I am trying to use Rockauto "closeouts" wherever I can.
edwardh80 wrote:amg_rx7 wrote: Cool looking car. far cooler than the Falcon.Wash your mouth! Eerrr - keyboard, I mean...
Hehe I was wondering how long it would take to get a comment on that. ![]() Falcons are cool cars but this is one you just don't see as frequently.
Falcons are cool cars but this is one you just don't see as frequently.
And here we are 7 months later. I had tucked the car into the storage building which promptly got blocked in with some long term non runners so popping it out for a weekends work wasn't something I could do by myself. Friday evening I talked a Paul into helping me free it.
This morning I tore in. I reinstalled the radiator and cut some hoses out of random pieces from the parts store $1 bin. I primed the fuel pump and turned it over. It started instantly and was reminded of the massive fuel leaks right away. Took the carbs off again, installed new o-rings on jet holders and put it back together. This time it ran and fuel was pouring out the bowl vent. Took them off again and double checked the floats and seats. All seemed good and this time it didn't leak.
http://vid459.photobucket.com/albums/qq313/ditch_digger/Triumph/20140920_135949_zpsnxspo2yy.mp4
It has an exhaust leak and needs the valves adjusted but it sounds quite nice in person
I tried to bleed the clutch and got no fluid movement. Took the line off and still nothing. Took the master apart
Aww dang. The spring is broken. It was coiled into itself making it too short to push the piston far enough back to open the port from the reservoir. I might just shim it tomorrow an see if I can make it move under its own power. It would be nice if I could move it into and out of storage without requiring two people and an hour.
The master is 5/8" bore and 2.25" vertical bolt spacing so any wilwood or girling master will drop in. Probably easier to find and cheaper than tracking down an OEM unit.
Good stuff!
Say what you will about British cars (and I've said plenty in the 45 years I've had Triumphs), there are some items like master cylinders that are kind of 'standard' and interchangeable.
(A good thing considering how often they need replacement)
Good stuff, will be following this. So you plan to keep the Strombergs, eh? I really like how SU 1.75s (with a slightly bored manifold) wake up the six in my GT6. Also like how easy they are to set up, but I'm sure that's not an issue for you anyhow :)
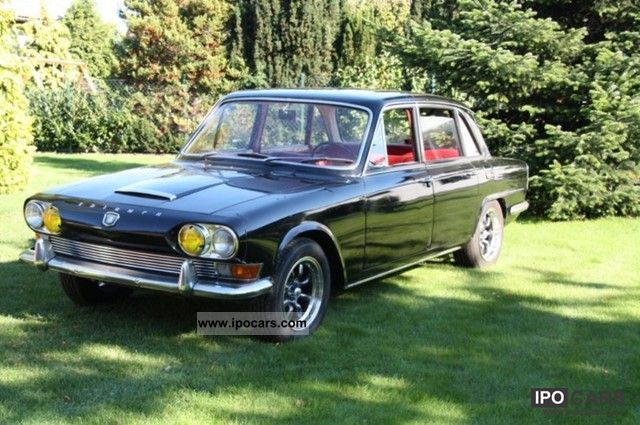
I had to GIS this car to see what one looked like in good fettle. I like where these can end up at.

This looks like fun. Following with interest.
Todays progress... and setbacks
I found a 3/4" master from an MGB in the scrap metal bin. It seemed to fit the bill other than the bore size. I cleaned and inspected and pressure tested it, swapped the pushrod from the old unit and mounted it up.
Hmmm..... Pedal is awful low.
Aww bugger
The mounting flange is quite offset from the other. Time to stretch that pushrod
cutoff wheel, random scrap of tubing and a bit of weld and we are 1" longer than before
OK now we need to plumb it. Aww crap, the MGB master uses 3/8-24 thread for 3/16" brake lines and the old unit had 1/4" lines. Luckily I spent all of friday installing new brake lines on an Alfa GTAM replica and hadn't cleaned up my mess so everything was still laying around.
Flare
Bends
and we end up with this guy. It has the factory flex line on there which seems very "light" duty
Got that bad boy installed, poured some fluid in it and was treated with brake fluid on the floor. Yep, that factory flex line had a hole worn through it. Probably what took the car off the road. Back to the bag of tricks. Luckily I keep extra treasures in the bottom of my tool box and there was a nice Earls braided stainless line that looked about right.
A bit of modifying and this.
With an ugly metric to SAE adapter on the end
Hooked that up and.....
You can see where this is going. The slave cylinder was seized up tighter than a tight thing. To say I was expecting this is an understatement. I kept saying "You know, when I fix this master the slave will be bad" and "Now the lines are done so I can see just how bad the slave is" Thank the FSM we had a used and ugly slave cylinder off a TR250 on the shelf. It too was seized up but I managed to get it apart using the grease gun trick. I cleaned the bores, lubed it up and got it on the car, bled the system again and had a working clutch.
Behold the first time this car has moved under its own power in 25 years!
http://vid459.photobucket.com/albums/qq313/ditch_digger/Triumph/20140921_150926_zpsb5dufhxv.mp4
My god what an ugly beast. I managed to back it out of the shop and then it wouldn't go into first. I found a leak at the master and tightened that line up and it started kinda working again. Enough for the quick hot lap and parking back into the storage shed. Note the front calipers are ziptied to the strut bodys (source of that clank when moving) and in no way in contact with the rotors so there are no brakes other than a minimally functional hand brake.
Overall I am pleased. For exactly zero dollars I accomplished my goal of making it move from storage to workspace. Now I can work on it whenever I want!
Next step is probably brakes. I have to decide if I want to redrill the PCD to 4X100 or 5X114.3 as well.
Ditchdigger wrote: ... Next step is probably brakes. I have to decide if I want to redrill the PCD to 4X100 or 5X114.3 as well.
What's stock, 4 x 3.75" ?
Come on ditchdigger, I need updates on this, and while you're at it I see you're updating you Fiat 850 thread over on Retro Rides so how about some love here too?
As loathe as I am to admit it this project is on indefinite hiatus. the body guy who was helping me flaked on me and it got pushed back over and over until now.
I still think it would be a cooler daily than the Falcon but the 850 is my big priority. The missus won't let me sell the Triumph just yet though. She tells my I will regret it later, so it sits in storage.... waiting. I think a BMW M50 and 5spd would go a long way to reigniting my interest.
The 850 thread is actually more active here than on Retrorides
https://grassrootsmotorsports.com/forum/build-projects-and-project-cars/71-fiat-850-sedan-the-redux/100510/page1/
In reply to Jumper K. Balls:
Opps, the change from ditchdigger to Jumper K. Balls stymied my search for it.
Saw something on Bring A Trailer that reminded me of your build today.

http://bringatrailer.com/2016/02/27/1965-triumph-2000-sedan-race-ready/
You'll need to log in to post.