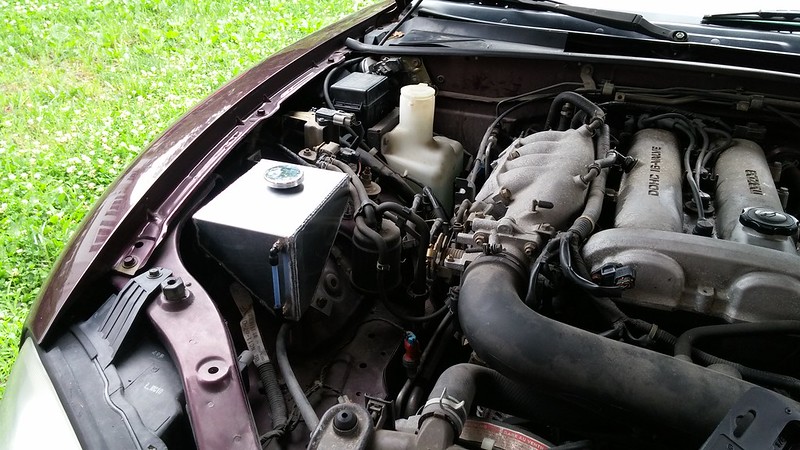
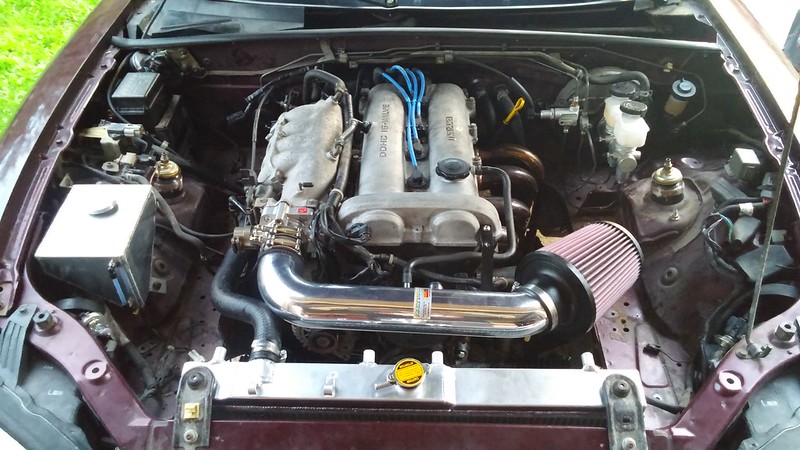
Harvey wrote: So dis is the super powah 1.6 motor?
Supa powah 1.6?
Nah this is a BP4W, will stay a BP4W. Name of the game is no motor swaps, no forced induction. ![]()
Harvey wrote: I was being ironic. 1.8 makes more than 90whp. Should be halfway decent with the MS on it.
Heh, i'm mostly just joking about that. I'm expecting around 130-135whp as it shows up at MATG.
140-145 with the intake manifold i'm planning on having on it by end of Fall. ![]()
Should be pretty sprightly with the 6spd/4.3 combo.
Mixed results for this weekend's wrenching.
Seats: Fail. WAYYYYY too high. My wallet hates me. PCI brackets en route.
FrankB tanks: Mixed. Coolant overflow was cake, washer reservoir, need to revisit. Instructions are from an MSM, which had ABS. My car does not have this, oem tank in a different place, need to extend some wires. No big deal, just didn't feel like doing it on Saturday.
Miataroadster shifter: Win. After i disassembled it again after i realized i forgot to fill the transmission.
FrankB coolant overflow
 FrankB overflow tank by concealer404, on Flickr
Shifter setup.
 Miataroadster tall/angled shifter and Carbing High Grip by concealer404, on Flickr
Dat closeness.
 20150620_181606 by concealer404, on Flickr
Video of shifter. This is so much win i can't hardly stand it. ![]() http://youtu.be/cufg6pkQKq4
http://youtu.be/cufg6pkQKq4
Ordered today: Radiator, timing belt kit, valve cover gasket, Trackspeed EGR and coolant neck blockoffs ($10.53 shipped da fuq?), and EGR plug for header.
Gonna be a lot of work to get this thing done in time for MATG, but very doable. I remain optimistic.
Awesome that you're going with Megasquirt. I love mine (after I figured things out more). There's way more to them than I ever need. Is there a plug and play kit for the most part for the Miata with Megasquirt? Or are you going to still end up wiring a bunch of stuff yourself?
corsepervita wrote: Awesome that you're going with Megasquirt. I love mine (after I figured things out more). There's way more to them than I ever need. Is there a plug and play kit for the most part for the Miata with Megasquirt? Or are you going to still end up wiring a bunch of stuff yourself?
There's many plug and play Megasquirts for Miatas. Some don't even require a patch harness. (Mine does.)
I won't have to wire much myself for this particular install. Just wideband and IAT, figure 30 minutes for both.
However, as the car progresses, i'll need less and less of the factory harness, so over winter i may very well sell off this setup and build my own harness to use with an MS3Pro. ![]()
Had a DIYPNP on my turbo 95 Miata, loved it. ![]()
New seat brackets came in. These are works of art. I'm going to feel stupid for not just buying these the first time if they work. So nice.
 20150624_221259 by concealer404, on Flickr
Timing kit (With ALL the cam seals for some reason), Trackspeed Engineering EGR and coolant neck blockoffs, plug for header side EGR.
 20150624_221405 by concealer404, on Flickr
MSM steering rack should be here any day now to go with these delrin rack bushings. Then it's time for some depowering goodness and removing a/c and power steering in one fell swoop. Win!
 Delrin rack bushings by concealer404, on Flickr
Those seat brackets are going to work. I'm going to need to lop the top hole of the side brackets off in order to get the seat low enough to use the bottom holes, but that's it. And some mild massaging of the transmission tunnel. No big deal. I can pass a broomstick test as is using the second lowest holes, but would really need a 320mm steering wheel for comfort at that point. Would rather sit lower and not need to swap steering wheels. Excite. Will NOT be able to use the integrated sub strap eyelet hole in the brackets because it won't clear the bottom of the seat. Oh well. Going to try to get the seats and harness eyelets bolted in on Wednesday.
Other things:
1) Spent 7 hours on Friday trying to remove the diff from this berkeleying car. berkeley the PPF design. Seriously. berkeley it. These came out, which Mazda says is bad, bolts stayed in. DA FUQ? Diff still in car. Will re-attack as soon as my rage subsides.
 20150704_154823 by concealer404, on Flickr
1) Radiator came in. Ebay because poor right now. I've used these in the past and they worked just fine. Learned my lesson in the past though, and did NOT get the fan/shroud setup to go with it, because garbage. Will either use the main factory fan on this, or hack up my old shroud to run one SPAL 12", use the other side to fab up some oil cooler mounting brackets. This is one of the better-looking ebay radiators i've had my hands on. No warping, all welds look pretty uniform, no bird E36 M3 splatter anywhere.
 20150703_175754 by concealer404, on Flickr
 20150703_175822 by concealer404, on Flickr
3) Stock exhaust including manifold weighed 51lbs. Racing Beat header + Hytech race exhaust weighs 29lbs. I like.
4) Hella made the oem headlight harnesses?
 20150704_182653 by concealer404, on Flickr
5) Let the molestation commence.
 20150704_170606 by concealer404, on Flickr
6) Cut, remove, drain, repeat.
 20150704_173252 by concealer404, on Flickr
7) Much better. I need to run and get an M8x1.25 45mm bolt to go in the lower A/C bracket area so my oil doesn't come out. Motor mount replacement from here is now SUPER EASY. I like.
 20150704_181653 by concealer404, on Flickr
8) berkeley this thing in particular.
 20150704_182946 by concealer404, on Flickr
9) I like it when you remove things from Miatas. Motor looks like it floats. Still more work to be done. Shortly after this i removed the A/C box from under the dash, installed the delete pipe from Mazda, as well as the 3 firewall plugs. Looks nice.
 20150704_183440 by concealer404, on Flickr
10) Next weekend's job after the diff comes out: Figure out how much of this BS i can remove.
 20150704_183553 by concealer404, on Flickr
On my '95, I was able to remove all that crap without a light being triggered. Just looped/capped off whatever vacuum lines I pulled. I'll see if I can find a picture.
I don't necessarily care about a light. As of right now i'm going to be running either a BP5A ECU or that Megasquirt. Planning on the Megasquirt, but unsure if i want to tune the car on the way down to MATG.
Could be good for some mad street cred, though.
Round 2 with the diff will be tomorrow. Wish me luck!
In the meantime, got another care package from 949Racing. Has the new LSU 4.9 sensor, so yay!
 MTX-L w/ lsu4.9 by concealer404, on Flickr
Bad day.
Got the diff out.
 20150711_181714 by concealer404, on Flickr
Realized that some monkey had replace the diff before (probably last time it was wrecked), and they obviously didn't bother to line up everything right before hitting everything with what must have been a 1" impact, so these stupid nuts had machined new lips in the aluminum spacer and completely berkeleyed every spline. Which 1) Explains why i had such a hard time and 2) ensured that the new diff wasn't going back up in the car.
After a few hours in the freezer, the Delrin diff mounts went right in.
 20150711_194135 by concealer404, on Flickr
Rears fit just fine. Still need to work on the top hats for the front some more, apparently. Just barely too big still. Blah.
 20150711_194036 by concealer404, on Flickr
Finally got the rest of the endlinks out of the damn arms.
 20150711_203703 by concealer404, on Flickr
More WTFs:
1) Shop i paid to press a new bearing in the driver's side spindle didn't install the new seal i provided them. Upon further investigation, there were bad burning smells, and a realization that the bearing didn't turn smooth. Additionally, the bearing was blatantly pressed in cock-eyed, and now the bearing and spindle are both destroyed. Thanks, berkeleying idiots. Not only did i waste $120 on parts and labor, now i get to find a new spindle before i can even put this berkeleying car on the ground.
2) Pulling the passenger axle out, looked like the joint had slipped out of the cup. After 20 minutes of wrestling with it trying to get it back in, i realize that what i'm trying to get back in is NOT the joint, and rather, the axle itself had berkeleying snapped AT the joint. WTF. I drove this berkeleying thing with a snapped axle, the only thing holding it together was the boot.
FML.
I leave on the morning of the 22nd.
You mention removing the AC evaporator and replacing with a by-pass.
Does this mean you have an AC system for sale?
NOHOME wrote: You mention removing the AC evaporator and replacing with a by-pass. Does this mean you have an AC system for sale?
Yep, i did just cut through the rubber/soft hoses though. Everything else should be largely intact. I may have broken through one of the hard lines, but the main components are intact, and the a/c worked well in this car. I'd love to get rid of everything in one shot for a fair price to a GRMer. Shoot me an email, we'll talk.
STAND BACK I'M DOING SCIENCE
 20150714_200014 by concealer404, on Flickr
Installed. Have to put the fender back on the passenger side, no big deal. Broke both bottom fender bolts on passenger side, one on driver's side. Just going to ram up some sheet metal screws for now to keep it in place on the passenger side, driver's side is good enough with one bolt. Will fill my holes and go to rivnuts over winter, just don't have time to berkeley with it right now. (And don't have rivnut tools)
I'm torn on these. I wouldn't have paid full price for them. I'll give fitment a B-, and the supplied hardware a solid C. The washers supplied were too small and literally fit in the damn holes, and the bolts are some really cheap Grade 5 crap. Backing plates were cheesy and didn't fit well. I would have attributed the fitment issues to the car, but the same exact fitment issues were on both sides down to the millimeter.
I'm sure they'll work just fine, it's not like they're moving parts, but if i'm spending money on fender braces, i'm buying the GarageStar units next time.
 Boss Frog Frog Arms by concealer404, on Flickr
Well... i made it.
Depowered the MSM rack and added Miataroadster Delrin Bushings. Because i'm an NVH Hero.
 Depowering MSM steering rack and Miataroadster delrin bushings by concealer404, on Flickr
New PPF hardware, axle, wipers, and a silly amp interface thing i didn't get around to installing.
 20150715_184419 by concealer404, on Flickr
New-to-me spindles. Came off an 03 so i don't have to do silly modifications to the shields to fit over sport brakes. Bonus!
 20150716_105249 by concealer404, on Flickr
Mechanic Kitty approves. (Stray we feed.)
 20150716_105424 by concealer404, on Flickr
You're not being helpful, cat.
 20150716_105621 by concealer404, on Flickr
Step 1 of re-route, remove valve cover and be very pleasantly surprised by the state of the motor. Me gusta.
 20150716_113543 by concealer404, on Flickr
Step 2: Remove THIS berkeleying thing.
 20150716_130033 by concealer404, on Flickr
Step 3: Assemble this thing with a new Stant Superstat. I did 180F. I think that may have been a mistake. More on this later.
 20150716_134758 by concealer404, on Flickr
Step 4: Realize that most of the gasket had been left on this stupid face. Drown your rage in alcohol.
 20150716_151445 by concealer404, on Flickr
Step 5: Install, and realize that your spacer is a couple mm too thin and getting a hose past that line nipple thing on the head is berkeleying impossible. Rage enough to get the hose past enough, then install your clamp on there cock-eyed and hope you got it tight enough, realizing that this is not an acceptable solution for track work, so rage again that you paid money for this and gave away your old spacer.
Resulting question: How far can i shave down that nipple? RESOLVED. Have to put hose on FIRST before bolting down water neck. Not happy with this. Moving to M-Tuned reroute over winter.
 20150716_153051 by concealer404, on Flickr
Took a break from annoying things to remove EGR. This was much easy.
 20150716_154736 by concealer404, on Flickr
Back to the re-route. Realize that to remove the water neck, you have to pretty much do a timing belt job that i was trying to avoid, anyways. Rage some more.
 20150716_161452 by concealer404, on Flickr
Remove that E36 M3 and pound a plug in.
 20150716_162228 by concealer404, on Flickr
Cover your E36 M3.
 20150716_162524 by concealer404, on Flickr
Realize your water pump is leaking. Rage more.
 20150716_165307 by concealer404, on Flickr
Remove it and throw that crap in the trash.
 20150716_180203 by concealer404, on Flickr
Get angry and bang out the water pump and timing belt in 15 minutes.
 20150716_185647 by concealer404, on Flickr
Make your top hats fit. Later realize that you put the longer ones up front like a moron.
 20150717_112749 by concealer404, on Flickr
This E36 M3 is broken, so do something about it.
 20150717_124722 by concealer404, on Flickr
Did something about it.
 20150717_130246 by concealer404, on Flickr
Marvel at how legit your suspension looks.
 20150717_145803 by concealer404, on Flickr
Install your new/old PPF hardware and rejoice that it's not jank.
 20150718_115922 by concealer404, on Flickr
Do a magic trick without snap ring pliers, instead choosing to jam a pick into your thumb.
Abra...
 20150718_121515 by concealer404, on Flickr
CADABRA
 20150718_122128 by concealer404, on Flickr
Some idiot put 100w bulbs in this at some point. Too lazy to replace right now, so i just closed up the prongs a little and lights work again.
 20150719_113339 by concealer404, on Flickr
After spending a couple hours trying to get the tie rods out the right way, give up and mess up your favorite pickle fork with a sledgehammer.
 20150719_115157 by concealer404, on Flickr
Repeat on the other side.
 20150719_115437 by concealer404, on Flickr
Exhaust doesn't fit bumper too well. Oh well, it'll self clearance by melting.
 20150719_160753 by concealer404, on Flickr
Racing Beat's own hardware for the front sway bar block/brace kit doesn't even fit their own E36 M3, so that's cool.
 20150719_162500 by concealer404, on Flickr
Install 1.25" swaybar anyways, because YOLO if the subframe tears.
 20150719_184303 by concealer404, on Flickr
Race car E36 M3.
 20150719_210522 by concealer404, on Flickr
Install seats and harnesses. Have a bad time.
 20150720_135903 by concealer404, on Flickr
Put it on the ground, consider drinking a beer, decide to attempt to get it out of the driveway first.
 20150720_174529 by concealer404, on Flickr
Made it!
 20150720_175423 by concealer404, on Flickr
Baby's first sticker.
 20150720_210939 by concealer404, on Flickr
Bezel with things. Doesn't fit. Needs improvements, but we'll get there.
 20150720_215036 by concealer404, on Flickr
Plastidip the top because the red is just too much to handle. Came out like crap, but it's not red.
 20150721_160414 by concealer404, on Flickr
Drive on highway, hate life.
 20150722_142902 by concealer404, on Flickr
At this point, Gchambers helped me out with an alignment, despite the car being a bad combination of too low with too much droop travel to get on his platforms. Saved my ass, as the alignment was REALLY bad up front. We lucked out on the rear being ok, so after driving a total of 40 miles on this thing since January, i figured it would be ok to drive down to MATG on Wednesday morning.
I got the brakes to work on the way there by dragging them at 80mph for about 10 miles until i saw smoke. Let them cool, and i had stopping power! Found out the next morning that i only had front brakes, as there was nothing but air in the rear lines because my wife apparently didn't have the leg strength to push past the front brakes with the monster master cylinder i have. Bled brakes in the rain on Thursday night, E36 M3 was cash. Proceeded to spit a bunch of the pad clips out over the weekend, so now my brakes rattle a lot, but they stop well.
Meeting people in Knoxvegas for pizza.
 20150722_200444 by concealer404, on Flickr
Rained on Thursday, so spent the day drinking at the cabin and taking pictures of my car in the rain from the porch.
 20150723_180559 by concealer404, on Flickr
Ran the Dragon Hillclimb route a couple times, pic at the top.
 20150724_112444 by concealer404, on Flickr
View from the overlook.
 20150724_113441 by concealer404, on Flickr
At Crossroads General store after the A&W run.
 20150724_210741 by concealer404, on Flickr
Saw this cool Sentra parked with the Miatas.
 20150725_114413 by concealer404, on Flickr
Met a dude with a Raptor Jesus tattoo.
 20150726_012434 by concealer404, on Flickr
Then drove home.
The car is fast, reliable, loud, hot, uncomfortable, and doesn't give a E36 M3 about anything. It's exactly what i wanted.
Had a buddy drive past us a couple times on the hillclimb route just to see how loud it was outside the car.
http://www.youtube.com/watch?v=O1M7909yfcc
http://www.youtube.com/watch?v=rga5fj3Xuis
Anyways, the car ended up a bit more "race car" than i was thinking it would.
I think i'm going to embrace it and continue down that path, since it's easier (and probably cheaper) than trying to make it more street-friendly at this point.
I think there's a lowish and cheapish 100lbs hanging out in the car i can get out without drastically affecting comfort levels even further, and since nobody seems interested in the Racepak IQ3 i have for sale at a ridiculously low price, i may just go ahead and stick it in this car to avoid the cash outlay for gauges. Plus, then i have no problems keeping all engine vitals in easy view.
Stereo comes out this weekend, might attempt Megasquirt install to see how that goes. Need to cut the hood up for the Singular Motorsports vents.
First goal: 2000lbs.
You'll need to log in to post.