wae
UltimaDork
9/3/24 12:23 p.m.
Finally had time to go back out and do some sanding. I left a little bit of a low spot in the filler somehow.
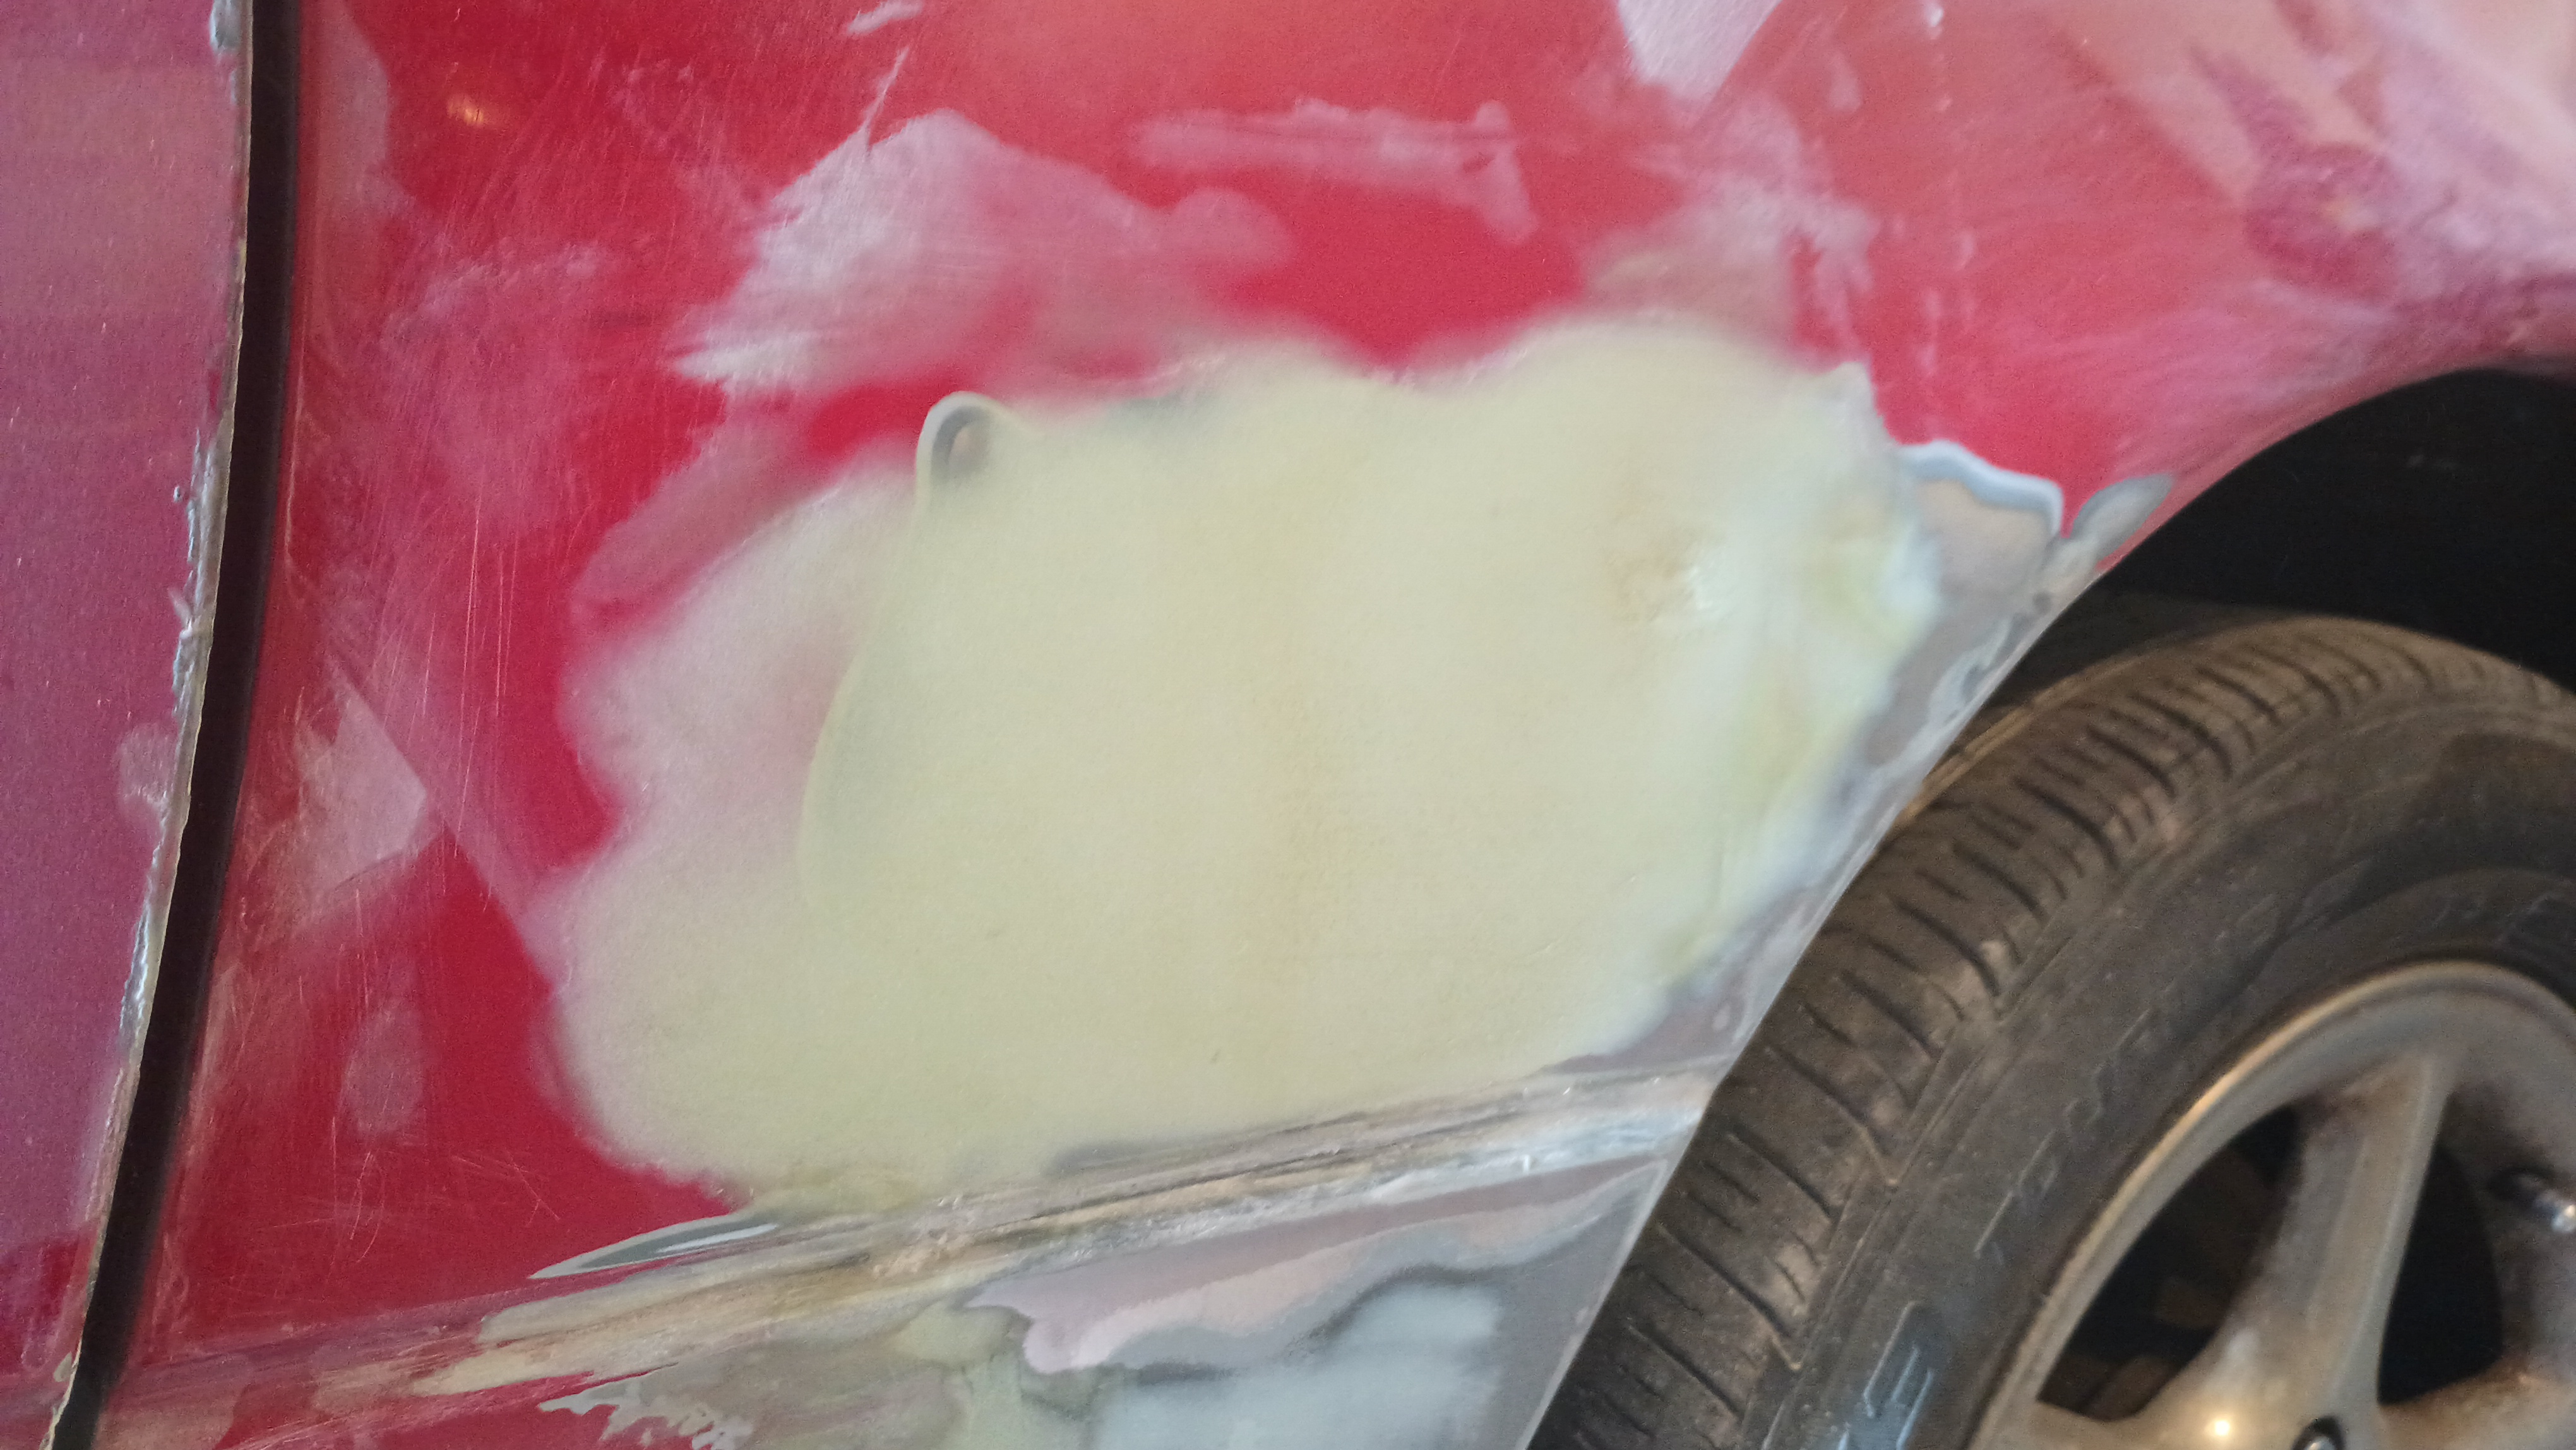
So another quick coat and some sanding:
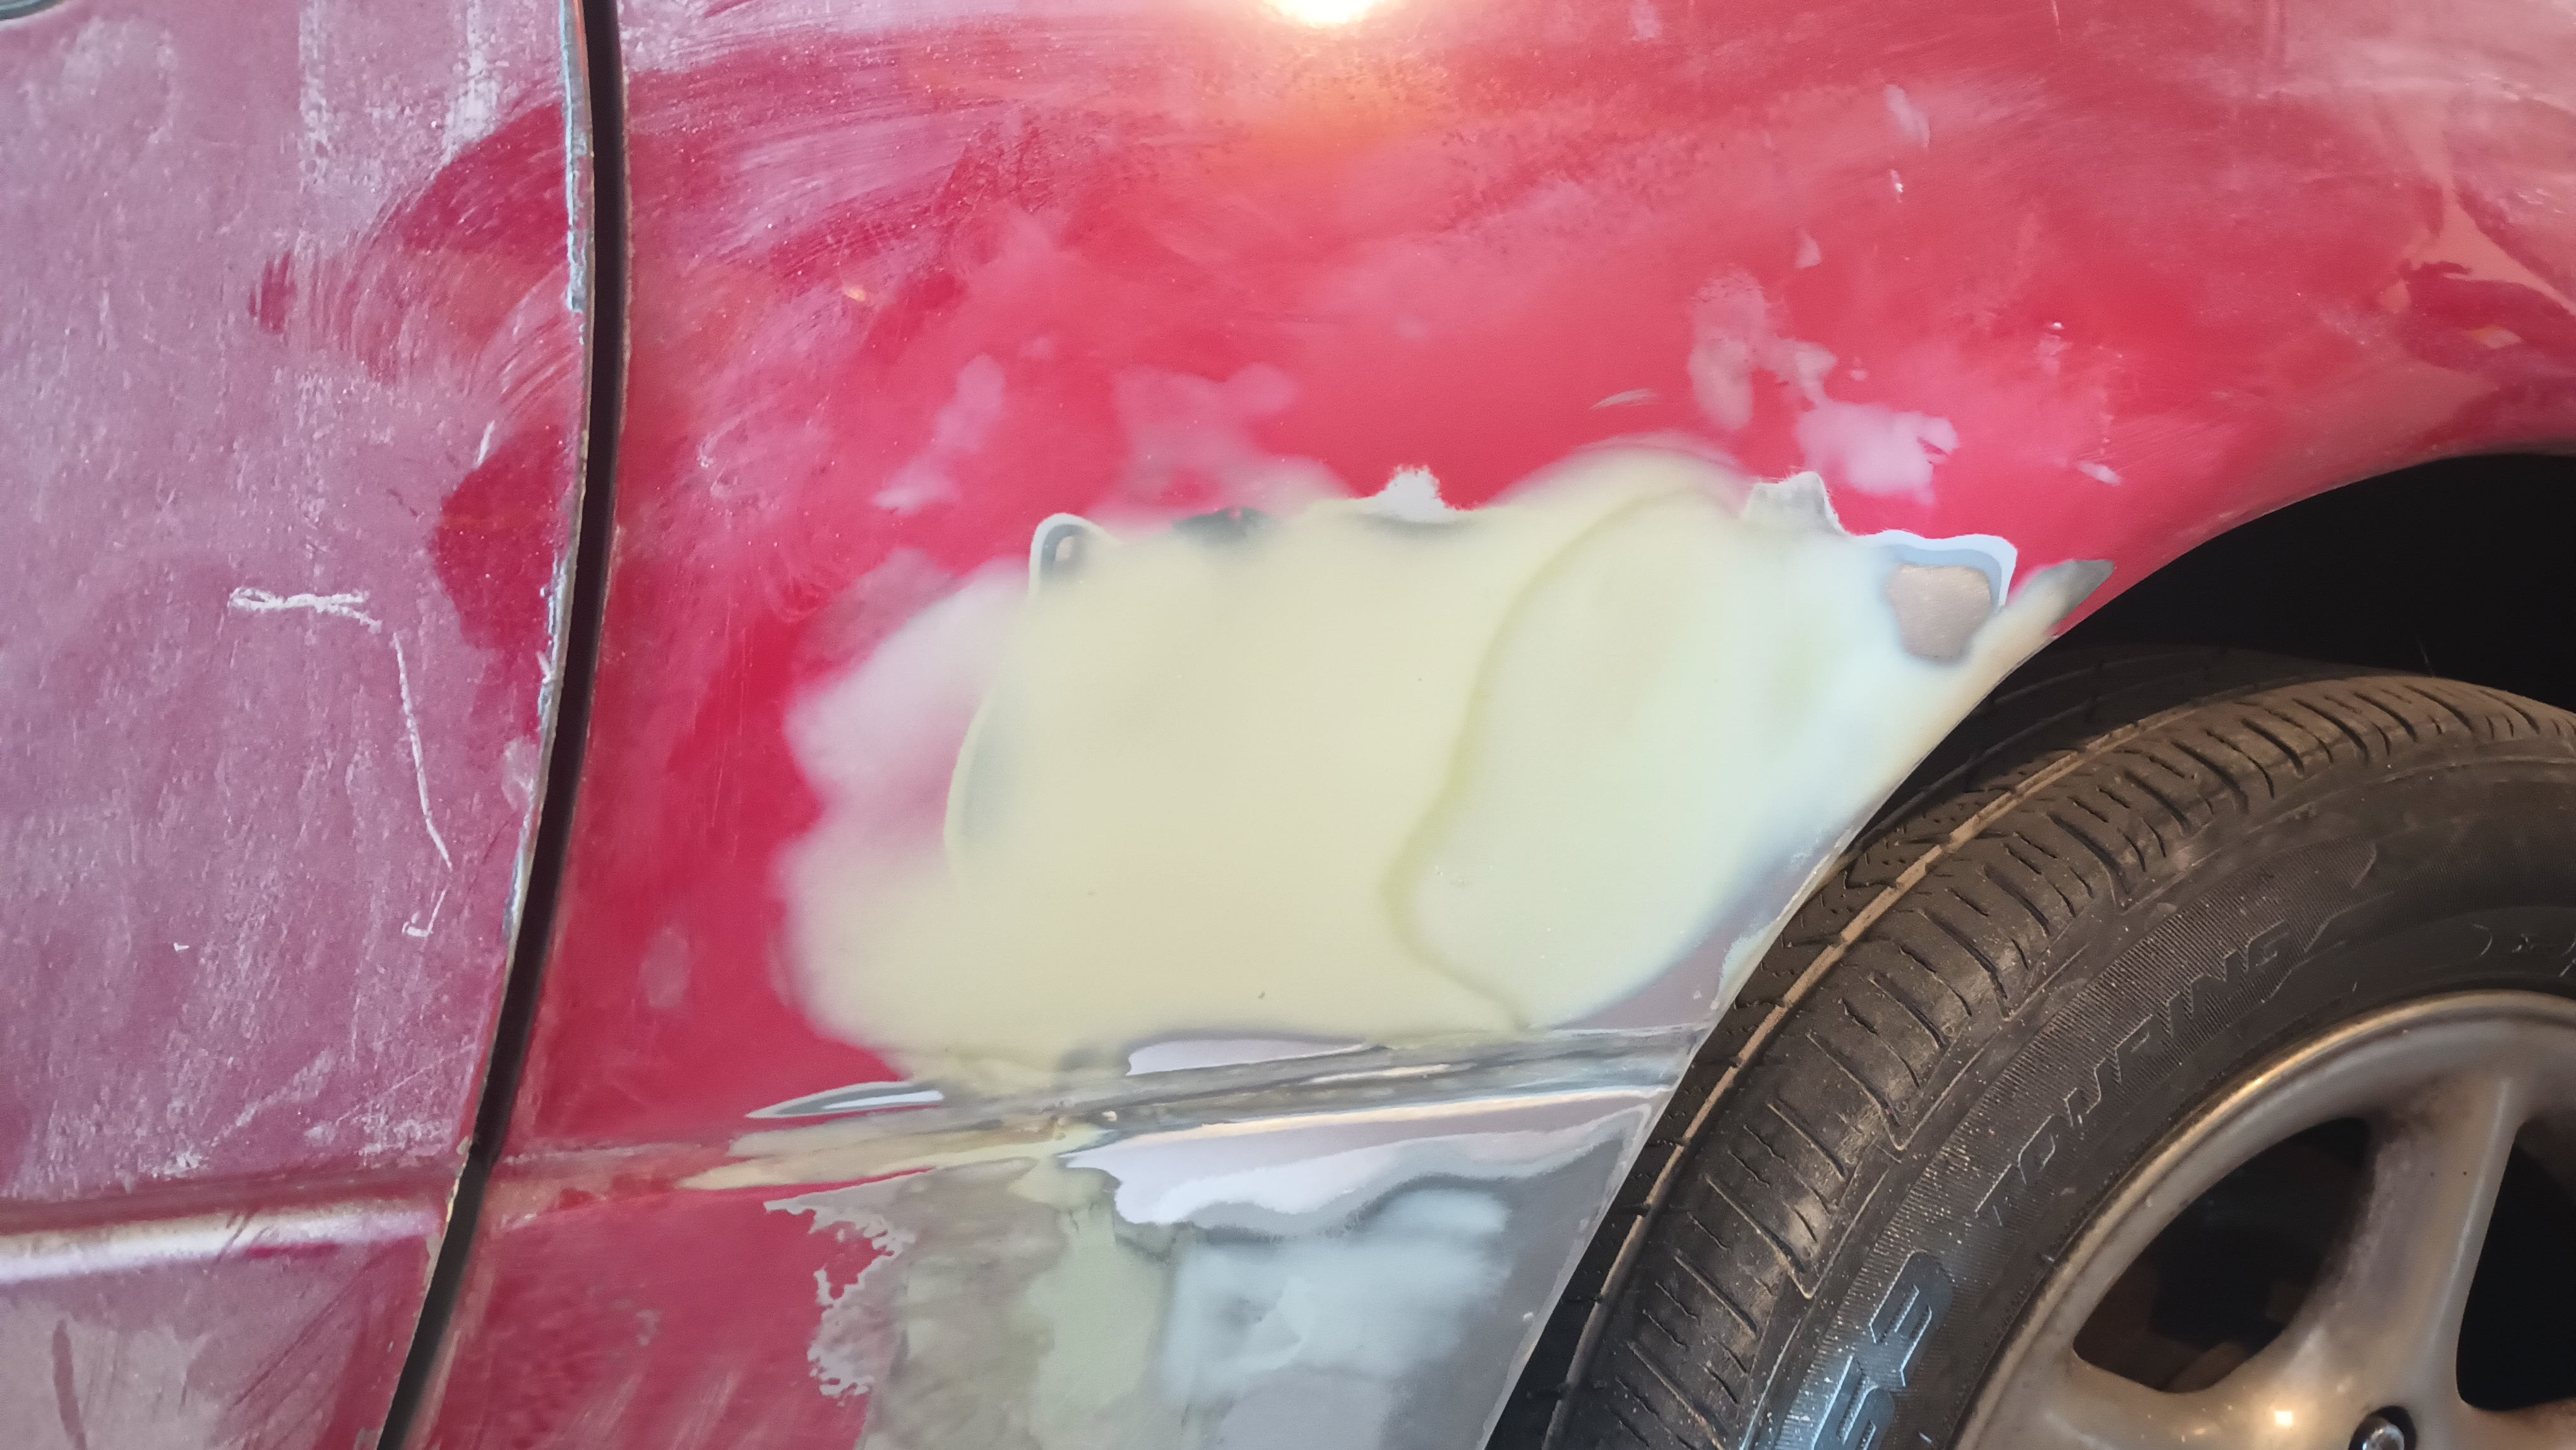
It is certainly not perfect, but I think it's pretty good.
I need to give the lower half a little bit of sanding to clean it up a little and take out the sanding grooves, then do the same to the right side, give it another quick skim coat, and then more sanding. I may need to put a little glazing putty in the pinholes as well. But the left side is now almost perfectly smooth with only the slightest little bit of bump that can be felt under the paper towel. It's so slight that you have to go real slow to notice it and it doesn't cast any weird shadows when I put the super bright flashlight on it.
wae
UltimaDork
9/3/24 6:23 p.m.
Heh.. turns out that little bumplet I've been trying to work out is present on the other side of the car, too. In a place where I didn't cut! To be sure, before I got in there with the stud welder, it was a pretty big hump, so it needed to be fixed. But I think that it's even closer than I thought before.
Everything is sanded down with 320. My glazing putty is over at the shop so I'm going to pick that up tonight so I can fill the little pinholes. After a quick hit with some 800 on the DA, I'm going to call the shop down the road and see about getting it in for the paint.
wae
UltimaDork
9/4/24 11:05 a.m.
Making notes for myself:
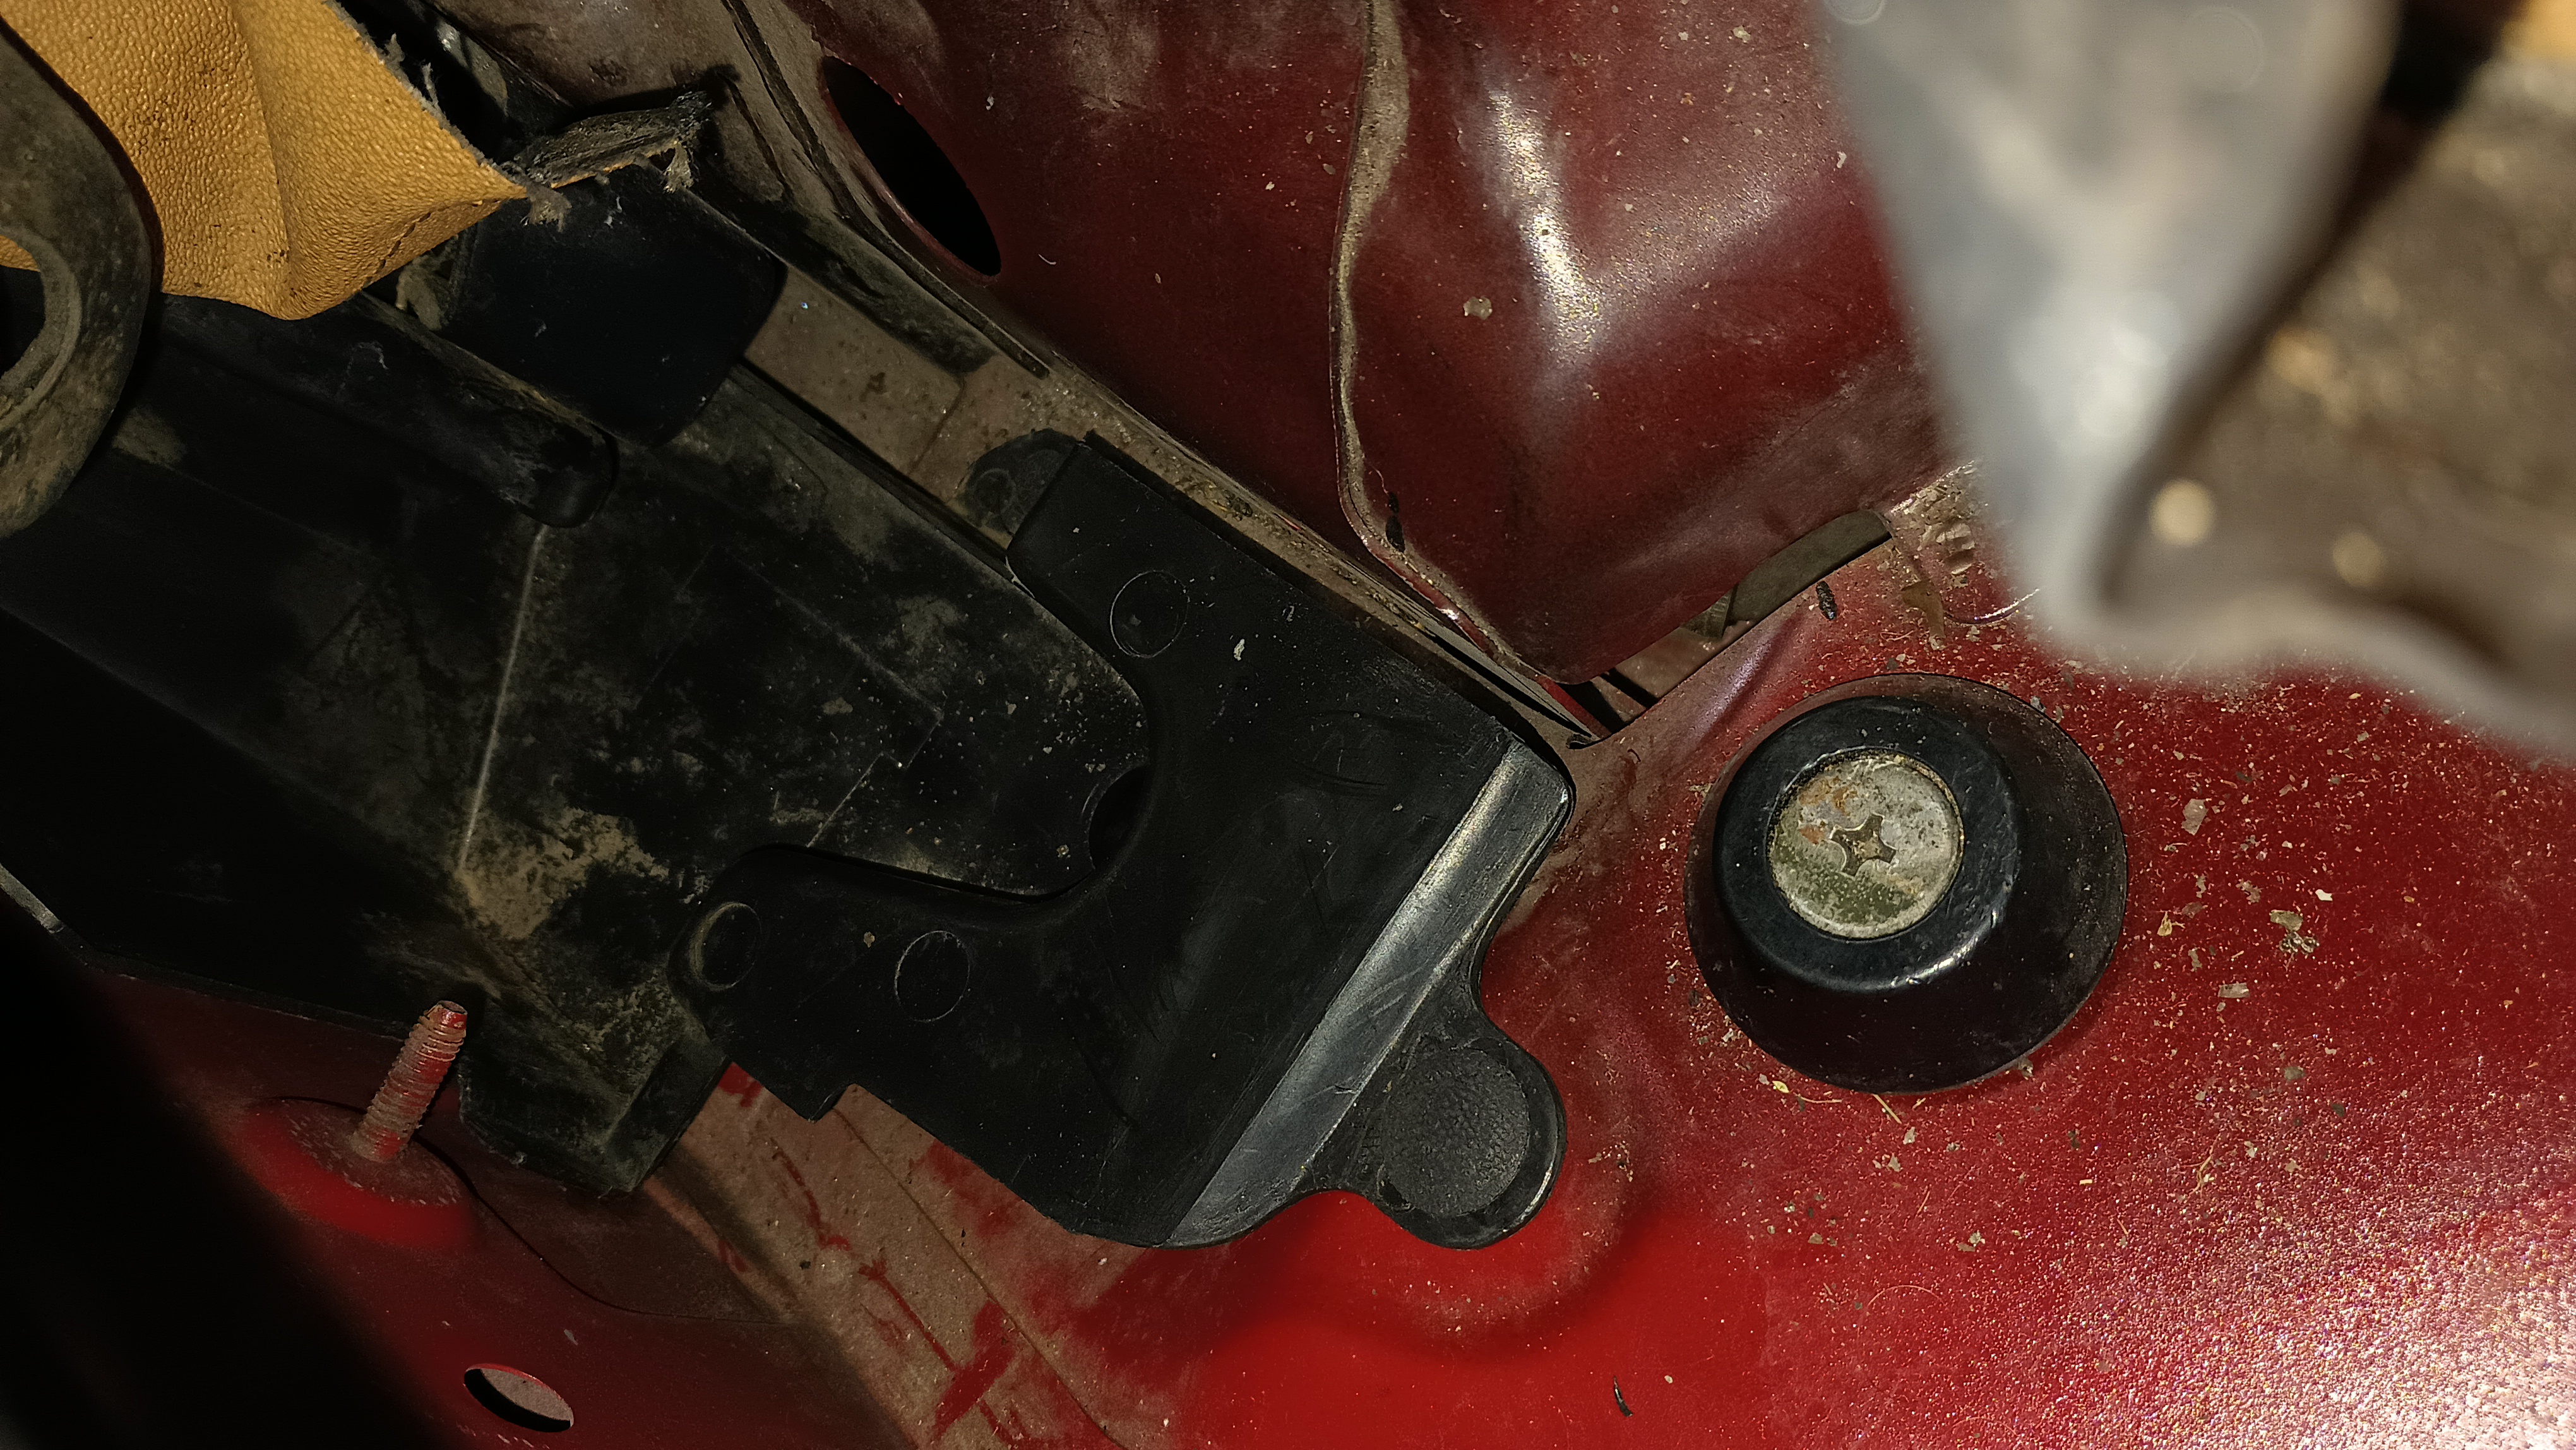
Need the three clips that hold down the rubber trim at the front of the rt headlight.
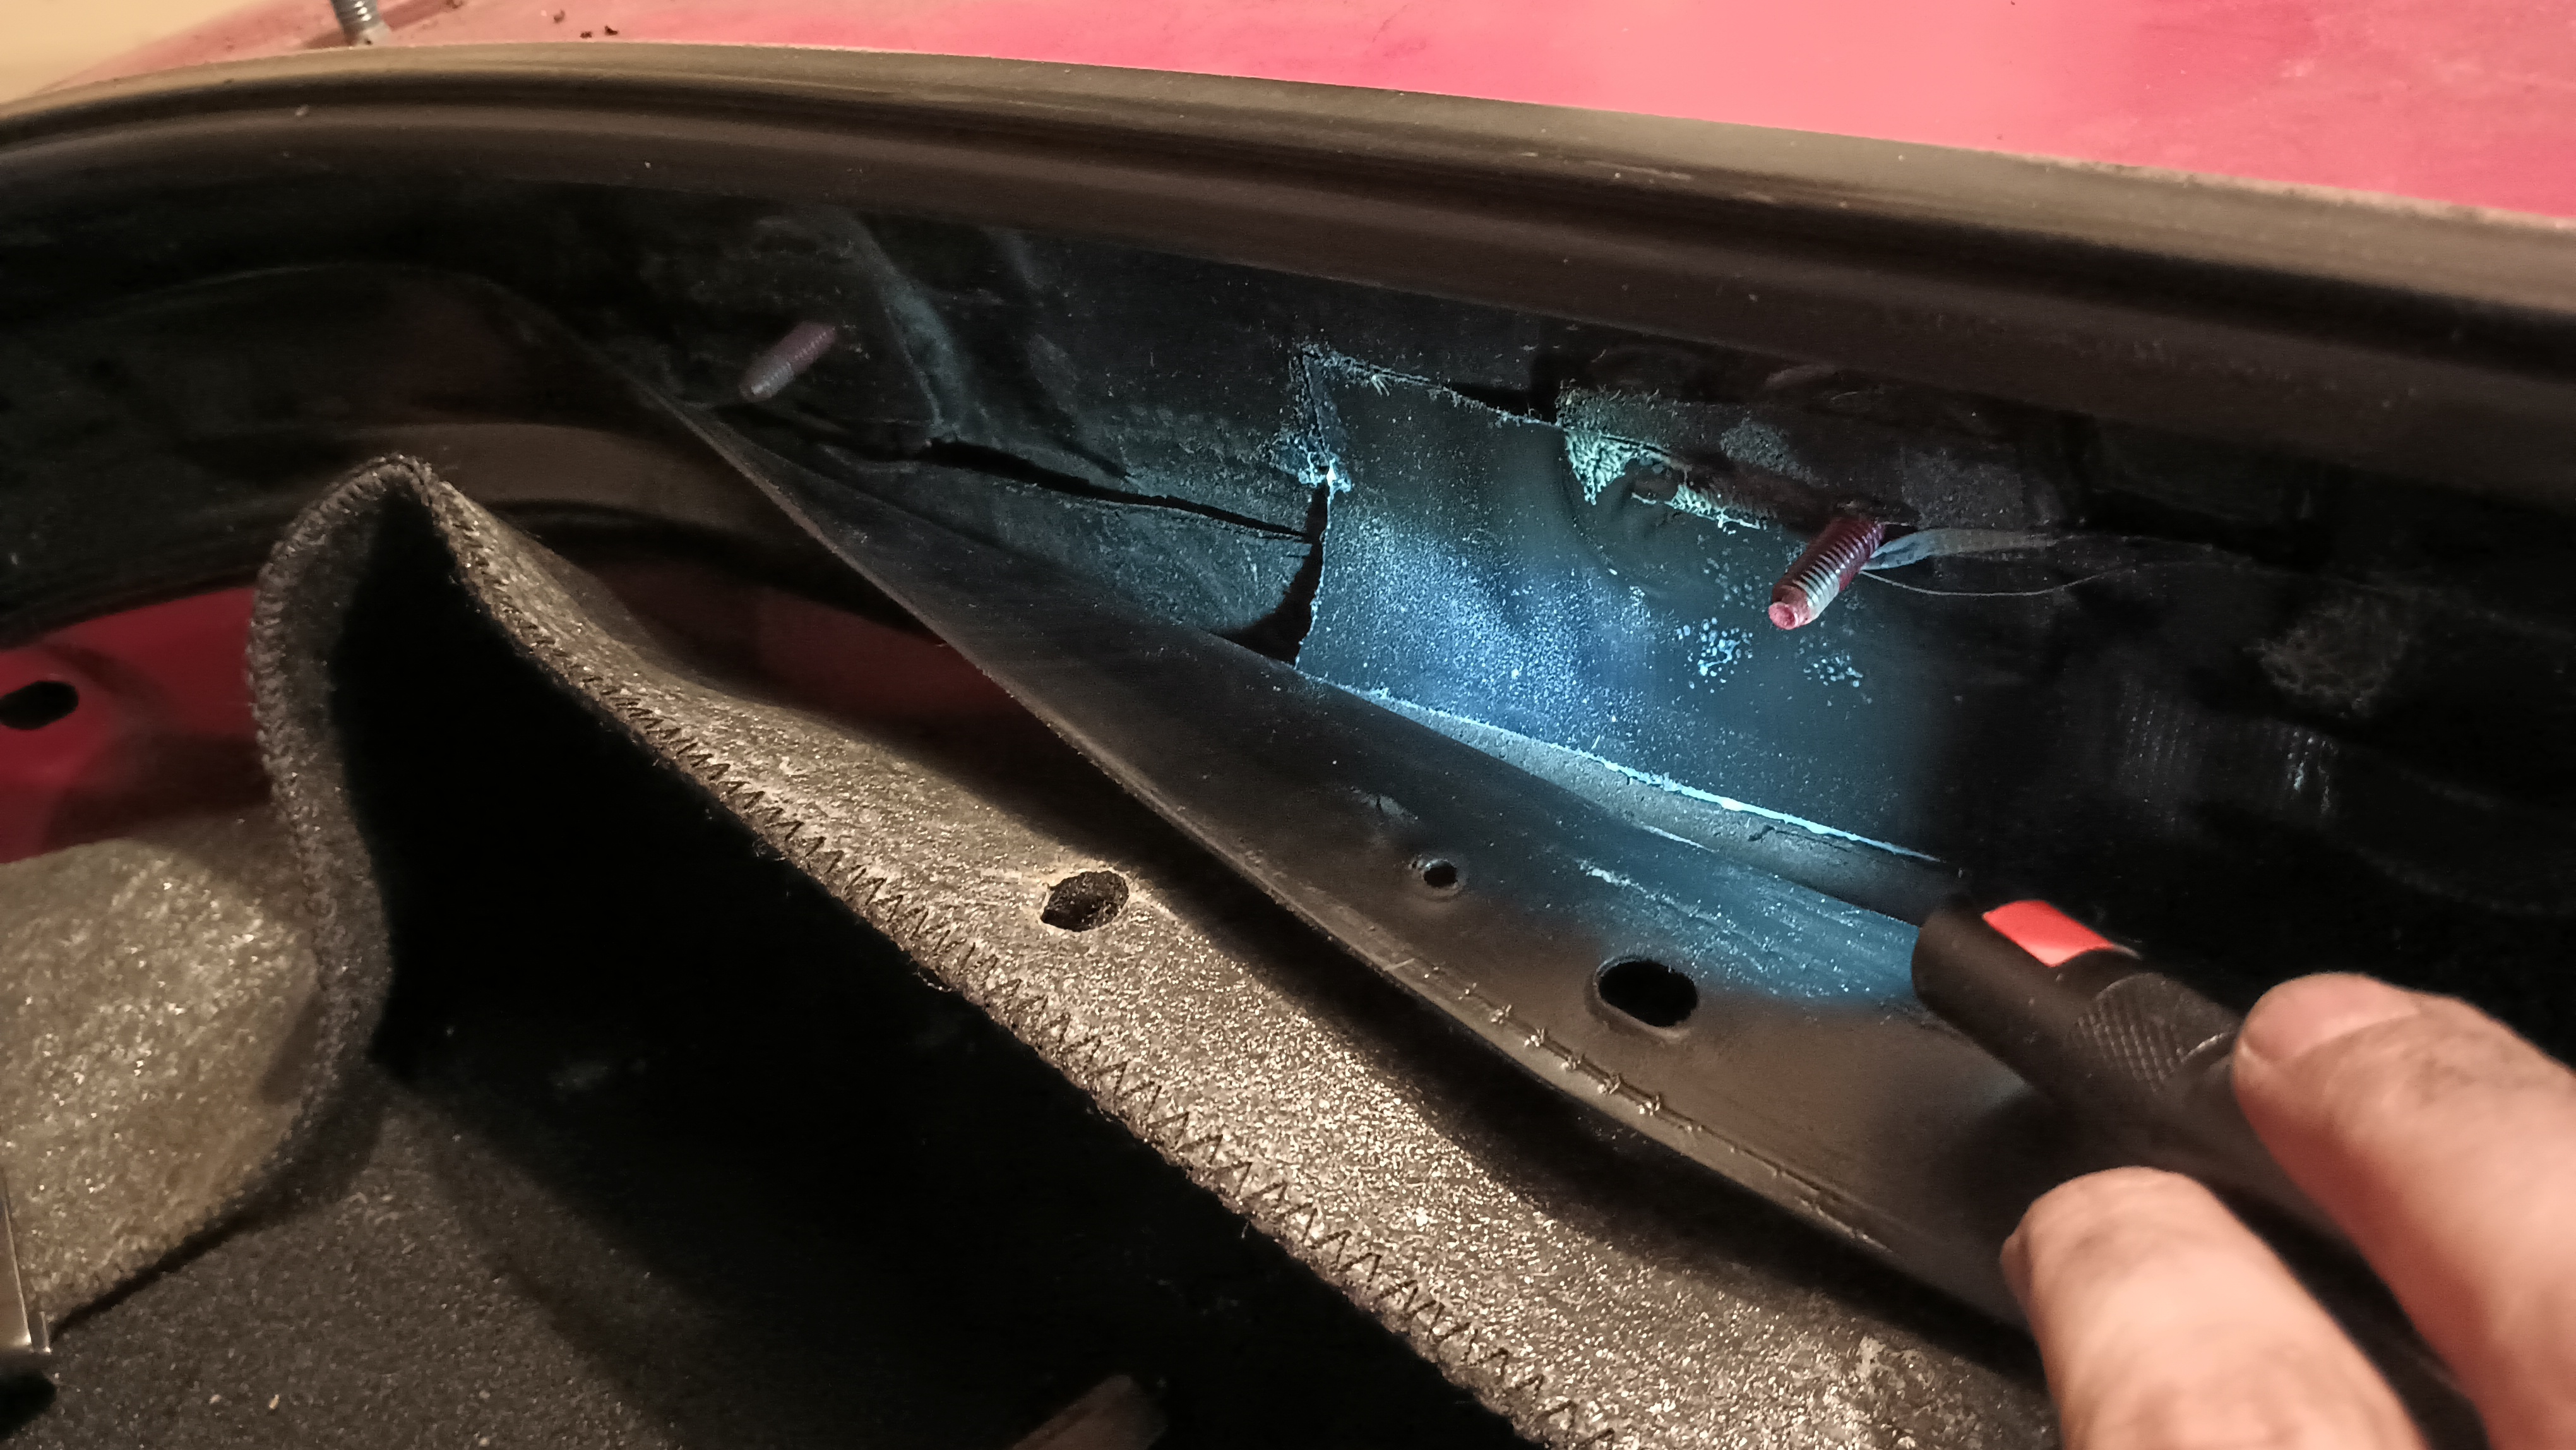
Stud to which the inner bumper brace is supposed to attach broke off on removal. Need to come up with some sort of solution for that - I think I'll wind up cutting it flush and either welding on a new stud or drilling and tapping a hole.
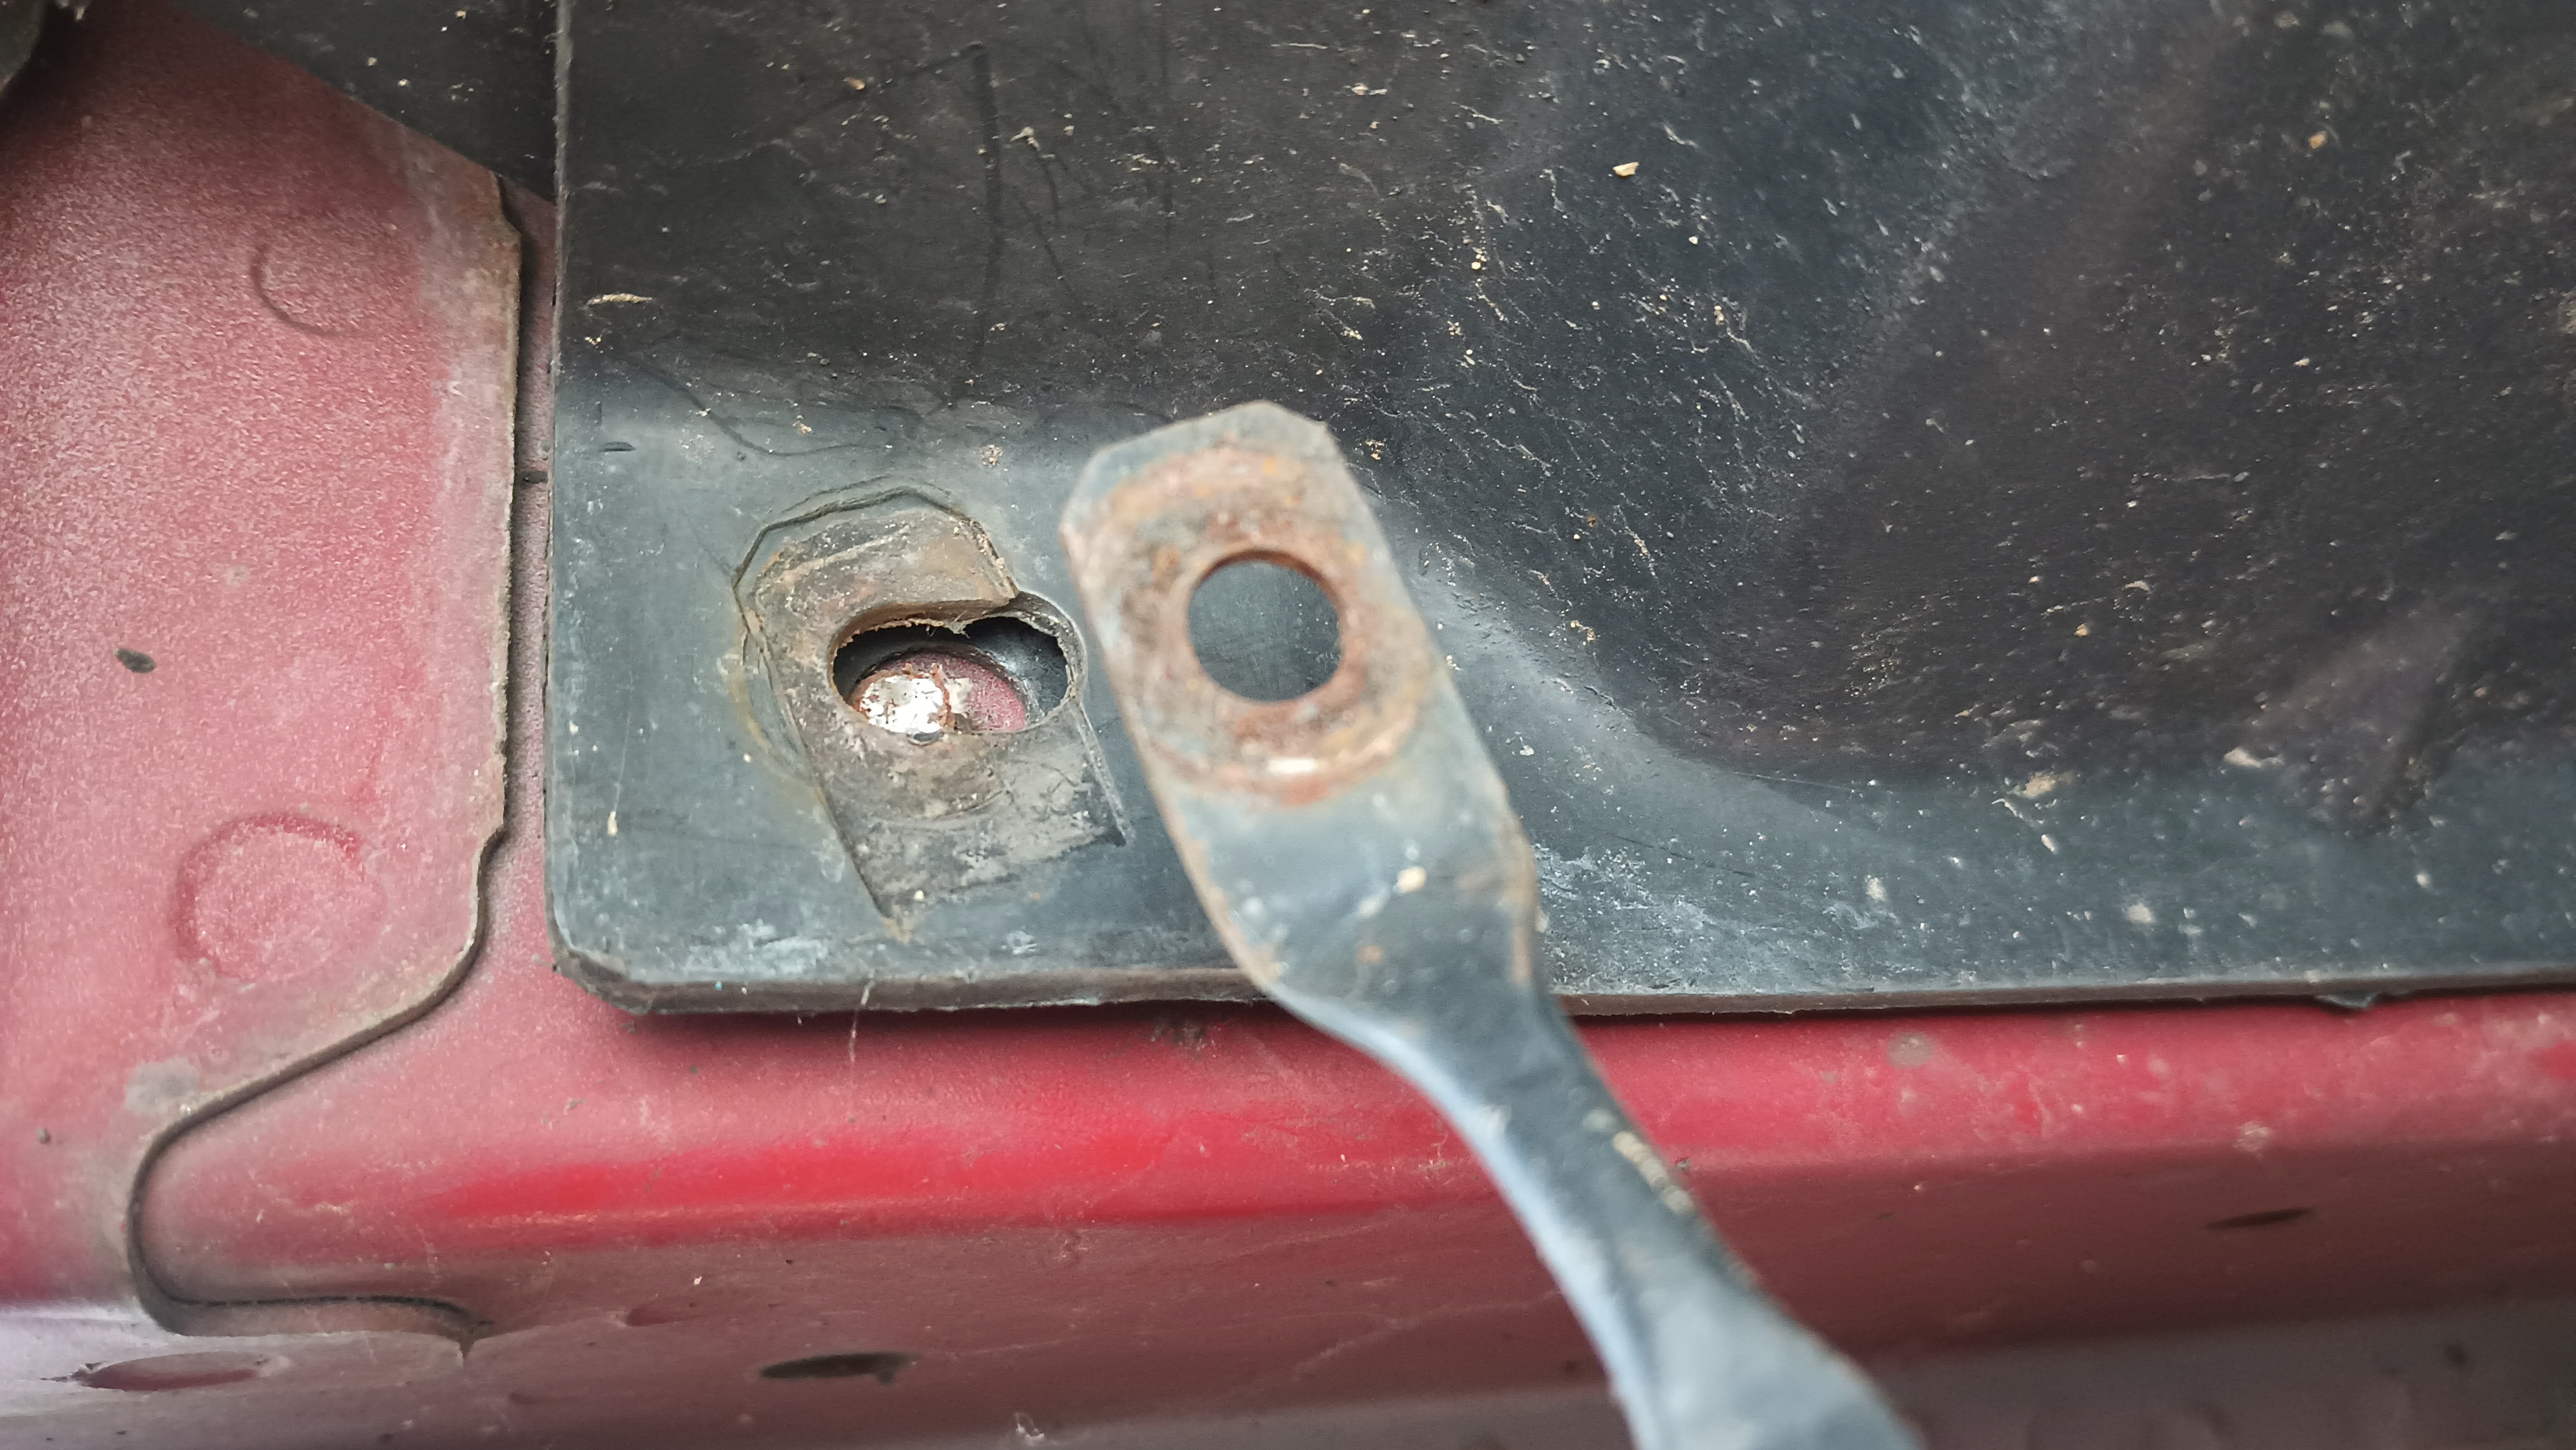
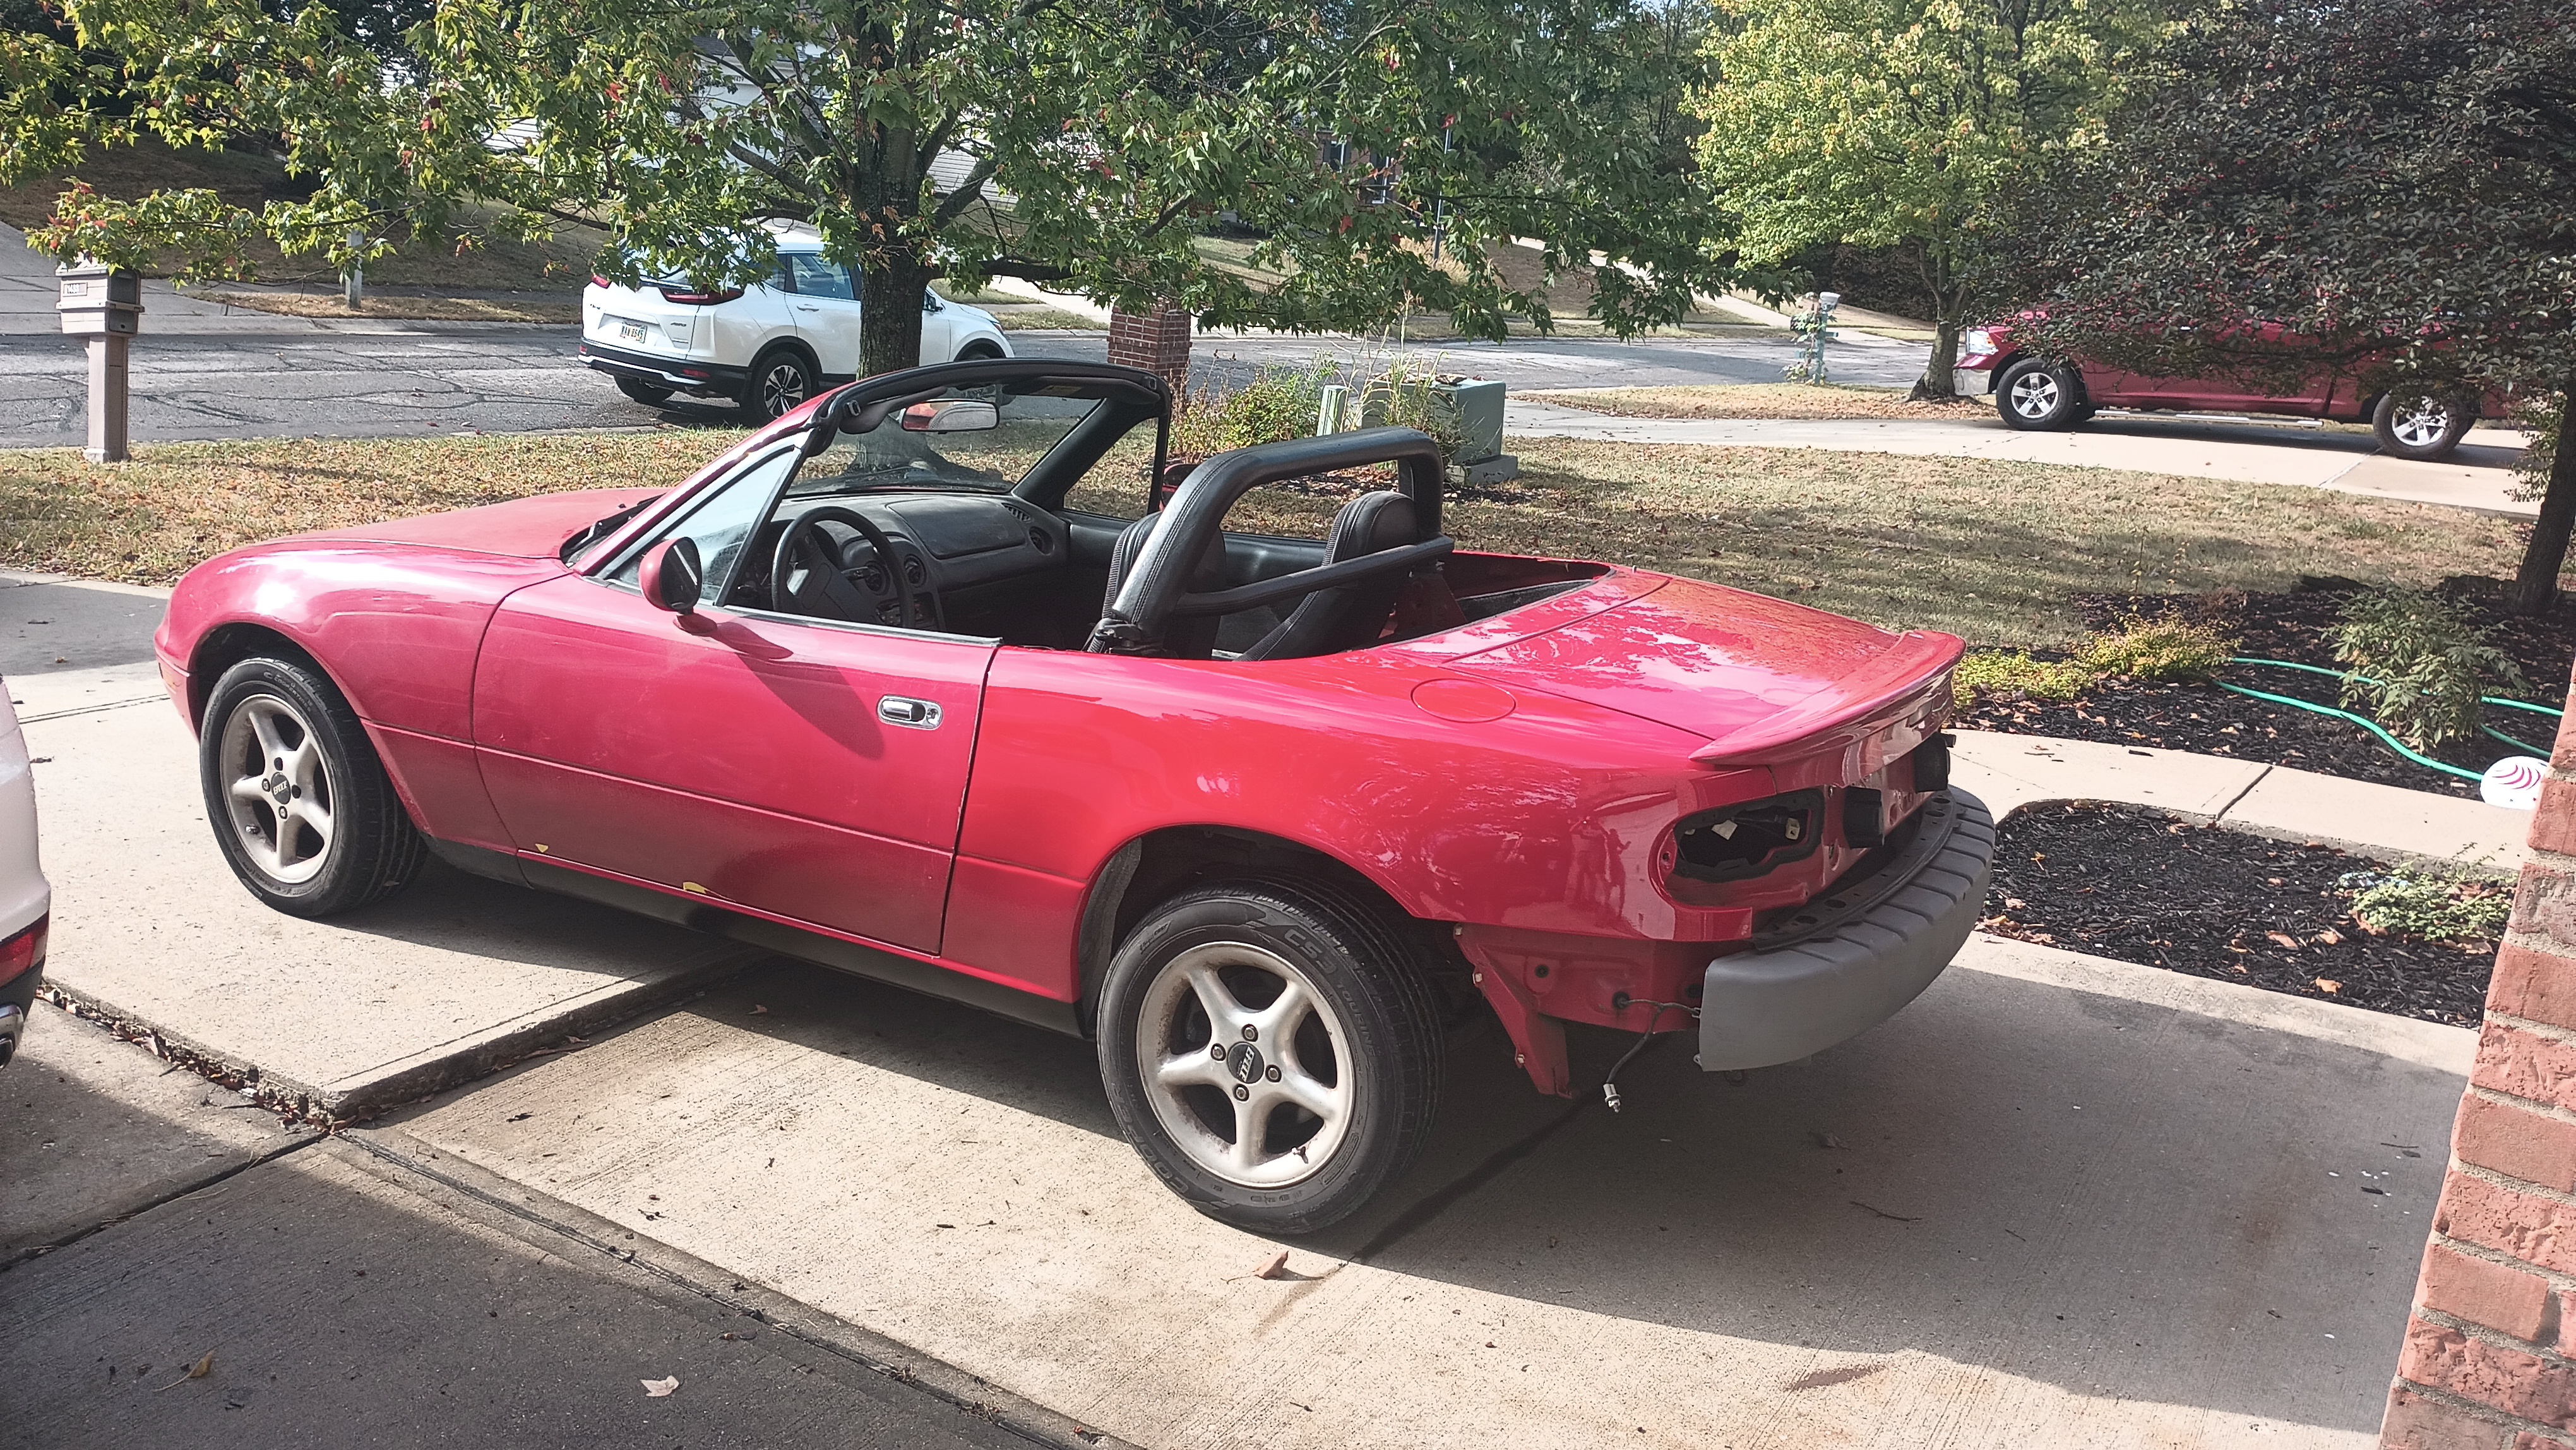
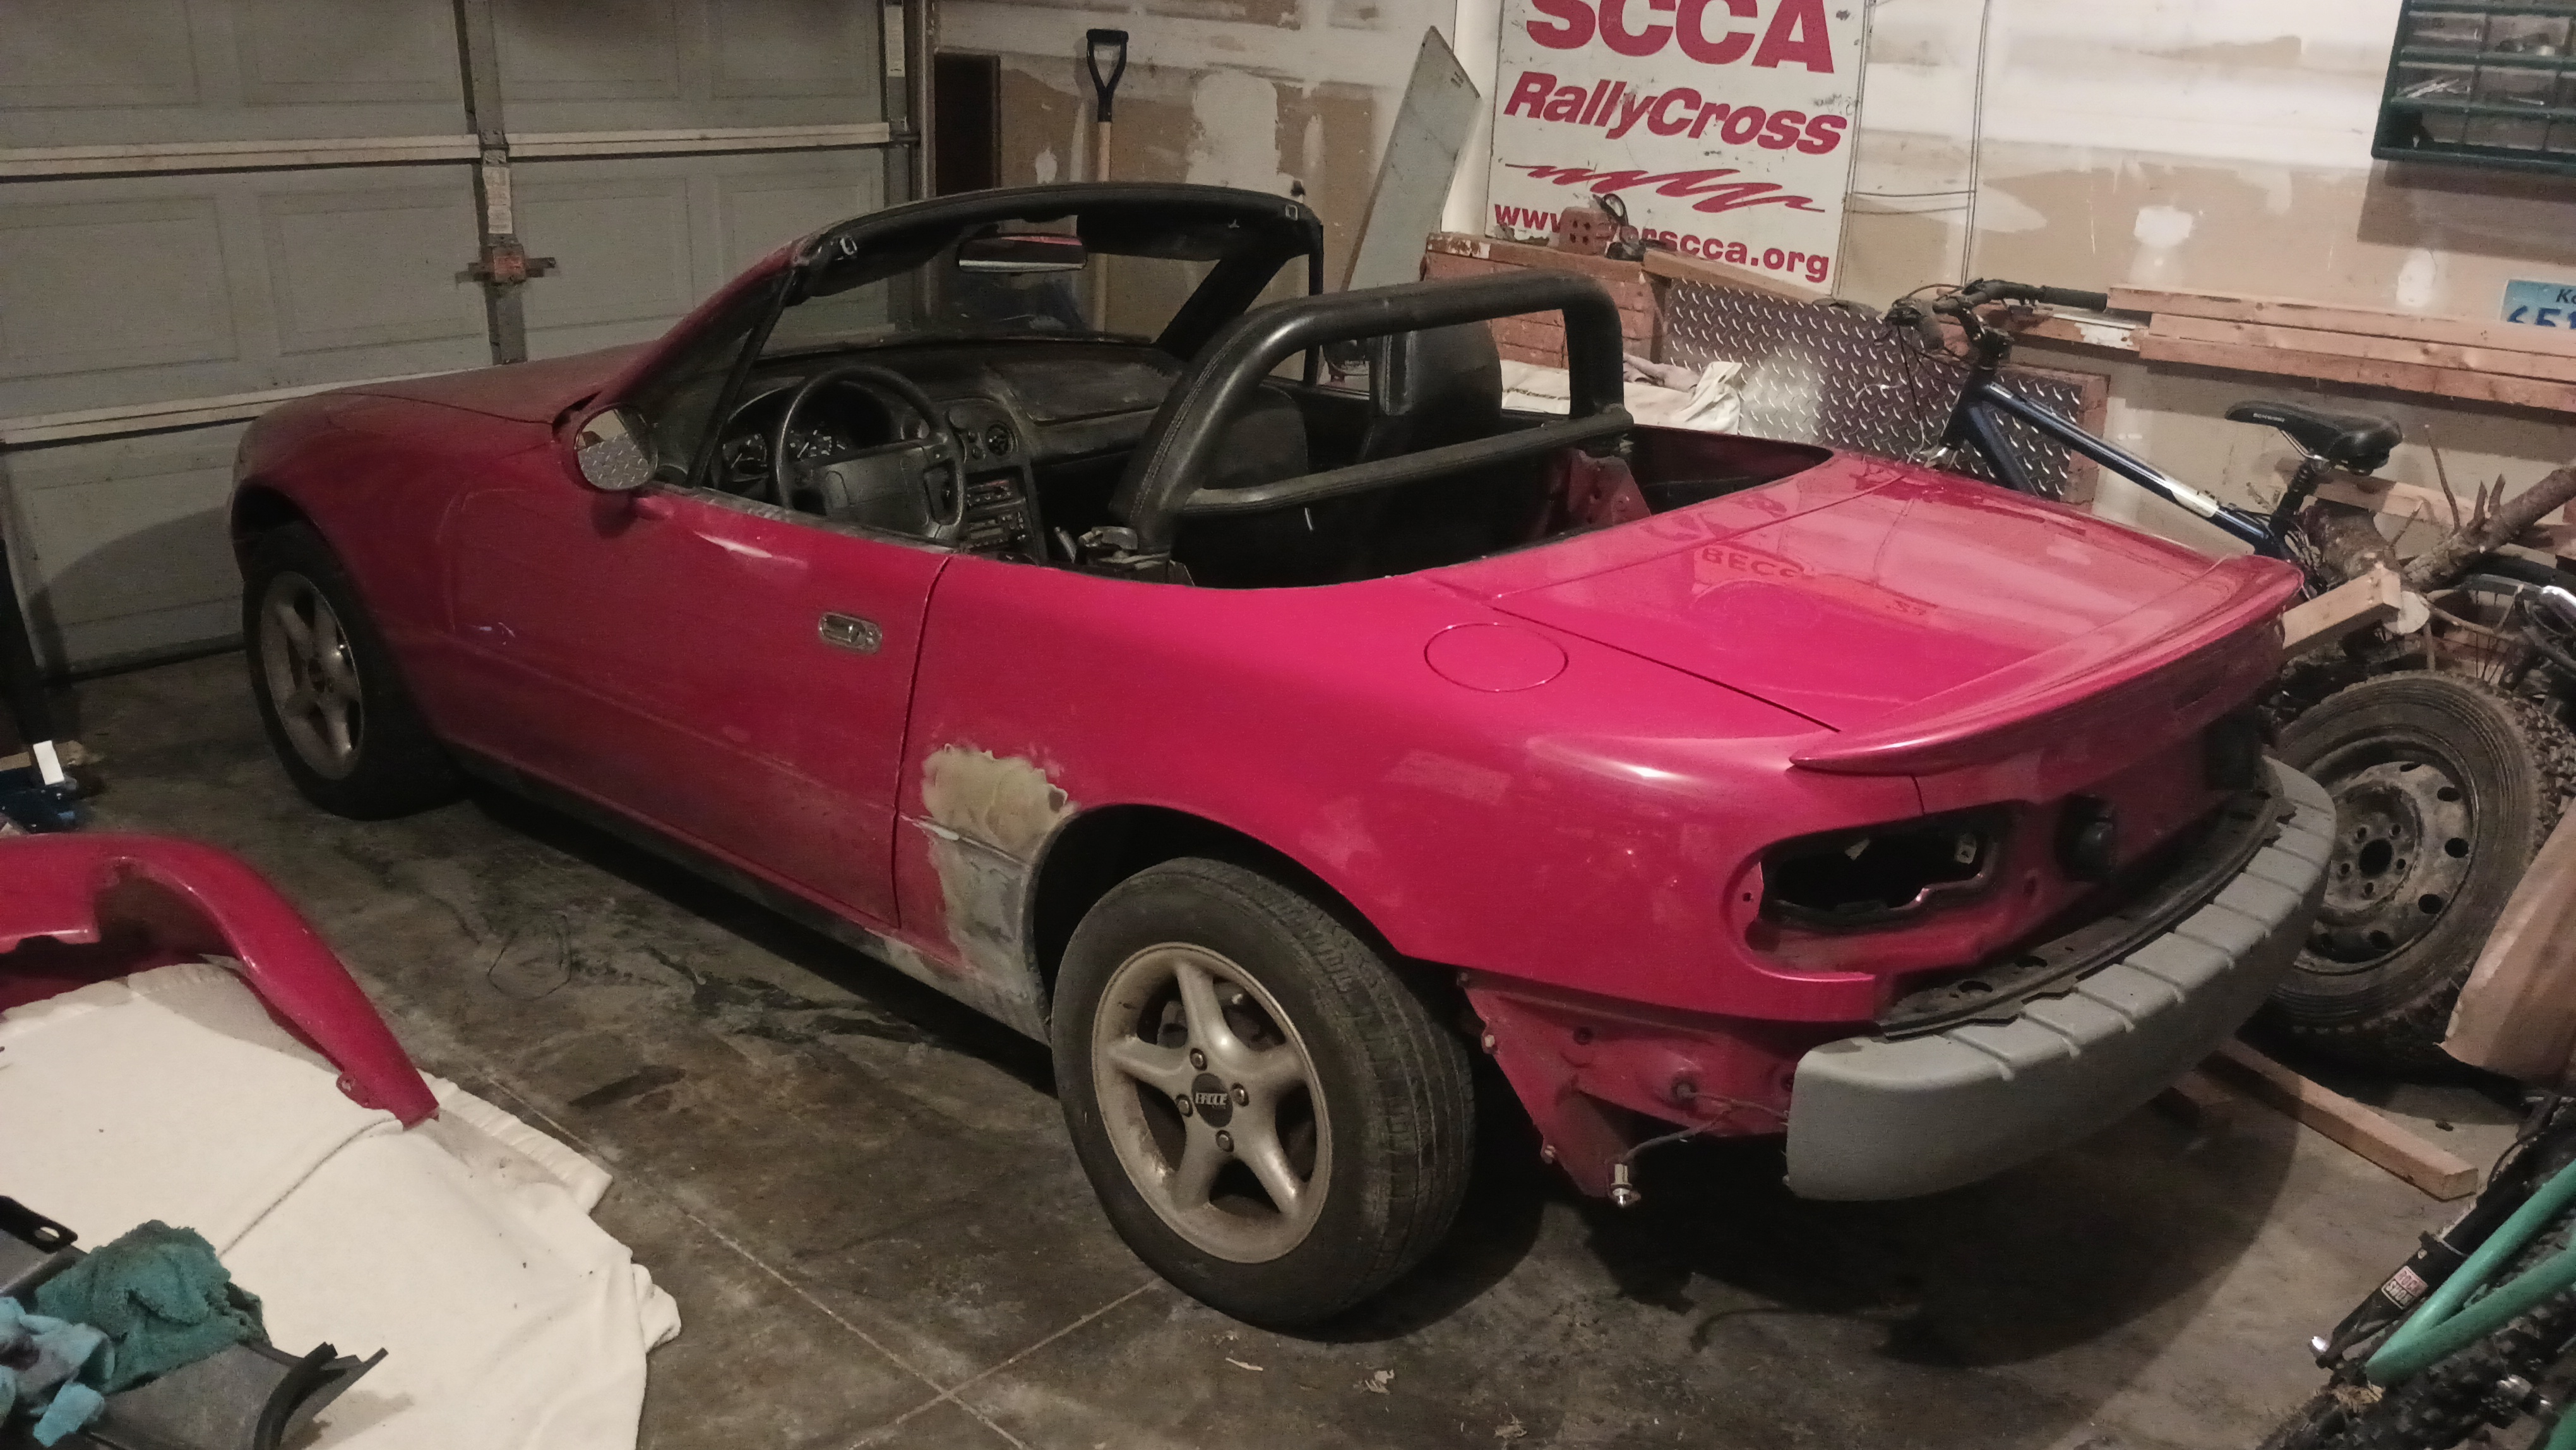
Other than that one connection and that rubber flap in front of the headlight, the front of the car is back together:
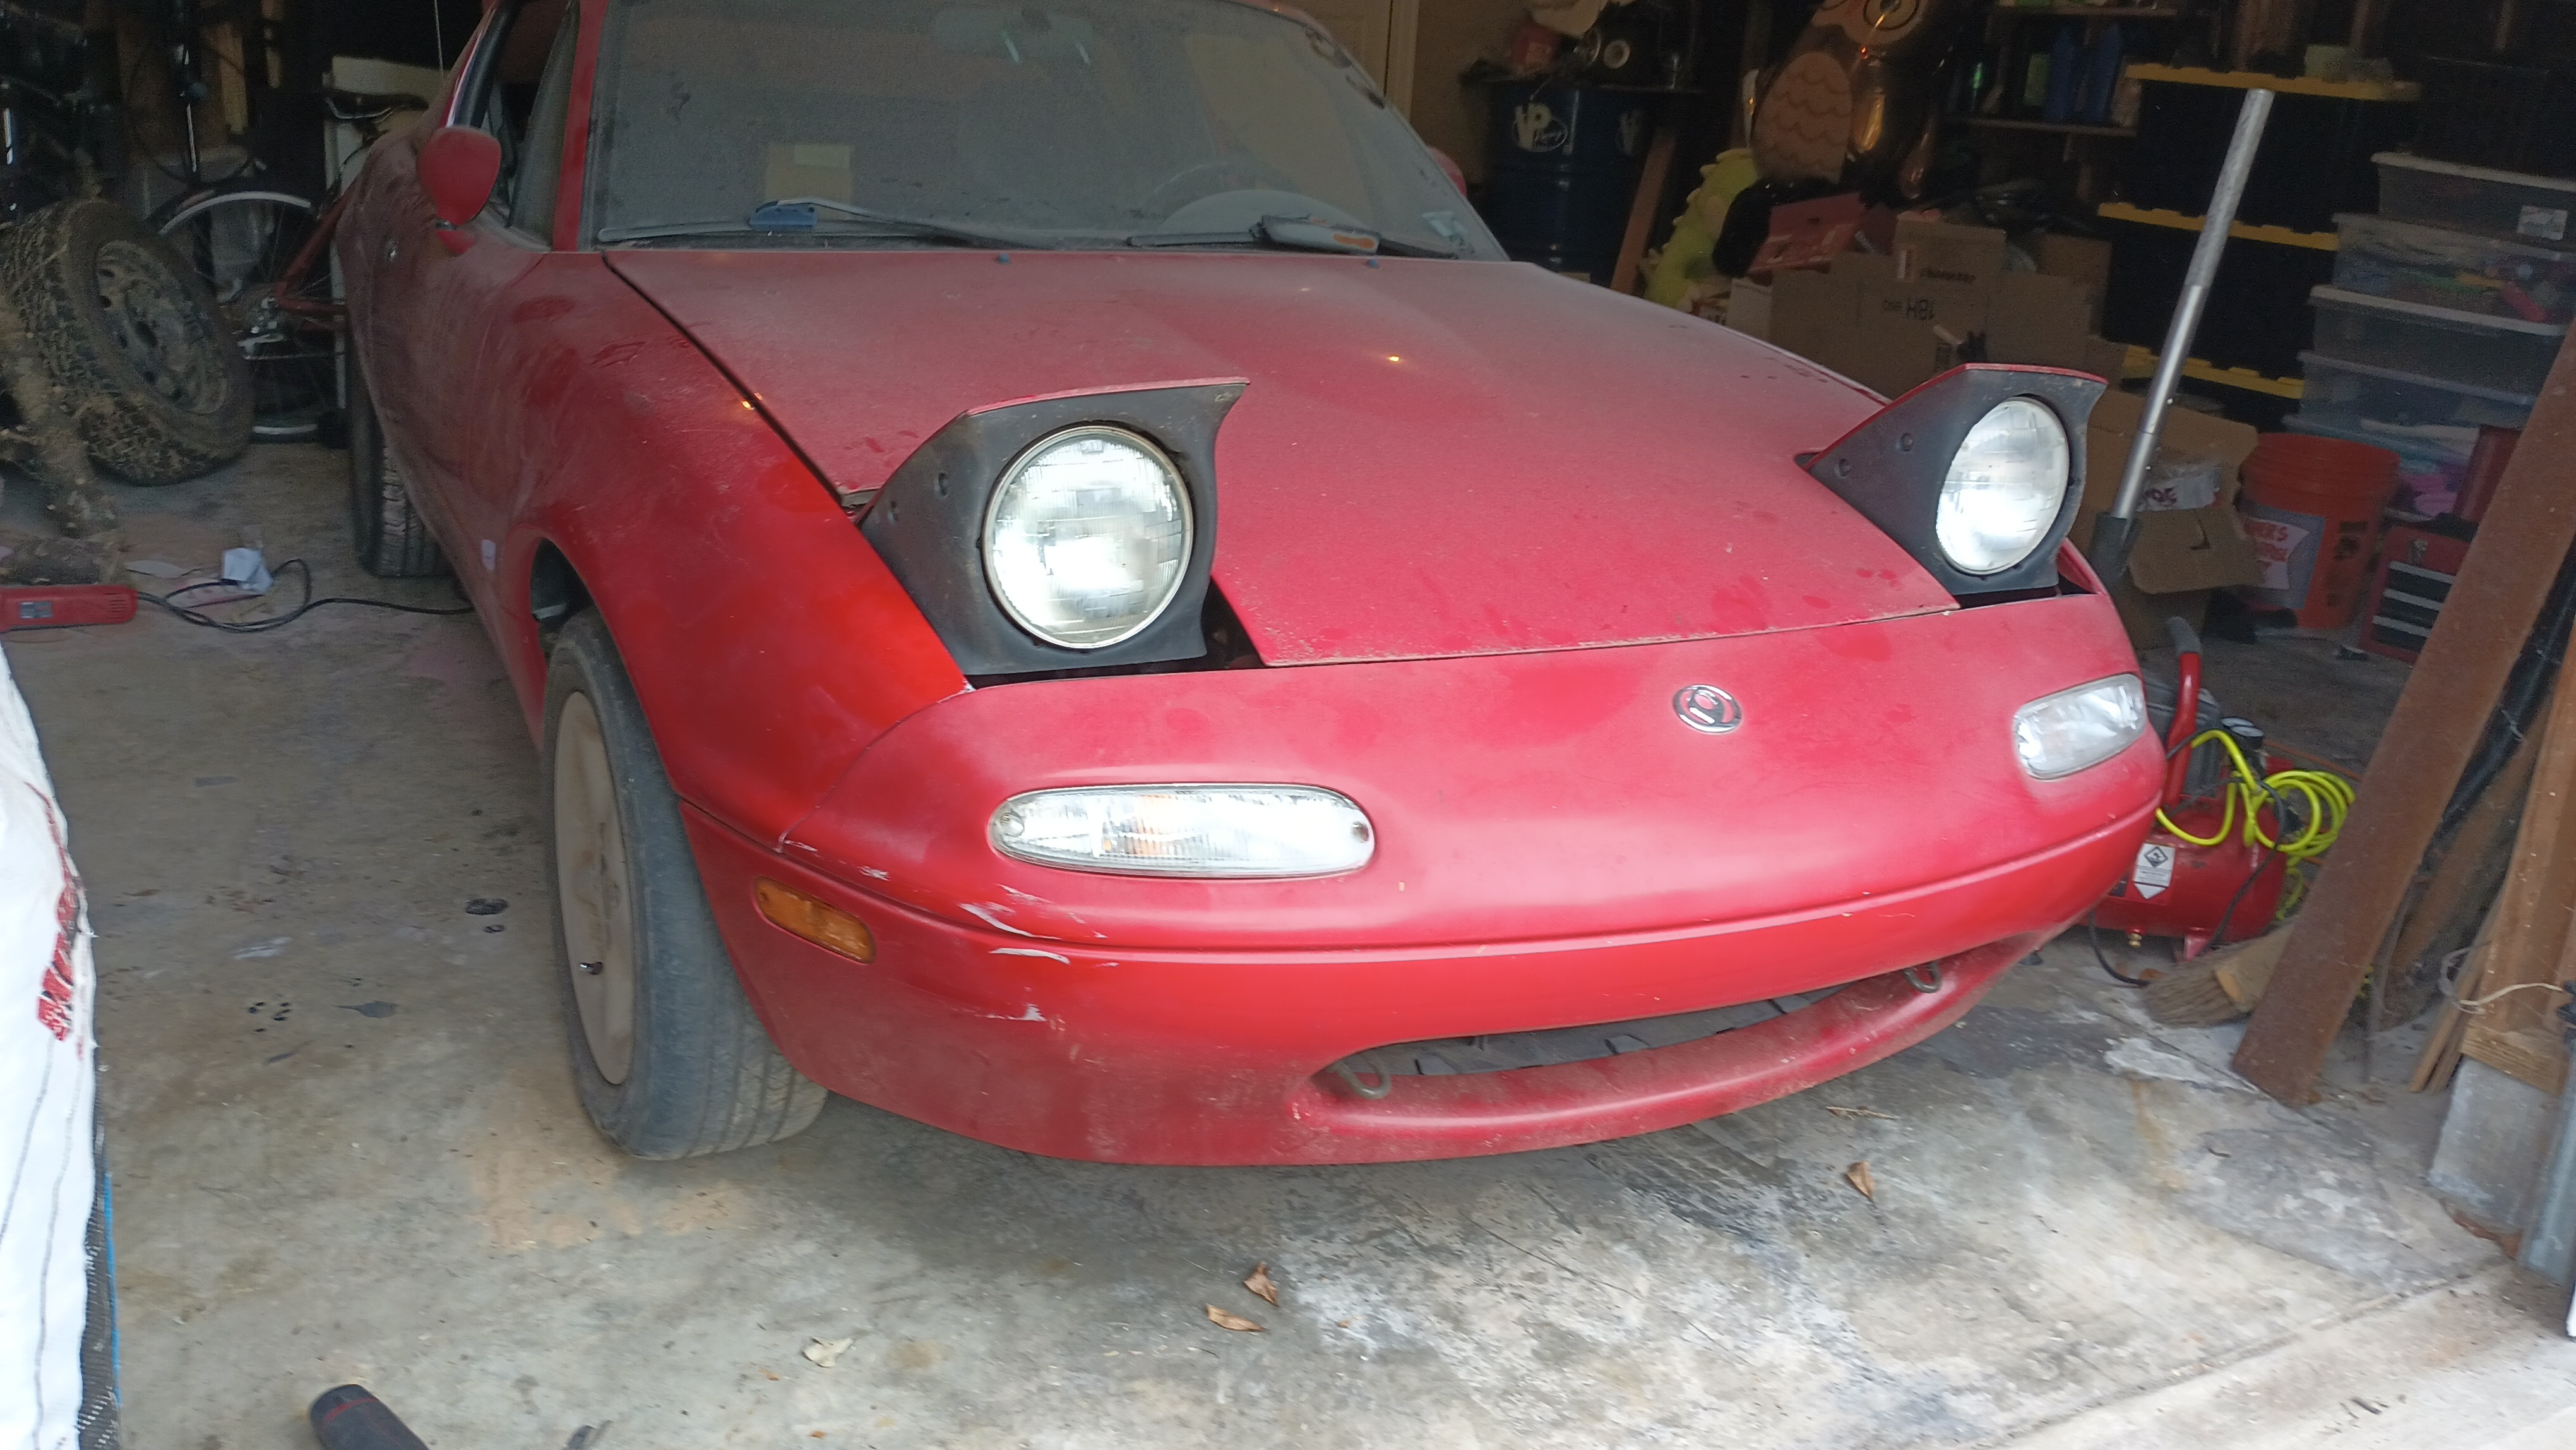
While it was off the car, the front edge of the fender got a little bit of a bend in it so it'll need to be touched up and maybe bent a little more, but I'm not too worried about that yet. The marks on the bumper will come off with a little bit of rubbing, so that'll come out pretty easily.
I put a little glazing putty on the sides and once it dried, I hit it with the DA with some 800. It's beautifully smooth and seems like it's pretty close to perfect. I just have to sand the character line on the left side one last time. Once that's done, I need to clean it up a bit before taking it to paint, but I've got to do it without getting anything wet.
I suspect there are a non-trivial number of Miatas running around without that bumper brace. Not saying you don't want it - my cars have it - but your failure is common and the car doesn't seem to suffer too badly for the lack. The bottom corner of the bumper can start to spread, that's the main problem.
wae
UltimaDork
9/6/24 2:45 p.m.
Took the Miata over to the body shop this afternoon. The official quote is for about $1900 but he said I'd drop it down to about $1300 if I took off the bumper, tail lights, convertible top, hard top, and the weatherstripping at the base of the top. Since he can't get me in until the 19th regardless, I'm going to take it back home and do all those things myself. The top needs to come off anyway since I've got a replacement to install.
I say that I'm going to take it back home because I got about a third of the way back from the shop when I discovered that the lugs nuts were a bit loose, so we're going back to fetch a socket.
wae
UltimaDork
9/8/24 9:57 p.m.
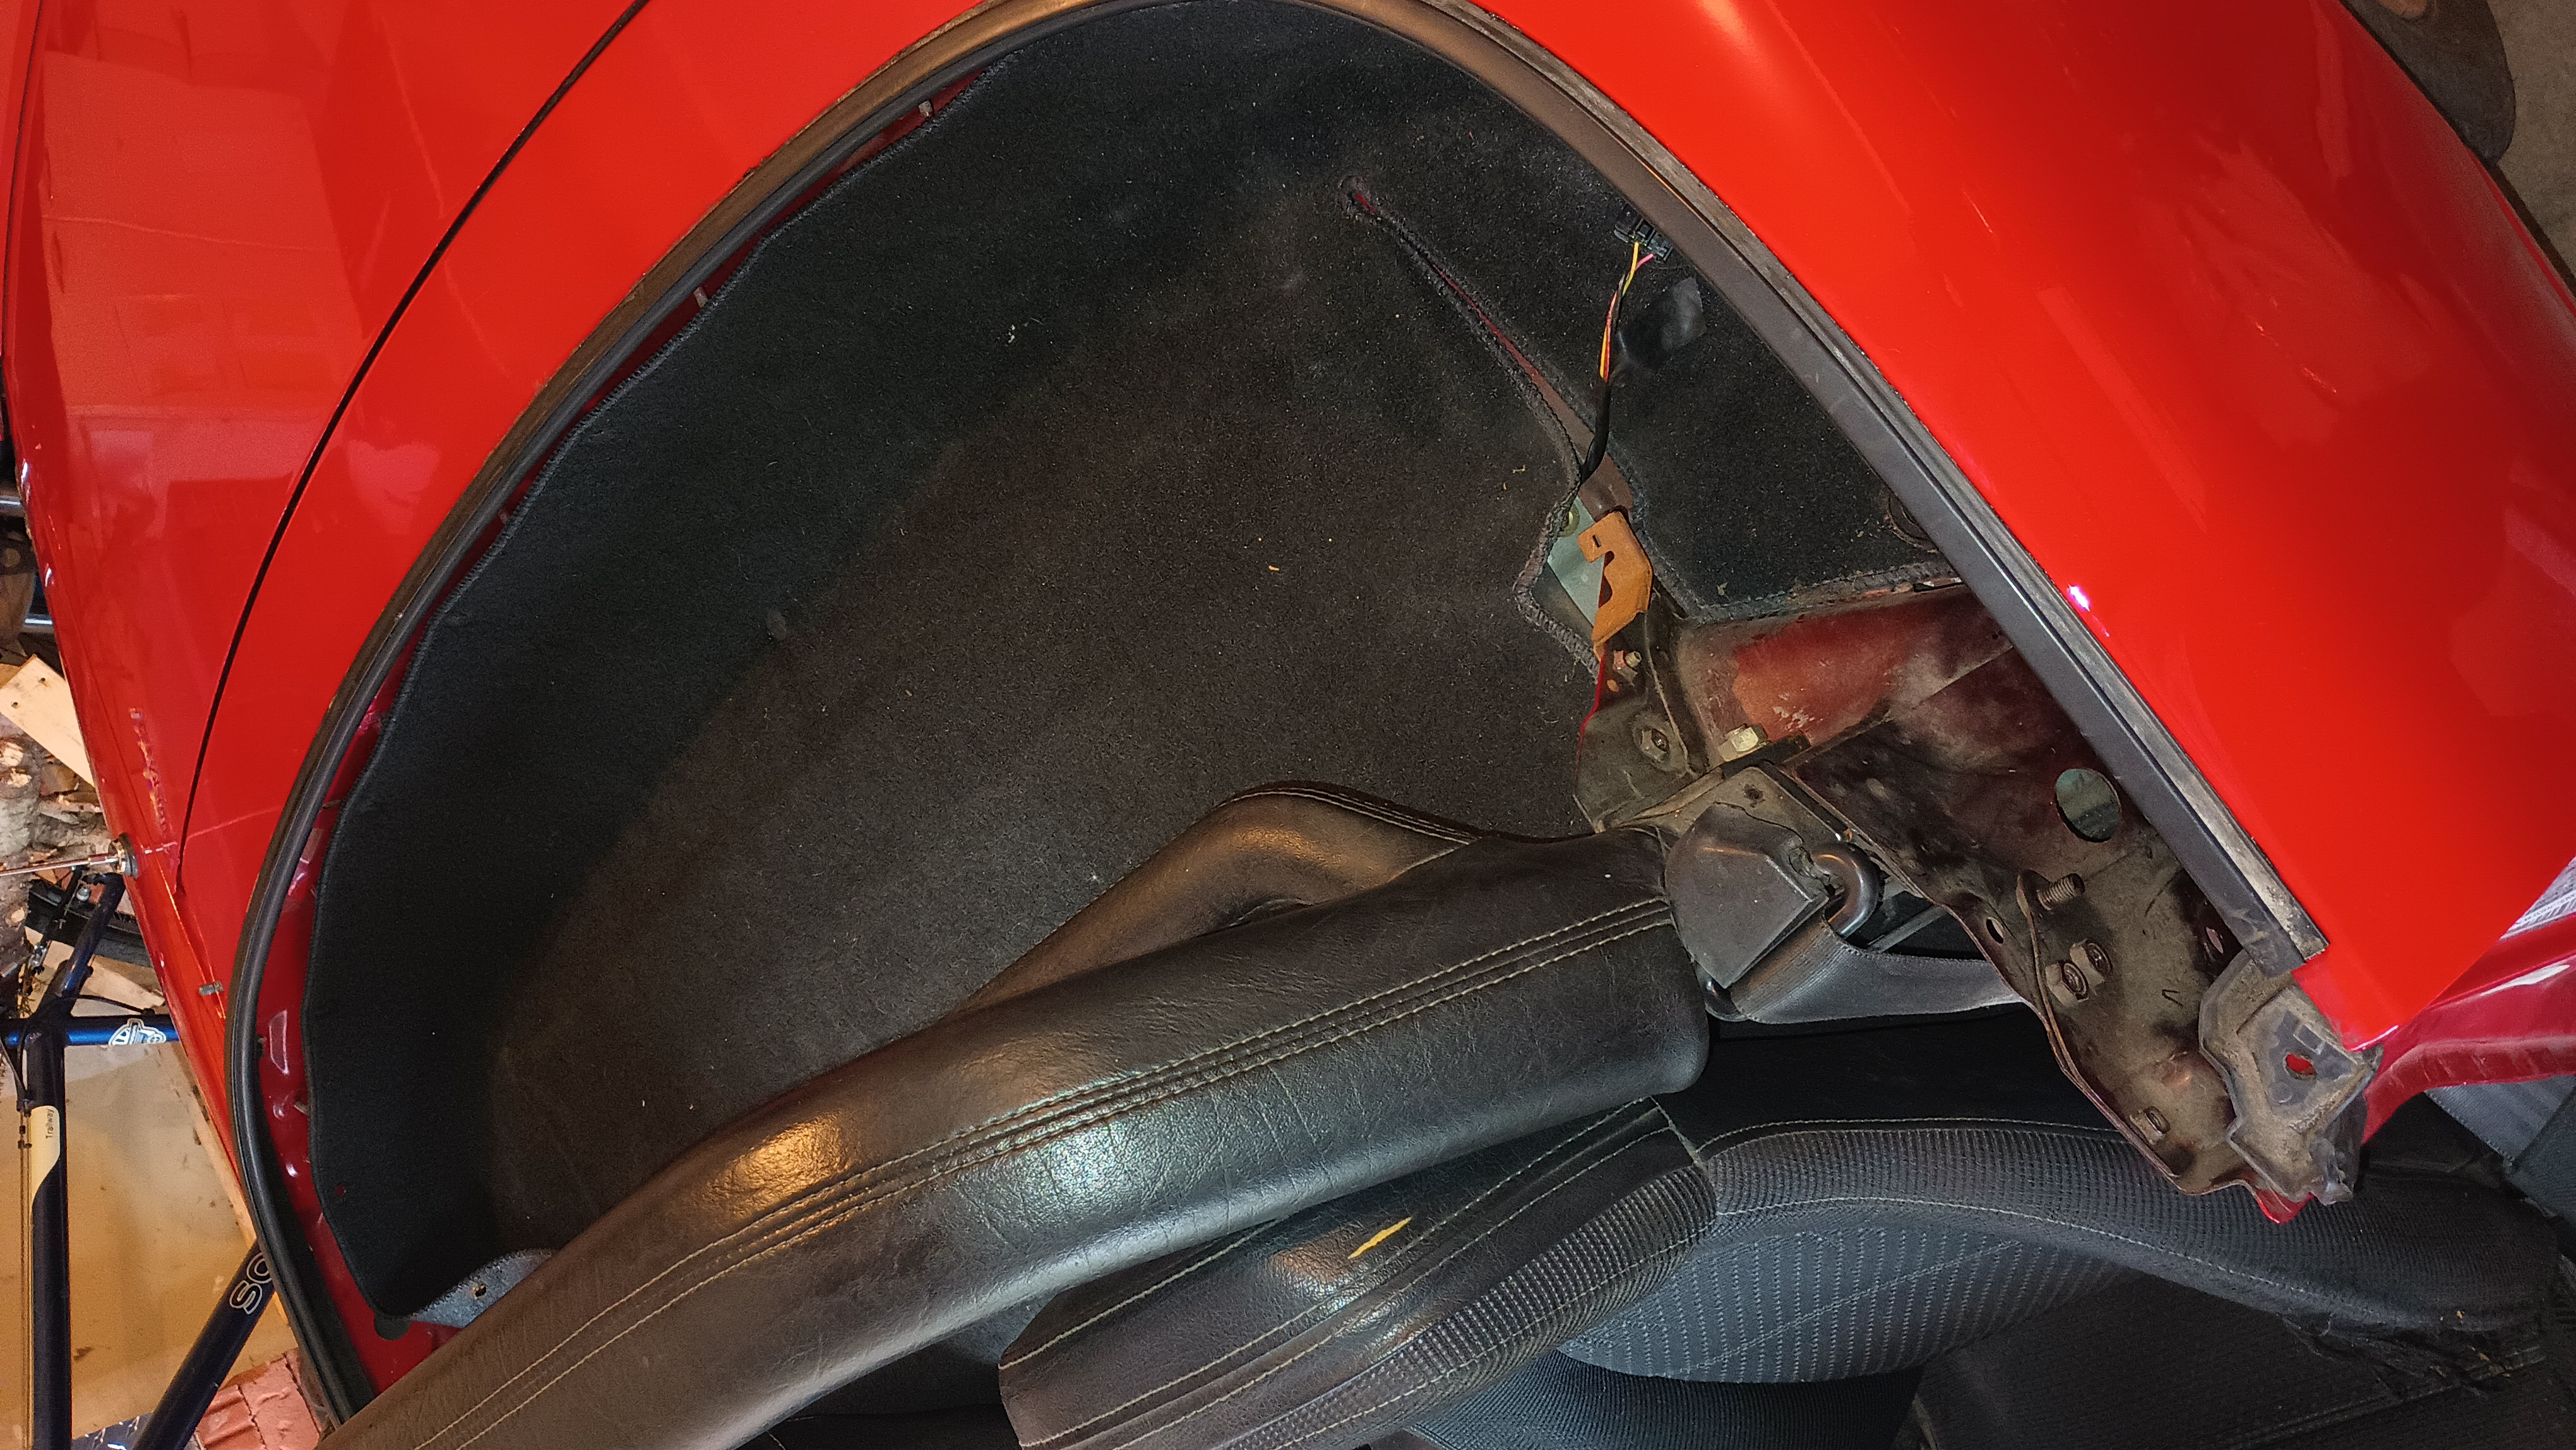
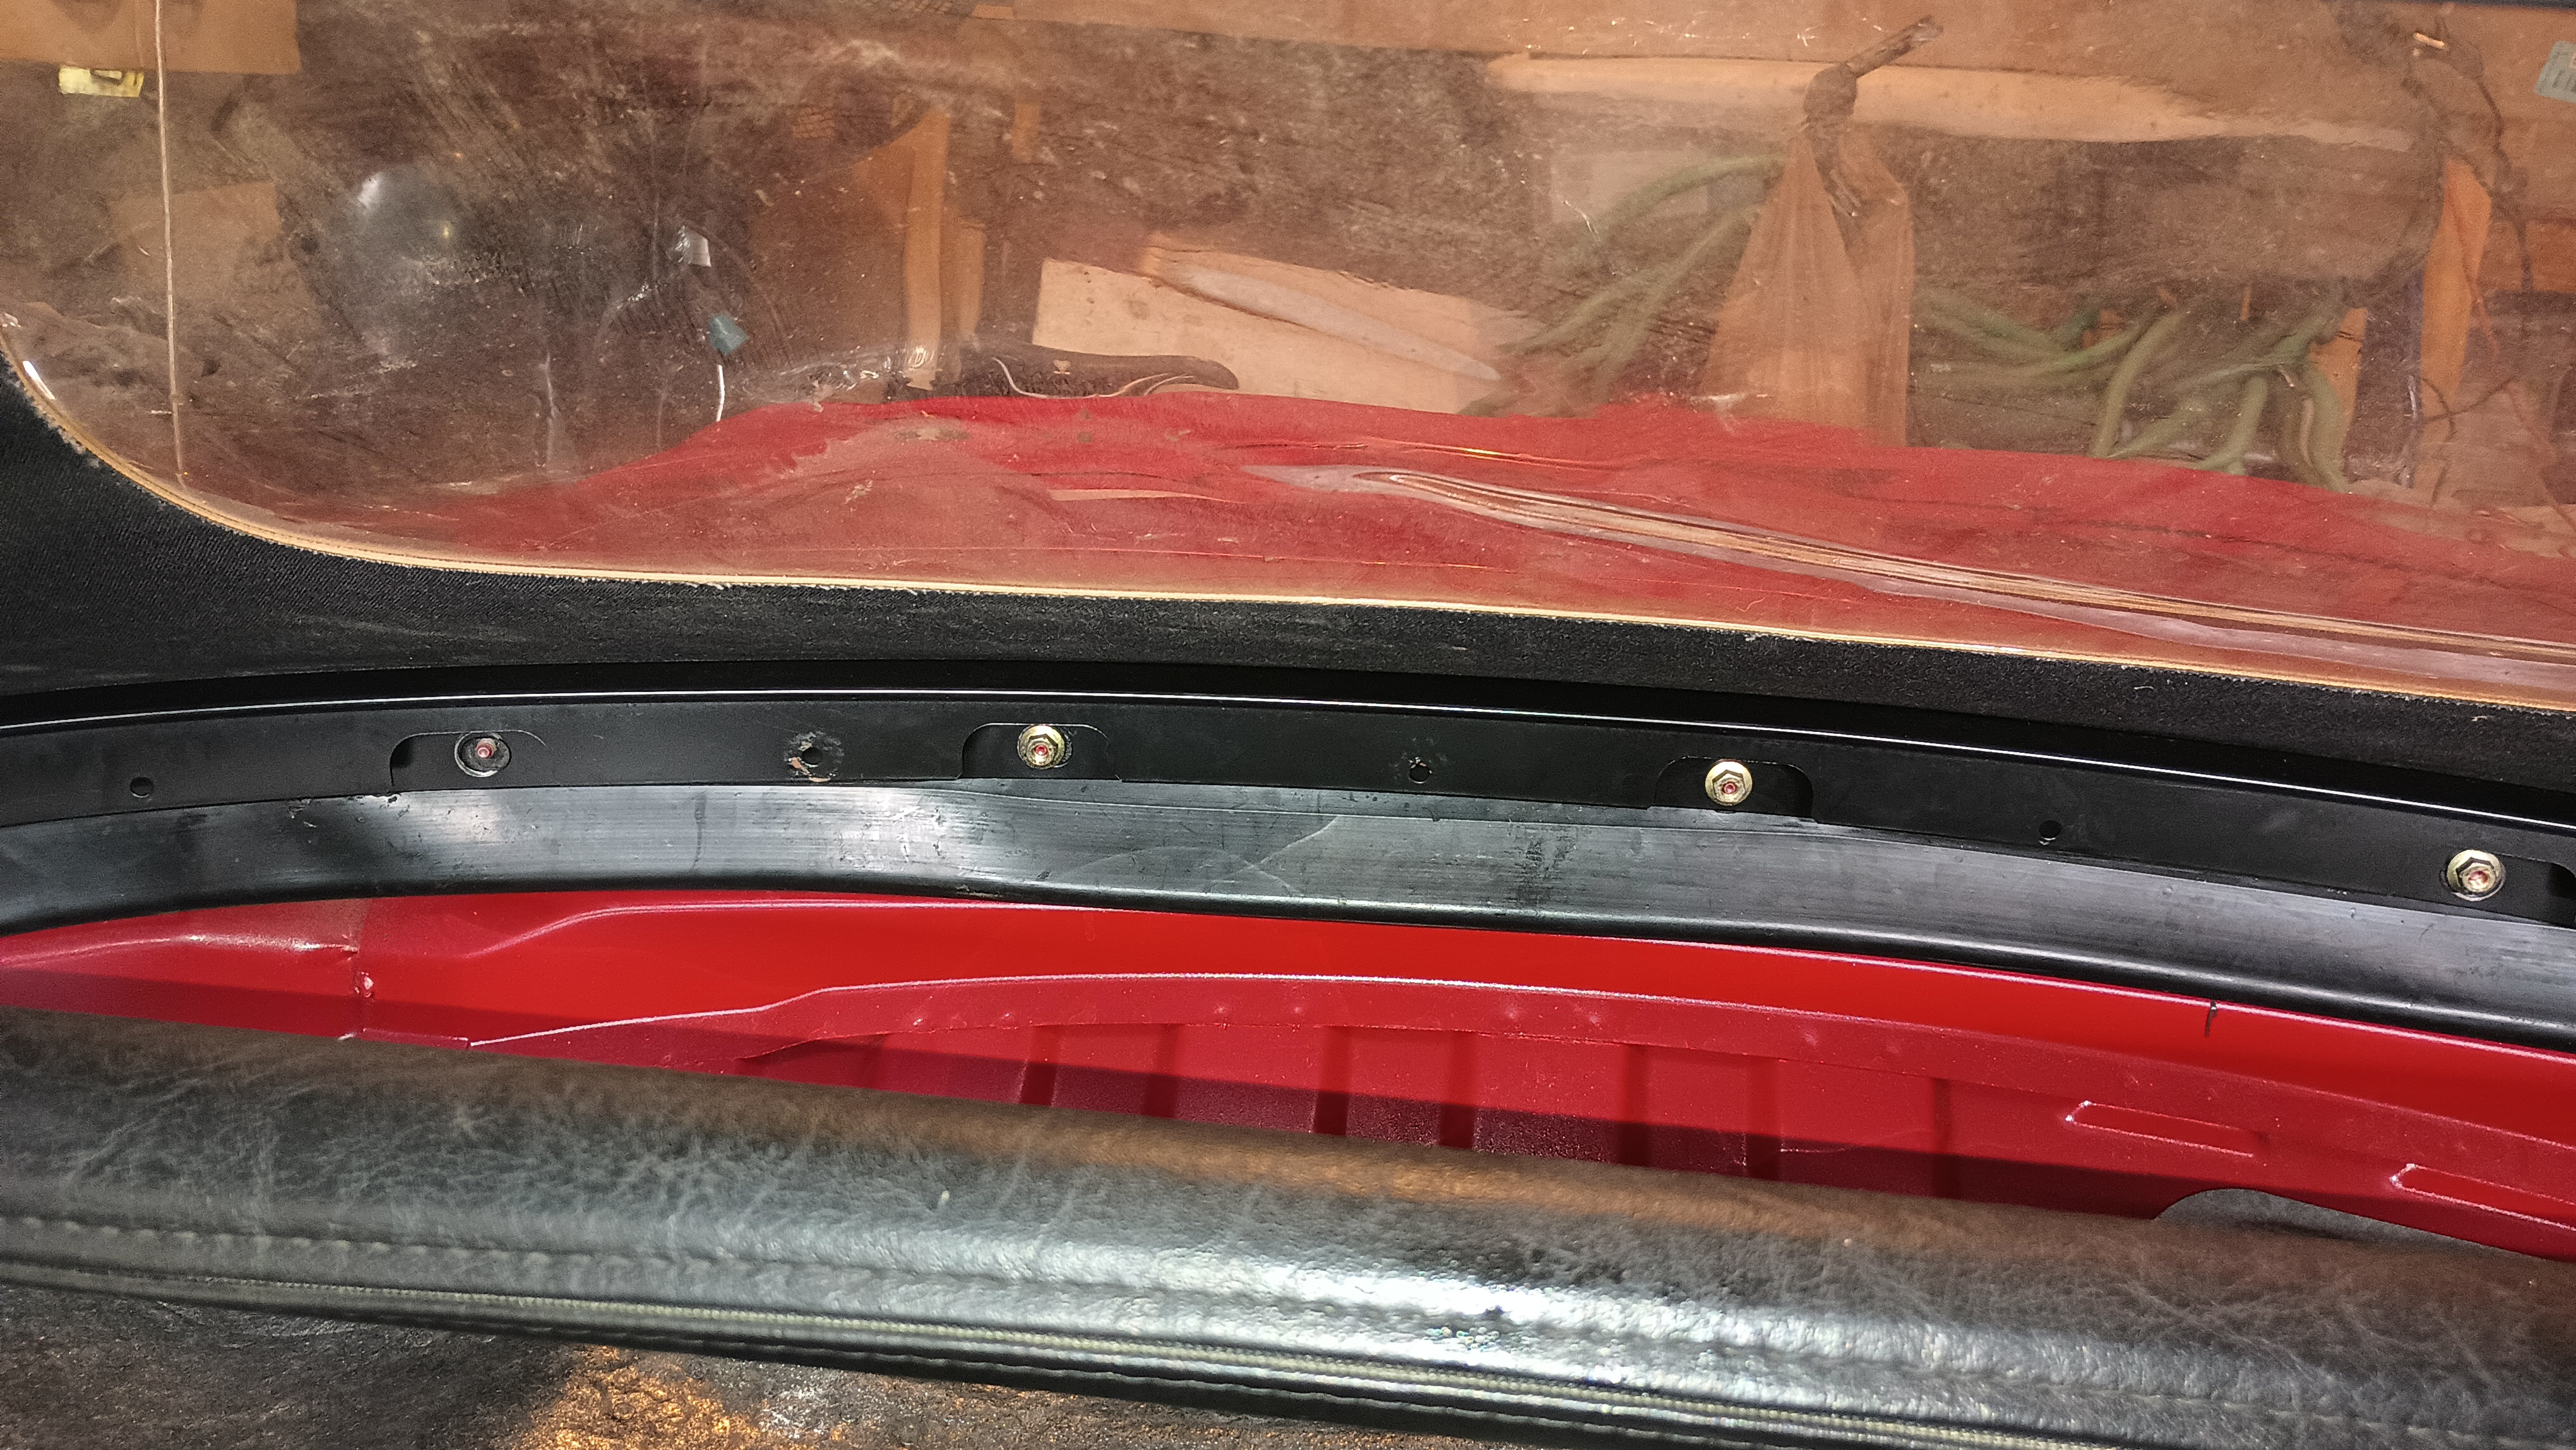
After I did my homework, volunteer work, and made dinner, I scooted out to the garage to get some of the to-do list squared away. The hardtop mounting brackets and Frankenstein [sic] bolts are removed as is the top, the rain rail, the moulding around the top, and the tail lights. All that remains is to take the bumper off but, frankly, I didn't feel like getting down on the ground.
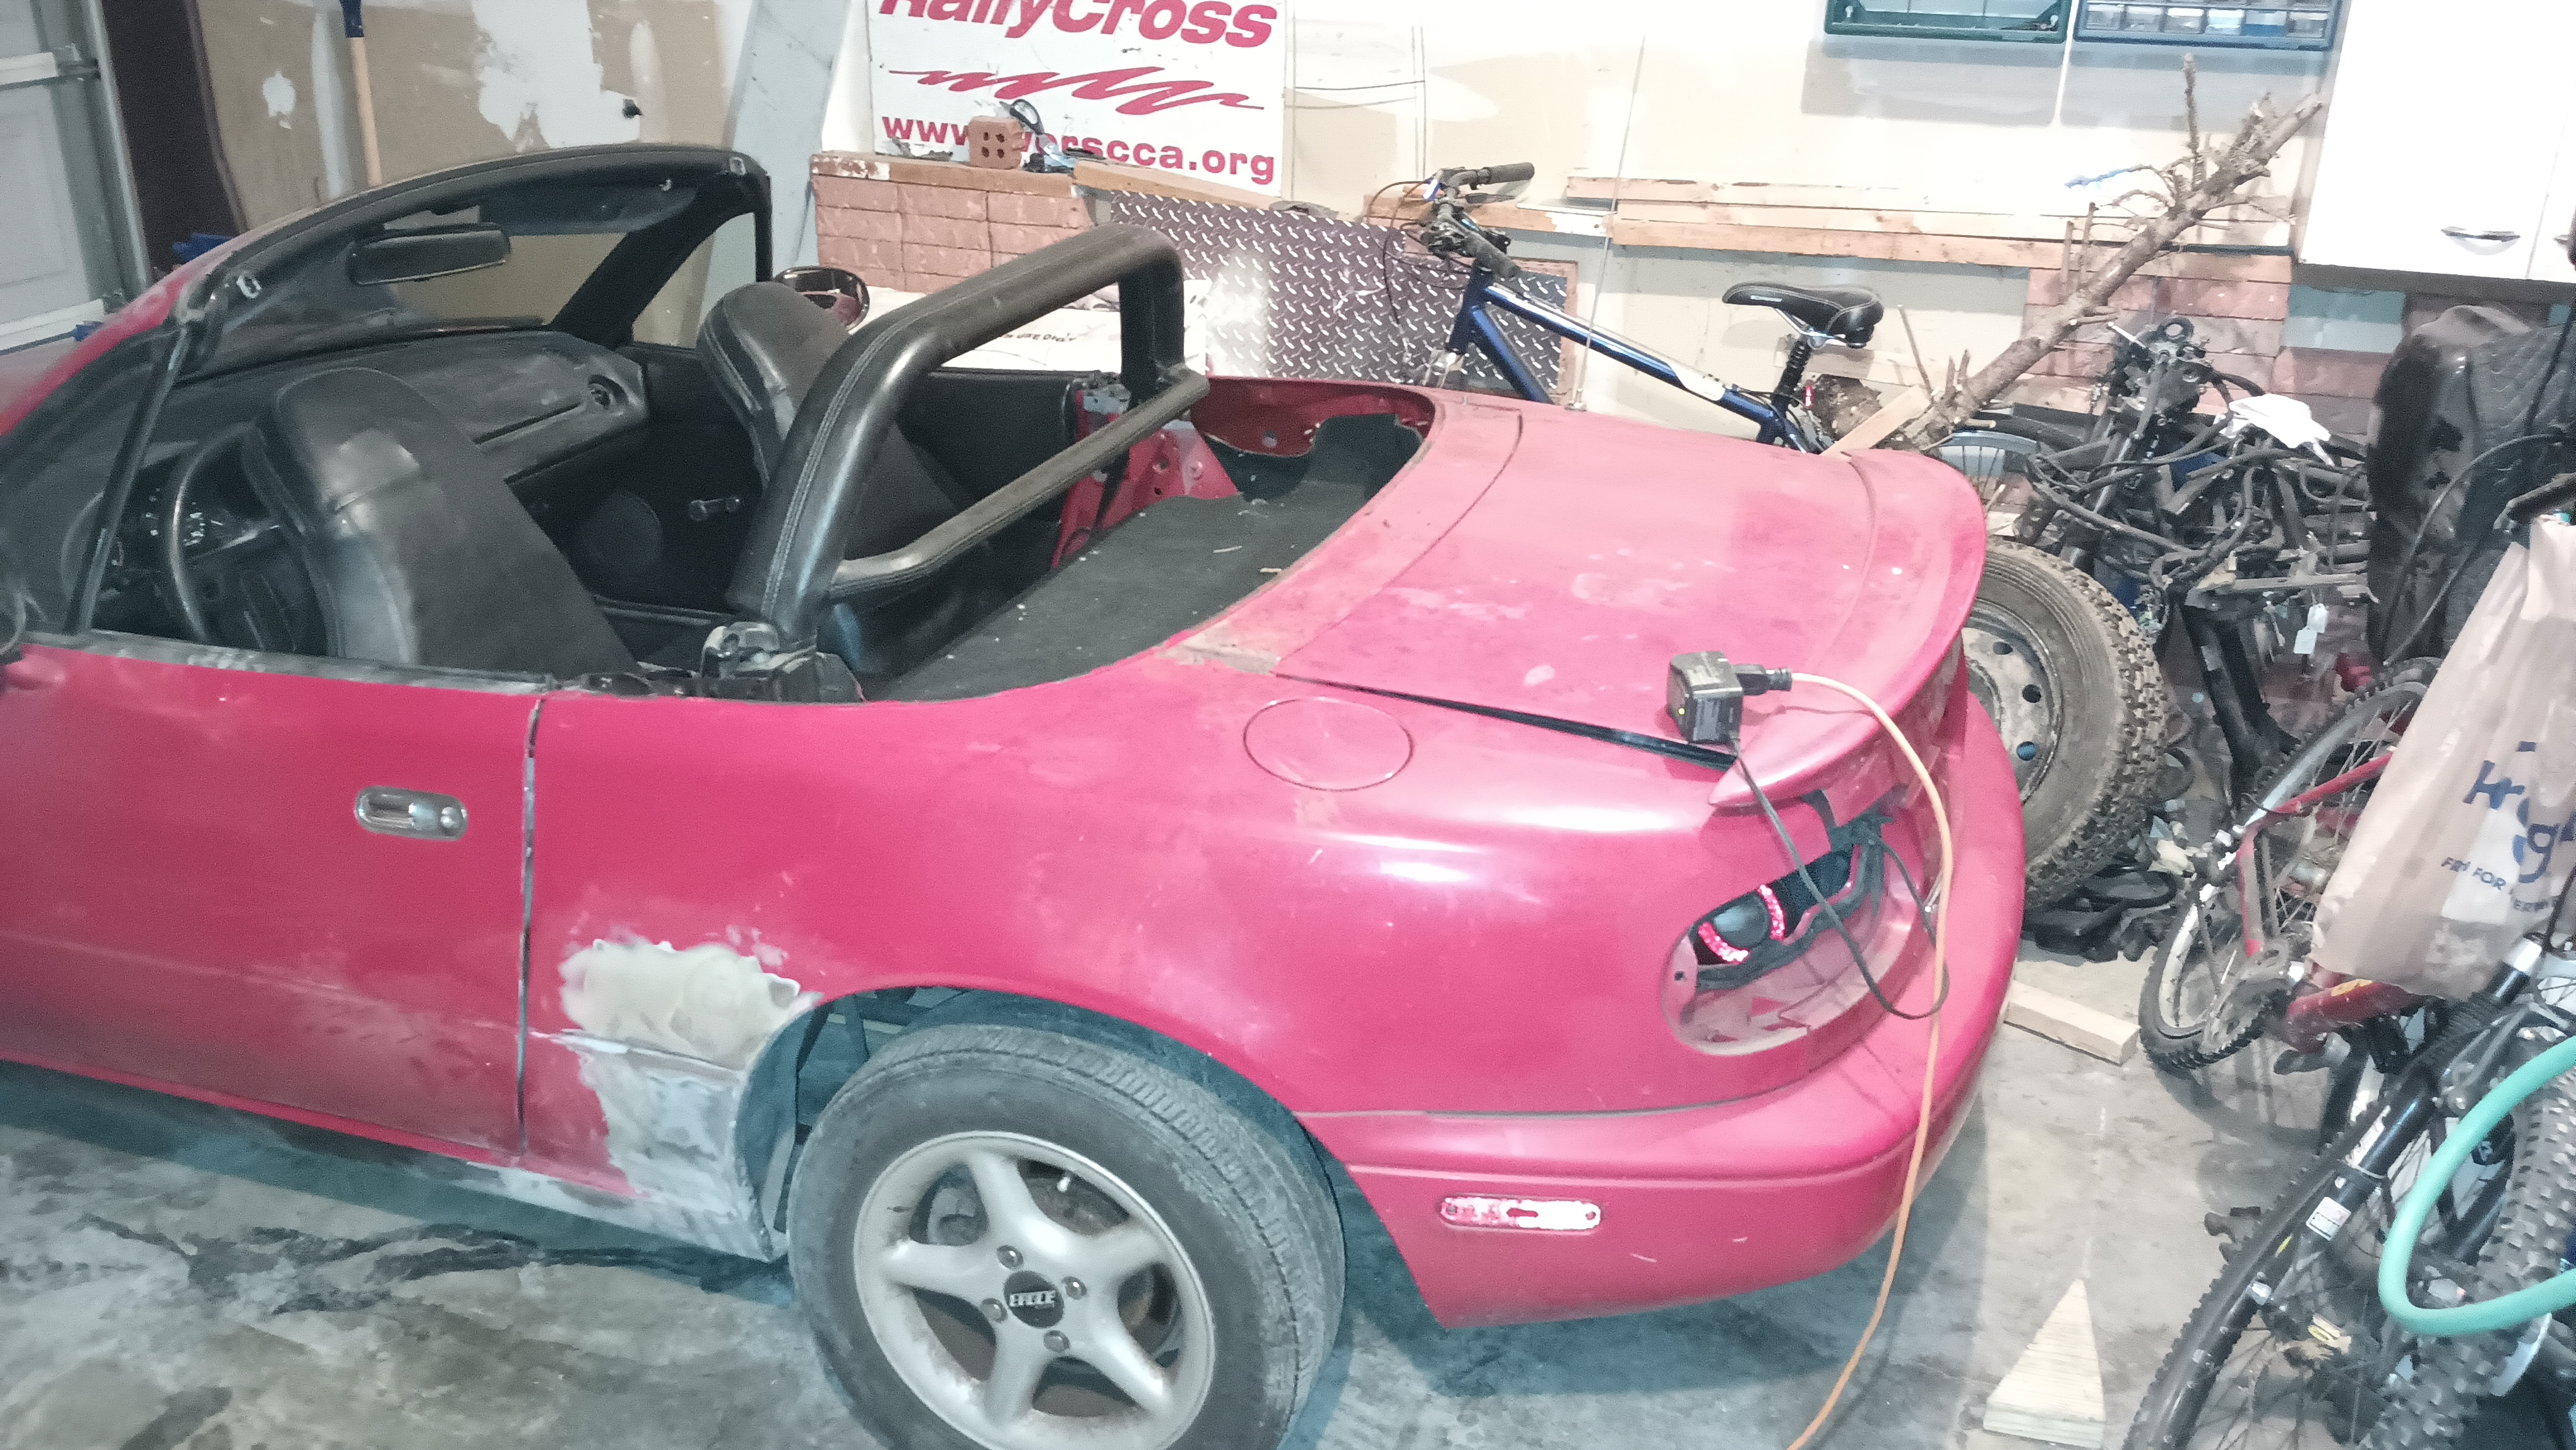
I don't know if this had anything to do with anything, but the rain rail was broken in several places and a repair attempt was made.
I don't remember if I got the rain rail with the new top or not, but it looks like there's at least one aftermarket solution out there if I didn't. I've got to go over to the shop this week sometime and play with my wood, so I'll hunt around and see what I've got. With all that removed, I can get to the drain tubes pretty easily of course, which means I can pop them out a little bit so I can pretty easily sneak the 360 degree spray nozzle on the Eastwood Inner Frame Rail Coating down into the quarter panel. I'd like to do what I can to reduce the chance that this just rusts through again after a year or two!
wae
UltimaDork
9/19/24 8:15 a.m.
I went over to the shop last night specifically to get one of the extra spray hoses for the Inner Frame Rail Coating. In the process of packing up the toolbag - while I was there, I got the things I'll need to do the air strut in def Scheißwagen tonight - it fell over and dumped its contents. Of course the one thing that apparently skittered across the floor and didn't get scooped back was was the damned hose.
That shouldn't be too big of a deal, I guess. When I get the car back, I can spray down in there before I put the new top on. And speaking of the new top, I did also get the rain rail when I puled the top and that rain rail is in perfect shape. It's nice to not have to worry about that! Yesterday, I finished pulling the bumper off and this morning I went out and cleaned things up a little bit. In a couple hours, I'm going to drive it down to Crone's and they'll get started with the spraying!
While it's off at paint, I want to get everything lined up so that I can have it put back together very rapidly once they're finished. I know that 14" tires suck. I don't care. The car was built to run 185/60R14s and I think the best-looking wheel an NA can have are daisies. I know that I can get a repro daisy-looking wheel in a 15x8, but a 225-width tire seems a little big for stock power levels. It seems like the best street tire in a 14" that is out there would be the Vredestein Quatrac 5, but that tire seems to be only theoretical in my size, not actually in-stock anywhere. Looking, then, at non-generic brand tires that I could actually purchase, I'm looking at the General Altimax T45 or the Kumho Solus TA51A. I could go to a 195/60 which would give me access to the Riken Raptor HR or two different flavors of Falken Azenis. I'm not sure I want to spend $800/yr on tires, as wild as driving around on a set of 200tw tires would be. I could also get into the Michelin MXV3-A which I know very little about. It's about double the cost of the non-Falken tires. I'd consider it a lot harder if it were in the actually correct size simply because I've never had a bad Michelin tire, but I'm just not sure that it would be twice as good as the Altimax.
I was going to try to get the wheels cleaned up and the new tires mounted while the car is at paint, but I've settled on waiting until after it's back because that way I can have the shop take the old tires off the current wheels and dispose of them without worrying about them wanting to charge me twice. Tire Rack is fast enough and my local tire shop is quick enough that once I have the car back, I should be able to order the tires and make my install appointment while I'm putting the new top on and getting the bumper and whatnot reattached so that the minute I'm finished with all that, they'll be ready to do my tires.
wae
UltimaDork
9/24/24 1:04 p.m.
Just got the call that the car's ready for me to pick up. Quite a bit quicker than I had been led to expect, which is nice!
I went ahead and pulled the trigger on the Altimax tires in the original 185/60R14 size, so those should be ready by the time I have the top installed.
That looks really good! I'm impressed for just $1300... did they paint the rear bumper as well?
wae
UltimaDork
9/25/24 2:02 p.m.
In reply to Ashyukun (Robert) :
They only did the quarters - the bumper stayed home in the garage. When it was done it was a little better than the estimate as the out-the-door cost was $1200. That still seems a little steep for just paint, but I'm happy that it's done and I couldn't have done a better job myself.
In reply to wae :
Ah, so they didn't paint the doors or hood? Or the trunk/spoiler?
wae
UltimaDork
9/25/24 6:34 p.m.
In reply to Ashyukun (Robert) :
No... My theory on this was that the car is nice but not super nice. There are a billion little dings all over it so to paint the whole car, I would have had to have gone through and repaired all of those first. And once it was all perfect, I'd wind up being afraid to drive the stupid thing. And I really want to use it to do track days/TNIA and if it were perfect, I don't think I'd be able to get up the guts to do that. (Yeah, I know that the style bar on there would have to go to get on track, but let's focus on one problem at a time, shall we? :) )
wae
UltimaDork
9/25/24 6:41 p.m.
First step was to get the rear parts back on:
Then I used a little weatherstrip adhesive to put the trim back on.
And then things went a little bit wrong. I got the center mounting bar installed:
And then I realized that I hadn't secured the left side rain rail collection cup. So I undid all that so I could put that in. What a freaking fight that was.
So then I put the mounting bar back on.
And then I realized that the rain rail wasn't in the rear trim all the way around. So I undid all that so I could tuck the rain rail into place.
So then I put the mounting bar back on.
The top has been sitting on top of the ceiling of the office at the shop for a couple years now, so it was a real fight to get it to close. But I really like the look of the tan top.
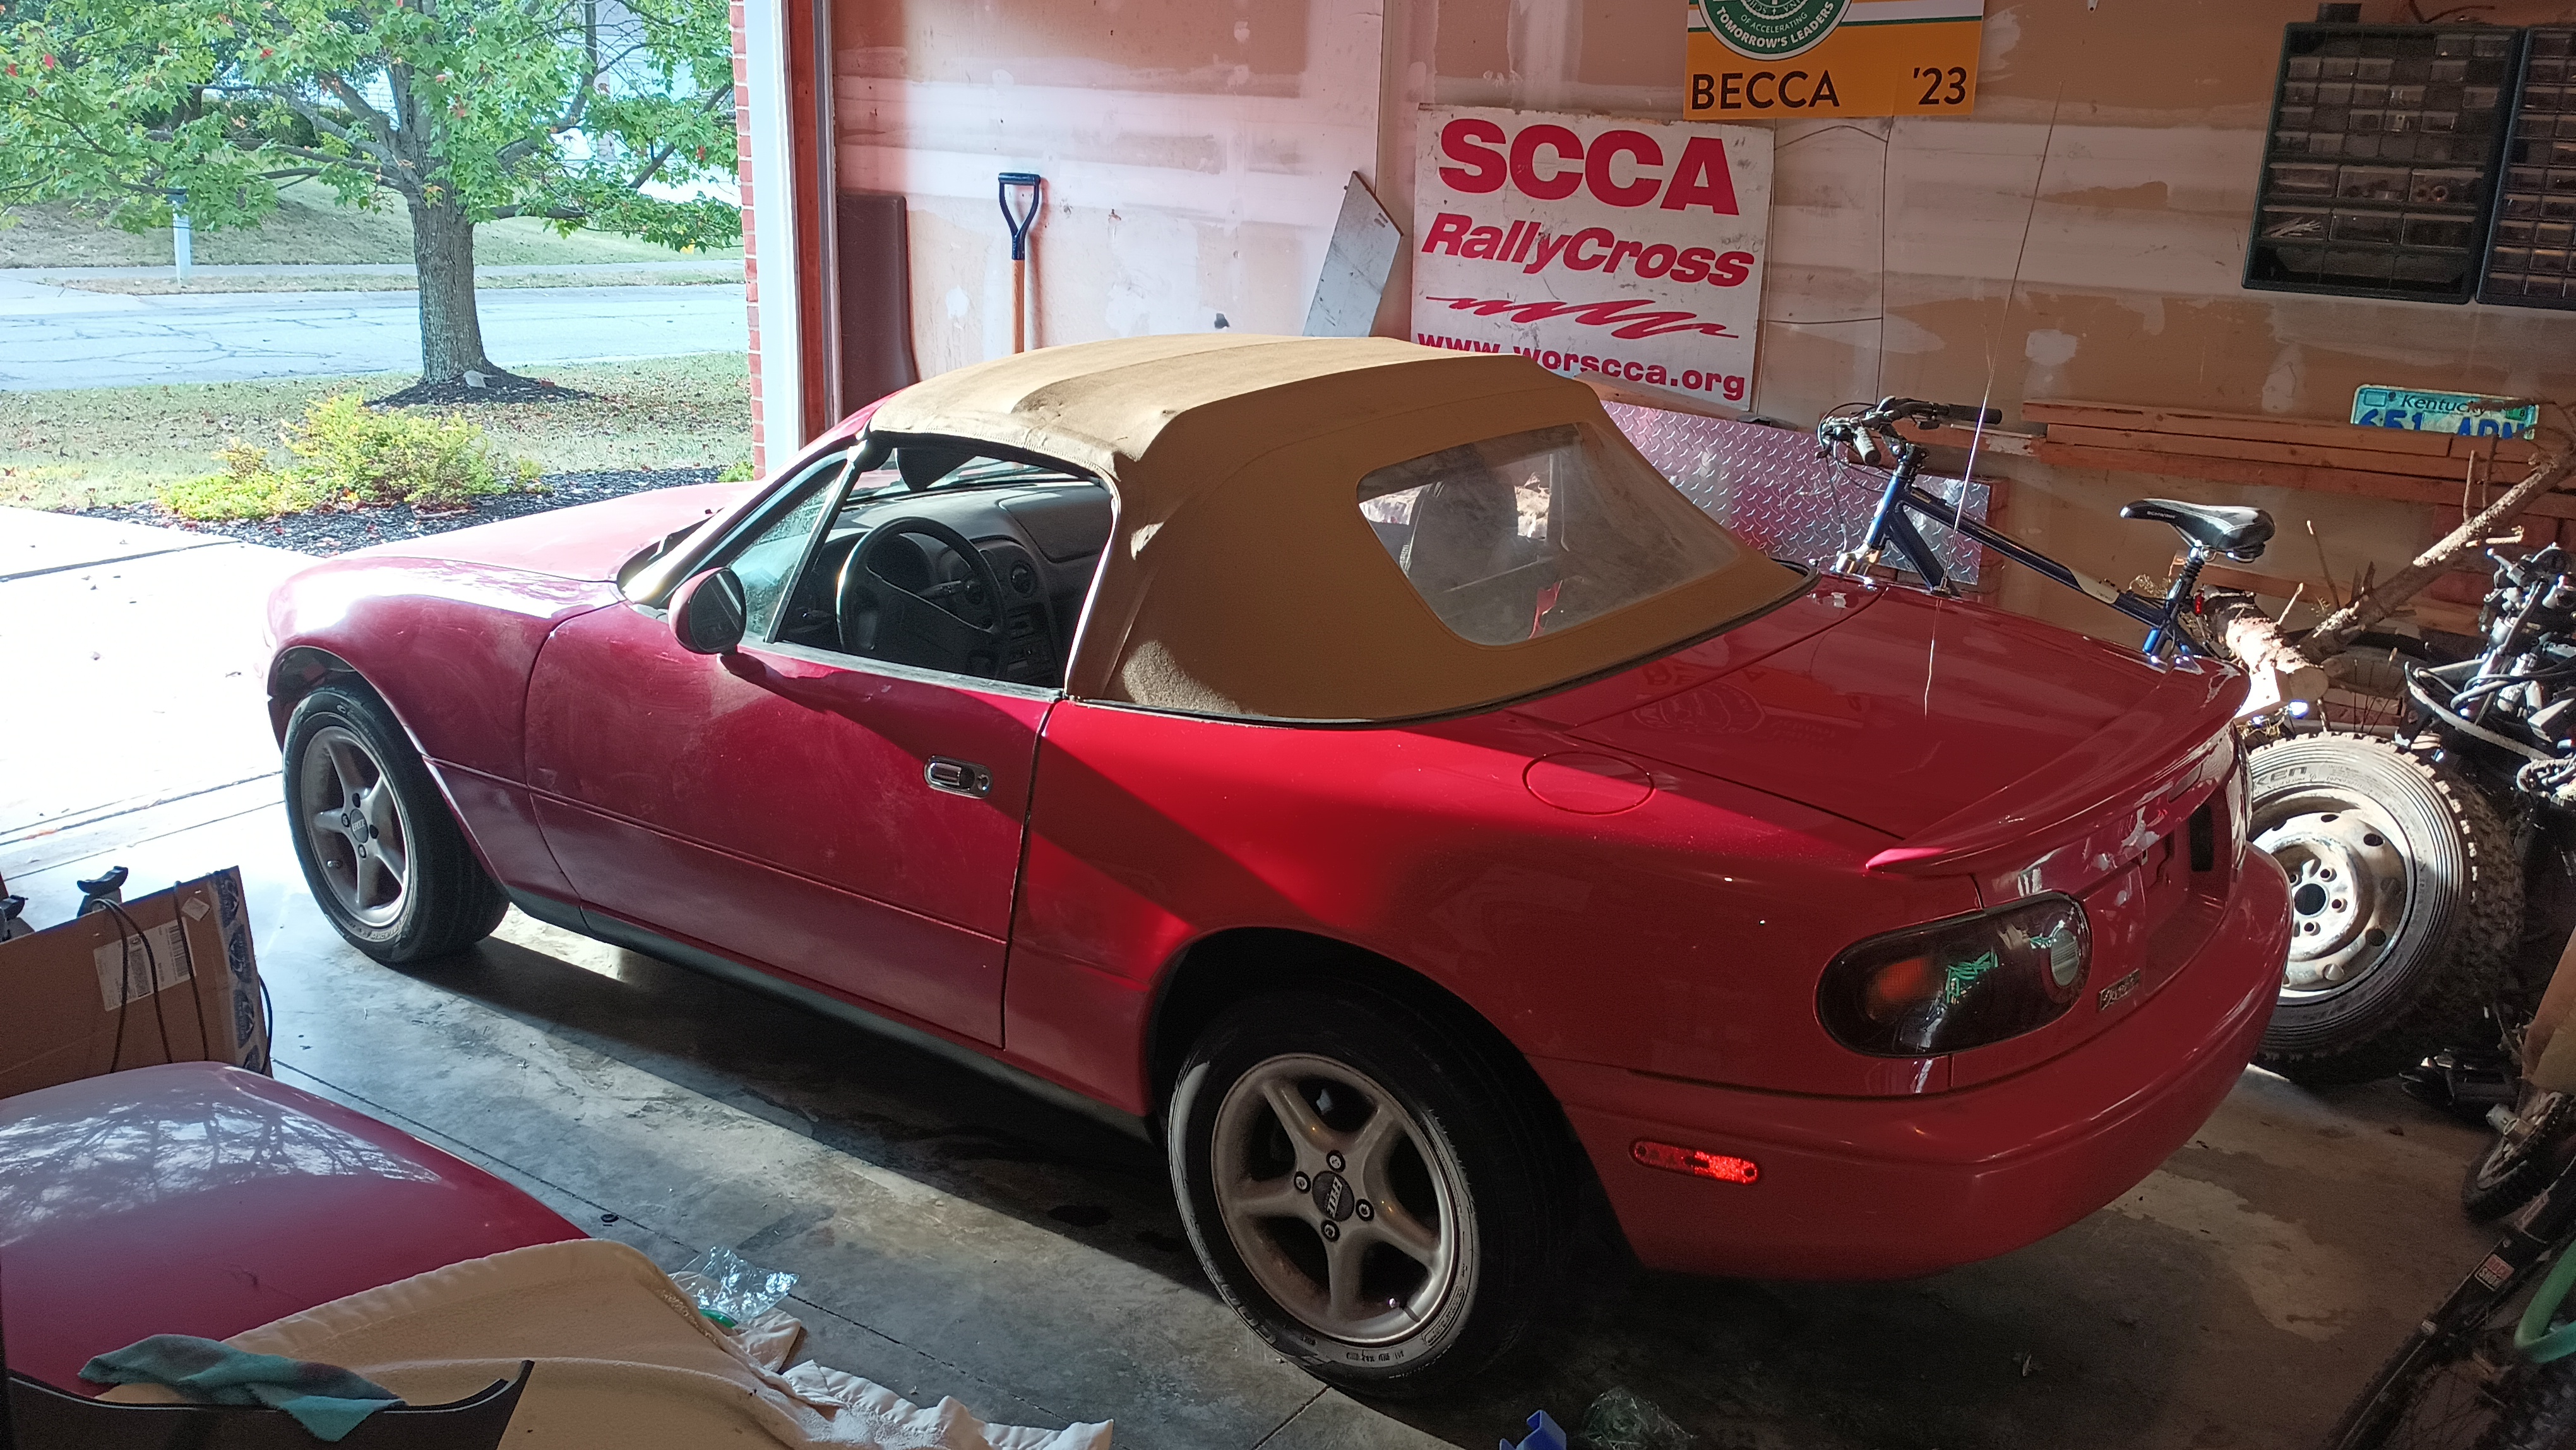
I've got some interior trim that needs to go back on as does the hardtop hardware and I need new license plate bolts.
The tire shop called me today to let me know that my new rubber has arrived, so I'm going to get the daisies cleaned up tonight so I can take them over there first thing in the morning. I'll let them mount those tires then I'll swap them out and take the old rubber back to have them dismount and dispose of the old tires.
The color on the rest of the panels MAY come back with some judicious buffing, if it's single stage and not clearcoated.
Or you might find that the paint is actually .0001mm thick and you burn right through it.
wae
UltimaDork
9/26/24 12:57 p.m.
Most of the color on the panels will come back when I rinse off the dust and grime! Beyond that, I've found that just a tiny dab of swirl remover applied by hand seems to punch things up nicely. That's going to be my afternoon project if the rain holds off.
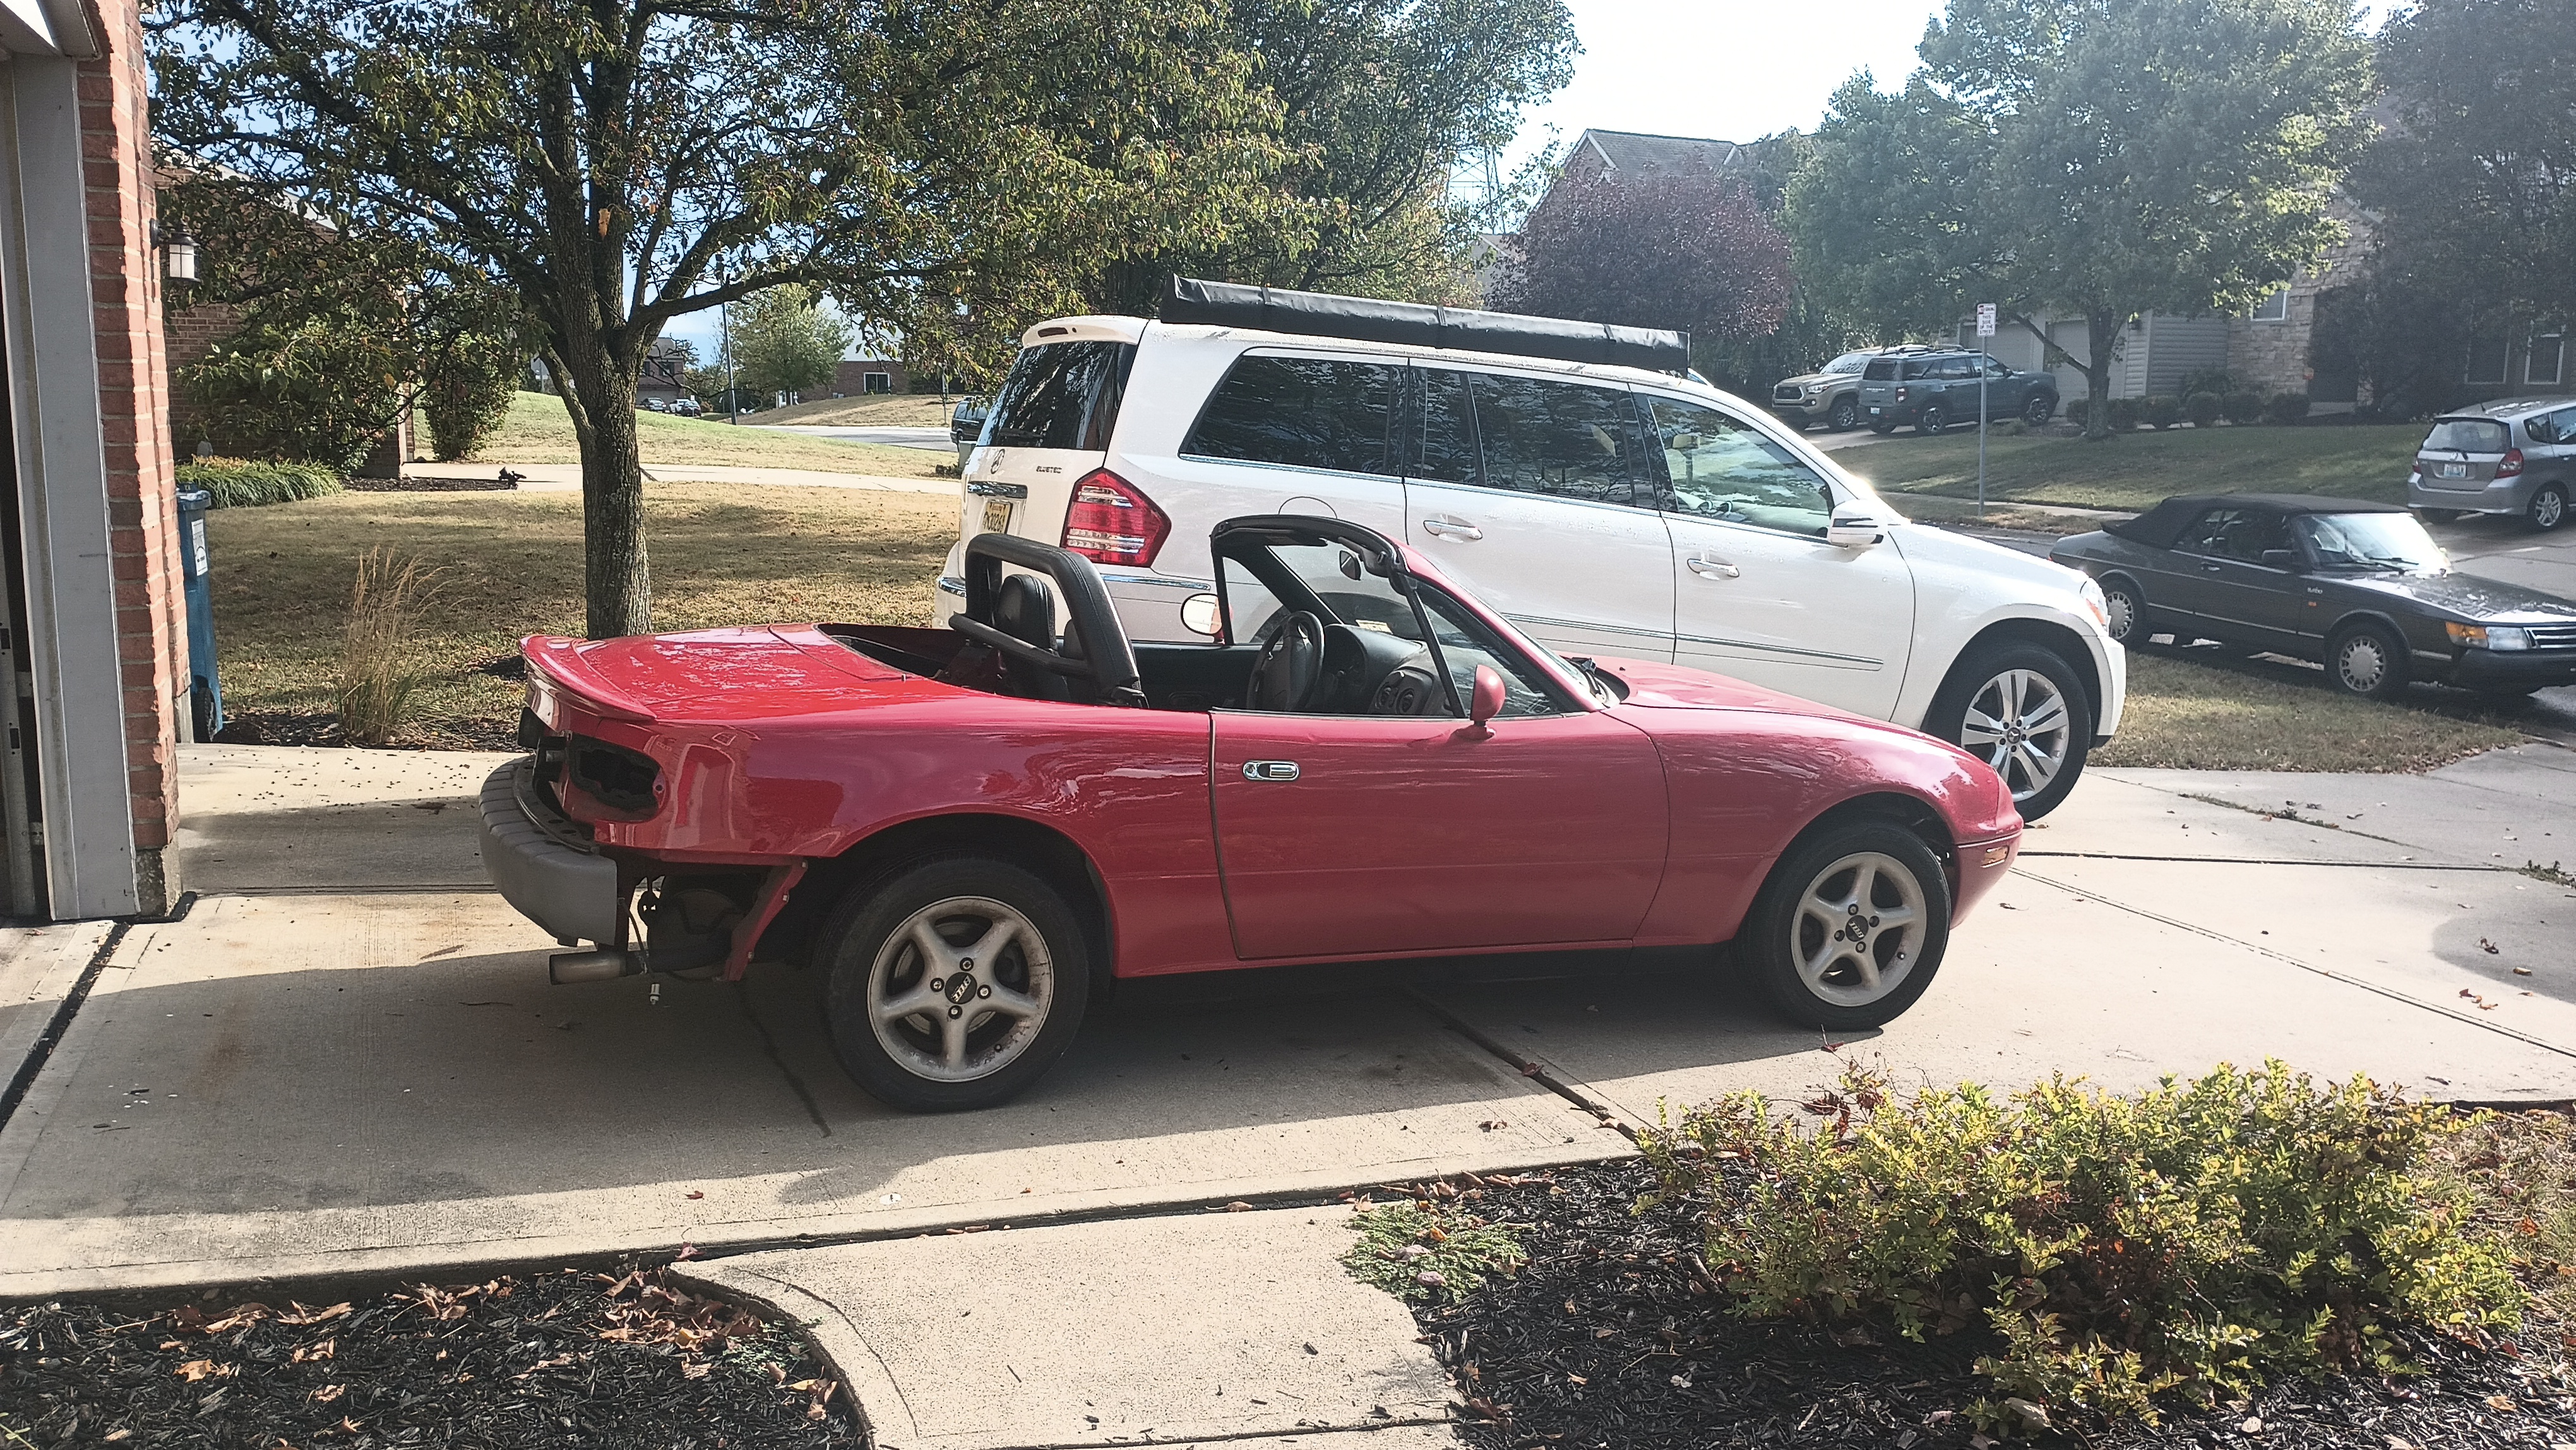
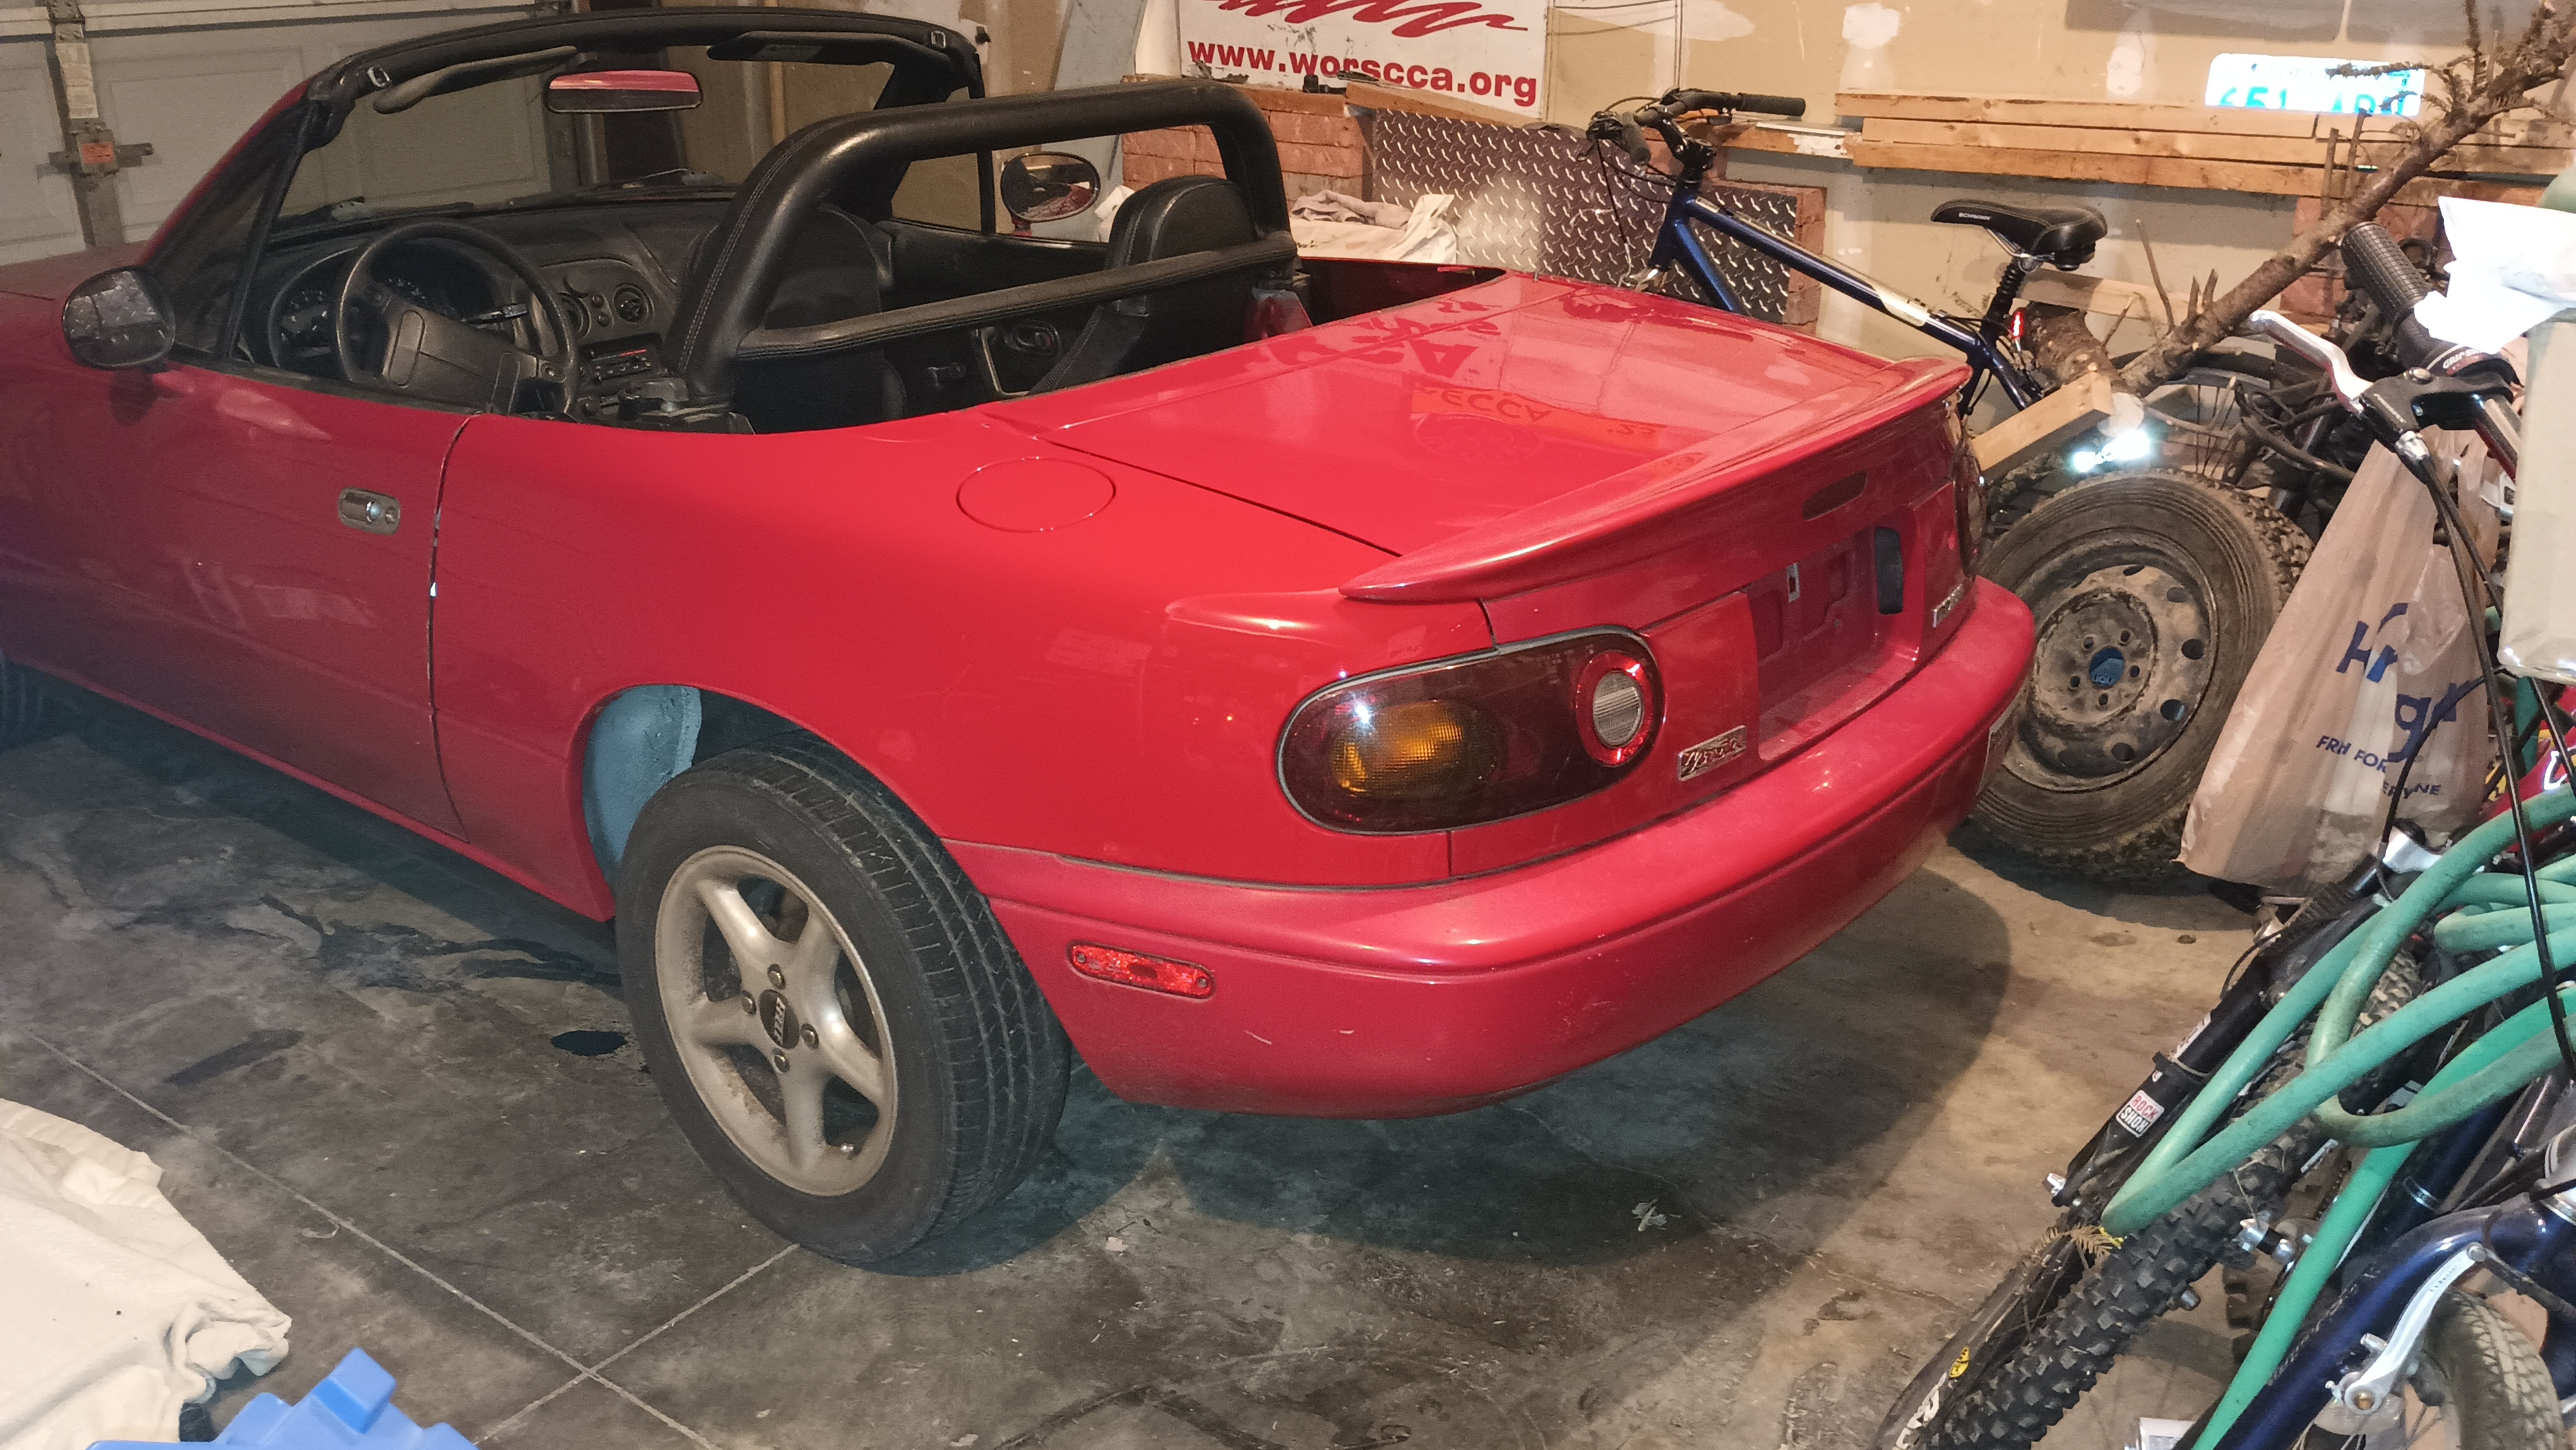
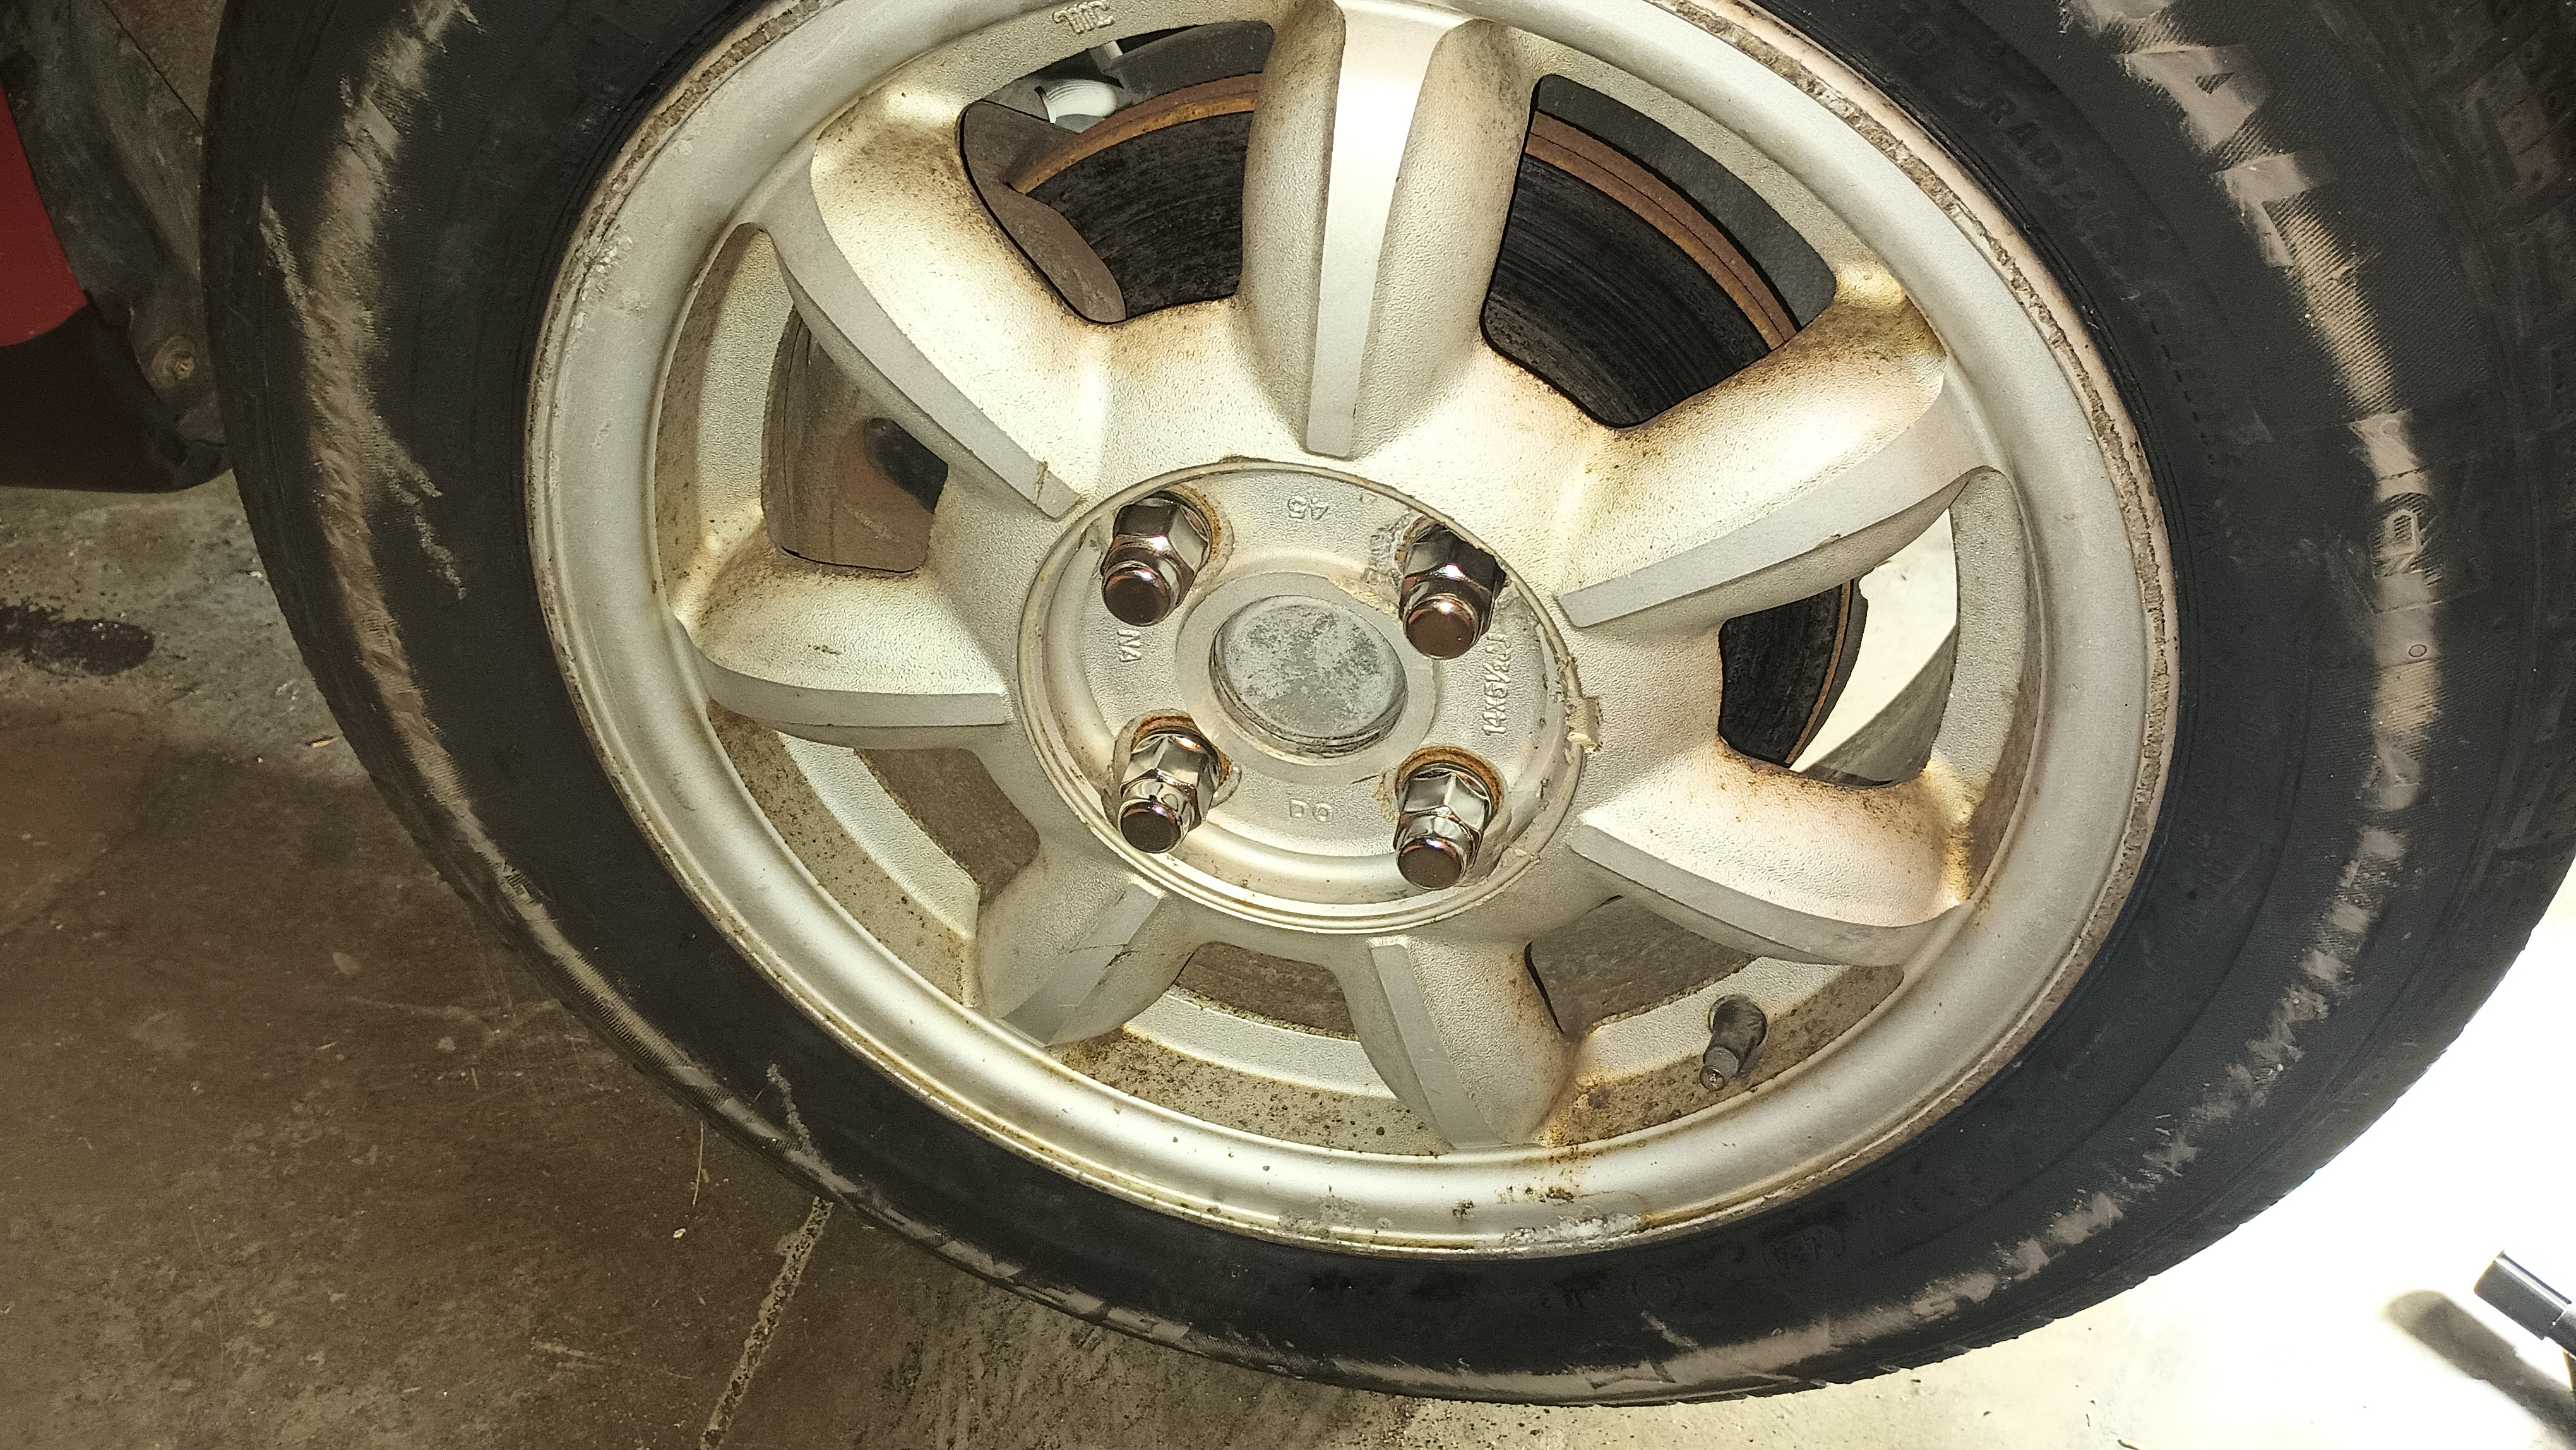
I got the new rubber mounted up and this is the way a Miata should look!
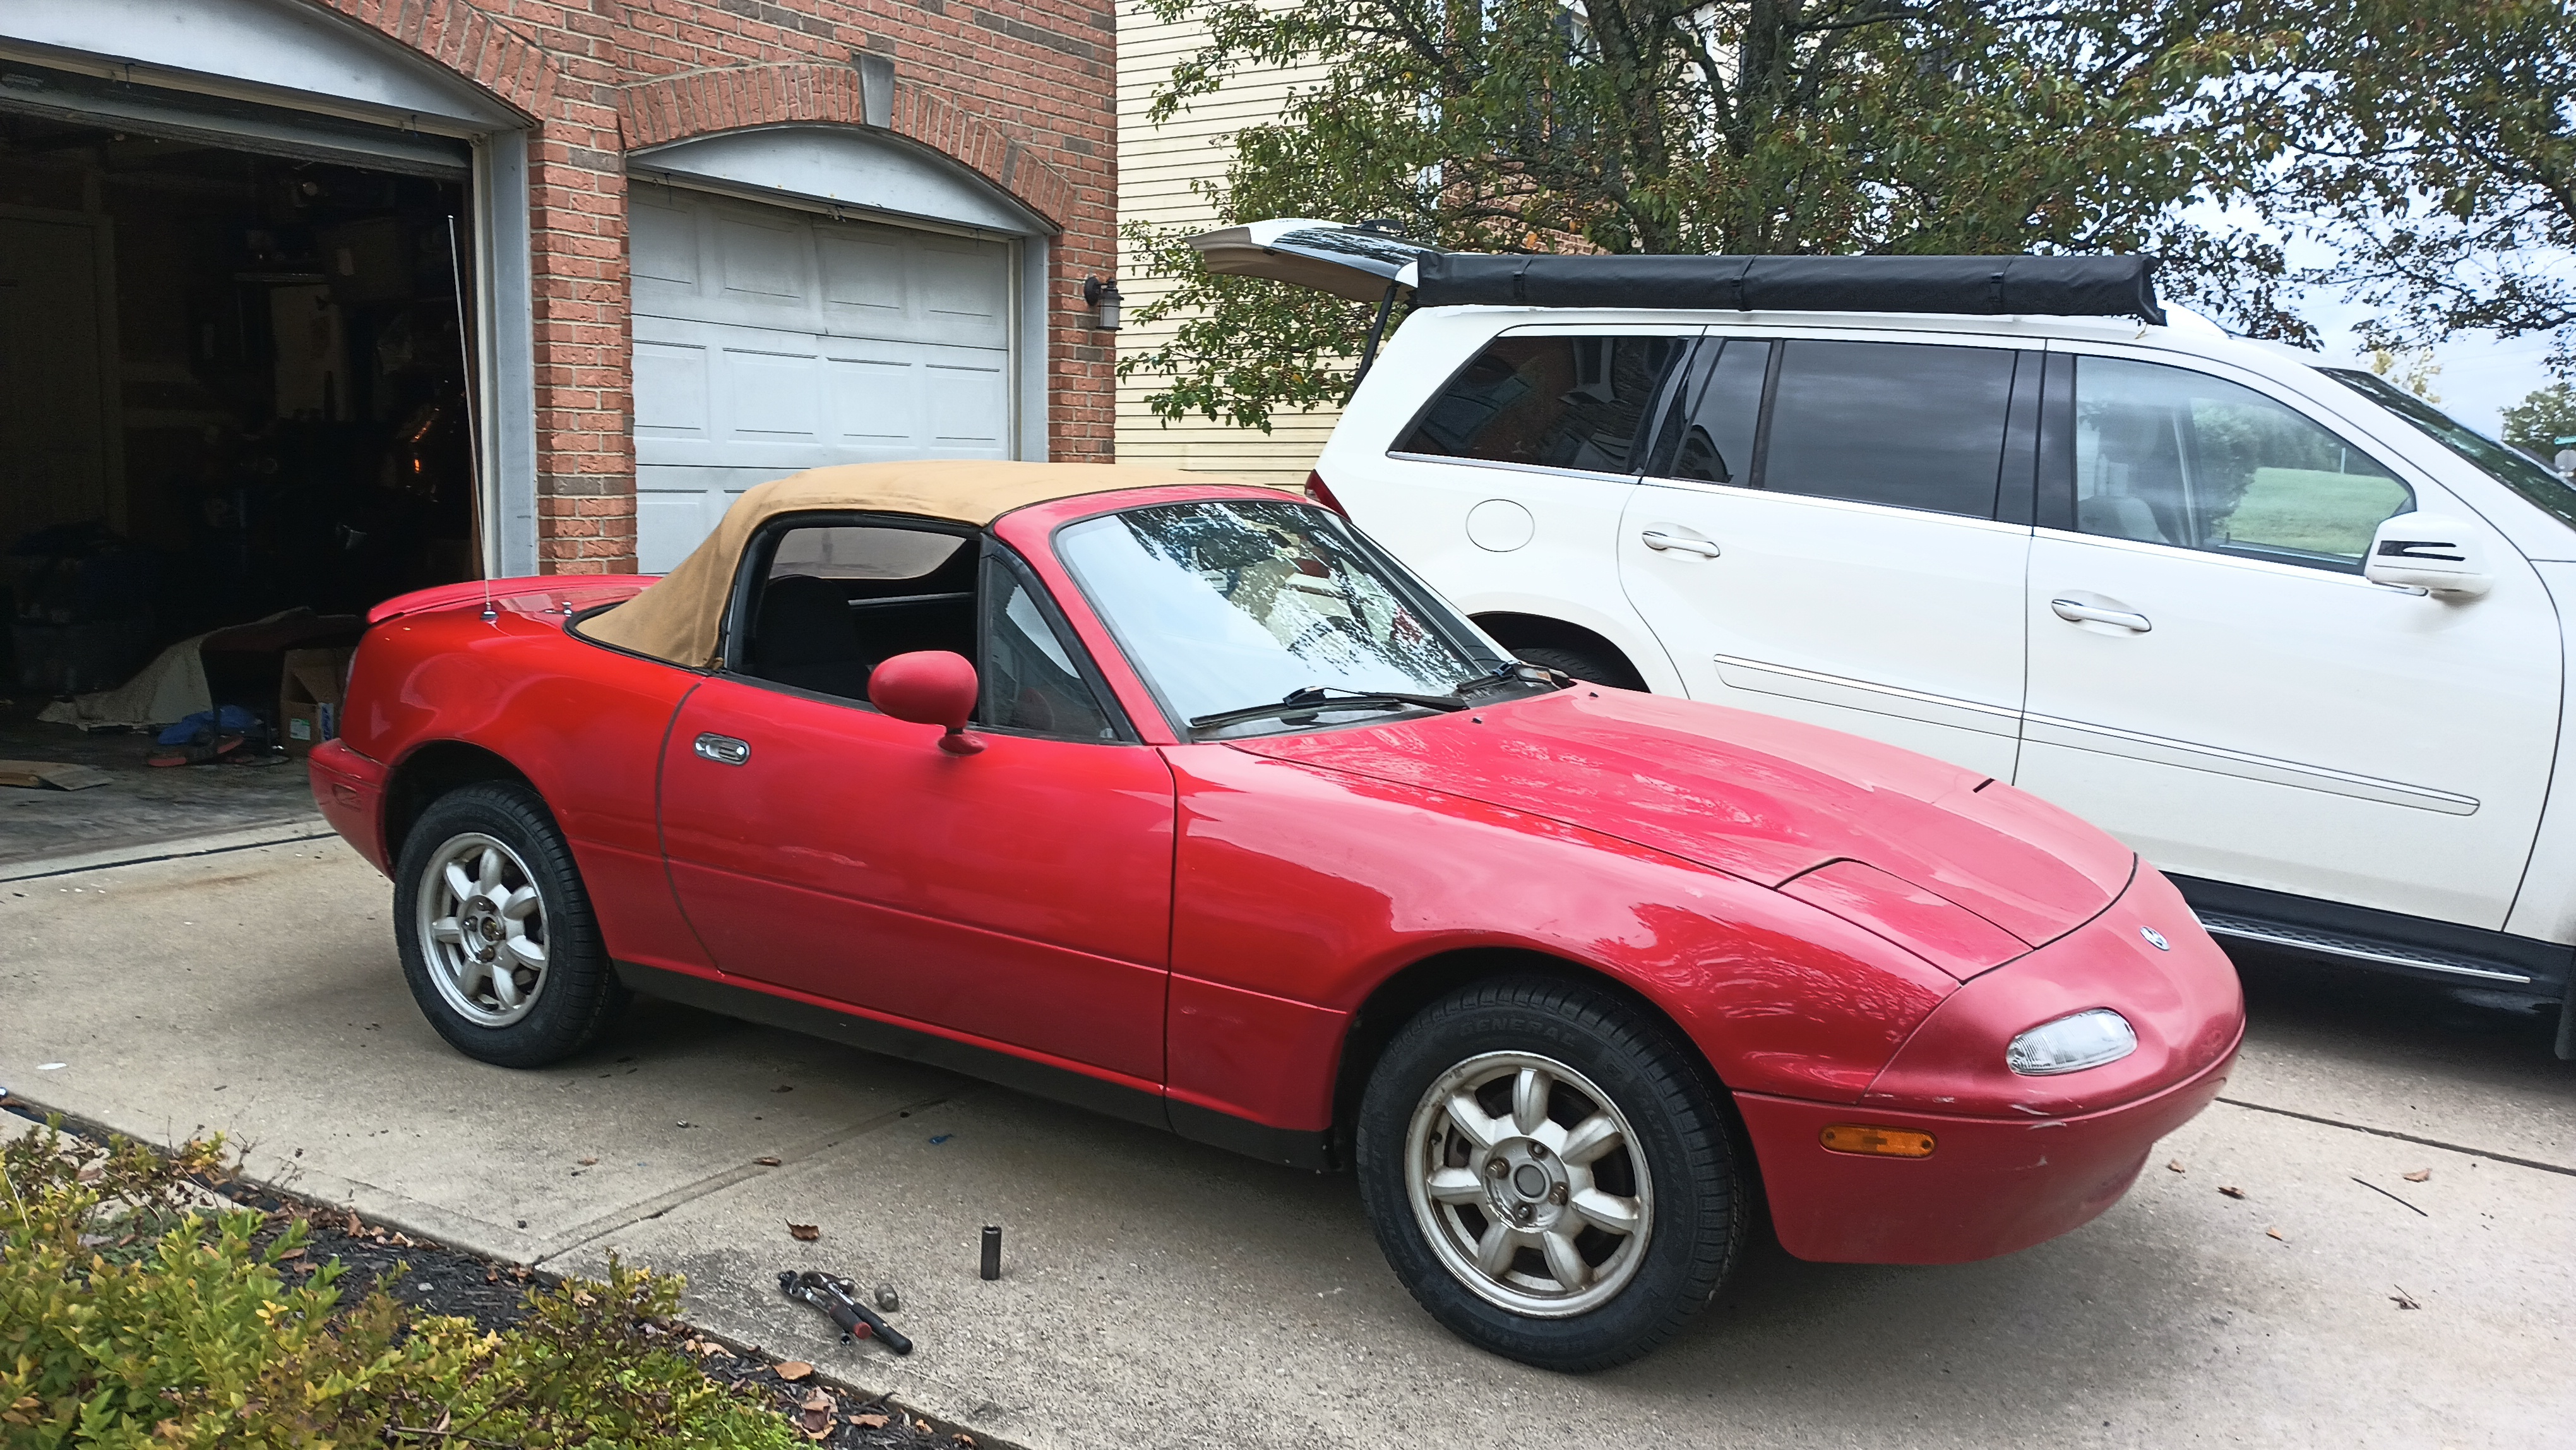
For some reason, there are three different types of lugnuts on this thing. And two of them fought me hard:
You know, because nothing is ever easy. And before you say it, I don't care. I am fine with replacing these studs if it means I never have to screw around with a wheel bolt ever.
Hey, I had it happen to an RX-7, which is why for several years, I had three M12 bolts and one M14 bolt holding the left rear wheel on 
wae
UltimaDork
9/27/24 11:59 a.m.
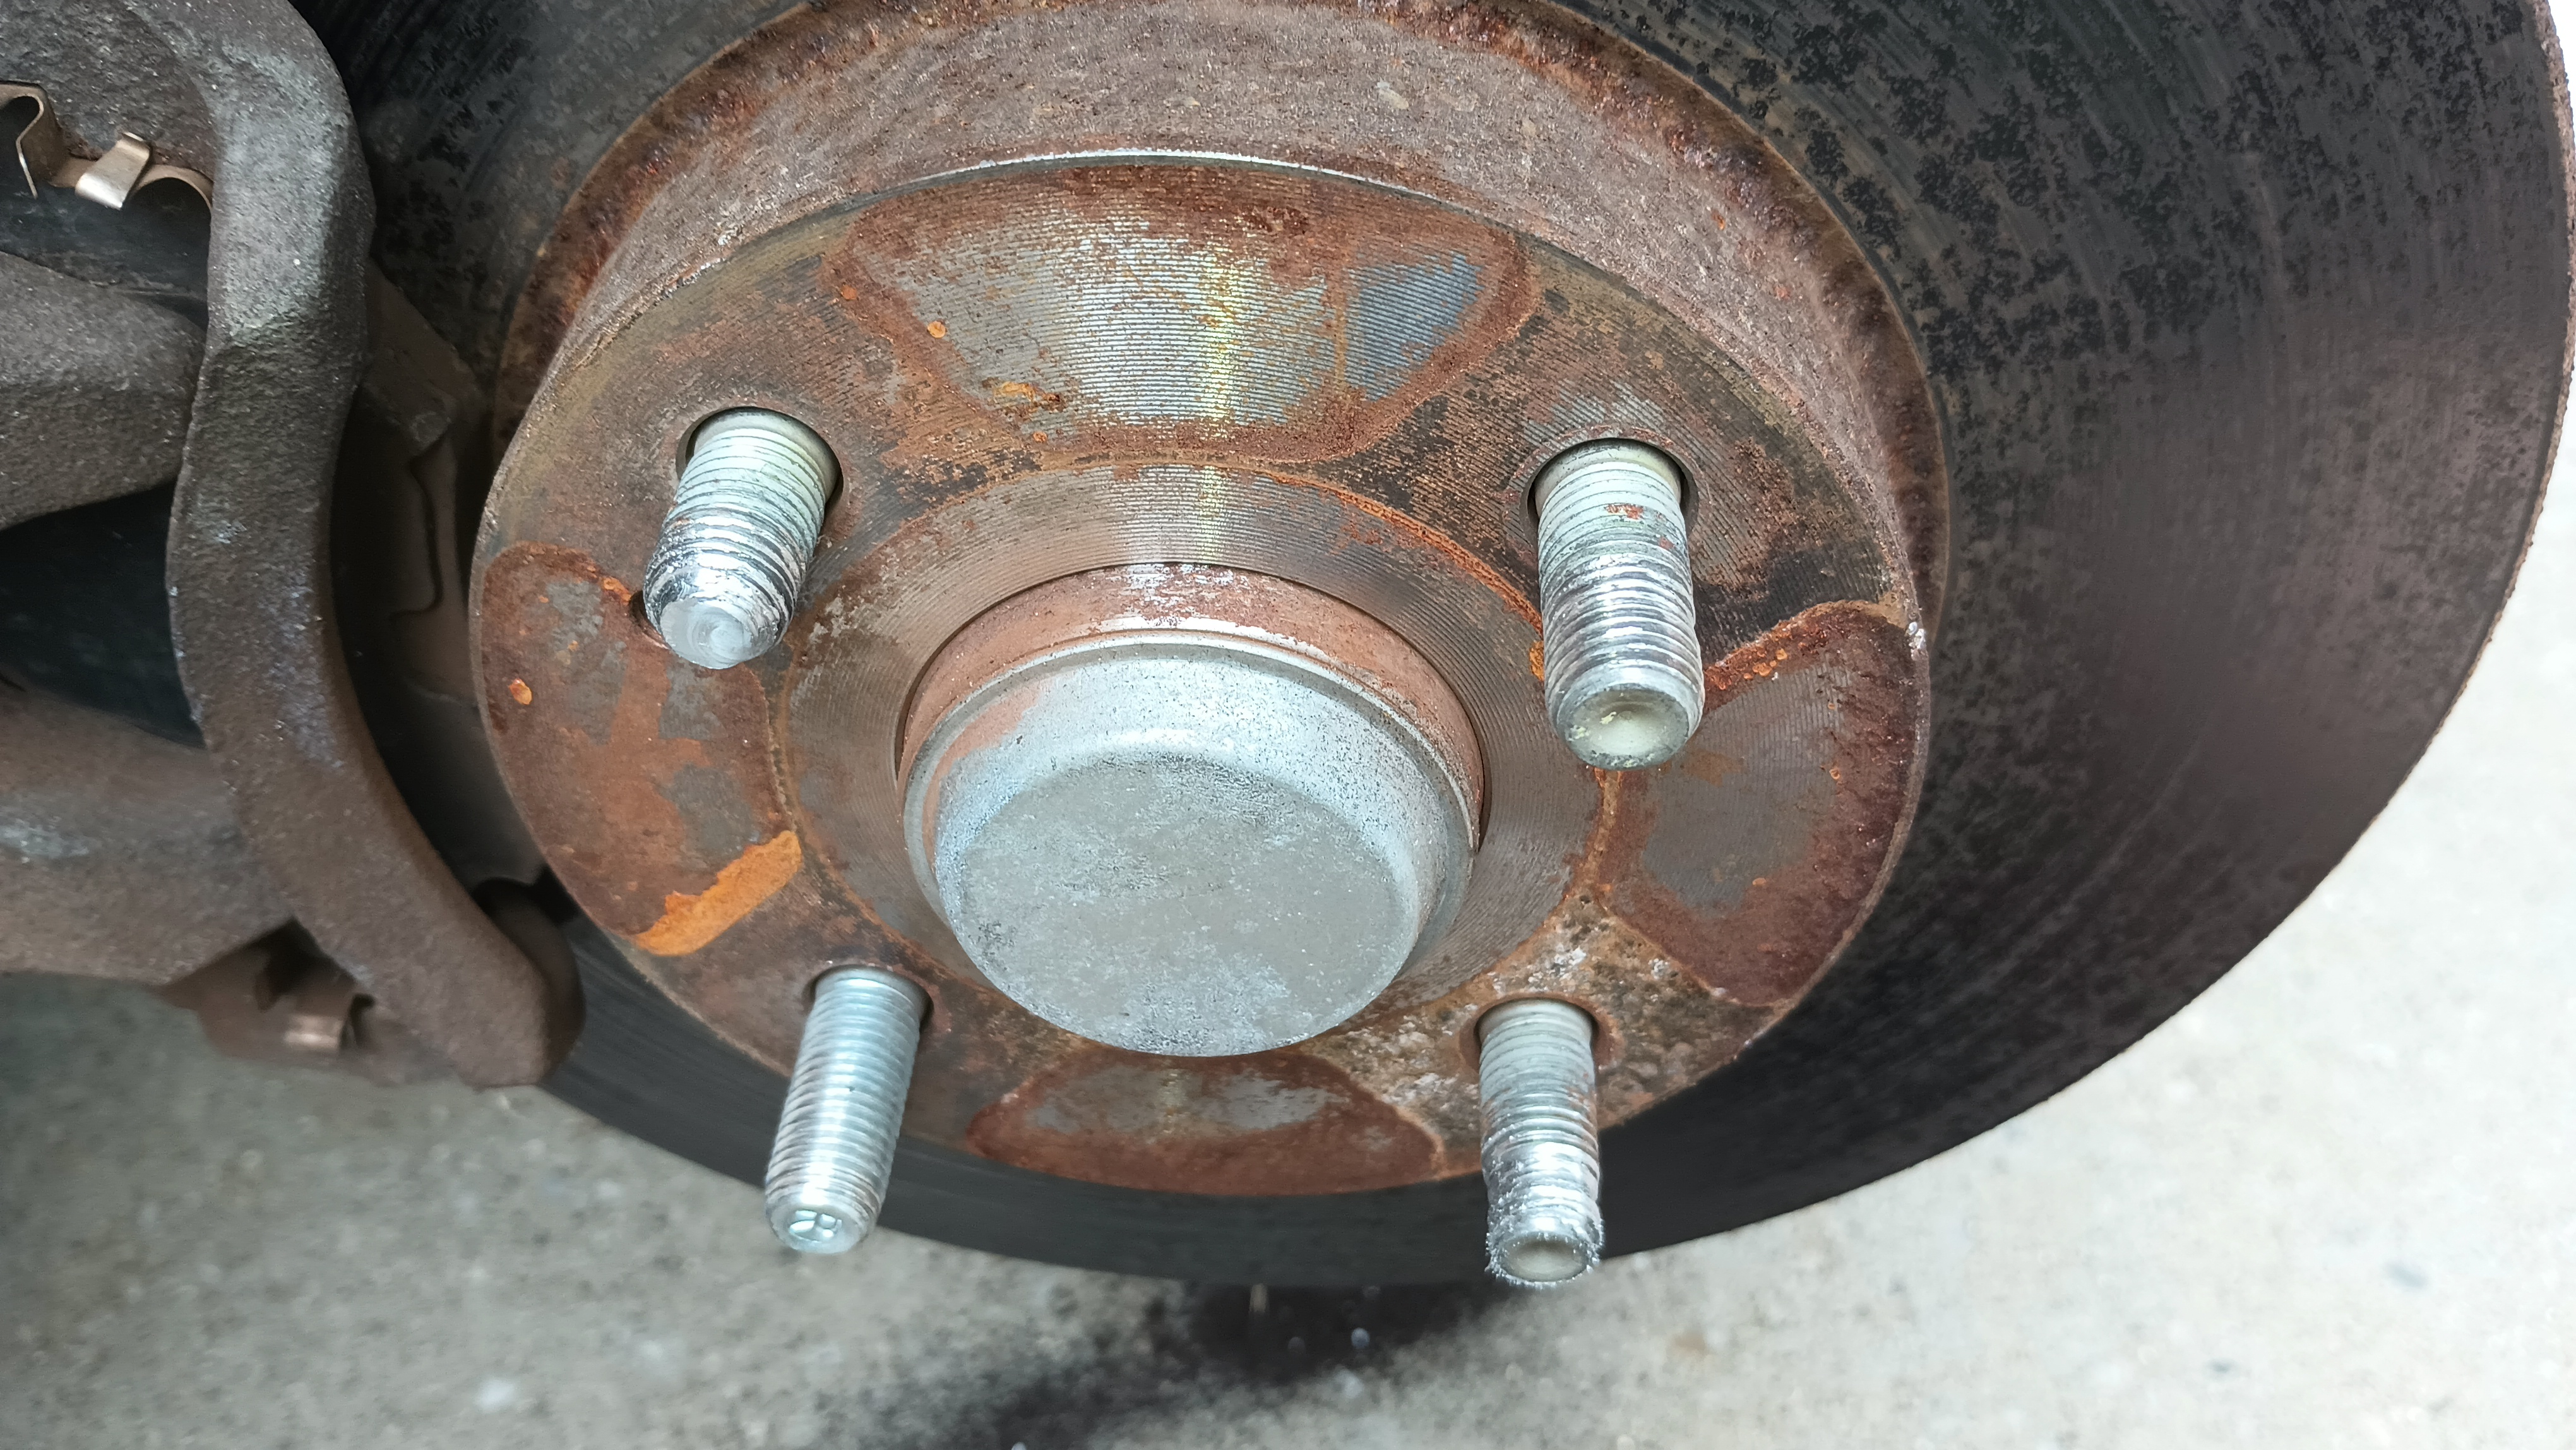
Thank you, Mazda, for making these some of the easiest studs I've ever replaced!
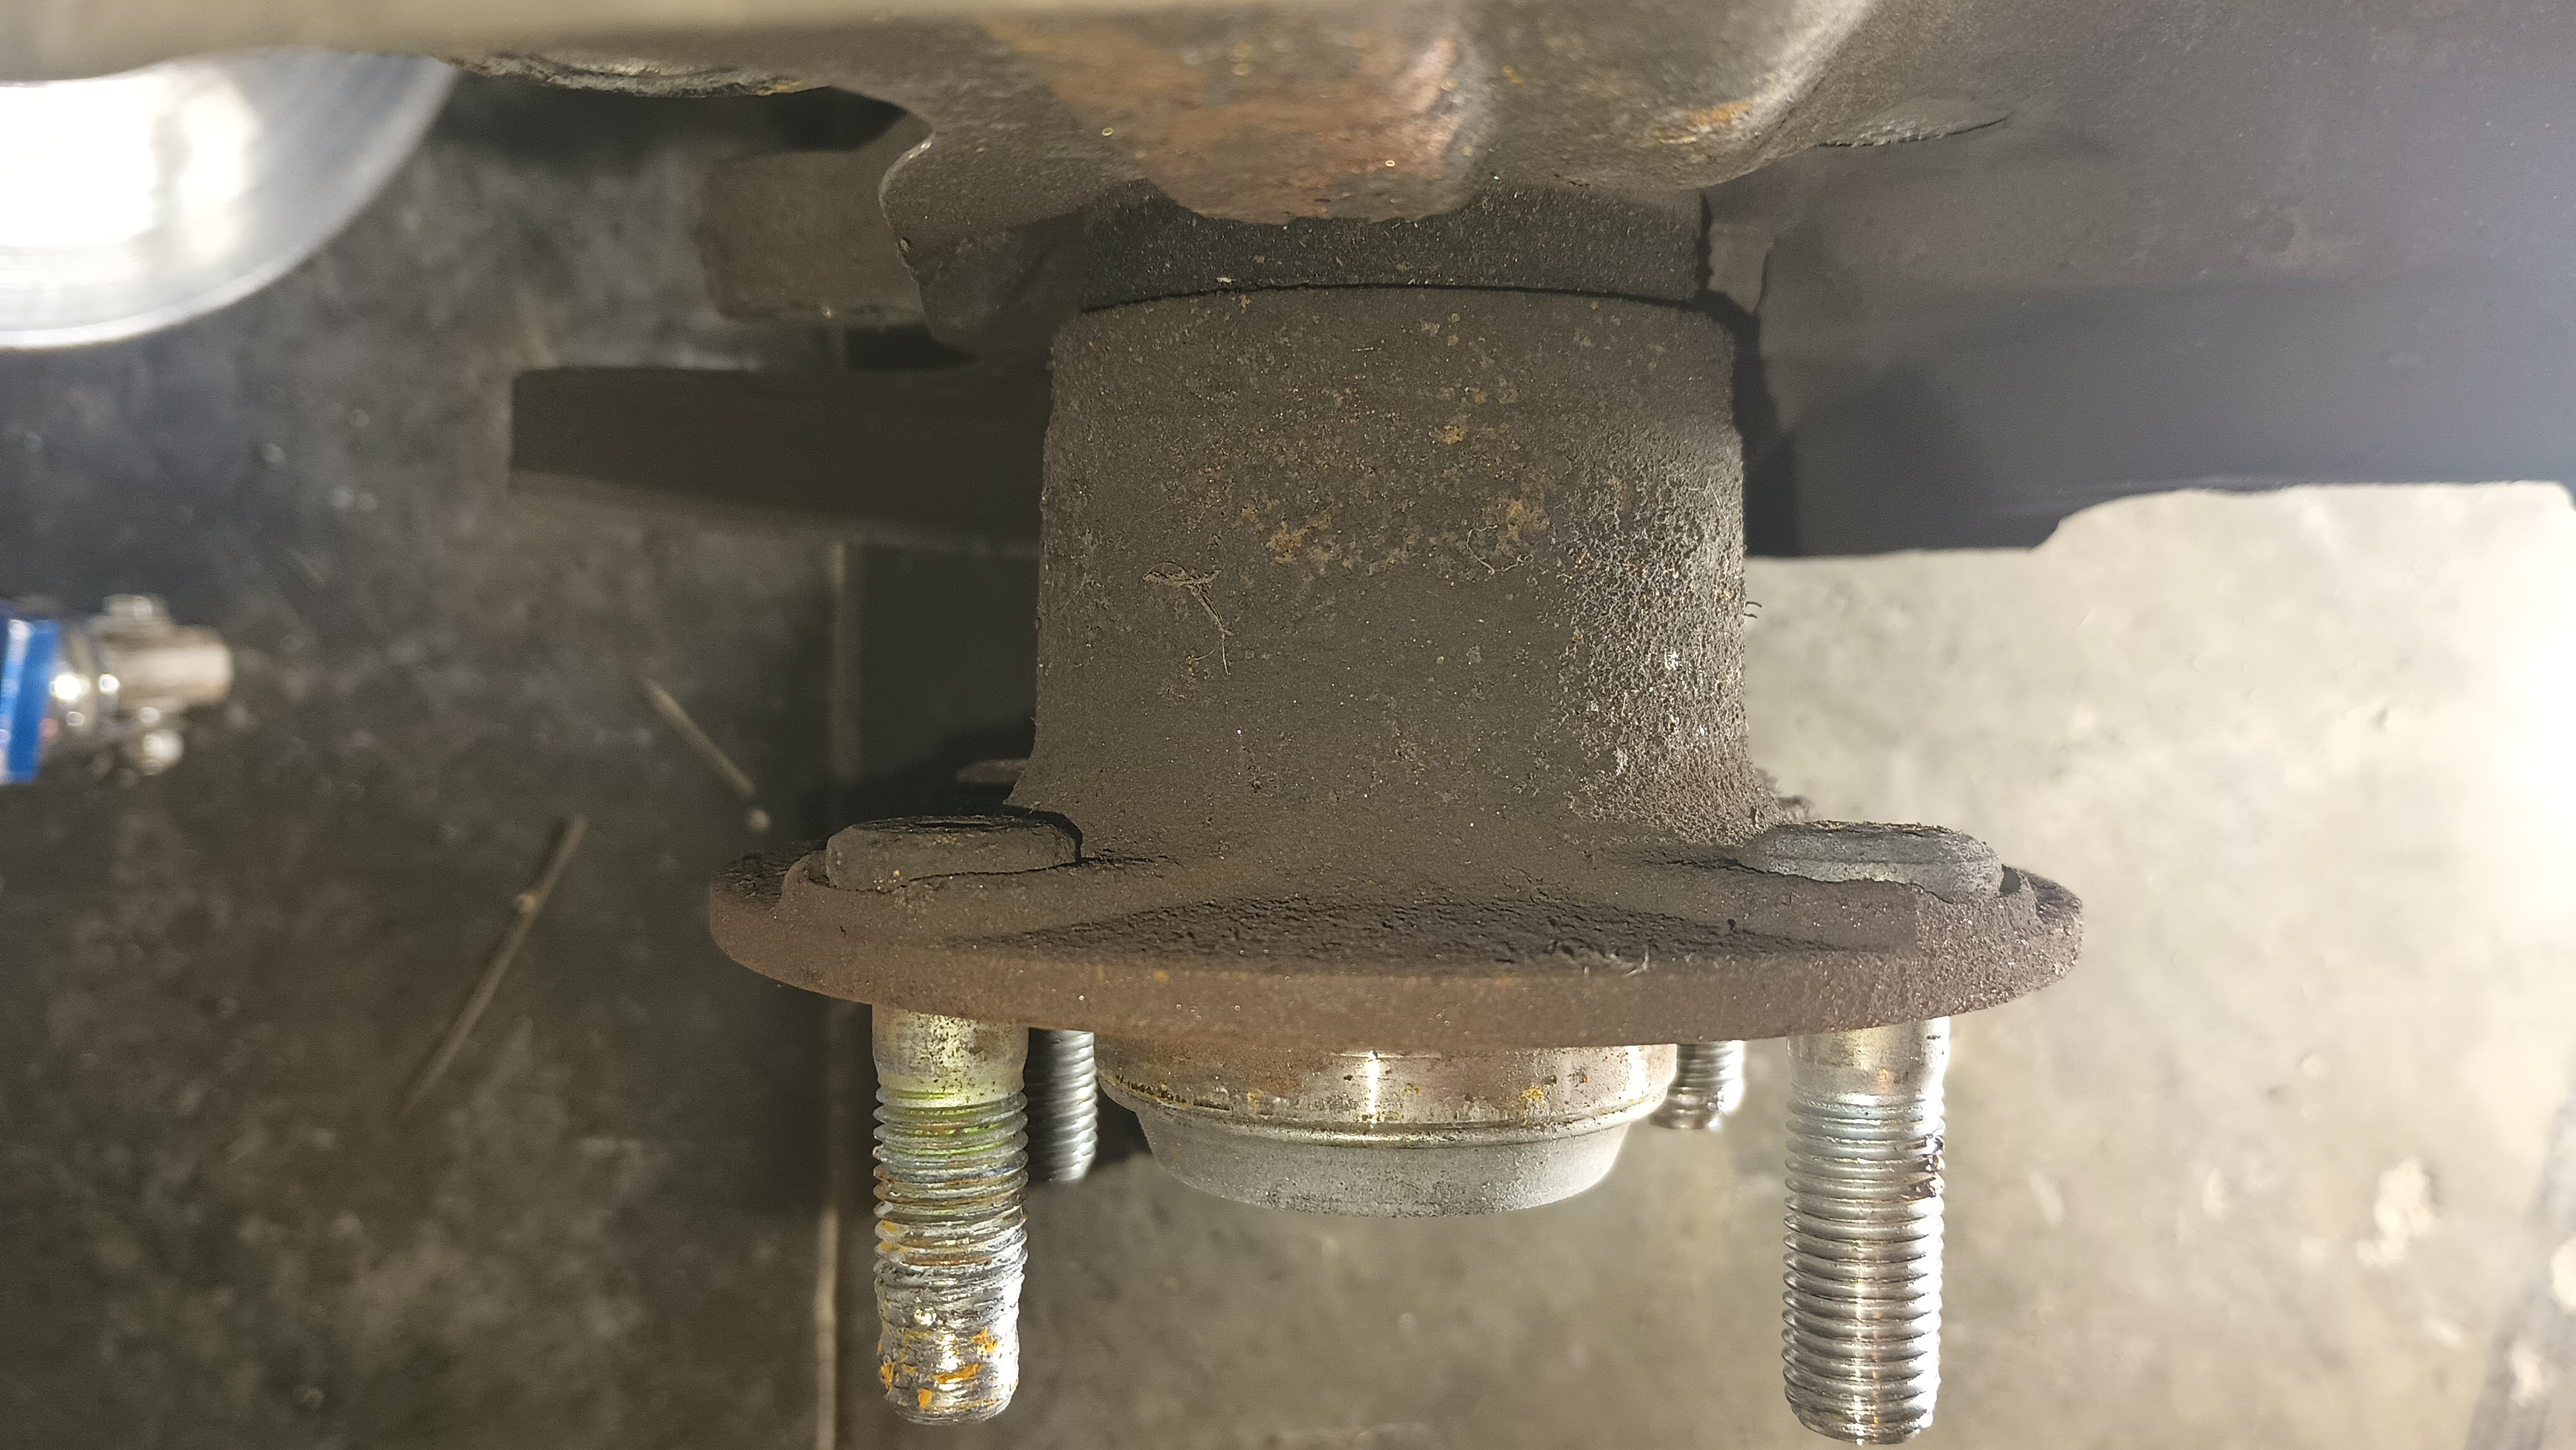
Two 14mm bolts to remove the caliper bracket (with the caliper) and there's a ton of access to the back side of the hub. A ball joint tool pops the stud out the back and then flip it around to pop the new one back in.
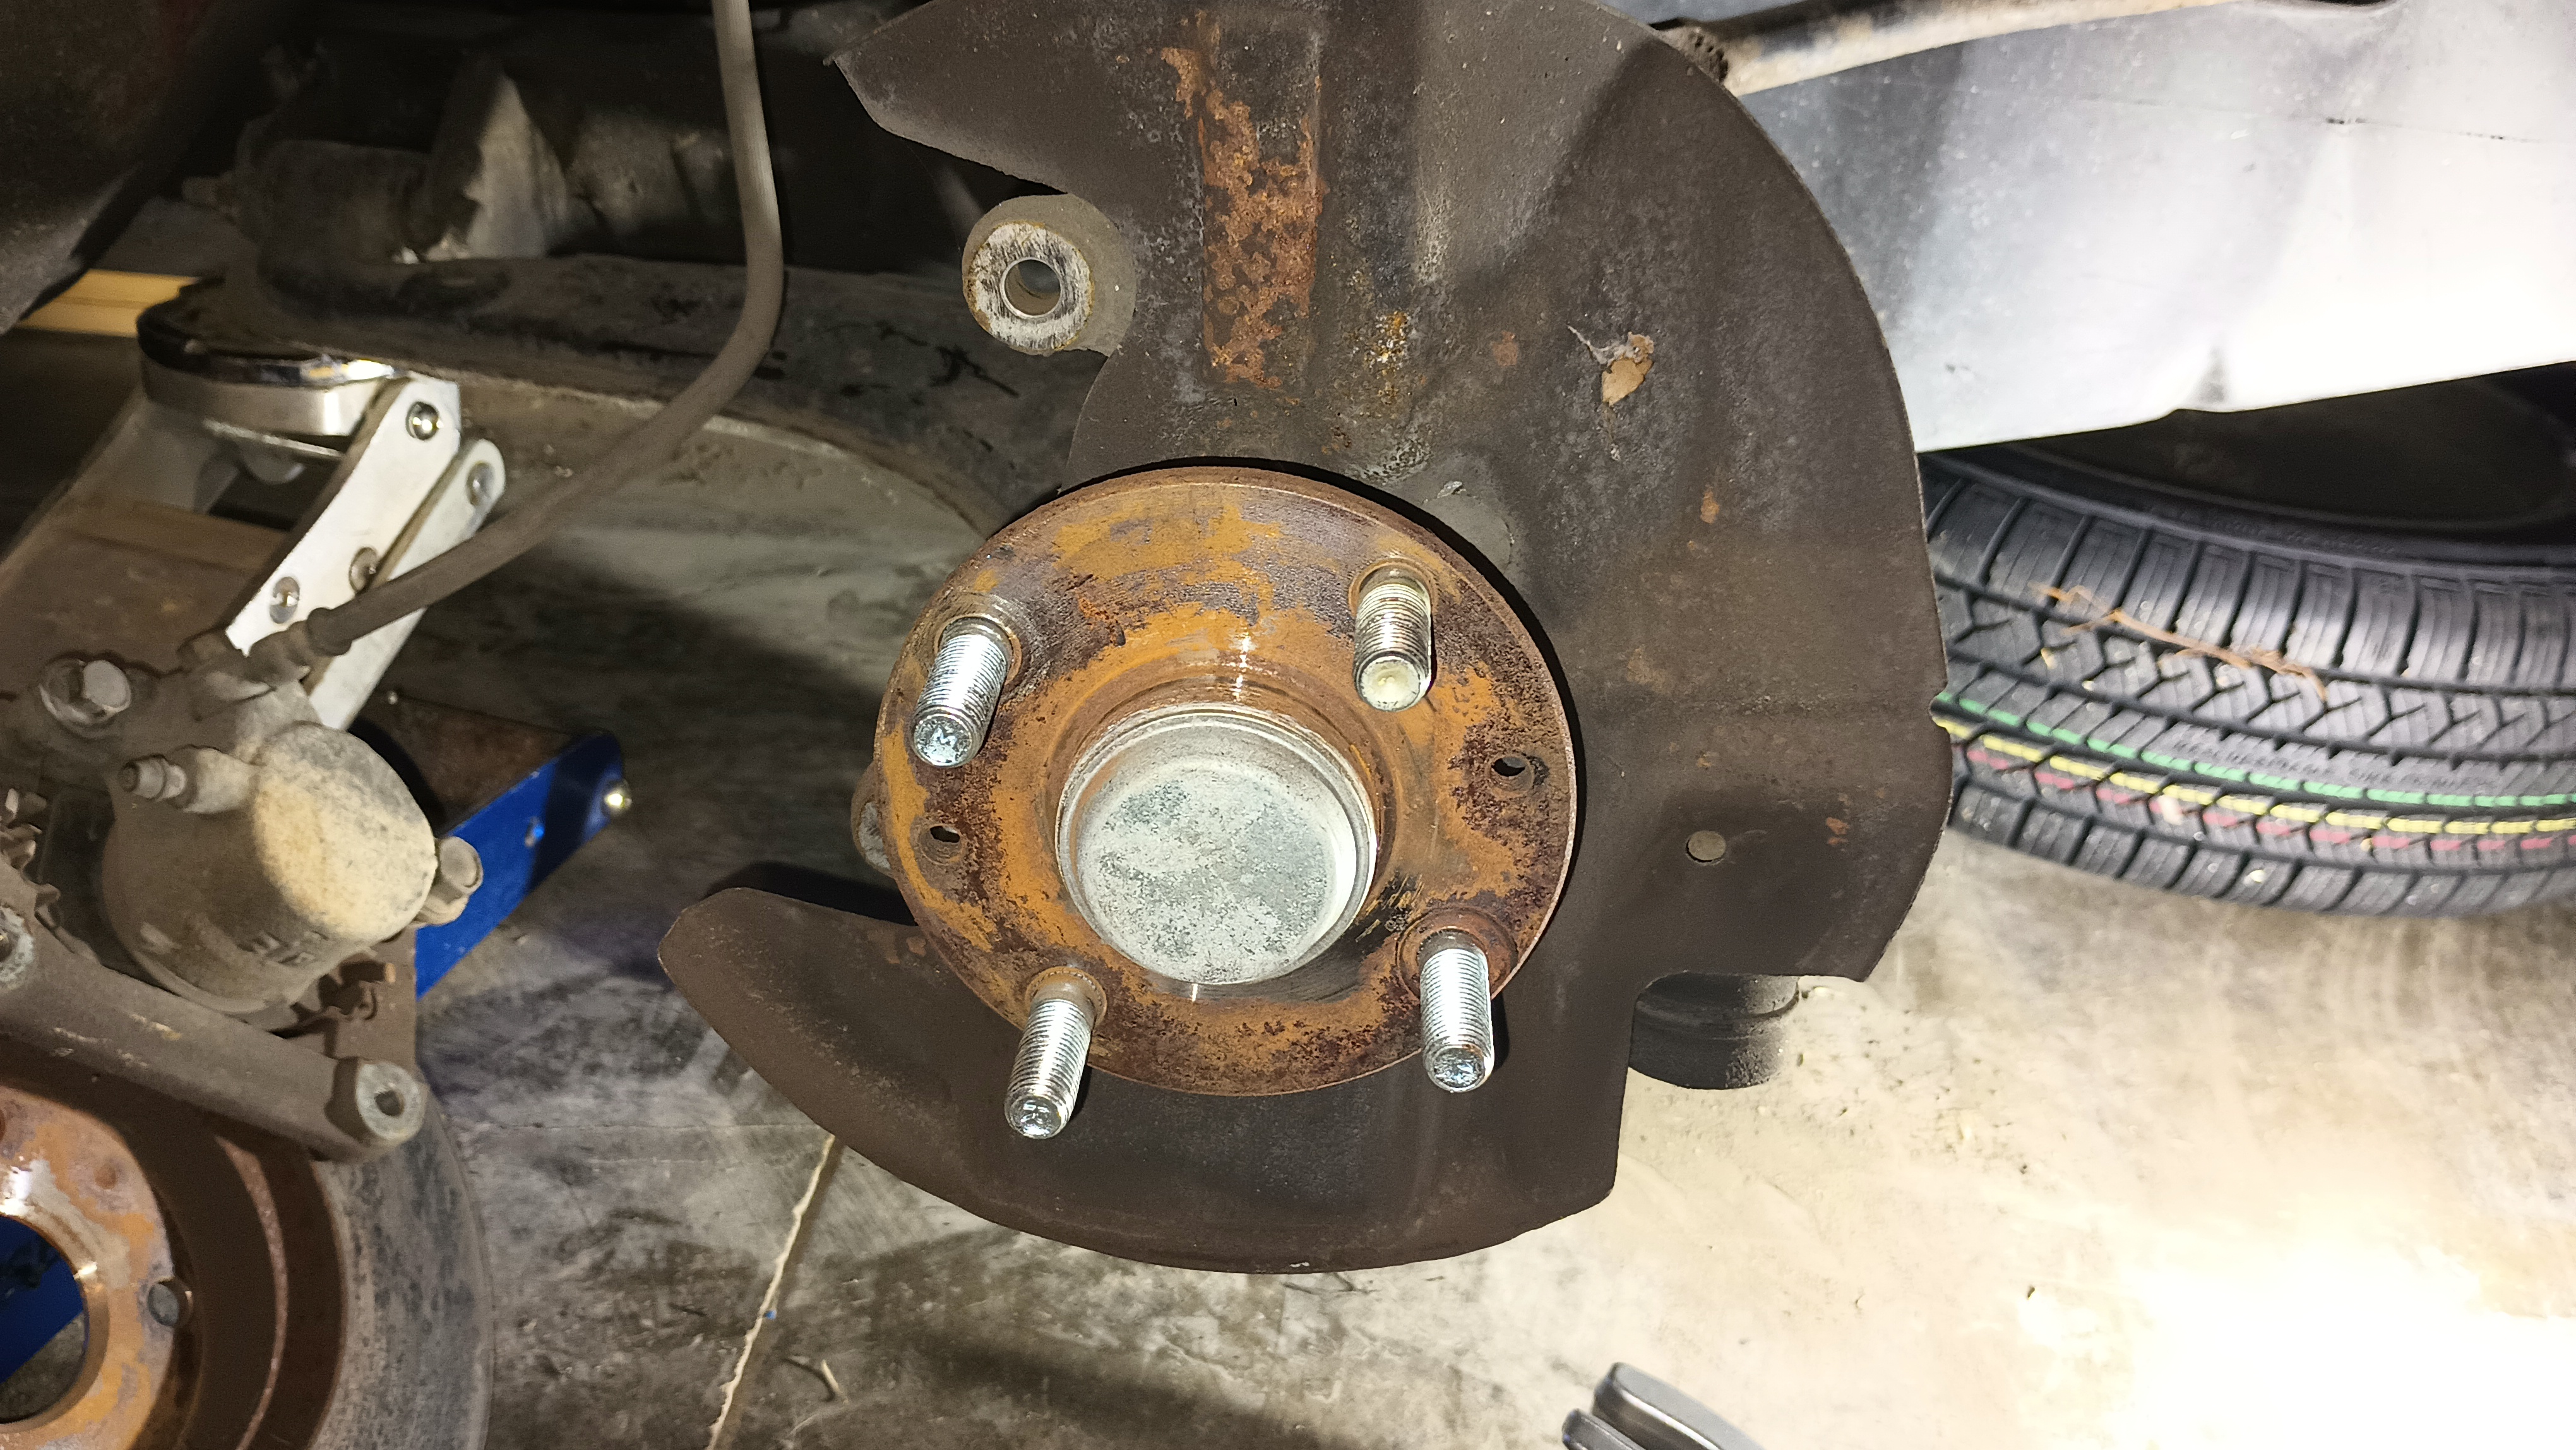
Pardon the dust and dirt that got onto the tire when I slid it under the car, but now I have all four attachment points for the front wheel!
I've got 8 more lug nuts to install and 4 more waiting for me at the store and then they'll all be shiny!
wae
UltimaDork
9/28/24 10:13 p.m.
After the challenge, I was talking to my daughter about how I had finally decided that I didn't want to keep the Biturbo because as cool as it was, I just didn't have a place for it. About five minutes after that conversation, a package arrived for her and she gave it to me to open. It was a Maserati Biturbo shift knob since mine was missing its. Well, didn't I feel like a jerk!
Yesterday, I had my wife print a Miata shift knob adapter that I found on thingverse. It doesn't really thread very well because I think the sizing is a little off, but it went on and I was able to slide the Maserati shift knob on. So now I have her gift in a car that I really do have a lot of attachment to. And since the sale is the Maserati funded the finishing of the Miata, I think it's appropriate!

In reply to wae :
Great, now the Miata is going to throw the timing belt or something.
I was going to say "have electrical issues" but the Biturbo may be one example of an Italian car that didn't last long enough for the electrics to go wonky.
wae
UltimaDork
9/29/24 11:24 a.m.
Pete. (l33t FS) said:
In reply to wae :
Great, now the Miata is going to throw the timing belt or something.
I was going to say "have electrical issues" but the Biturbo may be one example of an Italian car that didn't last long enough for the electrics to go wonky.
Oh, no, electrical problems were one of the hallmarks of the Biturbo! That was at least 50% of the fires and 75% of the excitement of "will I make it home today?"!
As long as no one tries to actually use the dog-leg pattern that's indicated on the knob, I think we'll be okay!
One CAN start off in a Miata in 2nd with little issue. One CAN'T do a 5-R upshift without first jogging into Neutral due to a clever interlock.
Backing up in 1st gear, however, is tricky and won't work.
That shift pattern makes me regret not buying the Biturbo.
wae
UltimaDork
9/29/24 5:01 p.m.
In reply to Pete. (l33t FS) :
But one can make a 4-R shift!
Whenever I drive the three-pedal minivan, I always make sure I shift through 5th on the way to 6th. The gears are close enough that if you've been accelerating fairly hard in 4th, you can go right to 6th. After driving the 5 for a while and developing some muscle memory, I jumped into the Neon and came really close to the 4-R shift.
Were you at the rallycross at Smoke and Mirrors where ZB did a successful 2-R downshift in his Golf? Just about stood the car on its front bumper. This was coming down the hill by the woods, at where the brick pile was. Gotta love the VW shift pattern and the easy to defeat reverse interlock.
The transmission clanked when backing up from then onwards