1 ... 3 4 5 6 7 ... 12
Rabbit Farmer
Rabbit Farmer Reader
2/24/19 9:31 p.m.

Mar 16, 2013

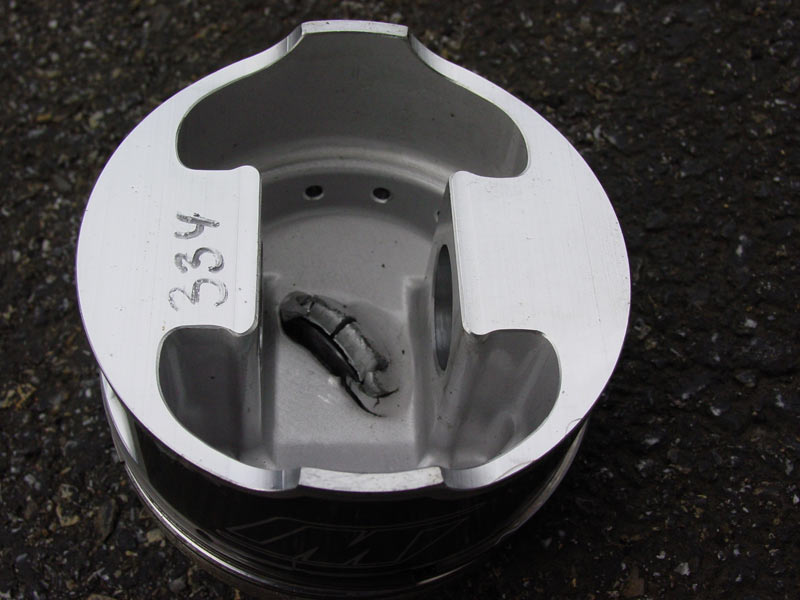
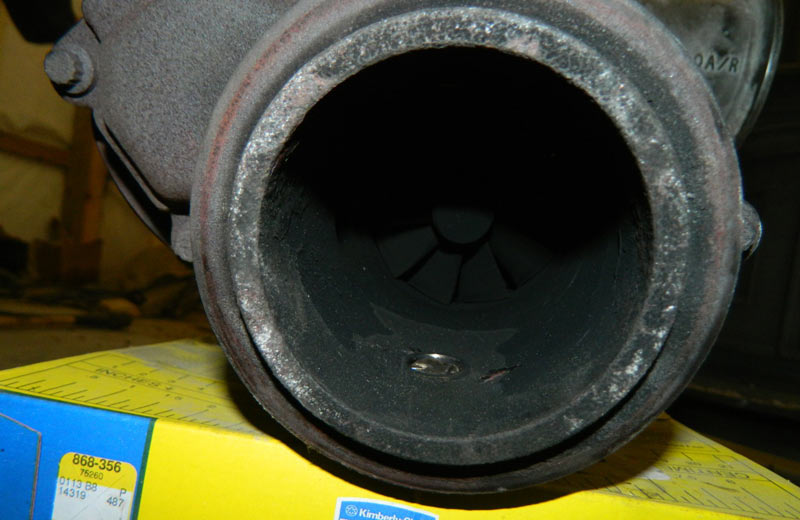
I'm pretty sure that I won't be using this piston again.  Temped to pull out the offending matter and apply some bondo to see how that works.

Something new to hang on my wall.

I did notice that the top ring is stuck in the groove and not making contact with the cylinder wall.  I will order a new piston, get the rod checked out, and then all new rings for the other three pistons.

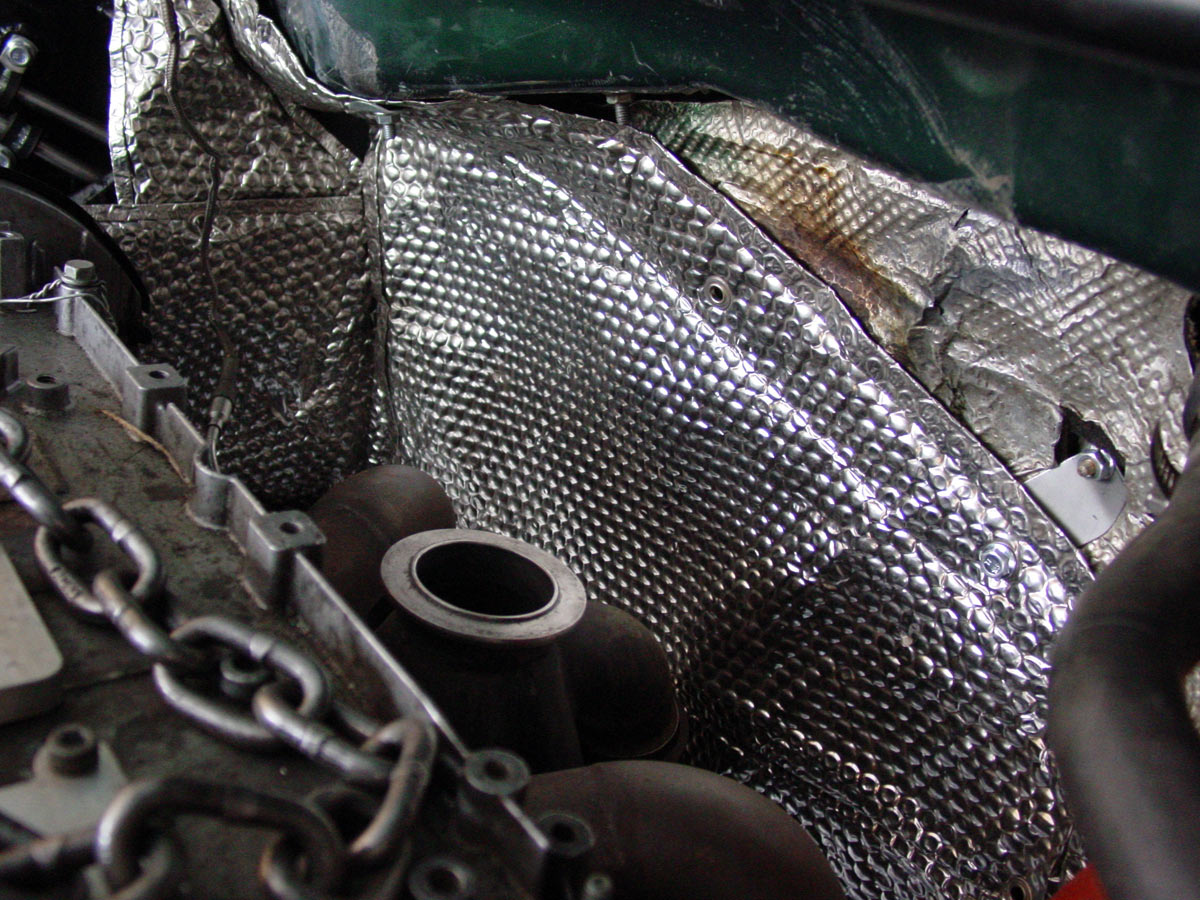
Some good news... kind of.  If the valve was not introduced to the piston, I would not have noticed that the heat from the turbo was melting some plastic bits on the passenger wheel well.  It you look through the little hole on the large melted plastic piece you will see a white tube.  That's the fuel line.

Heat shield is in order!

----------------(meanwhile, back at the ranch)----------------------

For those of you playing the home game, here is a little more turbo action for you.  Assuming that the tune is stock, this is running around 17psi of boost.  Not too bad for something that has a 17.5 to 1 compression ratio.

The 444 cubic inch engine has been great over the years.... let's see, carry the two, divide by infinity, and I come up with 7.3 liters of stump pulling power out of the old 2001 F250.  Today's trucks will blow away the power numbers of my old work horse, but since it still looks pretty modern, looks nice, and it quite functional, I started addressing some of the issues.

When I got on the throttle, there would be a cloud of oil smoke behind the truck.  To avoid the smoke and oil spray out the back when towing the trailer/car, I would slow down while going up hills to stay out of the high RPMs.  A buddy (Dana) took on the task of addressing the oil leak.

My understanding was the oil was coming from the turbo pedestal so I ordered the four O-rings from http://www.dieselorings.com (funny that they have my exact truck on their home page).  When Dana got into it, he discovered the oil was actually coming from the EBPV actuator on the pedestal that controlled the warm up valve; closes the valve to help the engine warm up quicker. [EBPV - exhaust back pressure valve).

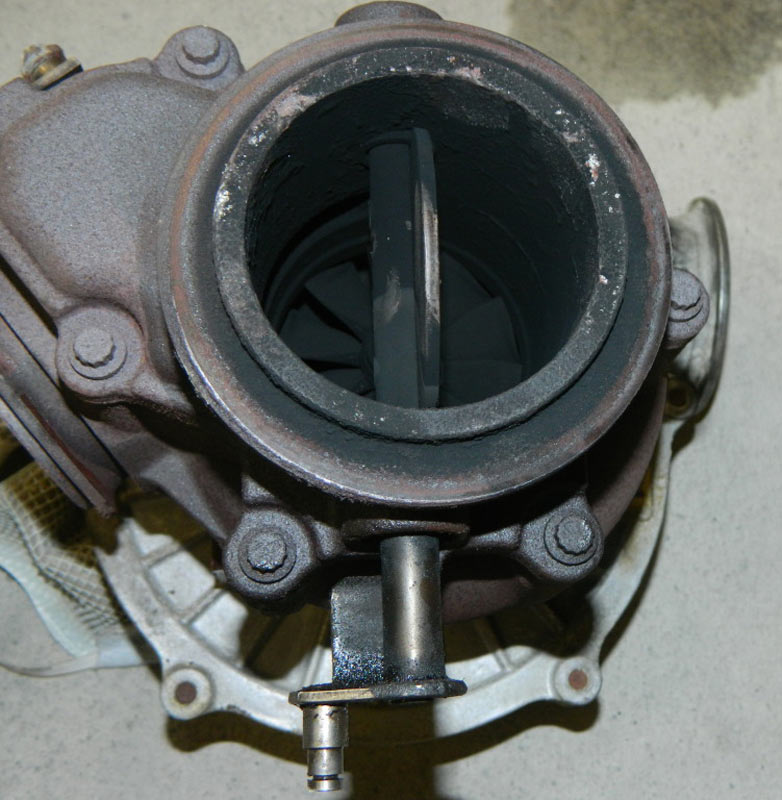
Turbo with the valve.....

Actuator with obvious oil leak around the EBPV....

Removed all the EBPV parts.....

Sealed the pedestal....

No more valve....

Next.... the fuel tank!

Rabbit Farmer
Rabbit Farmer Reader
2/24/19 9:32 p.m.

Mar 20, 2013

A little unexpected progress.....

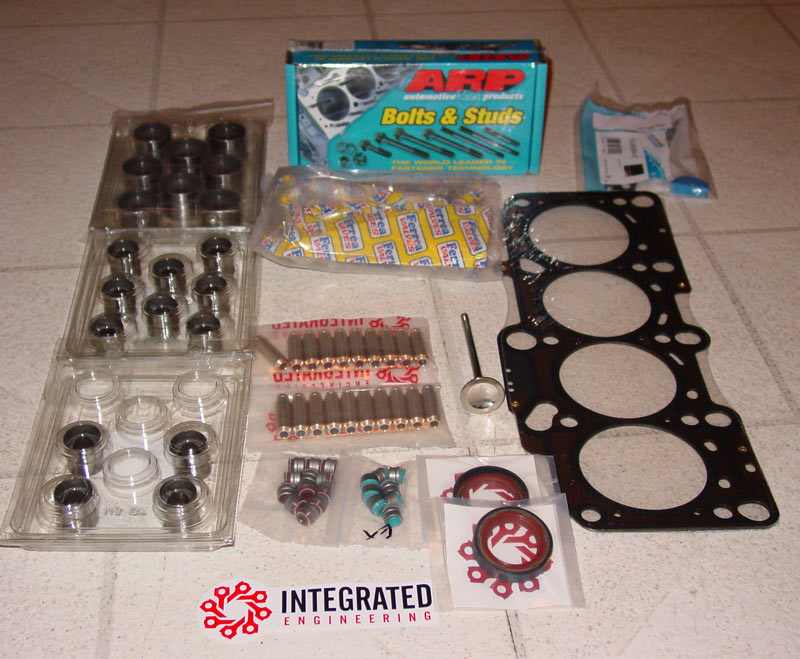
As I mentioned, I dropped the head off at RPM in Georgia, VT to have them clean the head, deck the head (it isn't called decking with the head.... correct term escapes me), etc.  Then, when the new parts (exhaust valves, guides, etc.) arrive, I would drop them off for them to complete the head.  I gave them 20 valves (intake and exhaust) and explained they would only use the intake valves and I would bring them the exhaust.  I also did not expect anything to happen (opps, premature foreshadowing... you know where I'm going with this) as I did not drop off the valve guides yet.

Weeeeellllllll, they did a great job of turning around the head really really fast by calling me on Tuesday to say it was 100% done and ready to pick up.  They ended up using sleeves instead of the guides that arrived today (Wednesday), so I will have to return the guides.  So kudos to RPM for getting the head done really fast.  I explained to them on Tuesday what my expectations were when I dropped off the head (minor miscommunication, no big deal).  They will swap out the exhaust valves later in the week.  Fast turn around, love it!  Getting closer to putting this all back together.

Ordered a new piston.  I forgot that we did a one-size over (82mm vs 81mm) on the pistons during the last rebuild.  Complete piston with new rings and wrist pin should be here soon..... I will bring that to RPM to get the wrist pin to fit nicely into the piston (I'm learning!) and to balance all 4 rods/pistons.  New rings are also coming for the other three pistons.

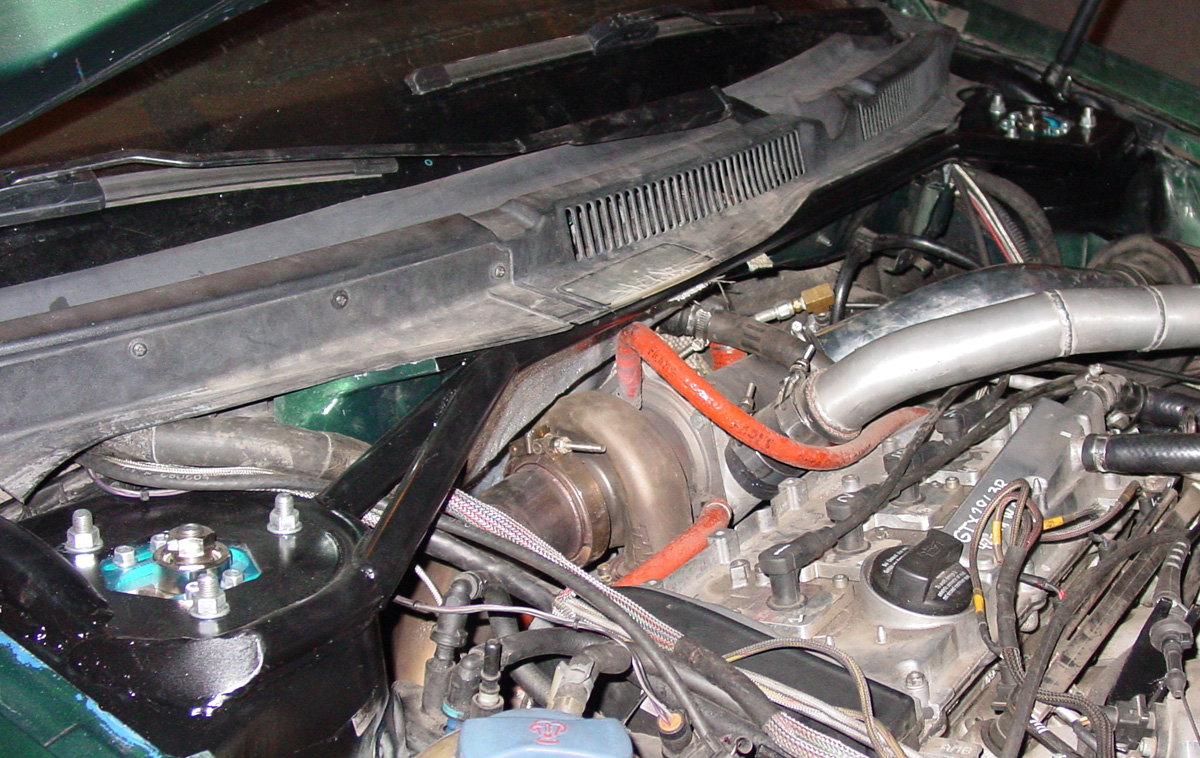
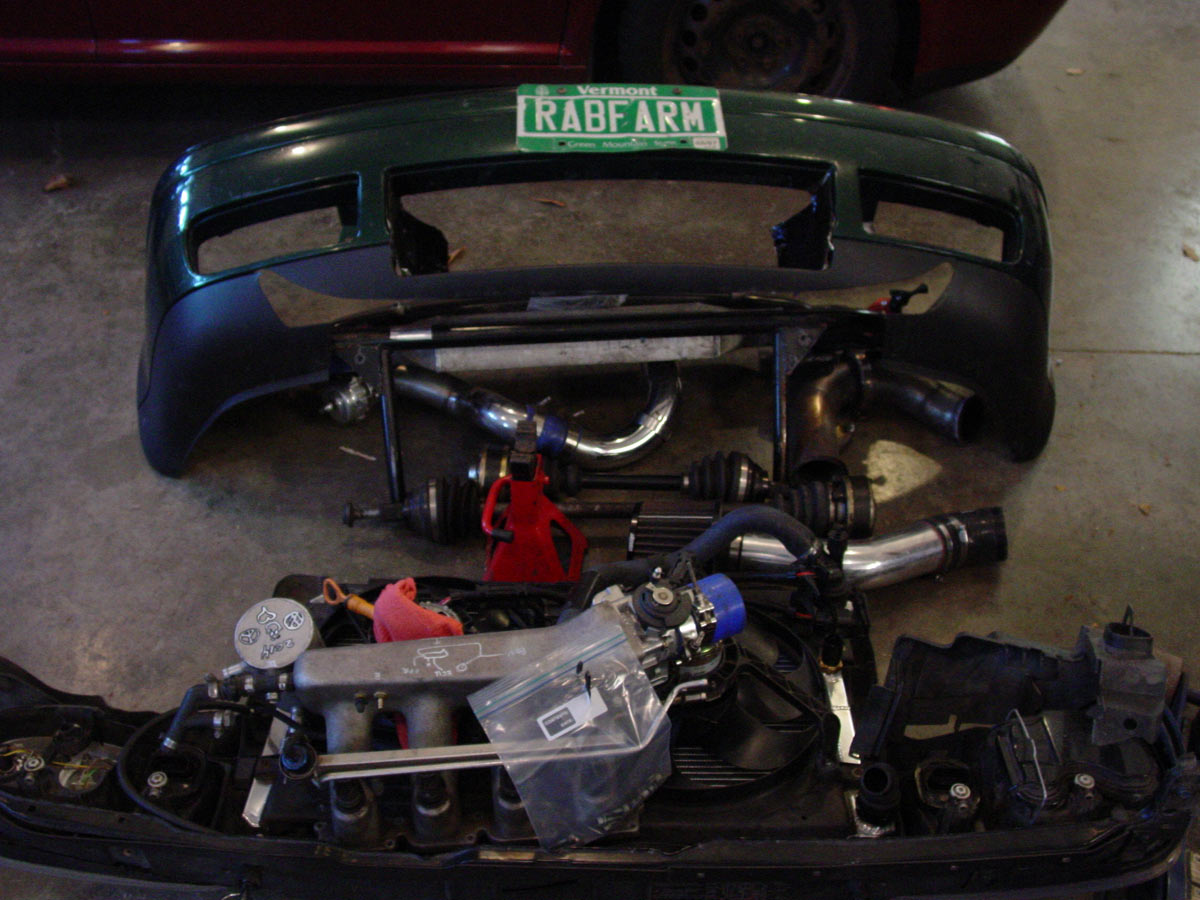
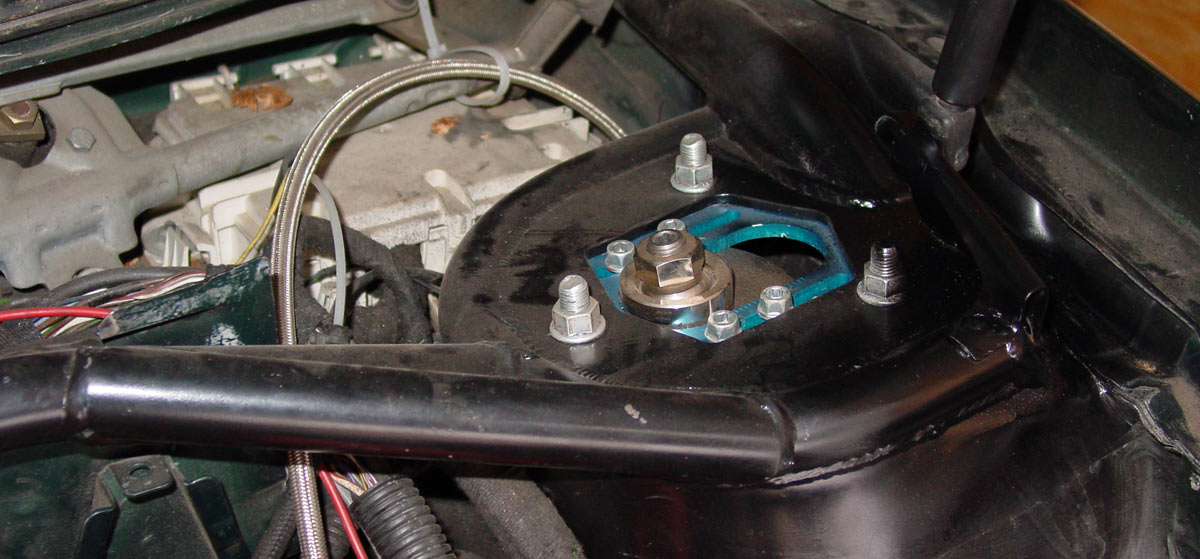
That leaves some thermal protection for the oil lines and the strut tower area... KalesCustom.com has Earl's FireGuard in stock so I will get that for the oil lines.  Still thinking of options for the heat shield on the strut tower.

Picture for those who don't read posts with paragraphs and punctuation.... like me.

-------------------------------------

Then there is the truck.

Chris (vtGTI) accepted the task to swap out the fuel tank on the F250... only took some excessive persuasion.

Jason at [b]VEMS.us[/b] (Colchester, VT).... same guy that did the last tune on the Golf and will do it again this spring [i]AND[/i] did the great tune on the Cabriolet.... allowed Chris to use his "shop" (more like a warehouse) to work on my truck. Very helpful as it was snowing all day on Tuesday.

With a little bit of blood (yuck... will spare you that picture!), sweat, and tears... and a lot of oily diesel fuel, rust, and dirt, he was able to get it done by 1:30ish AM (at least that is when I rec'd the pictures from him).  Thanks Chris!

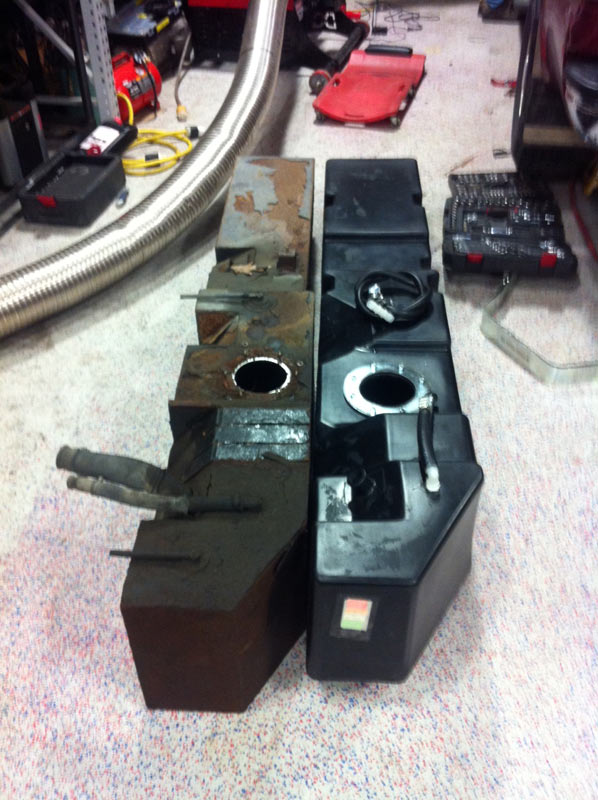
Old 47 gallon metal Transfer Flow fuel tank that I have been talking about replacing since 2005 vs. the new 50 gallon Titan Tank fuel tank made from "military-grade, cross-linked polyethylene".... you know, plastic.

This hole on the top explains why it leaked while parked on a hill or when I fill it about 3/4 of a tank.

So, I did something stupid like try to fill up the tank on my way home.  There was already 10 gallons in the tank so I put another 40 gallons in for $176!!!  Ouch!

While the truck was at VEMS, Jason checked out my trans temp, EGT, and boost gauges to see why they stopped working.  While he was in there, it hooked them into the dimmer switch so they dimmed with the rest of the dash!  He believes the trans temp gauge is now working (I won't know 100% until we get some heat in the transmission); the EGT gauge needs to be replaced, but he confirmed the sensor and wiring were functioning; and the boost gauge seems to just need a new tube.  I will take care of all of that soon.  Big thanks to Jason for being a great tuner, standalone engine management harness builder, tuner, and electrical genius!

Rabbit Farmer
Rabbit Farmer Reader
2/24/19 9:32 p.m.

Mar 21, 2013

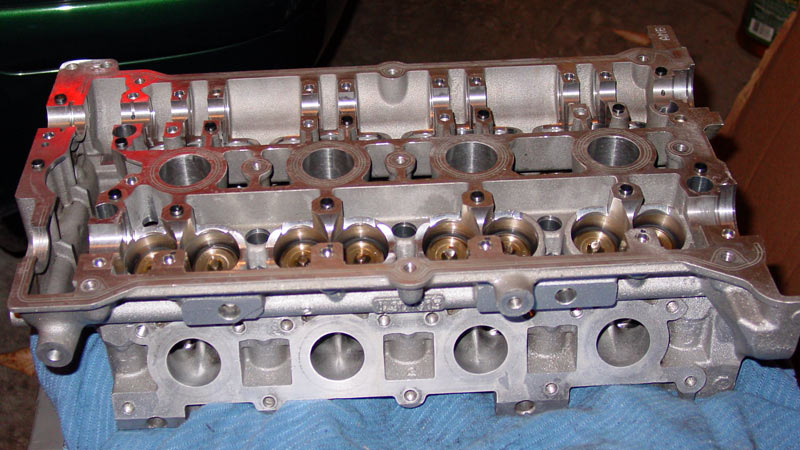
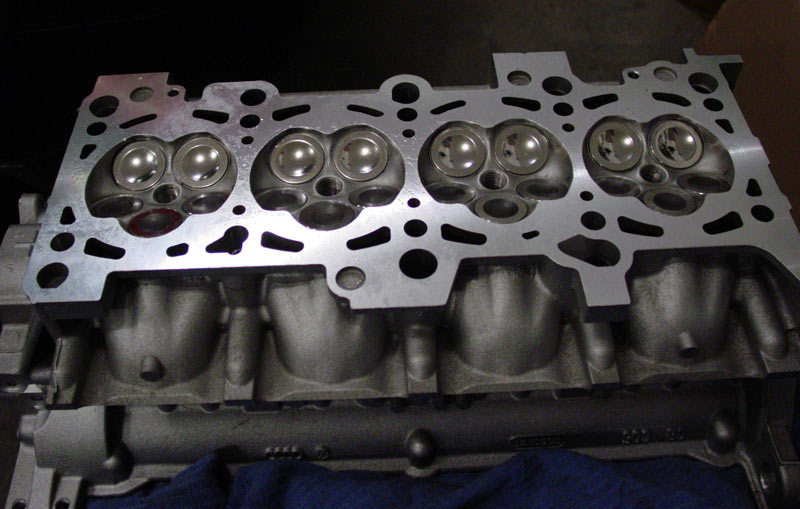
Not much to report... got the head back from RPM today.  Looks great.  I will put the rest of it together this weekend.

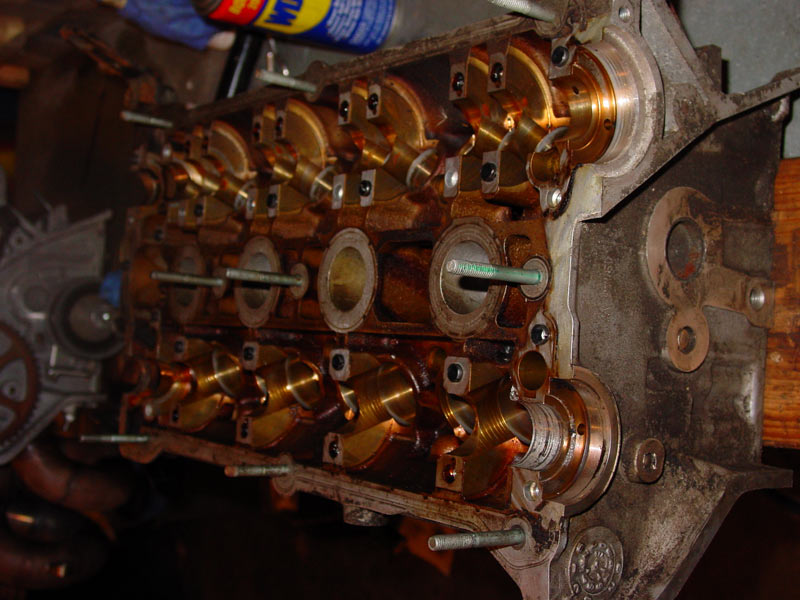
I acquired two heads from some fellow racers.  This is the one that I opted not to use this time around as I was worried about the cam journal on the "front" of the engine.

Rabbit Farmer
Rabbit Farmer Reader
2/24/19 9:33 p.m.

Apr 14, 2013

Been a while since I posted.  Lots of progress.

Received the new Wiseco to replace the "modified" one.  RPM machine shop in George, VT balanced the pistons/rods so that everything was equal.

Finally received the new rod bearings from 034Motorsports.... I guess they were on back order.

Receive all the exhaust manifold goodies from German Autoparts including a Jackson Racing Racing timing belt.

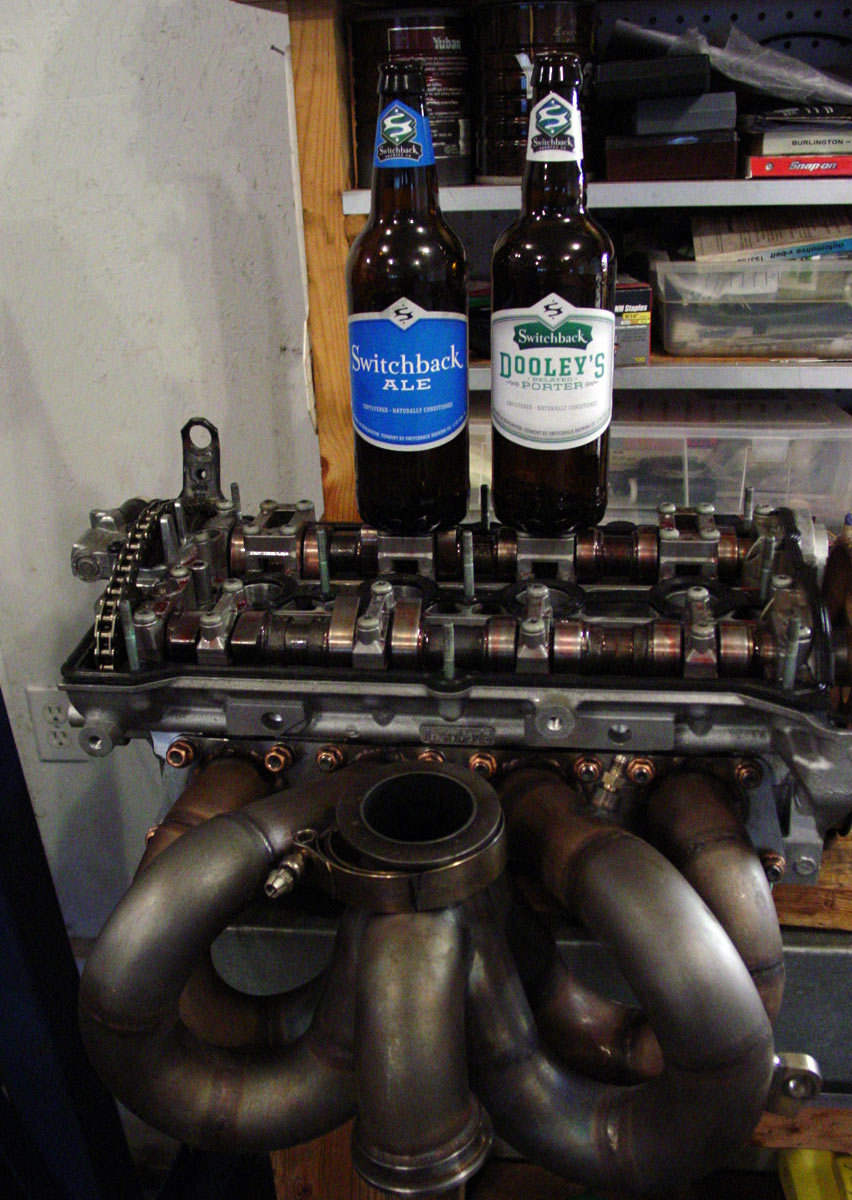
So.... since all the parts are here, I dived into taking all the parts off the old head and putting everything together on the new head.

First... for years I have sworn at the ATP exhaust manifold because the nuts were impossible to get at.  Guaranteed to round off the nuts when trying to loosen or tighten.... terrible design.

Well, the KalesCustom.com custom (naturally) exhaust manifold was a dream to remove from the old and install on the new head.  I could get to all the nuts with a straight or flexible drive socket. Just one nut required a box end wrench, but that was just fine as it was an easy swing from the bottom to remove/install.  Happy camper!

All together... celebrated with two flavors of Switchback!

Motivational music as it was a long day.....

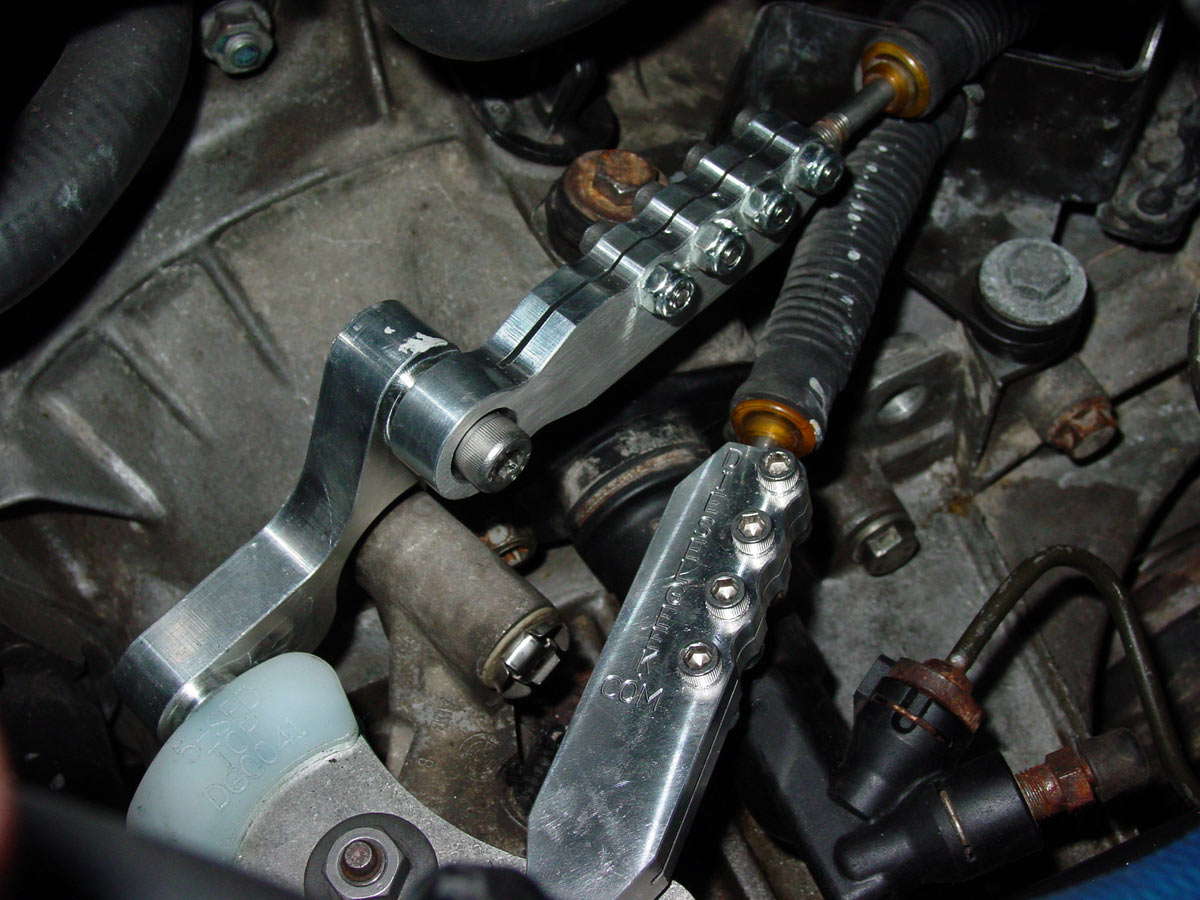
Chris Cheesman had the Cabriolet this week to make some adjustments to make her perform perfectly.  I didn't have any garage space (or time!) to do some of the installation stuff (i.e. short shifter and splash tank/filter) so he did it all.

Cabriolet is now ready for summer.... new Diesel Geek short shifter kit (positive engagement/notchy gear selection), oil change, balance, alignment, splash tank/filter, and replaced VVT oil gasket/half moon.  Thanks Chris!

She is hiding, but ready for summer..... or the next owner.

Rabbit Farmer
Rabbit Farmer Reader
2/24/19 9:33 p.m.

May 13, 2013

Updates without pictures….

The Golf is ready for the Mt. Ascutney #1 hillclimb (all four miles of it).  Engine is together, broken in, and dyno tuned.  I brought the car down to Jason at VEMS.us (Colchester, VT) where they have an AWD dyno.  Rear wheels still show zero wheel horsepower regardless of how much boost we add.

Goal of this tune was to remove the water/meth while still running race fuel and, more importantly, not to have too much power for a front wheel drive car.  Sooooo, we went from 353wHP down to 300wHP.  In 2010, when I first installed the 6-speed gearbox and had new tires, I was able to get traction at the Ascutney hillclimb.  Because it seemed that combination did work, we shot for those numbers this year.  Spinning tires, especially with a turbo, is not very functional.

Currently, the goal for later this summer is to take the race fuel out of the mix on the dyno and add back in the water/meth AFTER we have ensured that the proper at-the-nozzle check valves are in place to keep the water out of the engine when it isn’t running.  At that time, we will have a max of 300wHP using high octane pump gas with the water meth.  The final numbers may be lower because of the pump gas, but I am fine with that as I’m trying to make the event costs more affordable.  Also, it is impossible to find more race fuel on the weekend while at the event should I use more than planned.   For added protection, I do plan to mix in 2-3 gallons of race fuel at the events to bump up the octane.

I do need to reinstall the skid plate and change the oil prior to Ascutney.  Almost there!

We are official selling the turbo Cabriolet.  Nice car with a nice engine.  We just don’t drive it enough.  Add is currently on VWvortex at http://forums.vwvortex.com/showthread.php?6034750

Looking forward to the Ascutney hillclimb so that I have different content for the videos!

Steve

Rabbit Farmer
Rabbit Farmer Reader
2/24/19 9:35 p.m.

May 21, 2013

Mt Ascutney #1 (2013)

"long course" is 4 miles instead of the normal 3.

I broke the driver's side axle (a Drive Shaft Shop axle... they are warranted!) on my first run on Saturday.  We replaced it over lunch and kept going.  Unfortunately, because of the axle issue, I was only able to take one run of the entire hill on Saturday.... I don't know the 4th mile of this hill as we last ran it in 2004 or 2005.  This didn't help with being able to memorize the upper section.  I still felt I didn't know it (and it isn't that technical up there), but it is a very fast section with some consequences for leaving the road at a million miles an hour. (Note: some exaggeration is in this post as bumps increase speed by 47%)

Mainly 3rd and 4th gear with some 5th thrown in for the lower and upper straights; it is a 6 speed.  I think I only got down to 2nd in one or two slower corners.

Car felt good.  Still thinking of swapping out the current spring setup for two-step springs to suck up some of the bumps.

Here is the video.  One angle for the entire event.... I didn't move my camera around the car like I normally do.

Available in 1080HD / full screen for your viewing pleasure.  You have to select those options at the bottom of the video.

We had 5 dash plaques for this event that I put together.... they represent the folks that have been doing this hillclimb for many, many years.

Enjoy.
Steve

http://www.youtube.com/watch?v=AXVwKRPum3k

Rabbit Farmer
Rabbit Farmer Reader
2/24/19 9:35 p.m.

Jun 14, 2013

Not much to update.  Did a little tweaking with the tune (non dyno) for some areas on the map.  Drove it at the Burke Hillclimb!

Practice day (Saturday) only.  Event cancelled on Sunday due to technical difficulties with the mountain.  There will be a Burke #2 this year!
All runs were in the wet.  Managed 5th gear prior to the first checkpoint.

Managed 10th overall.  Quite pleased with results.  

All cars above me were modified Subarus (highest street prepared class) or the super fast modifieds.  

Hard to compete with AWD cars in the wet.

Steve

PS - Really loving the 50 MB download and 10 MB upload speeds with cable... big improvement from the 1.5 MB download and .nothing MB upload with DSL.

http://www.youtube.com/watch?v=wM8-pr0rbsA

Rabbit Farmer
Rabbit Farmer Reader
2/24/19 9:36 p.m.

Jul 14, 2013

Not much to report.

Okemo #1, 2013 hillclimb this weekend.  Had a great time!

Had some issues with brakes on Saturday.... bled all brakes.

Achieved 113mph in the straight (top 3 of all cars at the event.... pleasantly surprised!)

Here is a link to the video... select either 720HD or 1080HD.  Unsure what happened, but the quality of the video on youtube is pretty poor.

http://www.youtube.com/watch?v=1uWvbzQ5JVY

No chipmunks were harmed in the making of this video!!!!!

http://www.youtube.com/watch?v=1uWvbzQ5JVY

Rabbit Farmer
Rabbit Farmer Reader
2/24/19 9:37 p.m.

Jul 25, 2013

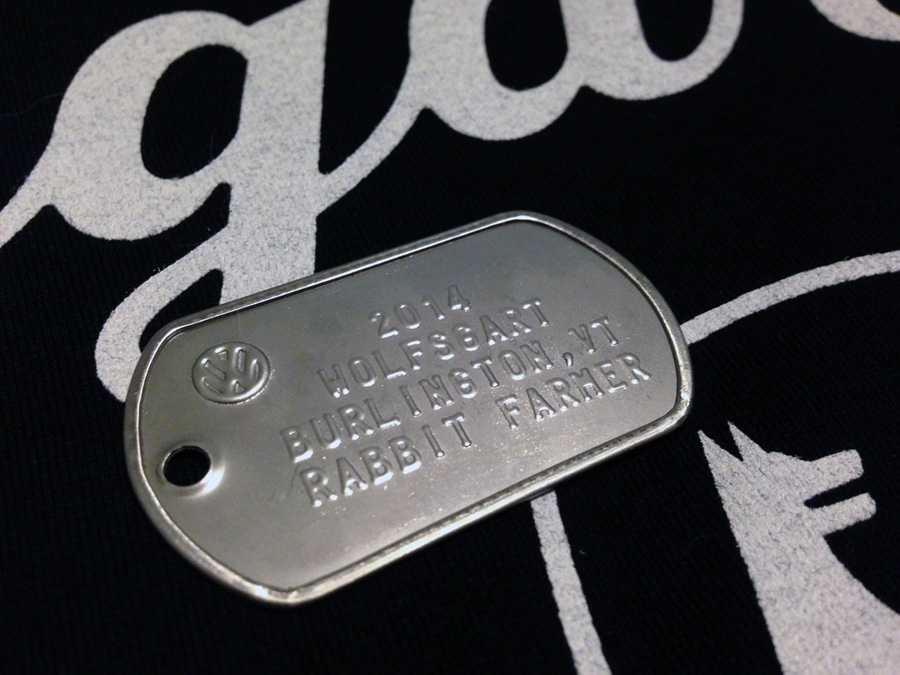
Nothing to report.... just making a post to say "Hey!  I'm going to the Wolfsgart car show in Essex Jct, VT" this weekend.

http://www.Wolfsgart.com for information.

I hope to have both the Golf and the Cabriolet there on Saturday.... just the Cabriolet on Sunday.

In Volkswagen news.....

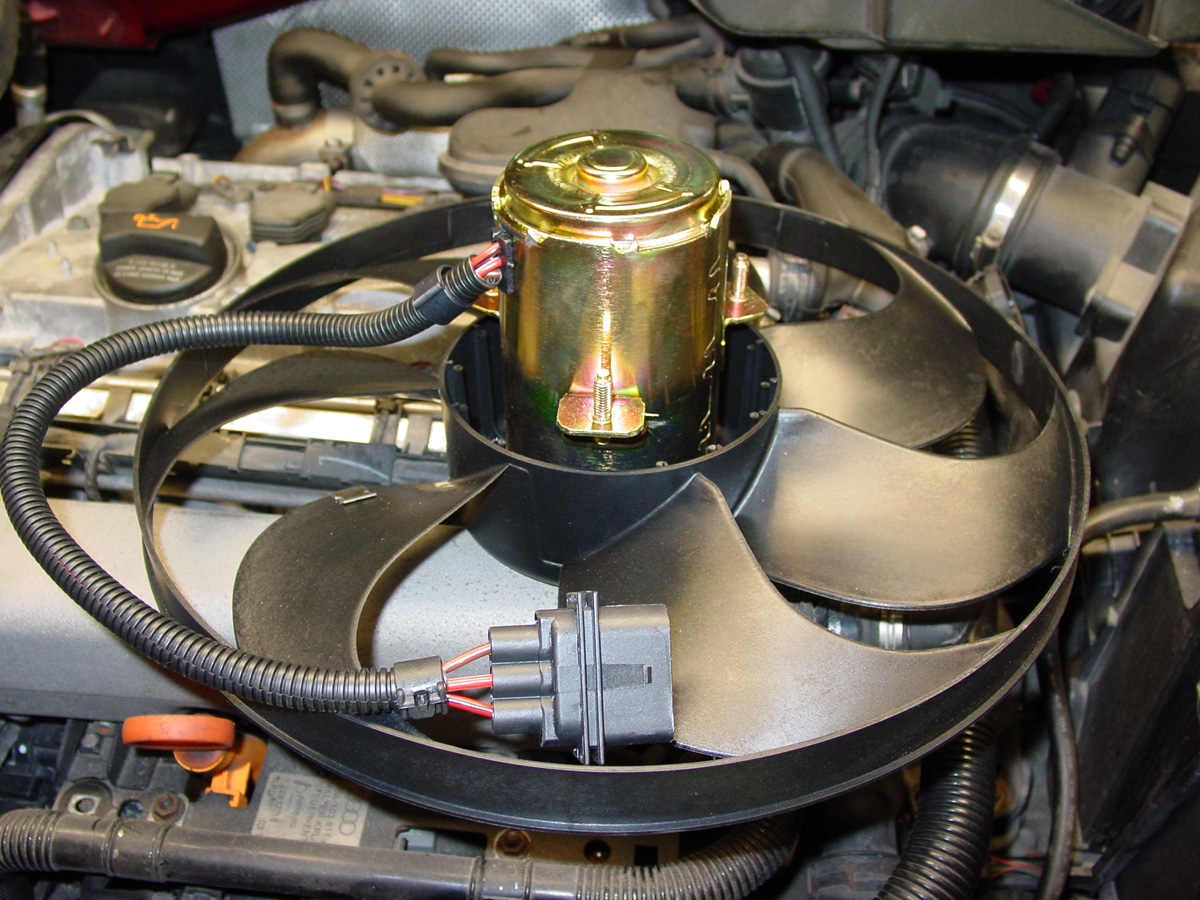
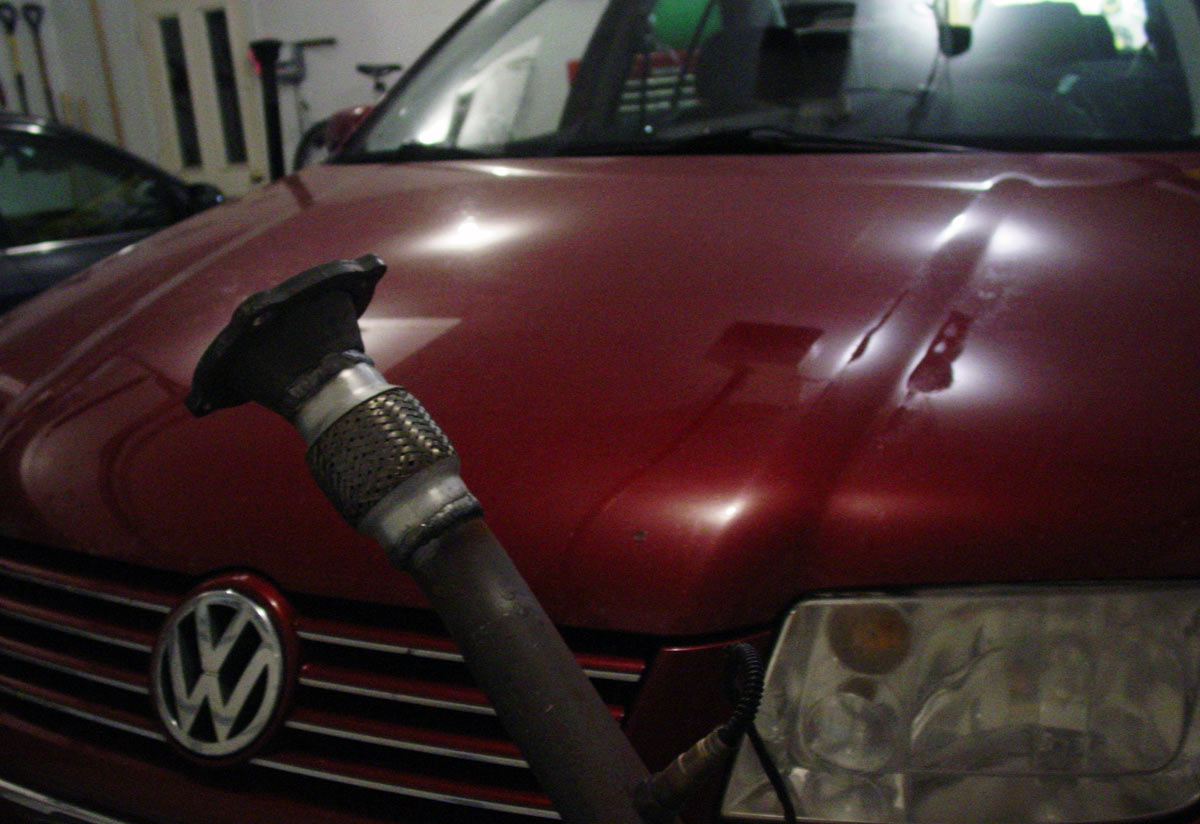
Jetta: The main radiator fan decided to cease operation at the Okemo #1 hillclimb so I added that to the Honeydew list.  Later in the week the downpipe started to make noise.  I correctly determined that it was the flex section of the downpipe (again!).  Third time is a charm.  Rewelded it twice and figured that it was time for a third time.  Nope.  The internals of the flex pipe failed closing up the exhaust to slightly smaller than my thumb.... not a lot of breathing.   So, doing some research to figure out if I want a stock SS exhaust system or get a performance exhaust.  Not a big difference in price.  I don't really plan to modify this car, but just in case..... kinda on the fence but need to figure it out prior to Okemo #2 so that Julie can race it there.

So.... Jetta needs radiator fan (arrived yesterday from German Auto Parts), full turbo back exhaust (rear muffler fell apart at Ascutney #1 and first muffler is getting up there in age), adjust e-brake cables.

Anyway.... boring text.

Painted the floor of the trailer.  I used oil based deck stain (dark gray).  My only problem spots (literally) are where there was motor oil on the floor.  I might have to cover that with industrial carpet or the like as the paint isn't going to stick (obviously).  I tried different methods of cleaning it, but it was far from perfect.

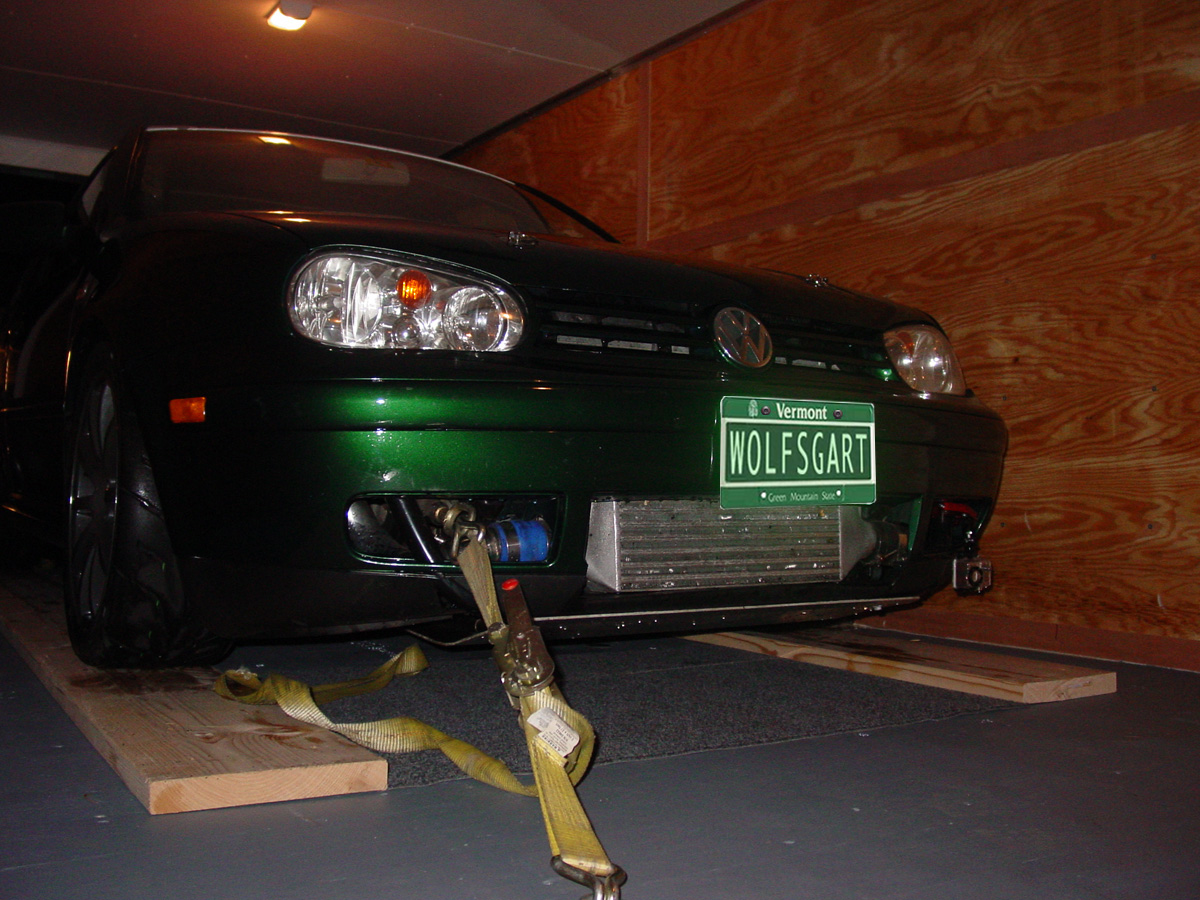
Golf loaded for Wolfgart.... I even washed the outside!  Inside be damned!

Rabbit Farmer
Rabbit Farmer Reader
2/24/19 9:38 p.m.

Aug 12, 2013

Had fun at Wolfsgart... brought both the Golf and Cabriolet (still for sale!) to the show.  Looking forward to next year.

Julie noticed that the temp was running a bit high while sitting at the bottom of the hill waiting for her run at the Okemo #1 (2013) hillclimb.  John Hart (http://www.fastaddiction.com) took a look at the car for her and figured out that the large radiator fan was not turning on (even with the AC switched on).

After the weekend of racing was done and we were back at home, I checked out the fan to determine if it was the motor or the magic switching box that turned it on..... determined it was the motor by applying direct power to the fan.  Ordered fan.

It was actually quite easy to remove and install the fan.  35 minutes start to finish.  I removed the nuts that held the fan to the bracket and then removed only the top two nuts (bolts?) that held the bracket to the fan... left the third leg (lower section of the bracket) untouched.  Slipped the old fan out and slipped in the new one.  Easy!

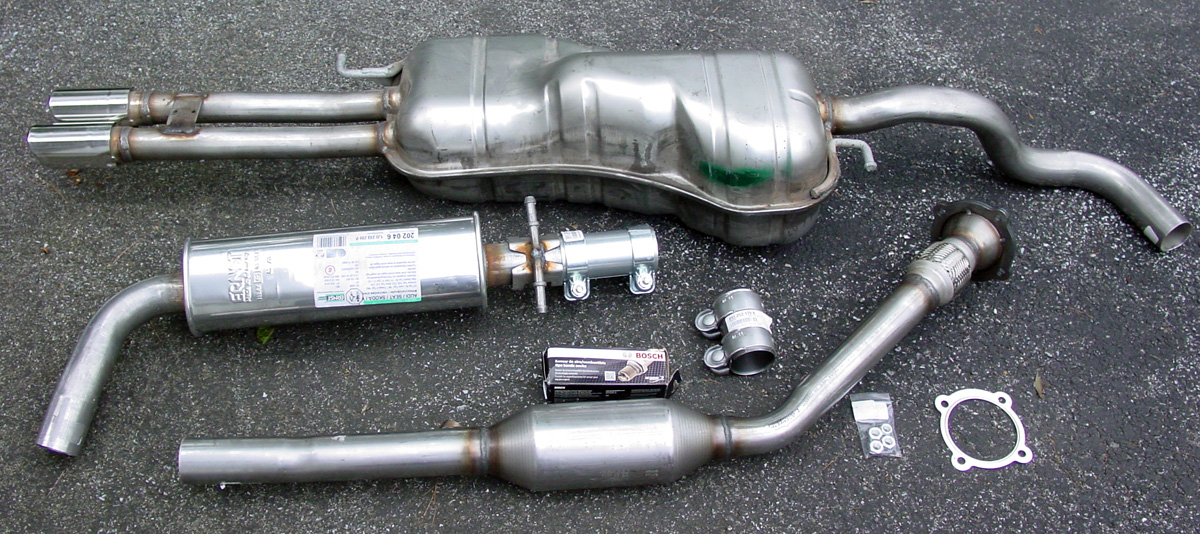
I had ordered a new muffler as one of the stock/original tail pipes rusted where it connected to the muffler and started to fall off.  Shortly after getting the muffler in the mail, the downpipe started to leak on the flex joint that we replaced a while ago.  I took the downpipe off to determine if it was a matter of a quick reweld... nope.  The entire inside of the braided flex (it was been suggested to me since to get the flex joints that do not have the braids on the inside) had let go.  This choked off the exhaust to about the size of my thumb.  Started poking around a bit more and saw that a small hole was starting to form in the front muffler.

Okay.... [(2012-2004)x150,000 miles] / My wife races it = time for a new exhaust.

But..... since the Okemo #2 hillclimb was only 1.5 weeks away, we did not have time to get a performance exhaust to our house in time to allow me to install it prior to the event.  So.... we went with a stock "turbo back" exhaust system.

It was great putting new parts in.  Surprising, the old muffler (stainless steal) came apart quite easily.  A little PB Blaster might have helped.

In with the new!

Decided it was time to start personalizing the trailer.  In last month's exciting episode of "As the Trailer Turns", we saw Ken painting the trailer floor while Barbie took a nap.

So.... ended up with some shelves in the trailer this week.

Pretty picture of the car at the Okemo #2 hillclimb (2013)....

And the reason that I couldn't go any fast on Saturday (essentially every single run was a 2:30.xx with the exception of one 2:29.73.... at least I am consistent!)

Since Sunday seemed to be a series of 2:29.xx times and one 2:28.xx, I decided that I needed some traction.  I took the best tires I had (I have a total of six mounted tires), which happened to be located on the back of the car, and mounted them on the front.  I took the tires holding down our canopies and put them on the back.  Big thanks to fellow racers Mike R. and Don T. for their assistance in getting that done is record time!

Got in the car and started my run.... it wasn't until slightly after checkpoint 1, when I was trying to get into 4th gear again (I normally get into 4th at the first corner, but I didn't notice my dilemma until a little further up the hill), that I noticed I was sitting too close to the steering wheel.  When I am too close, I am not able to bring my arm all the way back to select 4th and 6th gears.  Doh!

Every time I needed 4th, it took some effort to get my arm back far enough to select the gear.  Such is life.  Last run of the weekend and I didn't get myself setup properly in the car.

I am kicking myself a bit as I was able to get a 2:27.xx even with all the slow shifting with 4th gear.  Doh! Doh! Doh!

I have order two new tires!

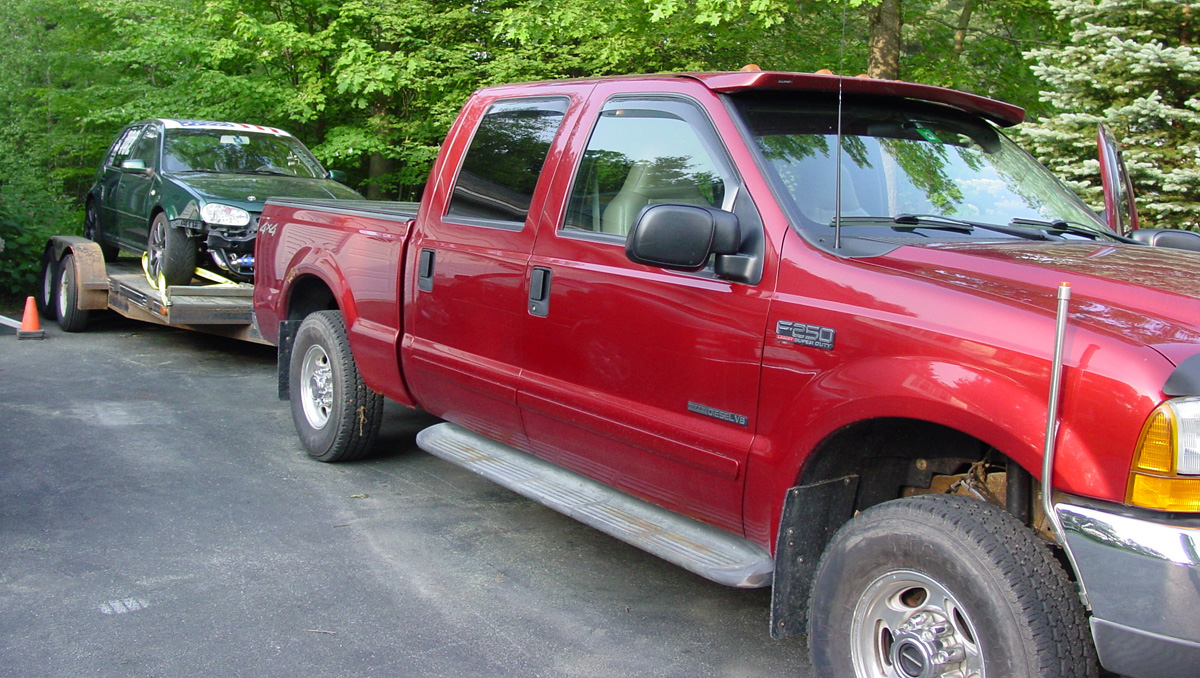
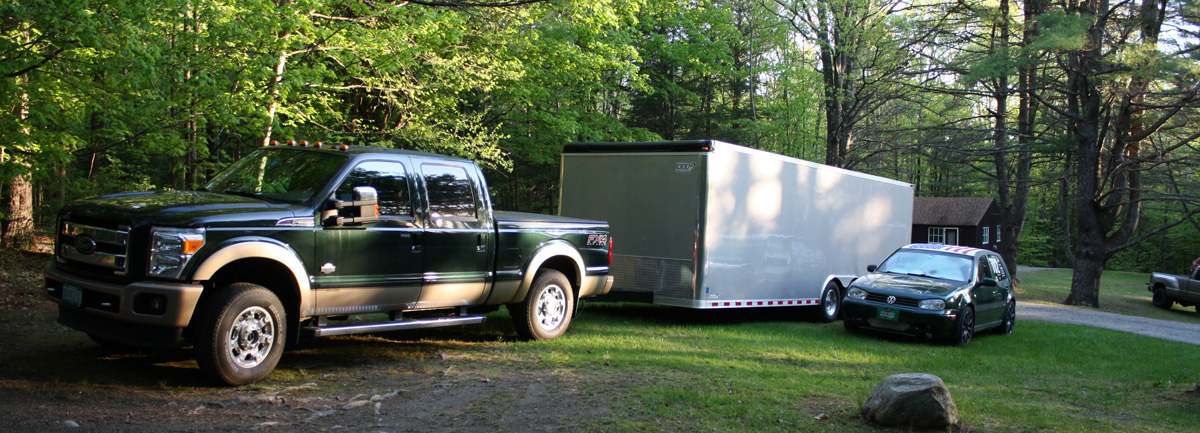
Picked up a new (2012) truck on my way to the Okemo #2 hillclimb.  Kinda funny leaving my house with truck/trailer and a half tank of fuel, stopping at G. Stone Motors in Middlebury, VT to swap trucks (traded in the 2001 F250 7.3PS), and continued on my way to the event.... and getting there with a full tank of fuel.

Loving the new truck.  2012 F250 King Ranch 6.7 diesel with 400HP and 800 ft/lb of torque... wow.  Oh, and 6 lovely gears!  I think I was able to out accelerate my wife in the Jetta with the truck.... with the 24' enclosed trailer attached with the Golf and all our crap inside.  Sweet!  

Getting on it a bit on the way home (0 to the speed limit a bit quicker than I really had to), I got 14.7 MPG.  Happy with that.  Short drive to work this morning (20 miles) after resetting gauge and dropping the trailer, I was over 18MPG.  Double sweet.  Has lots of toys (too many for me).  Loving it so far... until the first "mortgage" payment comes in.

The important part..... I think..... video of the Okemo #2 hillclimb should be done soon.  I managed to setup with Go-Pro camera properly this time at 60fps instead of 30fps.   Creates a much better video than what you saw in the Okemo #1 video posted earlier.  Just waiting for some trackside video from people before I post it.

Burke is in two weeks.

Car is currently running great (zero issues with year!!!!!) thanks to a great tune by Jason at http://www.VEMS.us in Colchester, VT.

I did drop the car off at Joey's (http://www.KalesCustom.com) tonight so that he could replace the coolant line going to the turbo.  I don't have any -AN fittings to replace it myself.  The coolant line is leaking a bit under pressure.

That's all folks!

Steve

Rabbit Farmer
Rabbit Farmer Reader
2/24/19 9:39 p.m.

Aug 26, 2013

Finally caught up on video making from the Okemo #2 hillclimb a few weeks ago.

On-car and course-side video throughout.  

http://www.youtube.com/watch?v=__iFK637nXo

Also, the Burke #2 hillclimb was this past week. While I did manage a good time, I was getting really sloppy trying to get the no low-end turbo car to perform.  I think I only have two runs recorded from the weekend (more mistakes than good driving).  Managed to pop a power steering line on the last run on Sunday... thankfully at the top of the hill.  Darn.

Someone at one of the checkpoints caught my major error on video.... required me to back up to continue up the hill.  Opps.  Managed three gears/two tires spinning leaving the scene of the mistake.  :)  I will post that up soon.... Got my fastest run of the day after that run.

Next hillclimb is Ascutney #2 (my favorite).

Steve

Rabbit Farmer
Rabbit Farmer Reader
2/24/19 9:40 p.m.

Nov 08, 2013

Winter is almost here, which means it is almost time to start working on the cars over the winter.

Mt. Ascutney Hillclimb II (Sep 2013)

http://www.youtube.com/watch?v=cc0aVwk2kuQ

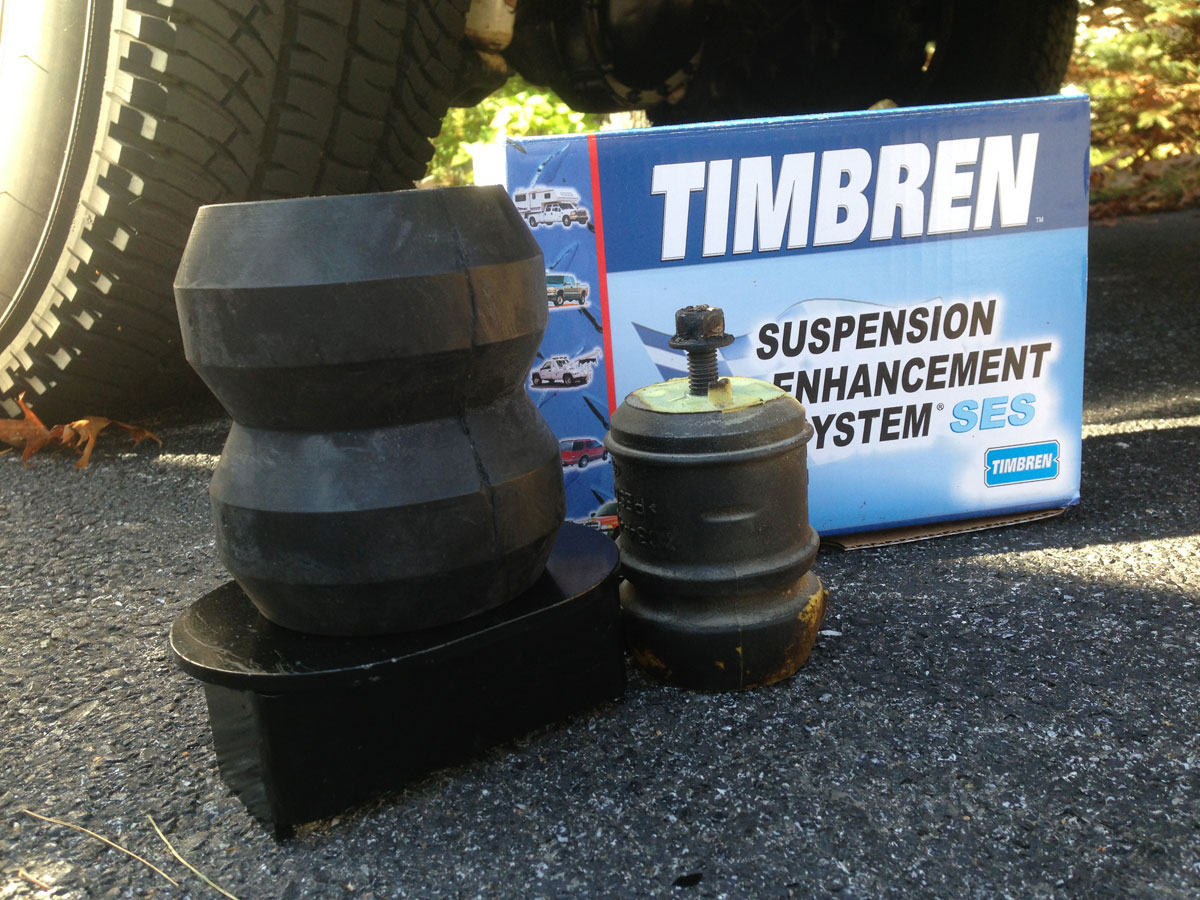
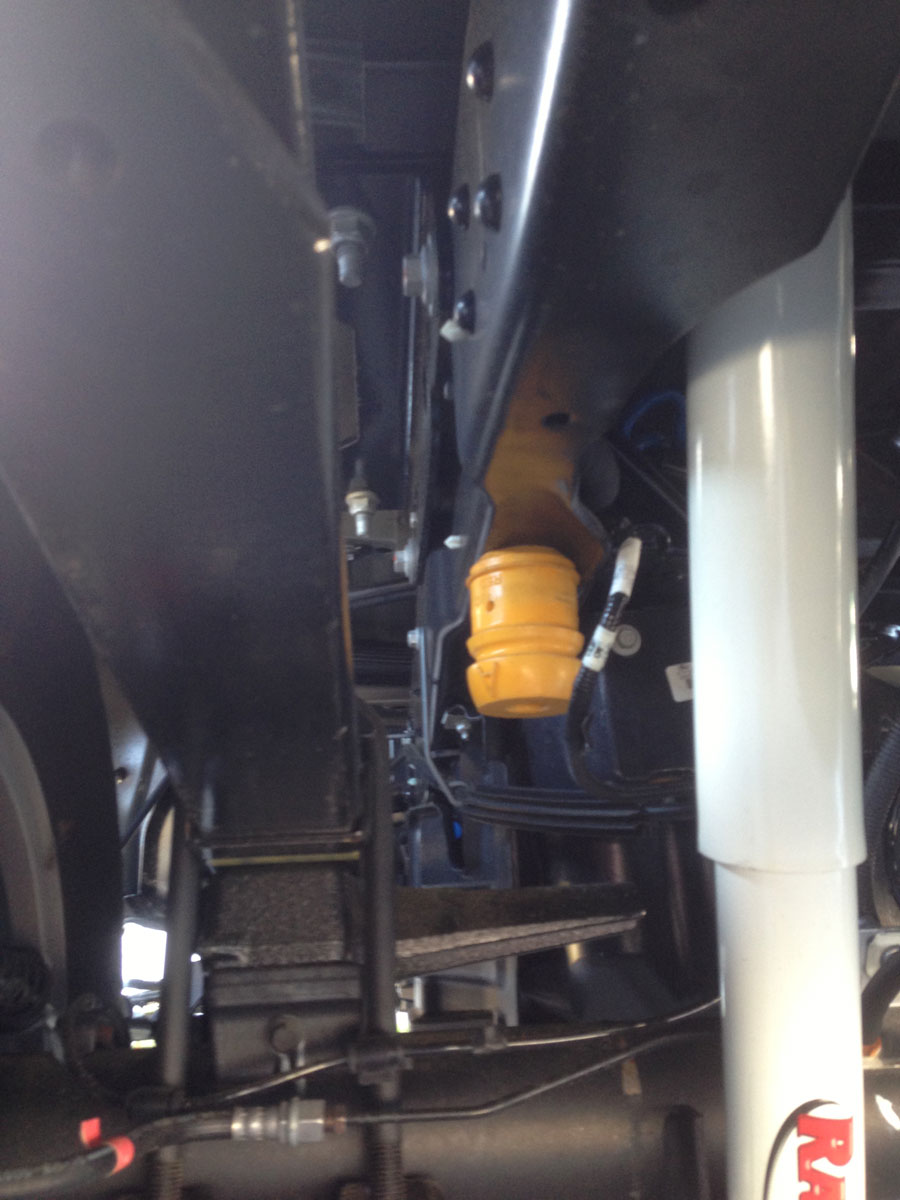
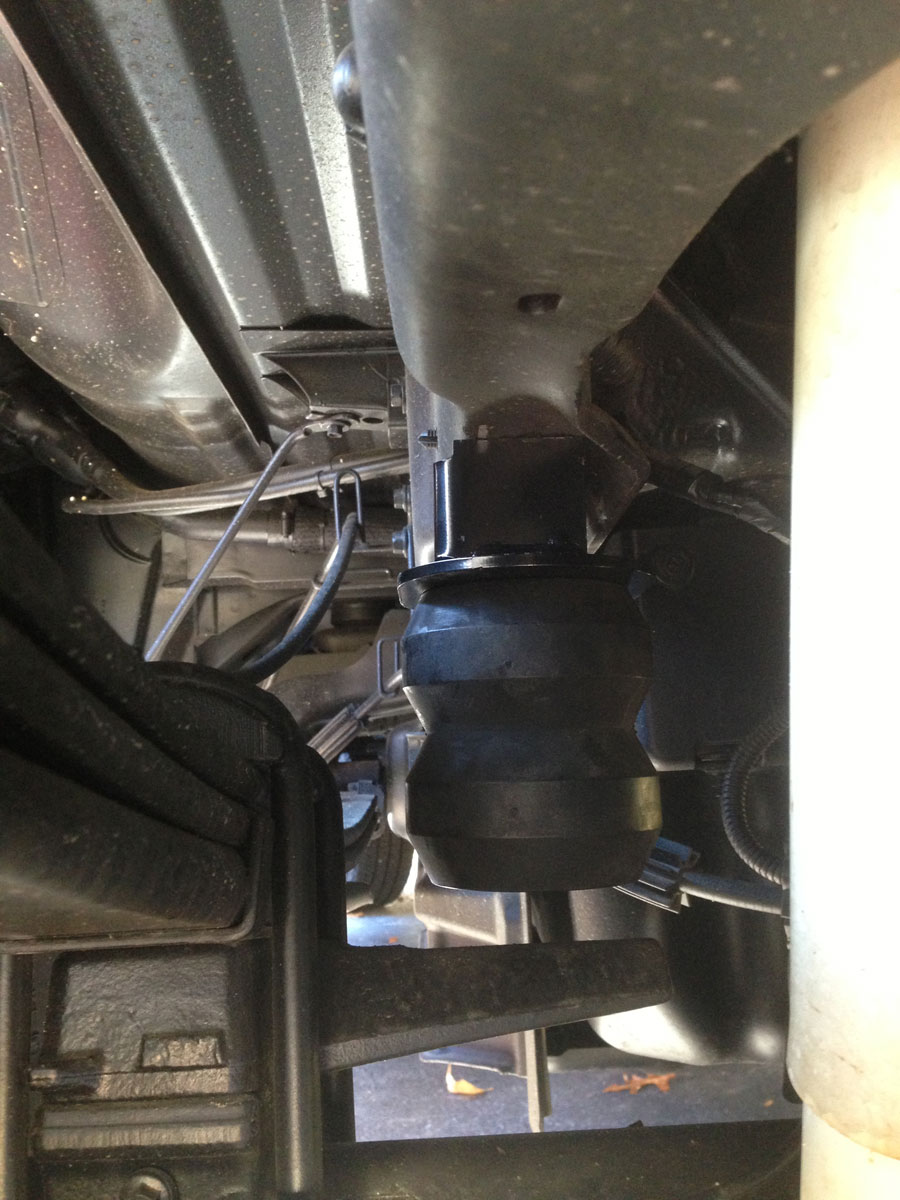
Since the back of the truck (the 2012 F250 is sprung weaker than my 2001 F250) seemed to swat a bit too much (heads lights aimed up a bit), I installed some extended bump stops.

Truck on the ground with stock (yellow) stop.  Notice distance between the bump stop and the bar it... um, stops against.

Much closer. The new bump stop acts a bit like an air cushion.

What's on the menu for the winter.....

Golf
* Have someone check out the transmission.  It seems to be 'not perfect' getting it into third.  I would rather address it when I don't need it (the winter) vs. the week before an event.
* Check out the inside of the engine to make sure everything is 100%
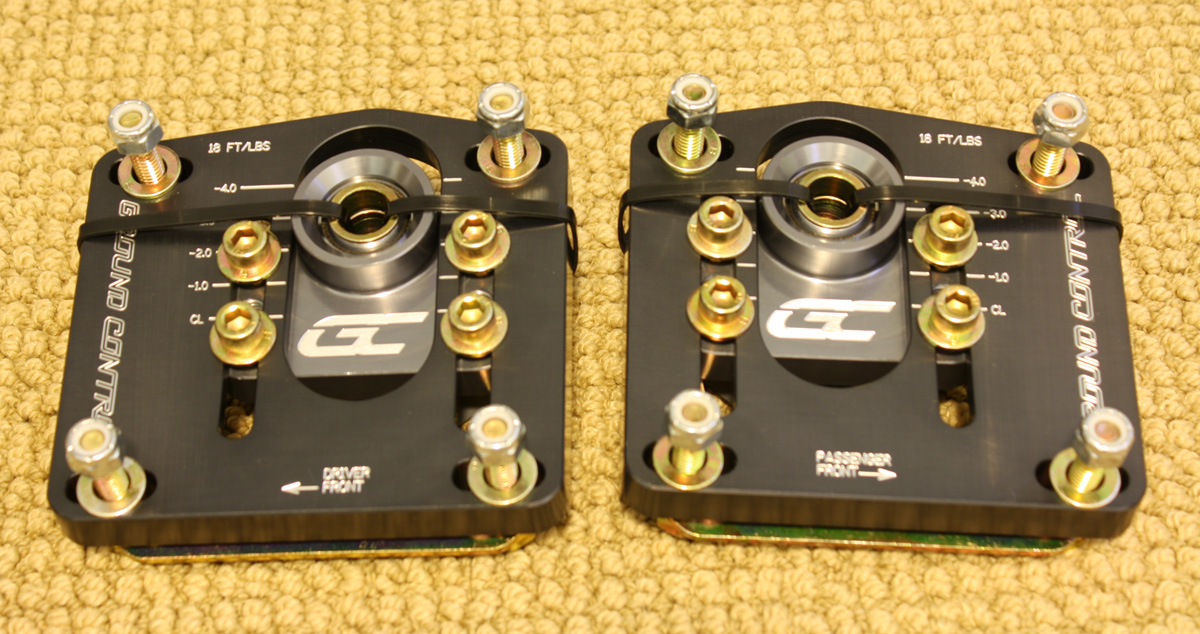
* Camber plates (Remove Shine plates and use Ground Control)
* Order tires for 2014 season
* Check out shocks and struts to make sure they are all good

Scirocco
* Engine and VEMS from the Cabriolet to the Scirocco
* Make sure the cage is up to date for whatever racing I want to do in 2014
* Get all other safety equipment up to date (harnesses, fire ext, etc.)
* Body work and paint
* Glass install... she is going to be road legal! (-ish?)
* Ground Control camber plates
* Send out the shocks/struts for rebuild
* New tires! (current tires are from the 1990s)
* Different options for dash (i.e. gauge placement, etc.)
* Keep really beefy far from stock 4.25 final drive 020 transmission or go with the stock 02J with LSD (cable shift and perhaps hydro clutch)?
* Everything else.... the list will grow as I start getting into the car

Truck and Trailer
* Install Hella Black Magic driving lights (either two 1000 H2 or four 500 H3 lights)
* Back-up lights on bumper
* Stabilization bar for easier/better balanced towing
* Trailer: Canopy
* Trailer: On-board power for lights when disconnected from truck (perhaps with roof mounted solar cell for recharging)
* Trailer: Back-up lights
* Trailer: Back-up camera (?)

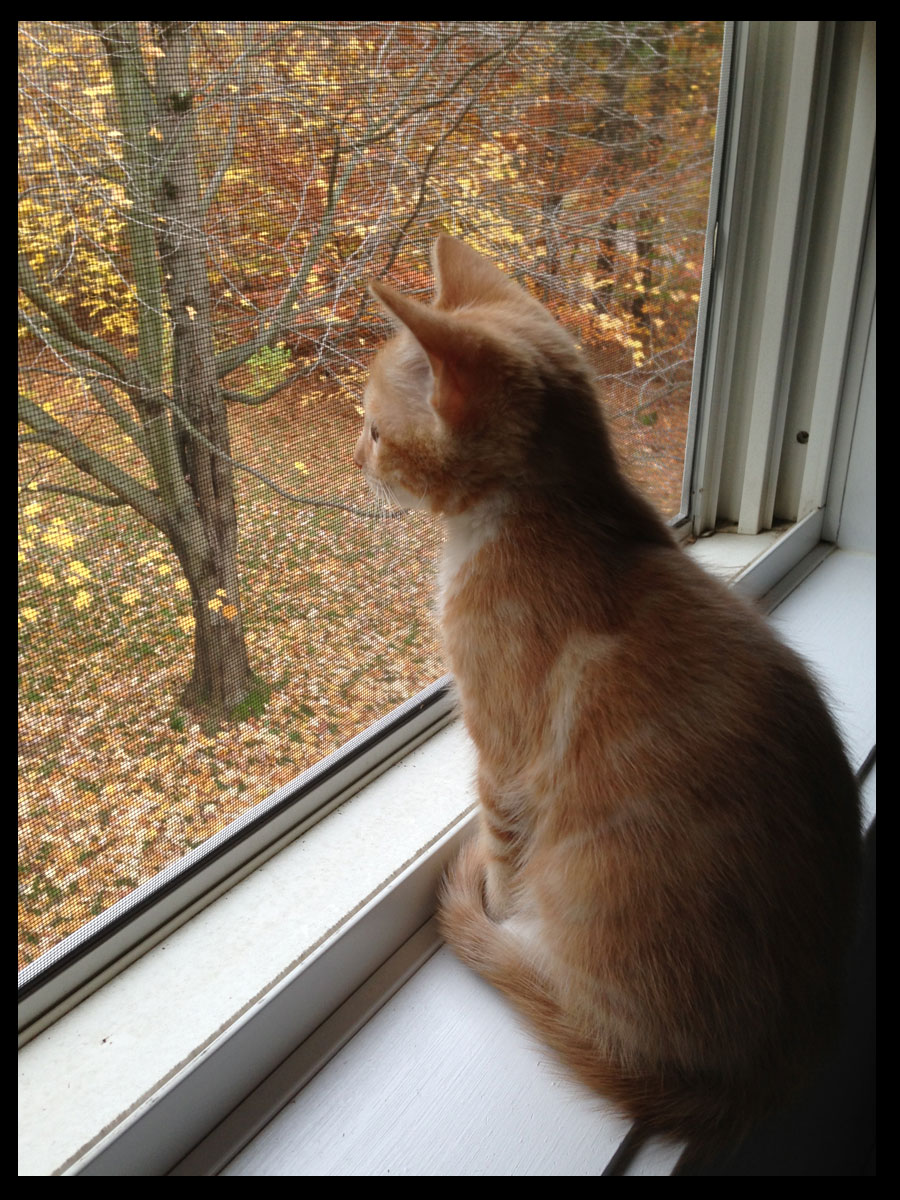
Got a new cat to help me in the garage when Vern is napping.  Vern is 13+ years old and Marley is only 13 weeks (or so).

Rabbit Farmer
Rabbit Farmer Reader
2/24/19 9:42 p.m.

Nov 30, 2013

Normally I do not start doing anything to the cars until February... this year I am starting in December as I have a lot to do.

Golf

Swap out Shine camber plates for Ground Control
Check all struts/shocks to make sure they are up to full performance.
Scope engine to make sure everything is 100%
New brake rotors and pads... been a while since I have touched these.
Think about removing ABS..... still mixed on this.
Transmission checked out... I sometimes had a grind with 3rd gear.

Doing all this to make sure that I am 100% percent ready for the 2014 Mt. Washington Hillclimb (http://www.climbtotheclouds.com/)

Cabriolet... the donor car (so sad) is parked next to the Scirocco (the recipient).  This will be a big project!

Wife wants me to cage the Jetta so she can race it next year.... I do not want to put a cage in the car that I have to daily drive everyday.  I told her she will just have to drive the Golf next year.

Lots of work and little time... I would rather start now and not rush-rush-rush as the hillclimb season approaches.

Steve

Rabbit Farmer
Rabbit Farmer Reader
2/24/19 9:42 p.m.

May 23, 2014

New twist to this year.... I actually started earlier than normal, it just ended up taking a lot longer than expected... and I am still not done!

First, go grab a drink and a bag of popcorn... enjoy.

Before I put the car away for the winter, I brought it down to Ralph's Foreign Auto in Colchester, Vermont.  Ralph has been racing for years (earlier in my post I included a picture of his BMW CSL... sweet!). I wanted Ralph to take a look inside the engine to make sure everything looked good... it did!  Check.... put the car away and start planning for the 2014 season.

In February, the Golf ended up at Joey's (http://www.KalesCustom.com located on Prim Road in Colchester, Vermont...they are working on their website right now and moving 300 yards to a new shop).

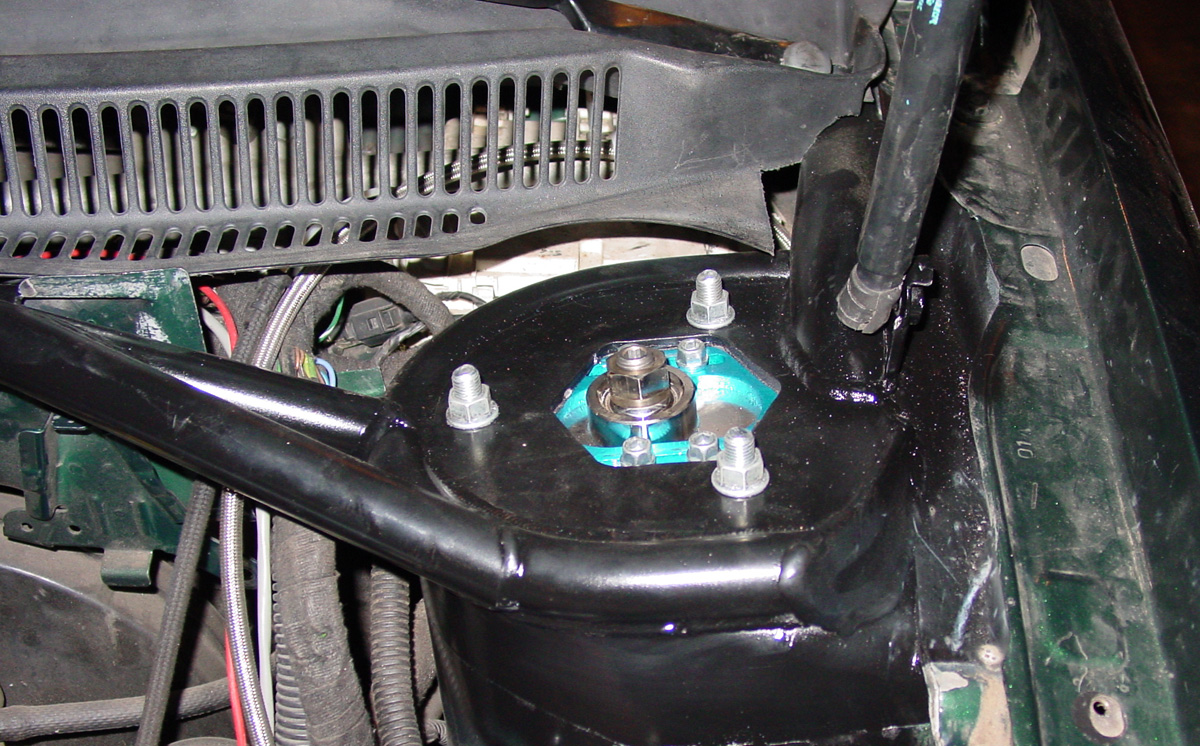
The goal was to replace the aging and bent Shine Racing camber plates, so I picked up a set from Ground Control (universal camber plates).

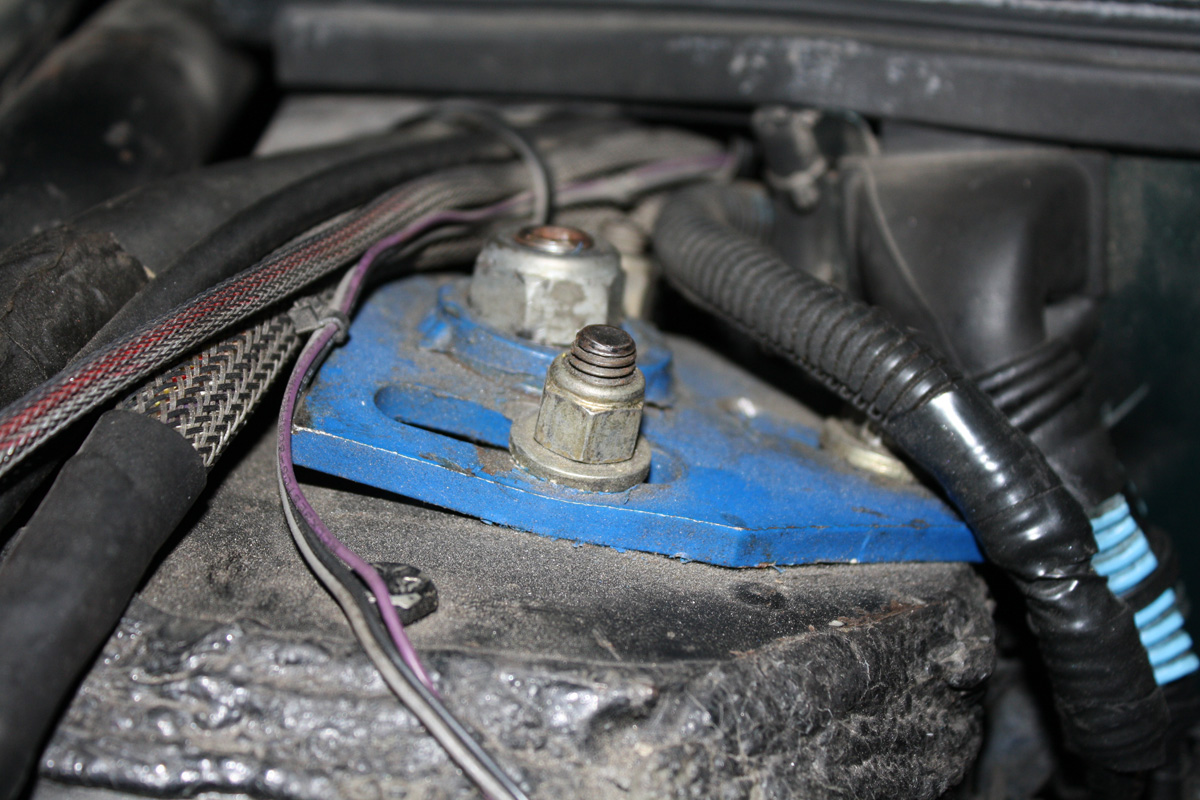
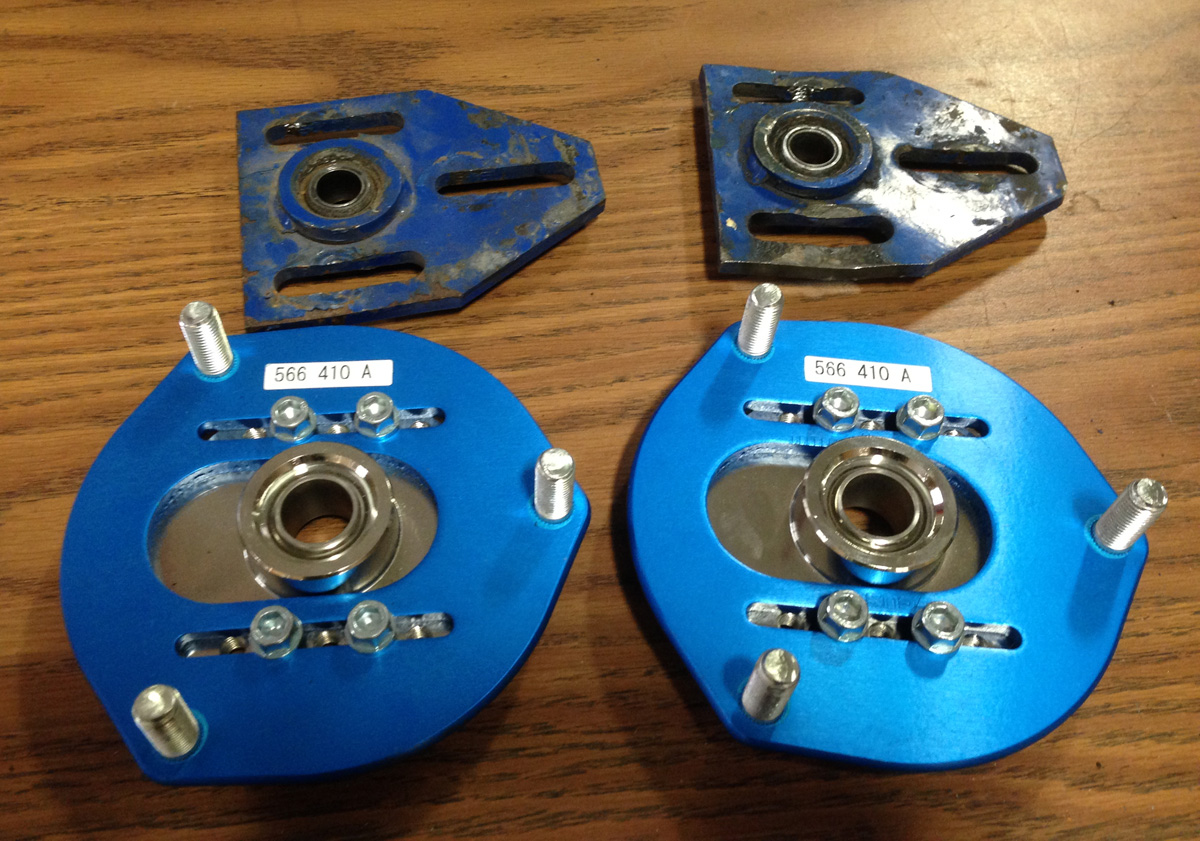
The bent camber plates...

Cutting off the old plates....

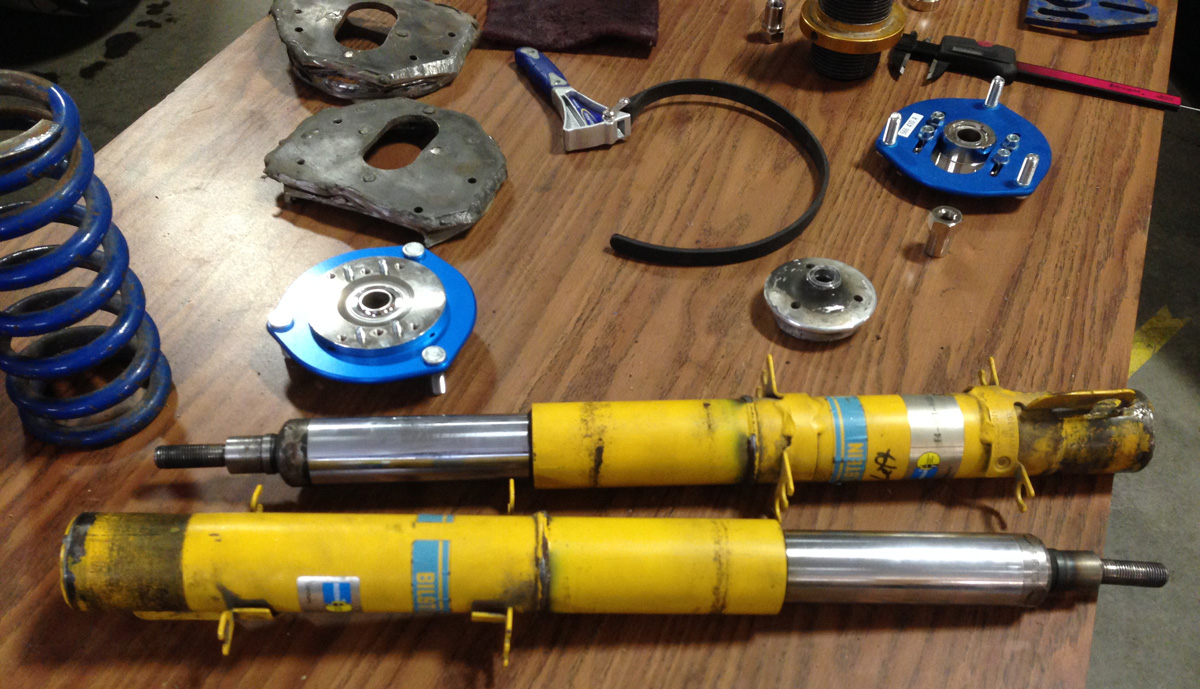
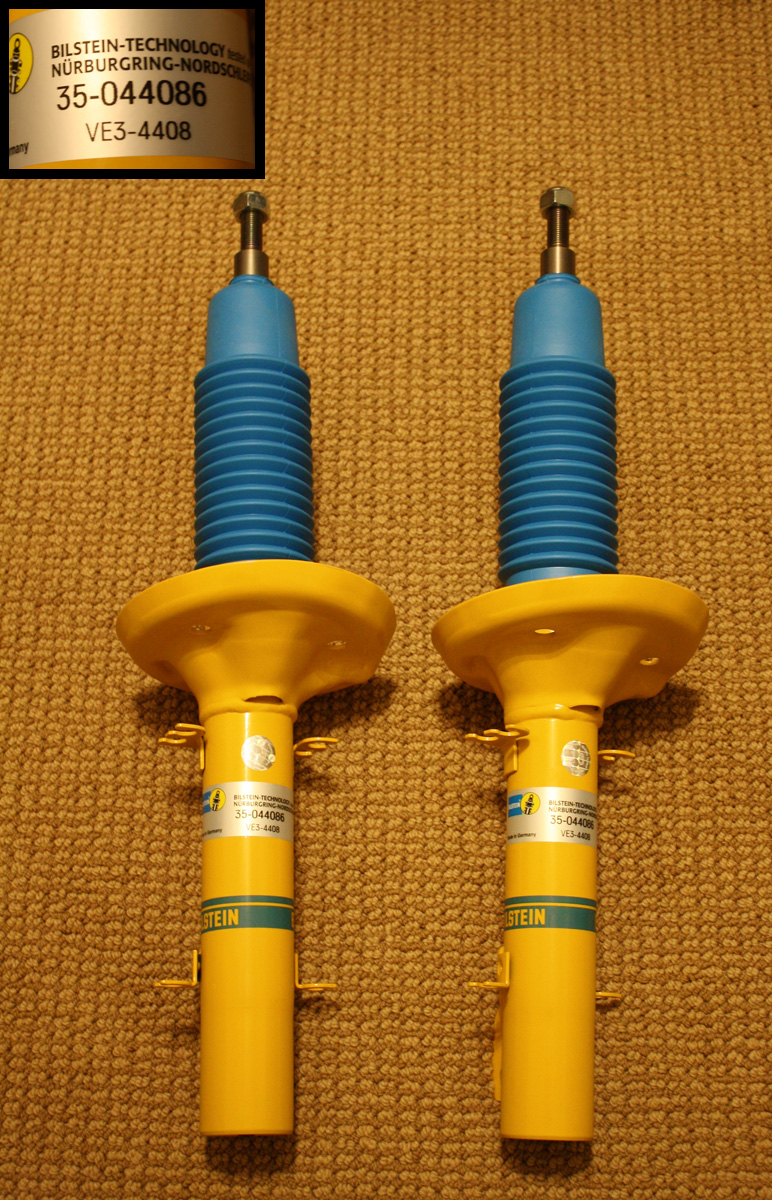
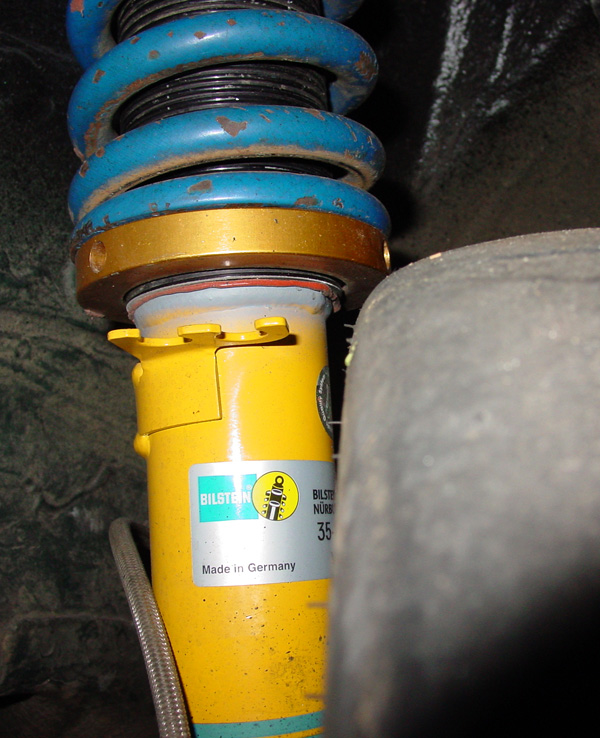
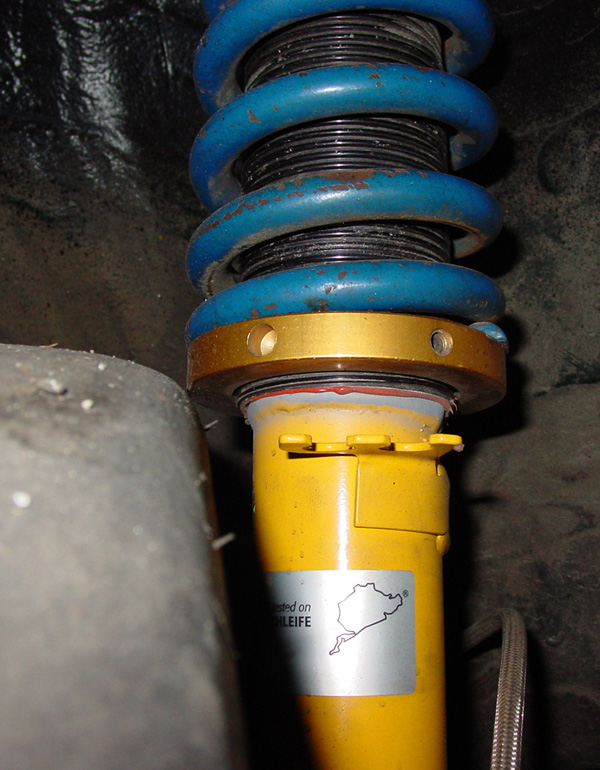
And removing the suspension. Notice that the strut in the foreground is bent at the very top; time to order a new set of Bilstein struts.  Good thing they are really, really, really inexpensive (not!).

After some discussion with Joey, we decided to go with to go with a set of Cusco camber plates.
Looking at the Shine Racing plates that were bent, it seemed they were not supported like a camber plate that is mounted underneath the strut tower.
The Ground Control camber plates will be used on the Scirocco.

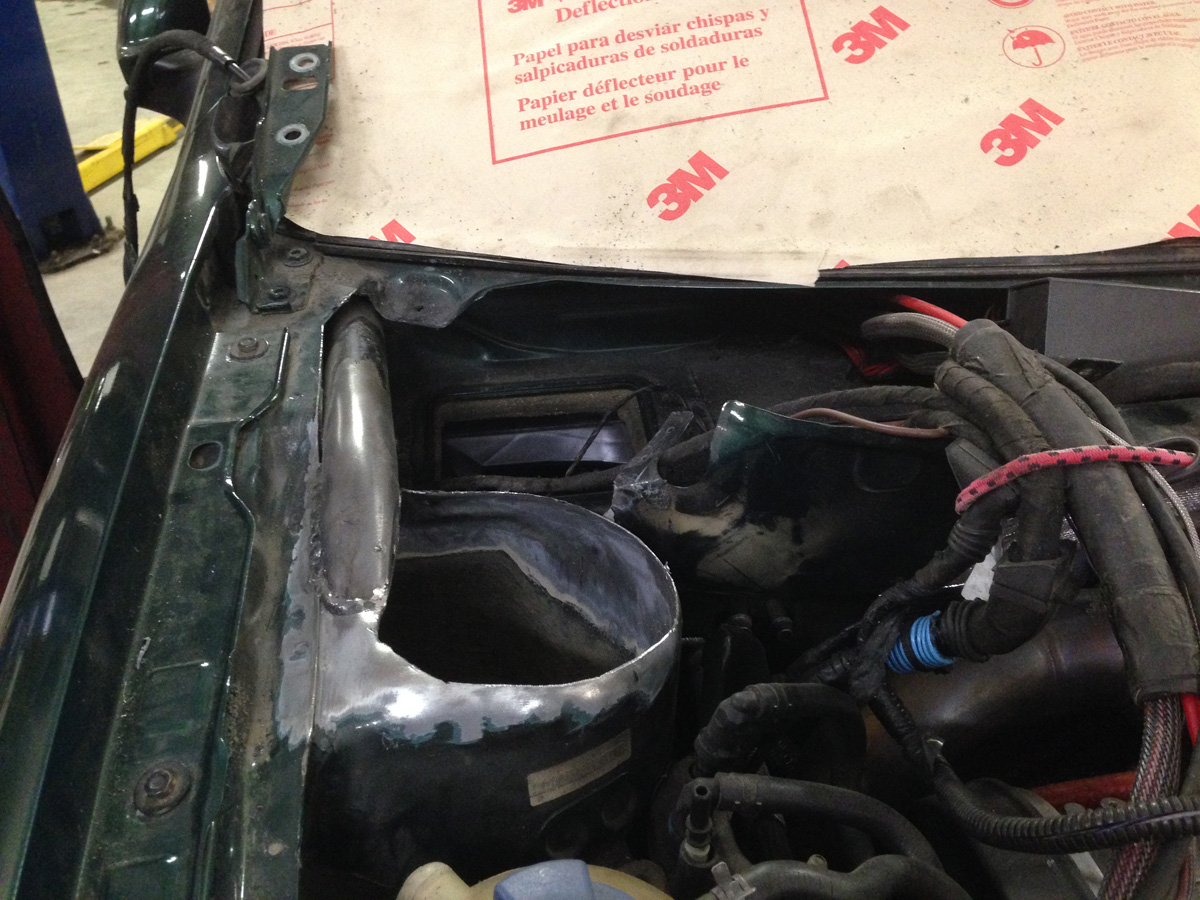
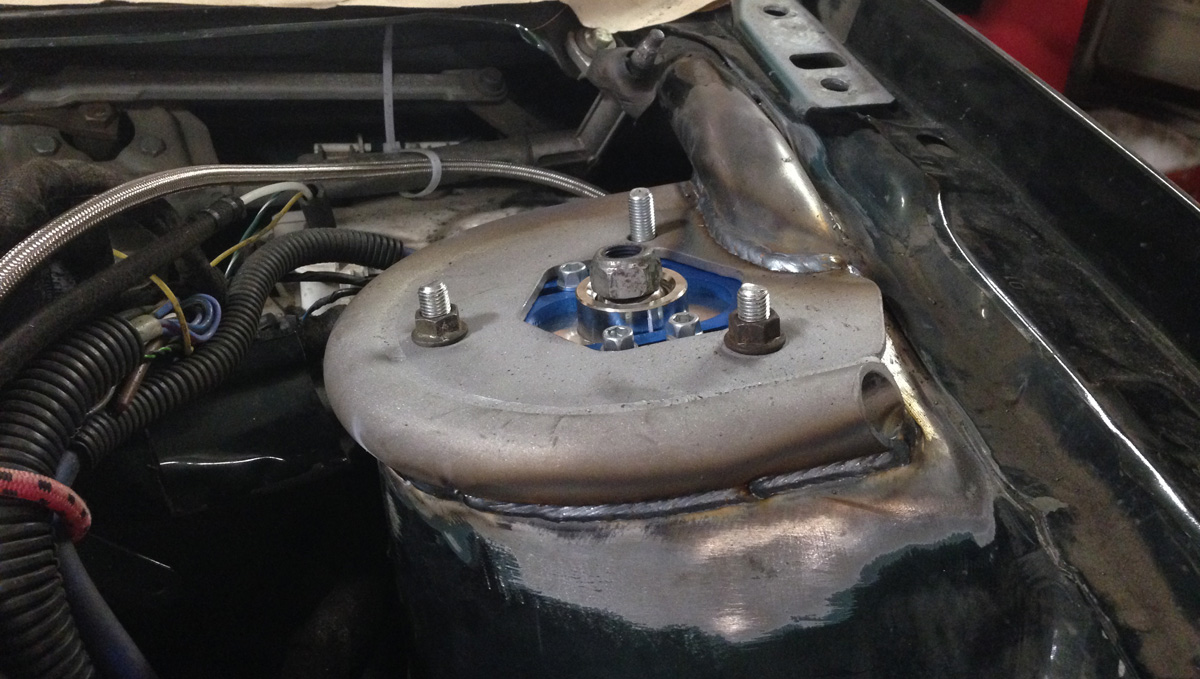
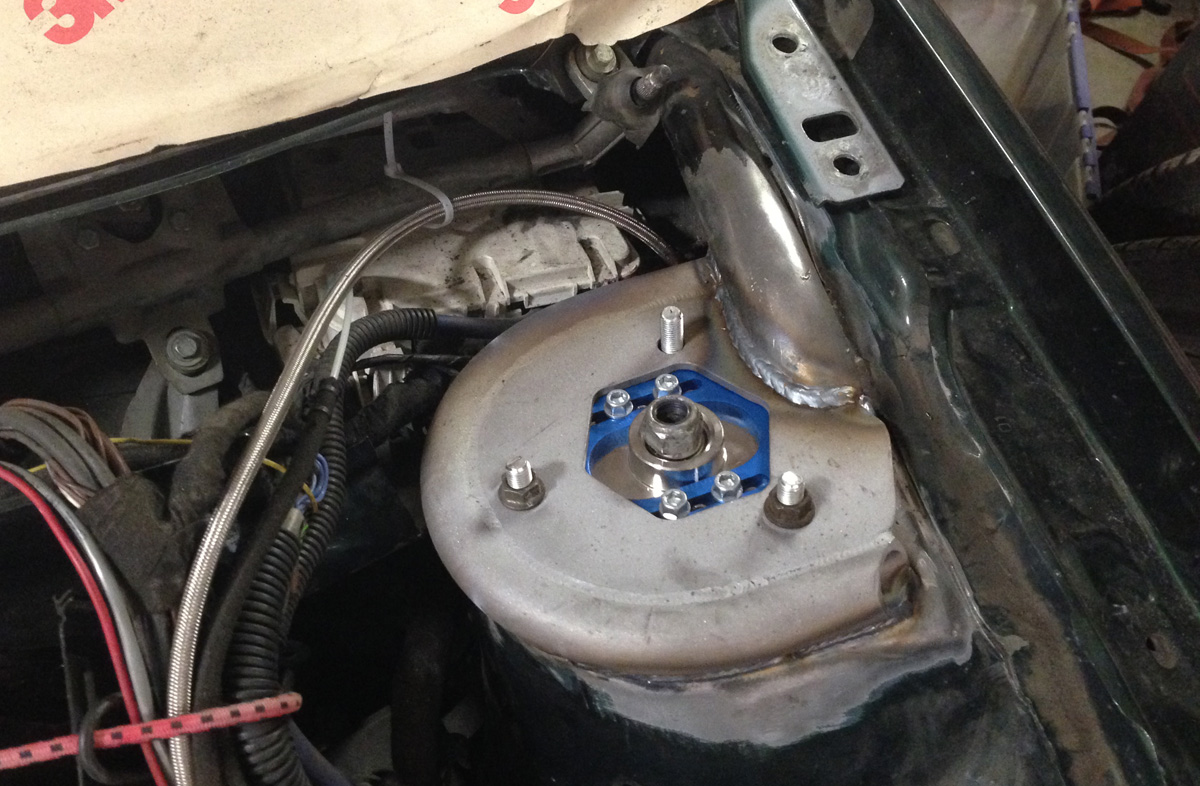
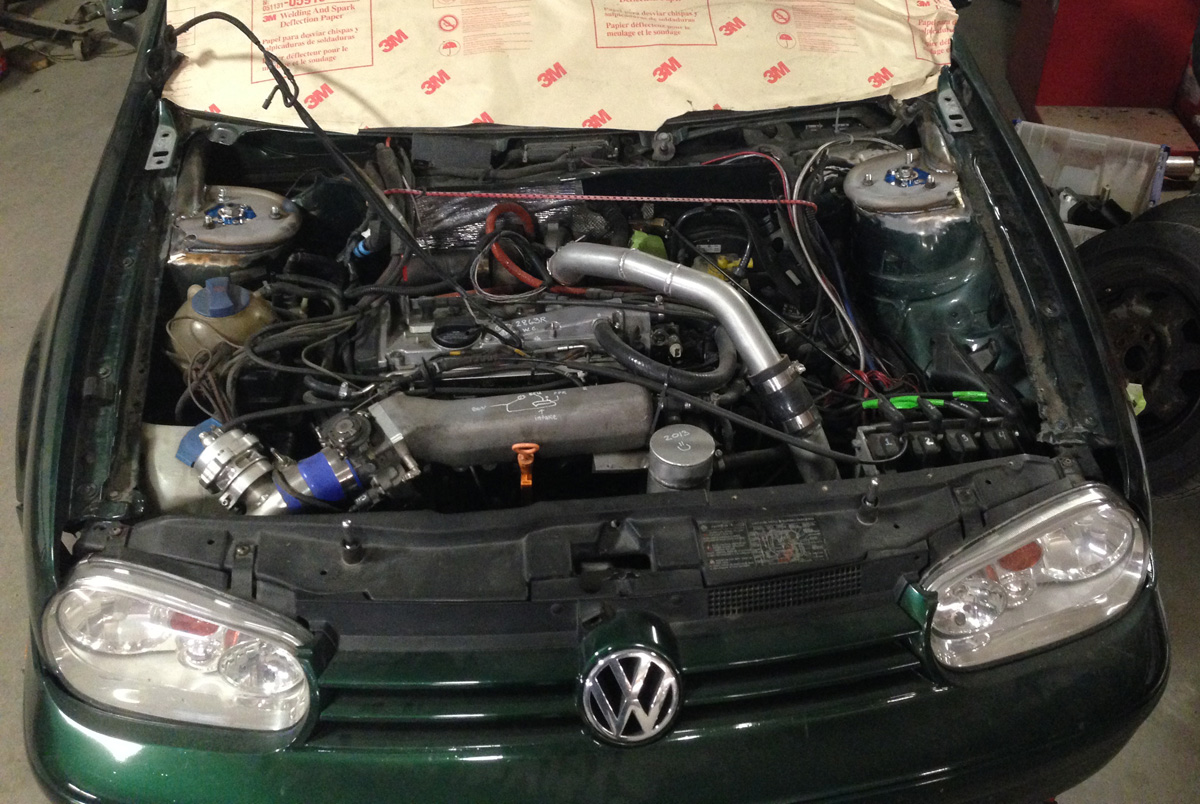
Making the new strut towers....

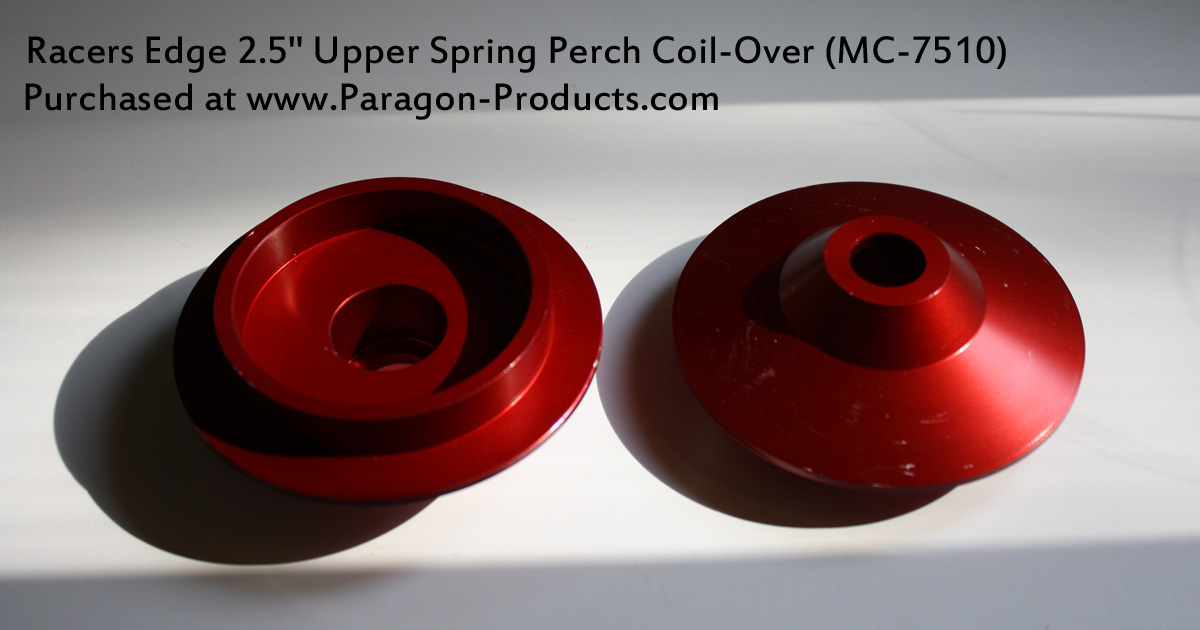
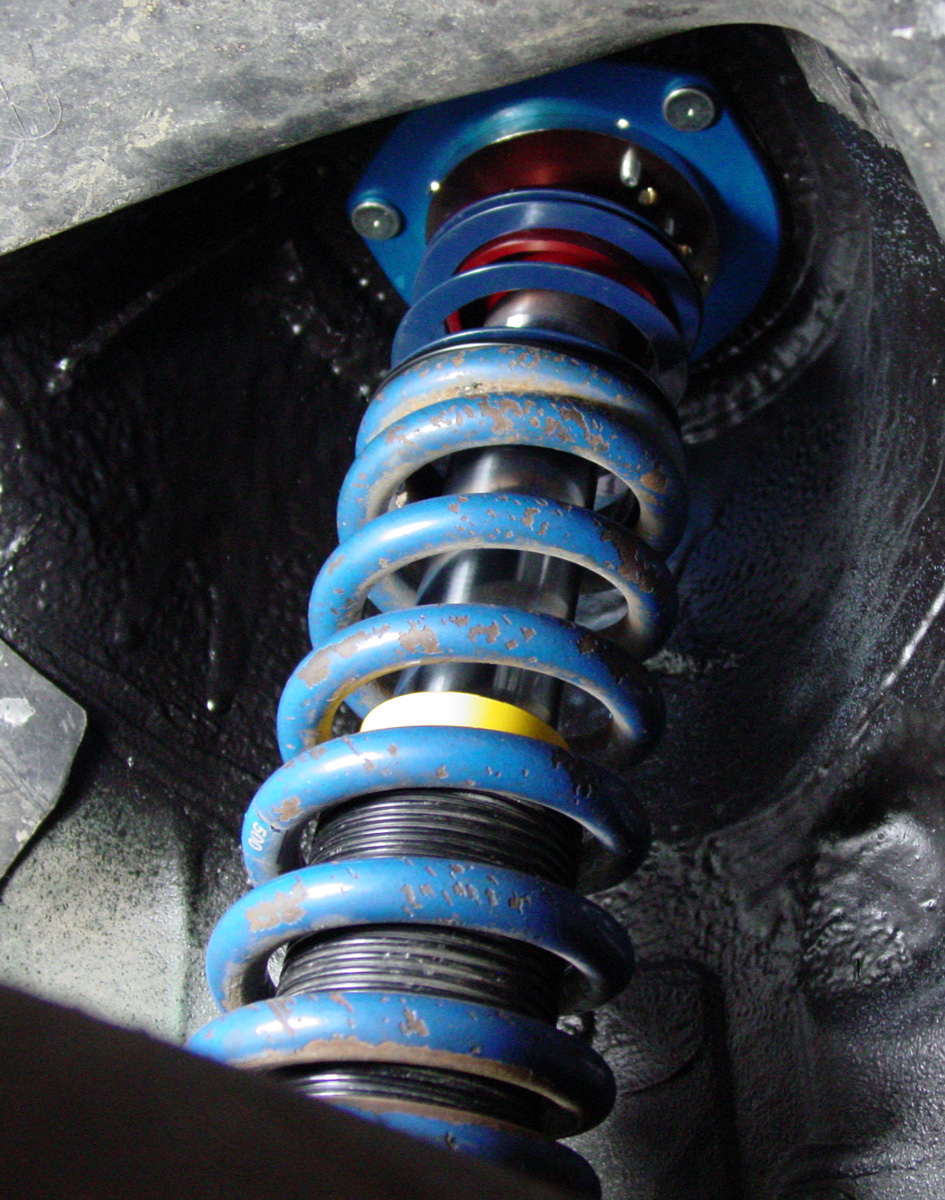
The upper spring perches were a bit banged up because there was nothing to keep the spring within the perch when jacking it up (or if the car happened to take a jump at the hills).  Because the spring would not always seat properly, the perch suffered.

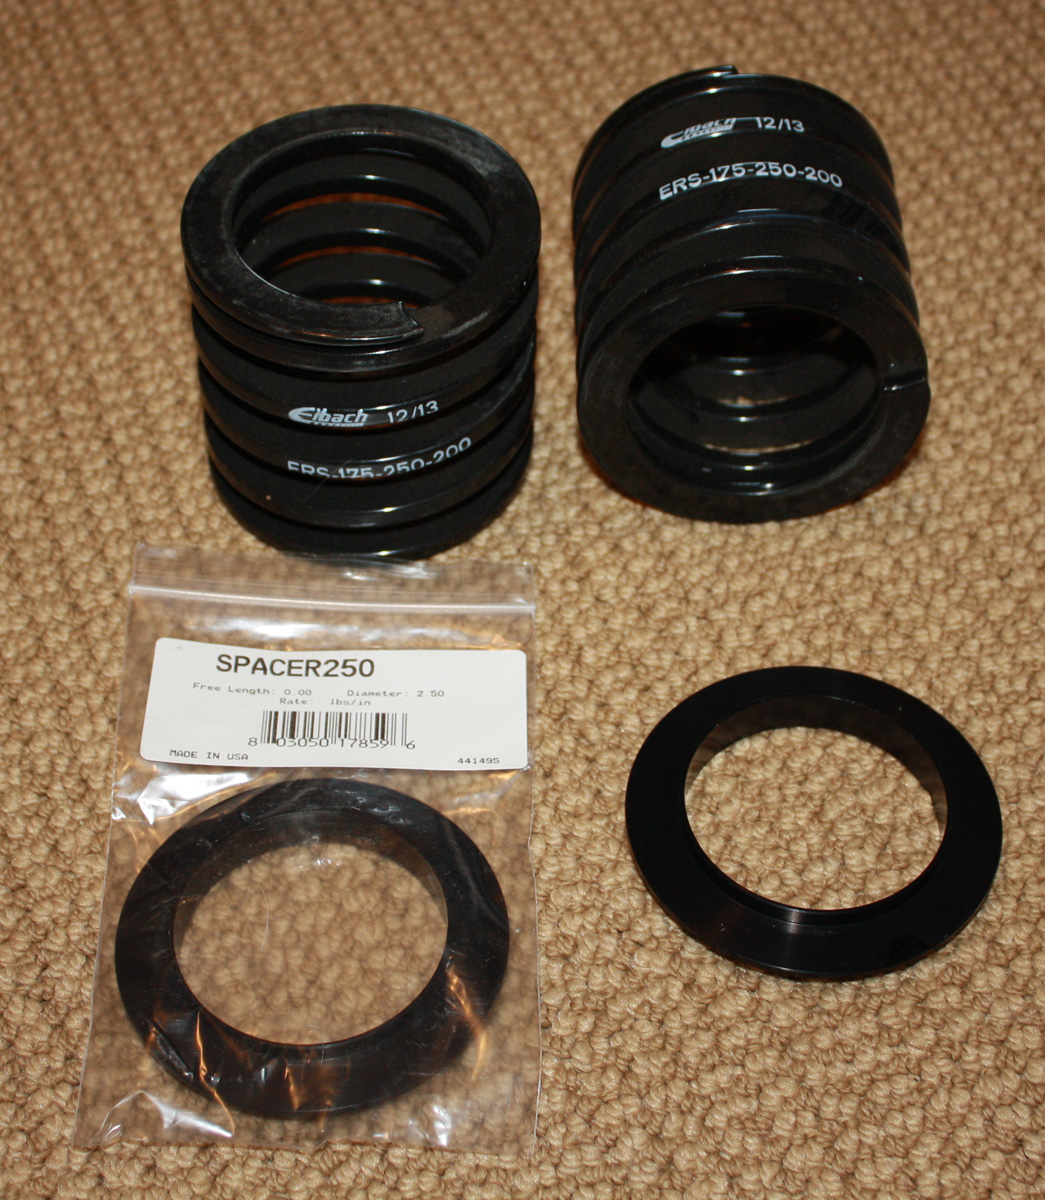
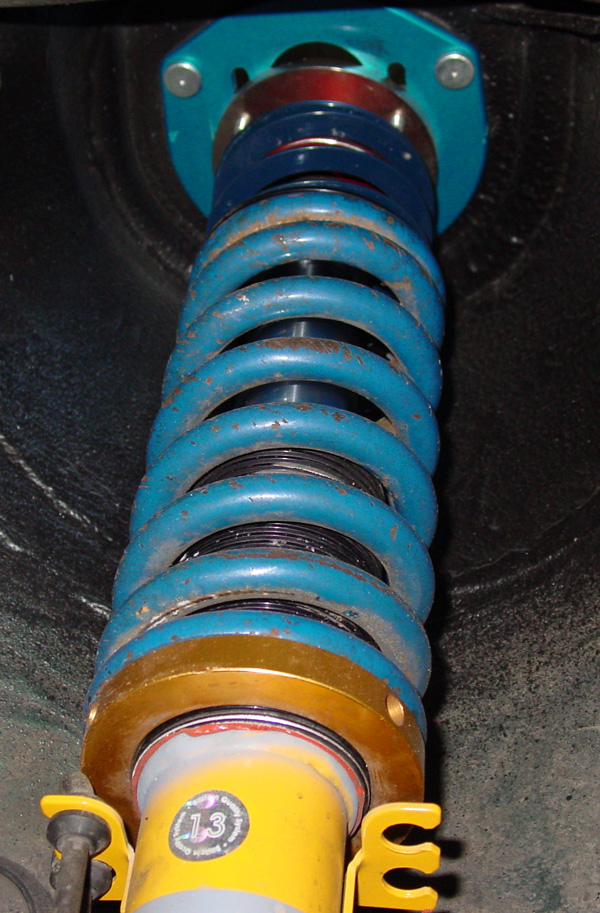
Next, thinking about the suspension setup on my old Rabbit (use of a tender and main spring), I ordered a set of 3" 200# tender springs to bridge the gab between the main spring and the upper perch.

Order a new set of Bilstein struts....

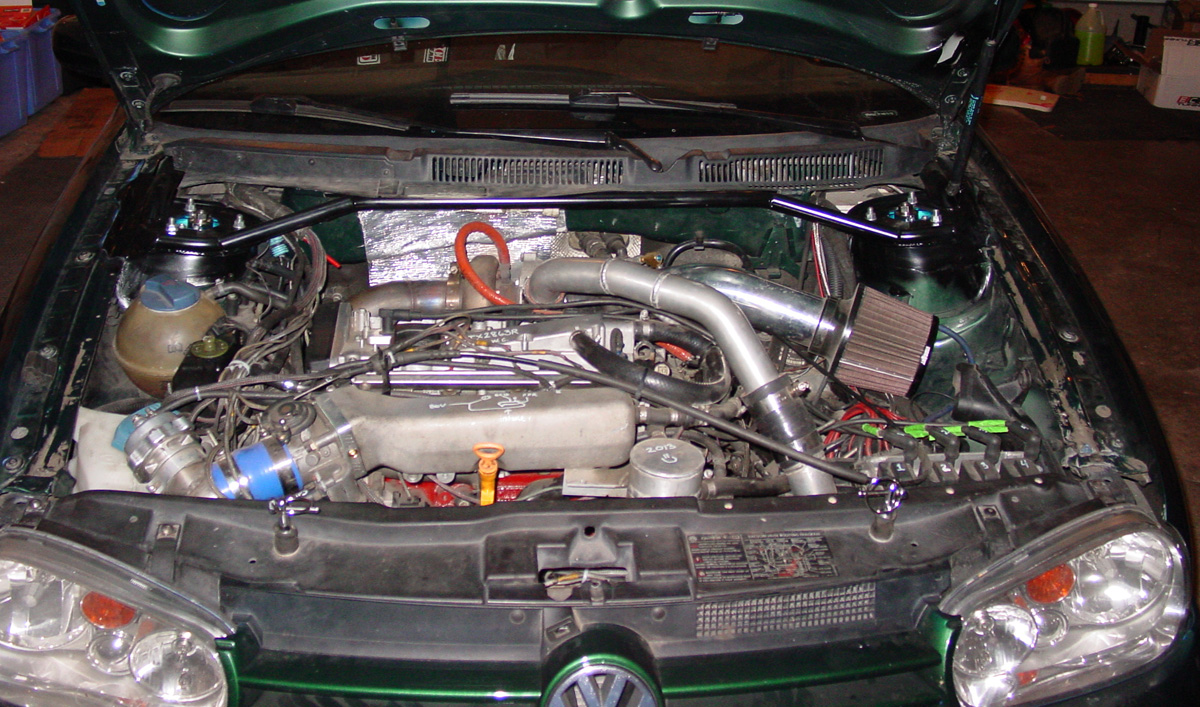
Camber plates are done!

Naturally, plans change as you are trying to build something from scratch.  The 3" tender springs were about an 1" too long.  To get us ready for the first hillclimb of the season (Mt. Ascutney), we used a helper spring instead.  To help suck up the bumps at the hillclimbs, I think I will revist the main spring again and might go with a shorter main to allow for the 200# tender (or some other rate)... some research is needed.

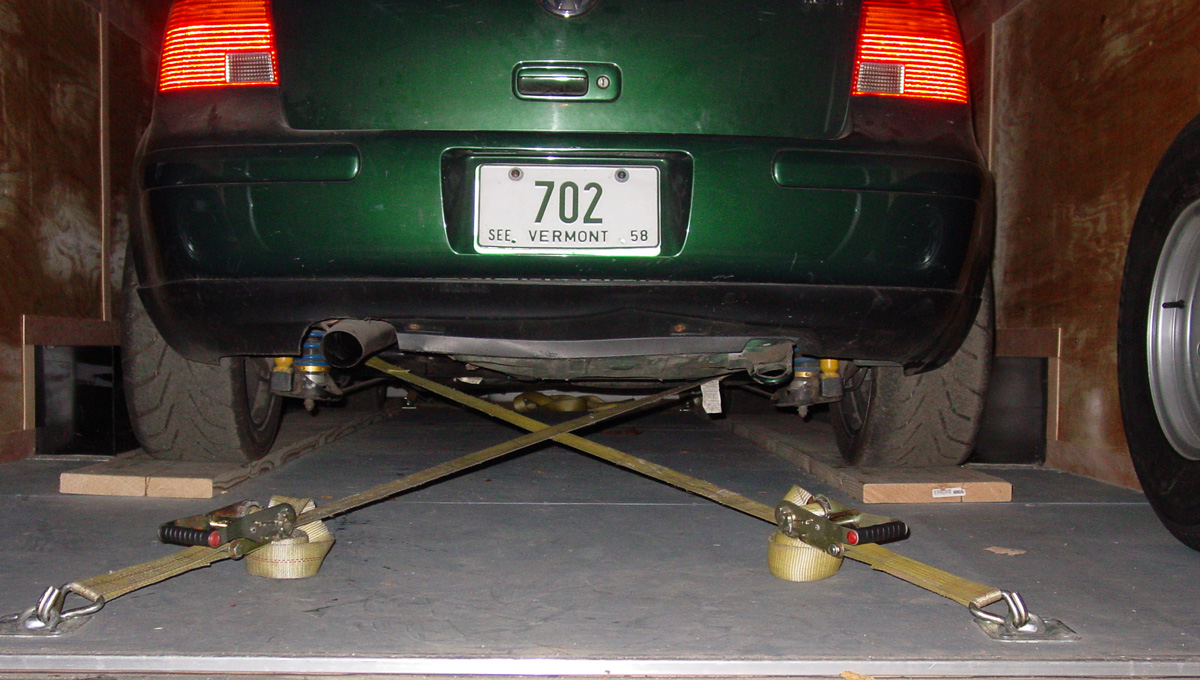
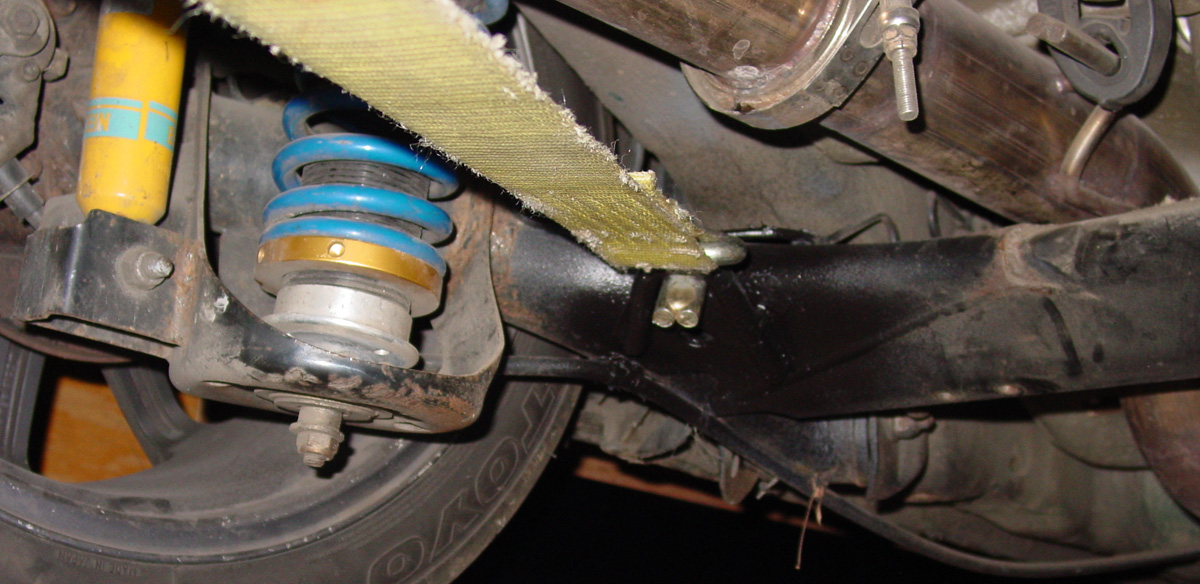
Another think I wanted was a way to tie down the car in the trailer without having to use a wheel.  I was putting the straps through the wheels to hold it down in the trailer.  Enter some new tie down spots on the car....

There is also a new tie down point in the front that mirrors the factory tie tow hook location.... now I have two mounting points on the front (stock tow hook plus new hook)

Some things left to do....

Cooling!!! The car is running hot with the FMIC in front of the radiator and the full belly skid plate.  I have been researching options and talking with other people to see what they did to keep their engine running cooler.

I believe that I will go with a louver on the hood, misting system for the radiator and FMIC... plus a more efficient radiator that is waiting to be installed.

Currently, I have EBC Yellow (if memory serves) brake pads on the car; these are designed for the track because they take some time to heat up, but they work great when hot.  With hillclimbs, you start out at 100% speed (cold tires and cold brakes) with no opportunity to warm things up for best performance.

To help with the brakes, I am going to install some pads that heat up a bit quicker.  Additionally, I am trying a different compound in the rear to balance things out.

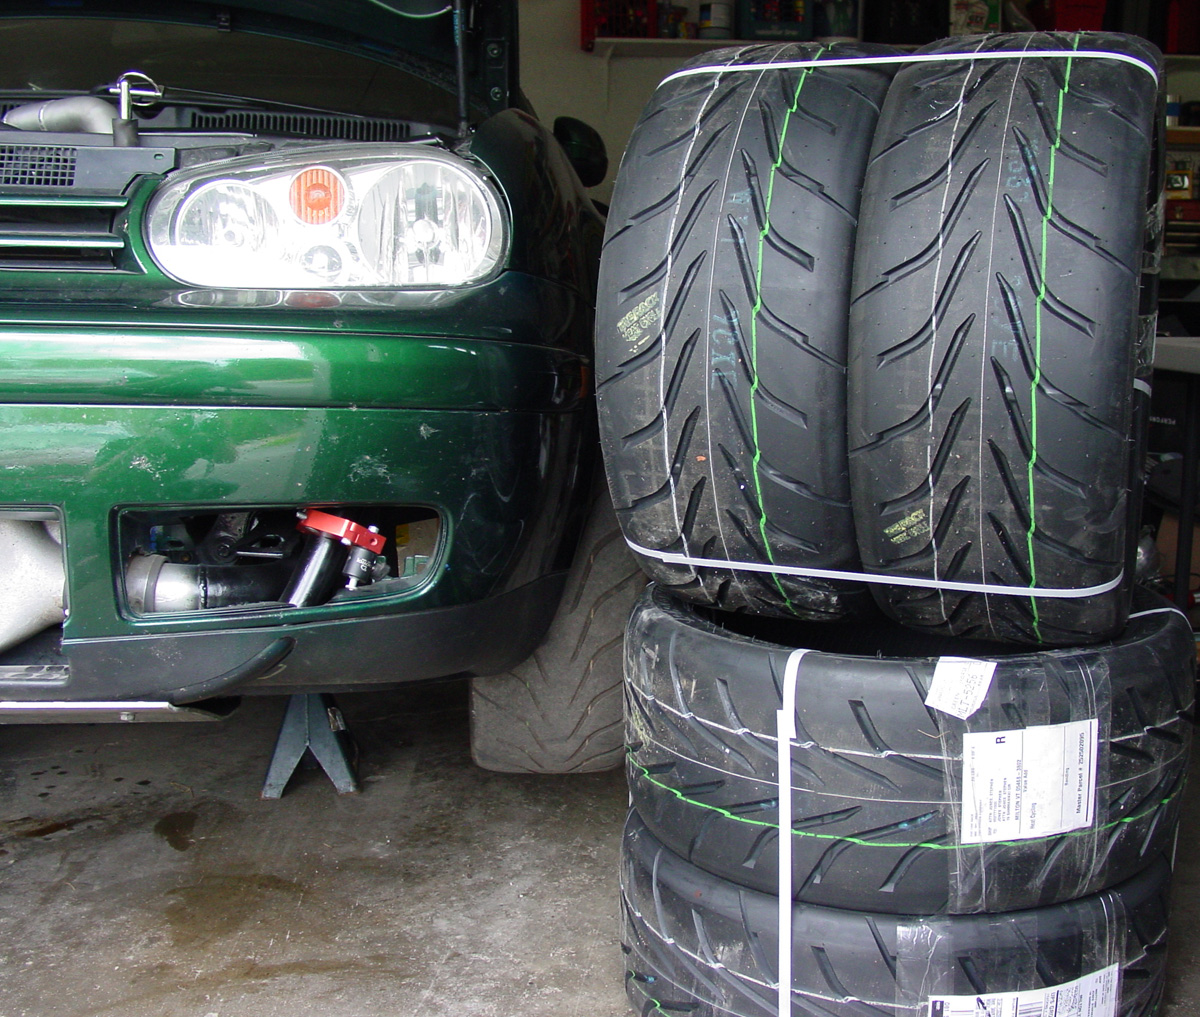
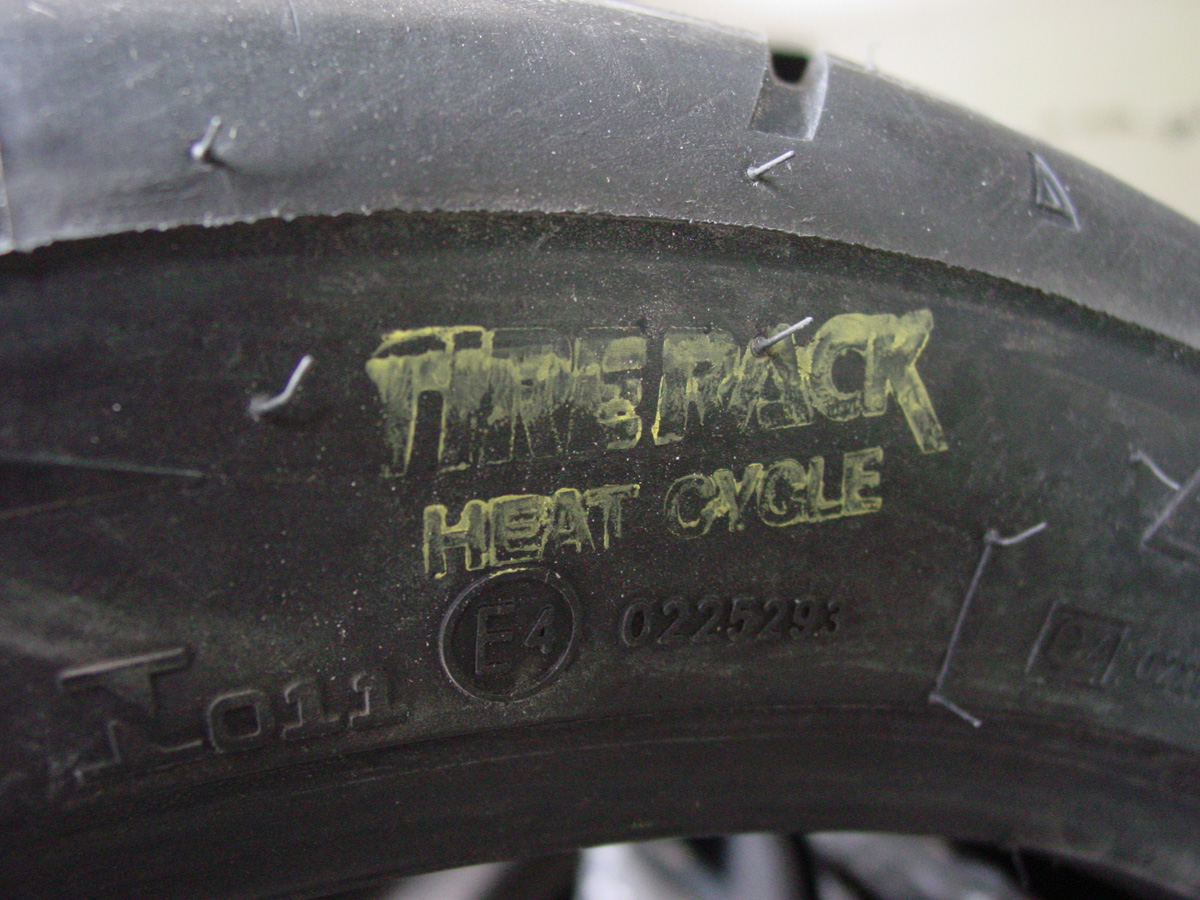
Tires.... bald last year and bald for the first hillclimb of this year (I almost wish I put the new tires on at Ascutney).  Enter a set of Toyo R888, 235/40/17, that I tried the heat treated option this time.

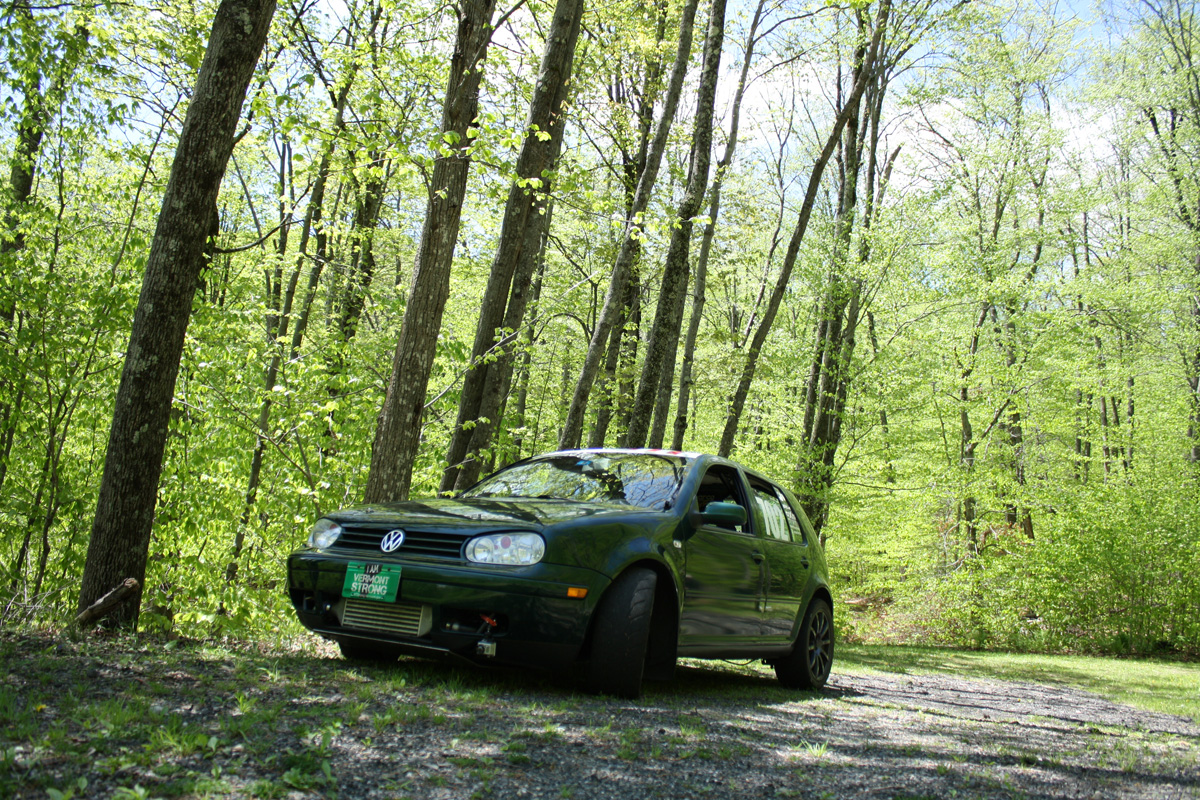
Since we were a bit short for workers at the Mt. Ascutney hillclimb, I signed up to work a checkpoint when I wasn't driving.  Managed to get a lot of photos... Photos on VermontRacing.com

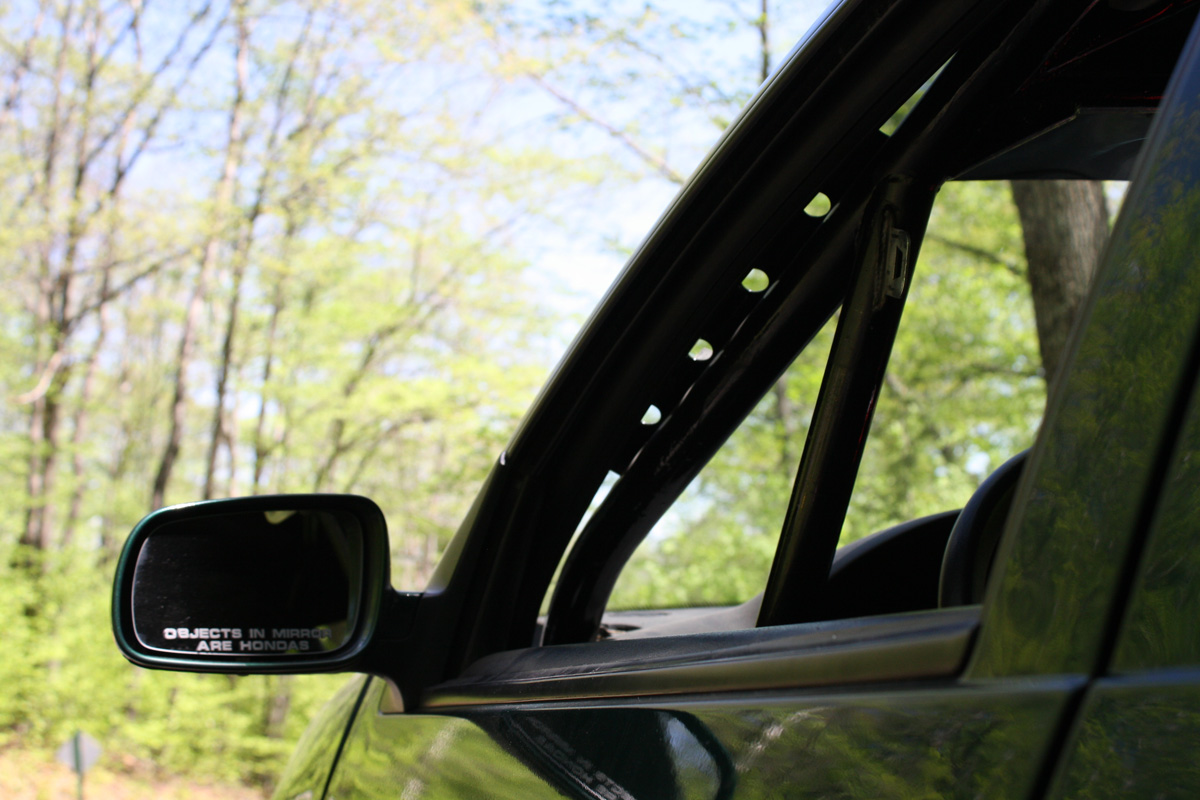
The sticker came with the mirrors... thought it was funny, so it stayed.

Grab a seat in the time machine.....

My old towing rig (2001 F250 7.3 Powerstroke with open trailer)... loved the truck.  

The 7.3 is actually a very desirable engine, but I needed a bit more power and gearing with the enclosed trailer. Honest, I did not try to color match the truck to the car, it was just what was left on the lot when I was looking for a truck.

So.... what is coming in the next unexciting update of this project?

* Photos and videos from the Mt. Ascutney hillclimb.
* Radiator install
* New brake pads
* Louvers for hood (?)
* Misting system for radiator and FMIC (?)
* Mount the new tires

It is already making me tired just thinking about all the stuff I have to do to get ready for the 2014 Mt. Washington hillclimb (http://www.climbtotheclouds.com).

Next event is the Mt. Okemo hillclimb!

Rabbit Farmer
Rabbit Farmer Reader
2/24/19 9:44 p.m.

May 26, 2014

Busy day... most of it researching and ordering parts.

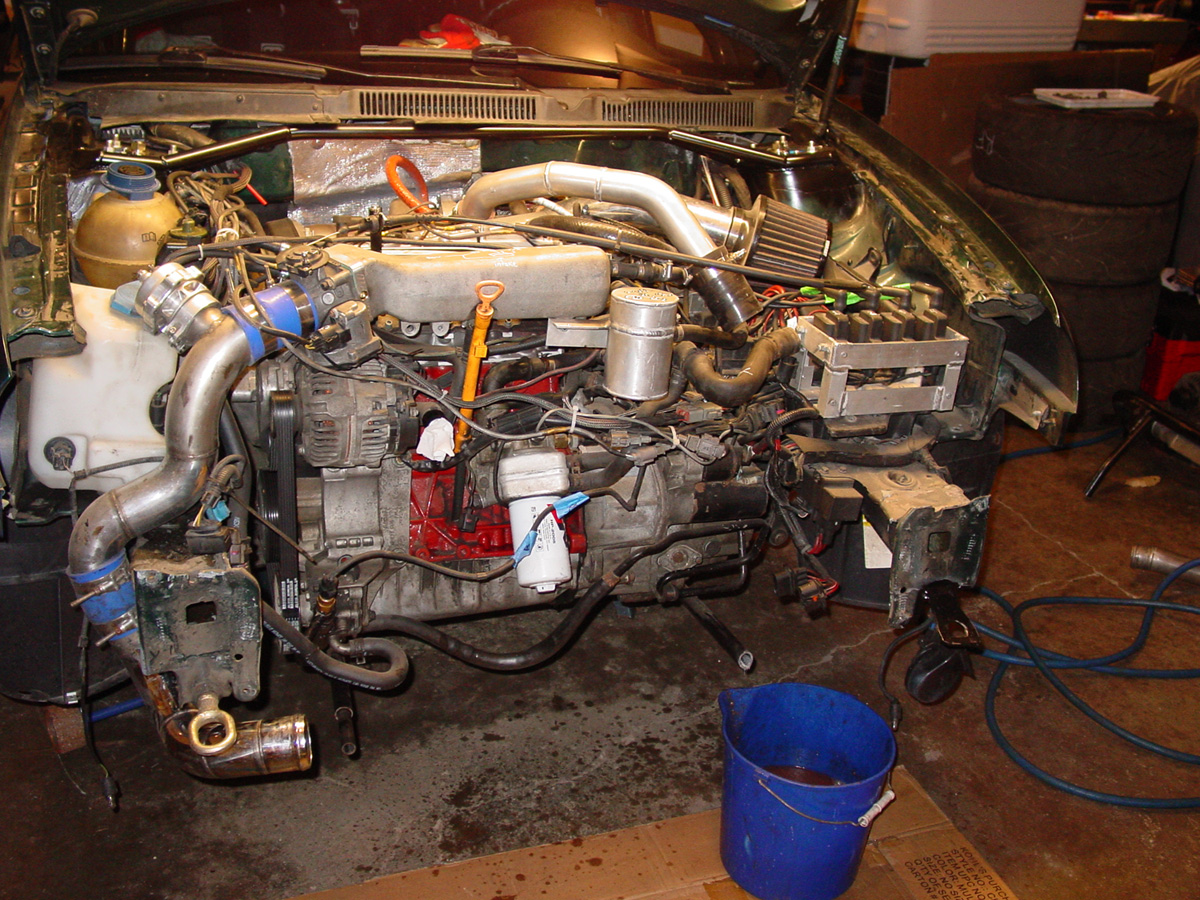
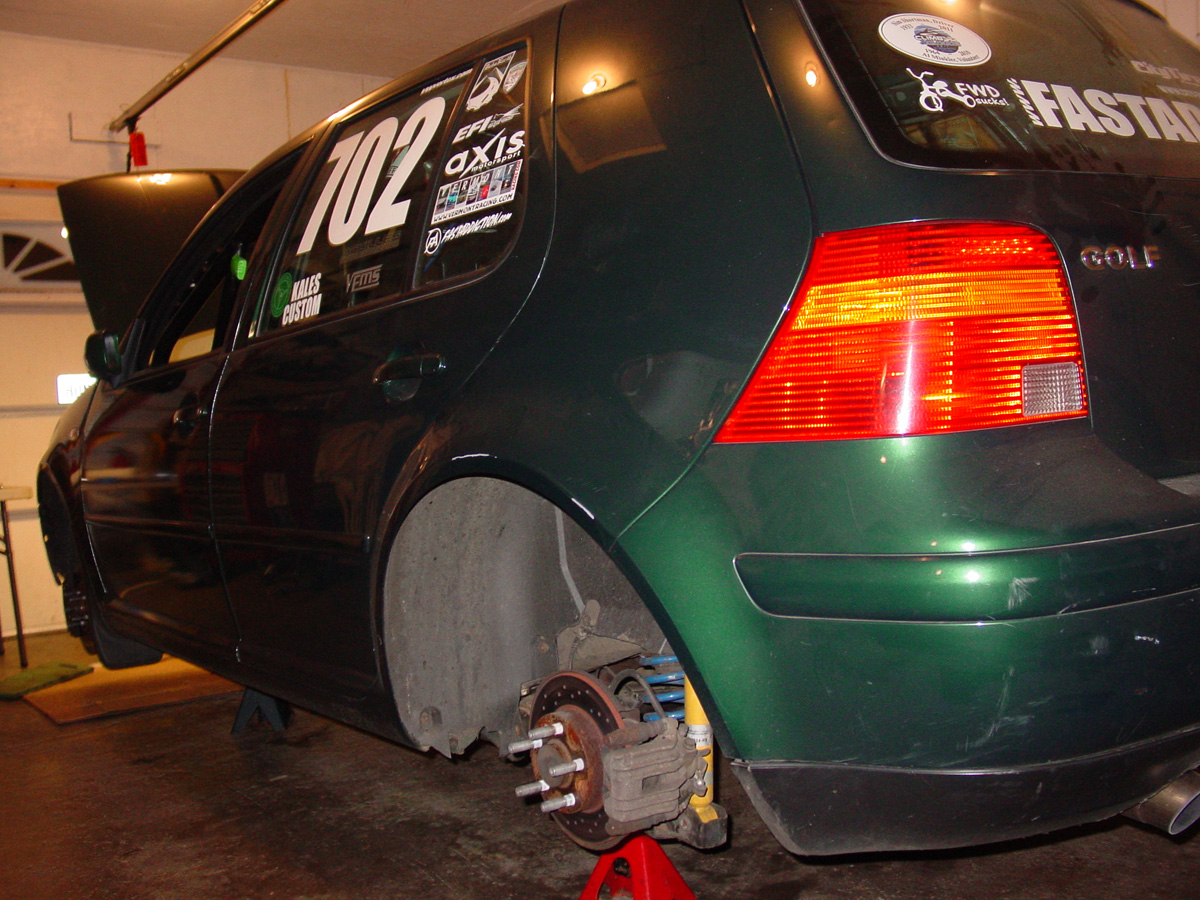
Goal today was to get the car off the ground, remove the tires (prepare for brake install and possible tire change), and remove the front end/radiator.

Mission accomplished.

Naturally, today's accomplishments yielded a long list of parts to order (replace old parts, rusty screws, etc.).

When I was getting the car aligned, Ralph mentioned to me that the tire was really close to the spring. Okay, no problem, I will order some spacers.  4mm spacers on the way... is that enough?  Unsure at the moment.  Brainstorming other ideas.

The wheel is not touching... more of the camera angle than anything.  It is close, though.

Back to the brainstorming session (weather man said it was a weak system that was moving slowly)....

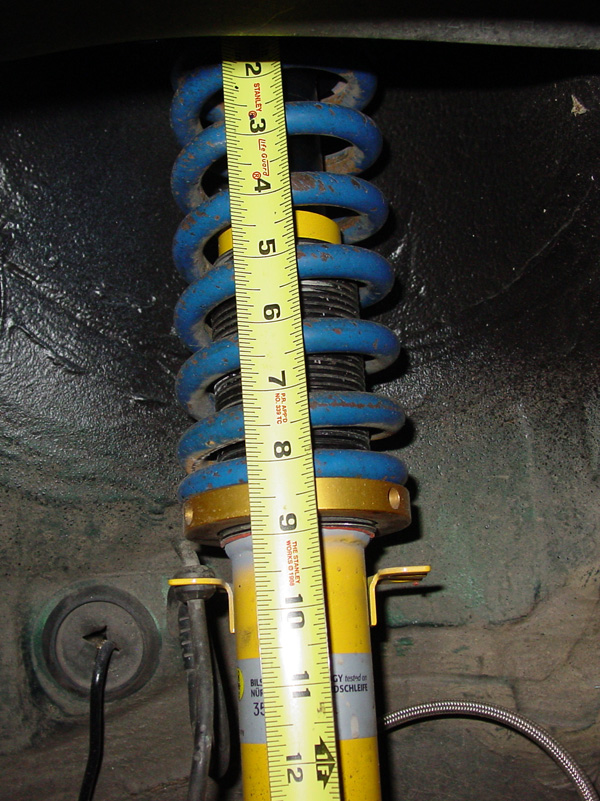
Another shot of the main and helper spring.... I am looking at other spring options where I can use the 3" 200# tender plus a different main spring (shorter and less stiff... it is currently 500#).

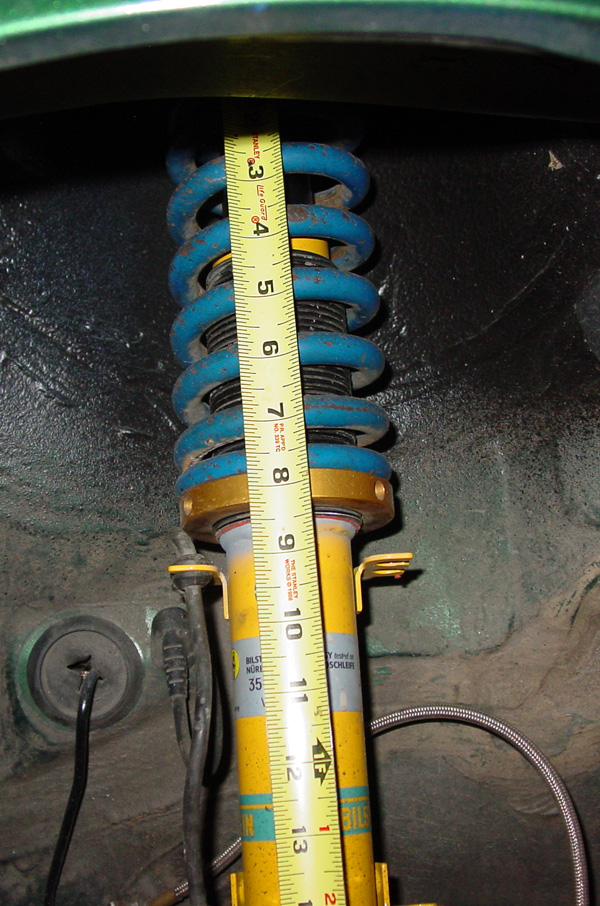
Height of the springs (measuring tape is at the top of the helper spring) when at full droop (limited by sway bar).

With helper spring depressed (jack under the control arm)

Approximately what it would look like sitting on the ground.... The jack under the control arm is supporting the entire right side of the car with both the front and rear off the ground and the left side supported by jack stands.

Spring rate and length brainstorming will begin tomorrow.  Oh, the back spring (I forget the rate at the moment) is an 8" spring at full droop.

Back to the front.....

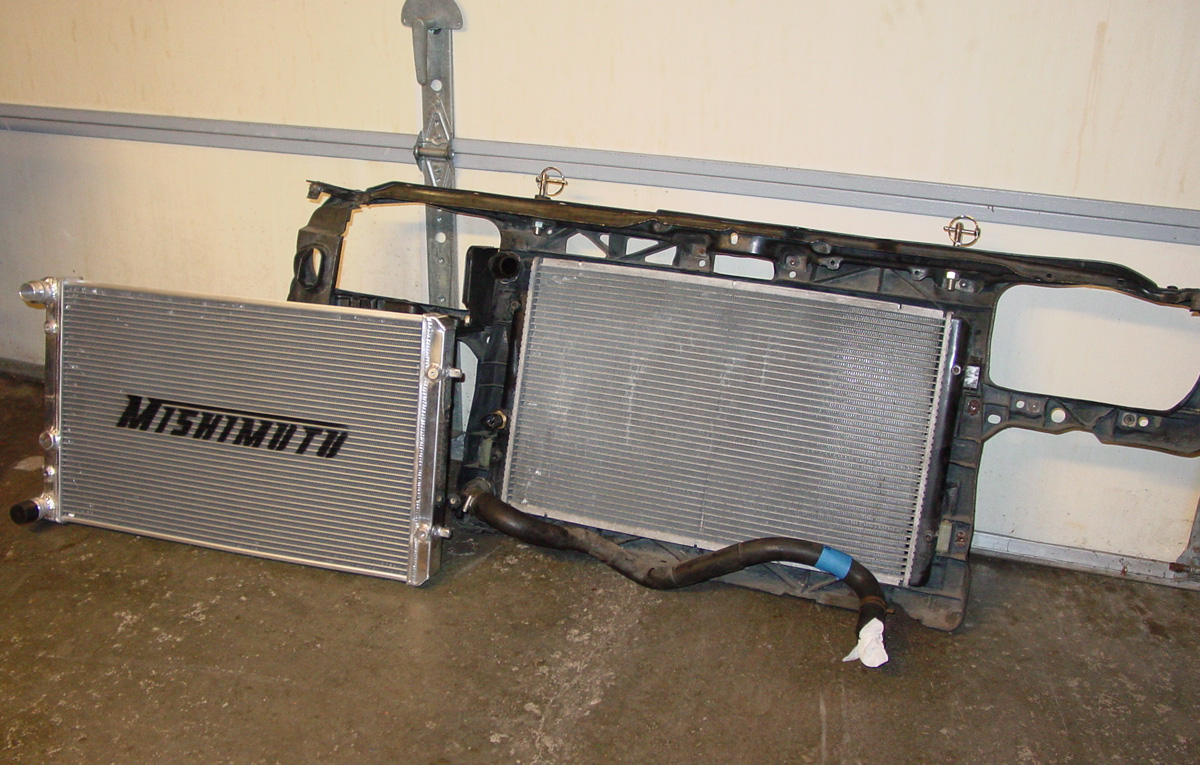
Side by side comparison of stock vs Mishimoto radiator.

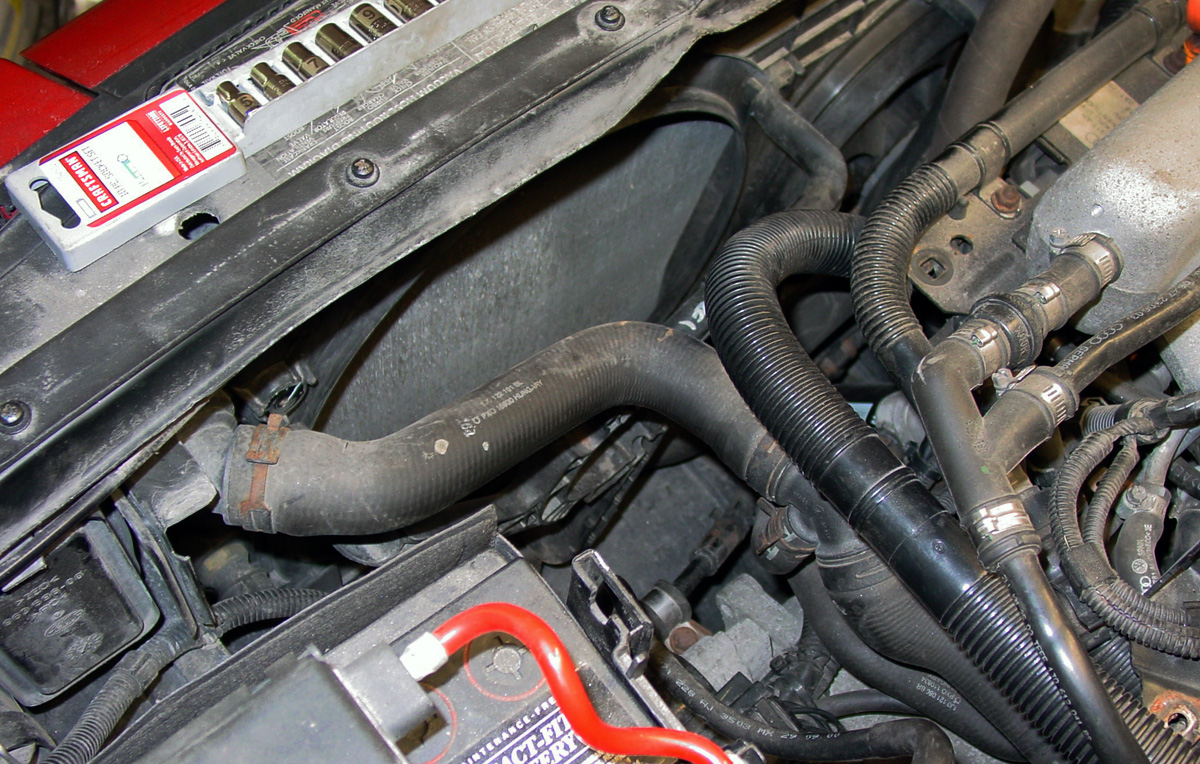
I do need to purchase some of the plastic/rubber retainers (holds the radiator in place on the two pegs on each side of the radiator), fan switch (I'm in there, it gets replaced!), upper and lower radiator hoses (again, I'm in there....), etc.

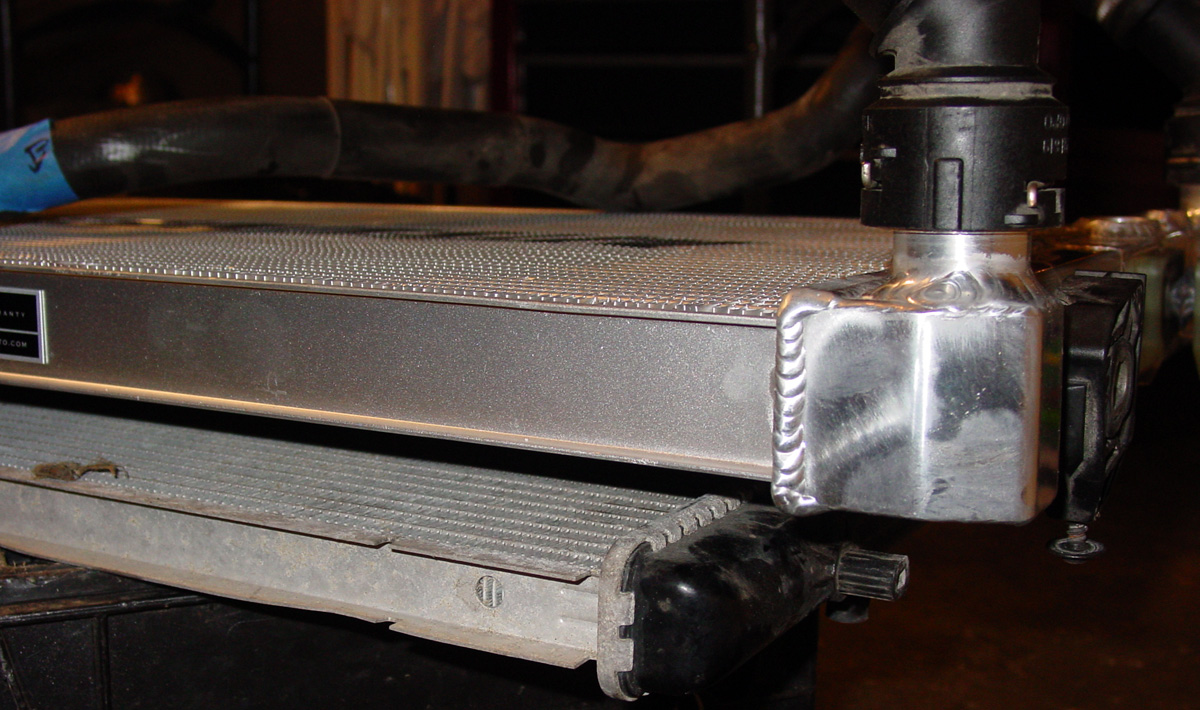
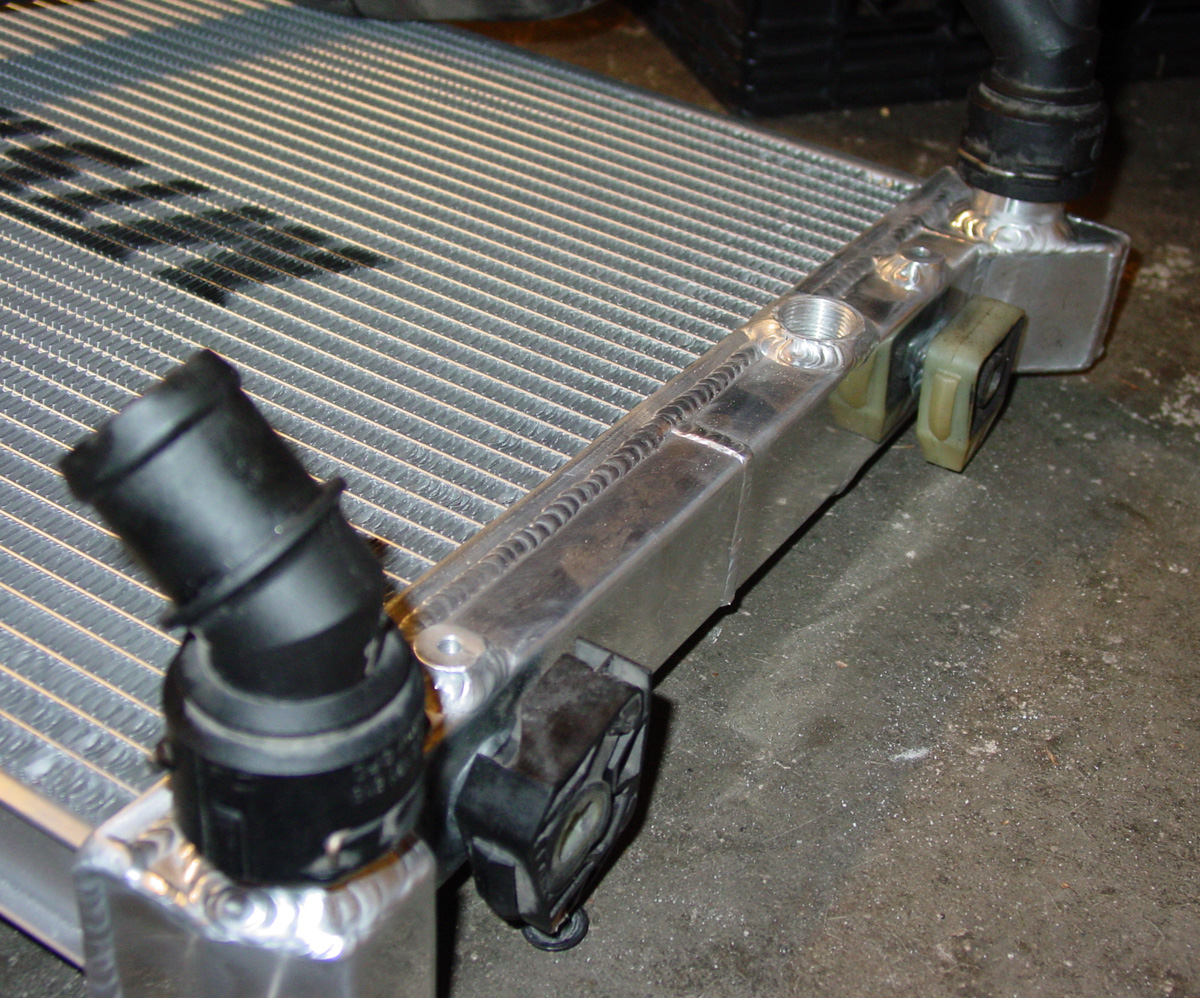
One thing of concern are the hard plastic connectors that mount directly on the radiator... the rubber hoses connect to the hard plastic connectors. They seem to wiggle around a bit on the new radiator; unsure if this will be an issue with making a good seal.

How it sits.... time to order some parts online and then hit VW in the morning.

Rabbit Farmer
Rabbit Farmer Reader
2/24/19 9:50 p.m.

May 29, 2014

Got a number of packages in the mail today... parts for the Golf.

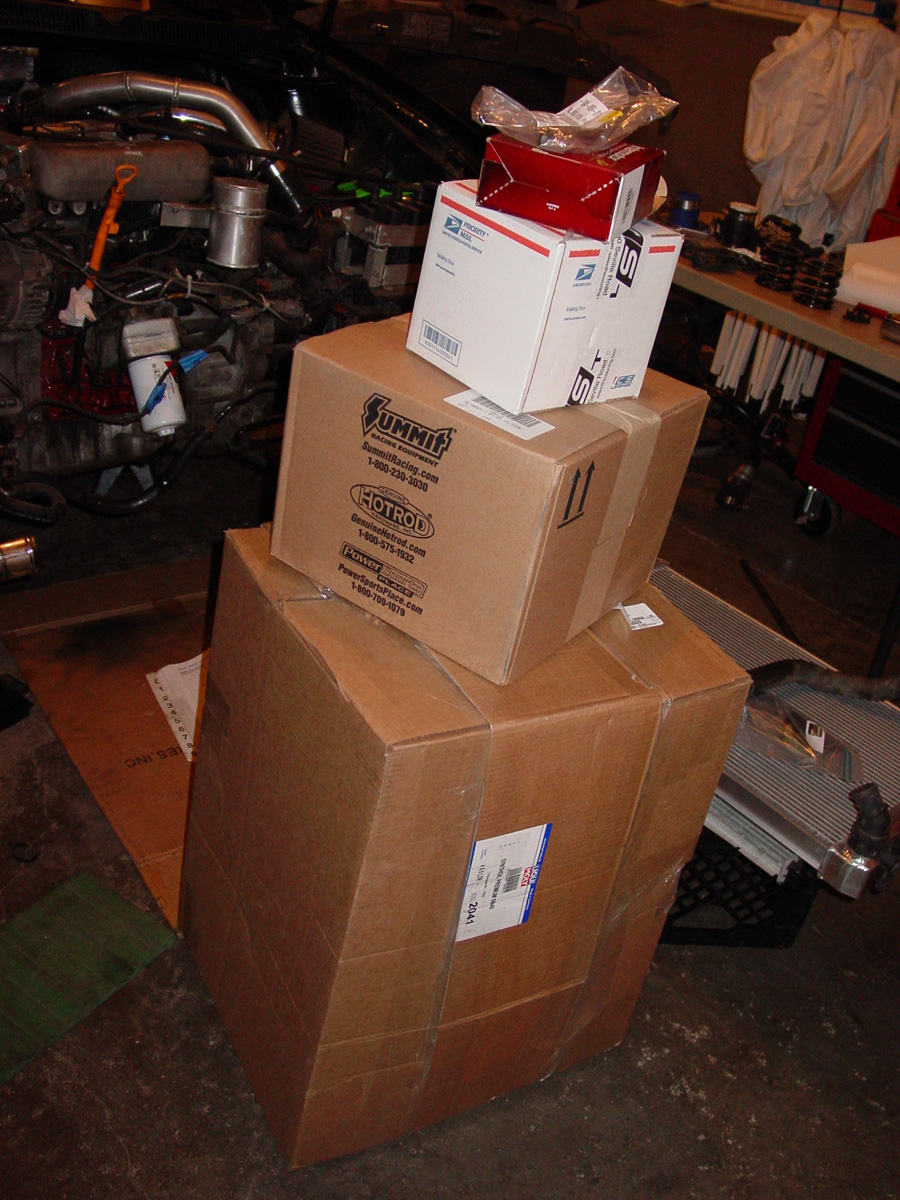
The package from German Auto Parts looked like one of the USPS poster child packages for "if you get a package that looks like this, don't open it!"  It was 3 or so boxes taped together (1/4 of tape) to form a "box" to house all the other boxes and parts.  I think they need to purchase some bigger boxes.... looked like they use the boxes from the stuff that was delivered to them.

In other "wrong size" news... Summit racing had a big box with lots of packing balloons to house a tiny box inside.  I guess they don't have a lot of size options at Summit.

Perhaps the two companies should get together.

This weekend should prove to be a busy weekend... just waiting on a few more packages on Friday.

Jul 08, 2018

So.... a lot has happened since the last update; I just haven't had the time to update the project thread.

The aforementioned pile of boxes that arrived....
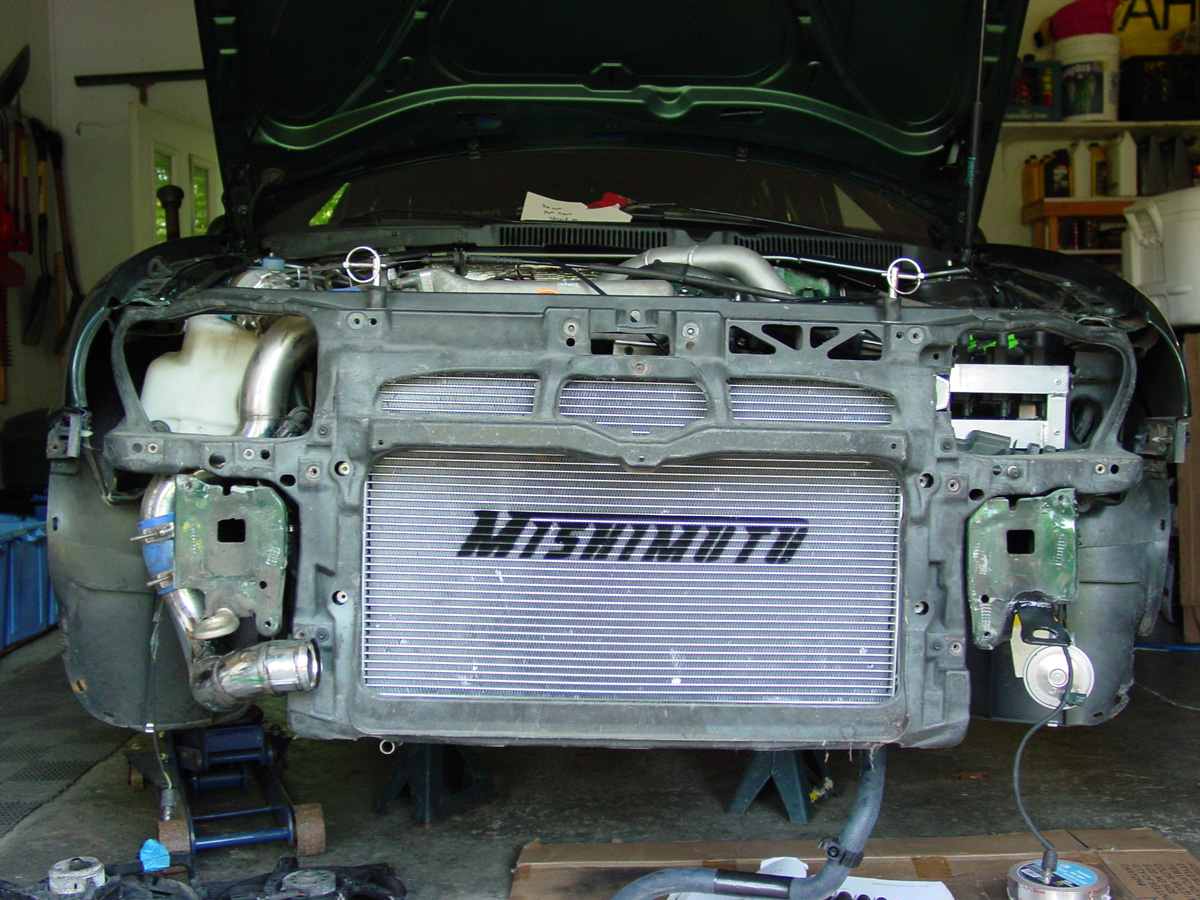
The work continued on the installation of the bigger aluminum radiator.  I read somewhere that some fabrication was needed so I purchased a new Dremel to replace my old one that gave up the ghost a while back.

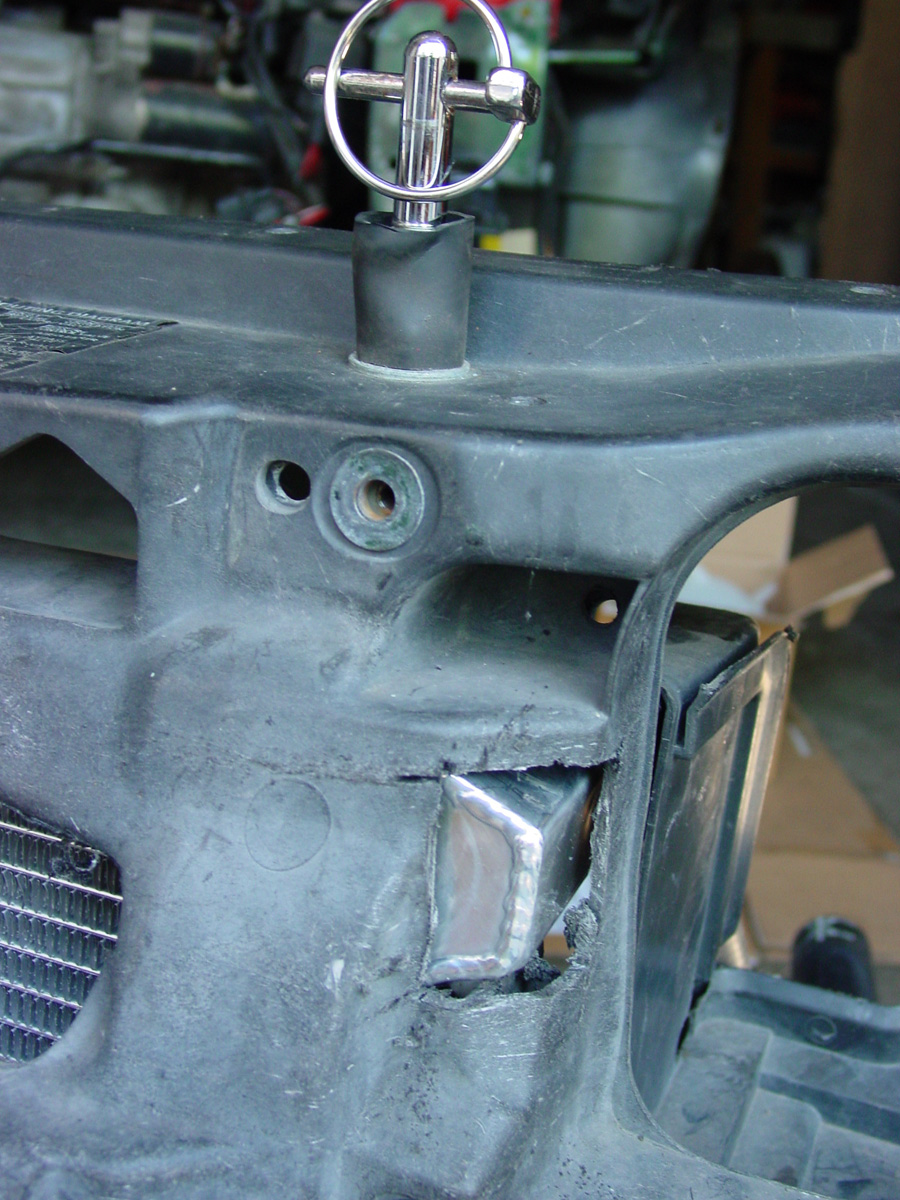
Cutting a hole in the plastic front piece....

Guess what?  The headlight is supposed to be there!  I had to cut a hole in the back of the headlight to make everything work.  I am unsure if this modification is needed on a perfectly straight car, but I am thinking it was only necessary (especially the headlight cutting) because of the car-meets-tree incident in 2010.
Installed....
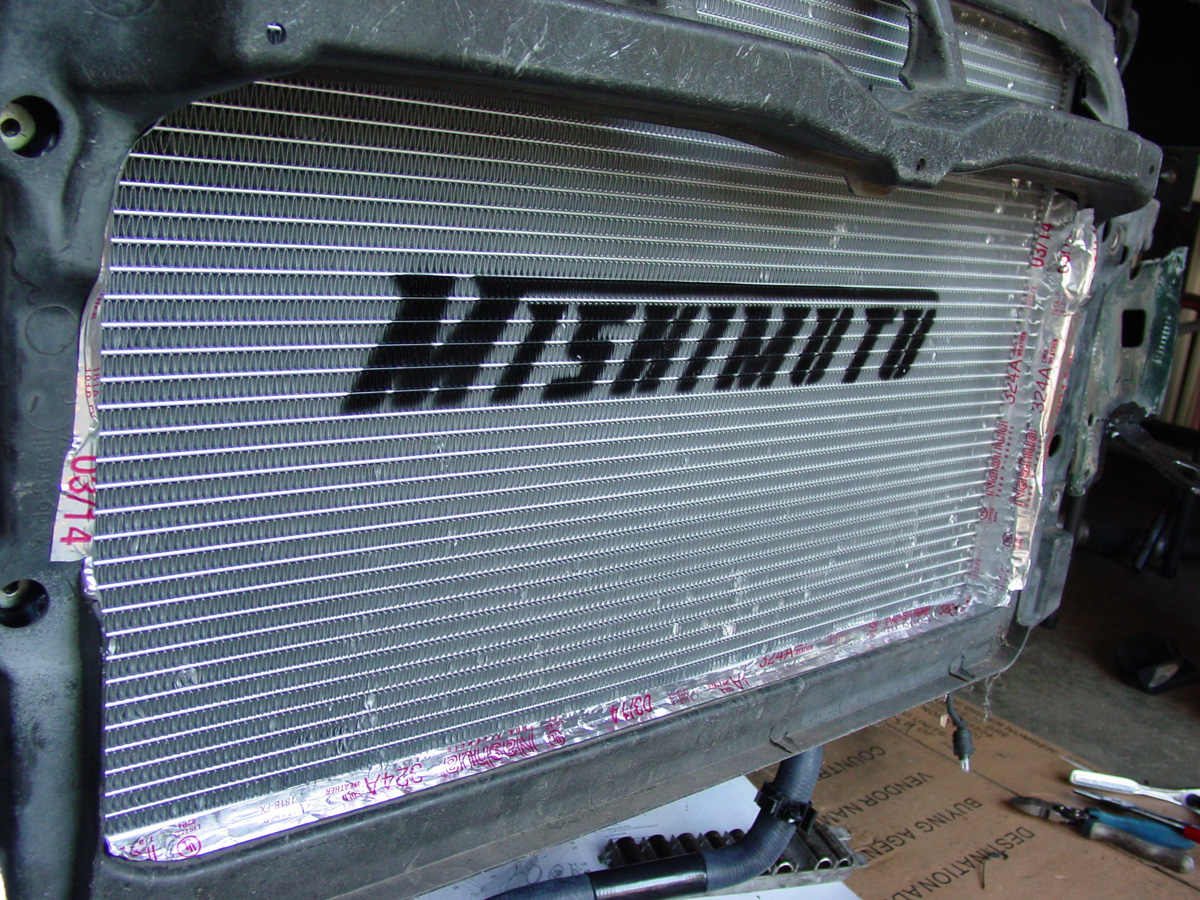
Trying to block airflow around the radiator....
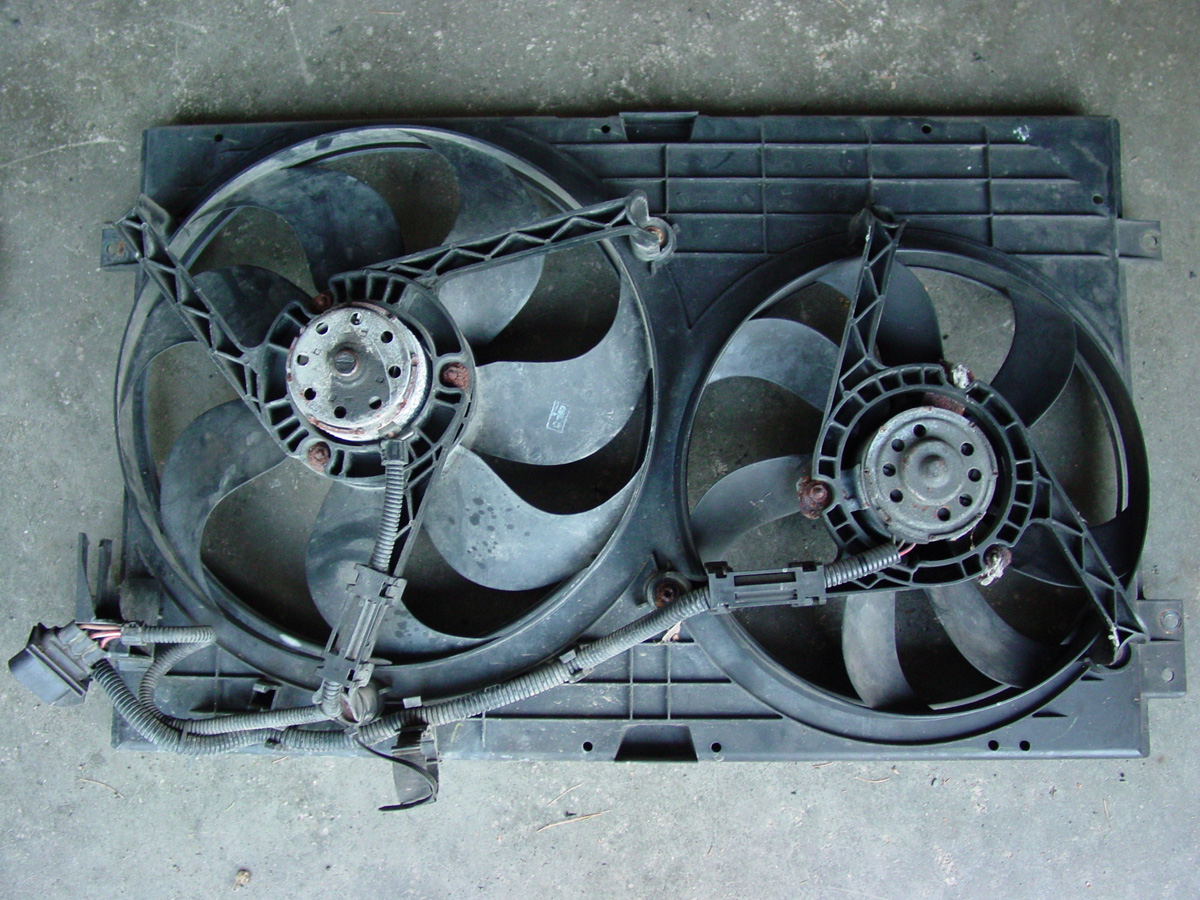
The fans worked just fine before.  They were from one 20AE parts car that was harvested for the frontend parts.  I noticed that the nuts that held the fans to the bracket were very rusty so I sprayed them with PB Blaster and tried to remove them.... snap! (I don't have the power!) There were so rusty that they were not salvageable.  The fans did make a little noise when free spinning them. I figured since it was apart, I might as well replace the fans.
In with the new....
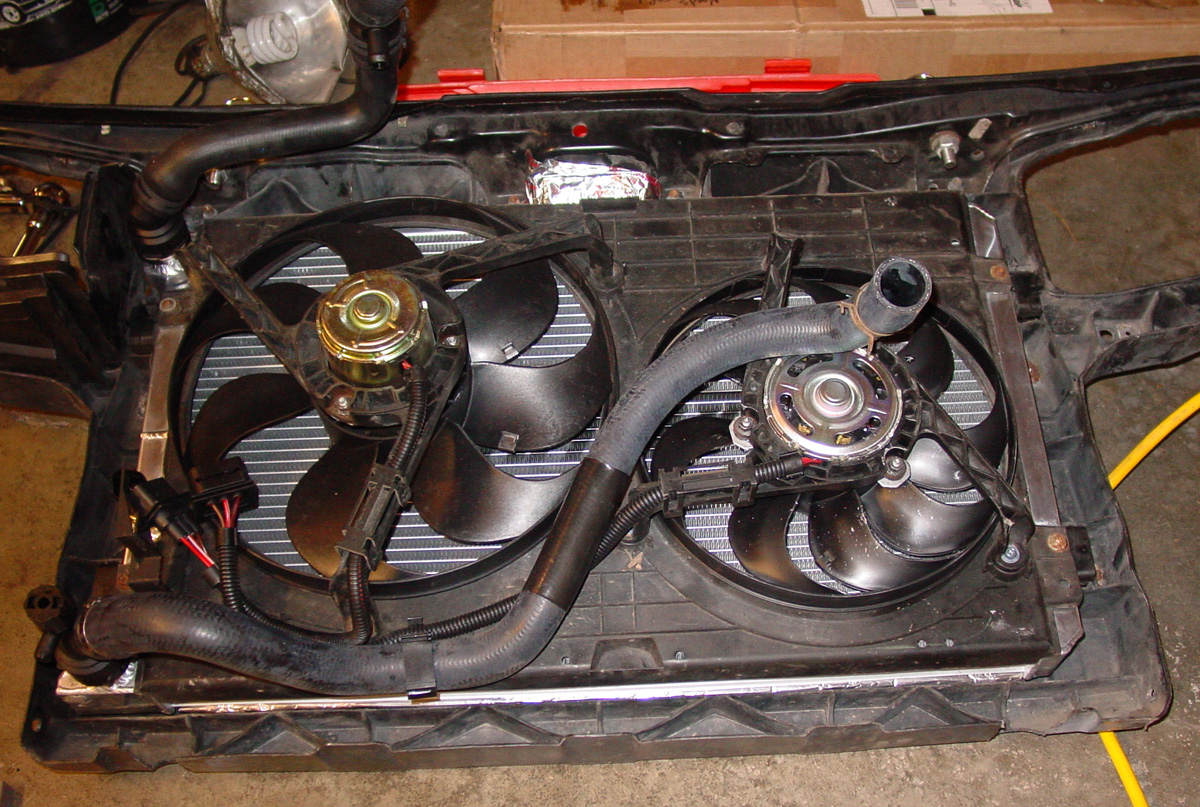
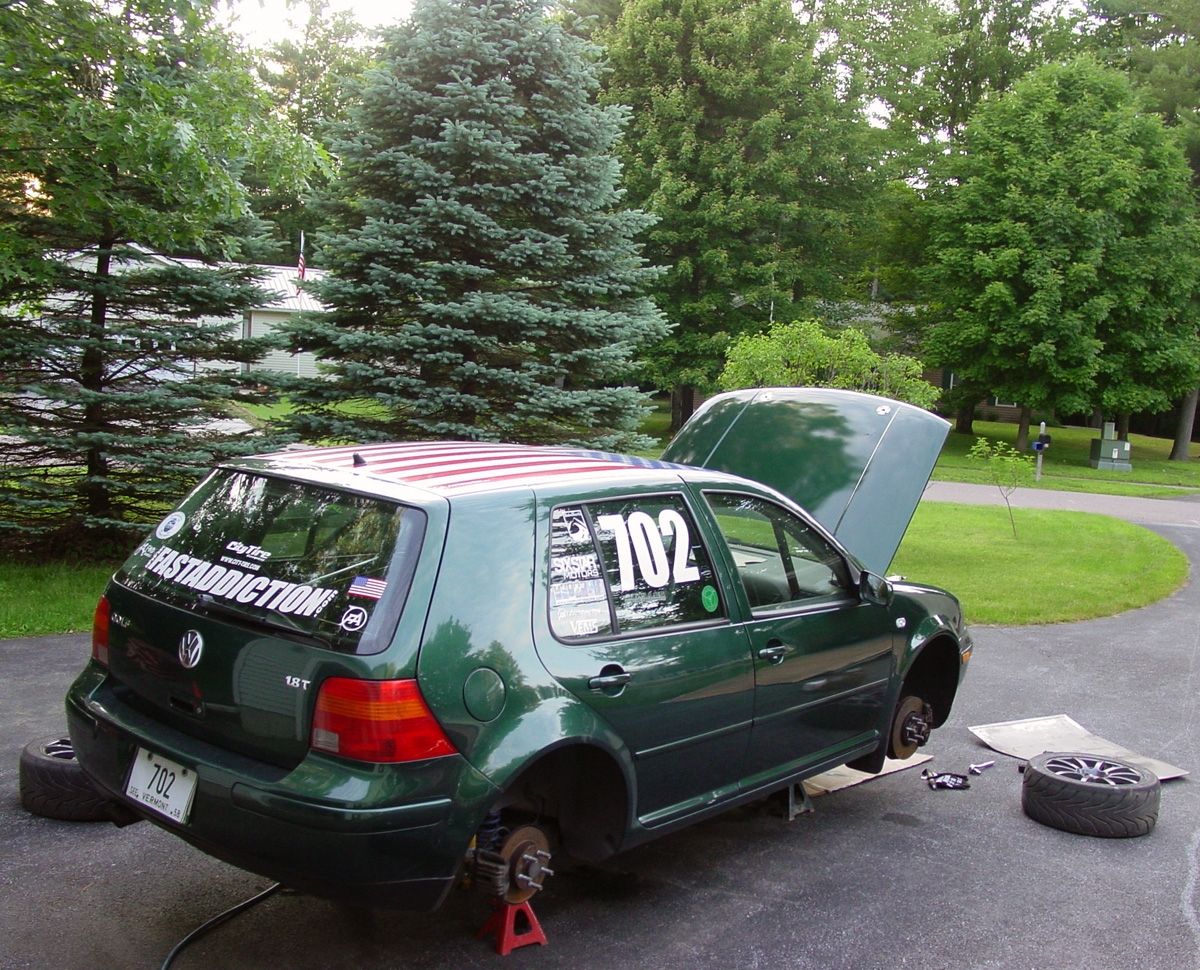
There.... all ready for the Mt. Okemo #1 hillclimb….. where things got interesting.

Here is the video of one* of my runs at Okemo. If you have watched my past videos of Okemo... this is essentially the same with ONE exception.  I attached the GoPro to the shifter and used the footage as picture-in-picture.  What is slightly interesting is that the audio is coming from the out of car video clip and that the in-car and out of car used the same camera on two different runs.  Seems I am pretty consistent with my driving as the PIP in-car footage with the shifting matches the audio from the out of car video.

http://www.youtube.com/watch?v=kdLJrRX3mpw
*some video editing was done to make three separate runs look like a single run because I only have one GoPro camera.

So.... the end of my second to last run on Saturday had an interesting result just after the finish line…. the car kept accelerating even though I was not pushing the gas pedal.  The gas pedal moved away from my foot and stuck to the floor.  I stepped on the brake pedal and it was hard as a rock because the car was boosting. (there was no vacuum for the brakes).

Yes, the danger must be growing
For the rowers keep on rowing
And they’re certainly not showing
Any signs that they are slowing!

Thankfully, the finish line is essentially a straightaway, so I was able to get things under control by shutting the car off.

What was strange is that the car did not rev if I had the clutch depressed.  When I put it in gear, the car would accelerate; slowly at first and then ramp up to full throttle.  Press the clutch and it went back to idle.  Huh?

A little prodding around under the hood, we discovered there was a dent in the hood where the throttle body was making contact with it.  We cut off the cruise control connector (I think this is what it is for) and went for another run.  

Same result, but not as bad as the first time.

More prodding, thinking, drinking, and head scratching… then alais!
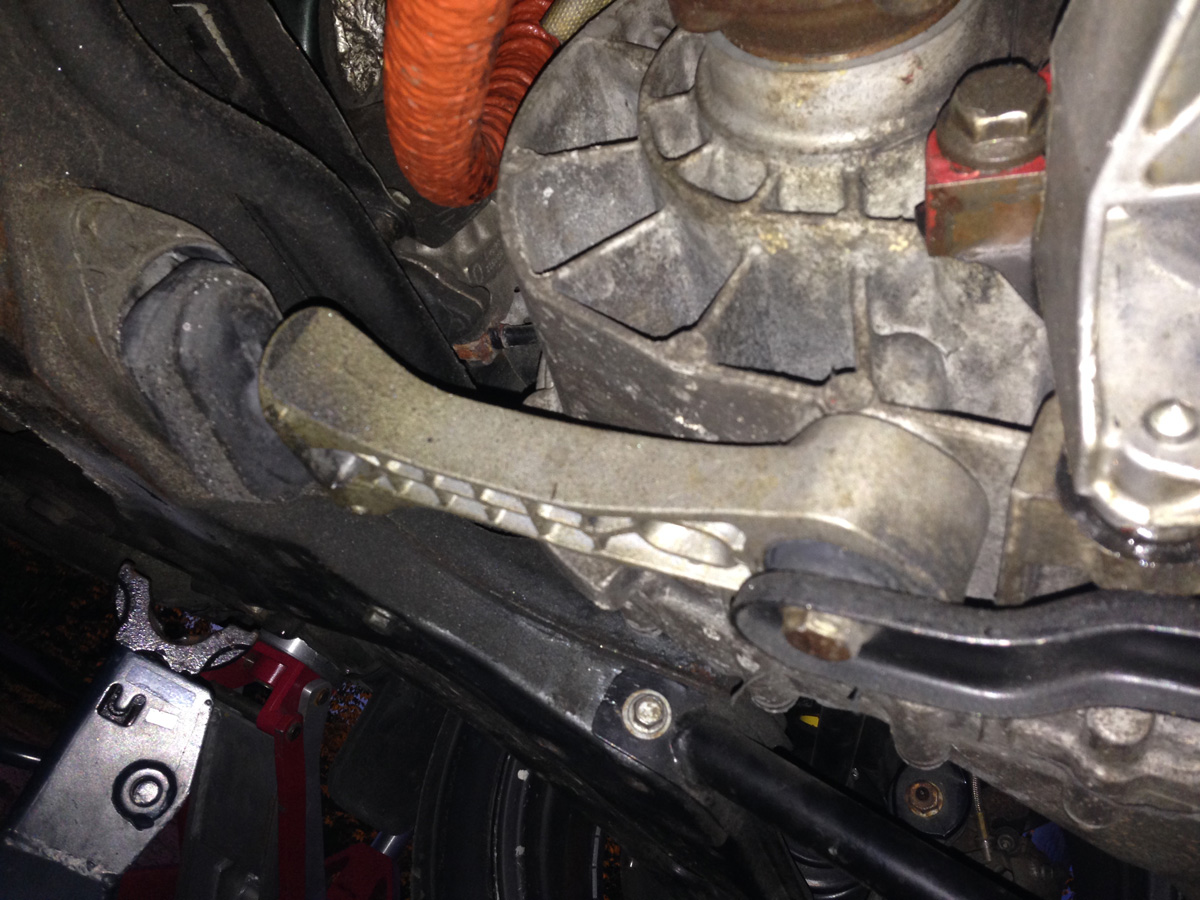
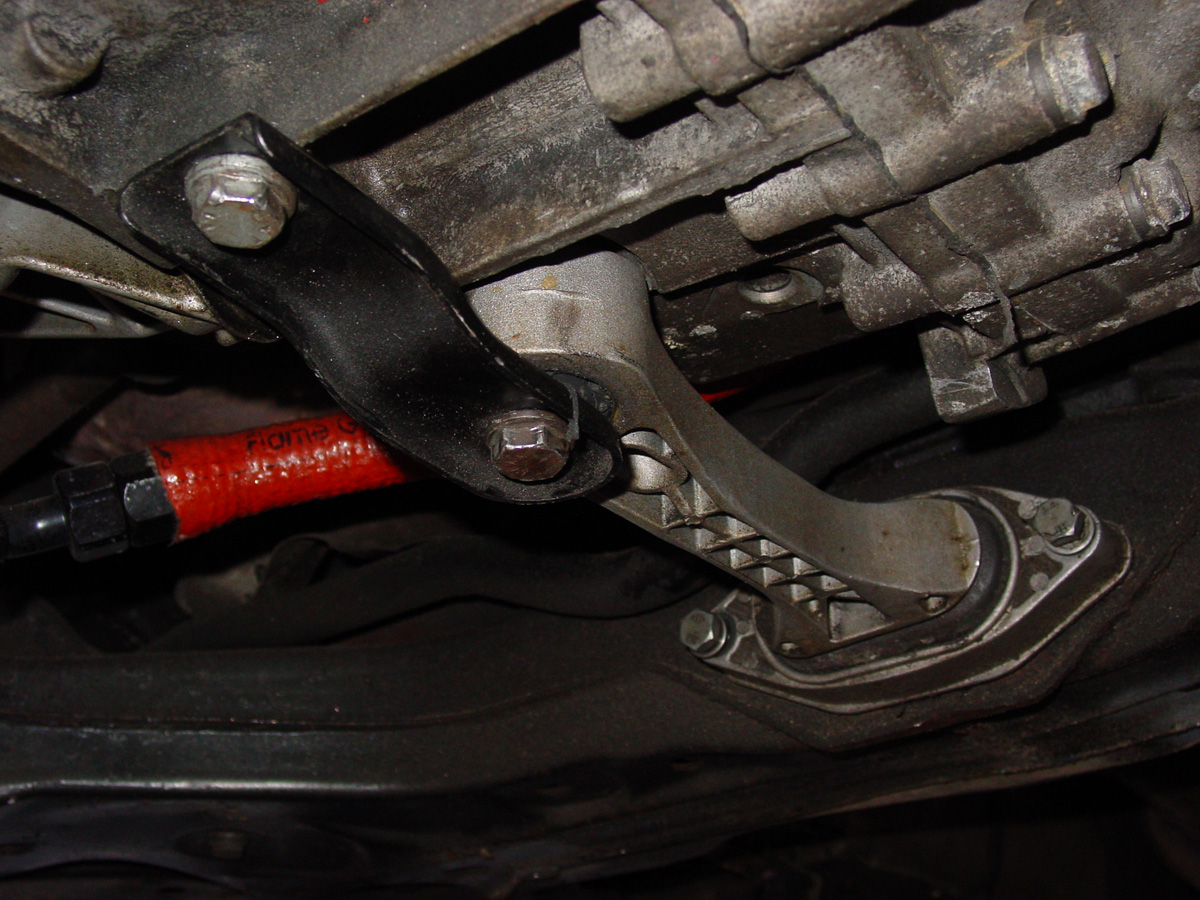
The nut that held the dogbone together decided to take a permanent vacation.  This means that the engine was free to swing in the engine bay. Therefore, thus, and hence, the throttle body was pressing against the hood.  The more it pressed, the more the throttle opened, the more it pressed, the more…. You get the picture.

With the help of a lot of people at the event, in the dark no less, we were able to take a thick nut and make it thin to reassemble the dogbone.  All runs on Sunday were good.  I just needed to change the spark plugs (I can tell when they are going…. Sluggish acceleration)…. I felt lazy before the event and didn’t replace them.  Too bad for me.  (insert sounds of a Waaaaamulance)

Got the car home to prepare for the Mt. Washington hillclimb.  Yeah!  Lots of small things to do to get ready for this event.

First… fix the broken stuff.
The “Okemo fixed dogbone” held together.
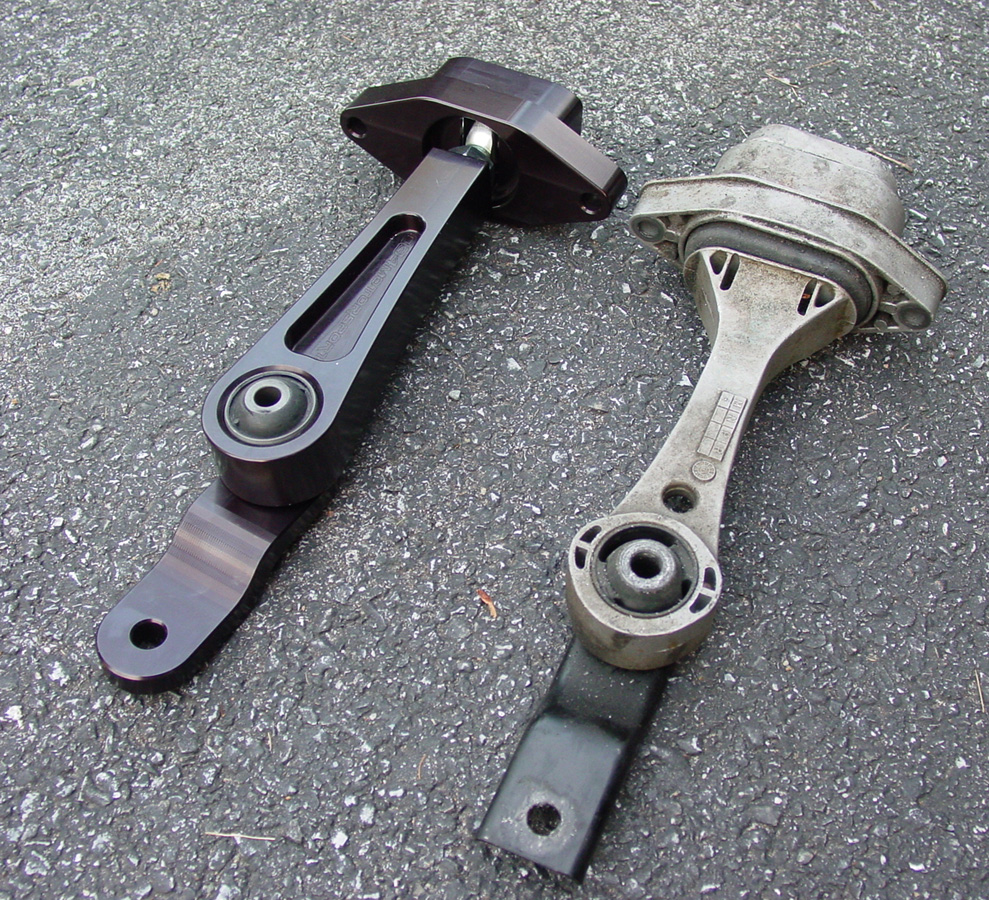
New 034 EFI Motorsports dogbone…. Yeah, I know that I have the little metal piece upside down in the picture.
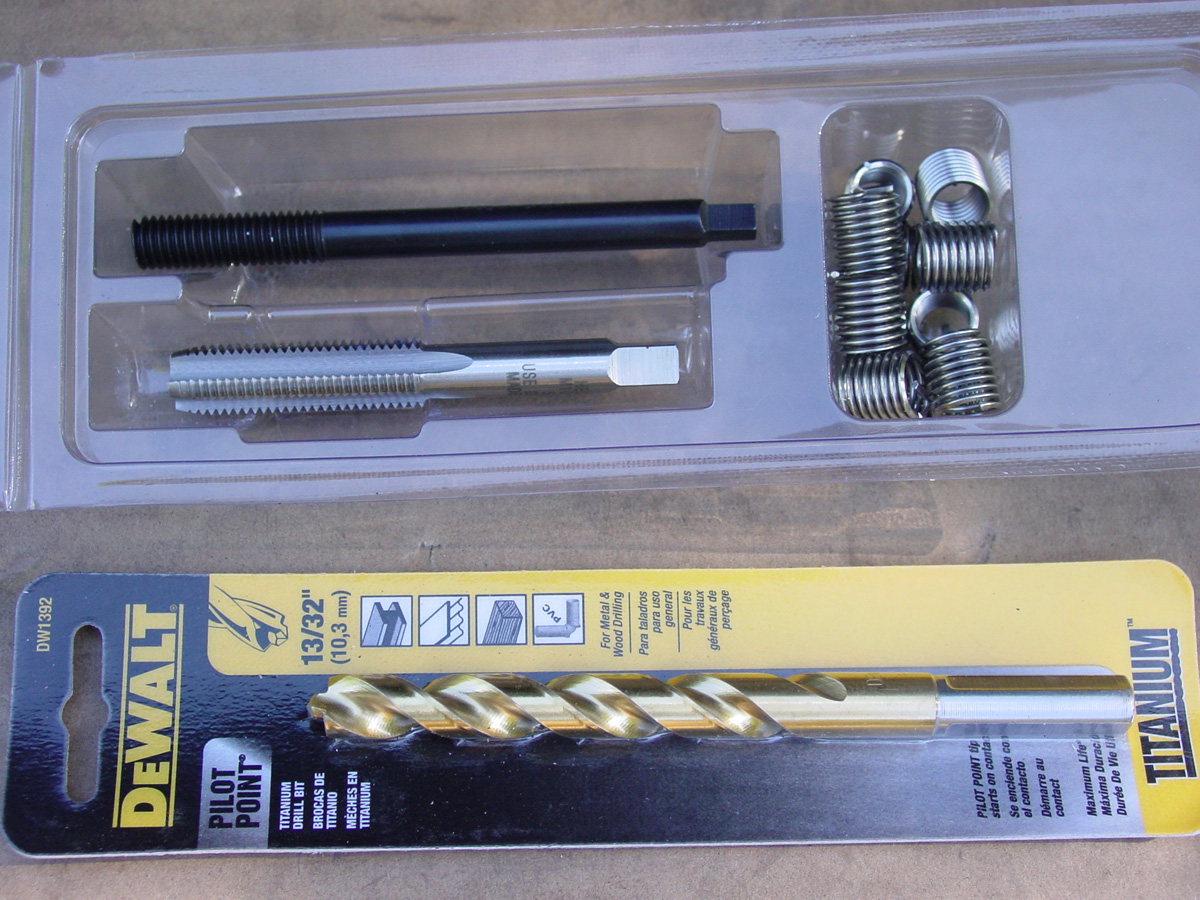
Since the engine was swinging (yeah, baby, yeah!) in the engine bay, it managed to strip the mounting point in the bottom of the transmission.

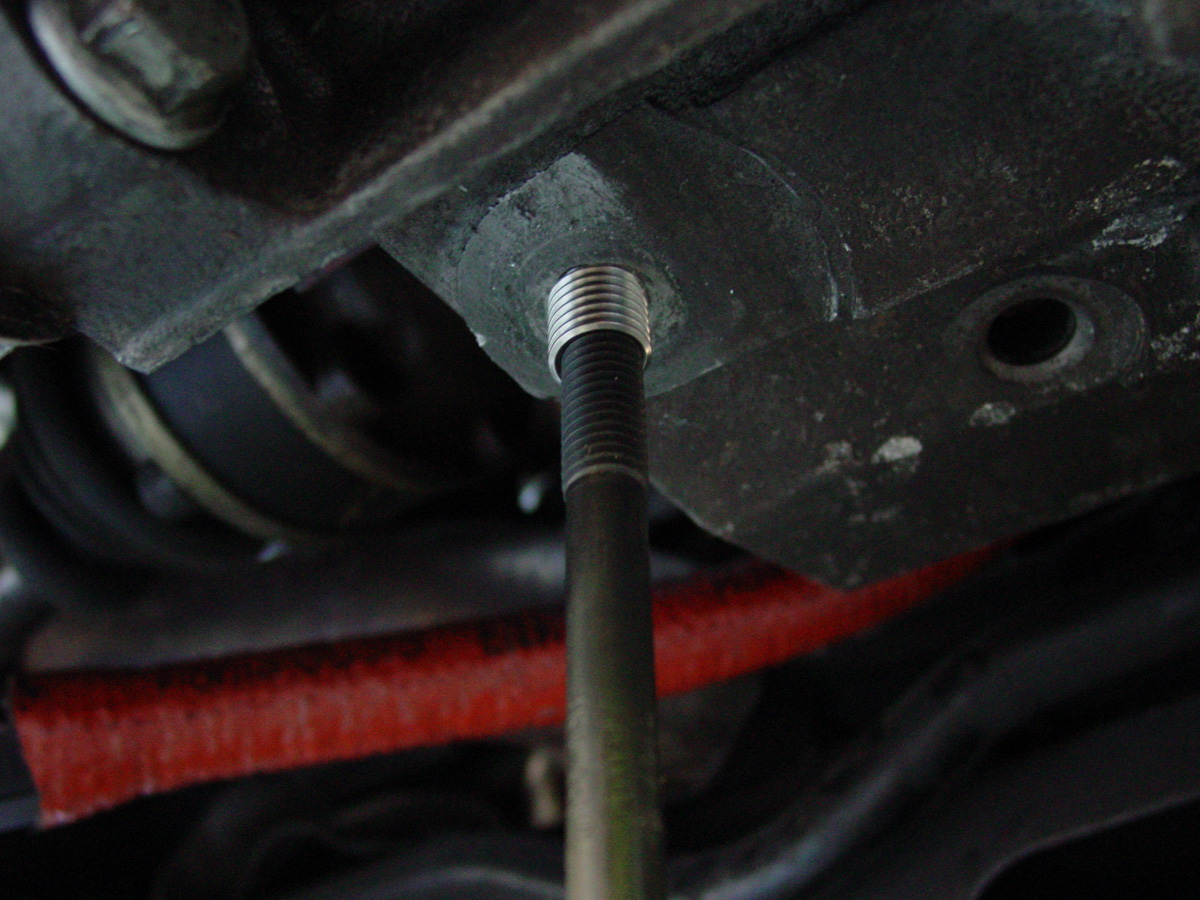
Easy fix with a Heli-Coil repair kit.  First time using it.  Was straight forward and easy to do.  Sweet!
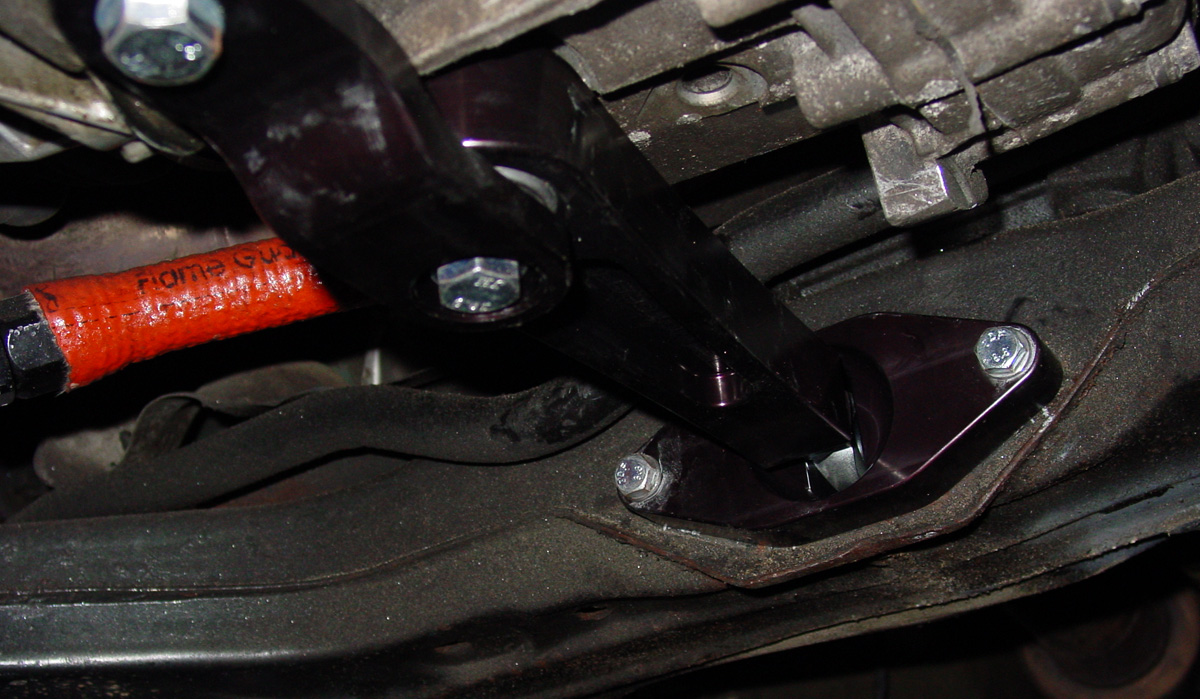
New 034 EFI dogbone installed…. Pretty.
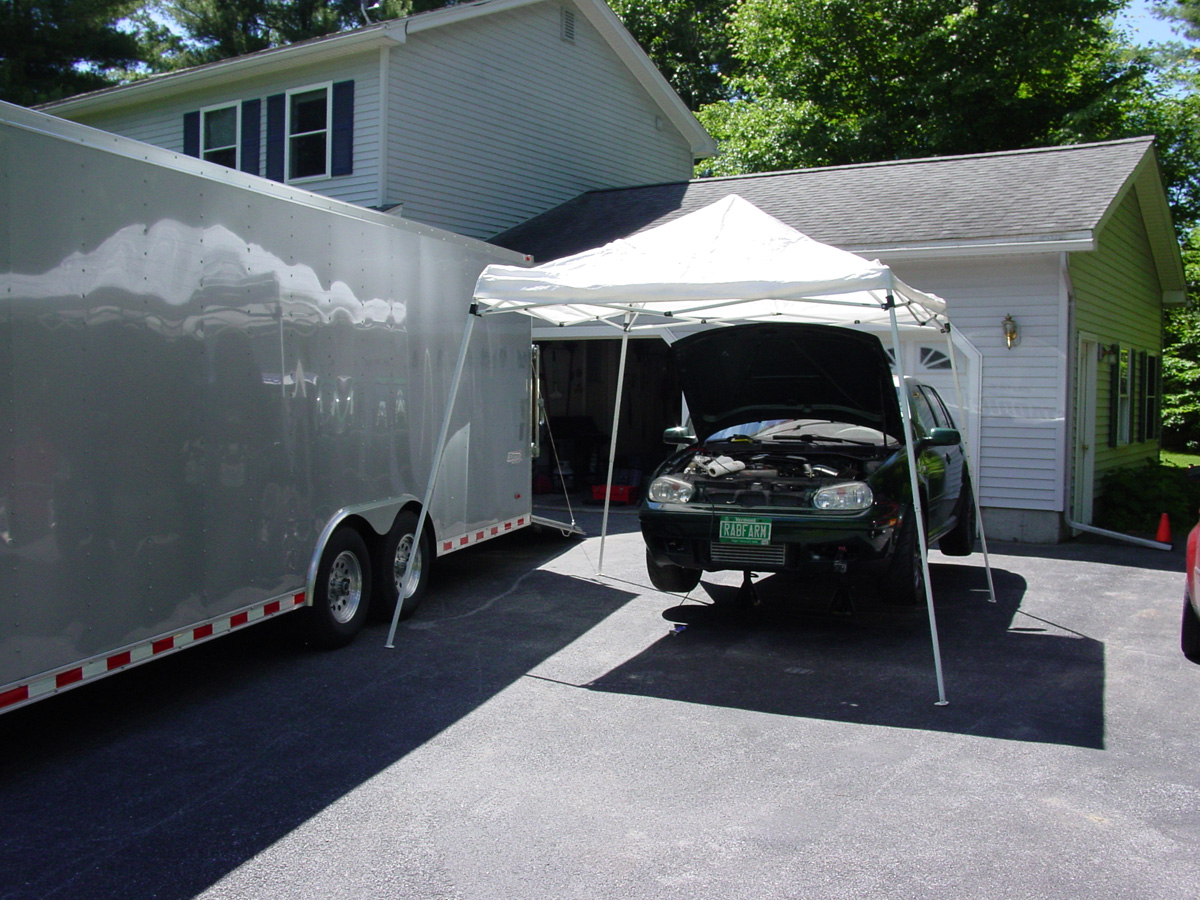
So, one would think that since I sold the Cabriolet (what?!) there would be plenty of room in the two car garage to work on the Golf on a really hot day.  Nope…. We are redoing the kitchen so it is full of all the crap associated with the kitchen.  The driveway and trailer (when it was raining) was my new garage.
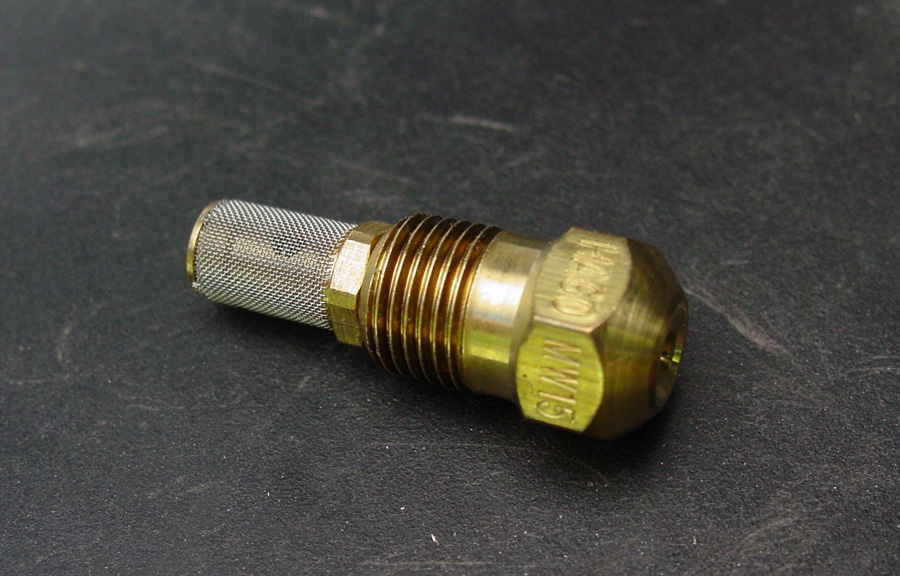
To help with the cooling, I ended up with four sprayers (only installed two) that I temporarily mounted using zip ties.  I connected the nozzles to the original Sno Performance water/meth tubing, used the same pump and water tank, and used the Sno controller (is controlled by boost pressure) to provide a nice misting spray on the radiator.  
One note on the Mt Washington Hillclimb / Climb to the Clouds / CTTC2014… Friday and Saturday were practice days where we practiced approximately half the hill each day (bottom half on Friday, top on Saturday). I had to keep an eye on the water level for each run to determine what settings on the controller I had to use to ensure that I had water for the entire 7.5+ miles during the Sunday runs.  I ended up using the highest numbers to turn on the sprayer (initial on) and full flow (100%).  I think it ran out about 2 corners before the finish line… so close.

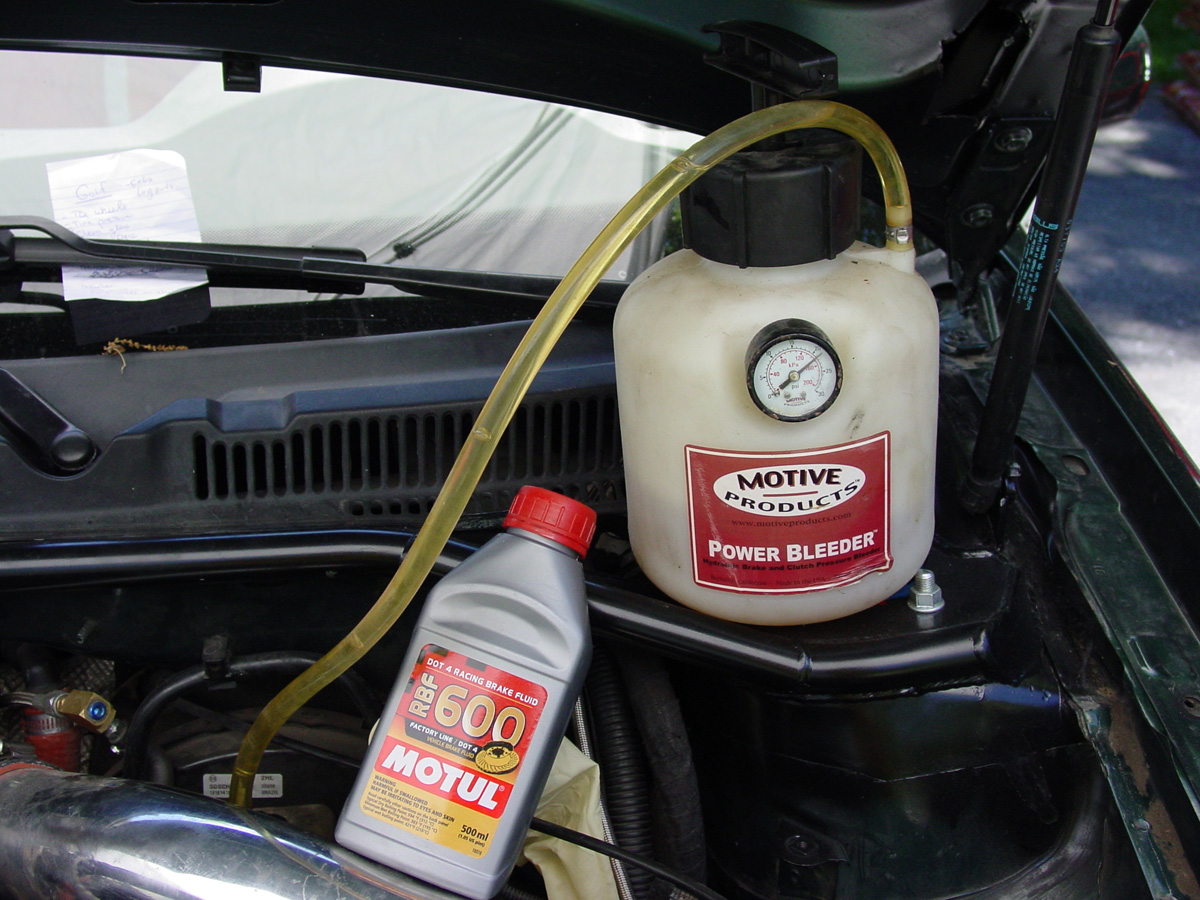
Changed the brake fluid.  Nope, this update isn’t for you, it is for me so I can remember that last time I changed my brake fluid.
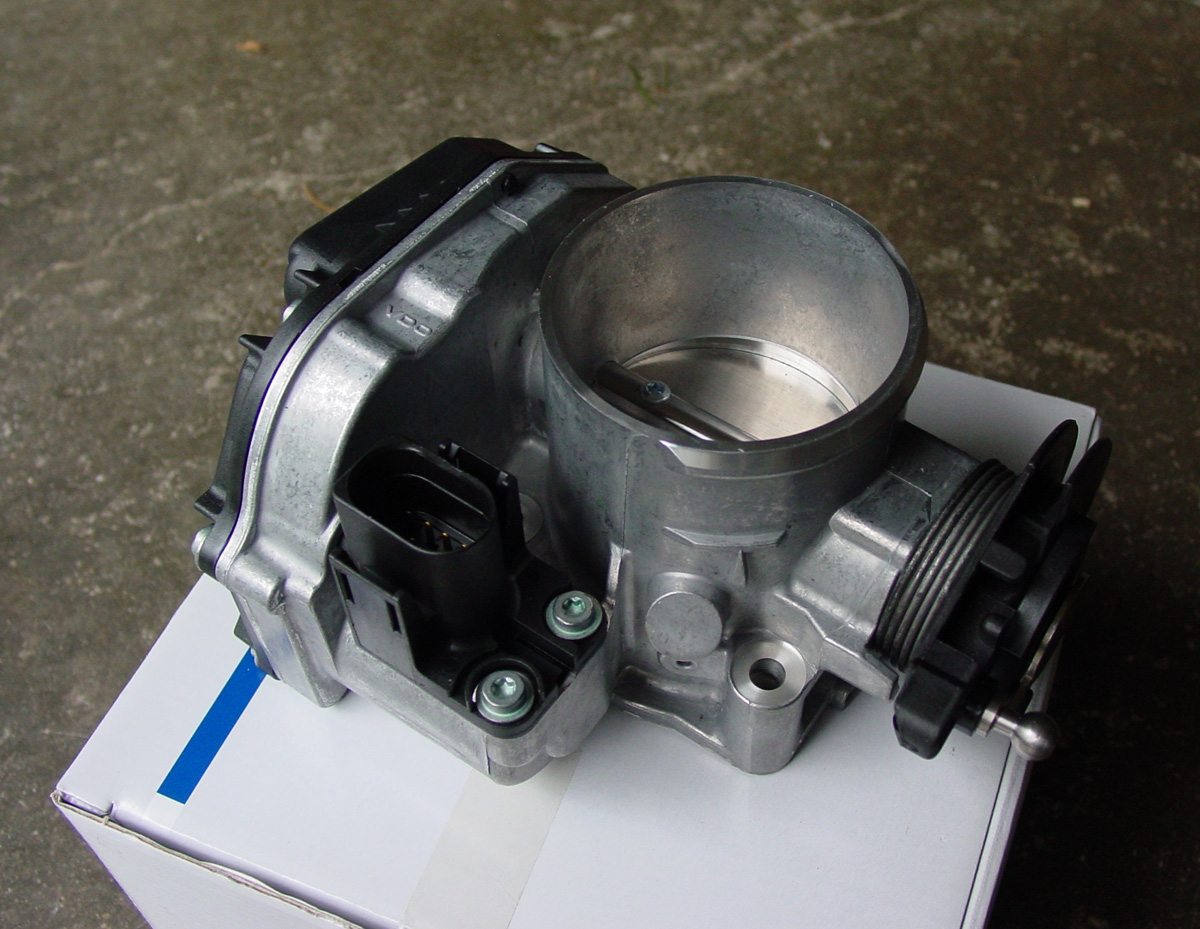
Mt. Washington is only days away… and the car isn’t running correctly.  Grrrrrrr…

I was convinced that the ECU did not know the throttle position because it was slow at ramping up the acceleration (I noticed this at Okemo) and would bog down if I floored it really quickly.

I replaced the spark plugs, checked the spark plug wires (made a new wire for #3 because the resistance was a lot different from the other wires, but I think this is because the original batteries in the volt meter that I purchased back in 1998 were finally dying), and checked the mechanical timing.  All was good.

From the 2010 car-meets-tree incident, the mounting points for the TPS on the throttle body was damaged.  I figured this must be the culprit because I can SEE that it was broken. I can replace broken stuff.

Don’t ask how much this was to overnight it to me.  CTTC2014 entry fee is $800…. I wasn’t going to be sidelined for a bad TPS.
Installed.  Pretty.
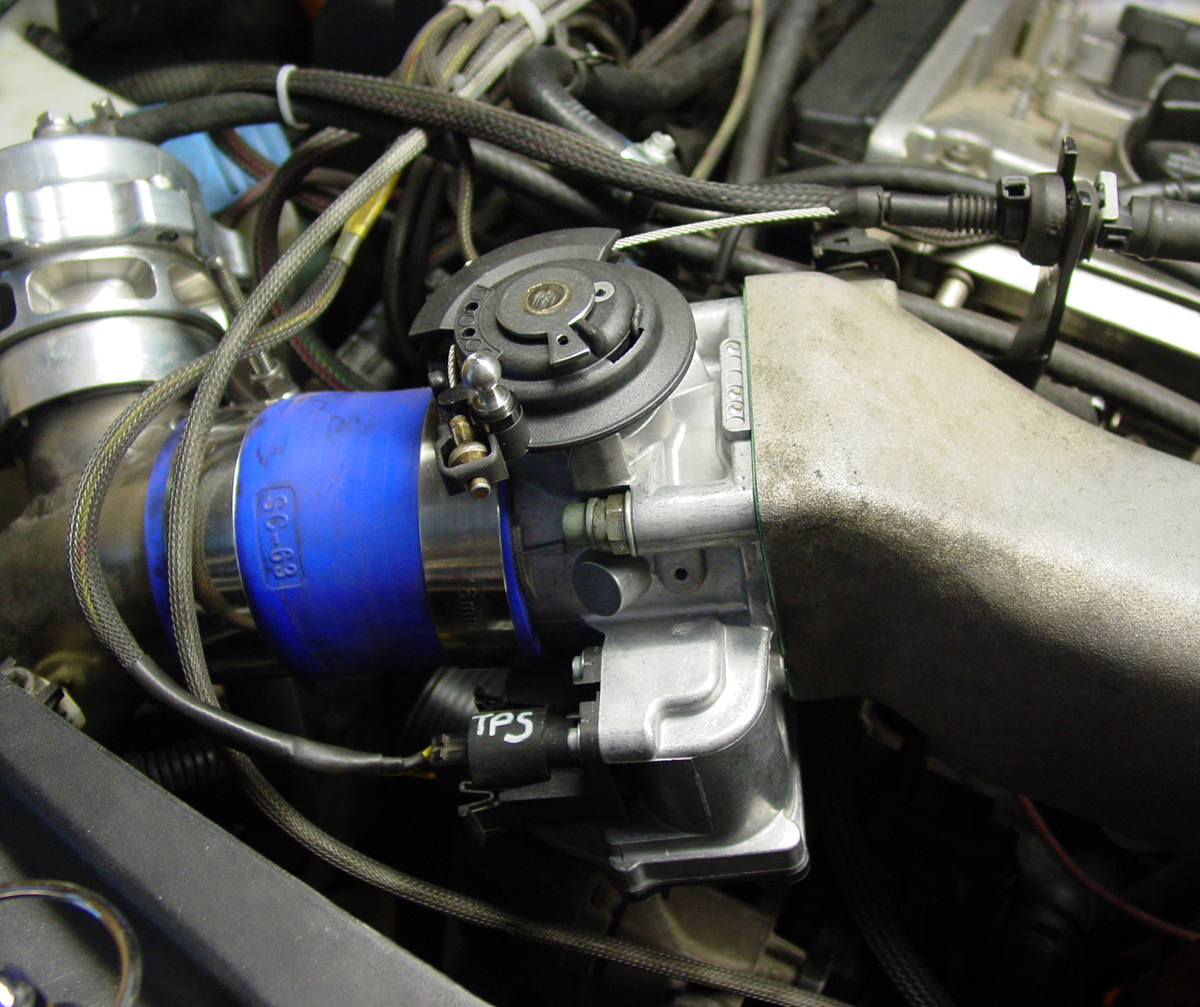
The goal was to leave at 6:00am on Thursday to head to Mt. Washington.  Because the TB was replaced, the TPS had to go through the open/close motion to ensure the ECU had the correct information.

A ginormus (nope, not a real word) thank you to Jason at http://www.VEMS.us in Colchester, Vermont for getting me in late on Wednesday night to take care of the TPS position vs. the ECU.

But… he said the ECU can’t see the TPS.

Huh?

Turns out the engine swinging (yeah, baby, yeah!) at Okemo damaged one of the TPS wires. Jason repinned the plug.  More on wire breakage in the next exciting episode of Golf-meets-the-top-of-Mount-Washington!

All fixed… car is load, finished packing, and left around 6:00am on Thursday for the Mt. Washington Hillclimb.

Woo-hoo!

And, since you are getting the above update well after it all happened, I should have the video from the Mt. Washington Hillclimb up in the next few days.  Sorry, only one camera angle as the new GoPro 3+ Black is night-and-day better than my original GoPro 1.  Wow, what a difference! The rest of the camera footage will stay on my computer.

The cliff hanger…. Loose coolant hose, oil light, out of water, bad wire, and no guardrails.

Rabbit Farmer
Rabbit Farmer Reader
2/24/19 9:53 p.m.

Jul 08, 2014

While the video is uploading, I figured I would type up a very short summary of the 2014 Mt. Washington Hillclimb / Climb to the Clouds / #CTTC2014 / and other interesting identifiable labels that were associated with the best event this year!

We rented a house about 20 minutes down the road so we could enjoy the comfort of a nice bed, normal bathroom, a shower (much needed with the hot weather we had for three days!!!) and some place to make breakfast/dinner.  We brought the full size gas grill to make lunch at the hill.  Somehow I was off the hook for making dinner.  Much appreciated!!!!

Devil is in the details.  Check the tire pressure, check the water level for the sprayers, check the sprayer settings, torque and re-torque the wheels, change the sparkplugs (used three sets all weekend... time to try a different type or brand), wash the windows, etc. etc.
I did enter the 2011 CTTC, but with engine failure on the Friday practice day and in the pouring rain, I learned exactly 0% of the hill.

So, I really consider 2013 CTTC my first go at the hill.  The recce (explore the hill/learn the course) on Thursday was in the rain and fog.  I did not learn as much as I would have liked.

Friday morning we practiced the lower section of the hill (two runs) and Saturday morning was the upper section (two runs); both days in perfect weather.

Sunday was the full hill.... the race course is 7.4 miles... and the weather was perfect!  

Here is the full [b]Course Map[/b]

The snazzy poster.....

My only goal for the event was to finish every run over the course of the three days and then drive it into the trailer with it being ready for the next race.

Success!  I could have been the slowest car on the hill... didn't matter.  I just wanted the joy of finishing the event.

I did have issues with the larger turbo as it took a while to spool.  This was especially problematic in the dirt sections where I wanted to accelerate without spinning the tires. Also, at the top of the hill, there were a number of tight corners that required me to go from a slow speed (drive faster, man!) and accelerate in 2nd gear.  It felt like I could have adjusted the radio and checked my e-mail messages while waiting for the car to get going.

There were only two issues all weekend.

First, the coolant line that went to the turbo became loose.  Joey and James (http://www.KalesCustom.com) just happened to arrive at the bottom of the hill and they jumped in the took care of it.  Nice!

Next, and this is related to the engine swinging (yeah, baby, yeah!) at Okemo, the stock oil pressure warning light/buzzer went off during my second run on Sunday.  I looked at my big red light (it is hooked up to an aftermarket oil pressure switch... light goes on, I turn off the car very quickly!); it was off.  I looked at the aftermarket oil pressure gauge; all was good there.  Lights and gauges that are easy to read while racing is key! The single wire that went to the oil pressure sensor on top of the oil filter broke.

I guess there was a third issue... I purchased 30 gallons of race fuel (VP110 leaded) and only needed to add 5 gallons to the car all weekend.  Talk about overestimated my fuel needs.  Guess I will have to sign up for a road course this summer to burn it off.

Not much else to say.  Thanks to all the officials and volunteers that made this event a success and a lot of fun.  Looking forward to the next running of the Climb to the Clouds hillclimb (perhaps in 2017?)  Congratulations to all the class and overall winners.... especially to Nick (1st) and Brian (2nd) in my class that provided some excellent competition. It seemed the key to success in our class was to have a normally aspirated car with talented drivers behind the wheel.  New record 6:09:09 by David Higgins and co-driver Craig Drew.

Here are the results: http://climbtotheclouds.com/files/2011/05/2014-CTTC-Final-Results-Adjusted.jpg

The video.... it is uploading slowly right now.  Don't expect to see anything until Wednesday late morning (at least for the HD content).  At the end of the video, I included some footage from the back of the car on the upper section of the hill.  I think it really shows the problems that one could encounter if they make a mistake on a corner.  Ouch!

http://www.youtube.com/watch?v=DdUNjZXbG30

Rabbit Farmer
Rabbit Farmer Reader
2/24/19 9:53 p.m.

Jul 29, 2014

I will provide an update from the Burke hillclimb (and some video/pictures) soon....

In a nutshell... 3rd gear gave up the ghost at Burke.  My belief is that Mt Washington, which is a long hill where I am using 3rd for most of the course, pretty much broke it, but it didn't actually fail until Burke (surprisingly, when I was in 4th gear).

I get the transmission back tonight (Tuesday) from http://www.SixStarMotorsVT.com (Charlie) and hope to get everything back together and ready to go for the Okemo hillclimb this weekend (Friday).  Fingers crossed.

Well, I guess that was the entire Burke hillclimb update... just need some videos and pictures now.

The Wolfsgart 5.0 car show was this weekend.  Since I sold the Cabriolet, the Golf was up on jackstands, and the Scirocco has been a pipe dream project, I had no car to show.  Worked the event (pointed people where to park their show cars) and hung out.  Had a good time.

Steve

Rabbit Farmer
Rabbit Farmer Reader
2/24/19 9:54 p.m.

Posted Dec 18, 2014

Really nothing exciting up to this point to report, so you'll get the short version.

August 2014

As mentioned, transmission went at Burke so we swapped the complete diff to another transmission that I had laying around (hmmmm, since a 2010 tree incident).  Put the transmission back in the car and I noticed there was a clunking noise when rotating the wheels; decided that there were issues and not to try it out.

Purchased another 6-speed online and brought everything over to (new website address!: [url]http://www.sixstarmotorsvt.com[/url]) Six Star Motors in Colchester, Vermont.  Same building as Libra Racing (John Buffum)/home of Super Chicken.

Charlie identified that some of the teeth on the diff were damaged so he swapped the good diff ring gear from the "new" transmission to the diff and put it all back together.

In case you don't know what a transmission looks like.  ;) This is the "new" transmission.  Same gear ratios that I had before.

September 2014

Jetta flex pipe went again.  World famous vwJodi did a quick weld to get the car back on the road.

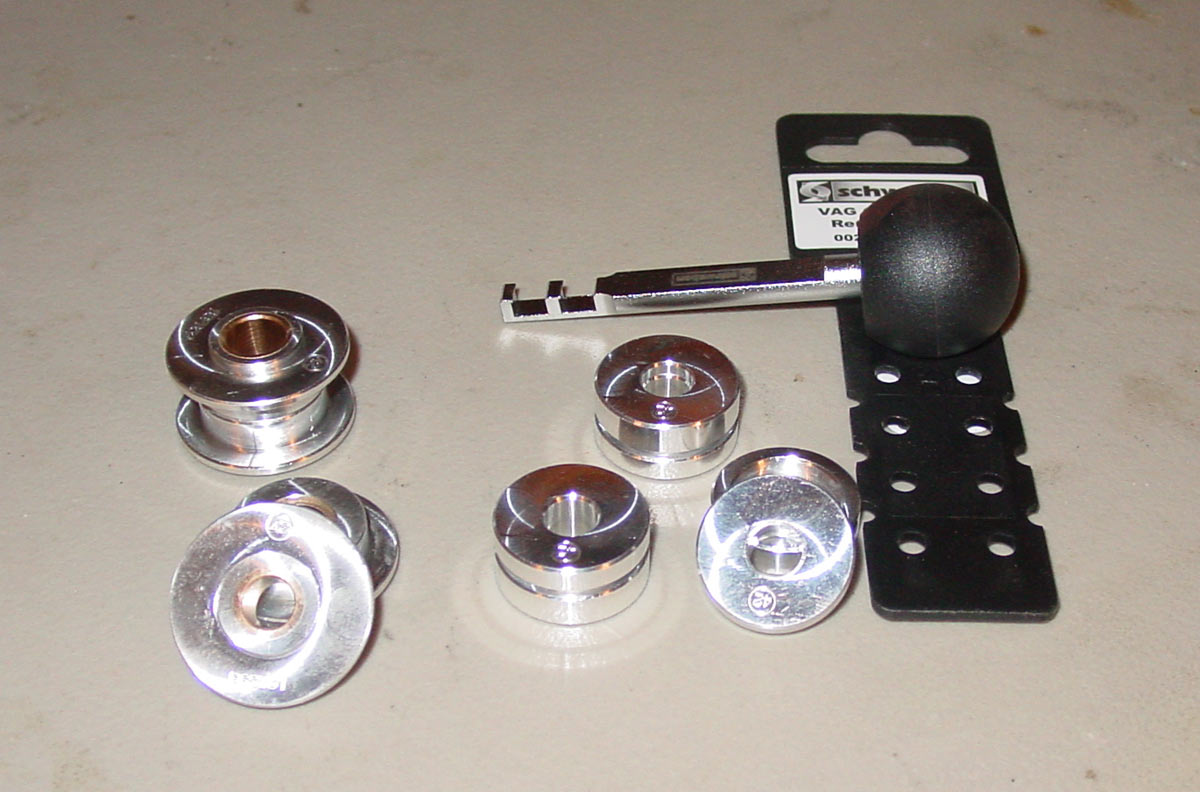
Purchase some shifter bushings and shift mounts from [url]http://www.42DraftDesigns.com;[/url] both for the transmission end of things.  Will install in January 2015. Plus, purchased "VAG Connector Removal Tool" for $15 from [url]http://www.ECSTuning.com[/url] to make it easier to take VW plugs apart.... Rabbit Farmer approved!

November 2014

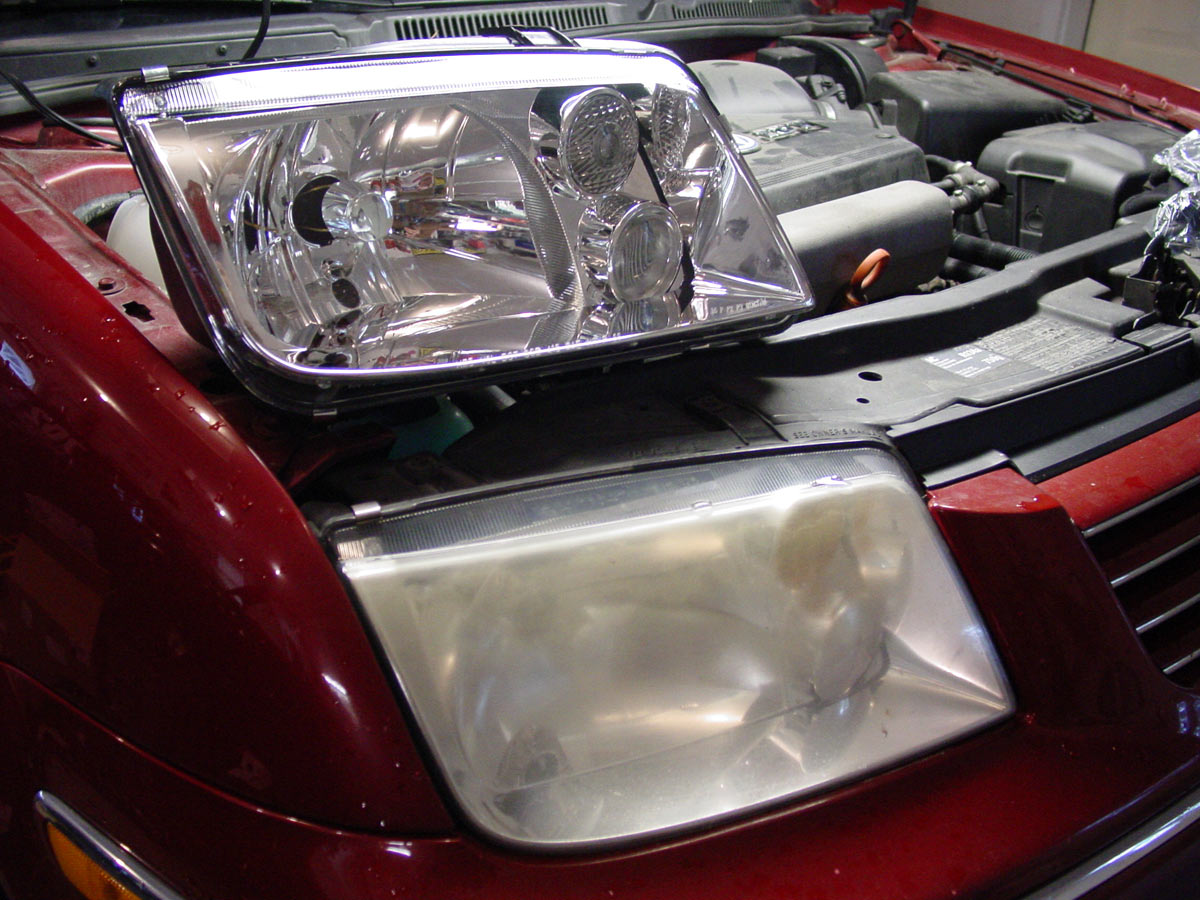
Jetta needed new headlights.  I polished them the year prior (or so); decided it was time to replace them.  Did not want to spend the long dollar at [url]http://www.ECSTuning.com[/url] (almost $300), so I got a set from an ebay vendor.  This picture (with new light over the old) is the ebay special with clear directionals that require amber bulbs.

Now... imagine that they are the absolute worst possible quality available... these are from DT Moto.  They do not make the lights, just sell them.

[url]http://www.ebay.com/itm/131185073888?item=131185073888&viewitem=&sspagename=ADME:L:OC:US:3160&vxp=mtr[/url]

Nothing was right about the lights.  
* The bulbs type, per the instructions, did not work... unsure what bulbs would actually work
* The internal plastic hosing where the lights are mounted was not tight, therefore, it moved a lot (would cause a lot of flicking lights)
* Best yet, the retainers for the main lights would require so much pressure to lock in the light that the metal ring would pop off the plastic housing.  Looking at the housing afterwards with the light bulb removed, the connector that holds in the light in would be 1.5" below the back of the bulb.

So, I contacted them and they gave me a full refund with zero issues within 24 hours... and was told to keep the lights.  So, complete headlight assembles with new lights (all of them) for sale for the price of the brand new bulbs I purchased for them.

Ended up at ECSTuning and purchased GLI smoked lights (Hella brand) with amber directionals and fog lights (nice addition!)

Purchased nice wiring harness to run the fog lights.... easy to install.

Installed...

December 2014
Jumped into refreshing the Golf for the 2015 season.
* New harnesses
* Revisit the camber plates
* Get rid of the nylon fuel lines (especially sitting next to the glowing turbo)
* Figure out why bolts on turbo keep backing out
* Revisit heat shield on firewall
* Clunk in driver's side axle or transmission.... grrrrrr.
* Fix broken pipe for wastegate; guessing it has something to do with engine moving at Okemo when dogbone gave up the ghost.
* Go through engine; rehone cylinders, check seals, gaskets, etc.

Car is current down [url]http://www.KalesCustom.com[/url] in Colchester, VT for the camber plates, fuel lines, firewall, turbo, and wastegate.

I am going down there tomorrow to install the engine at his shop so he can replace the waste gate piping... needs everything in place to fabricate.

So, why the early jump on the Golf this year? Normally I start in late Jan to early Feb.... well, I have the drive to get the Scirocco together for next season.

I think I will use the 1.8T as everything is already fabricated for that engine. Complete engine rebuild, [url]http://www.VEMS.us[/url] stand-alone engine management system, send out suspension for rebuild, complete body work and paint (vwJodi), cage update by KalesCustom, etc. etc. etc. etc.  Big project, but looking at getting this on the road, track, and hills.

Rabbit Farmer
Rabbit Farmer Reader
2/24/19 9:55 p.m.

Mar 25, 2015

Lot's of catching up to do.

First, Joey at KalesCustom.com addressed the camber plates as we wanted a little more camber adjustment available to us in 2015.

What it looked like in 2014:

And now in 2015:

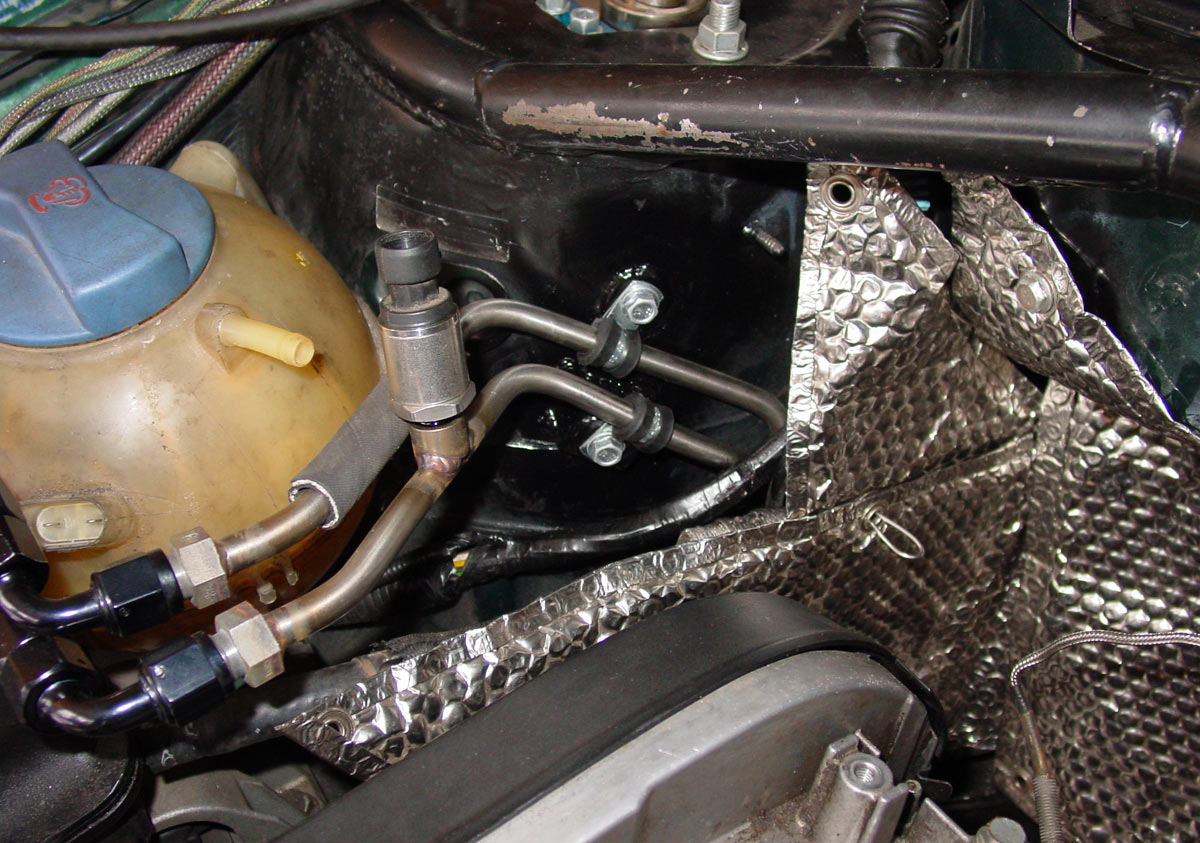
Did a better job with a heat shield on the firewall; when it all goes back together, I will also add some heat shielding on the upper firewall/rain tray to protect the electronics in the rain tray.

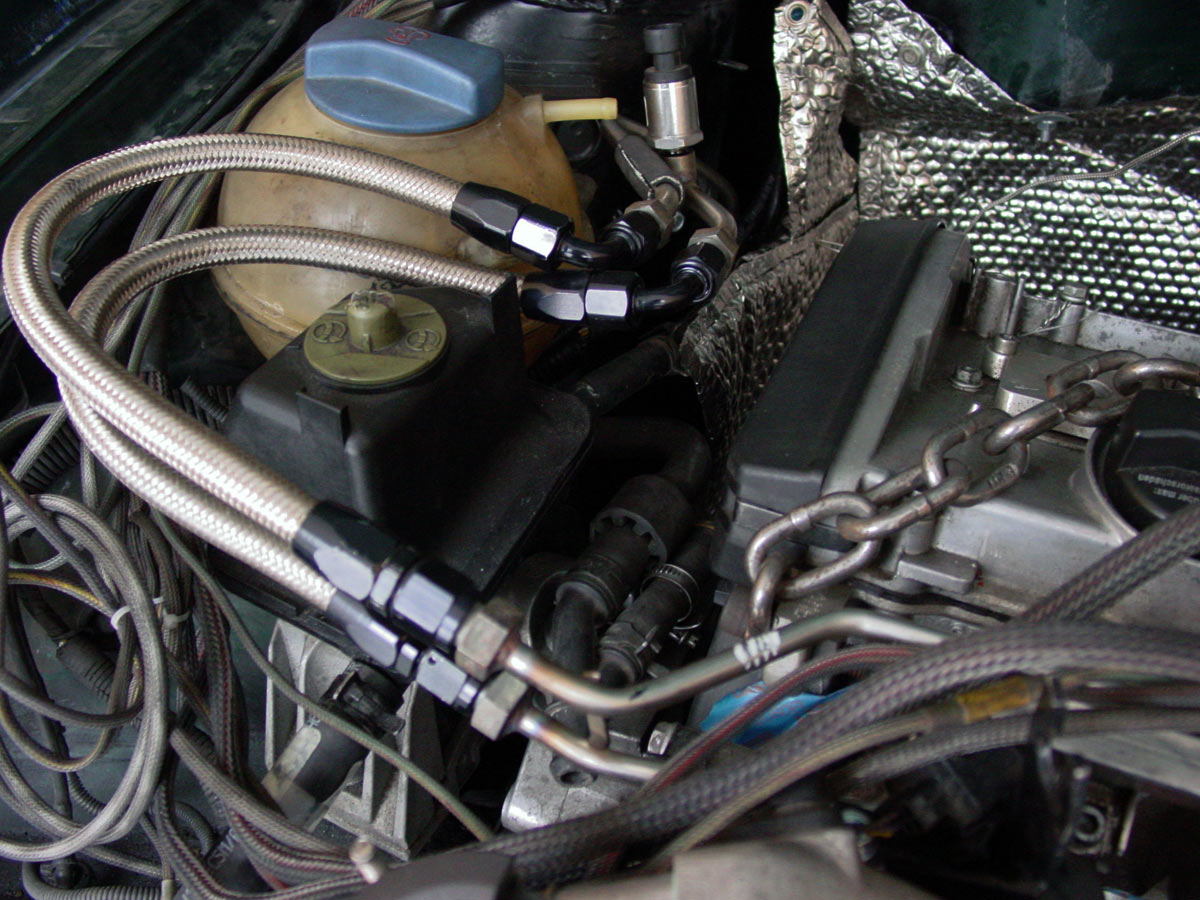
A big part of wanting to improve the heat shield was to protect the fuel lines... a big improvement for 2015 is the removal of the plastic lines and the installation of hard lines.

Straight through to the fuel rail without any rubber lines.
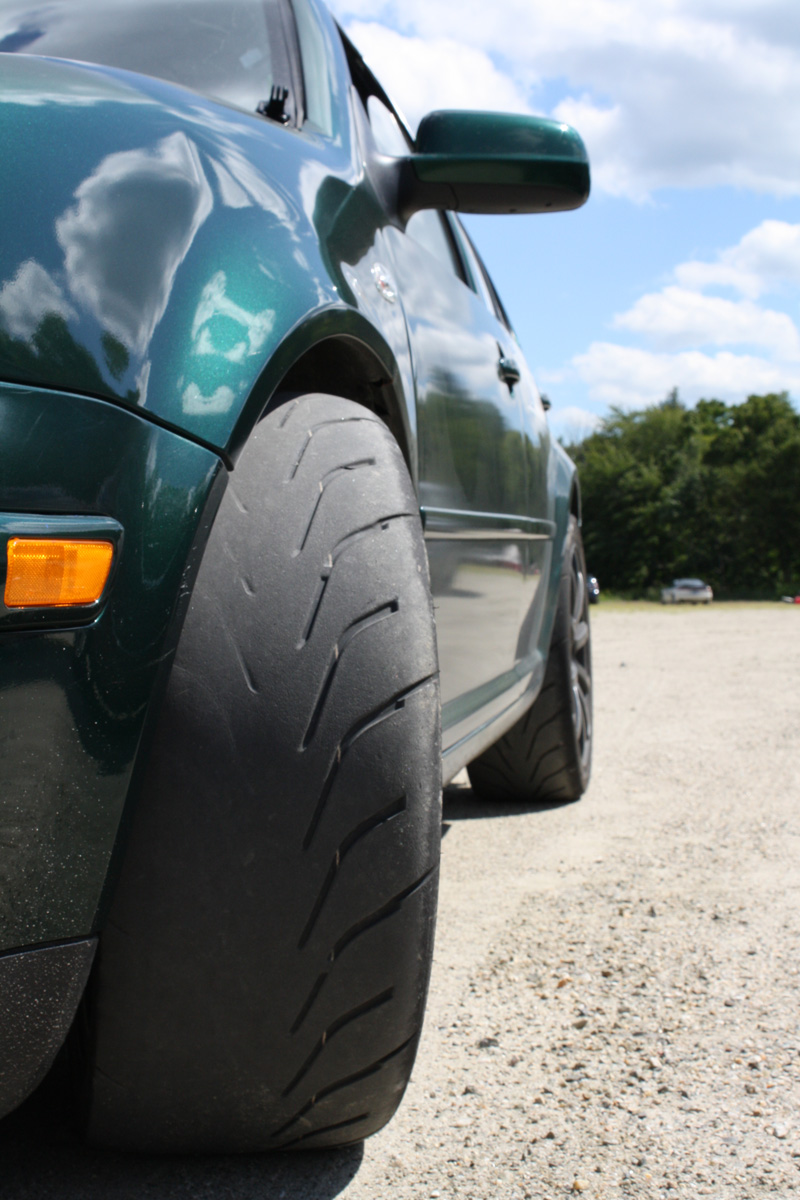
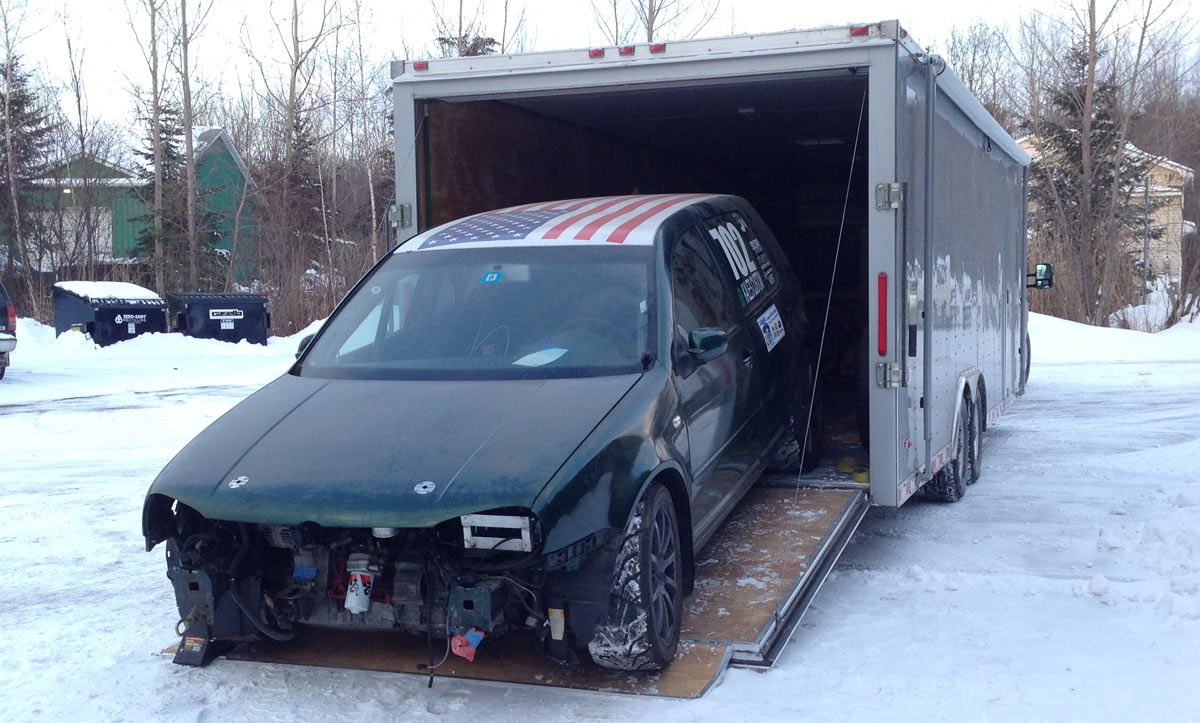
Car heading home from Kales Custom in February 2015

Things got a little busy at home in February, and it was "wicked" cold, so I didn't do anything on the Golf until very late March.... this means I haven't done a thing yet, but should do something starting today.

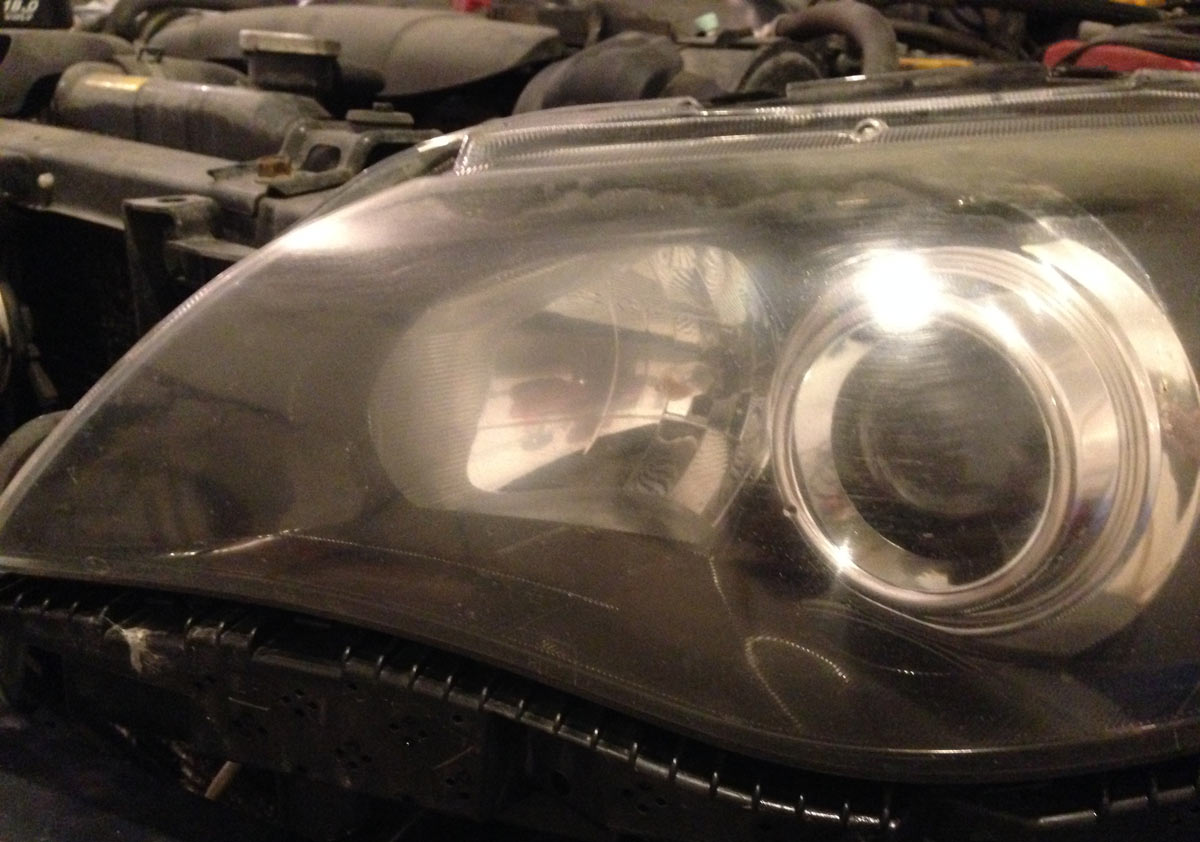
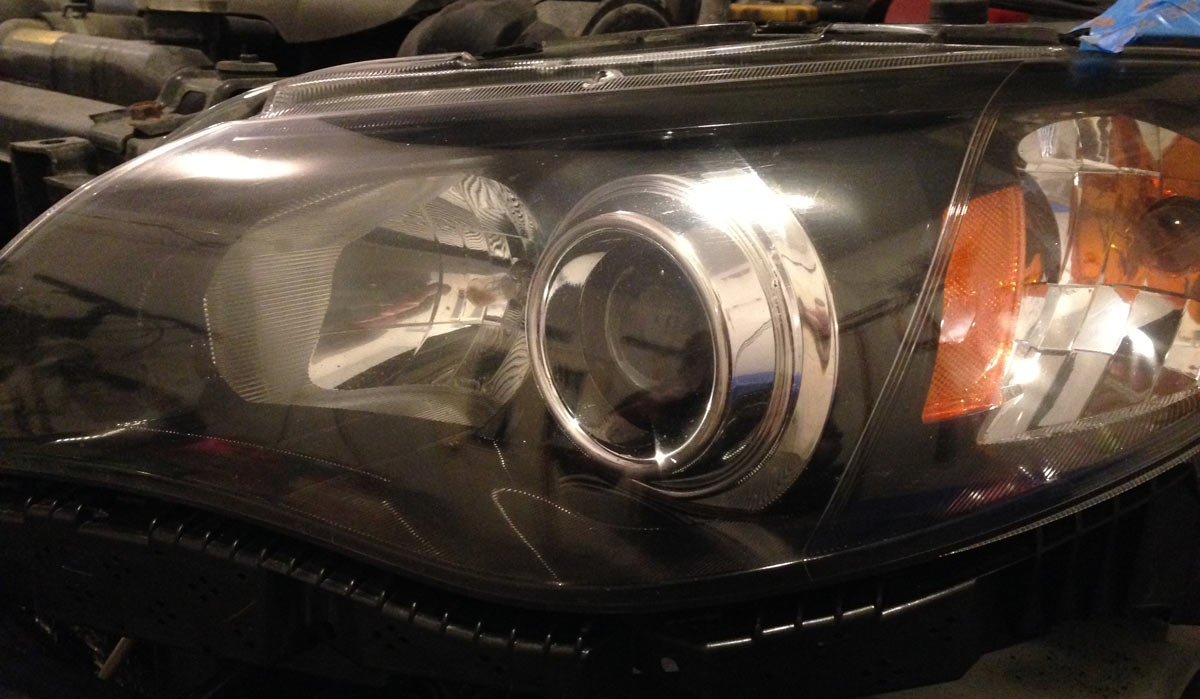
Since I didn't want to work on the Golf, I addressed the headlights and fog lights on the 2009 WRX.

Pre-polishing...

And done! Second time that I have had to do the headlights on the car.  Not difficult, but I liked the idea of using lens protectors for future cars.

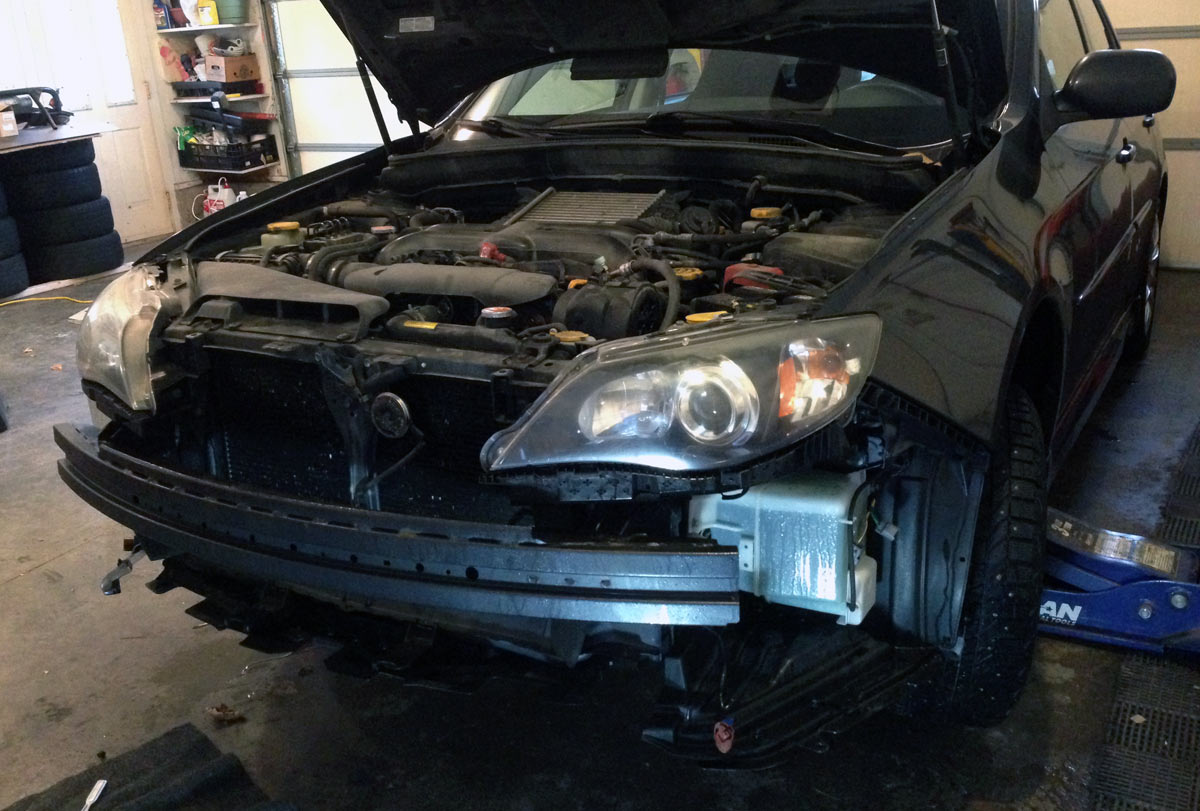
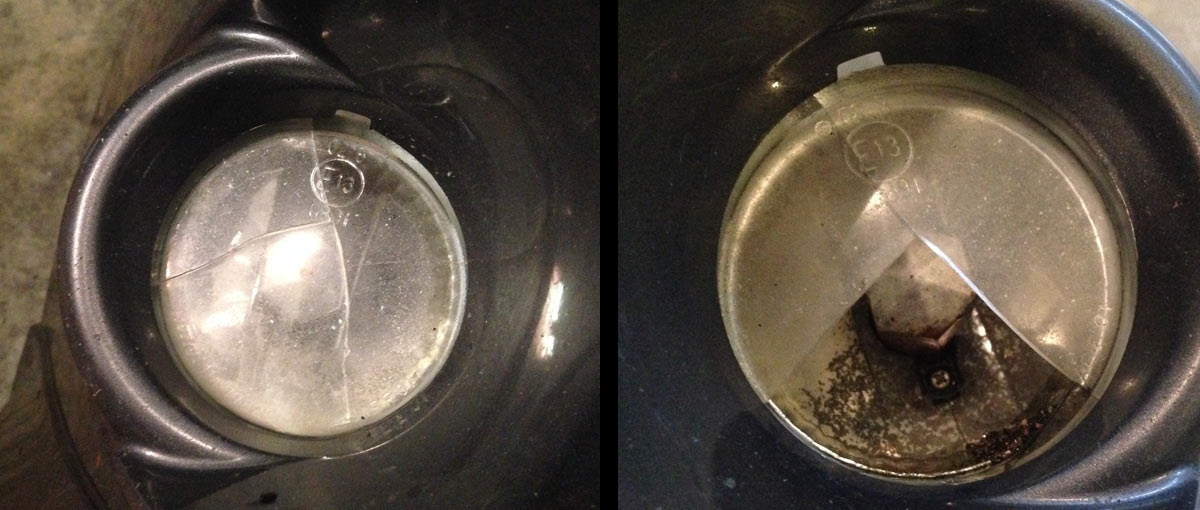
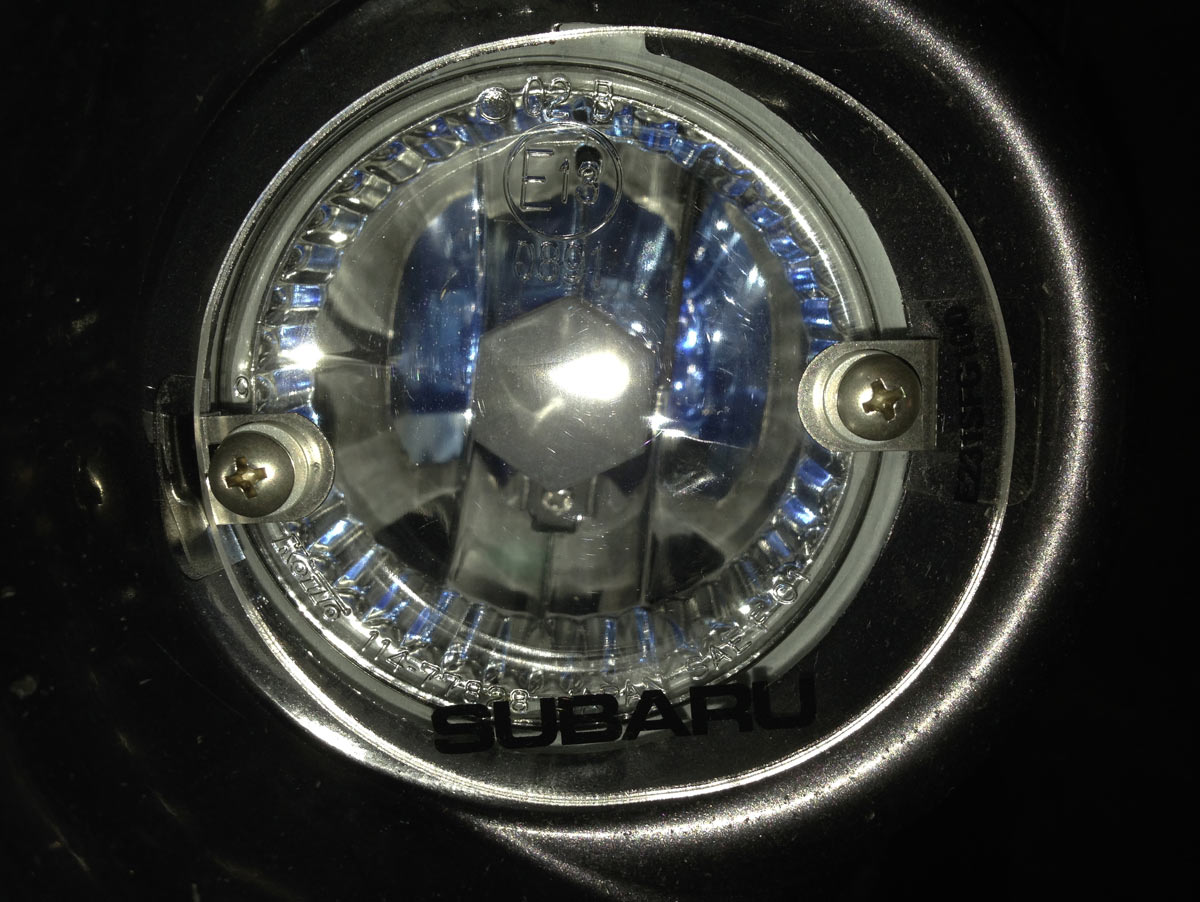
Broken fog lights.  It was an option to have lens protectors on the fog lights when we first purchased the car, but we didn't do it since it was expensive as they stated they would have to remove the front bumper (which is actually pretty easy to do on these cars).  So, we didn't do it.

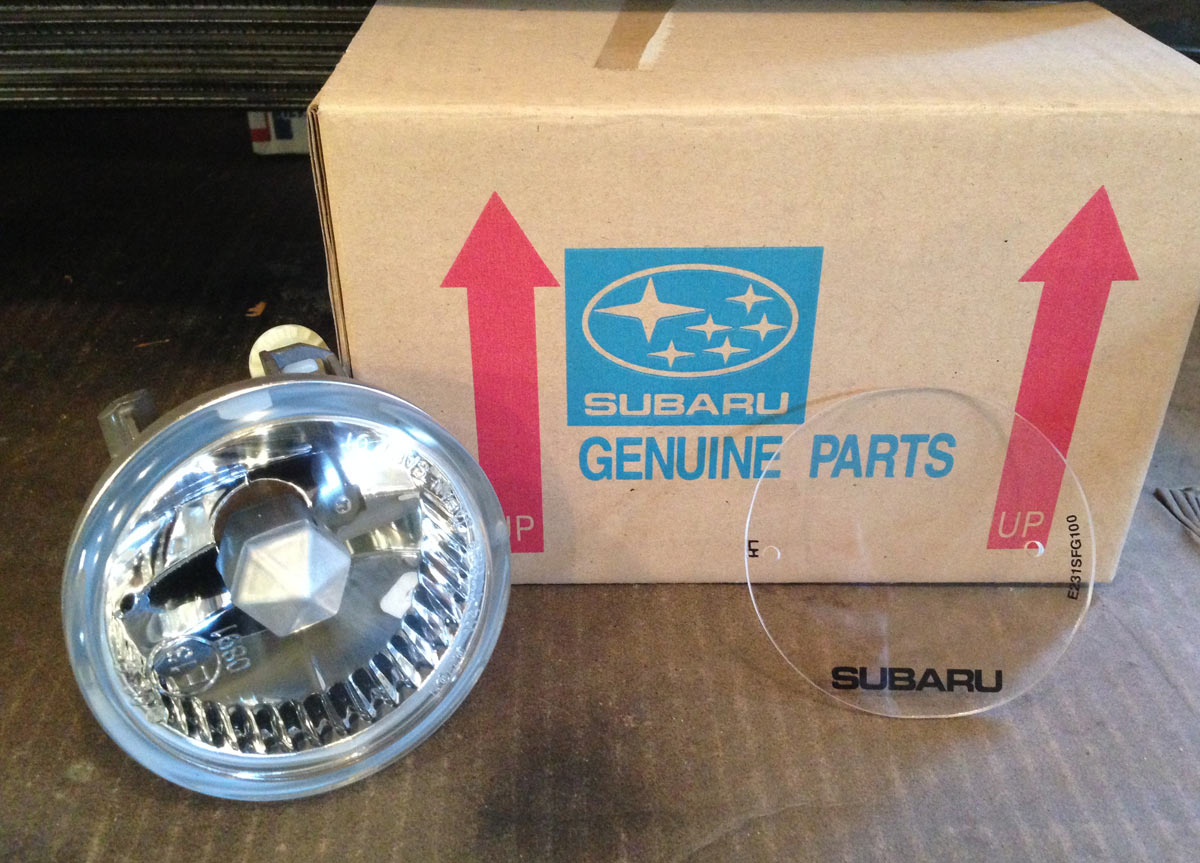
Purchased the new fog lights from http://www.SubaruPartsDepot.com and the lens protectors from http://www.subarugenuineparts.com.

The covers are called "Fog Light Protector Acrylic Shields" and were quite easy to install.  Even easier with the bumper removed as I had to install the new fog lights.

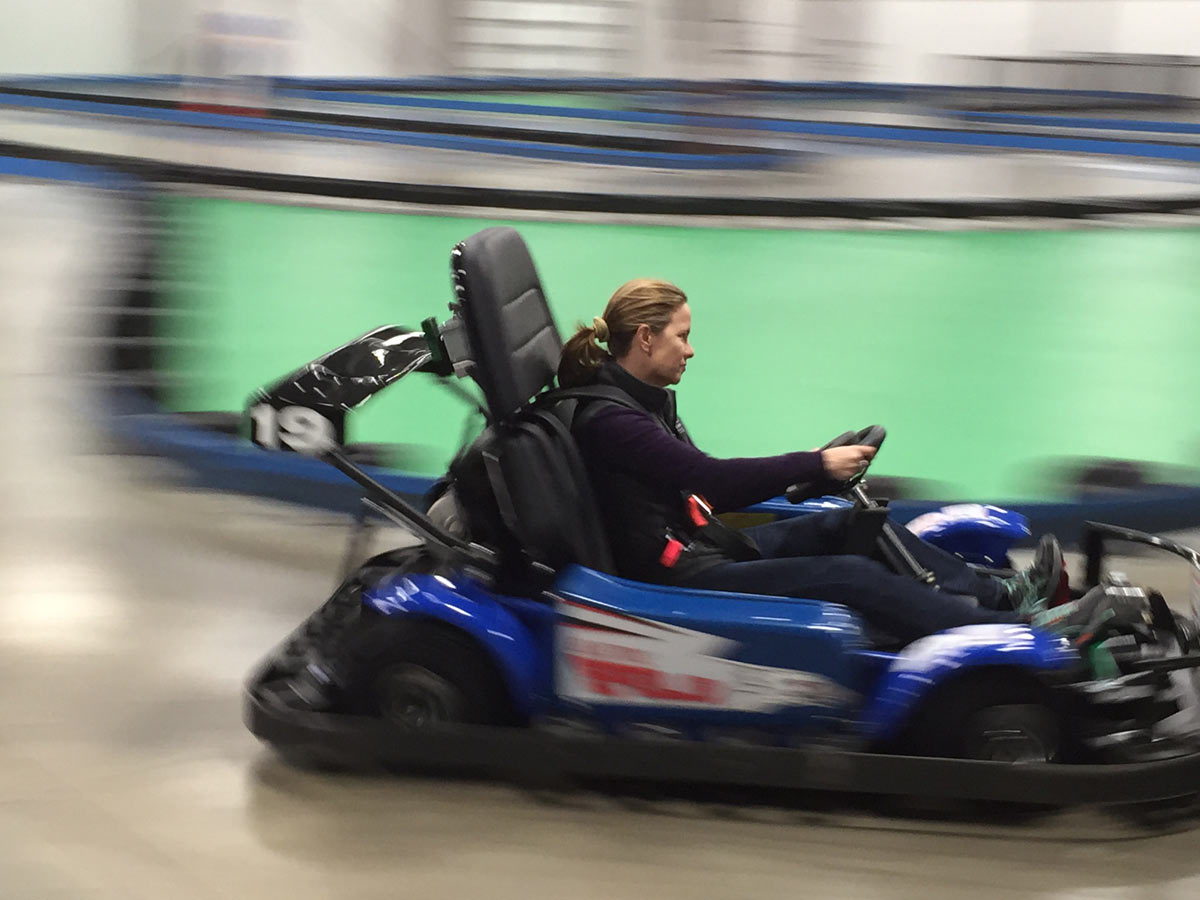
And then we joined a small go-kart league at the new local go-kart track (http://www.essexspeedway.com).  Electric karts.  Fun, but there is no possible way to pass someone as full speed is easily achieved. We did determine that the typical "race line" was not the fastest way around the course.  Fast in, turn in, let off to rotate the kart, back on it.

Video of one of the races.  The breaks in the video are where I removed the footage where we stopped because someone spun out from being hit from behind. They are able to stop all cars remotely so no one can continue driving.

[youtube]http://www.youtube.com/watch?v=3EJzC00Ej-E[/youtube]

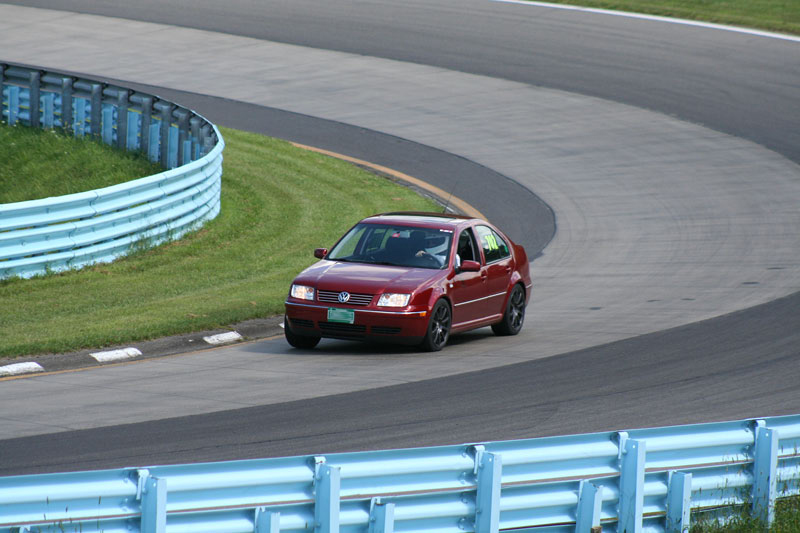
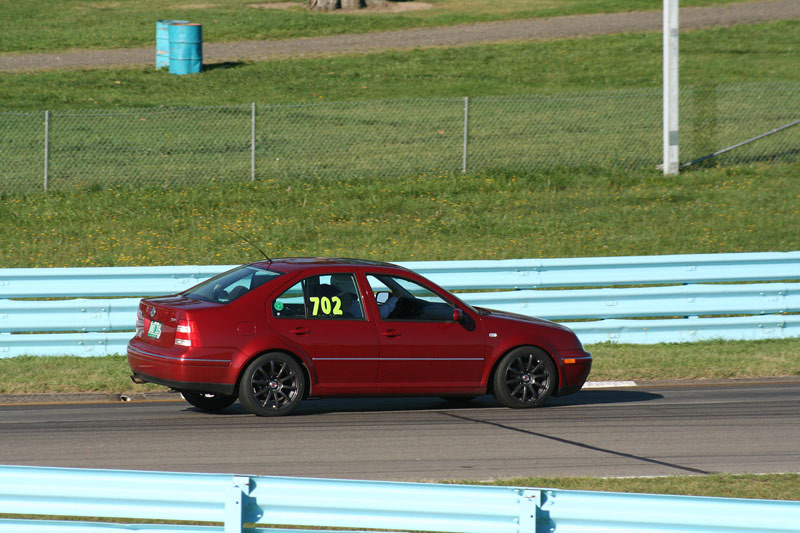
Out with the old.... time to say good bye to the 2004 Volkswagen Jetta GLS 1.8T.

Pictures from the March 2015 classified ad.... did a small collage so not to bore you with all the photos.  A very clean and reliable car.

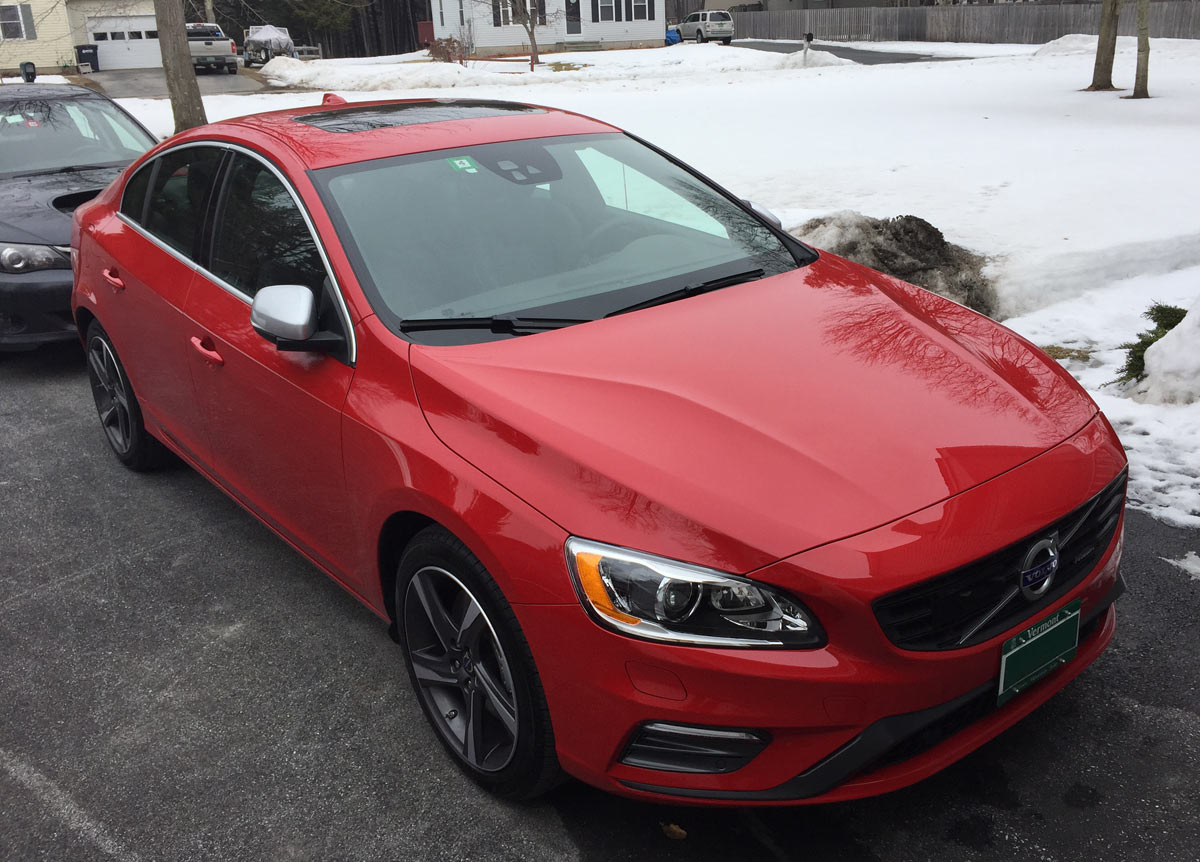
And in with the new! First time Volvo owners....

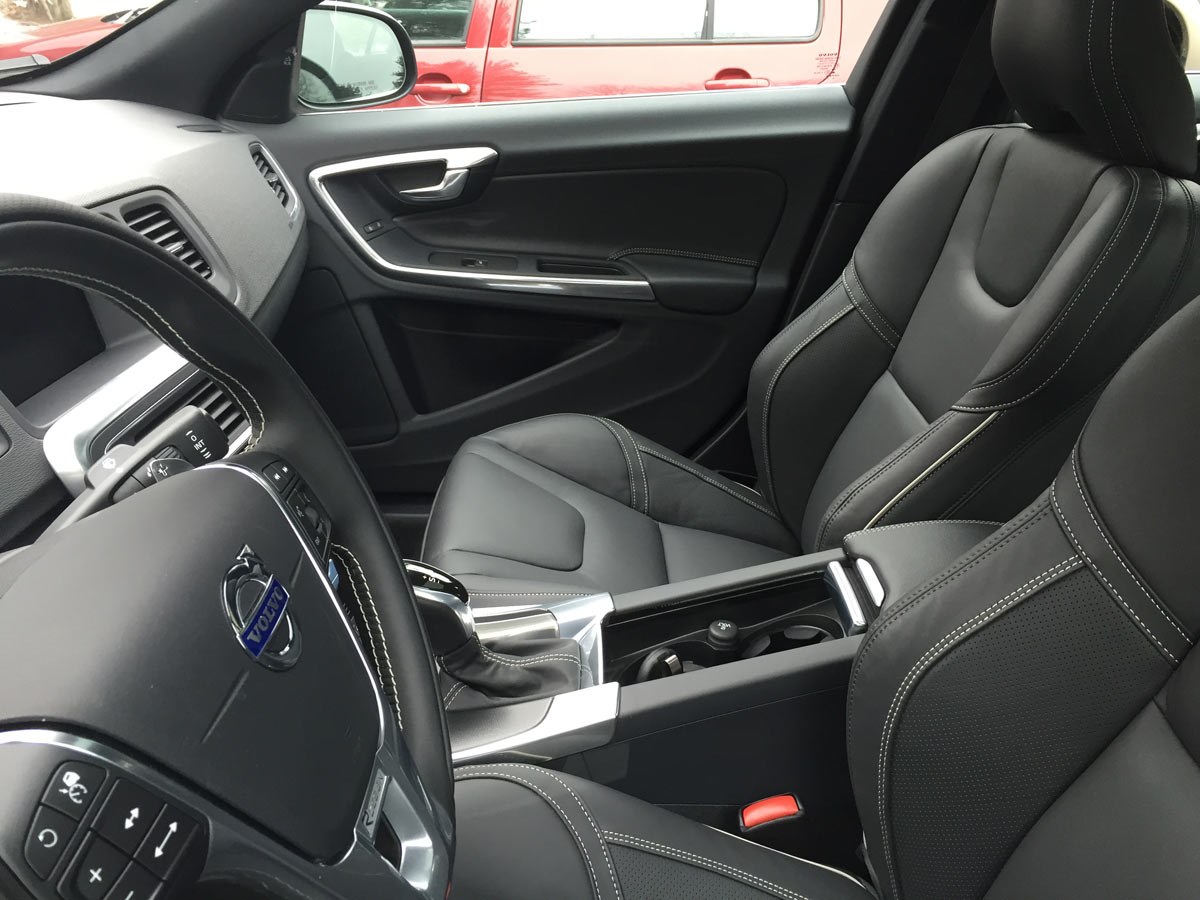
2015.5 Volvo S60 AWD T6 R-Design

I was new to Volvo-speak also.  It is an all wheel drive sedan with a 325 HP/354 TQ turbocharged 3.0-liter inline six cylinder.  Very fast and handles beautifully.  The "R-Design" package gives us the sporty seats and some other trim changes.... I was only excited about the seats.

This is Julie's new daily driver while I get the WRX hand me down. Time for a better suspension and new tires on the WRX.  (insert evil laugh)

We purchased the car from Frank at Al Martin Volvo in Shelburne, VT (www.almartin.com); I highly recommend Frank and this dealership.  The best car purchasing experience that we have ever had. He even took car of the auto insurance with our company. We just had to show up and drive away... Sweet!

And that is all she wrote in terms of actual progress.

We have been researching options for the Scirocco.  I am thinking that a supercharged 1.8-liter 20V engine would be a great option for hillclimbing. Unsure if I would go with the cable shift 02J 5-speed from at MK4 VW instead of the current shift rod 020 5-speed (with custom beefed-up gears) that came in 1980's MK1 cars.

Still researching. And the first hillclimb is not that far away.

Rabbit Farmer
Rabbit Farmer Reader
2/24/19 9:57 p.m.

Apr 26, 2015

2009 Subaru WRX

Ordered Bilstein struts/shocks and lowering springs from Race Comp Engineering (http://www.racecompengineering.com). I went with the GTWORX/Bilstein Cup Sport Kit with their Black "Regular Guy" springs.

Stock springs are 216# front / 209# rear while the "Regular Guys" springs are 275# front / 250# rear and provide a 25mm (slightly less than 1") drop. A little stiffer than stock, but still year around comfort.

Seems the springs are back ordered... hopefully the install is quick and easy as the alignment appointment is on May 7.

2001 VW Golf 1.8T

Been procrastinating with finishing the Golf.  I started with the big stuff at the end of last season with a goal to have this 100% done in February +/-.

Short version... new brake pads, bled clutch, installed some parts on the shifter to stiffen things up a bit, ordered new harnesses (they have arrived), etc.

To be 100% ready for the season... alignment, install harnesses, install front bumper, clean it.

Pictorial version.....

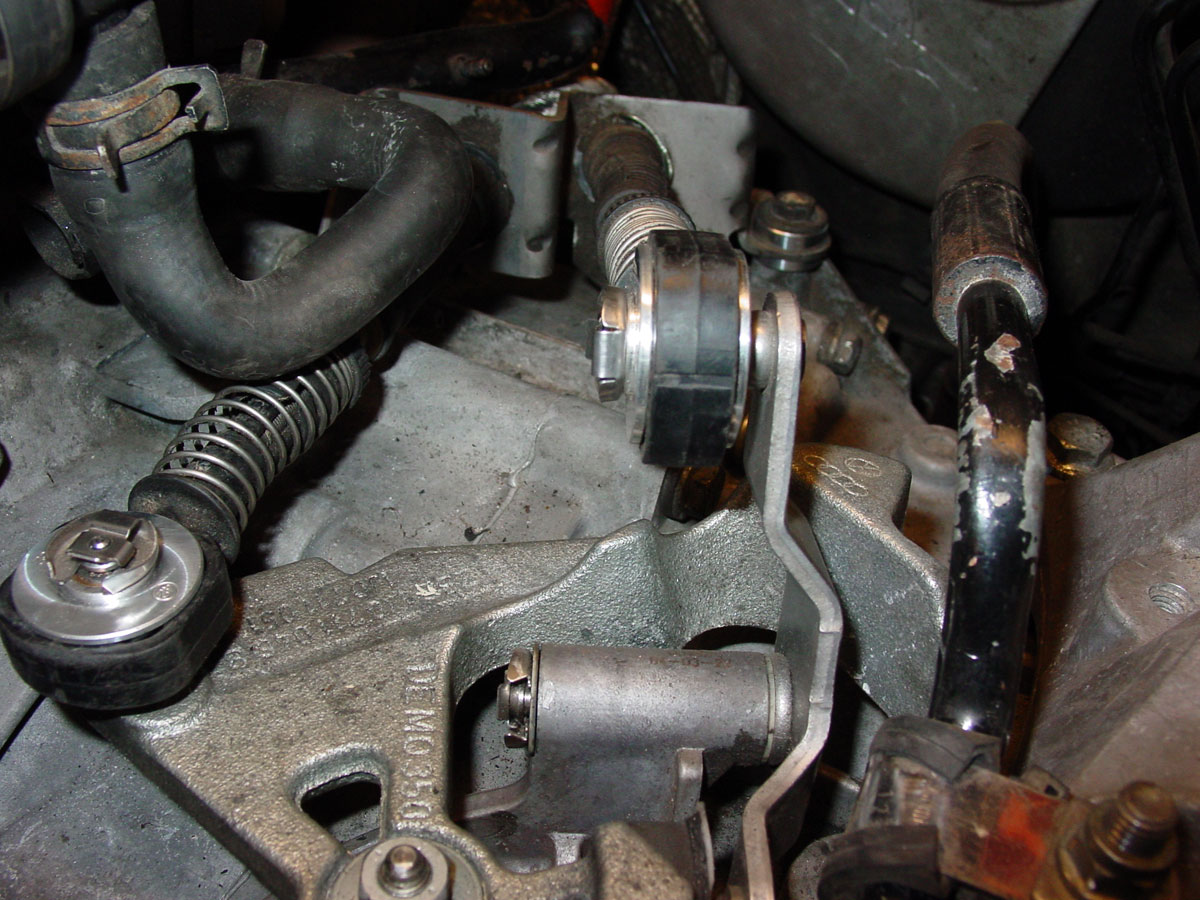
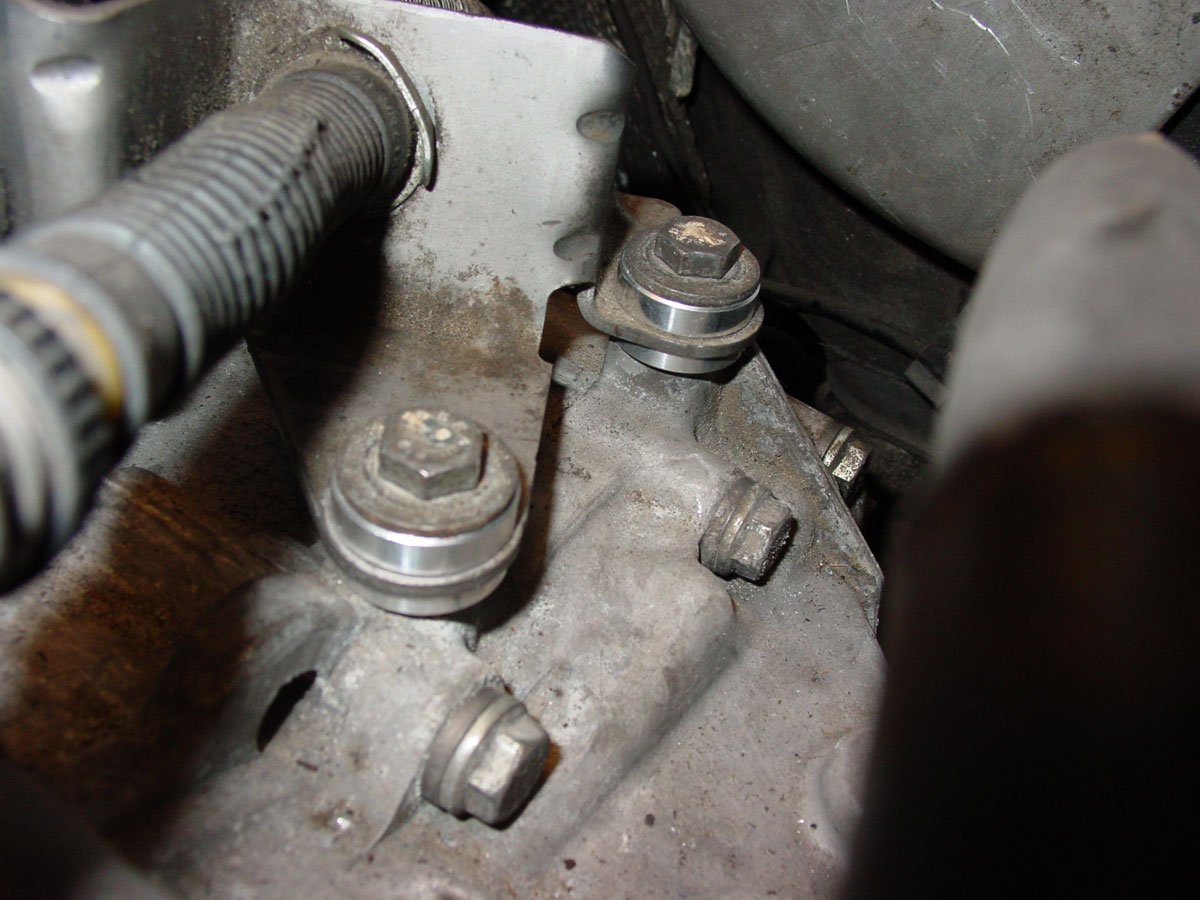
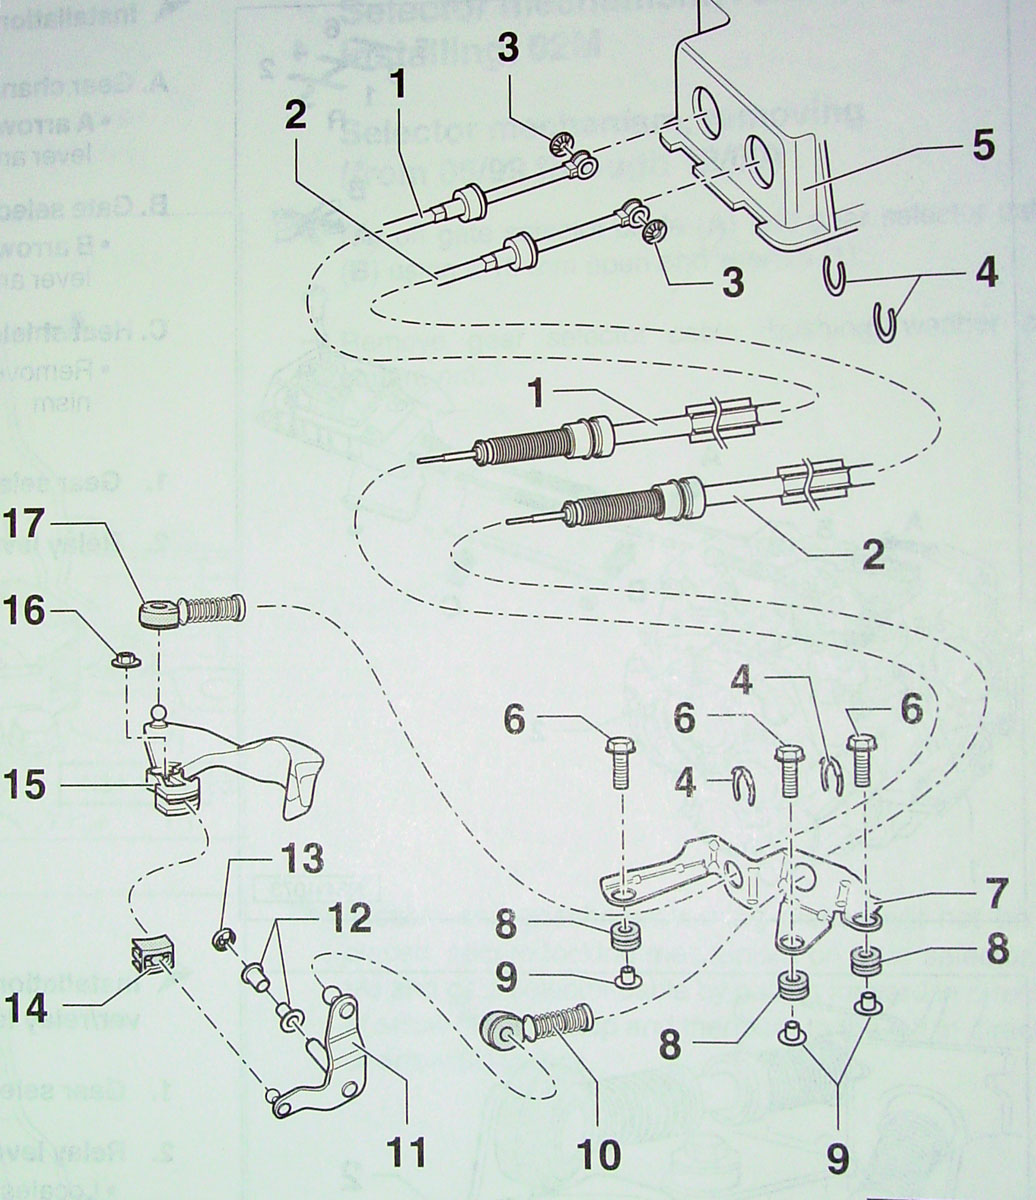
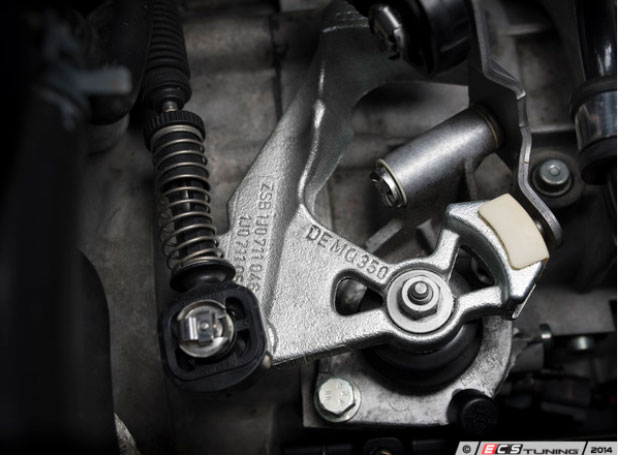
Draft 42 Designs (http://www.42draftdesigns.com) shifter bushings for the cable ends. (See #10 and #17 in the image below)

Draft 42 Designs shifter bushings (See #9 in the image below)

Image from the Bentley manual for reference.

Also, one part that I wanted to replace was #14.  In the manual it is called a "Slide Shoe", but the internet searches state otherwise.... no good results. Shearer VW (f/k/a Lewis VW) was finally able to identify and order the part; they call it a "Friction Slide".

Per http://www.ECSTuning.com, it is called a "Shift Lever Slide"....
http://www.ecstuning.com/Volkswagen-Golf_IV--1.8T/ES4915/

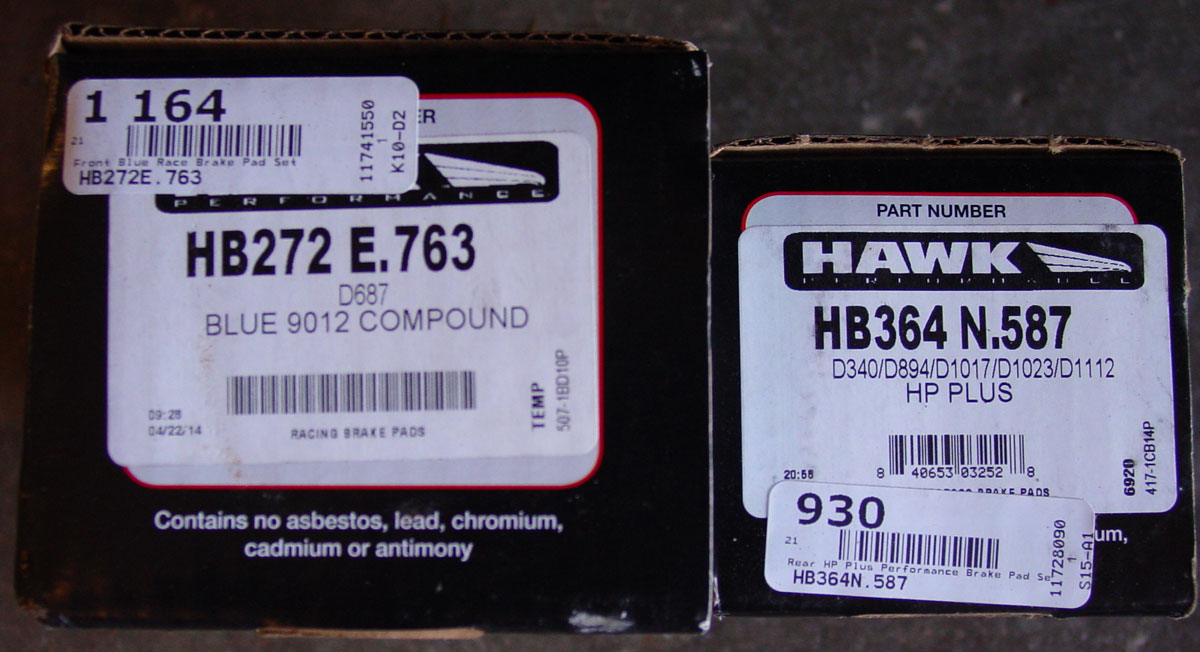
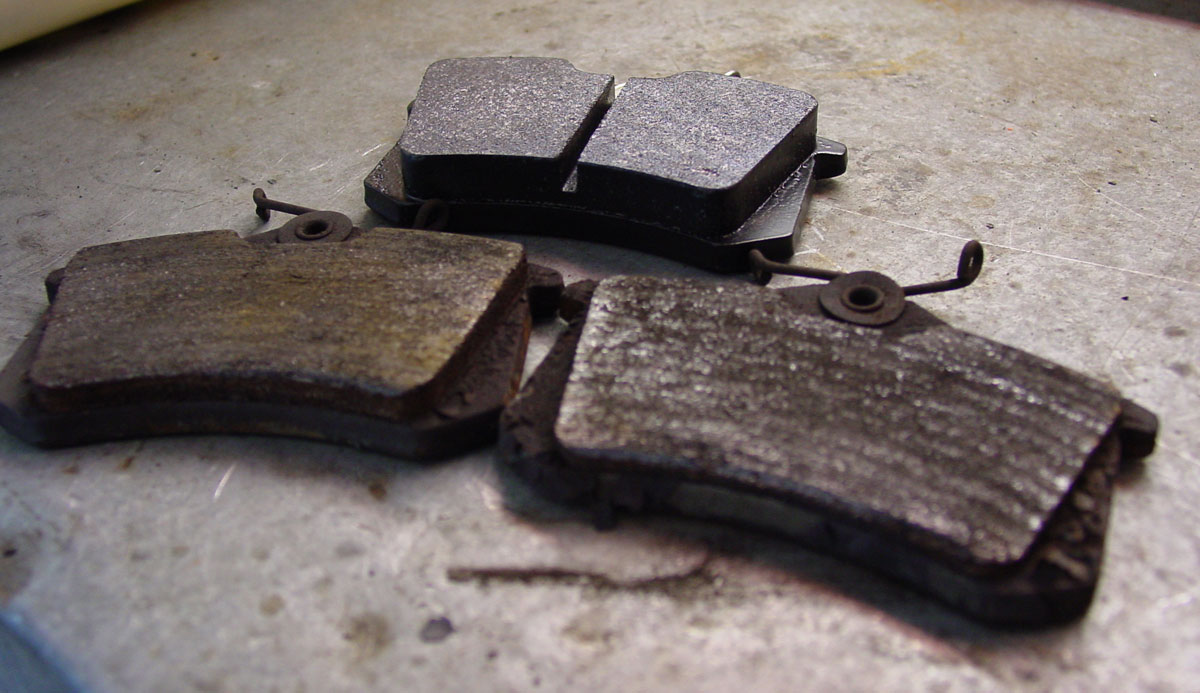
I purchased a new set of brake pads last summer with the intent of installing them.  Didn't happen.

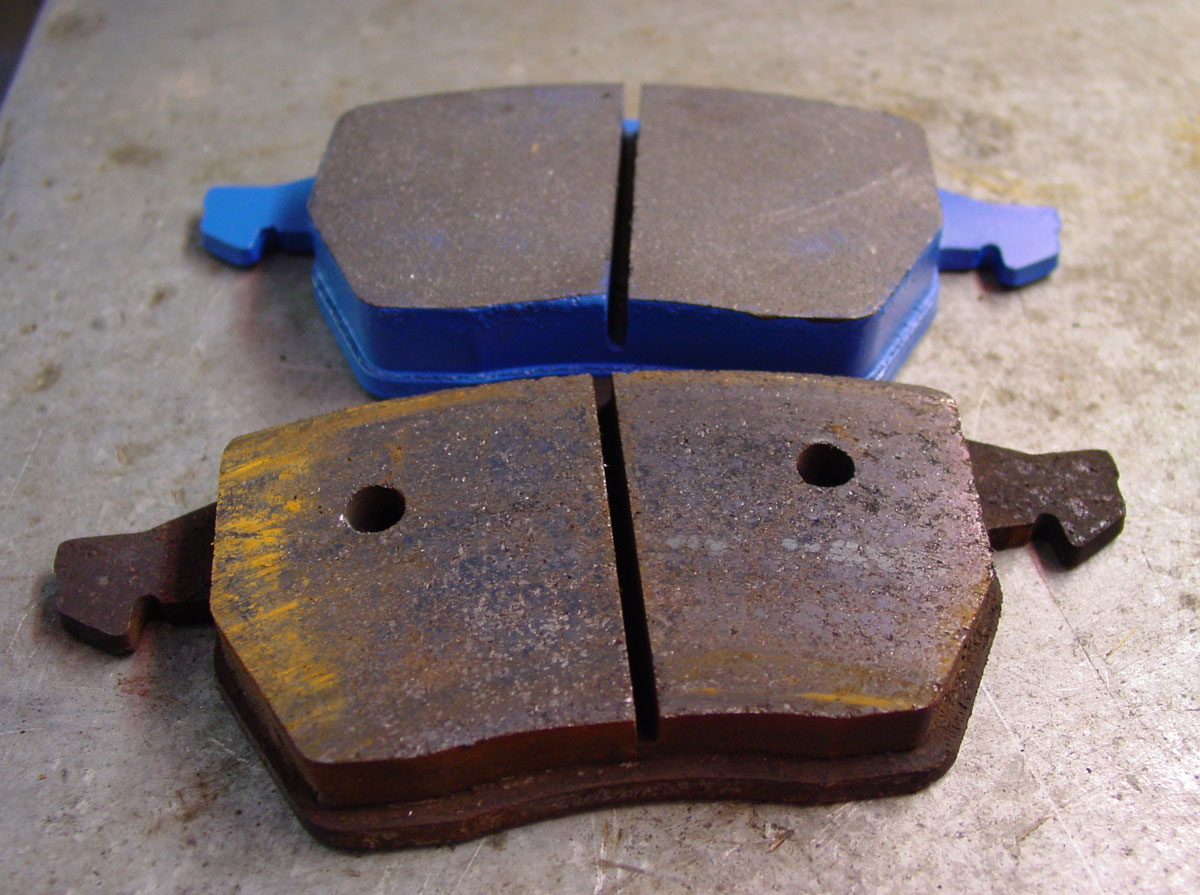
Fronts are Hawk Blue 9012 and rears are Hawk HP Plus (cooler pad); thought is that the rear pads and front pads will come up to operating temperature around the same time as opposed to running hot pads front and rear where the rears will never see the high temps at a hillclimb... at a track they would.

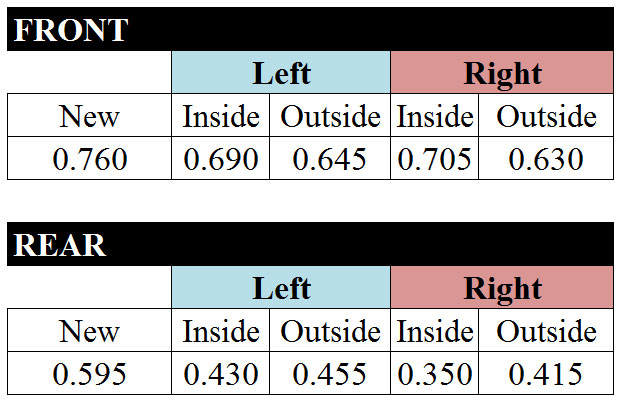
Front pads: Not a lot of wear on the fronts.

Rear pads: Lots of wear! Unsure where there is such a huge difference in wear between the fronts and rears.

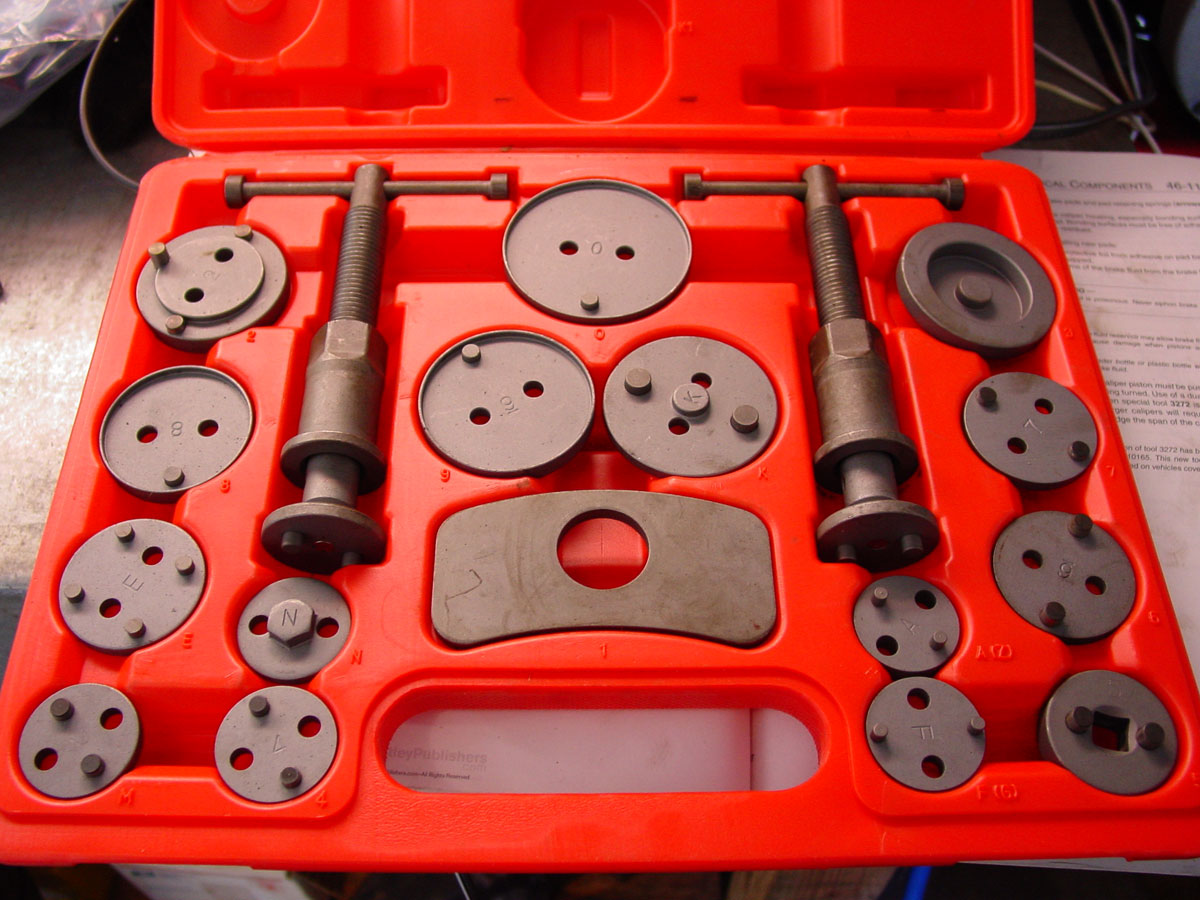
A must have tool for the rear calipers and they require turning/pressure to push in the piston

For those of you that like to see numbers (in inches)

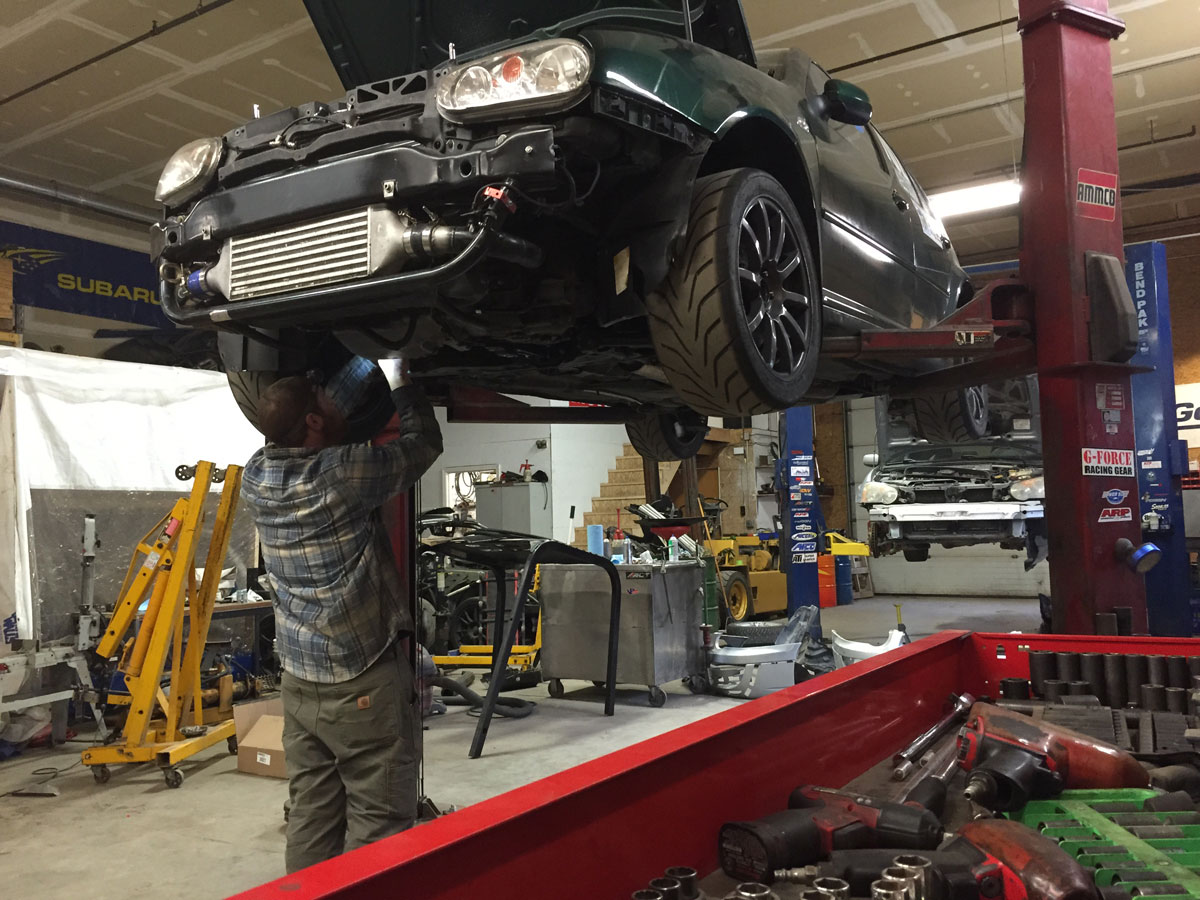
I put everything on the Golf together with the exception of the turbo, front bumper, and skid plate.... also need fluids.

Since I wasn't quite sure what we needed for gaskets for all the lines to/from the turbo, plus Joey needed to finish the heat shield on the upper fire wall, I brought the Golf to http://www.KalesCustom.com.

Almost ready for the Ascutney hillclimb in May.

Steve

Rabbit Farmer
Rabbit Farmer Reader
2/24/19 10:00 p.m.

Aug 28, 2015

Welcome to August... almost September... and I haven't had a lot of updates.

This tells me that the Scirocco I needs my attention as the Golf IV seems to be sorted out.

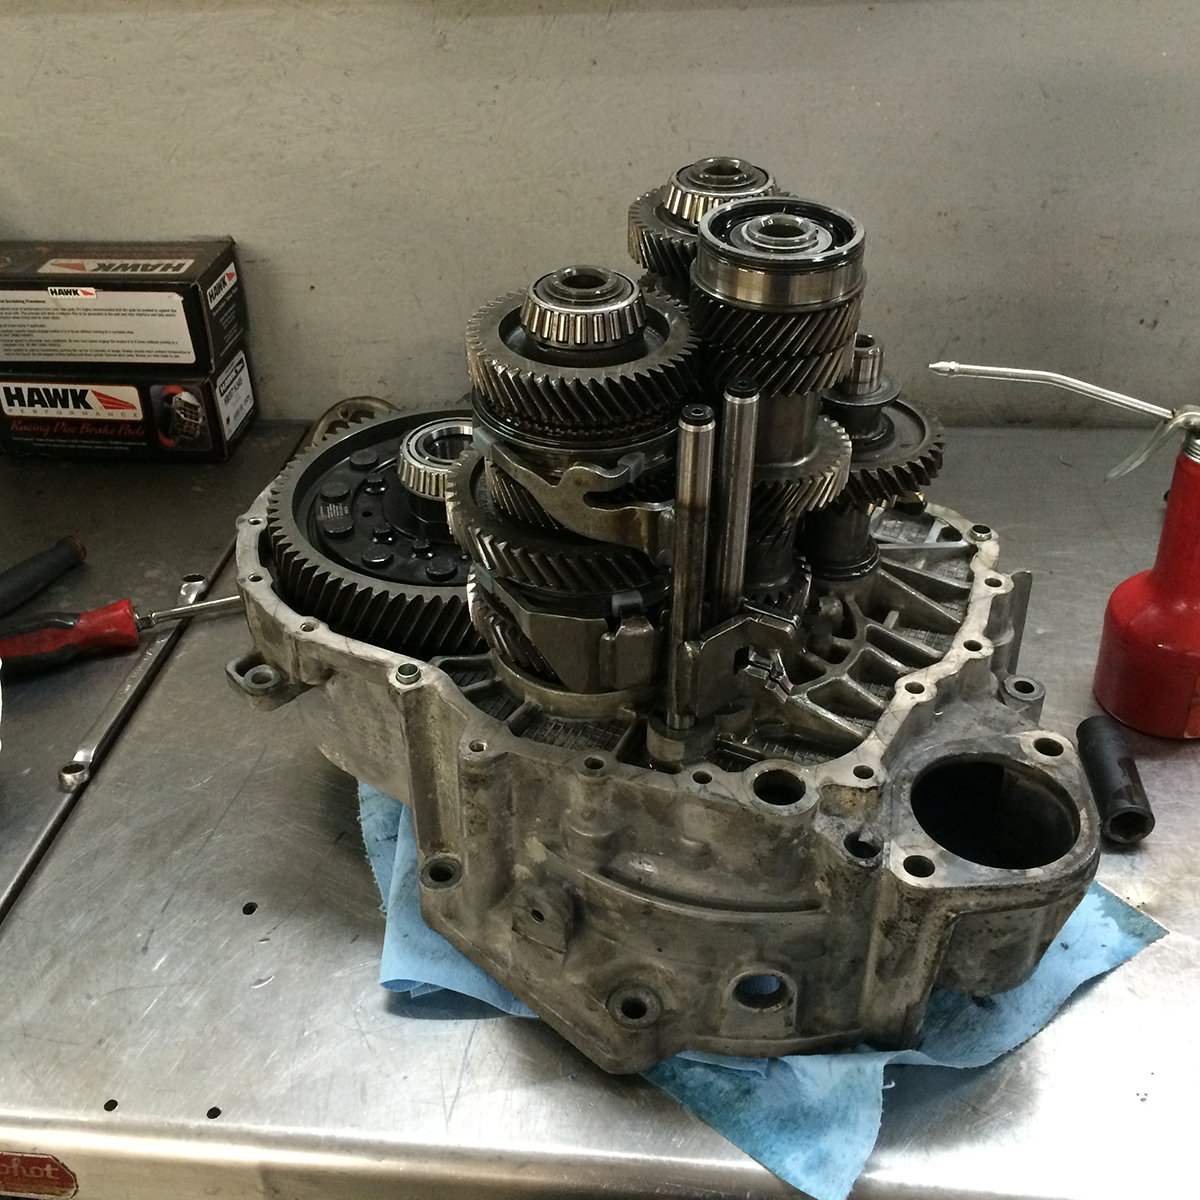
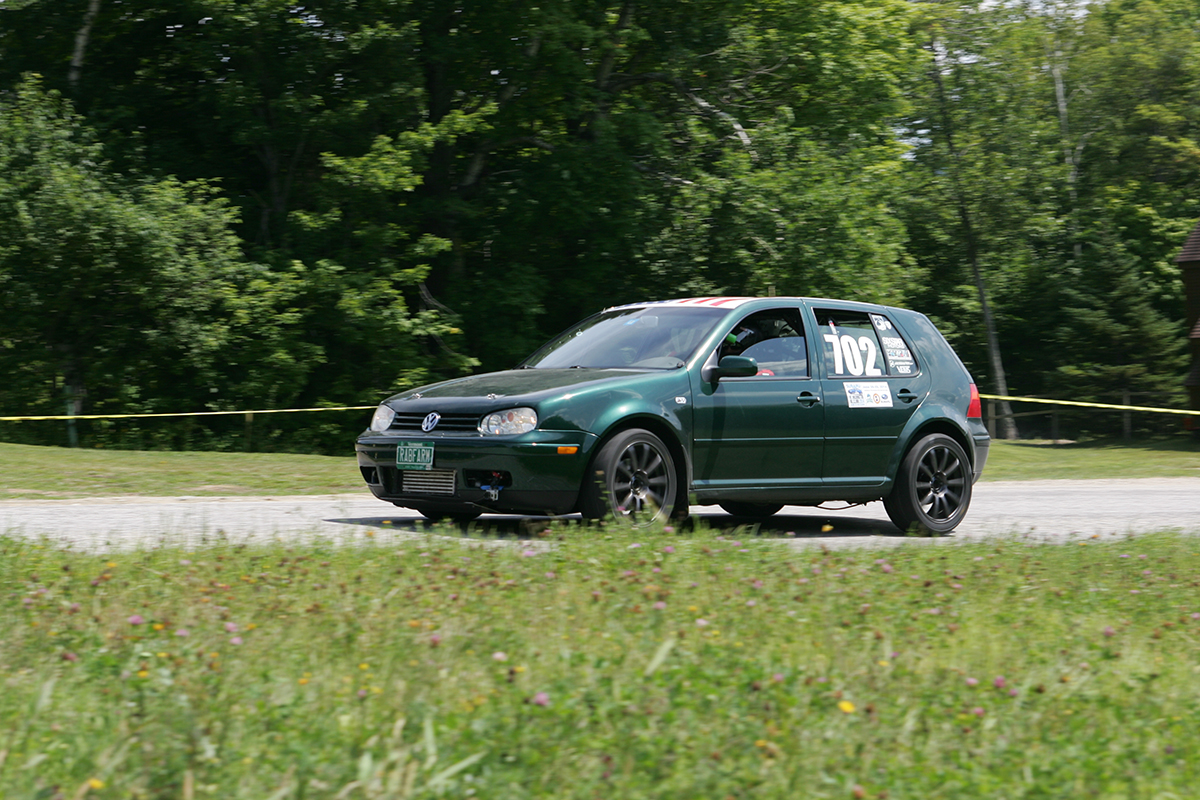
Ascutney #1 hillclimb was fun. I have video, but since the GoPro Hero 3 internal microphone delivers sub-par quality, I won't bother posting anything.  I was there and had fun.... until the transmission let go on Sunday.

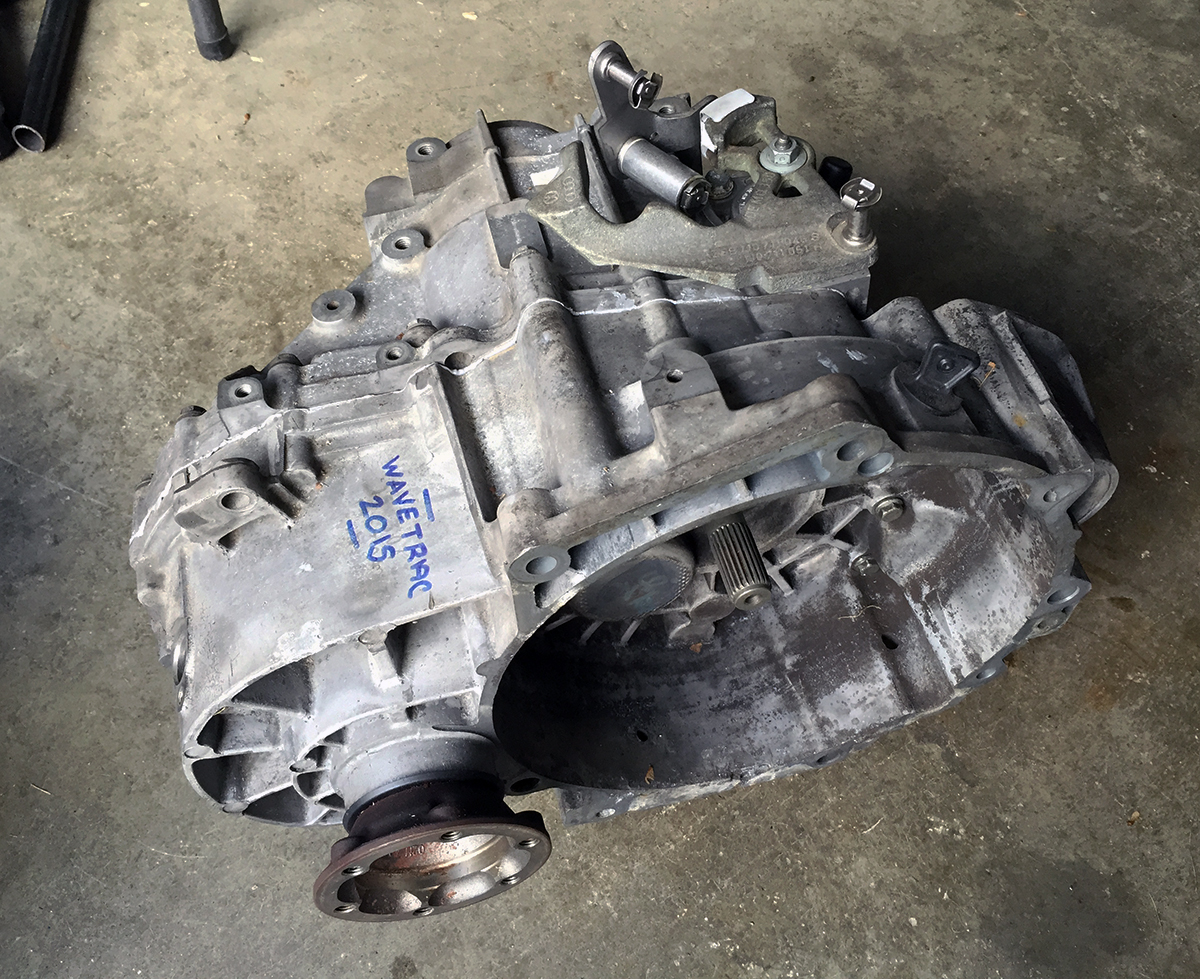
I picked up TWO replacement transmissions; one to rebuild the one currently in the car and one for a back up.

After some research, I ended up going with the WavTrac ([url]http://www.wavetrac.net[/url]) LSD for the reasons outlined below.

Wavetrac: Designed from a clean sheet using state-of-the-art knowledge and engineering to be a better differential than any other. It uses a patented design to improve grip in low traction conditions.

Wavetrac: Gives you quicker acceleration and faster cornering by driving both drive wheels instead of just one. And, it offers improved no-load performance when compared to other helical gear differentials on the market.

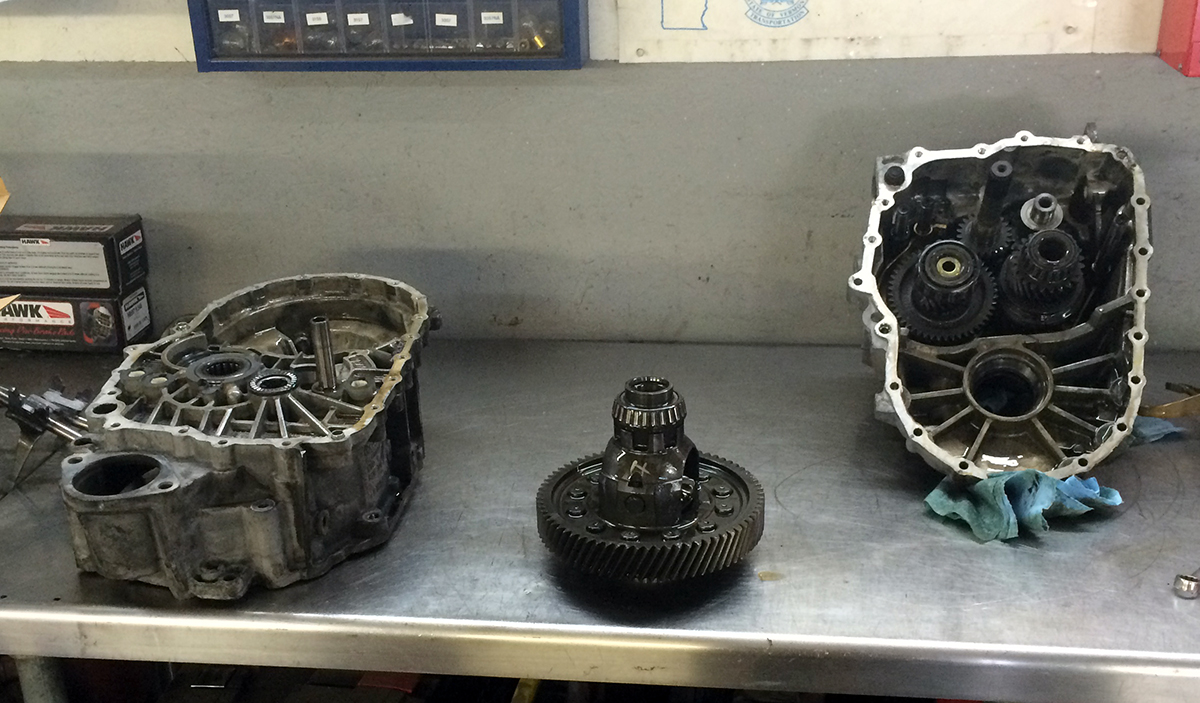
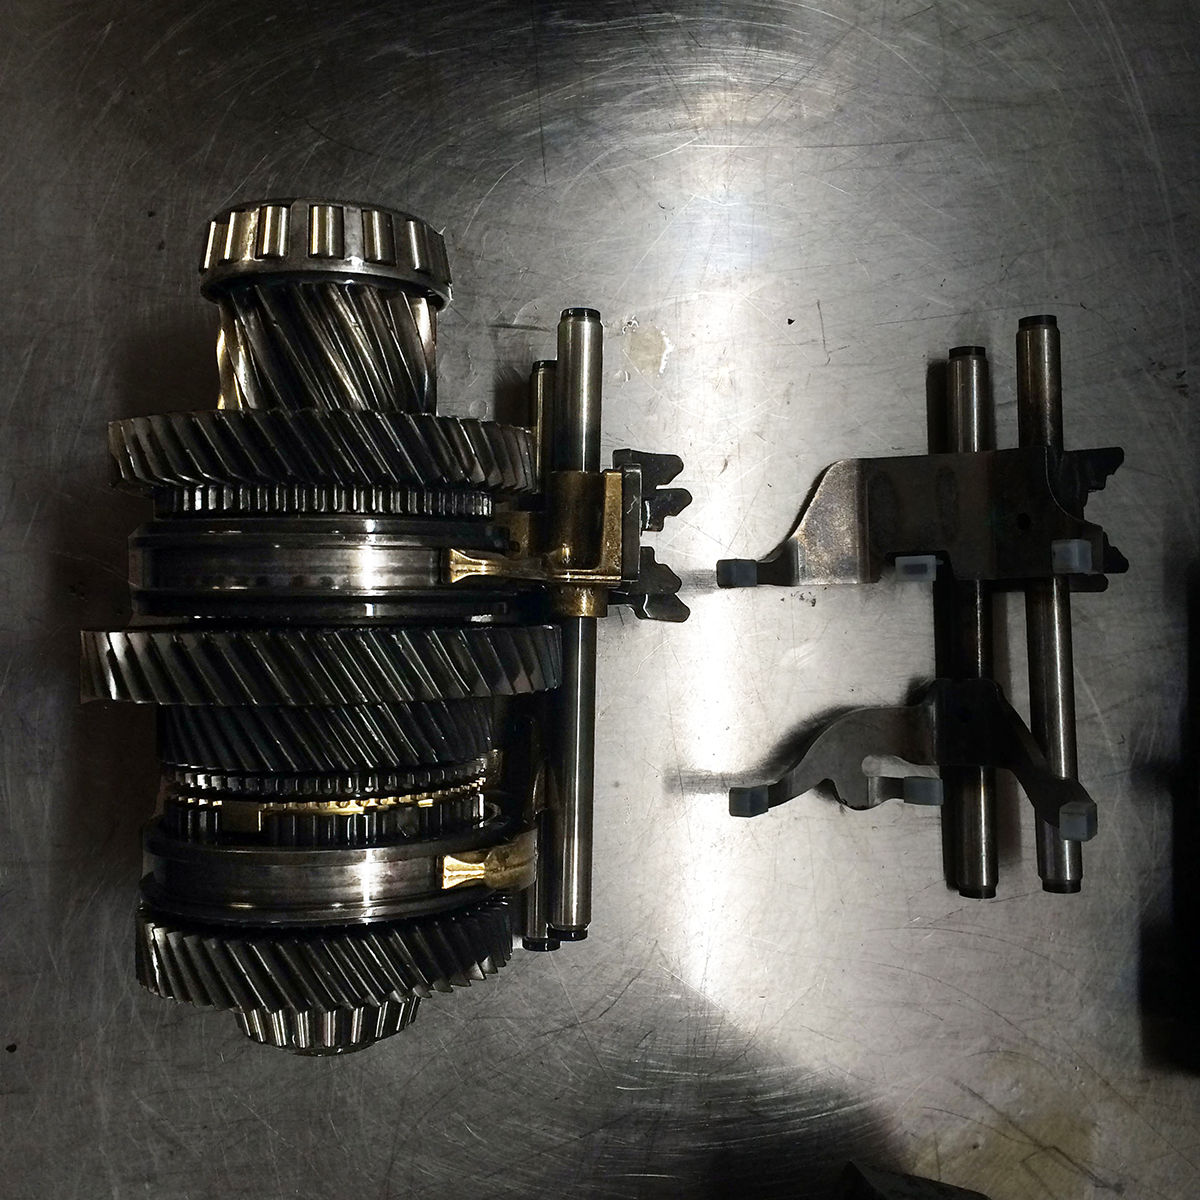
Charlie at (SixStarMotors.... he now works at Vermont Sports Car!) in Colchester, VT took on the task of building the replacement 02M 6-speed using the WavTrac LSD, new bearings, new shift forks, etc.

The "Steel 1st-2nd, 3rd-4th Gear Shift Fork Transmission Upgrade" are from USP Motorsports (http://www.uspmotorsports.com).

Link to the specific product: http://www.uspmotorsports.com/Drivetrain/Manual-Transmision/Steel-1st-2nd-3rd-4th-Gear-Shift-Fork-6spd-Transmission-Upgrade-02M-02Q.html

Something different I tried this time was to remove the entire front end as one piece (bumper, FMIC, radiator) instead of removing the FMIC separately.  Unsure why I did it the long way before....

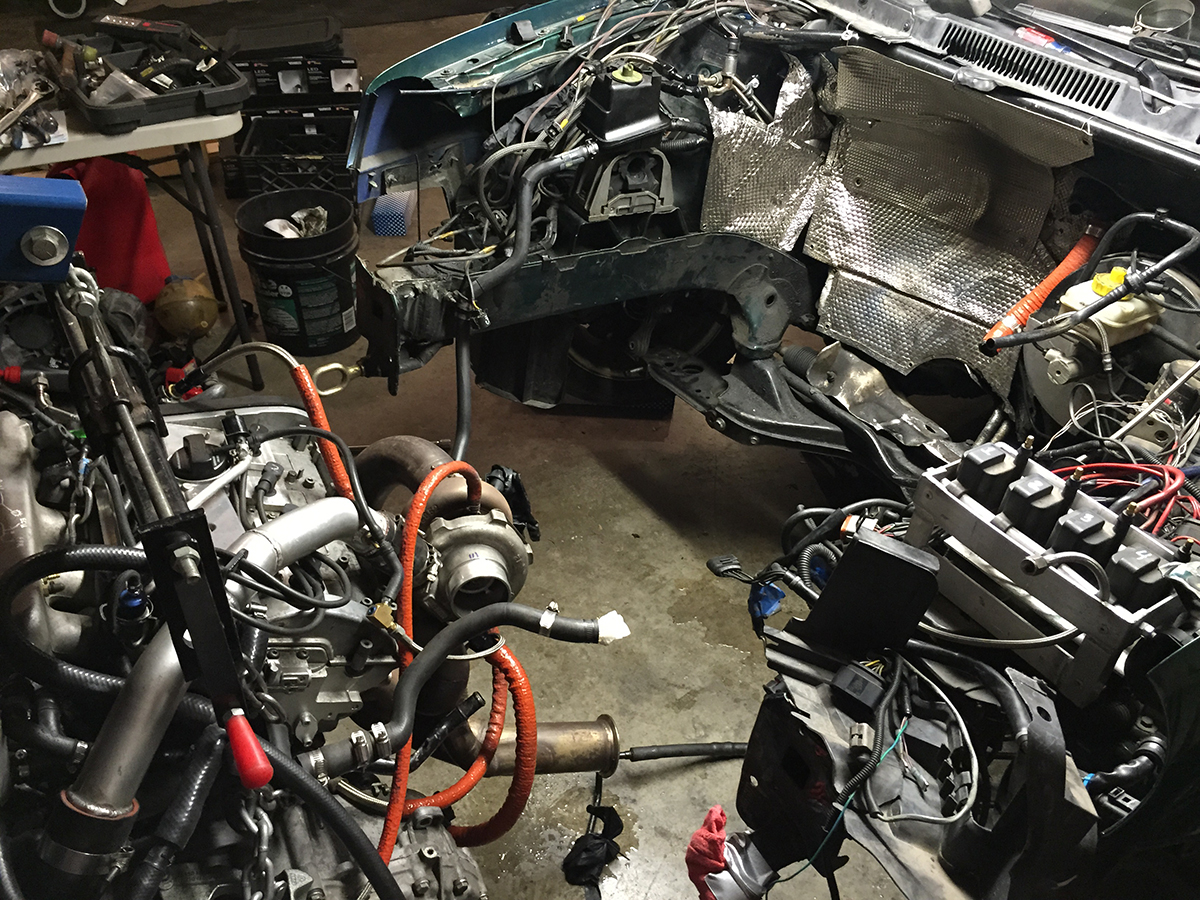
I also removed the engine with the turbo and downpipe attached.  In the past, I did not think that I would be able to accomplish this because the v-band clamp is on the other side of the sub-frame. It was actually quite easy removal and install... and I did not need to mess around with disconnecting and reconnecting the external wastegate (which is a pain as you need three hands to do it).

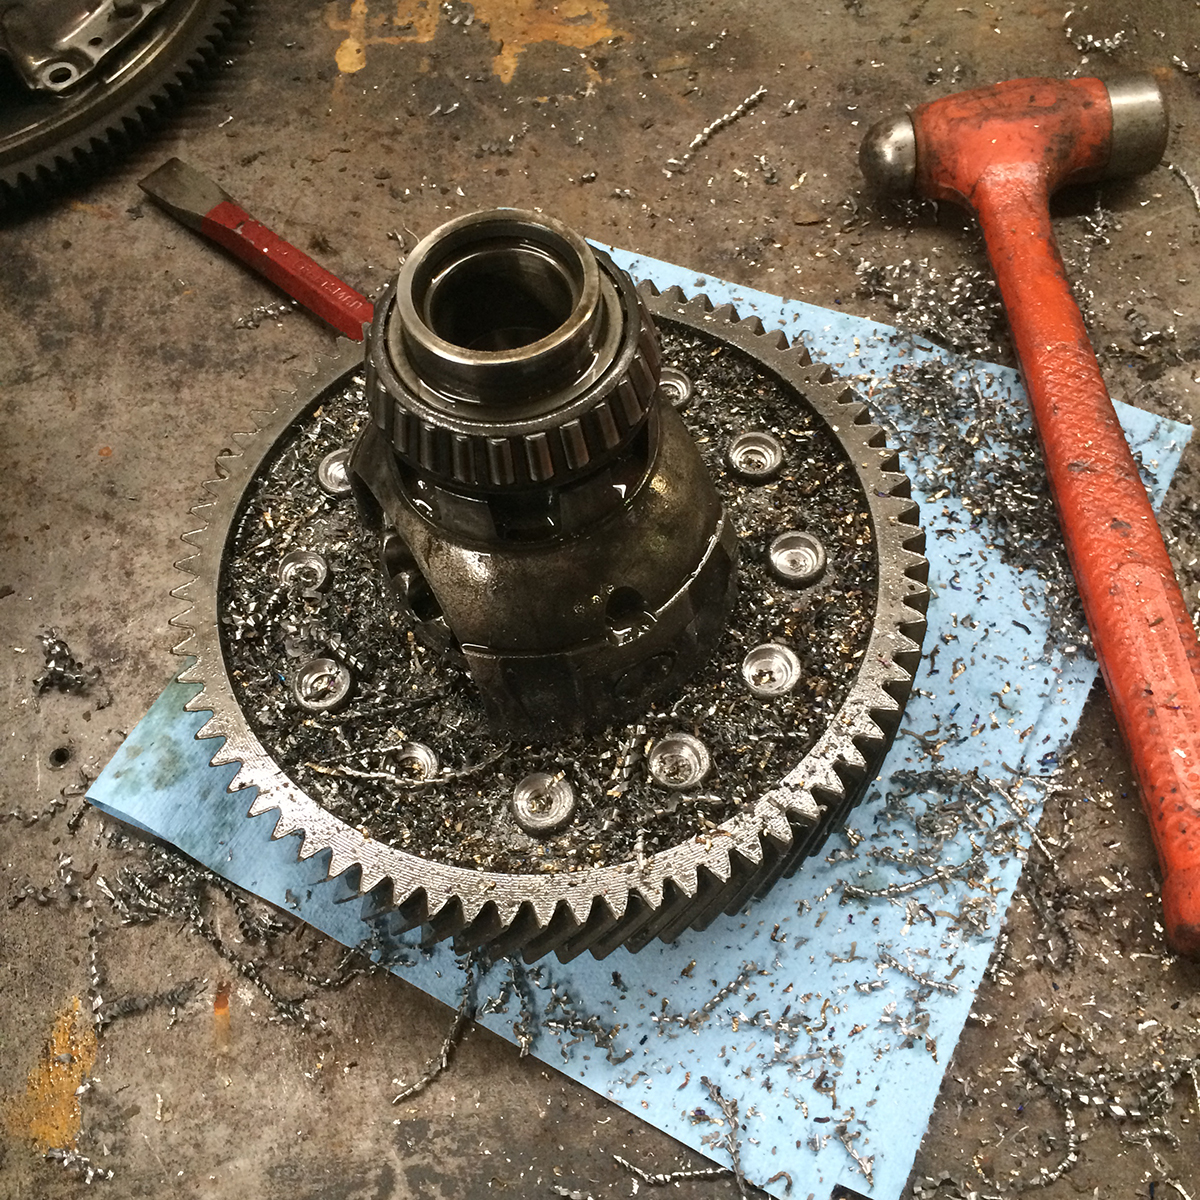
Removing the ring gear from the donor stock differential

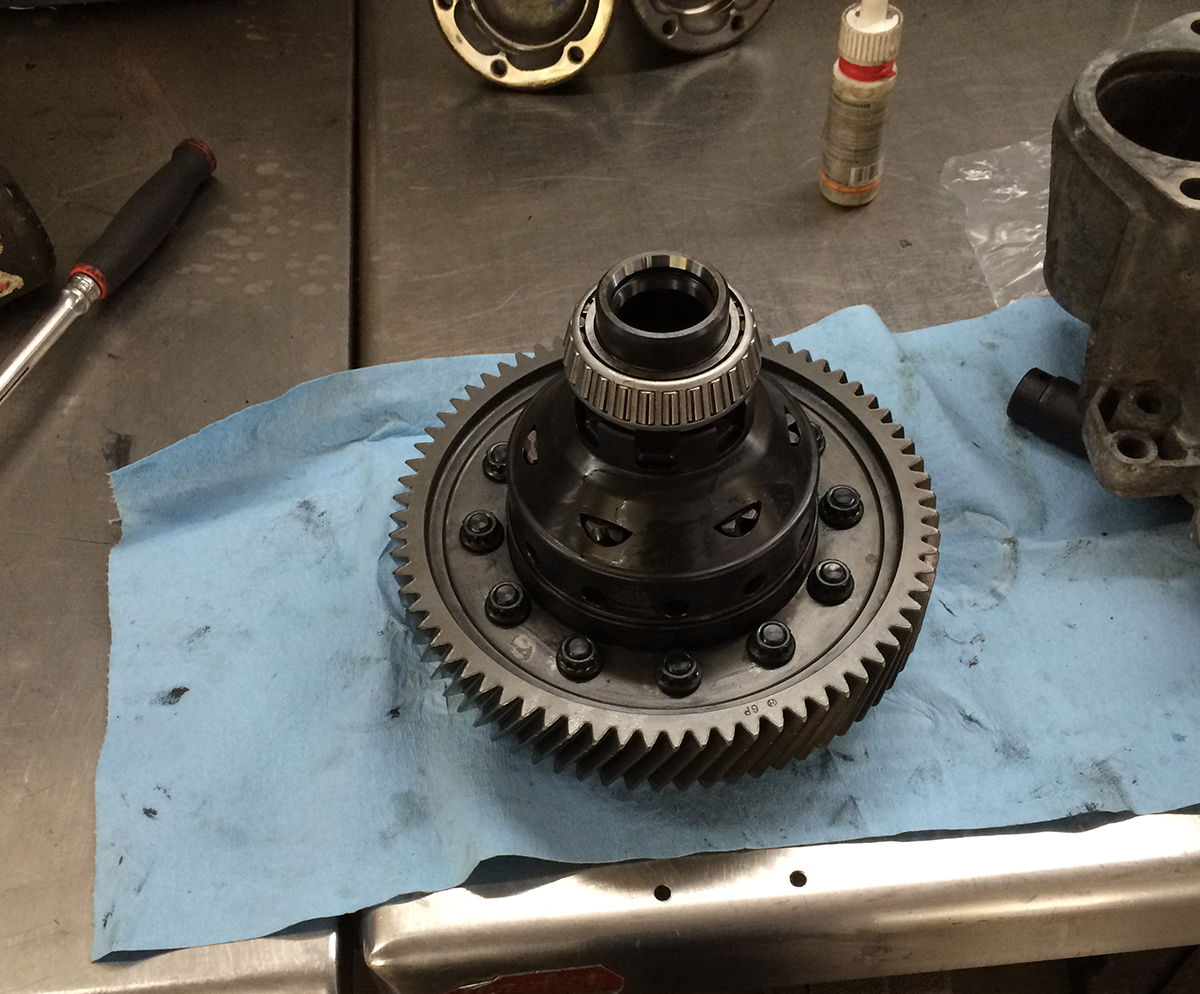
WavTrac LSD with ring rear installed, new bolts, and new bearings... pretty.

New shift forks.... I have never had a problem with them, but figured I would replace them this time since it was apart.

Maiden voyage was at the Okemo #2 hillclimb (I drove the Daewoo... yawn... at Burke and was in Italy for Okemo #1).

Saturday I was impressed with the WavTrac LSD especially on the first long sweeper. Could be a combination of the brand new heat-cycled R888 tires and the WavTrac LSD.  Or.... it could be that the turbo halves were loose again so I wasn't creating any boost.  I would have to go with the latter.  Working on ideas prior to the next event to help keep the turbo together.

Sunday, using most of my boost (I couldn't tighten all the bolts on the turbo because they were underneath), the WavTrac LSD still seemed to be good on the long sweeper at checkpoint 1 (first long sweeper), but I am unsure of its effectiveness at checkpoint 3 where the right front tire gets very light. I had wheel spin (of course, when aren't they spinning!?!?), but it didn't seem to push me as much to the outside of the corner. Jury is still out. My time was a little slower than past Okemos, but that might be because of the turbo.

And... because of the crappy sound quality at Ascutney #1, I purchased an external microphone.  For most of the weekend, it was mounted on the rear bumper next to the exhaust. For one run (you will see/hear this at the end of the video) I had the microphone next to the air intake.

Enjoy.

Steve

http://www.youtube.com/watch?v=PFE6-gPoN9k

Rabbit Farmer
Rabbit Farmer Reader
2/24/19 10:01 p.m.

Aug 28, 2015

2009 Subaru WRX 2.5 / 5-speed
Modifications: Bilstein struts/shocks, Racecomp Engineering Regular Guy Lowering Springs, and Hawk HP Plus Brake Pads.

Nice relaxing day at an autocross.

http://www.youtube.com/watch?v=fa9HOb4EmY4

Rabbit Farmer
Rabbit Farmer Reader
2/24/19 10:01 p.m.

Oct 1, 2015

Nelson Shepard Memorial Hillclimb at Mt Ascutney

http://www.youtube.com/watch?v=_ThQXCBHt4M

Rabbit Farmer
Rabbit Farmer Reader
2/24/19 10:02 p.m.

Oct 19, 2015

Great event at the Sports Car Club of Vermont's Mt. Philo Hillclimb that was sponsored by Joey Kale of Kale's Custom (www.kalescustom.com).

Joey did all the fabrication work (minus the cage) on my Golf.

Not a personal best, but I think it was pretty good with the limited traction (very cold... it was snowing in the morning!).

http://www.youtube.com/watch?v=dERbkLpsLvU

1 ... 3 4 5 6 7 ... 12

You'll need to log in to post.

Our Preferred Partners
Z3XSeatecTXCwPxccm6SPBxRAtLyoVzJg93QZtrmLXm6TvsbsAKQr3L1UIfCqXPq