Is that you in the pic or a minion?
bluej wrote: Is that you in the pic or a minion?
Minion. This minon's current projects include putting a 48 chopped Merc on a CASCAR frame, ( a-la Rodakill) and a Coyote engine into a 69 Mustang. Good guy to have around.
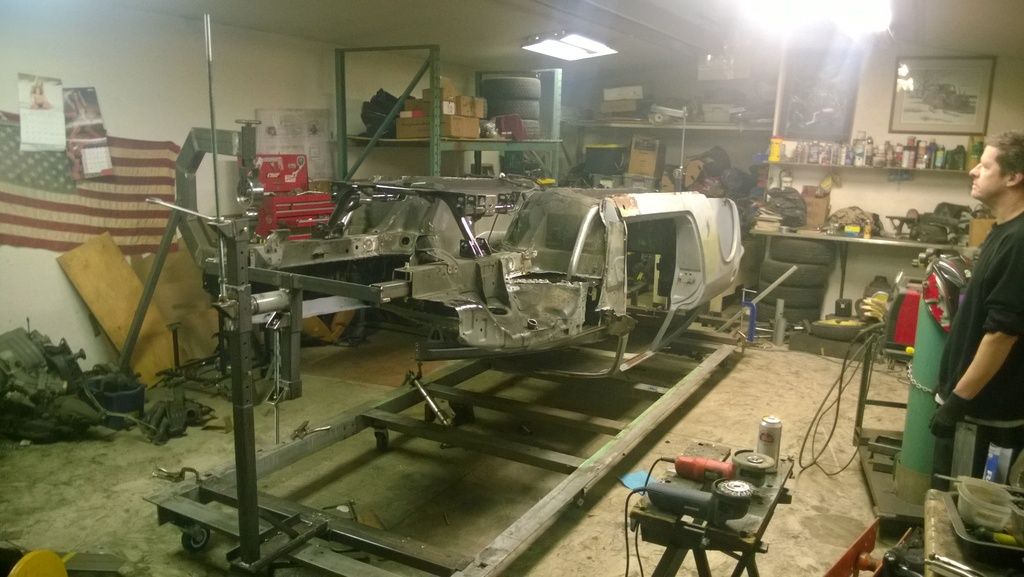
NOHOME wrote: I made the rotisserie so that the center of gravity can be adjusted and the car can be raised by just myself in attendance.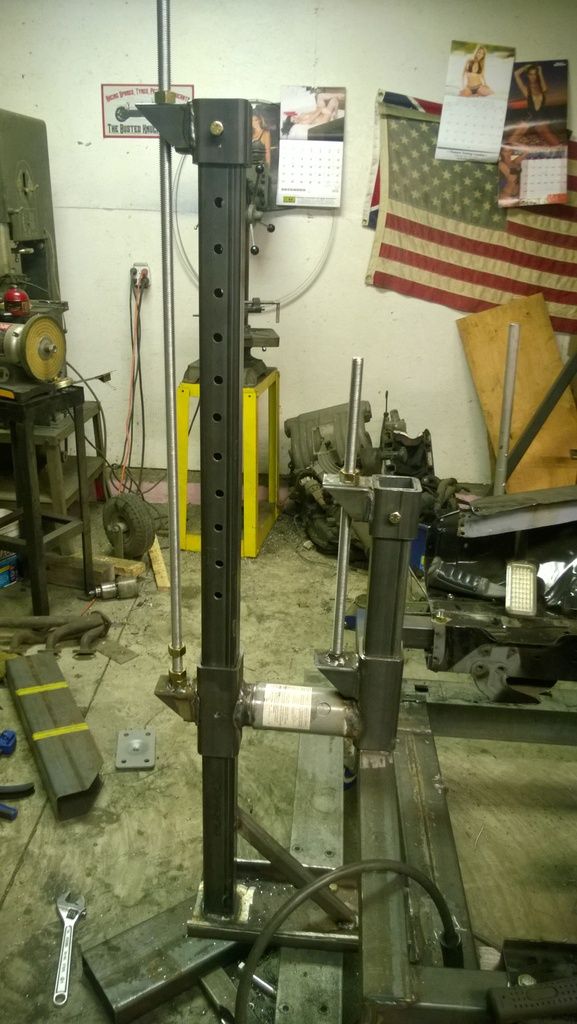
![]()
Show-Off.
Seriously, inspirational work as always...must be all the calendars.
Seriously indeed. Calendars for a different kind of inspiration.
Closest I can come is having the new motor on a "rotisserie"
[URL=http://s937.photobucket.com/user/MichaelYount/media/LS3%20Engine%20swap/onstand_zpssmfhiviv.jpg.html] [/URL]
Mr Yount.. Have I not told you to stop putting bad ideas in my head? That rear sump would make my life SO much easier than it is going to be in a future episode.
Feel much better...the workspace is sorta clean again. There had to be 10 lbs of metal dust swept up

And while it is not much to look at, getting a start on welding in these pieces that cover the frame extension were a big deal to me.
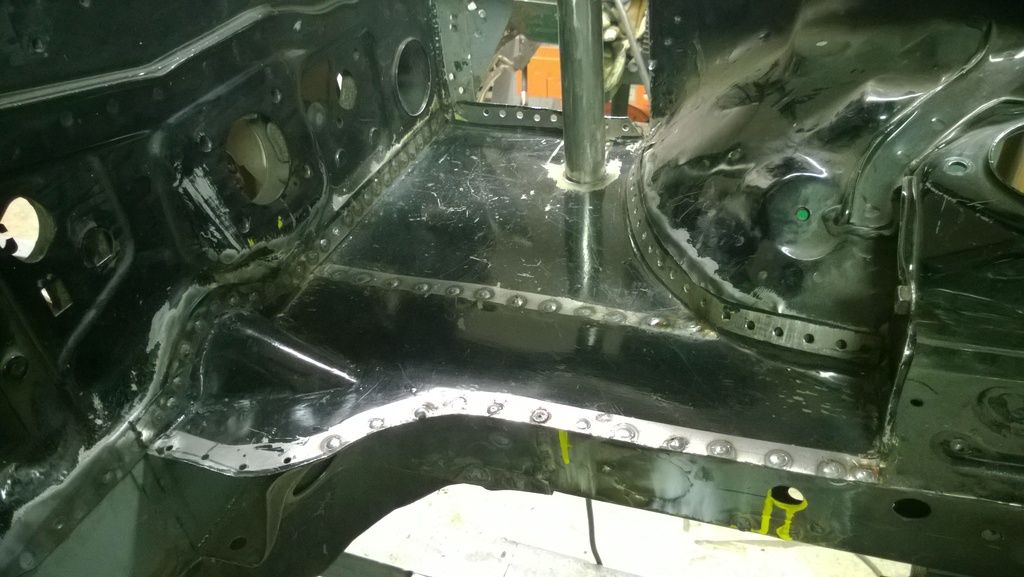
If you like that rear sump --- you'll LOVE this one...
[URL=http://s937.photobucket.com/user/MichaelYount/media/LS3%20Engine%20swap/pan_zpsttkbufse.jpg.html] [/URL]
Ok - that's it. No more bad ideas. Unless of course you want to know the weight difference between 5.0L and LS3 - scaled the new engine last night. LOL.... Besides, my tiny project is drawing mucho inspiration from yours! Keep it comin'!
MichaelYount wrote: Seriously indeed. Calendars for a different kind of inspiration. Closest I can come is having the new motor on a "rotisserie" [URL=http://s937.photobucket.com/user/MichaelYount/media/LS3%20Engine%20swap/onstand_zpssmfhiviv.jpg.html][/URL]
That is some serious motor porn there my friend
Seriously...how do people afford to have this work done for them? The hours seem to add up at a fast rate![]()
Today's task was to finish welding on the sheet-metal covers where the Miata was stretched in front of the firewall. The plates were already fabricated. Already had the DS mostly done.
Somehow it took me most of Sunday to prep and finish both sides. It is the "prep" bit that kill the clock. Spotwelds want to be tight with clean metal on all sides. Trying to hold these pieces down along the front wheel-tub was kind of fun.
DS done and scratched off the list.
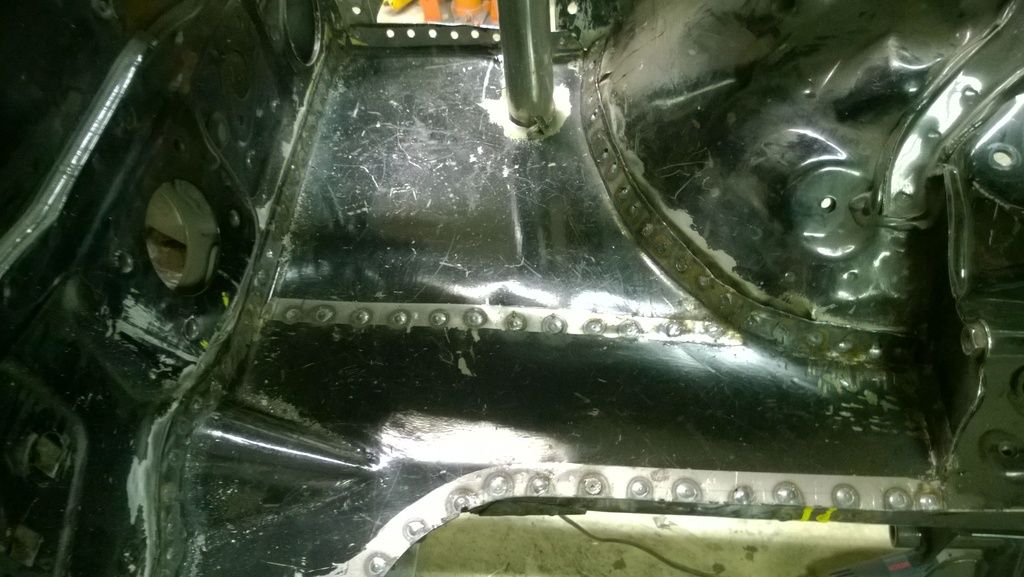
PS done and scratched off the list.
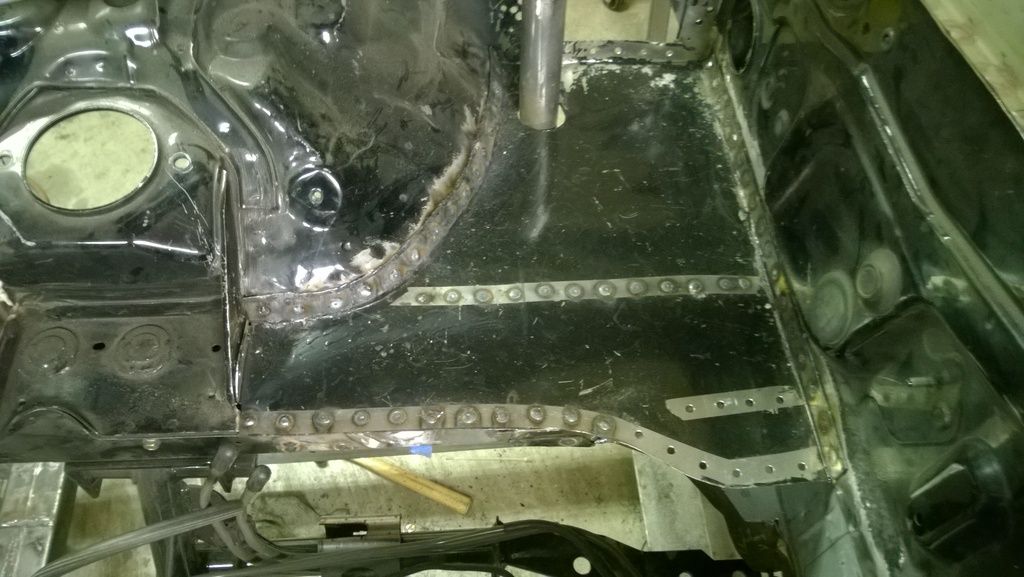
http://i1063.photobucket.com/albums/t520/NOHOME1/WP_20160104_004_zpspjwf5z97.jpg
On a depressing note, I had 21 items on the "Things to get welded while I am on vacation" list. I got 3 of them done![]() The only consolation being that "build a rotisserie" was not on the list.
The only consolation being that "build a rotisserie" was not on the list.
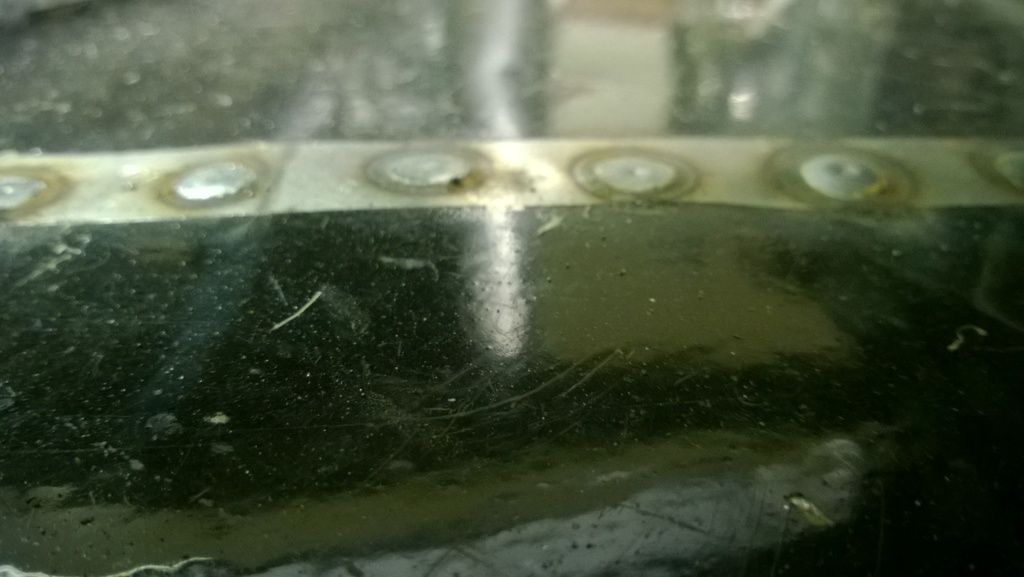
On a totally different subject. I am incredibly lazy and hate grinding spotwelds. As such, I strive to keep those buggers as low as possible. The way to do that is to weld at a heat setting way above what seems correct.
The heat settings on the Lincoln 180 go from A to E. E is for 1/4" and most people want to do spotwelds on the B setting. I load the welder up with 0.035 wire and use a 1/4" punch to make the holes.
Honestly, it does not burn through as you would expect. Just aim right down the middle of the hole (two hands to steady and a bright light to see) and hold the trigger till the puddle just floods the hole. (did I mention the metal must be tight to each other).
Nice flat spotwelds that will require little to no final finish. Save time and save $$$ on abrasives.
Very pretty!
I confess a brief scroll through to see what was up had me thinking that GM engine was headed for this car after all!
tuna55 wrote: Very pretty! I confess a brief scroll through to see what was up had me thinking that GM engine was headed for this car after all!
Maybe if someone wanted to donate an engine to the cause, but emotionally and financially I am committed to the SBF.
NOHOME wrote:tuna55 wrote: Very pretty! I confess a brief scroll through to see what was up had me thinking that GM engine was headed for this car after all!Maybe if someone wanted to donate an engine to the cause, but emotionally and financially I am committed to the SBF.
The SBF is a fine engine. With aluminum heads, it will be pretty potent and pretty light. For your purposes, it will be fine, I'm sure. They always knew where to put a distributor, anyway.
Also, they made way better rear ends. What rear end are you using? I forgot.
There really isn't a whole smattering of aftermarket oil pans with varying sump locations for a 302? I am genuinely surprised this is an issue.
Tuna: The oil pump is right up front in a 302 and defines where you can locate the engine. I am actually good to go as is, but might try a ploy to get it even lower.
The rear is a 8.8 with a 3.73 gear and posi. Out of a T-bird or Lincoln I believe.
On another note, now that the underside of the car is literally in my face, I am mentally constipated on what to do about it. While there is no rust, the bottom does have the expected smegma of a car that was driven for 100,000 plus miles. Seems I either ignore it or launch on a major clean up campaign where the undercoating gets removed and the bottom somehow refinished.
Lookin' really nice - your spot weld technique results in tiny little things of beauty!
Unless you just can't stand it (which is what I expect being afflicted with the same disease from time to time) -- that '100k smegma' is doing a pretty good job of protecting stuff. I'd leave it right where it is, a light brushing to knock loose stuff off, and hit it with rattle can satin black. It will look like new and go right on protecting. Unless you blast it all off and are real careful with prep after that, it'll be tough to get anything on there that's going to protect any better. Might look better.....but likely won't be as protected as it is now.
Retouch undercoat, hit with cleaning products, shoot satin black, ignore.
That's what I would do.
Wait, I did that on the elky and the duster.
It works. And the only people who will know are you and the guy you run over. One is guaranteed not to give a berkeley.
Dusterbd13 wrote: Retouch undercoat, hit with cleaning products, shoot satin black, ignore. That's what I would do. Wait, I did that on the elky and the duster. It works. And the only people who will know are you and the guy you run over. One is guaranteed not to give a berkeley.
LOL!
yeah...kinda where I am thinking.
Would maybe like to take it out of the garage and attack with a power-washer. Thing is that the entrance to the garage is lawn (tells you how often anything rolls out of this shop!) and the little wheel on the tilter would sink right in. The grime has got to go somehow...Might have to build a set of tracks![]()
I really love seeing welding done right. Maybe because it's a skill that I don't have and I know how difficult it is, or maybe because this is what I see at my work...

I have a sincere dislike for people that don't take pride in what they do.
Got a few more chunks of elephant masticated today.
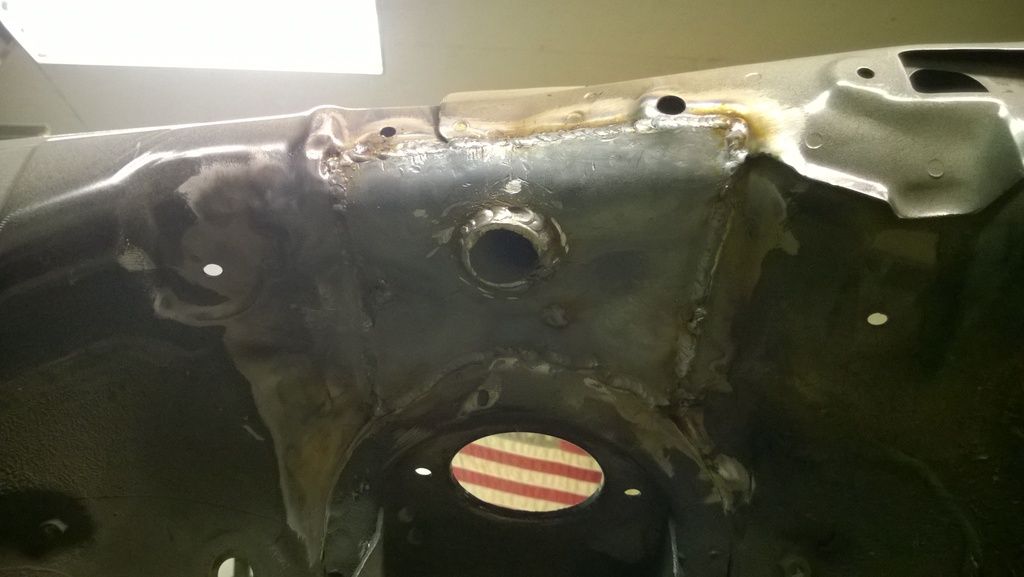
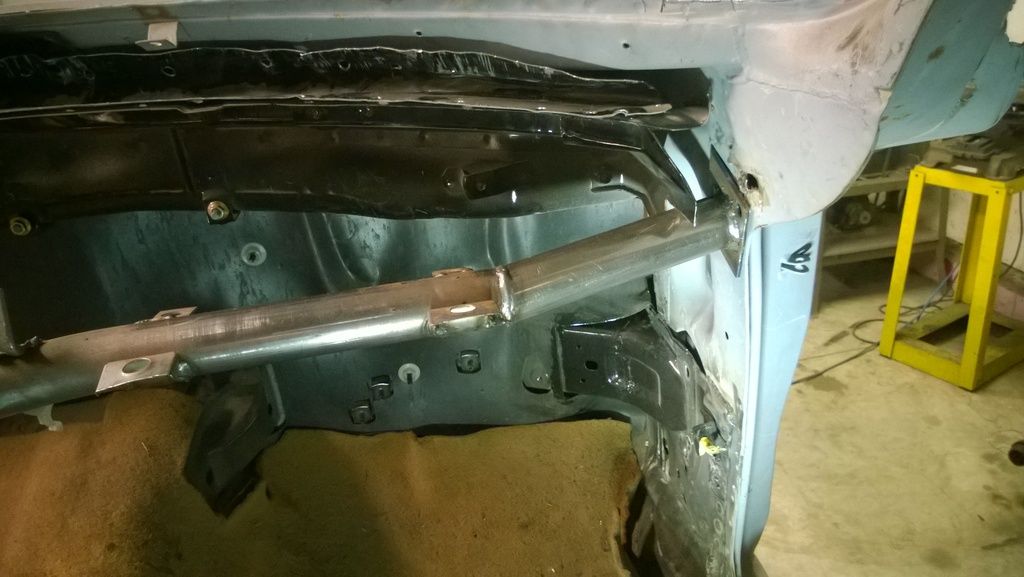
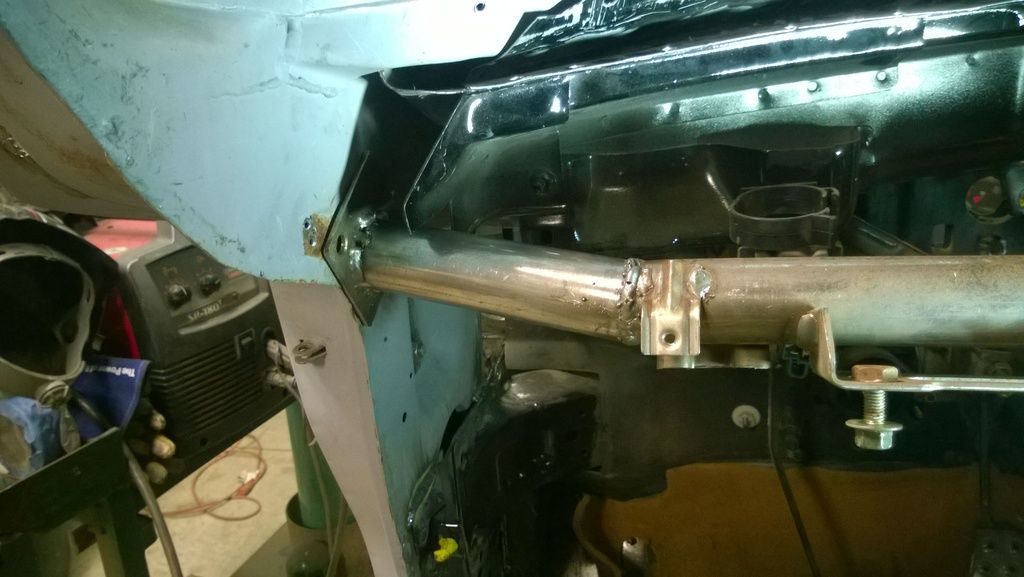
first item on the list was completing the front bar tie-ins to the Miata tub. These are key to melding the two chassis together as a rigid structure. The challenge was to create a reinforcement plate out of 1/8" plate to spread the load and weld it i to the Miata tin. Making it more fun is that this are was far from a flat or uniform surface.
The answer was to make a tape template and then transfer it to steel. Tack the steel in a convenient place where it actually contacted the Miata. The use a torch to heat and beat the plate into the required shape.
Worked out quite well. Need to cut out a disc to fill in the bottom of the tube. Got both sides done even though I keep showing the DS because there is more room to take pictures!
Second item was to create a flange that provides a welding location for the a-post closing panel. Took a bit of finagling with the shrinker stretcher.
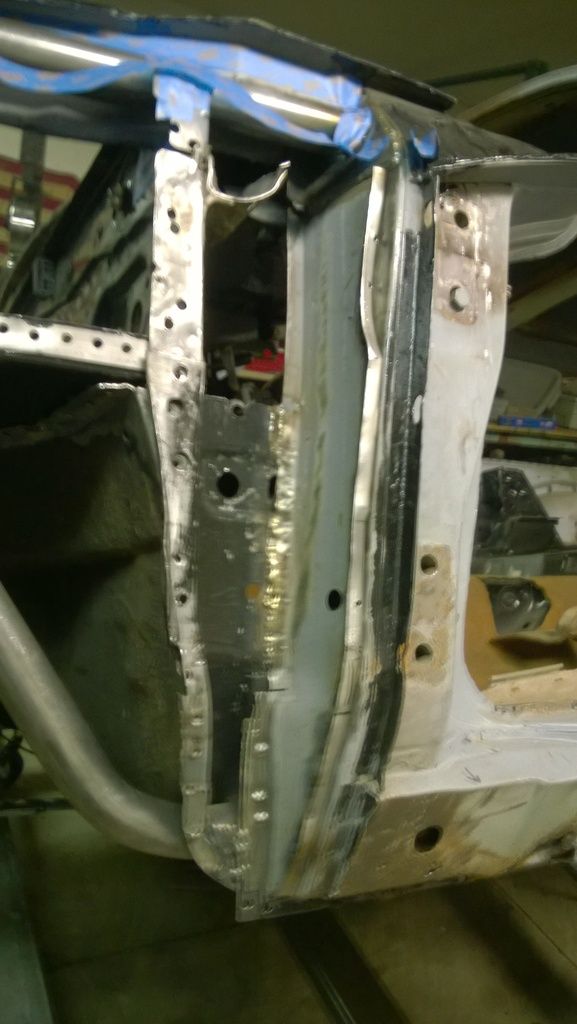
The structural rigidity is pretty much locked in at this point. Slowly working away at the cosmetic surgery required to heal the scars from the 7" frame stretch. Keeping engine compartment fumes out of the cabin is a consideration at this point.
The rotisserie earned its keep tonight. Got the lower pinch welds done on both sides. Being a rewards driven operation, the beer did not get opened until the work was done.
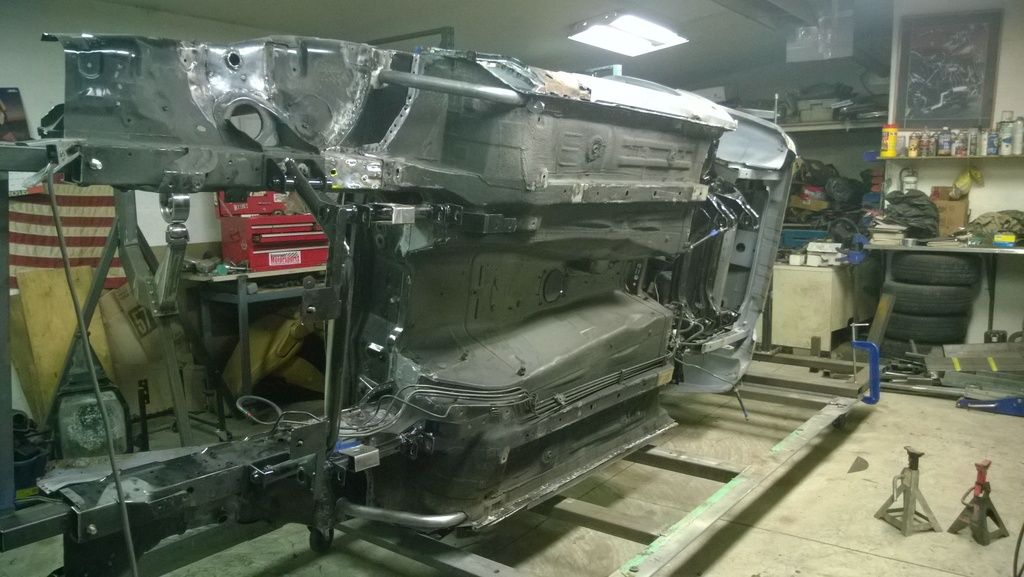


My favourite thing...crossing items of the to-do list of welding task.

The joys of sandblasting. Been two years and I can still get this:

Items #2 17 and 18 got crossed off the list today.Making good progress towards the next list that has the heading "Once the berkeleying Welding is Done!!!!!"
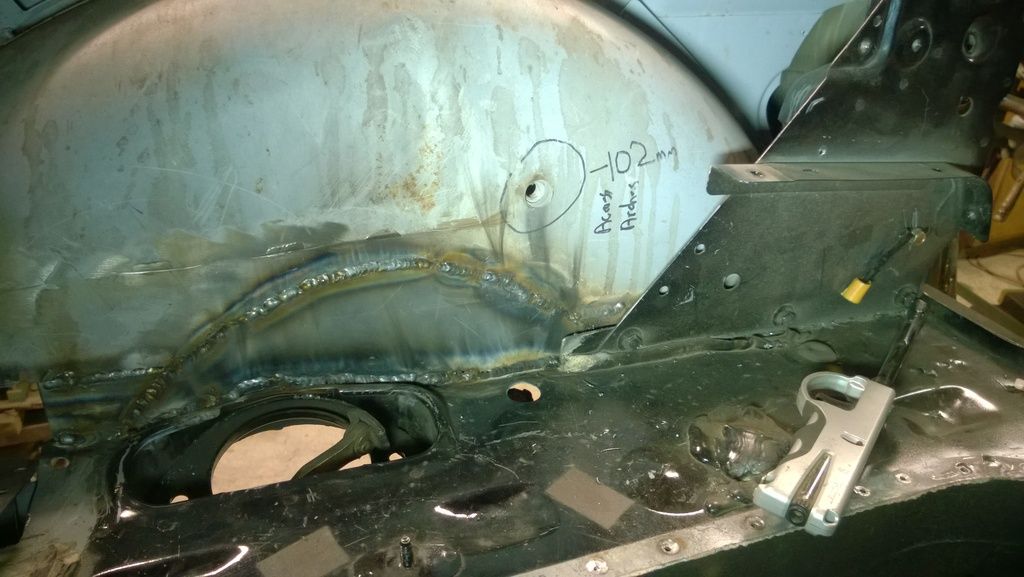
Volvo rear wheeltubs are integrated into the Miata:
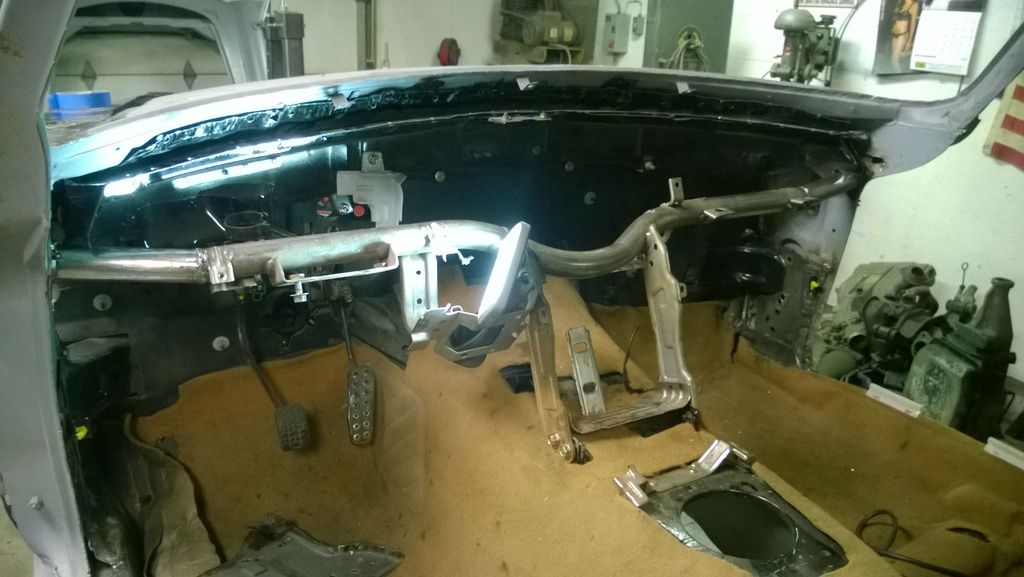
Miata dash support tube is now integrated into the Volvo a-pillars.
Coming along! As for the sand is maybe you can make something like a small siphon hose that you can run with an airline to pull it out? Or maybe blow with air while running a shopvac to suck it up?
This juat popped up in my Facebook newsfeed http://autoweek.com/article/car-life/because-world-needs-8-second-volvo-p1800-drag-racer
Once again...5 hours of work in a 5 minute post.
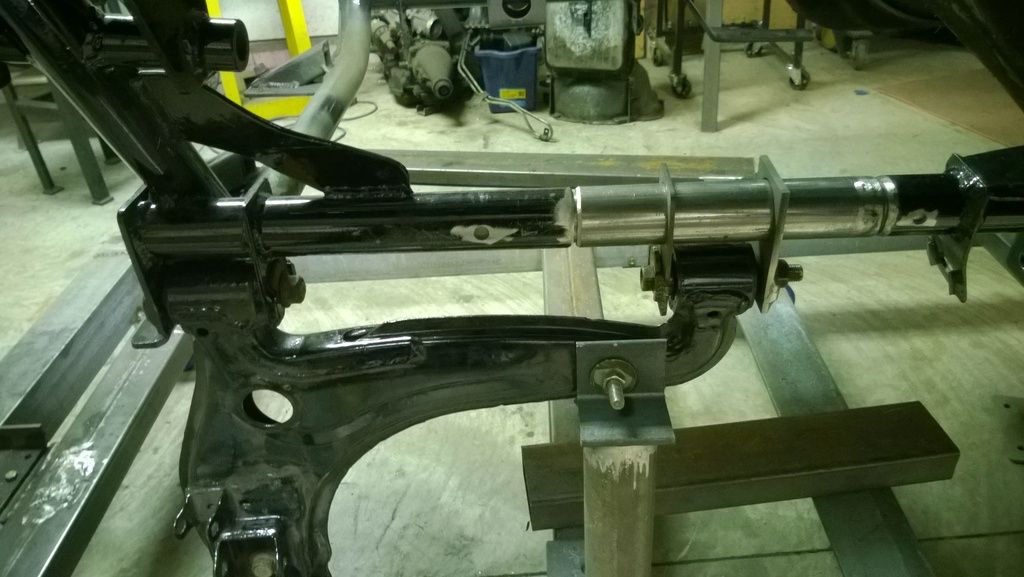
The job today was to get out the tube stretcher and modify the front K member. Seems that when I stretched the wheelbase by 7" the rear pick-up points for the K member were left hanging in space.
So here is the problem. The mount at the back wont reach the Miata frame attach points
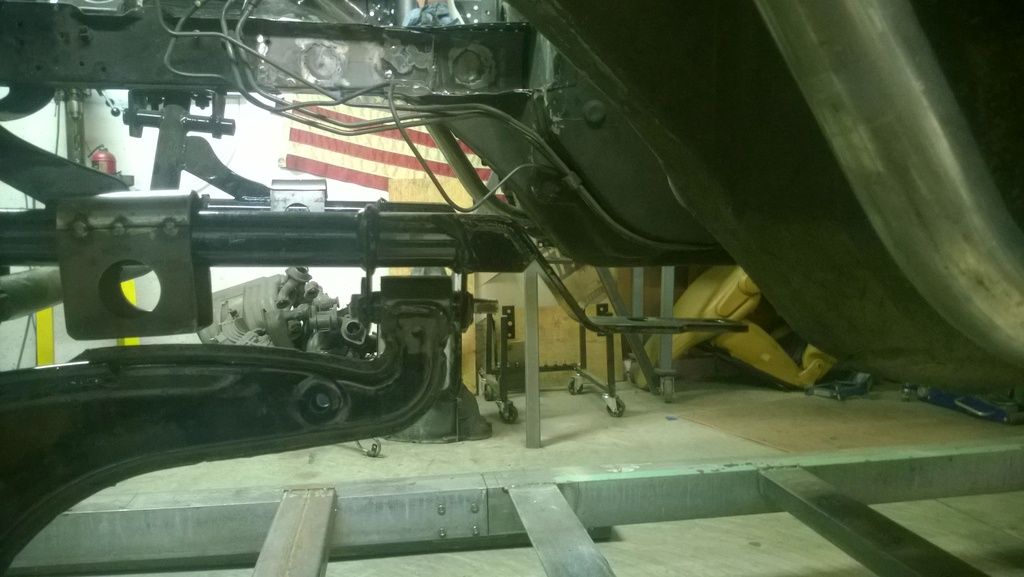
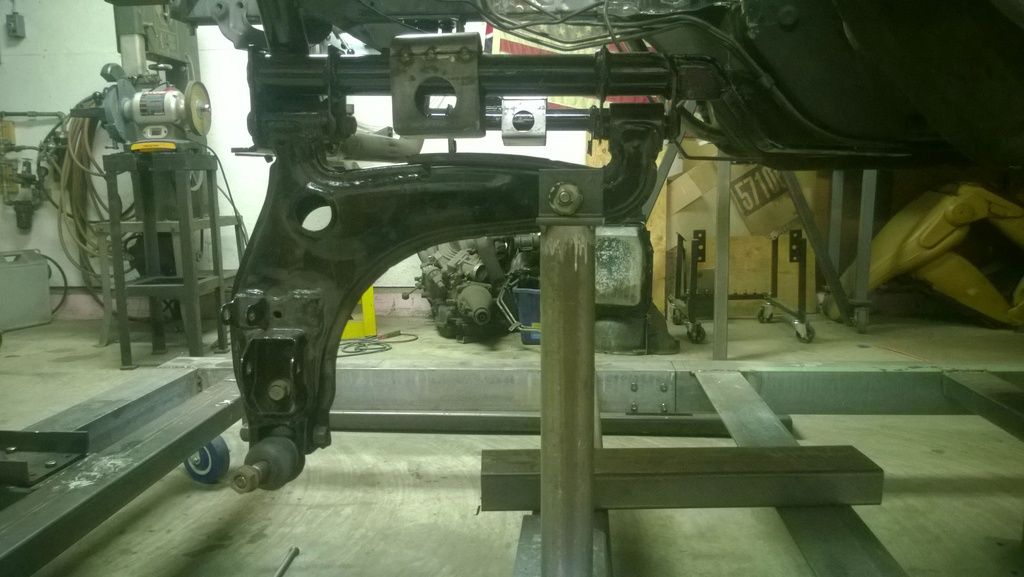
Since I am stretching the frame, I need new rear a-arm mounting points. Make up a quick jig using the a-arm and some scrap steel
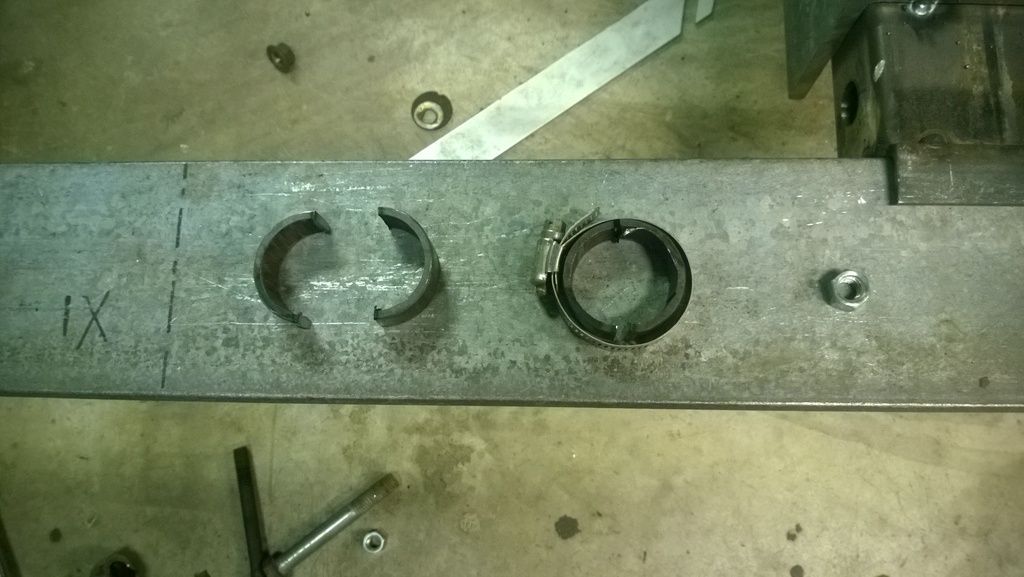
Need to make a square cut on the K member tube, so whip up a couple of guides from "next size up tube" and some hose clamps
Creating a path for the sawzall to follow and proceed to cut
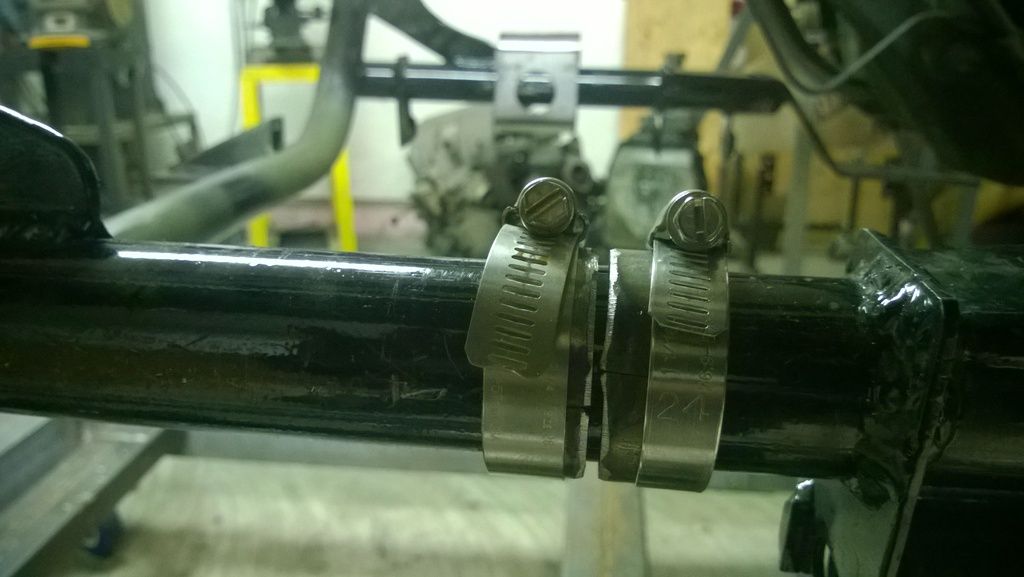
Sleave with 1.25" DOM inside the 1.5DOM, Stretch so rear portion reaces mounts and cut a filler piece out of 1.5" DOM. Remember to put the new rear a-arm mounts in place and call it a day. Weld tomorrow. Trust the other side wont take 5 hours.
Moving to the rear of the car. The task was to blend the Miata and Volvo rear wheelwell. The job starts with a substantial gap, some rust repair buried under two layers of tin and an awkward curved filler piece required to mate the Volvo wheeltub to the Miata chassis.
Looks like a fun day to me.


Tape template

Patch welded in

What more apropos than a chunk of Miata to fill the gap?

All said and done. The curved piece a bitch to make but came out OK in the end.

I will let my good friend "Seam Sealer" take care of the final details.
You'll need to log in to post.