
In reply to Crackers :
The whole car is like that. Very rust free, but waves back at the crowds. The only deep ripples are on the PS door, but this thing is going to go through two gallons of rage gold before it is ready for paint.

Thats the suck. I don't envy you the task you have ahead.
Somewhat unrelated, you use a shrinking disc right? What size disk do you use?
I'm about to order one and I'm debating between a 4 1/2" or a 9".

Wow, it is sure too bad that the PO was a tool and sandblasted it. Have you had any success in getting things closer to flat with the shrinking disk?
I used one of these on flat panels to speed up the process. Still need the hand work, but helps if you have enough air available.

A friend had one similar to this Hutchins, but I never could justify the $300 
I do just fine with the Durablock sanding blocks where you buy rolls of stick-on sandpaper. There is a zen thing to sanding a ar smooth and I don't hate doing the work. Power sanding tools get dust all over the shop and this job is dusty enough.
I have a 9" shrinking disc and it does work as advertised. I find it works best with two people; one to run the disc and one to quench.
Sandblast damage is actually caused by shrinking the top layer of the metal as the sand compresses it under force. Heat has nothing to do with it. The answer is to do hammer on-dolly to stretch the metal. Did this on the DS door last night to great effect. I don't gain any quality of life by taking the tin to perfect ripple free status, so am not getting too fussy; anything less than 1/8" I ain't gonna worry about.
Pete
Seemed like I was always painting a car that had a deadline.
Maybe I will see if I can find the Zen in bodywork on my 1800 since there is no deadline. ![]()

Moving right along...
While there is a skim of mud over pretty much the entire surface, none of it is very deep and the edges , or jumps between gaps, are all steel on both sides; that is a good thing. You do not want a filler edge since there is a good chance an edge will get chipped at some point.
Looking ahead, this is the worst:

Those are 1/4 or more low spots. NOT going to be filling and sanding over that sinkhole. Options:
Buy new door skin.. $500
Find a new rust free door and import to Canada and have sandblasted.
Peel off the existing door skin and E-wheel the ripples then re-install?
Cut off lower half of door-skin and e-wheel a new lower half from a piece of tin?
Panel-beat the bejabbers out of this door until it is close-enough.

panel beat. if its good enough for a 100k benz repair......
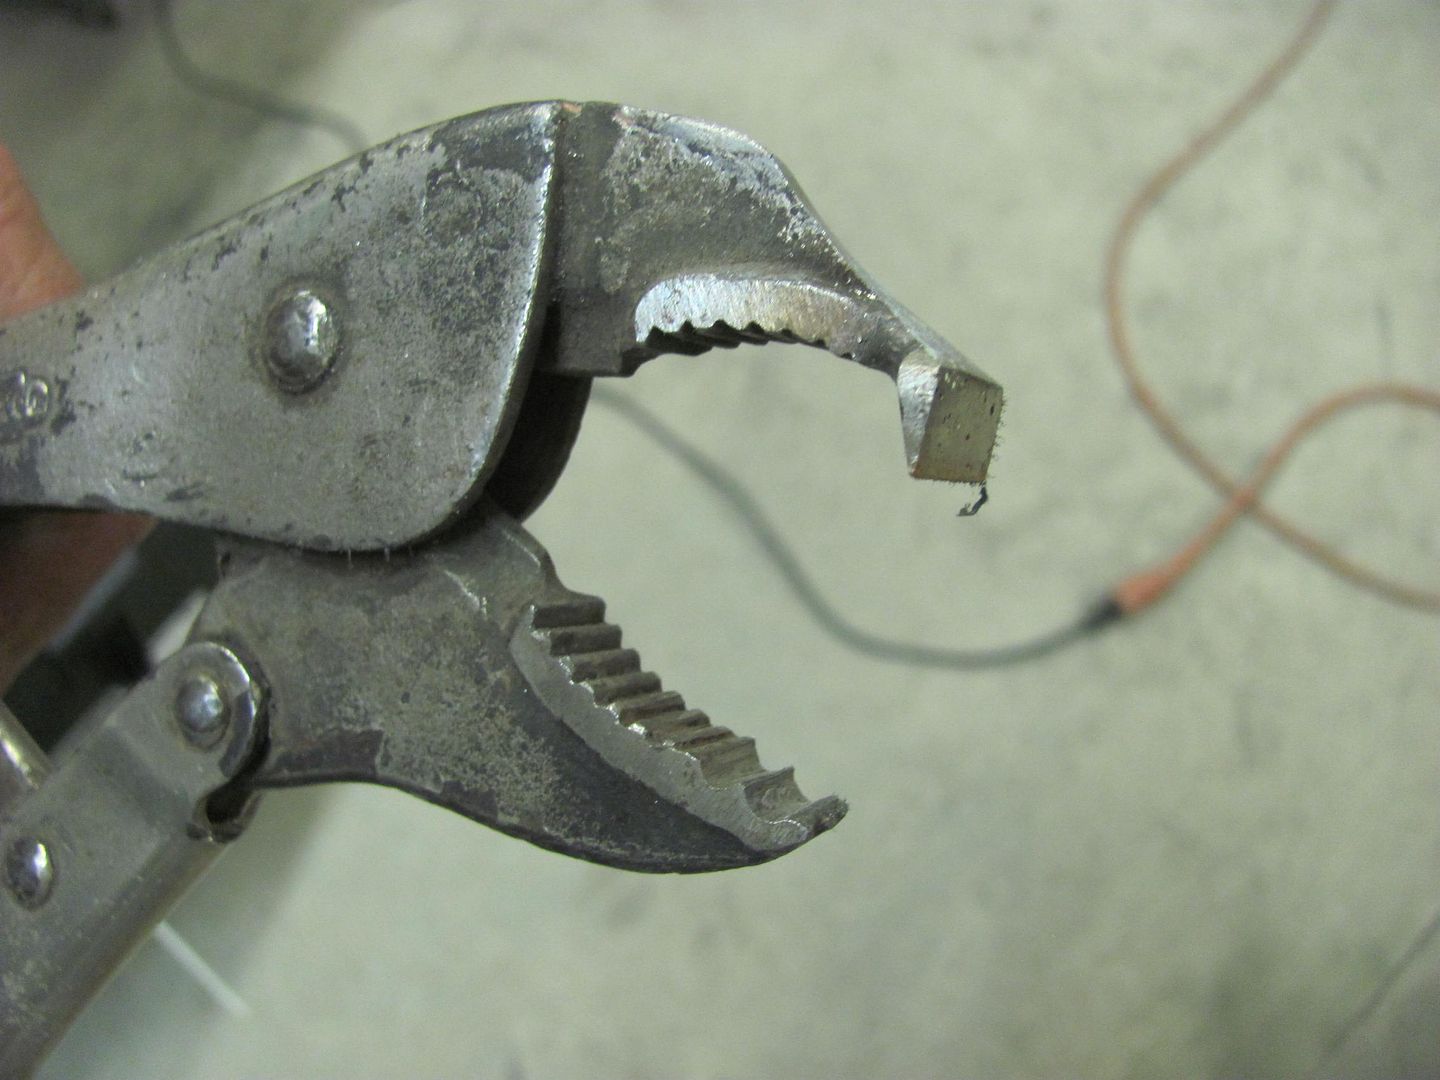
And the answer is "Remove the door skin"!
With careful use of one of these, the Minion spent a couple of hours unfolding the door skin from the frame. Thanks to the nice guys at Metalmeet for giving me the low-down on how to do this.
The inside of a Volvo Door! It amazes me how little rust this car has.

And the patient awaiting paint removal and a run through the English wheel to (hopefully) iron out the wrinkles.

And while the Minion was about that task, I continued with the Rage Gold road show! The DS is about 90% done.

And moving on to the rear quarter panel on the PS. I like how the quarter panels are broke into three sections. Top full lenght and then the lower is divided into the front of arch and rear of arch sections.
You can see my approach to this filler game. After giving the gray eposy a good scuff witth the 40 grit to give some tooth to the panel, I cover the entire panel in a thin layer of mud. I don't worry about where the high and low spots are, the goal is jut to raise the entire panel level by a small amount. Then I will use the long board to sand this layer down until metal high spots start to poke their head up. At that point I stop. Any more sanding will just introduce a wave between the metal islands (high spots). If there are any spots that are lower than the metal high spots, then I can go back and fill just those spots.

Currently shooting for June to have the car ready for the paint booth.
Pete

Thanks for documenting all of this and explaining your steps...I'm taking notes. It's looking great so far.
In reply to maschinenbau :
Have to admit that sanding bondo is not the most visually fascinating subject,up there with paint drying and maybe even below if you are the poor guy on the end of the sanding block, but for those that have not gone down the road yet, the story-line should be of some use as to how to go about this game.
Glad someone is amused!
Pete
I have to split my hood like that to do some rust repair. So not looking forward to that.

In reply to NOHOME :
as long as you wear a dust mask, you can say you're doing low-impact aerobic exercise. sanding filler is good for you!

As someone with a wrinkly car that may need to be prettier for the Challenge, I appreciate the how-to on body work.
Ignore unless you are trying to learn about AC circuits. Parking it here for future reference
So - quick breakdown of the two systems (NA specific here) - and this is widely true of most automotive A/C -
When you press the A/C switch it goes to ground. This signal then tells the ECM that A/C wants to be turned on. The ECM checks 2 things - if you're not flooring it (by reading the TPS, avoiding power loss) and if you're low enough revs (to not overspin the compressor / causing belt slip). If it passes those two checks it goes first to the evap core temp thermoswitch. It's the two spade connectors underneath the dash in the evap core box. Normally it passes right through this - unless the core is iced up (at which point it breaks the connection). Passing this, it runs through the pressure side sensor / switch. It's a 3 position switch - it needs to see more than 30psi but less than 430psi to pass. Relay switches on and power is dumped real close to the compressor clutch, but not quite there yet. First it goes to the high side pressure switch that's mounted on the compressor itself, and then to the clutch.
Oh - and somewhere in there, the radiator fan is turned on without as much logic applied.
The Camaro side is virtually identical - except it uses a 0-5v sensor that allows the ECM to read the pressure instead of the switch, is commanded by the body module instead of a switch to activate the relay. I've read about some people using this input to read/log wideband O2's.

Holy hell, Pete!
Took me a week to get through, but what an amazing project- I'm wildly impressed! Great stuff!
Maybe I missed it, but did we ever hear definitely what was wrong with the Vmaxx coilover setup that was causing the ride height confusion?
damen

Yes, thank you for the explanation on the filler work.
What grit paper do you use to knock down the filler? Same 40 grit as roughing up the epoxy, or finer?
In reply to badwaytolive :
Wrong tool for the application. I did not factor in the fact that the shock body was 1.5" shorter than the Miata shock body. The correct shock for this would have been the V8 roadsters coil-over since it allows for both body length change and spring pre-load change.
Pete
In reply to Run_Away :
The way this game is played in my mind is: coarse paper makes it flat and fine makes it shine.
So, I shape all my filler with 40 grit until I am pretty sure I am on the last round of shaping. Then for whatever last shaping I do I use 80 grit.
Then I lay on a coat of Featherfill spray-on polyester filler, dust it with a guide coat, and and block it down with the same 80 grit I used to finish the filler. ( remember, coarse makes for flat) the Featherfill fills in any 40 grit scratches and lets me fine tune any low or high spots in the filler.
Then I shoot another layer of feather fill and sand with 220 and a guide coat, assuming the guide all sands out , then 330 and then 500. Invariably, you end up doing some spot spraying of the Feather fill in some area that was not perfect.
Then I paint. Actually, this time I will have it painted.
It takes a ridiculous amount of time.
Pete
My elbows hurt just thinking about it. LOL
In reply to Crackers :
These are my best friends

I have them too. My elbows still hurt.
Actually, I'm about to order a second set to modify for concave panels.
I will aplogize ahead for a long winded post about what visually looks like nothing has changed since last time. Such is the nature of body work when I am doing it.
So, about ten days have gone by and maybe 20 hours of labour...what have we accomplished?
Not much to look at I hate to say, but progress none the less. Suffice to say that witout a shrinking disc, the thing would never be straight. Rust free, yes, but it would need a ton of filler or just never be perfect. If you do a lot of tin work on old cars, you need one of these

Recall this door, it looked pretty good at a glance, until I started to hit it with the guide coat and it eventually explained itself to me that it had 3 areas of high metal that kept poking up past the filler, and preventing me from getting a perfectly level panel. You can se a few spots where I have added filer in hopes that I could fair it out over the length of the door. I COULD have just called it good enough. I maybe SHOULD have called it good enough.

The culprit is the guy at the back. The 24" Durablock with 80 grit paper stuck on might as well be rebranded as "Your berkeleying Consience". If your work is not perfect, when you do a guide-coat sanding, it keeps telling you that you are not good enough to pass go. The red lines are either hammer marks from beating on the backside or sandblast damage as seen in the middle of the panel. EVENTUALLY, depending on how inexperienced and stubborn you are, you come to the sad conclusion that adding more filler is not the answer. You need to make the metal high spots go away. So off came all the filler near the high spots and out comes the shrinking disc and start over pretty much from scratch.

The circles are where I had to strip filler off and hit the panel with the disc. Amazing tool and quite controllable. Just run it over the high spot and friction will heat up the metal. Then hit the spot with a wet rag and it shrinks the high spot down. I started with the middle and then kept going around the ring areas that kept being exposed as the new high spots. The area near the door handle was hammer marks from beating out an oil-can. Oil cans are a story in themselves; I have come a long way in the understanding of oil-can psychology. That is going to come in handy in the near future...
My hope is that this is going to be the last coat of mud on this door.

Enough of the bad stuff. let look at the wins...these are all taken after scuffing off a guide-coat of paint to make sure the panels are flat.
PS rear quarter is ready for high fill. The B post right behind the door took a lot of massaging with the shrinking disc before it would conform.

The PS front fender was not a big deal. You can see the layers it took to get it smooth. You can also see the crown about halfway down the fender that defines how much mud I could sand off. It JUST worked out as is and you cant feel a "Hump" or transition as you run your hand over the panel. If the transition had been detectable, it would have been another job for the shrinking disc. A guide coat is confirmation that the job is done well and/or information on what needs to be fixed, but your hand will always let you know if it is not right, it does not take a special feel.

The nose is looking good. Not much more than a 1/16" of filler, but it makes all the difference in the world. This probably could have been done with the high-fill primer but I like to get the tin as smooth as possible with filler and do less spraying. The hood is just sitting in the hole at the moment, I still need to bolt it to the hinges and custom fit it to the rest of the car. Sure that will entail some kind of fun that I am not yet aware of!
Not to go unmentioned is the area inside of the grill. One of the Pete-Minions has dedicated about six Sundays of his life to fabricating. welding grinding and smoothing out this cavity so that it looks like factory. When it comes to places where Miata-meets-Volvo, and you want the scar to be undetectable, this was a fun area. Lots going on.

The DS front fender was without any major drama. Note the area where the side-marker was removed; that is a fun little piece of geometry to sand smooth. Note that where thereis a panel gap, it is tempting to just level across with filler and sand it smooth. Not a good idea as filler will chip. Unless you are doing this to sell the car, you want the edges of the panel to be metal high spots when you are done.

The DS rear quarter is also in the "Done" column. The bit of guide coat on the front is overs-pray from working on the door.

In the work to be done column, I have the PS door. After removing it and e-wheeling it and re-installing it, I was real close and should have quit, but then I did this thing with the shrinking disc. Did I mention that the disc has a learning curve? I quit working on it last week when this happened cause I did not want to start throwing stuff, and have not gone back because I cant get to the back of the panel. I have a plan...

And the final frontier...The roof? I There are half a dozen oil-cans/depressions that are going to have to come out of this panel. The disc lessons I have learned will come in handy and I am glad I practiced on the doors first.
The truth is that I could have just smeared the entire roof panel in filler, and nobody would ever know. But where is the beer drinking, tool buying, opportunity in that?

So, assuming you have not all given up in this novel of a post, lets talk about what happens AFTER all the mud is in place....
In the normal course of events, I would spray the car in an epoxy, then shoot feather fill polyester filler, and finish with a sealer coat sanded to 600 before paint.
But I got talked into this product. It is a hybrid epoxy whatever that means. What if means practically is that depending on how you mix it ( reduced or non reduced) it is either an epoxy sealer or a sandable high-build. So, what I am going to try and do is get away without using the gallon of feather fill that I already bought.

Stuff I have learned,
Featherfill comes in two flavours. The traditional one that I bought demands that you must not have any bare metal. So all those spots that get exposed during filler work need to be epoxy primed. In my case, pretty much the entire car.

What I should have specified is this product: Evercoat Feather fill 4:1. ( DTM or "Direct to Metal")
It can be shot over bare metal and actually builds a thicker film than the G2 version. I have worked with Feather fill before and love the stuff, but if I have done a good enough job with the body fill and I have to shoot the entire car in a high-build epoxy anyway, maybe I wont need it? Well see.

As so as you can see, even though it looks like nothing has happened for the last couple of weeks, its chugging along.
Pete

My only advice about mounting the hood - remove the radiator so you can access all of the bolts through the grill opening. Then when you get the hinge-to-body alignment down, tighten down and never touch them again. If done properly, there shouldn't be any shims or anything between the hood and the hinges. All adjustment is done between the hinges and the body. Then the hood itself can easily removed and reinstalled by the 4 bolts that attach it to the hinges without affecting the alignment, although you do have to remove the grill. To me, this is one of the main benefits to a forward opening hood. But you do want to get the hinges bolted to the body before nailing down the rest of the engine bay components because it's a royal PITA to do later.
In reply to Ian F :
Still need to come up with a latch at the back. ![]()
Easy button would be the Aero latches as sold by FM, but not sold on the look when the goal is to have a stock exterior. Maybe something like the TR6 latch.
About the only thing I want to change carrozzeria-wise, is the grille insert. The black plastic P1800 grill does nothing for me. One of the Pete's works in the gravel industry and might be able to score some SS grate material that can be re-purposed for the job. Few passes in the E-wheel to give it shape and some creative beer drinking to figure out how to fasten the stuff, and it could work.

Pete
In reply to Ian F :
I kinda recalled that my rad situation made the hinge thing easier than a stock P1800. I can just get a wrench on the nut whereas the stock one requires that you pull the rad.

You'll need to log in to post.


