
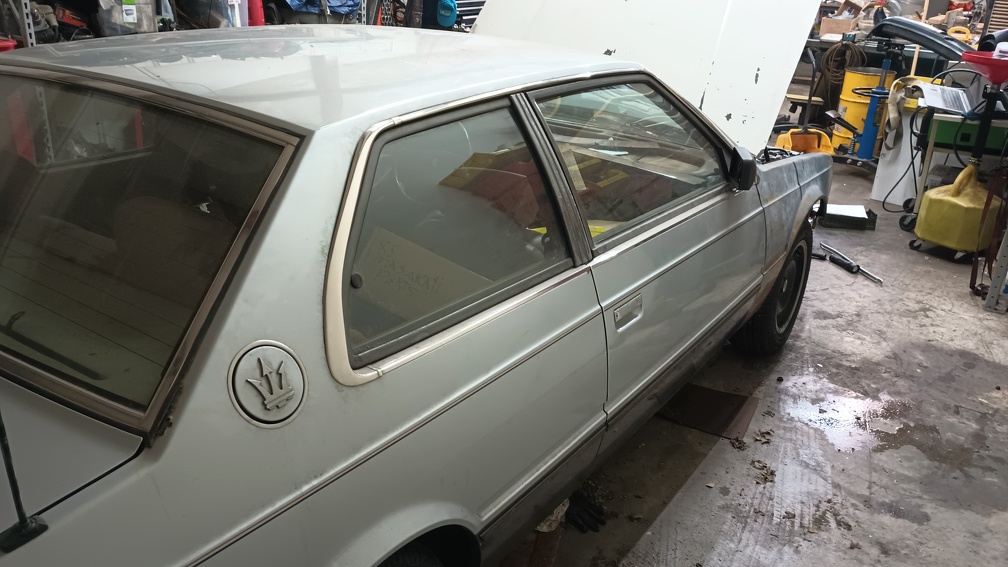
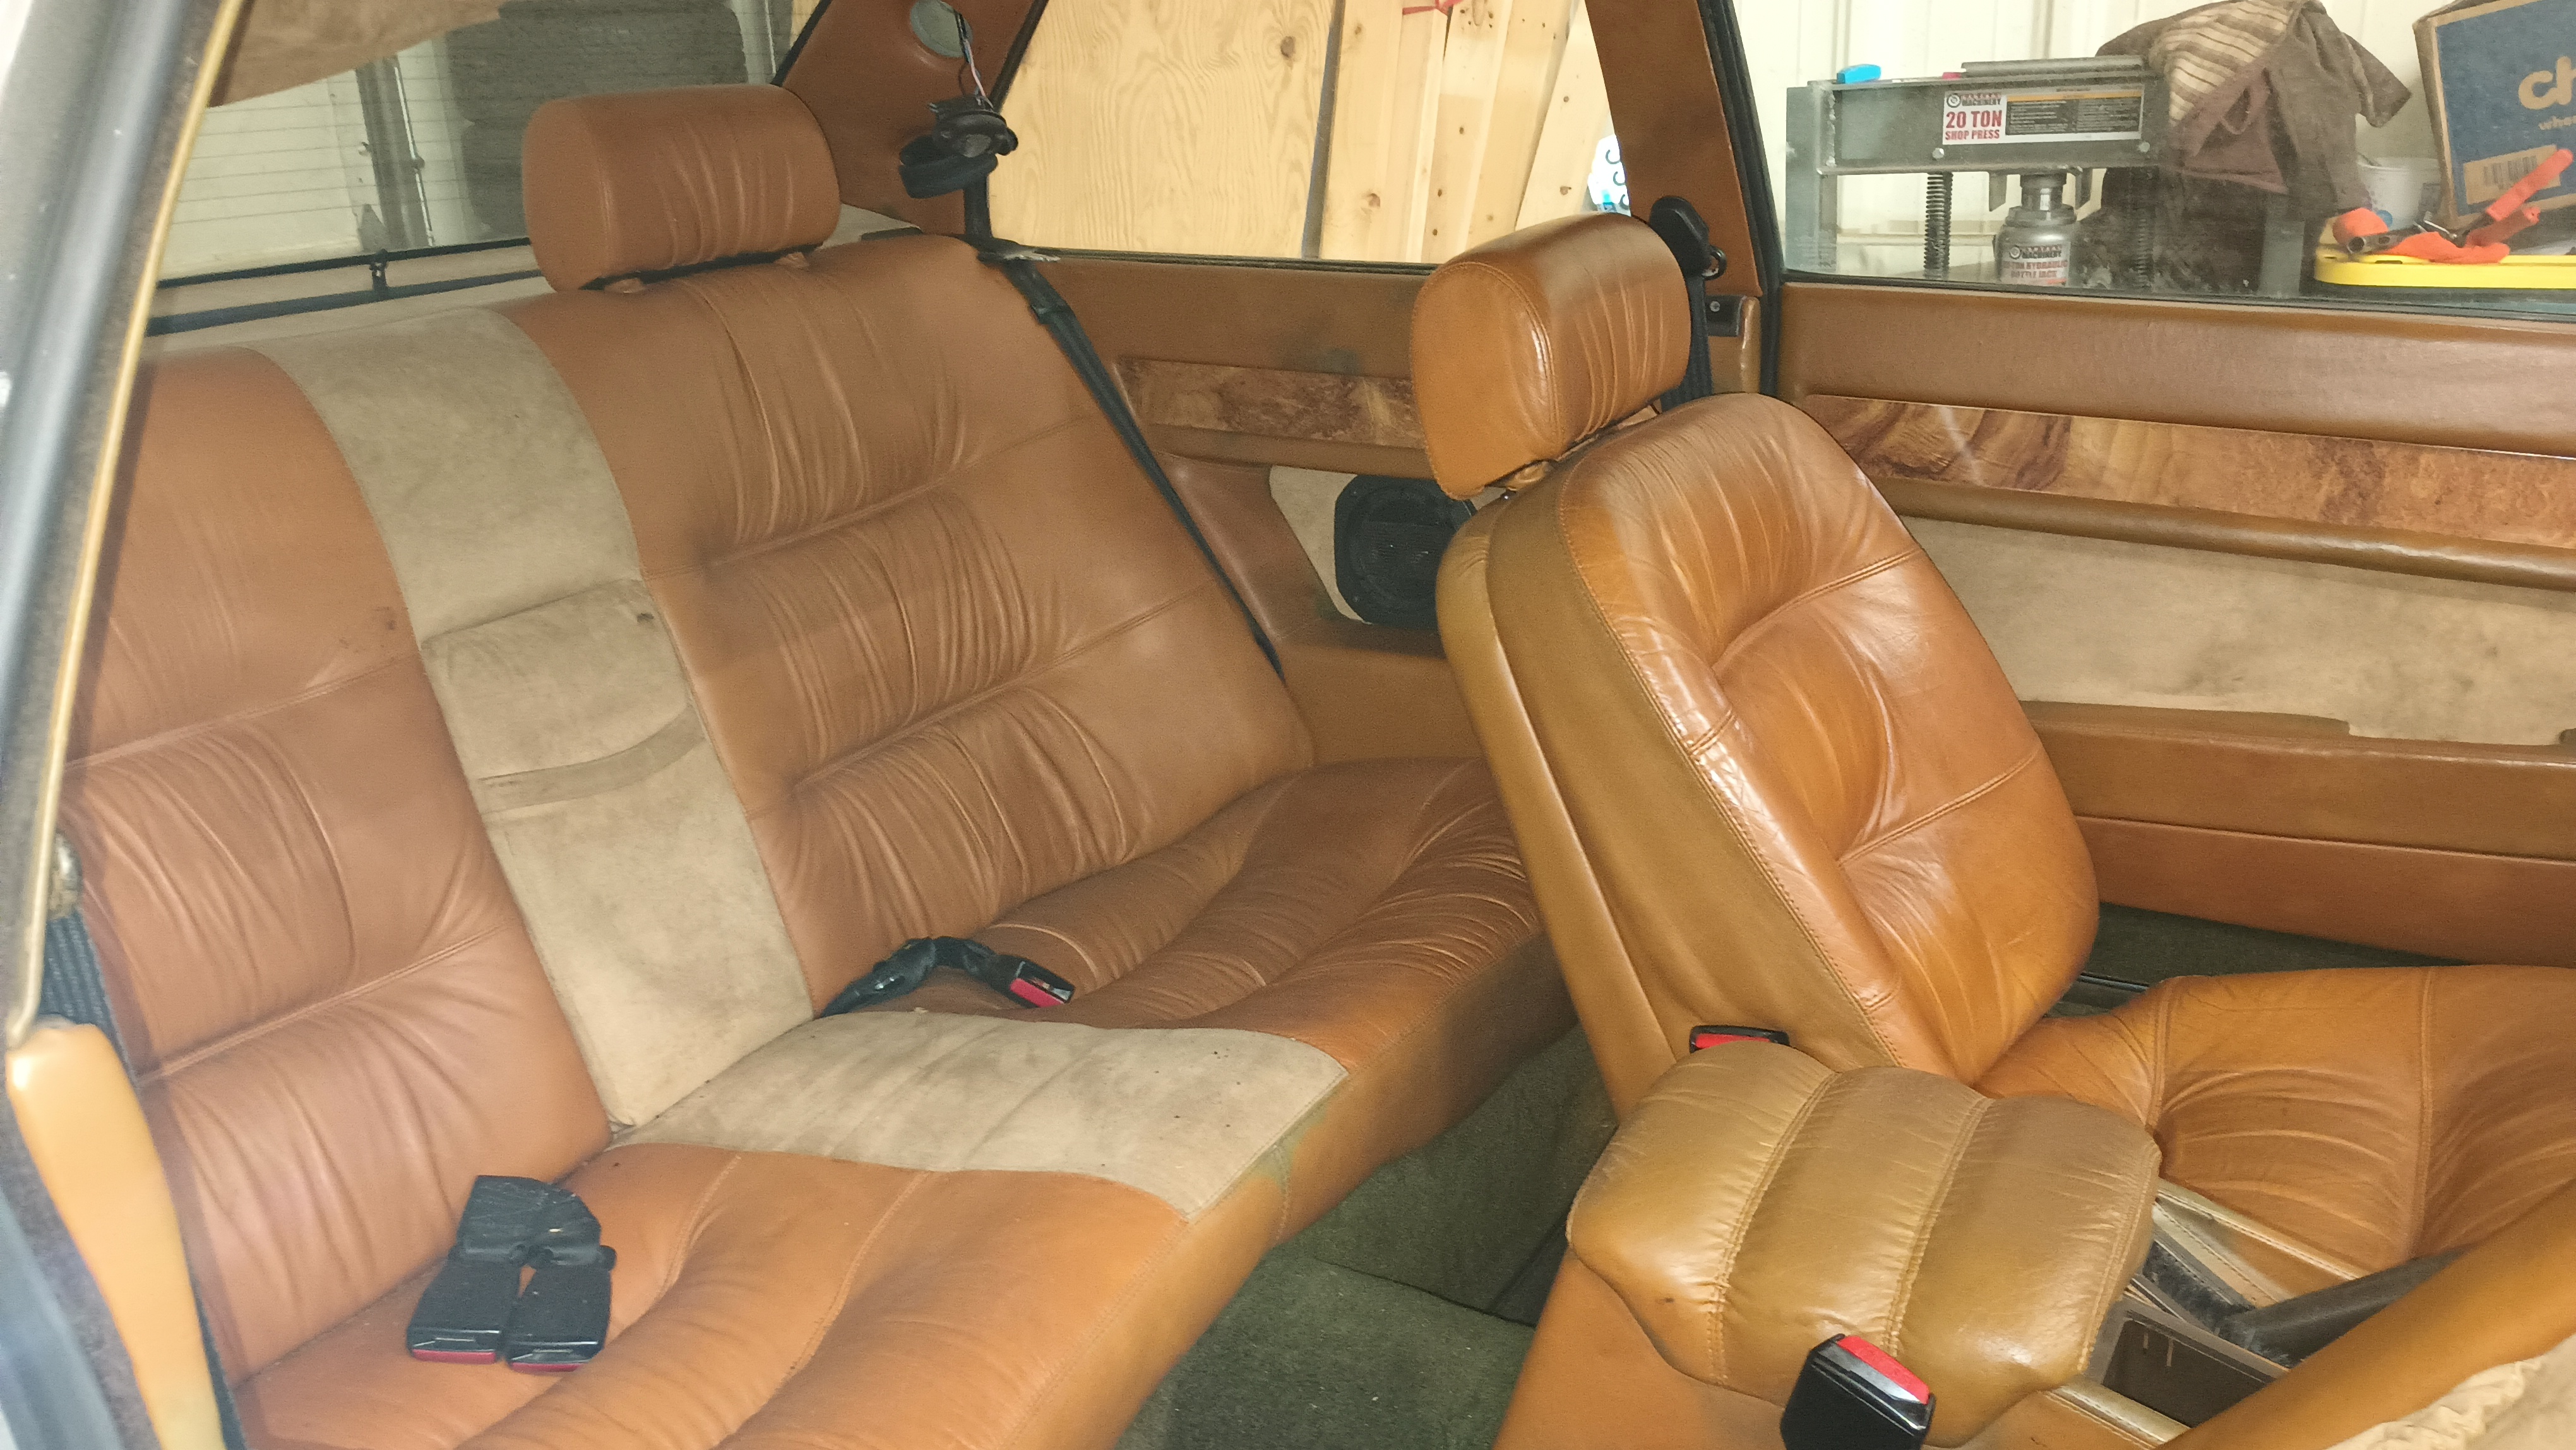
Ever since I read an article in Grassroots Motorsports back in 2006 about the Maserati Biturbo, there has been something about it that has called to me. Unlike other cars that I’ve been interested in, though, I cannot really explain what it is about these that draws me in. I don’t particularly care for how they look, I’m not all that interested in Maserati as a manufacturer or Italian cars as a whole, and while the interior is very posh, I don’t really like the Grandma’s-overstuffed-chair look to the seats. They certainly aren’t good cars if reliability is a factor at all in that equation, and by all accounts they aren’t particularly fast or nimble. But like a moth to the flame, I haven’t been able to put it out of my mind.
Over the years, there have been a number of cars at the GRM $2000 Challenge that have been considered white whales. For years, everyone talked about who would be the first person to actually bring a Zamboni. There was the Free Europa. There was the first Corvette. MonZora finally made its appearance. But the Biturbo remained as a car with the mystique of never having appeared at the Challenge with a decent amount of buzz about who would be the first to show up with one. Who could do it?
In 2023, I brought a very stock, very slow 1990 Saab 900 Turbo Convertible to the Challenge. The intent wasn’t to win anything or even impress anyone, all we wanted to do was just be there and what better way to spectate than from the inside? The car was well under the $2,000 budget, so we stuck some GTN$ vinyl on it and headed off. The response that we got there was absolutely unexpected. We didn’t win any awards or anything, but everybody wanted to talk about the Saab and complimented us on the car. That’s when it really sank in to me that it was possible to compete in the party while not being competitive in the event. At that moment, the gears started turning.
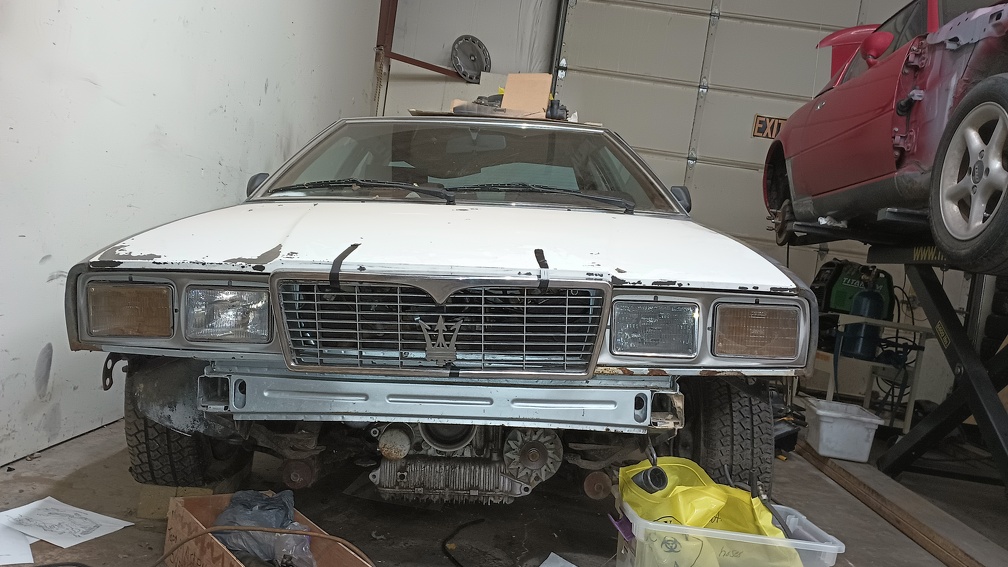
My search started off in a pretty wide area. While there were a few running examples out there, the prices were not conducive to a Challenge effort. In Duluth, MN’s craigslist, I found a promising candidate listed for $500, but despite having an amazing story, the title paperwork was likely lost to the sands of time and I really don’t want to be stuck with an albatross. Another was advertised on the Eastern seaboard for about $1,500 but it had been in a fire – surprise of surprises! – so that wasn’t going to work. One popped up in northern Georgia for only $600, but it was gone before I made up my mind to inquire. There was one in Tennessee, however, that was listed for $1,000 as a parts car that was promised to be 99% complete with a pile of spares.
Due to scheduling conflicts, it took a couple weeks before I could make the 4 hour trip to look at it. Early on a July Saturday morning, I picked up my dad, hooked up the trailer, and headed south. The car was pretty much as-advertised. Some rust on the bottoms of the doors and a little bit on the c-pillar, but nothing terminal anywhere. After taking it out of gear, the engine spun freely for a complete rotation and other than the air filter assembly, nothing appeared to be missing from the engine itself. The A/C compressor was long gone and there was another bracket that looked like it could have been for power steering, but I didn’t see any power steering lines hanging loose anywhere. The parts stash wasn’t massive, but there were a decent number of things that looked to be either useful or saleable.
The car belonged to the seller’s son. He had a driver and a second parts car in addition to this one at one time. The other parts car – which was reported to have been absolutely chock-full of even more parts – was stolen out of a side yard. The driver met its end in a conflagration at a gas station. Apparently he was driving the car, pulled over when another motorist pointed out the flames, and the car was fully-involved after that. Since the car was a total loss, he decided he was done with these and the remaining parts car and parts stash were for sale.
After a little bit of a think, I decided that it was worth the gamble, handed over the money, and got started with the winch.
Once the Challenge is over, I have three possible outcomes for the car:
I fully realize that I am jumping in to this without really looking where I’m going to land. I know that there could be a million different very expensive things wrong with this car. I also know that I could be missing some very vital parts – it was sitting in a field as a parts car, after all. But I’ve decided that this is an adventure that I want to at least make an attempt at.
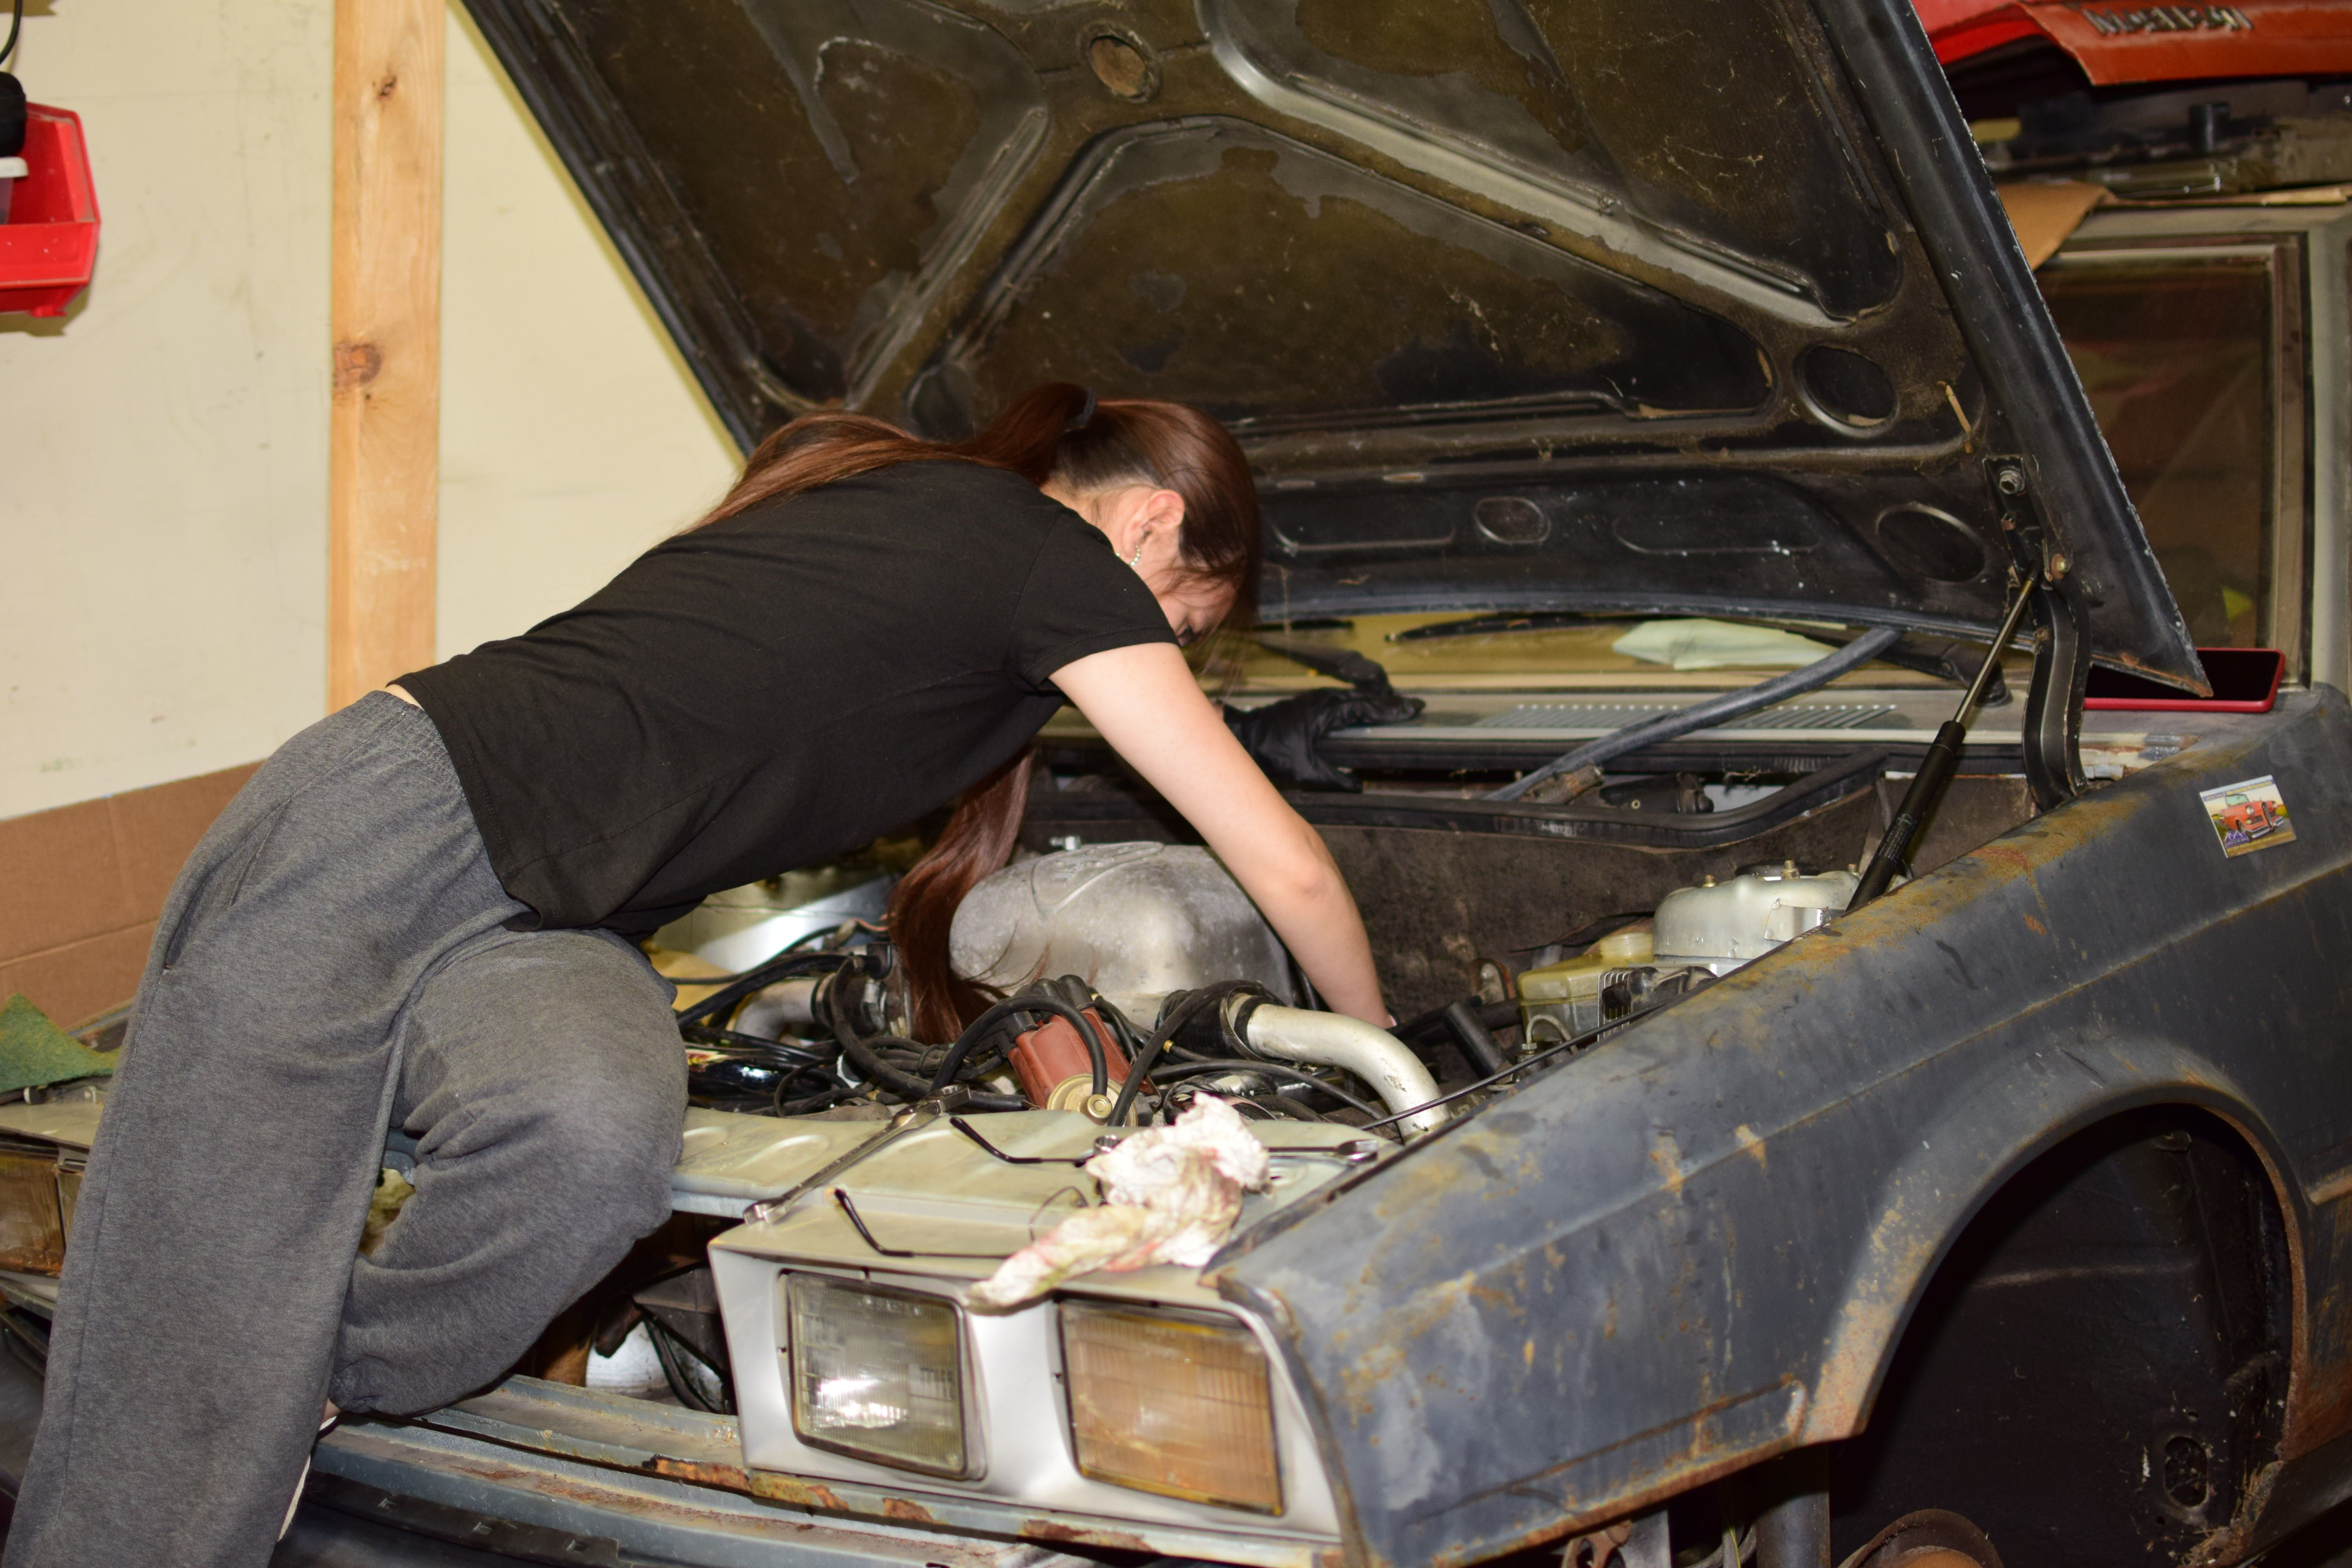
Undertaking a project of this magnitude is not something that I could do alone. My daughter, Becca, is interested in helping but I knew that I also needed some experienced gearheads on our side as well. Enter the crew.
Tim is a long-time friend who introduced me to the Challenge in the first place. When I first started getting an inkling that I might want to tackle this project, he was the first that I drew into my circle of trust.
Greg is a fellow forum participant who lives in the area and works pretty close to my part of town. When he heard there was a secret Challenge project underway, he was in.
David is another fellow participant and Challenge attendee who lives in town. He wasn’t able to join us in person for the reveal, but thanks to the magic of FaceTime, he was with us virtually.
Once the car was back home, I sent a text to our group:

With a hook like that, no one could resist, so we gathered on a rainy Monday evening for me to unveil the car. Becca and Tim already knew what the car was, but neither had seen it yet. Greg and David made their guesses – another Saab was the consensus there – and then Tim and I pulled the cover off to reveal the car. Greg’s response was “when you said it didn’t run, I feel like we probably should have guessed”.
After reminding everyone that there was an absolute media embargo, we started scheming and making plans. Since I have some other projects that need to be taken care of first, the official “start date” of the project was slated for mid September, after Tim and I return from the Silver State Classic Challenge.
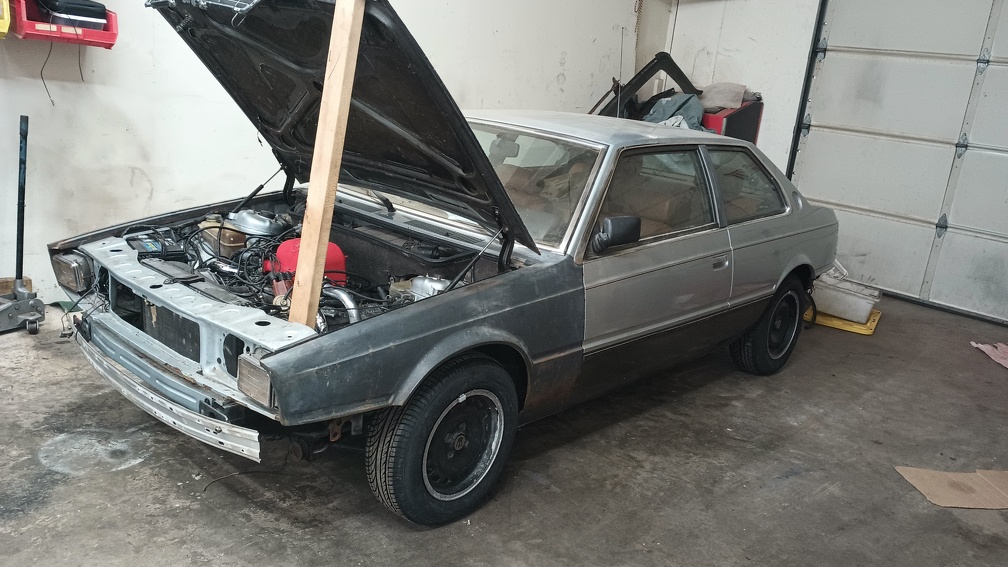
Once we returned from Nevada, the car needed to be delivered to the shop and arranged so we could work on it.
The spare had already been put on the rear to replace a tire that popped and now one of the front tires had also developed a significant hole. The growing number of completely flat tires combined with the mostly flat tires made it a little bit difficult to move around. Tim, Becca, and I were able to coordinate some floor jacks and a come-along to eventually get the Maserati to sit in the “project car spot”, though.
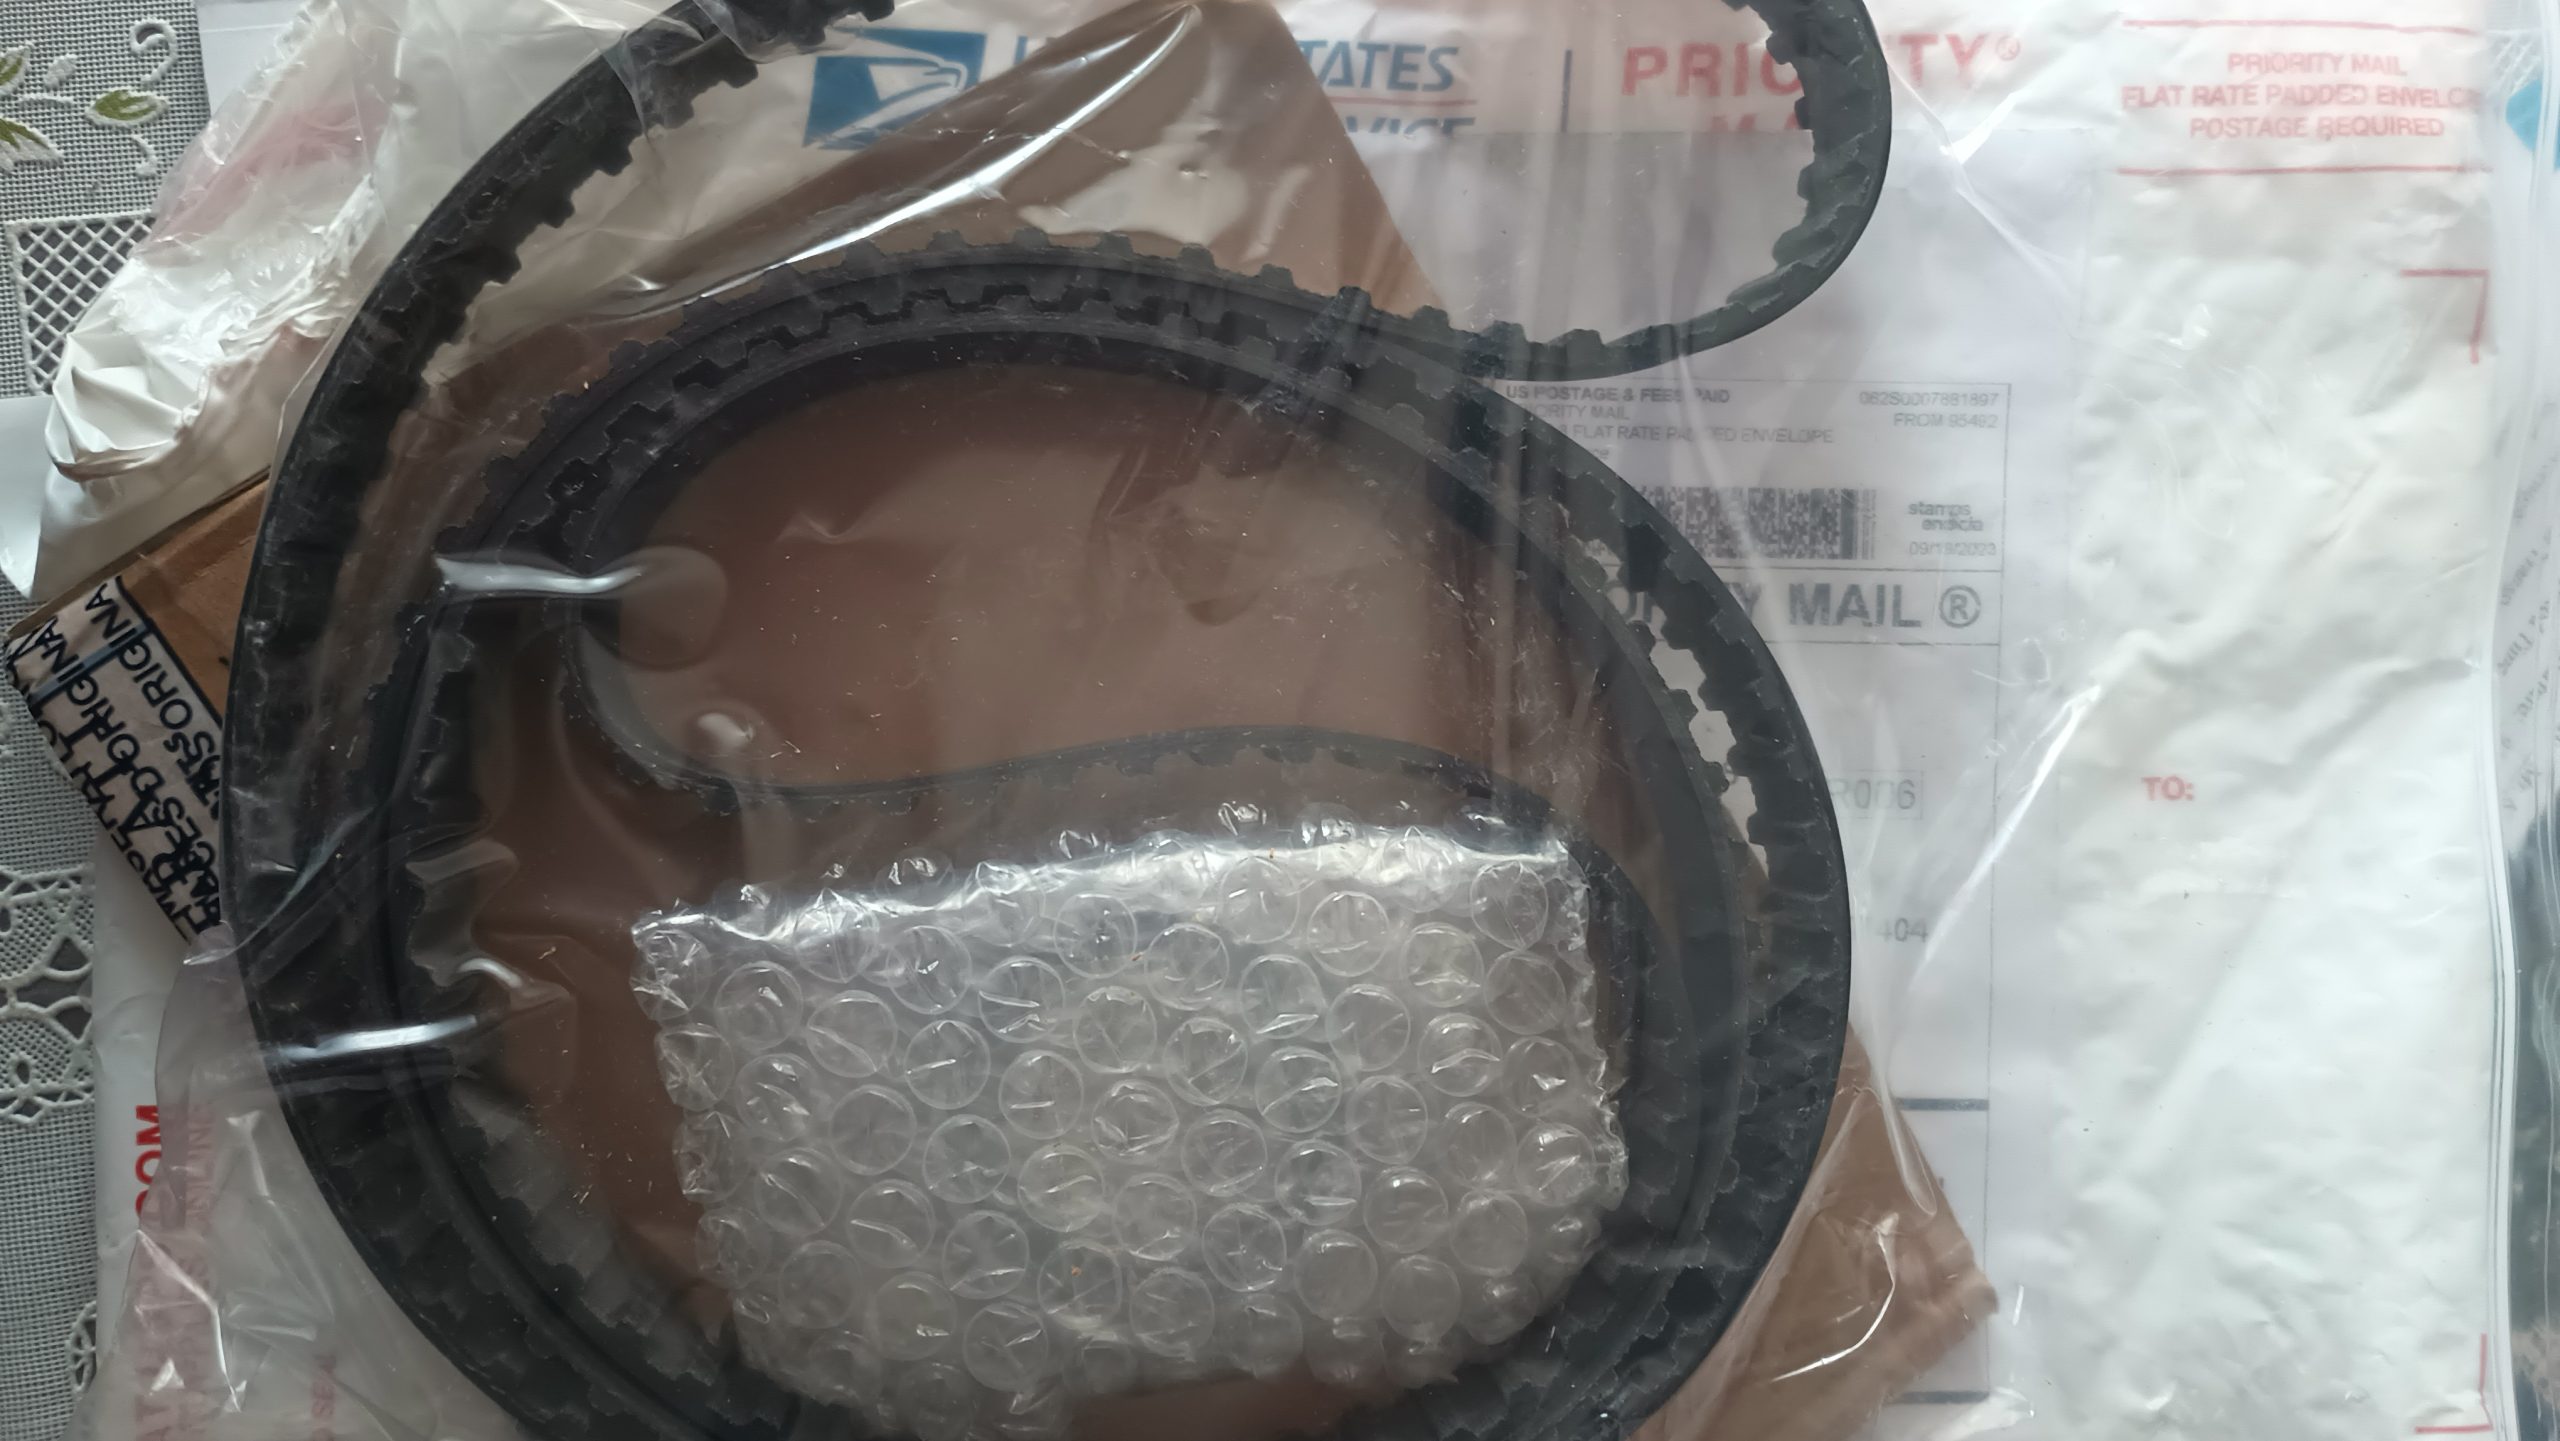
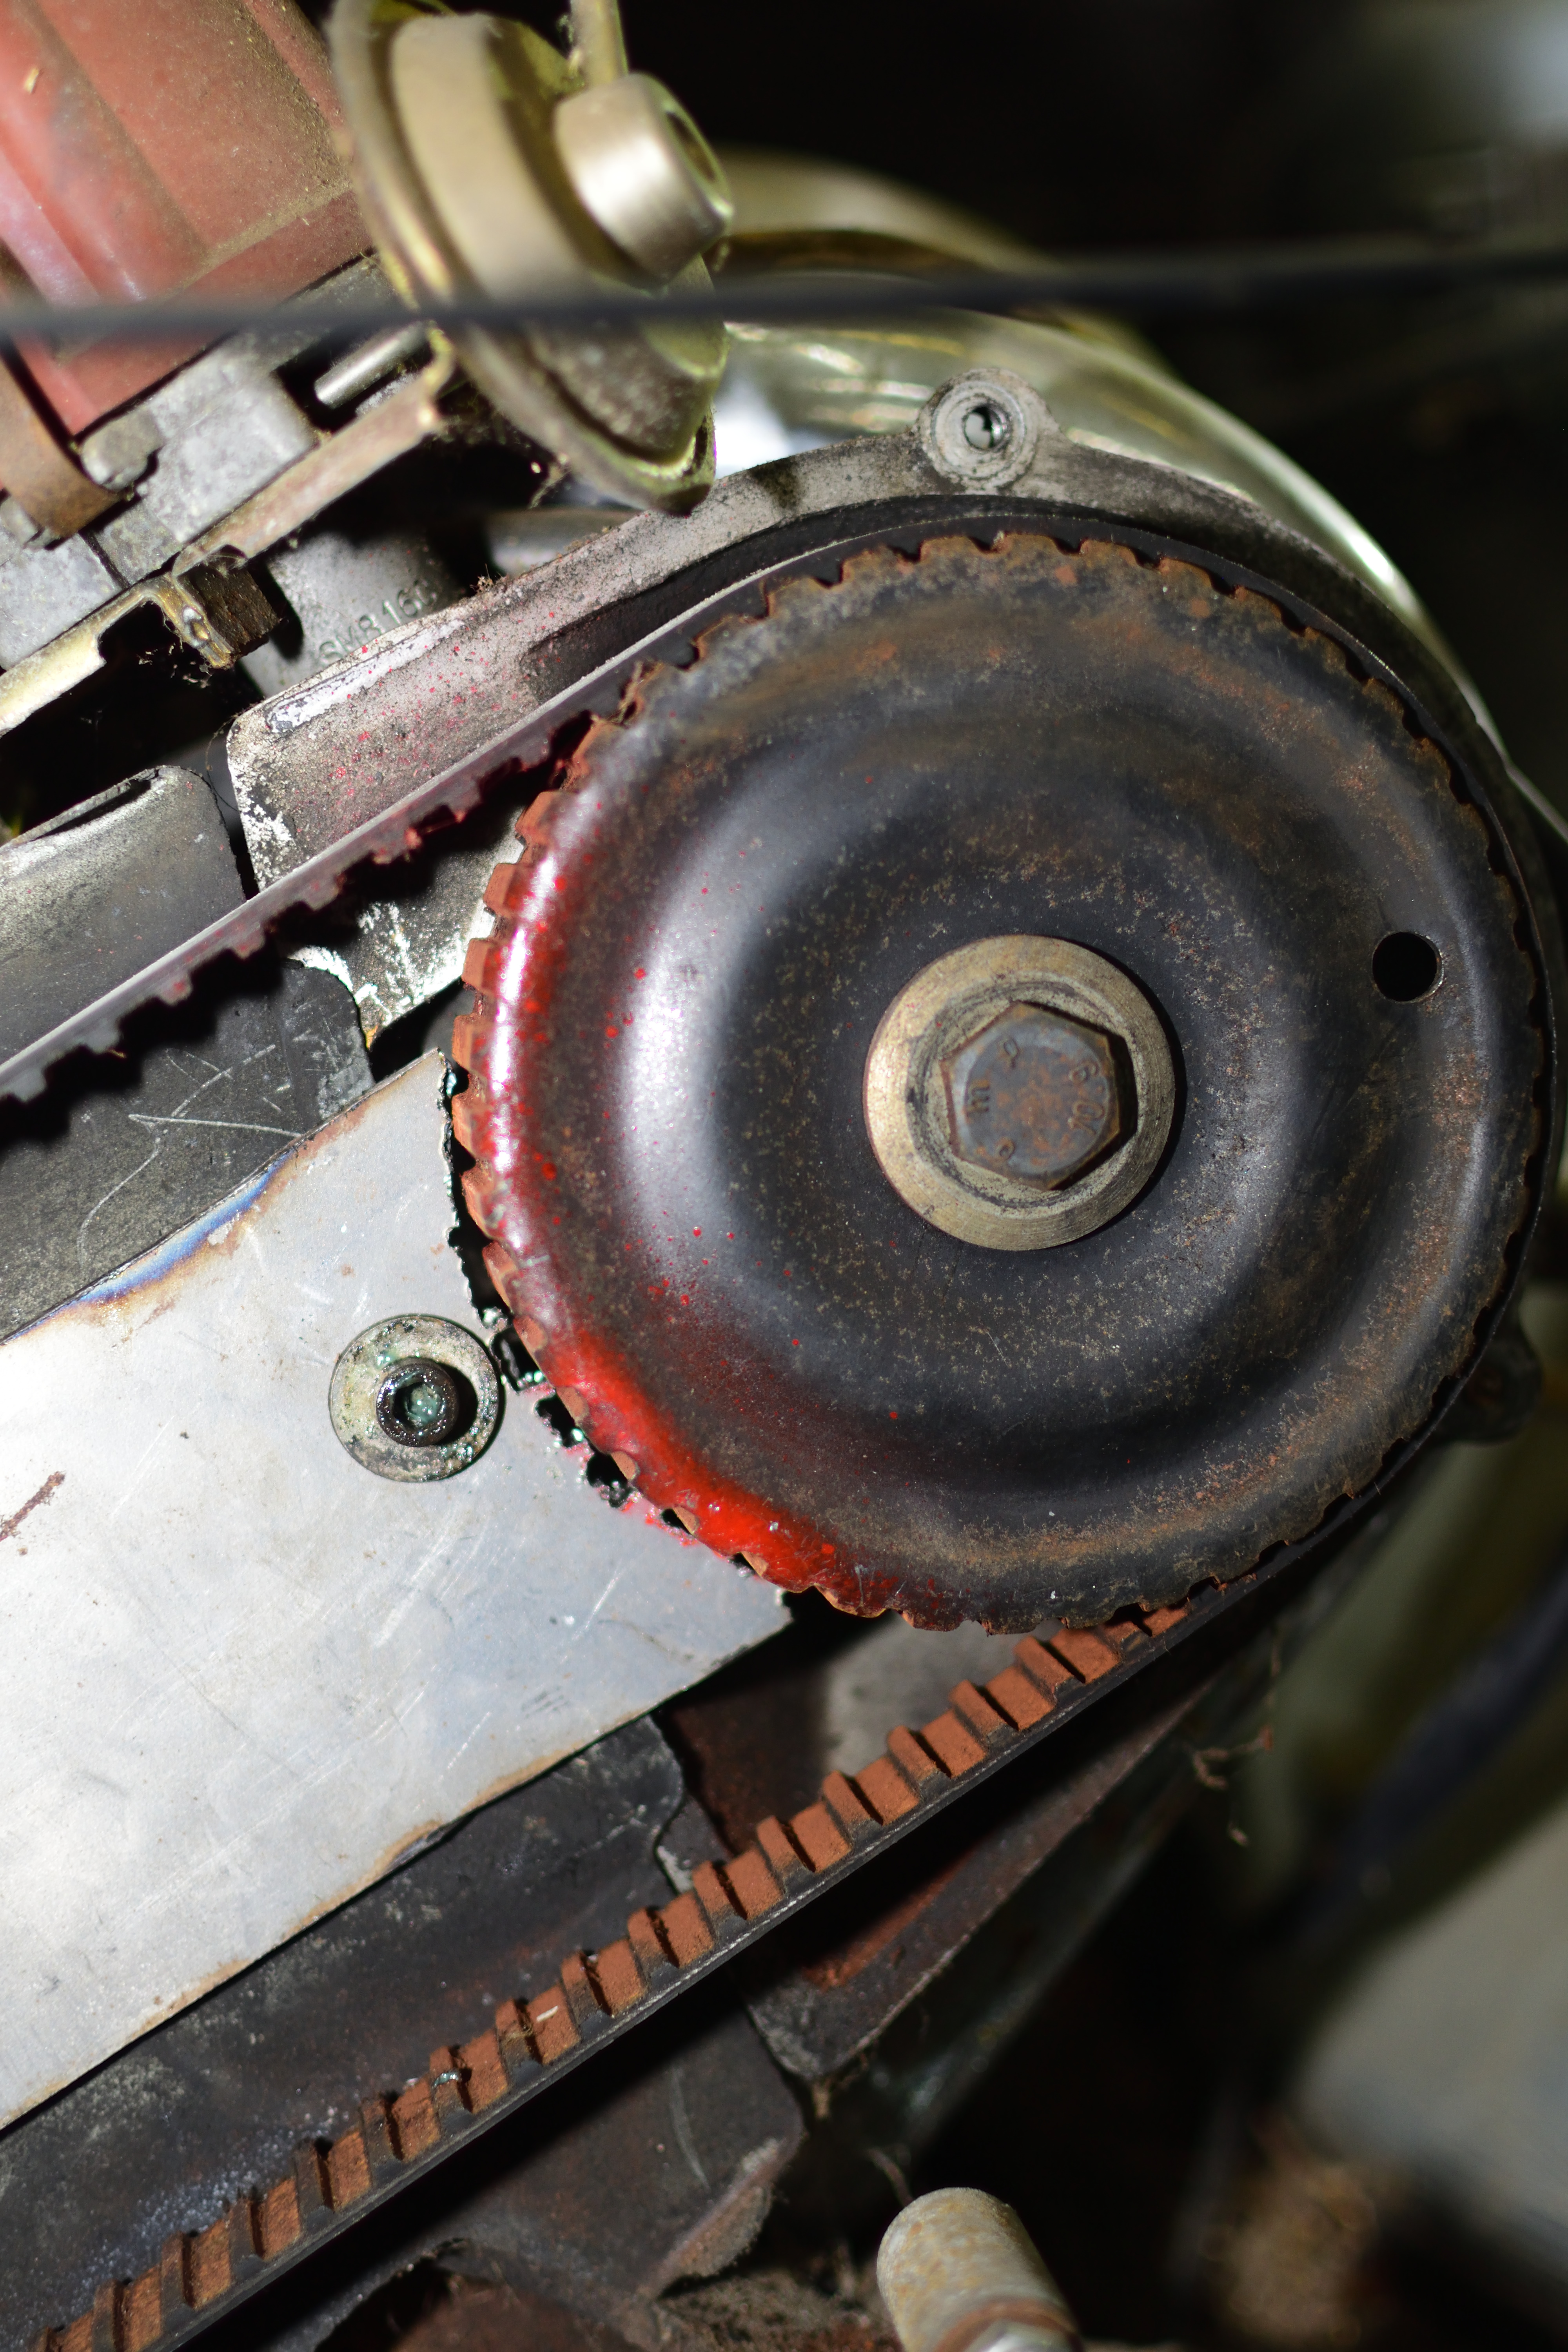
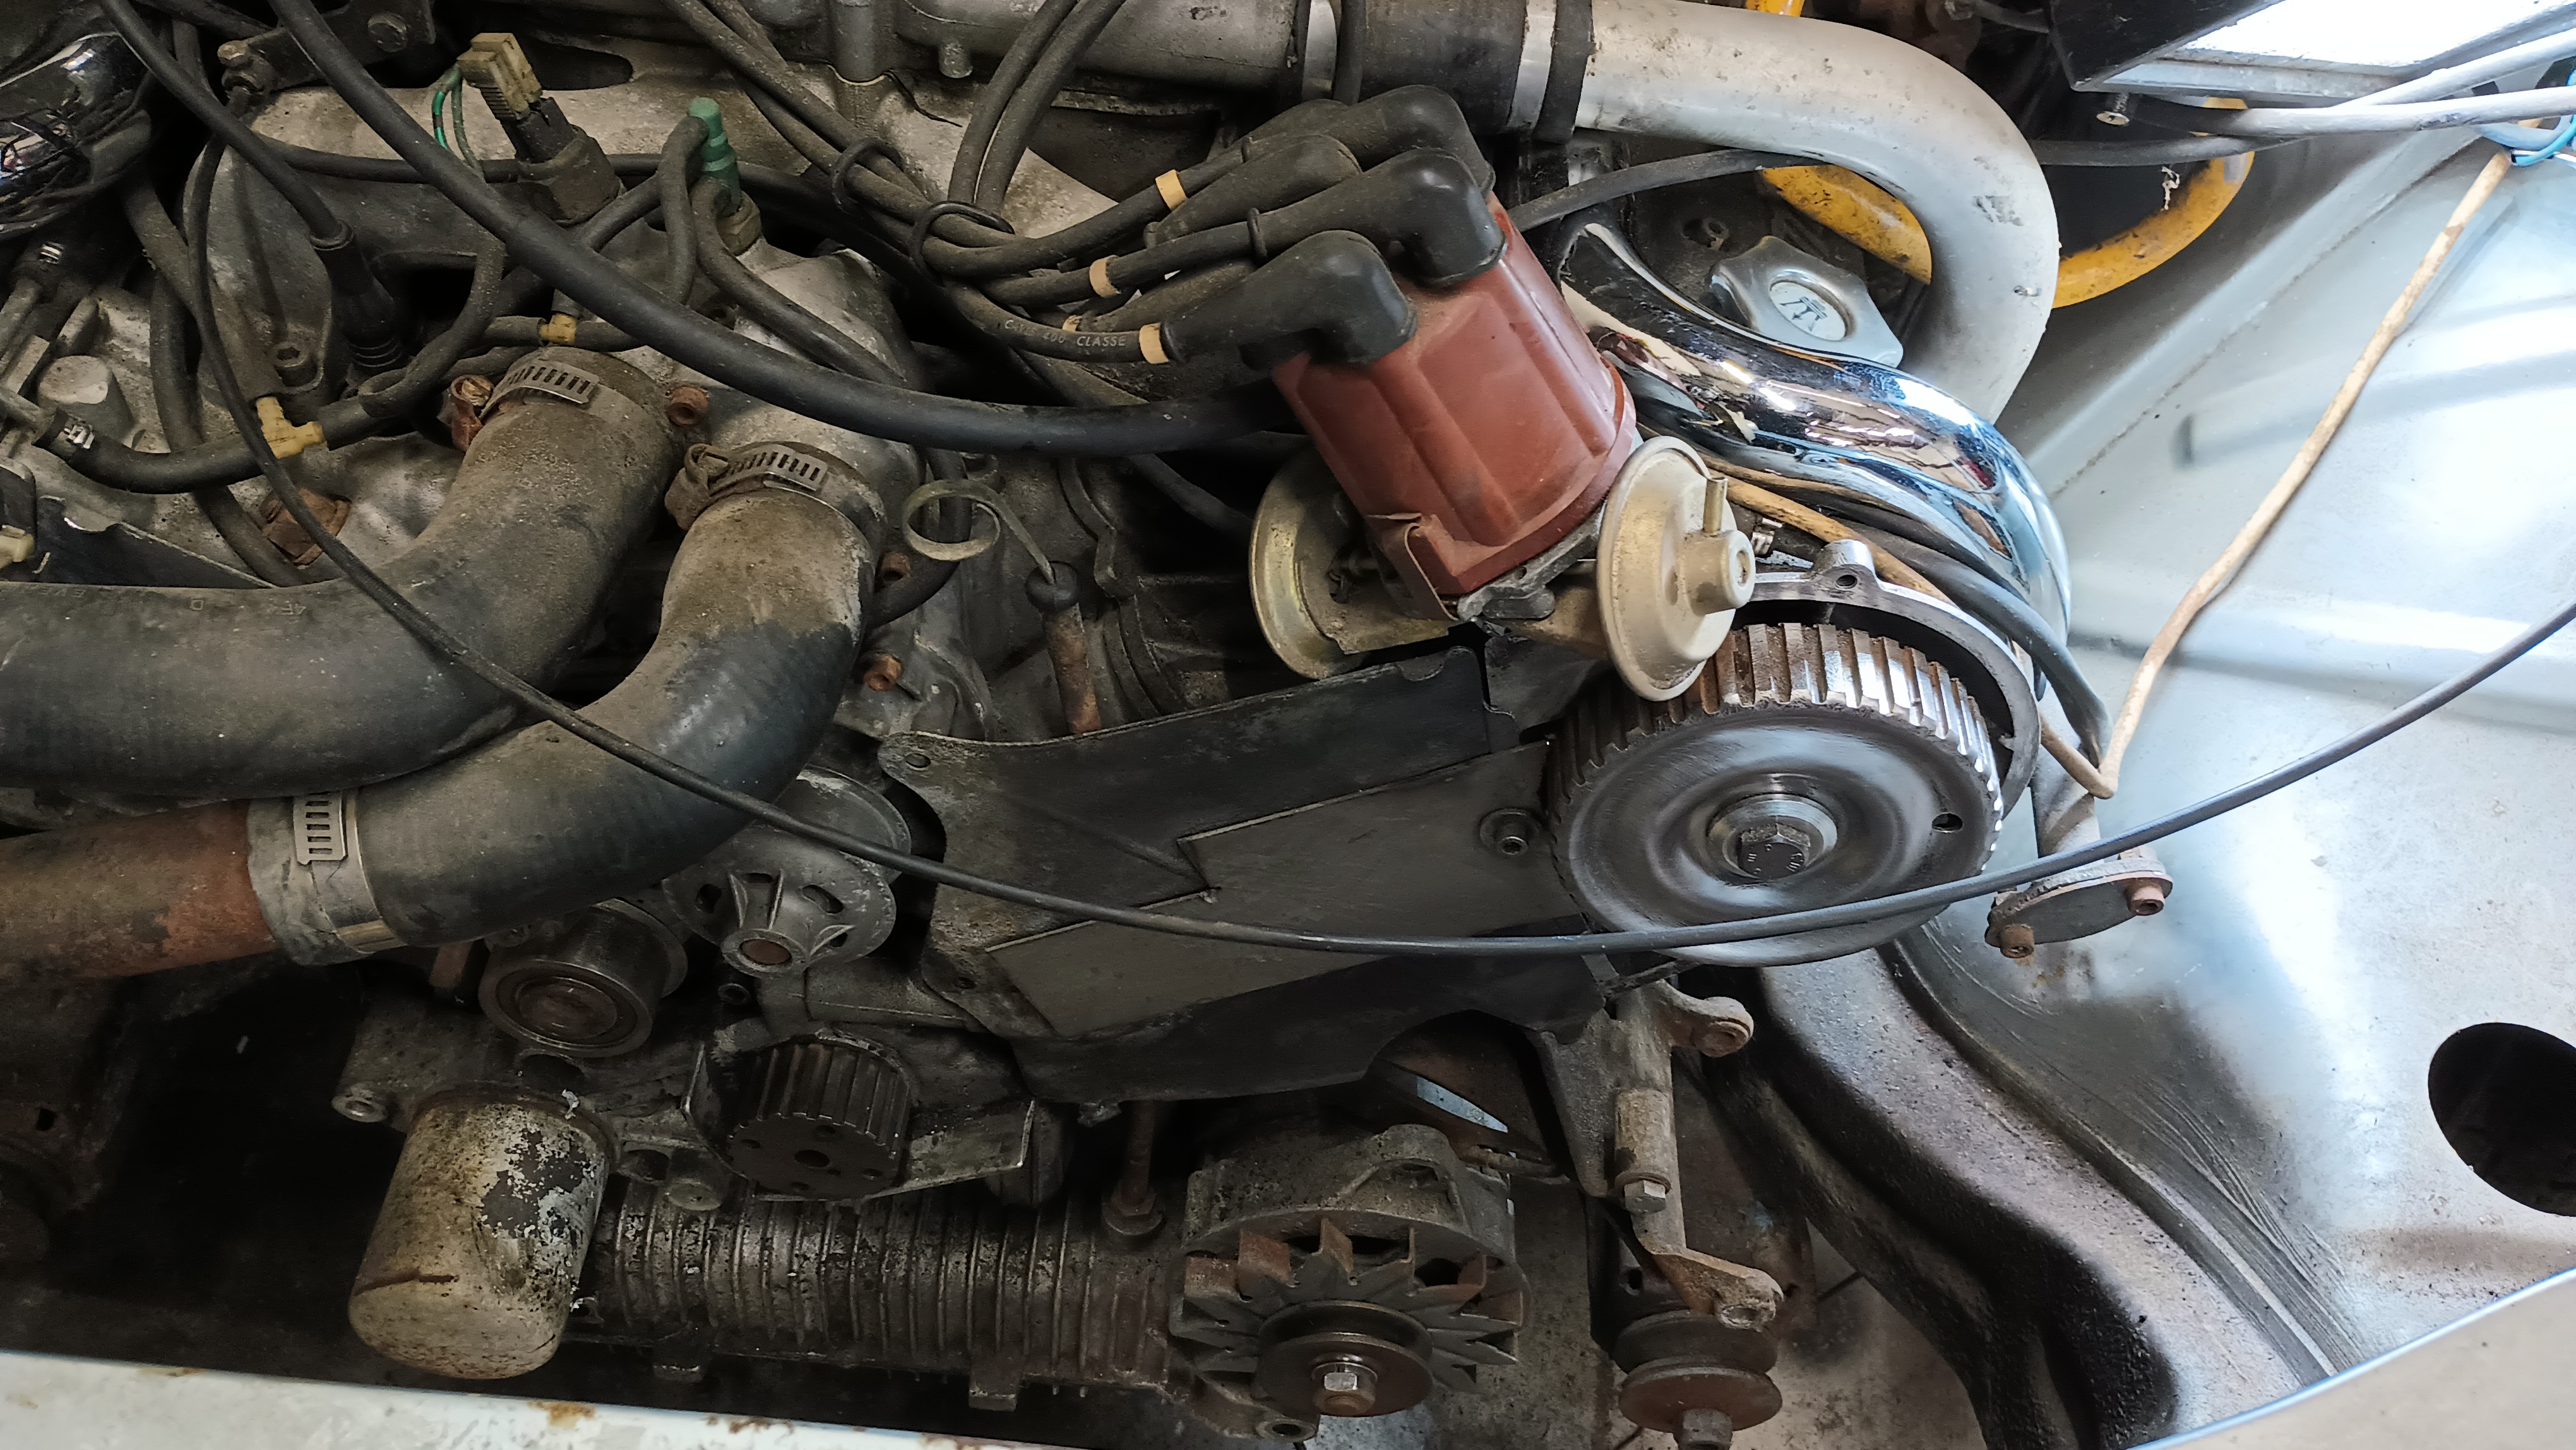
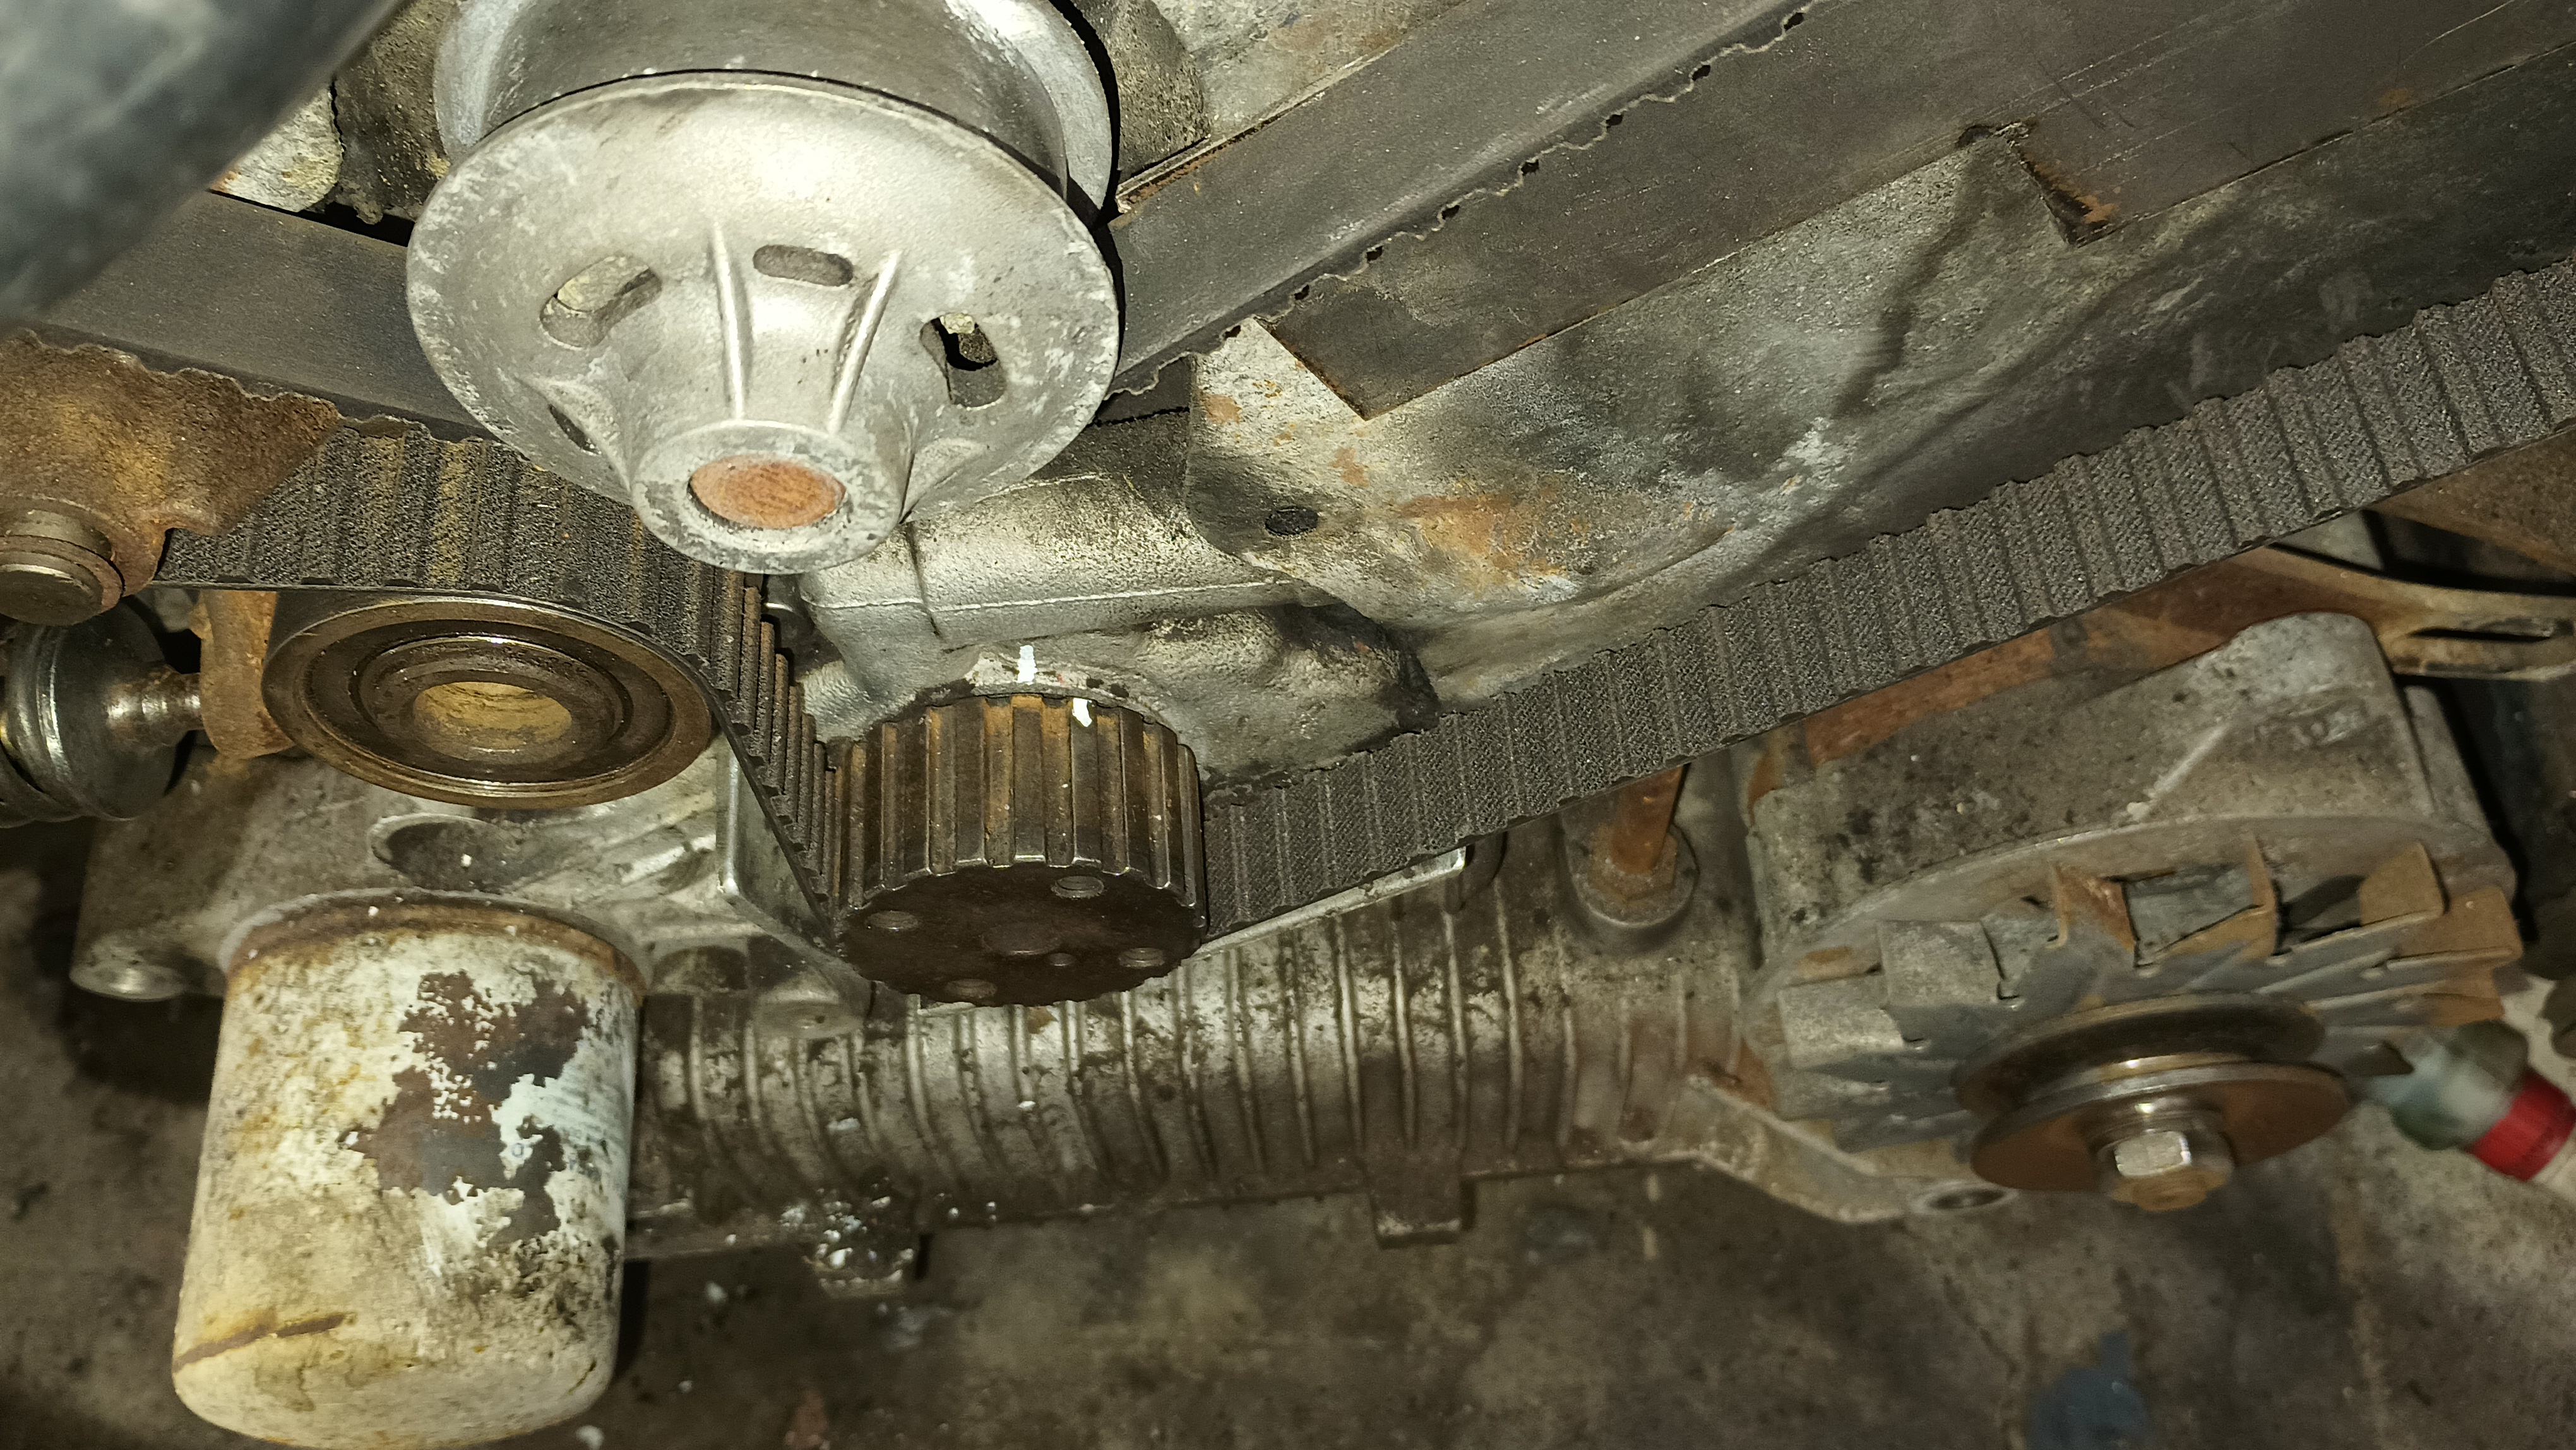
Now that the car was where I wanted it, it was time to begin the work! After careful consideration, we decided that because the cars were so prone to timing belt failure and it is an interference engine, the potential cost plus the risk of the timing belt failing while trying to start the car were both high enough that the first step should be to put a new timing belt on the car. For $114 after shipping and tax, I got a new Dayco timing belt and a bearing for the tensioner.
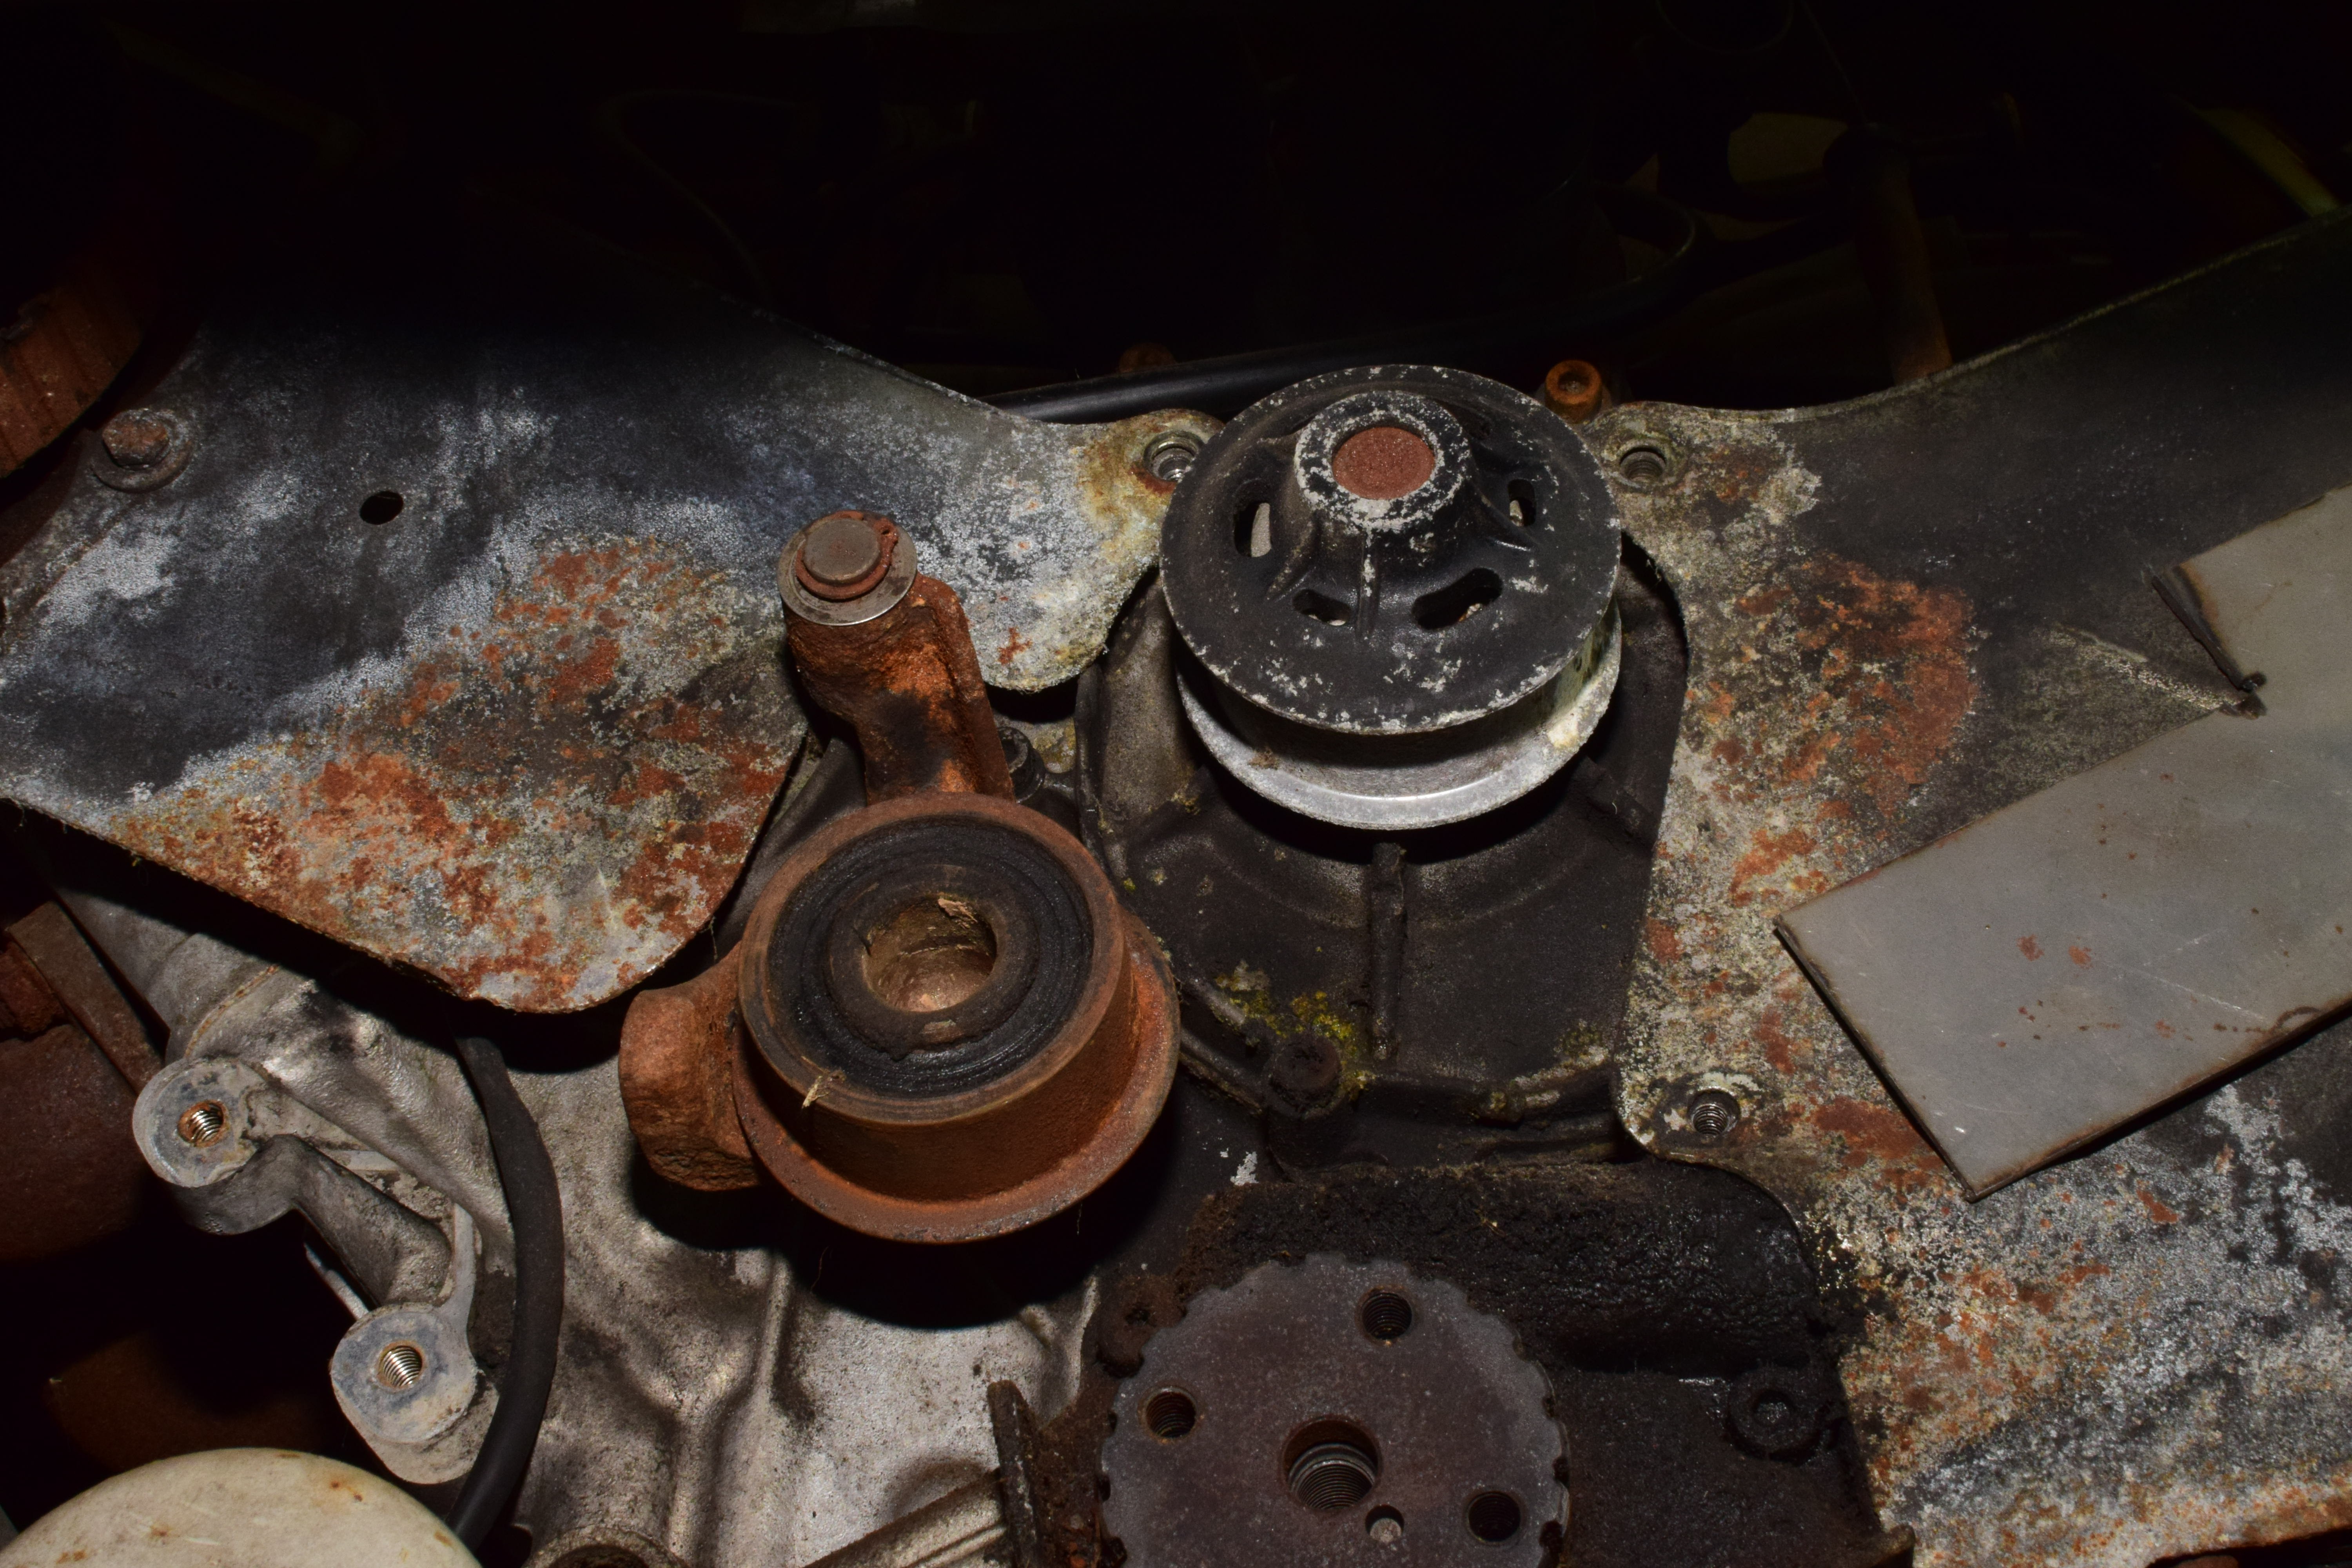
Greg, Tim, Becca, and I got started by pulling out the radiator, loosening the alternator, and removing the timing cover. Our first observation was that while the timing belt had definitely been replaced at some point judging by the broken-off and missing bolts on the cover, deciding to replace it now was a good choice. While the belt was intact, there were a number of small cracks already developing in it.
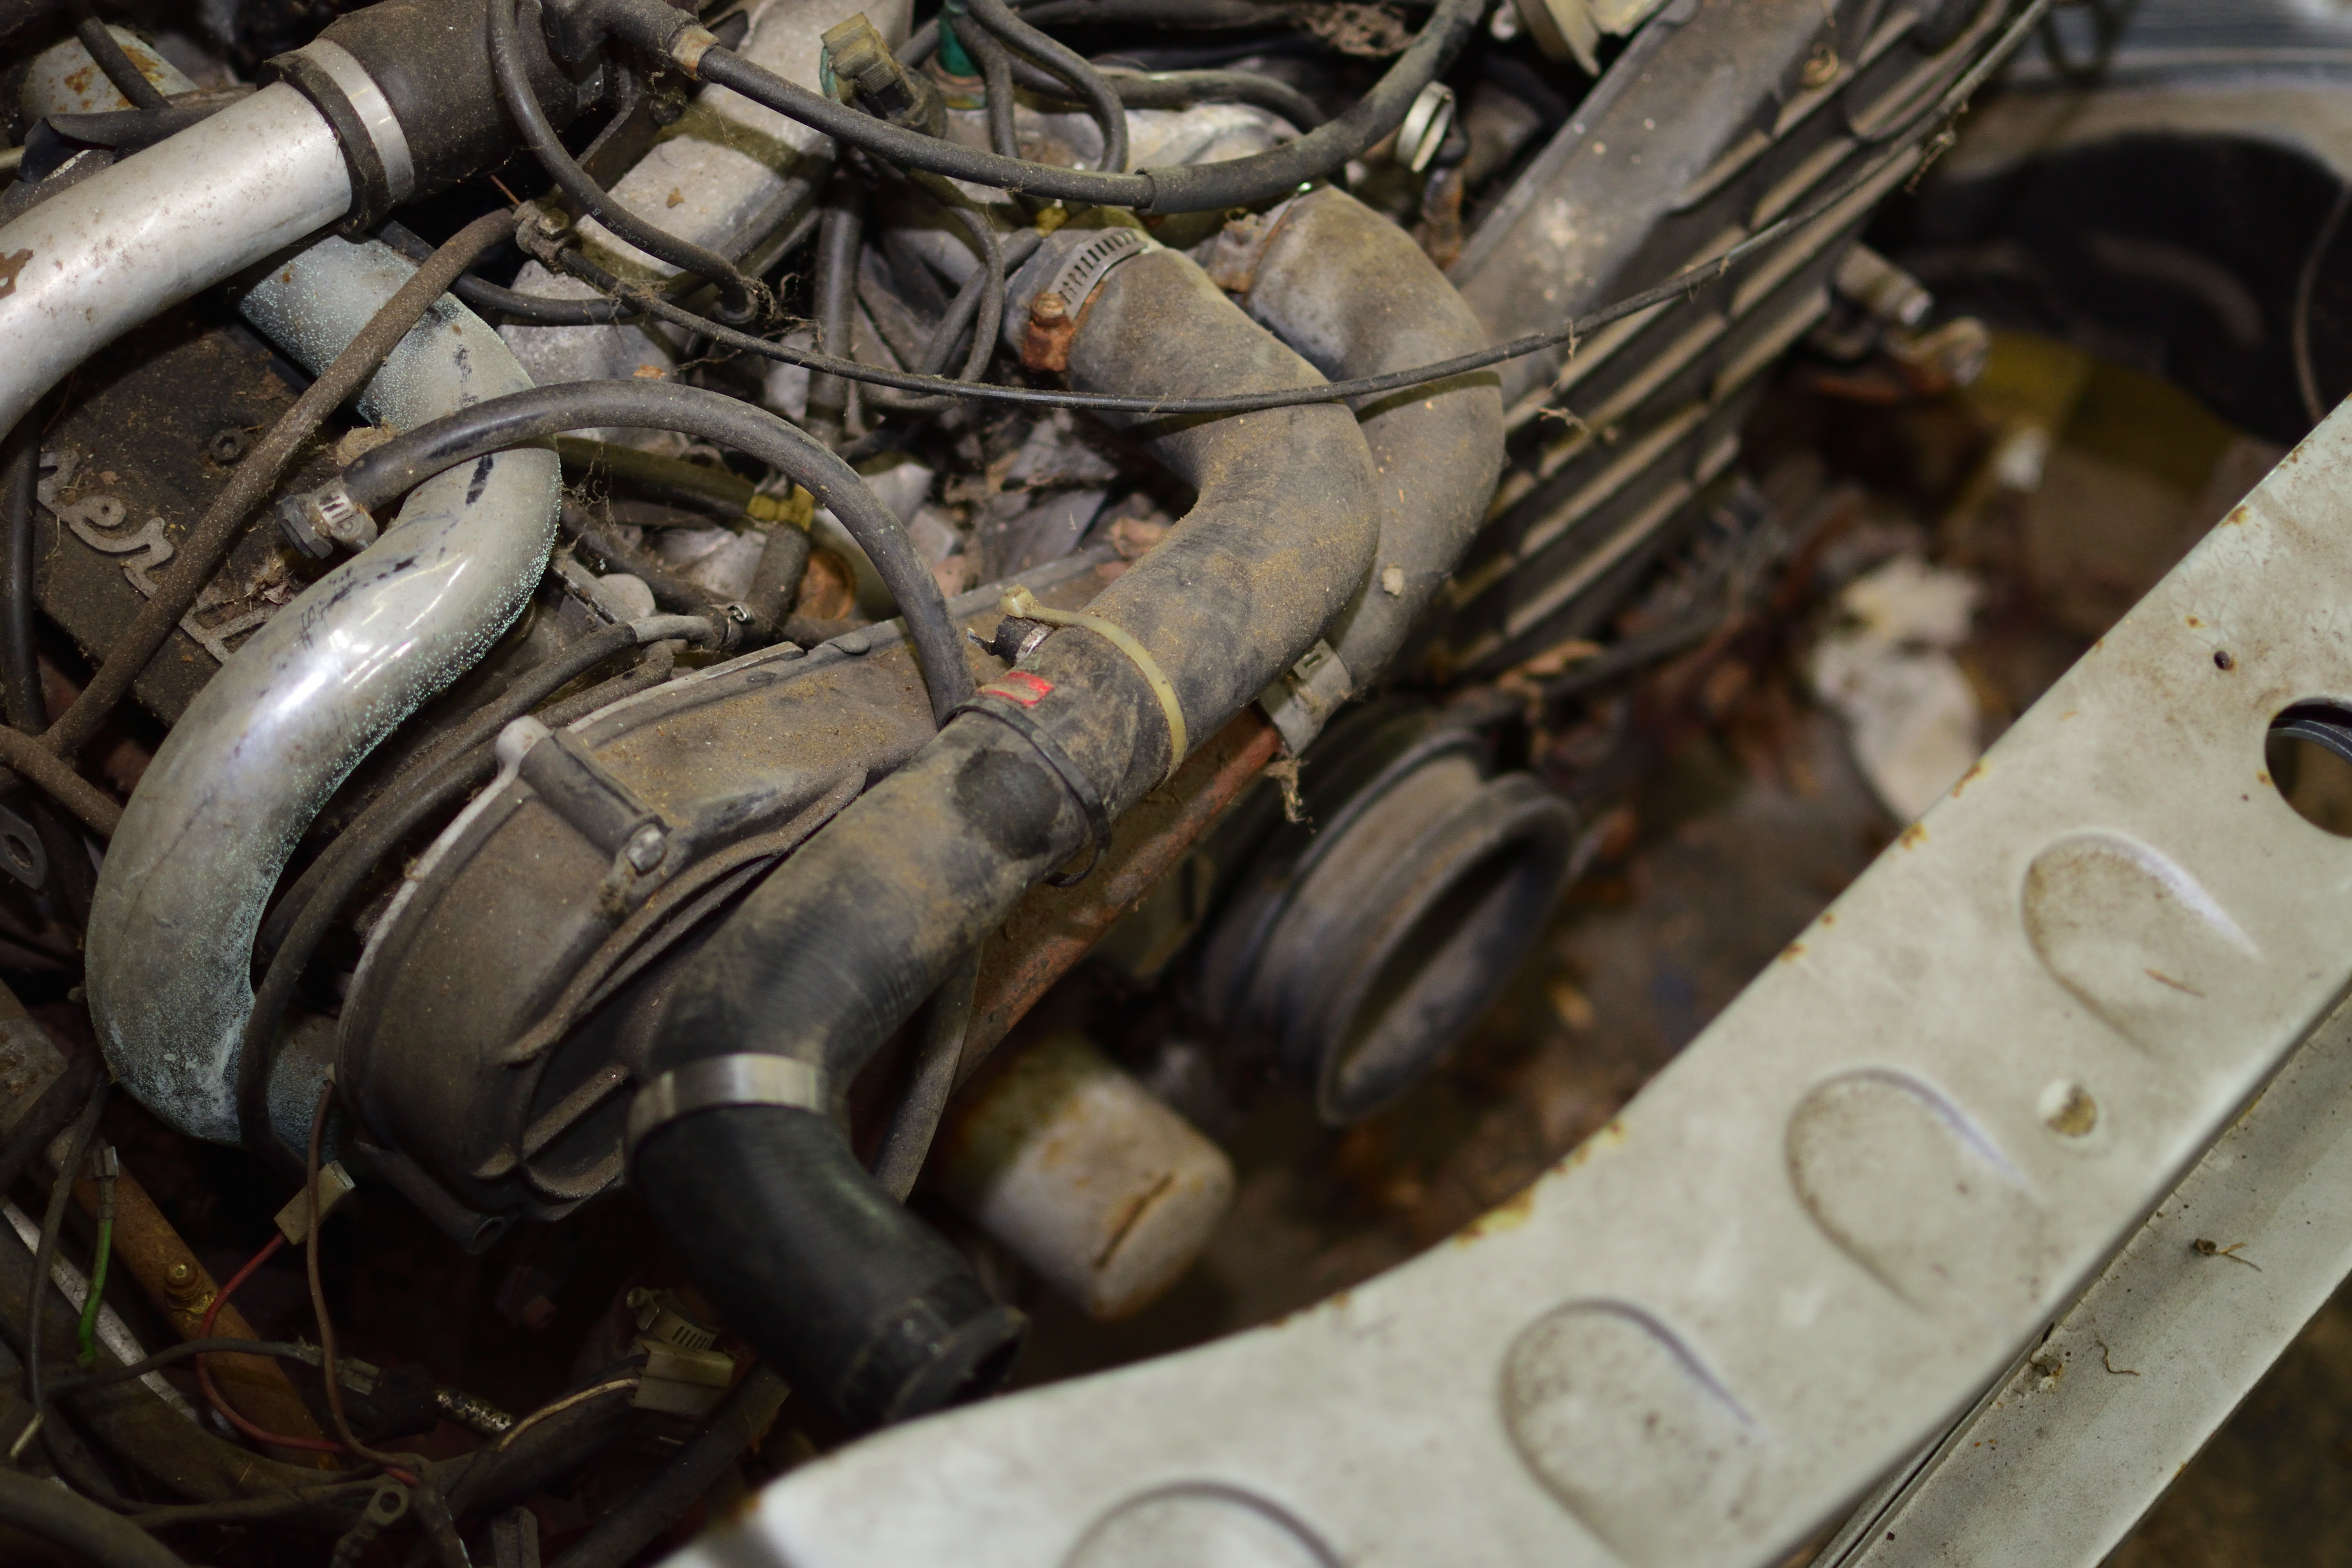
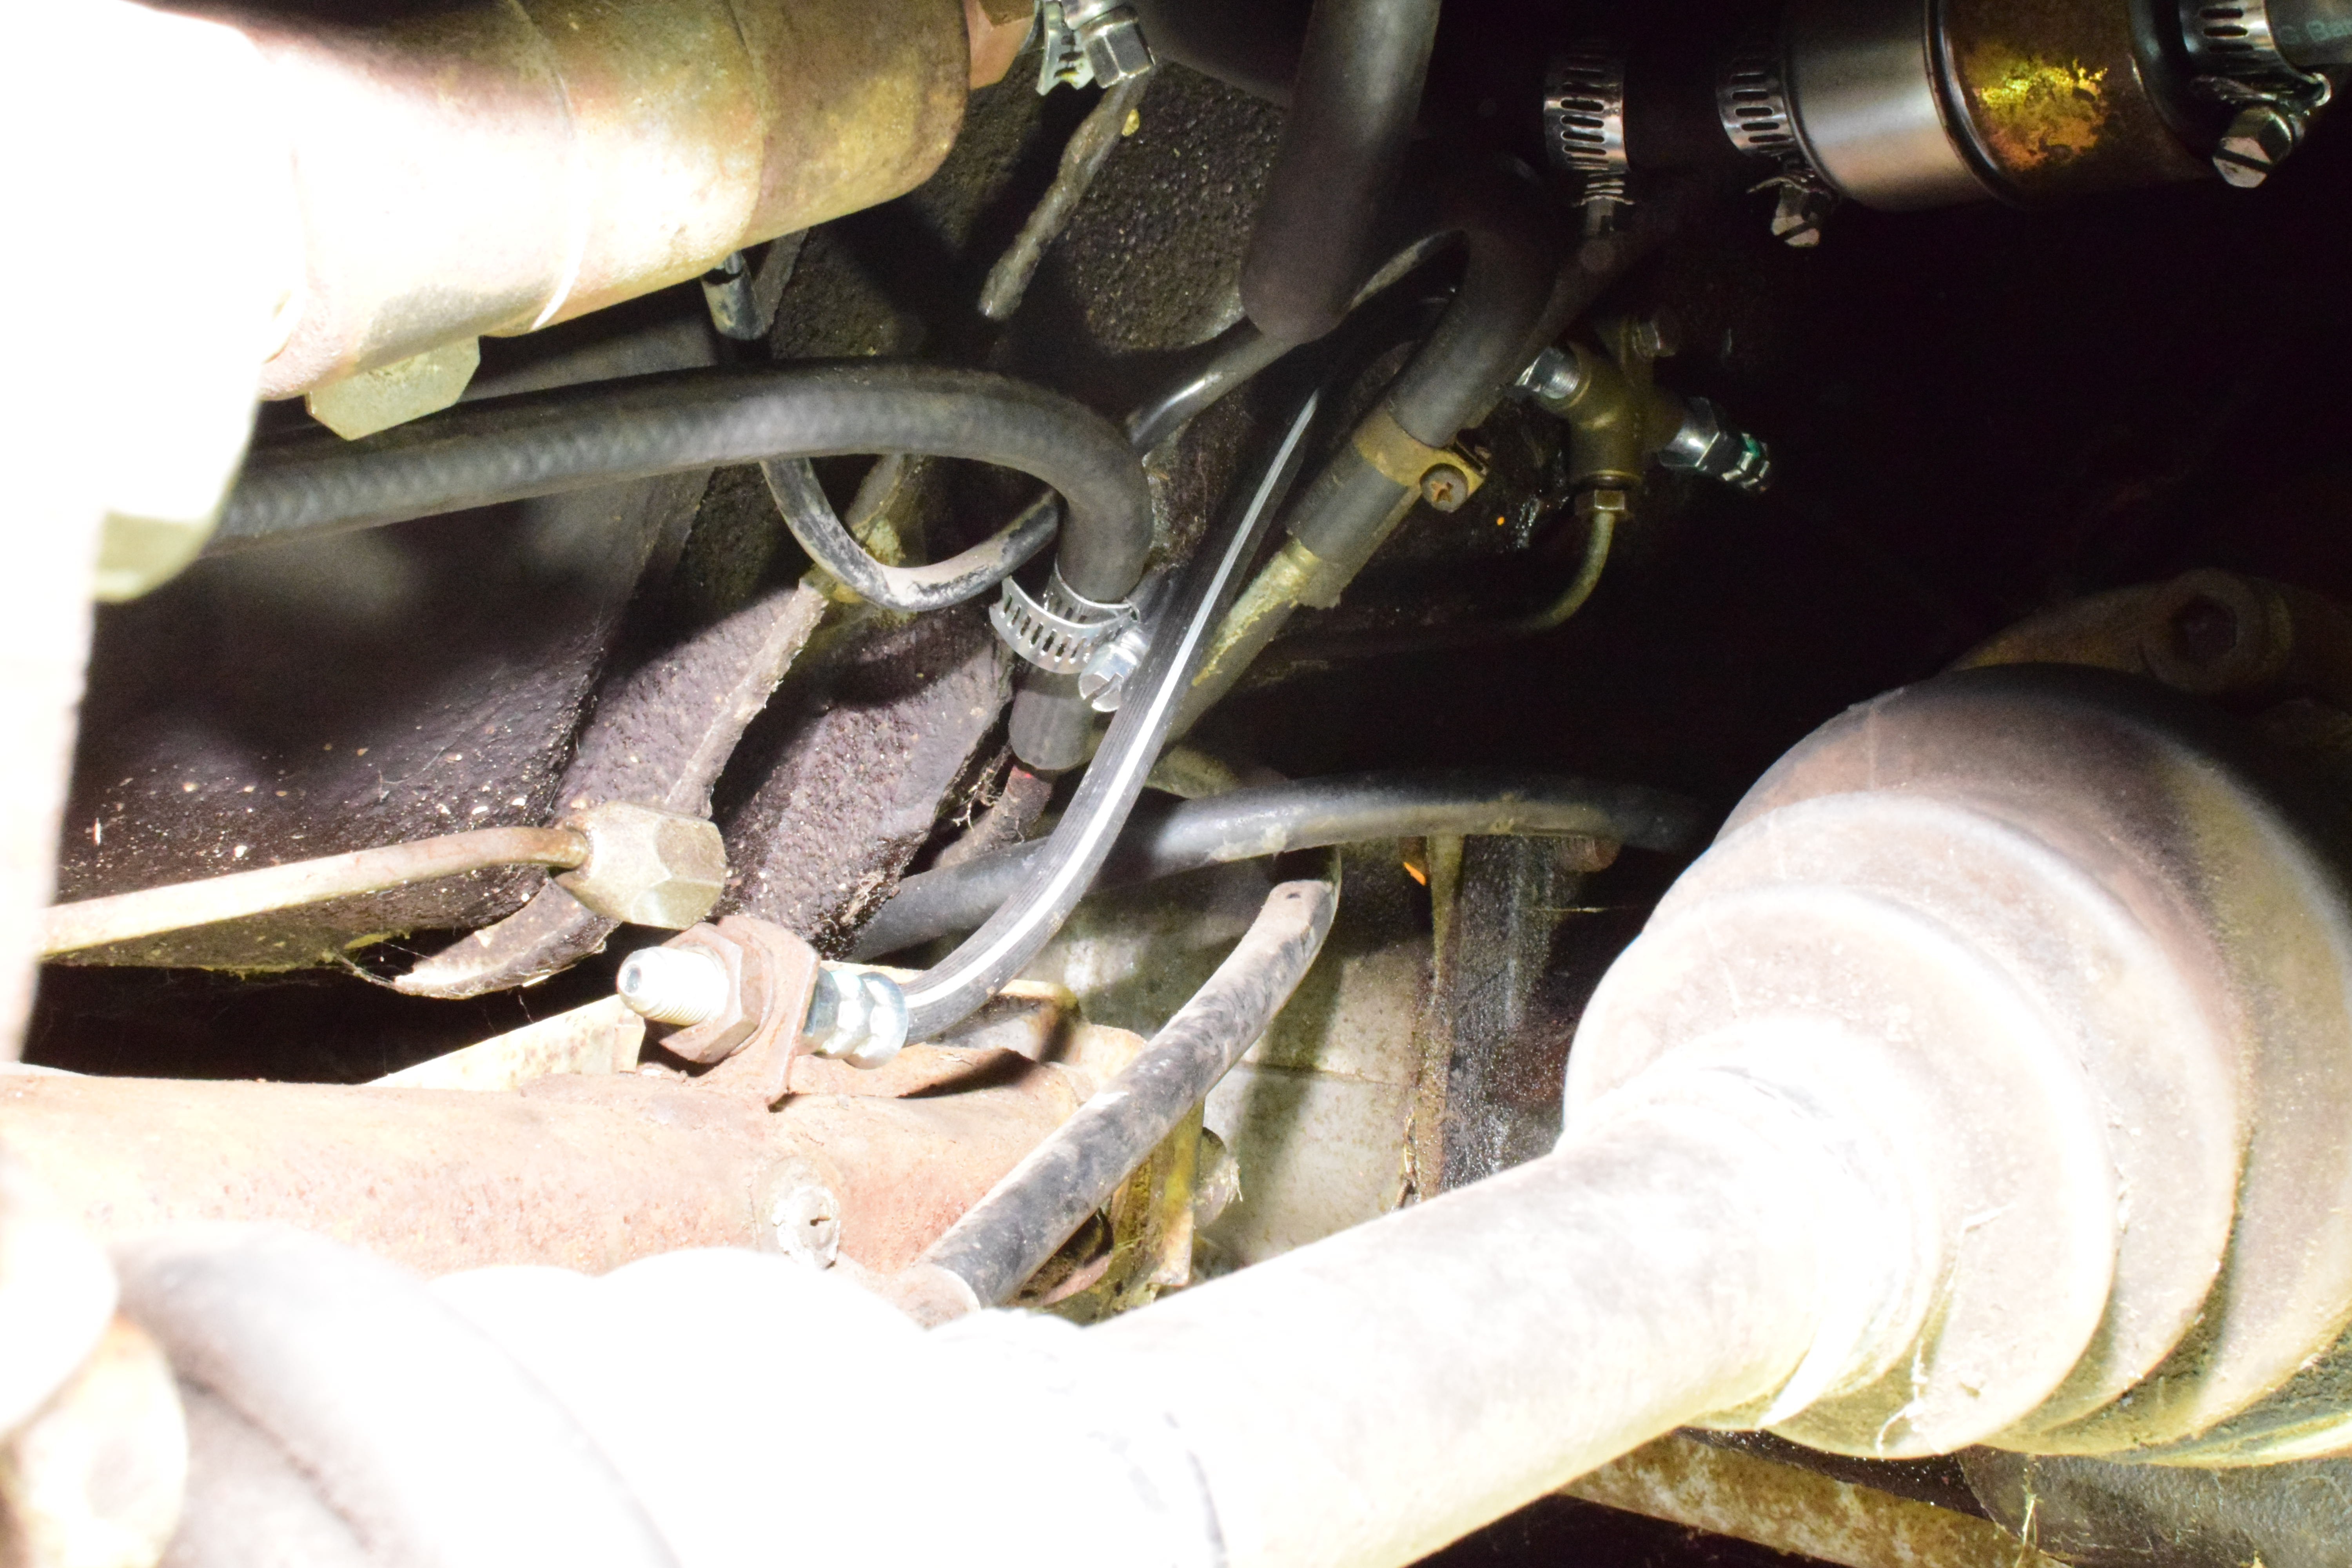
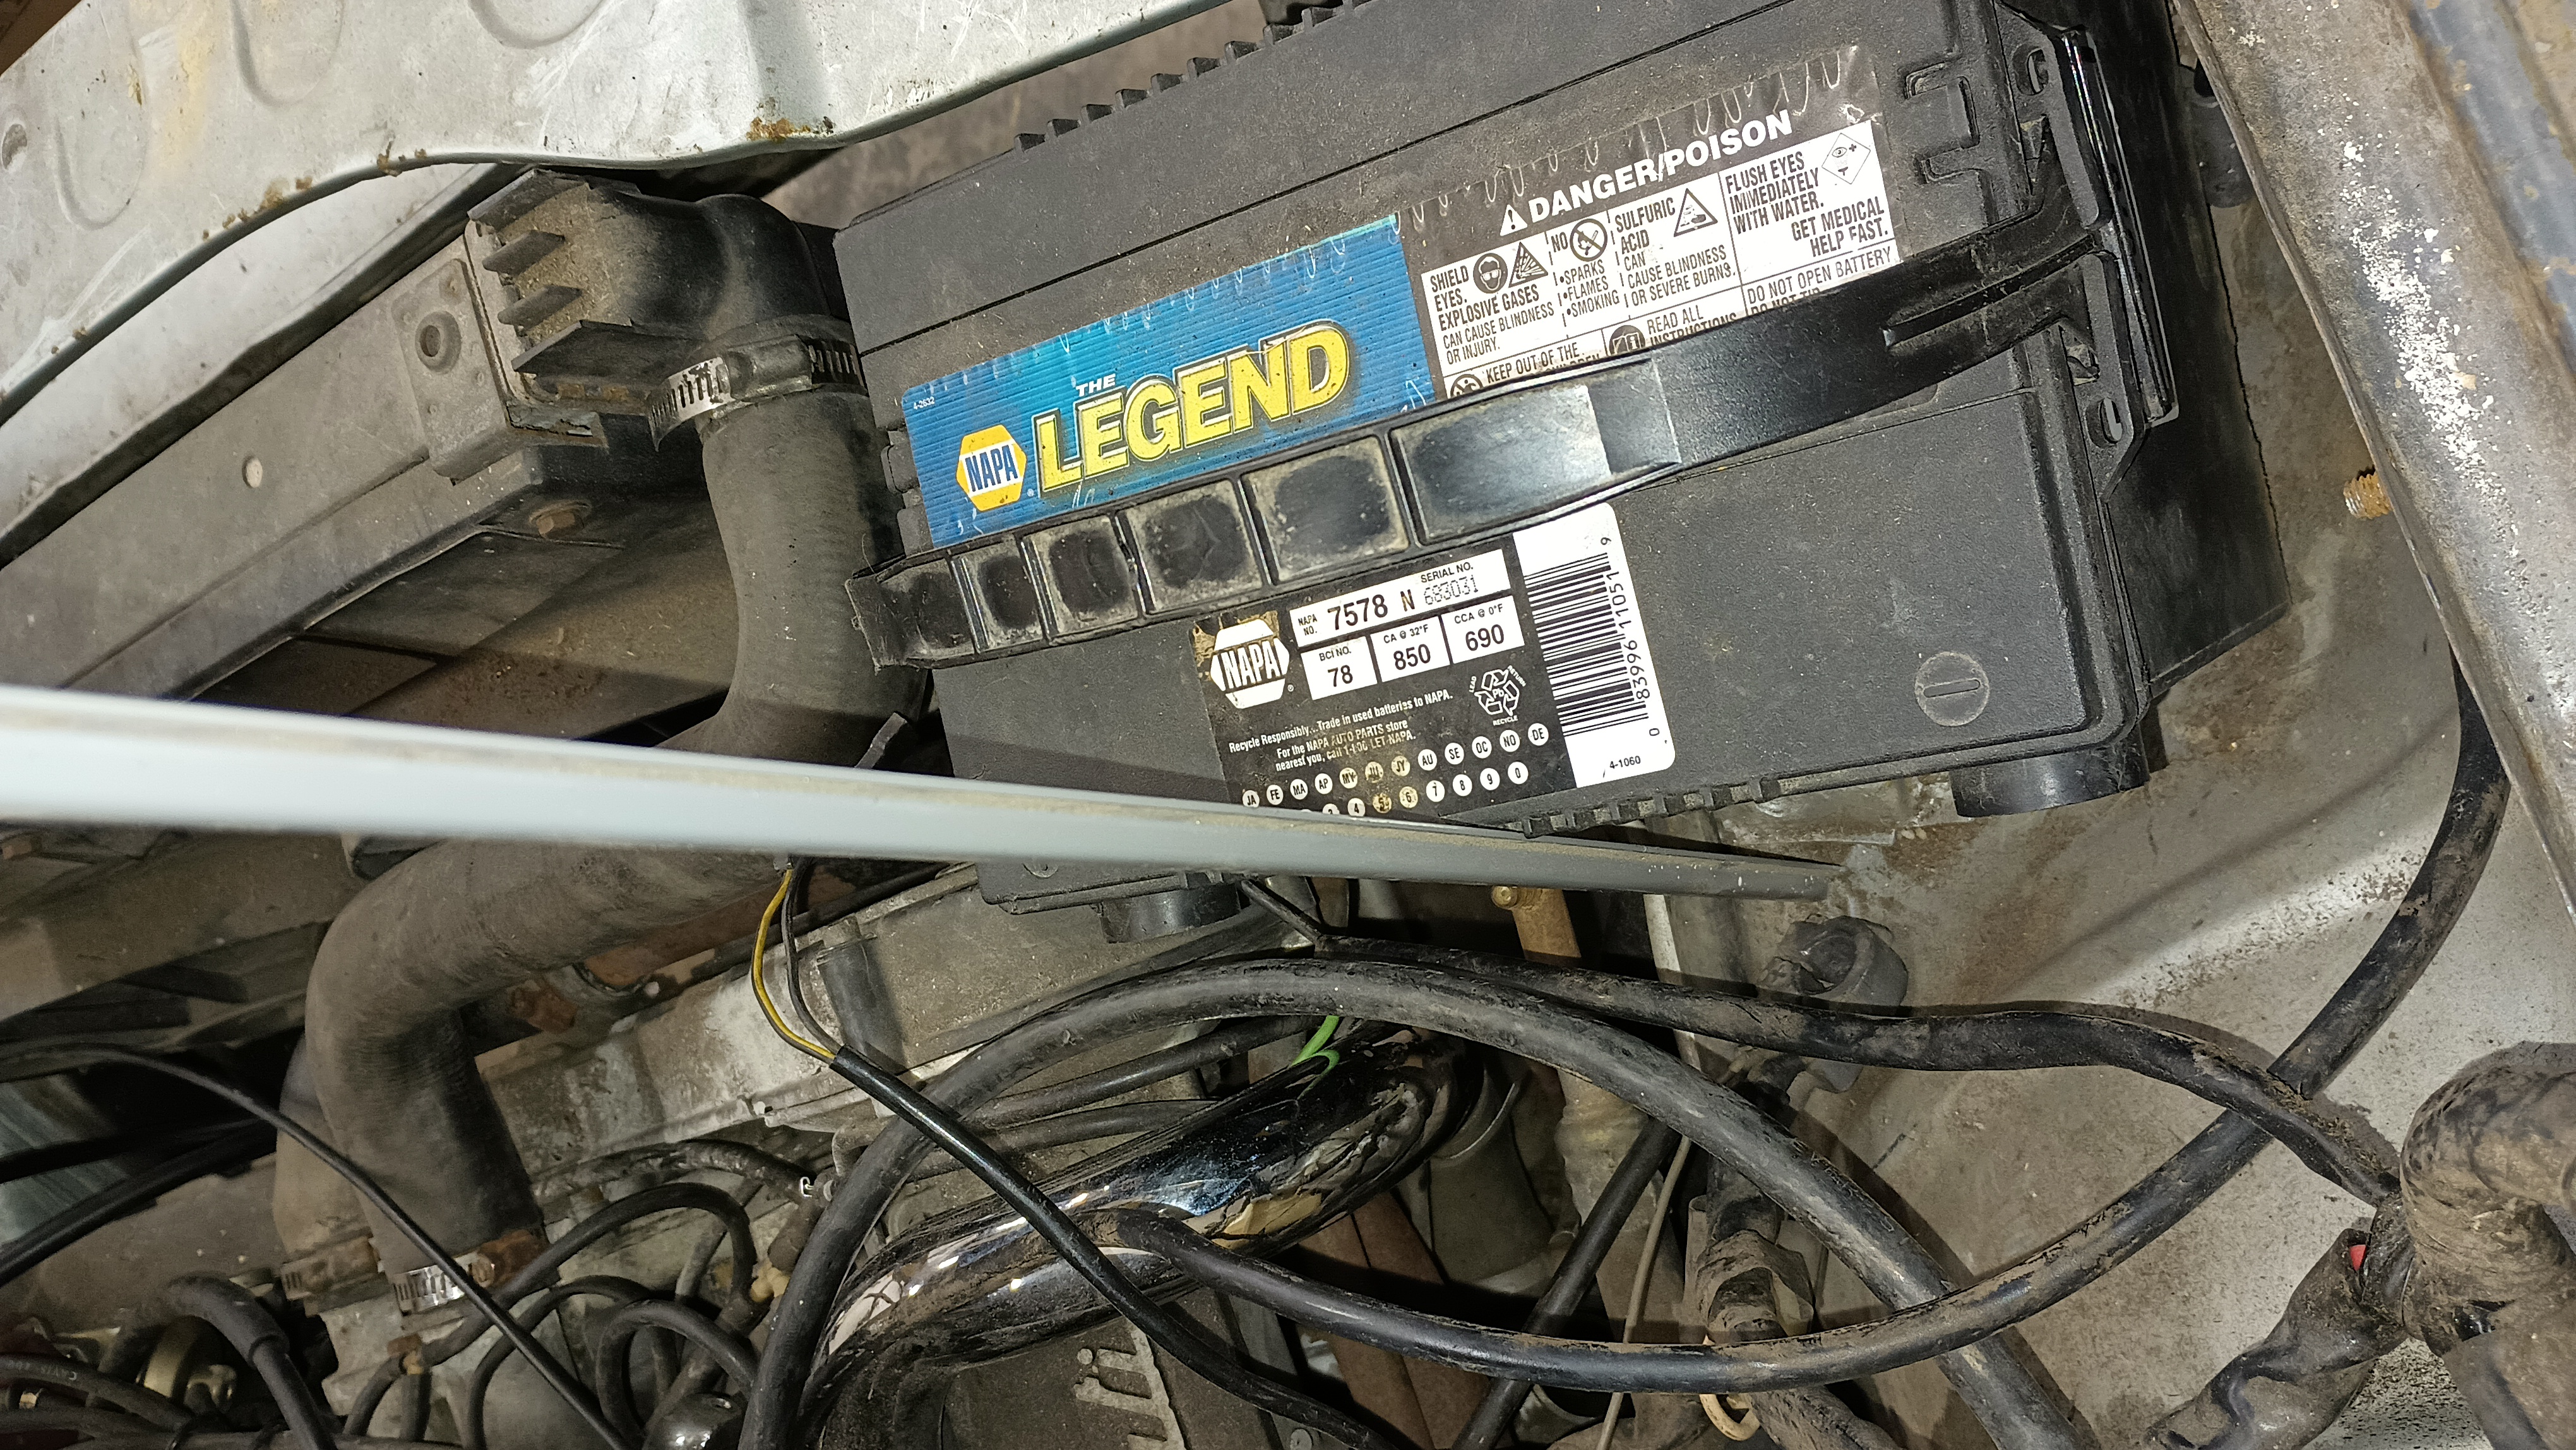
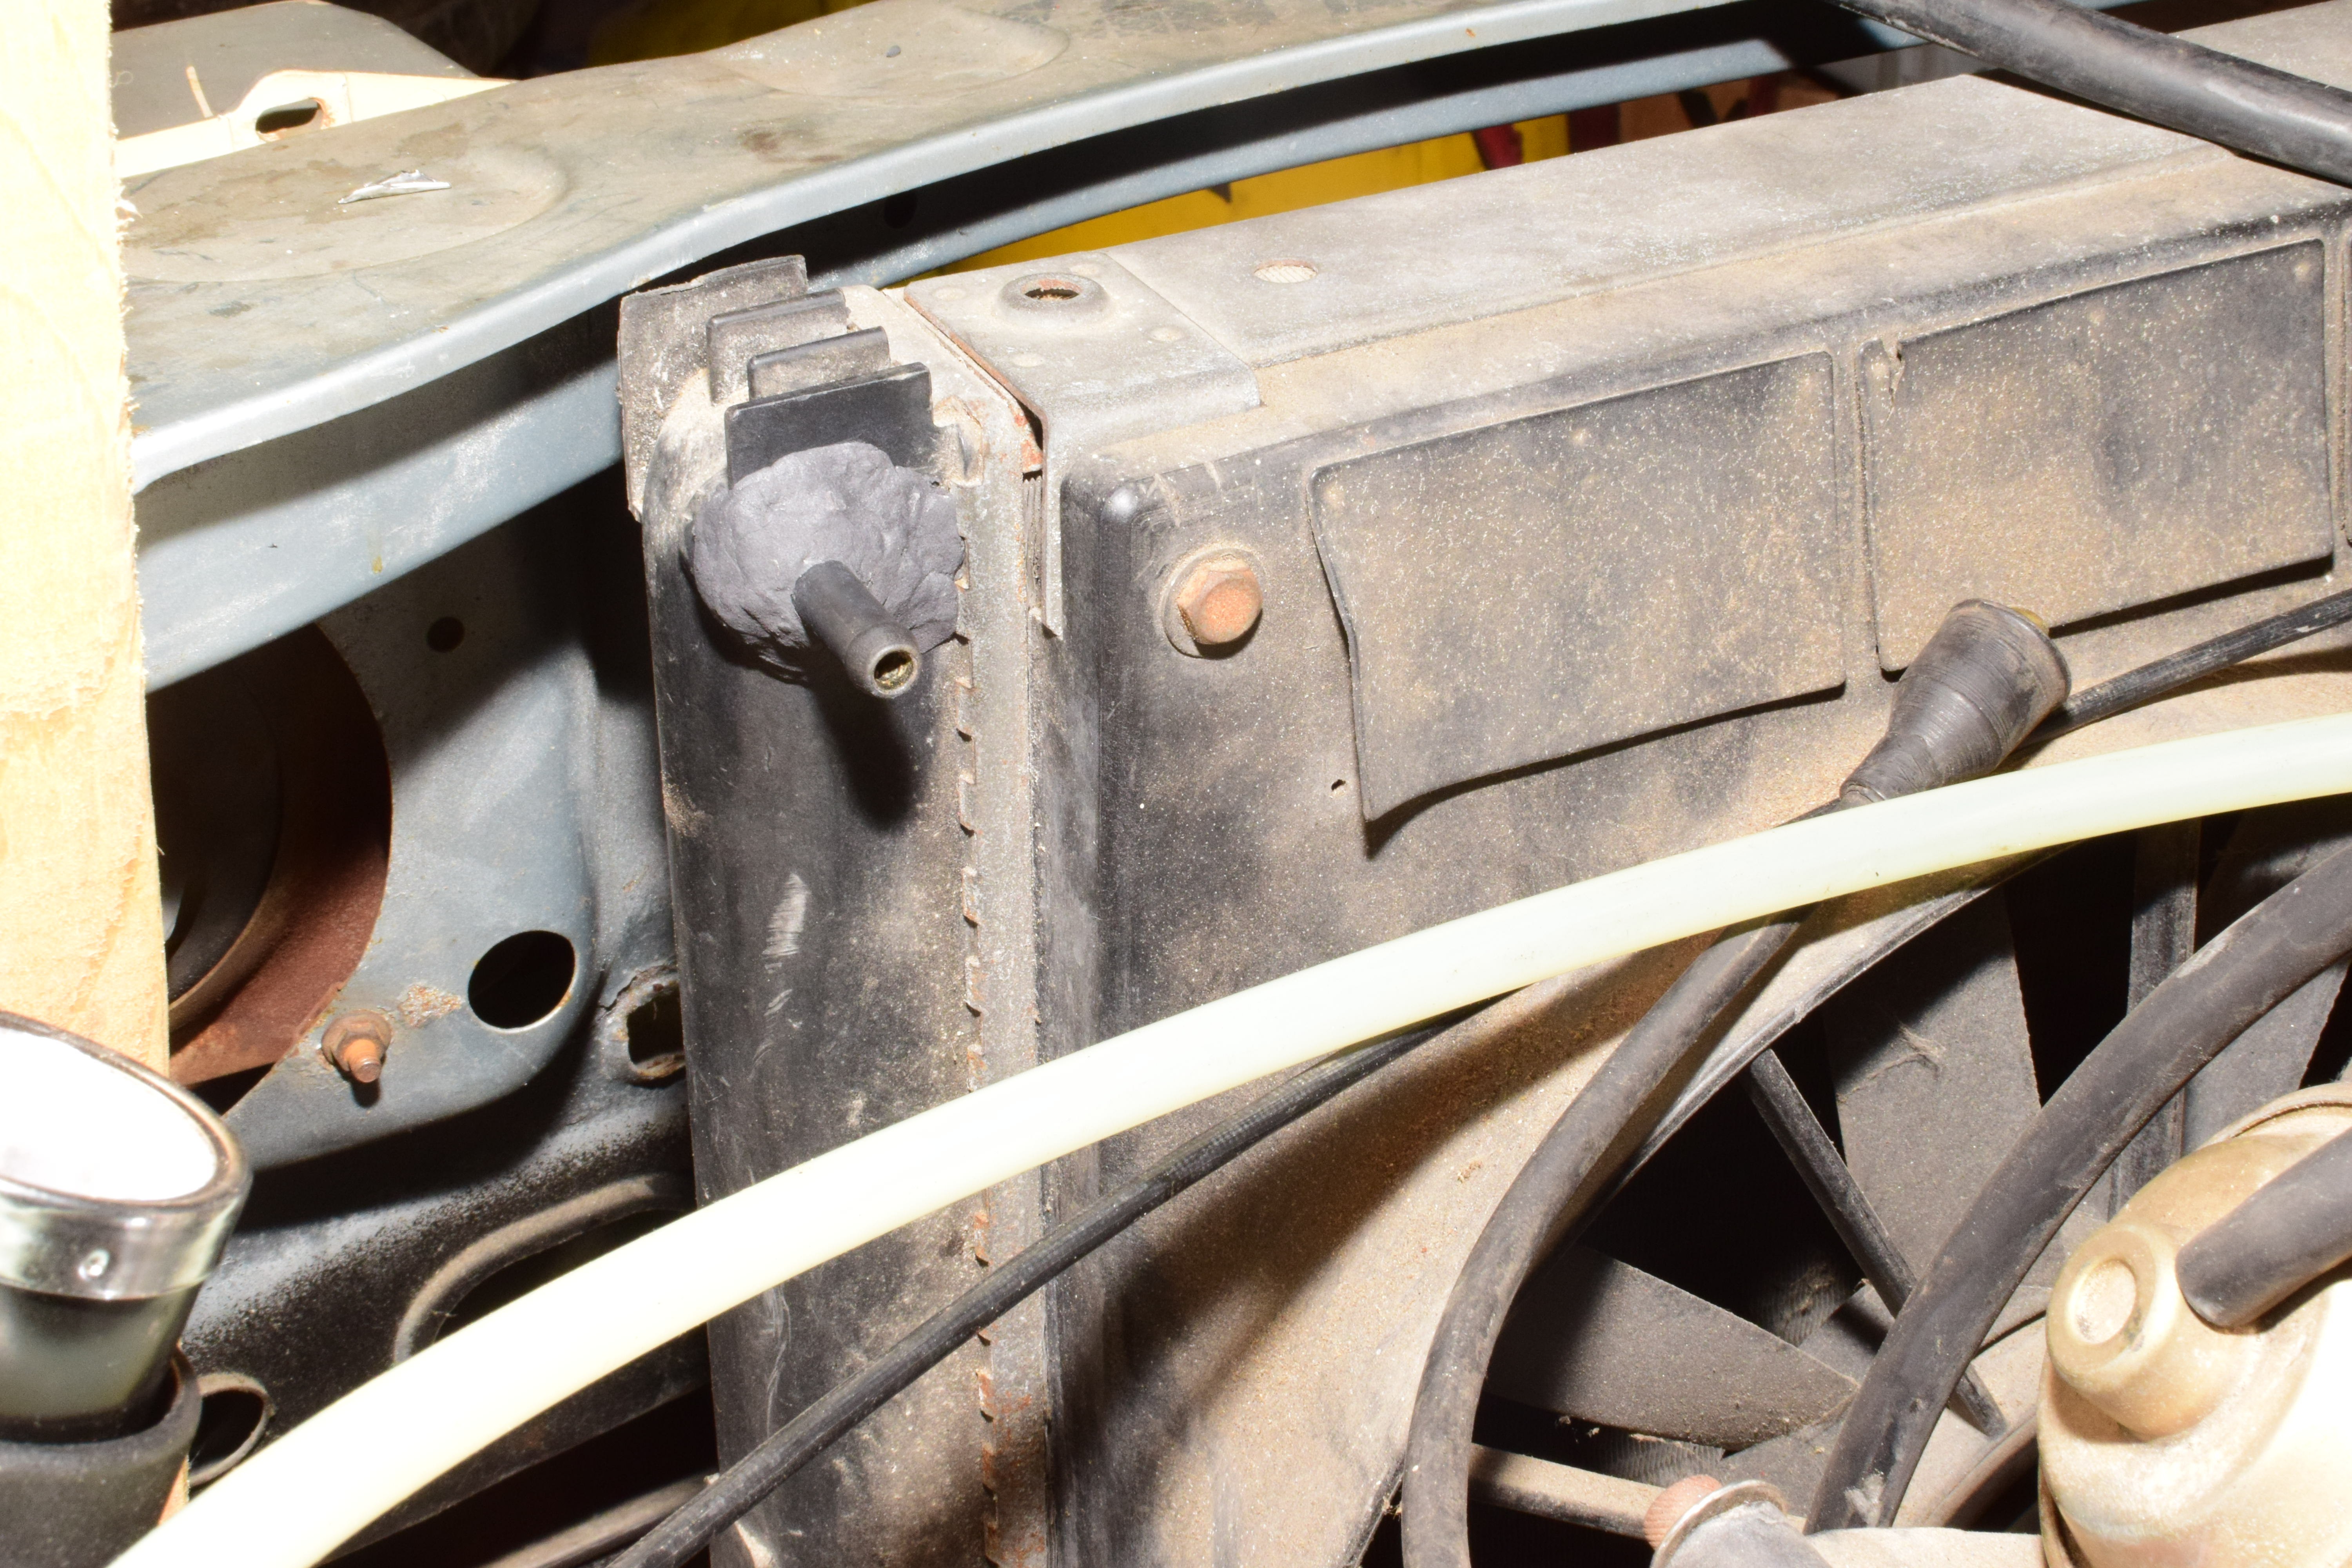
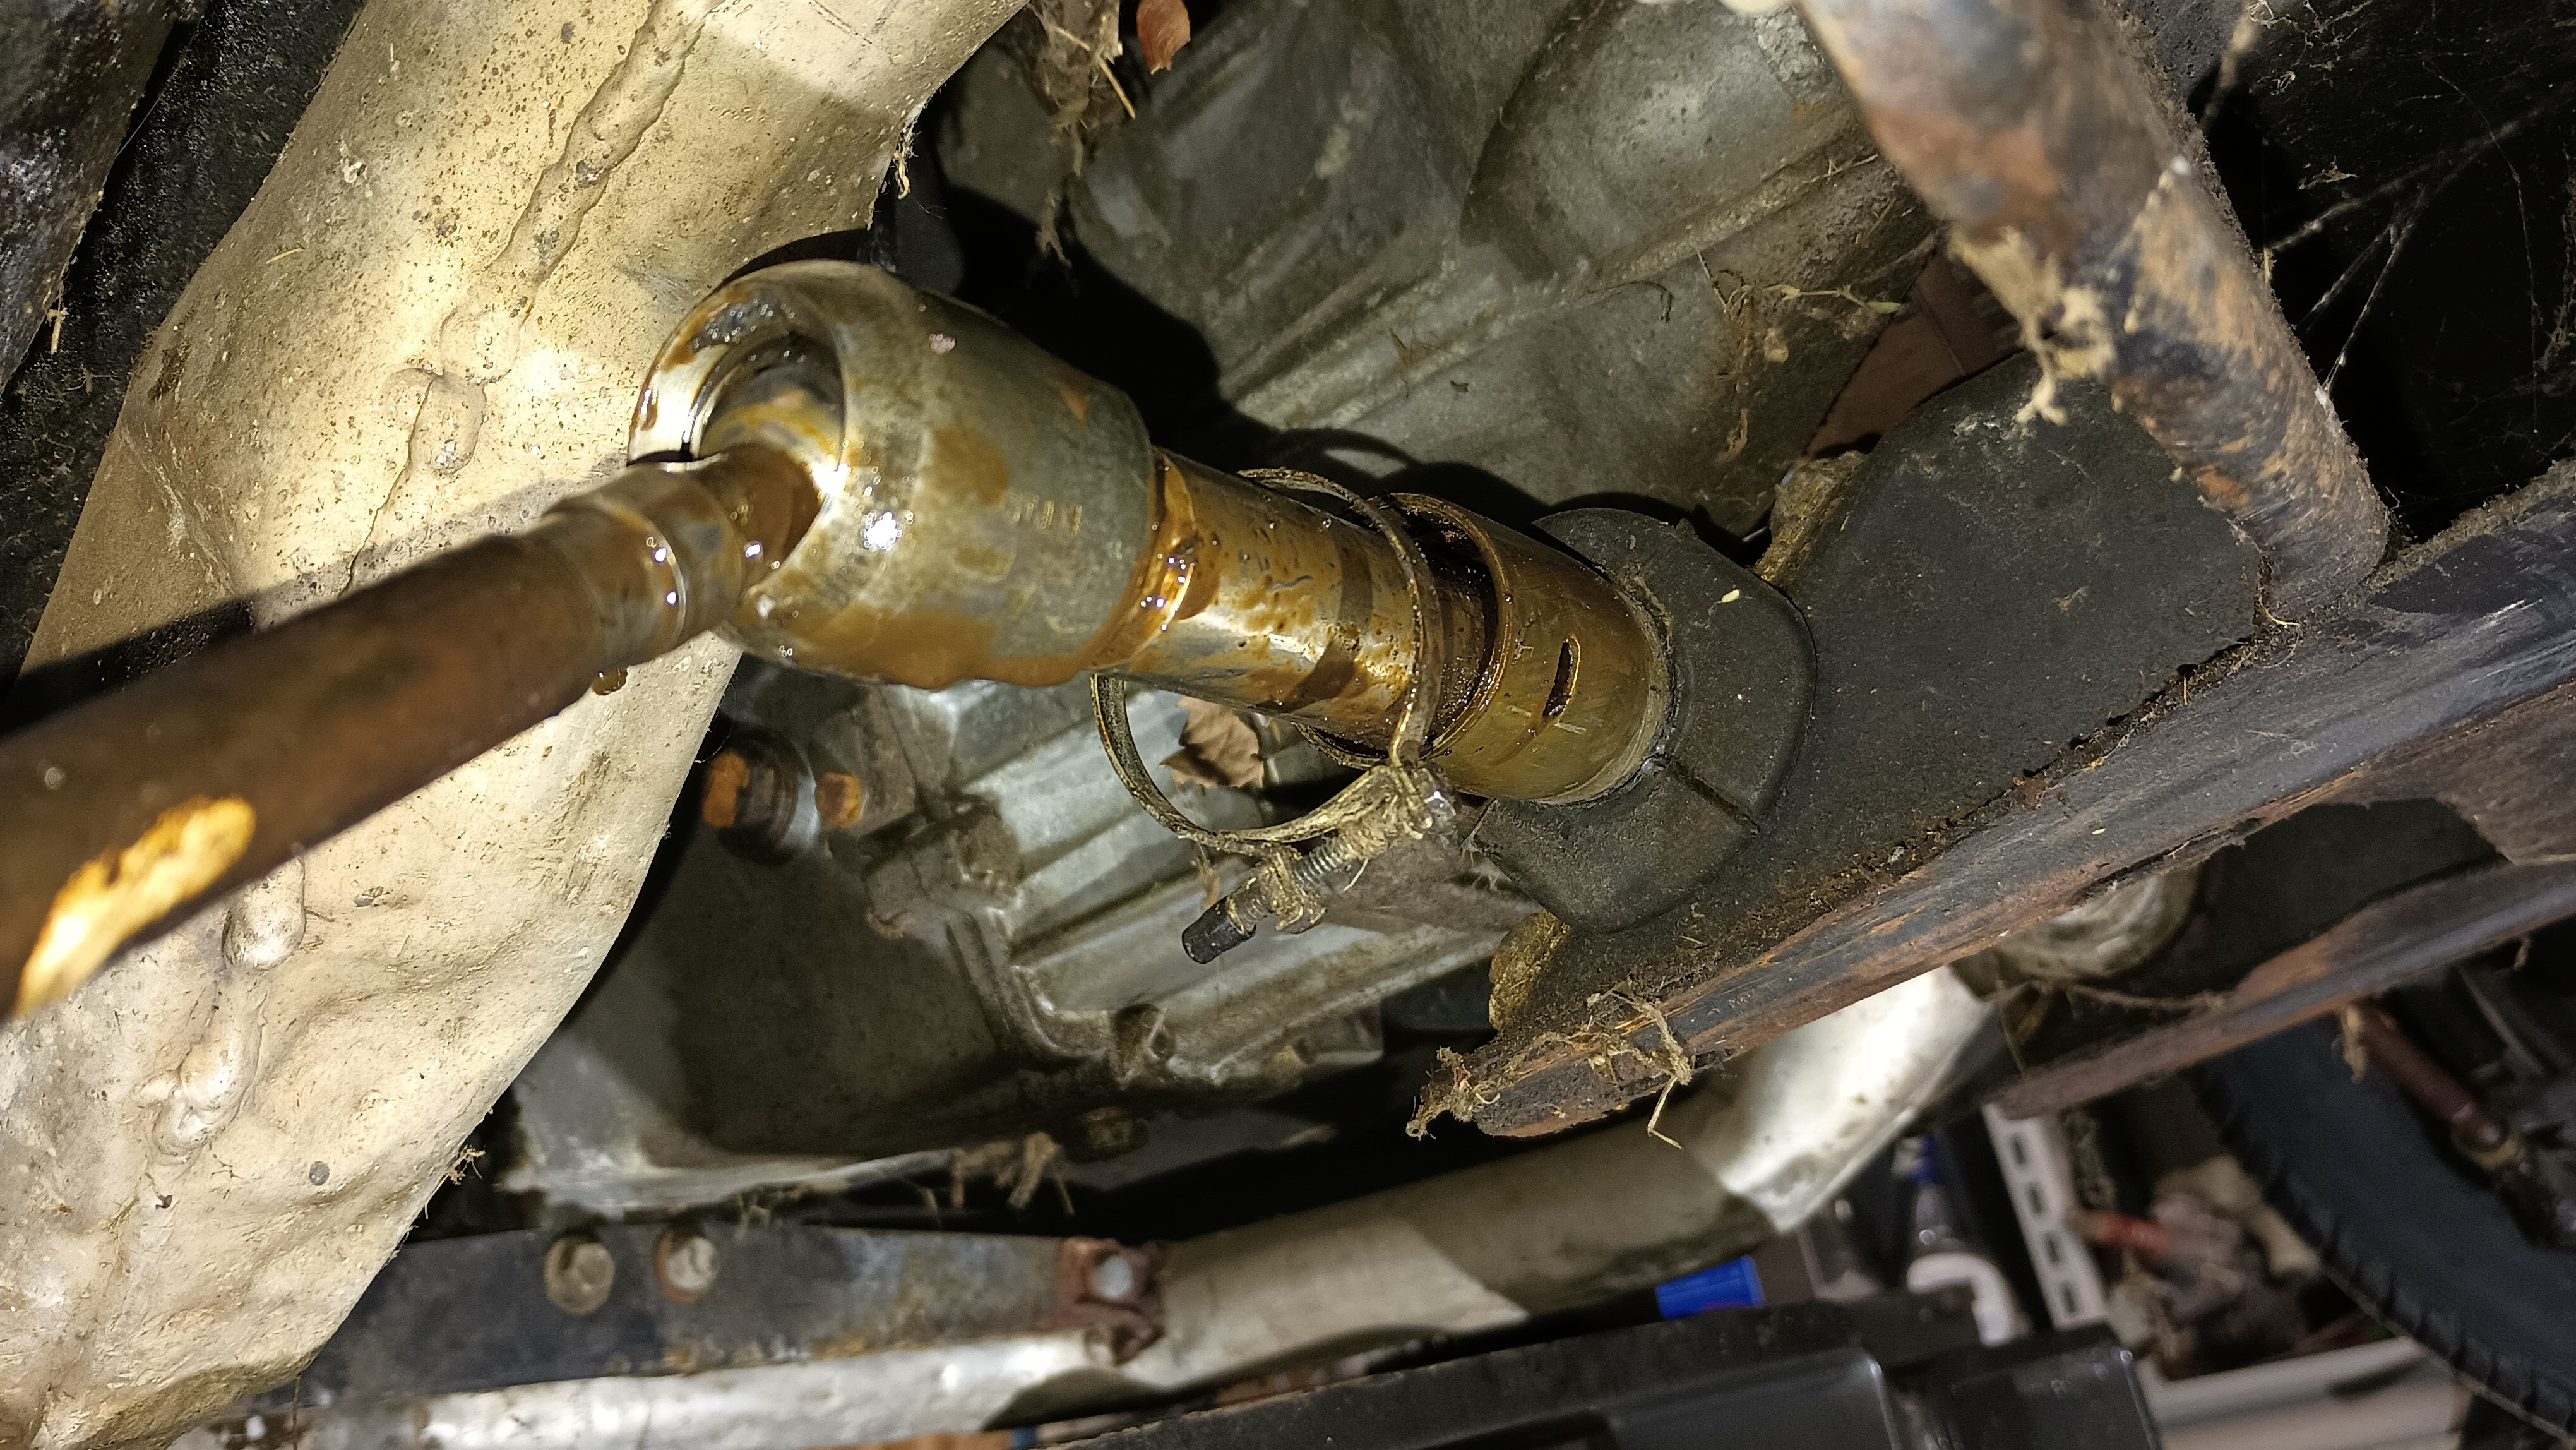
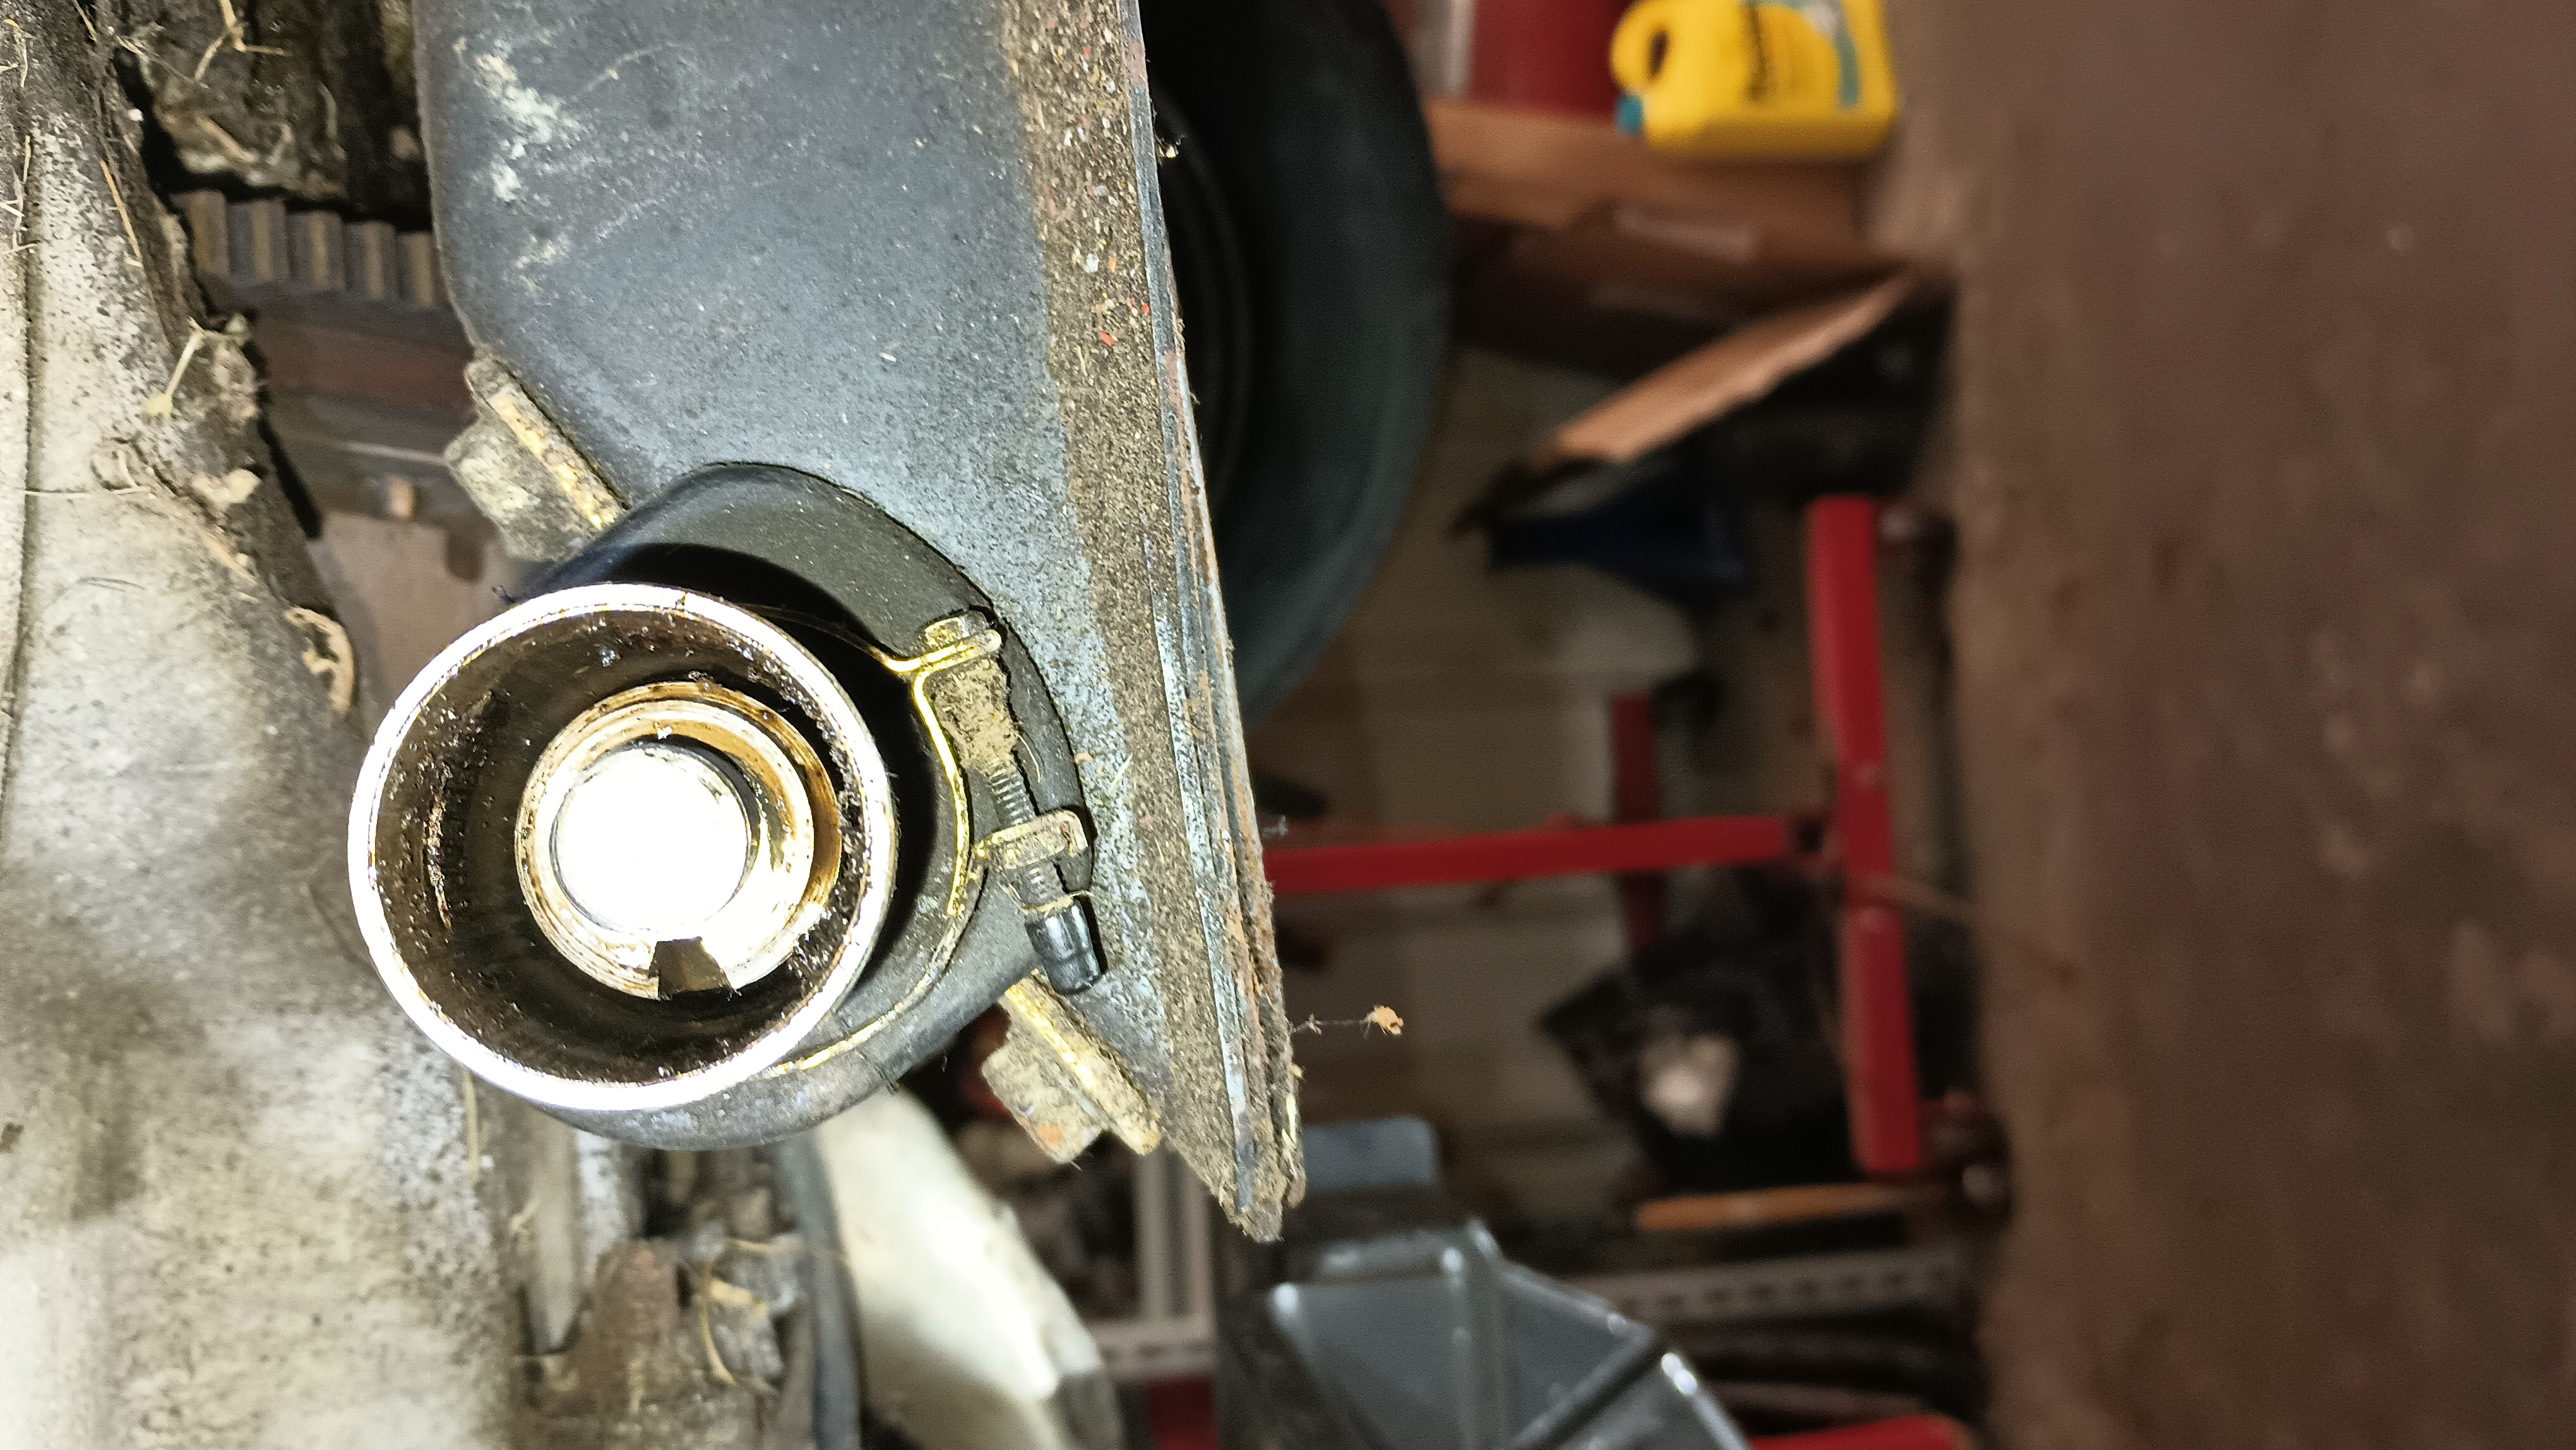
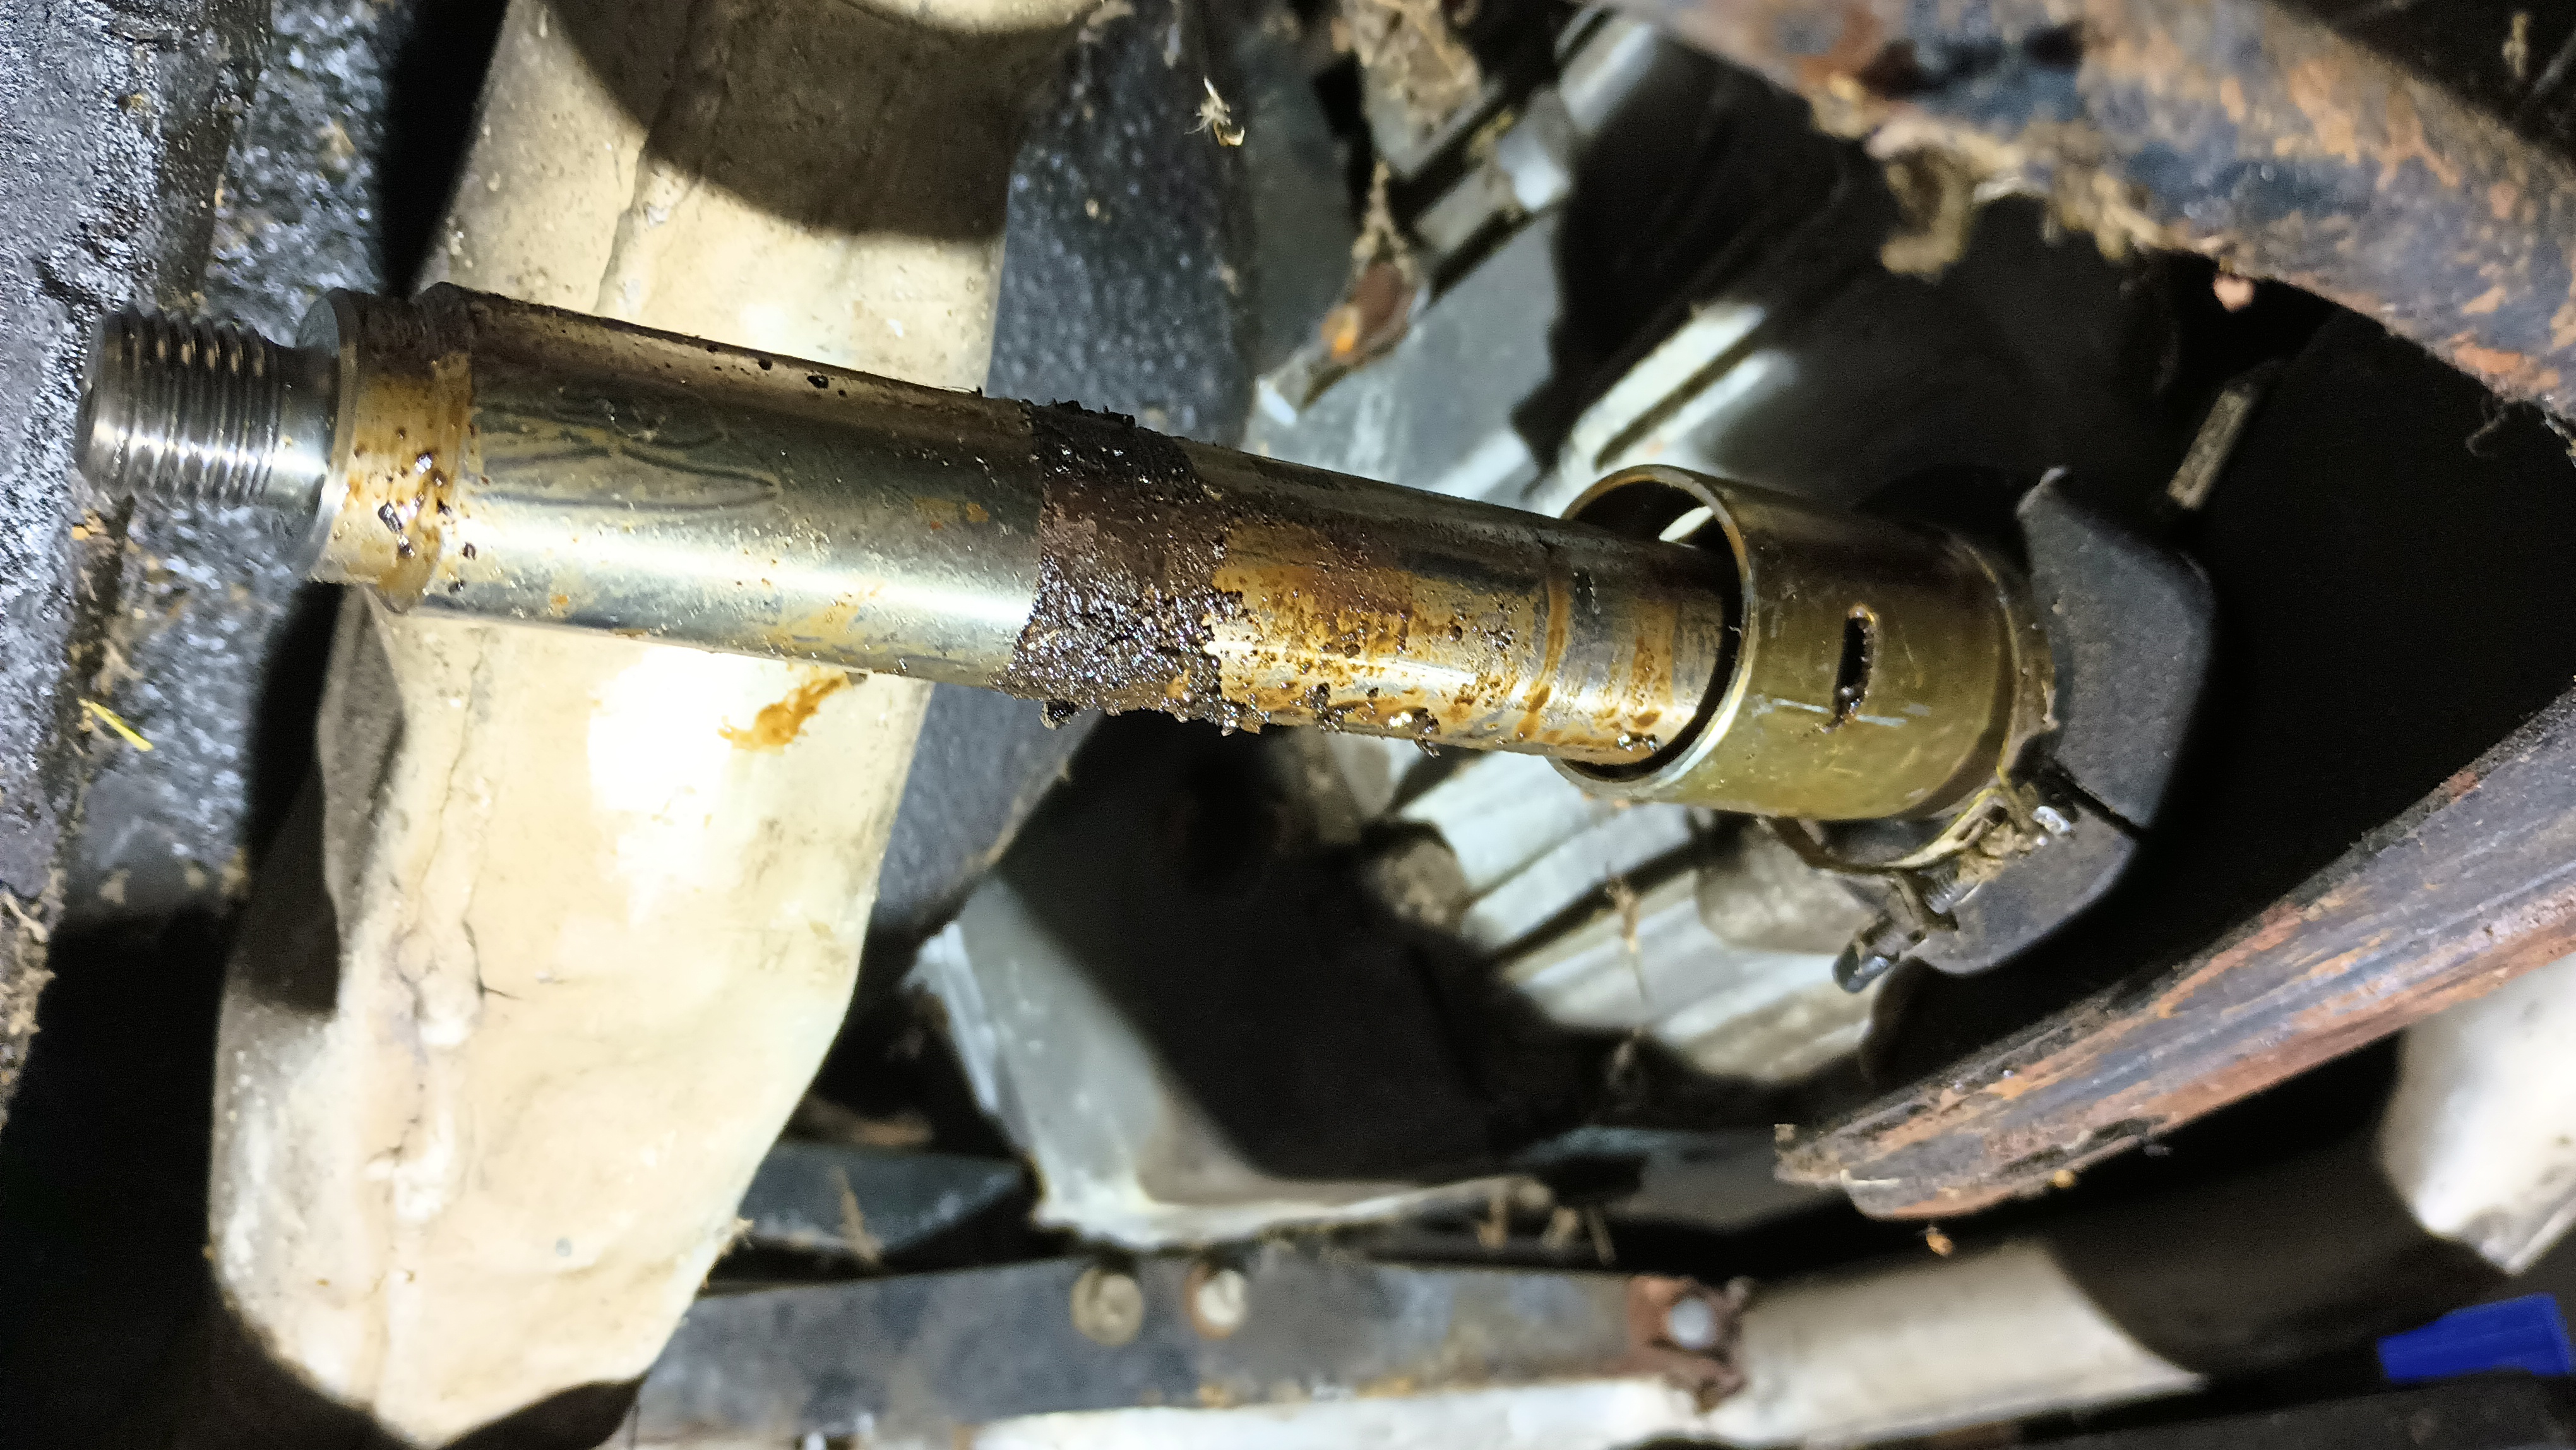
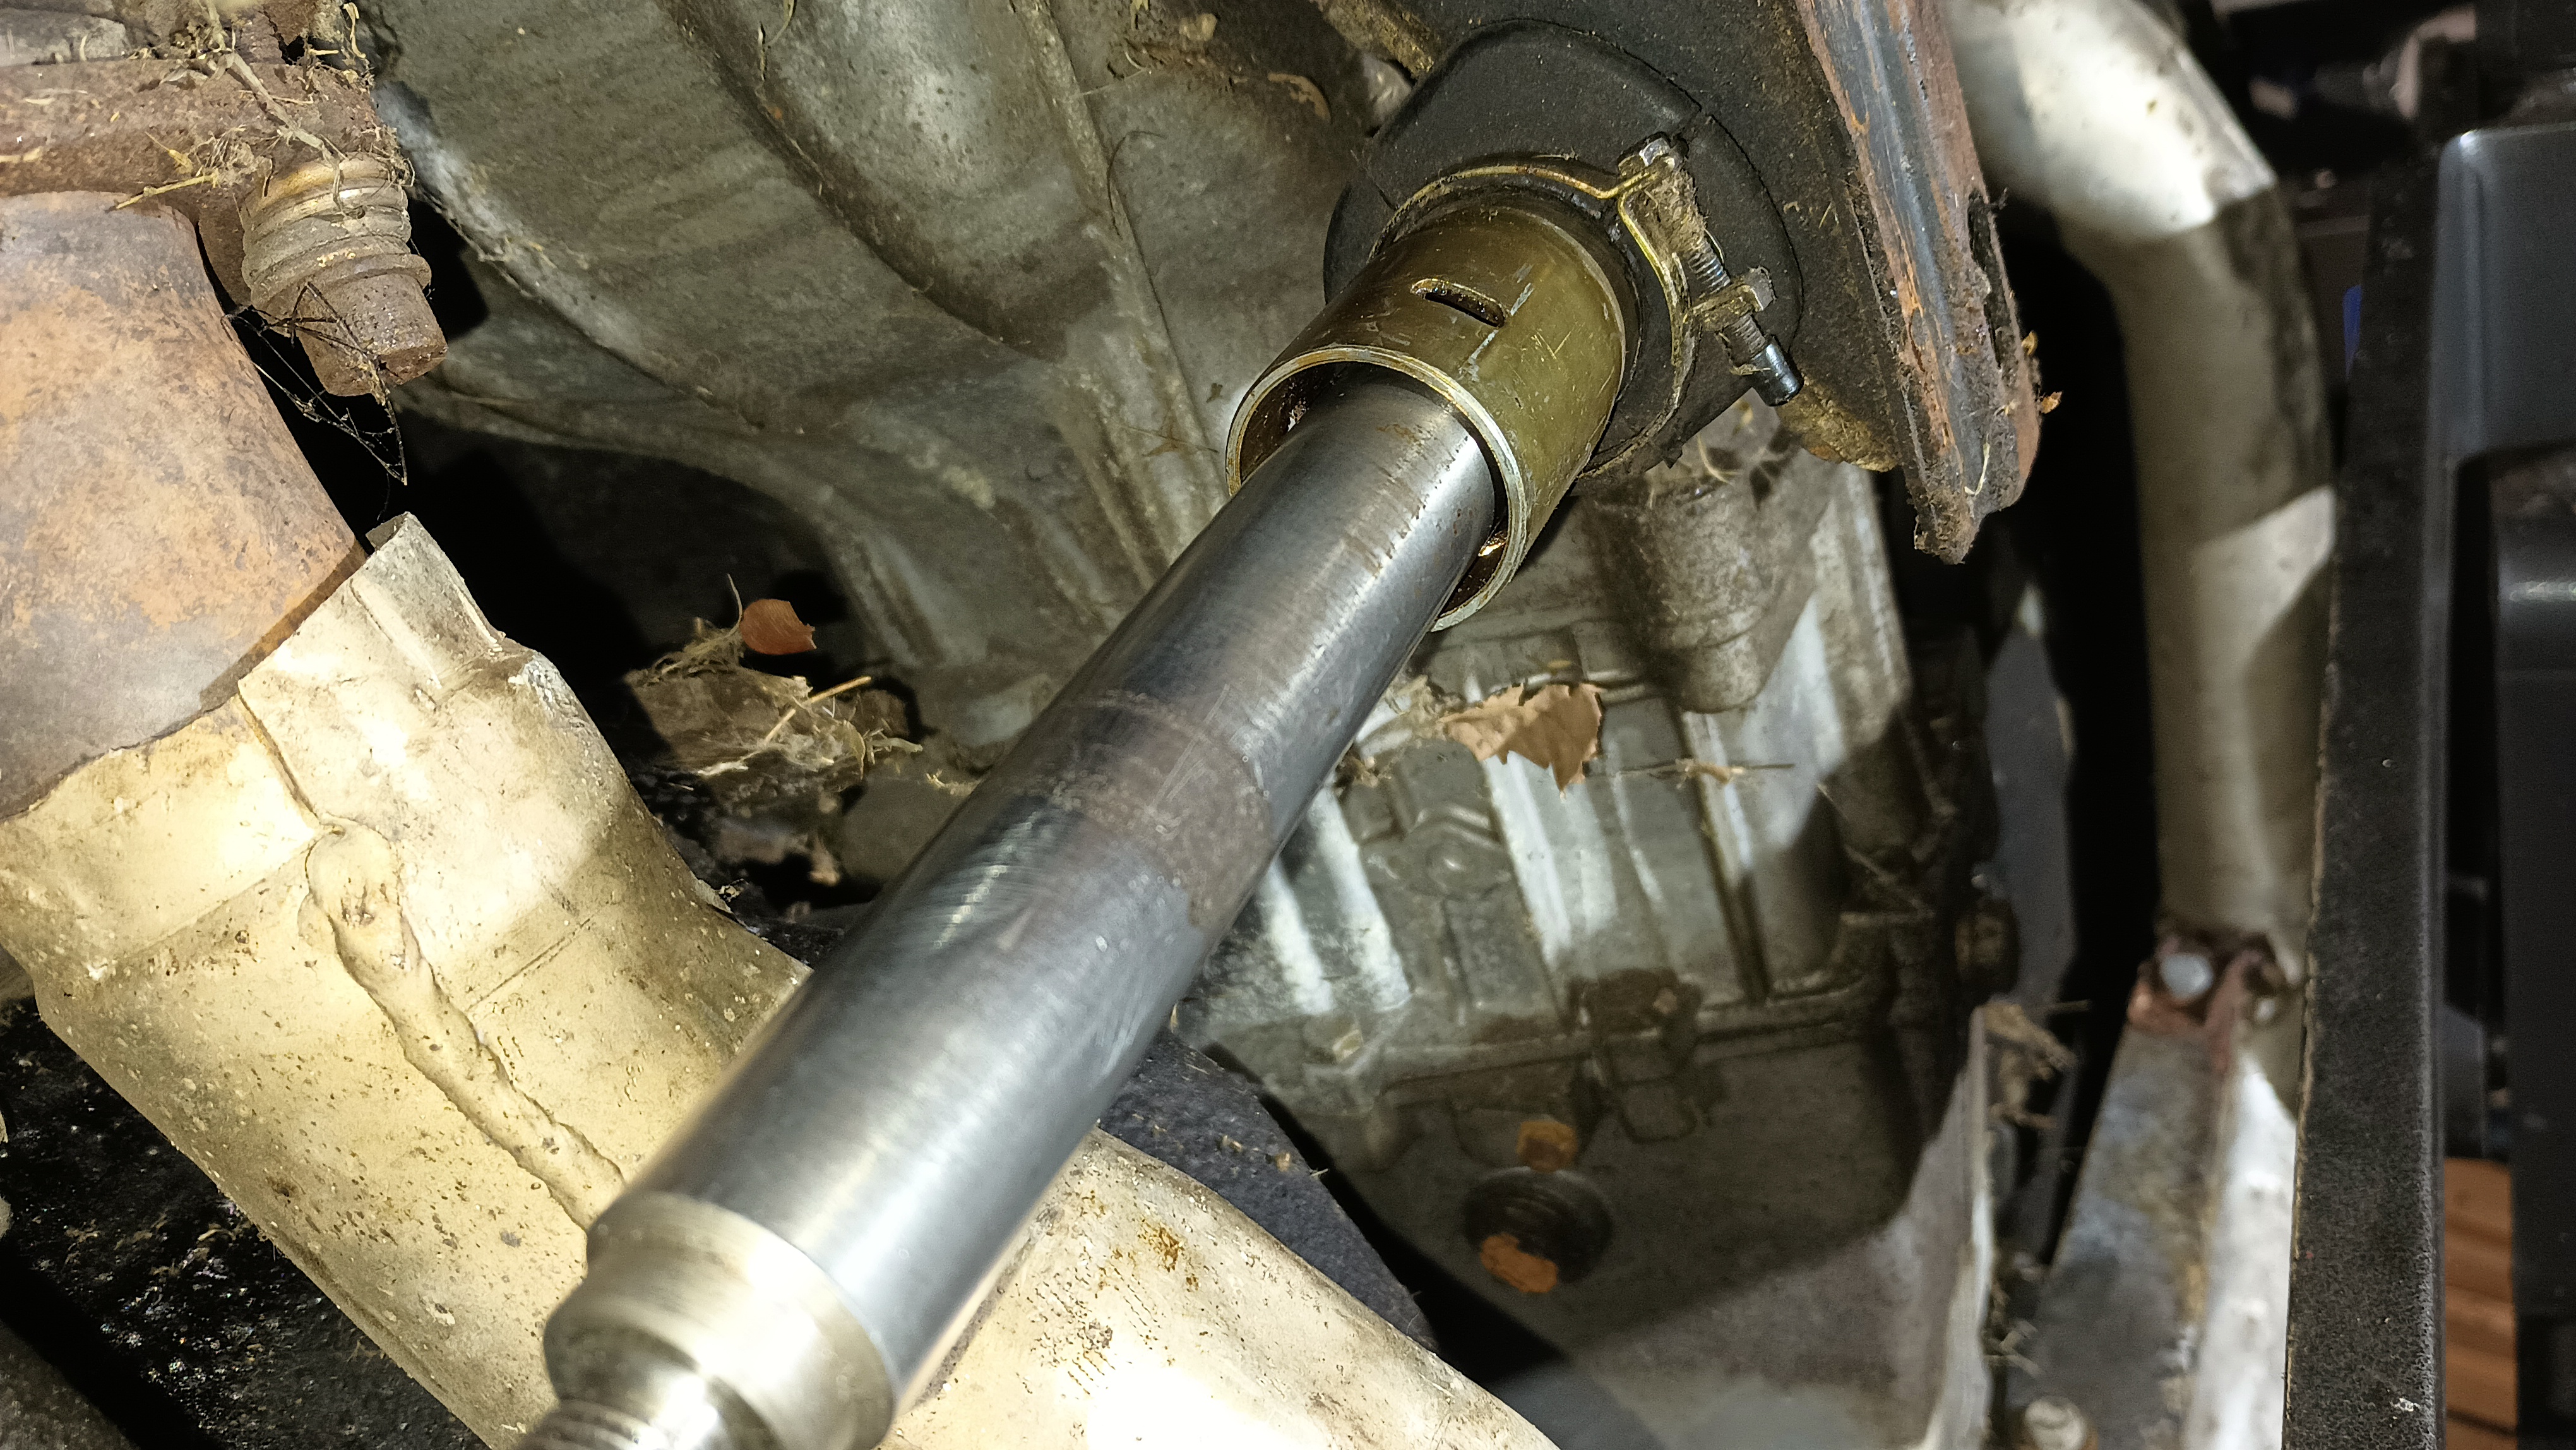
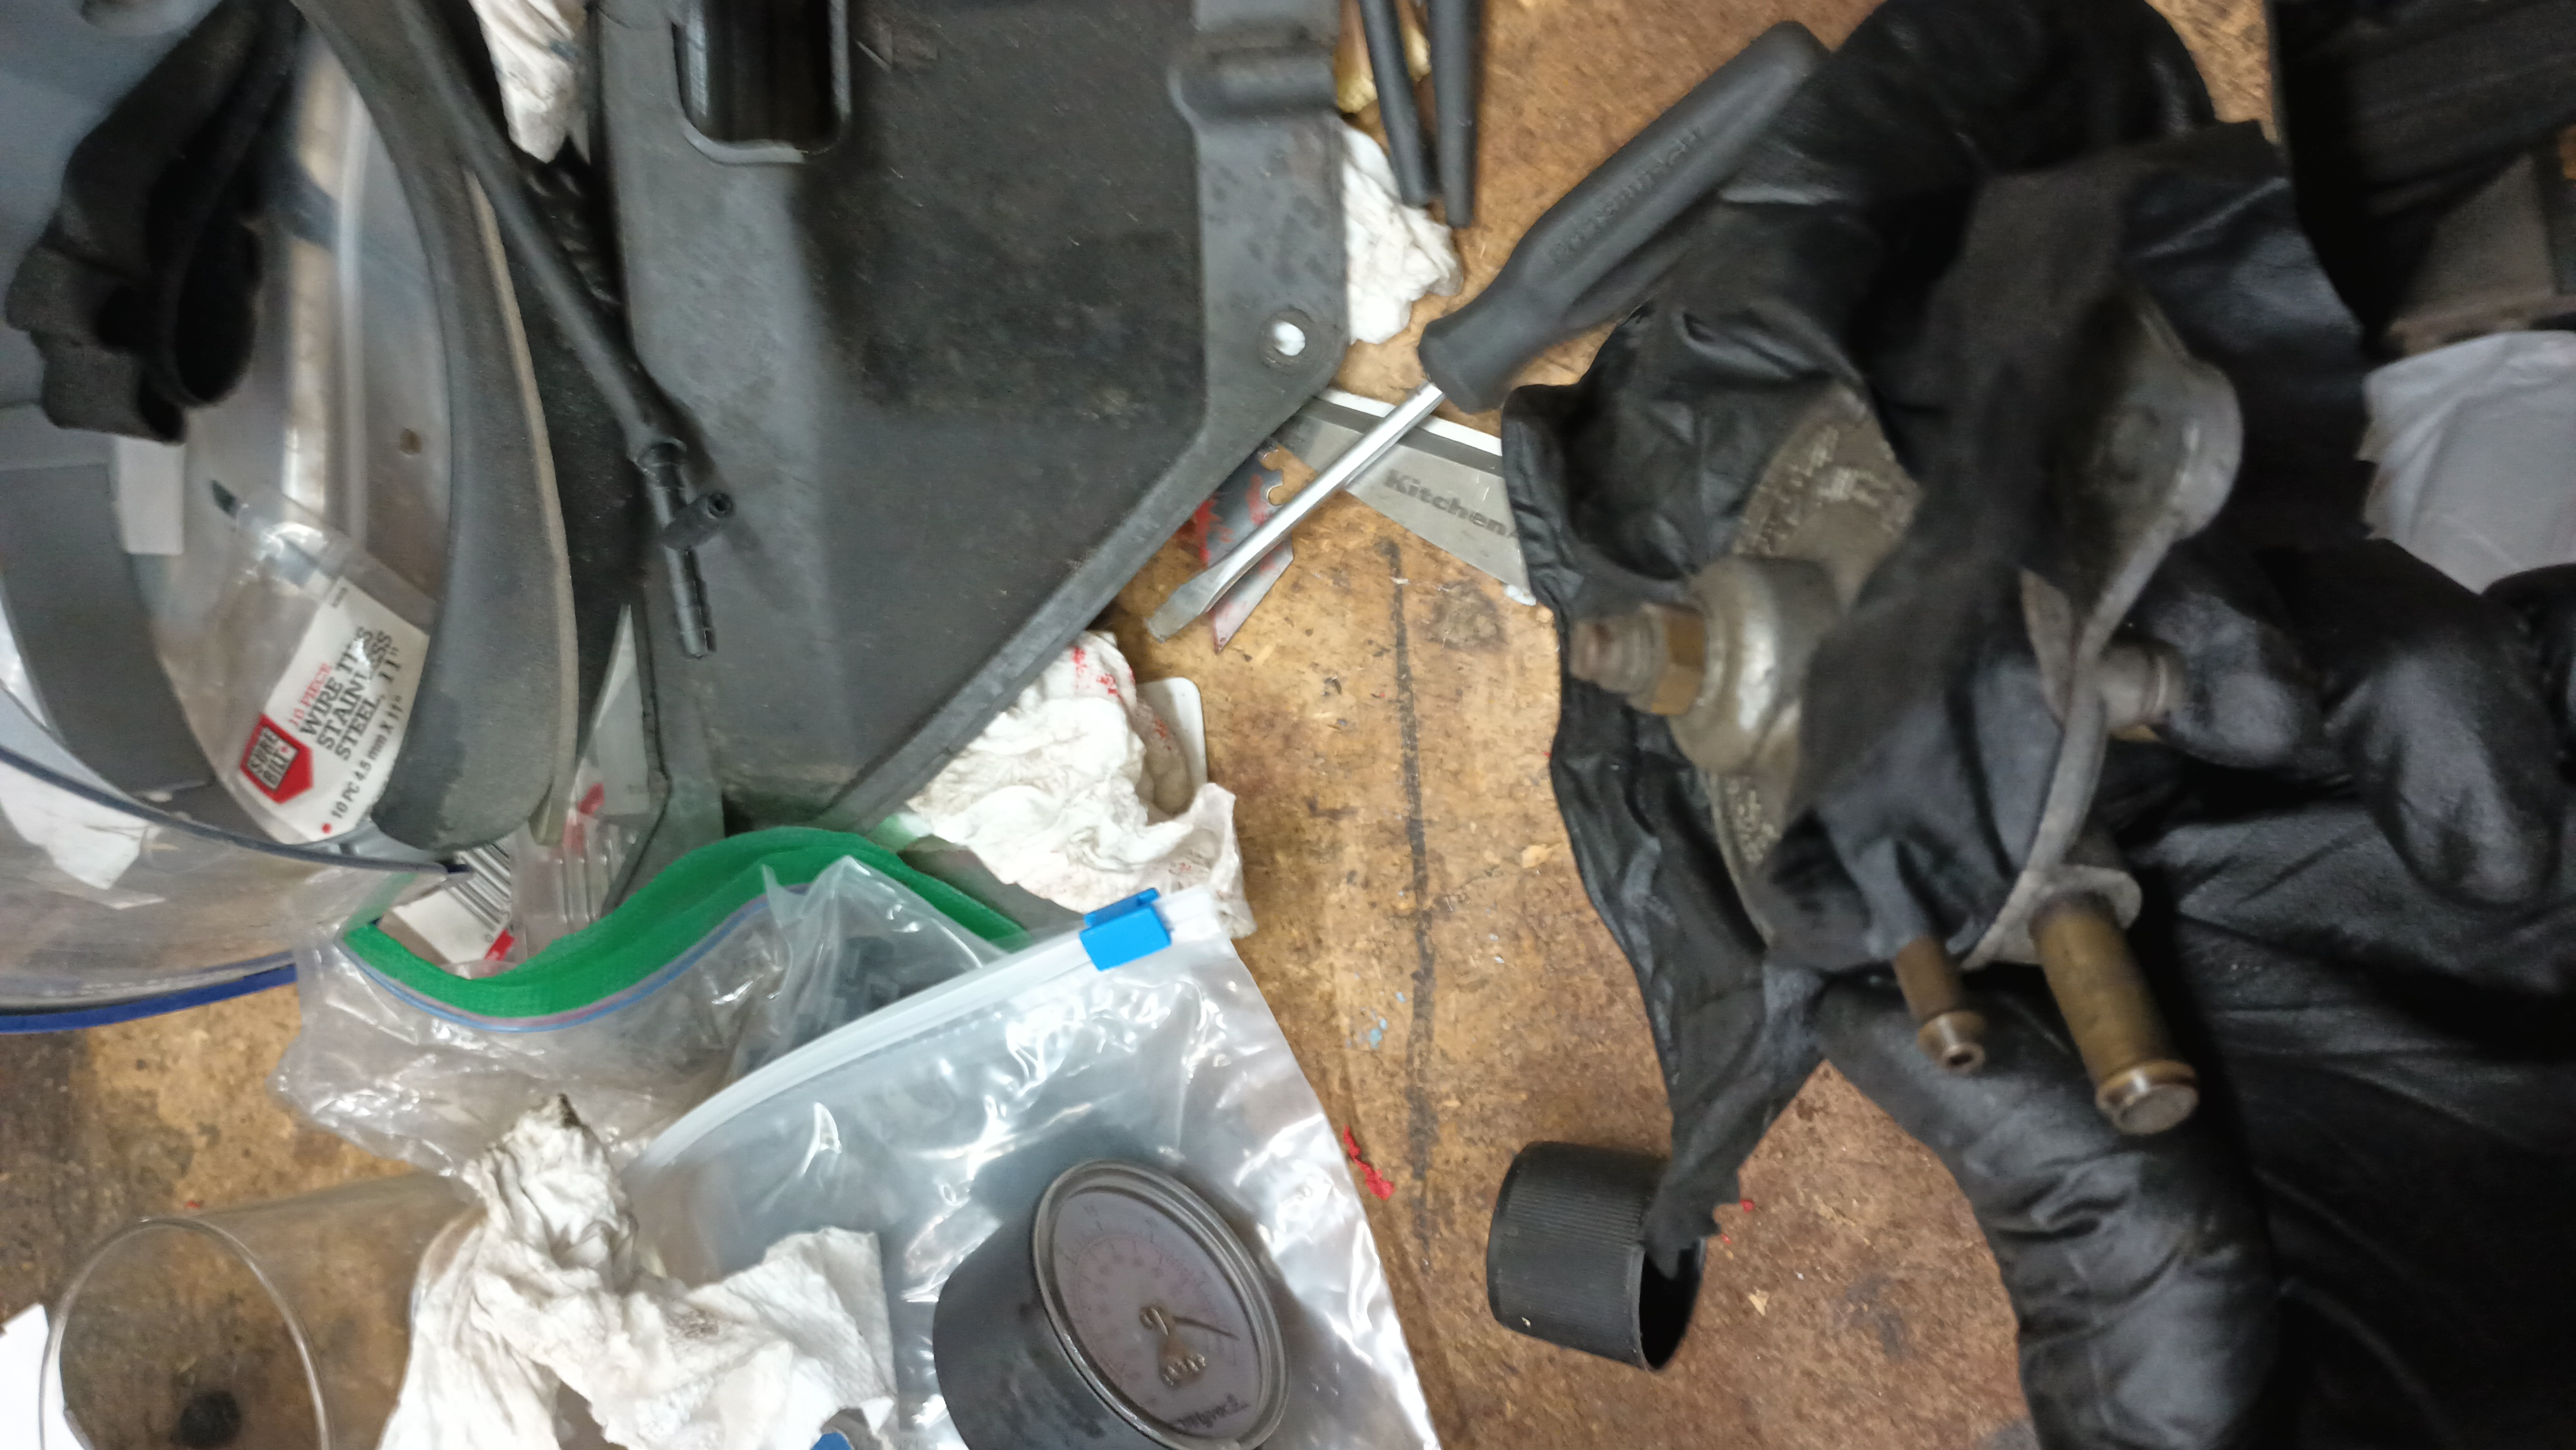
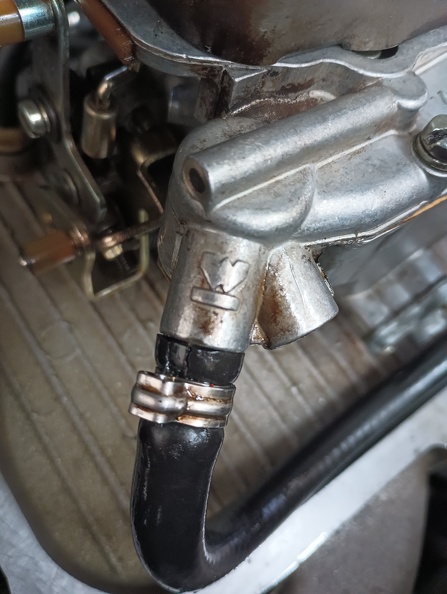
With the radiator out of the way, we gave the engine a little more of an inspection and noted that the oil in the crankcase does not appear to have any coolant or water in it and it is completely clean, as though the last thing that happened to this car before it was put up was an oil change. There are no visible holes in the block anywhere, but the vacuum system is a mess with cracked and missing hoses everywhere. There are a couple spots where the vacuum lines have been plugged with bolts. When we disconnected the radiator, we noted that the lower hose had been cut and there was absolutely no coolant anywhere in the system that we could see. We are assuming that the coolant temperature switch that controls the cooling fan has failed as the fan was connected to the alligator clips that were taped to the upper radiator hose.
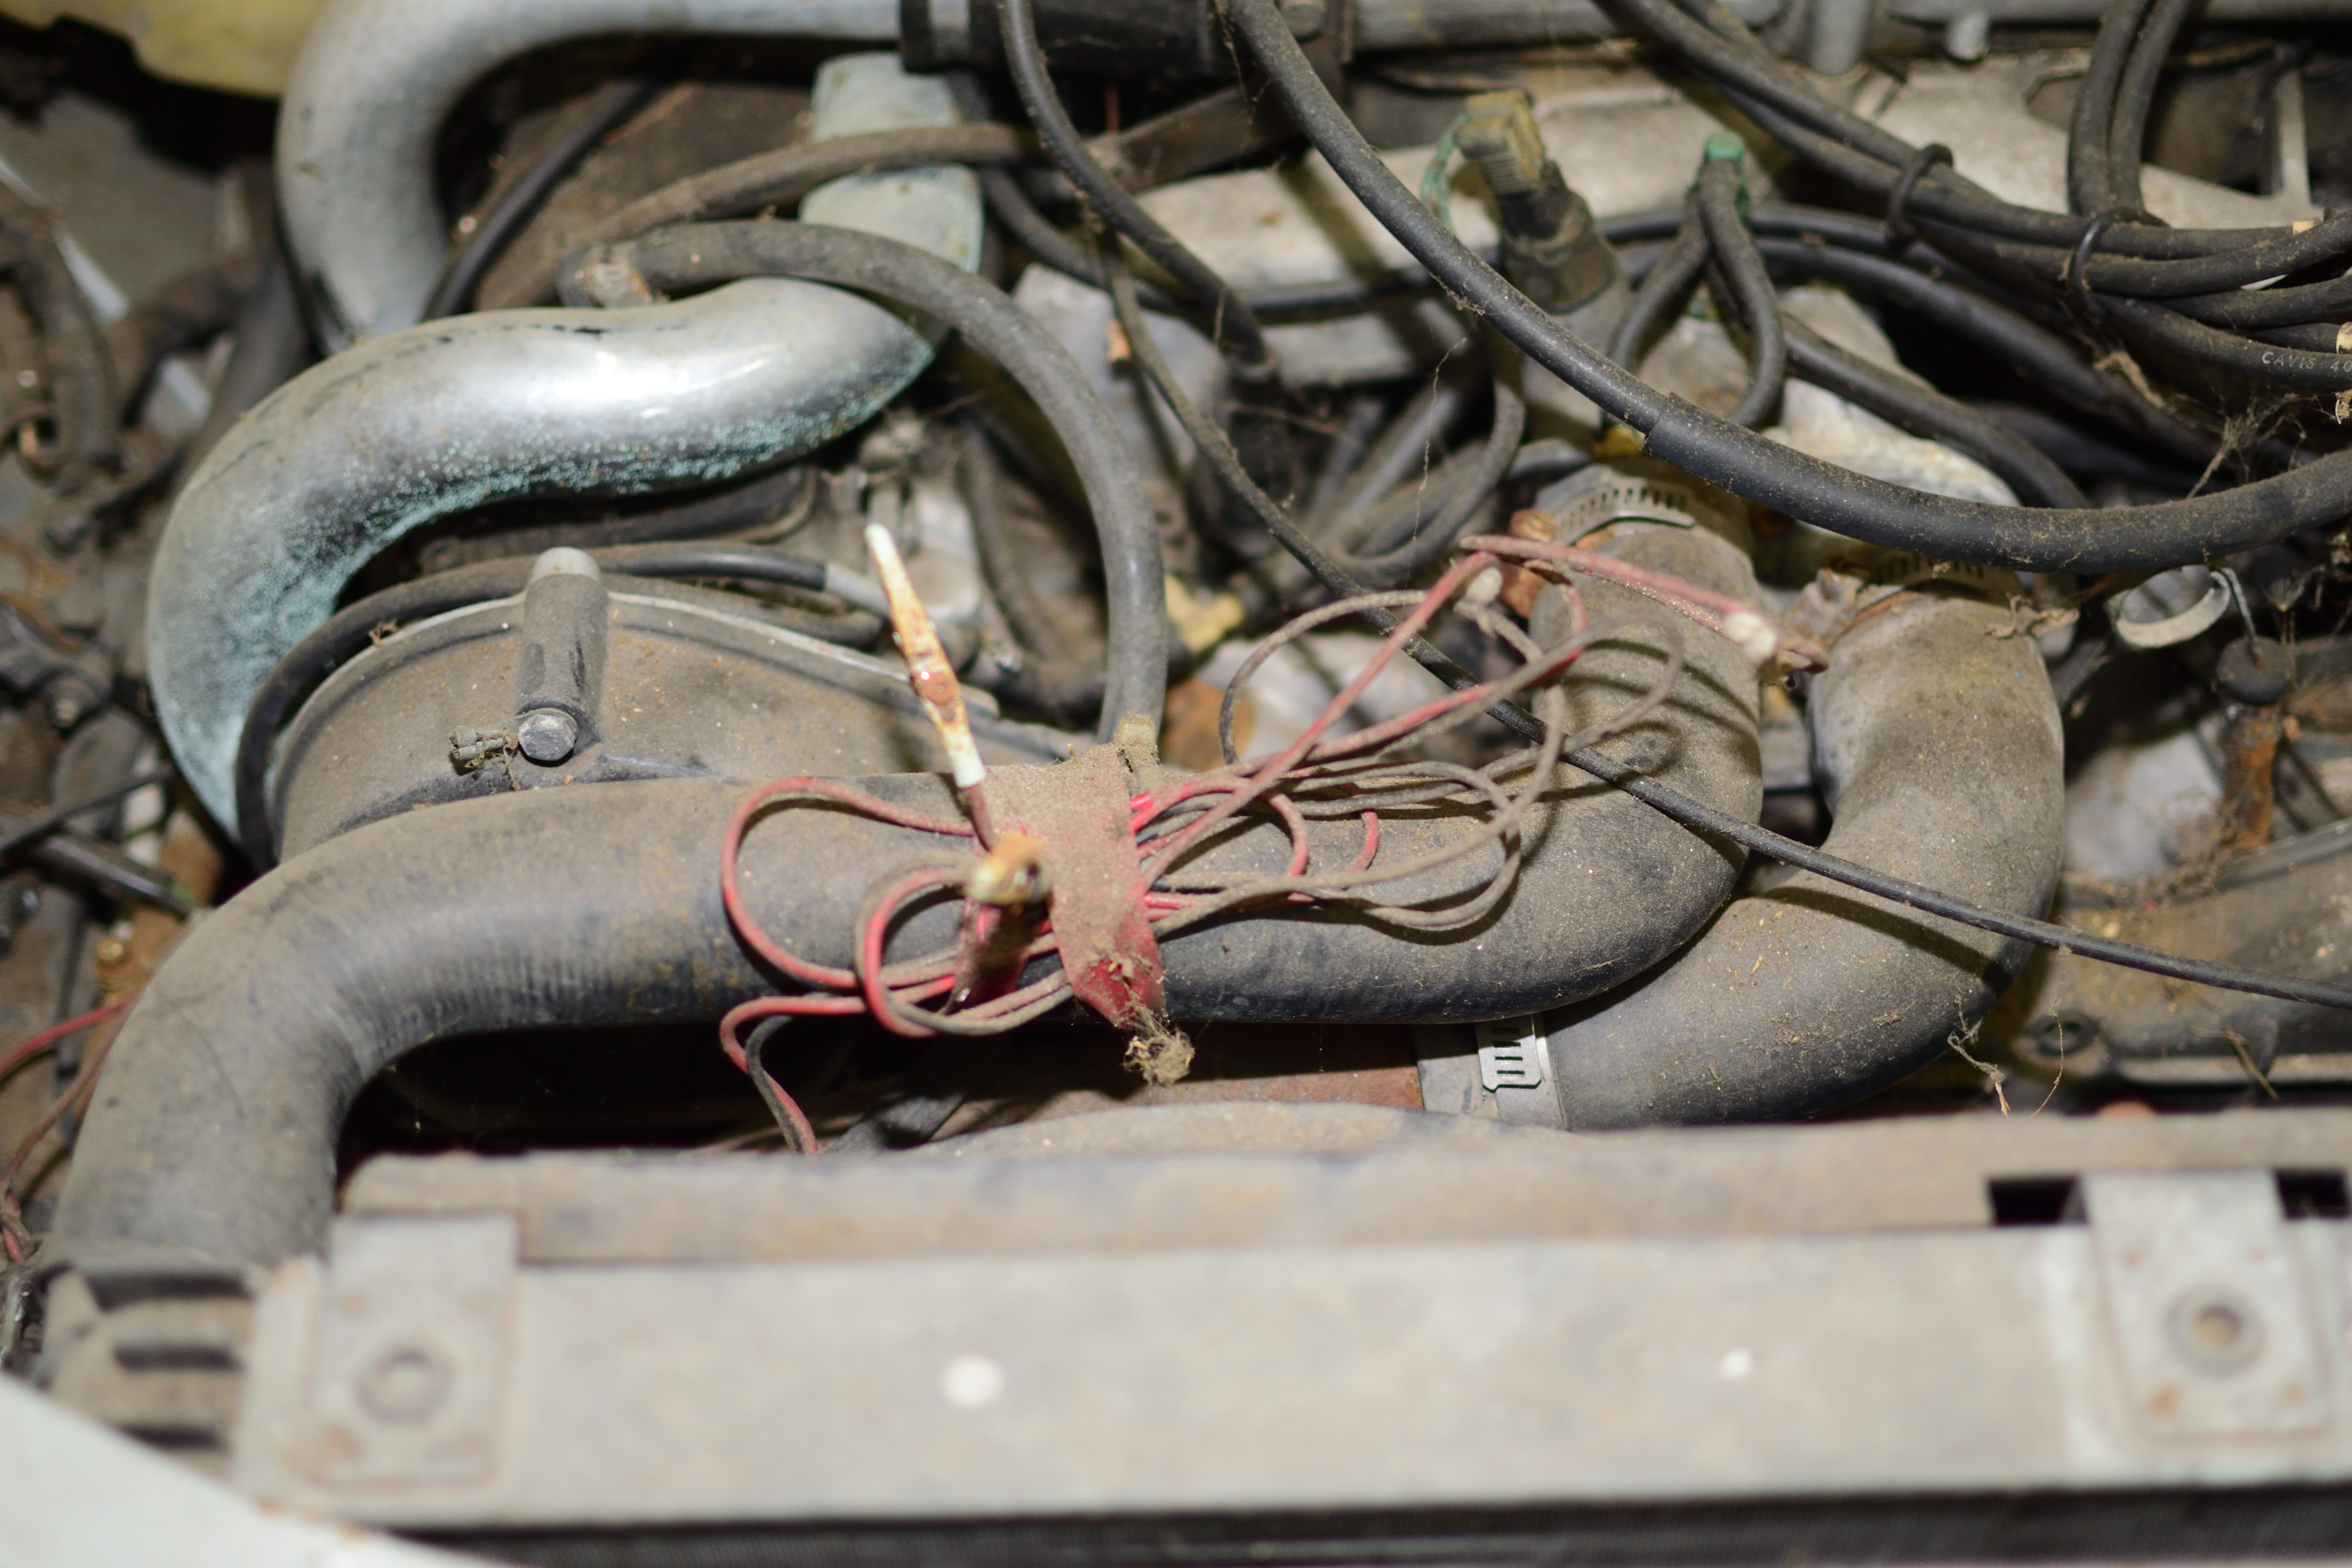
As we were working we speculated a bit as to what made this a parts car and the theory that we’re working on right now is that it was taken off the road to do regular maintenance and because the fenders were damaged and/or rusty. The car has new fenders welded on, but the body work isn’t complete. That would explain why the whole lights, bumper, and grille assembly is removed since that would need to come off to do the fenders. I suspect that the body work was started and the car was sold as an unfinished project at a price that was cheap enough to make it good to stick in a field as a parts car. Looking at the mileage, it’s just a few hundred miles past the timing belt change:
That’s my theory at least.
According to the service manual, the right cam will stay in place when the engine is a TDC and on the timing marks, but the left cam must be held in place. Naturally there’s a special tool for that, but we don’t have one. So using a bit of leftover steel, I cut out some teeth and put a hold in it to bolt it down to the block. We got as far as testing my cam gear holder by trying to rotate the engine and it seems to work. Next up will be releasing the tensioner – or the “belt stretcher” as the manual calls it – and pulling the crank pulley and the tensioner bearing so that the old belt can be removed and the new one installed.
The tool is imperfect, as evident by the above photo, but it does hold the cam in place. Cutting that out would have been much easier with a loose pulley to use for better measurements and fitment since the transfer from paperboard to steel resulted in the teeth being off a bit as the paperboard was bent a little behind the pulley. Being extremely unlikely that this tool will ever be used a second time, however, it should get this job done and then be returned to the scrap steel pile to find another life once the new timing belt has been installed.
We got together on Friday the 13th to make some more progress. While it feels like we got a few steps forward, we didn’t actually manage to finish anything yet.
Currently, we’re working on three tasks: Complete the timing belt change; catalog the spares and parts in and around the car; empty the fuel tank of the old gas. None of the parts got cataloged, but progress was made on the timing belt and problems were found with the fuel system.
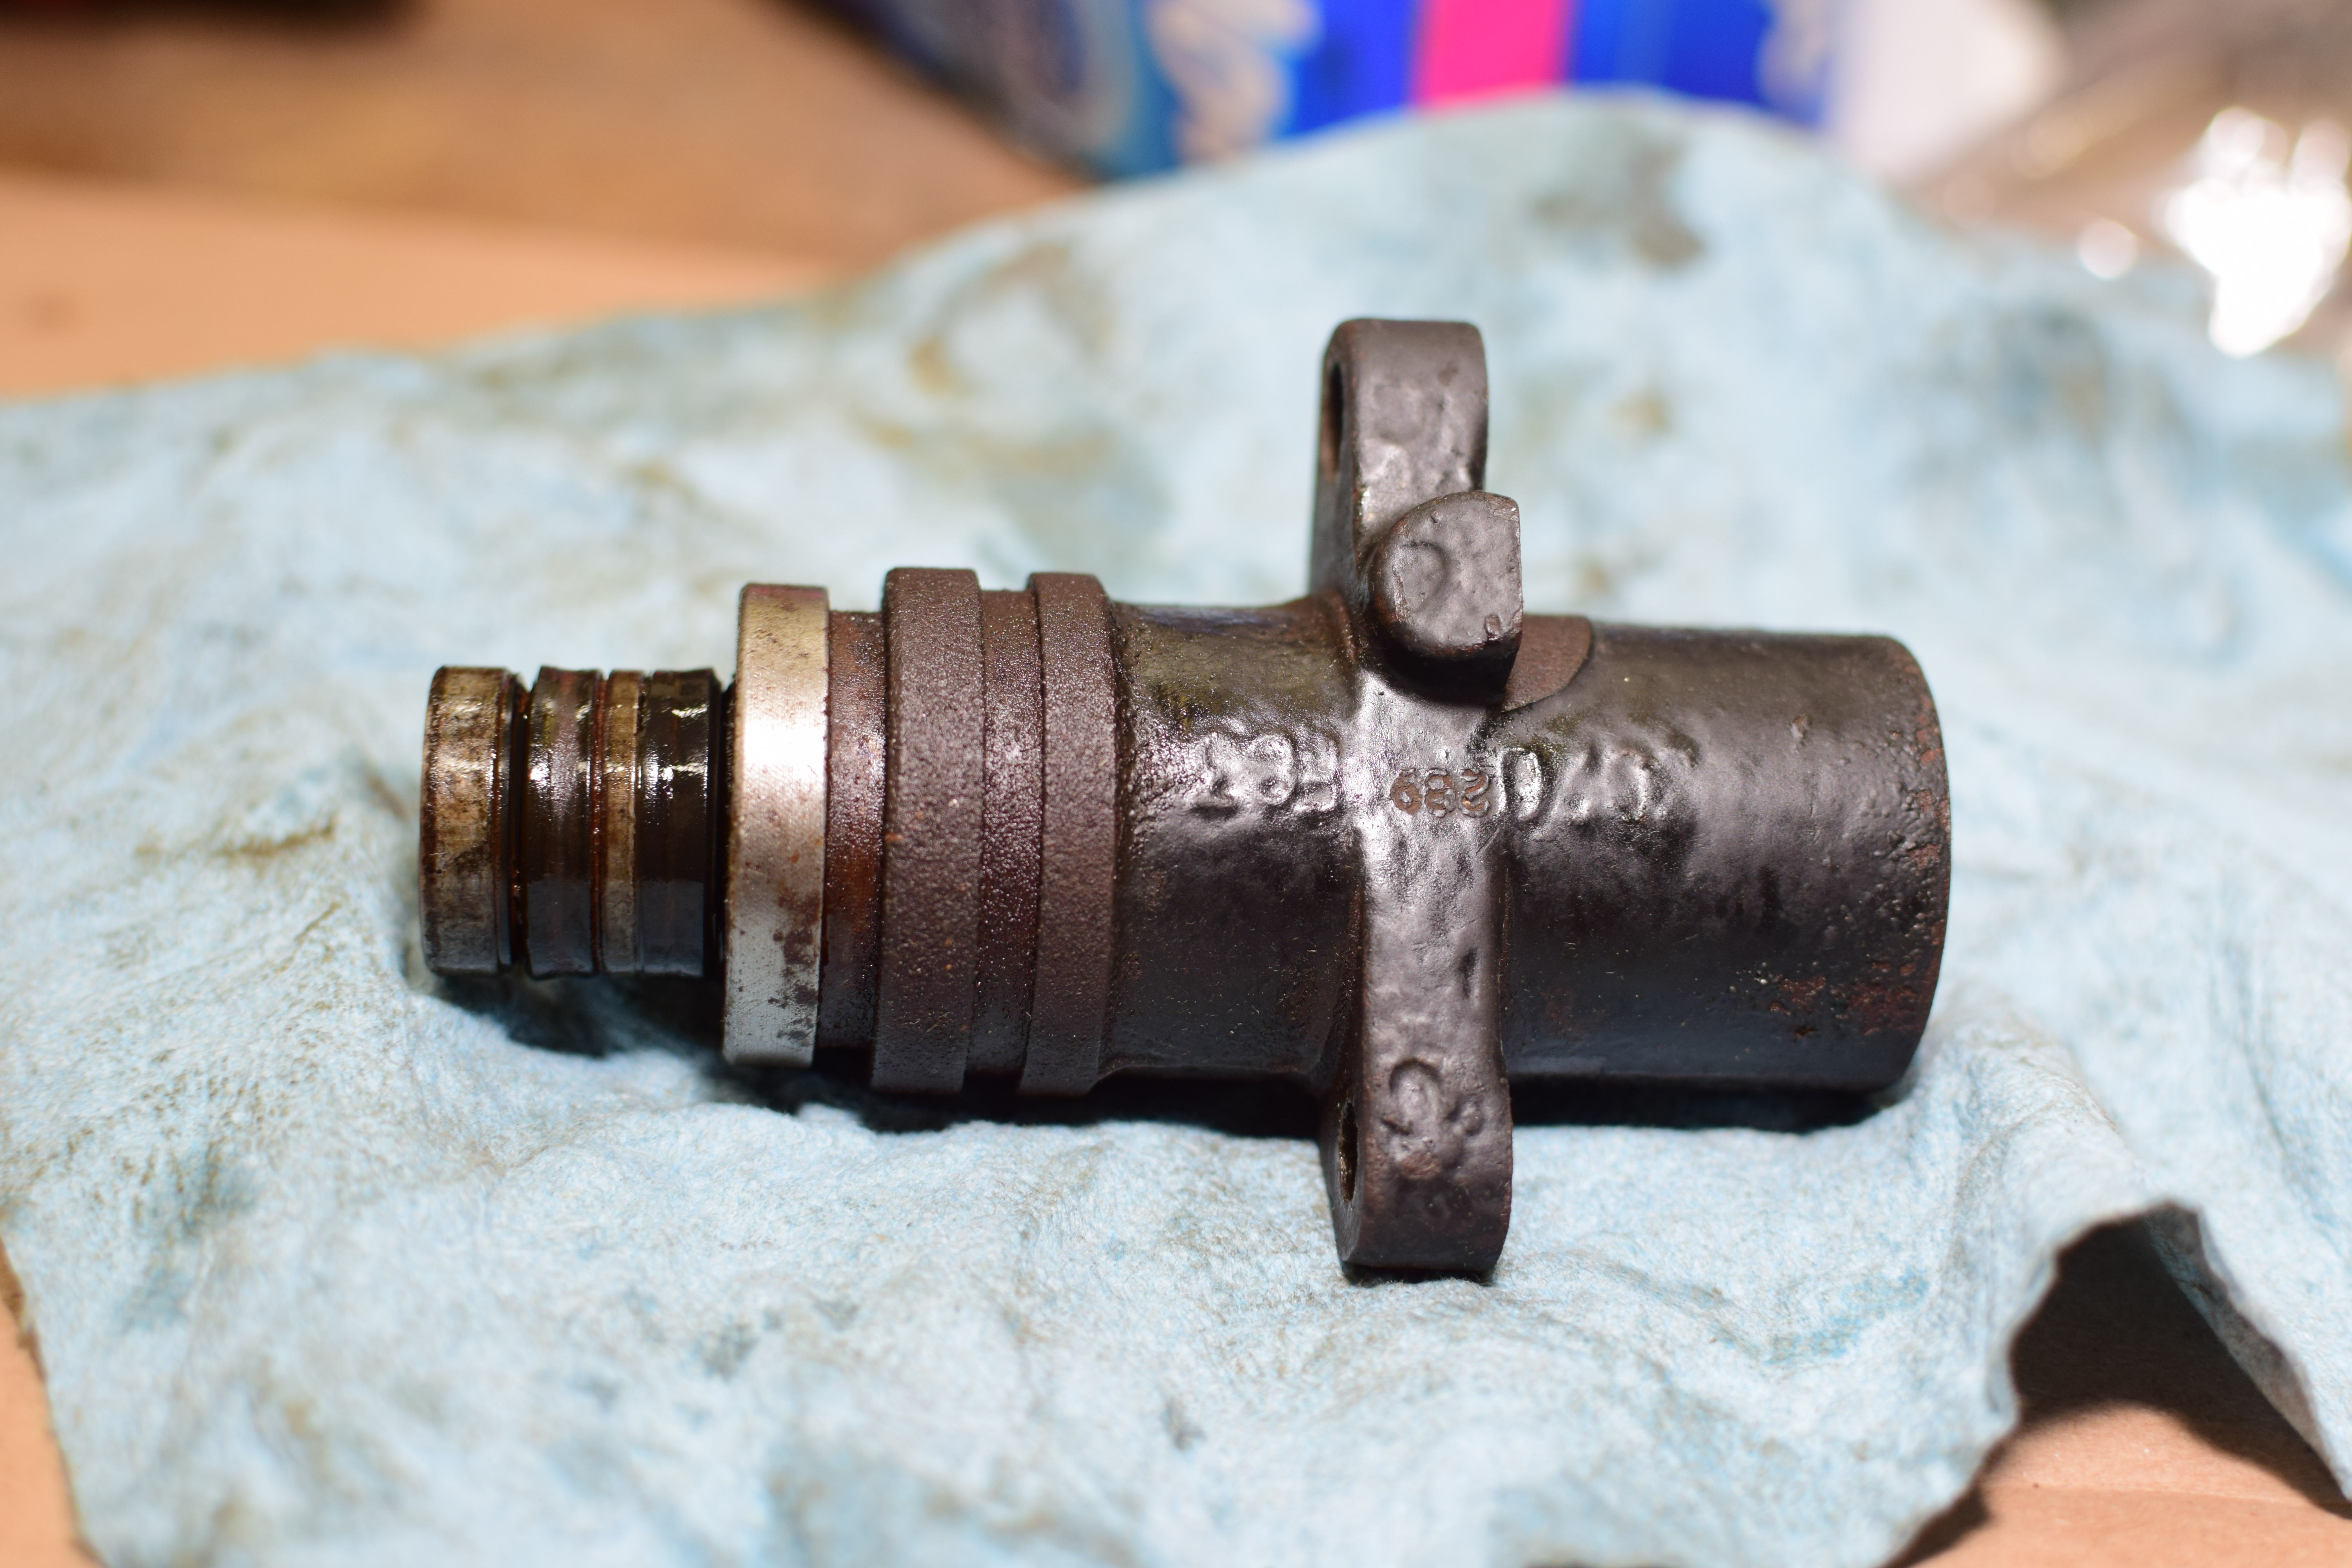
For the timing belt to be removed from the engine, the crank pulley needed to come off and the tensioner needed to be relaxed. Pulling the crank pulley was simple – the five bolts zipped out and the pulley easily slid off.
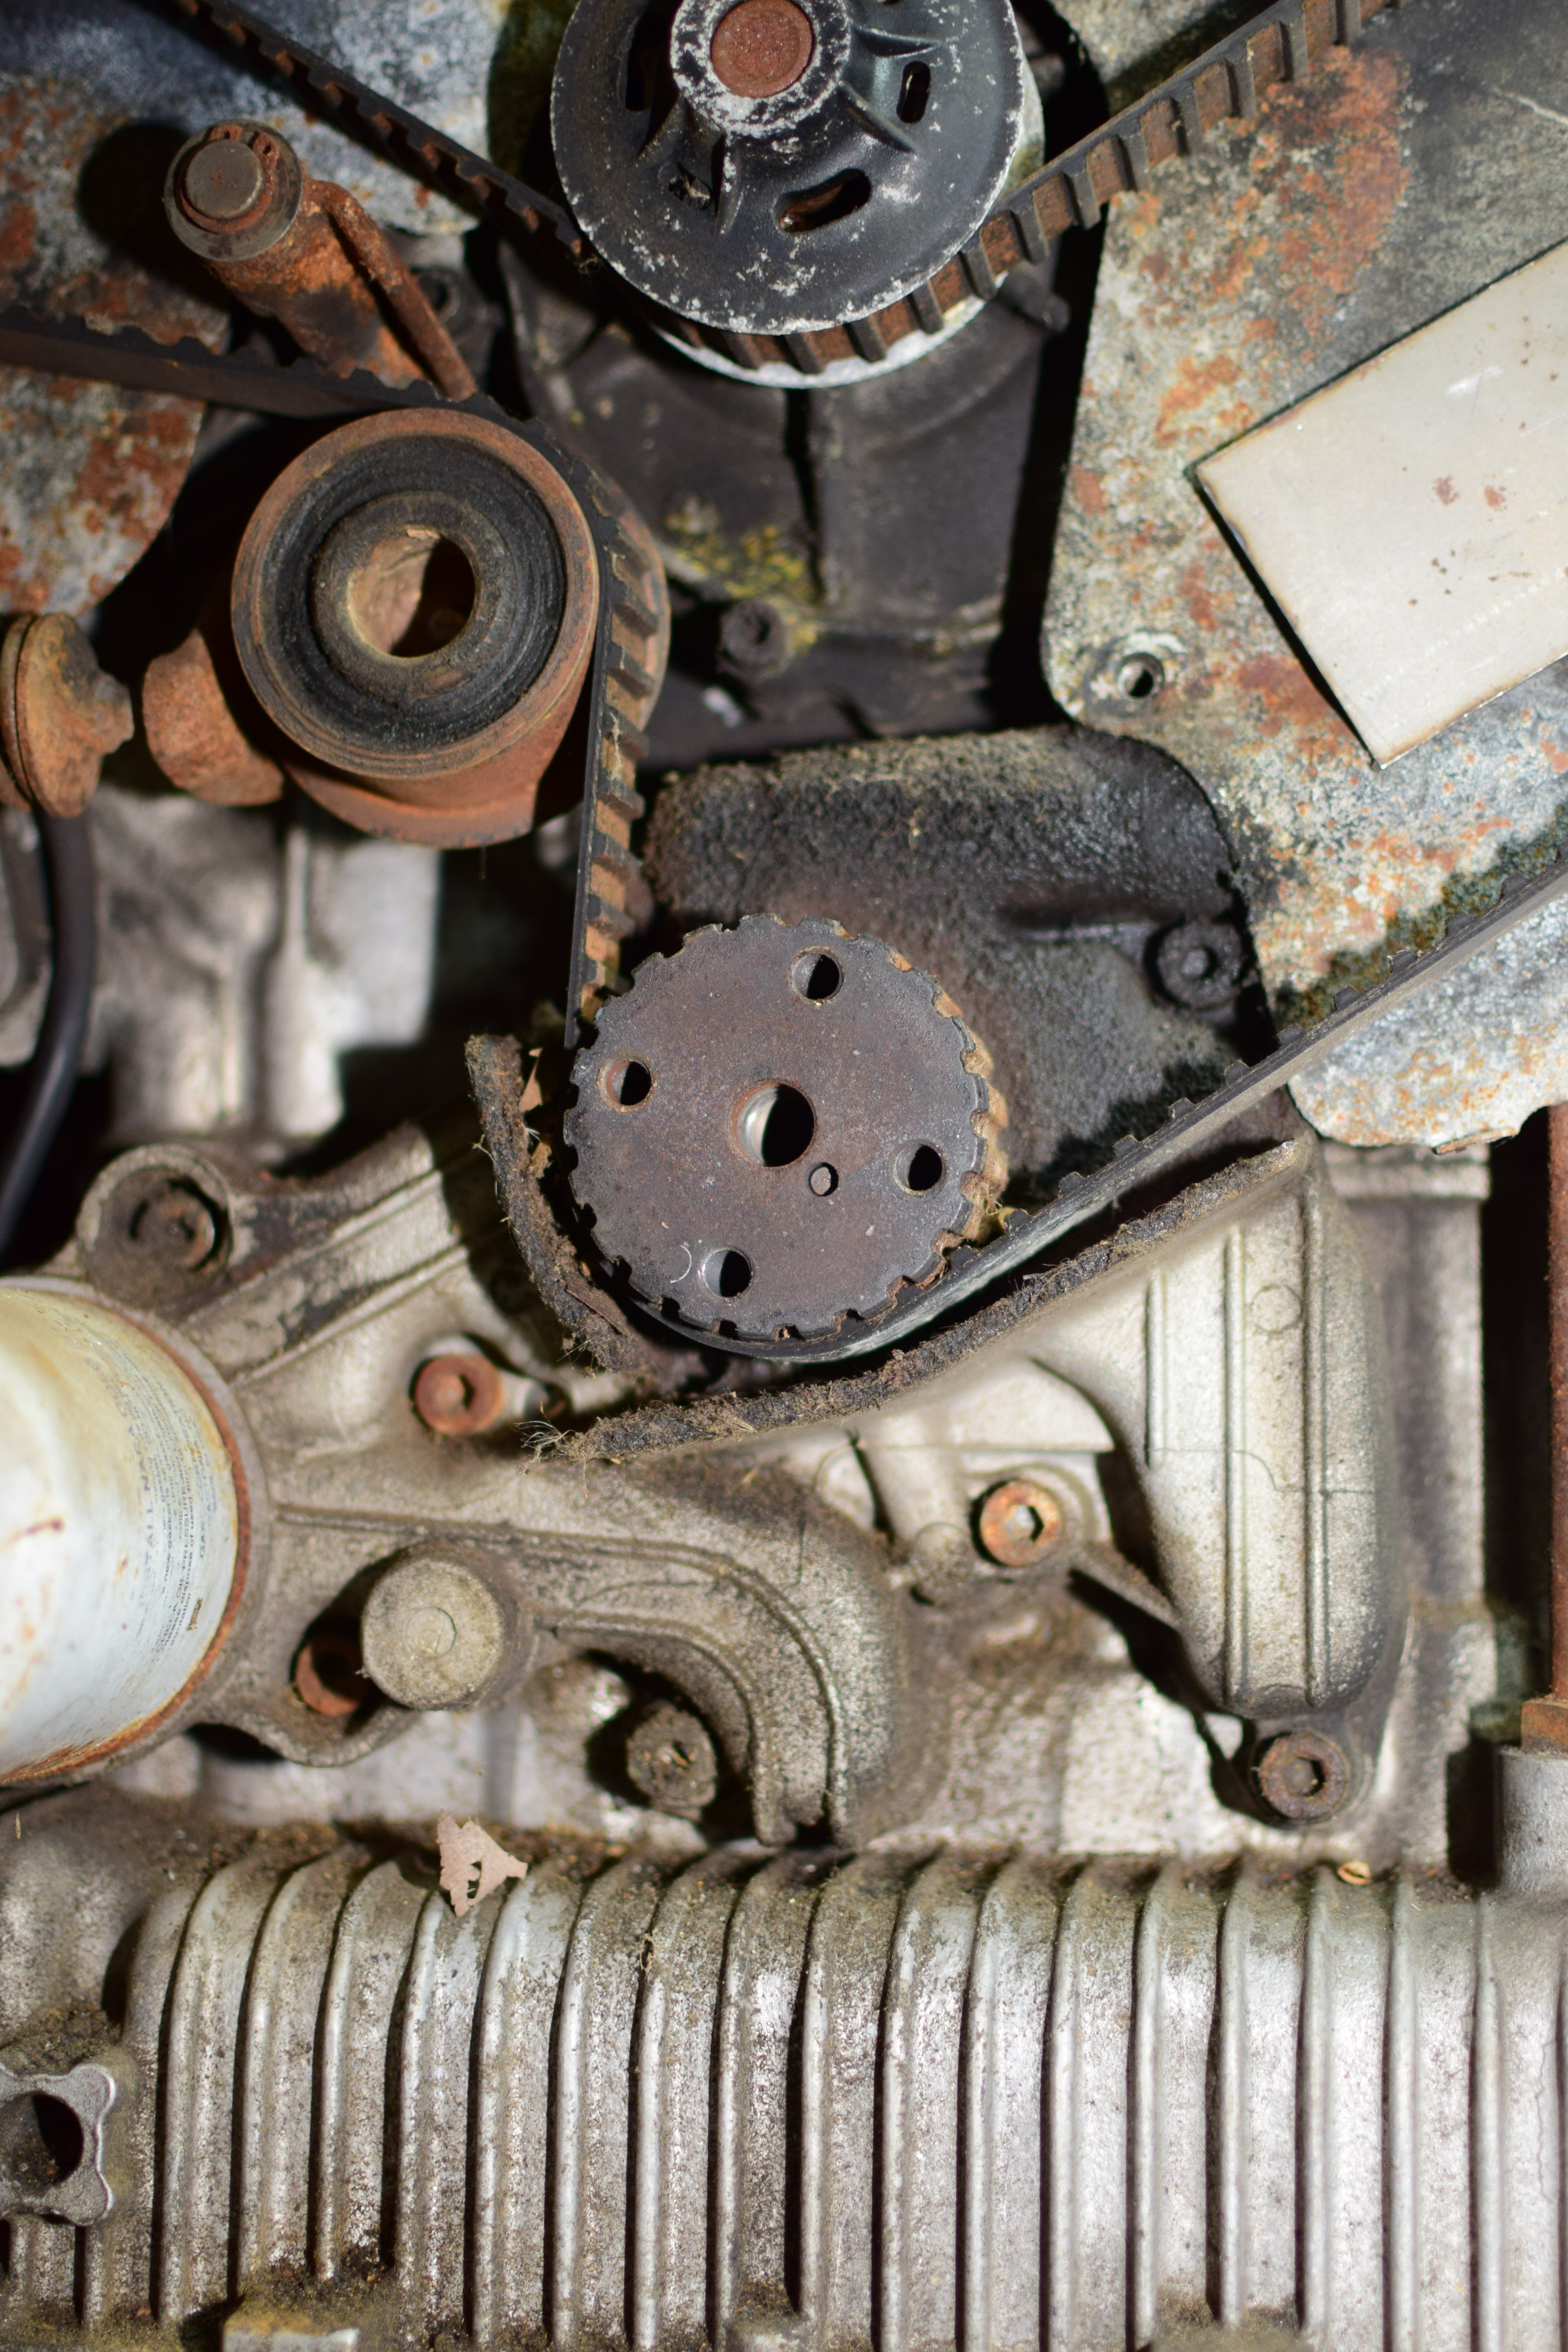
The service manual, translated from the Italian a couple decades before Google Translate became a thing, says that to remove the “belt stretcher” – by which they mean the timing belt tensioner – you’re supposed to loosen the cap locking bolt, compress the spring to release the tension, tighten the locking bolt, and then remove the tensioner and the “jockey pulley”. I, however, decided to try to remove the tensioner without re-reading the manual and didn’t remember any of that. Instead, I took the mounting bolts out of the tensioner to remove it and then slid the old timing belt off. Either way, the job was complete. Two bits of good news came from this. First of all, the water pump bearing feels smooth and is quiet. Secondly, the tensioner pulley bearing was a disaster!
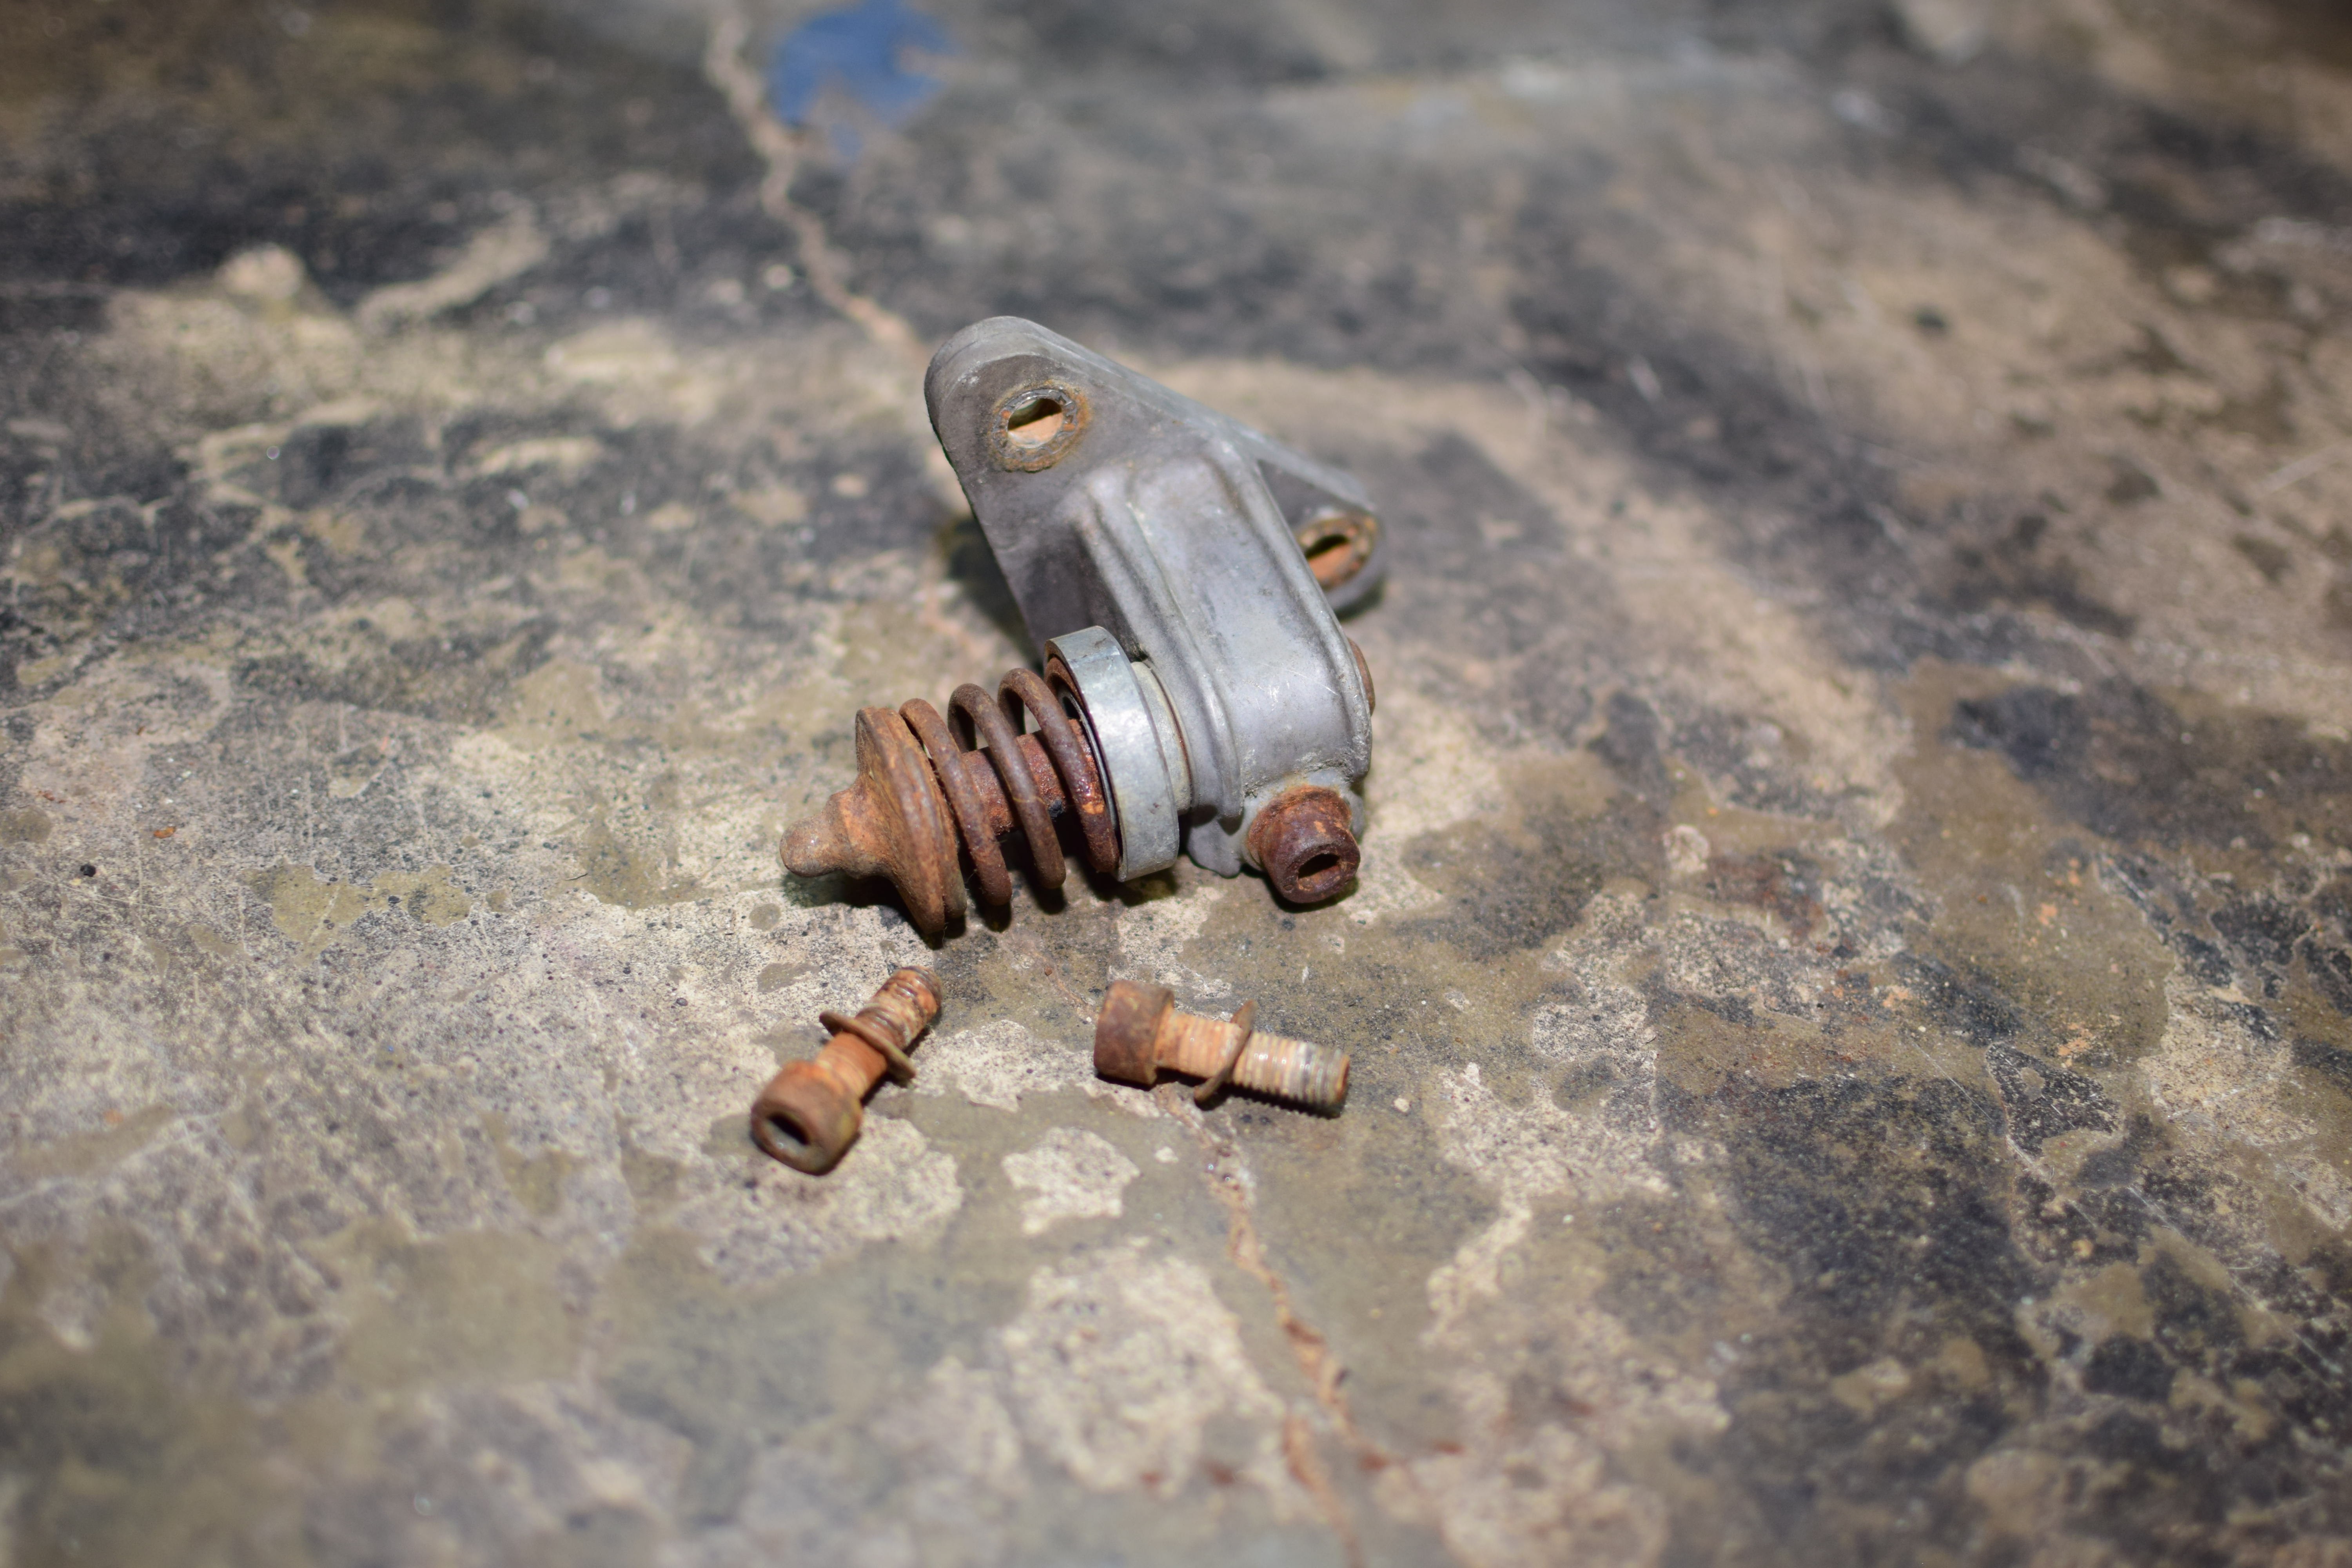
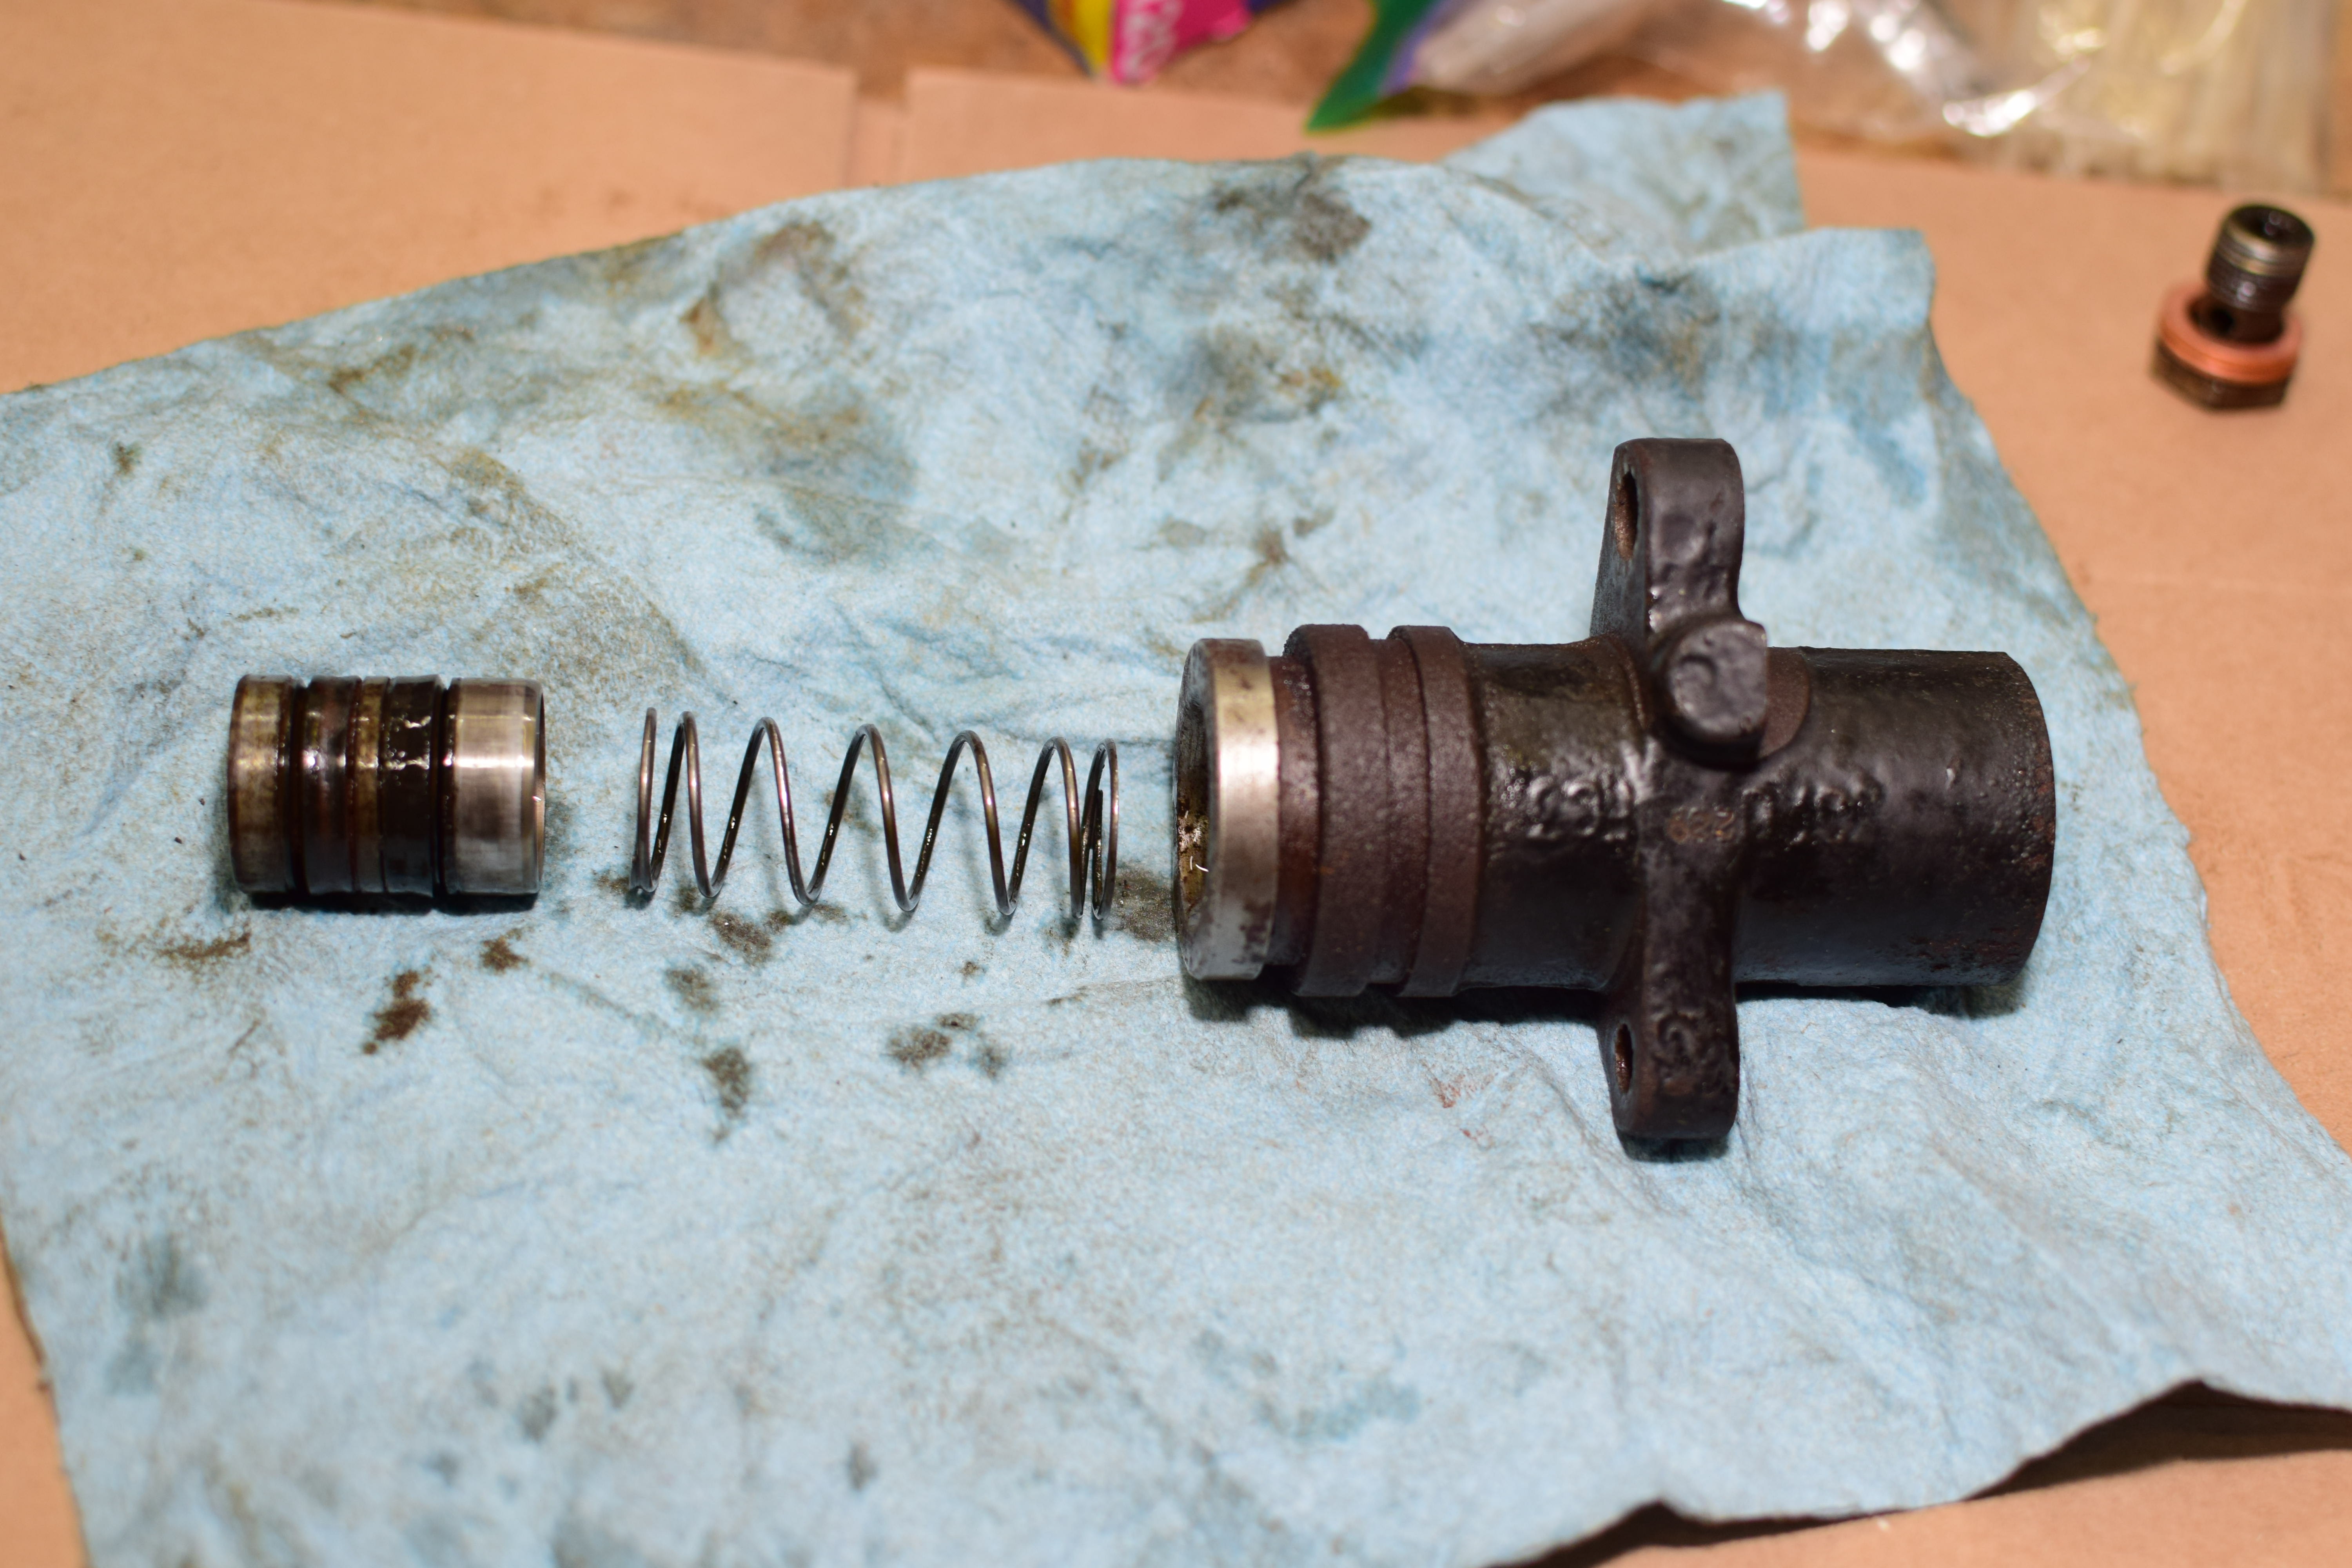
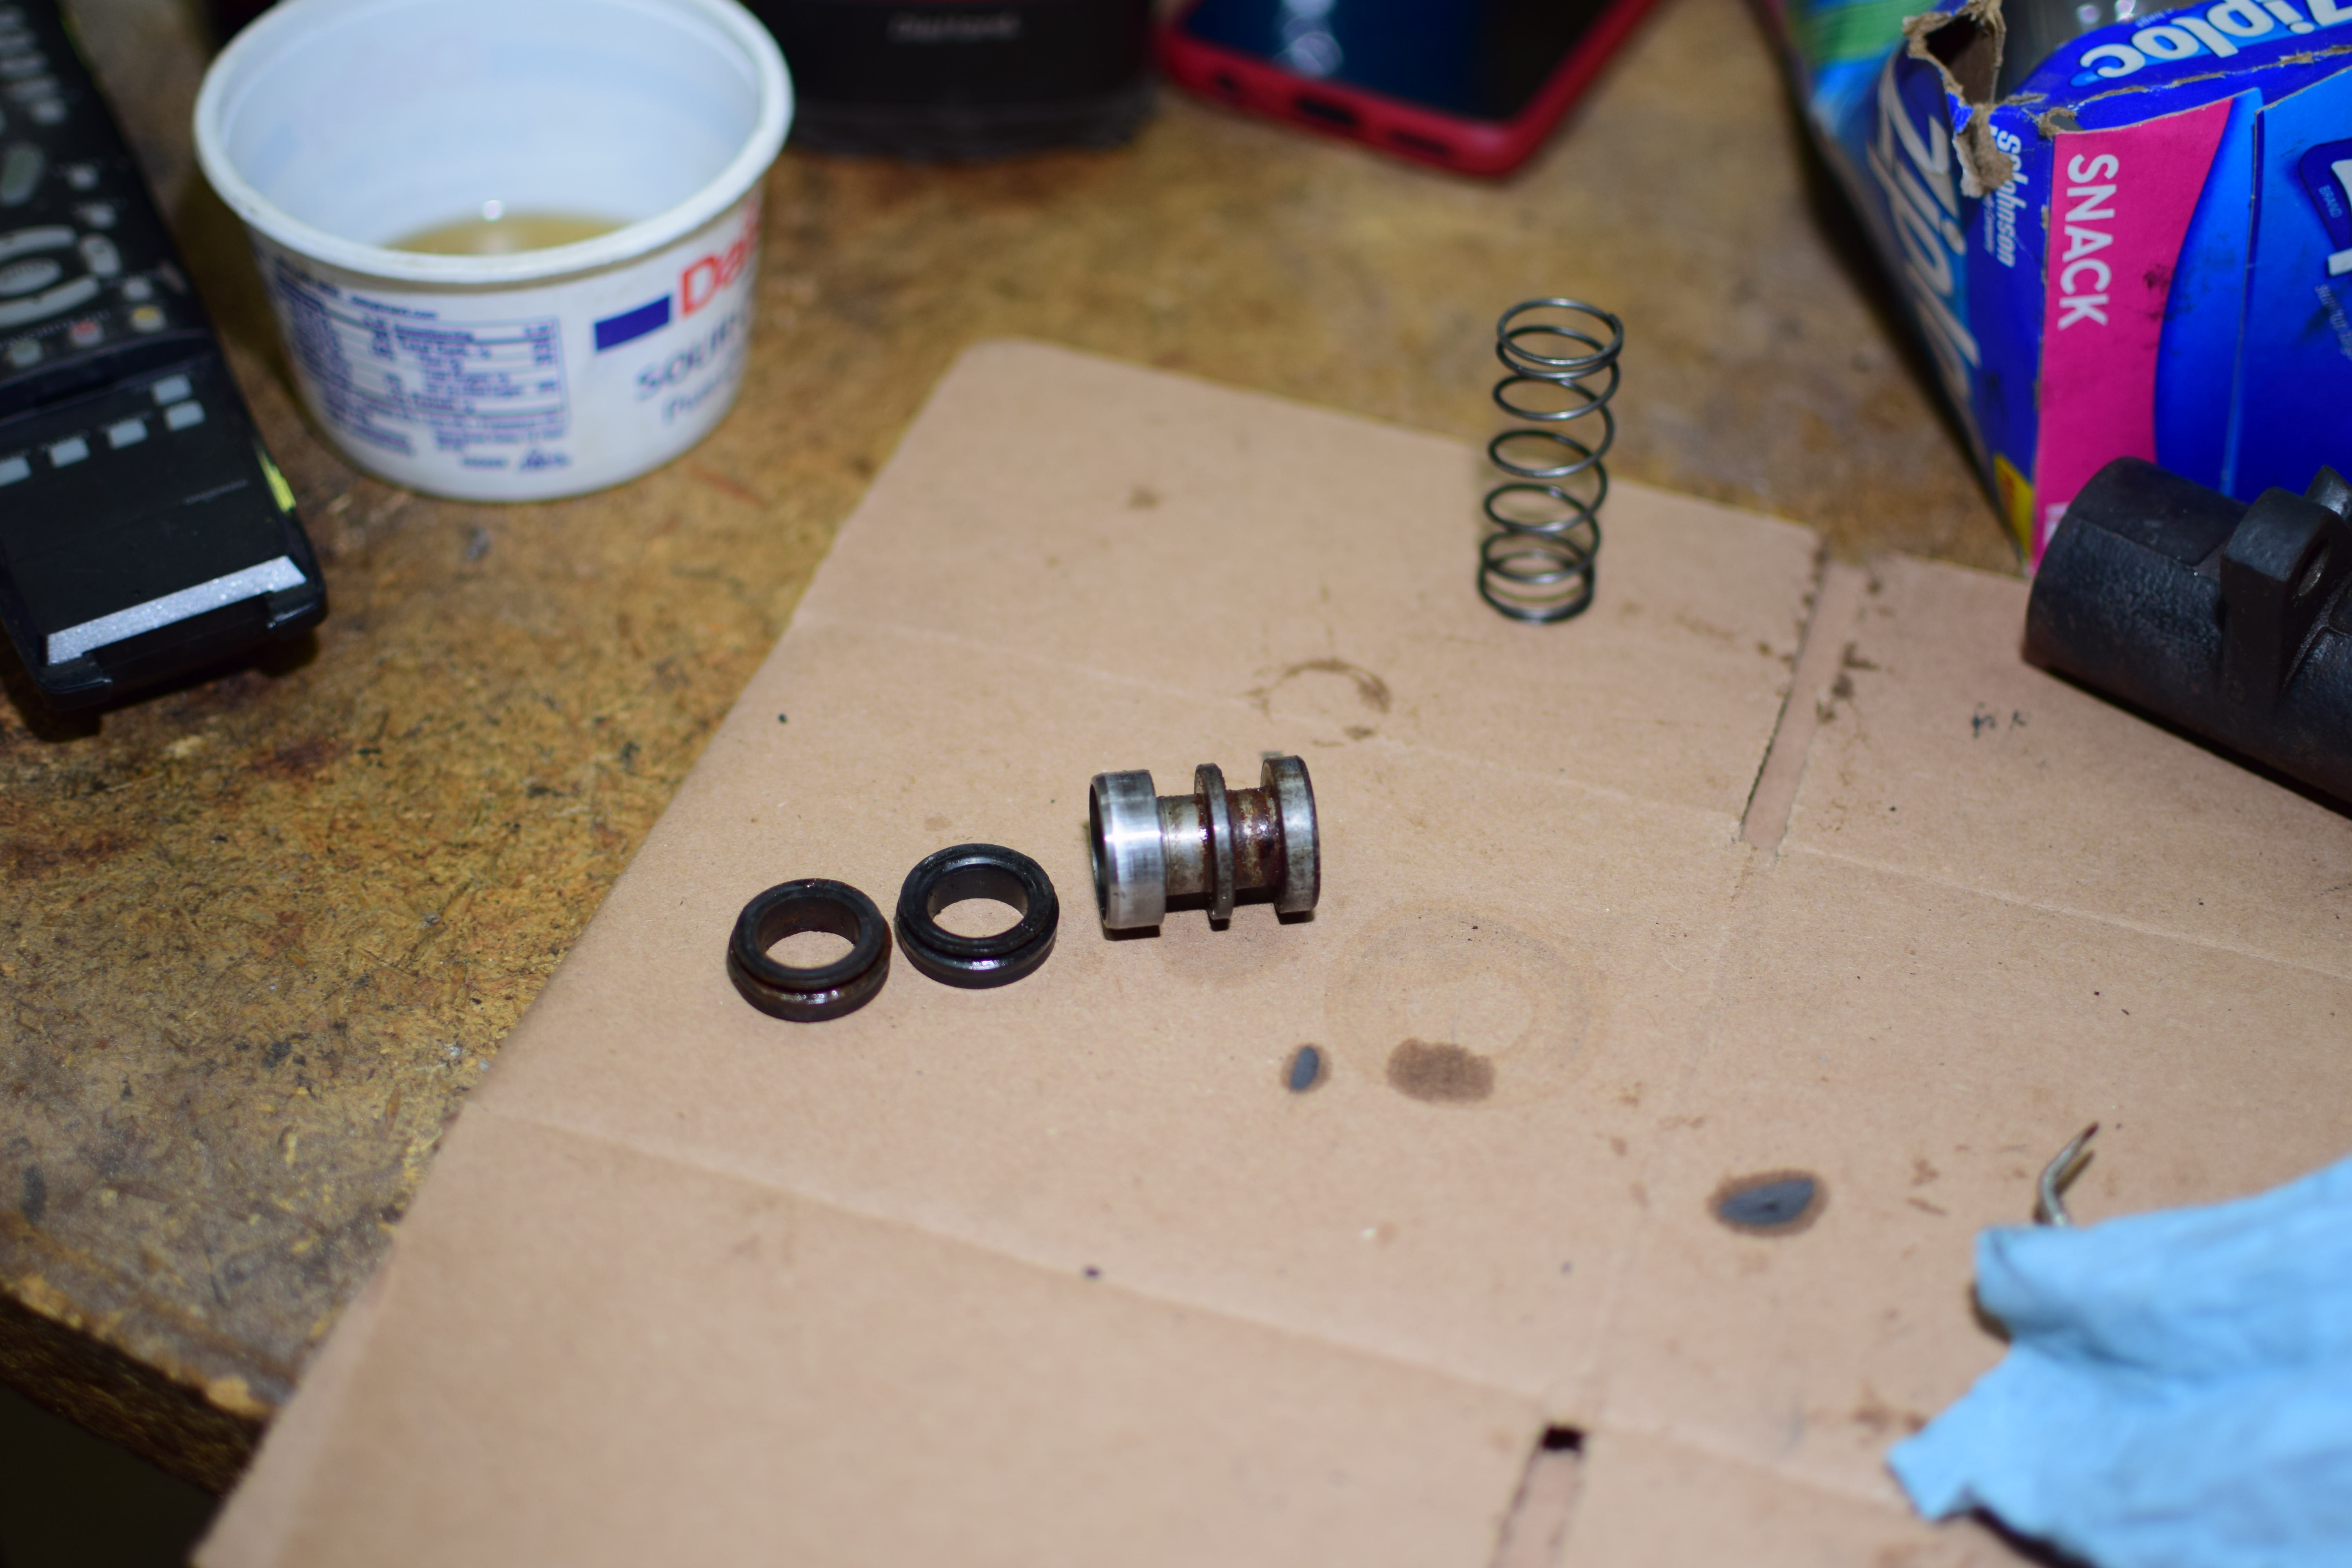
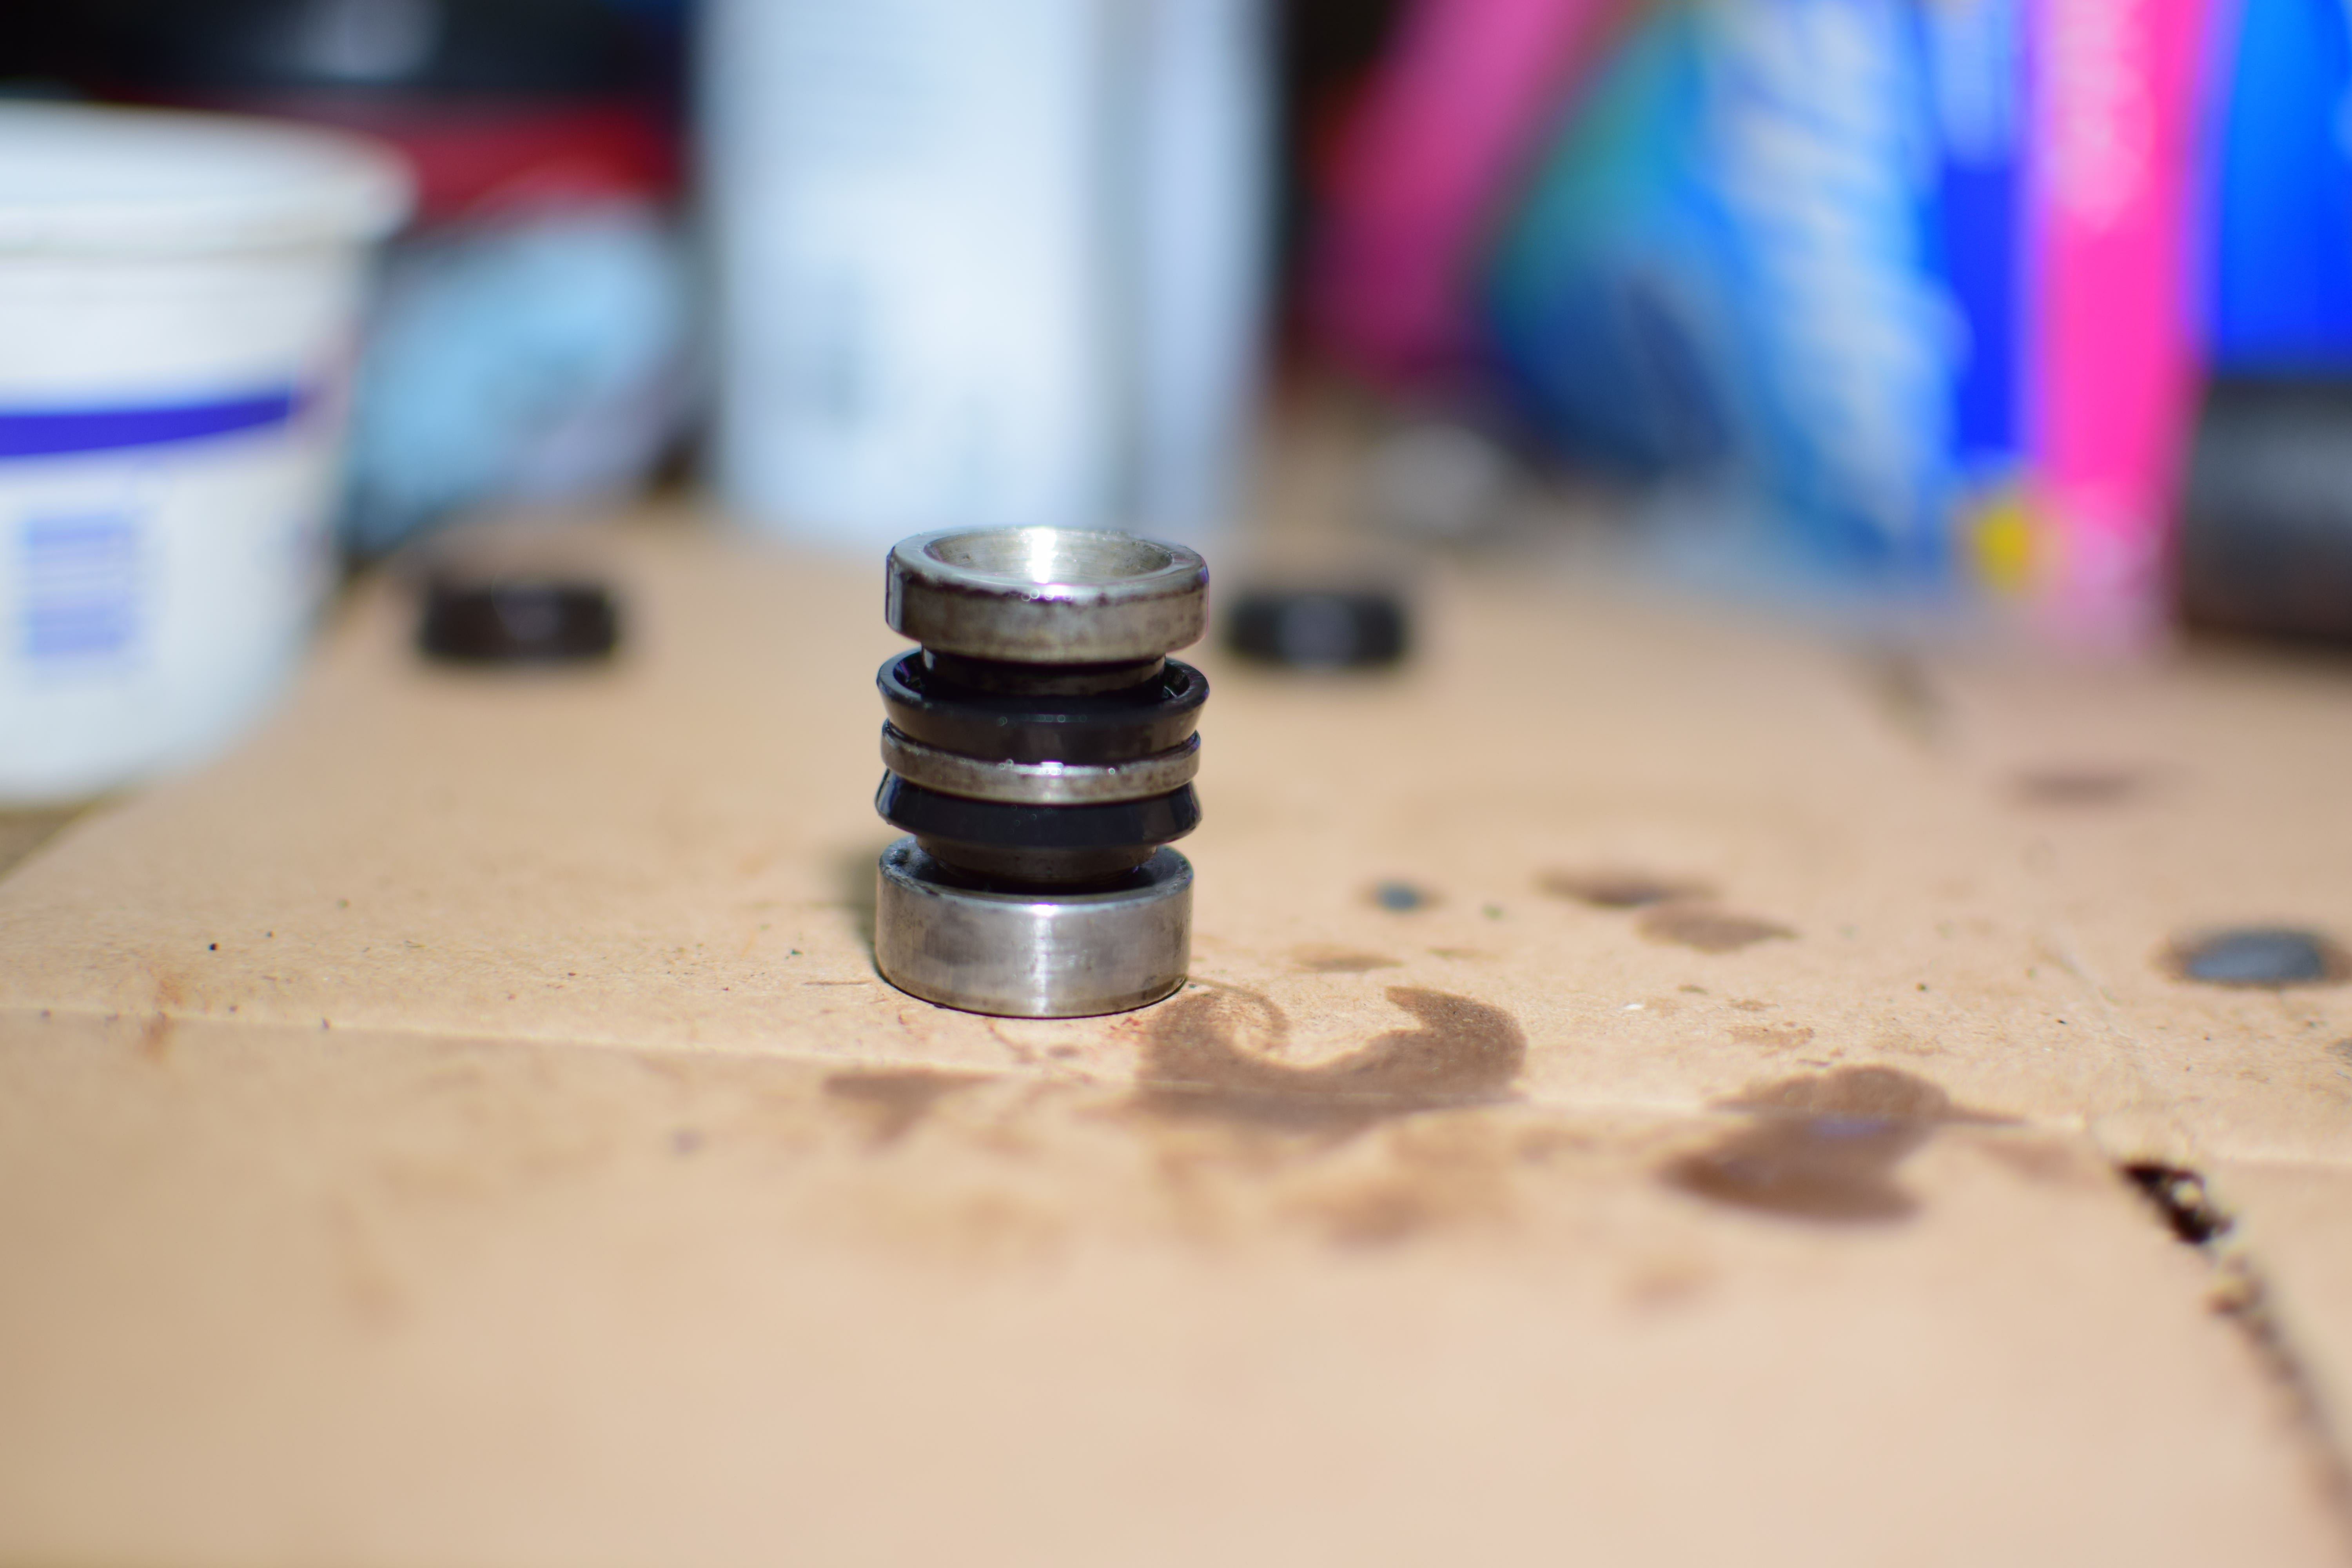
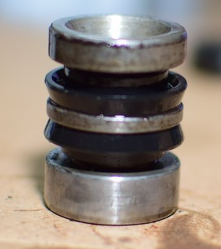
The tensioner pulley is removed by taking off the snap ring and sliding it over its mounting peg. The corrosion meant that it took considerable effort to remove the pulley, but once it was off, I could disassemble it so the bearing could be replaced.
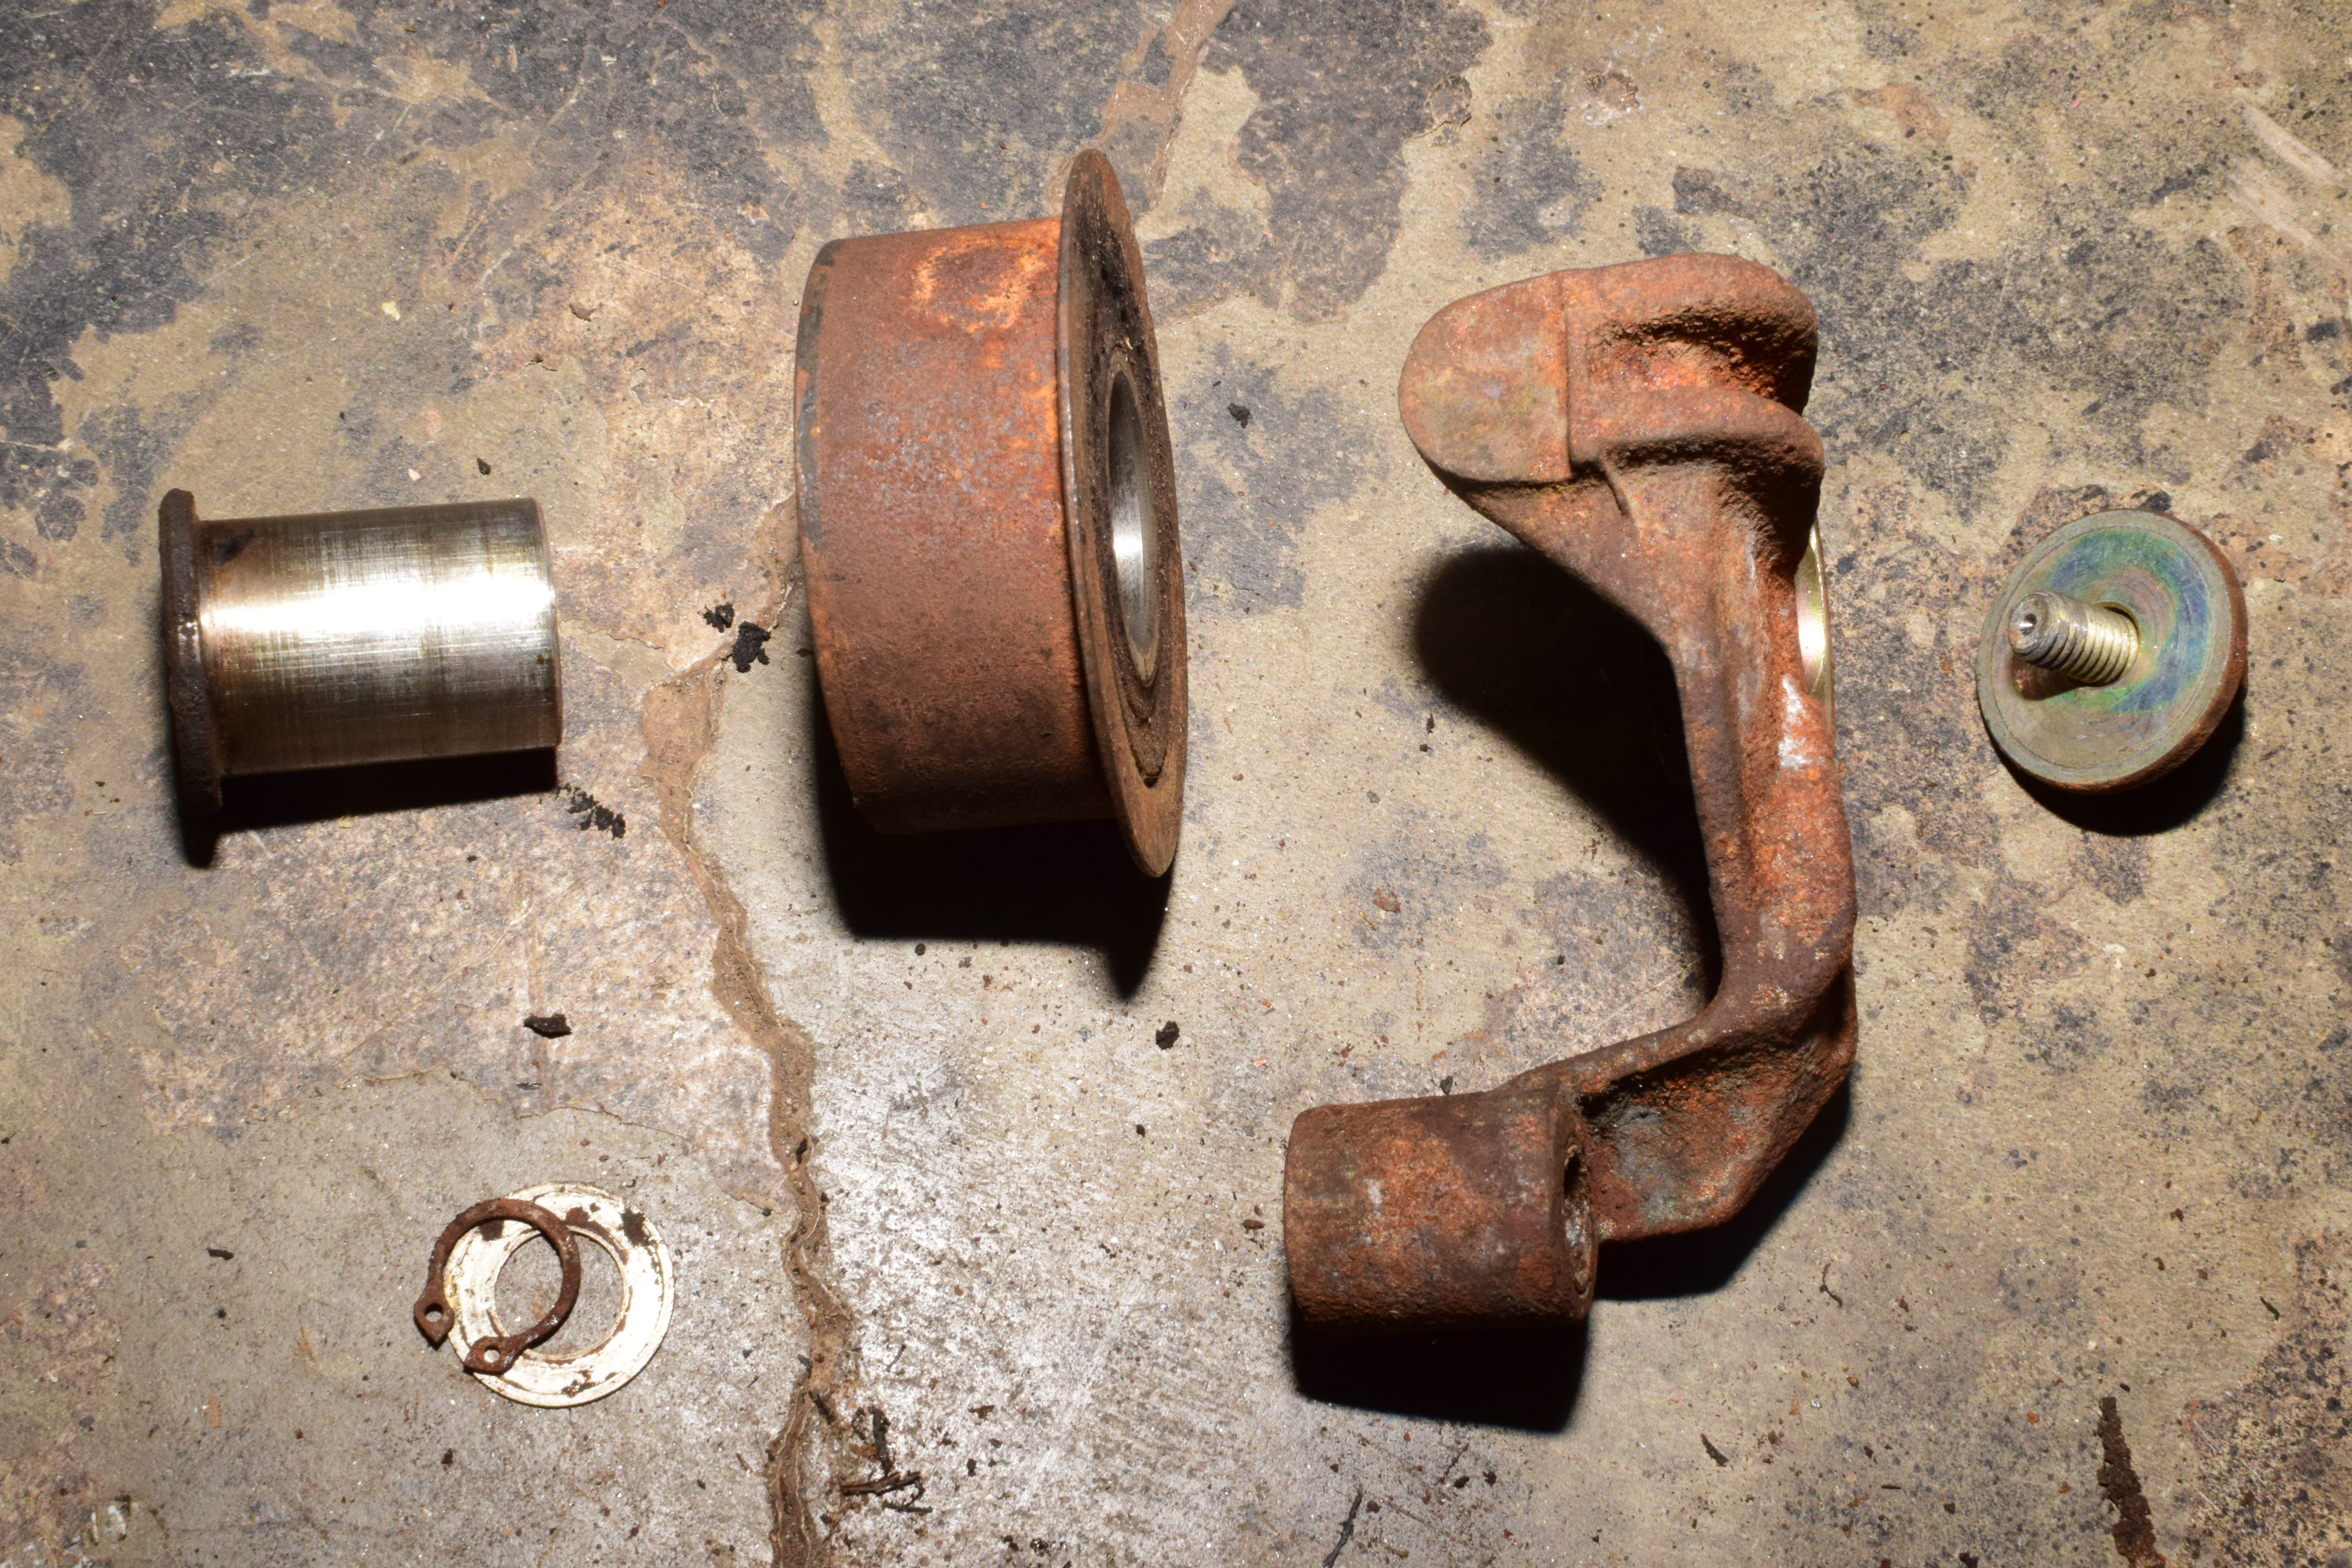
Using the hydraulic press, I took the old bearing out and pressed the new one in.
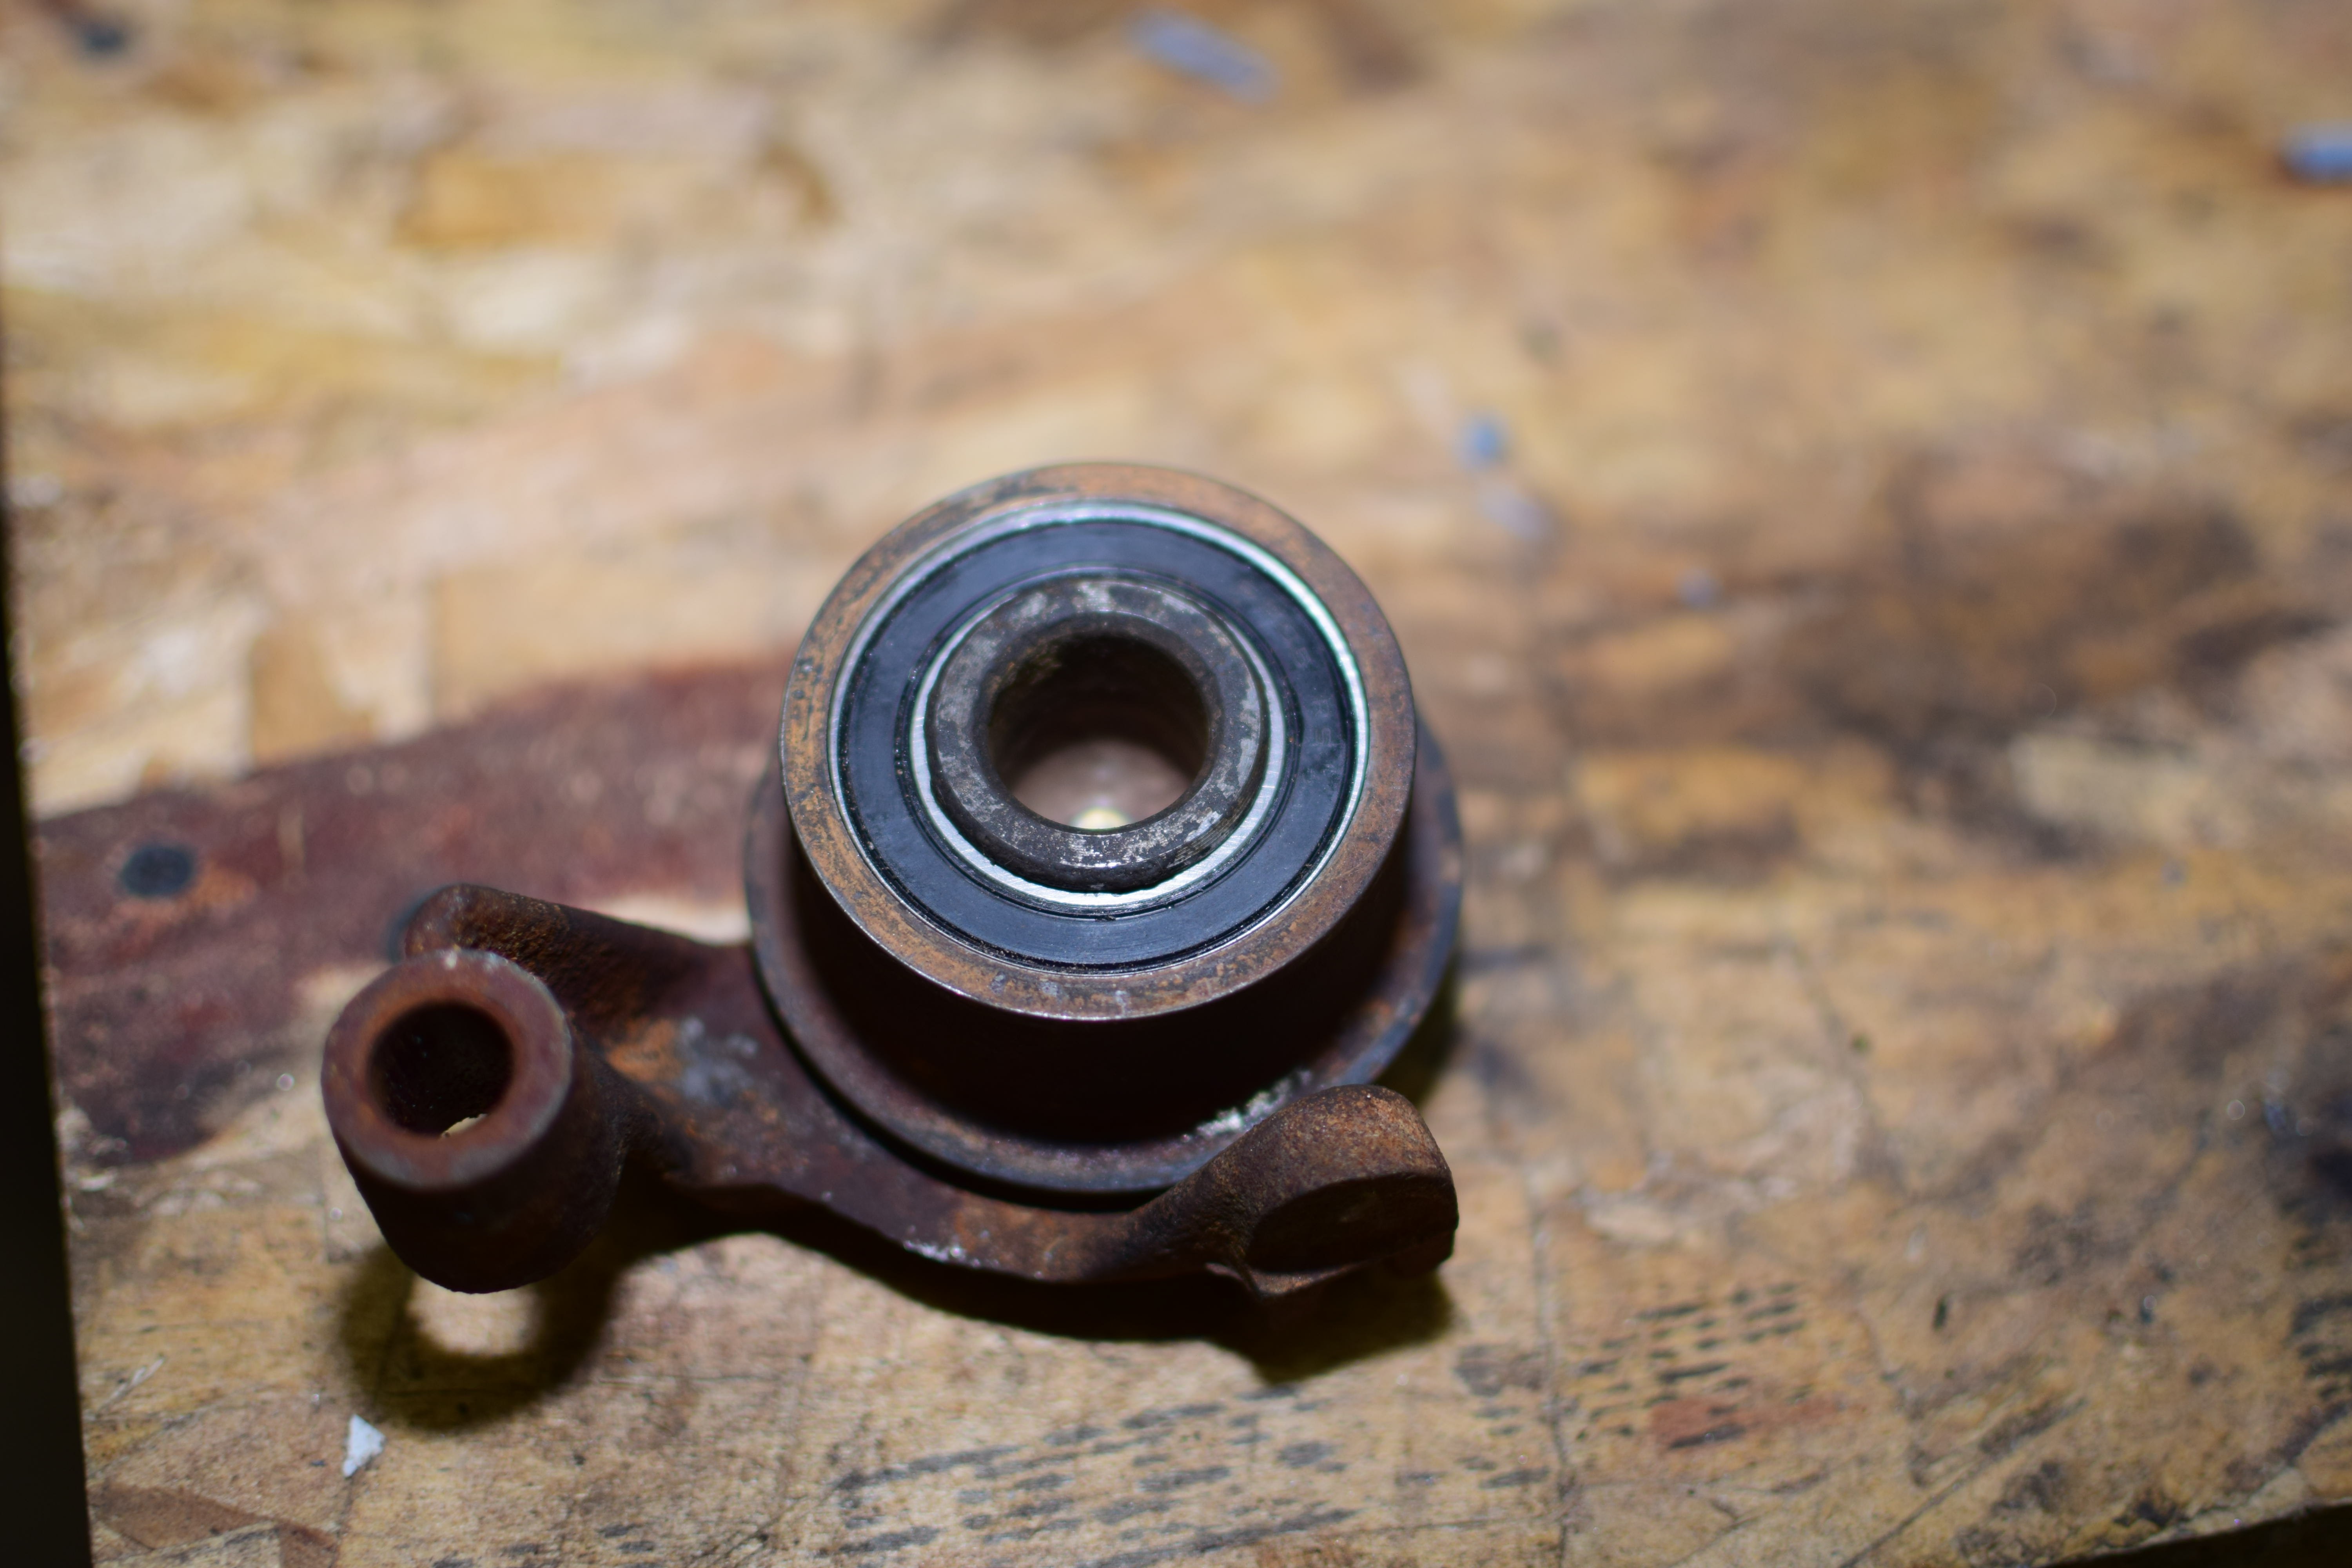
Once I figured out how the tensioner actually worked, I lubed that up as well.
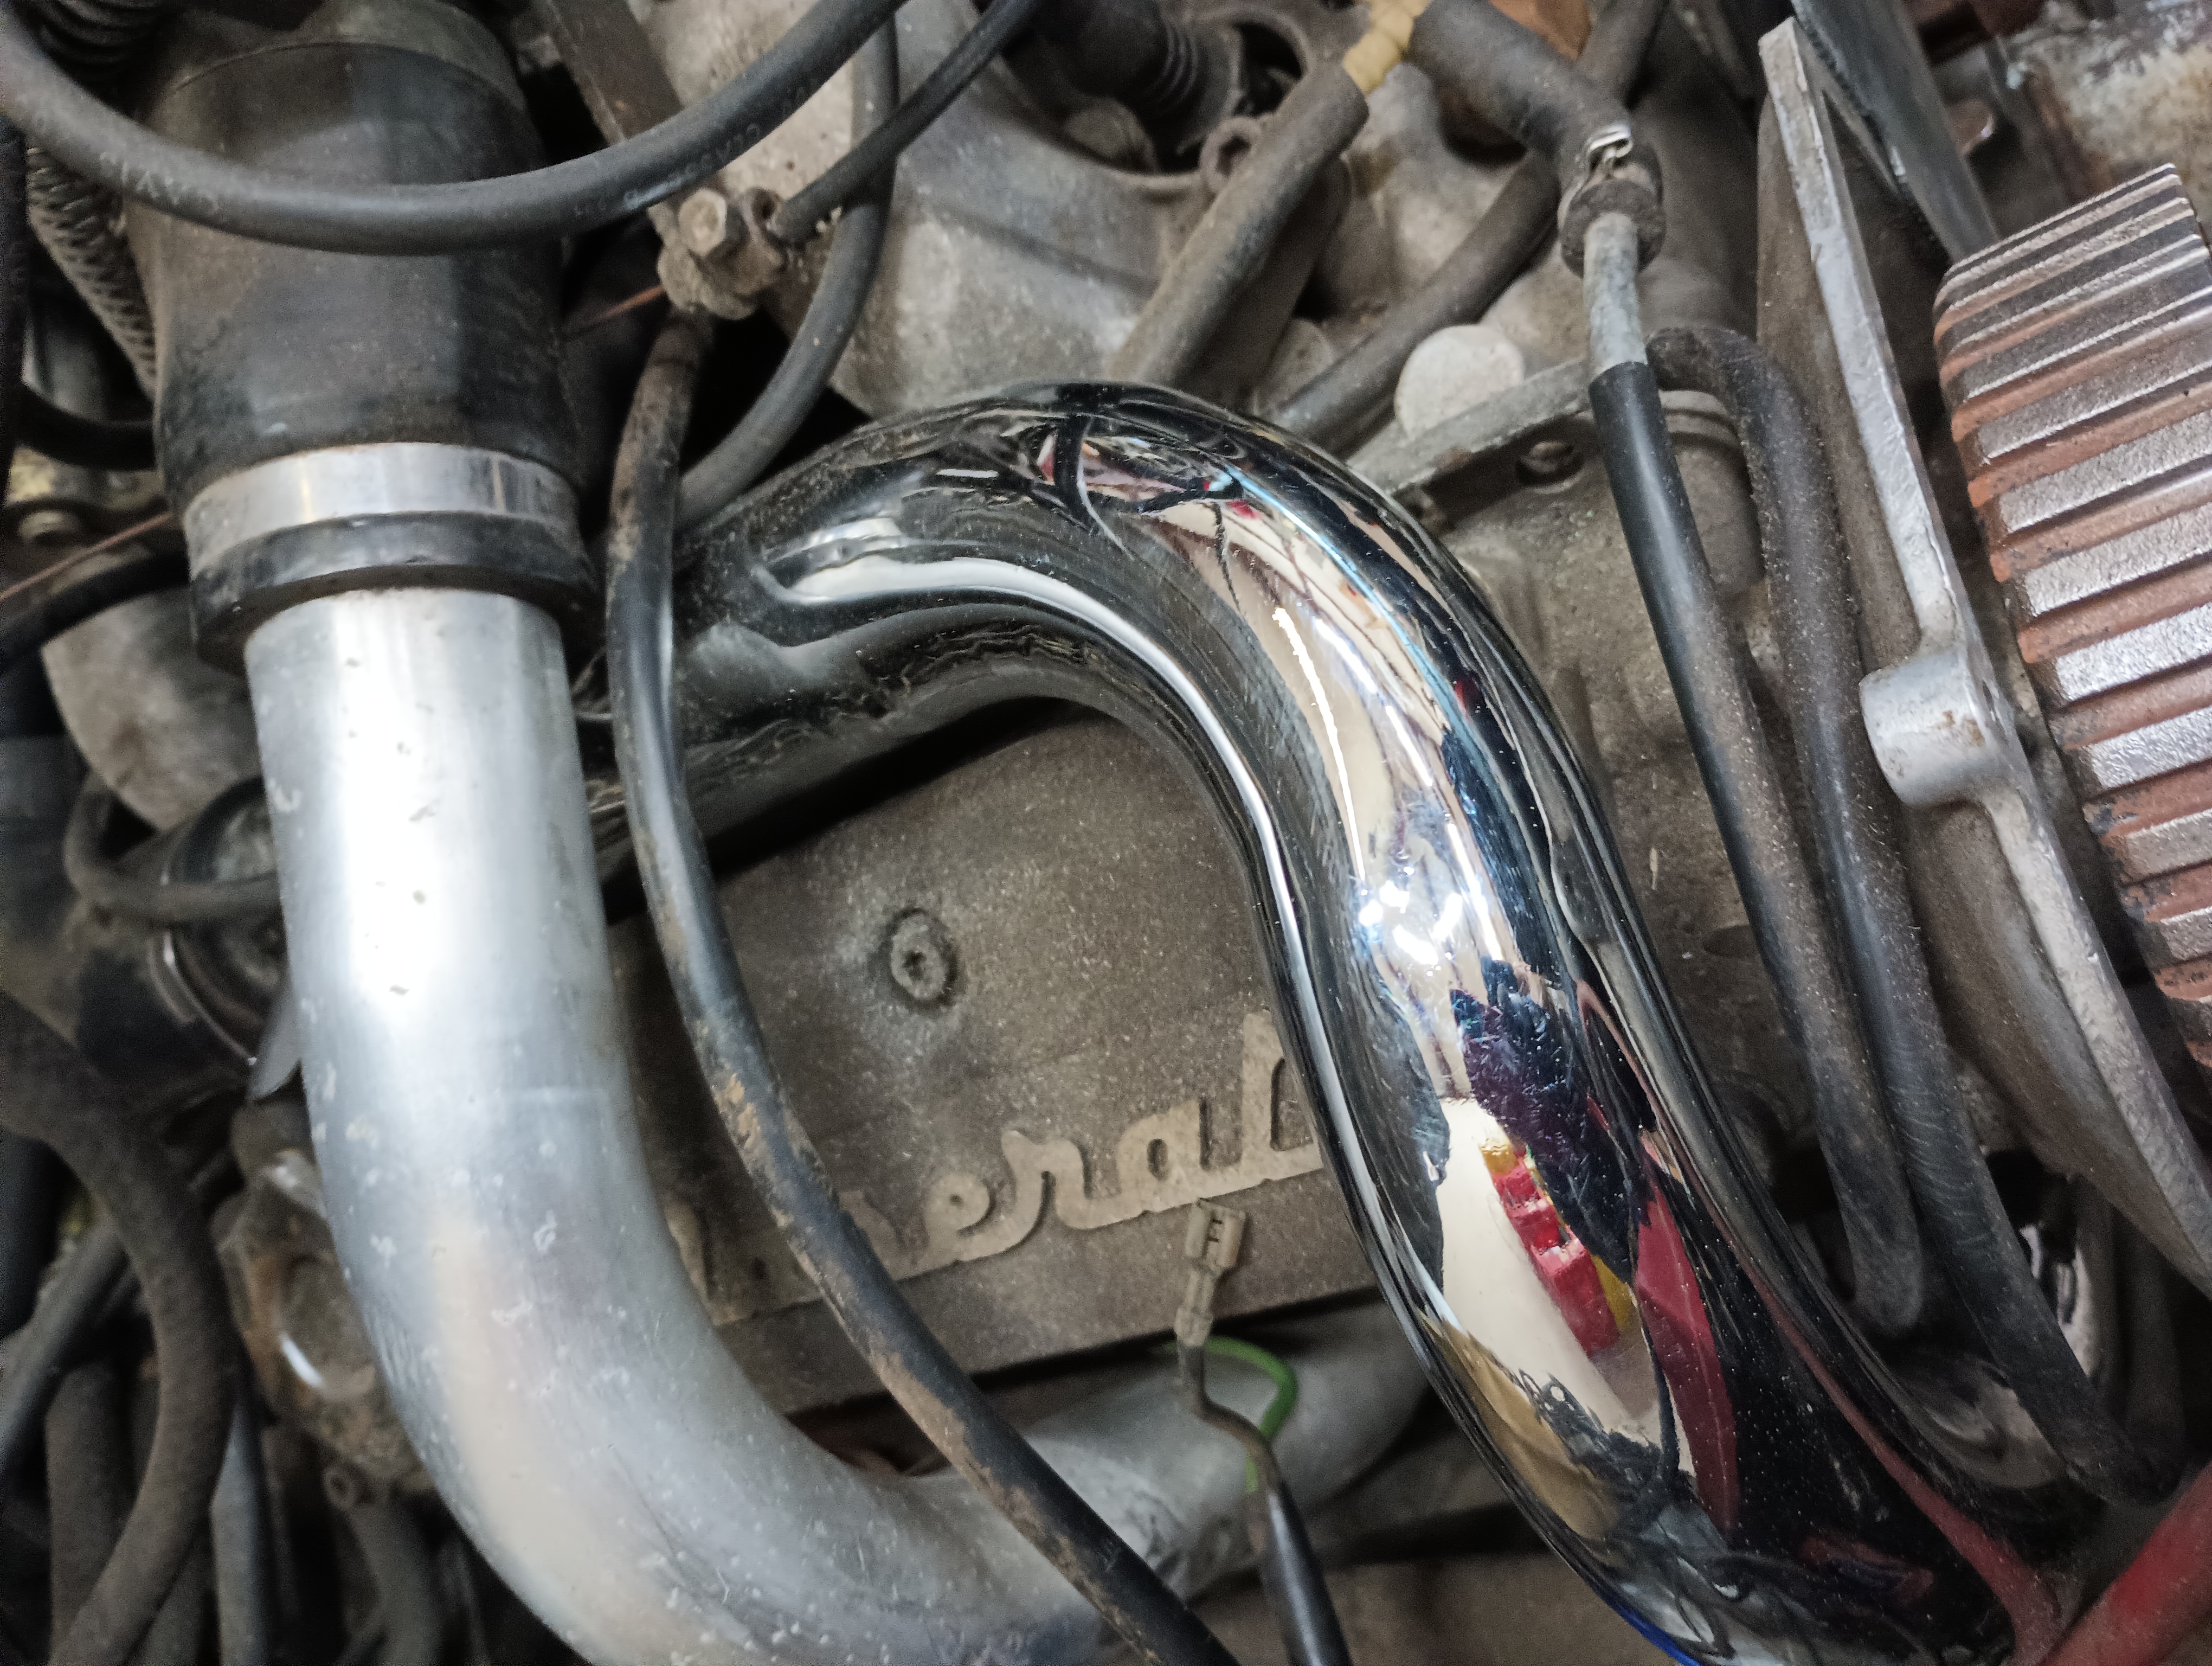
Meanwhile, Dave got in there and cleaned up the pulleys. And the cold-side charge pipes.
Again, I failed to remember the specific instructions, so I got the belt on a tooth off. But I’ll fix that later on. In the meantime, Tim was working on draining the fuel. He was thinking that getting the fuel pump to do the work would be easiest, so we hooked up a battery and tried to get the fuel pump to run. Nothing. He tried connecting 12V directly to the fuel pump and still nothing. It looks like a new fuel pump will need to be sourced.
Things got fairly busy around here due to a couple unplanned projects that cropped up and consumed a few weekends. On the 10th of November, however, with the day off work, we set about trying to get the car to attempt to fire.
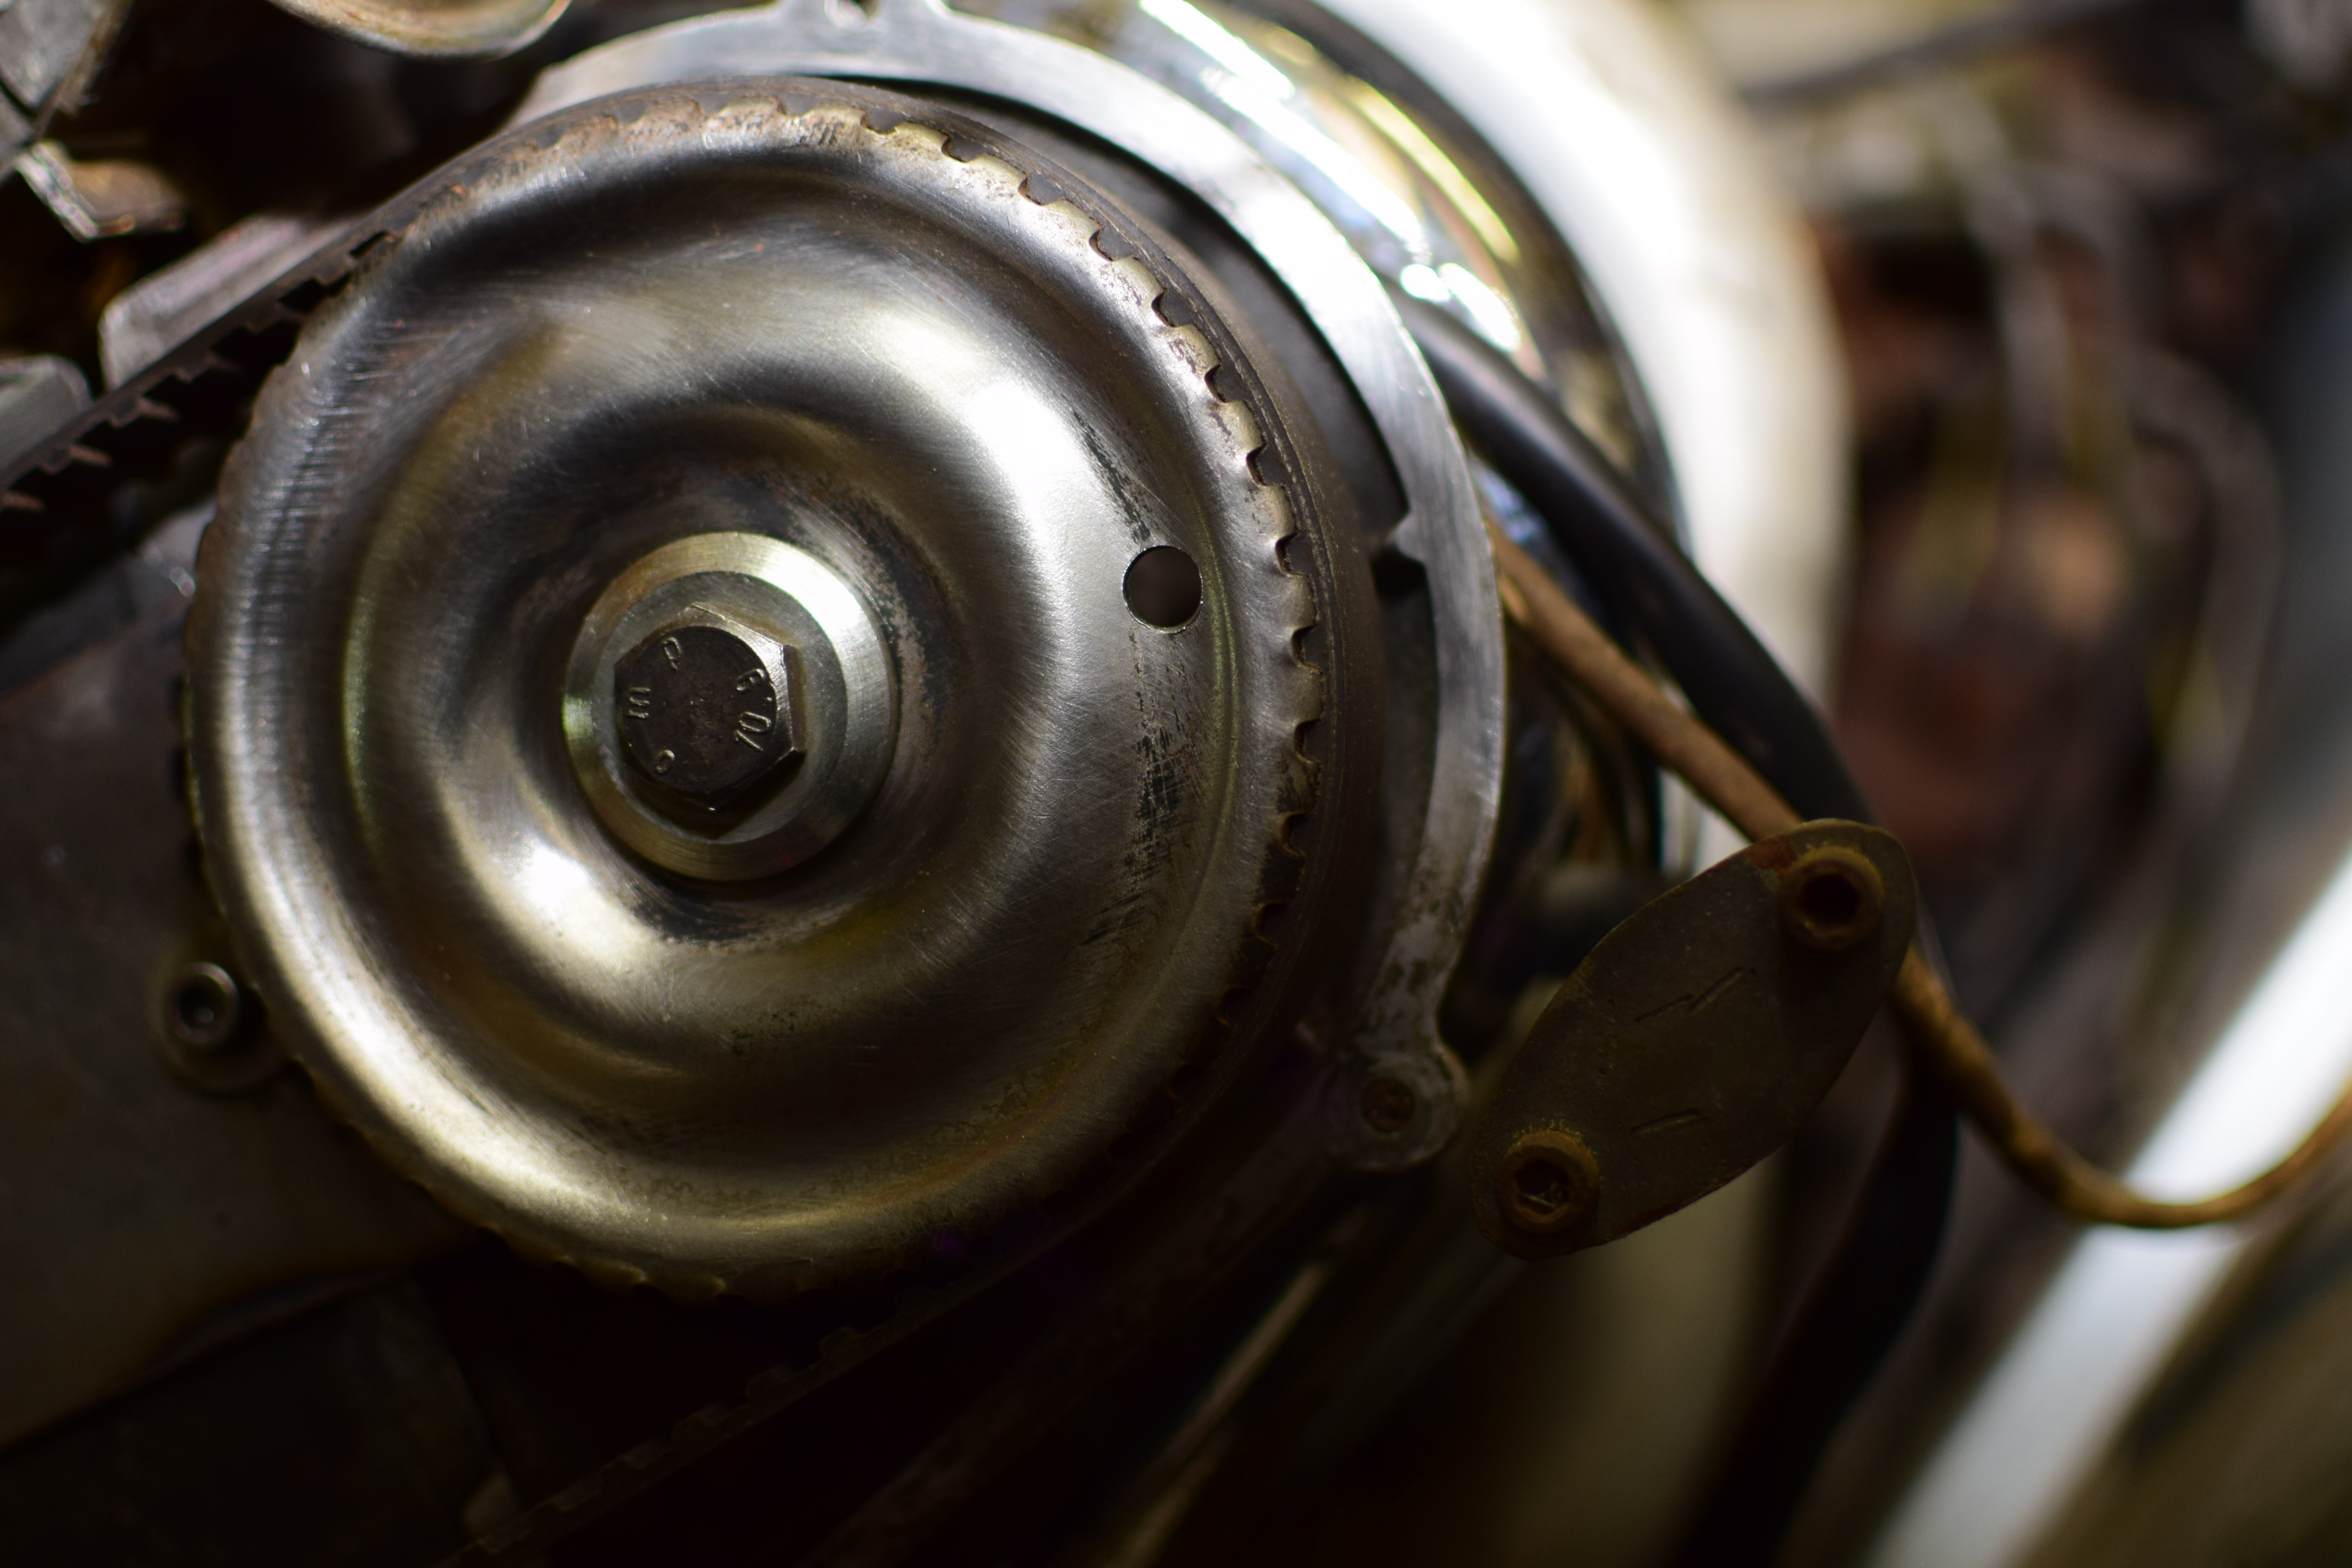
The cam pulley was spot on
We knew that the fuel pump was out to lunch, so I bought a new Mr. Gasket 42S fuel pump to install in its place. Before installing that, though, we set about to get the timing corrected. The timing was off a full tooth at the crank, so I retracted the tensioner and pulled the belt off again.
The crank pulley, however, was off a full tooth.
Following the service manual’s instructions this time, I got the belt on starting at the crank then looping around the left bank timing pulley. To do that, I needed to pull on it quite a bit to get it to stretch into place. With the timing set correctly this time, we threw a battery on the car to see what would happen. Once there was a good battery hooked up, the starter easily turned the engine over with no strange noises.
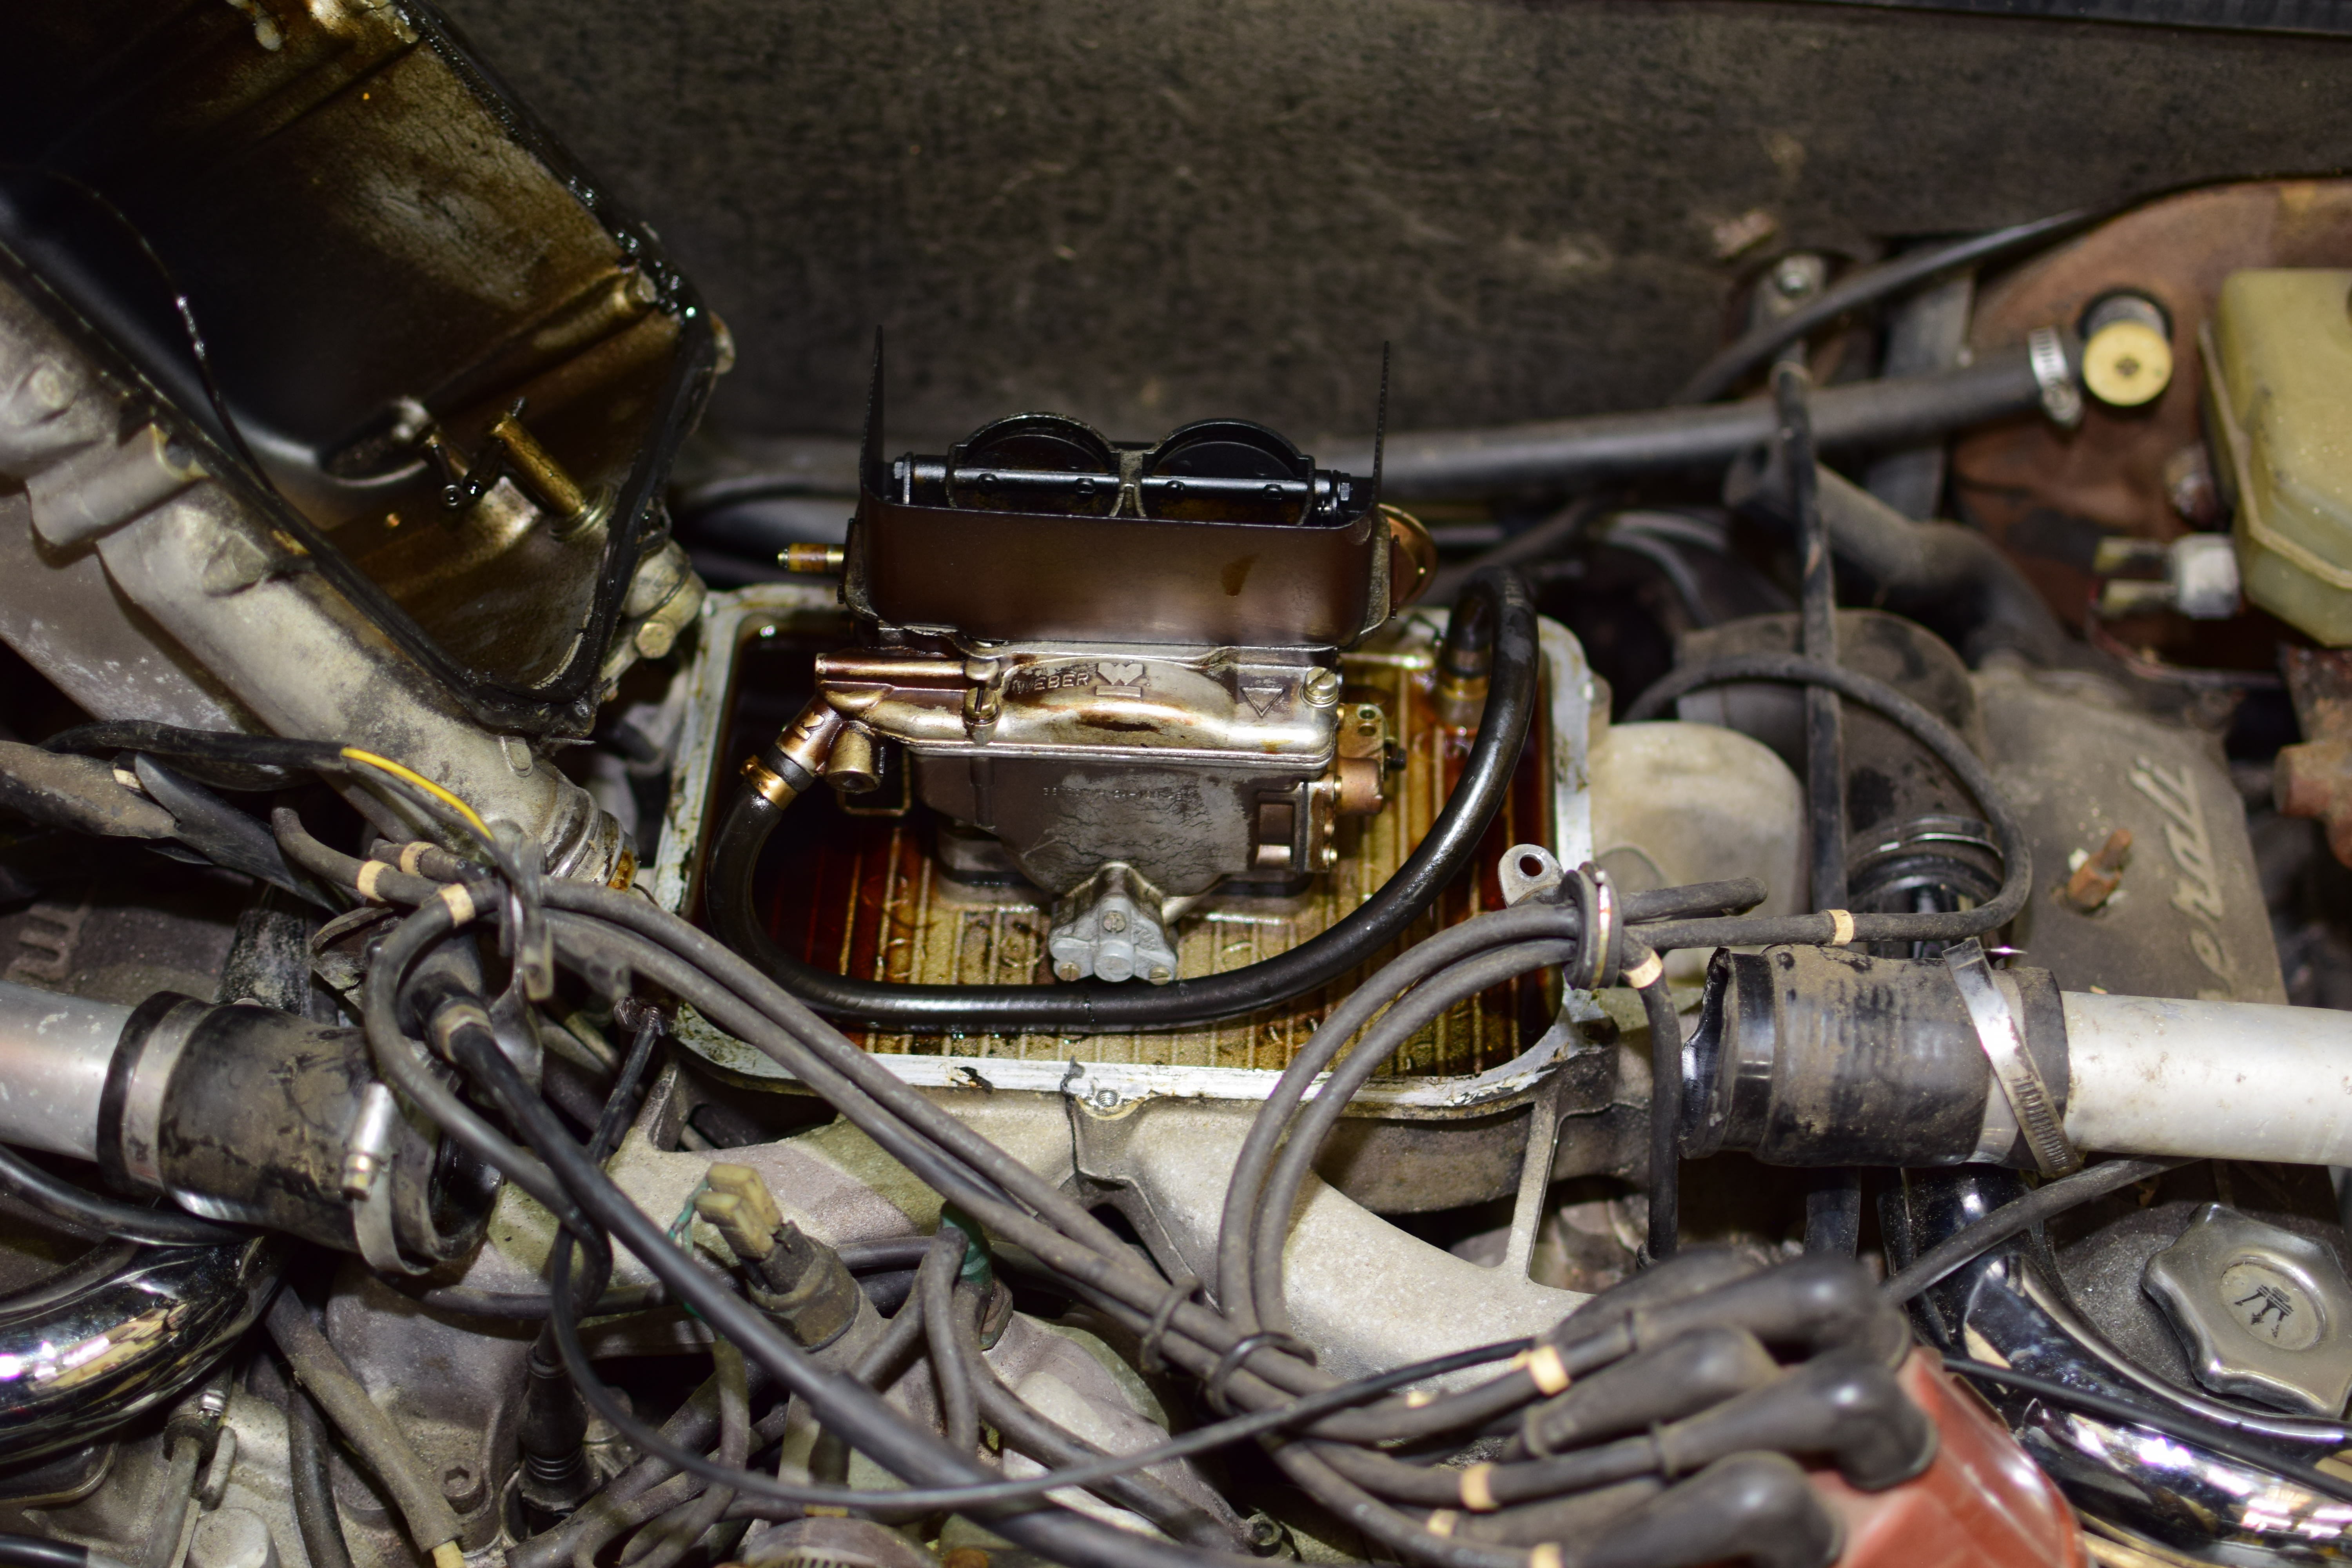
The next step was to remove the carb box, spray some starting fluid down the carb, and see what would happen. Sure enough, it coughed to life and sounded fantastic! Of course, it didn’t run very long and we didn’t want to keep washing it down with ether, but we definitely had a running engine.
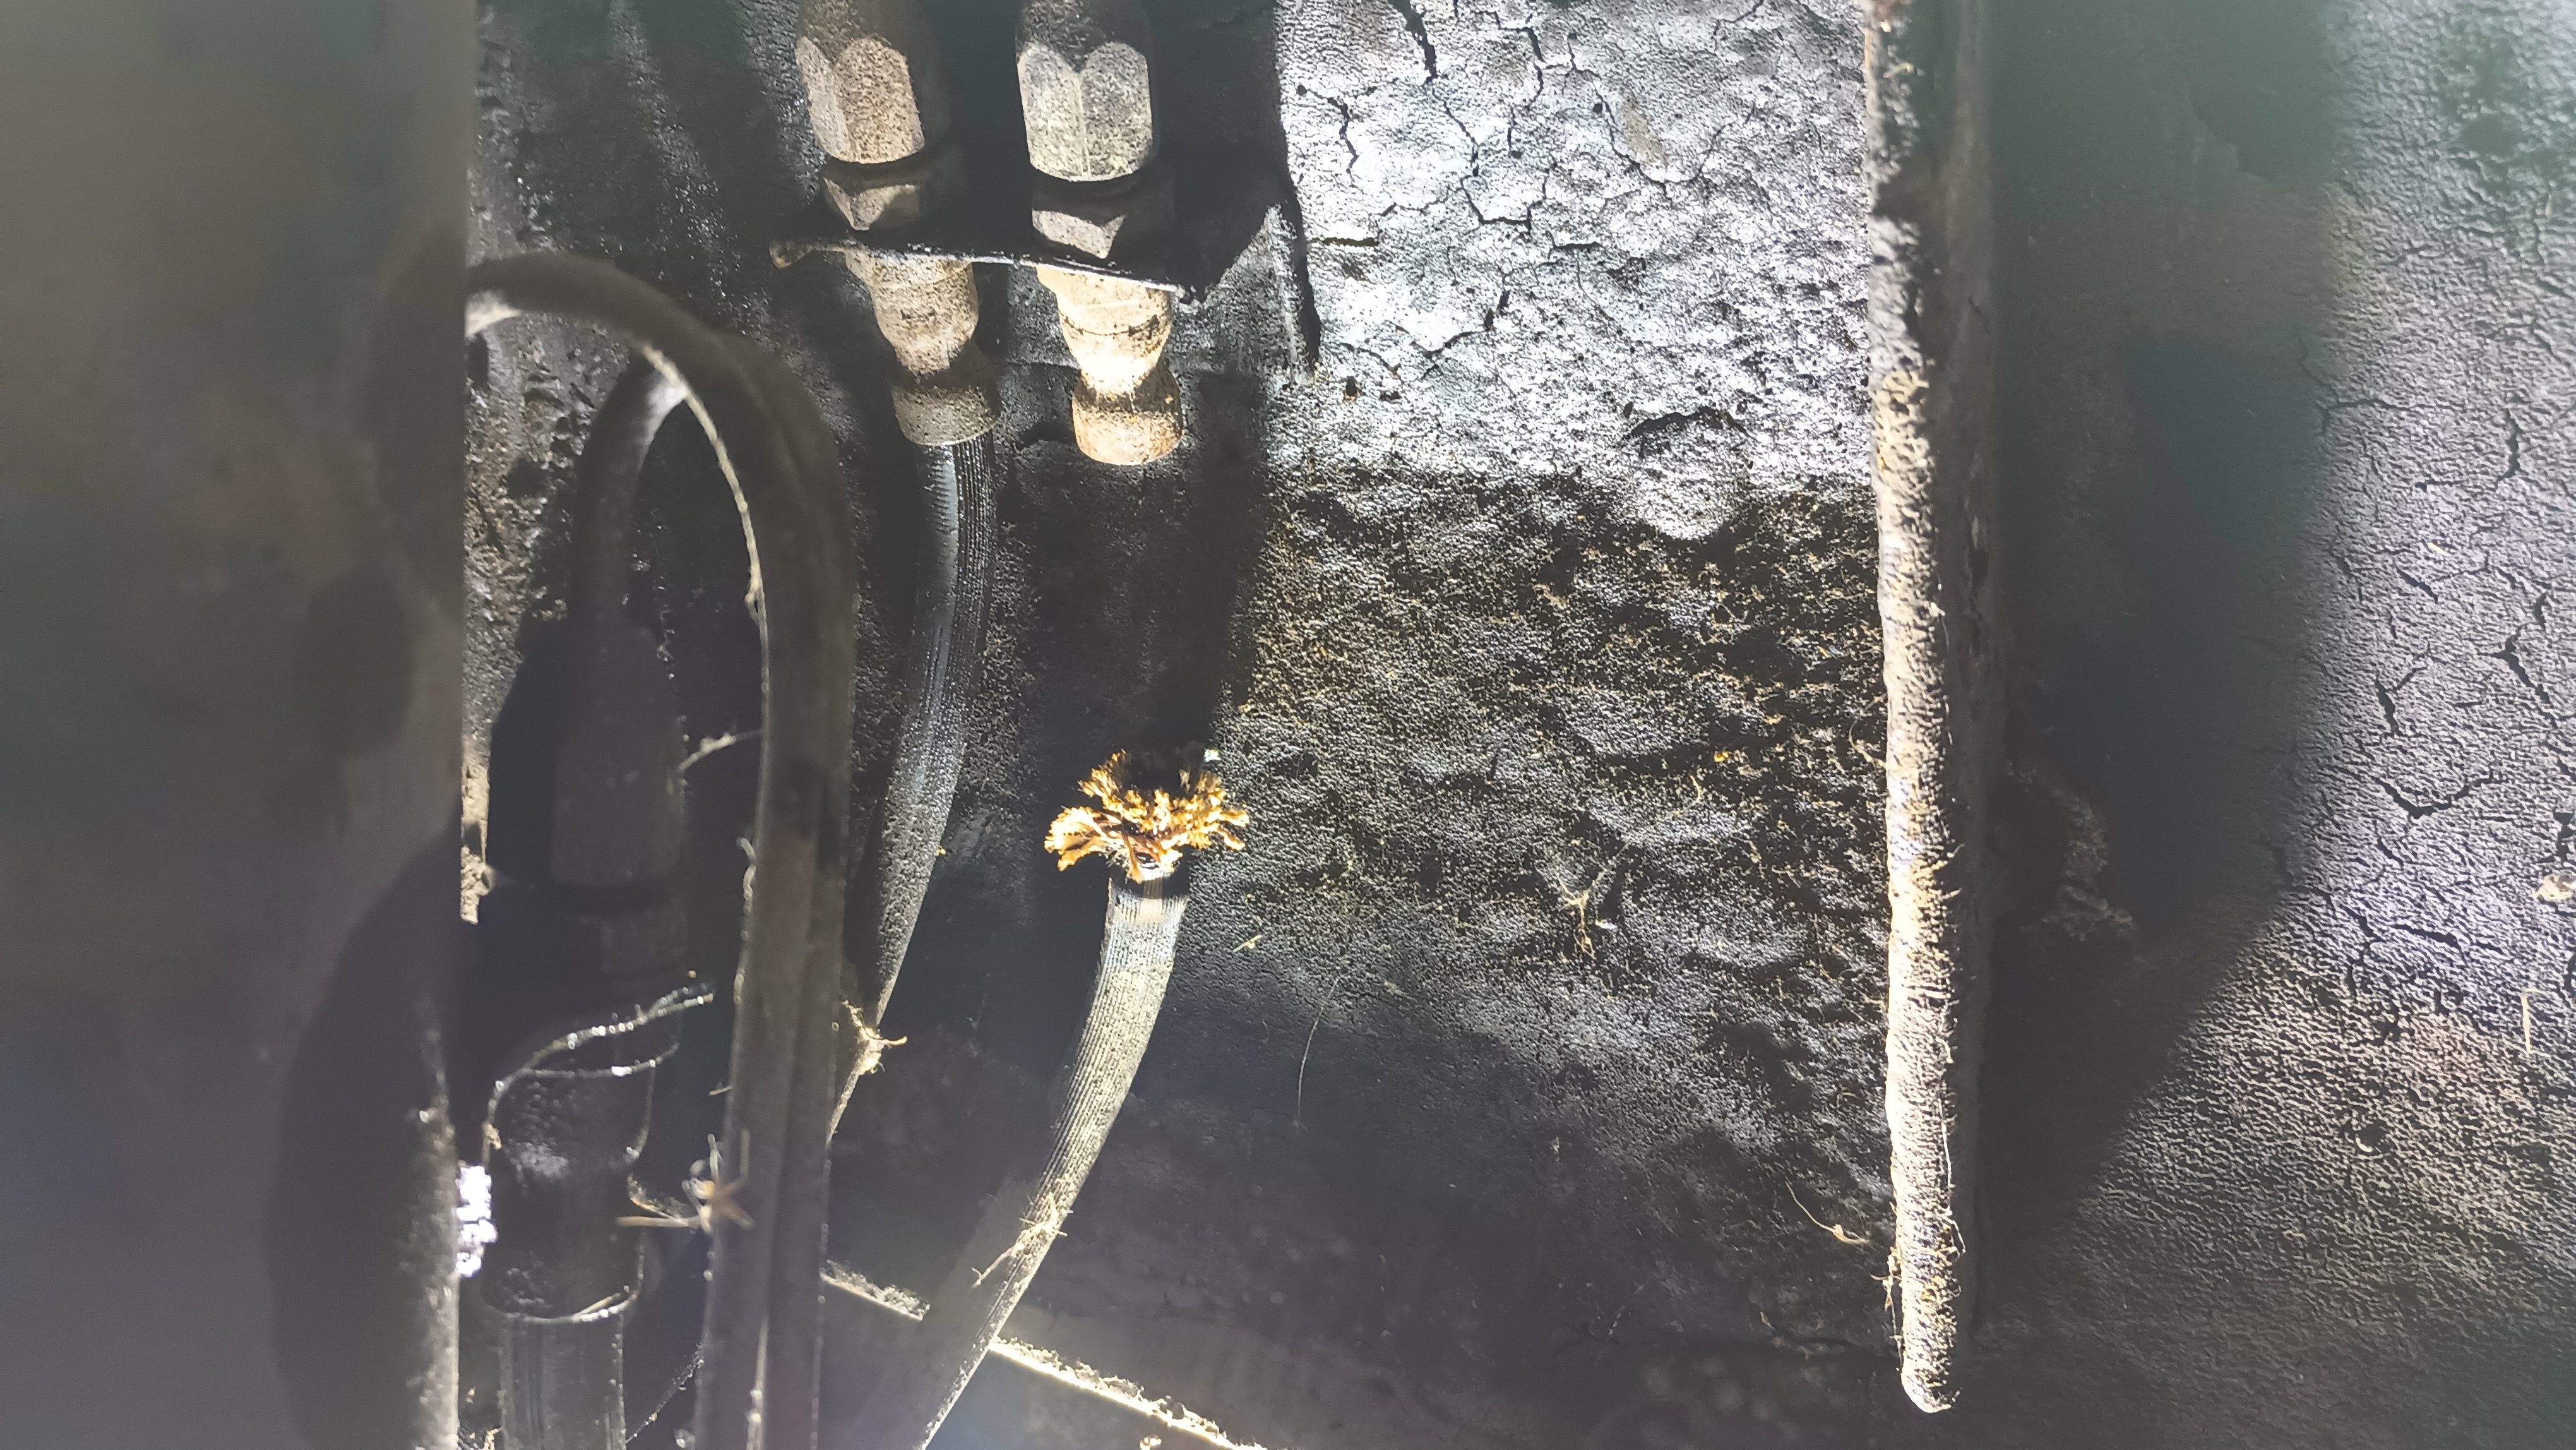
From there, we moved our focus to that fuel pump. The fuel lines from the tank to the filter to the pump were leaking if you touched them wrong, so I’m going to need to put new fuel line in. The car was basically designed with a desire to catch fire and I don’t want to make it too easy. Interestingly, the fuel in the tank really didn’t smell all that old or bad, and there wasn’t a whole lot in there. Once things were drained out, the next step is to go get some fuel line and then work out how to mount the new pump.
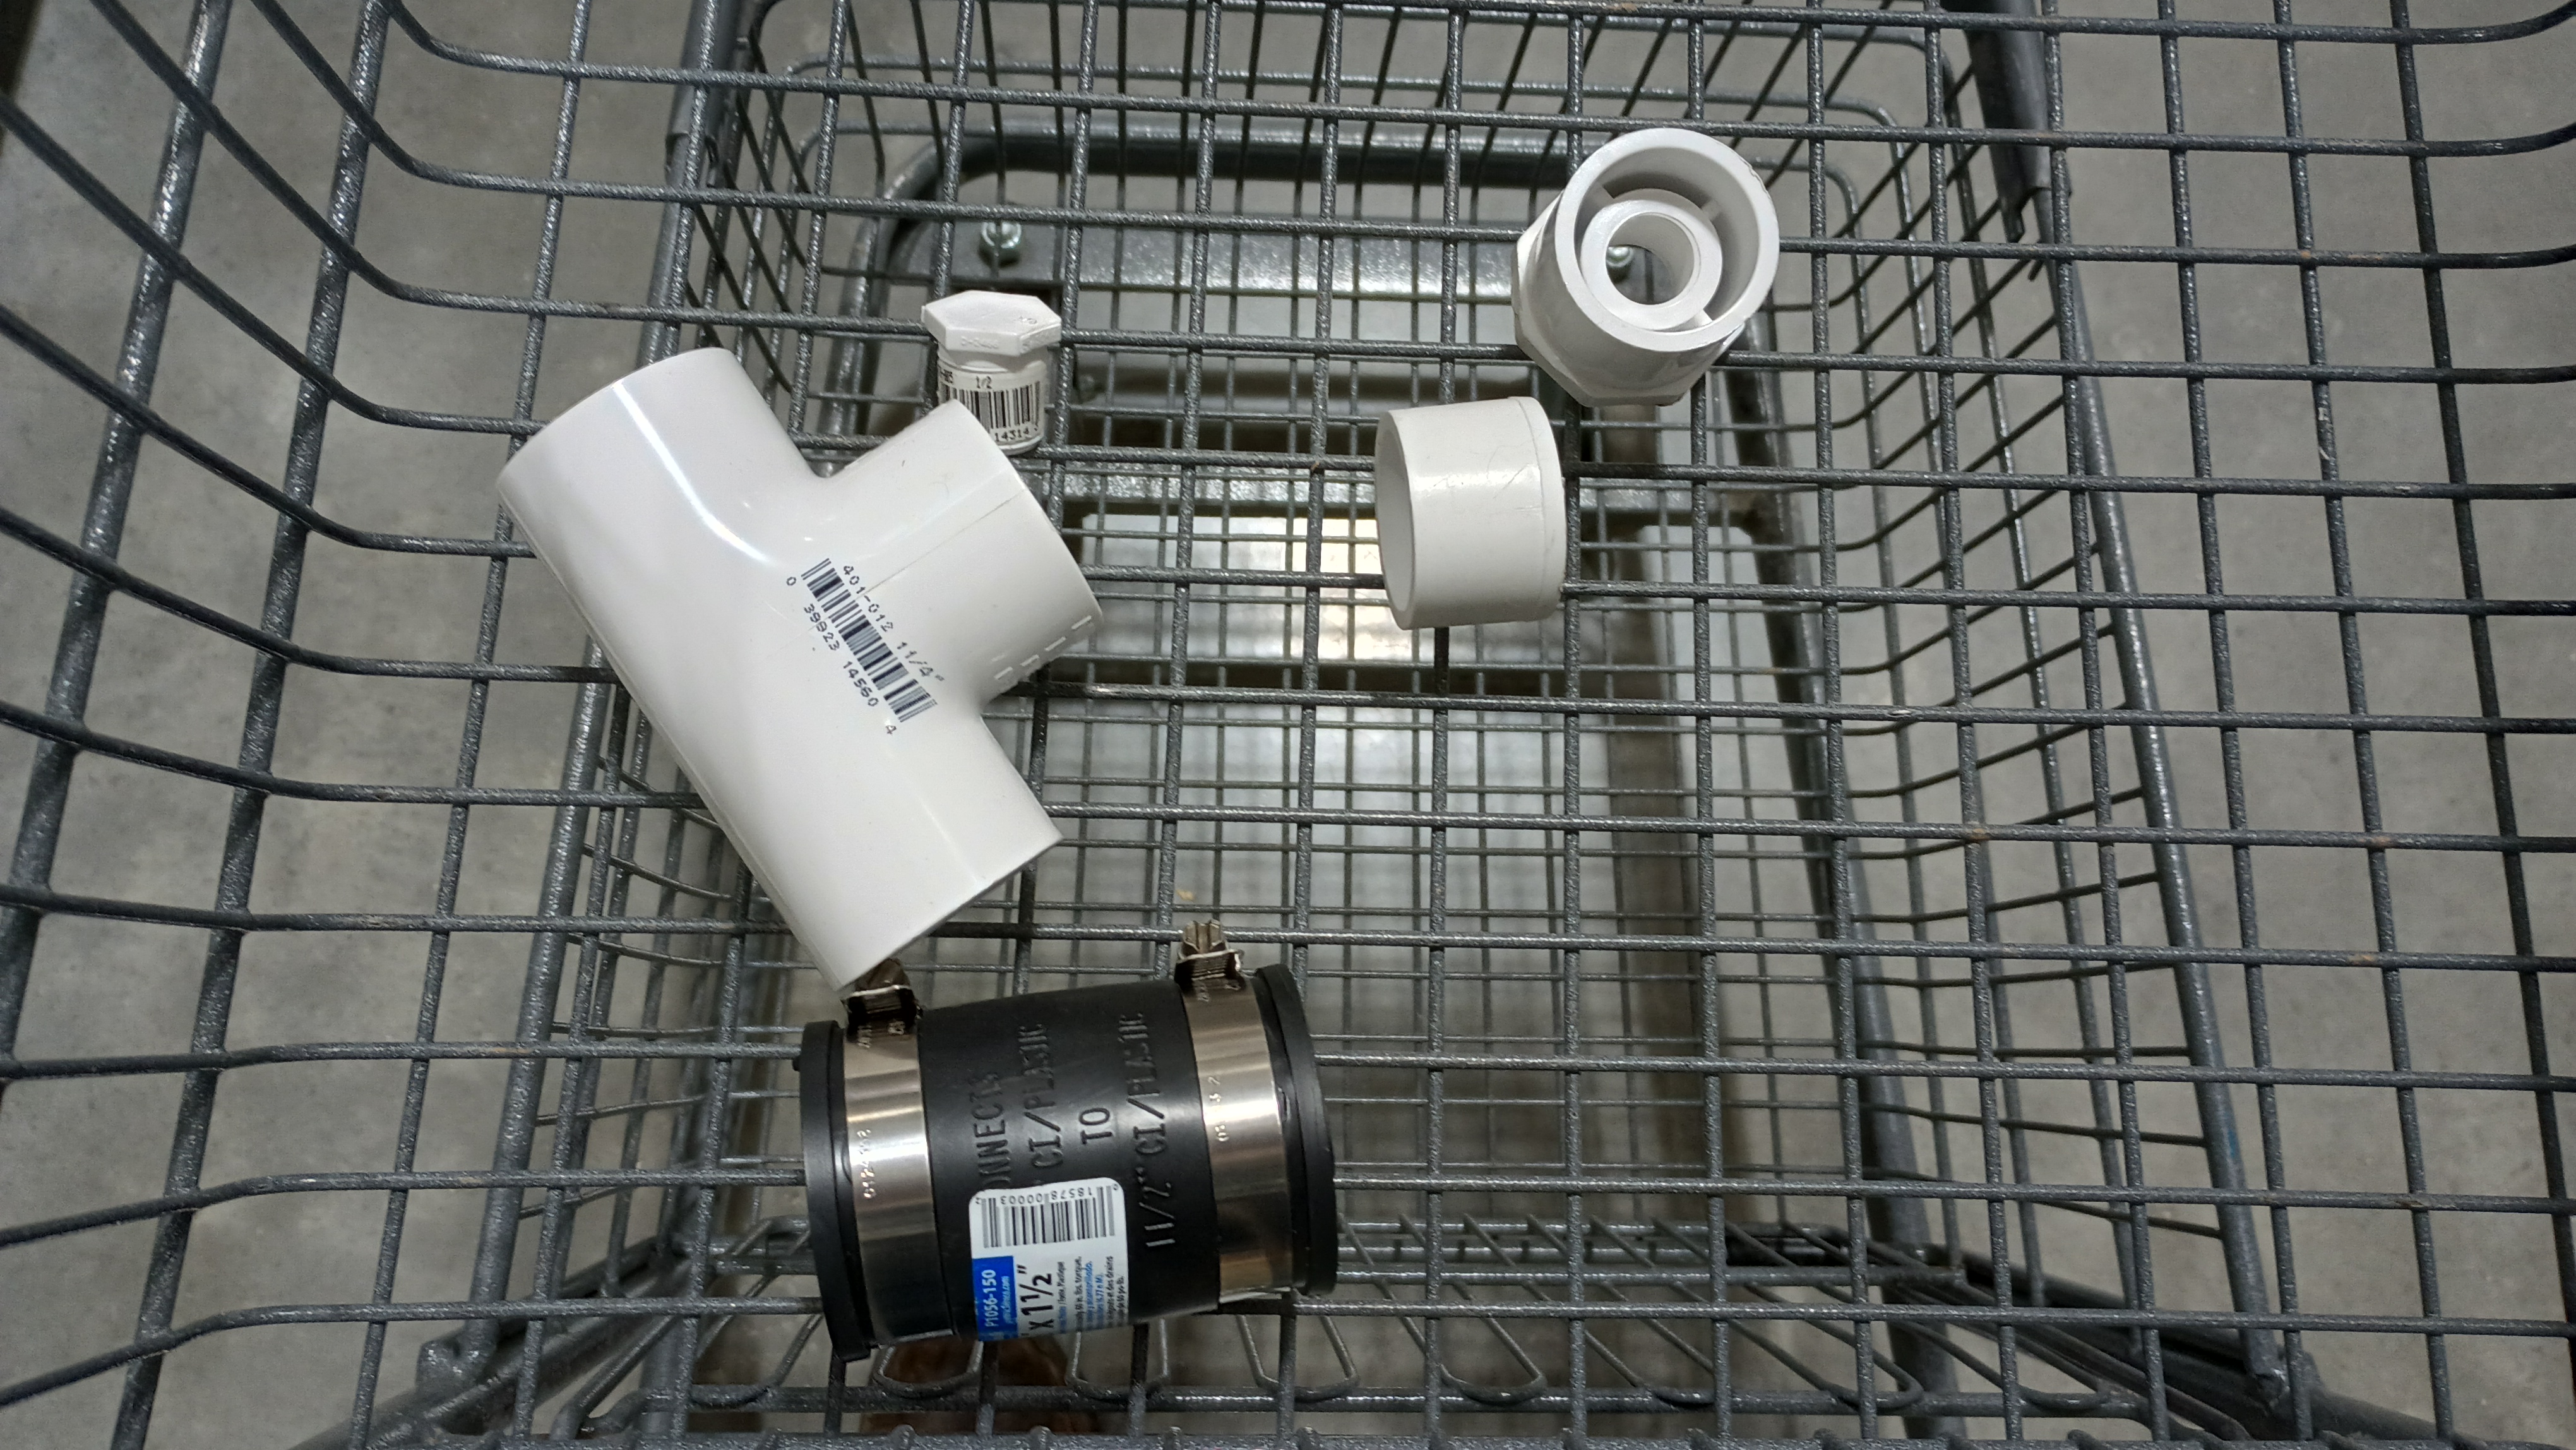
With the constraints of the $2000 Challenge budget, the intent was to use the replacement fuel pump to get the car running, but to also attempt to repair the original fuel pump to be used for the competition. Granted, $50 isn’t a lot a money in the grand scheme of things, but it is 2.5% of the budget and that makes it worth the effort. The original fuel lines were actually seeping gasoline, so as mentioned in the last post, before replacing the fuel pump, I wanted to get the lines replaced. Out came the calipers.
All-in, that should be around $35 (plus tax) worth of new hoses. The fuel lines I don’t trust because they’re old. The vacuum lines I don’t trust because I can see that they’re either missing or cracked. I may wind up needing more of the 7/32″ vacuum line than that 6ft roll, but we’re going to start there and see where things end up.
Rather than just bolt the replacement fuel pump to the car, I wanted to attempt to isolate it from vibration as much as I could. To that end, I wanted to get the rubber isolators off of the original pump, so I brought the whole thing over to the workbench.
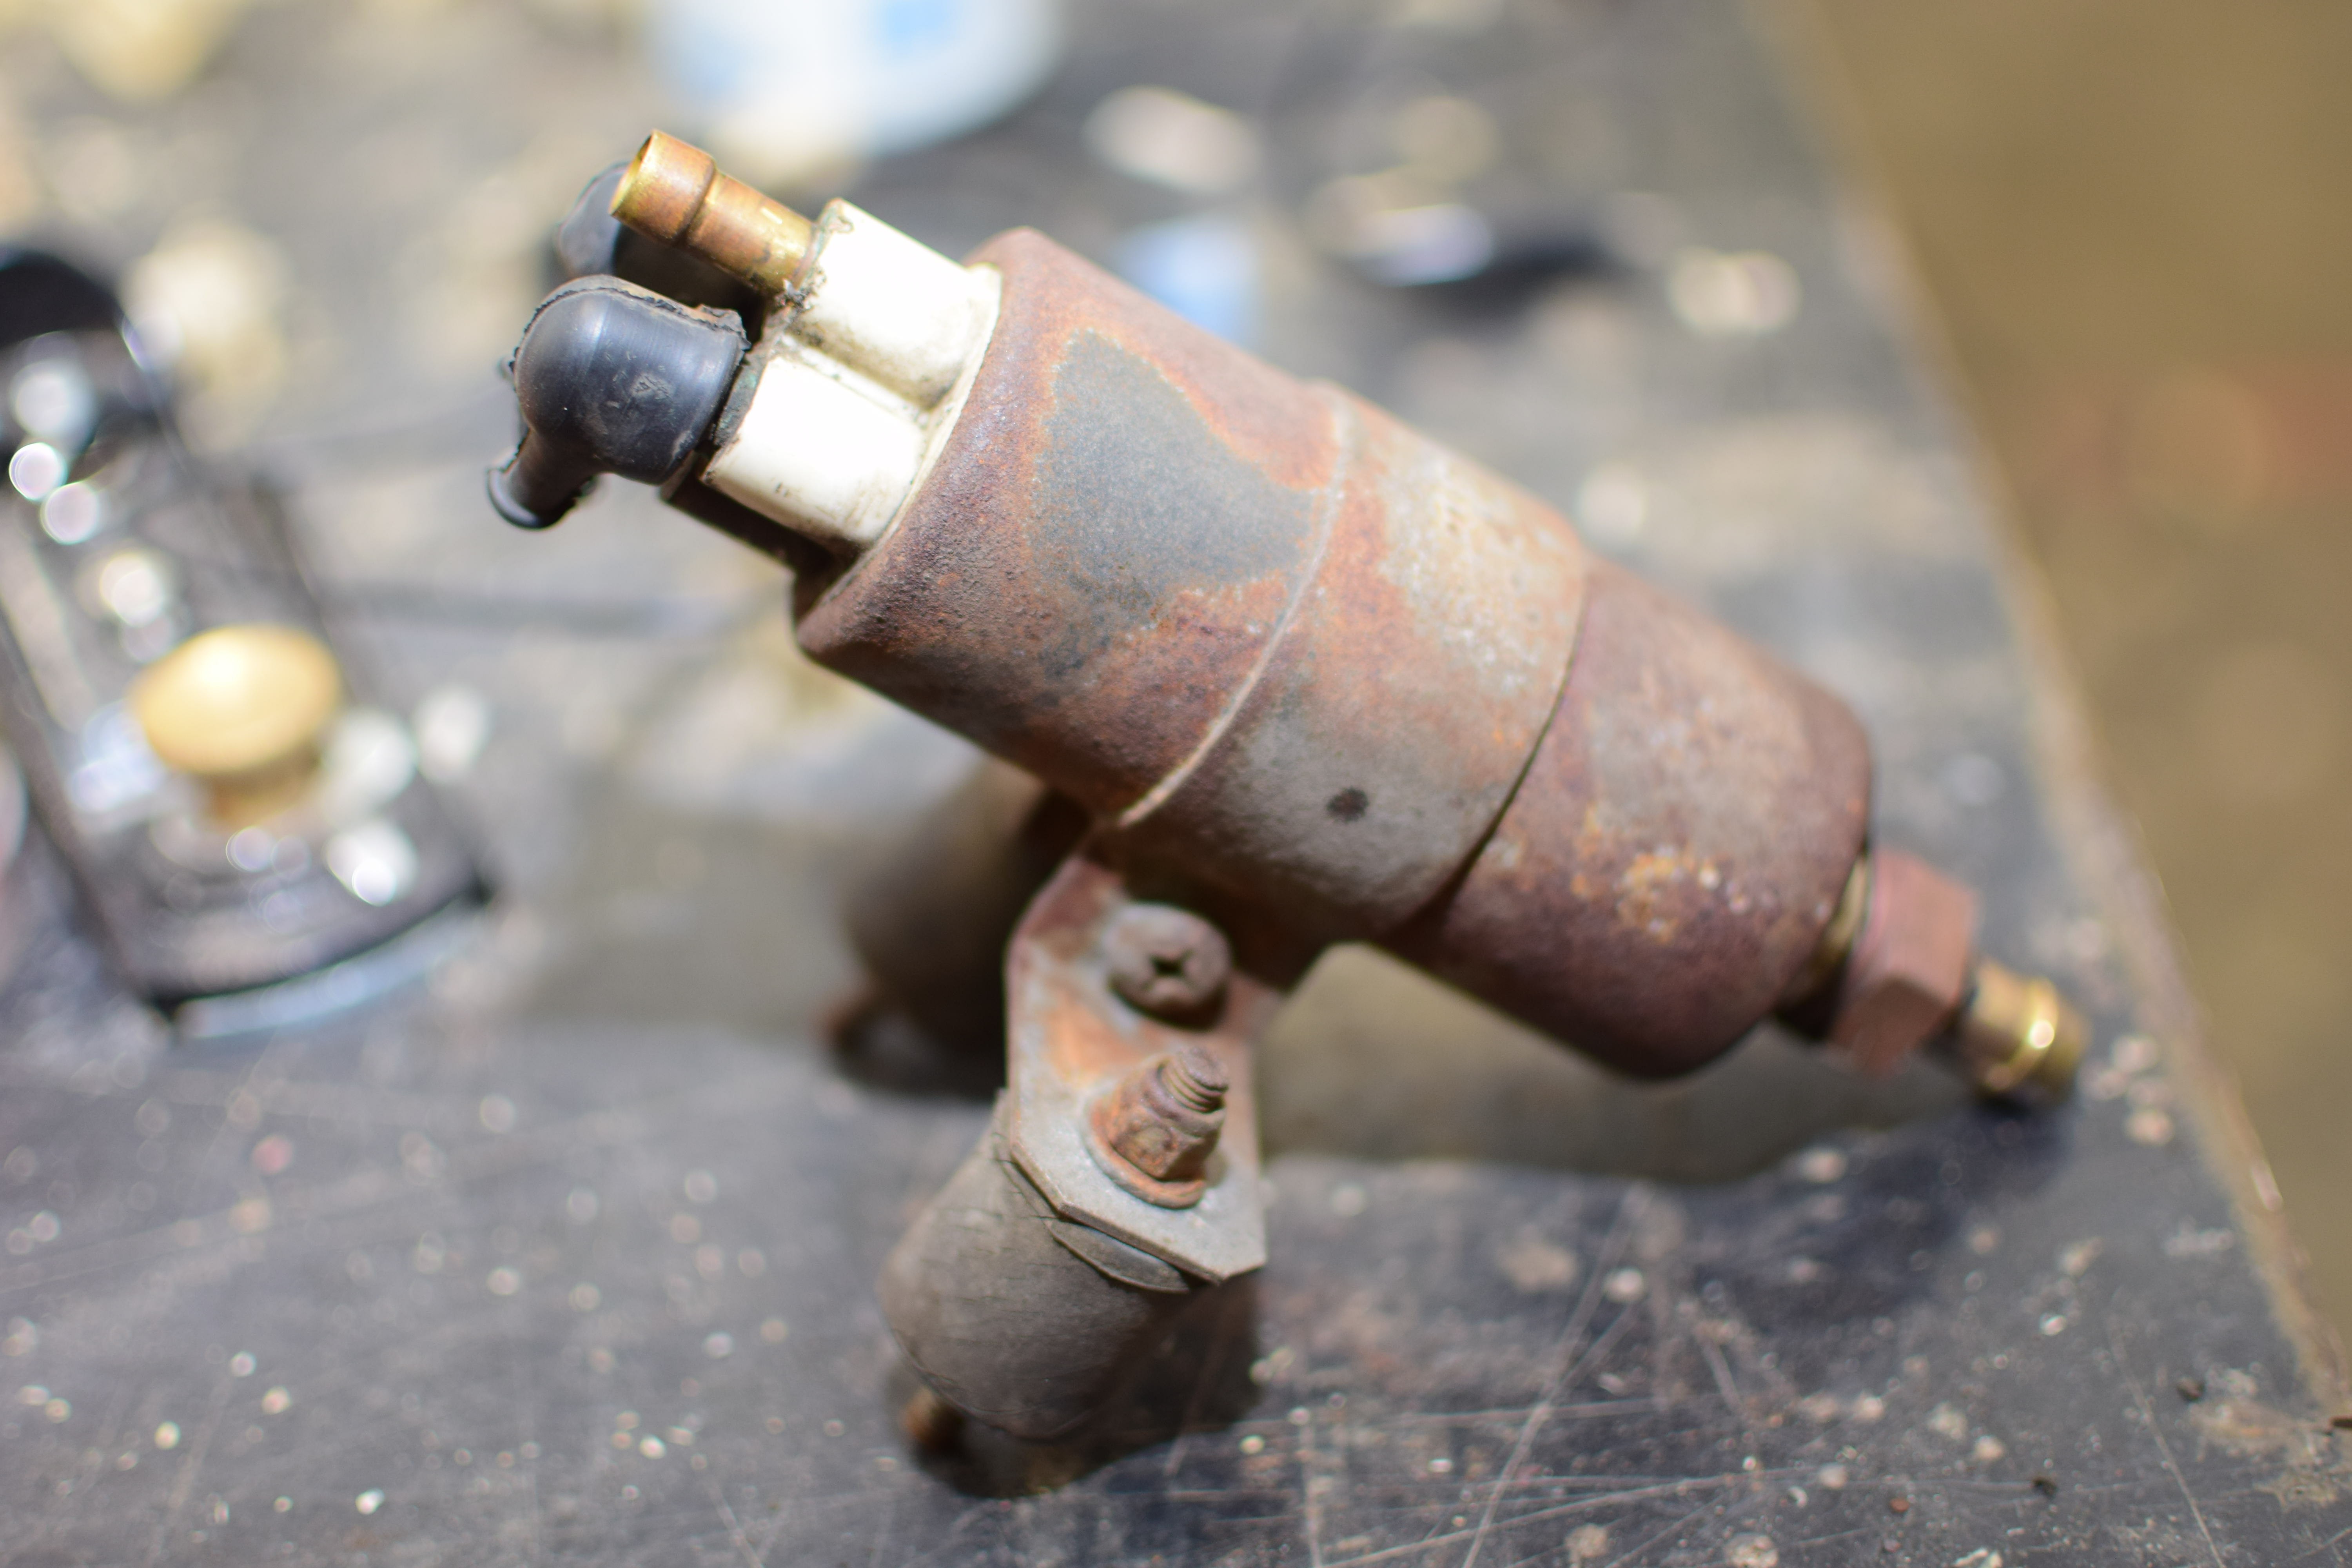
While it was sitting there, we pulled the jumpbox out of the back of the Merc and hooked it up to the pump to see if it would run. At first, there was nothing from the pump, but one gentle nudge from a bit of iron pipe and it started humming along! We tried all manner of additional vibration and movement on the pump to see if it would stop again, but it seems like it’s going to keep going!
The new plan is to keep the replacement fuel pump and get it all built up and ready to install. The inlet will need to be adapted – the line from the tank is 1/2″ while the inlet on the new pump is 5/16″ – and I’ll need to get some new rubber isolators and some long bolts. Basically, I want it ready to install with minimal work in the event that the fuel pump dies again, but I think the pump was simply stuck from sitting and has been revived.
We gathered around the temple of stupid on the day after Thanksgiving to potentially get the car in a position where we might try to start it. Very exciting. There were a handful of simple tasks that needed to happen first, but as you can probably imagine by now, with this car there’s no such thing.
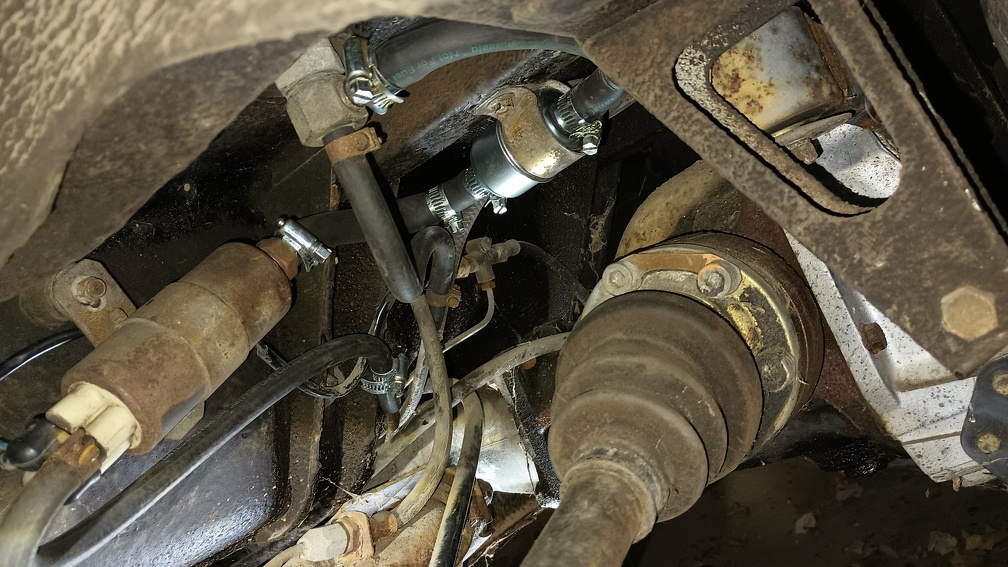
Before the car could be fired, it’s going to need fuel. Step one was to finish putting the fuel fuel lines in place, mount the new fuel filter, and re-mount the old pump. In order to maintain clearance with the differential and the axles, the fuel pump/filter are packaged fairly tight with some pretty serious bends in the fuel lines. I assume that the official parts book would call for some molded fuel lines to fit in there, but this project doesn’t have the budget to pay Ferrari prices for fuel line. If they’re even available anywhere!
Following some advice that Tim found on the Internet, we decided to make our own molded lines using the freebie 1/2″ fuel hose that I got. We used the U-bolt out of an exhaust clamp to put a bend in the hose and then submerged the hose in water that we were boiling with a heat gun. Nothing sketchy about this at all!
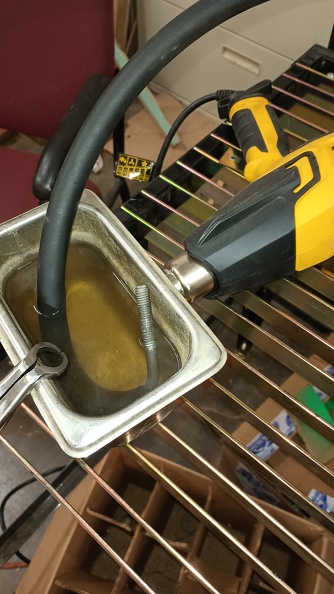
It didn’t come out looking like a “real” molded hose, however, it did put enough of a natural bend in it that there is no longer a kink in the hose when it makes the turn necessary to clear all the various parts that could chafe it. After sorta-molding both ends of the hose, I had a new fuel hose that would clear everything without kinking. It took a little fiddling, but the new filter, old pump, and new lines were all hooked up.
We turned our attention to the vacuum lines under hood next.
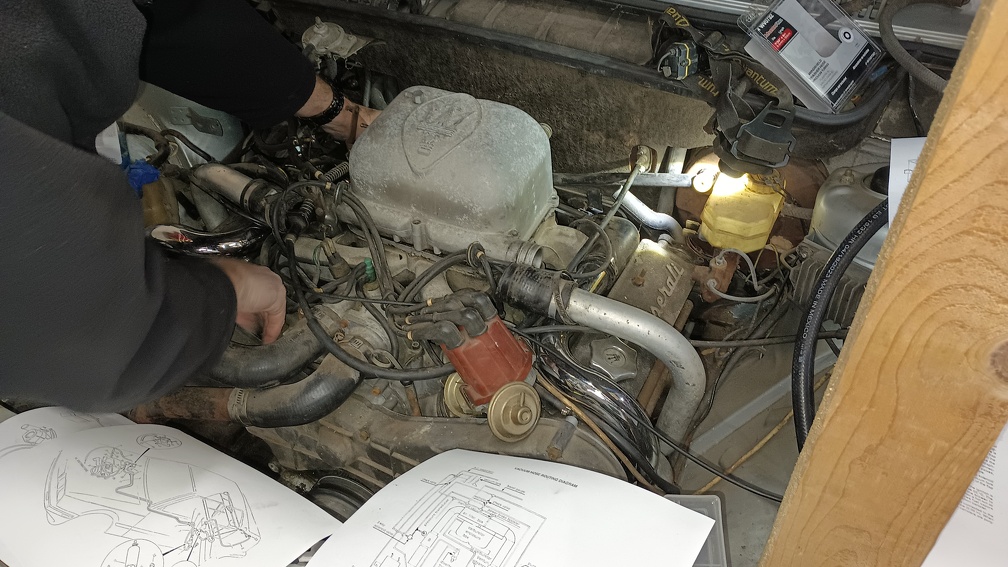
Damn, there are a lot of vacuum lines under there! And it’s not all that well documented. We had these diagrams from the service manual to work with:
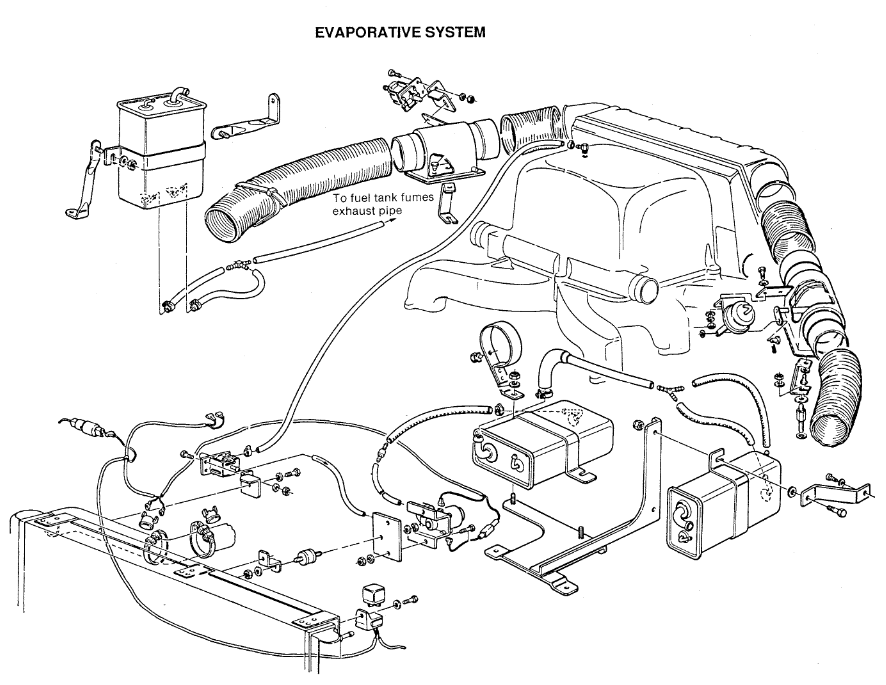
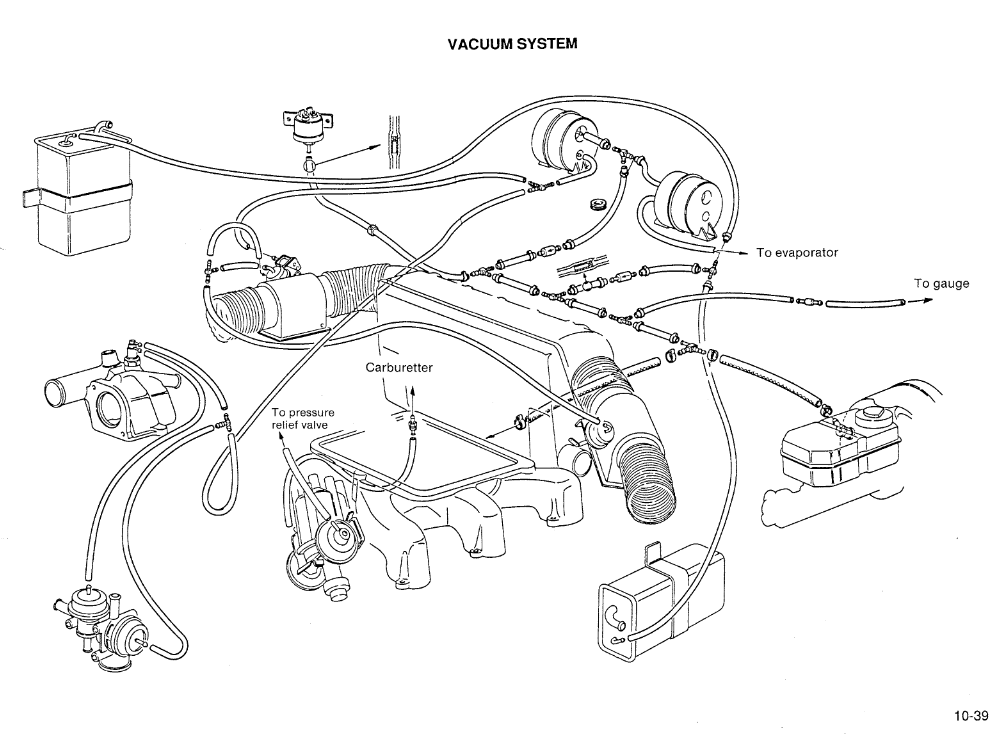
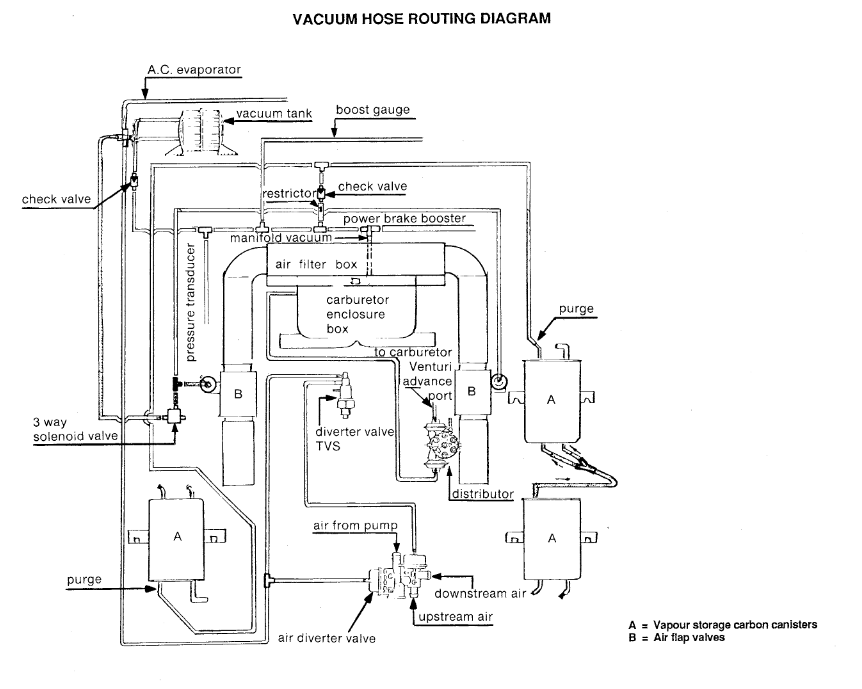
We quickly realized that the “Vapour storage carbon canisters” were long gone. The “Air flap valves” that appear in the last diagram as “B” were also nowhere to be found. The two outputs on diverter valve were teed together, and there were plenty of other missing and disconnected hoses.
Apparently the “Air flap valves” are part of the evaporative emissions control system. Because there would be fuel vapors in the carb box when the car was shut off, those flaps were in place to be held open by vacuum when the car was running and then snap shut when the car was off to keep the fuel in the carb box. So the good news there is that we don’t need to care about those at all and it sounds like it’s something that was just born to break anyway.
We decided that we’d hook up the vacuum lines that we absolutely knew for certain had to be there, and then we’d give it an attempt at a start. After connecting the jumpbox, we turned the key on to see if the fuel pump would come alive, and it did. Next, we put some fuel into the tank and turned on the key to see if we had any leaks. The fuel lines in the rear all stayed dry and we could see the fuel spraying in the carb when we worked the linkage. So far, so good. We got the fire extinguisher handy, the camera rolling, and…
All of a sudden there was absolutely no power in the car at all. No interior lights, no dash buzzers, no fuel pump, no nothing. the jumpbox still had power and there was good ground, but nothing else. It was getting a little late, so on that terrible disappointment we called it a night. Just a Maserati being a Maserati, I guess.
Coming back to the problem the next day resulted in a discovery that the issue wasn’t so much with the Italian-ness of the car, but the partially-disassembled state that it’s in. I poked around with a test light and couldn’t really find anything that jumped out at me, but the big clue came when I started noticing that when I opened the door, the oil pressure light came on. Sure, it could just be an Italian car doing Italian car things, but that seemed more like a bad ground somewhere. Looking at the engine compartment, the negative battery cable immediately disappeared under the intake manifold. So the engine was grounded, but the chassis wasn’t! There is a little bracket on the negative cable that is supposed to bolt to a stud along the inside of the fender. Once I bolted that down, all the electrics started working properly again. We must have been making incidental contact with something before and when we moved things around to get ready to start it, we broke whatever that contact was.
Now that the electrics seem to be sorted, I’ll wait for the next opportunity that the guys have to come over so we can attempt to see a Maserati Biturbo start and run.
We gathered at the shop last night to see if this Italian creation was ready to be awakened from its slumber. I brought the battery from the Neon and Tim brought some starting fluid. Initially, the Neon battery was drawn down enough that there wasn’t enough juice to engage the starter, so we added the jump box and put the battery charger on it. With a couple squirts of starting fluid and a twist of the key, the car coughed to life for a few seconds before dying. We closed off the remaining open vacuum lines and tried again, this time holding the choke mostly closed – the linkage for the carb all depends on the hat being in place and we had it off to the side.
Amazingly, with the choke held in place, the car started – without any more starting fluid! – and as we eased the choke off, it idled on its own and would even rev! It’s a little bit of a rough idle for now, but it’s close enough to call it a running car! It didn’t make any nasty sounds and it appears to be making good oil pressure, if the dash gauge is any indication. The left turbo is spitting out a not-insignificant amount of oil, so it seems like that turbo is likely to need a rebuild. When we took the hat off initially, we found a bunch of oil pooled around the carb, so at least we know the culprit of that now. The plugs were all a bit carboned up, so we pulled them out, hit them with some sandpaper, and re-gapped them. But now, it’s time to make decisions.
At this point, I still do not know what my long range plans for the car will be. I don’t really want to try to build it for any sort of motorsports activities, but I haven’t decided if it’s something that I want to keep long-term as a resto-mod on the original engine, do some sort of engine swap to either a FI biturbo engine or something else entirely, or just unload the car and likely make a little bit of a profit on the deal. In any case, I want to be careful to not destroy the value of the car, little though that might be.
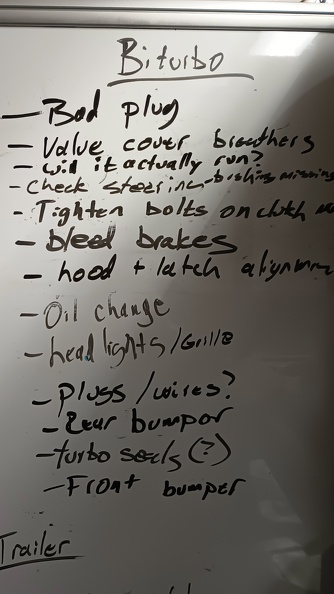
As of right now, there are a number of things that I know need to be done to be driveable:
There are also a number of things that I know are wrong that may or may not be fixed for the Challenge:
Continuing to apply the theory of working in small steps, I think the right thing to do is to start doing the minimum effort to put the car back to a point where it can be driven on the road. By doing that, at least, we will be able to find out the condition of everything else.
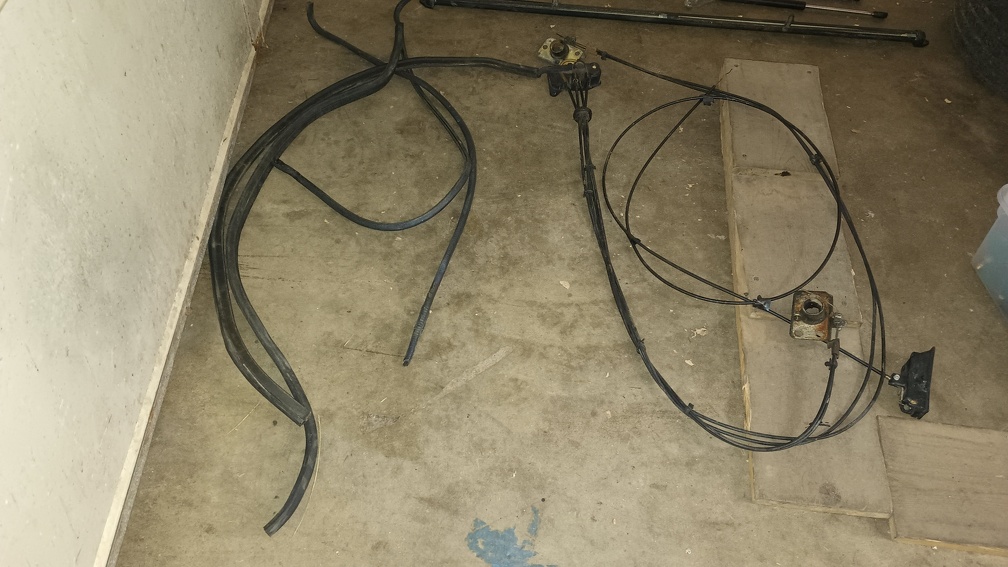
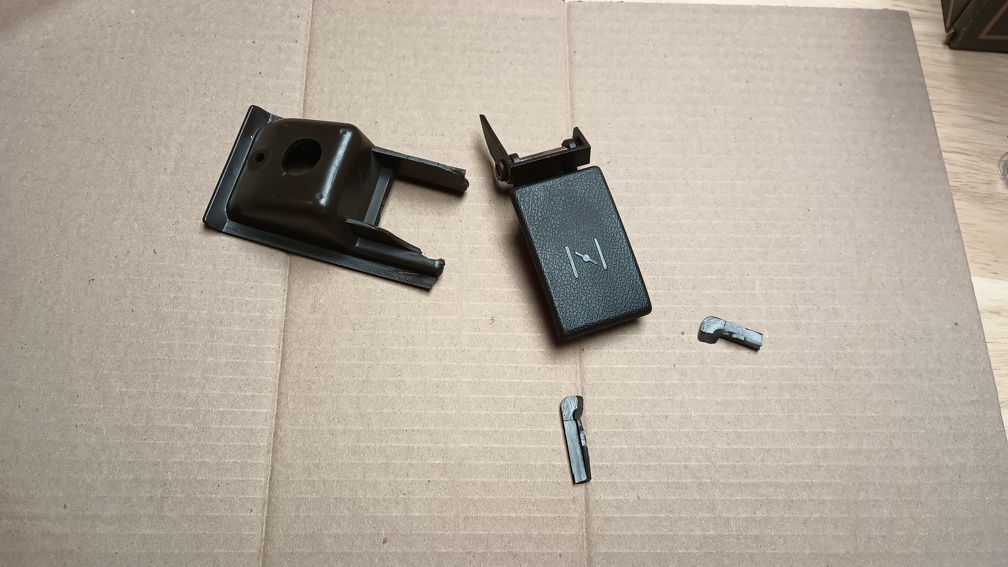
When I initially inquired about the car, the seller assured me that along with the car that was pictured, there were enough parts that were to go with it that I’d have 99% of what I needed to make a full car. At the time that I picked the car up, I didn’t have a chance to go through everything bit-by-bit, but I did manage to fill the back of the truck with parts. Now that it’s actually starting up and running, it was time to take inventory of what I have.
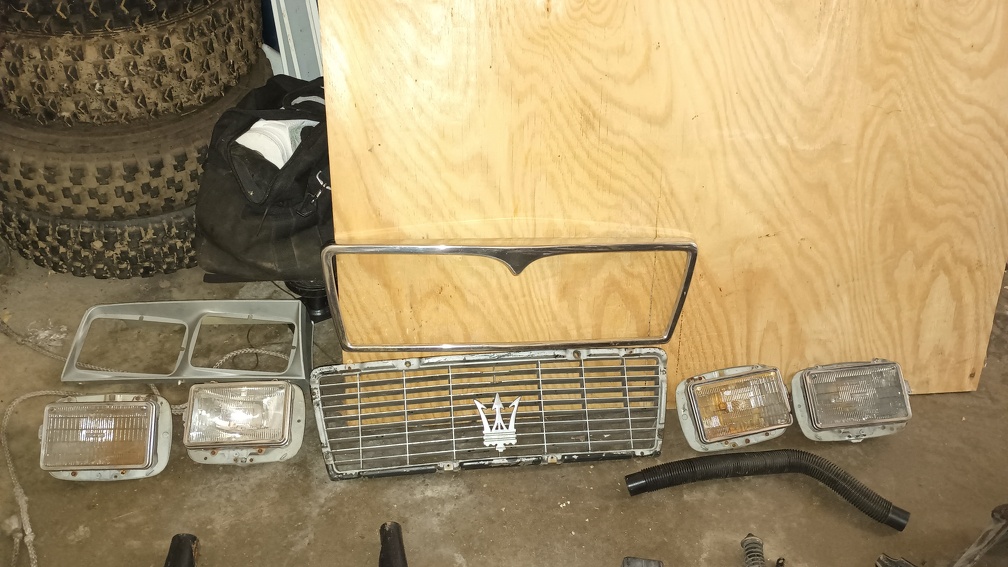
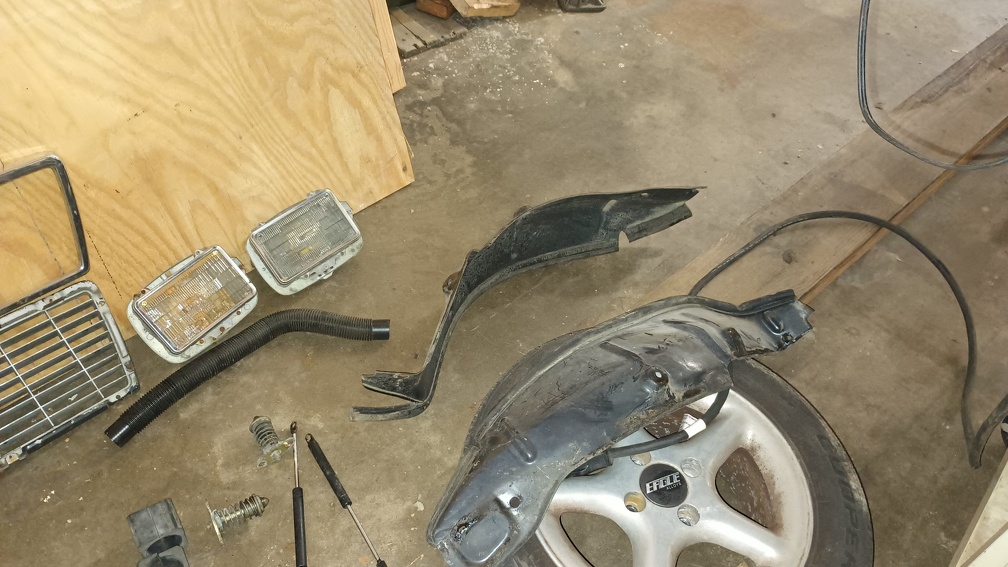
Both headlight surrounds were in the trunk – only one is shown in this picture, but the other is there – along with the headlights, the grille, and the grille frame. That tube is probably part of the airbox, but I’m not 100% sure. Both of what I believe are the low beam bulbs are busted, so they’ll need to be replaced. The metal frame that goes around the grille is supposed to have some tabs to which the grille bolts as well as some threaded attachments that are used to bolt it to the hood. All of those have broken off and the frame-to-hood attachments are completely missing, so that will need to be repaired. Also, the grille that I have is for a regular Biturbo, not the Biturbo E. That doesn’t matter for $2000 Challenge purposes, but if I ever come across an E grille for not much money, I may snag it just in case.
I took an opportunity to mock up the front end a little:
All of the latching mechanisms for the hood are missing right now with the exception of the hood release handle itself. It uses a pair of latches instead of a single one in the center. Good news is that there’s a full assembly – including another handle – in the trunk.
There’s an extra rear window screen, what I assume are the mounts for the front bumper, an oval Maserati emblem, a couple black trim bits of some sort, and the strikers for the hood. I believe the trunk striker is in the zip-top bag. There are also a bunch of hood and trunk support struts, but they’re all blown. I don’t know if it’s possible or worth rebuilding them or if they’re just trash. It looks like new ones for the trunk are about $12 each and the ones for the hood are about $32 each. I don’t see having $87 worth of room in the budget (after shipping, of course) to replace them, but at least it’s something that is readily available.
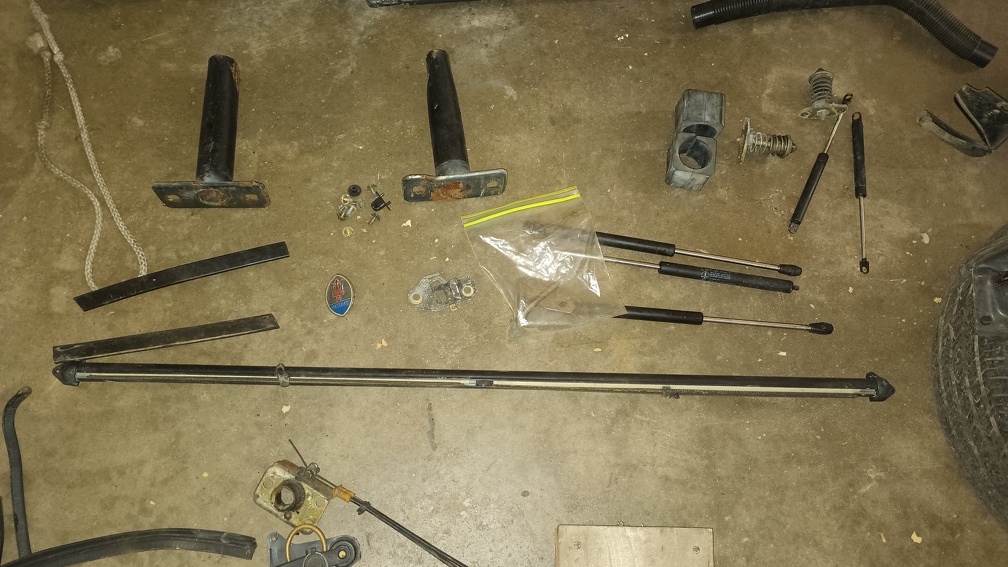
The front fender liners were also in the trunk.
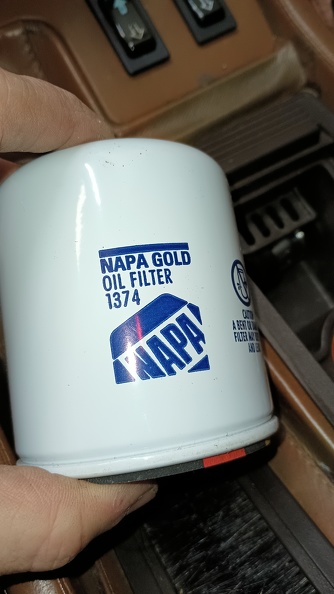
Moving to the inside of the cabin, there were more boxes and bags of parts, and I didn’t photograph all of them. Importantly, there is a new oil filter:
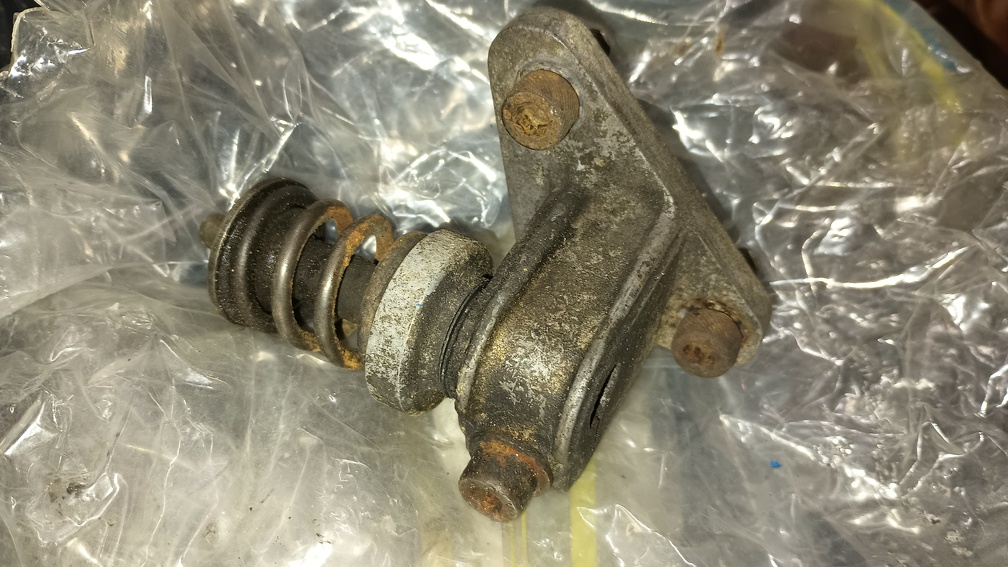
There is also a spare timing belt tensioner.
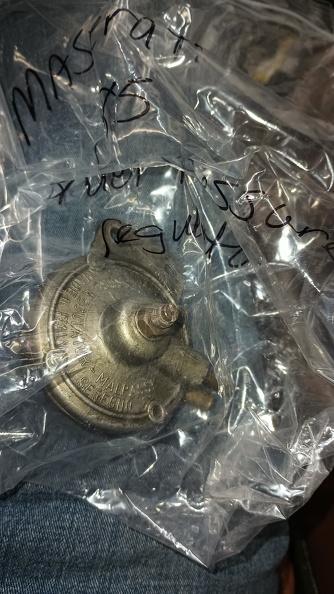
Another fuel pressure regulator.
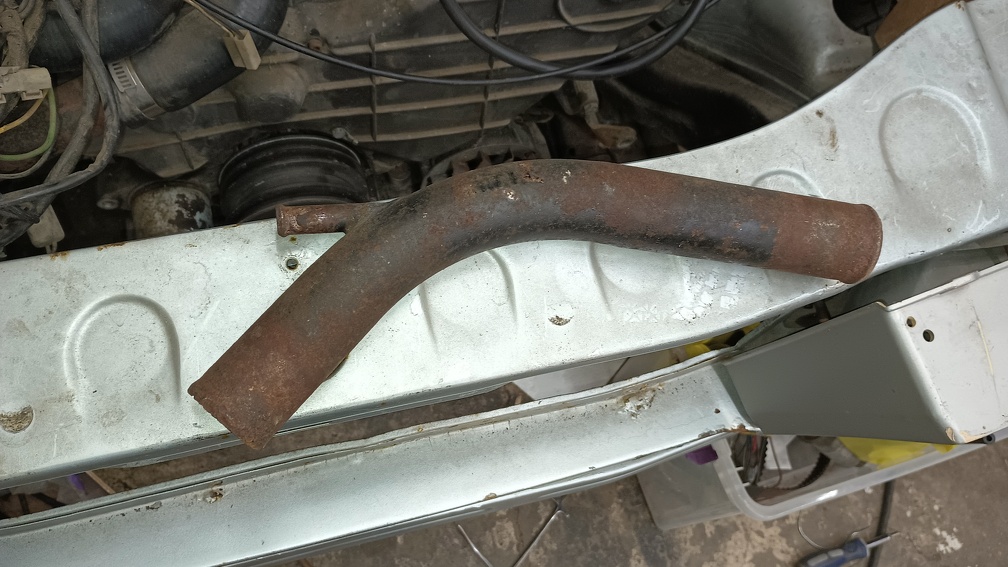
I was glad to have a spare coolant Y-pipe in there as well. This I can put in the blasting cabinet to clean up and then give it a nice coat of paint so it can class up the engine bay a bit.
Front(?) bumper isolators – but no front bumper.

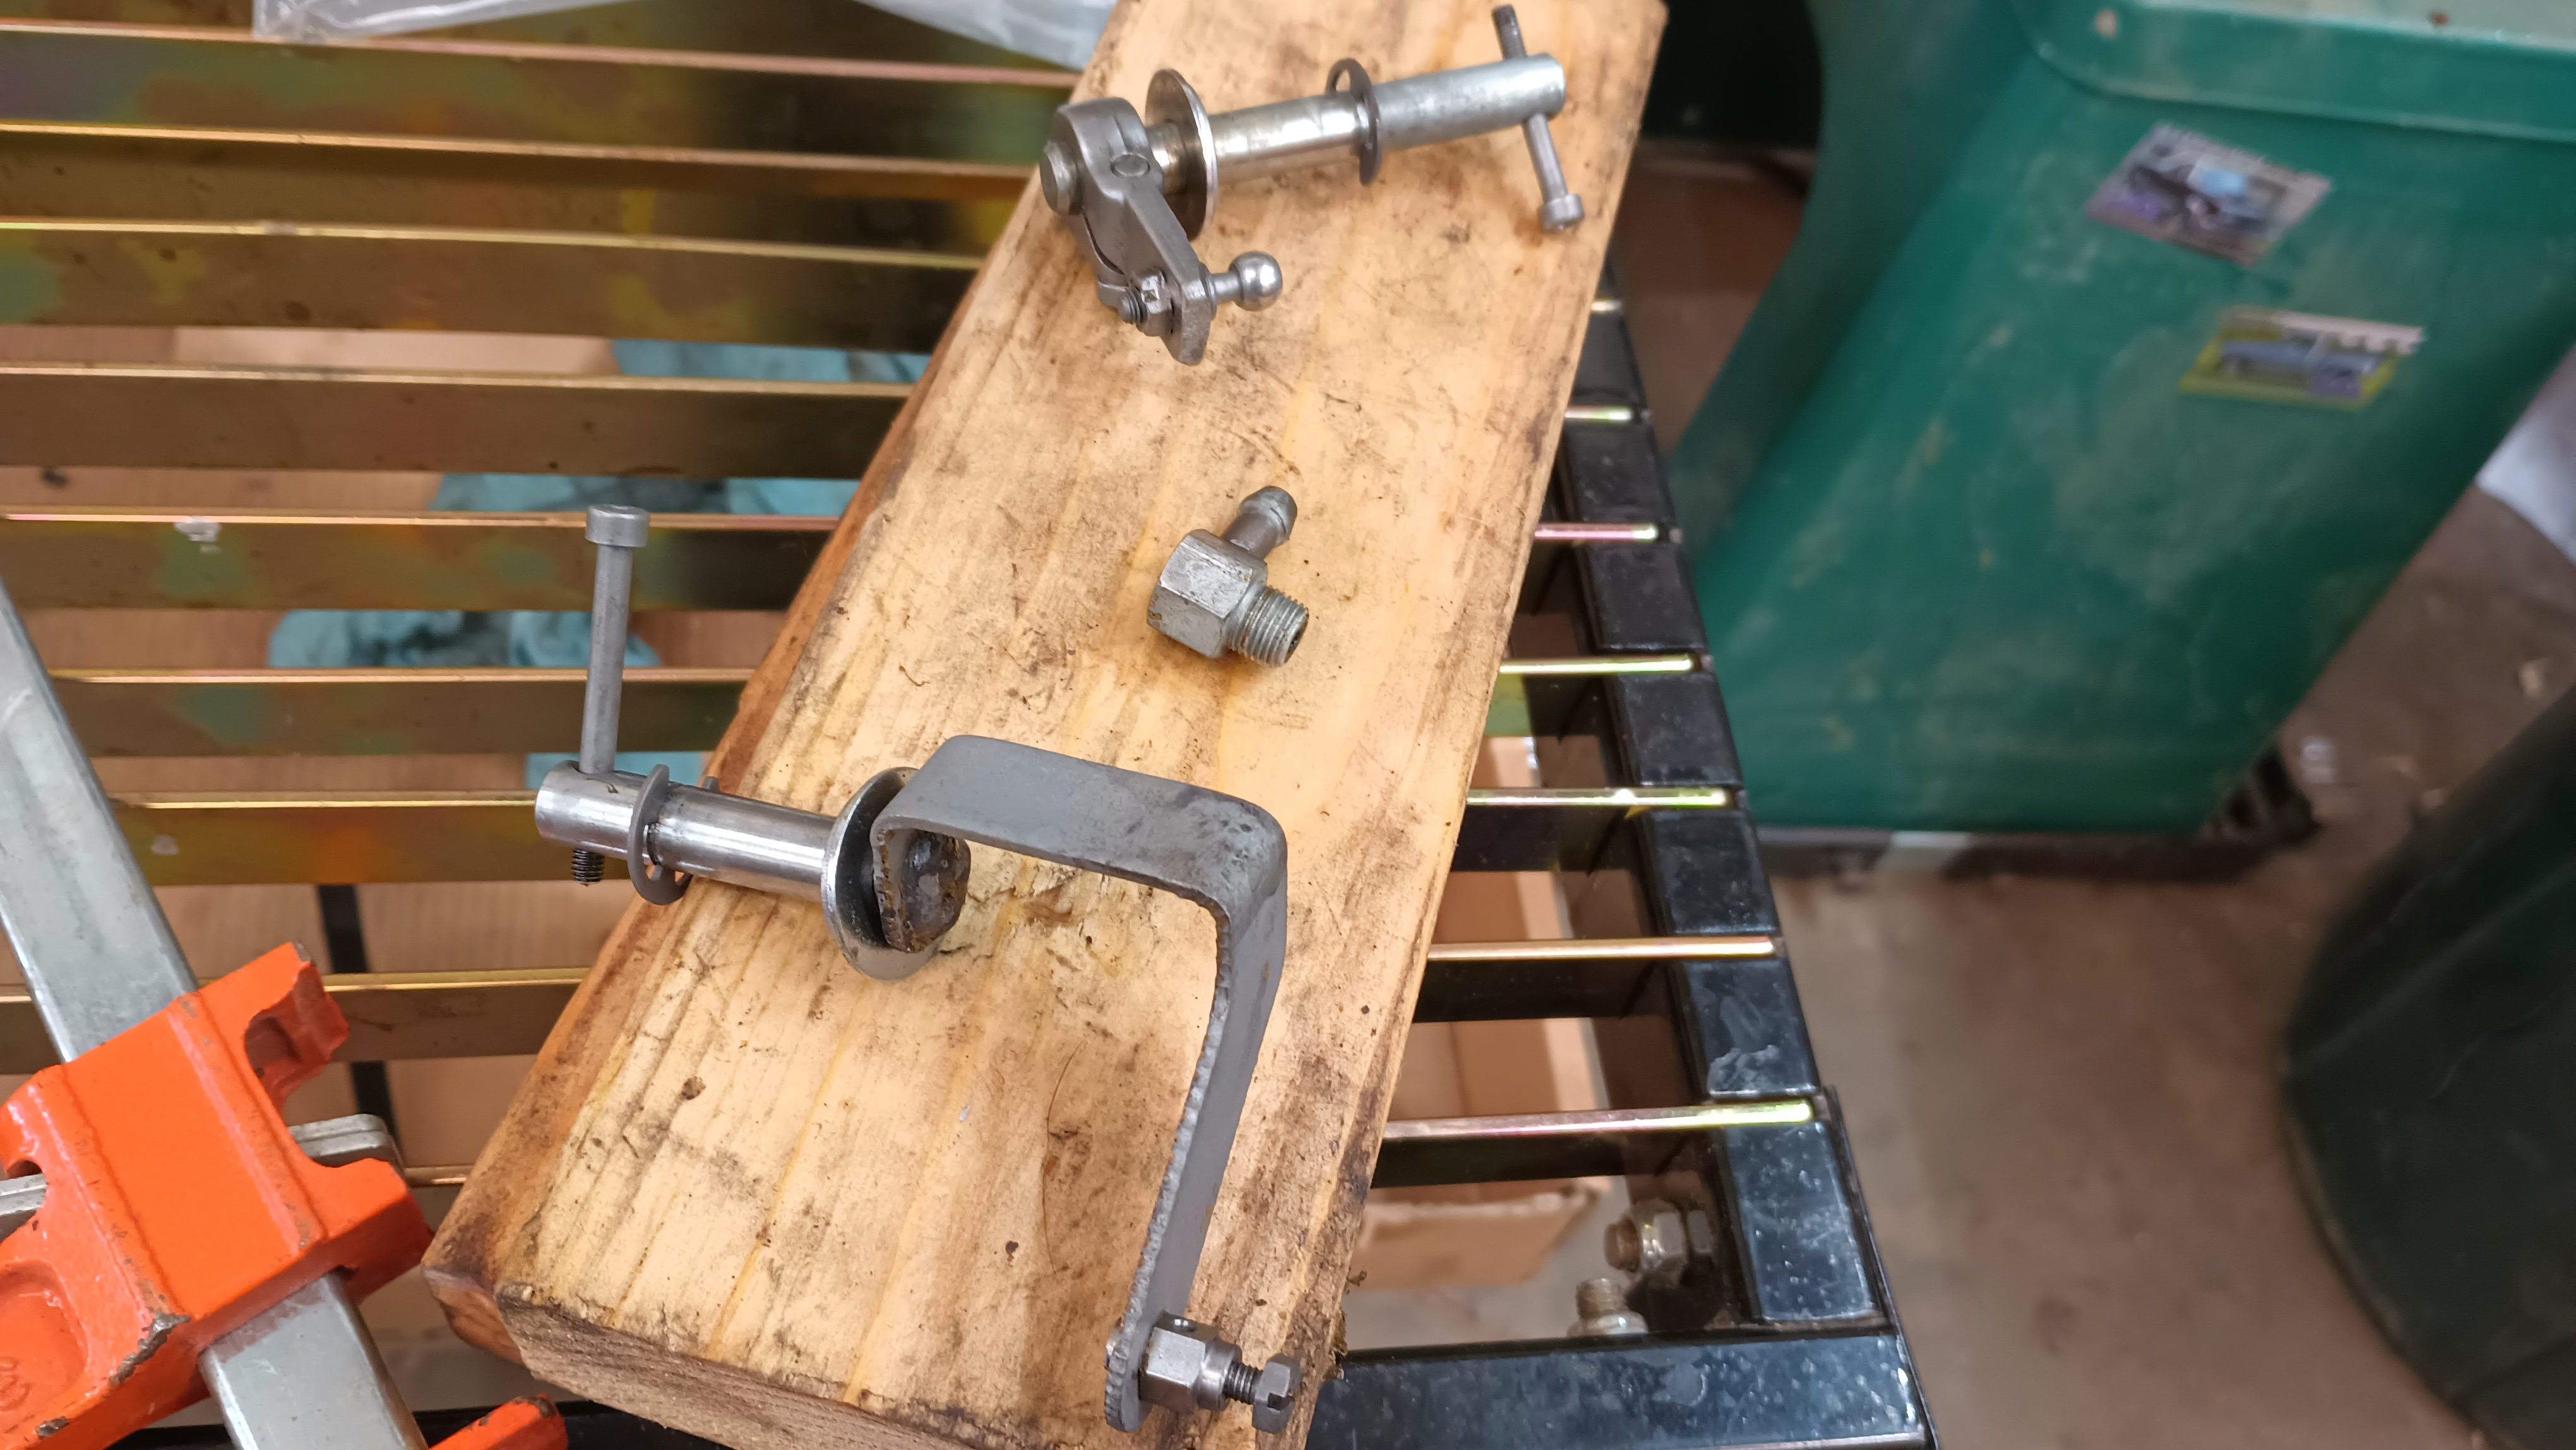
Other parts that I didn’t get pictures of include:
And there are probably a few other smaller things that I’m missing from the list. The big things that I know I’m missing are a front bumper, shift knob, and the A/C compressor. Also, the Nardi wheel is missing, but there is a regular Biturbo steering wheel in its place.
While there are certainly still some things that I’m missing, the spares that are available should significantly reduce what I’ve got to buy in order for this car to see Challenge glory.
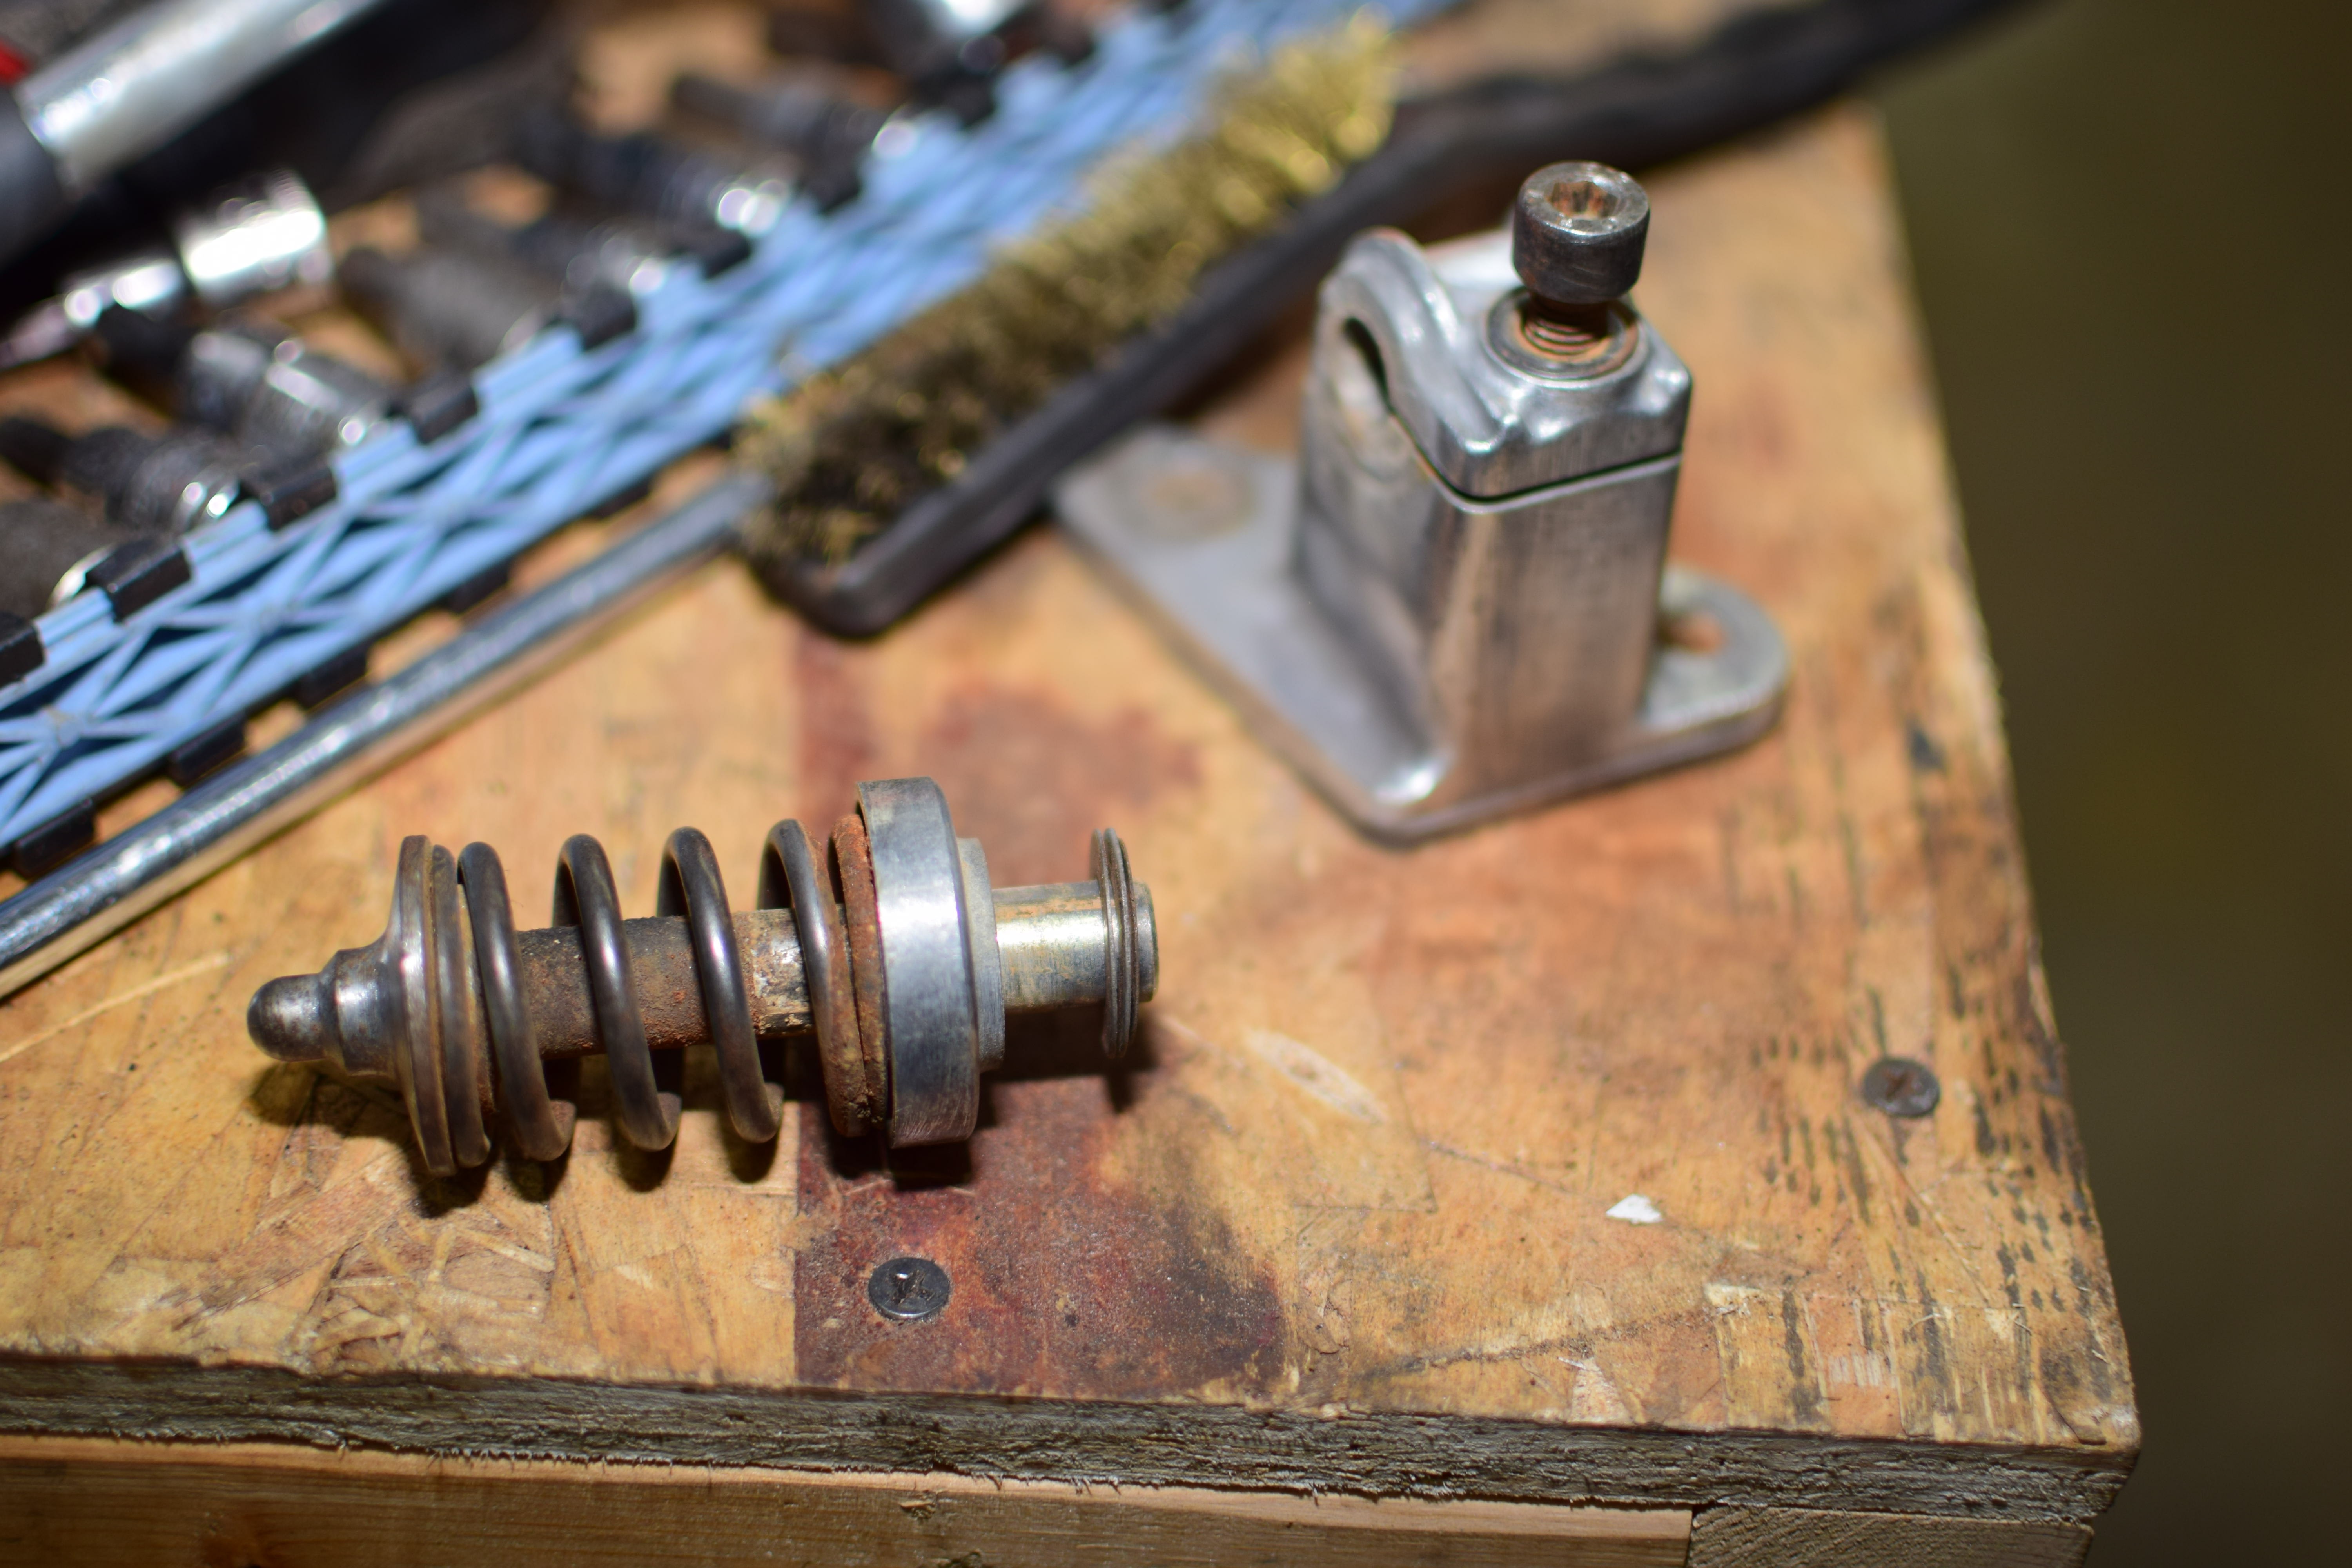
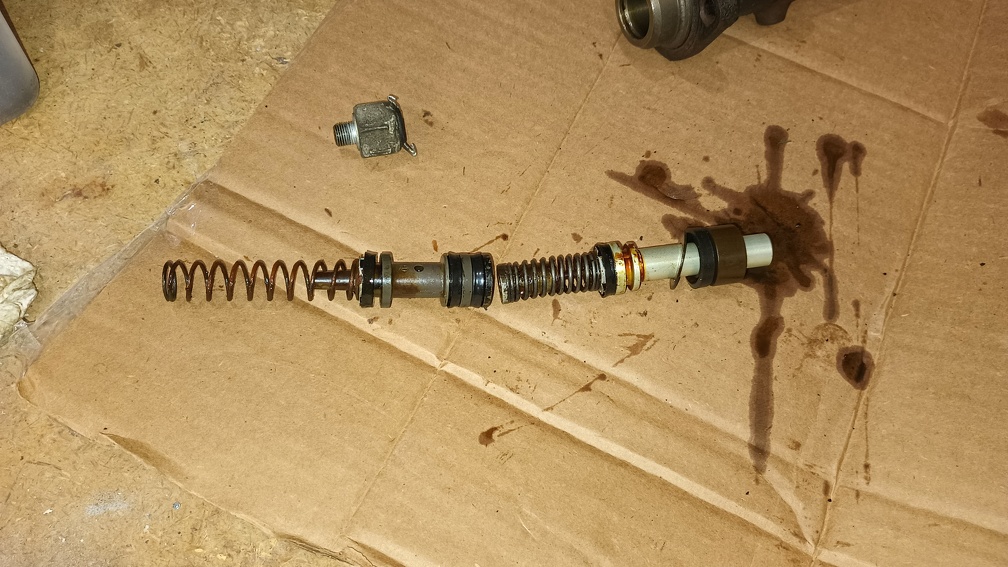
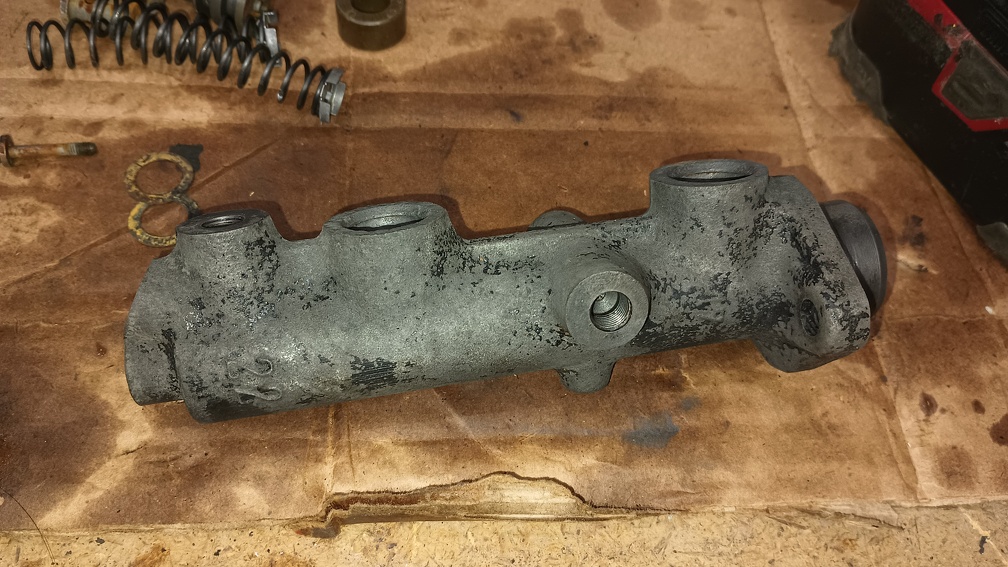
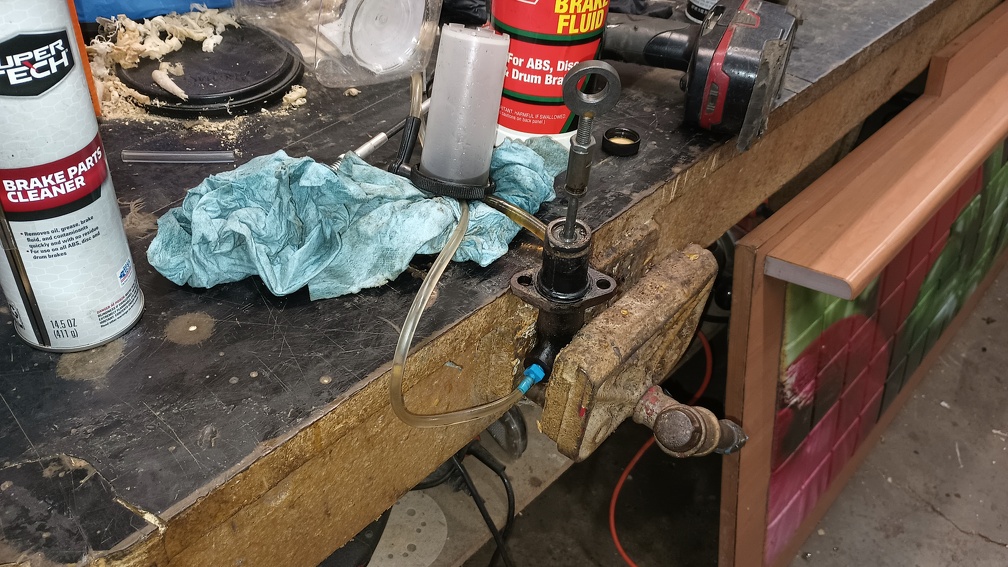
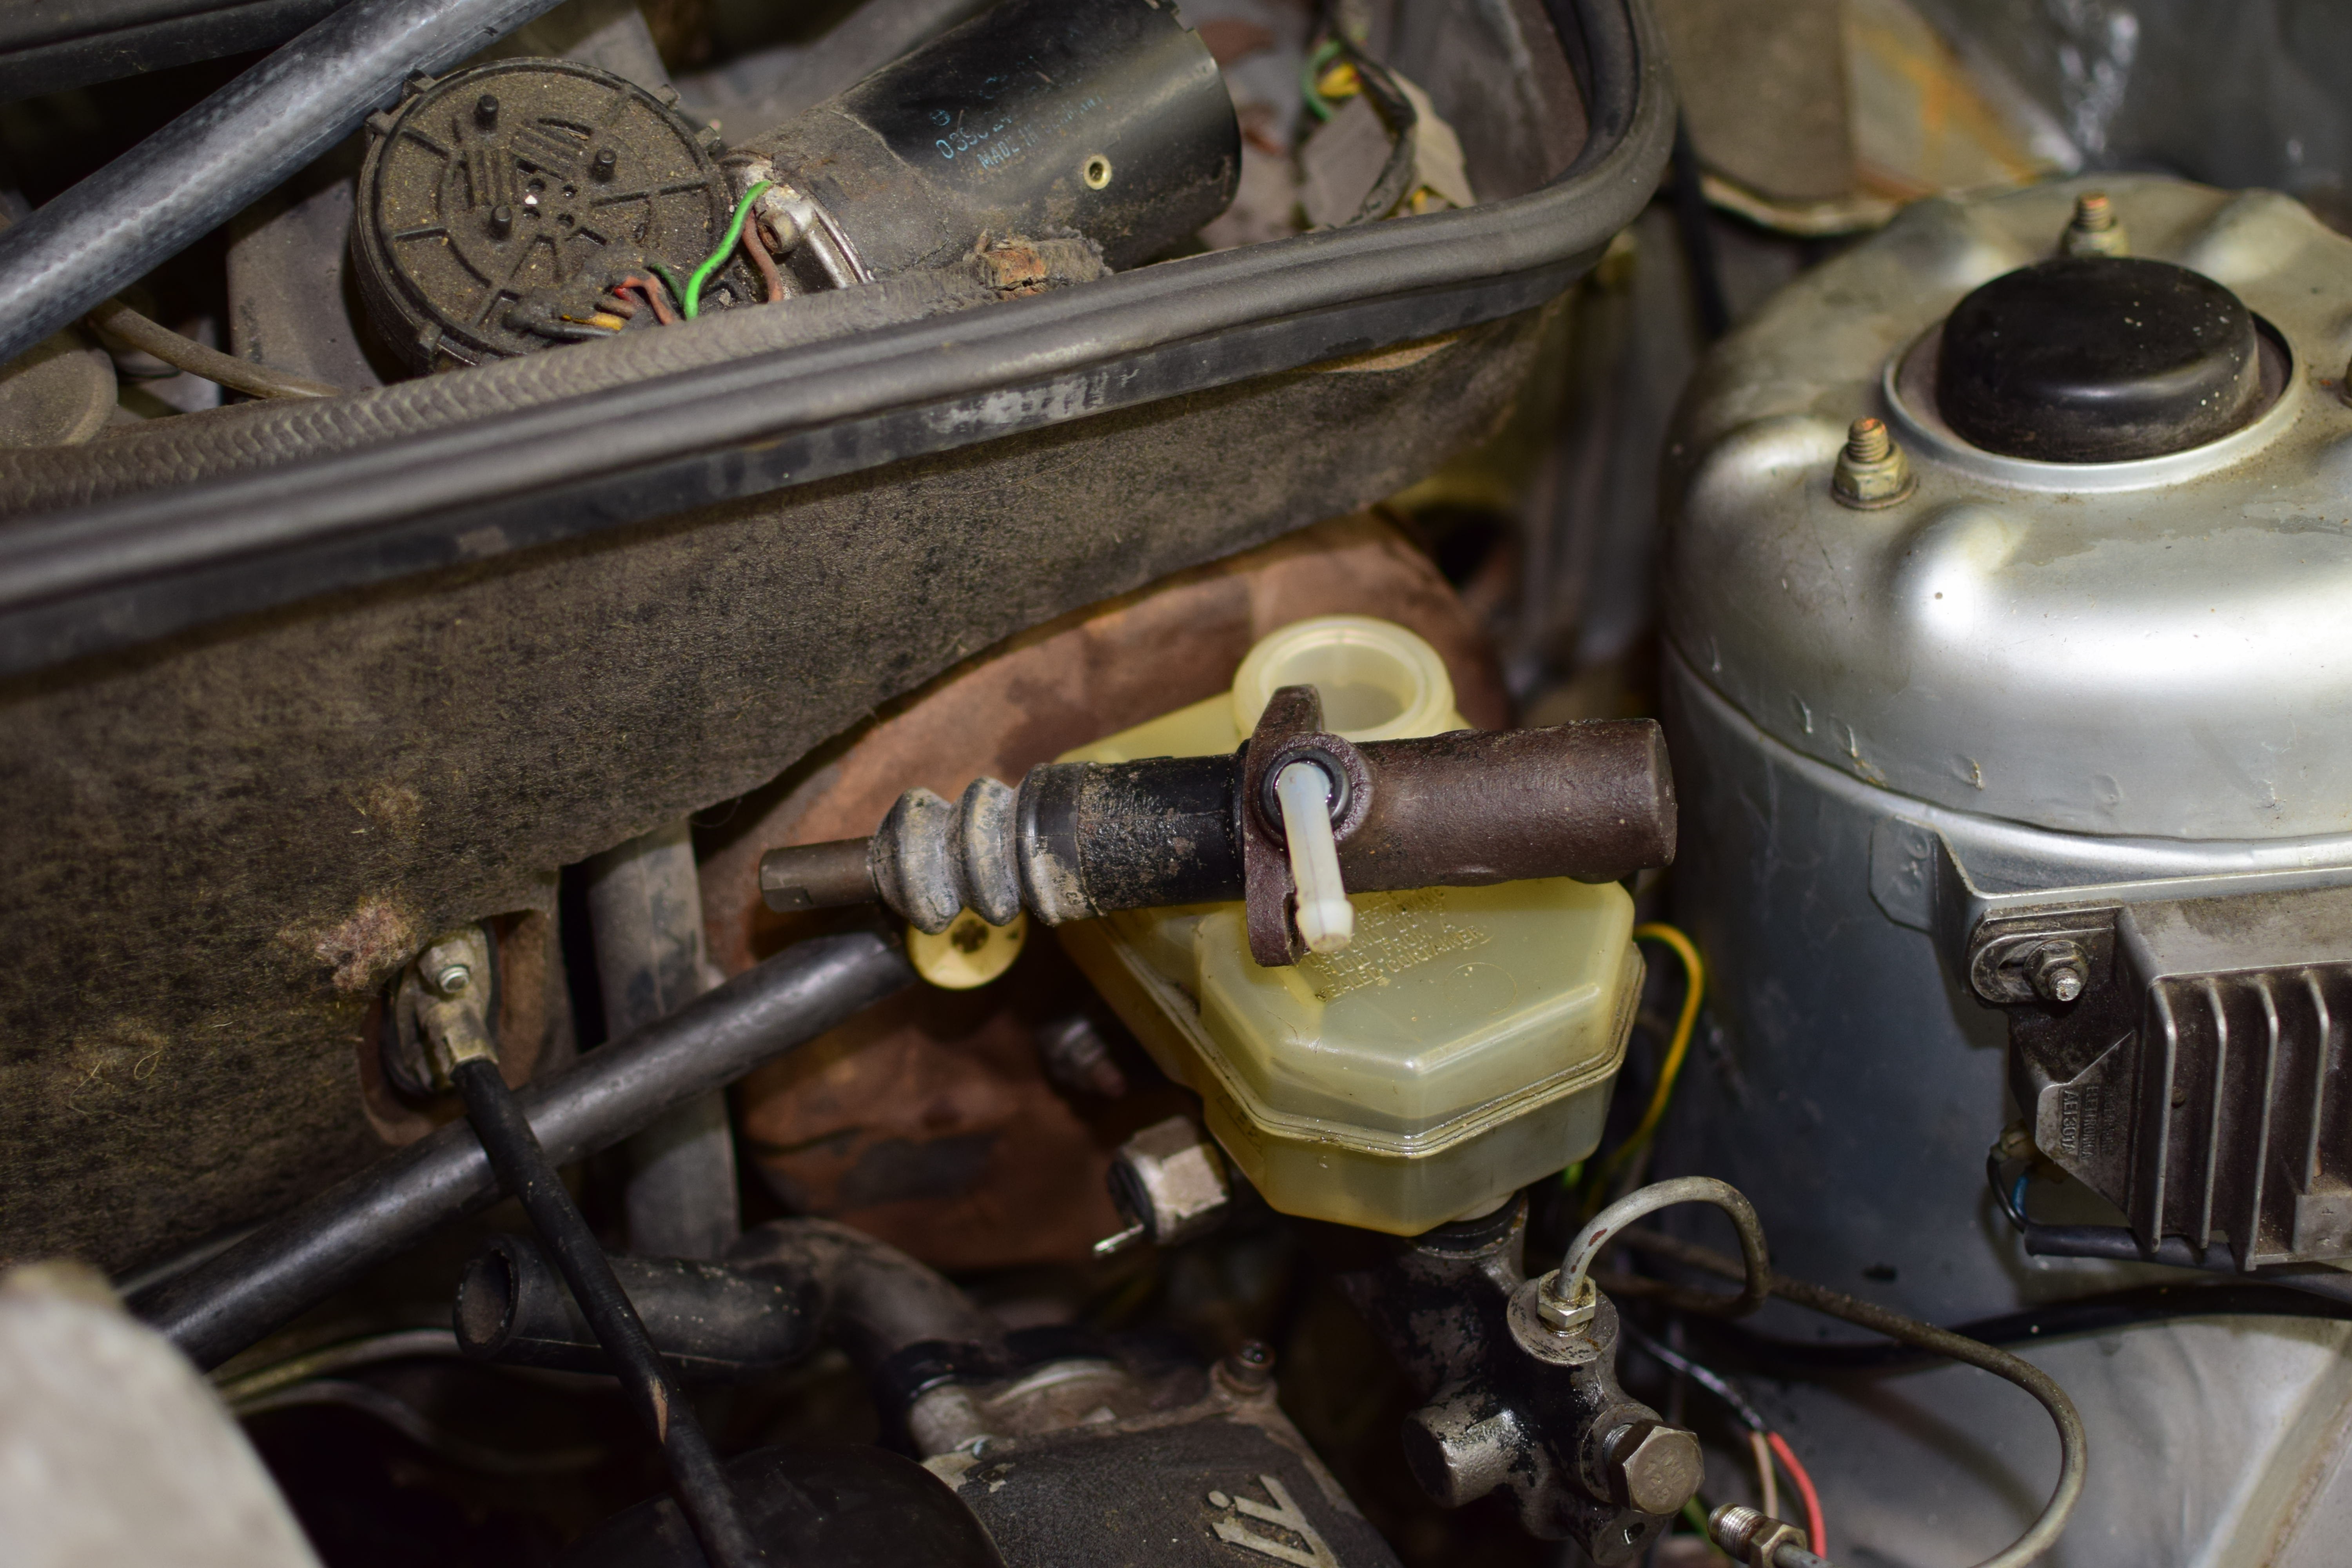
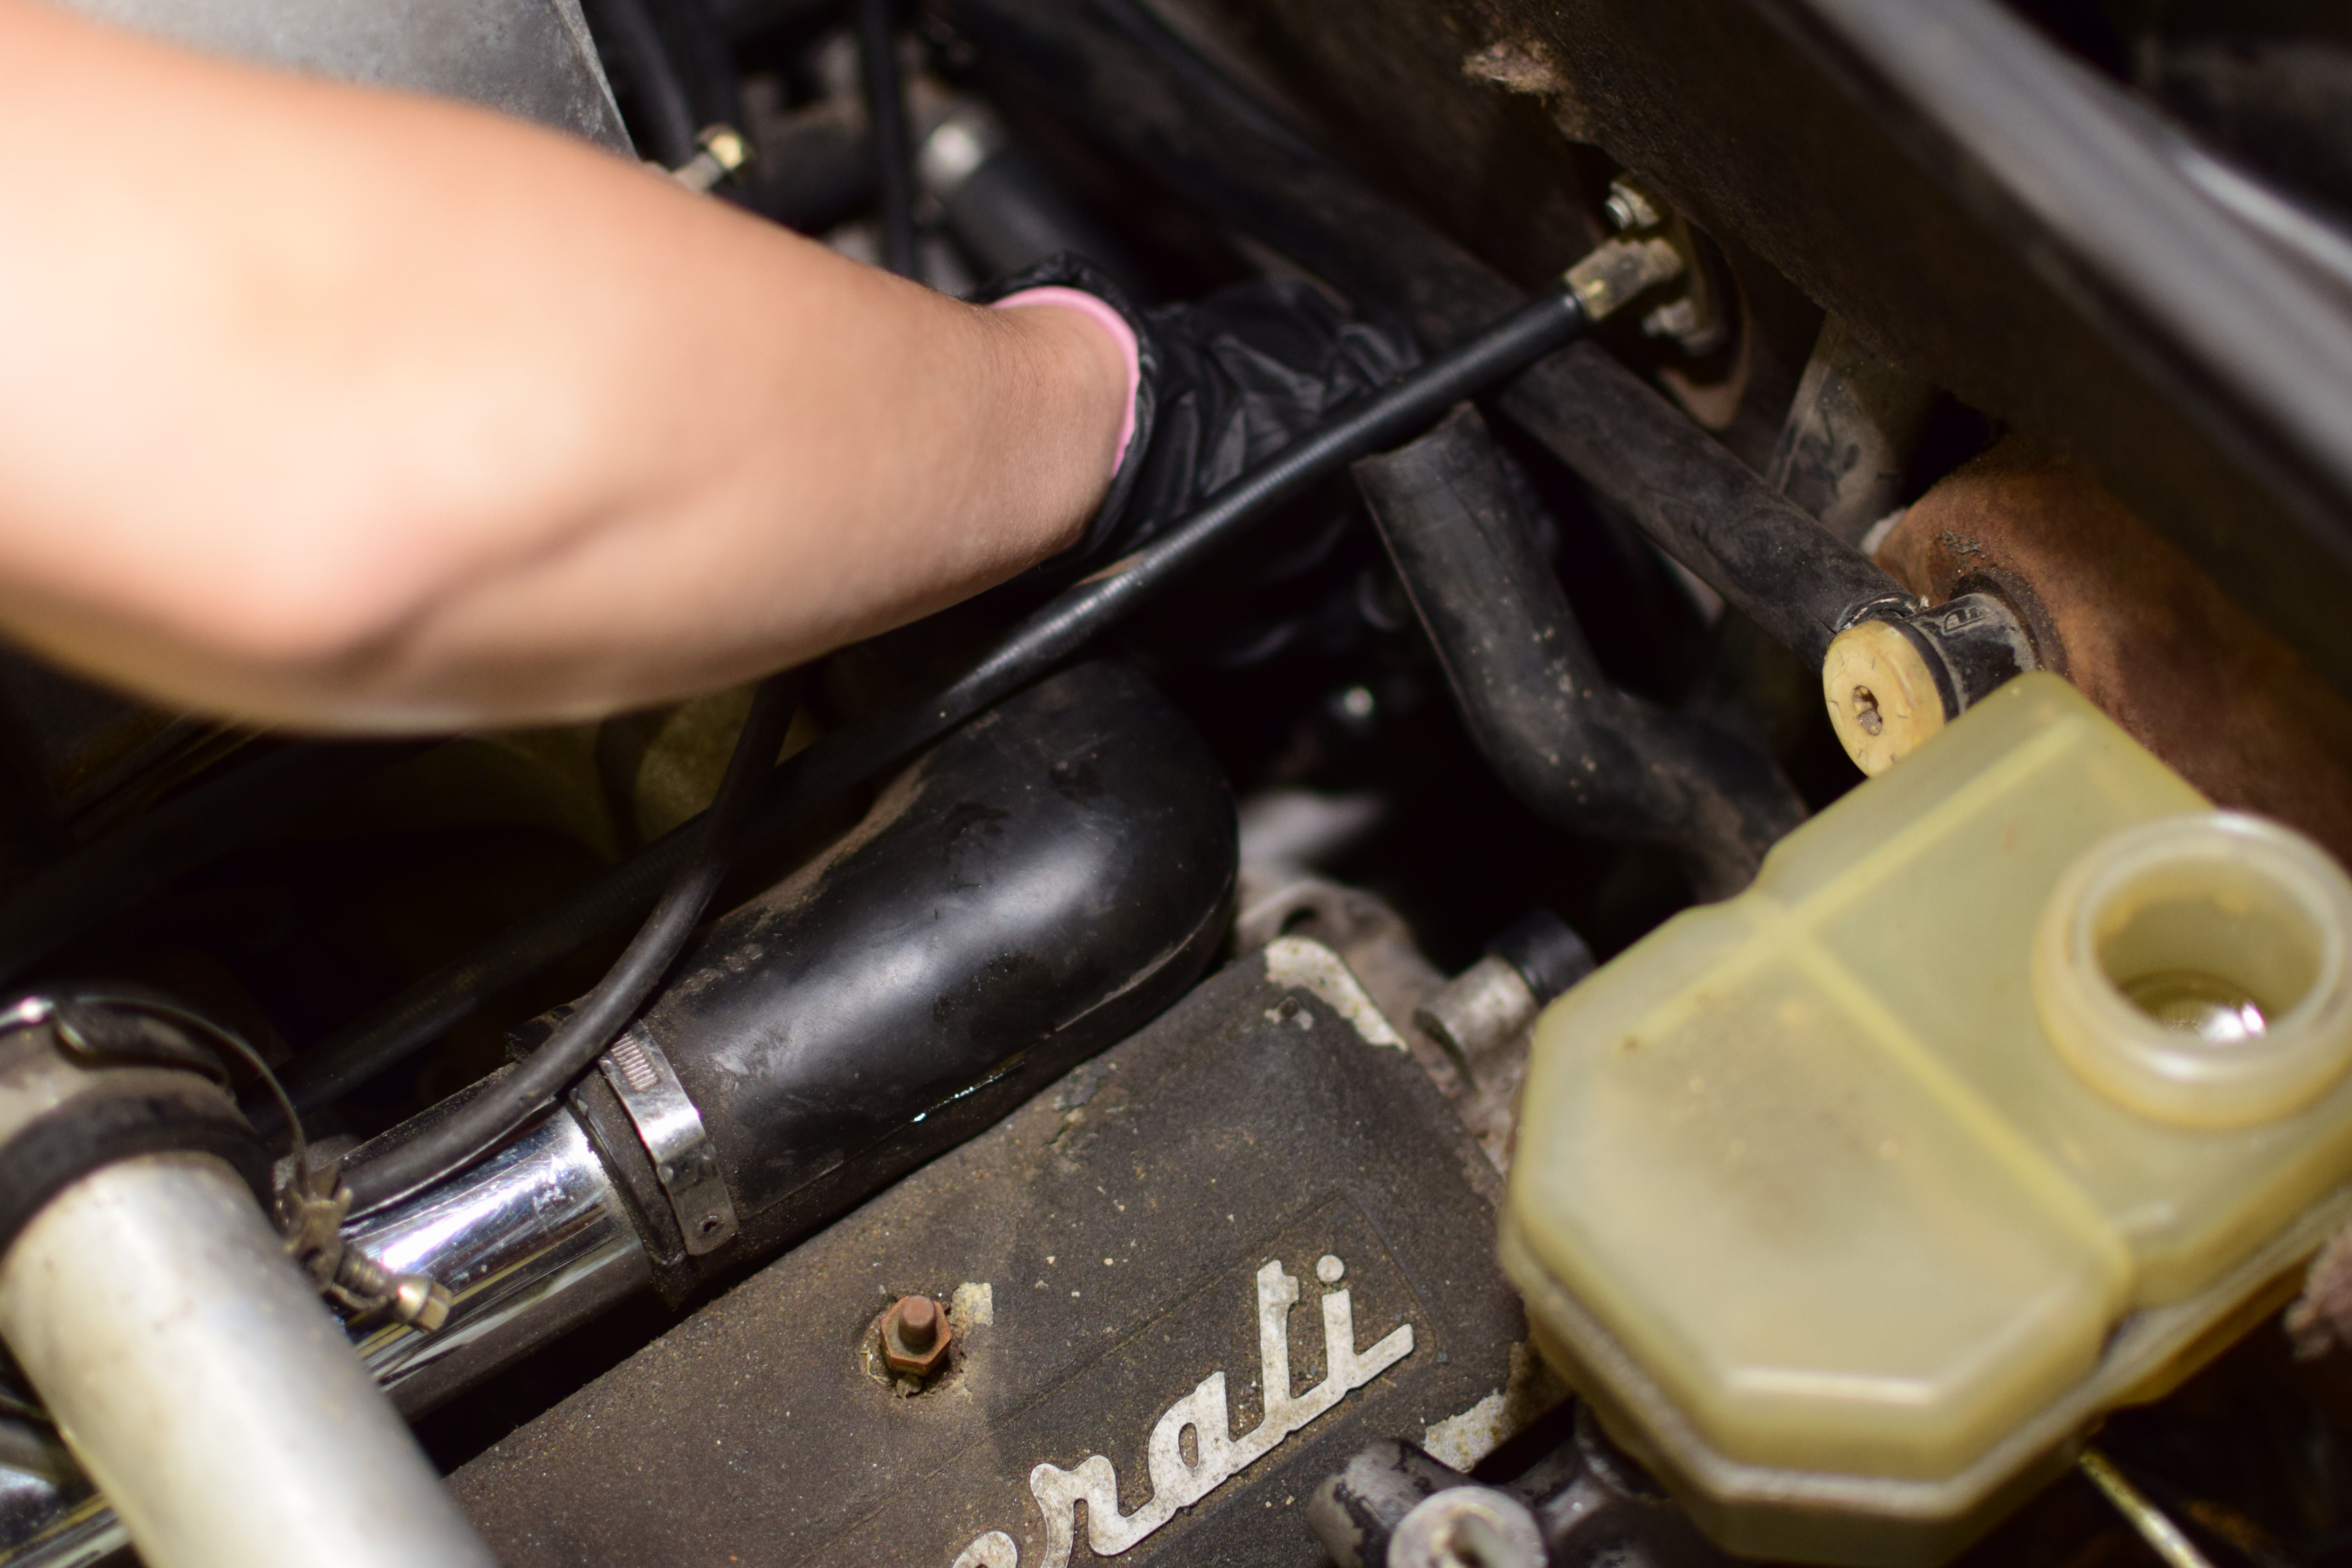
With the car able to start, we need to make sure that it will stop. When the car came in, the shared brake fluid reservoir was dry. The first troubleshooting step was to put brake fluid in and try to bleed the brakes, but we weren’t able to get any fluid to come through the line. The most likely cause, then, was a failure of the master cylinder, so off it came. Once the pistons were out, it was pretty obvious that the seals were well past their prime.
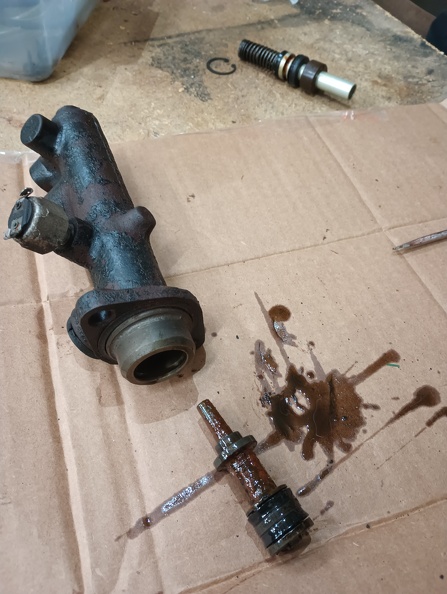
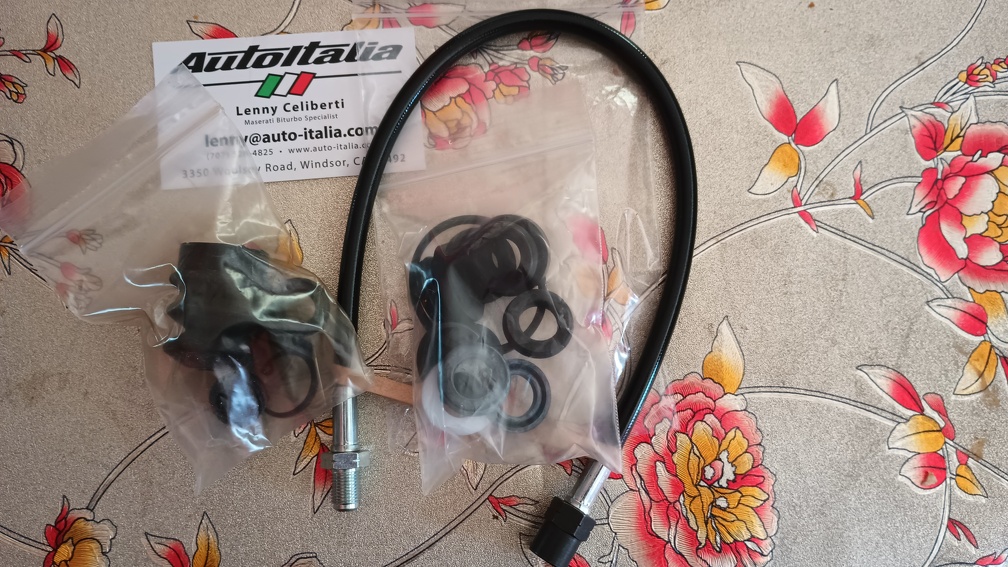
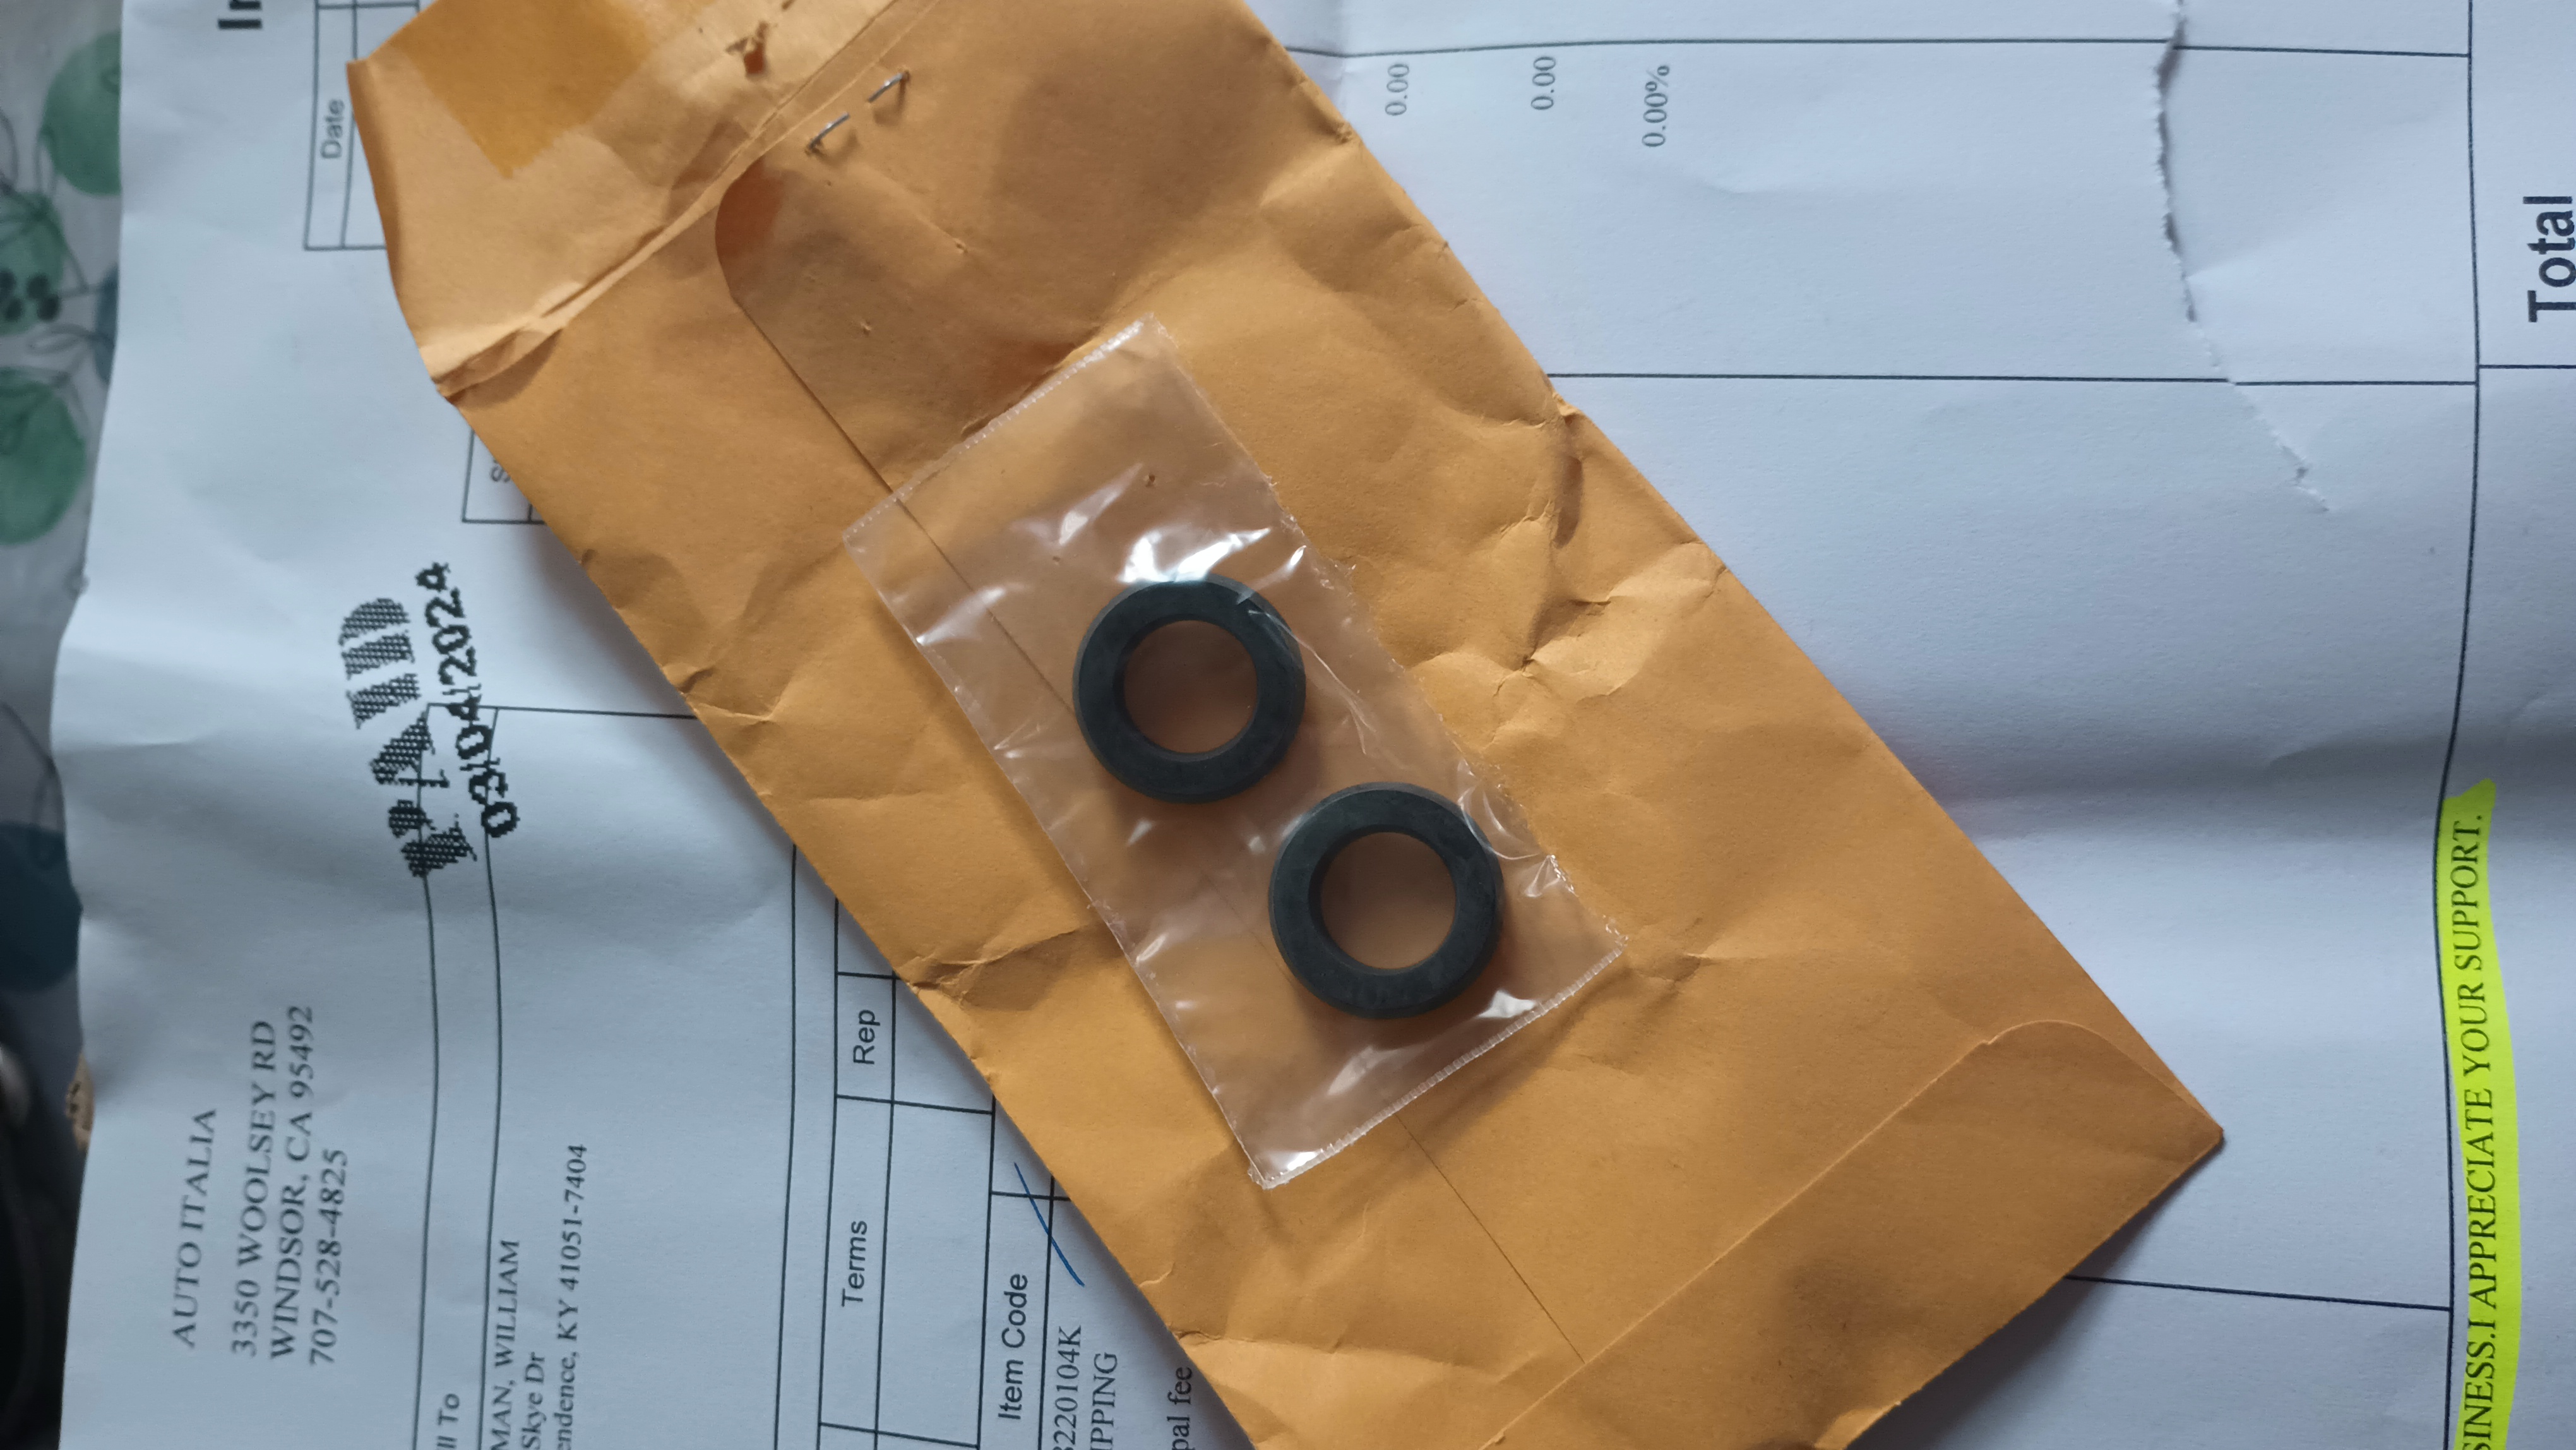
For $143.60, Lenny from AutoItalia sent me the rebuild kits for the clutch and brake master cylinders as well as a new hose for the clutch.
Once the cylinder was disassembled, I used a hone to clean it up, dropped the whole thing in some Evaporust in the ultrasonic cleaner, and got it looking pretty good.
Once the new seals were installed and the pistons were back in the cylinder, it was time to bench bleed.
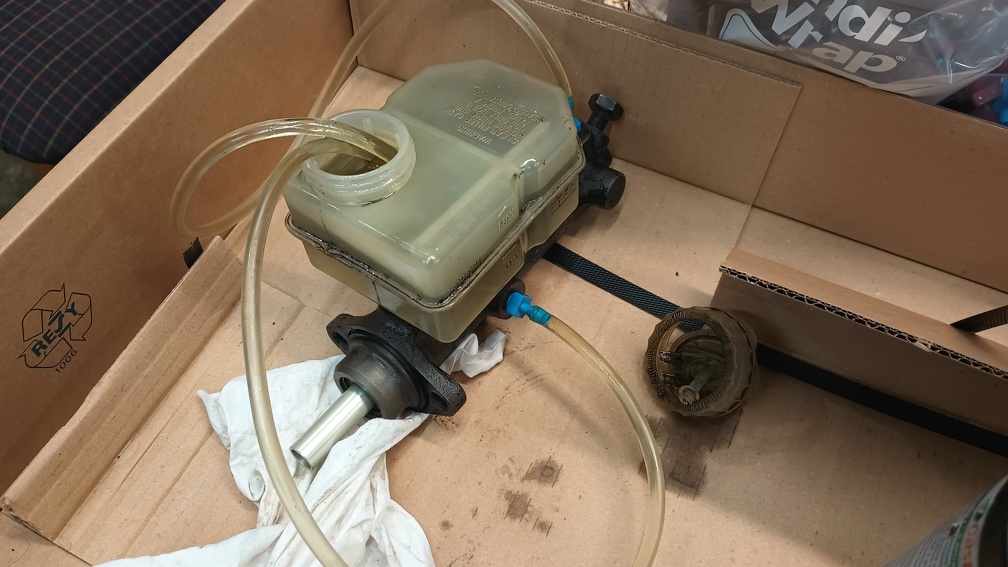
There are a total of four ports on the master cylinder – three for brake circuits and one for the brake switch. Each of them have M10x1.0 threads. I used a Dorman bench bleeding kit for two of the fittings and then a couple bolts to block off the others. Once the first two were bled, I swapped the plastic fittings and the bolts and bled the other two and after very little effort, I had no air bubbles.
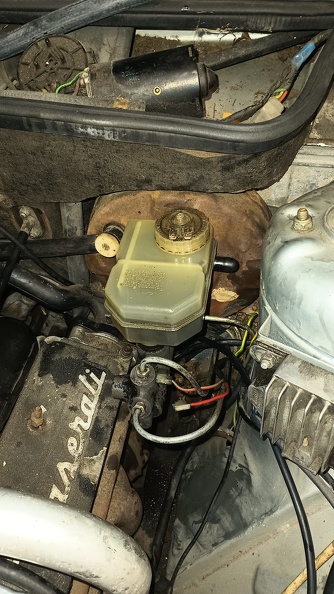
With that bled, I got it bolted back onto the booster and hooked up the brake lines. The next step is to vacuum bleed the brakes to see if the caliper seals are also in need of replacement.
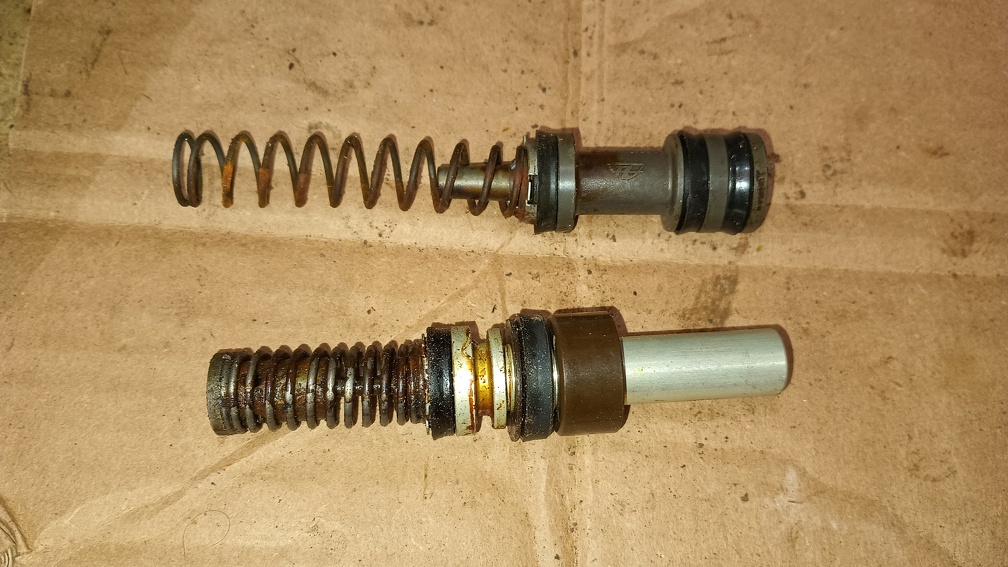
The clutch master cylinder also got a rebuild kit installed. I followed the same basic process of tearing it down, hitting it with the hone, and cleaning it up in the ultrasonic cleaner. Bench bleeding it was a little easier since it only has the one port. The most difficult part was coming up with a reservoir for it, since it shares with the brake master cylinder.
Both the clutch slave that was installed on the car and the one that was supposed to be a “good spare” were frozen up. I was able to knock the installed one loose, but it’s leaking enough that it also needs a rebuild kit. Once that comes in, I’ll get the slave rebuilt, bleed the whole system on the bench, and then install it in the car.
While I wait for the slave cylinder to arrive, I can work on getting the braking system functional again. Ordinarily, I would start with the right rear and work my way closer to the brake master cylinder, but in this case, the car is up against the wall on the right side, so it’s a lot easier to start on the left.
The left rear bleeder cracked open with no problem, but there was no fluid at all, even after sitting for a bit. The vacuum bleeder got me no fluid either, so I pulled the brake line off of the caliper. I haven’t done a lot of work on cars of this era, and I’ve never touched anything from Italy before, so maybe this isn’t as weird as I think it is, but the brake plumbing comes off of the master cylinder as a hard line – normal – tracks under the car – normal – and then reaches a proportioning valve at the back of the car, forward of the rear suspension – still normal. Coming out of the prop valve, however, it transitions to soft lines to make the jump to each rear control arm and then returns to a hard line to make the connection to the caliper. That seems weird to me.
That minor digression aside, with the brake line off the caliper, I tried pulling a vacuum and instead of getting brake fluid, the pump held a pretty serious vacuum. To isolate the problem further, I disconnected the rearward brake line from the master and plugged the master with an M10x1.0 bolt and still held a vacuum. So the problem was not likely in the master rebuild job I did, which is good news. Next, I connected the shop air to the brake line that was disconnected from the master and it was unable to push air to the back of the car. Finally, I removed the hard line connection from the rear proportioning valve and was finally able to push air through the brake hard line. It made a mess, but it also got all the old, nasty fluid out of the line, so I’ll take the win.
Surprisingly, the brake plumbing came apart with relative ease. I pulled the hard line off the rest of the way so I could get the soft line out.

You can see in that picture how the soft line connects to the control arm. The prop valve is mounted up on the unibody around and behind the fuel pump.
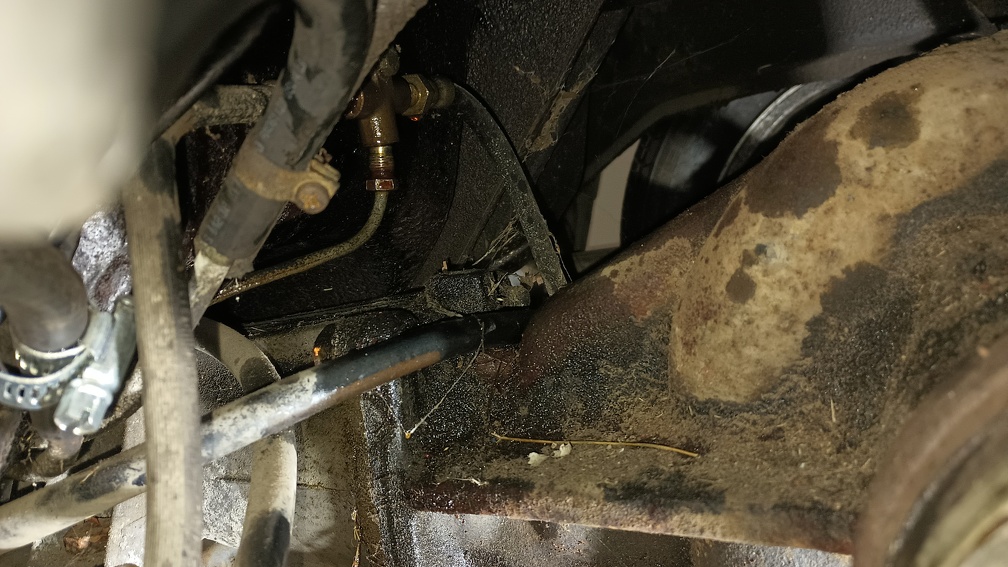
The soft line was a little bit harder to remove on the proportioning valve side and I didn’t want to risk breaking anything. My solution was to disconnect the right side hose from its hard line caliper connection, take the 10mm mounting bolt out, and remove the valve and hoses from the car as a unit. Once the assembly was out of the car, I put the valve in a vice – okay, I didn’t use a vice, I actually just put it in the hydraulic press to hold it still, but same time – and the hoses came off pretty easily.
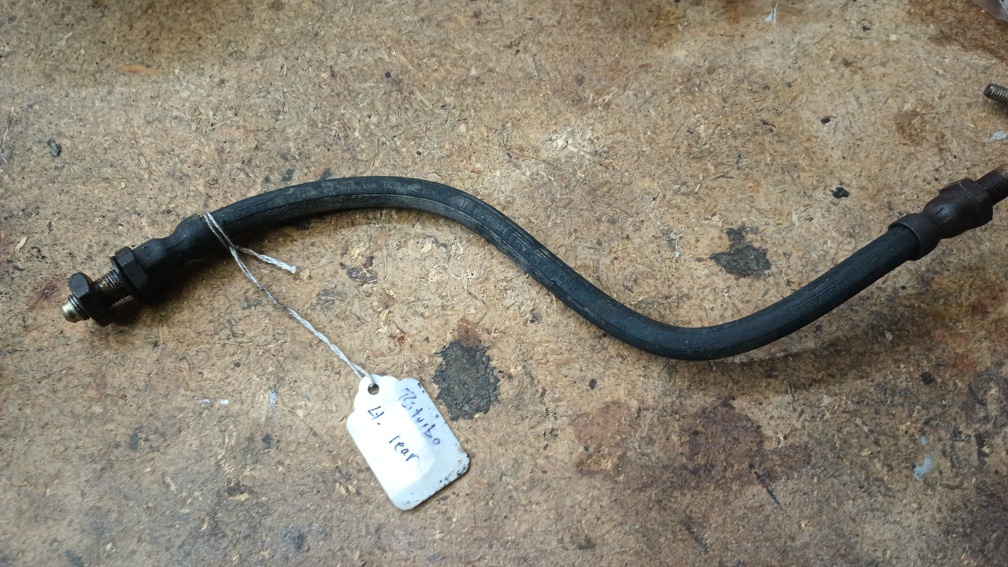
As it happens, the car has 6 of these hoses in total, all mounted in the same fashion. One for each rear brake and two for each one in the front. They’re all used to go from a hardline on the car to a hardline that connects to the brake caliper and they’re all the same part number. The hose is about 13″ long and has a male M10x1.0 fitting on each end. I was able to find a source to get new hoses that are the “right” part, but at $25 each plus shipping and only $672 left in my budget, I decided that there had to be a better option. And by better, I absolutely meant cheaper.
As it happens, in the late 70s, Jaguar used an almost identical brake hose. Now theirs had a longer hose in the front than the hose in the rear, but the rear hose is very close in length and they both have M10x1.0 male threads on both ends. I’ve ordered up a pair of the cheapest set from Rock Auto, the Sunsong 2202540 for just under $8.50 each, after the 5% discount and shipping. When they arrive next week, I’ll get to see if they get the job done. I’m hoping that they’re not just good; they’re good enough.
Ordinarily, I would have waited to order those hoses until after I checked the front, but time is getting short, so I decided to go ahead and get those moving and if I need more, I’ll order them up later. Moving to the front left, I was again able to easily crack the bleeders open and started bleeding one of the circuits. Once again, I started with some really nasty fluid, but after a couple pumps with the Mity-Vac, I was starting to drain the reservoir and clean fluid was coming through.
I ran out of time before I got too much farther with that, but that’s confirmation that 25% of the front hoses are in good shape, so I’ll take that win. My next trip over to the shop, I’ll check out the other three circuits and, hopefully, will have good front brakes.
My wrenching time got interrupted by a minor work crisis, so I did not get as far as I had hoped. Before things went pear-shaped, though, I started with the slave cylinder.
The new seals arrived in the mail, and getting the old ones out started with putting a drift through the banjo bolt connection on the back of the slave cylinder and giving it a quick tap.
Once the piston was sticking out, it was easy to pull out of the cylinder and start cleaning off.
The old seals were pretty toast and, with the use of a small pick, came off without a fight. I hit the inside of the cylinder with the hone while I cleaned up the piston with a wire brush and some brake cleaner.
Getting the new seals on was definitely more difficult than removing the old ones, but with a screwdriver to provide leverage, it only took a couple minutes to have both seals installed.
I did some basic bleeding of the system, but it required more than the two hands God blessed me with, so for now, I put the new rubber boot on the master, hooked up all the fluid lines, and went about threading it back into the car.
I left the clutch lined up with the hole in the firewall and the clutch hose routed under the brake lines in such a way that it shouldn’t rub and abrade like the old one did. I think the connection to the slave cylinder will also need to be re-clocked about 180 degrees by just loosening the banjo bolt and giving everything a quick twist. When I have some help, we’ll bolt the master cylinder back to the firewall, re-install the clutch pedal linkage, and then finish up with the bleeding.
Moving back to the brakes, I finished flushing out and vacuum bleeding all three ports on the left brakes. As I was getting ready to move to the right side, I got interrupted, but at least I know that the two brake hoses on the left side are not collapsed.
Before I had to go, I took a quick look at the tires that were on the car and noticed the “Made In” notation. Now I knew the tires were really old, but I had no idea they were this old.
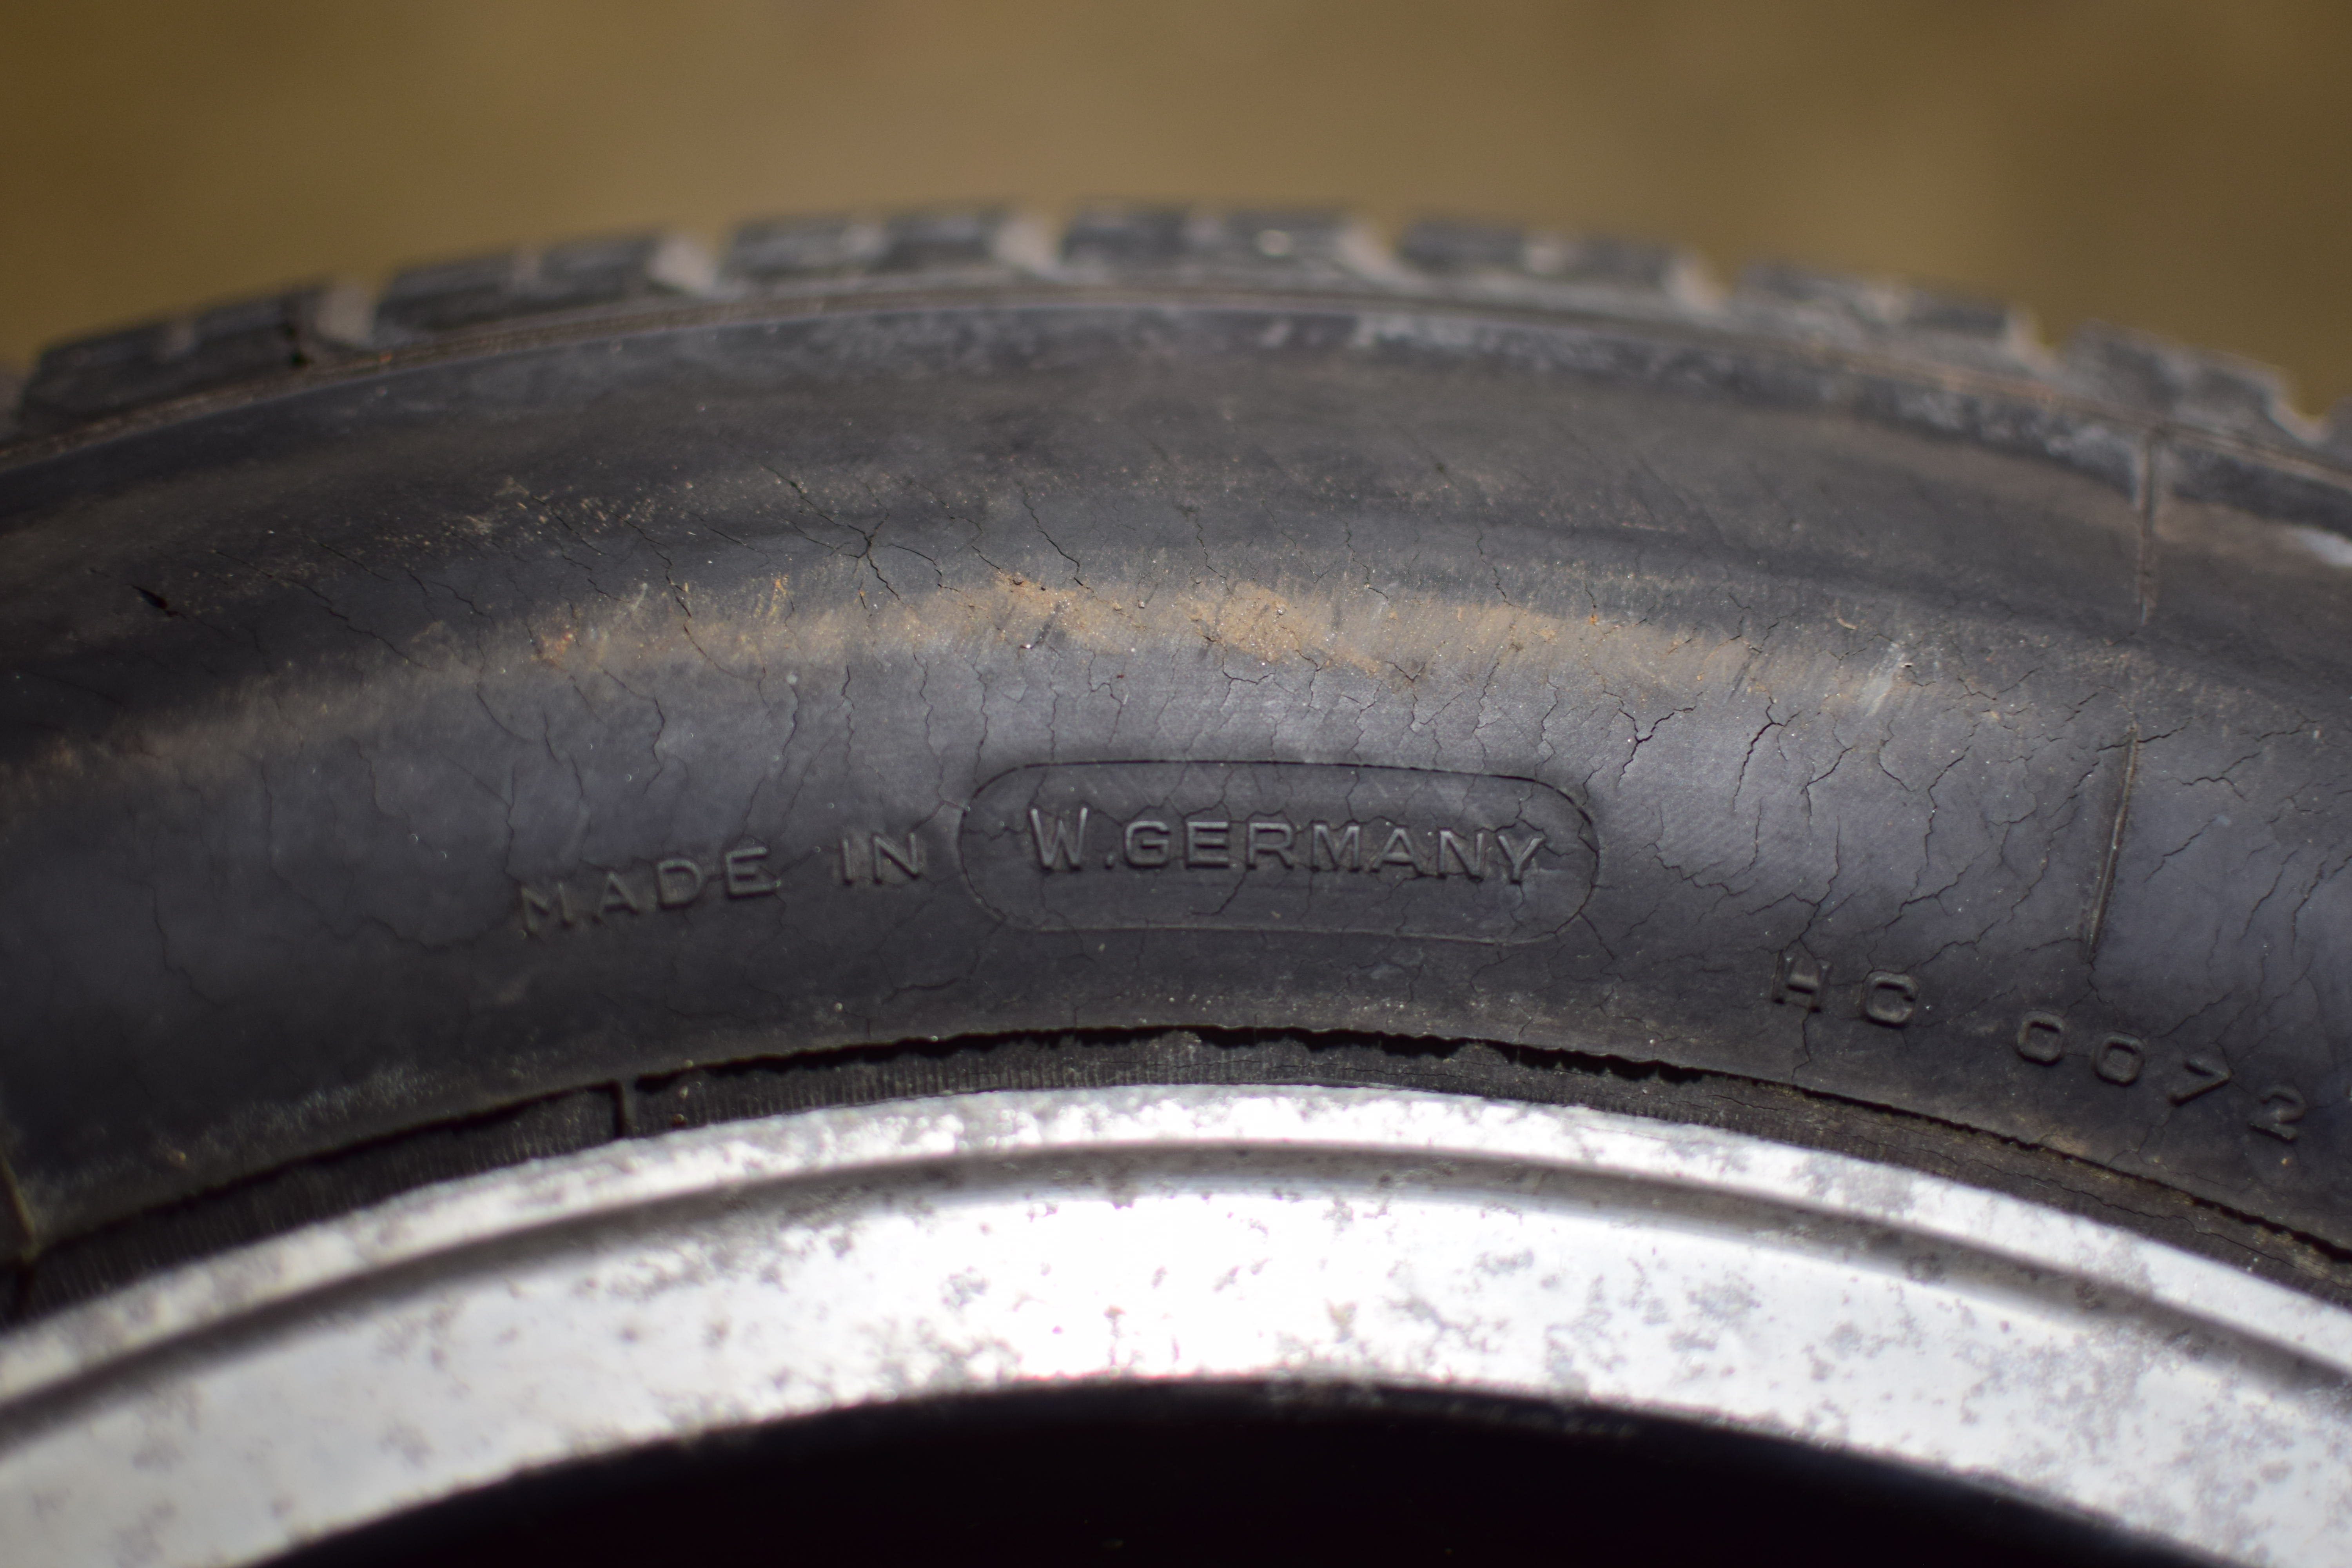
The date code is 324 which means the 32nd week of a year before 2000 that ended in a 4. By 1994, West Germany wasn’t around any more. So are these tires from 1984???
This is the third time that I’ve worked with clutch hydraulics and going into this project, I was only batting .500. In the last update, the master was bled and the next step was to bleed the system on the car once it was installed.
With a little bit of help, the master and slave cylinders got re-installed. Both of them are in somewhat fiddly locations that can be a challenge. The bolts that hold the cylinder to the firewall are particularly difficult because you need to put a wrench on the bolt head on the master cylinder side and then work a ratchet on the nut on the inside.
Once everything was installed, it should have been a simple matter of having someone depress the clutch, open the bleeder, close the bleeder, release the clutch, and so on. But Becca and I went through that process for quite a while and the pedal never got any harder. Frustrated, we called it a night and I decided that what I needed to solve the problem was a pressure bleeder.
Finding the right cap looked like it might be difficult, so I decided to make my own. Off to Menards!
By the time this goes live, there should be a YouTube video about this. I installed it on the reservoir and gave it about 5spi.
But I got nothing. No fluid shooting out of the bleeder, no fluid going past the seals. I cracked open a brake line and got pressure in that system, but from the clutch I had nothing. I pulled the slave back off, pulled the hose off of the slave and was unable to extract any fluid at all with the vacuum pump, despite it holding a vacuum for several minutes.
I went home to think about it and eventually I came up with the theory that the rod on the master was adjusted improperly and wasn’t allowing the piston to pick up fresh fluid. When I got back to the shop, though, I quickly discovered that the rod was fine. Out of ideas, I went ahead and took the whole system back off the car and disassembled it again. I couldn’t really find anything wrong other than potentially one seal maybe being installed in the wrong direction. Looking at the pictures from disassembly, the new seal was oriented the same direction as the old, however, the old seal was worn enough that I couldn’t really tell which end of it was the high side. It was this seal on the end of the spring:
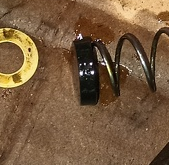
You can see how they always have the two seals with the peaks facing different directions, like this:
With the new seal installed so that it acted as a “cap” on the end of the spring, both seals had their peaks facing the same direction. So I flipped it around. Then I put the master and slave back together and started bench bleeding again.
The master took forever to bench bleed. I got it to a point where it seemed like all the air was out, but then as I was holding it, a last bubble made its way out of the clutch line port and bubbled up. So I spent a very long time working on bleeding the master. Eventually the bubbles stopped and I put the clutch hose on. Sinking the open end of that hose in brake fluid, I worked the master cylinder until the hose was bled. Next, I put that hose onto the slave cylinder, opened up the bleeder, ran a hose from the bleeder to the cup of brake fluid, and worked on bleeding the slave. That part also took a very long time to get all the air out. Eventually, I put a clamp on the slave to prevent the piston from moving and continued the bleeding process. That seemed to be the final step, as the master started to get pretty firm.
Once I felt like things were firmed up, I re-installed the master and slave cylinders to see if I had made any progress. Sure enough, all of a sudden the clutch pedal was firm, with plenty of resistance and using my phone to take a video of the clutch fork, I can see the clutch moving in and out! Success!
I still need to tighten down the bolts all the way and get the boot on the inside portion of the master cylinder. The rod may need to be adjusted if the clutch engagement isn’t right once the engine is running. But this is major progress!
When working with the rear brakes, I mentioned that I should have checked the front before ordering any parts. That’s advice I should have followed!
The Jag soft lines that I got – Sunsong 2202540 – are about an inch shorter than the original Maserati – manufactured by Pirelli, if I’m reading the old rubber correctly. I was able to get them installed onto the proportioning valve and then connected to the hard line at the bracket on each control arm, but at full droop they’re a little bit tight. I’m also a little bit concerned that the left side line is going to rub against the fuel line. For the $2000 Challenge, however, they’re fine.
Once those were installed, I connected the front end of the line to the master cylinder and hooked up the Bowie Bleeder. Opening up each side bleeder in turn, the pressure bleeder very quickly filled the lines, the caliper cylinders, and pushed out all the air. Moving to the front, I got the left side opened up and the air out of the three bleeders. Finally, I moved to the front right, but got absolutely nothing out of any of the bleeders. My guess was that the front soft lines were collapsed as well – the two lines do not share anything other than the master cylinder but both lines on the other side which are fed by the same ports on the master cylinder do work just fine. These lines were pretty well frozen in place, though. My final discovery about that was that the problem was that the fitting was stuck to the hard line and wouldn’t turn so by focusing on turning the soft line instead, I was able to get it to release.
Figuring that out, however, required some learning. I tried a penetrating lubricant and then striking it a few times, but that didn’t seem to help. Naturally, I then broke out the torch. That also didn’t get me anywhere as far as loosening the fitting, but after I moved away from it for a moment I heard a pop and there was suddenly smoke everywhere.
The hose blew straight out of the crimp fitting, but nothing else was damaged.
Dorman makes replacement soft lines for the other end of the same Jag model, so I decided to order those up. These H38546 hoses are about 3 inches longer than the Maserati lines so I think they’ll work better for the rear. The eventual plan is to put those longer hoses on the rear and the shorter ones on the front, but I may just leave the rears in place for now.
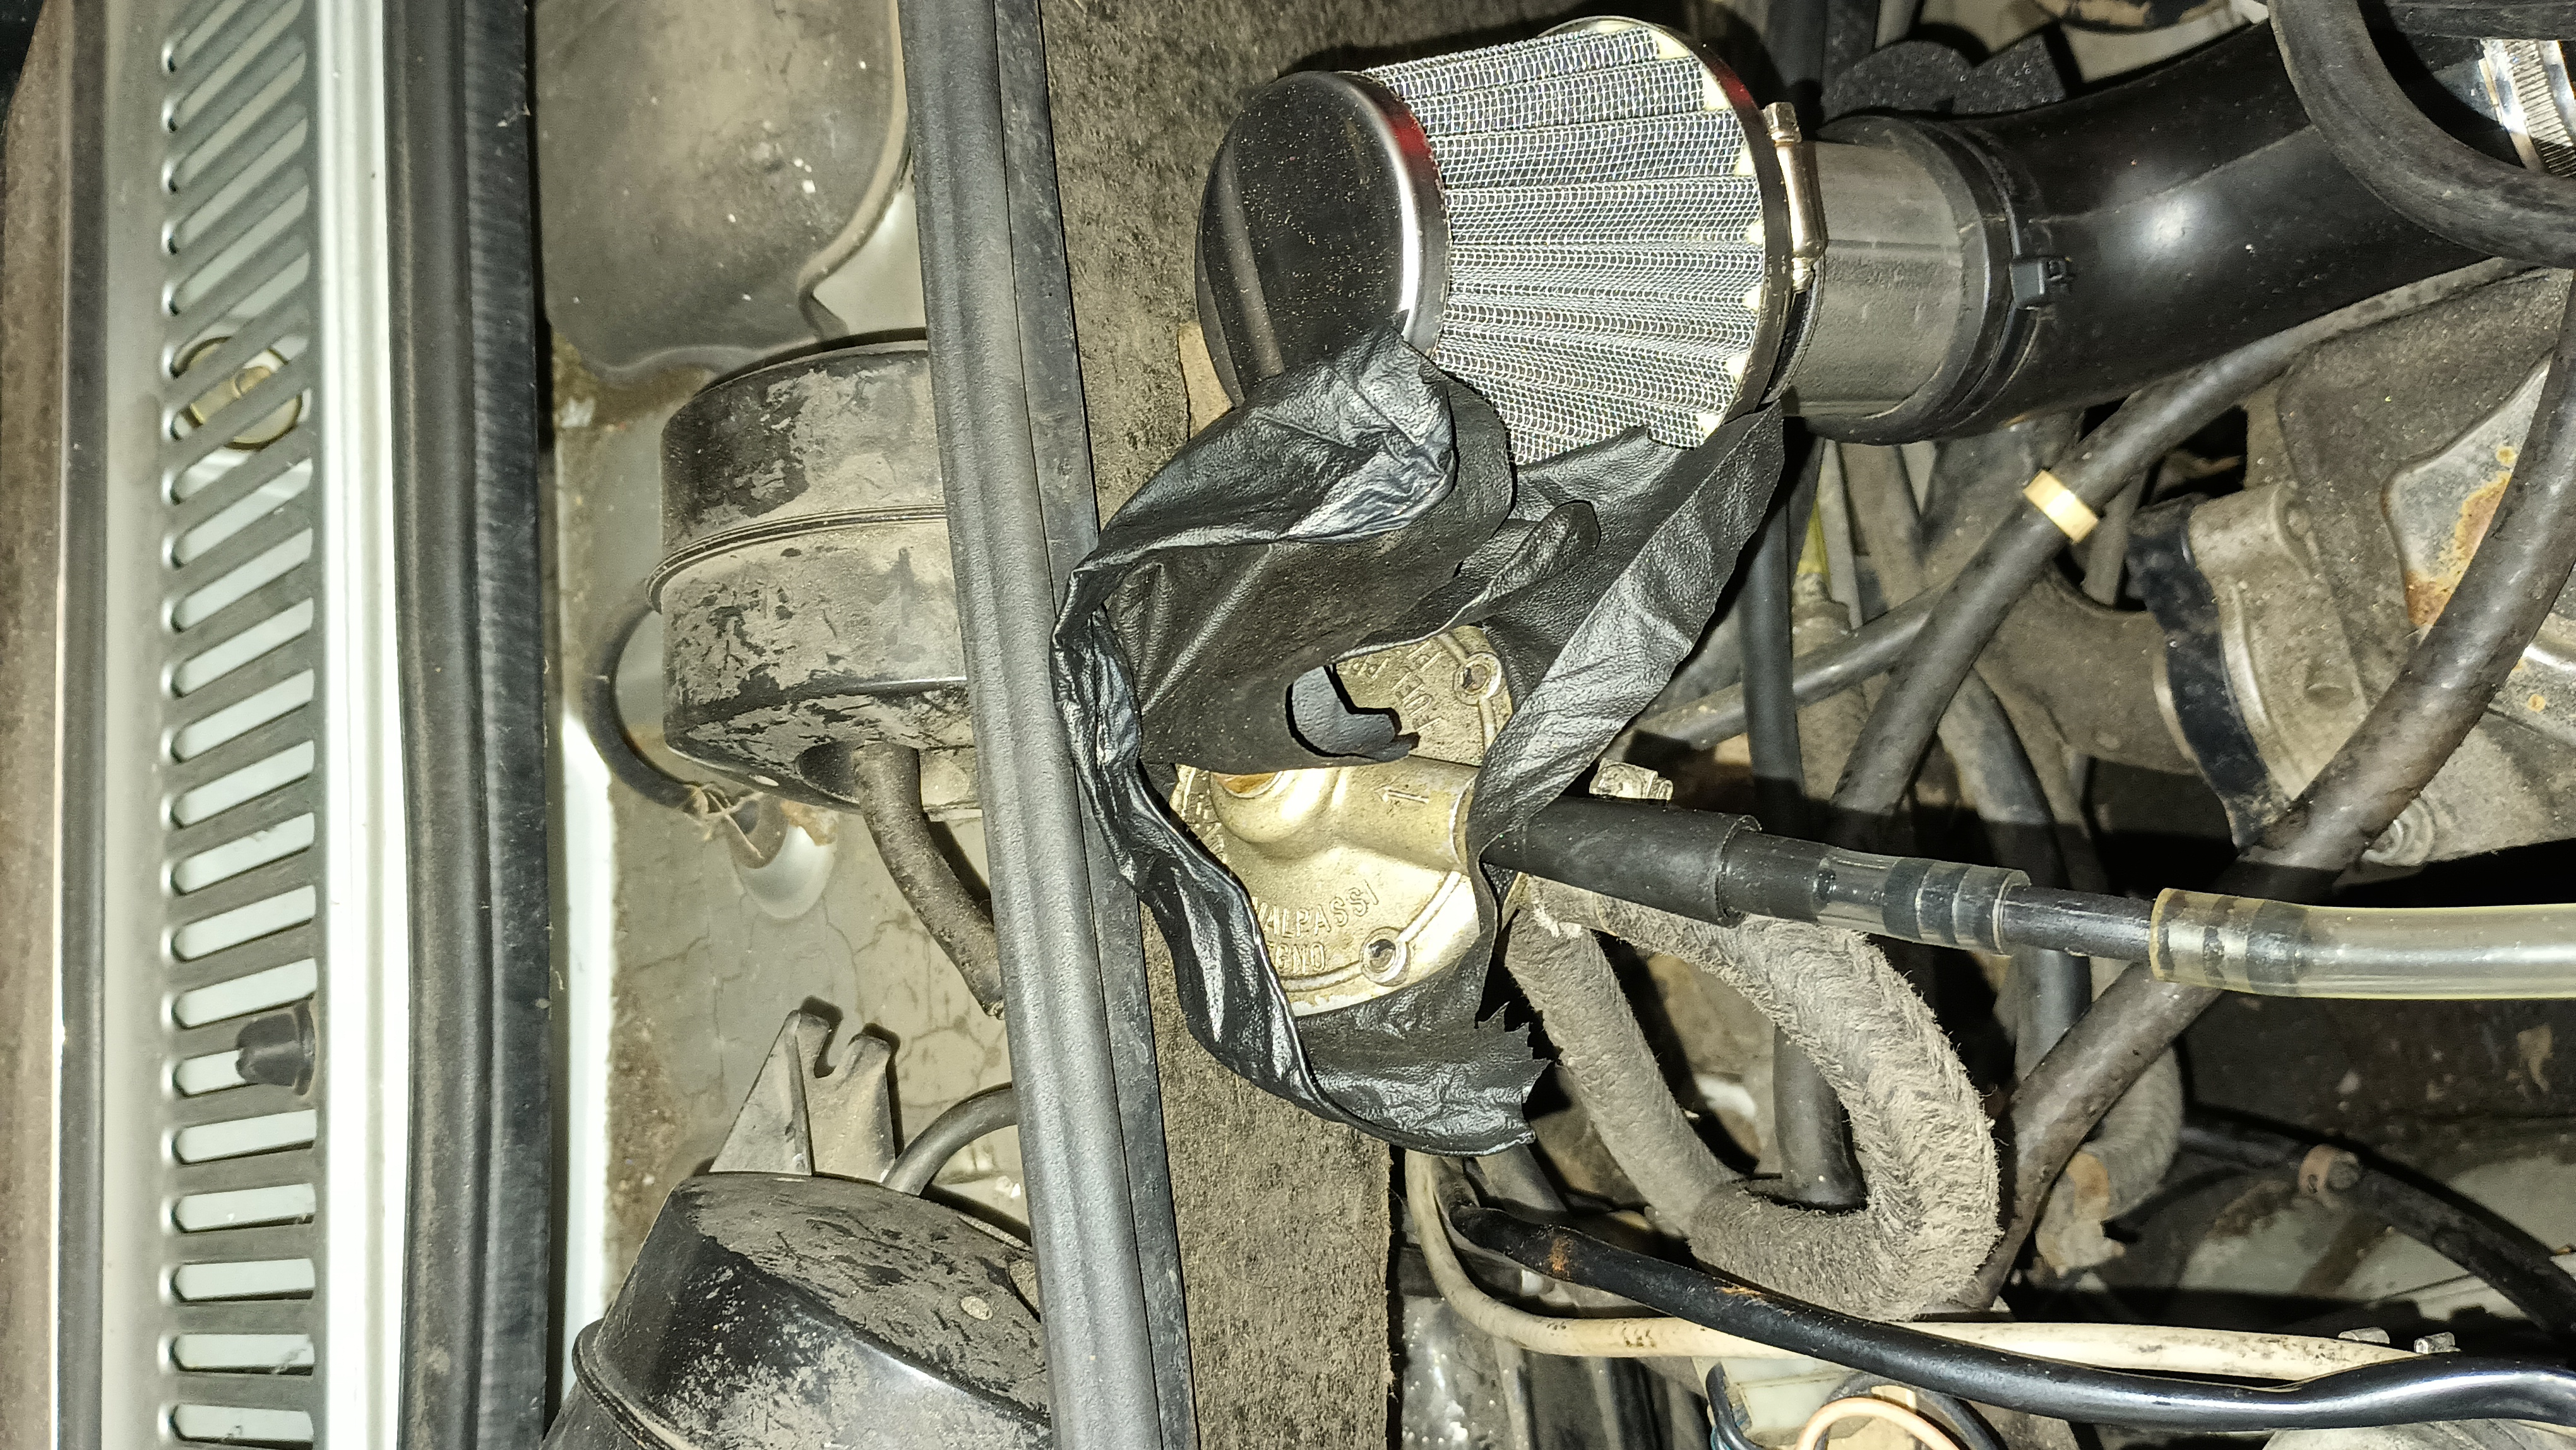
Since I’m waiting on the brakes, I moved under the hood to get things buttoned up there. The alternator belt is all tightened up now and hunting around in the pile of spares netted me the bracket that holds the radiator in place.
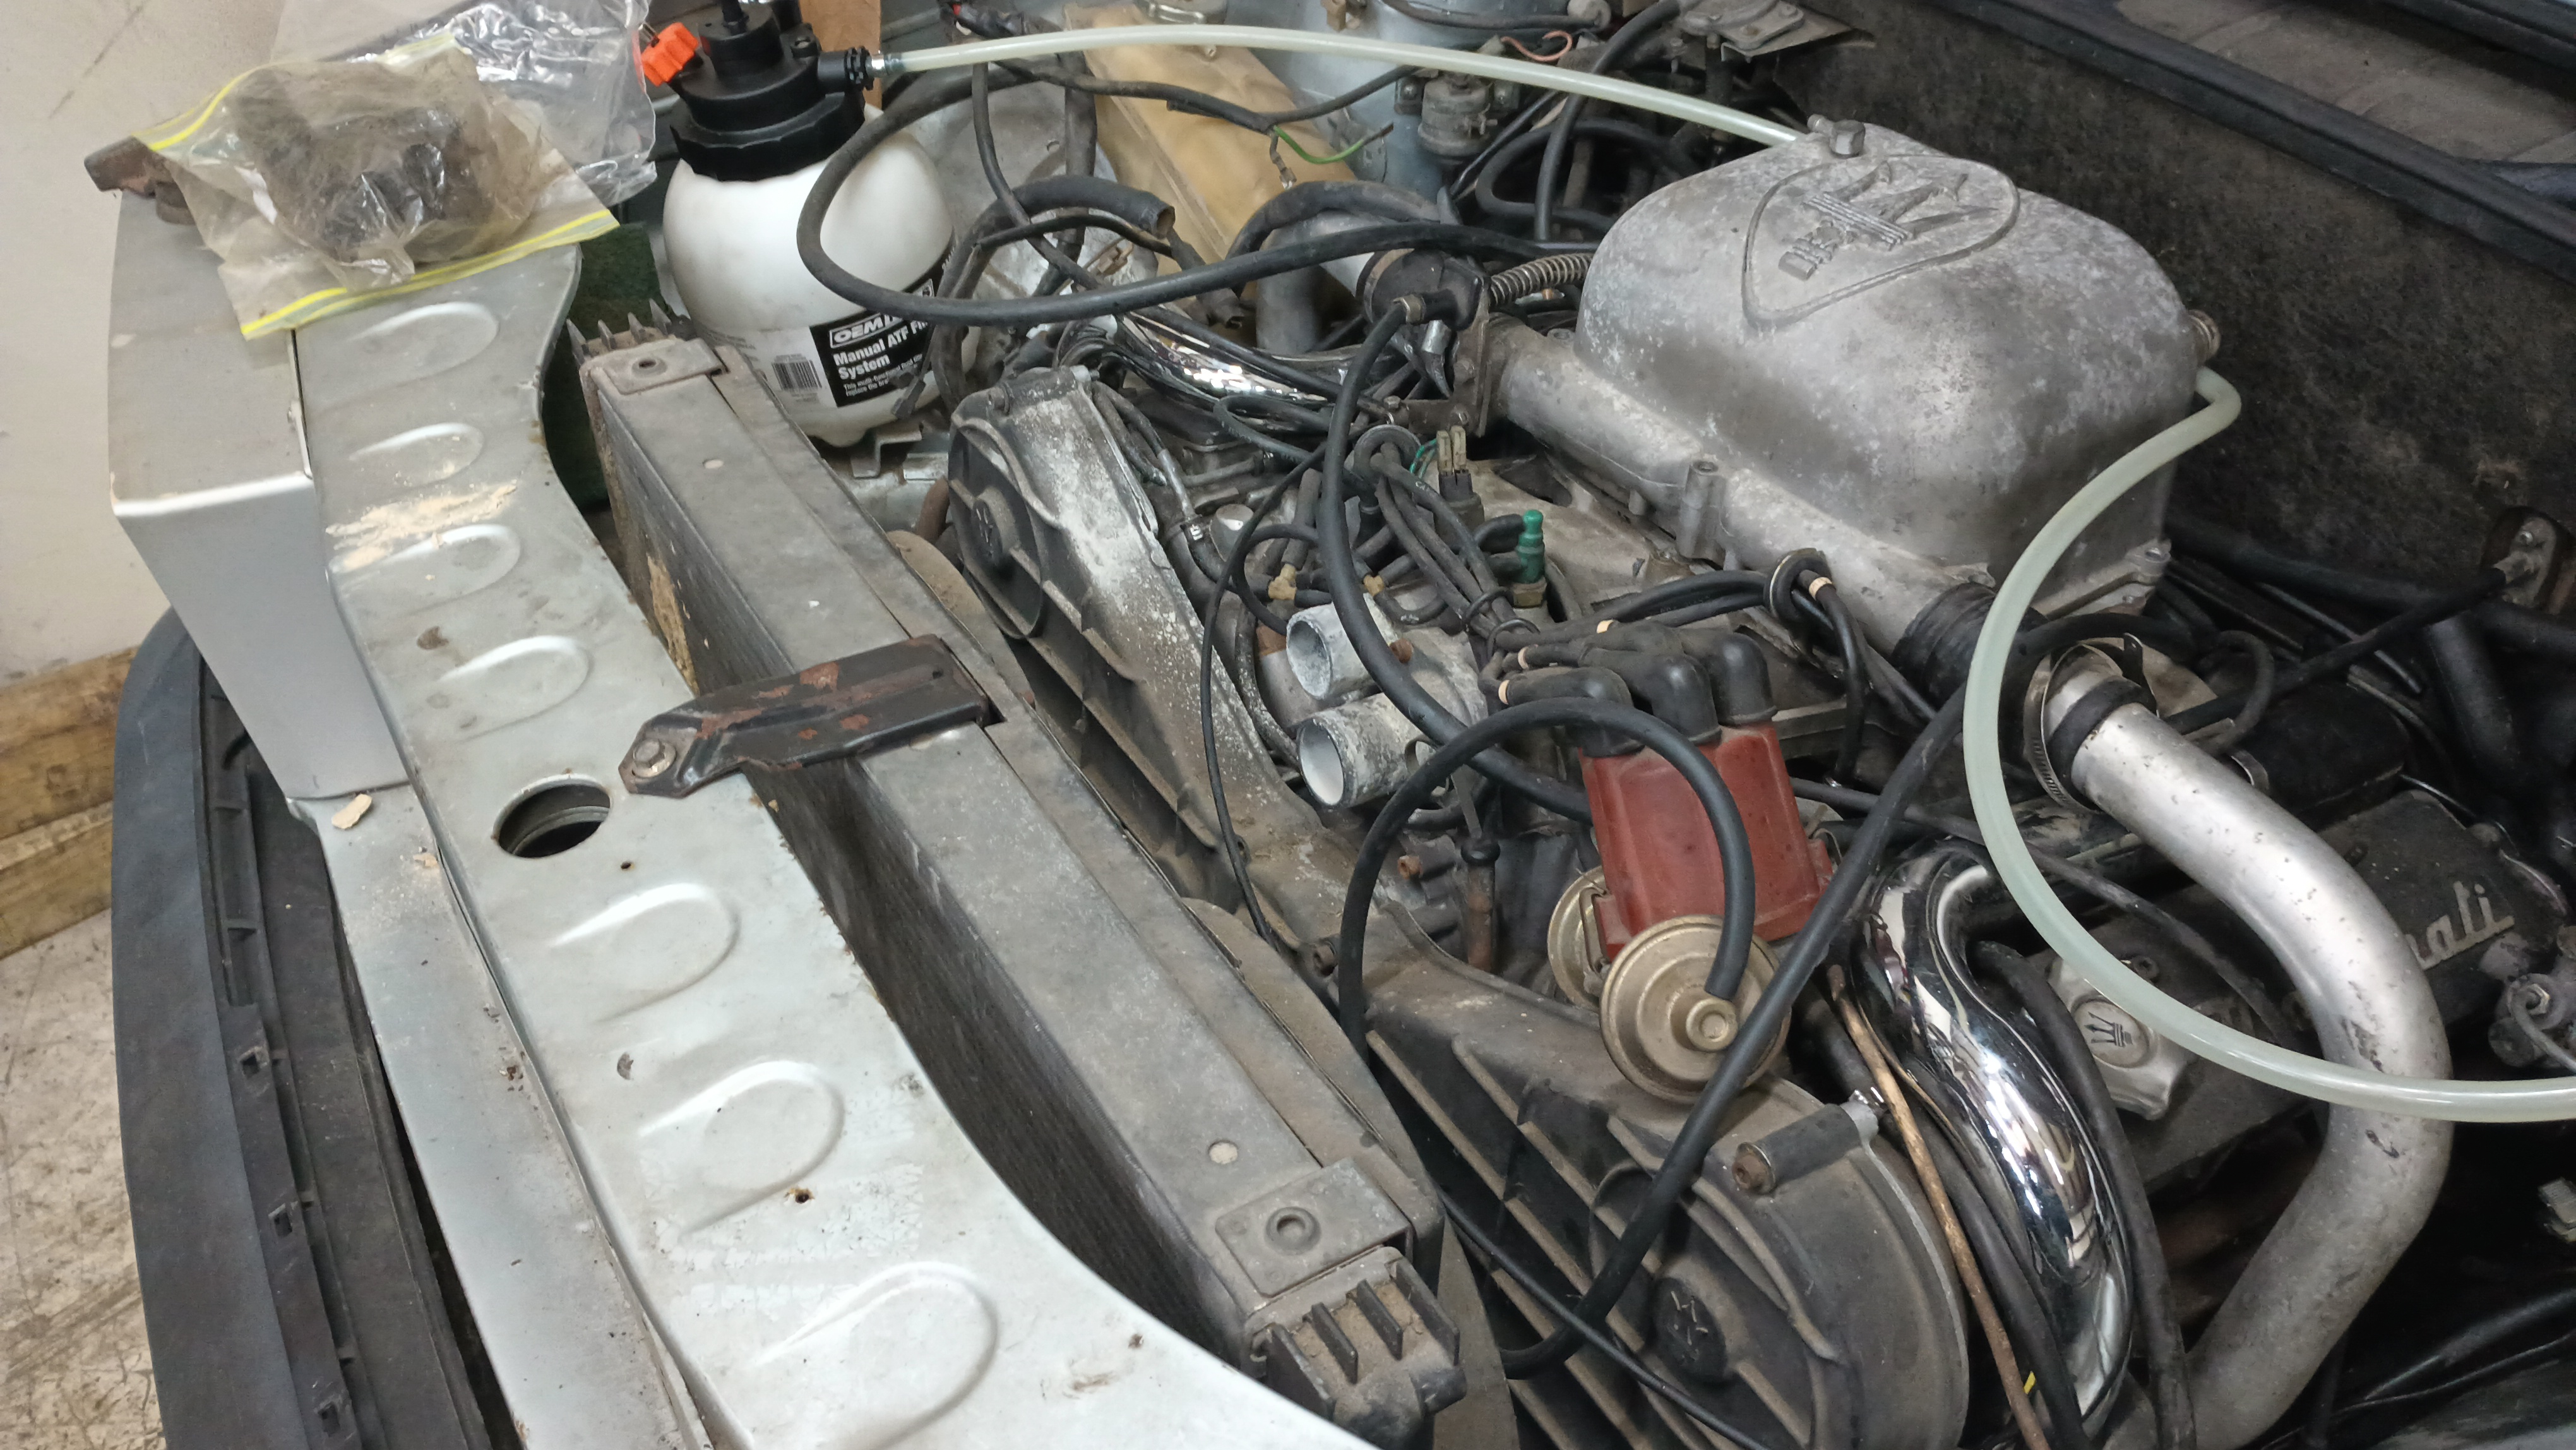
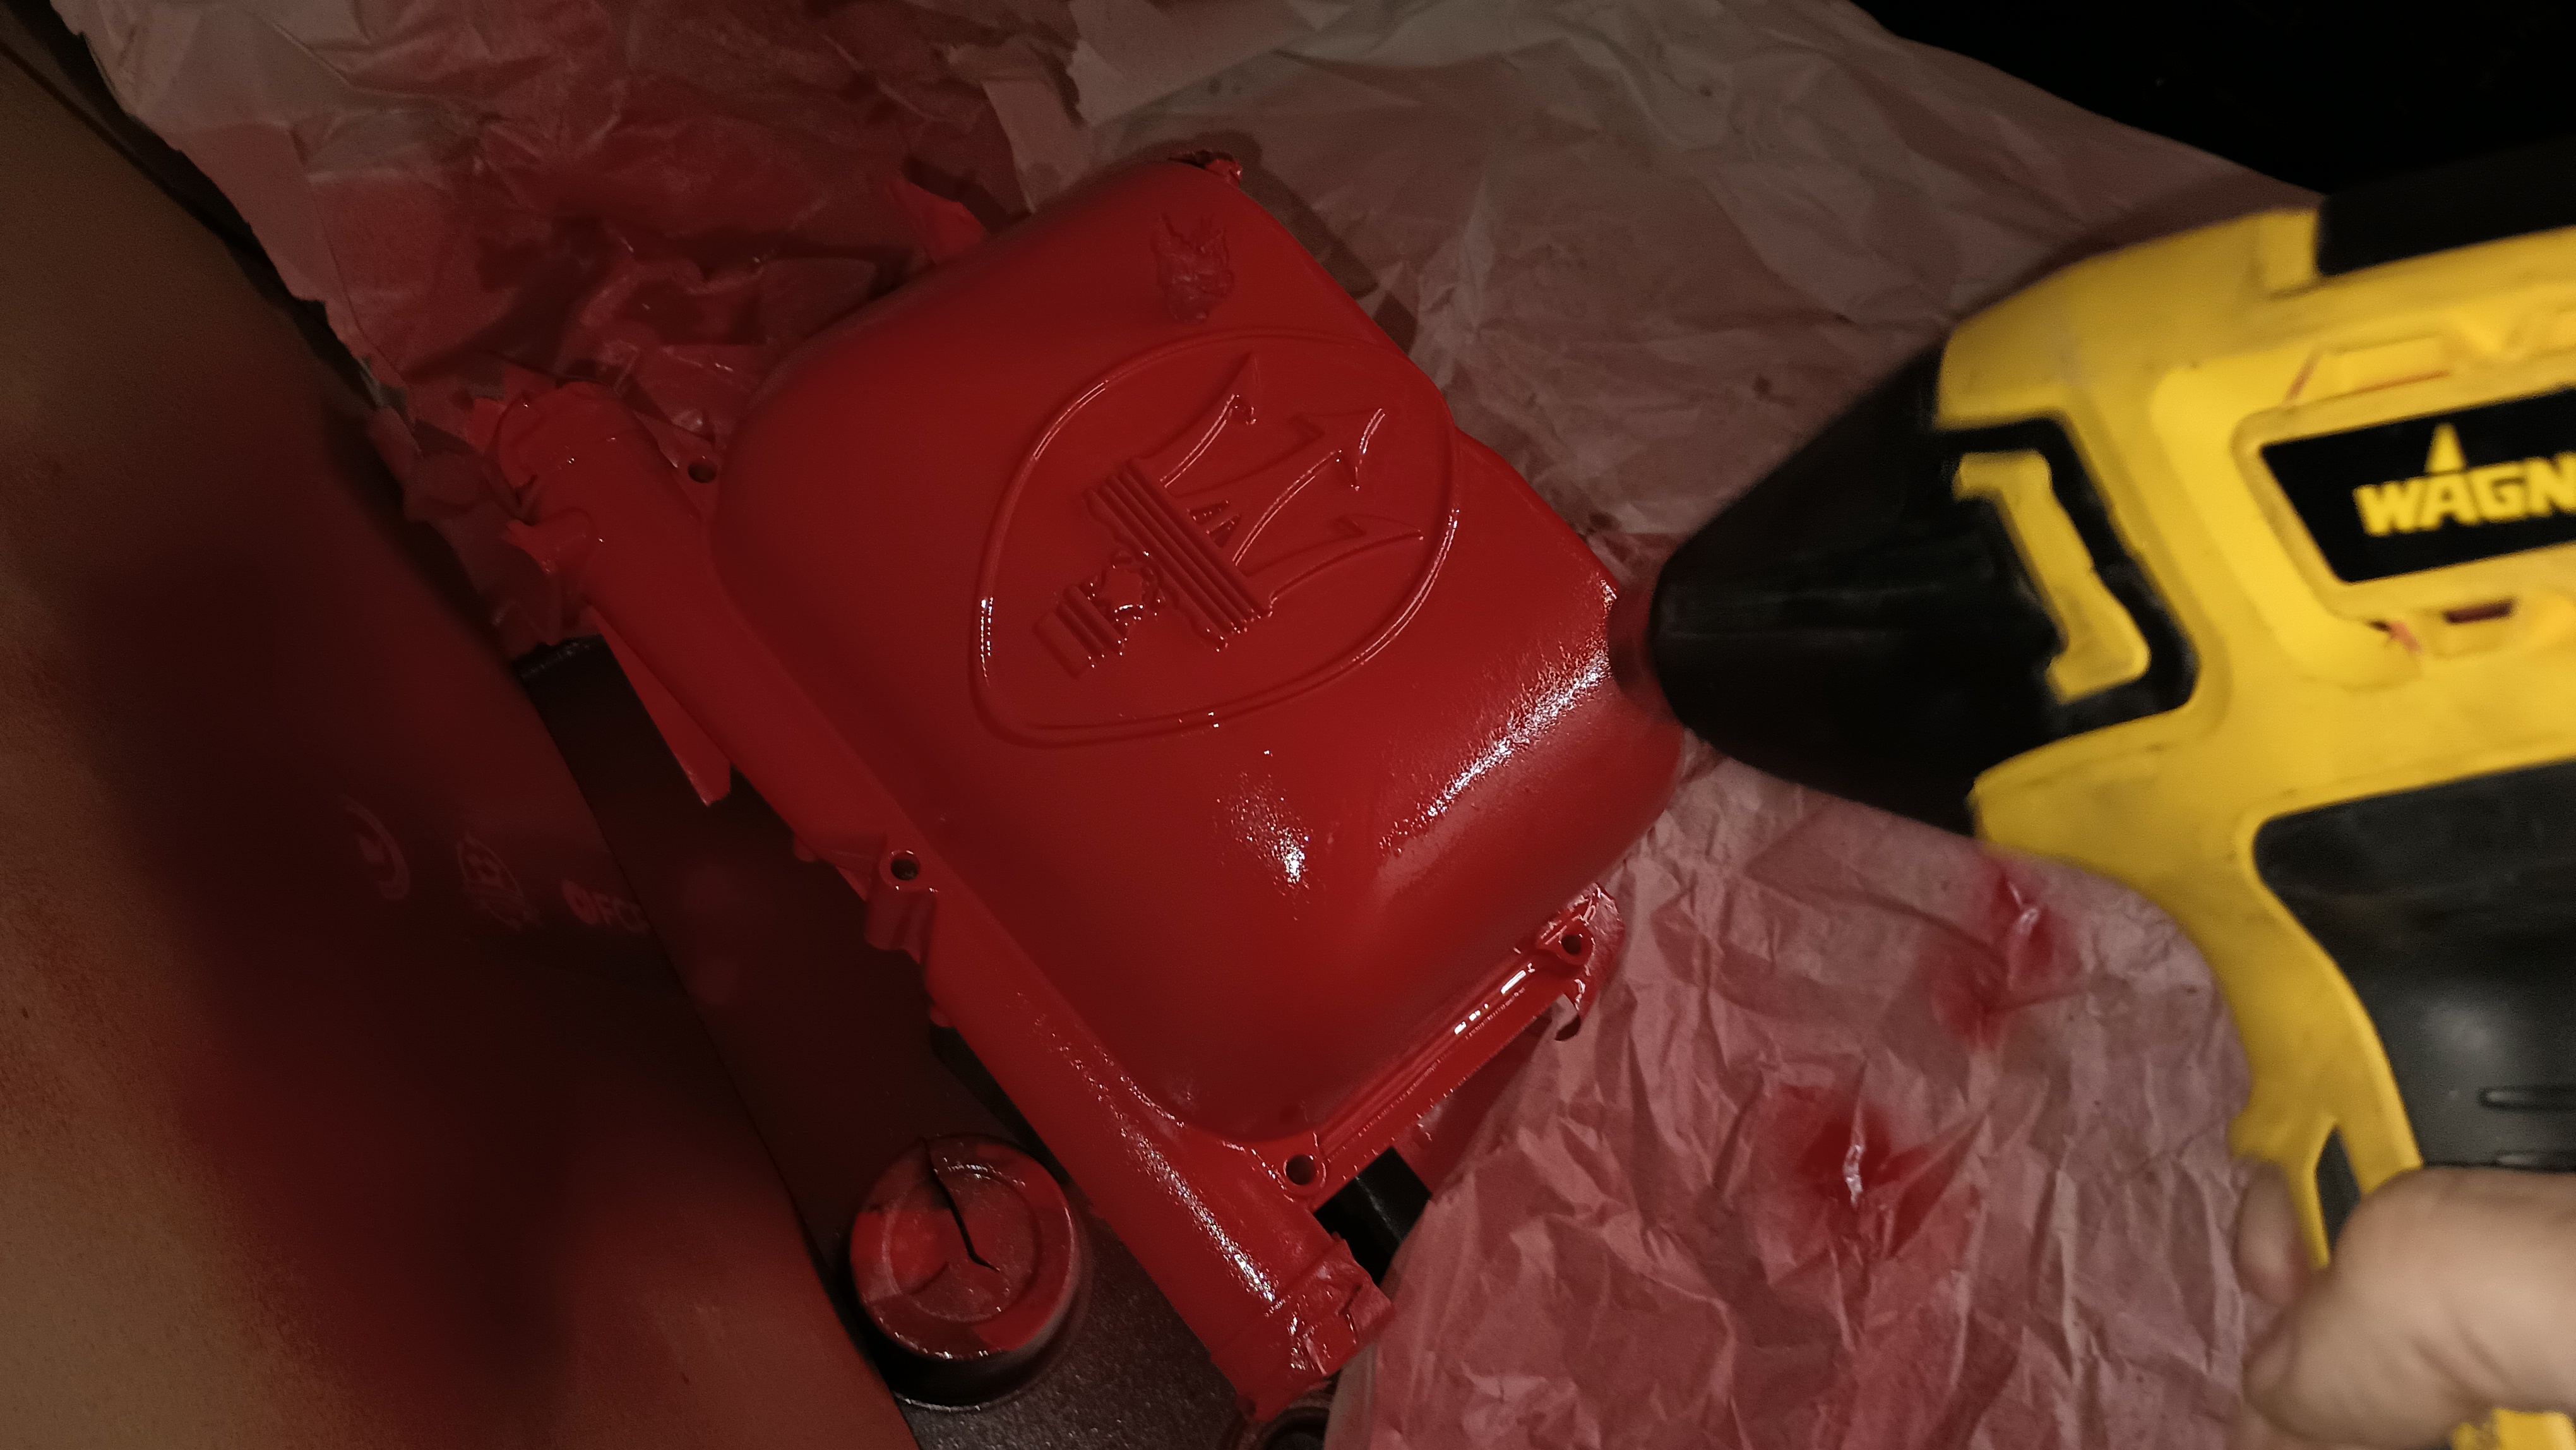
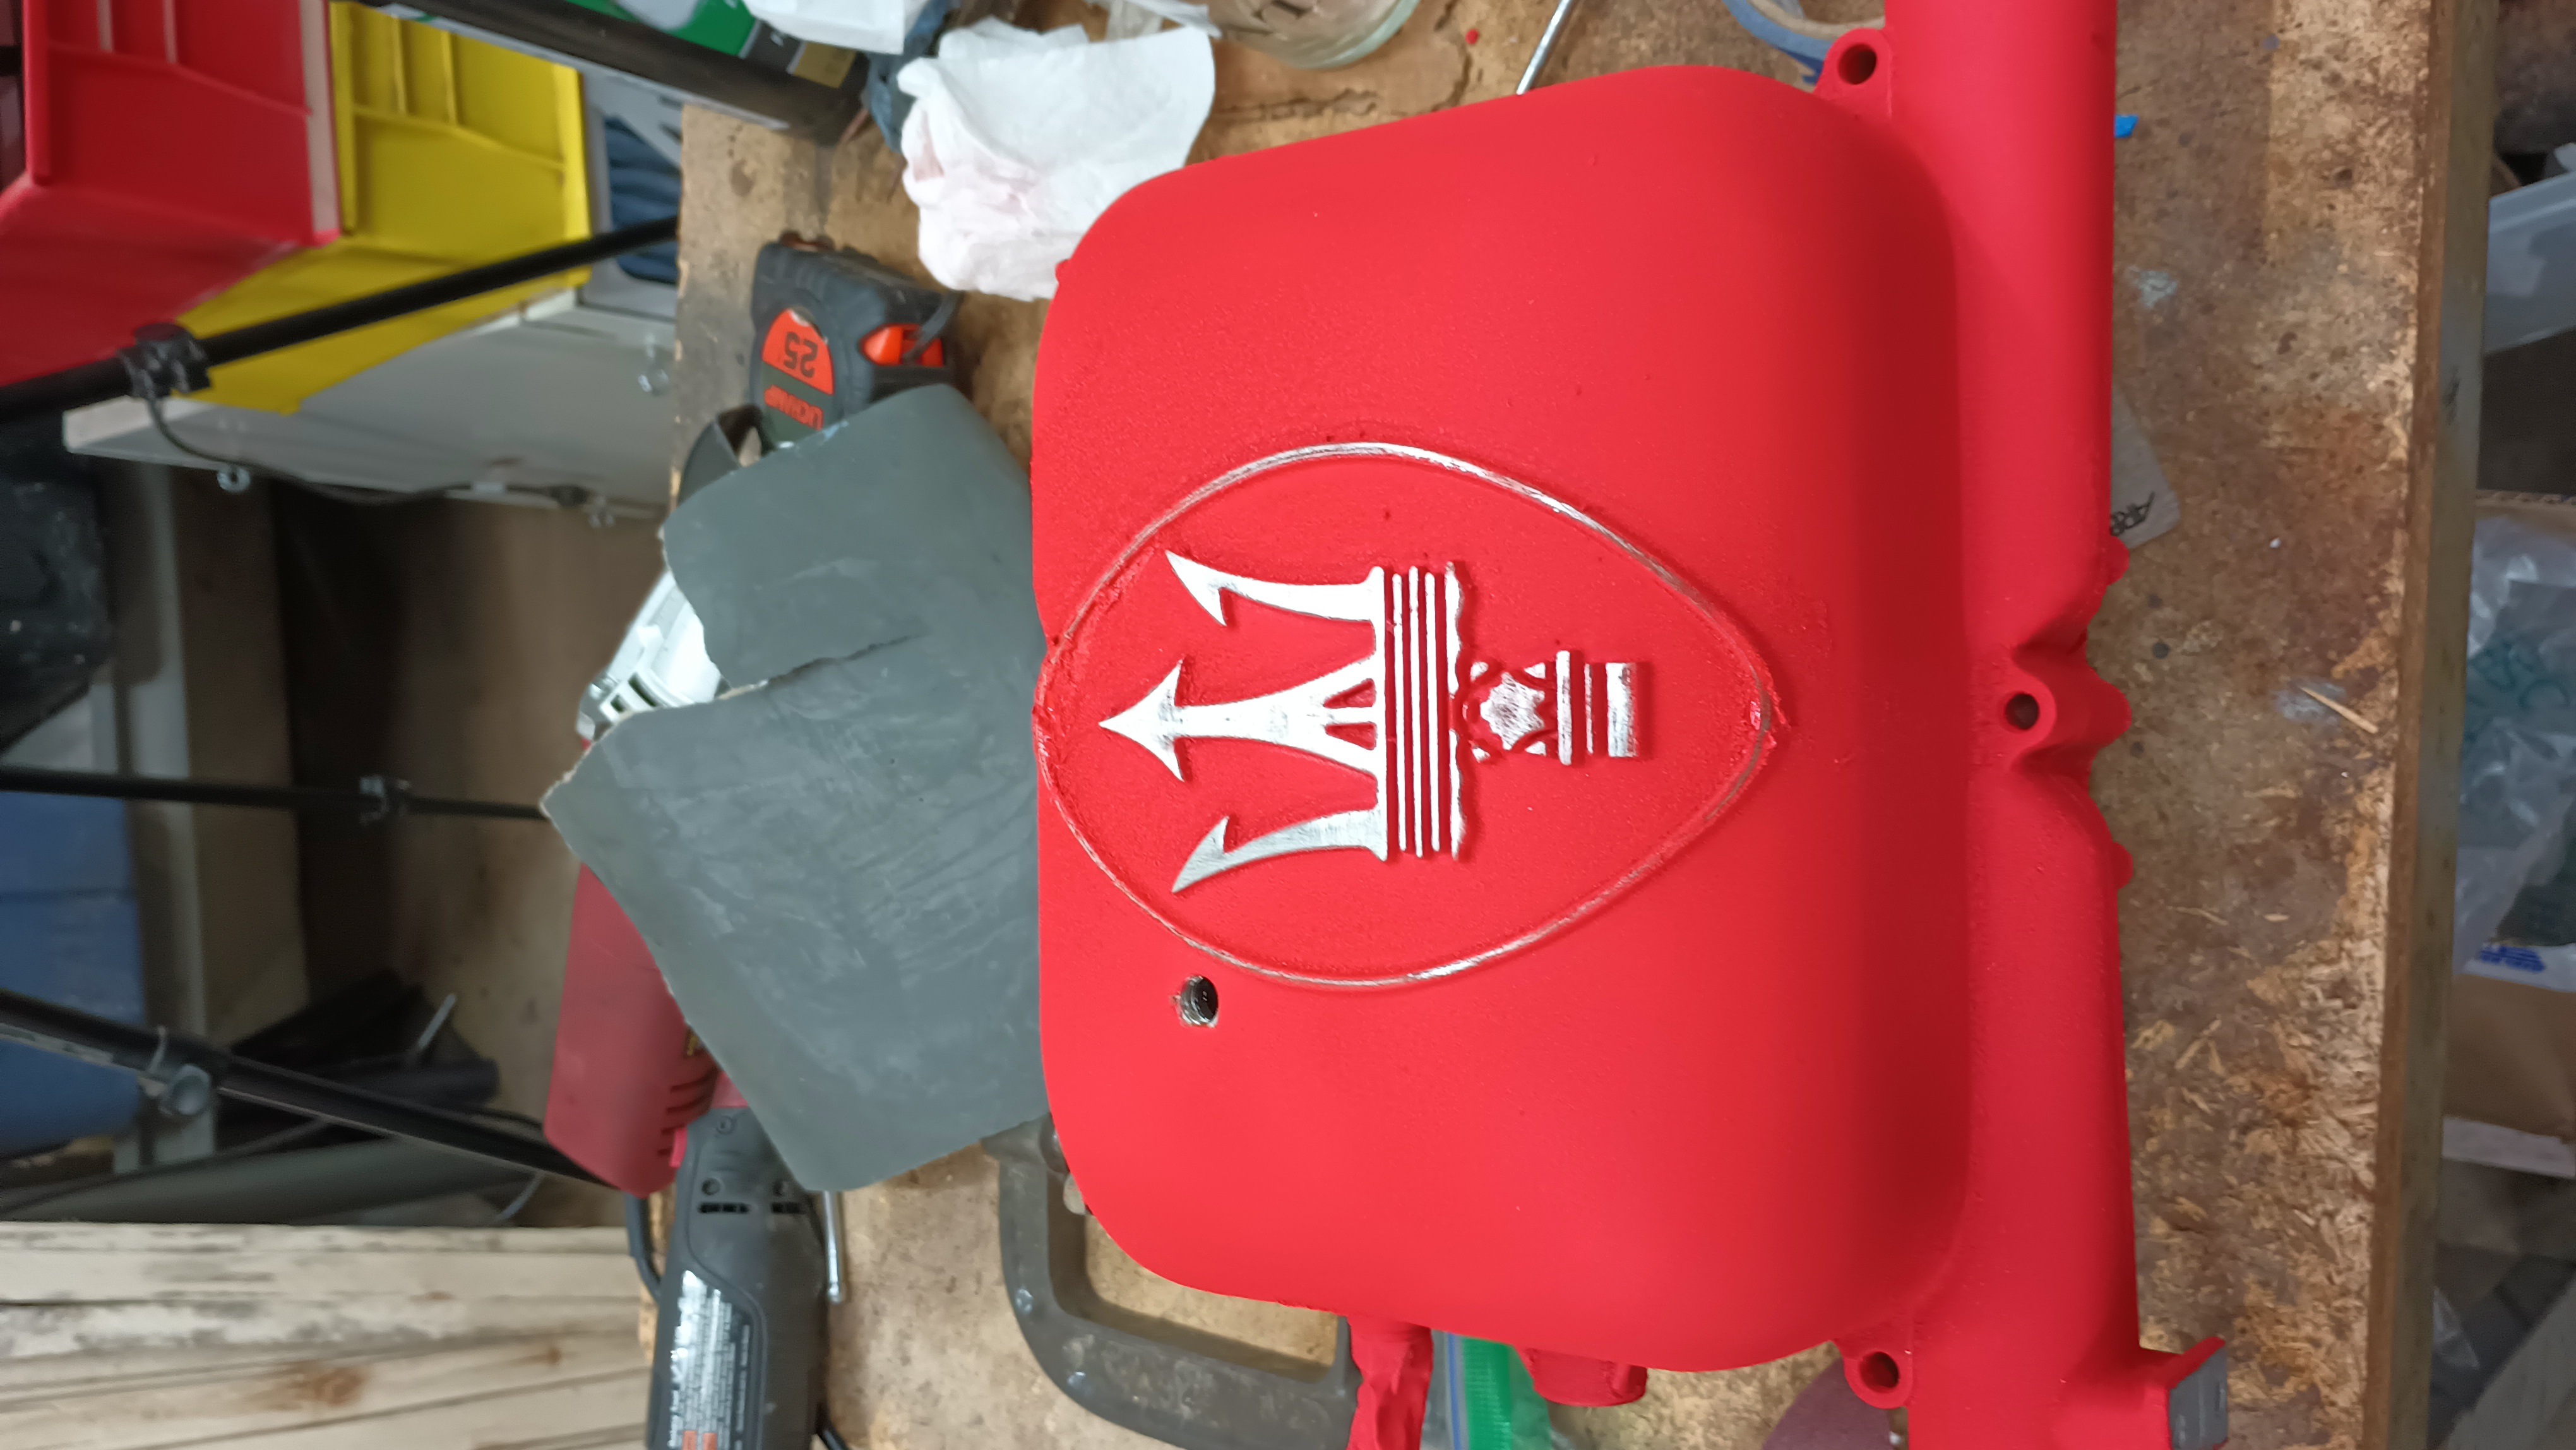
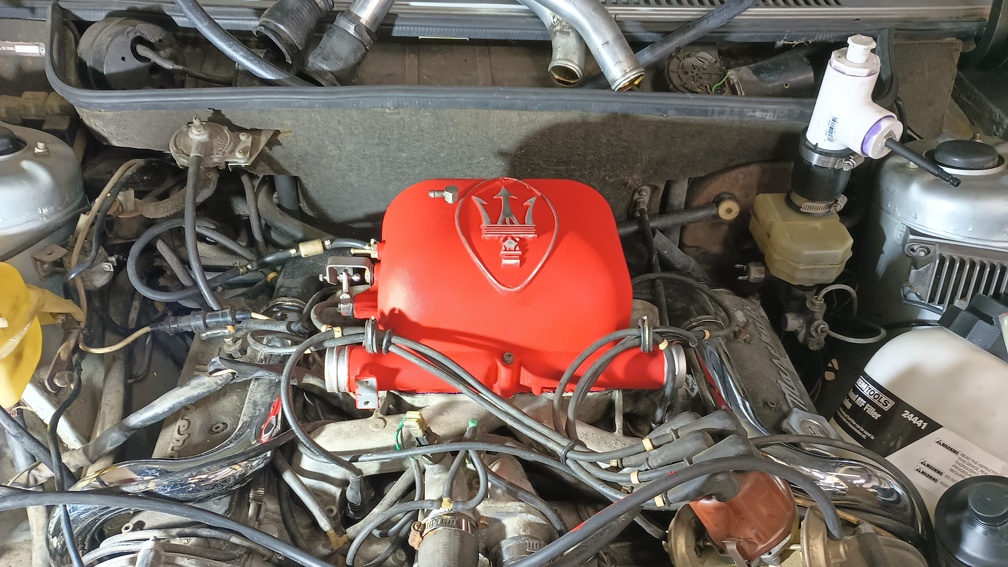
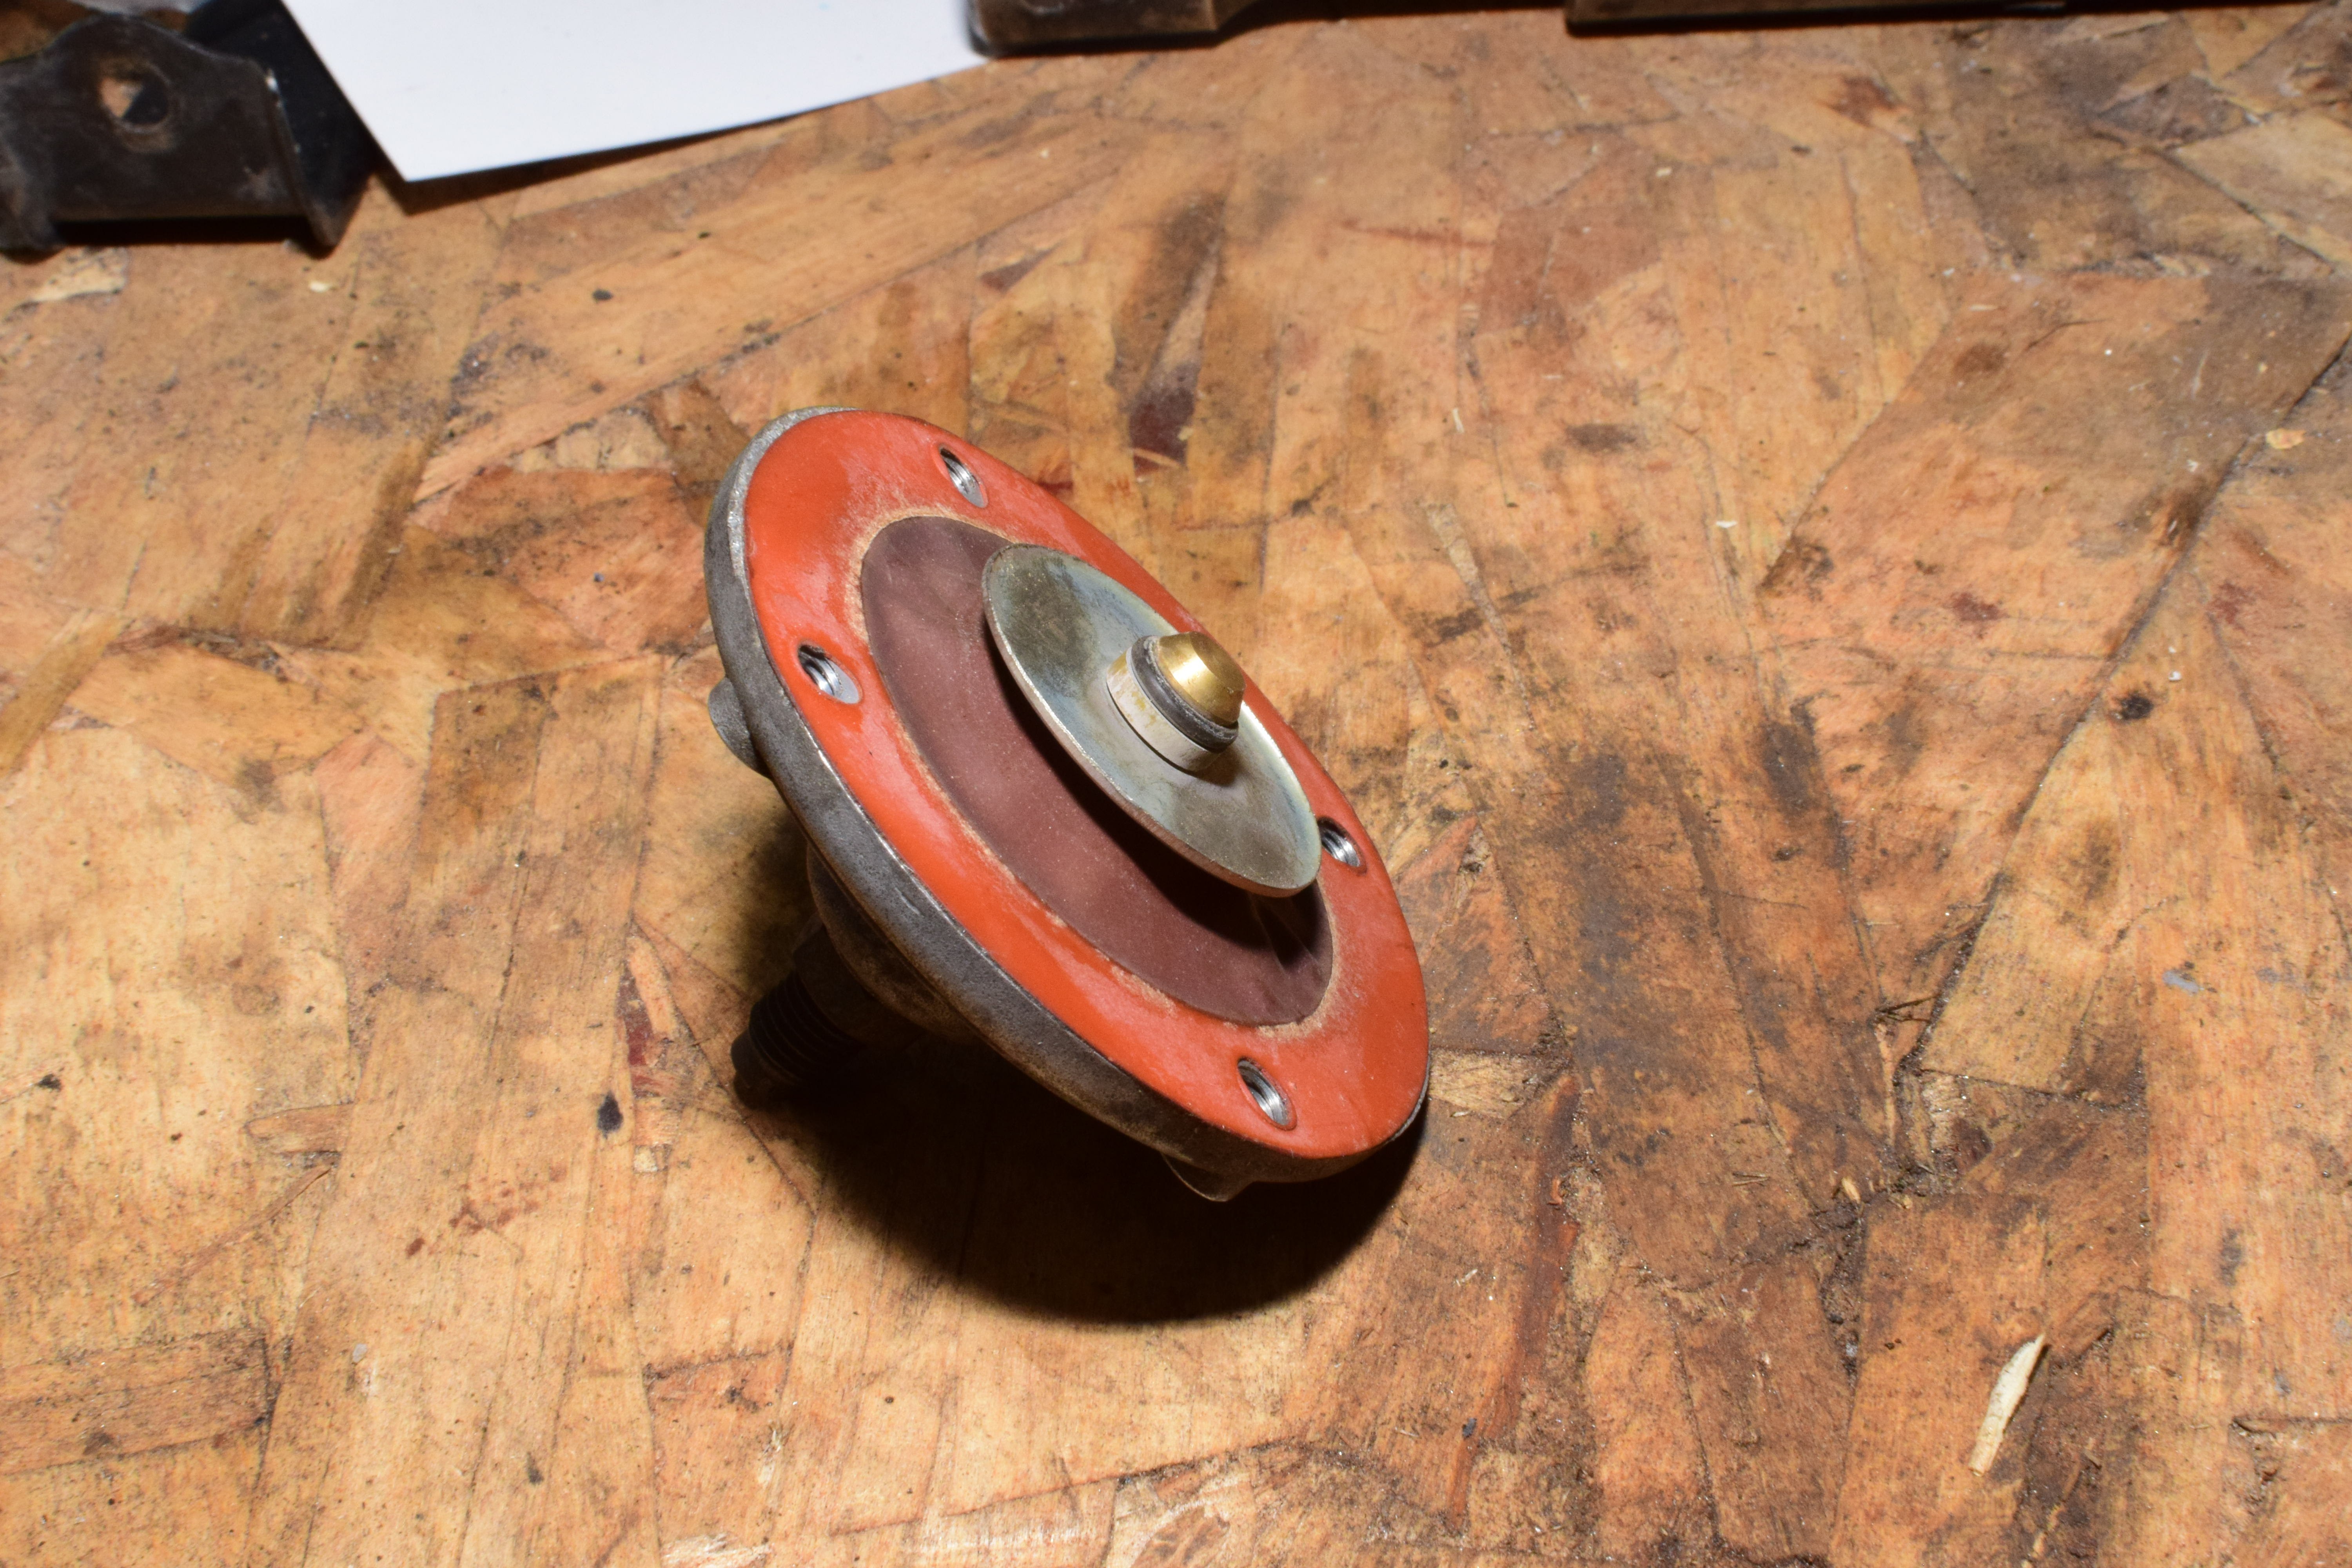
The carb hat needs to be resealed, but the original gasket is pretty chewed up. Instead of running down a new one, I’m going to use some fuel-safe RTV. But before I make that final, the carb hat should be a little more presentable. The order is in for a couple cans of VHT wrinkle paint in red and while I wait for that, I got the carb hat off and disassembled.
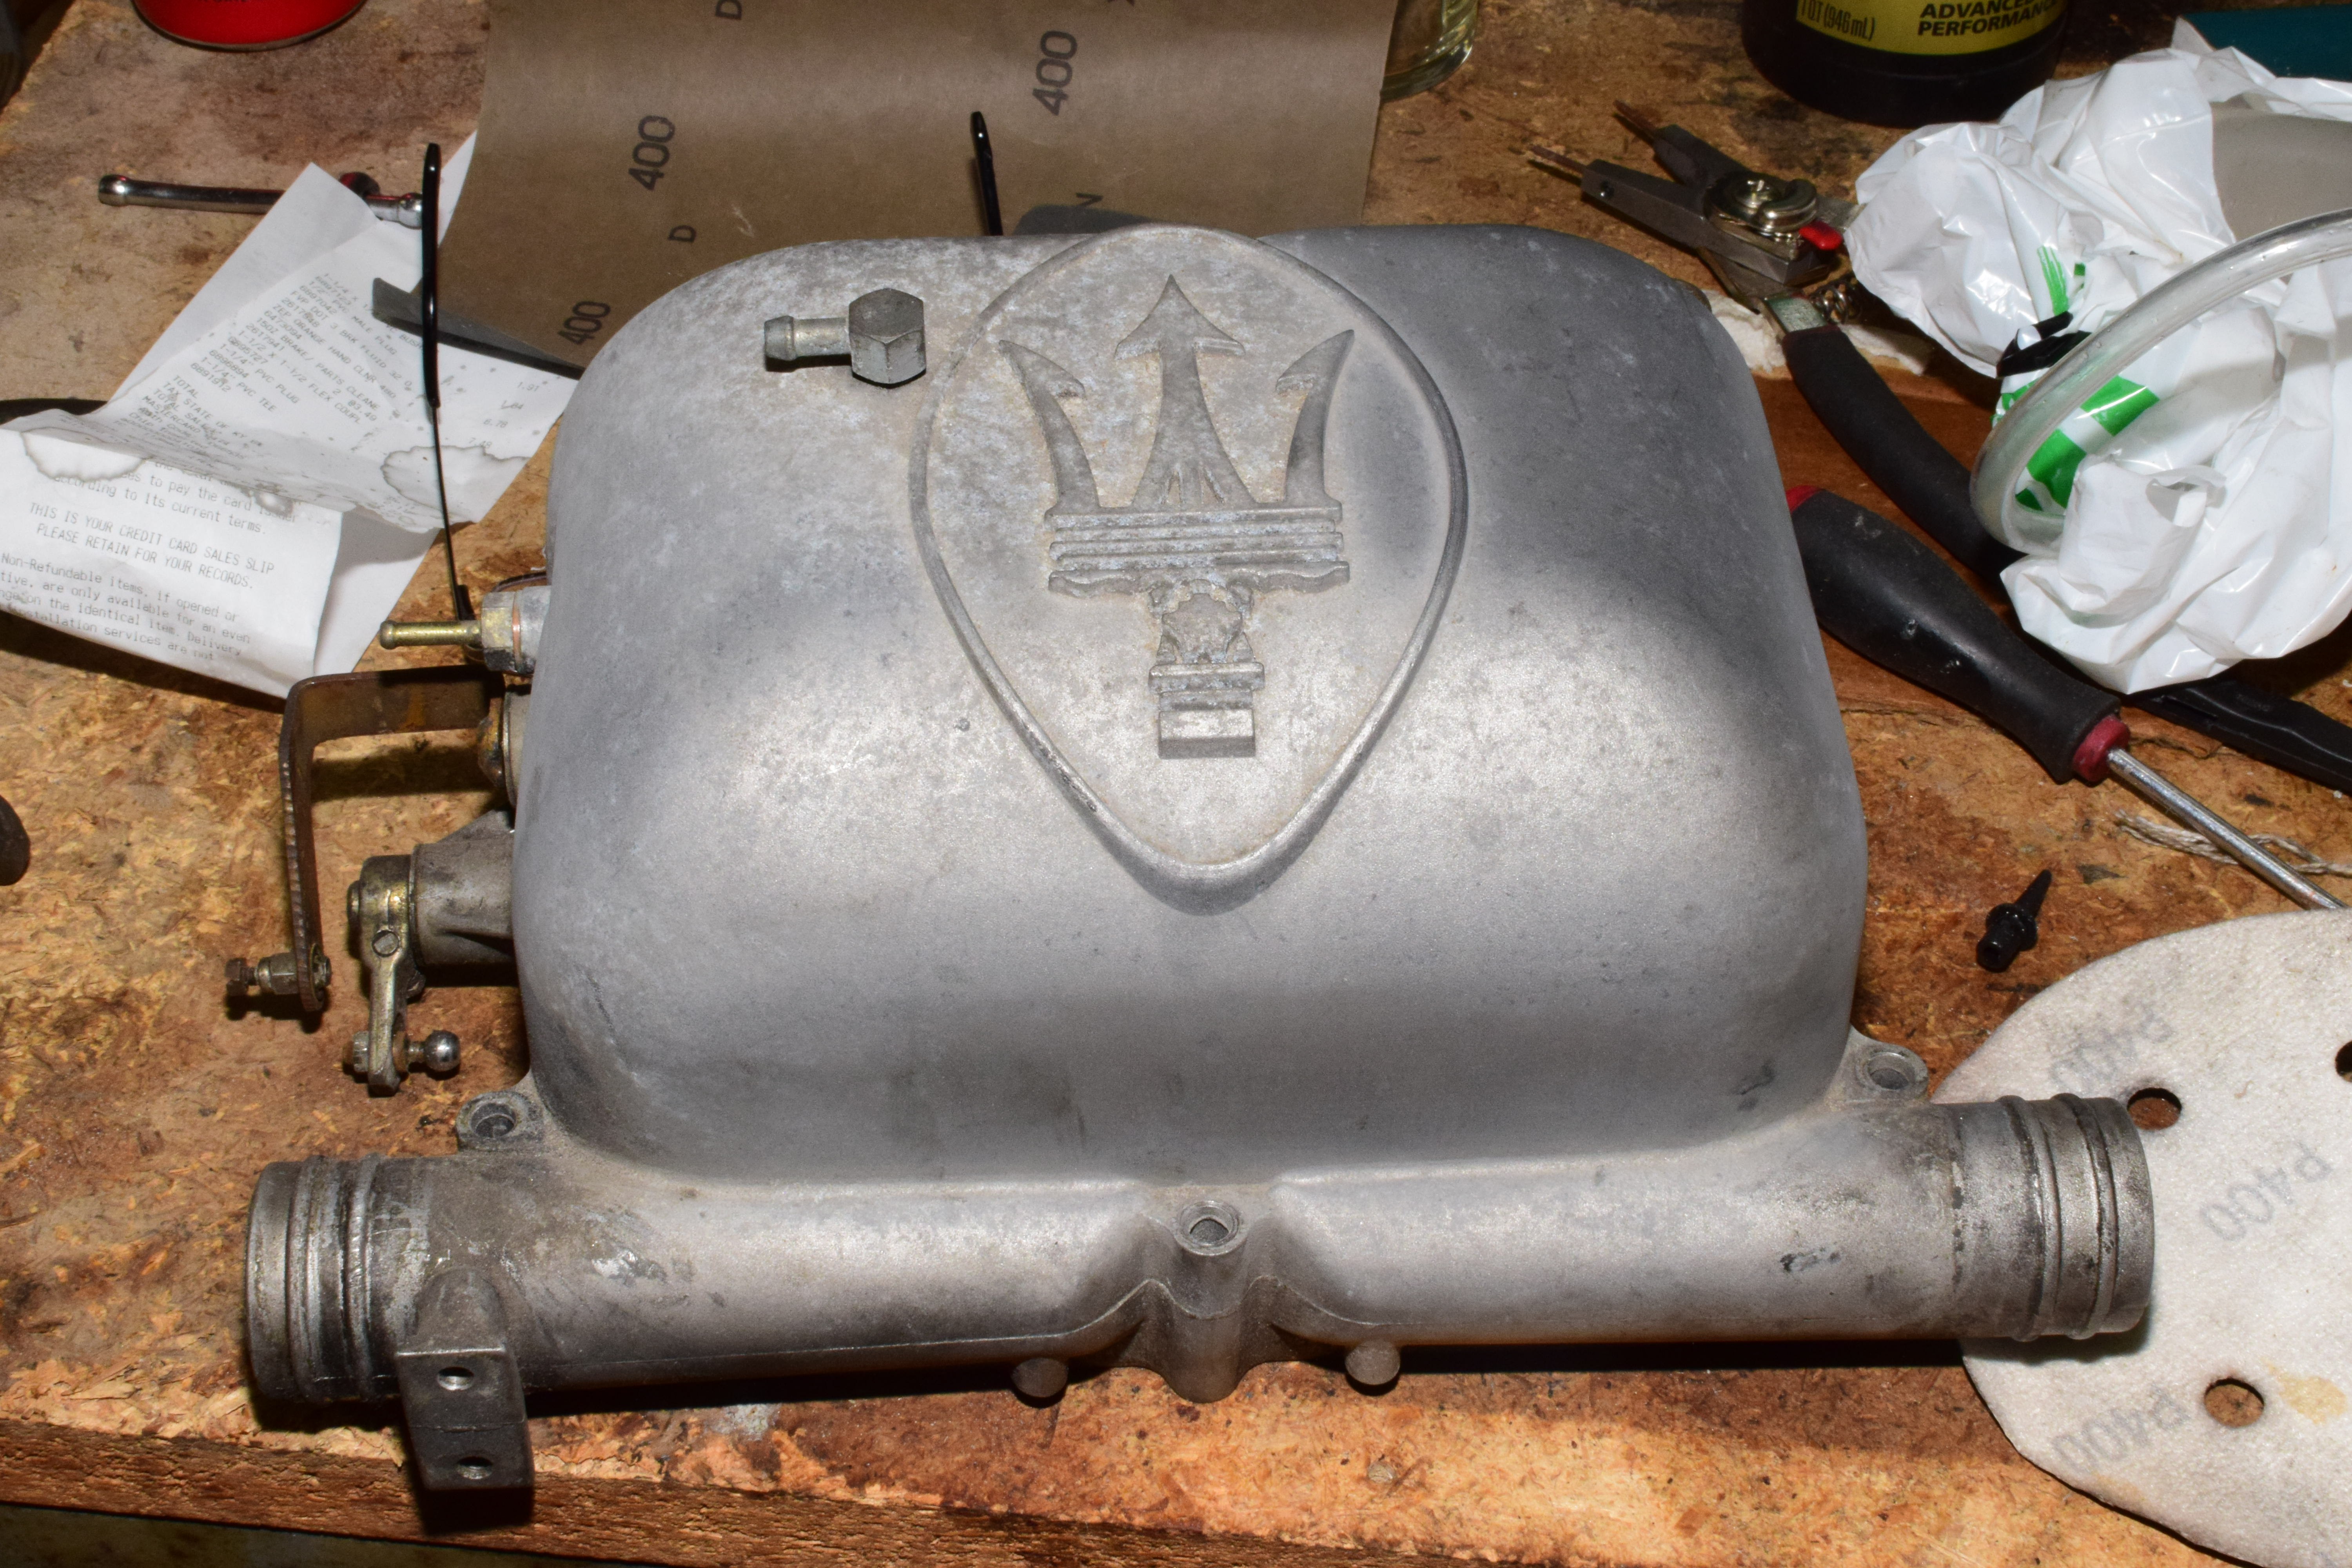
The look that I’m going for is the shiny trident on the red wrinkle so before I put the paint on it, I figured it would be easier to get the logo polished when I didn’t have to worry about damaging a fresh coat. I hit it with some steel wool, 400 grit sandpaper, a bronze whiz wheel, and some aluminum polish. It didn’t take a lot of effort to get it looking like this:
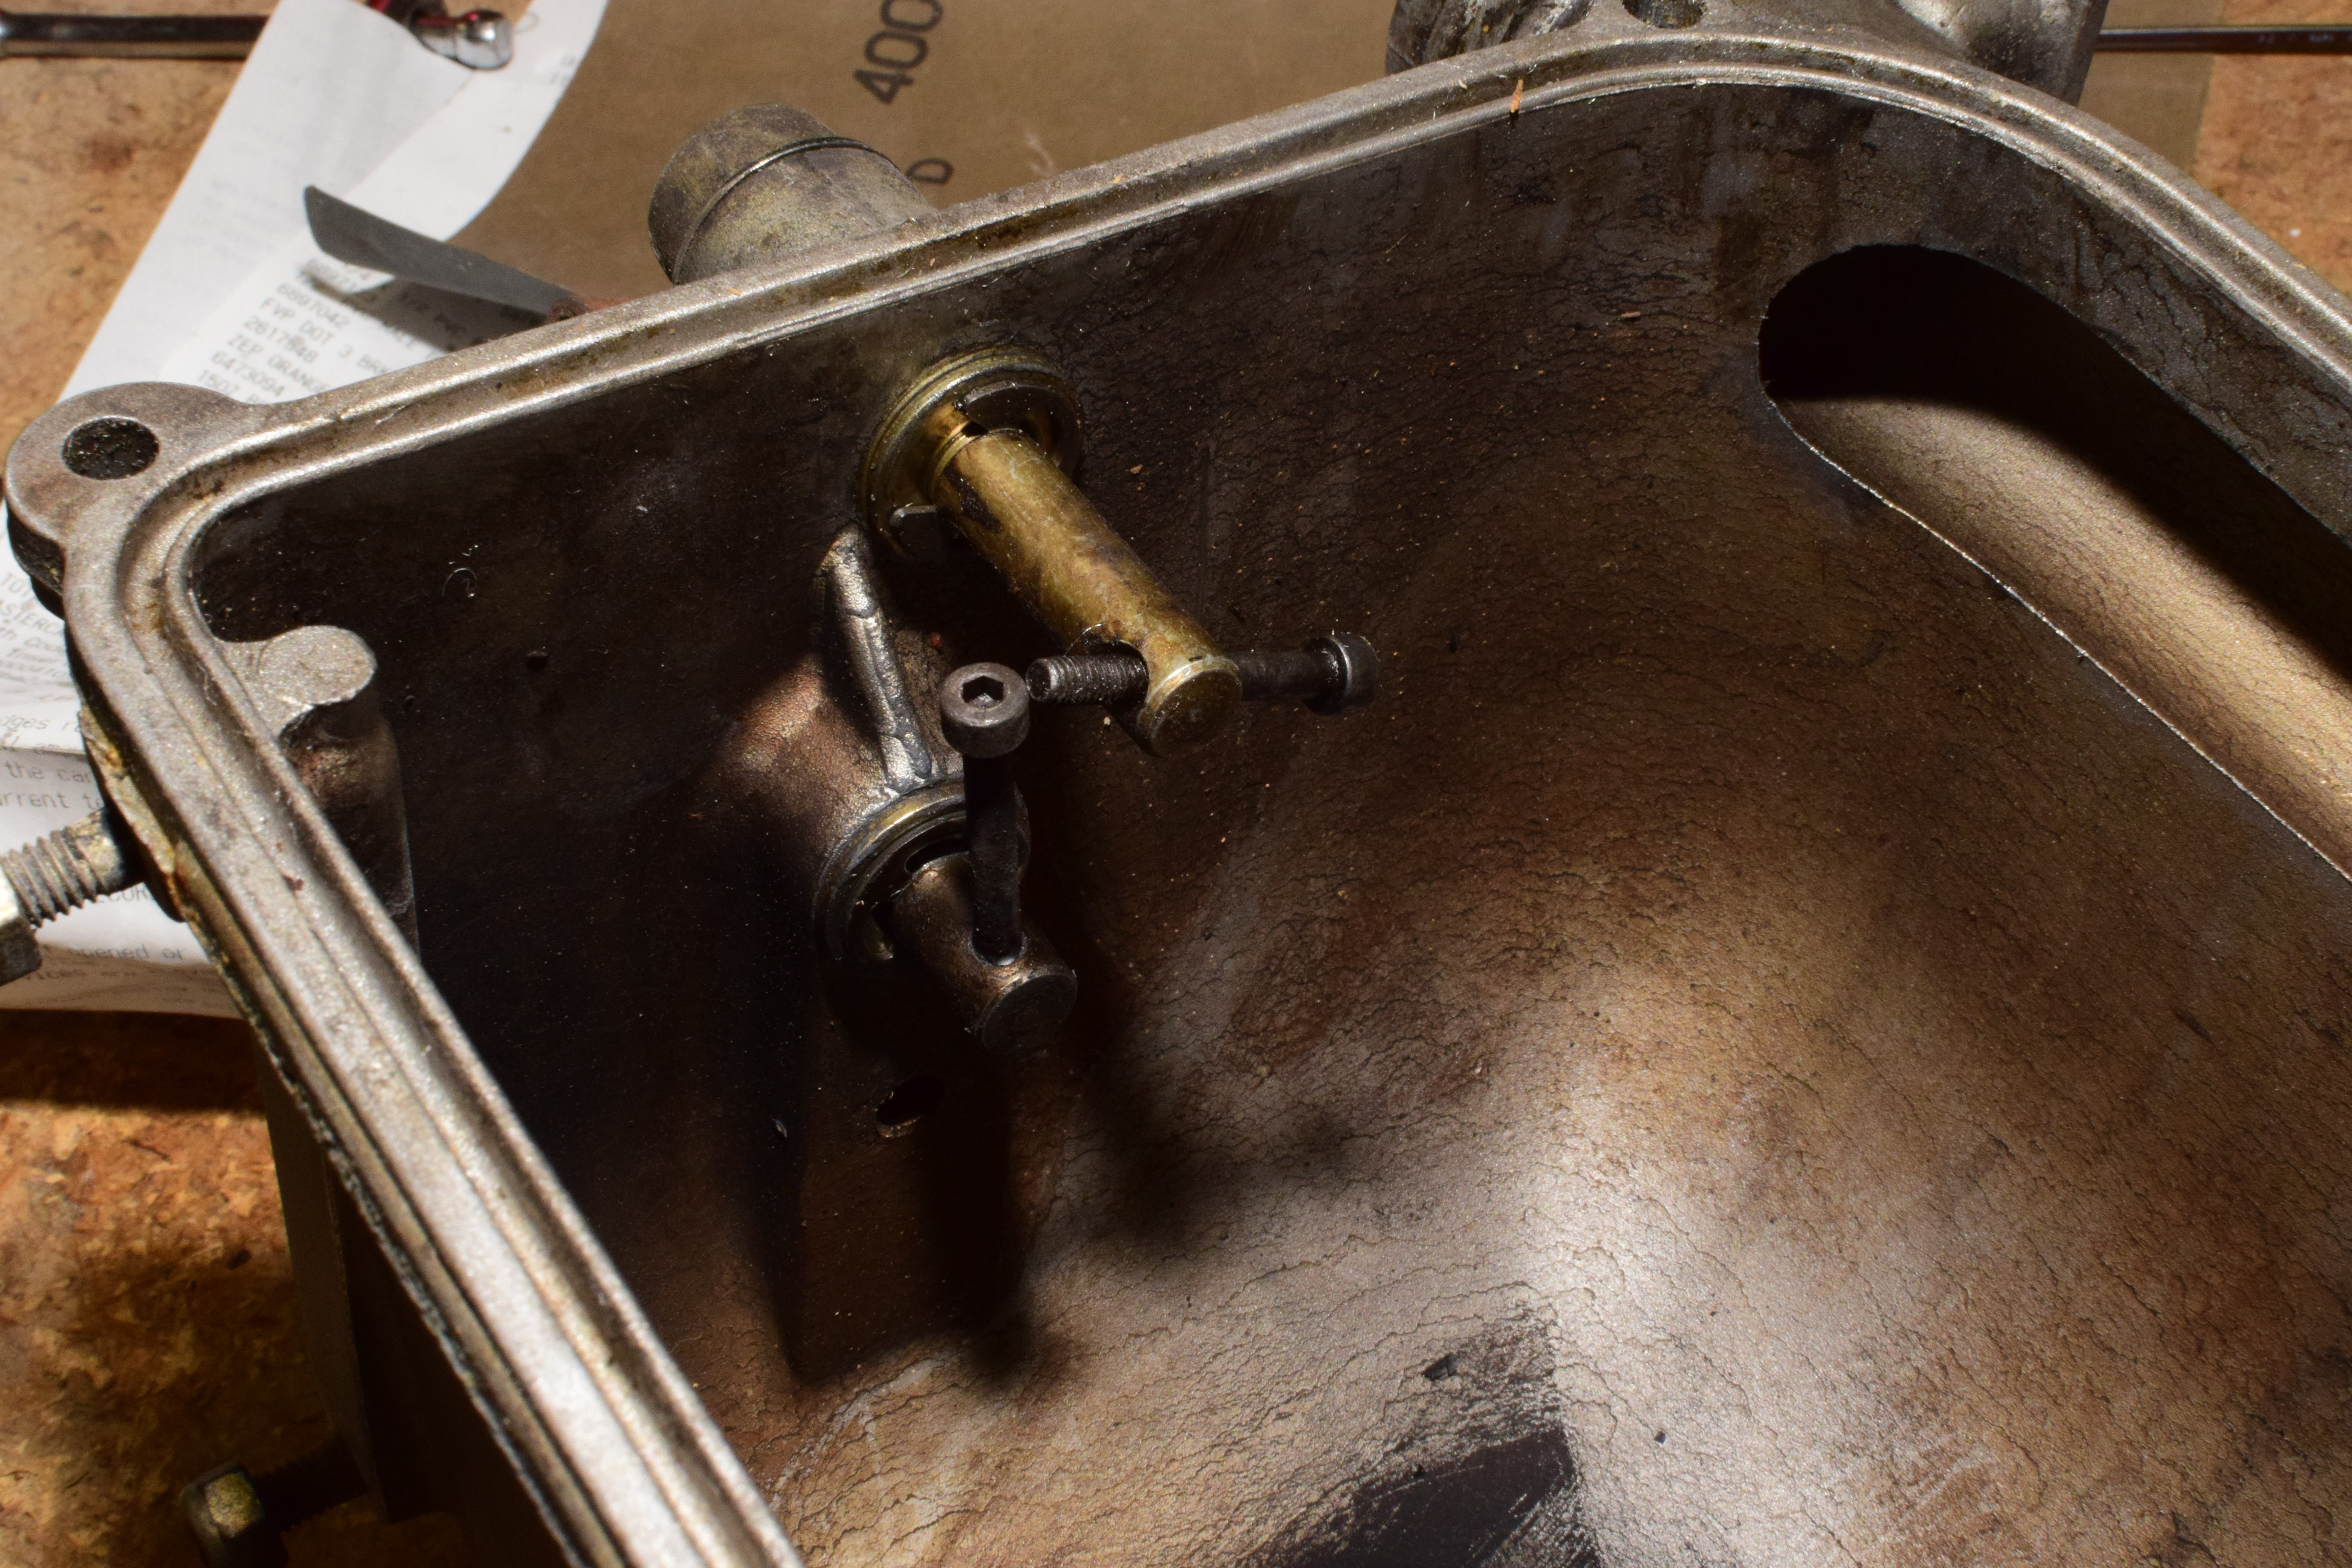
From there, I put the hat in the ultrasonic cleaner to get it cleaned up and ready to be painted.
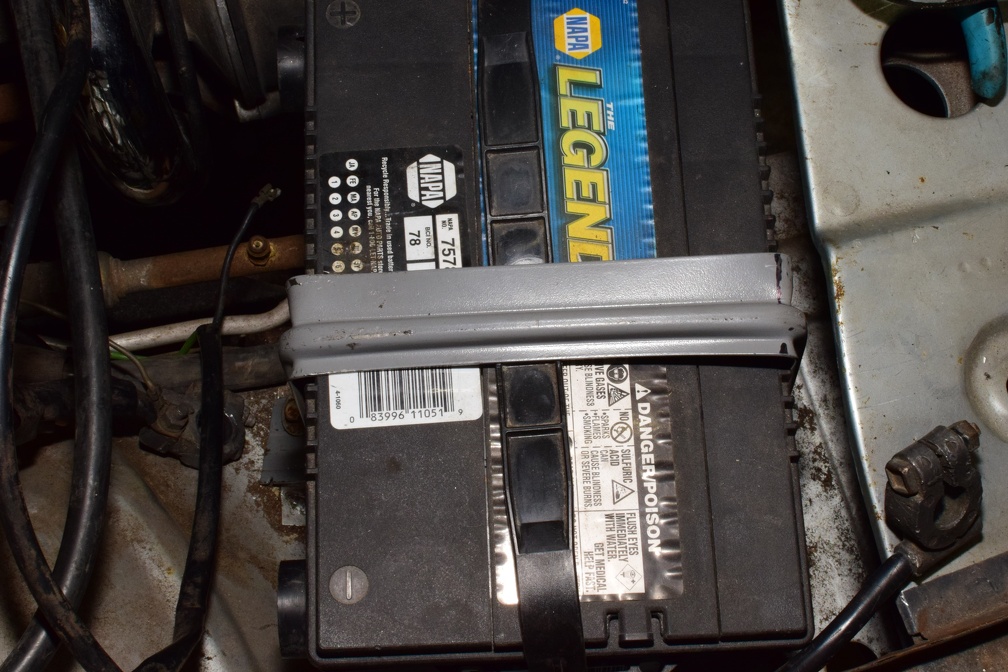
Next up, the battery needed to be tied down. Tim had an old battery laying about that’s not great but should be good enough. None of the battery tie-down brackets were with the car, so I needed to manufacture a solution. I started with this bit of file cabinet that I had in my scrap pile.
I measured it and then using my hydraulic press as a brake, I bent it into shape.
To attach it to the bracket, I used a bit of metal rod from the same file cabinet scrap, cutting it and bending it to fit in the existing spot on the car and then bending the hold down strap around it.
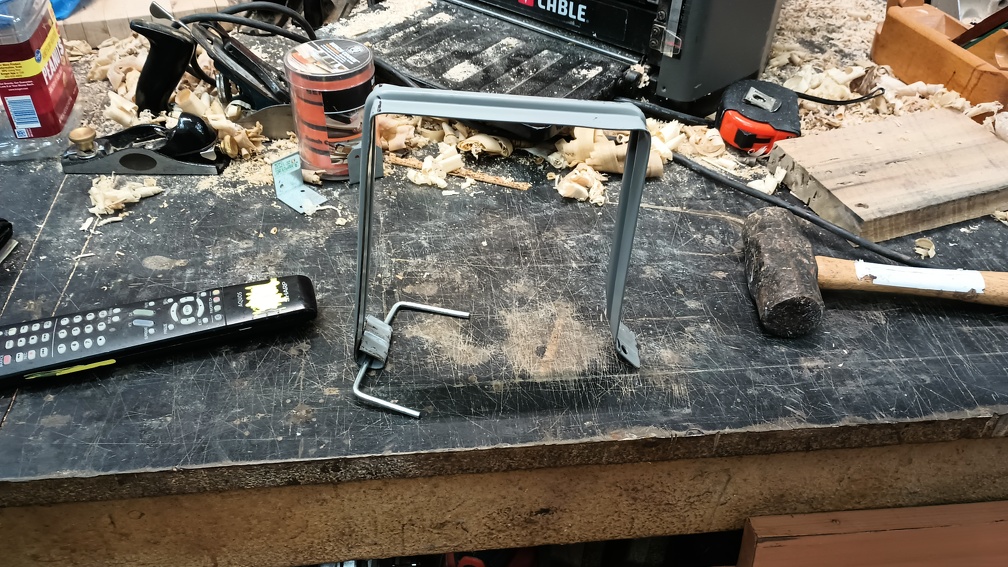
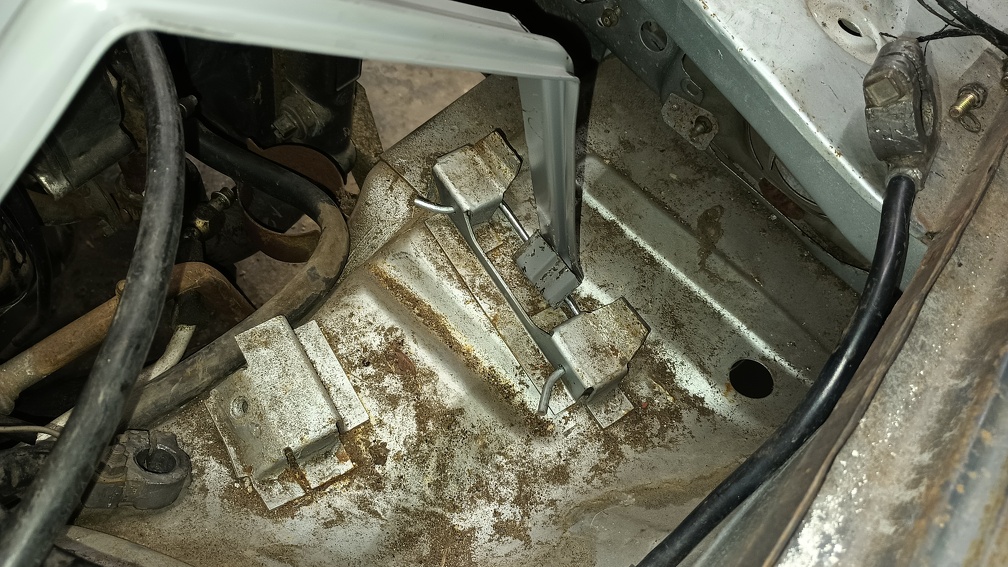
The battery is quite secure now, but I will try to make some small adjustments to make it look a little more perfect.
Running out of time before the Challenge, I’m trying to tie up all the last few things. I can’t check any of the actually important stuff because the carb hat is off, the brake lines haven’t come in yet, and I don’t have the tires.
First off, there was a coolant line that had some sort of plug in it.
Yeah, not a plug. It was a fitting that had broken off in the radiator. The rest unthreaded easily and came right out.
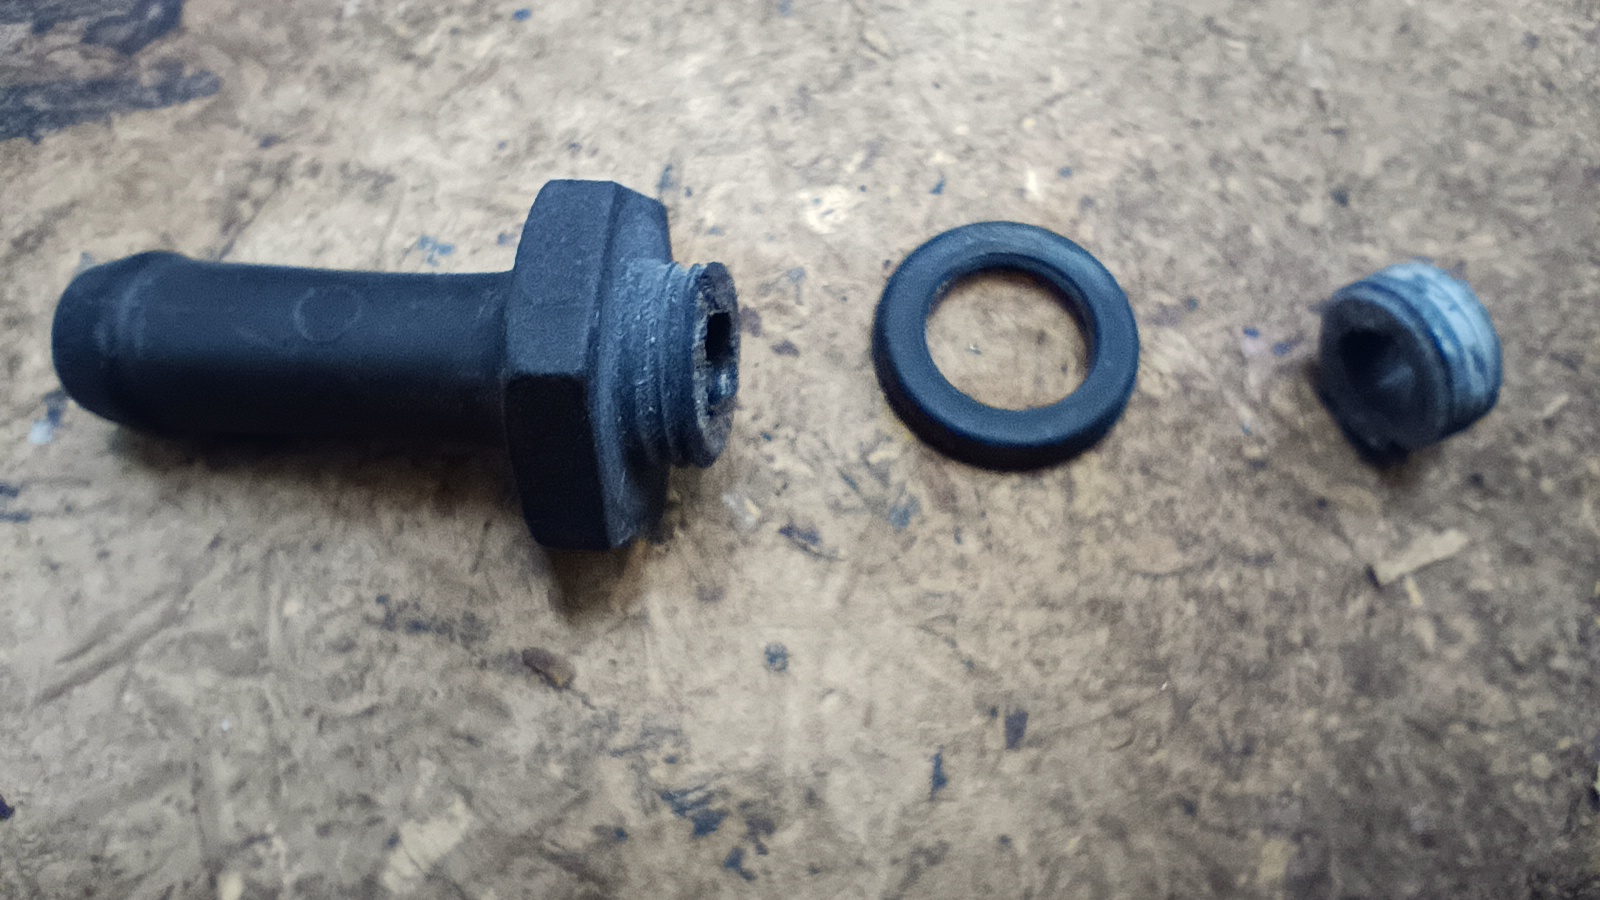
I couldn’t easily find an M10x1.0-to-hose barb fitting, so I threaded what was left into the radiator and put a little JB Weld on it.
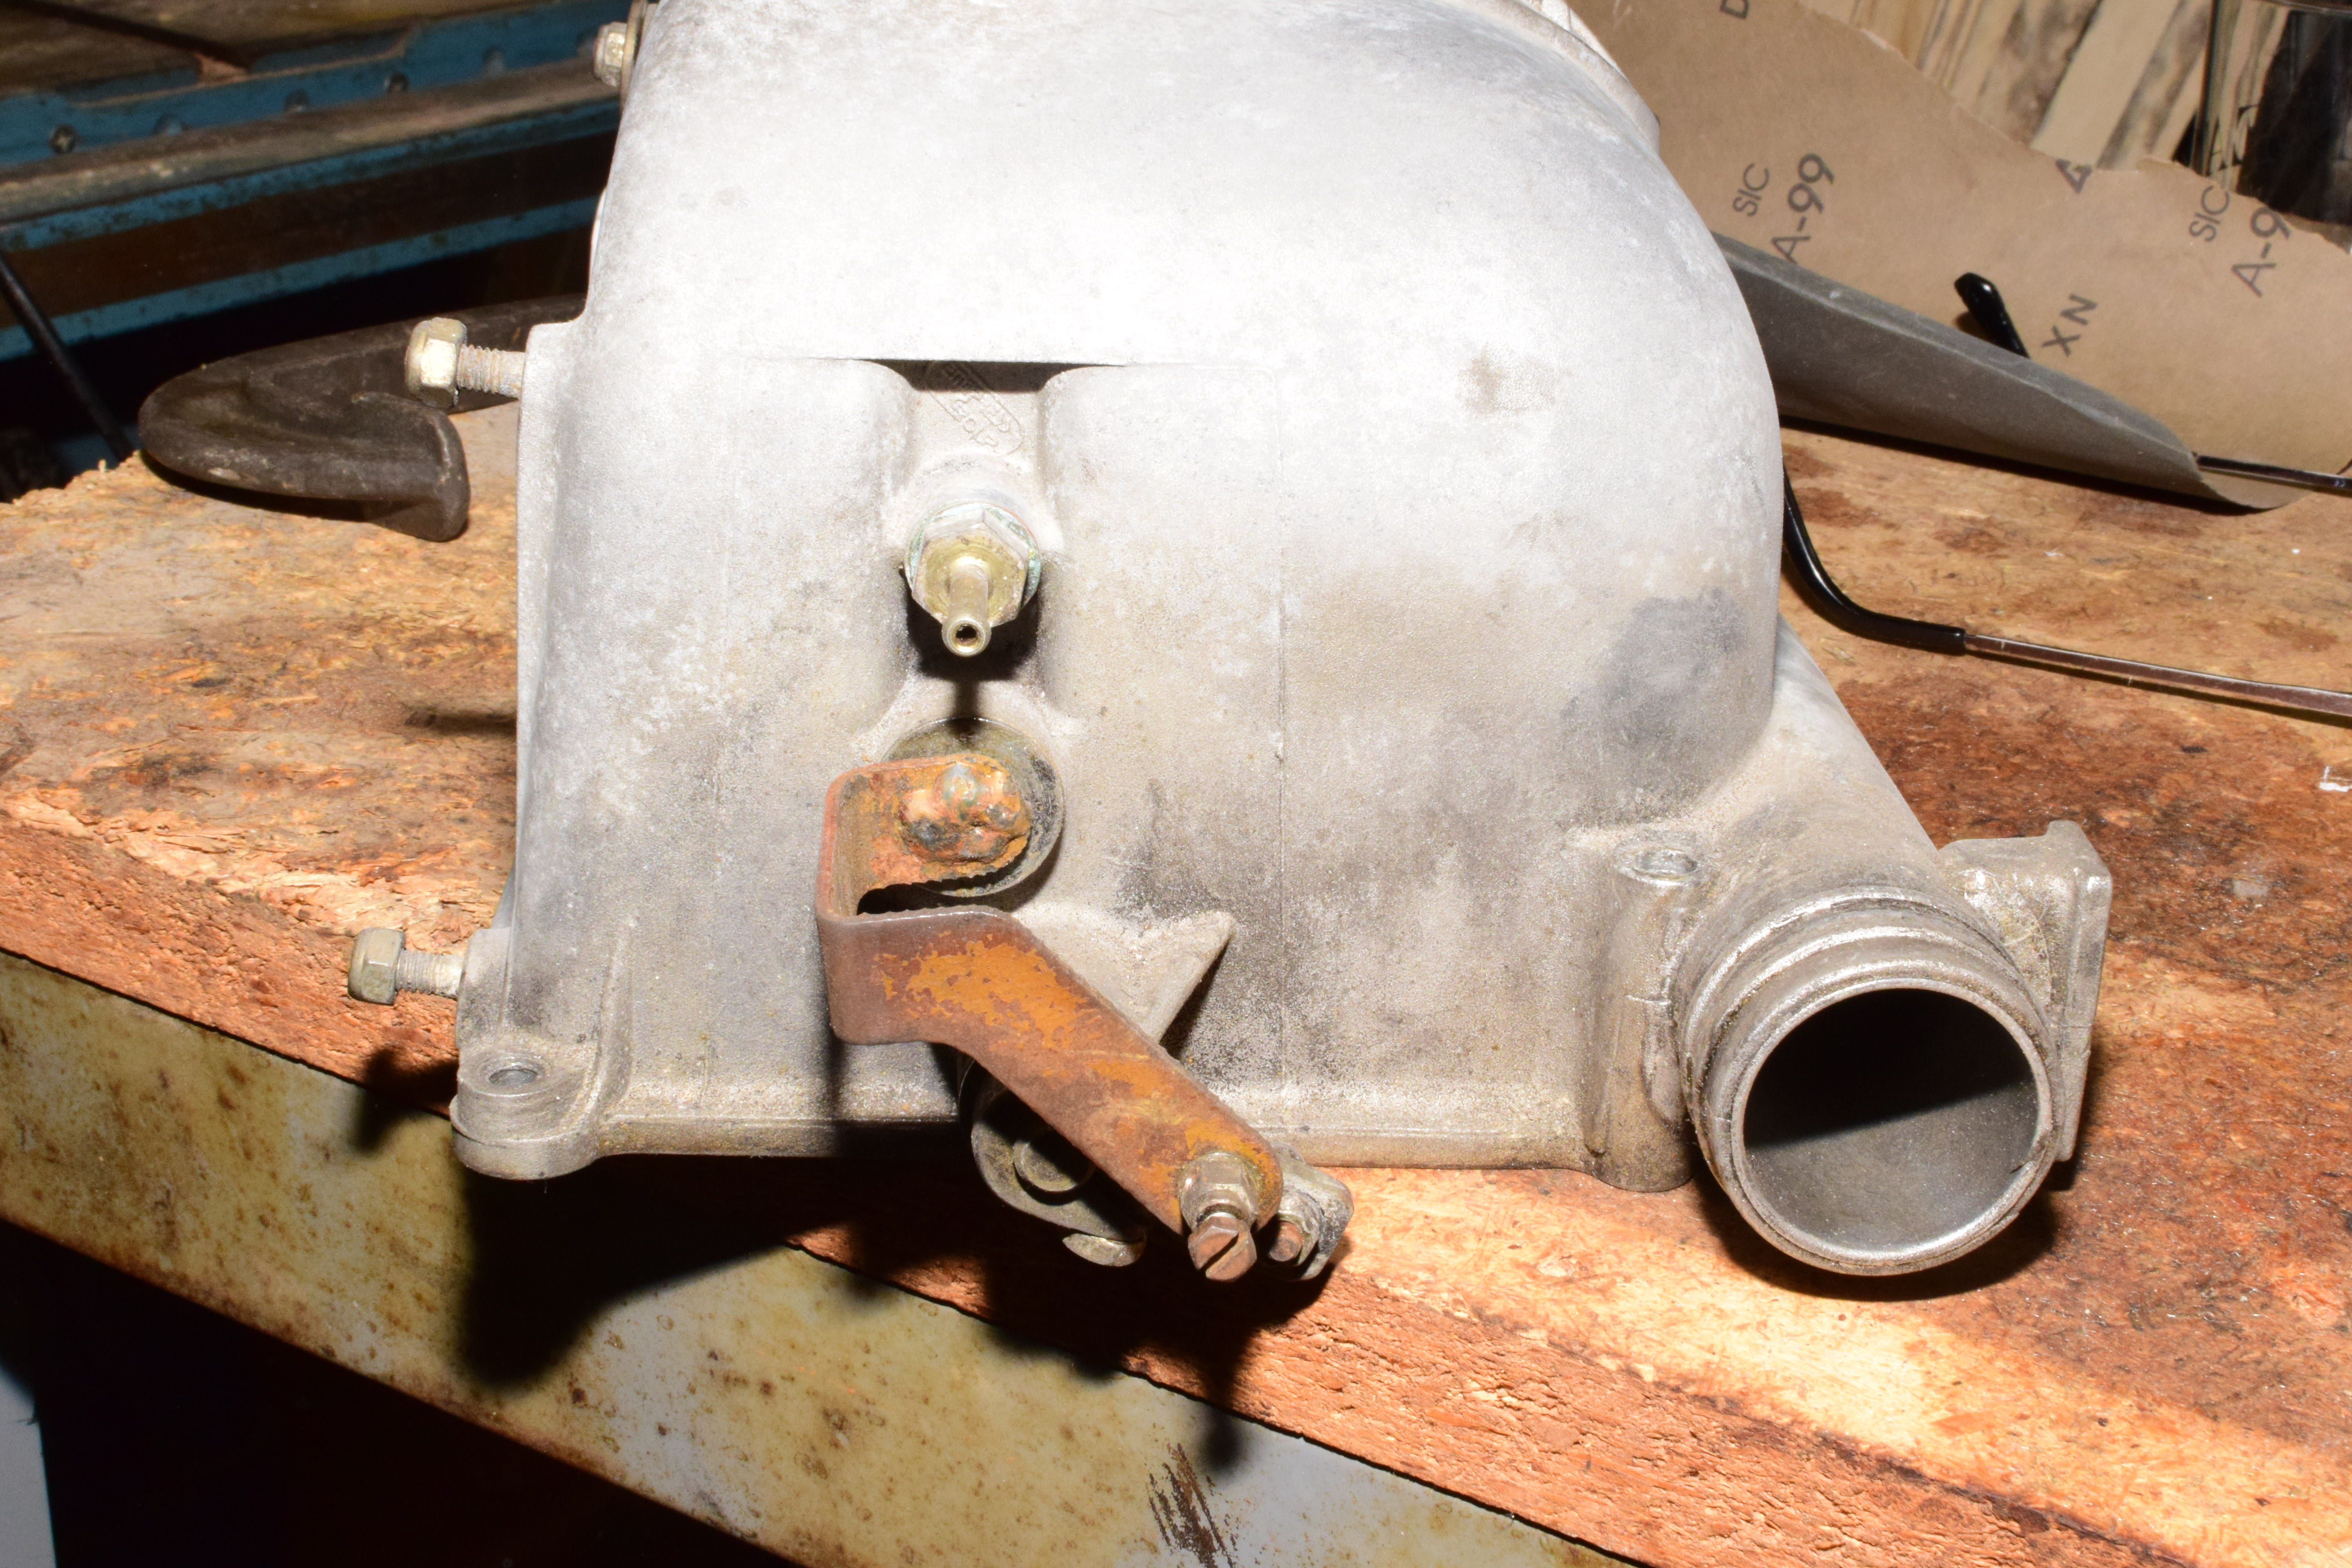
To clean up the carb hat a bit I took the throttle and choke links off and threw them into the ultrasonic cleaner.
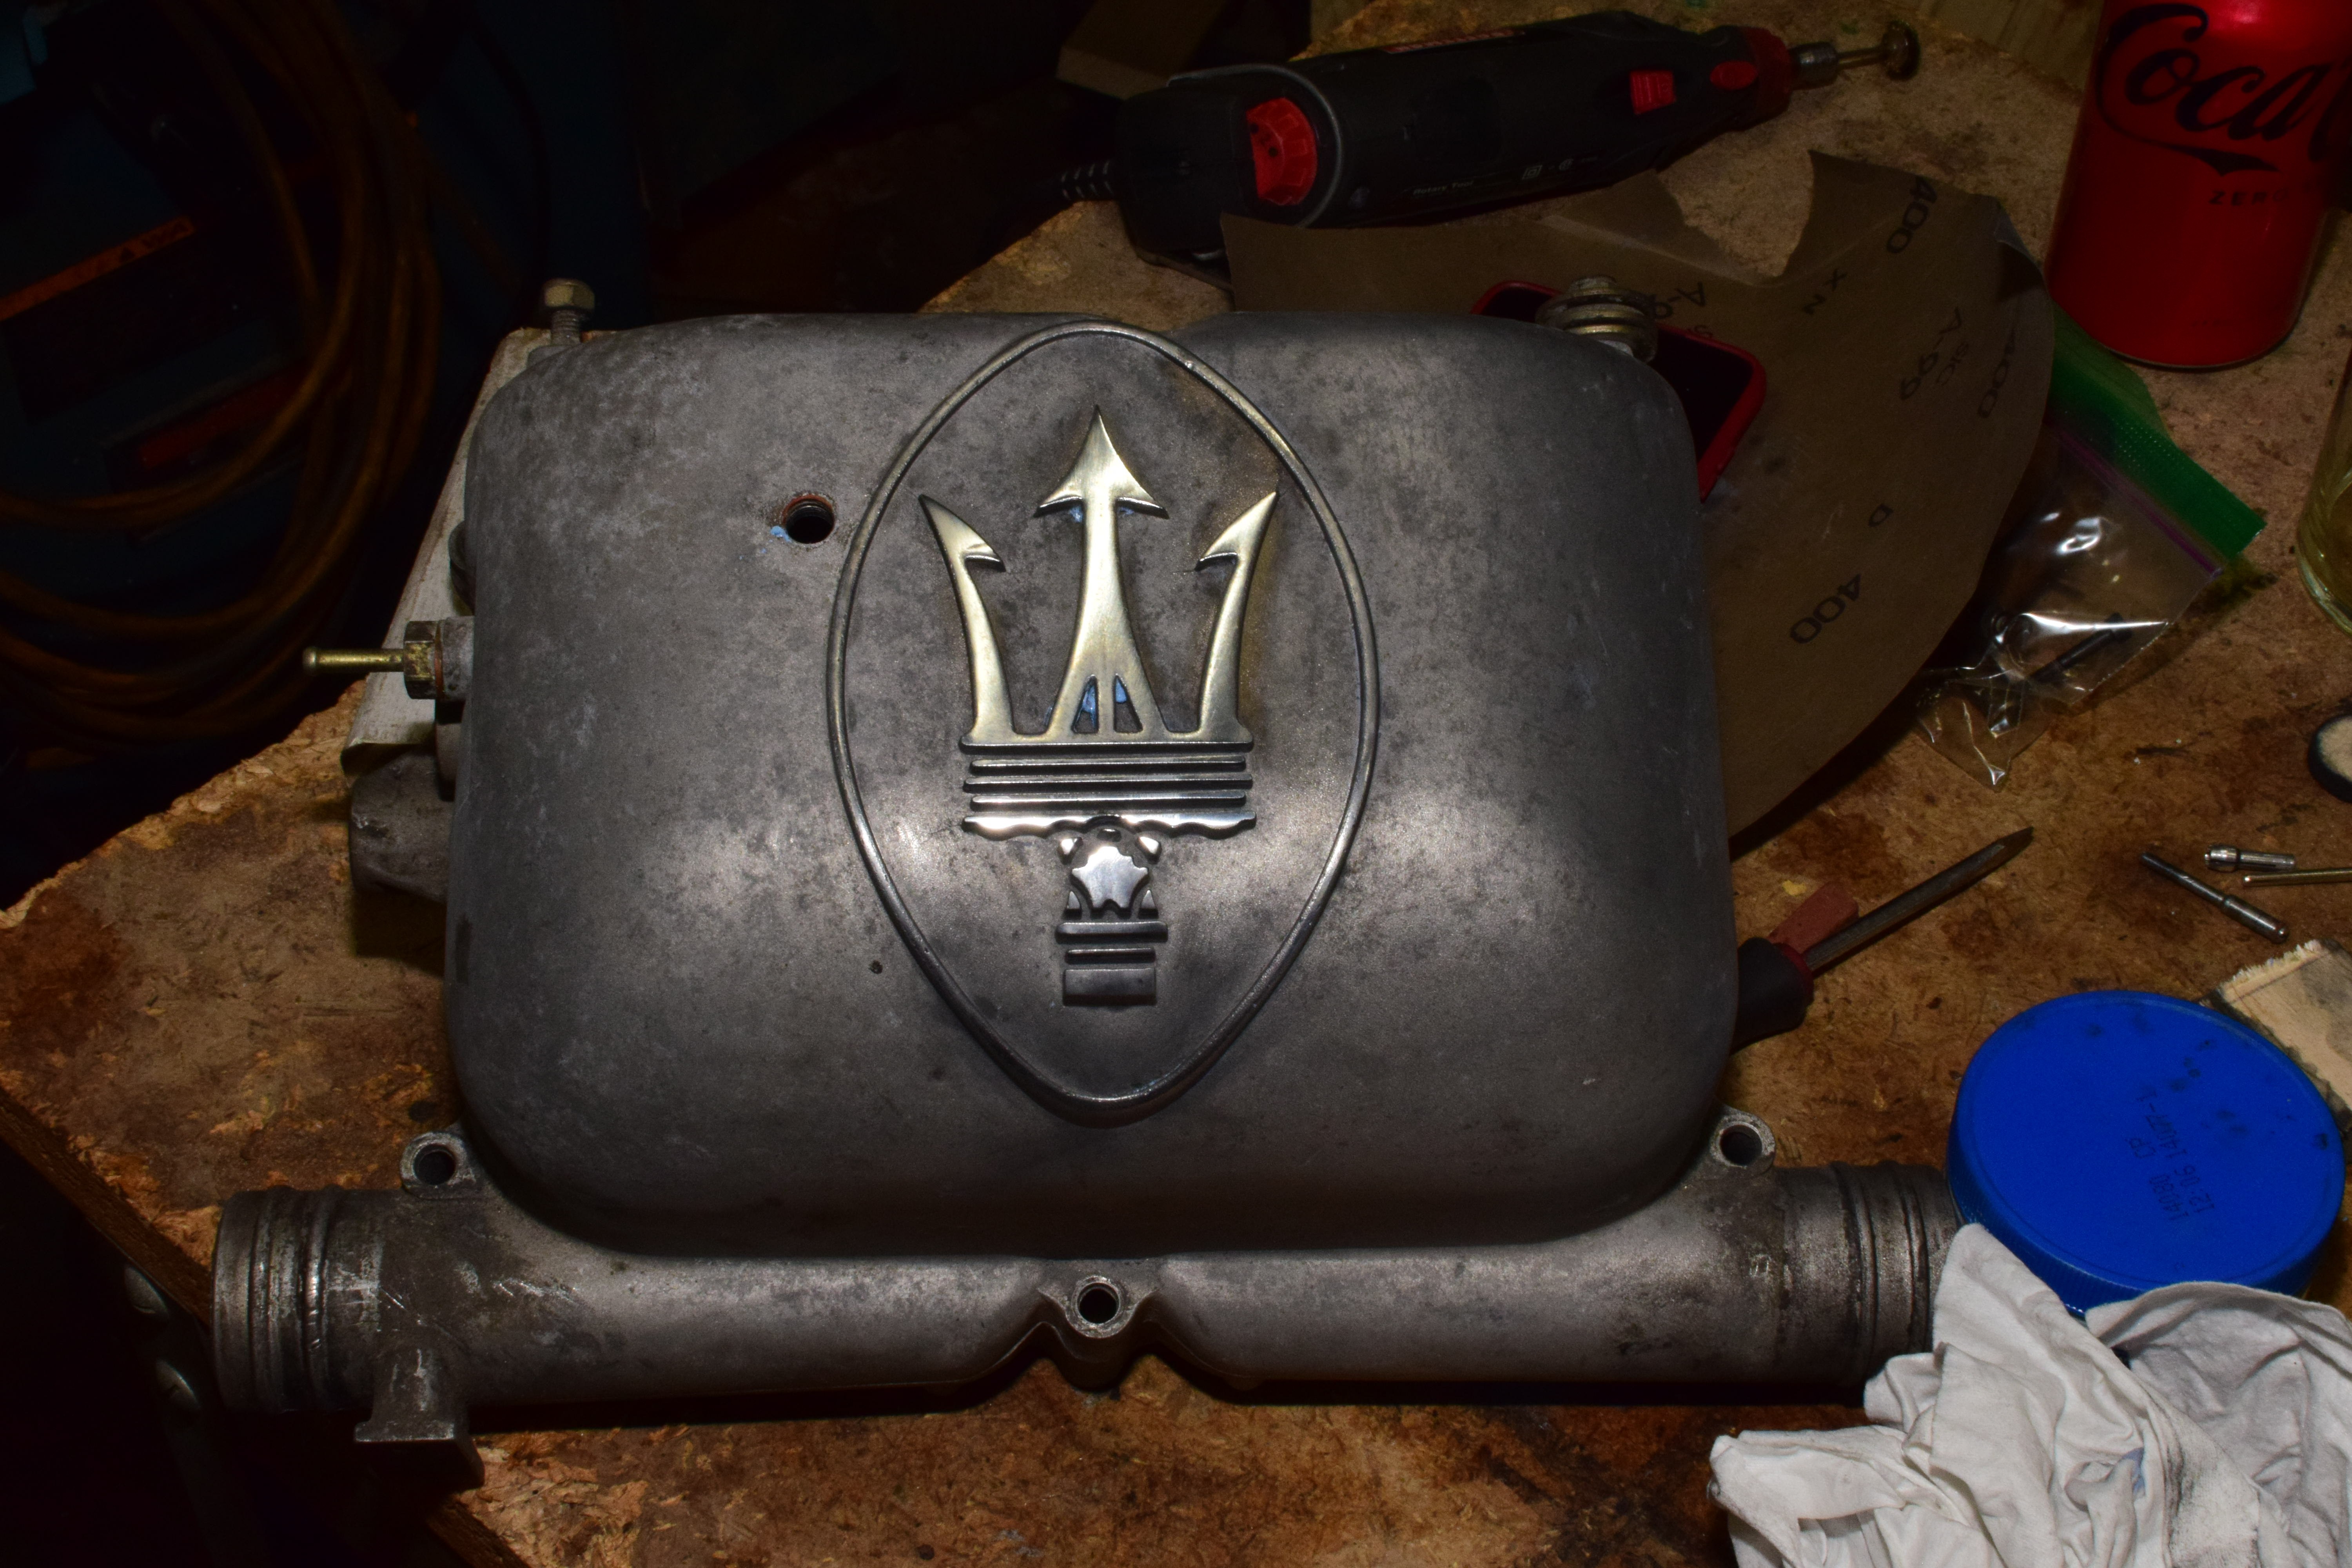
Then I grabbed a can of this and went to paint.
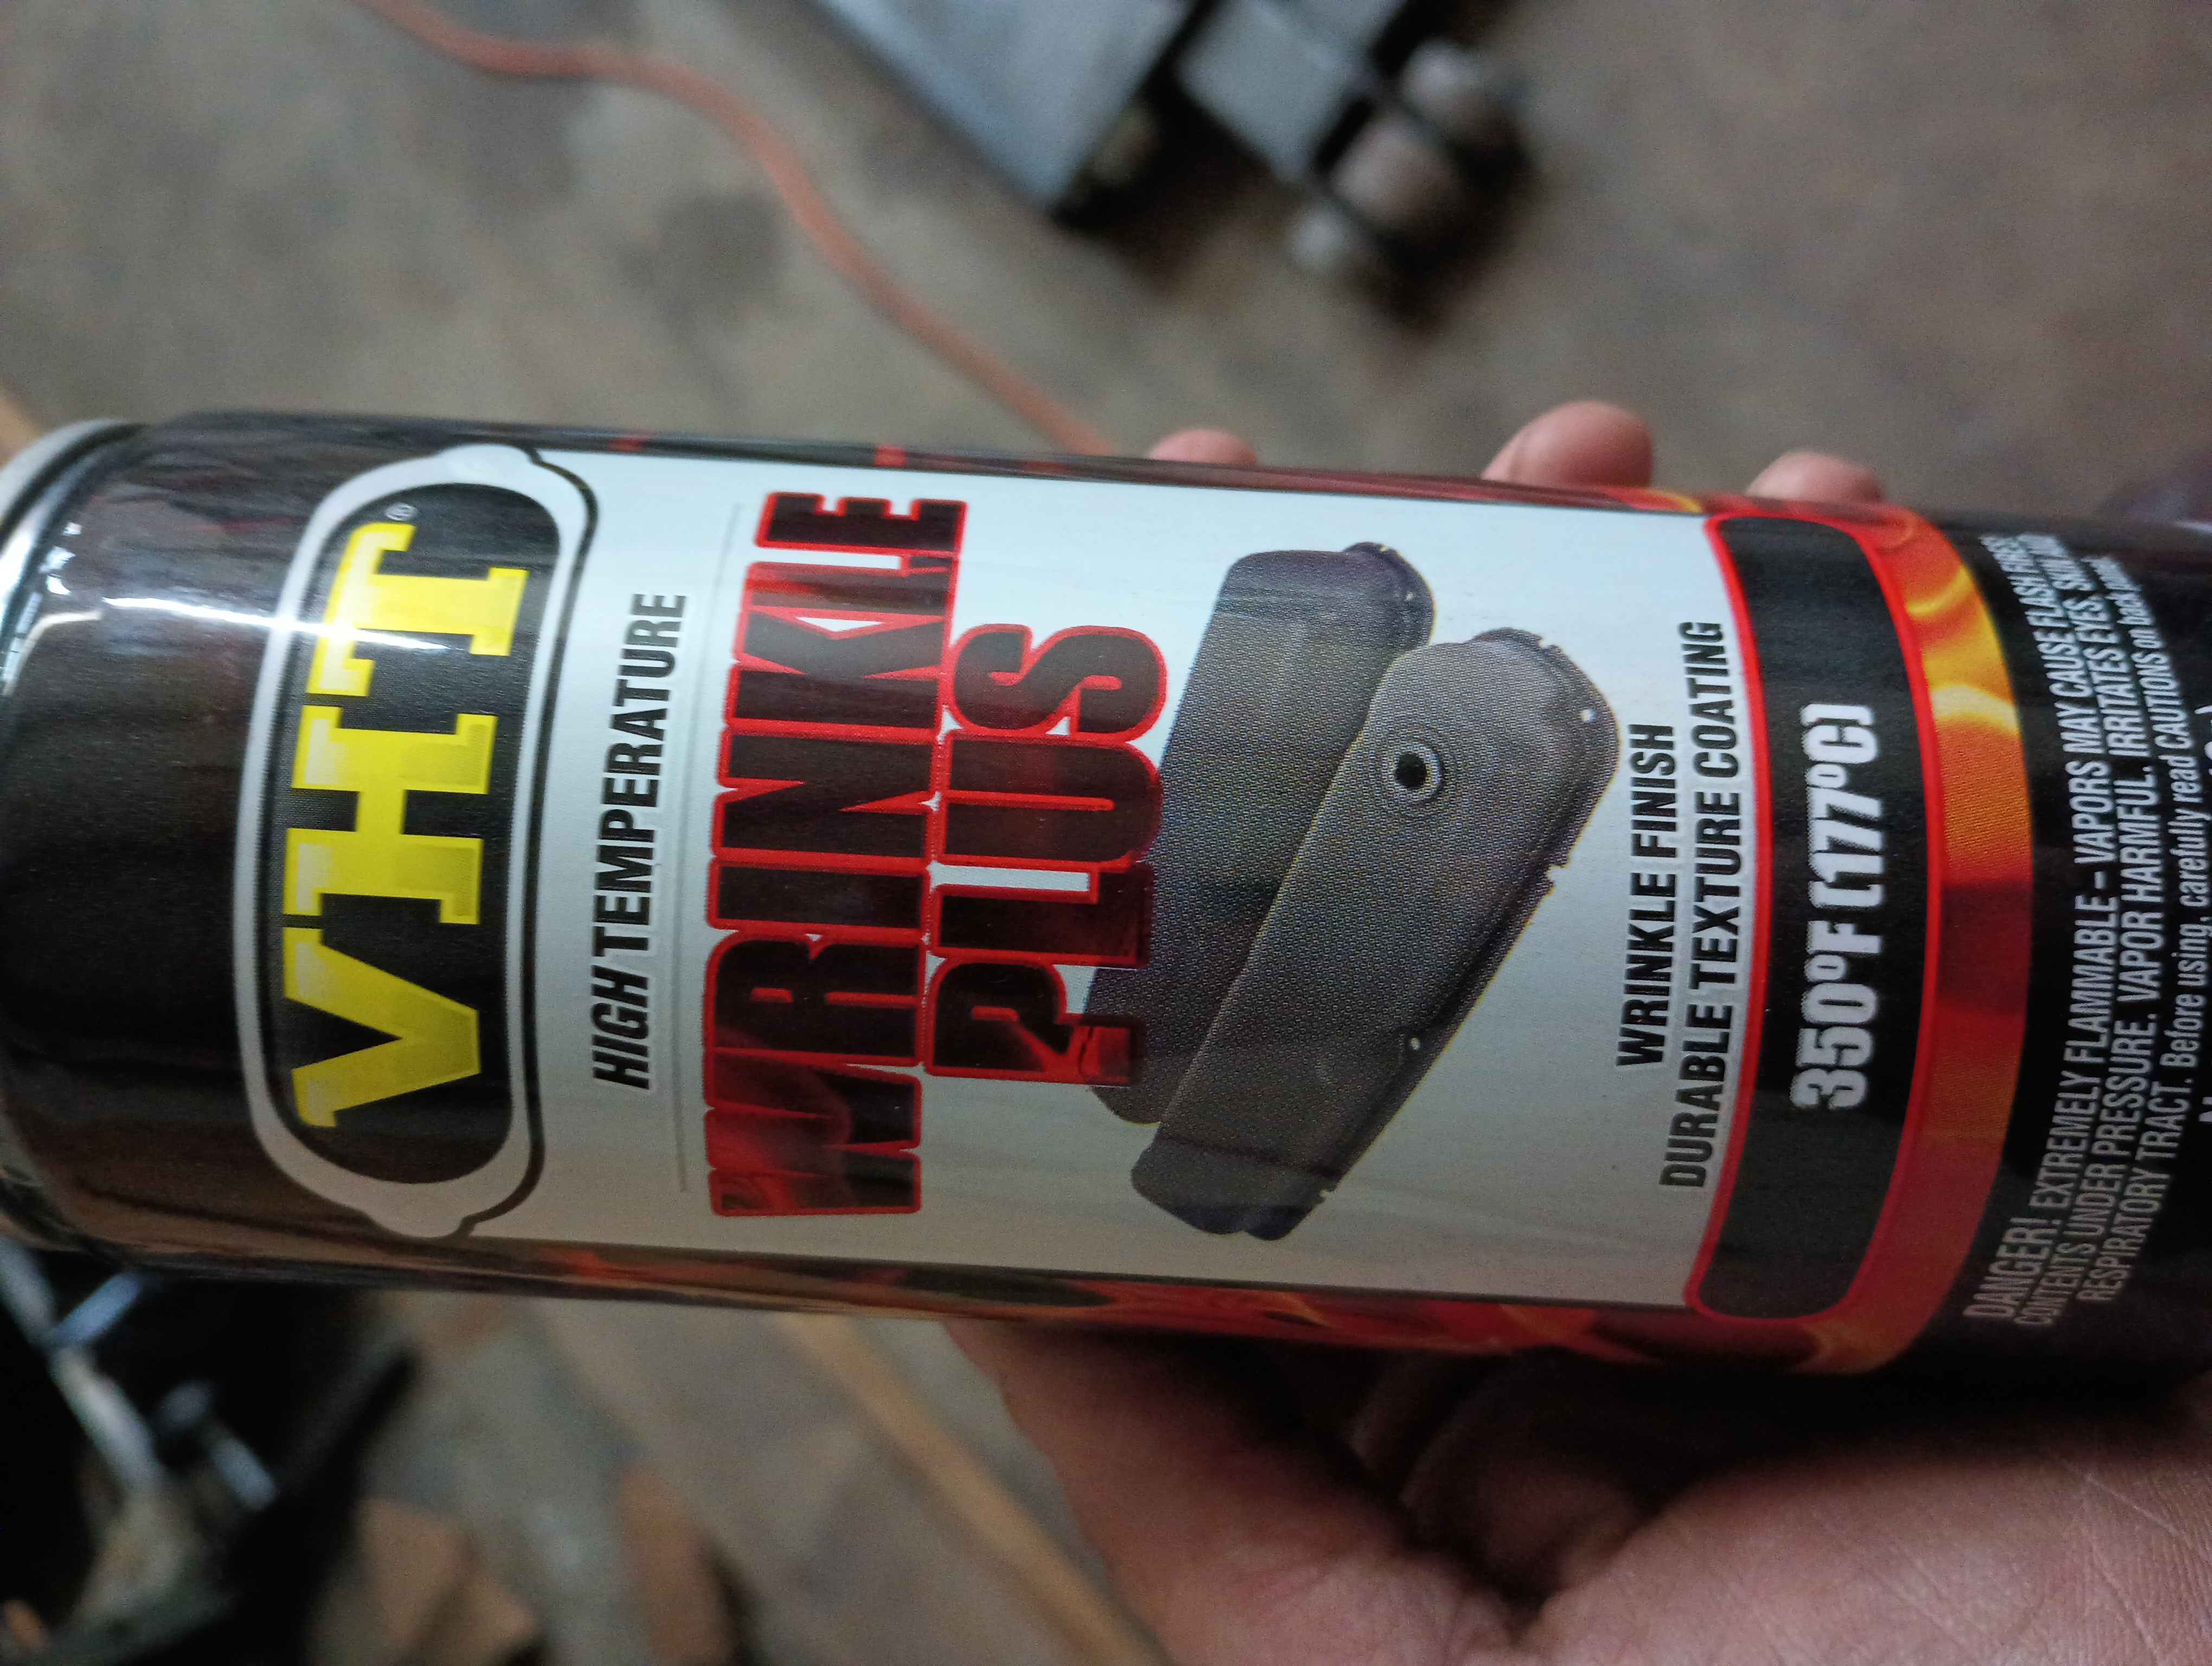
Three coats went on, with some heat gun action in between.
It needs a little more cleaning up once the paint dries the rest of the way, but it’s coming out pretty nice:
I sanded and painted the spare coolant hard line and installed it. I also threw the coolant bottle in the ultrasonic cleaner and then mounted it up.
At some point, one of the terminals for the brake light switch broke off so I soldered on a new terminal.
Not the prettiest, but it should work for now.
The last thing I got wrapped up was installing the hood latch components and running the cables through the firewall.
The Challenge is getting awfully close and I still don’t know if the car will do anything other than idle. As the parts all start arriving, however, I’m getting closer to being able to try to drive it for a short test. Using some Permatex 85420 fuel resistant sealant, I bolted the carb box back on.
Part of getting the carb box installed, though, was that the choke cable was all seized up; so much so that I broke the handle.
I used some JB Weld to repair the handle. The choke cable isn’t like the other cables because there’s no spring on the choke. That means that while the other cables are steel cables, the choke cable is actually a relatively stiff wire, since you can’t push a rope. I tried putting penetrating oil down the tube and working the wire back and forth; while I thought that had fixed it, it was still too stiff. The solution that I found was to completely remove the cable from the car and pull the wire completely out of its tube. I ran some Teflon lubricant down the tube, put the wire back in, and now it is pretty smooth. It’s a little weird since I’ve never actually had a car with a manual choke before so I’ve never had to deal with that.
The other brake line finally arrived making my next task to get the right front brake back together and hit it with the pressure bleeder.
The brakes are still not right, so something will need to happen with that still. I’m going to bleed them again once I have the car up on the lift. If that still doesn’t get it done, I may just have to get a new master, which should be doable before it’s time to load up.
I installed the side post battery adapter plugs and hooked up the battery. While Greg held the fire extinguisher, I jumped in, pulled the choke open, and twisted the key. It took it a minute, but it roared to life, no ether required! It was definitely missing on one cylinder, but it was running. And smoking a ton. I can’t tell where it’s coming from and if it’s just burning off at this point, but it does look like the exhaust on the left side isn’t fully tight. And we know that the left turbo seals are a bit leaky.
The Walmart special “Fullway” tires were mounted earlier in the day, so my daughter and I got three of those bolted up – we couldn’t really get to the right rear, so I figured with three tires it would be enough to pull it away from the wall in order to change the fourth. But it was mostly on its own wheels now and at basically the right height. I started it up again put it in gear, and the clutch worked! It slowly crept out of its storage spot and I was able to pull it away from the wall enough to put the fourth tire on. Interestingly, that wheel is only a 6″ wide wheel, as opposed to the 6.5″ E wheels on the other corners. I don’t remember if that was originally the spare or if the car had that to begin with. Regardless, I put it back in the spare carrier even though it’s flat and coming apart.
It’s a little tight in the shop partially because the Maserati was something of a shelf while it was sitting there, but I was able to move it away from the wall enough so that it can be worked on a little more comfortably. Once I have the whole issue with the missing cylinder figured out, it’ll go on the lift.
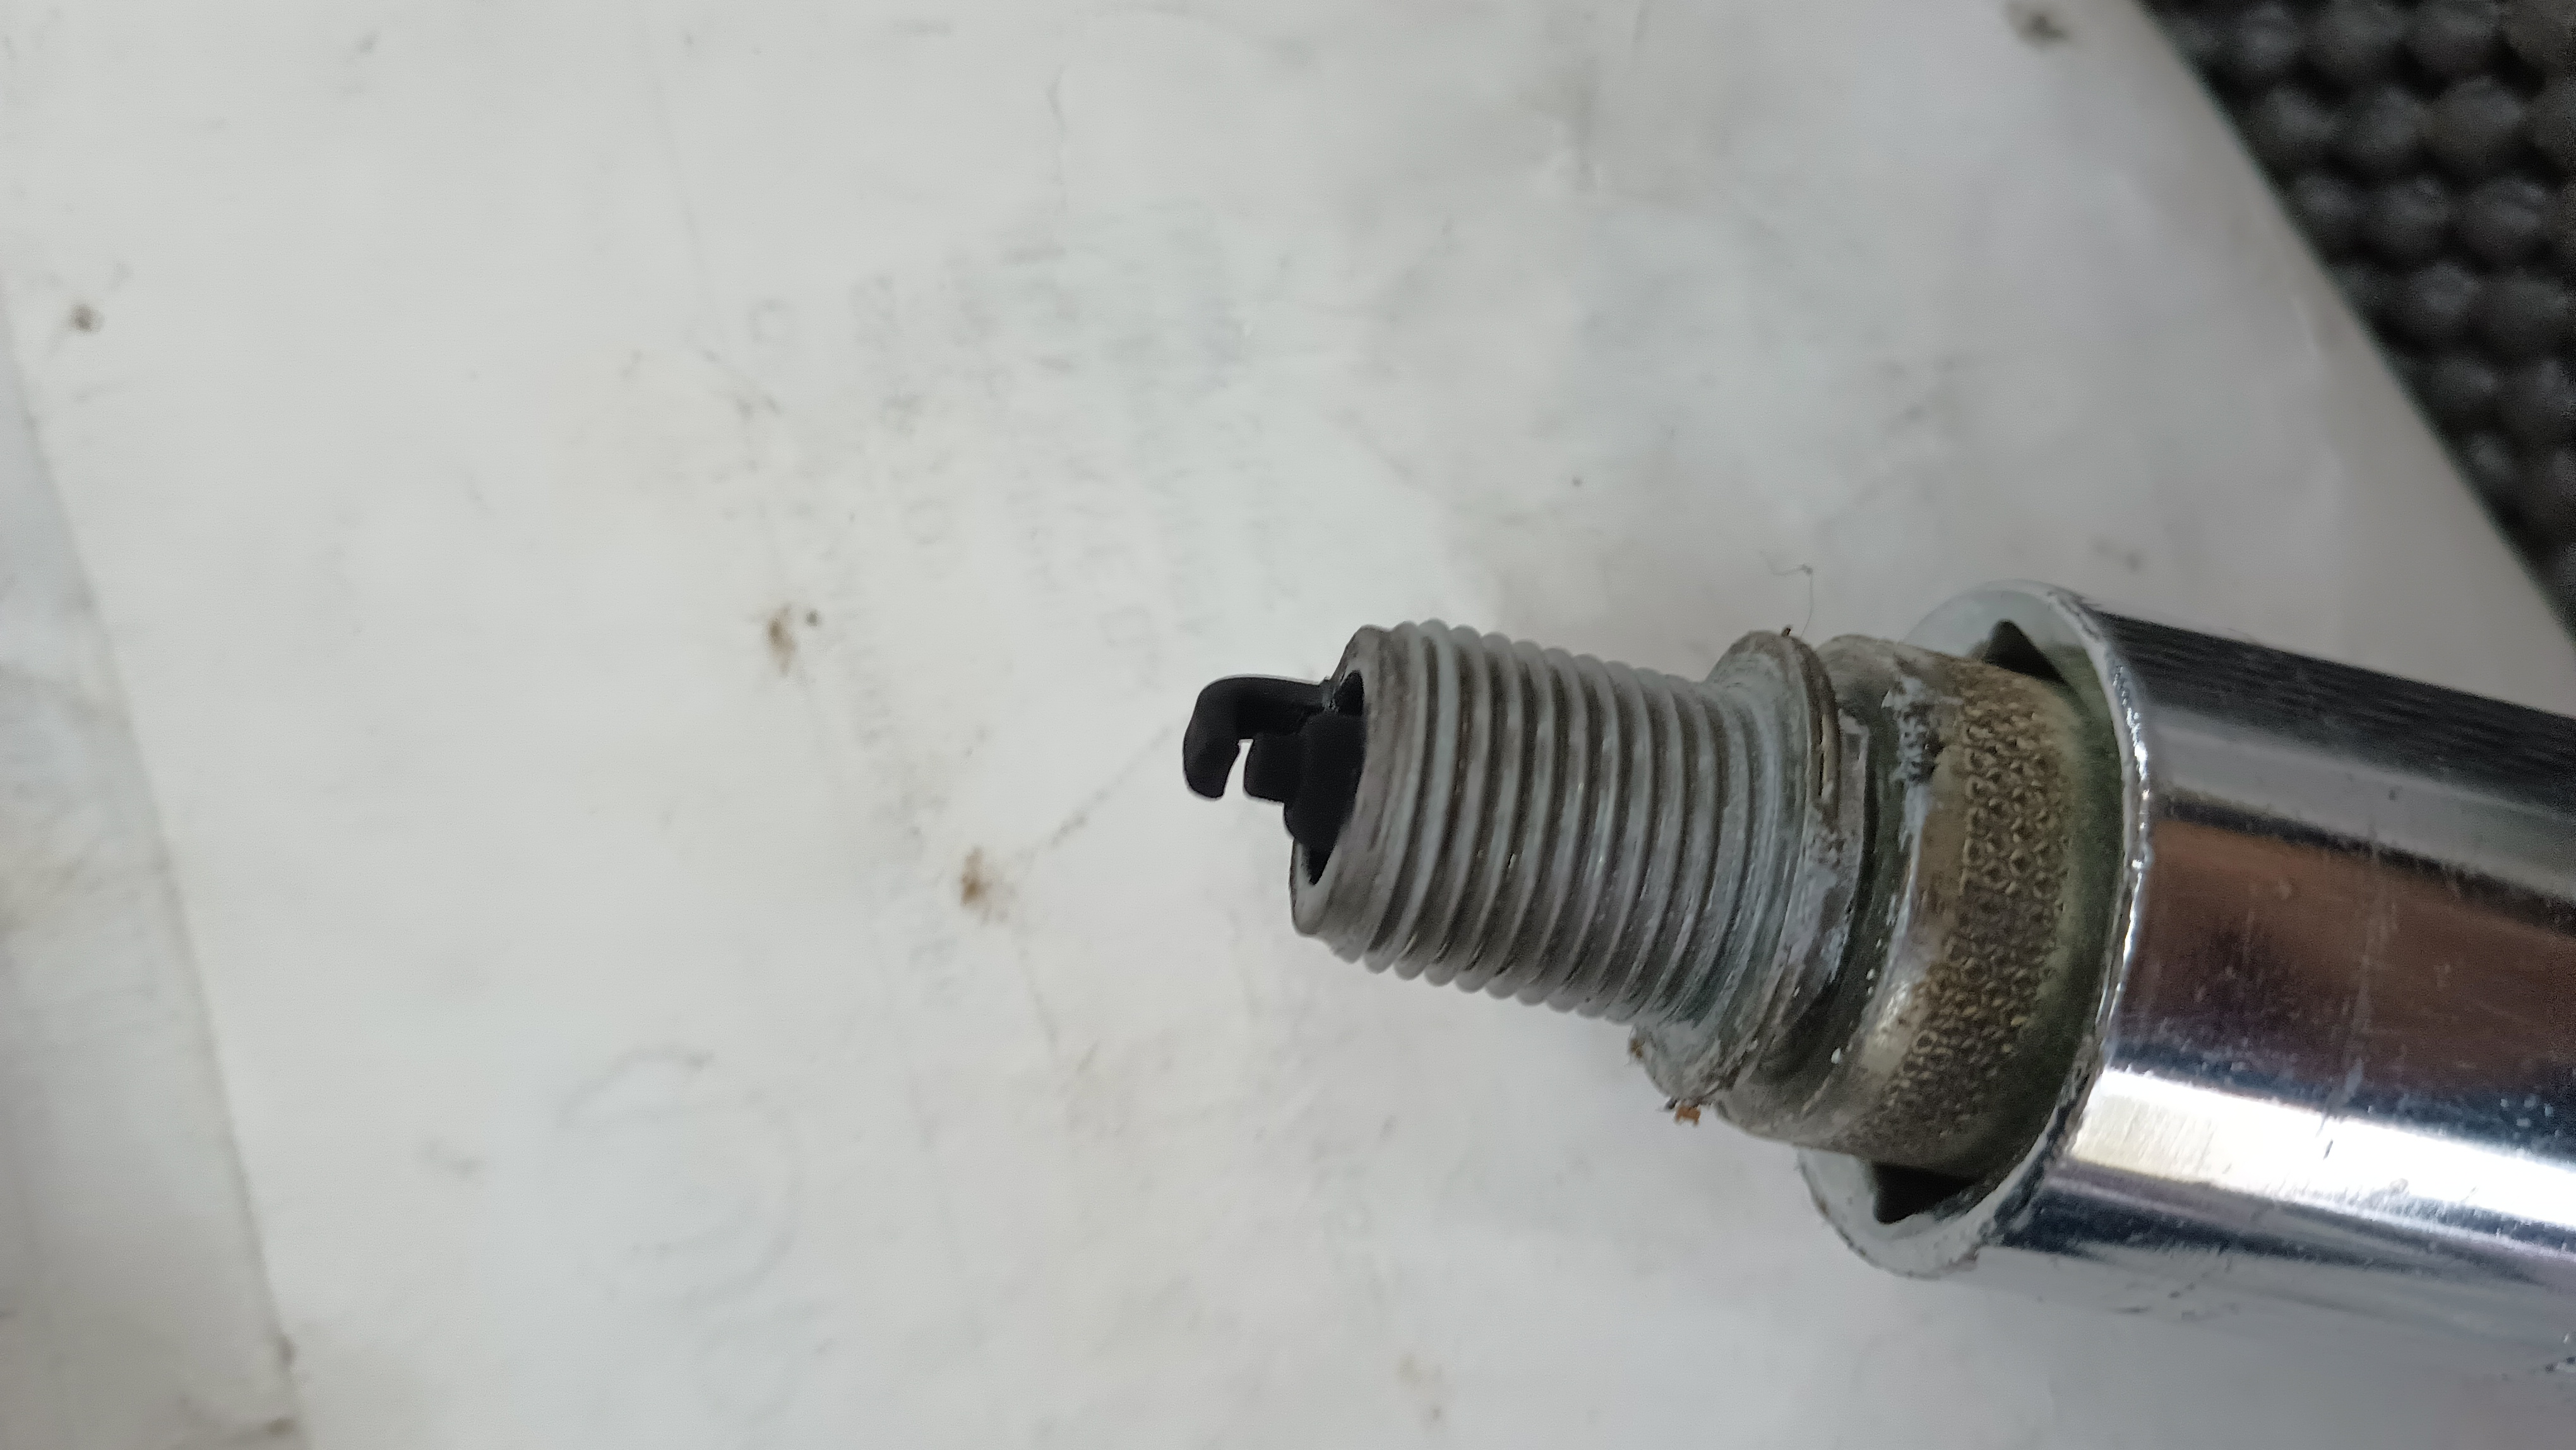
While the car was running, I started pulling spark plug wires to find the dead cylinder. Pots number 6, 5, and 4 all caused the car to stumble and nearly die when the plug wires were removed, so those cylinders were not my problem. When I pulled the #1 plug wire, however, there was absolutely no change in how the car ran. I tried a different plug wire and the #1 cylinder was still dead. All the plugs were a little blackened, so I hit the #1 with a little sandpaper to clean it up, but that also had no effect. Finally, I switched the #1 and #5 plugs and now it was cylinder 5 that had the miss. I’ve got a full set of plugs on order from Rock Auto and in the meantime, I’ll go buy a single plug from the FLAPS to verify that the new plugs will fix the problem.
Running out of time to get things wrapped up. Here’s what’s left to do:
With the car able to move around under its own power, it was time to work on getting it to run well and to see what else it needs to be ready to load up for Florida. Swapping in a good plug got it running a little better, but it was still a little rough. Turns out that a second plug was also not doing so great. It seems like it running a little too rich:
I cleaned the plug up with some sandpaper and a wire brush and got it running a little smoother. Six new plugs and a set of wires are on order.
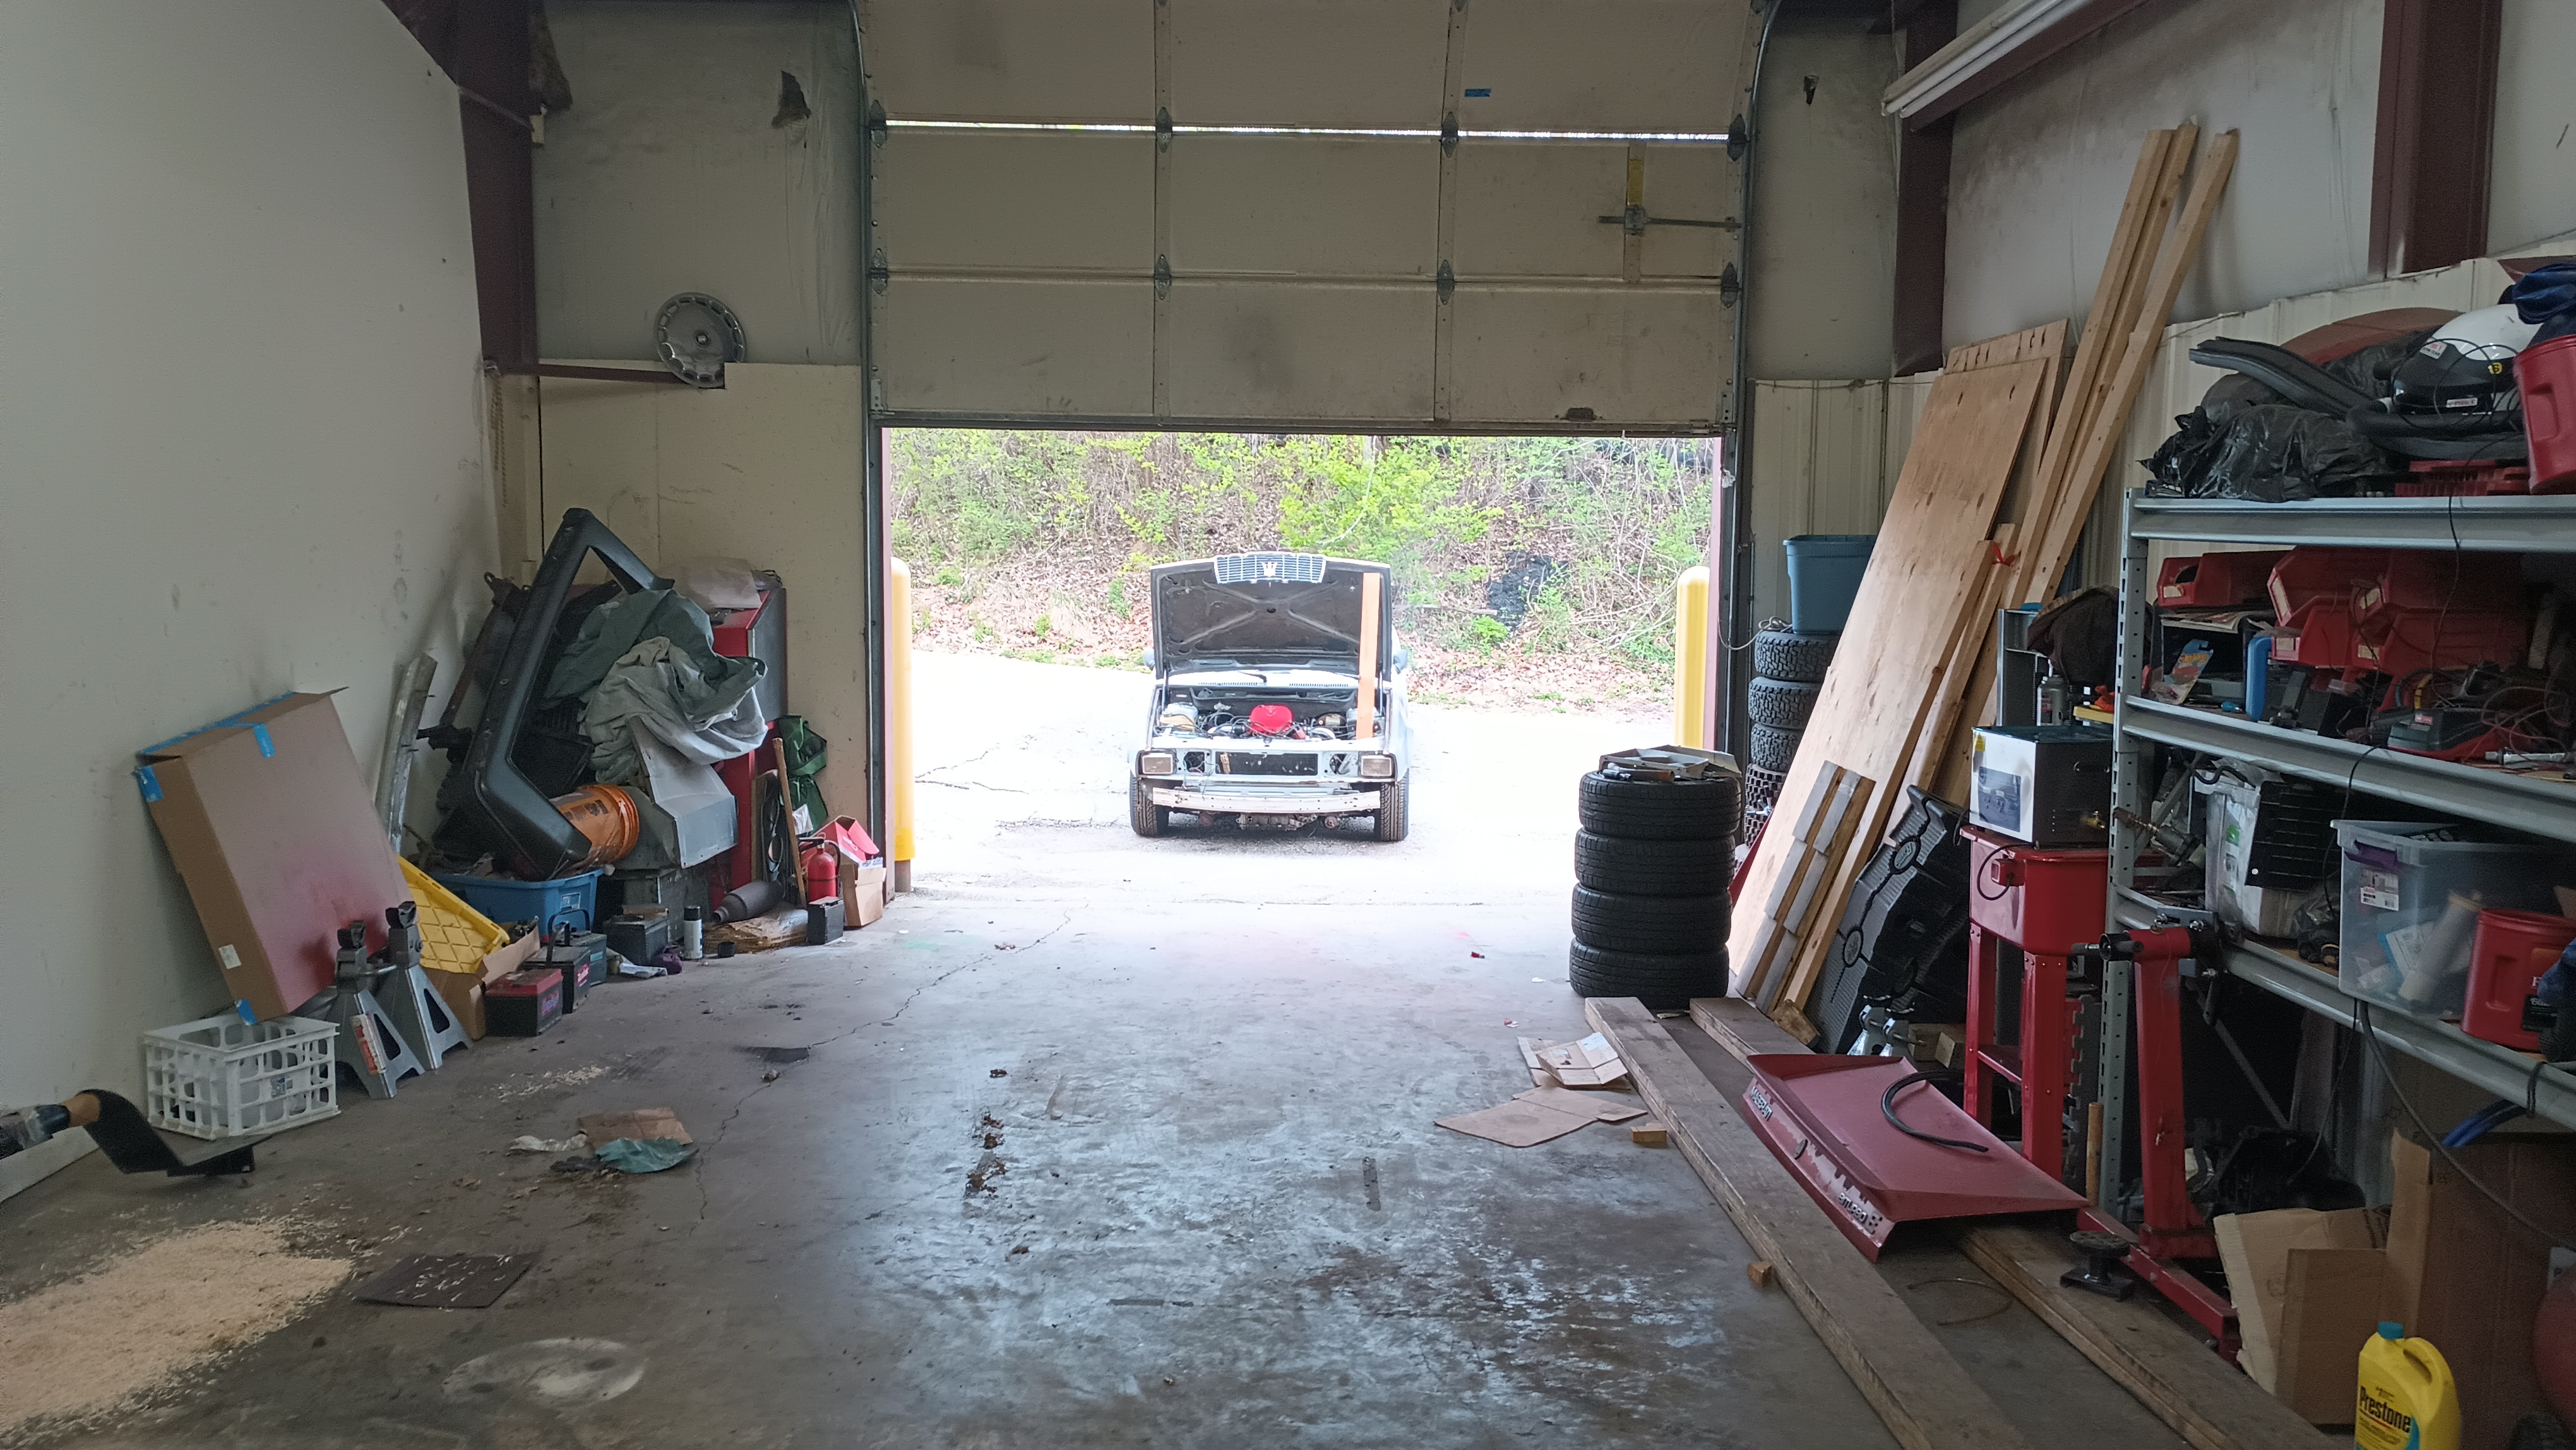
Since it was running enough to move, I let it have sunlight for the first time in a few months.
And then back up on the lift to start checking things out.
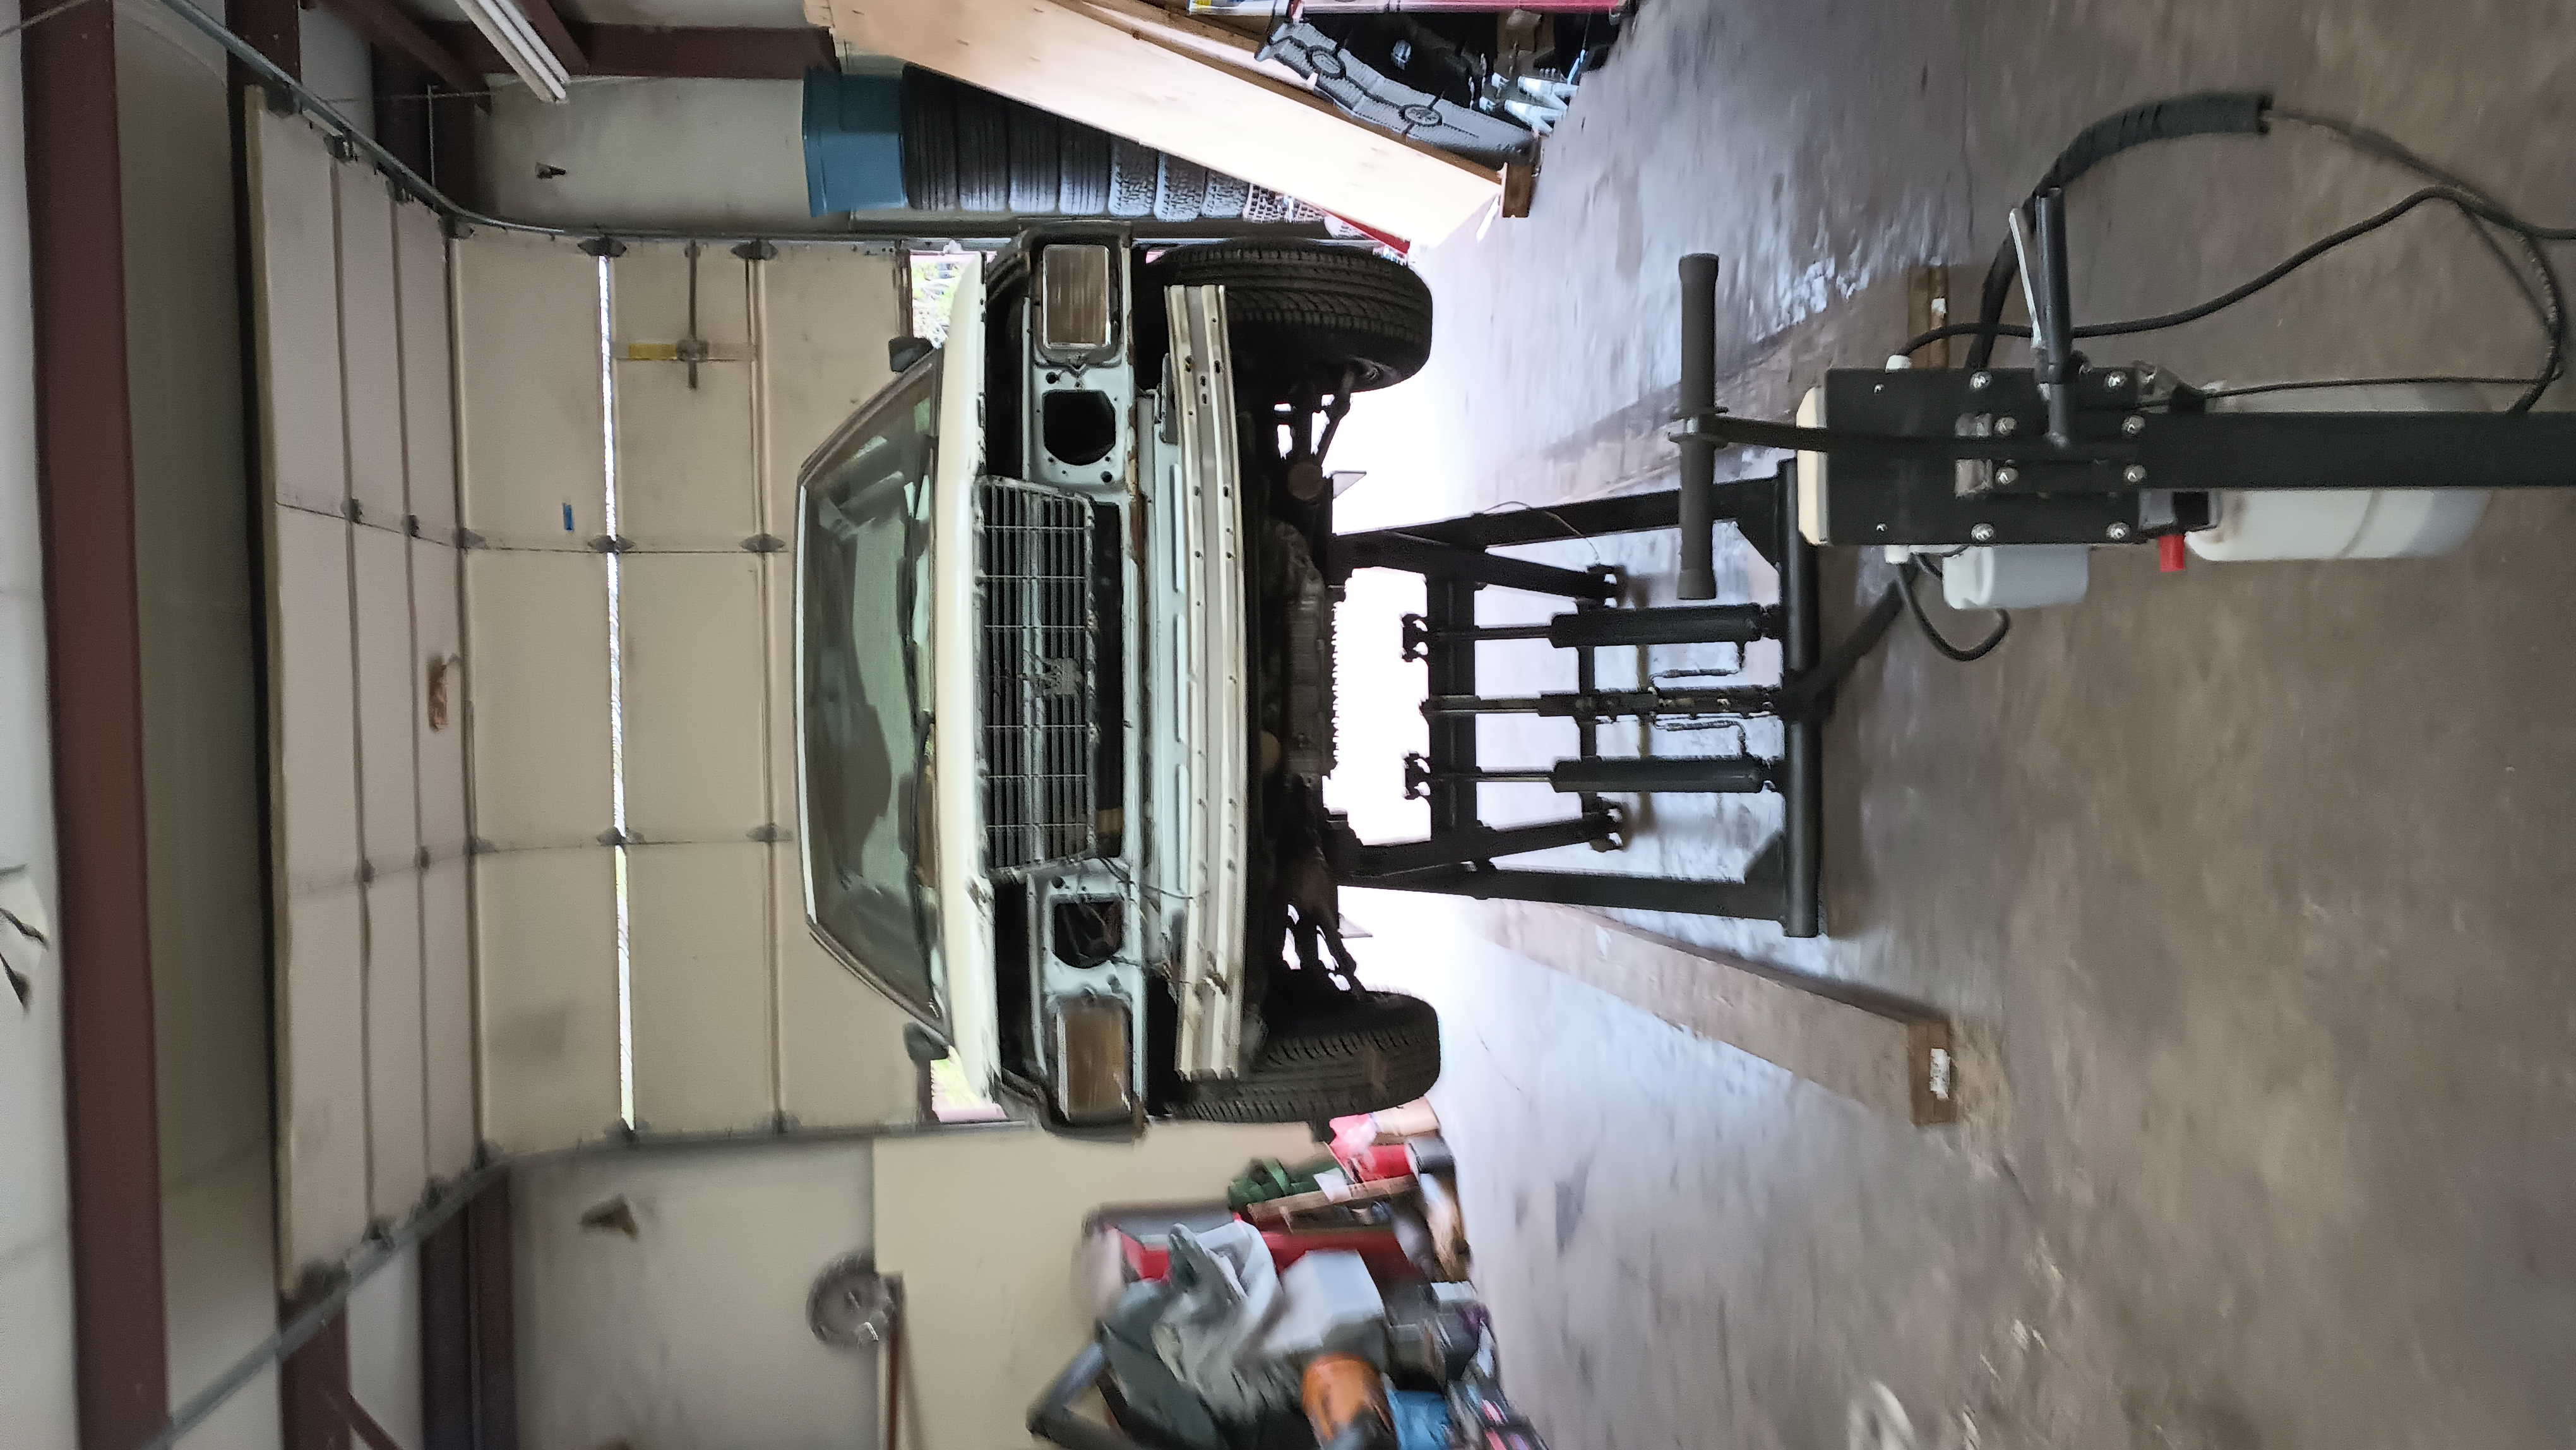
The first thing I wanted to check was that all the wheels were solidly-attached. I went around the car grabbing each wheel at 9 and 3, shaking, grabbing it at 12 and 6, and shaking again. One of the rear wheels had a bit of motion to it, but tightening the lug bolts corrected that. The front-right, on the other hand, had a lot of slop from side-to-side and it was coming from the steering. I got the tie rod boot off and found the source of the slop. While the tie rod itself was good and tight, the arm in the steering rack was flopping around.
There is supposed to be a nylon bushing there that supports the steering rod. I assume that it came apart at some point because I got a whole bunch of plastic bits that fell out of the boot when I removed it. It looks like some of the bushing stuck to the rod as well.
I got the rod cleaned up
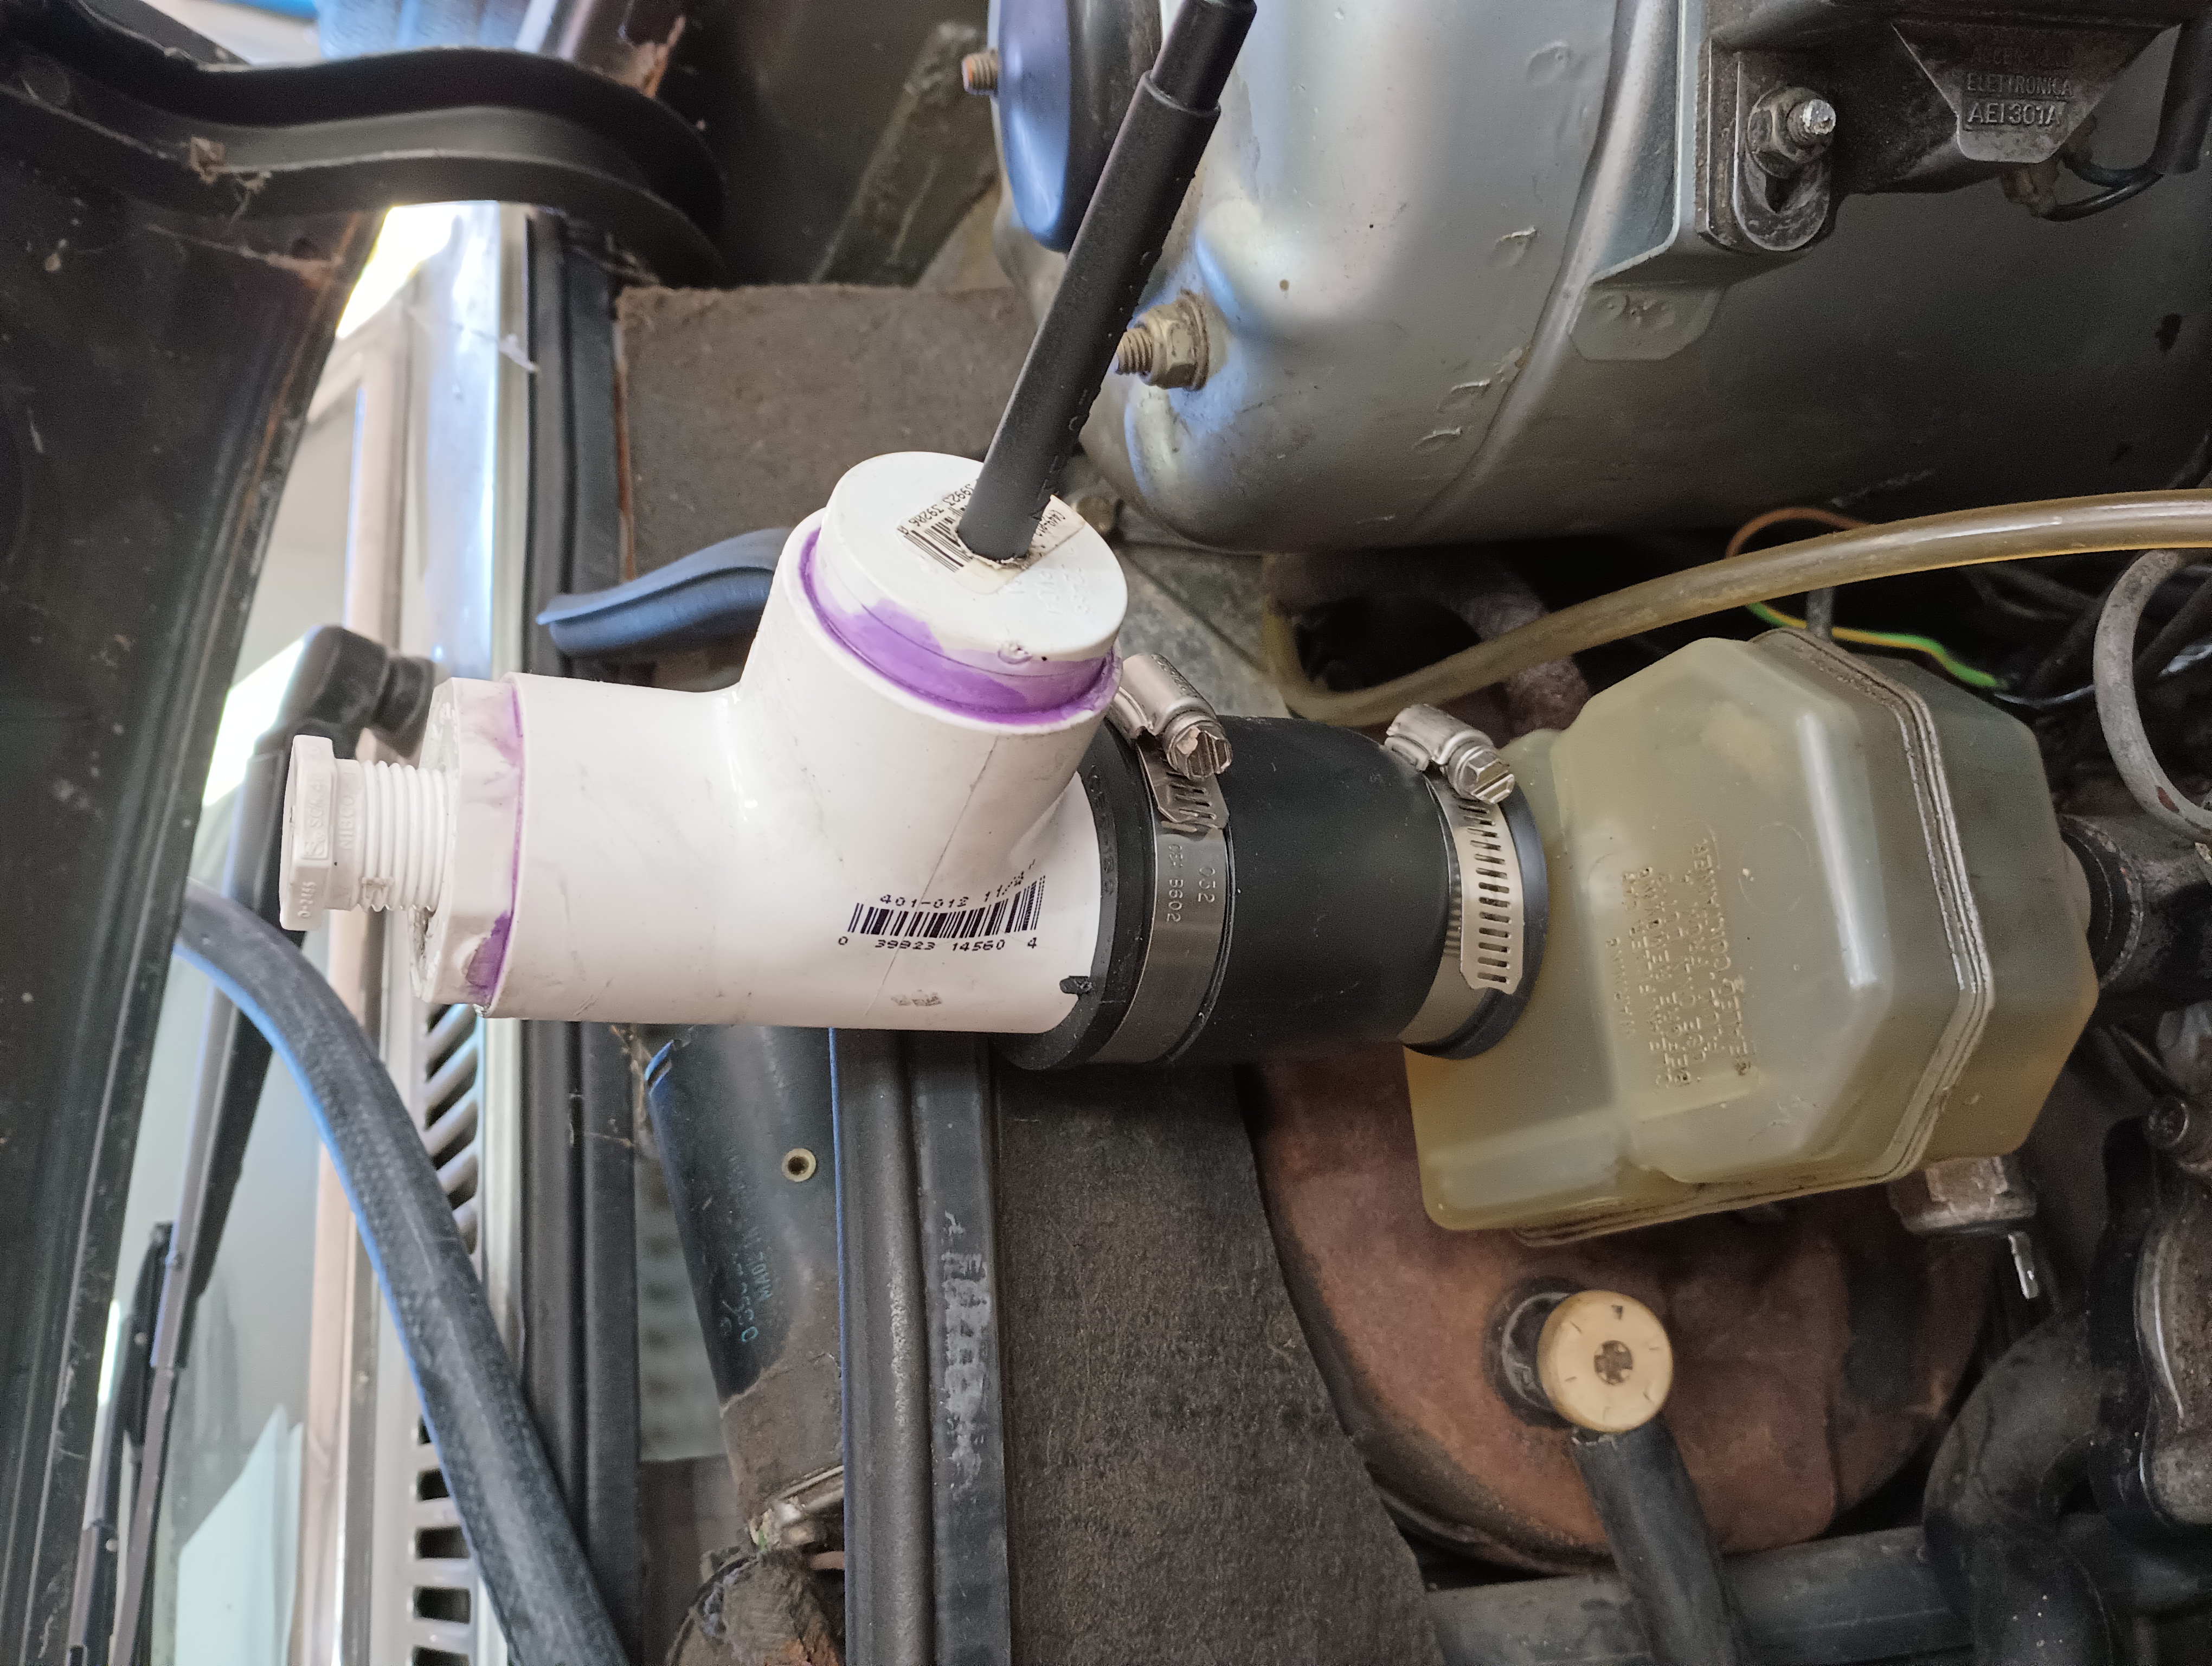
And set about trying to come up with a new bushing of some sort. I assume that the bushing is available in a steering rack rebuild kit of some sort, but I’m running out of time to pull the steering and rebuild it. A trip to the hardware store later and I had one of these:
That’s a 1″ PVC fitting that is just a tiny bit larger in diameter than the ID of the steering rack. Bringing it back to the shop, I found the center, put it in the drill press, and hit it with a 1″ paddle bit to bore it out.
It’s a tight fit in the rack and the rod rides on it with close to zero slop. Using a grinding wheel, I rounded out the hex head, added some grease, and tapped it in with a hammer.

Now the pinion bearing in there is still a bit notchy and I think the rack needs a real rebuild, but for now I think it’s going to get me through.
While it was still on the lift, we got all the remaining clutch bolts tightened up since it’s a two-person job, and then we set about bleeding the brakes again. I had pushed fluid through with the pressure bleeder, but the pedal was still really soft. We did a traditional two-man bleed following the pattern in the service manual. There was still a little bit of nasty fluid left in there which we got out and there were also a few air bubbles left. Upon completion of that quick task, the brake pedal was feeling much more solid.
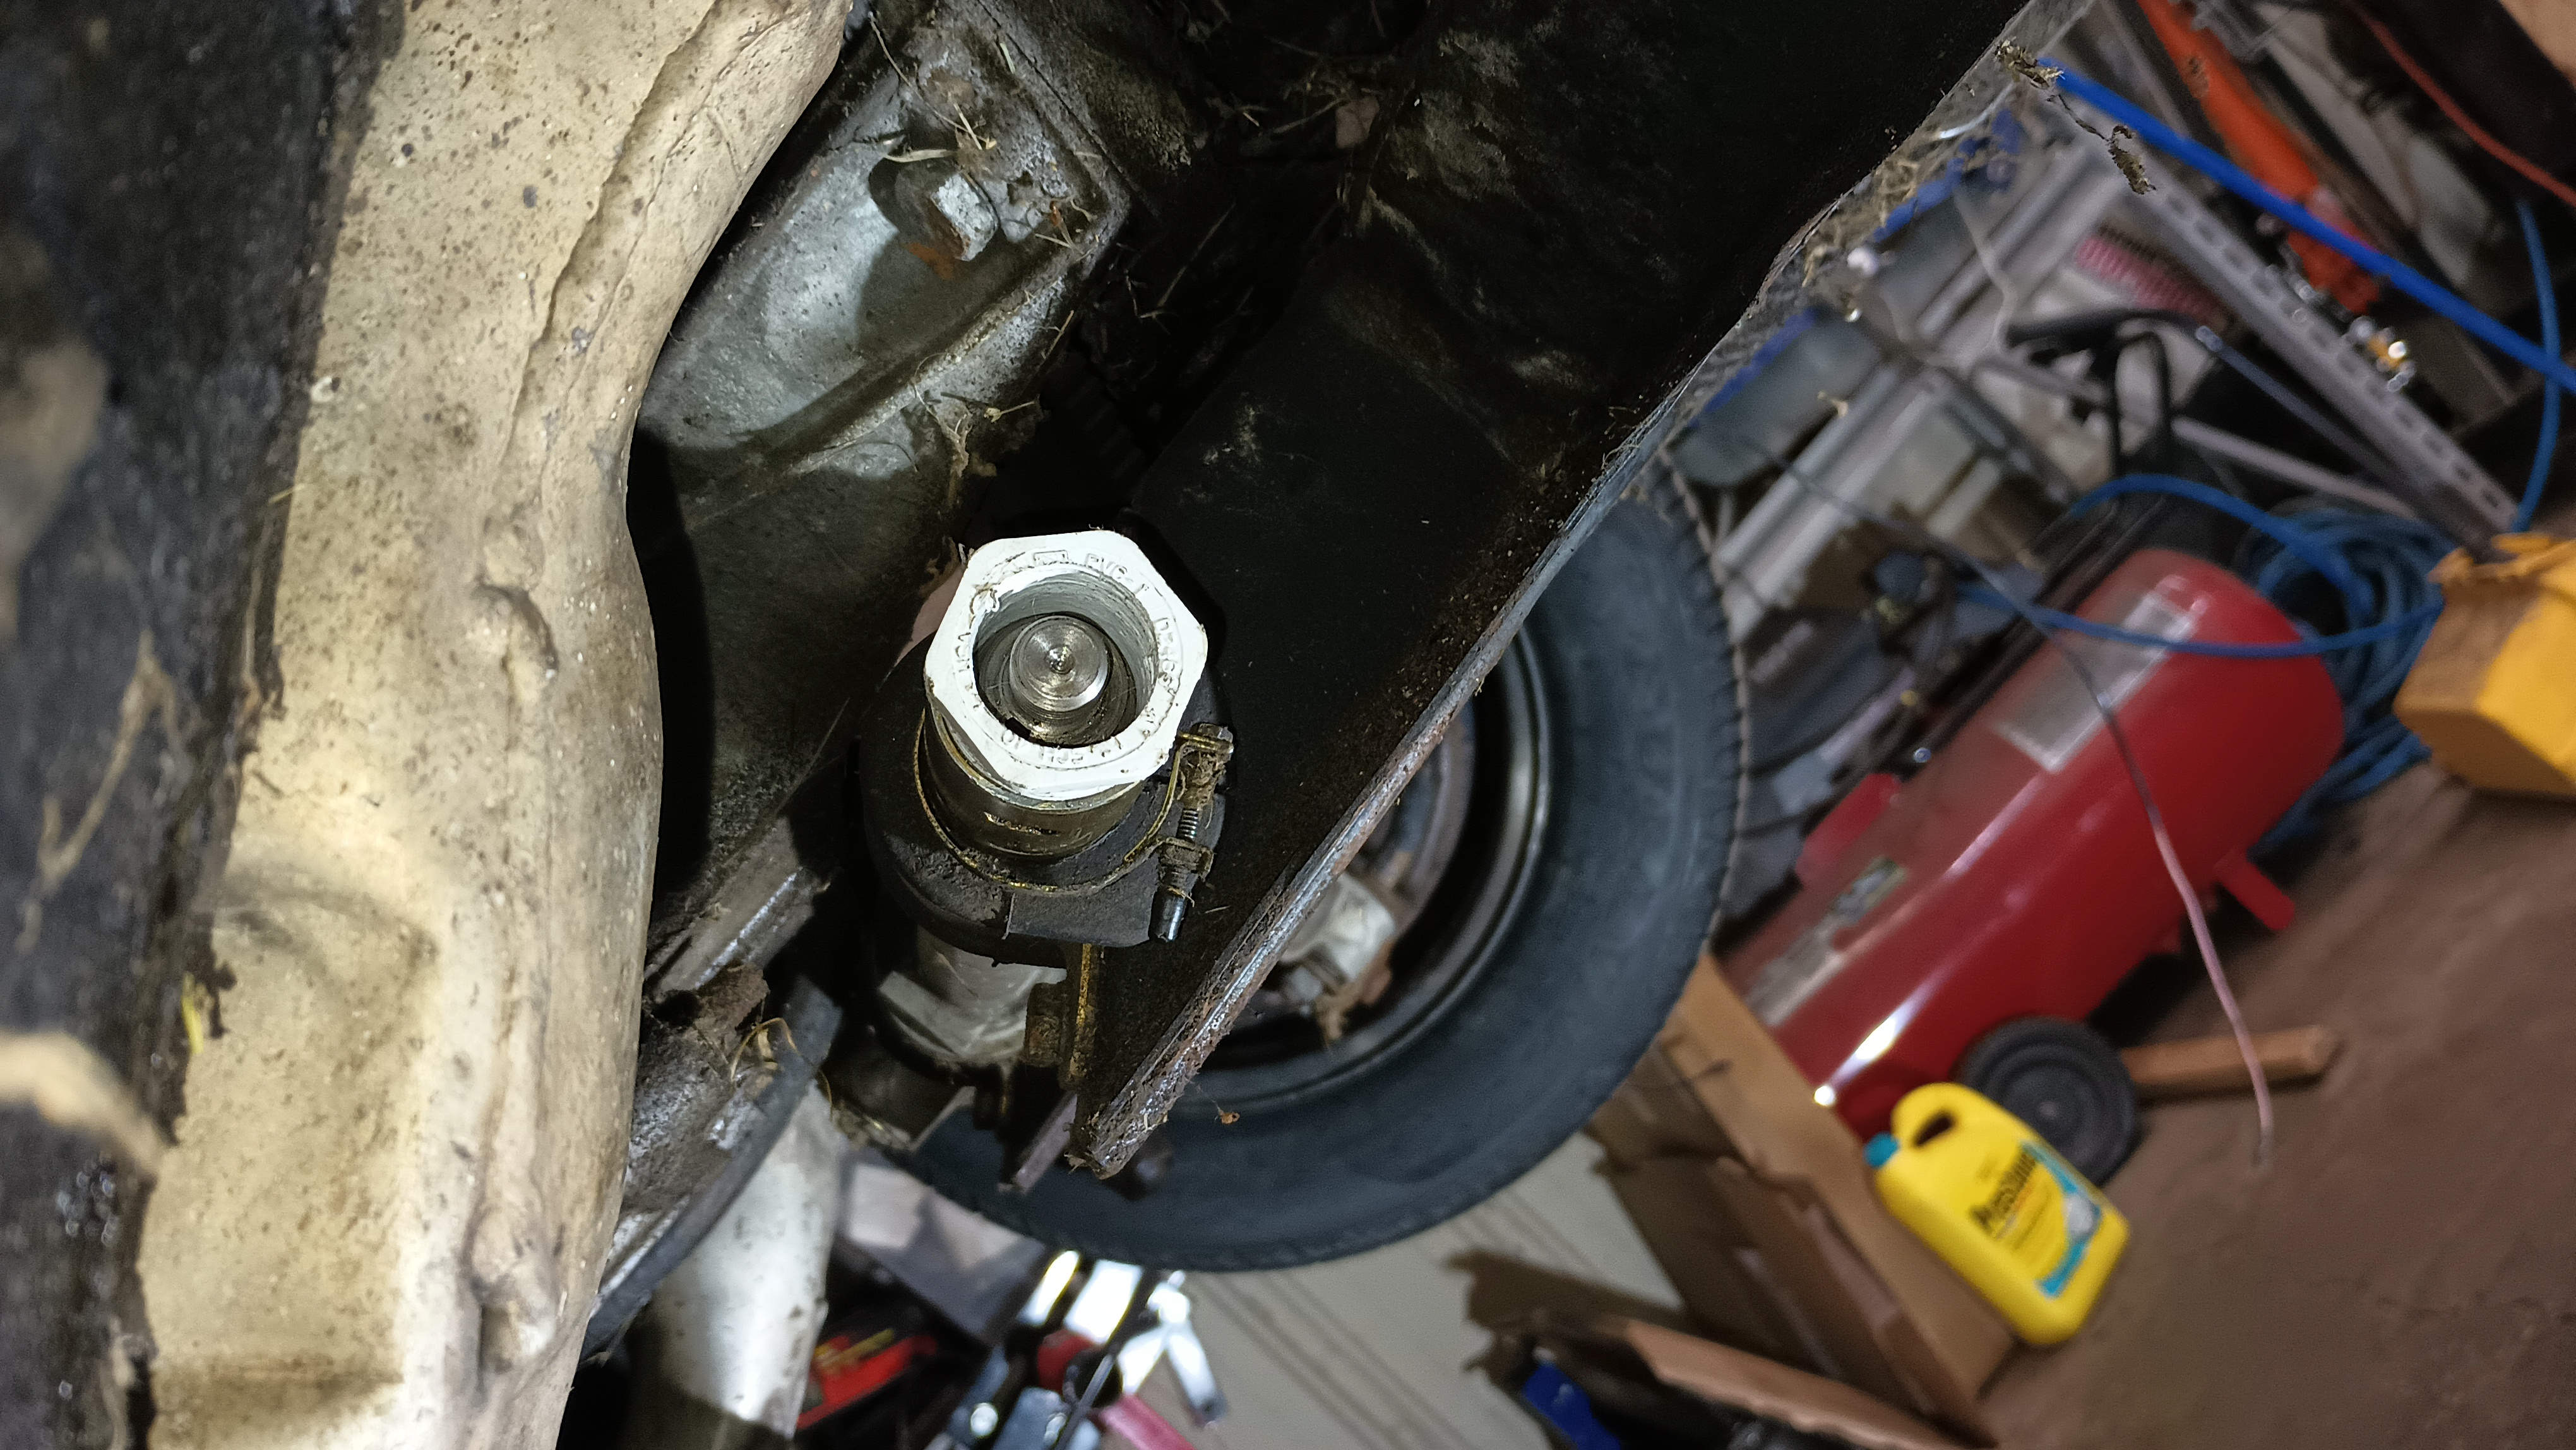
With the car up in the air, I did discover that there was a little bit of coolant that had dripped to the floor. It appears to be coming from the temperature sensor that screws into the radiator. I might be able to replace the o-ring that’s sealing it or I might just try to seal it with JB Weld. Before leaving for the night, I cleaned up the fluid from the radiator so that the next time I’m there I can see if it’s still leaking and, if so, have a chance at confirming from where.
Today I feel like I just sort of ran in place. I didn’t get to clear very many things off of my to do list and I’m absolutely at that hyper-nervous part where I’m not sure that this is going to actually work out.
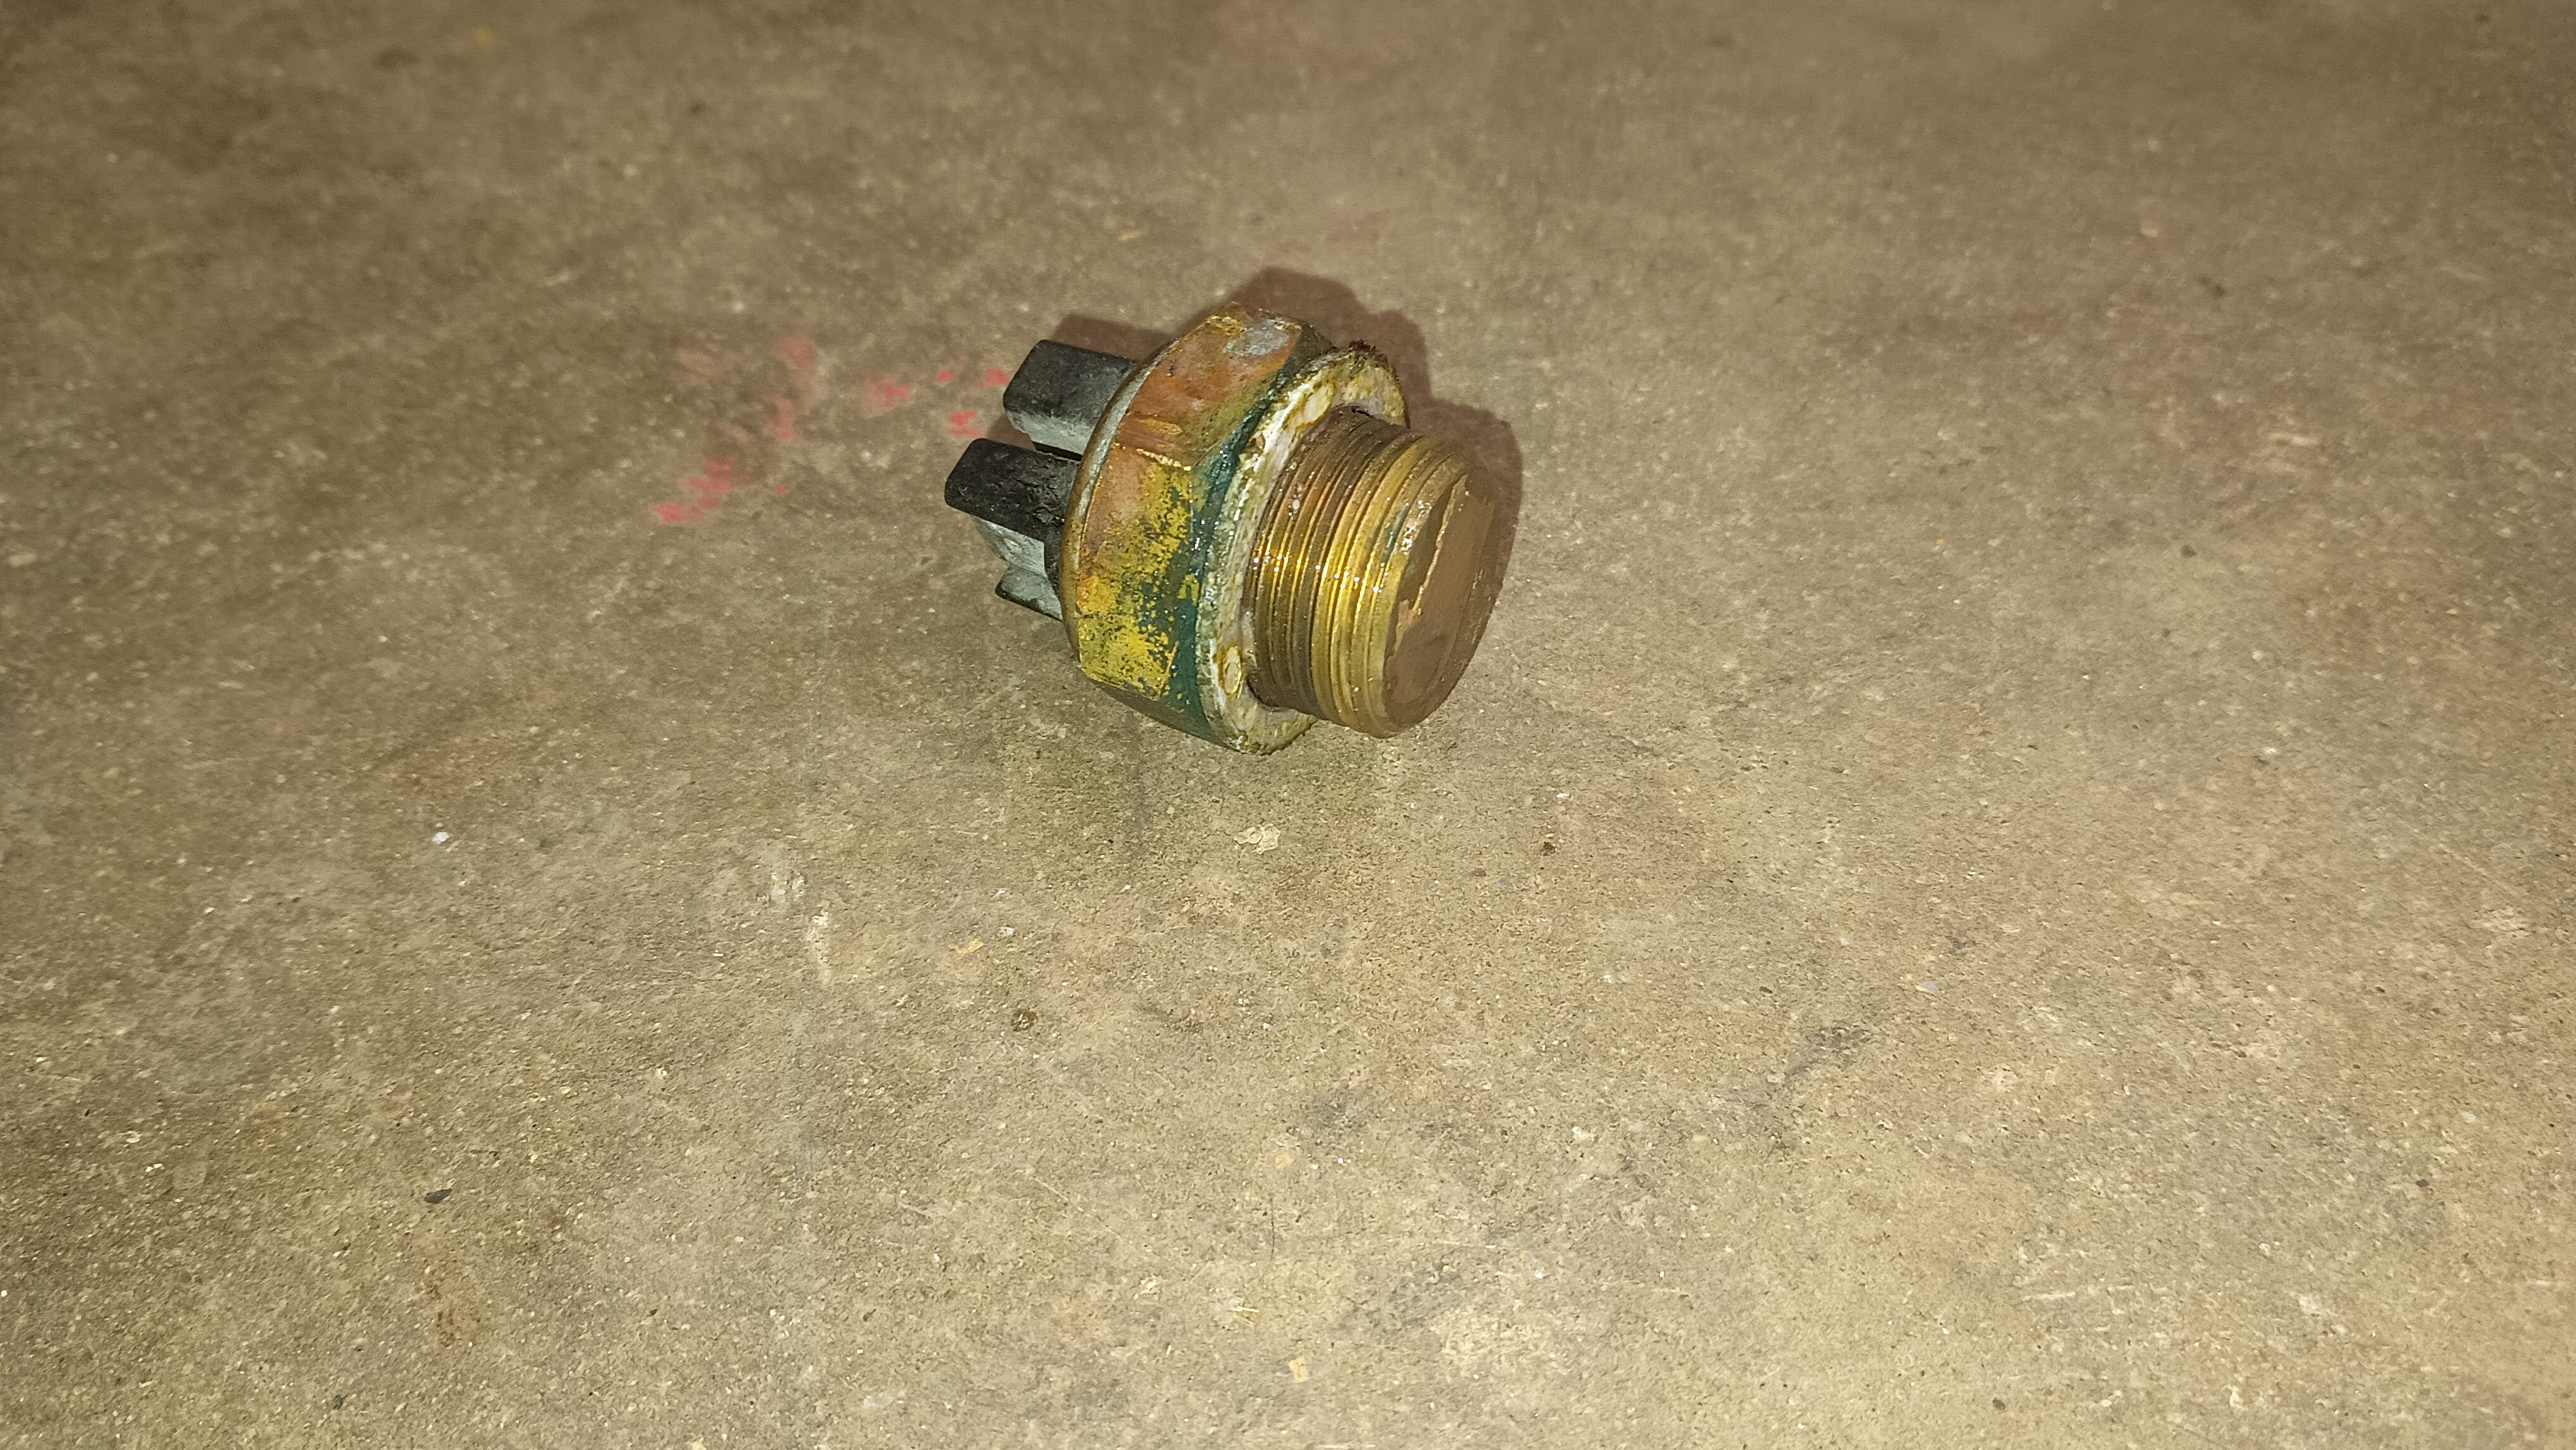
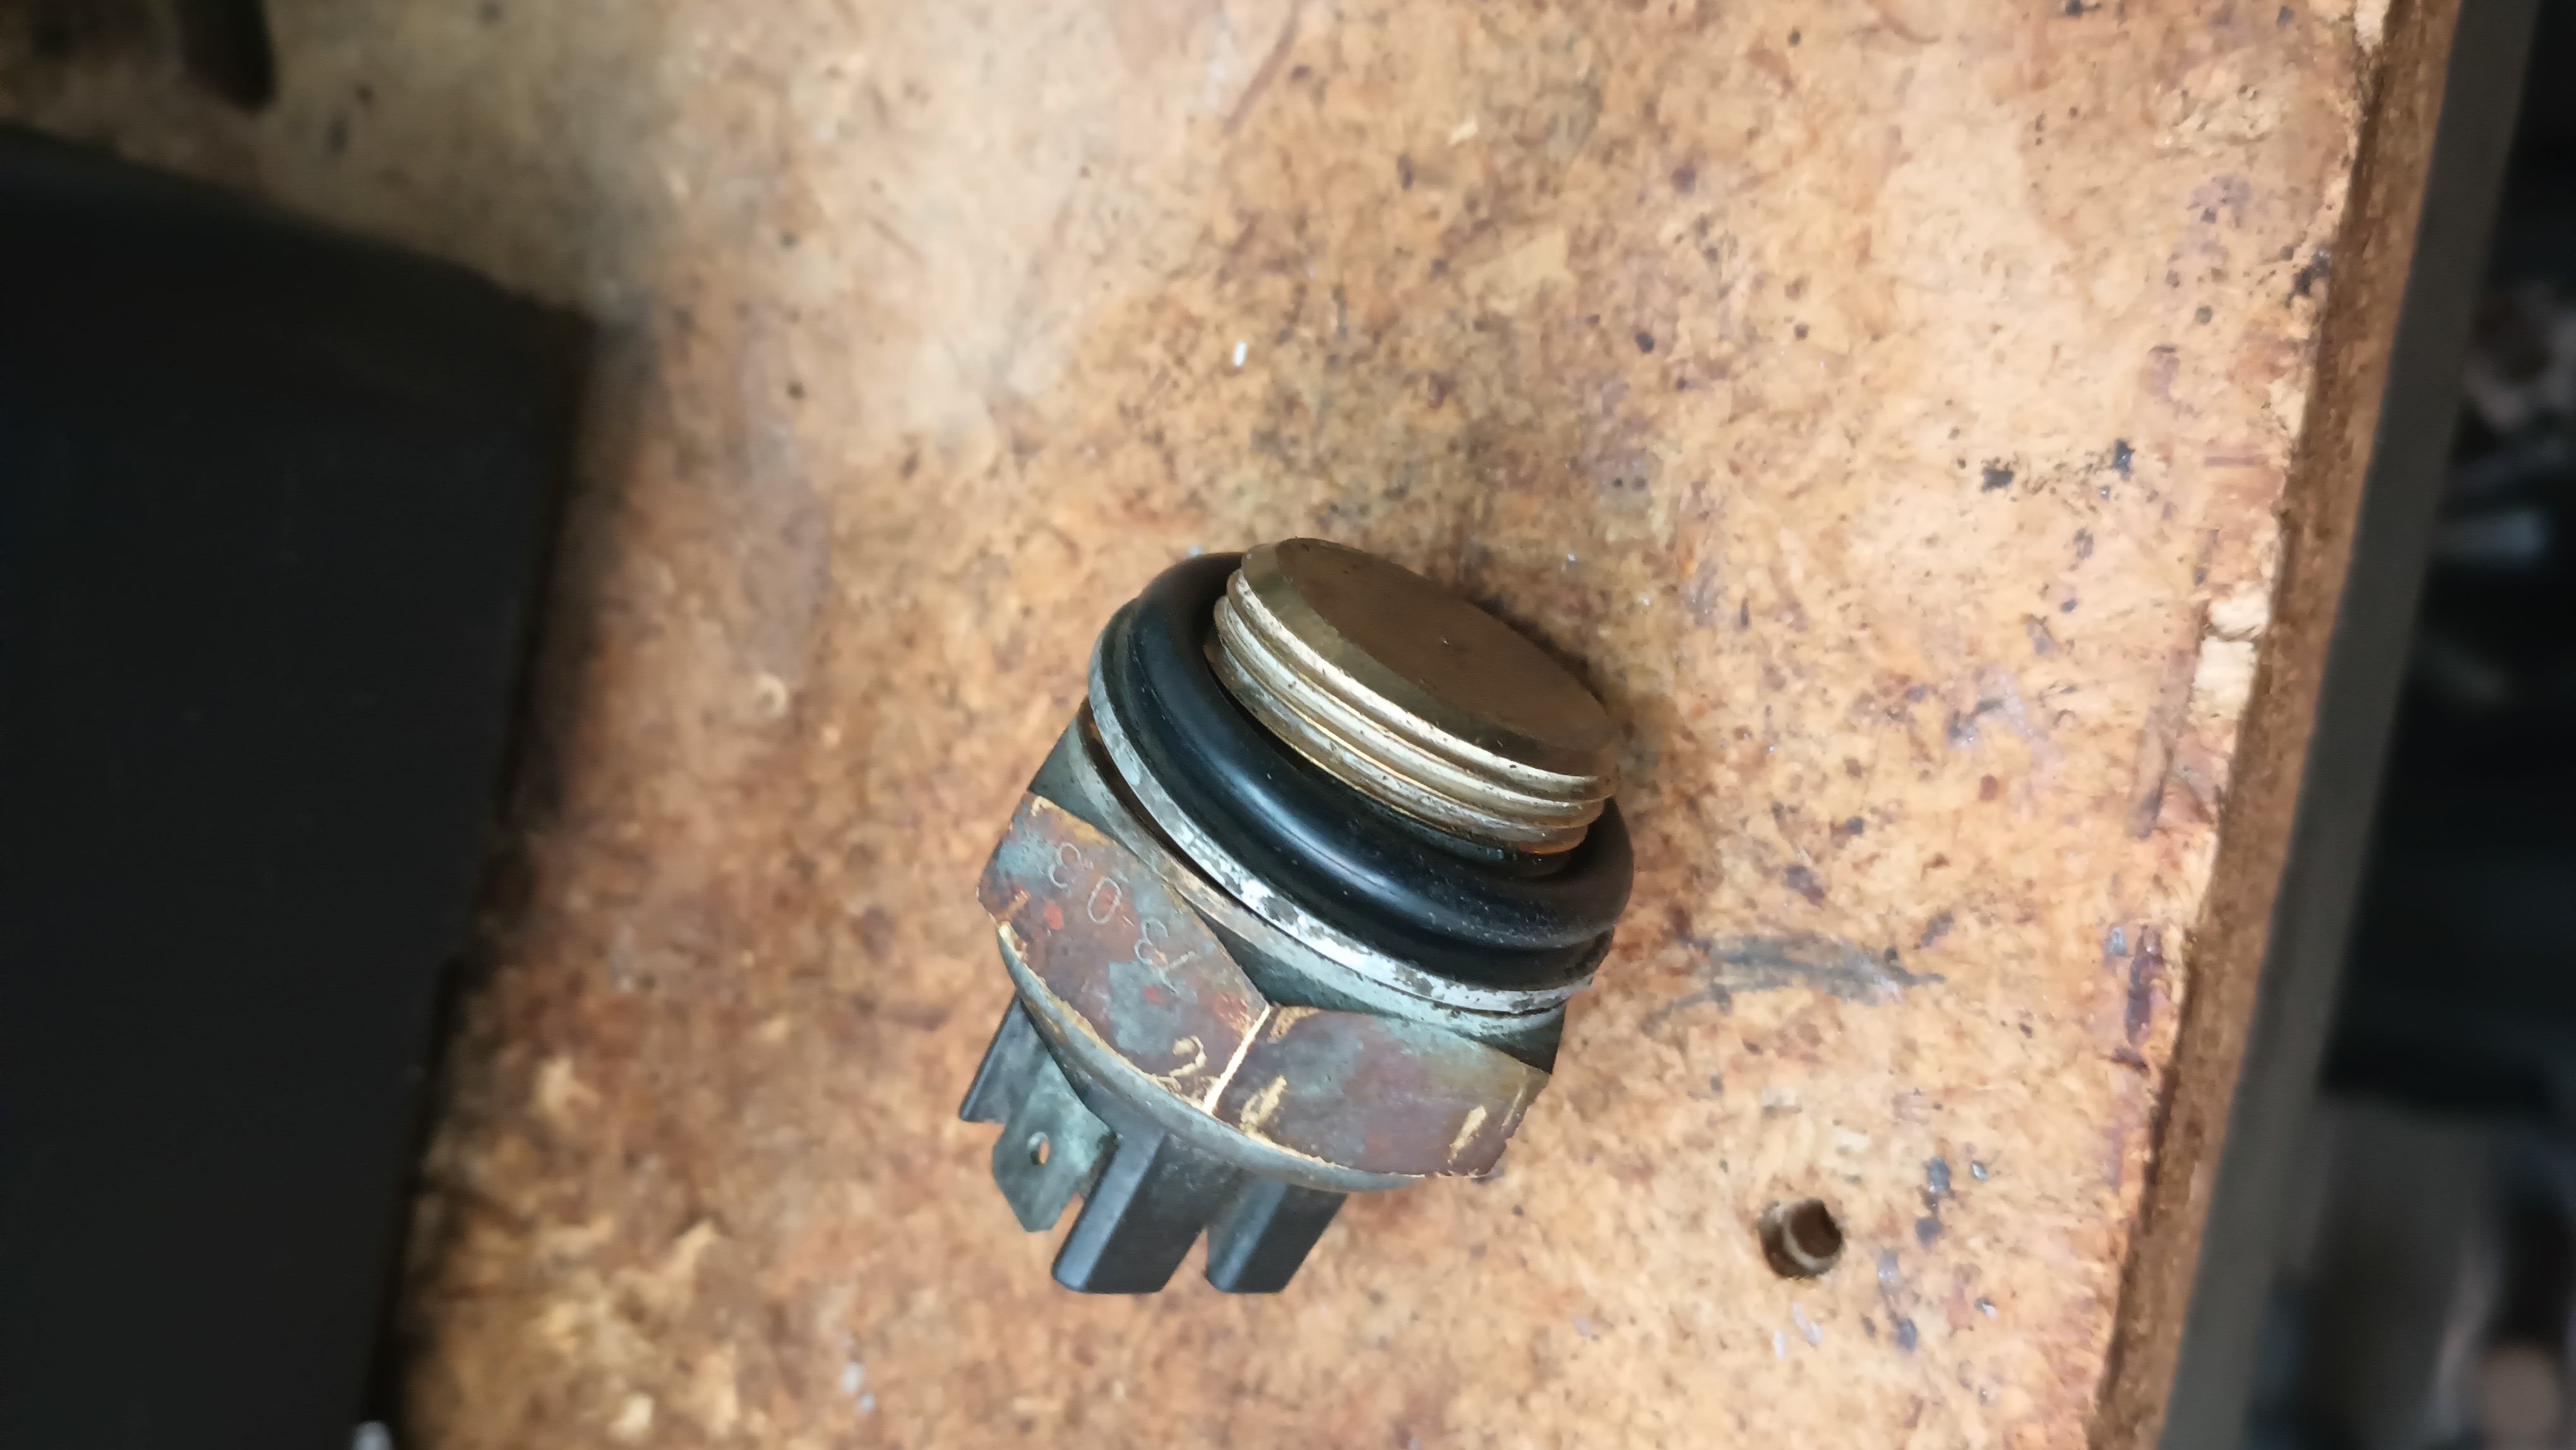
As previously mentioned, there’s a leak at the radiator and I was able to confirm that it is coming from the temperature switch for the cooling fans. After draining out the coolant from the radiator, I removed the sensor and verified that it is not working. I can get a new one for around $25, but I don’t think it will arrive in time for me to be able to continue testing, so replacing that switch is going to be a “later” item. For now, I need to seal it up. You can see that the sealing ring is a little grody.
I tried cleaning it up a bit and putting an o-ring on it.
That didn’t work. I’m trying a little bit of rtv right now in place of the sealing ring and the o-ring and if that doesn’t work, I may just put a coating of JB Weld around it to seal it. Or I might go ahead and make a bit of a larger order from Lenny at Auto Italia and just deal with knowing that I’m going to be leaking a bit while I test.
Moving on from that, I found an item that needed to be corrected but wasn’t on the list: The nuts holding the torsion rods to the subframe were pretty loose, so I torqued them down. Not worth a picture of that.
I stopped by the hardware store and got a bit of lawnmower air filter to make some filters for the valve cover breathers. While I was there, I got a big bin to store all the spares so that I could empty out the car.
Using some old scrap of exhaust pipe, I made a couple little tubes to go between the air filters and the low pressure charge pipes. I rotated the elbows around from their more flat orientation for the stock airbox so that the air filters will stand up and hopefully get some cooler air.

I also broke out the smoke tester and vacuum pump again. There’s a lot of smoke that comes from the secondary advance unit on the distributor and when I put pressure or vacuum on it, nothing seems to be happening. What’s weird about that is that when we didn’t have that connected before, the car didn’t run right at all, but once it was hooked up things got better. So maybe it is doing something after all, but that’s going to require more investigation at some point. I think that the vacuum portion can be removed from the bottom of the distributor, the bells can be opened up, and the diaphragms can be repaired.
Another sign of failure was that the fuel pressure regular does not hold a vacuum. It will pump up a bit and then fairly quickly drop back down. Fortunately, the car came with a spare and that one does hold vacuum. If that diaphragm is not sealing, then it’s very likely the fuel pressure is too high and also possible that extra fuel is coming in through the vacuum line. So I’ve swapped out the pressure regulator with the spare and hopefully that will help with the rich running.
Finally, I worked out how the rear bumper gets mounted and found most of the hardware to do so. I’m going to need a pair of M10x1.50 nuts to get the job done, but it should be a pretty quick job.
At this point, I need to start really planning out the time that I’m going to take to get things done. Cutting the numbers and other vinyl I can do over Easter while we’re traveling to see the in-laws. If the turbo rebuild kit comes in before we leave for that, I can also try to pull the turbo off and take it with me and do that on the road as well. I’d really like to wait for the plugs and wires to come in before I do any more testing of how it runs and drives but that may not be realistic. I’ve got 5 gallons of fresh 93 octane and a bottle of Seafoam that I’d like to start running through it to see if between that, and the fuel pressure regulator being replaced, things are any better.
Finally, I was able to track down how the boost control system works thanks to the diagram from the service manual:
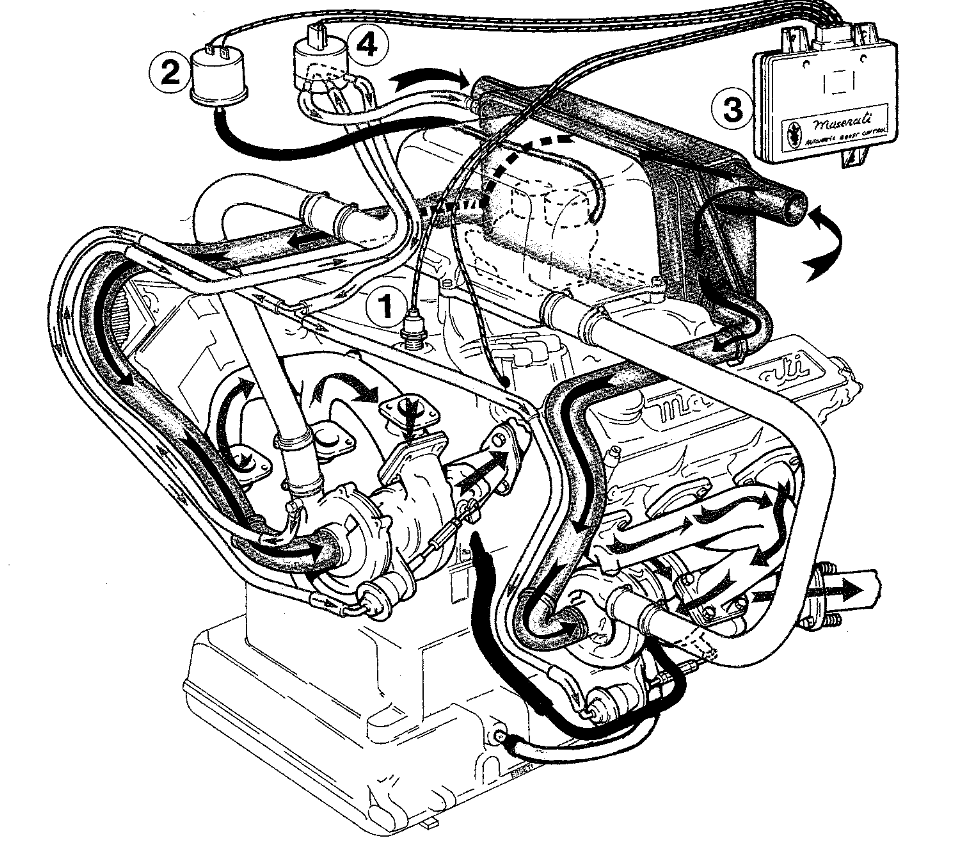
There was a line hanging off of the wastegate control valve (#4 in the above picture) that had a bit of tape over it and I wasn’t sure what the deal was. The way the system works, apparently, is that it gets its boost reference signal at the pressure transducer (#2) and watches the engine performance from the knock sensor (#1). The wastegate solenoid then opens up on command from the computer to push the little arms and bleed off pressure. But I think that the valve also works as the blow off valve, dumping the pressure from the right turbo, through the valve, and out what I have identified as the mystery hose. I may stick a little foam over that as a filter, but that is a loose connection that doesn’t need to be worried about at this time.
I had a list of things to do last night, but I did basically none of them, other than finding the giant wiring diagram in the packet of papers that came with the car.

I want to go about getting the fans set up to run to prevent overheating and work out what wires are for the headlights so I can have those ready. But I got distracted from that pretty quickly in my quest to try to make sure the ignition timing is set correctly. Because the timing marks are on the flywheel (!) I decided I wanted to try to set the timing via vacuum readings. When I popped the vacuum line off the fuel pressure regulator, though, I got a steady stream of fuel. Bad fuel pressure regulator. This failure mode is interesting to me because it holds a vacuum with no problem, but it still will suck fuel through the diaphragm.
I had already switched to the spare regulator, so I first tried re-sealing the original one with fuel-safe RTV, but that wasn’t the problem with it. The membrane itself was porous and allowing air to pass through. So I needed another membrane.
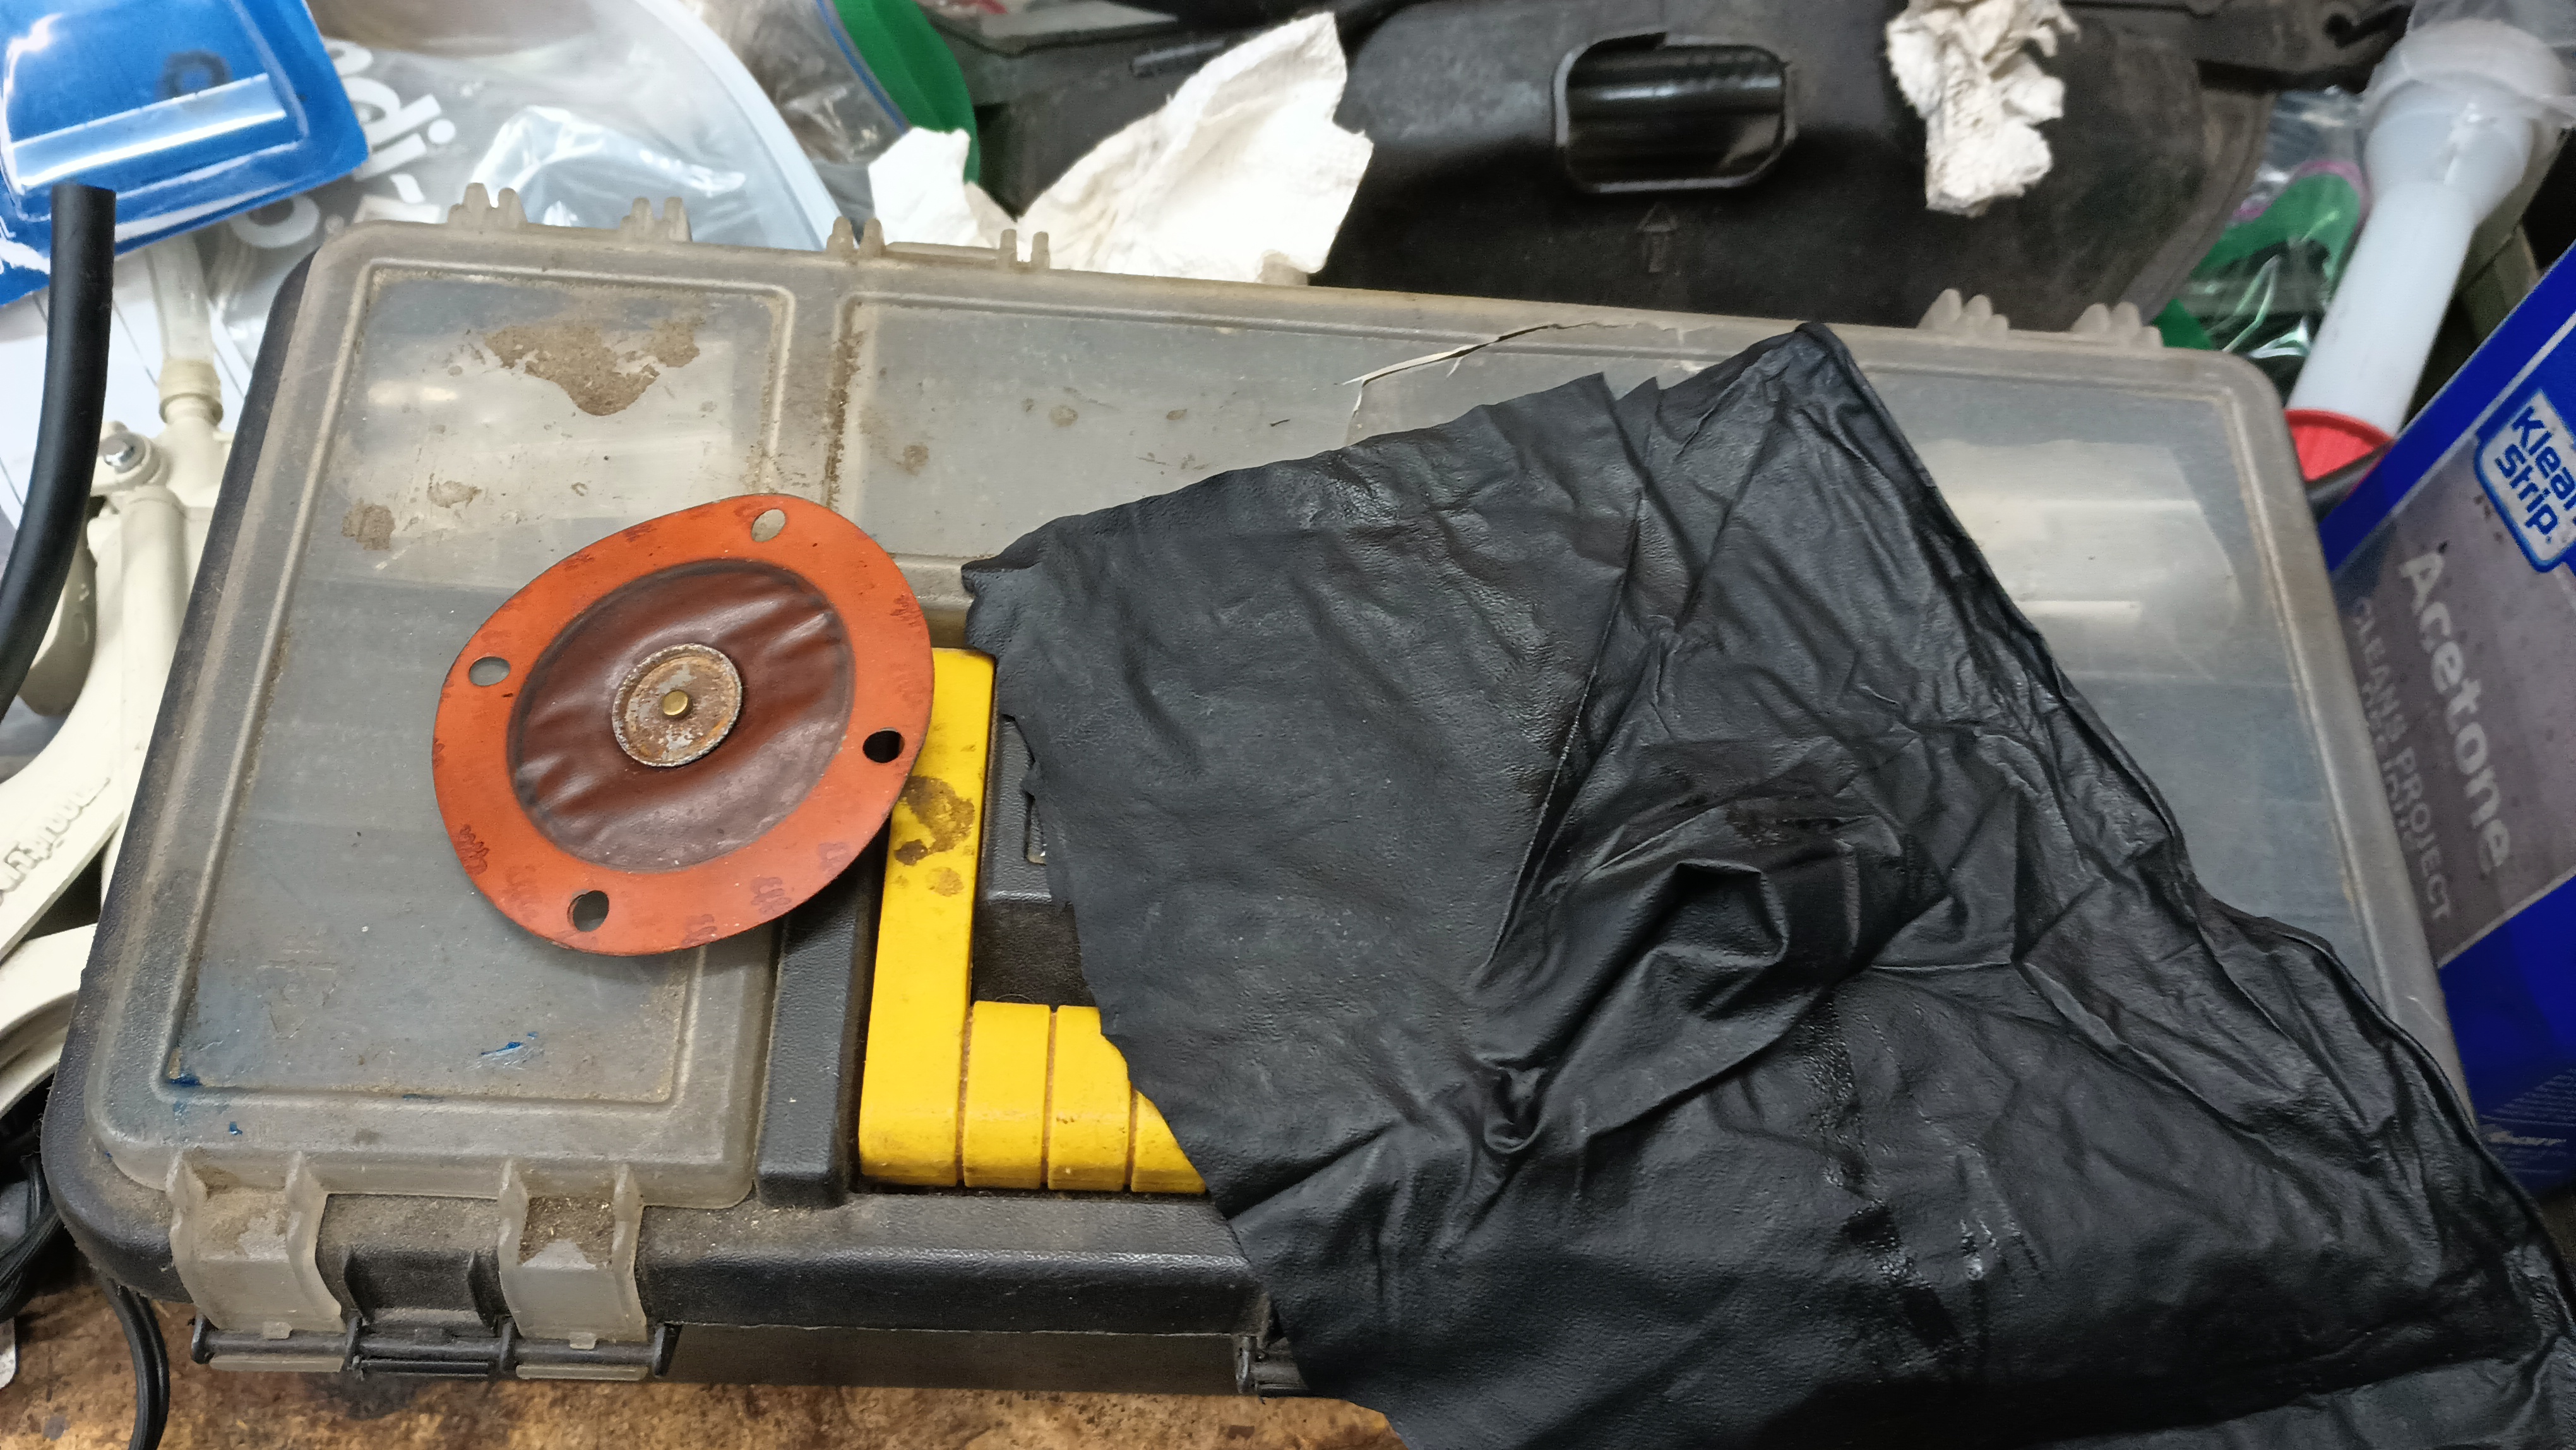
Nitrile rubber is fuel resistant and I just happened to have an old nitrile glove hanging about in the trash. Originally, I wanted to completely replace that membrane, but I couldn’t figure out how to remove that center bit. I tried to press it out, I tried turning it, but nothing seemed to be working. So I went to the air side of the housing, put the spring in, and stretched the glove over it.
I dropped the failed membrane on top of the glove, added the fuel-side half of the regulator housing, and put the screws through.
Installed back on the car to test and no more fuel leaking through the regulator!
I’ll clean up the glove and bolt it down later.
That problem solved, it was still running rich. Before making an attempt at tearing down the carburetor, I remembered hearing that the main cause of carb rebuilds was timing, so I went back to my original task of setting the timing. I put the car up on the lift, hooked up the timing light, and peeked underneath. As expected, the little marks on the flywheel were basically impossible to read, so I put a little white mark at the 15 degree line with my paint pen.

There’s supposed to be a plastic cover over that with a small inspection window and an arrow smack in the middle of the car that indicates where one is to read the timing. While I do have that cover, it is not attached to the car and, frankly, I’m not entirely sure how it’s supposed to be installed with the subframe and the steering rack in place. Add that to the list of “problems for later”.

At any rate, with the timing mark now visible, I got the distributor twisted around to put the timing at the specification of 15 degrees BDC plus or minus 2 degrees. I was hoping that would clear up the richness, but it is still pushing a little much fuel. The upside, however, is that it is running really smoothly. There’s no bogging down at load on throttle at all and it just idles beautifully. I have no way of checking fuel pressure right now, but I suppose the only thing that could be causing the issue other than the carb needing to be rebuilt is if that little seal on the regulator is leaking, preventing it from sealing up the flow.
With all the other rubber seal problems I’m having, though, I think the simple answer is that the carb just needs some love.
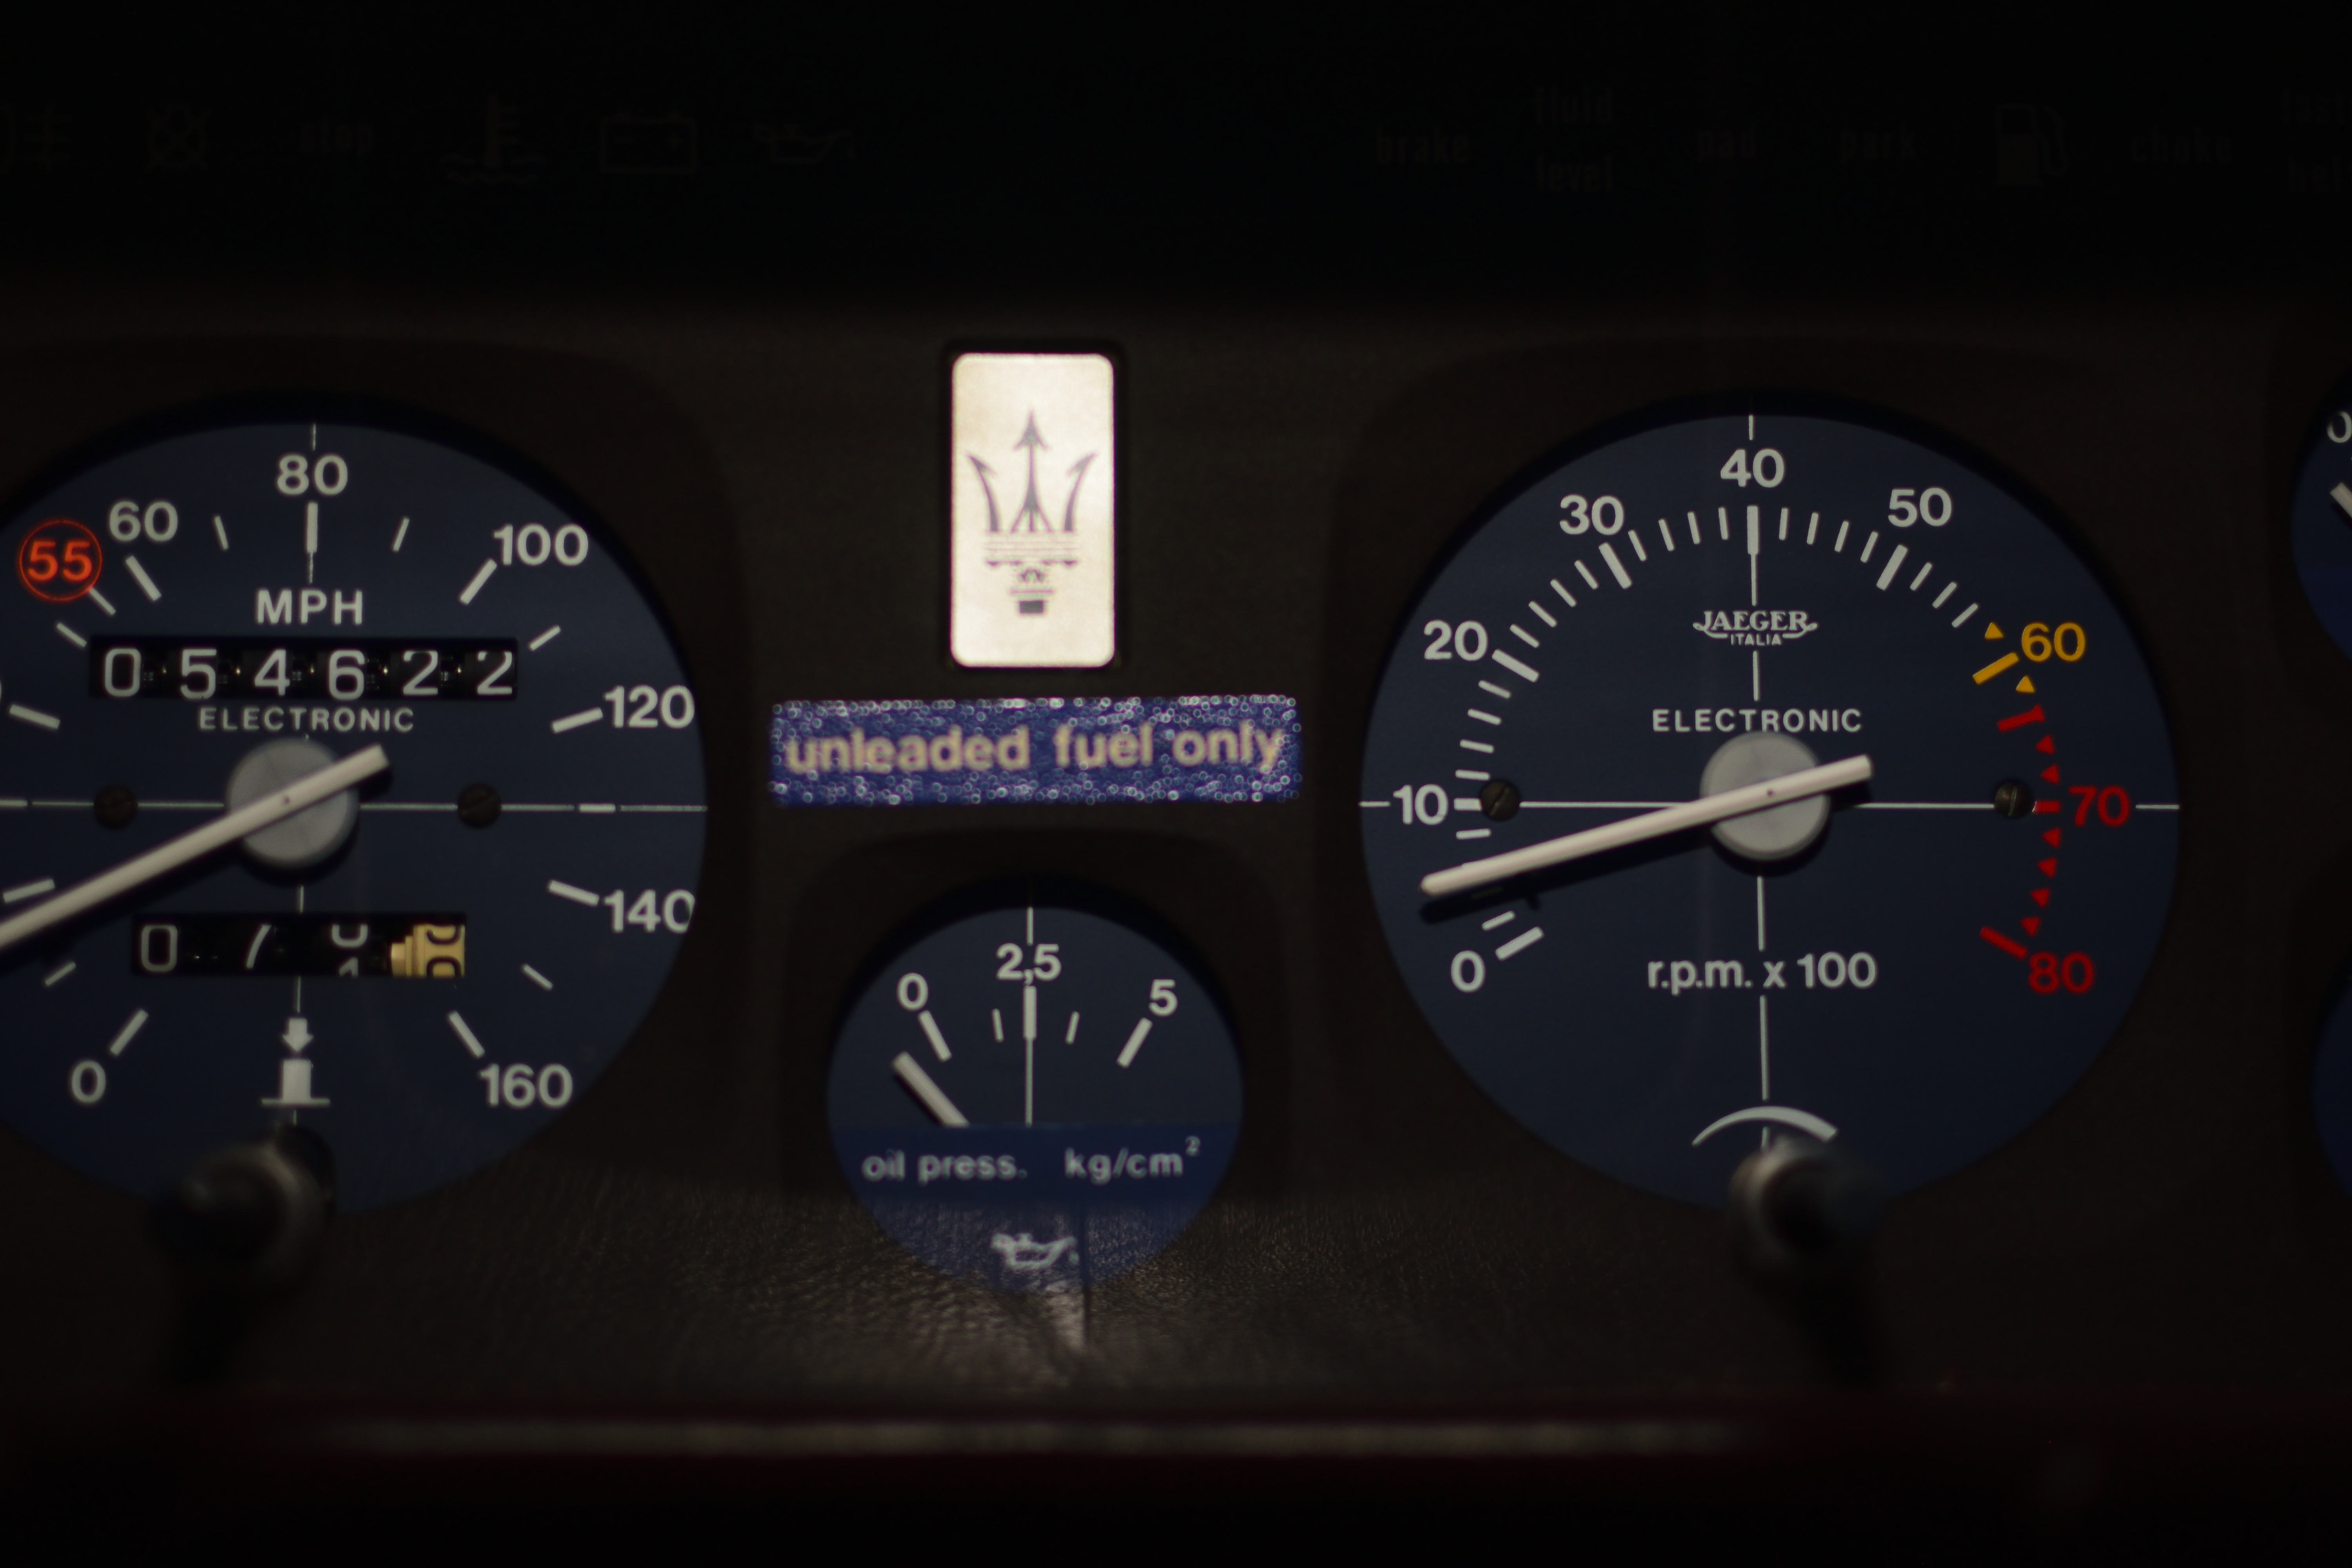
On a smaller note, I did determine that the temp gauge in the cluster is operational. I don’t know how accurate it is, but as the car idled, the gauge came up and started to move. The boost gauge remains non-functional as I need to find the hose that provides its signal and get it hooked up. There is also another coolant leak – this time it’s the lower end of the rubber hose that goes between the engine and the metal coolant pipe to the bottom of the radiator. It’s a pretty minor leak, but still should be addressed since it might become less minor when the system is at full pressure! I’m going to attempt to put another hose clamp on it to see if it will seal up that way. If that doesn’t work, it’s a pretty simple elbow that I may have laying about or at least won’t be tremendously expensive or hard to find.
The car was running so well, I decided I needed to take it apart again!

Okay, I guess that’s not entirely accurate. The car was definitely running too rich. I was getting a pretty constant stream of smoke out of the tail pipe that was absolutely unburned fuel and a few minutes of idling and revving in the garage had the brand new plugs pretty black. While I suspect that I’m going to get at least a little smoke out the tail pipe from the oil that’s getting by the turbo seals, I don’t want to wash down the cylinders with quite that much fuel. And besides, if it’s running this well with an imperfect carb, how much better will it run after I’ve monkeyed with it?

I’ve got this carb kit and I’m going to figure out how to use it! I’ve taken the carb off and brought it with me to my in-laws so that I can work on it in my downtime here. When I give the throttle linkage a rapid push, I can see that the accelerator pump is gushing fuel into the chamber instead of spraying it. Every other rubber diaphragm that I’ve come across in this car has been failed, so it’s a good bet that this one is also failed and causing my problems.
Before heading out for the weekend, I also pulled the distributor out (after carefully marking it, of course) so I could remove the advance/retard mechanism from the bottom of it. Using a screwdriver, I bent the crimp back to get a look at the diaphragm and, no surprise, it has several cracks in it which is why it isn’t holding pressure. I don’t know how I’m going to go about fixing it quite yet, but that might just get some silicone spread over it to seal it up. That’s another thing to work on while we’re visiting relatives.
On the cosmetic front, I realized that each of the headlight brackets could only fit into one particular spot based on where the mounting studs are and where the adjuster screws are located. All of the headlights were bad – one of the low beams had a good high beam portion, but that was it – so I pulled them out and tossed them. Replacing the headlight bulbs requires the headlight trim to be removed, so before I go through all the work to get those installed, I’m going to go ahead and put four new bulbs in.
The last thing I did before leaving town was to check out the wiring for the cooling fan. As a worst-case scenario, I’ve got a couple wires with alligator clips on one end and spade connectors on the other that will connect to the cooling fan harness. So once the car is running, I can pop the hood, hook up the clips, and then have working fans. I’d like to maybe re-do that with a thicker wire and a fuse, though.
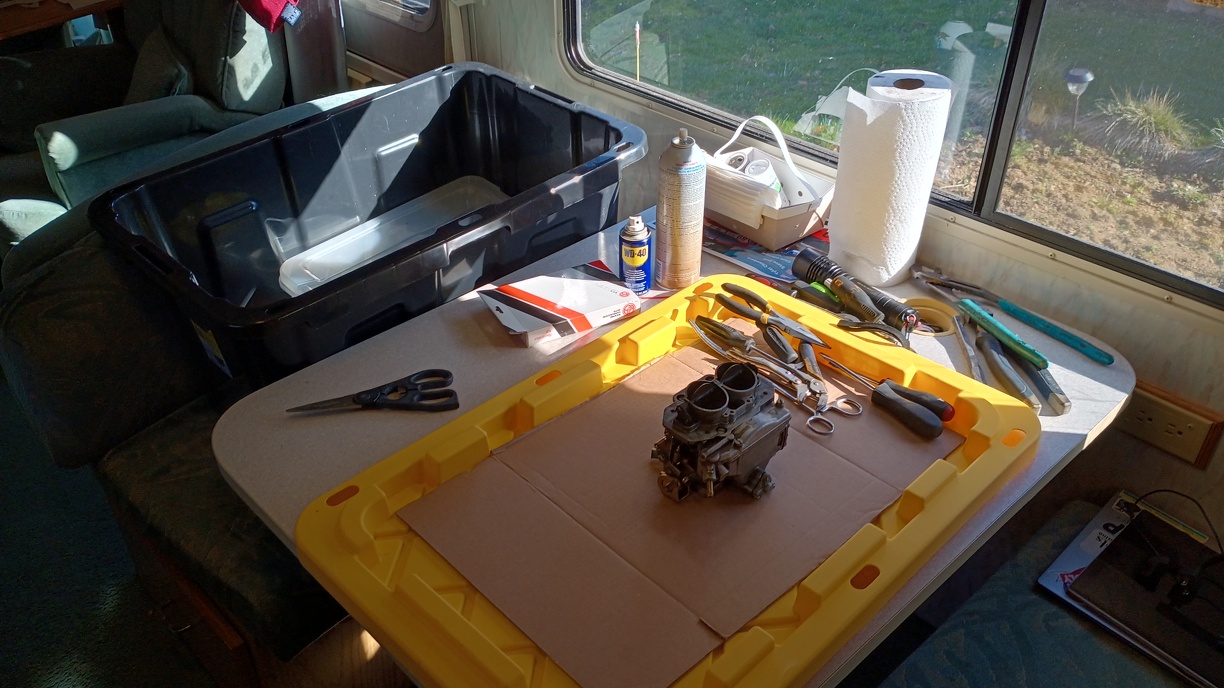
With only a few days remaining until I need to be southbound to Gainesville, I sat down on the RV at my in-laws house and started taking the carb apart. Now, you need to understand that I’ve never rebuilt a carb before in my life, so I don’t have the slightest idea what I’m doing.
The diaphragm in the accelerator pump was definitely in need of replacement

This other diaphragm also was quite leaky.

And the third diaphragm on the carb was also torn in a couple places. This is the little vacuum operated device that is supposed to prevent flooding when the choke is on all the way.

After cleaning things up a bit and putting in the new bits, I had a hopefully rebuilt carb to put back on when I get home!

In the meantime, I also opened up the vacuum pots for the boost/vacuum advance and repaired them. This becomes important later.
This will be the final update of the build thread before I leave for Gainesville. As of right now, the car is strapped down on the trailer and things are packed up and ready to go. It’s been a heck of a week so far though!
After getting back from the in-laws, I got the carb re-installed, but fuel was spraying everywhere. As it turns out the fuel line that goes into the carb was all torn up.
A new bit of fuel hose was procured – I needed about 17 inches’ worth – and then I used some blue Permatex to put the carb hat back on after cleaning up the mating surfaces.

I cleaned up the plugs, replaced the plug wires, and it started up and ran well. Except I was getting some steam from the radiator as well as getting fairly heavy “stuff” in the exhaust. This time, though, the exhaust was clean when it first started and it didn’t smell of fuel. But as the car warmed up, the “stuff” increased in volume. Trouble.
Fearing that there might be a busted headgasket, I put in a can of Blue Devil headgasket repair and followed the instructions. I was supposed to let it idle for 50 minutes, which we did. Everything was going fine until about minute 47 when the car sputtered and then died and wouldn’t restart. Checking the plug wires with the inductive timing light, we confirmed that there was no spark. With severe weather heading our way, we closed up the shop and went home. Later in the evening I came back out and started to take a look. When I pulled the distributor cap off, I discovered that there was a wire that was crimped between the cap and the body of the distributor. Now when I took the distributor off to do the advance repairs, I noted that wire was pinched and thought I had fixed it. But I did not, in fact, fix it.

After cleaning that up, wrapping it in tape, and carefully routing the wire to its proper channel, the car fired up immediately!
Next, I needed to clean up some of the appearance items.


The headlights were installed, things got cleaned up a little, a matte white vinyl wrap was applied, the oil was changed, and a couple zipties were added to hold the tie rod boot in place.
Now the car is loaded up and we’re soon on our way to Gainesville!

Okay, well that brings us to today!

We've spent the morning doing some cleaning and polishing. If you are here, I've got a Sharpie and the build book sitting over there so please sign the hood and/or fenders so we can prove - with witnesses! - that the $2000 Challenge has finally seen its first Biturbo!

Surprise BiTurbo build thread on Challenge Friday is absolutely berkeleying legendary stuff! I love it!

wae said:Once the Challenge is over, I have three possible outcomes for the car:
- Sell it as a running car for at least what I have in it
- Keep it for occasional drives and car shows
- Remove the Maserati drivetrain and swap in something else to have a relatively reliable classic to drive around
- Rallycross
Option 4 sounds great.
You'll need to log in to post.


