
I have too much stuff in the garage, so why not one more specialty tool? With a 20% off coupon in hand, I marched down to Harbor Freight and picked up their blast cabinet.

I've been casually shopping for a blast cabinet for a while to clean up the parts that are too intricate for wire wheels and my patience for hand cleaning. Sadly, the used market has been slim pickings - most folks are selling old HF cabinets for full retail, or serious shop equipment for serious shop equipment funds. So... knowing that this cabinet is suboptimal out of the box, I expected to do some upgrades out of the box.
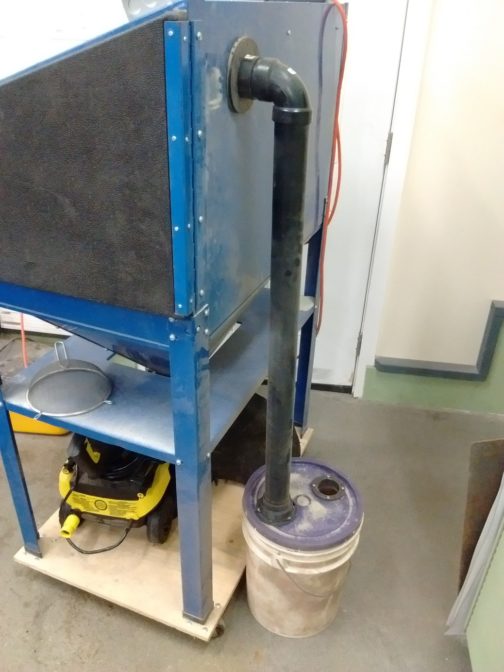
Step 1. Assembly. I mostly followed the instructions, but caulked every joint, and the bolts/nuts from the inside. The supplied foam tape will still leak and make a mess - now's the best time to prevent it. I just used what I had lying around, about 3 tubes worth. Don't skimp. I duct taped my old shop vac up to the vent port - will upgrade to dust separator in the next upgrade phase.
Step 1A. Everything is better on wheels. I grabbed a cheapo furniture dolly to harvest it's casters, screwed em on some scrap plywood and Bob's your uncle.
Step 2. Does this work? Nope. Well, I didn't give it the most fair shake. I had some walnut blast media that's been sitting open in a bucket for 6 months. The siphon tube didn't really siphon, and the little blast media that made it to the gun clogged. None of this was unexpected. I tried a couple methods to increase the siphon effect - but to no avail, so gravity feed conversion here we come.
Step 3. From suck to blow. This step will get broken up into gravity feed, gun air supply, and moisture control.
3A. Gravity feed. You can buy kits on ebay, but I was impatient and found a good solution on youtube. https://www.youtube.com/watch?v=2xaM0c_5pXg . This setup picks up on the bottom of the hooper, has a media drain cap and a ball valve for tuning the bleed air to help even out the siphoning. I found that just barely cracking open the valve evens out the media flow - it chugs when full closed. The media feed line did require drilling a hole in the side of the cabinet - I just have the hose running thru it for now, but will upgrade to a grommet in the near future. Unfortunately none of the HFs near me have aluminum oxide blast media in stock, but tractor supply had this stuff: TSC Blast Media. It worked well at first, but I think this stuff isn't really intended for use in a blast cabinet. It feels like it's clogging easier now, which has me thinking the media is getting pulverized and needs replacement pretty frequently if used in a cabinet. I'm keeping my eyes open for the al-ox stuff when I'm in HF.

3B. Gun air hose. For some reason, well, for cheapness... HF uses a clear hose and barbs to connect from your shop air to gun. No matter how tightly I screwed those crappy hose clamps, it'd blow off after a couple minutes of use. This just won't do. Luckily, the solution was only $4.
Cheap upgrade to the cheapo air hose
3C. Moisture control. This is an ongoing issue for me, so I definitely don't have a great solution. I have a big 60 gal compressor, plumbed into galvanized steel pipe (maybe it's conduit?) that runs across my garage. When setting it up, I put in drain ports at the bottom of the vertical run, and the horizontal run has couple inch slope over the 10' run. In the 10 years since I set up the garage, I haven't been great about draining the lines, but this project has flipped that on it's head. I'm purging the lines a couple times a day (was blasting when it was really humid this week).

I briefly tried running a tiny desiccant drier at the blast cabinet, but it was way too restrictive so I picked up the combo air drier and filter when I grabbed the gun air hose. This setup works OK.

I can blast for about 30 minutes before I start having moisture issues clogging the gun now. I'll unclog the gun, purge the 4 drain valves and let the compressor refill (to be fair, the big compressor cycles on after 1-2 minutes of blasting). The moisture issues get worse as the compressor gets hotter. I think I'm going to put a secondary desiccant unit at the blast cabinet.
So, where are we now: I can effectively clean parts. Win.

Alright, now that it's functional: what's the plan for making it more functional.
Media - replace the pulverized coal slag with aluminum oxide blast media: Blast Media
Vacuum - the filter on my little shop vac got clogged after ~4 hours. One of these guys will help: Cyclone
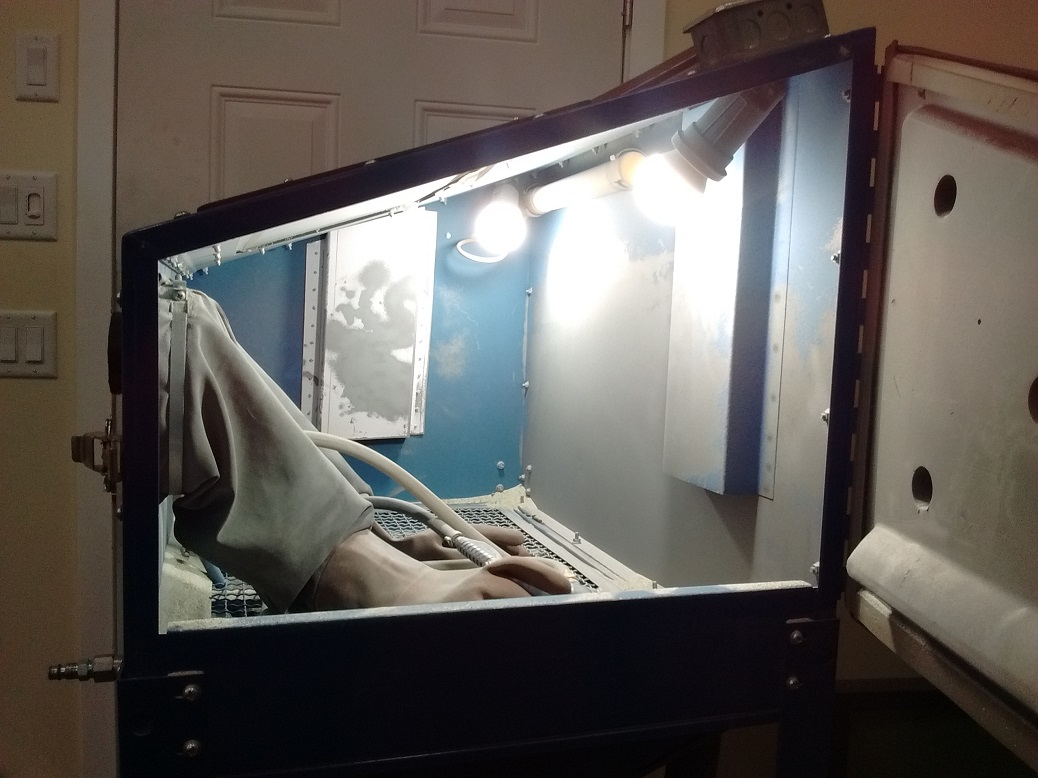
Lighting - the stock light sucks. I rolled the cabinet outside to take advantage of the extra ambient light, but when using it with the garage door closed - I found that I have to turn off several nearby lights in the garage to control glare and see what's going on. This won't do. Some folks have used halogen flood lights with cheapo flood light fixtures with good success. Others use magnetic wireless LEDs or LED strip lights. I like the idea of replaceable glass and will probably go halogen outdoor lights (rubber seals so I don't get conductive blast media in the light sockets).
Moisture control - I hope a secondary desiccant drier at the blast cabinet and the better media will help out. It's possible the gun design may also contribute to clogging, but we'll see.
All in all, I'm under $300 including the air drier and media and have a functional blast cabinet.

I have four 100W LEDs in out-door rated sockets in my (Princess Auto) cabinet. Some use Halogens so the heat plays a part in drying the sand. This pic shows two, which was fabulous, I've since added two more on the opposite side. Also, change the nuts and bolts for the window to nutserts - makes changing the glass so much easier, as your arms may not be long enough. I added a shield on the far side to duct fresh air in, without so much sand coming out. Shield at the back is where I put the vacuum.
I did the same siphon-thingie as you did, but out of pipe because I was just copying a youtube video. Mine sits on a plywood base on casters. Make it mobile!

I find the compressor and blaster are happiest with a very fine abrasive. I use crushed glass. Currently put Nickel Oxide in the cabinet, but that really doesn't blast well - I need a much larger tip and that makes the compressor unhappy.
My first vacuum separator was just a bucket, but the vacuum would still suck up everything. I found this youtube video,using two buckets, and made one like theirs. It seems better, but I don't have enough time on it.
Old and busted:
I do run a secondary water separator right at the cabinet, which always collects water. My compressor is in a separate structure 30' away, with piping designed to reduce the amount of water collecting in the system (and yet....).
On water in the compressed air problem: I plumed the output from the compressor cylinder to a heat exchanger (Just an oil cooler with AN fittings.) and then two water traps. All before the air enters the compressor tank. I can still get a bit of water in the storage tank but none in my air lines!
What if you put the cooler between the tank and the lines??

So what type of media and PSI do most folks run? I just set up my HF cabinet.
I tried some Black Diamond medium at 95psi but that is way too abrasive for general cleaning up parts.
In reply to GPz11 (Forum Supporter) :
You should only need 50-60 psi to blast with the media you're using. I never had run over 75 psi.

Some good tips here. I've had one of these cabinets for years now. Mine is "stock" other than some foil tape sealing it up. It's been acting all cloggy recently so I've been looking forward to the fact that it needs attention. I'll check out some of the ideas here.

Mine is stock.
I used crushed glass.
The nozzles will get stopped up by just about anything so keep the media clean. Paint flakes will bring everything to a halt.
Lighting in mine is 4 LED puck lights mounted outside the glass. They work very well and don't get eaten by the media.

I cribbed SkinnyG's advise and built the two bucket dust separator for the vacuum cleaner. Seems to work so far.
I added their dust cyclone to mine. Only mod was to use wingnuts to hold the viewing glass in.

Probably the BIGGEST improvement I did, was modifying the gun:
This went from "ok, it's better" to OMG IT'S AWESOME!
Paint, rust, mill scale, freaking AWESOME!
AWESOME!
Gun, man, GUN!
For those who haven't taken a close look at the gun for a while - what did you do?
I'm still using the stock gun without issues. I did a little testing with different size ceramic tips before I settled on one that seemed to work best, but beyond that, I haven't felt the need to mess with it.
If I need to do heavy blasting, I'm going to use my pressure pot, not the cabinet.
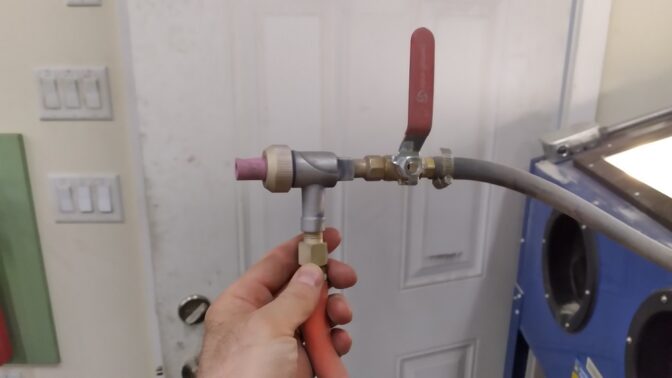
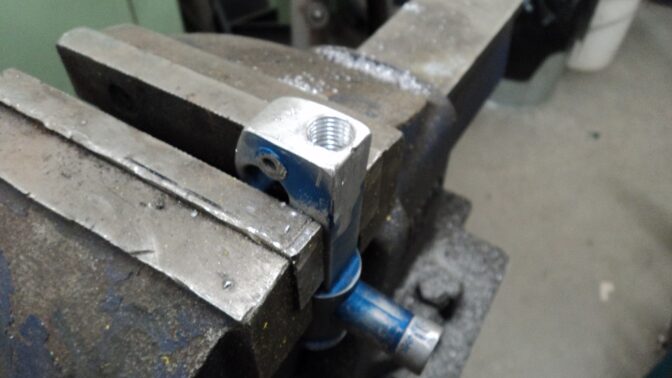
I cut the handle and trigger part off:
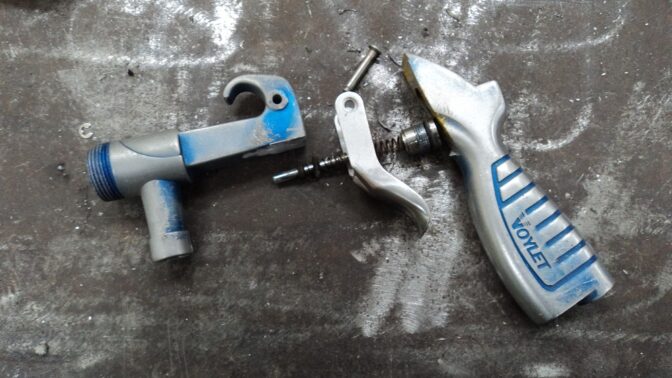
And threaded it to go straight to a ball valve (though I later shortened it further, as you saw above):
Modifying the gun made the blast cabinet just as effective as my pressure pot blaster. I can't recommend this enough. SO worth it.
TP Tools has all kinds of advice and parts for blast cabinets.
You'll need to log in to post.


