Anyone who’s ever had a track car has probably done some aluminum fabrication. Whether that was a simple hand-formed bracket or a more complex structure, aluminum’s low cost, ease of availability in big-box stores, high strength-to-weight ratio and mostly benign nature make it the perfect material for even the novice fabricator.
But when it comes to joining two pieces of …
Read the rest of the story

Larry
New Reader
12/1/20 9:19 a.m.
What about bonding? That is the preferred method of most manufacturers now. And it is being done by many body shops.
As heat weakens tempered Al and the bonded surface spreads out loads, the joints tend to be stronger. I would love to see more about DIY/grassroots bonding applications. Comparing things like Hysol /Loctite E-60HP and 3M 7333, ease of prep, application, strength, etc.
Fun fact, most hvac duct work is aluminum. Duct tape is clearly the answer.
Larry said:
What about bonding? That is the preferred method of most manufacturers now. And it is being done by many body shops.
As heat weakens tempered Al and the bonded surface spreads out loads, the joints tend to be stronger. I would love to see more about DIY/grassroots bonding applications. Comparing things like Hysol /Loctite E-60HP and 3M 7333, ease of prep, application, strength, etc.
This can work for some joints but not all. You need surface-to-surface contact to have a strong bond and many times you don't have that. When designing a part this can be taken into consideration but for one off parts you're making and if weight is a consideration I'd go with a welded joint.

wae
UberDork
12/1/20 11:32 a.m.
For a project I just completed, I had a need to bond aluminum roofing flashing to steel angle iron. There is no space on the inside for a fastener or rivet to stick out so I needed something flush. In retrospect, I could have drilled and tapped the steel and then used a very short machine screw, but that idea came late. I used a Loctite construction adhesive on one (PL-375), DAP construction adhesive (Dynagrip MAX) on two, and just regular silicone on one. They all worked pretty well, but due to the long cure times, clamping is required. Where I couldn't clamp things properly, I got some pull-back from the springiness of the flashing, but other than that it is pretty solid. It isn't structural, and I haven't tested it to see exactly how much force it would take to pull the skin off, but it worked pretty well and was quite cheap.

Shaun
Dork
12/1/20 12:38 p.m.
Really really good double sided tape and rivets has worked for me.
Larry
New Reader
12/1/20 1:00 p.m.
In reply to wae :
This brings up a good point. For many of us, we will be adding aluminum to a steel structure or composites to an aluminum structure to reduce weight. Welding will not work there, and bonding is stronger than mechanical fasteners.
While it will not work well for some joints, for joints with the needed surface area, bonding ends up being stronger and lighter than fill rod or solder (spot welds do not add filler, but are not as strong). Panel bonding is very common place now, but structural applications keep growing.
Bonding with rivets works well, the two methods pick up the slack in the weakness of the other: bonding helps distribute the load over a larger area than rivets generally are able to and can resist loosening over time. The rivets can help resist peeling and delamination, which is the weakness of a bonded joint.
Djtilly
New Reader
12/1/20 4:06 p.m.
You missed solid rivets - The mainstay of old school monocoque racing cars and aircraft. Biggest con is, of course, that you need access to both sides of the joint.
Also forgot gas welding...the way all those cool cars in the 50's were built. It takes a little practice but the equipment isn't expensive.
BA5 said:
Bonding with rivets works well, the two methods pick up the slack in the weakness of the other: bonding helps distribute the load over a larger area than rivets generally are able to and can resist loosening over time. The rivets can help resist peeling and delamination, which is the weakness of a bonded joint.
3M makes a wonderful bond with the side of rivets. The problem is I use Cleco's as an alignment tool but doing so means some seepage invariably gets on the Cleco's. I haven't found anything that gets the 3M stuff off so it's use em & toss em'. Expensive.
I've for non racing applications used mostly pop rivets and a pneumatic riveter to go fast enough to avoid letting the bond set up before finishing.
Since some aircraft applications allow "pop-rivets" maybe I shouldn't be so picky.
Also, this really wasn't fair to brazing. Many British racing cars were brazed in the 50's and 60's because the thin wall tubing used couldn't take the heat of welding. In fact, if you watch the video of the continuation XKSS cars being made today, some frame parts are brazed. Is it idiot proof? Not at all, but the people on this site have skill!
In reply to Leif_In_Calif :
Following on from Leif_In_California; Oxy/Fuel Welding of Aluminium goes back over 100 years and was the commonly used technique prior to World War 1. GTAW / TIG Welding came into use early during the Second World War. (1942 I believe). I look forward to further discussion on this subject with any one on this site who is interested.
In reply to frenchyd :
Typically aircraft "pop" rivets are what are called Cherry Max rivets. They are aluminum (yes, I know there are others) with a stainless pin that stays inside the pulled rivet which allows it to be used as a structural fastener.

pirate
HalfDork
12/5/20 9:50 a.m.
triumph7 said:
In reply to frenchyd :
Typically aircraft "pop" rivets are what are called Cherry Max rivets. They are aluminum (yes, I know there are others) with a stainless pin that stays inside the pulled rivet which allows it to be used as a structural fastener.
All rivets are not created equal with the type you would find at the big box stores on the lowest rung and the Cherry Max at the top. There are numerous style heads, and patterns as to how the back of the rivet forms when pulled. The advantage of the more expensive type rivet is the stem is always retained and seals as opposed to cheaper pop rivets where the stem may fall out after being pulled. A real advantage of the stem being retained is the shear strength it adds to the joint. If you go to Aircraft Spruce, Wicks, (there are others) they usually have a section that explains the different types of rivets.
if you use the proper length and diameter rivet the joint can be incredibly strong. An adhesive can make it even stronger. After laying out, drilling holes I deburr both pieces of the metals to be joined put it together with clecos to check fit then clean surfaces with acetone before applying the adhesive. I often times use a bead of Silicone RTV to make the joint waterproof and stronger especially if I think I might ever want to take the two pieces apart in the future. I use a pneumatic rivet puller to insure all rivets are pulled tight and it saves on the arms and hands if you have a lot to pull. I actually like the way rivets look if done well.
triumph7 said:
In reply to frenchyd :
Typically aircraft "pop" rivets are what are called Cherry Max rivets. They are aluminum (yes, I know there are others) with a stainless pin that stays inside the pulled rivet which allows it to be used as a structural fastener.
Yes I know that but you do bring up a good points. I also have the adjustable counter bore needed to set them flush with the skin. And have the rated pneumatic riveter required to meet NAS standards. Well it's calibration has long since expired so I can't use it on airplanes legally.
Ok, so real world application. I need to re-connect a bracket to an intercooler. Appears to have been both riveted and glued from the factory (although not totally sure how it was bonded, the material looks like very crystaline aluminum).
I am thinking this is a pretty straightforward fix. Drill out the rivets and replace, plus use something to bond it too. As long as I don't drill past the intercooler fins and into the bar, I'm golden, right? Any reason not to use steel rivets vs aluminum?

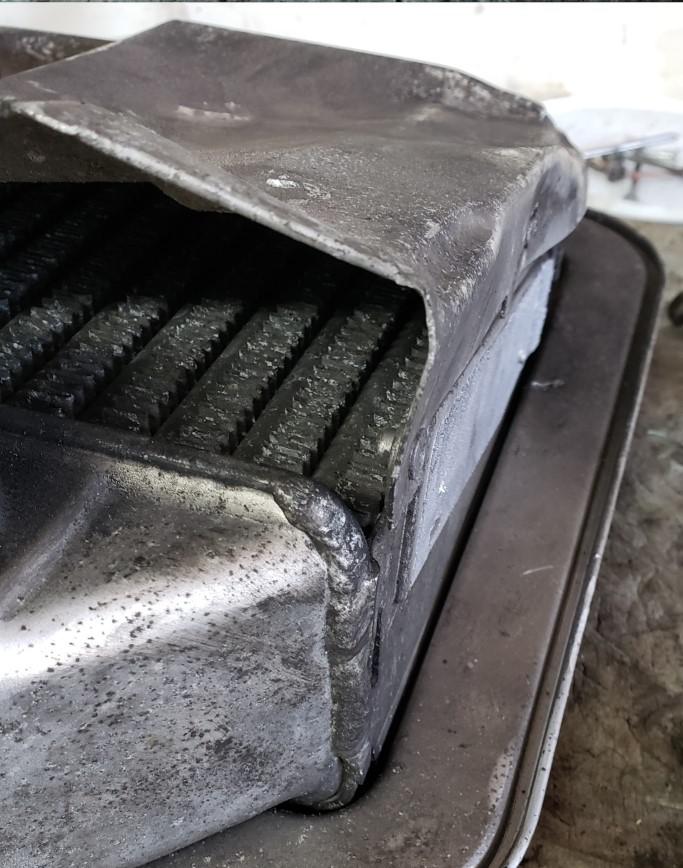
In reply to sevenracer :
It's a little hard to tell from the pictures where exactly the bracket is attaching, but as best I can tell yes, it looks like you should be able to bond and rivet that bracket back on.
I am having success feeding wire conventionally (no spool gun) through my MIG, Hobart handler 140... I wouldnt use it for anything water tight or heavy duty, but for light duting brackets and such it looks like a very effective go!
In reply to sevenracer :
Late reply....but better than none?
That crystalline appearing surface is a furnace brazing solder paste. It is applied to all the mating surfaces of the end tanks, header flanges, tubes where they protrude thru into the end tanks and mounting brackets. The whole deal is clamped together and sent thru a furnace similar to pottery, the paste has flux and low temp aluminum powder.
Four steel rivets, aluminum rivets or even rivnuts/nutserts spread near the corners of the bracket would work. You can drill thru the fins 5/16" deep behind but NOT into the tube behind that. Hold your tongue at the right angle so as not to drill too deep. No need to bond it, the manufacturer did that cos convenient as it reduces riveting time.
Most important is to vibration mount the cooler using rubber grommets in the mounting holes.
ALL RADIATORS, CONDENSERS AND COOLER MOUNTS MUST BE DECOUPLED FROM THE CAR. Check any OEM application.
Been looking at AL brazing so I can make a Sim Racing rig out of aluminum tubing.
preach (dudeist priest) said:
Been looking at AL brazing so I can make a Sim Racing rig out of aluminum tubing.
I have had ZERO luck with aluminum brazing, using a few different brands of rods. Like, I'm convinced I'm just genetically unable to do it. I'm watching that video as we speak to try and see why my life is such a living hell when it comes to this technique.
bigben
Reader
5/19/22 10:52 p.m.
JG Pasterjak said:
preach (dudeist priest) said:
Been looking at AL brazing so I can make a Sim Racing rig out of aluminum tubing.
I have had ZERO luck with aluminum brazing, using a few different brands of rods. Like, I'm convinced I'm just genetically unable to do it. I'm watching that video as we speak to try and see why my life is such a living hell when it comes to this technique.
How are you at plumbing?
I've found that using a similar technique to what you use to sweat copper pipe joints works pretty well. Heat the base metal until hot enough that the brazing rod melts as you push or rub it into the joint. Keep the flame away from the rod and let the heat conducting through the base metal do the work. The braze will wick into the joint and along it a bit. Keep the torch ahead of the rod and keep feeding the braze into the joint as you go. Just like copper you want your base metal to be nice and clean before you start.
I made this turbo inlet for my first attempt. The joint isn't beautiful but I'd call it decent. I used Bernzomatic rod and a map gas torch. 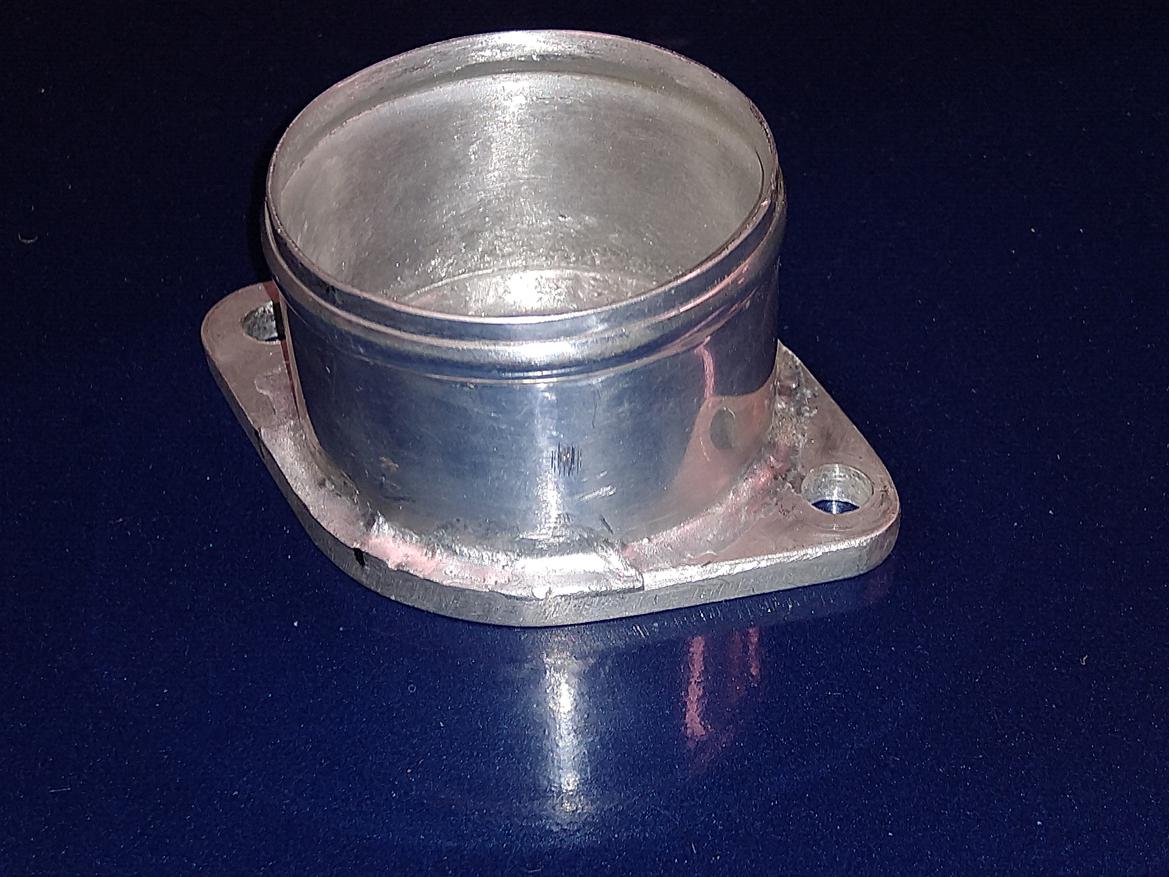

Leif_In_Calif said:
Also, this really wasn't fair to brazing. Many British racing cars were brazed in the 50's and 60's because the thin wall tubing used couldn't take the heat of welding. In fact, if you watch the video of the continuation XKSS cars being made today, some frame parts are brazed. Is it idiot proof? Not at all, but the people on this site have skill!
Not just the XKSS but the D type that proceeded it and the XKE that followed it. The XKE produced more than 60,000 cars with Brazing. And the whole front frame weighed only 22 pounds. Google Pictures of Jaguar XKE frames.
The steel was 1 inch square tube extremely thin wall ( 1/2 of sheet metal thickness ) it was called bicycle tubing but the specs are nearly identical to our 4130
Considering the engine the XKE used weighed over 700 pounds plus the solid forged steel suspension arms etc. there was more than 1000 pounds carried by a frame of only 22 pounds.
Remarkably it passed the required crash testing with no intrusion into the passenger compartment. Not bad for a limited production car that's coming on 60 years old.
Matt
Reader
5/20/22 3:58 p.m.
i made my wing from 2024 and 'strategic maple'. its bonded, no other fasteners. no problems 3 years on. The splitter i made is also bonded and spliced. i did use hardened inserts at the mounting attach points, but the inserts are bonded in and rated for 400in/lbs each...