
Lesley
SuperDork
9/11/09 10:45 p.m.
A while back, someone posted something on ECM's "career" thread about architectural rendering as a possible career choice. I thought this sounded like a fantastic job for a creative person. Well, wonder of wonders, I came home to a message today that a contractor is looking for someone to do some renderings for a future project, and was I interested... sure I am. Just not sure if I know what I'm getting into. I can draw anything, flesh, furred, four-legged, four-wheeled, bricks, you name it... but it's been almost 20 years since I had anything to do with AutoCad or anything like that.
Anyone know more about this kind of work? I used to do a lot of drawing of all the local heritage buildings - but that was working from photos of existing buildings.

Lesley
SuperDork
9/11/09 10:49 p.m.
In reply to fdfdfdfdf:
Well, that was helpful, now I know more about shoe canoe than I ever cared to.
CANOE!
CANOE!
My mom does this in New Mexico, actually she designs the houses and then does some rendering and walk throughs. She used a product called archicad.
Her website:
http://www.deltathird.com/
I can ask her what she uses today and if she has any tips for ya.

Josh
HalfDork
9/11/09 11:37 p.m.
Go download Google Sketchup right now (free!) and start playing around with it. It isn't the most full featured 3d program, but it is the easiest to use and the Pro version was what I used for 90% of the renderings I worked on at my last job. I would also use the output from sketchup as a base for additional work in photoshop or for hand renderings.
I really miss doing this sort of work, and I wish there were still some demand around here for me to do it :(.

SVreX
SuperDork
9/12/09 7:04 a.m.
AutoCad is probably not your starting point, unless you are interested in a product that costs several thousand dollars and has a VERY steep learning curve. It is an industry standard, and will become important if you pursue a career in it, but not a great starting point.
Check into some of the other suggestions in this thread first.
I do most of my rendering in photochop. I start by scanning the floorplan and rotating it to the angle I want to view it from. Then I use multiple layers with construction lines to rough in the basic shape in a perspective view. It's not complicated, and you have a very good eye so you will take to this quickly. It is not an easy process to describe in words, so I will post again later with some examples to help explain.


Lesley
SuperDork
9/12/09 10:21 a.m.
Thanks guys. ECM, that's pretty much how I draw cars, except that I start out with a line drawing done on a light table first. Love to see some samples. 

This looks majorly complicated buy it's really not. And I probably didn't need to go into so much detail but I did. LOL Bear with me.
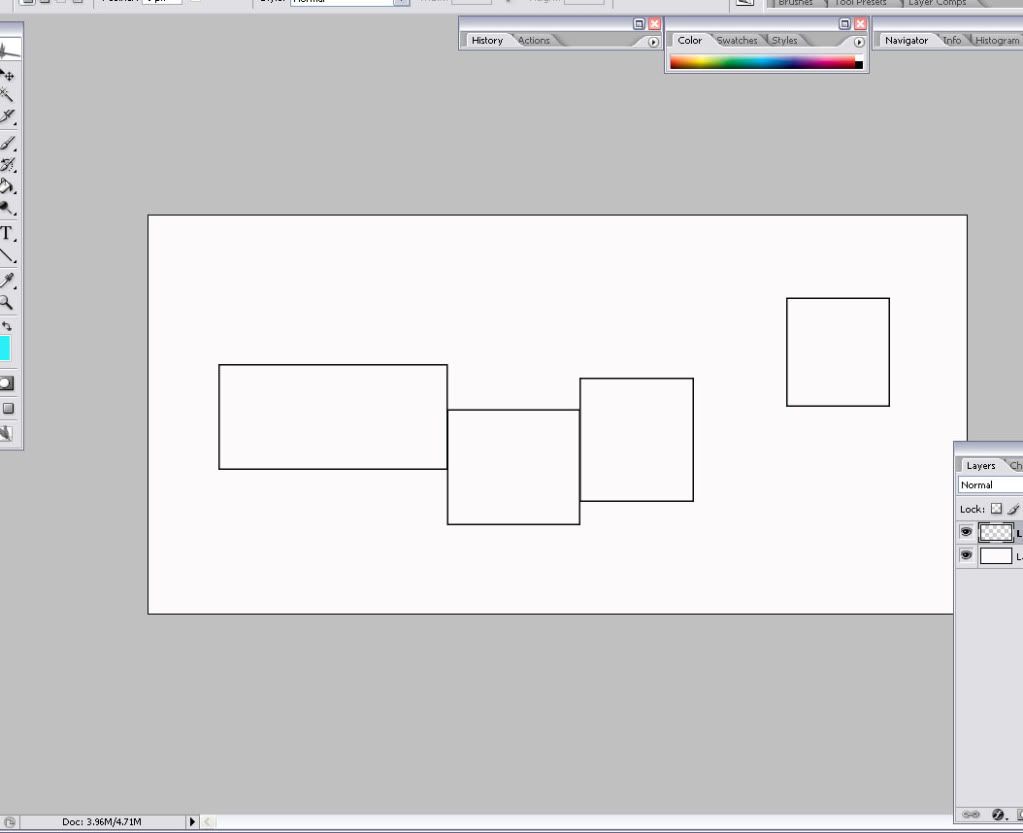
Here is the floor plan I made to show this technique:
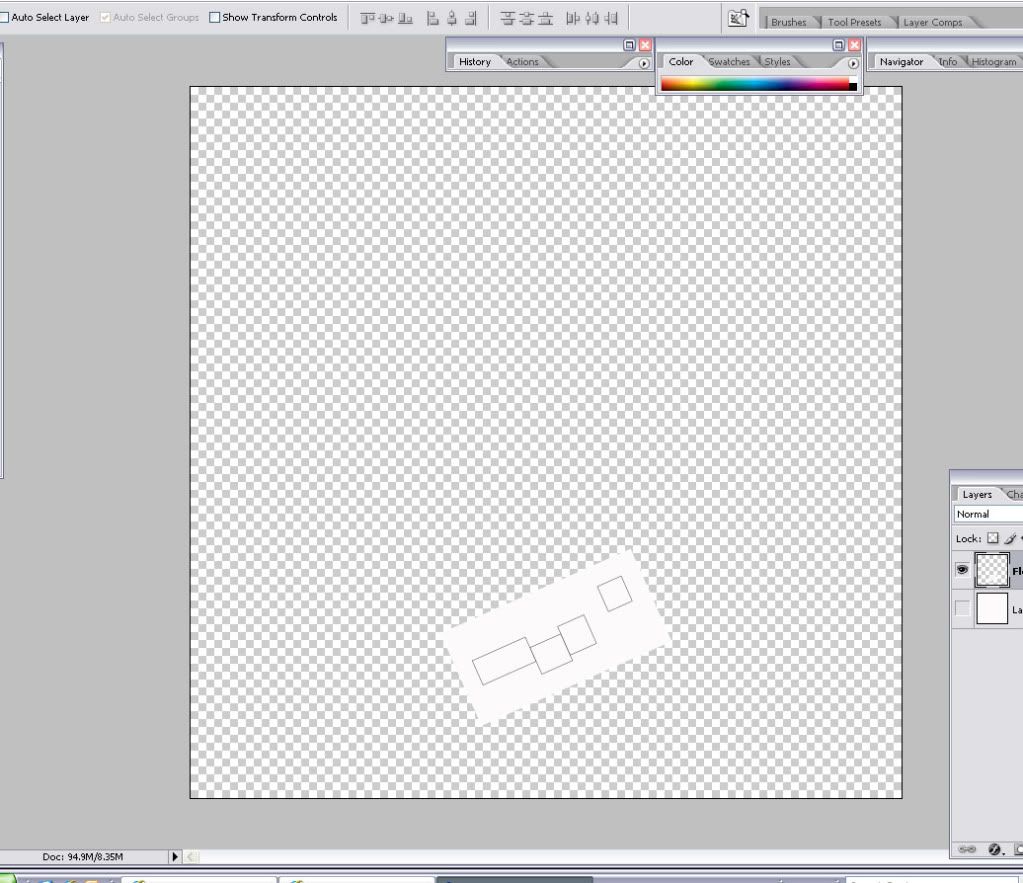
I positioned it at the bottom of the workspace and rotated it slightly:
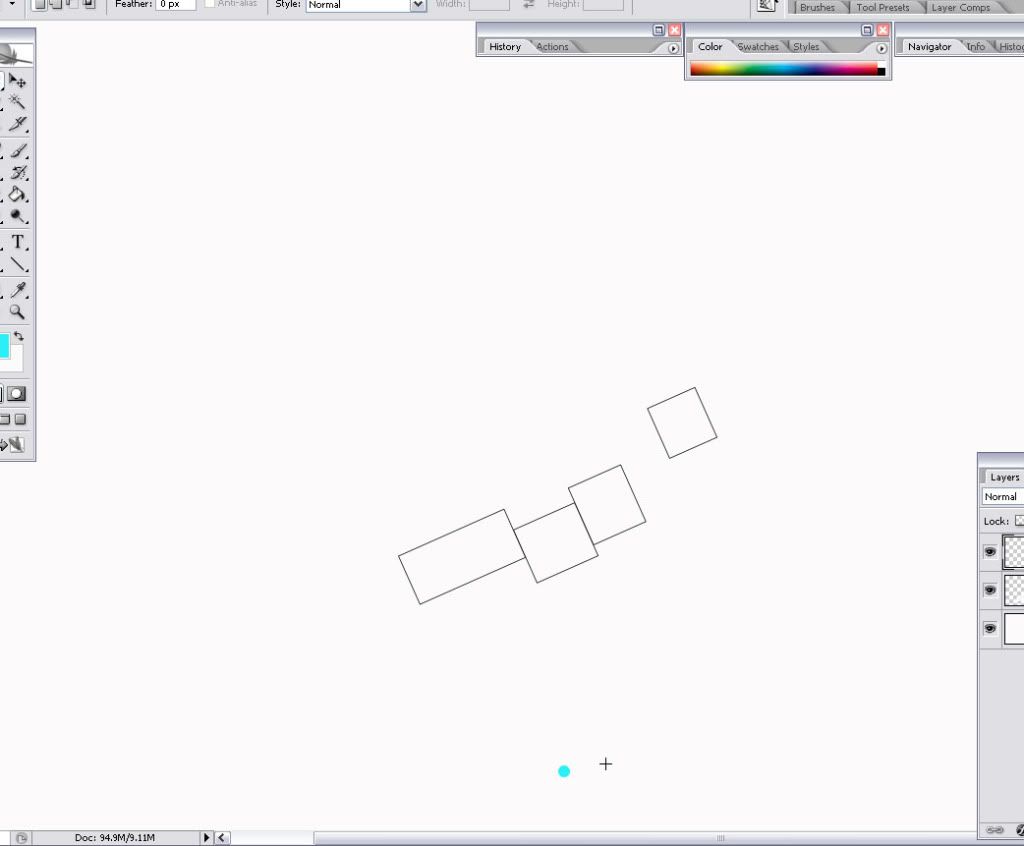
Then you want to locate the veiwing point, I made it oversize to make it easy to see:
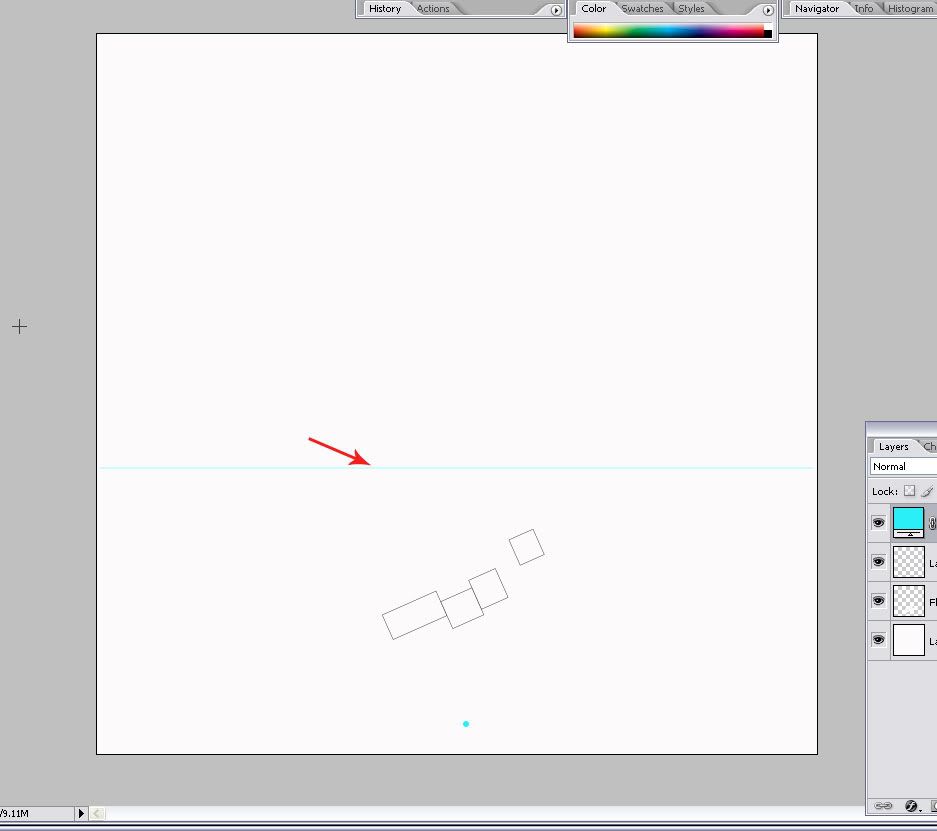
 Next you will need a line above the floor plan which I call the perspective plane:
 Here I have highlighted one square in red, it is the first one we will work with. I drew construction lines from the view point throught each corner of the red square and up to the perspective plane:
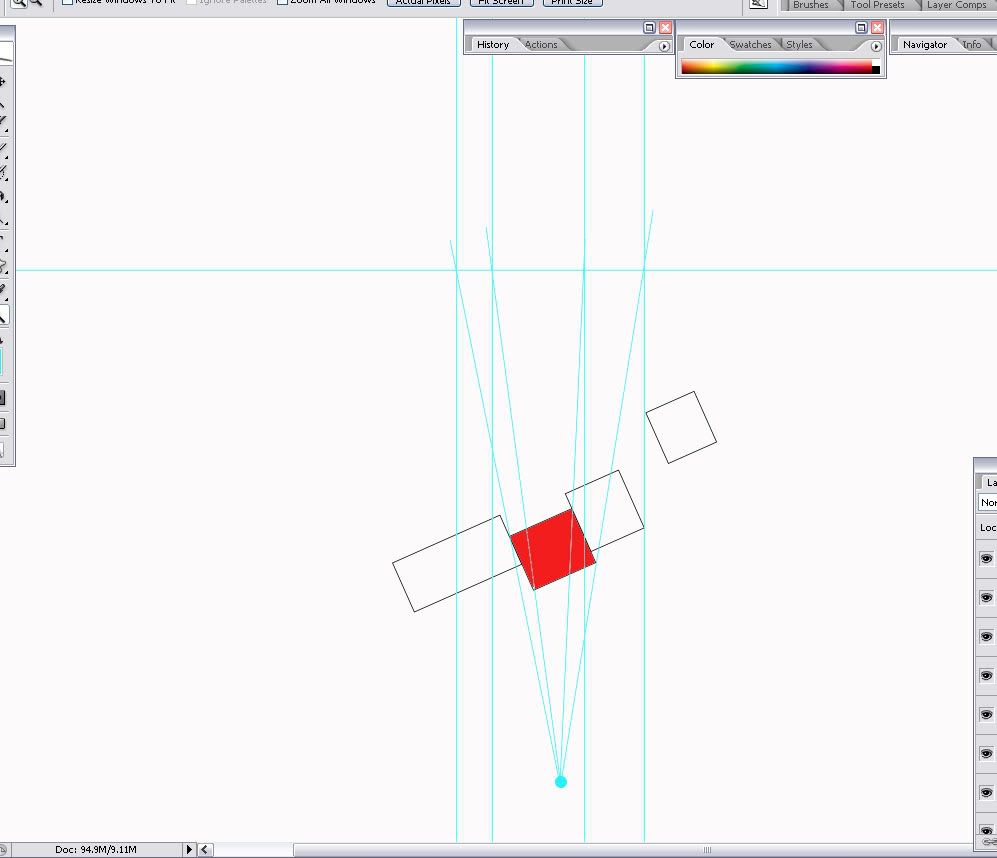
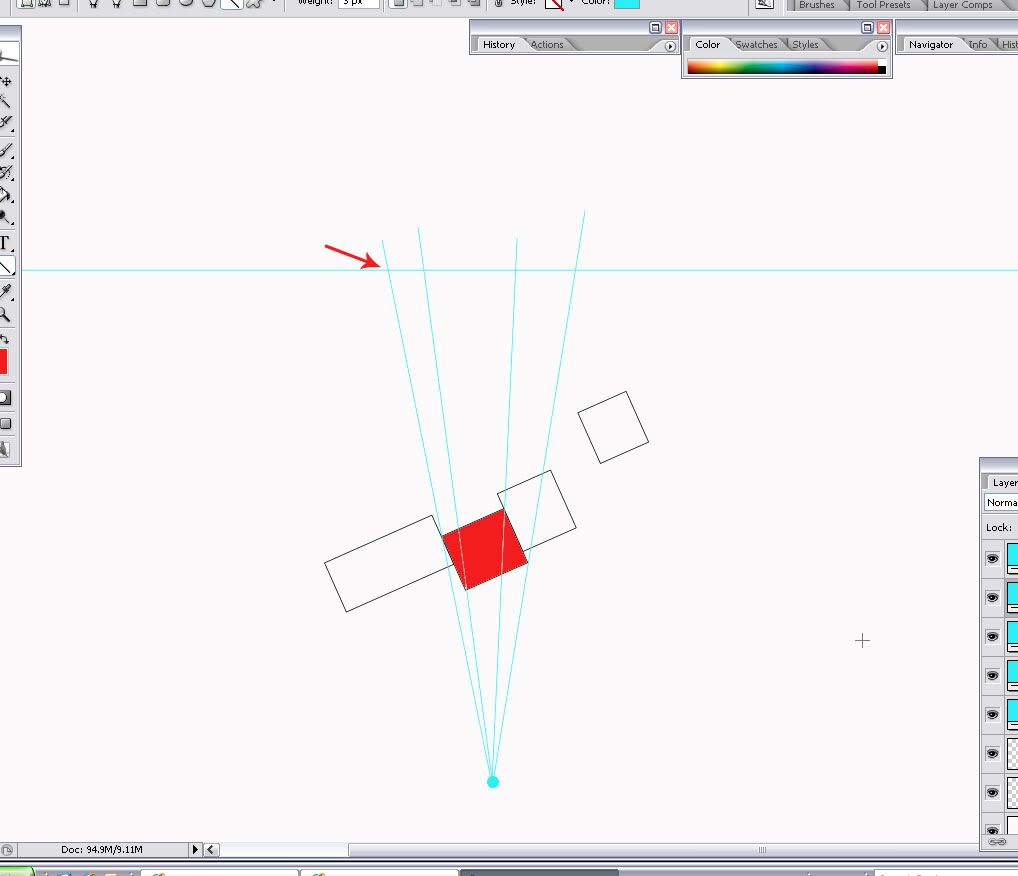 Next I use vertical guide lines and position them so that they intersect where the construction lines cross the perspective plane. These lines represent the corners of our square where the walls will intersect.
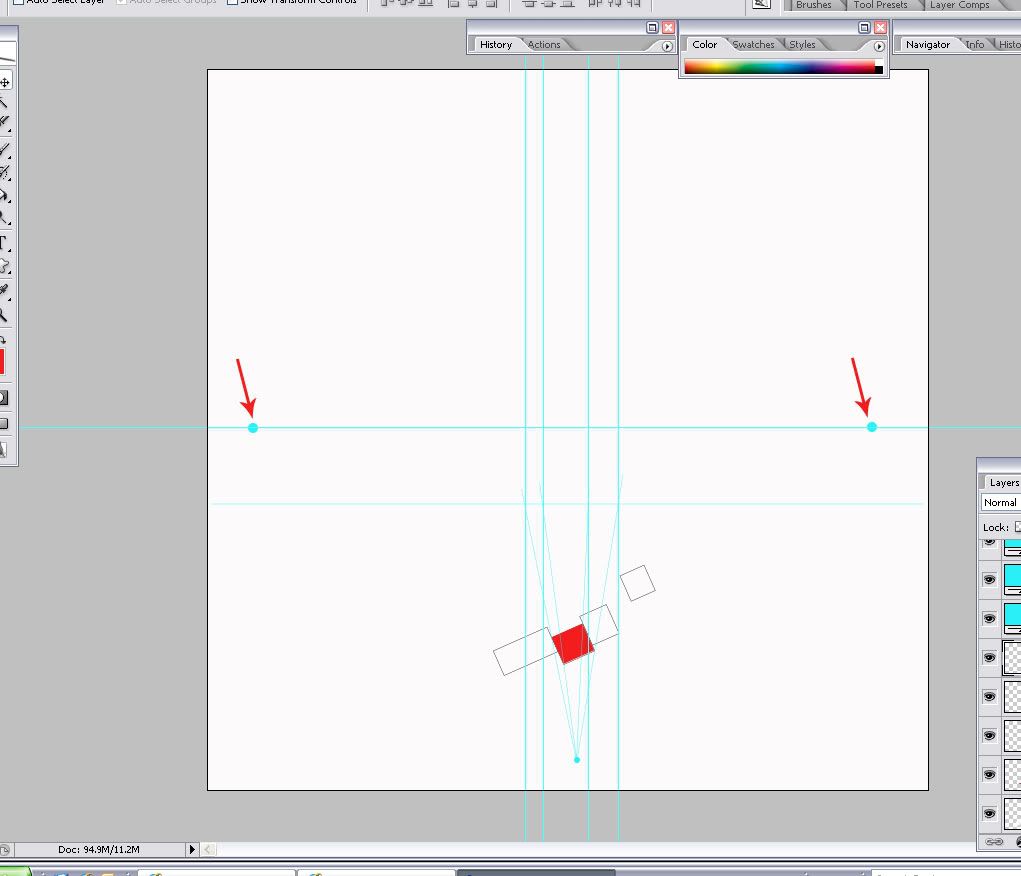
 Next we need to establish a horizon line with vanishing points. I rushed a little to do this demo, and that can make the perspective look wonky, so take your time and plan the best vanishing points for the veiw you are trying to create. Give yourself a little more room above the perspective plane then I did here and think about the feel, maybe you want the building to loom over you, maybe you don't. Vanishing points will make a big difference here.
 Now it does start to get fun. Draw construction lines from the vanishing points to locate your first (usually the leading) corner of the red square. The construction line needs to come through the vertical line that represents the right corner of the red square, all the way to the vertical guide line that represents the closest corner of the red square. Then, using the construction line as a guide I placed the red line on top, connecting the two points that represent the first wall of the red square. I did the same thing for the left corner to the leading corner, using construction lines first and then using them as a guide to make the second red "wall" line.
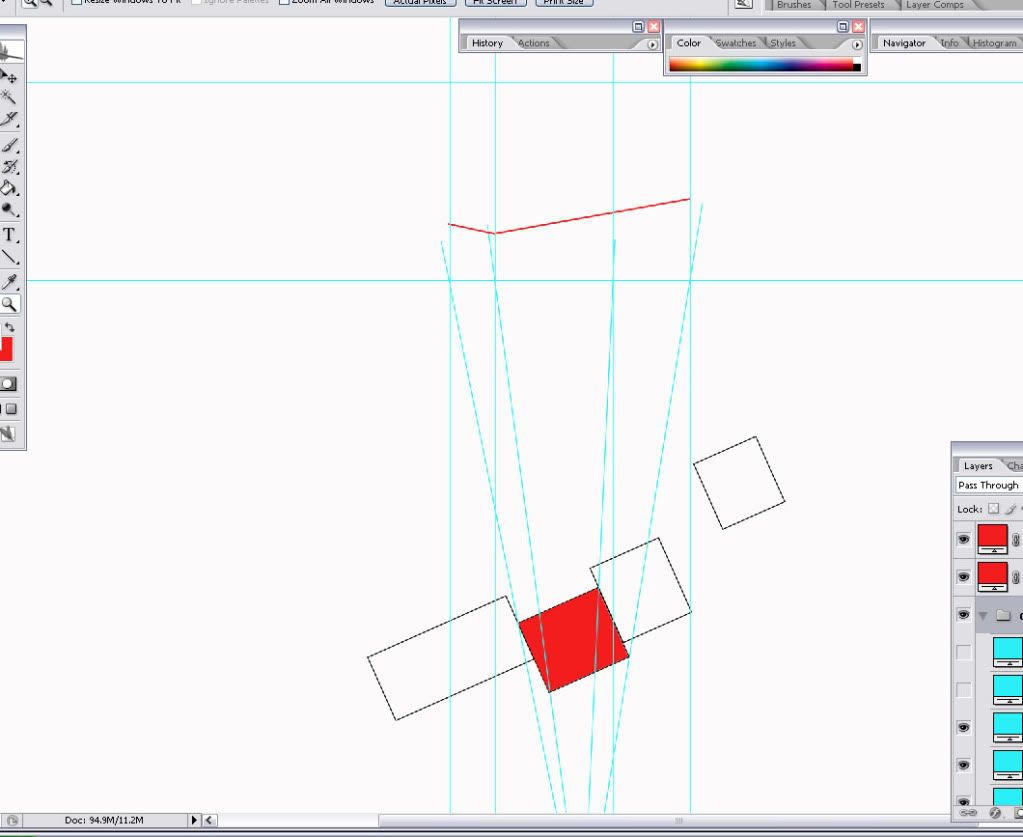 Next we make the first vertical corner of the leading edge of the red square by following the vertical construction line. I use my eye to tell me what look proportional. Use another construction line to the right vanishing point to create the top of the right hand "wall" of the red square.
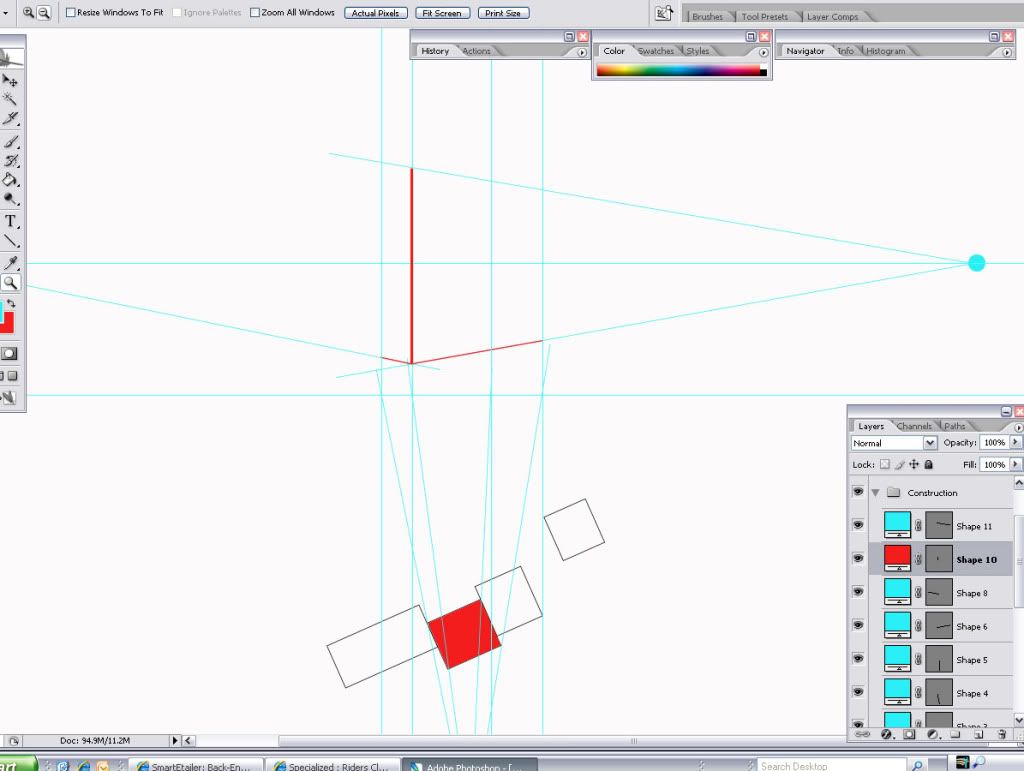 Here is a close up of the first wall of the red square:
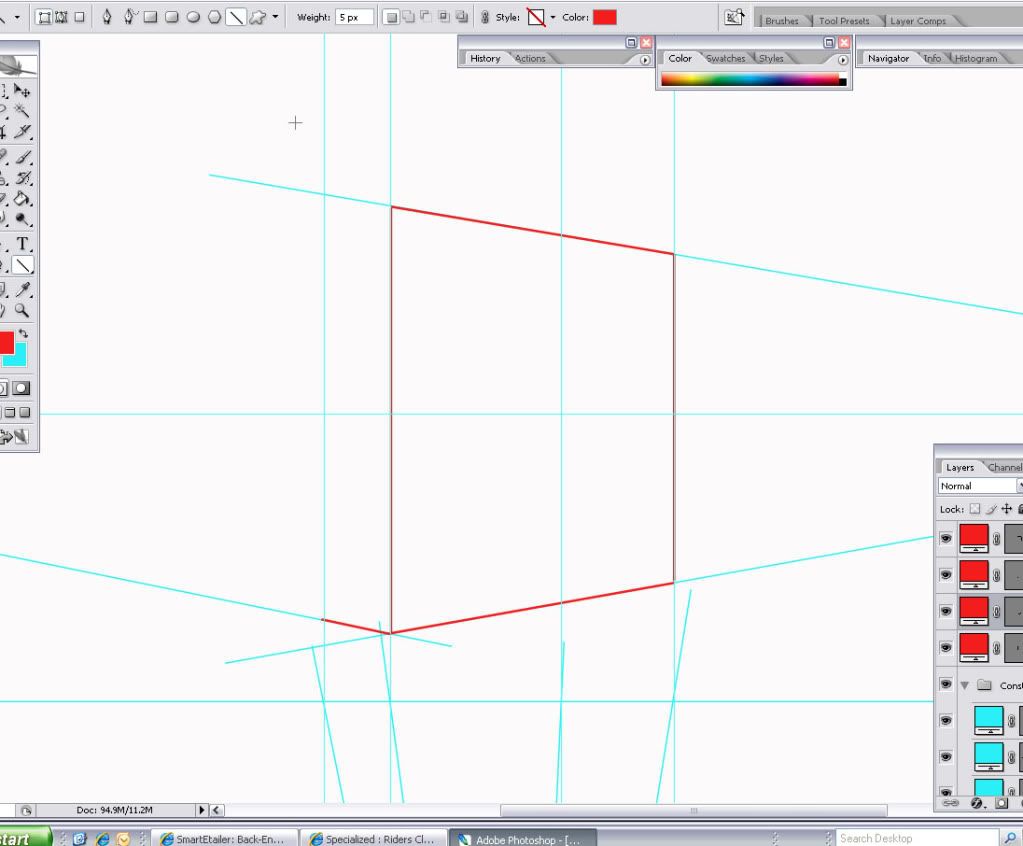 Finish drawing the left wall of the red square the same way, using the left vanishing point and the already established top of the square, and the vertical guide that represents where the red square stops.
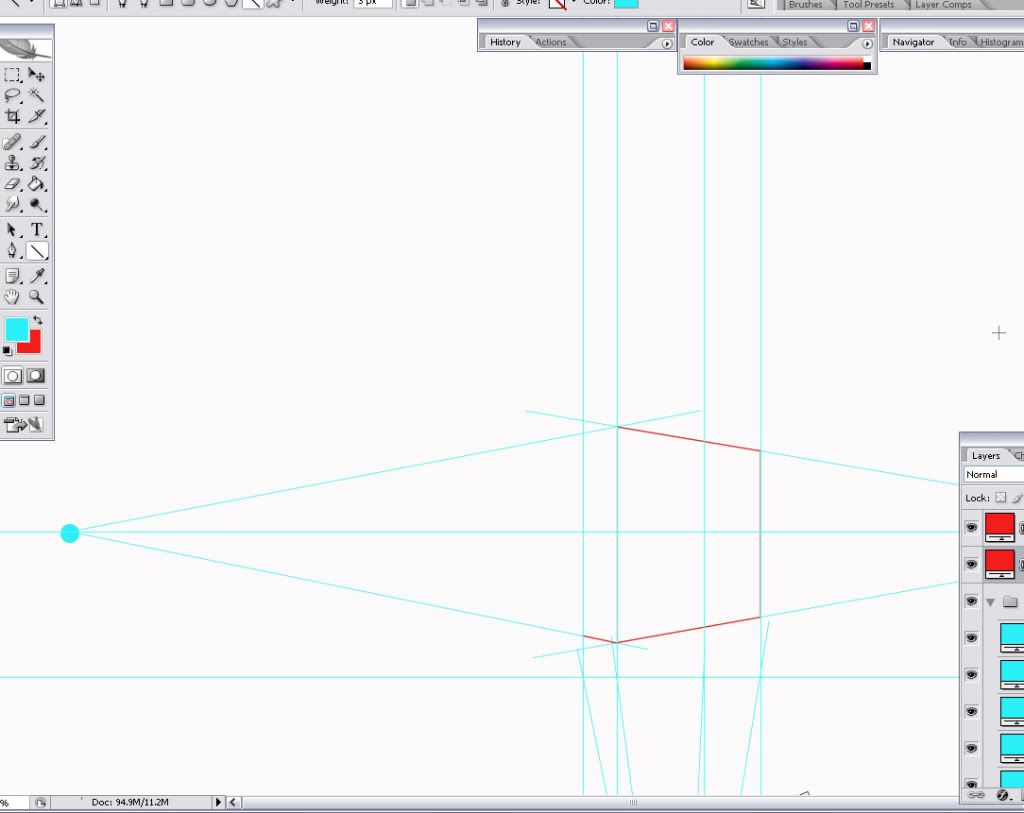 And here I have colored in the square to show it more clearly. All those blue lines are just construction lines. They are made on layers that I will turn off to display the final image.
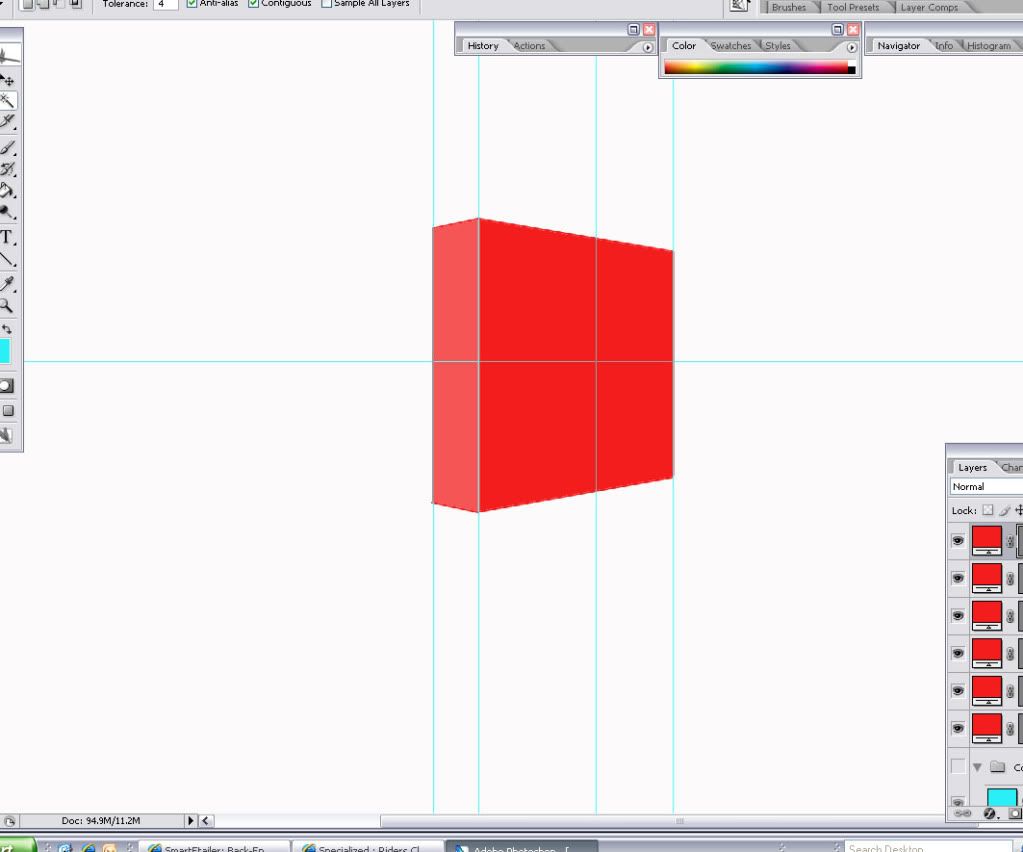 OK, so let's do another one I will make this one green. First I draw the construction lines fron the viewpoint through each corner of the green square and up to the perspective plane. THen I use vertical guide lines positioned at the intersections.
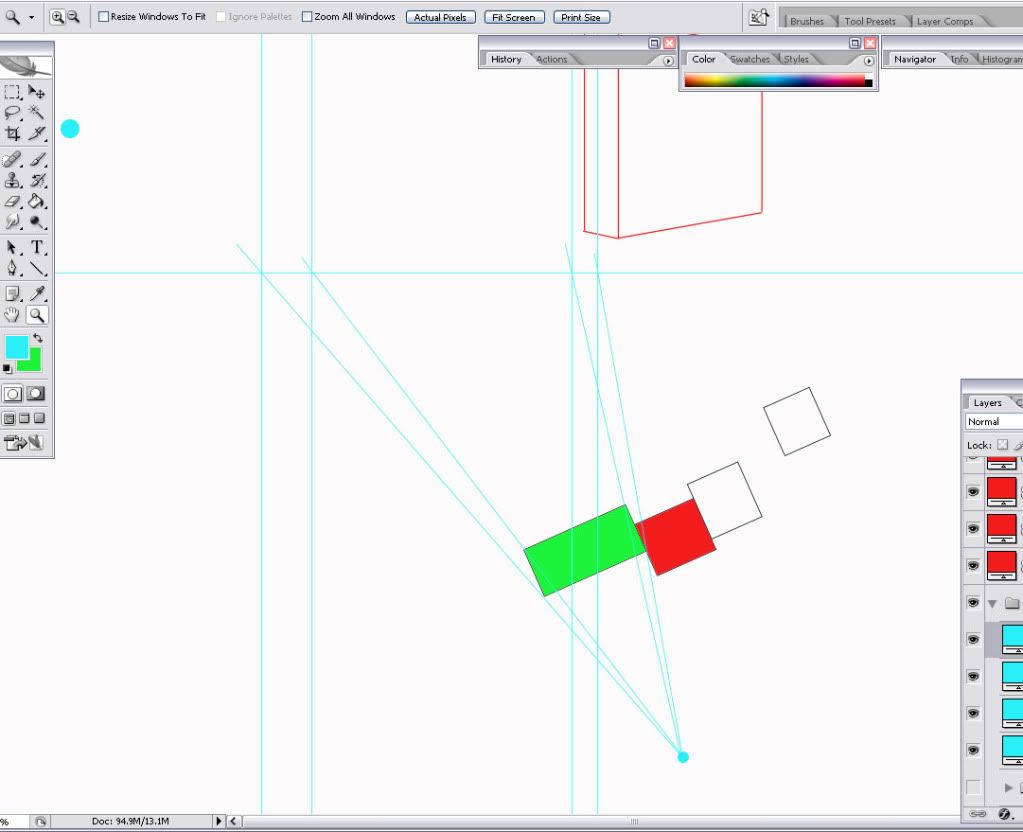 The green square touches the red square, so the point at which the vertical guide line touches the red square on that side determines where the green wall will start. Use the vanishing points to set the wall angle:
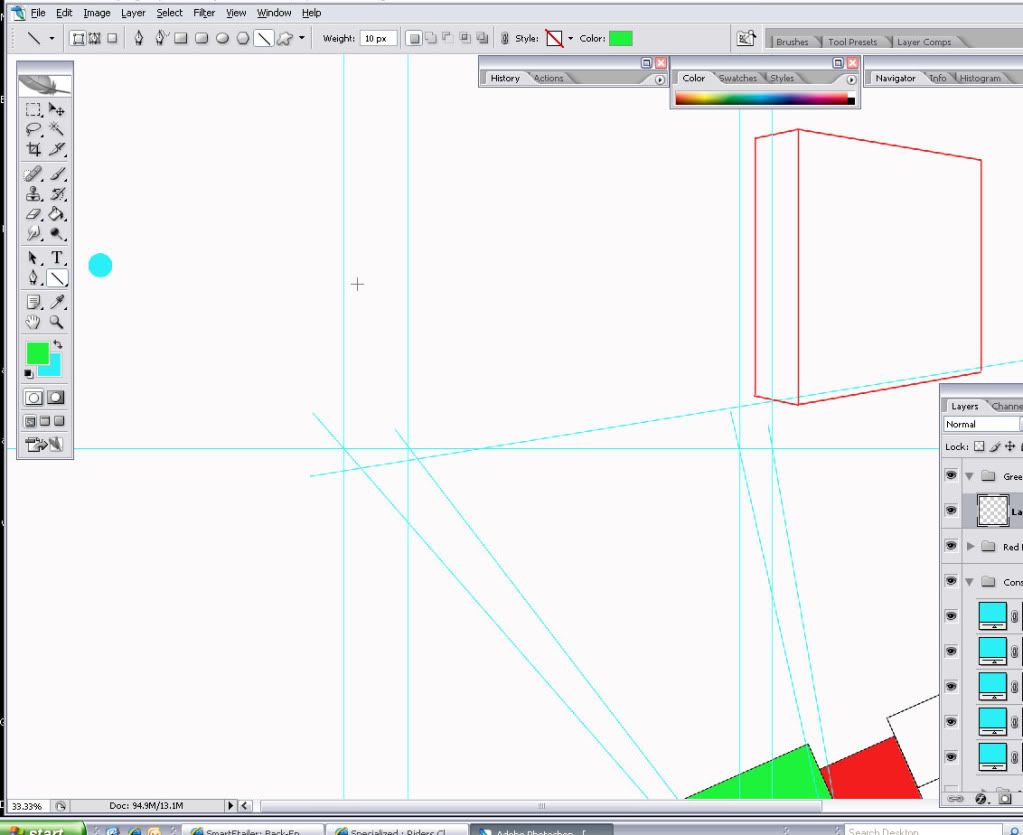 Use the right vanishing point to determine the top edgge of the wall, I made it the same height as the red square but it doesn't have to be.
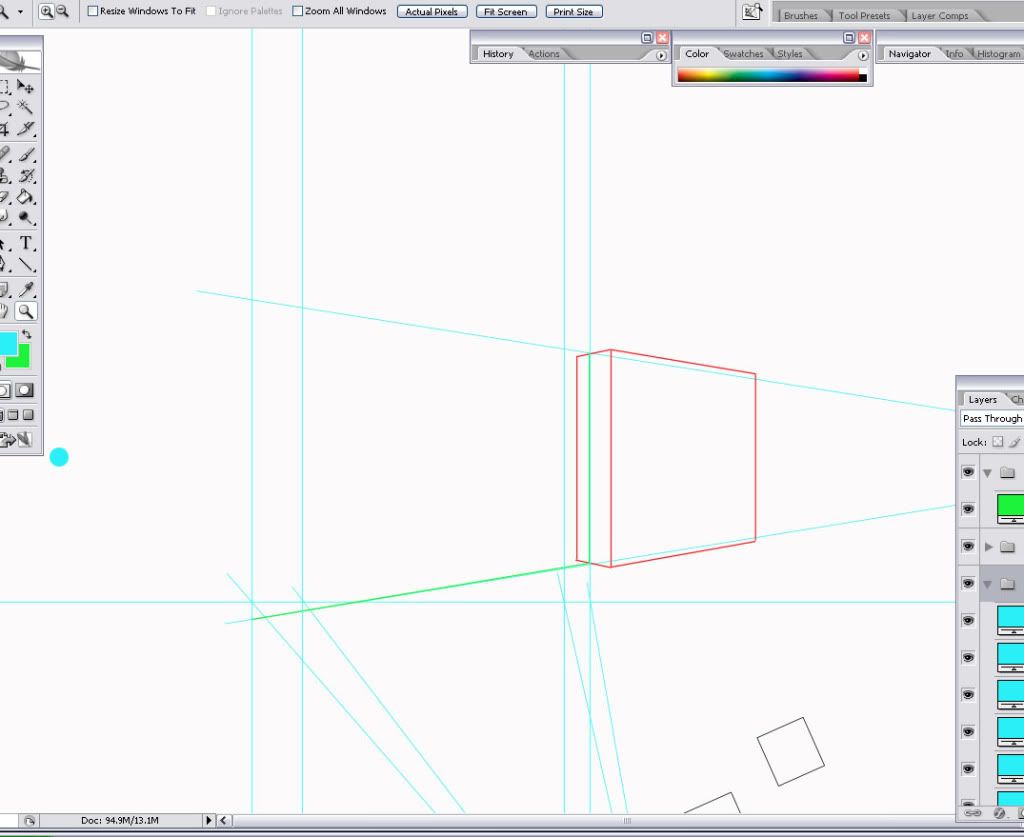 I finished off the left wall using the vertical guide. Here is what is looks liek with no construction lines:
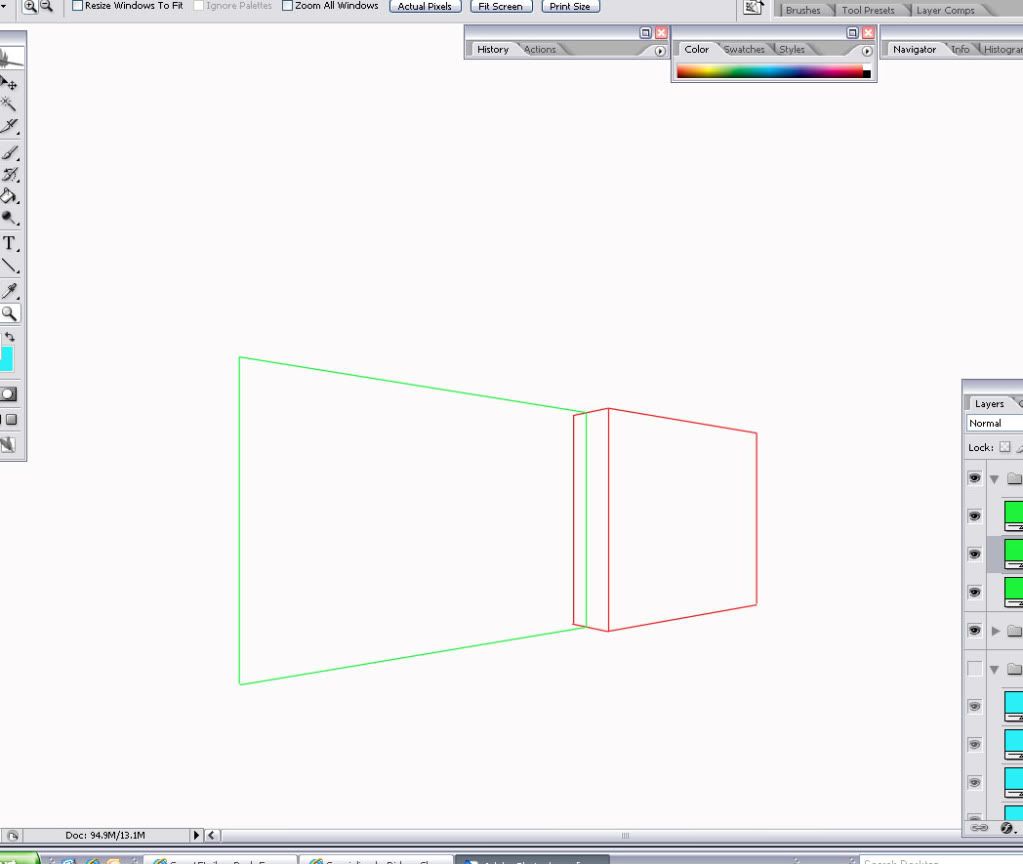 So, then I did a blue one:
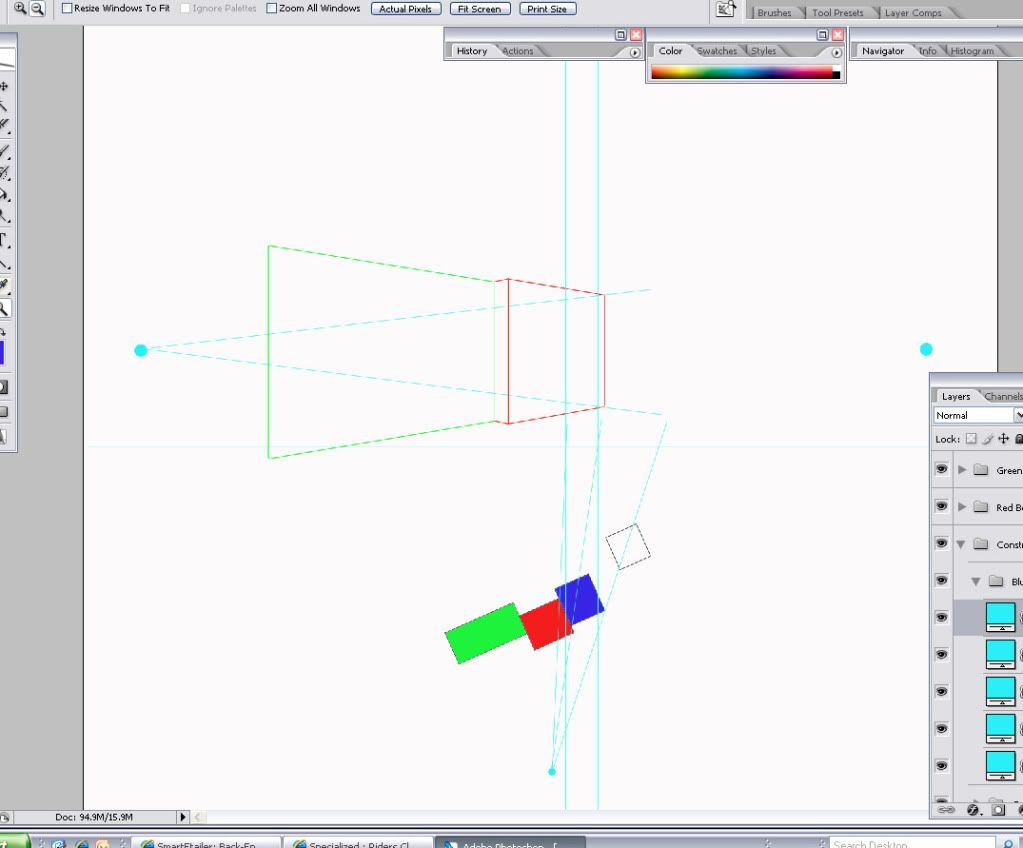
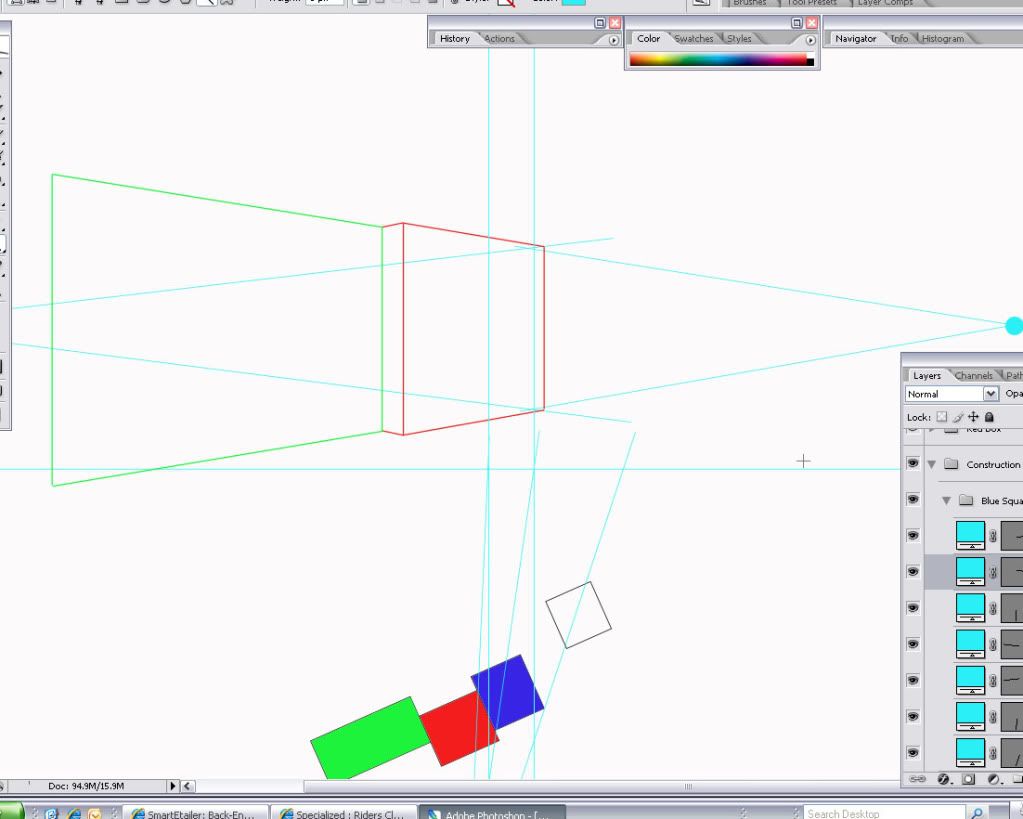
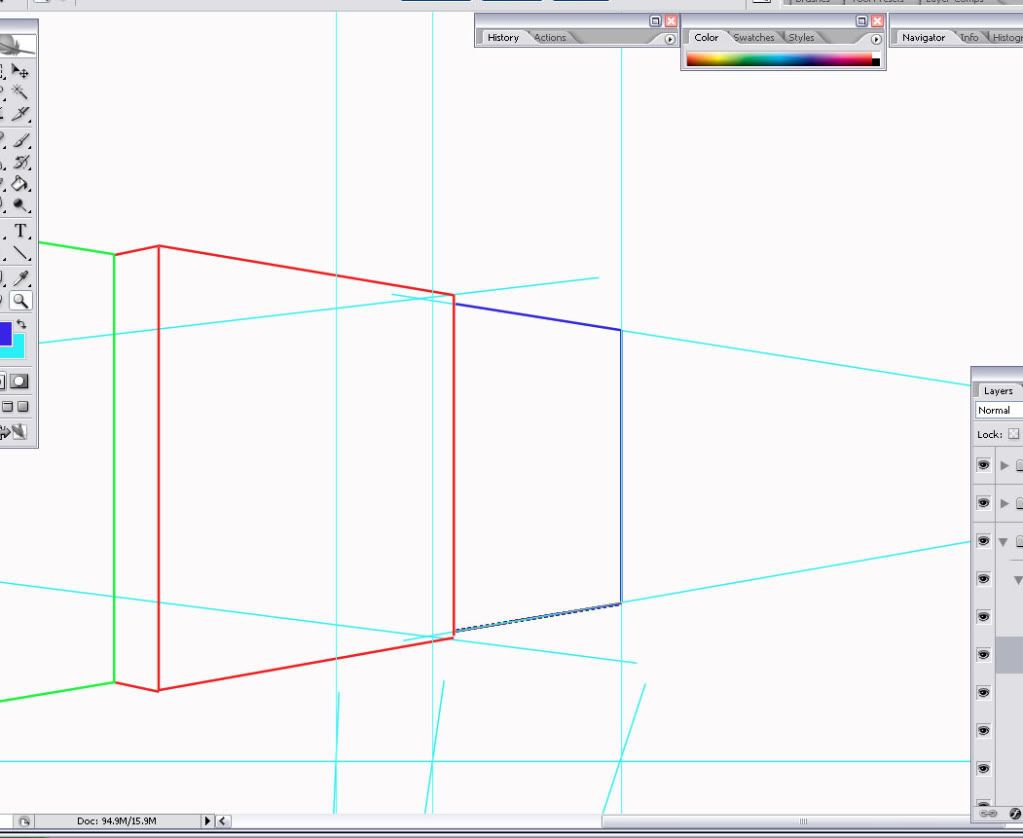 And after removing the construction lines it starts to look like something:
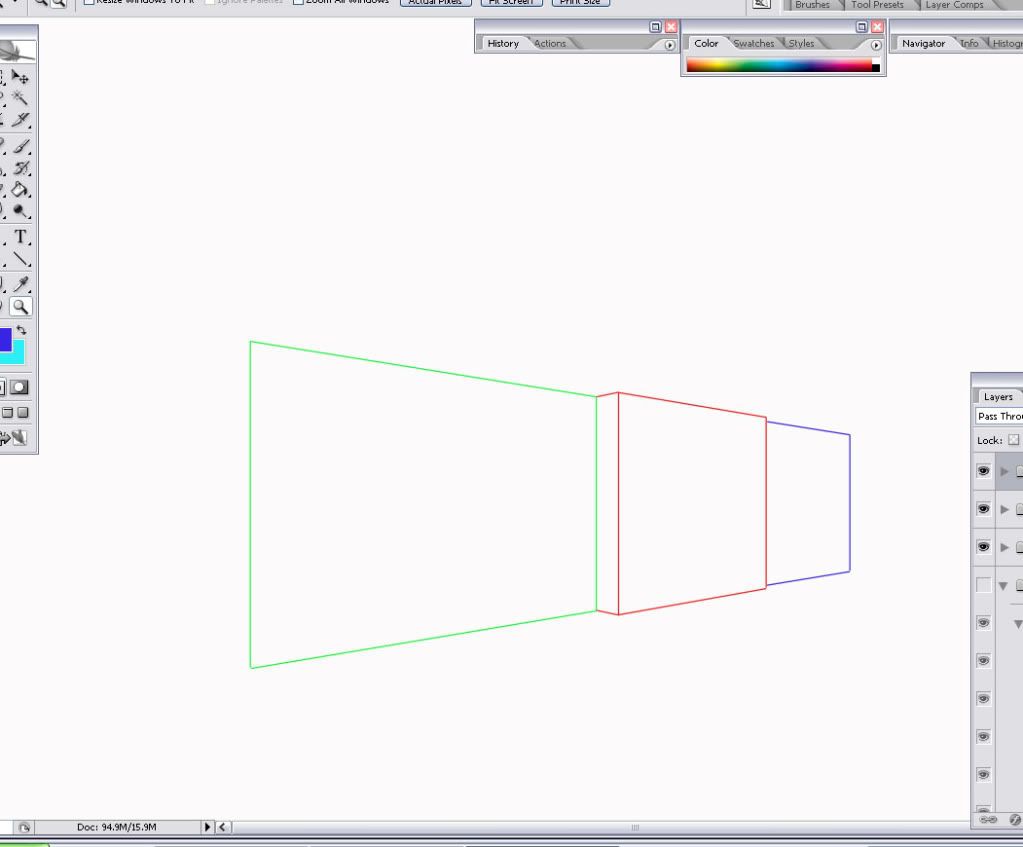 Of course, it doesn't really look anything like a finished rendered drawing, but it shows the basic technique I use to render a 2D floor plan into a 3D perspective with relative accuracy. Accuracy is not as important as asthetics and so that's where your artist's eye will be your best friend.
 Have fun!

Josh
HalfDork
9/12/09 3:40 p.m.
ECM, I know photoshop is your weapon of choice, but if you are doing this stuff on a regular basis you really need to take a look at sketchup. It turns what you just demonstrated into about a 30 second job, and you get an actual 3d drawing that you can rotate and take a new view of without redrawing anything incase you don't like the first one you picked. Plus you get accurate sun shading for any time of day/year by clicking a box. Even if you don't have interest in using it as a design tool or for full 3d drawings it is GREAT for setting up a basic perspective with accurate measurements in just a few minutes.
I also use 3D Studio max and it has a lot of the same capabilities of sketchup. Part of me is old skool though, and like to do it the hard way jsut because I know how. 

Duke
SuperDork
9/12/09 7:24 p.m.
Congratulations!
SketchUp is amazing stuff for the price (FREE) for the basic version, and even if you buy the Pro version it is incredibly worth it. It's so much easier to model something once and then generate a dozen different views until you get the best angles! I understand liking to construct perspectives for the challenge but as a pay-for service you will quintuple your output using SketchUp, and make it better to boot.
SU comes with a great variety of sketchy hand-drawing options that really look amazing. For near-photo-quality stuff I bring the SU model into Kerkythea (also FREE) and let it render. with a variety of backgrounds. You can do amazing stuff pretty quickly, and between the two of them, you can get any level of polish from "scratchy marker pen on notebook paper" to "show me exactly what it will look like from the outside on a summer's evening with the living room lights on".
And did I mention both programs are FREE? SketchUp's learning curve is miniscule and I will be glad to help anybody who wants advice. You can also export to a variety of graphic formats for Photoshop magic, too.
Some of my work from www.fcarchitects.net


I have used SketchUp, and I could do drawings like the above in about 57 years! They are really awesome.

Lesley
SuperDork
9/13/09 5:45 p.m.
Guys, thanks so much for all your help.
That's some amazing work.


RossD
HalfDork
9/17/09 12:54 p.m.
The guy here at work uses Revit. Its a AutoDesk's products so its in the realm of AutoCAD,...kinda. Its a pretty tall learning curve and way to many variables but its probably really powerful for some who has mastered it. The program can also replace AutoCAD to a certain extent and would be in the fore front of the BIM movement.

Duke
SuperDork
10/6/09 3:01 p.m.
Lesley wrote:
Well, wonder of wonders, I came home to a message today that a contractor is looking for someone to do some renderings for a future project, and was I interested... sure I am.
Hey, Lesley, did this work out for you? And Mojo, how is your possible career change going?
I'm doing some AutoCAD stuff on the side. It's good practice for me.


 Next you will need a line above the floor plan which I call the perspective plane:
 Here I have highlighted one square in red, it is the first one we will work with. I drew construction lines from the view point throught each corner of the red square and up to the perspective plane:
 Next I use vertical guide lines and position them so that they intersect where the construction lines cross the perspective plane. These lines represent the corners of our square where the walls will intersect.
 Next we need to establish a horizon line with vanishing points. I rushed a little to do this demo, and that can make the perspective look wonky, so take your time and plan the best vanishing points for the veiw you are trying to create. Give yourself a little more room above the perspective plane then I did here and think about the feel, maybe you want the building to loom over you, maybe you don't. Vanishing points will make a big difference here.
 Now it does start to get fun. Draw construction lines from the vanishing points to locate your first (usually the leading) corner of the red square. The construction line needs to come through the vertical line that represents the right corner of the red square, all the way to the vertical guide line that represents the closest corner of the red square. Then, using the construction line as a guide I placed the red line on top, connecting the two points that represent the first wall of the red square. I did the same thing for the left corner to the leading corner, using construction lines first and then using them as a guide to make the second red "wall" line.
 Next we make the first vertical corner of the leading edge of the red square by following the vertical construction line. I use my eye to tell me what look proportional. Use another construction line to the right vanishing point to create the top of the right hand "wall" of the red square.
 Here is a close up of the first wall of the red square:
 Finish drawing the left wall of the red square the same way, using the left vanishing point and the already established top of the square, and the vertical guide that represents where the red square stops.
 And here I have colored in the square to show it more clearly. All those blue lines are just construction lines. They are made on layers that I will turn off to display the final image.
 OK, so let's do another one I will make this one green. First I draw the construction lines fron the viewpoint through each corner of the green square and up to the perspective plane. THen I use vertical guide lines positioned at the intersections.
 The green square touches the red square, so the point at which the vertical guide line touches the red square on that side determines where the green wall will start. Use the vanishing points to set the wall angle:
 Use the right vanishing point to determine the top edgge of the wall, I made it the same height as the red square but it doesn't have to be.
 I finished off the left wall using the vertical guide. Here is what is looks liek with no construction lines:
 So, then I did a blue one:


 And after removing the construction lines it starts to look like something:
 Of course, it doesn't really look anything like a finished rendered drawing, but it shows the basic technique I use to render a 2D floor plan into a 3D perspective with relative accuracy. Accuracy is not as important as asthetics and so that's where your artist's eye will be your best friend.


