DILYSI Dave wrote: If you're looking for a fire barrier but want to keep speakers, rather than the PITA of swapping speakers for filler plates as part of track prep, how about just make some steel speaker boxes that you weld to the underside of the shelf panel. Would give you your fire barrier without swapping stuff around, and as a bonus the speakers will sound better.
I did this really easily with a cut up yard sale tool box.
wheelsmithy wrote:DILYSI Dave wrote: If you're looking for a fire barrier but want to keep speakers, rather than the PITA of swapping speakers for filler plates as part of track prep, how about just make some steel speaker boxes that you weld to the underside of the shelf panel. Would give you your fire barrier without swapping stuff around, and as a bonus the speakers will sound better.I did this really easily with a cut up yard sale tool box.
Deep baking pans work too.
Great idea on modifying something already made DILYSI Dave. The fireboxes at 5 lbs each are too heavy. I'm gonna look into the baking pan possibility and other similar shaped items.
Rushforth wheels and Yokohama tires were both prizes I won in the contest that got me started with this project. I've gotten a lot of questions on why I'm switching to the different size wheels and tires for the new combo, so I'll try to explain it as well as I can in this post.
My old wheel/tire combo was 17 X 9.5 with 275 40 tires in front and 17 X 11 with 315 35 rears. The tires were Yokohama AO32's which are DOT R tires and while street legal they are meant for track day road course use. They were offered in soft compound for lightweight cars (imports) and a harder compound for heavier cars (like my 3500 lb. bird). I was very happy with the 17's however I found out that the possibilities for improving my braking system (stock with braided flex lines and Porterfield race pads/shoes) was very limited due to the rim design and diameter. Sure, I could switch to a 4 piston caliper in front and an entry level 4 piston rear disc setup but I'd probably end up spending a bunch of money with a marginal bang for the buck improvement in braking over the optimized stock setup.
The prizes for the contest included a set of Baer brakes. I called Baer and spoke with Todd (RIP) for quite a while about tracks, brakes, and other things while he questioned me about my use of the car. At the end of our conversation he recommended and offered to send me their 14" 6 piston front brakes with spindles and matching 14" rears along with a rear bias valve. This was waay beyond what I'd even hoped I would receive as a "give away" prize in a contest.
The Baers certainly wouldn't fit in my old 17" wheels and with wheels and tires also on the list of prizes I started considering what to get. A discussion with Jay at Rushforth confirmed that I'd need to go up to at least 18" wheels to fit the Baers and he informed me that the wheels could be any one of their models with whatever options I wanted up to 10" wide for the prize. The offer of any wheel custom made to order was great and like the Baers was above and beyond what I thought would be awarded as a "give away" wheel in a contest. He also said if I wanted them wider than 10" I could just pay the difference to get the hoops widened which was a great offer but not in my budget so at that point I was looking at a 10" max width wheel with a minimum diameter of 18"
Having researched and followed discussions (debates) on the performance of wheels over 15" for years I decided 18's would be good if I could get tires to go with them and I'd prefer not to go up to 19-20". Seems like 17-18 is the sweet spot for most of us with PT type cars and unless you have ungodly power the increased MOI of larger diameter wheel/tire combos might actually reduce lap times. Yokohama had stopped producing the AO 32's I ran previously and released the AO 48 which is a newer version of the DOT R tire with a slightly different tread pattern. AO 48's are not available in a 275 or 315 width in 18" but are available in a 285 and 295 width which are ideal widths for a 10" wide rim. I'd experienced a slight rub under certain conditions on track with 315's out back anyway and had been considering trying some type of panhard bar or watts link but really had no desire to do that unless it became necessary. So with a 10" rim limit and a narrower tire I wouldn't have that problem anymore with the right backspacing.
A 10" front wheel with a 285 is too wide for most 2nd gens with stock turning radius and typical inner wheels/suspension/steering. Since I don't really need the turning radius tight enough for parking lots at the mall I decided I'd rather have wider front tires and limit the turning radius. The old 275 17's rubbed my swaybar at full lock so I knew the 285's would require some type of modification for safety.
I also needed to keep in mind the overall diameter because I didn't want to raise the whole car off the ground or have the tire hit the inner fender during bump. This meant I needed to pick a tire under 26" tall and the 285/295 30 18's from Yokohama are just under 25" which is pretty short for a PT car but fits my desire to keep the car low and have suspension travel, everything is a compromise. Performance comes before looks for me so although a bigger diameter tire would fill the wheel well better I think I'll like the tires I've chosen.
The final decision was 285 30 18 up front and 295 30 18 rear tires on polished 18 X 10 Rushforth Night Train rims with no rivets and when I got them the search for an installer started. When going to a tire installer I had to explain that the front and rear rims look very similar but have different backspacing. The tires are directional so each wheel/tire combination can only be used on one corner of the car once assembled so when they're done I'll have RF, LF, RR, LR. The tires are marked for match mounting to reduce the amount of stick on wheel weights they need to use so they need to line up the tire in the proper place on the rim before mounting while making sure they have the rotating direction and tire size correct for that wheel. I got the deer in the headlights look at most shops, and that was before I would even ask about road force balancing.
I finally found a shop that said they could install the tires on the wheels properly. The fit was very very tight and they (and I) realized they were out of their league after they only got the tire half way on the rim with it rotated so the match mounting mark was way off, so I stopped them and took the wheel without even allowing them to try and remove the tire for fear they'd damage the wheel, tire, or both. I then proceeded from tire place to tire place (15-20) asking if they had the proper equipment and could correctly mount the tires with no success. I stopped by the local Porsche race shop hoping they might be able to do them but instead they recommended AMF tire in Boca Raton saying AMF mounted the slicks on big fat race wheels for the Porsche's all the time. So off to AMF I went and even with the rim and tire bead all lubed up the machine wasn't wasn't powerful enough to get the tires on without the additional weight of a large heavy man on a long tire lever to help the machine. Ya, they were really tight. Once the tires were on the rims they balanced up fine.
After they were mounted and balanced I washed them of all the glop from mounting and polished them up for the beauty shots. I'd be nice if the car was ready for them but they're getting bagged and set aside till I start mocking things up and need them. Now if I could just remember where I put the center caps!
I had that problem with my DPEs on the e55, no one could muscle the 315/30 onto the rims.
That is going to look really pretty on the car!
Damn, and I feel pimp when I find some castoff wheels in the piles behind tire shops that sort of make my car look better.
That's gorgeous.
DaewooOfDeath wrote: Damn, and I feel pimp when I find some castoff wheels in the piles behind tire shops that *sort of* make my car look better. That's gorgeous.
Thanks guys! Now I just need to make the car worthy!
So onto window channel repairs. I'm waiting on weld in trim clip studs to repair the rear one so here's the front repair I needed to make. I have a new (well 20 years ago ahahaha) headliner it the car which is perfect and I don't want to damage or try to replace it with the roll cage in the way. So welding is something I wanted to avoid above the headliner plus welding creates the possibility of warping the roof skin in that area.
To get started the leftover urethane was scraped off with a scraper that holds razor blades using a plastic razor blade. If you've never seen them they are the same size as a single edge razor but without the very sharp edge, great for scraping stuff you don't want scratched (like paint) and don't dig in and snap like metal blades which is why I use them for scraping urethane window sealer. After scraping wax and grease remover with a bunch of rags will remove the remaining urethane then small wire wheels are used to remove the paint as well as any rust.
I found a small rusted area around one of the trim studs and several of the studs were missing. Now I know why the trim kept lifting over 100 MPH and had to be paped down! I'll clean off places to spot weld the new studs when they arrive.
To fix the rust the area was cleaned well with a wire wheel. Then a carbide bit (like you'd use porting heads) was used to "thin" the sheet metal where the rust was taking it back to clean metal. Then that area was carefully dimpled in a little and a piece of sheet metal bonded in with 3M 8115. Once dry the panel bond was sanded flush and a little plastic filler skim coated on, sanded, and then the window channel epoxy primed.
The findings after cleaning the channel were rust around a stud and a few missing? I had used one of the screw in repair studs when I painted the car 20+ years ago where the small hole is left of the rust area but that one along with a couple others were MIA after removing the trim and window.
[URL=http://s240.photobucket.com/user/NOTATA/media/The%2014%20Car%20Performance%20Therapy/001_zps154539bc.jpg.html]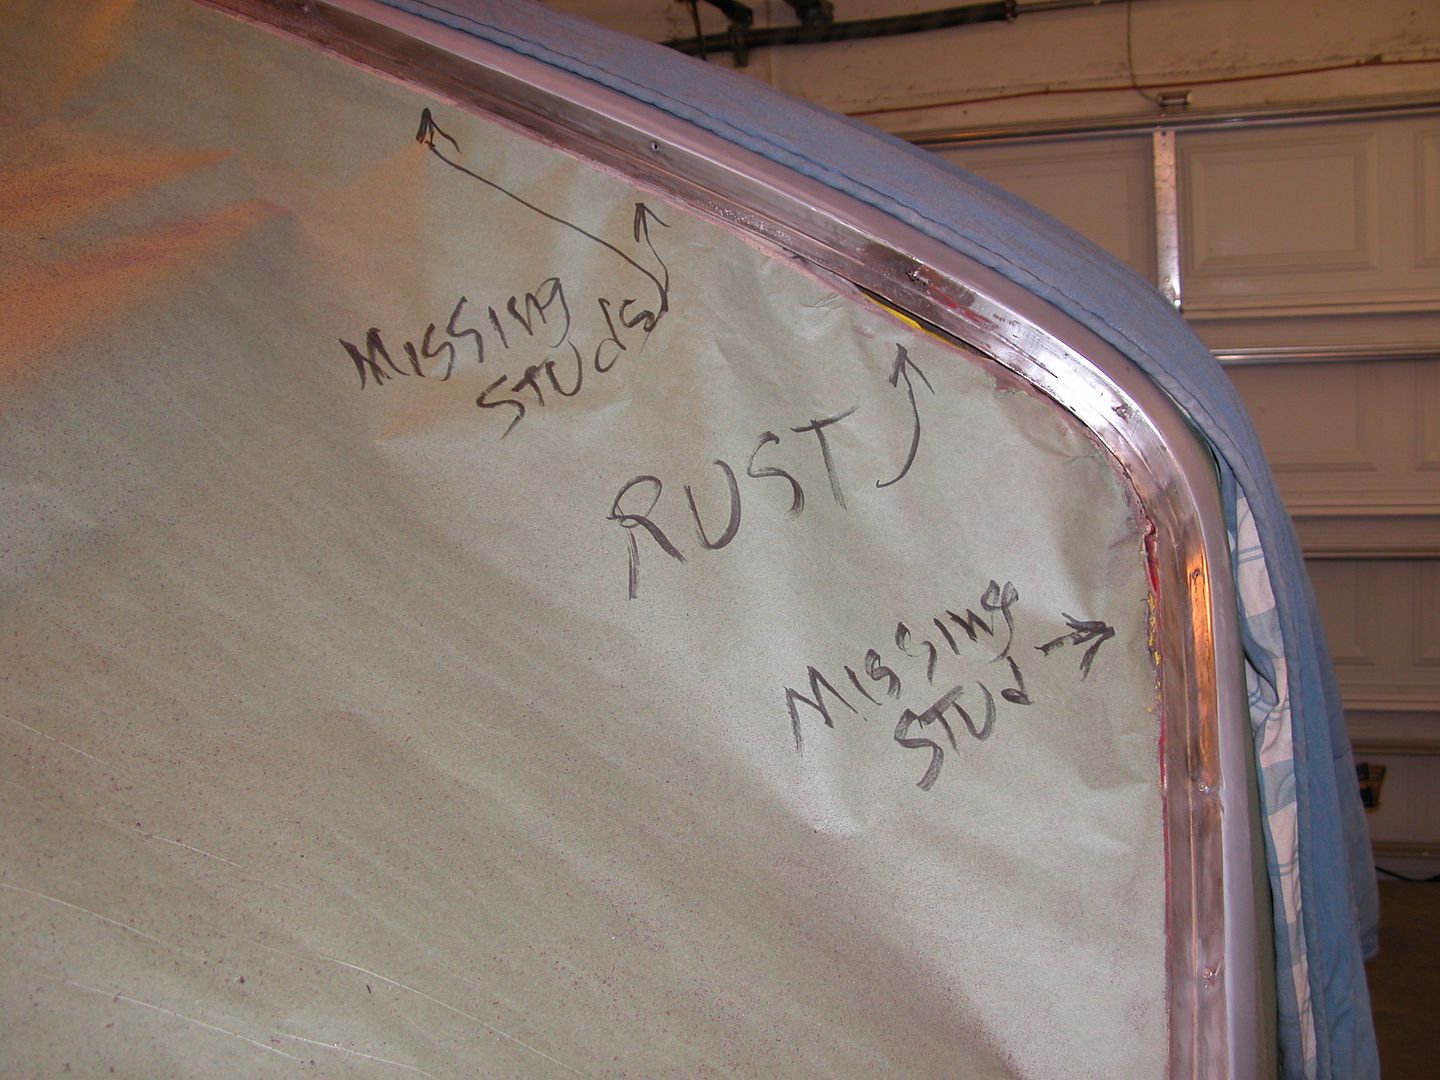 [/URL]
The rusted area after wire wheel cleaning marked to make a patch panel.
[URL=http://s240.photobucket.com/user/NOTATA/media/The%2014%20Car%20Performance%20Therapy/003_zps2b28294c.jpg.html]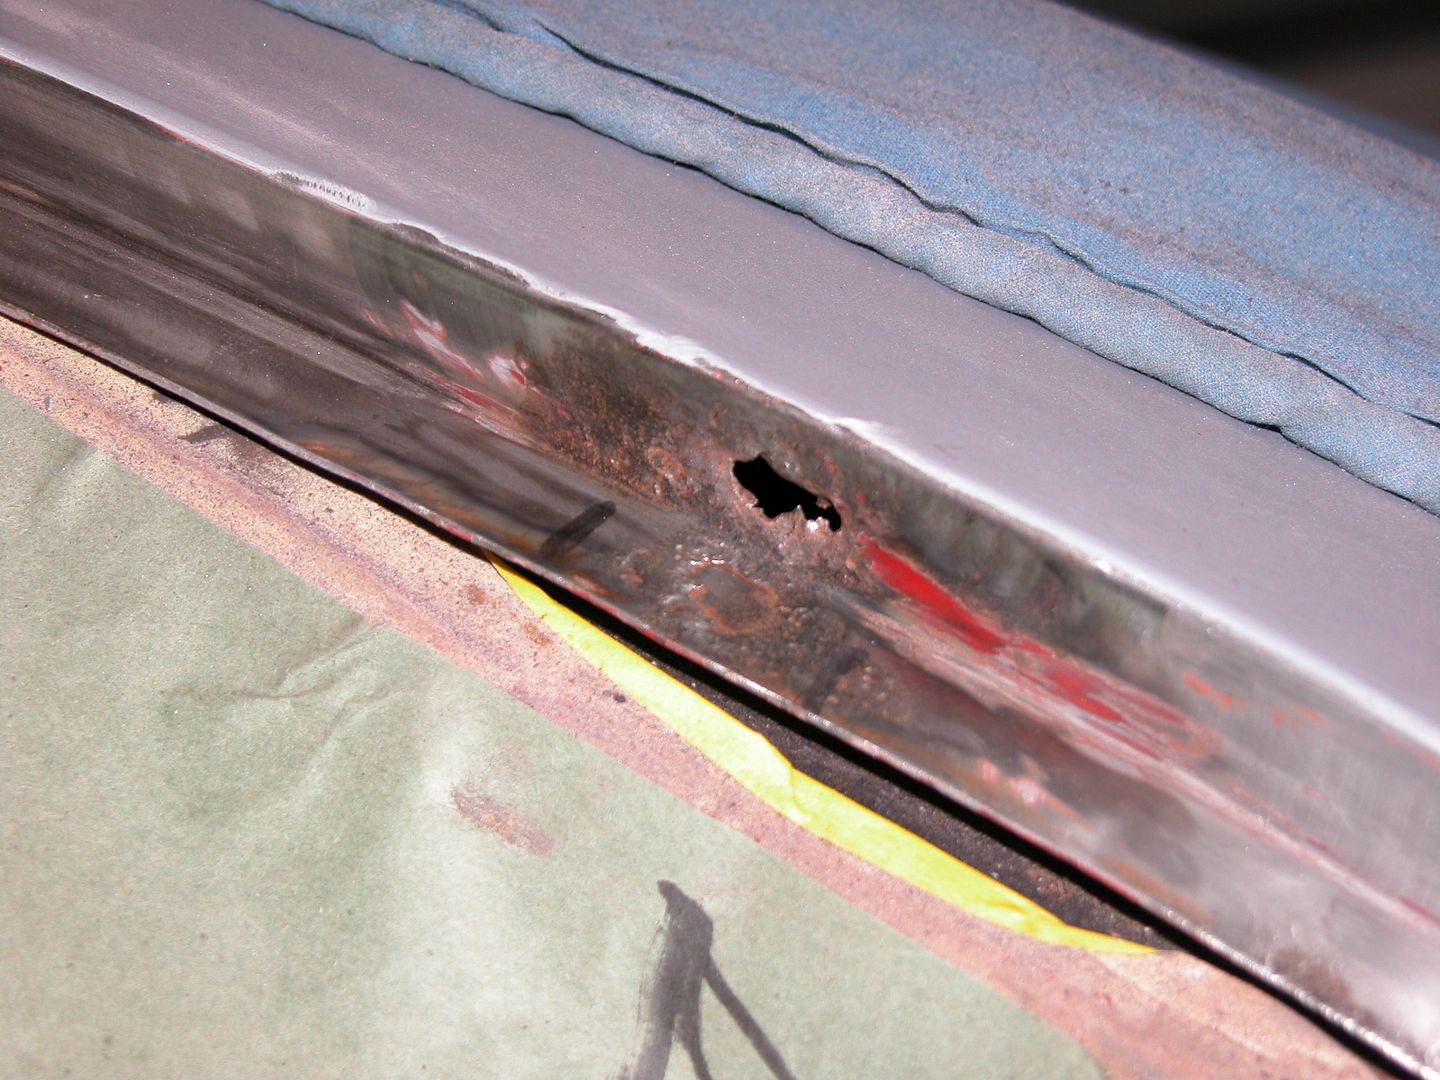 [/URL]
Patch piece and the area ground down for the patch.
[URL=http://s240.photobucket.com/user/NOTATA/media/The%2014%20Car%20Performance%20Therapy/004_zps01ea9ecd.jpg.html]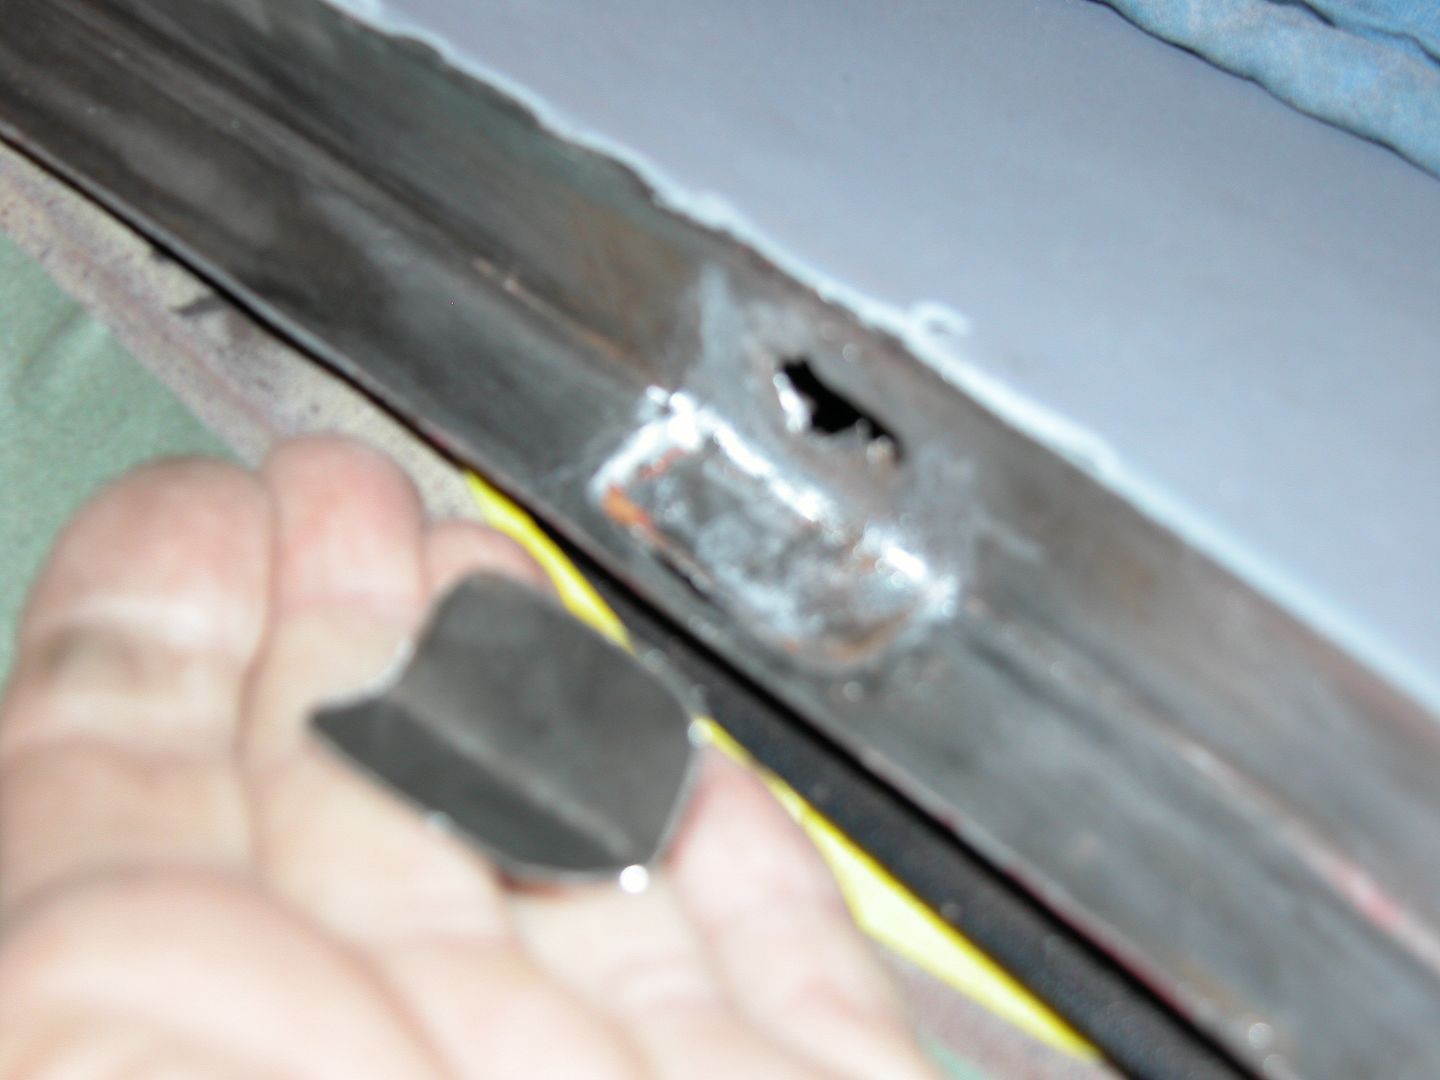 [/URL]
Patch installed with panel bond.
[URL=http://s240.photobucket.com/user/NOTATA/media/The%2014%20Car%20Performance%20Therapy/006_zpsa431cf6c.jpg.html]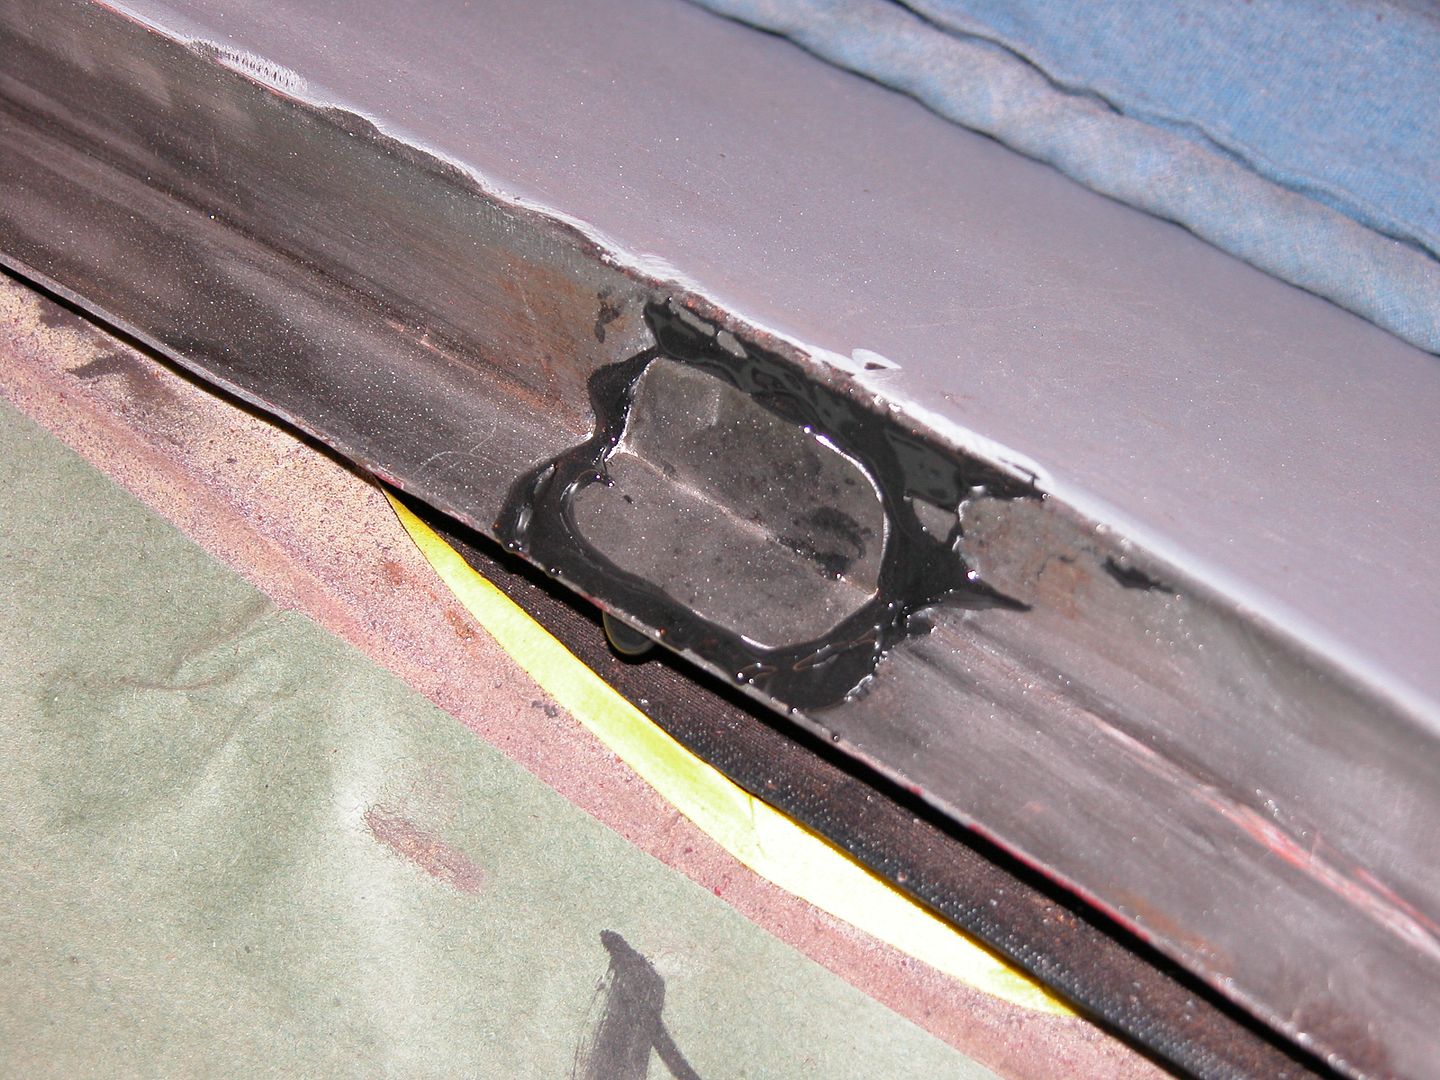 [/URL]
Extra panel bond removed.
[URL=http://s240.photobucket.com/user/NOTATA/media/The%2014%20Car%20Performance%20Therapy/007_zps4ea10d66.jpg.html]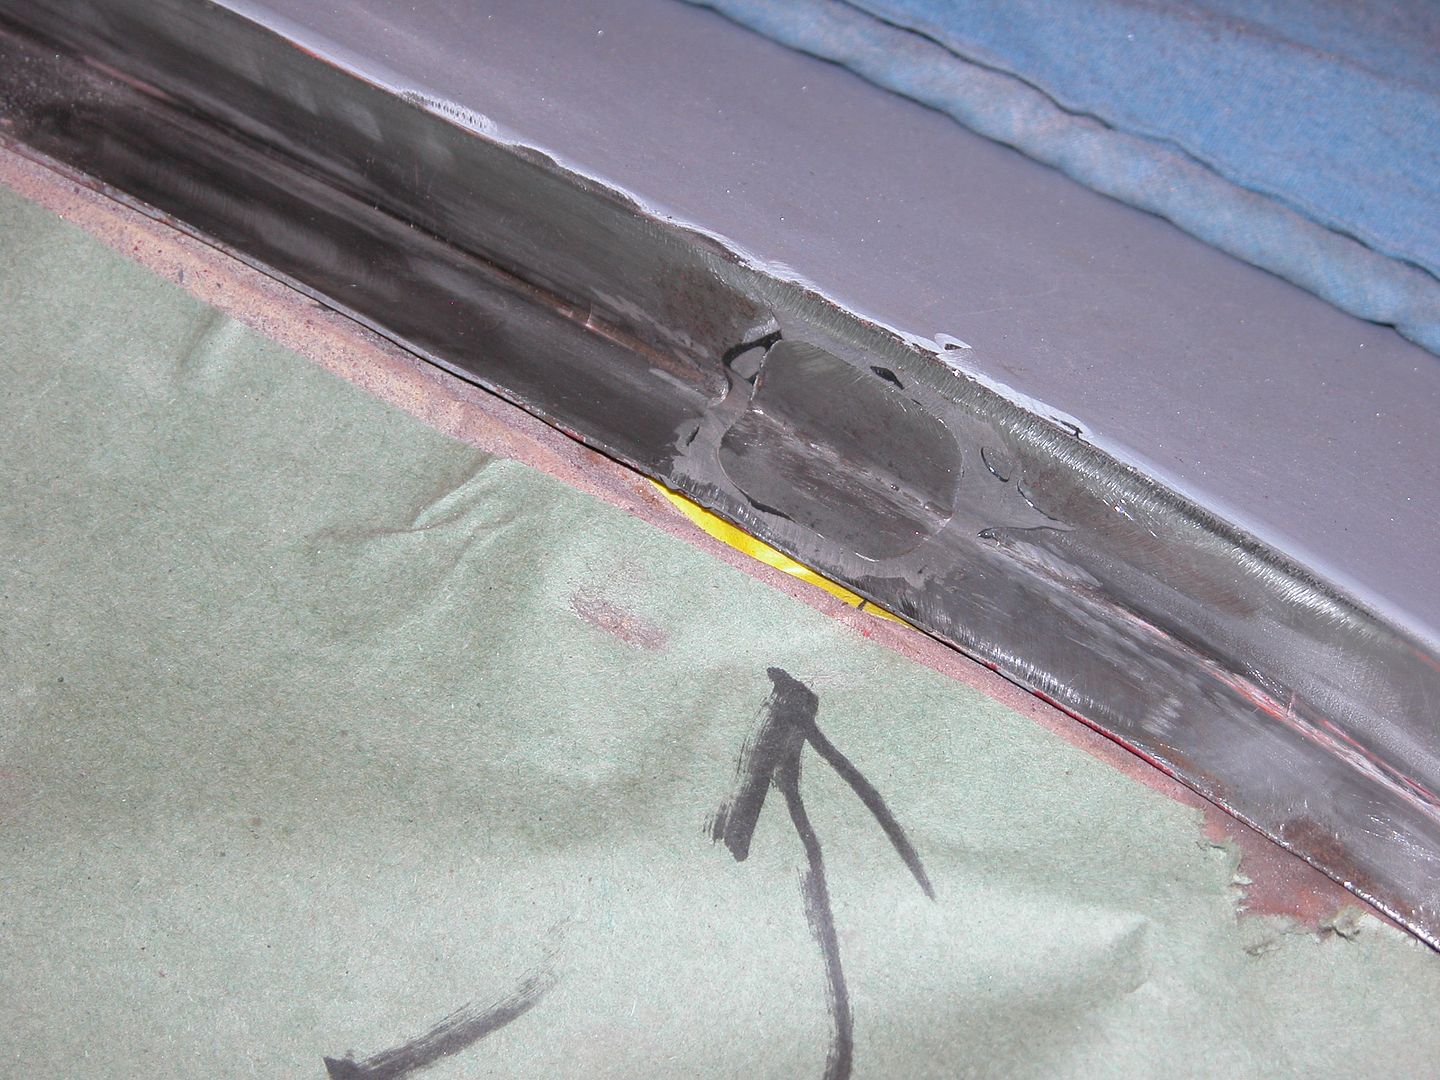 [/URL]
Plastic filler smoothed and the channel epoxy primed.
[URL=http://s240.photobucket.com/user/NOTATA/media/The%2014%20Car%20Performance%20Therapy/009_zps66f8ca7e.jpg.html]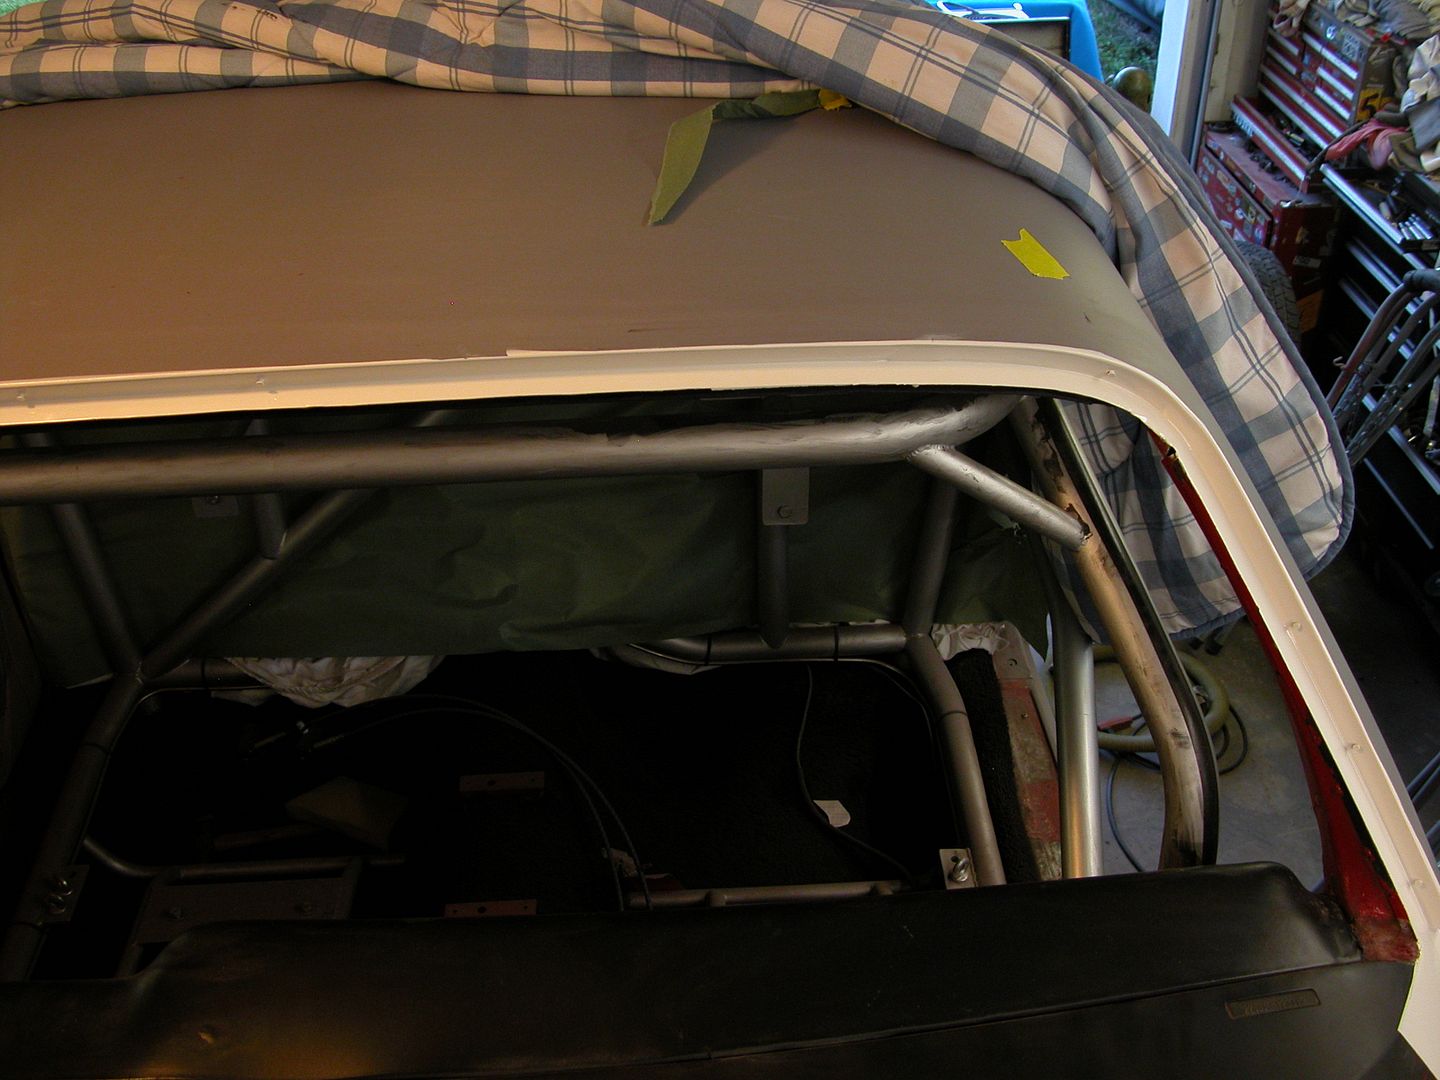 [/URL]
While doing the channel I also fixed some pitting in the lower corner of both sides that's common on 2nd gen F bodies. No new metal needed so pits were cleaned, panel bonded, smoothed, primed. Rear window channel needs more metal repair than the front did, will post when I get the studs I need to do it.
[URL=http://s240.photobucket.com/user/NOTATA/media/The%2014%20Car%20Performance%20Therapy/008_zps6963fae1.jpg.html]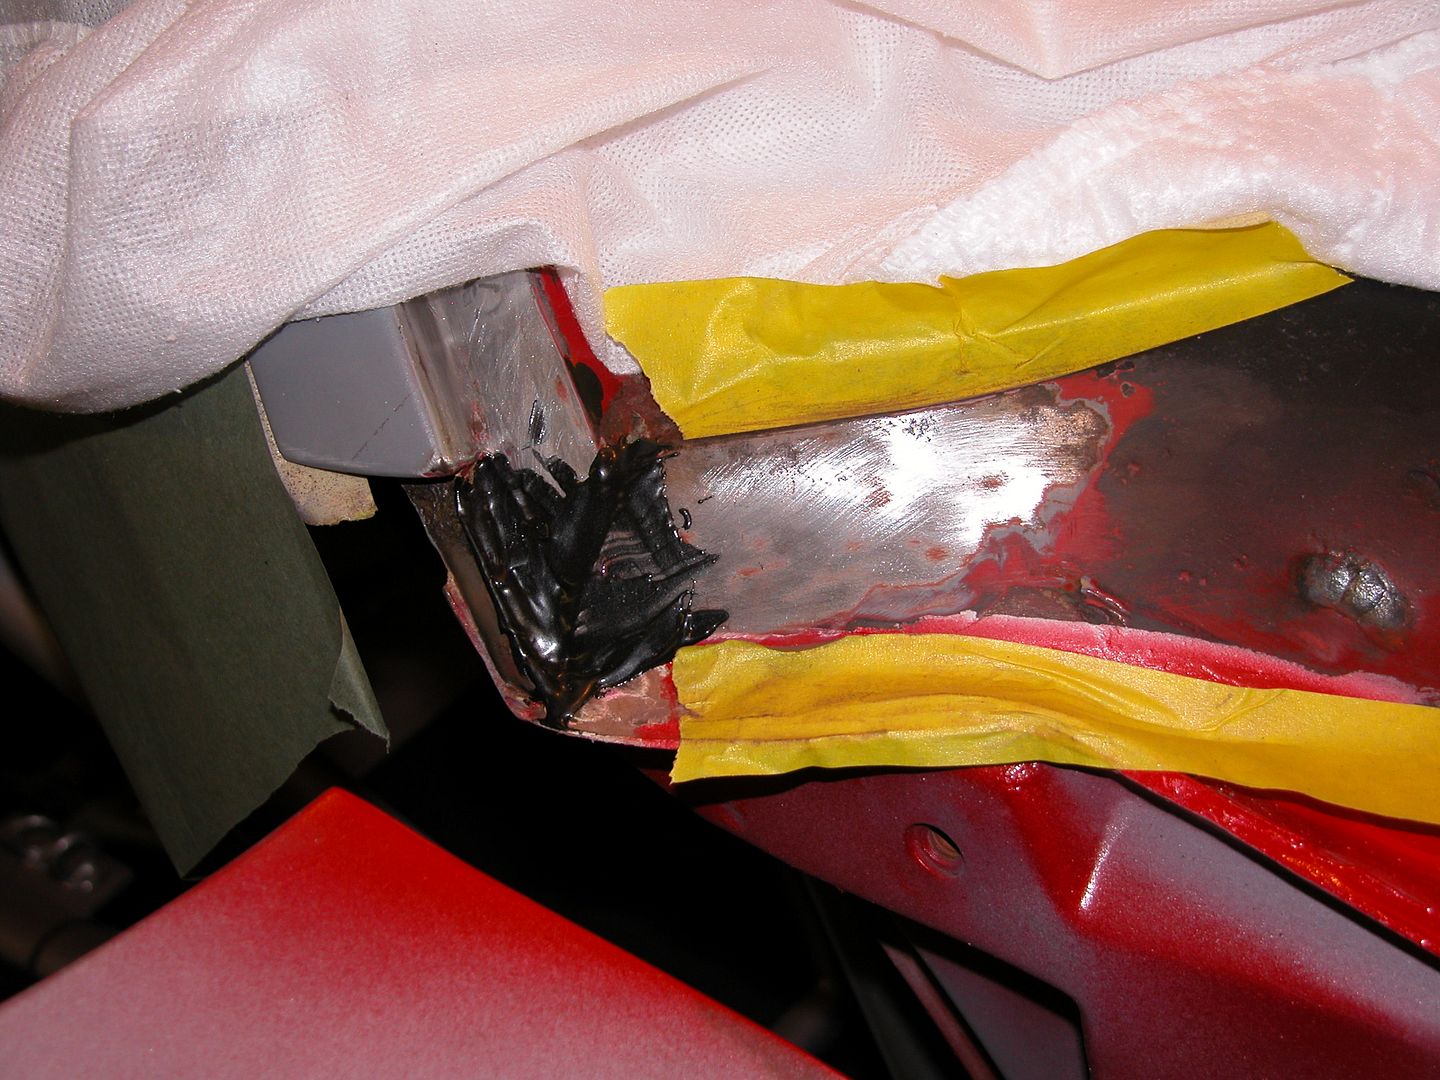 [/URL]
[URL=http://s240.photobucket.com/user/NOTATA/media/The%2014%20Car%20Performance%20Therapy/011_zpsd425b85e.jpg.html]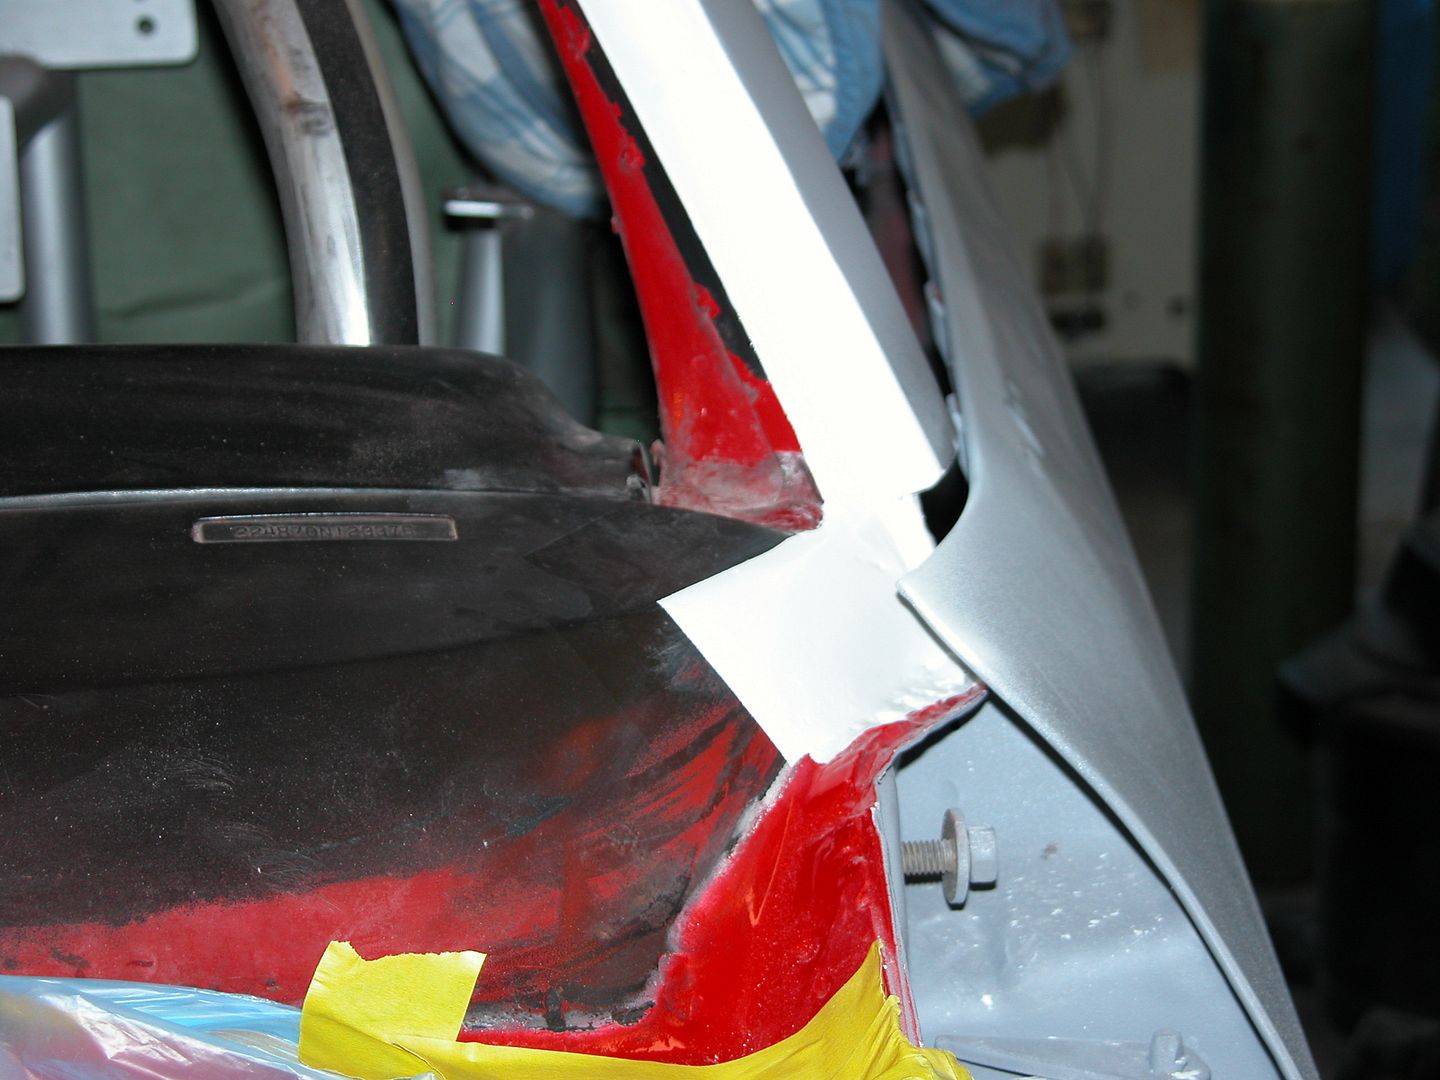 [/URL]
Sometimes a little mistake can add a lot of work and additional scope creep. Grrrr
Back in the summer I'd taken part of the dash out while removing the HVAC system and smoothing the firewall. While doing so I used some masking tape to protect the dash from scratches while removing the gauge panel fascia. I've done this several times in the past 20+ years since I originally dyed the dash. By sticking the tape to clothing several times before applying it the stickiness is reduced and the tape can be carefully removed within a few days without removing the vinyl dye. Well, I didn't remove the tape right away this time and am paying the price.
[URL=http://s240.photobucket.com/user/NOTATA/media/The%2014%20Car%20Performance%20Therapy/003_zps7bdb902a.jpg.html]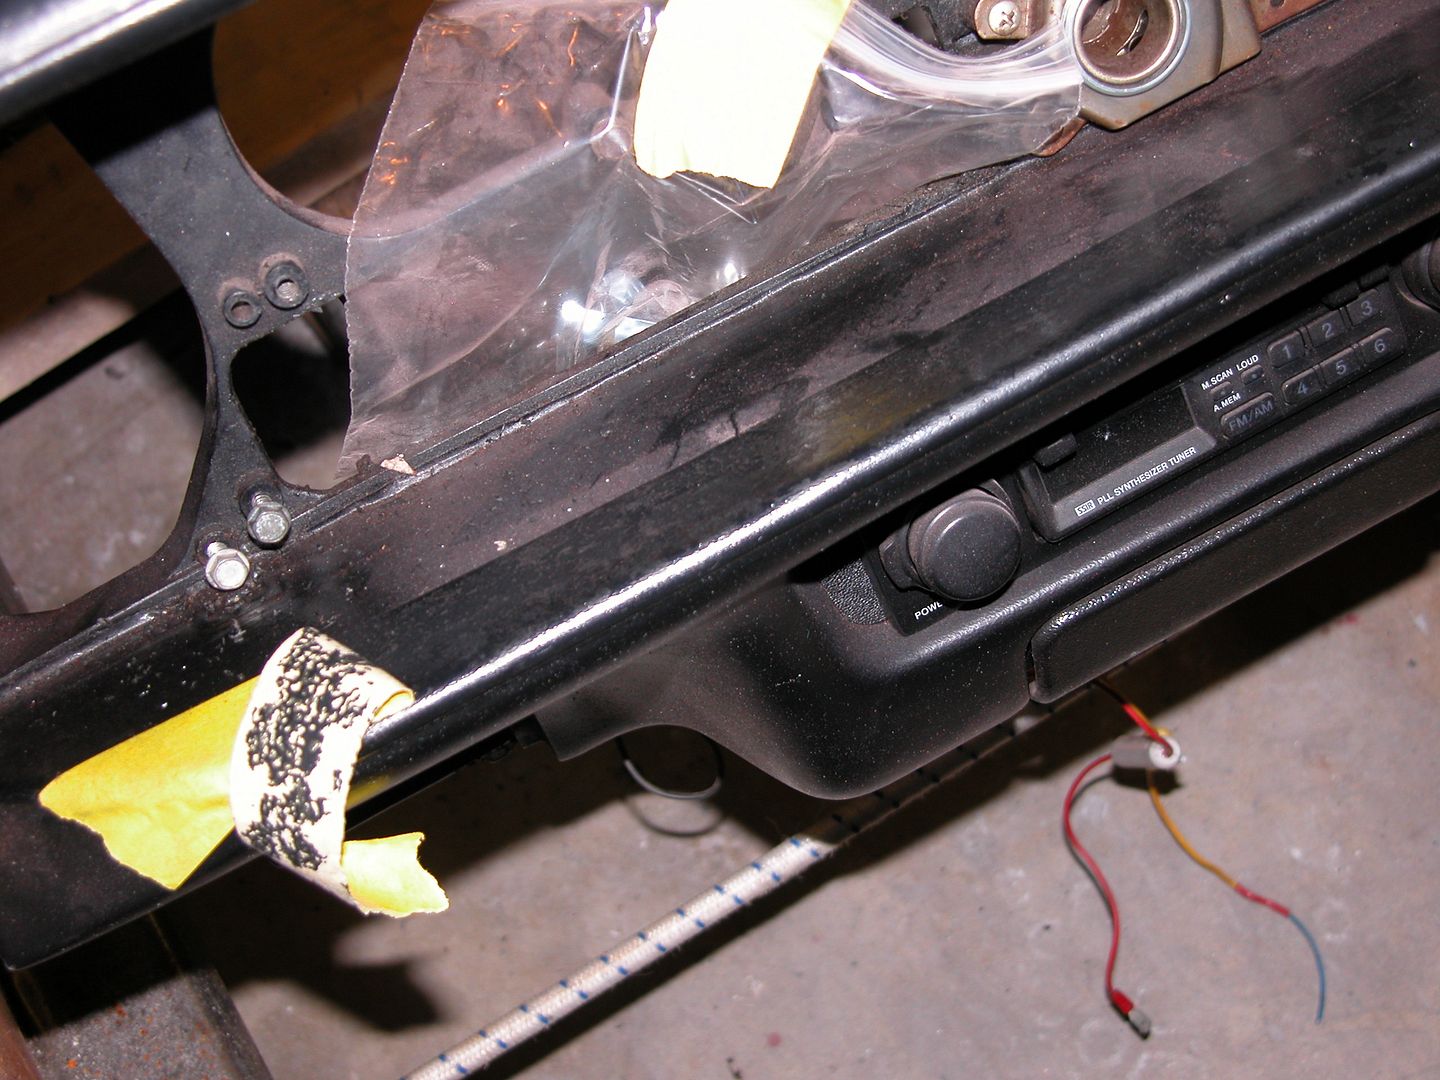 [/URL]
Stripping and redying the dash in the car with the cage in the way would make it very difficult so I figured , remove the dash right? I'd asked the cage builder at the fabrication shop to leave enough room to get the dash out so that if/when a new dash was needed and reproductions were available I could replace the original. Good plan but the dash wouldn't come out without hacking away part of the dash structure and cutting back the metal where the upper dash mounts.
Now although I got the dash out I had to remove the vent mounting area on the left side for clearance. That requires me to make a new gauge panel as well as doing the repairs necessary and strip/dye the dash before reinstalling it.
[URL=http://s240.photobucket.com/user/NOTATA/media/The%2014%20Car%20Performance%20Therapy/004_zpse58cde6f.jpg.html]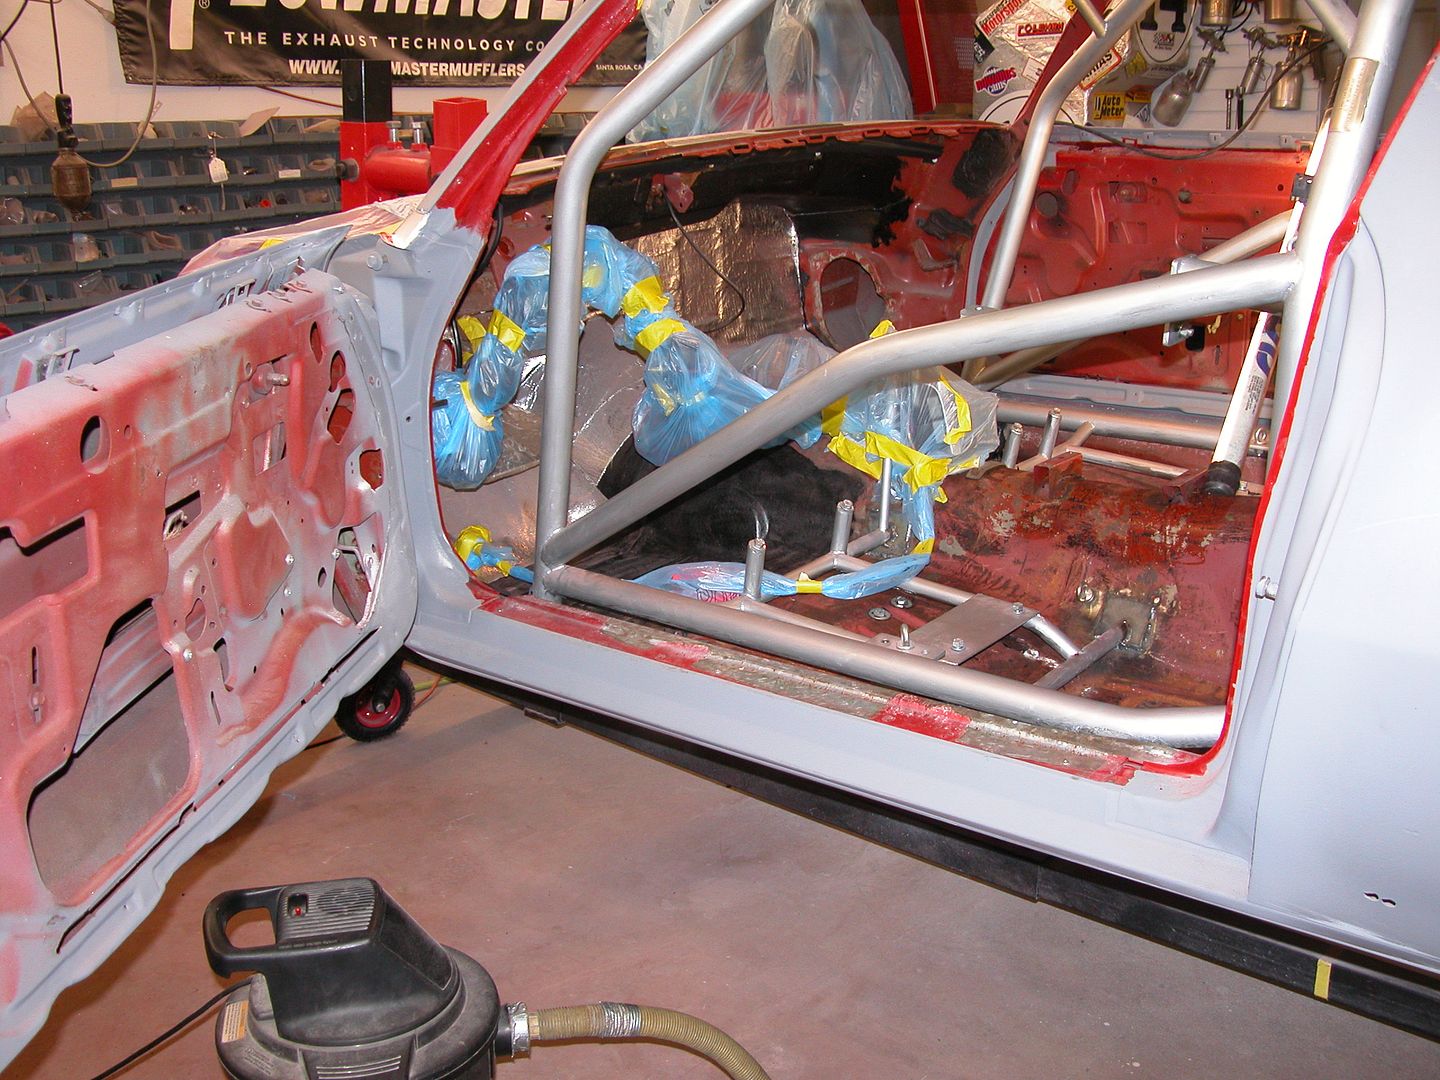 [/URL]
Then scope creep took over once again. I figured since I've gone that far and no longer have to protect the dash I'd might as well remove the rear carpet, do the floor, and shoot the cage with a gun. I had a deadline to make a track day when I was reassembling the car after the cage install several years ago and didn't have time to strip and paint the floors. Also with the windshield, rear window, headliner, dash, door panels, etc. in the car I couldn't mask everything well enough and have access to shoot the cage so I painted it with a brush. So nows the time and I'm stripping the floor as well as sanding the cage. The only things left in the car are the headliner, shifter, brake pedal, and wires. Had I known I'd get this deep I would have taken everything out from the start and saved a lot of time and materials trying to keep things masked off.
By the way, it really sucks trying to work in a caged car. My car evolved over time rather than being a ground up build originally. If you're gonna get a cage, strip and paint the interior first.
[URL=http://s240.photobucket.com/user/NOTATA/media/The%2014%20Car%20Performance%20Therapy/010_zps301955a6.jpg.html]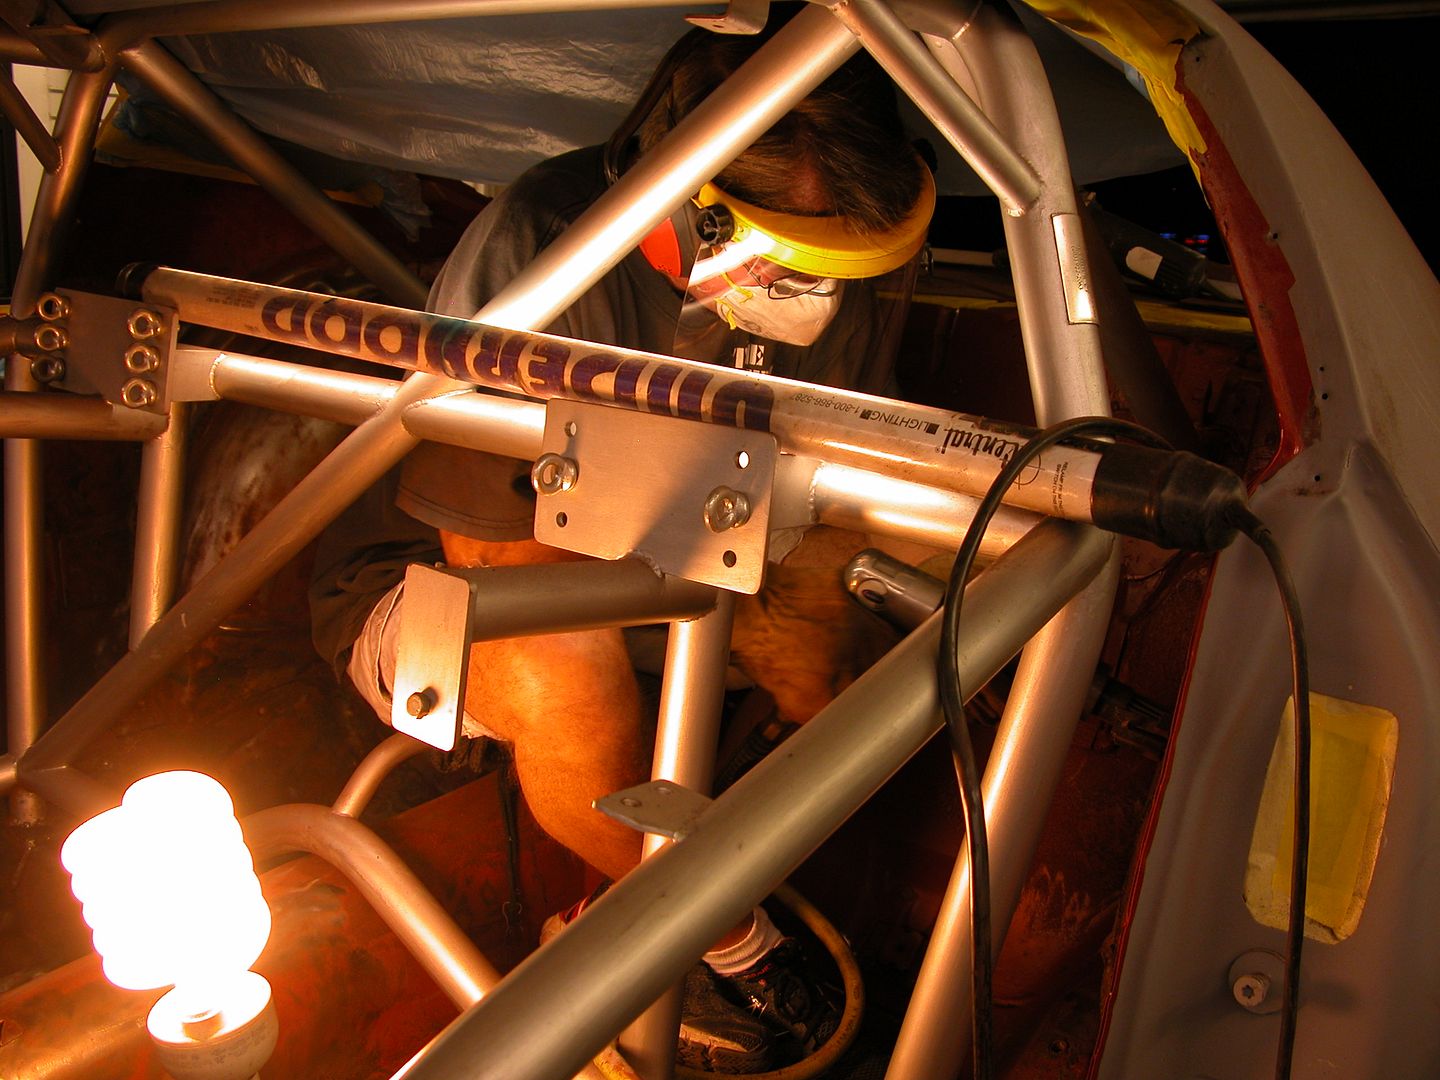 [/URL]
DILYSI Dave wrote:By the way, it really sucks trying to work in a caged car.Understatement.
Ya it was! Probably take a few days for the bumps & cuts to heal. Got the floor stripped to bare metal and painted with Chassis Saver tonight.
[URL=http://s240.photobucket.com/user/NOTATA/media/The%2014%20Car%20Performance%20Therapy/001_zpsff64e4f9.jpg.html]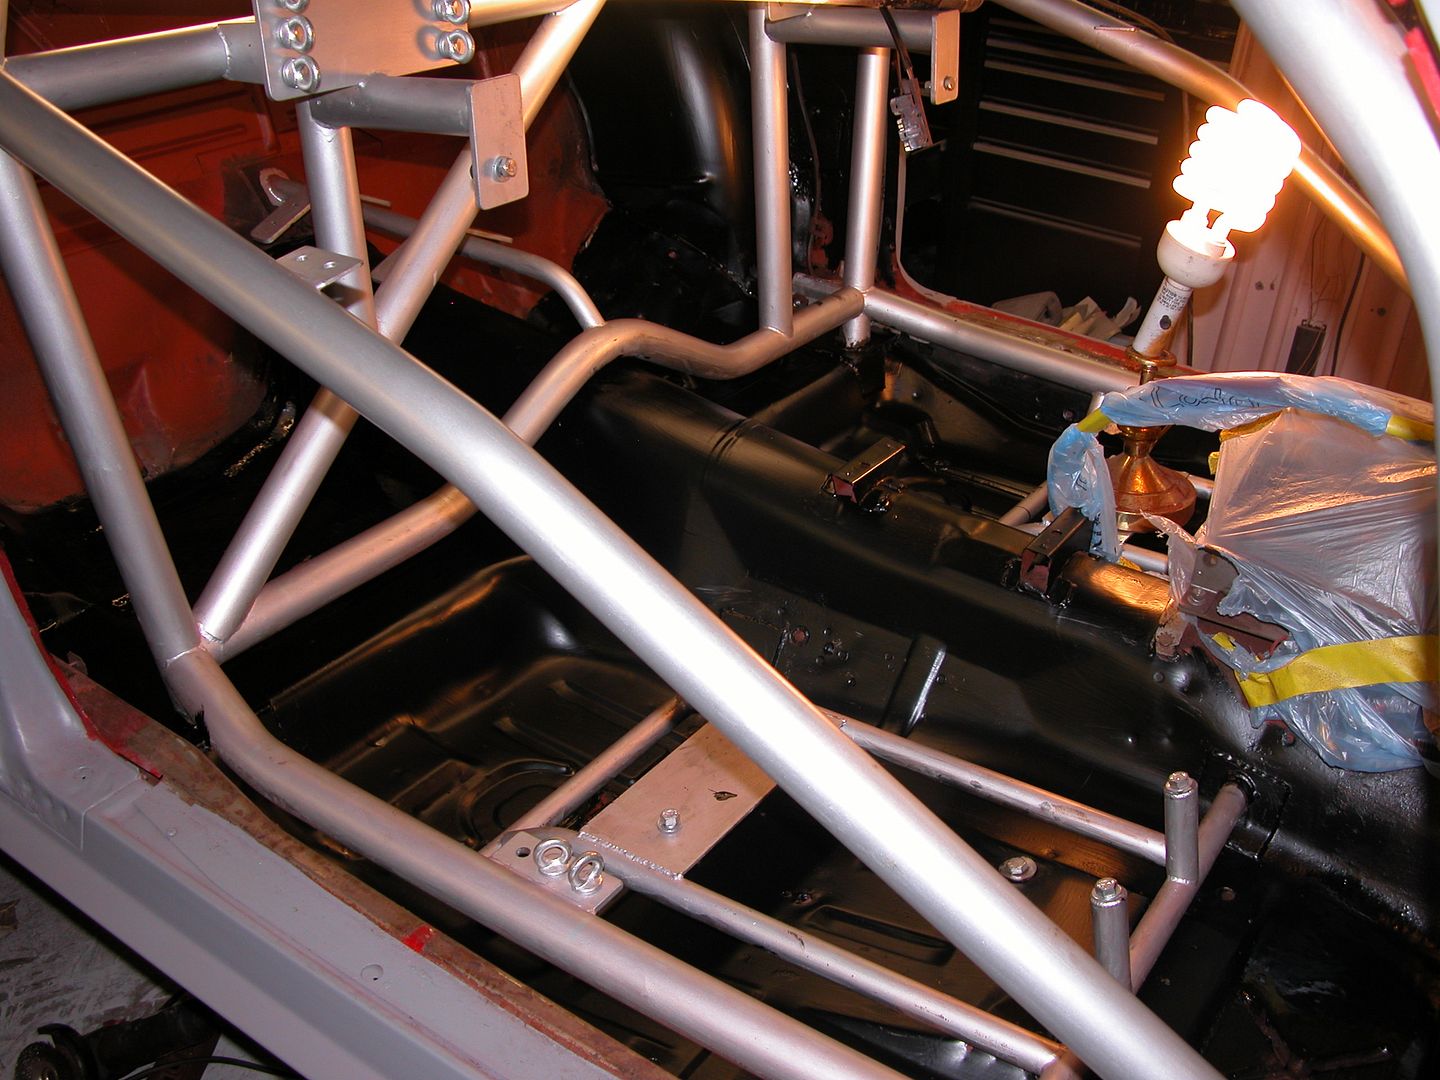 [/URL]
Still haven't come up with some kind of metal shoebox to use for the speakers but I'm looking.
My last lengthy entry was about a small mistake that cost me big. This one will hopefully prevent some of you from making a mistake I see too often.
While prepping cars for paint people have a tendency to concentrate their efforts on the exterior. Spending hours on panel alignment to get the best gaps, sculpting perfect body lines, and spending many hours block sanding to make the car straight. Meanwhile the door, hood, and trunk openings get little or no attention other than maybe a quick once over before paint. I've seen lots of cars with beautiful exterior paint and when opening a door, trunk, or hood there's bondo globs, grinder marks, wire wheel gouges, 80 grit sand scratches, rust pits, and dents that have been painted body color. I think of the openings as a transition zone which shouldn't attract attention between the gorgeous exterior and an inviting interior, engine compartment, or trunk.
My tip is to treat the areas you see when opening things as well as you would the exterior. Yes, I know it's a lot of tedious work and it doesn't look like you accomplish much for the time spent but it will greatly improve the overall quality of the paint job.The edges of the hood and front fenders should be treated like the exterior even if your engine compartment looks like crap now. You may do an engine compartment makeover later and wish you'd spent more time on the prep work there.
To be sure you're doing the areas that are seen, put the associated pieces in position so you can see the areas that will show when the car is painted. Then treat those areas to the same care you would an exterior panel.
You can see in the pics below how much of the trunk jamb needs to be done nicely. Yes it is a real pain to smooth and sand the hinge pocket area with the welded in bracket in place, but do it. Note the vertical area between the filler panel and trunk lip that goes all the way across between the hinge areas. It gets missed a lot on 2nd gens because people don't realize it's seen. I did the whole area under the filler panel pretty nice but you won't see most of it so if patience isn't your thing concentrate on the areas that are seen. Seam sealer will be used around the bracket where it's welded to the body. I'm getting all the jamb areas in final primer which will be sanded again before sealer and paint.
For the door jambs get your interior door panel and set it in place for the visual. There's a raised rib between the inner panel and door gasket that shows body color when everythings assembled so be sure to work past that rib to about where the interior panel clips pop in. The hinge end of the door isn't as critical just keep in mind what you can see when the door's open.
Most 2nd gen F bodies need rear window channel repairs at some point because of a lousy drainage design. I never knew until taking the car apart this time but mine was repaired by the previous owner with fiberglass in the 70's. I didn't remove the rear window the first time I painted my car 25 years ago but with it out this time I noticed the fiberglass matting and started digging with wire wheels and grinder discs exposing some areas that had rusted through and thin metal with pitting in surrounding sections.Luckily the rusted parts had not extended beyond the part covered by the trim before the previous owner had glassed it over preserving it.
Welding in new metal would require welding over the headliner and risking warping the exterior sheet metal so I chose to add new metal by bonding it in with panel bond. I DO NOT recommend this type of repair if the rust extends to the exterior surface because there is a high probability of ghosting and other surface anomalies occurring after painting the car. This happens because of the different expansion/contraction rates of single thickness sheet metal vs. double thickness sheet metal, and the panel bond itself. If the rust extended to the exterior I would have made a new channel and butt welded it in place.
For this repair I wire wheeled the window channel to remove all rust and cut out the thin rusted sections of the channel with a cut off wheel. Removed paint on the backside with sandpaper rolls on a tapered mandrel attached to a long reach die grinder to get up in the little channel inside the quarter. Welded trim studs in sheet metal measured to line up in the centers of the holes I'd made, then cut and ground the patch panels to fit. Dimpled the panels where the trim rivets that will be used for trim clips are being retained after panel install (extras are used to hold patch panels while drying). Bend twist panels to fit tight to the back of the original window channel. Finger smear panel bond on backside of channel and locate panel into position. Pull the panel tight using the trim rivets to pull on. Used old bondo spreaders with a slot cut and additional spreaders used as a wedge to keep panels tight while drying. Used carbide grinding tip on die grinder to remove unneeded trim rivets. Ground off excess panel bond and then added a layer of panel bond over the repaired section including all pitted areas. Ground down panel bond with 36 grit wheel and hand sanded to make sure the panel bond was slightly lower than the metal. Finger smear bondo over the whole section. Sanded bondo smooth and epoxy primed, ready for high build primer and finish sanding. Backside will be brush painted with epoxy primer to cover any bare metal of the sanded metal and patches.
[URL=http://s240.photobucket.com/user/NOTATA/media/The%2014%20Car%20Performance%20Therapy/001_zpsc46a69e8.jpg.html]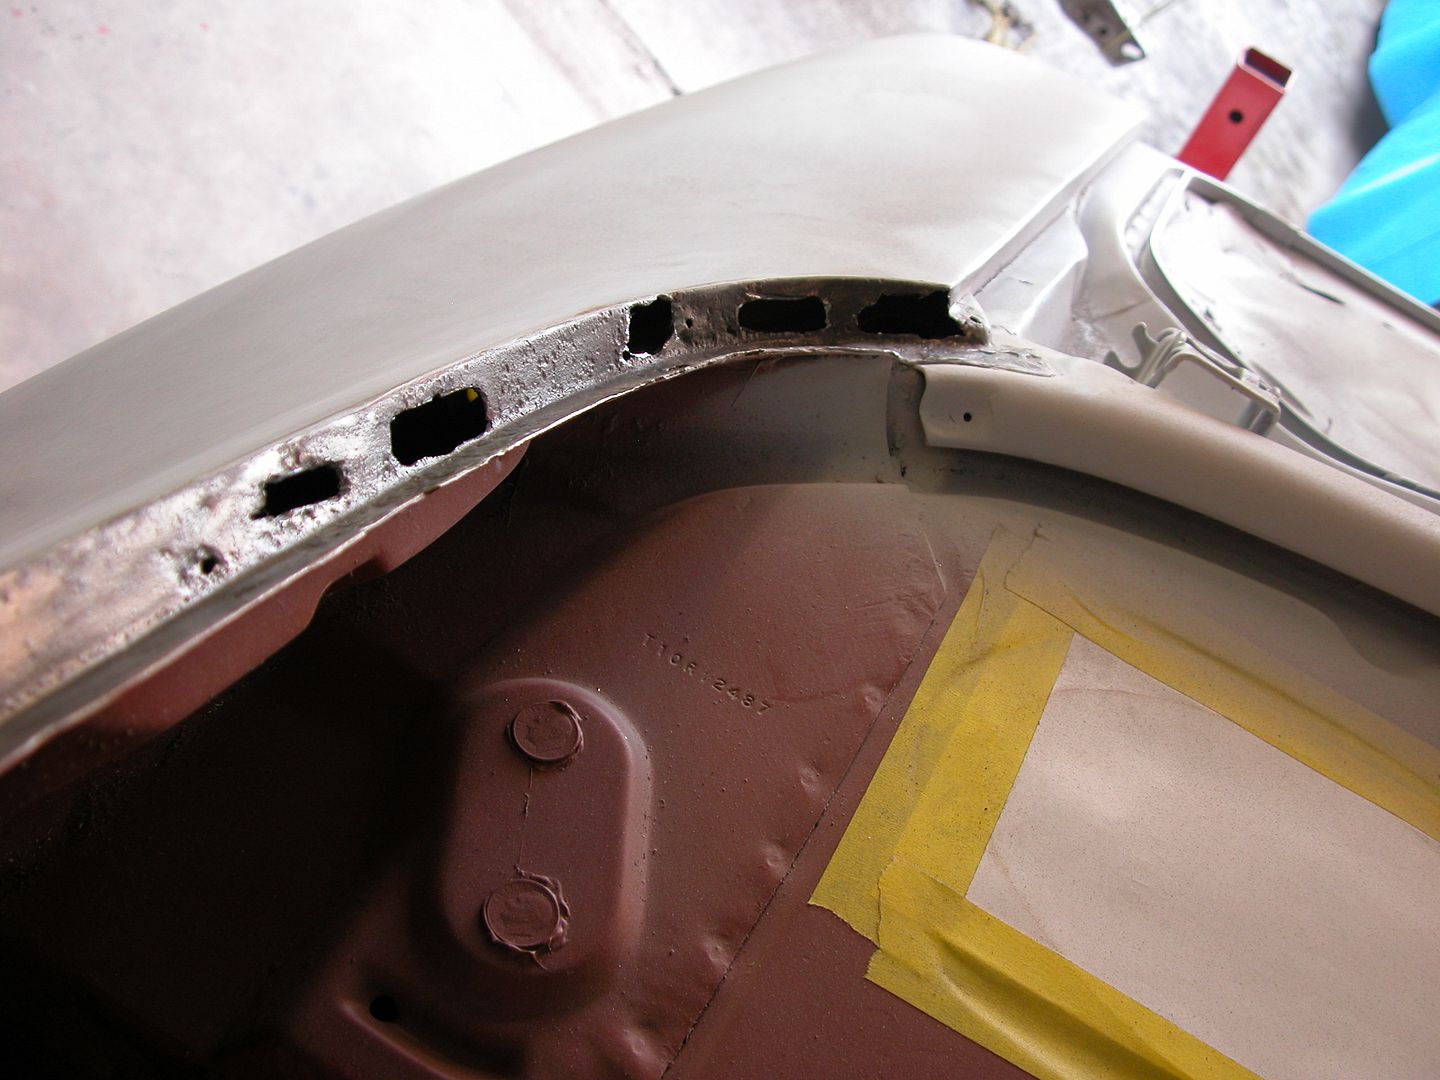 [/URL]
[URL=http://s240.photobucket.com/user/NOTATA/media/The%2014%20Car%20Performance%20Therapy/003_zps043a021c.jpg.html]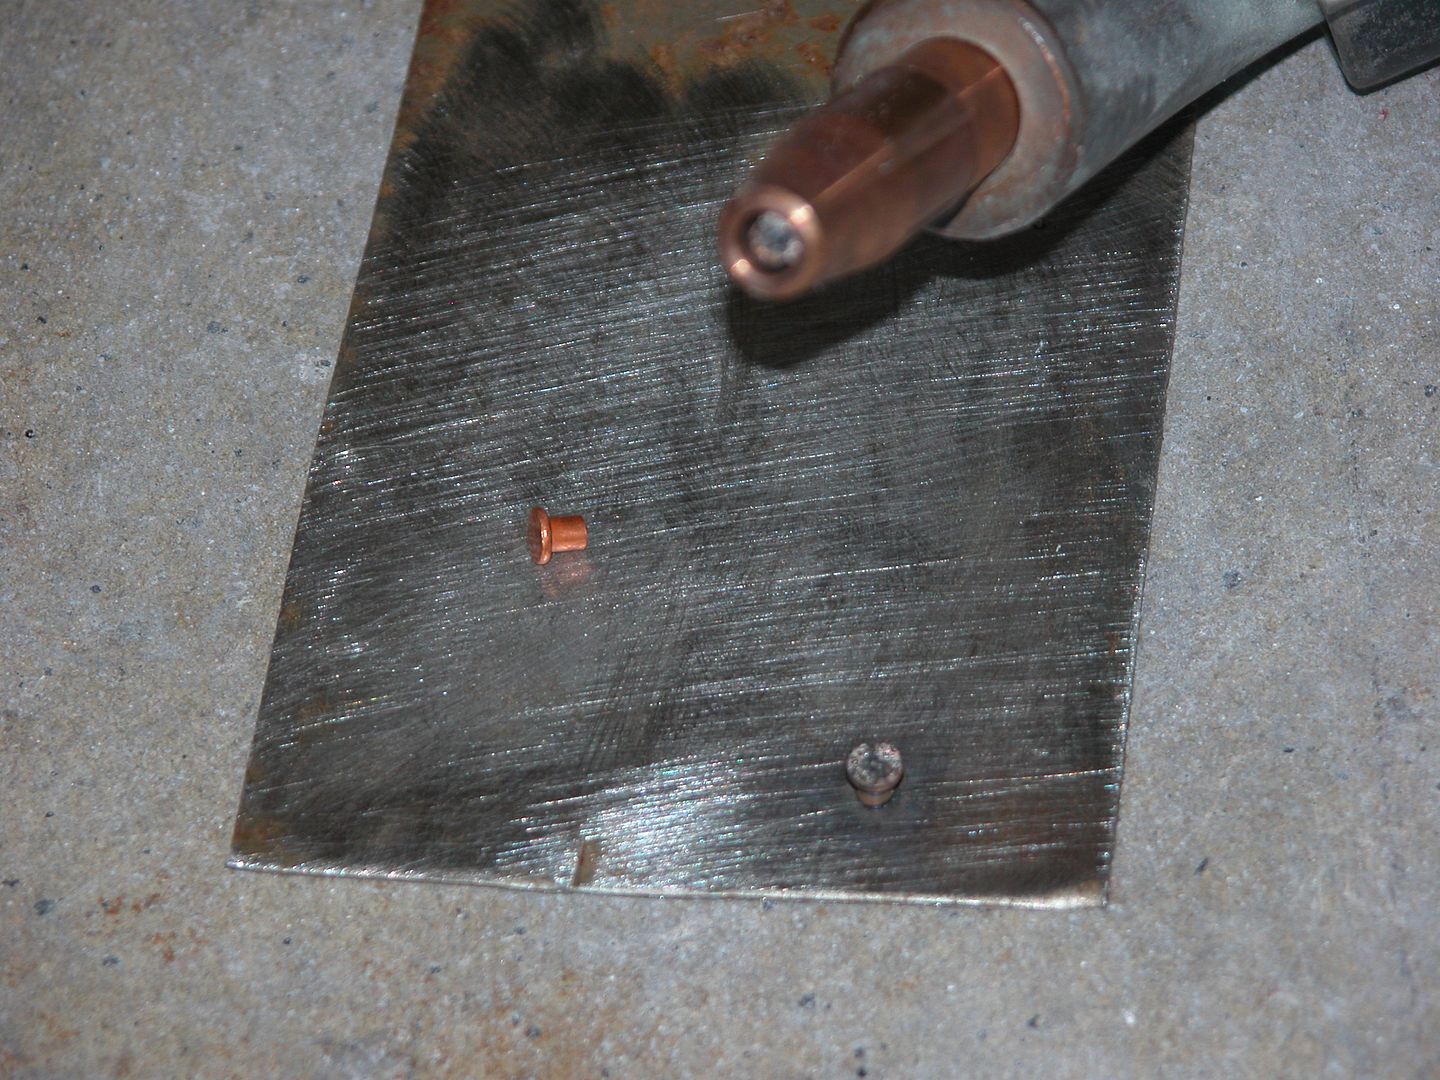 [/URL]
[URL=http://s240.photobucket.com/user/NOTATA/media/The%2014%20Car%20Performance%20Therapy/004_zpsb4dc4855.jpg.html]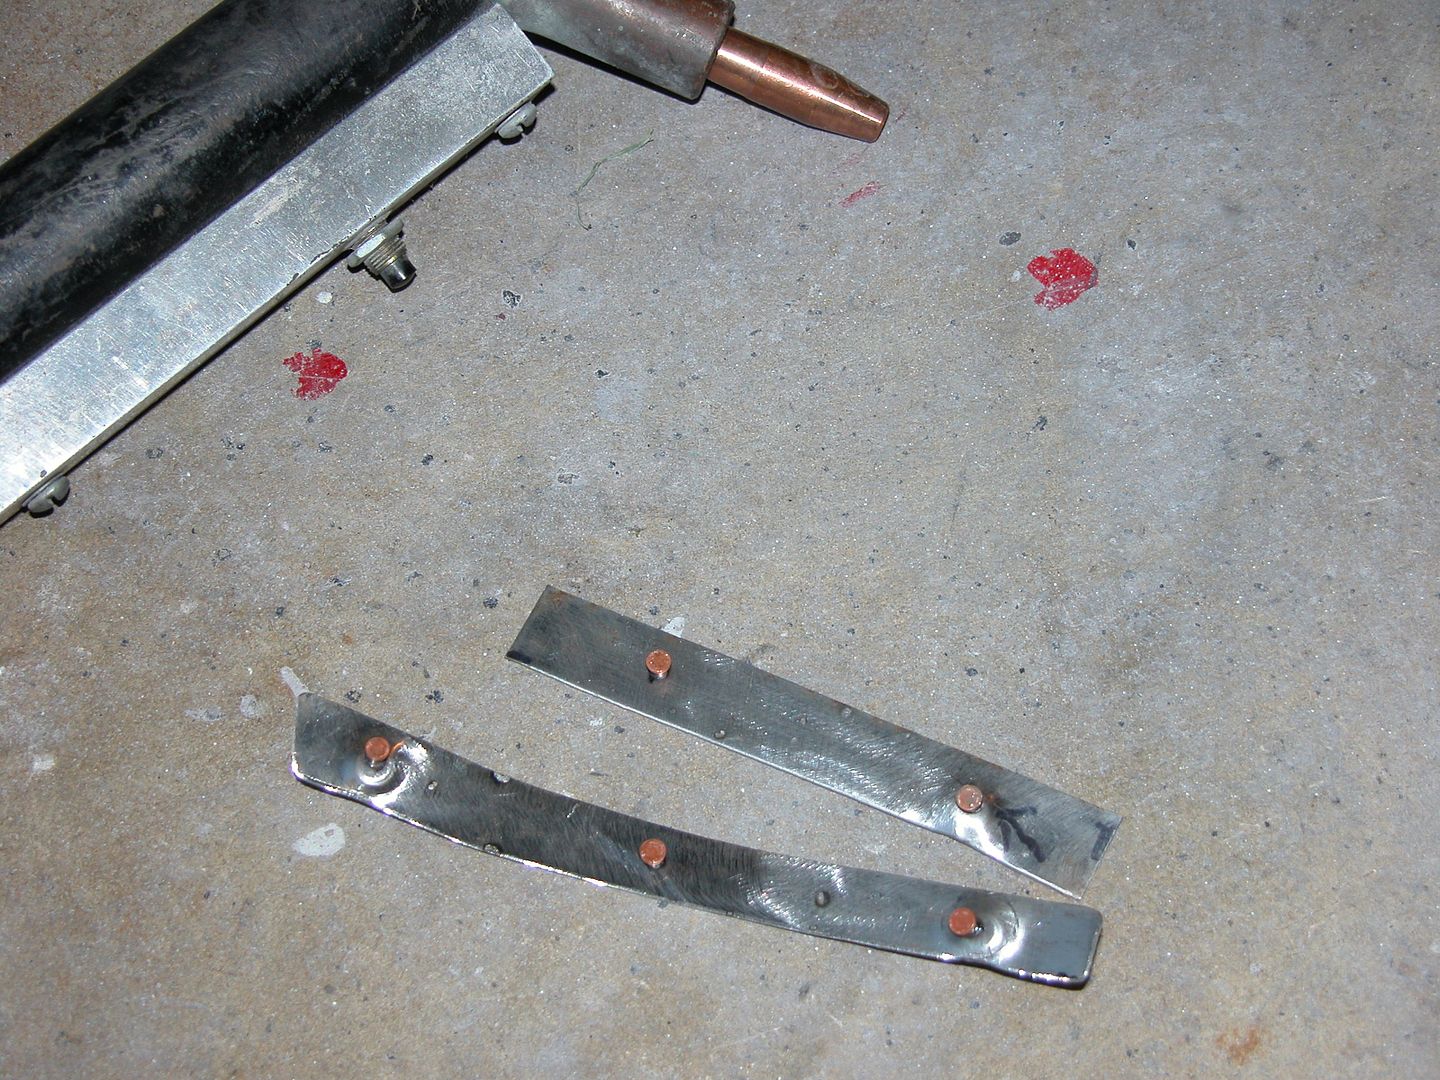 [/URL]
[URL=http://s240.photobucket.com/user/NOTATA/media/The%2014%20Car%20Performance%20Therapy/008_zpsaeb28cff.jpg.html]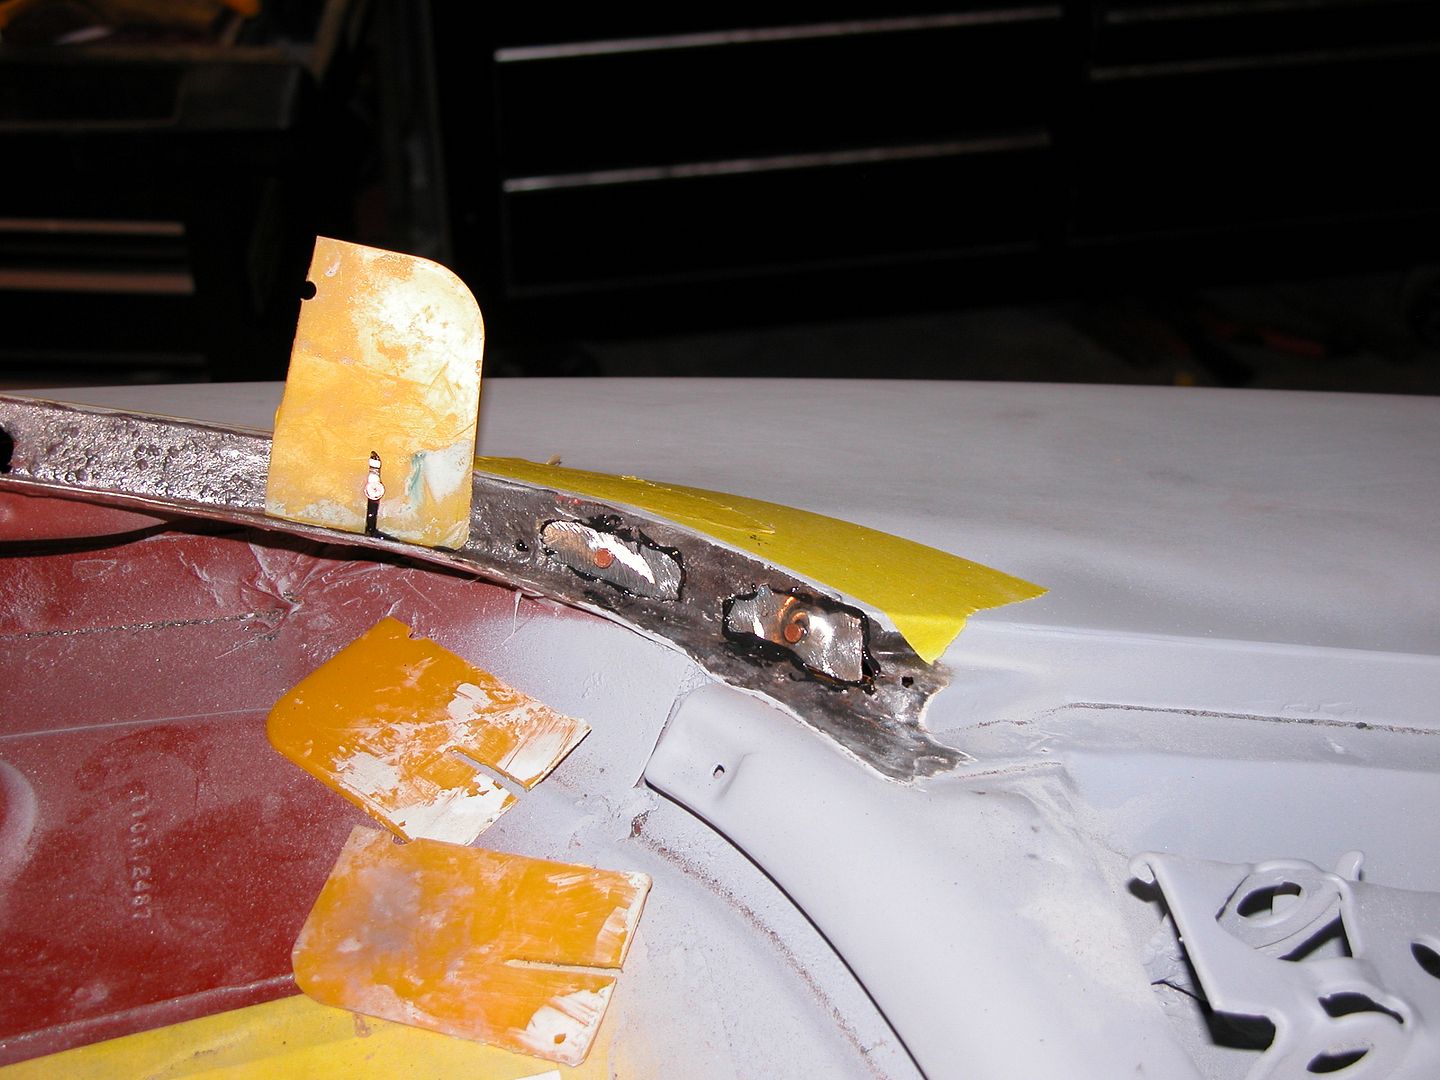 [/URL]
[URL=http://s240.photobucket.com/user/NOTATA/media/The%2014%20Car%20Performance%20Therapy/010_zps36d1b640.jpg.html]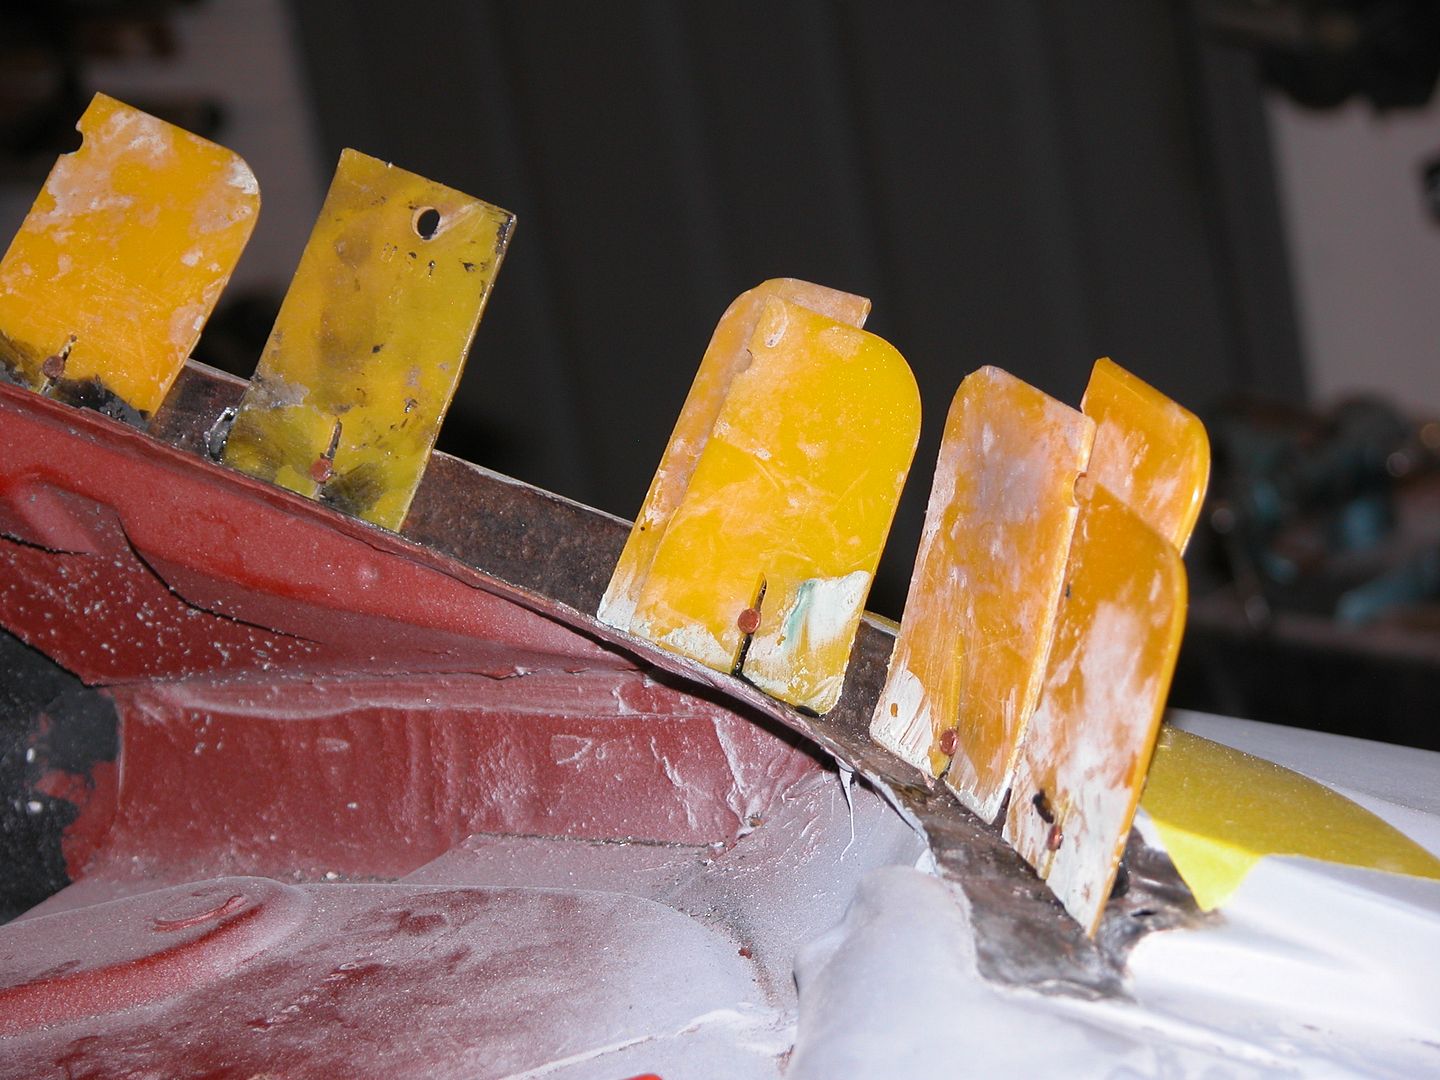 [/URL]
[URL=http://s240.photobucket.com/user/NOTATA/media/The%2014%20Car%20Performance%20Therapy/002_zpsd98e29d4.jpg.html]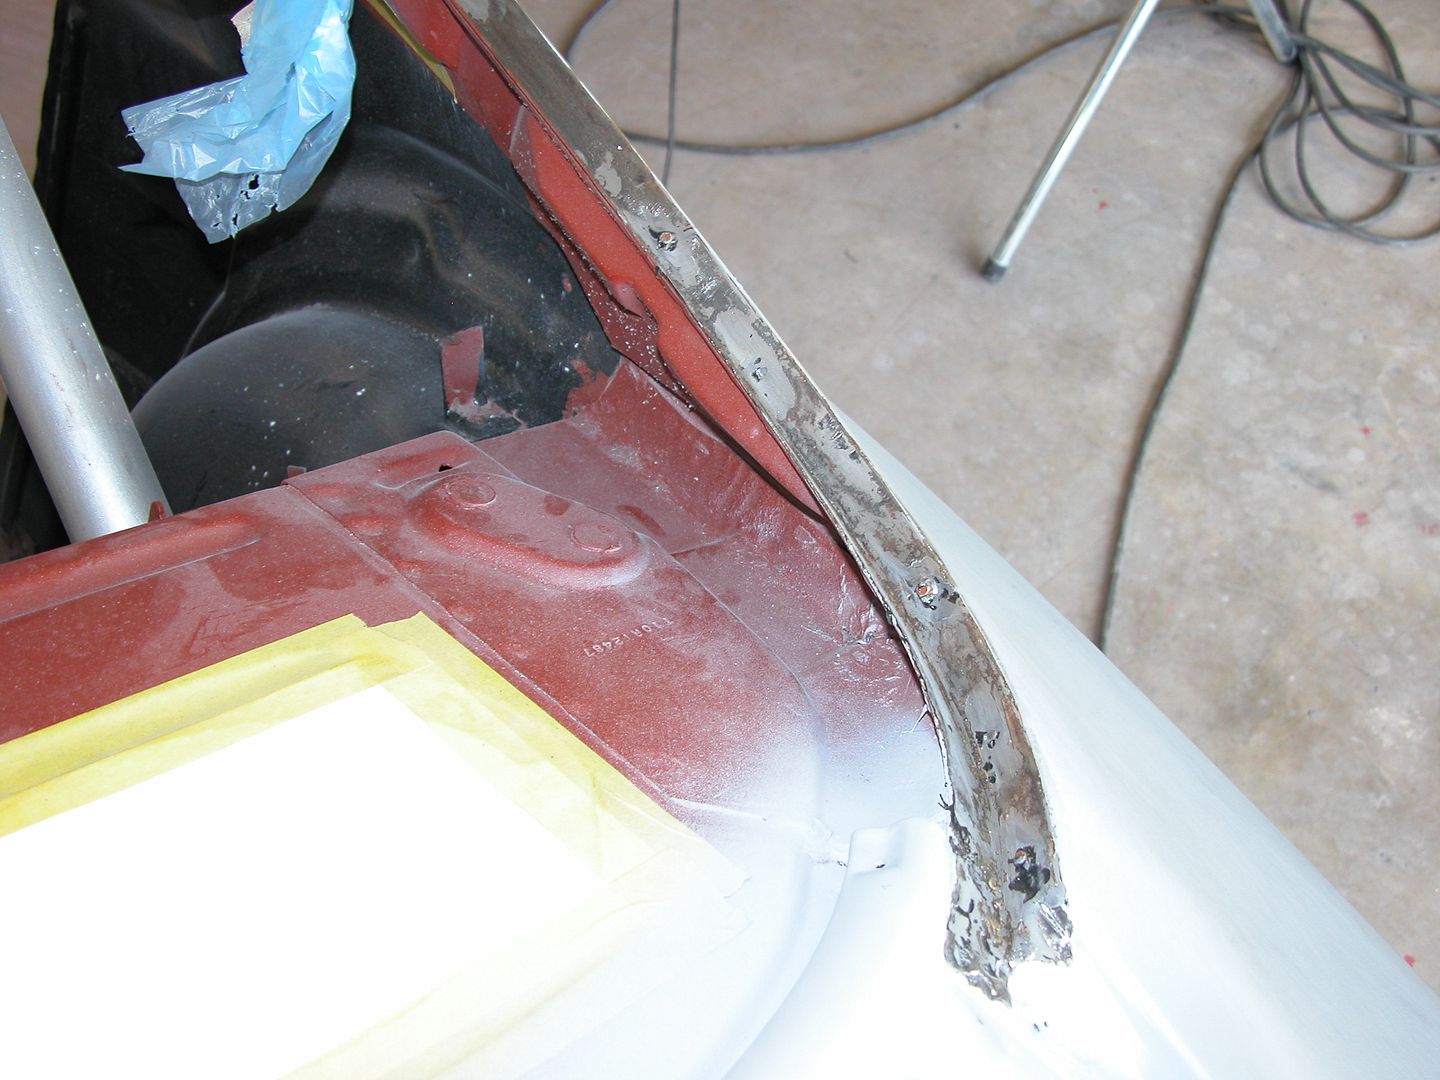 [/URL]
[URL=http://s240.photobucket.com/user/NOTATA/media/The%2014%20Car%20Performance%20Therapy/004_zps3515bee7.jpg.html]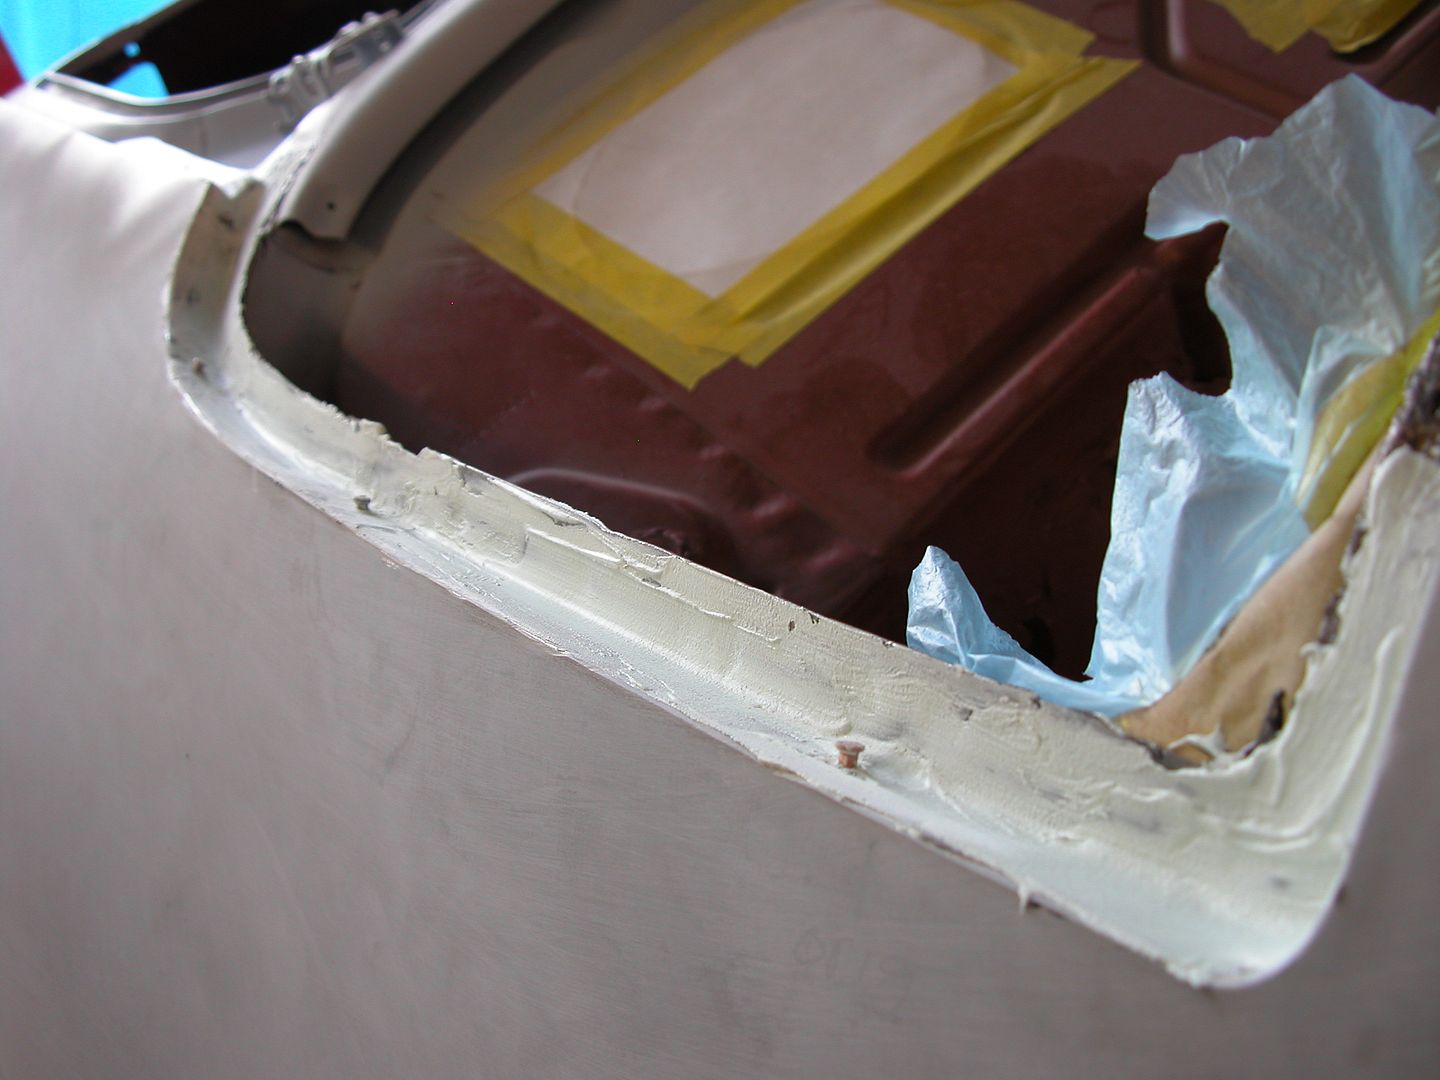 [/URL]
[URL=http://s240.photobucket.com/user/NOTATA/media/The%2014%20Car%20Performance%20Therapy/001_zps1921610f.jpg.html]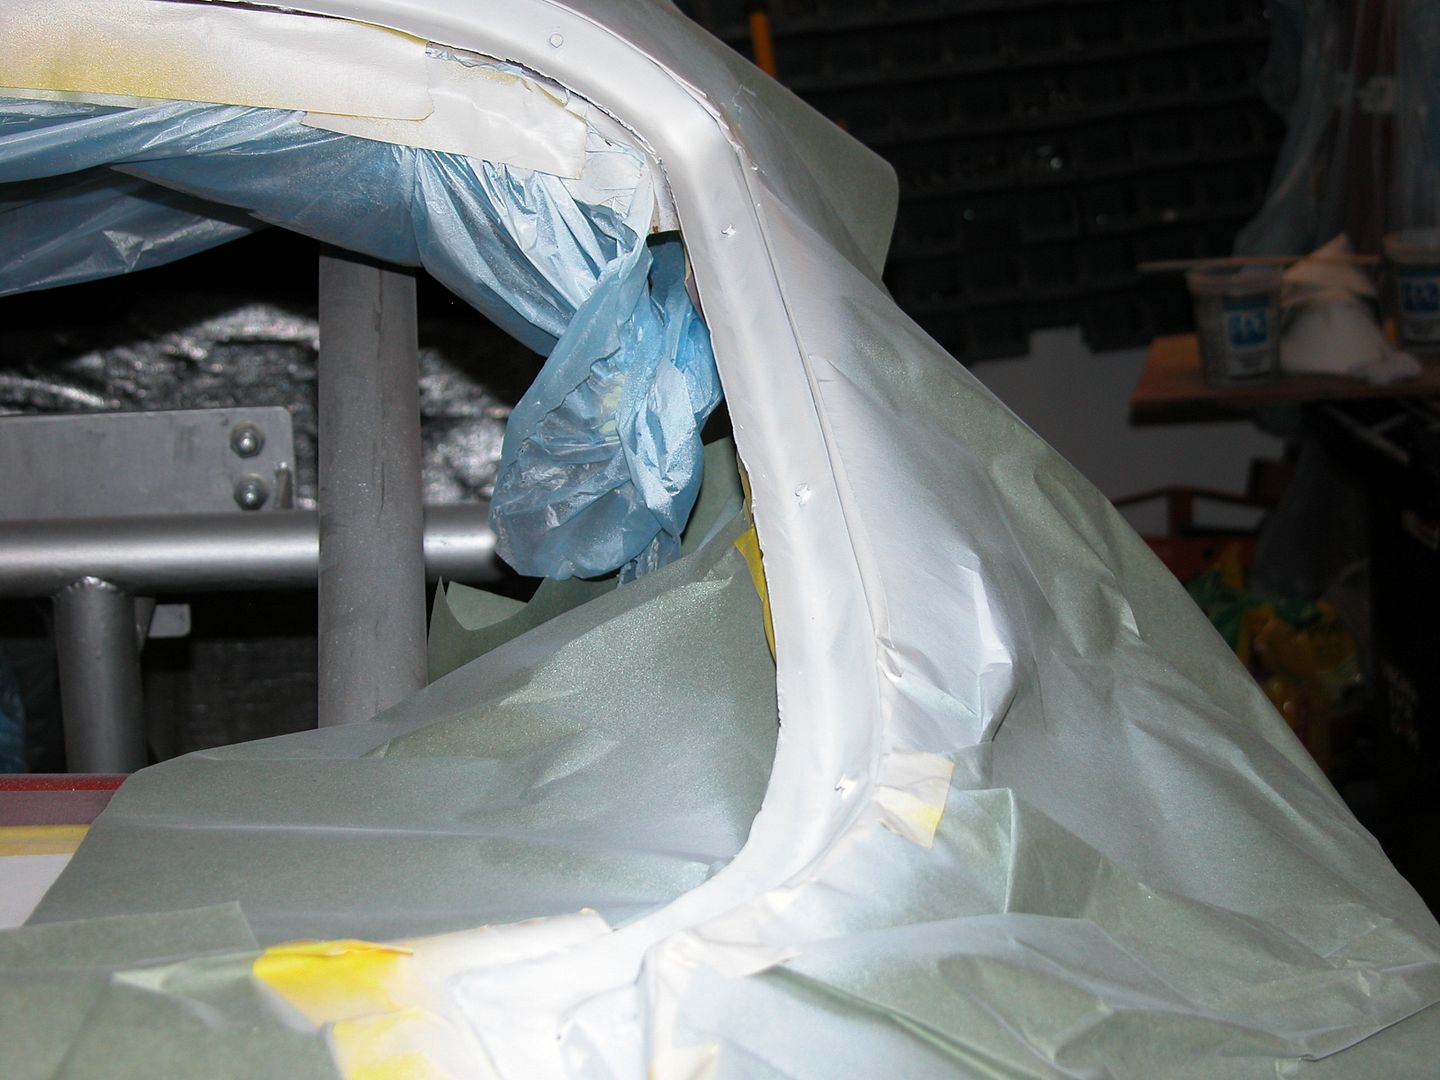 [/URL]
[URL=http://s240.photobucket.com/user/NOTATA/media/The%2014%20Car%20Performance%20Therapy/012_zps2a6d3e5d.jpg.html]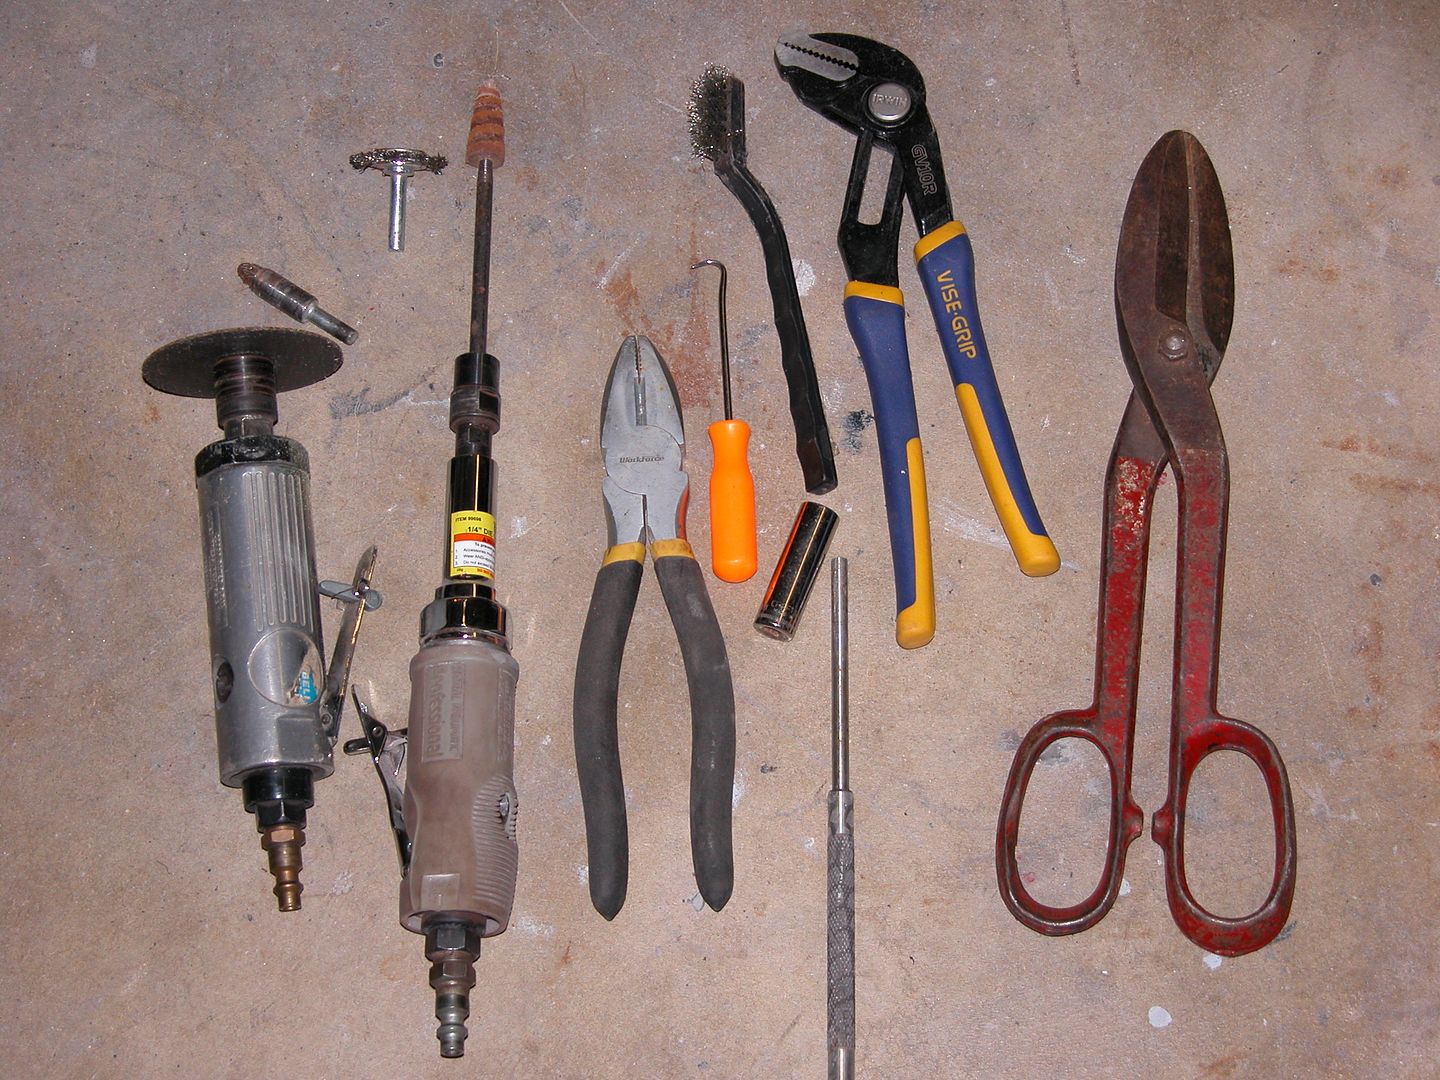 [/URL]
i have a pair of shears just like the ones on the right end of that pic. that's about all the overlap between my garage and yours. i love the problem-solving methods you come up with, and the way you write them up. this thread is a great reference for all sorts of things!
AngryCorvair wrote: i have a pair of shears just like the ones on the right end of that pic. that's about all the overlap between my garage and yours. i love the problem-solving methods you come up with, and the way you write them up. this thread is a great reference for all sorts of things!
Thanks! Should have mentioned the trim studs can be bought as screw in studs as well as the weld in ones I used.
I like the look of gutted race car interiors with their spartan "all business" look. I also like the look of well done complete interiors. My car's kind of in between with carpeting, headliner, and a stock looking dash while also having a full cage, Kirkeys, fire systems, etc. I Removed the heating system leaving the defroster vents wide open and you can see the dash wiring, heat shield, etc. through the openings and also through the speaker grill since there's no speaker there. So I decided to cut out the raised area around the defroster openings and smooth the dash top with a solid panel that will be bonded to the original metal between the dash pad and the windshield. When completed and painted it should look stock but without openings.
[URL=http://s240.photobucket.com/user/NOTATA/media/The%2014%20Car%20Performance%20Therapy/005_zpsd7eb5235.jpg.html]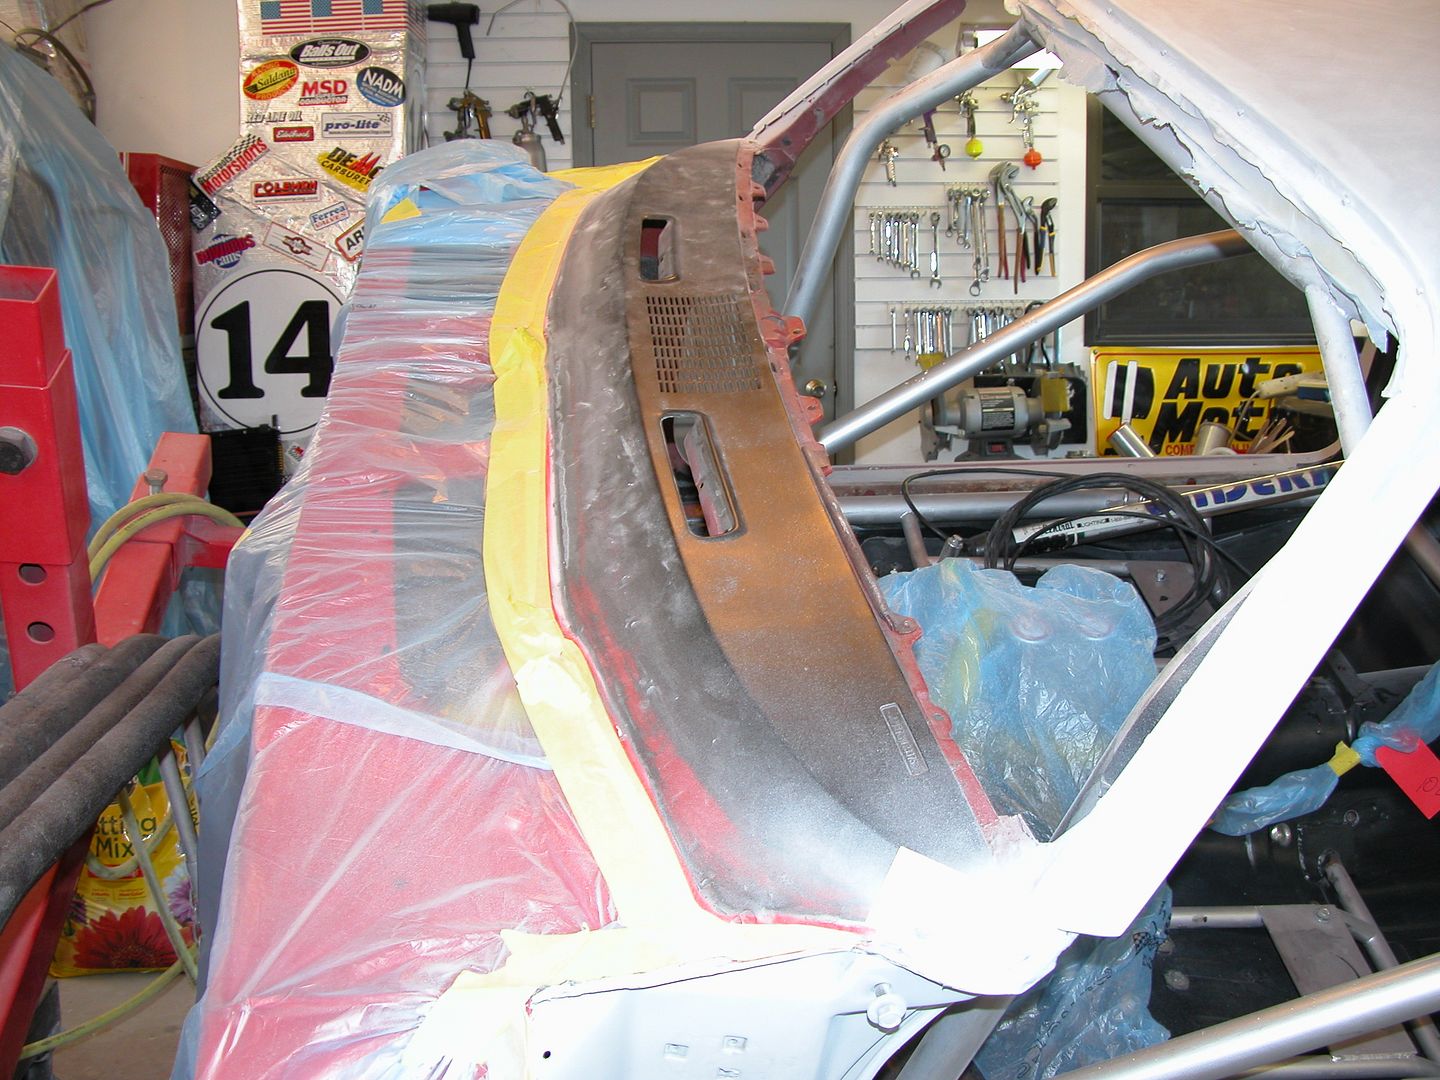 [/URL]
[URL=http://s240.photobucket.com/user/NOTATA/media/The%2014%20Car%20Performance%20Therapy/007_zps8d035484.jpg.html]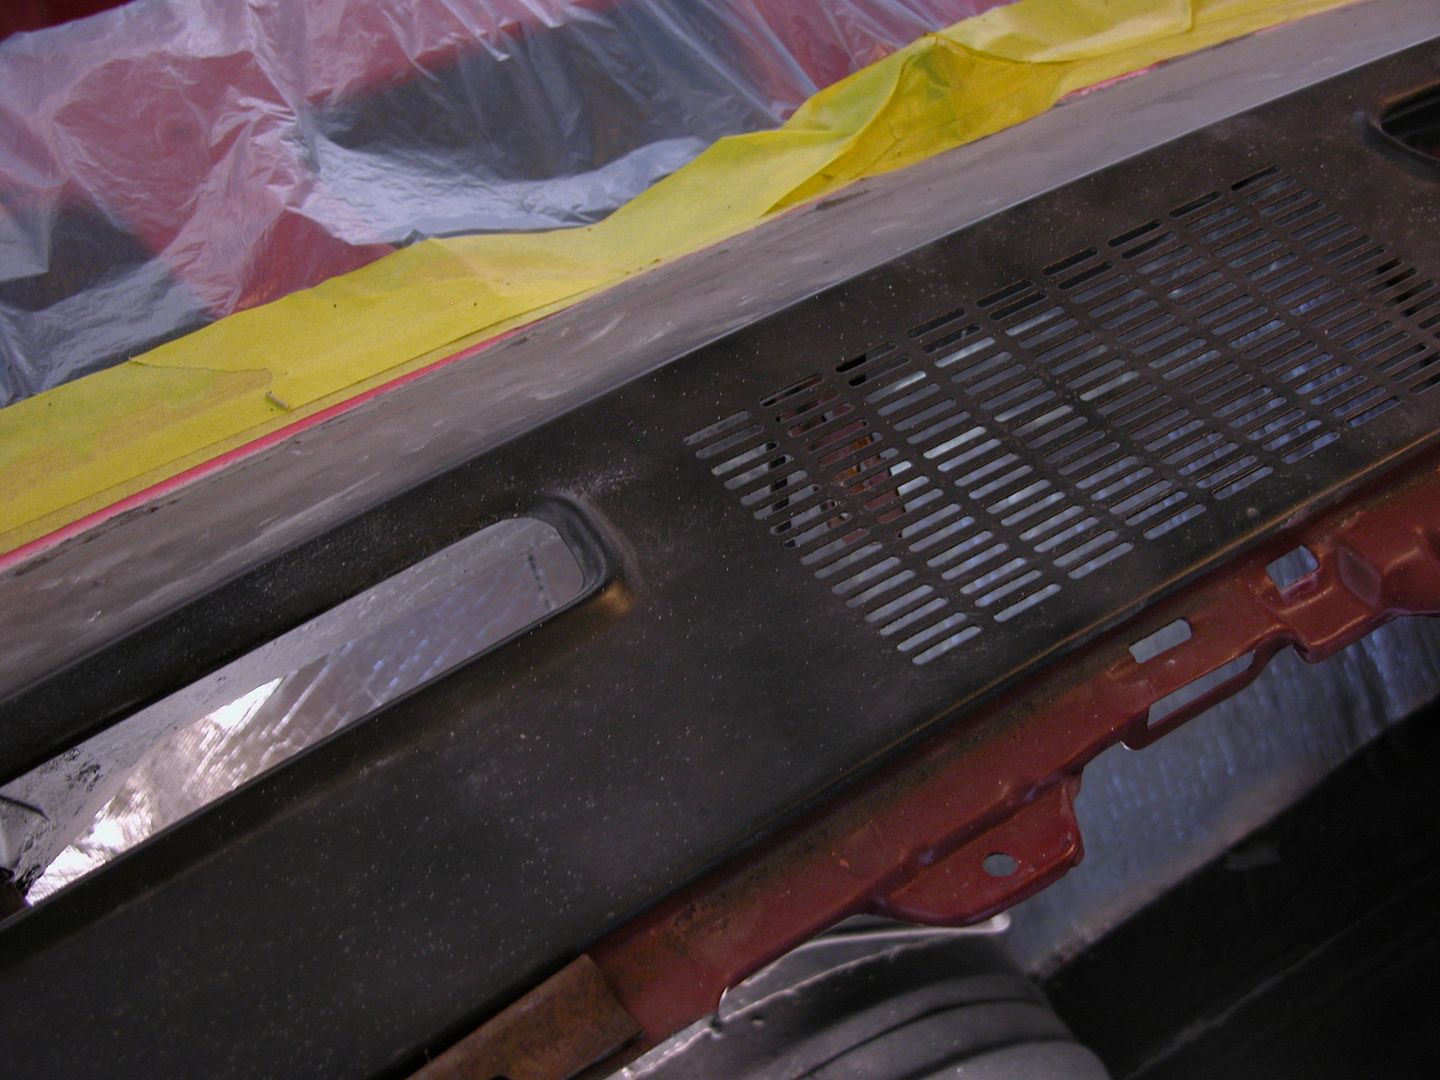 [/URL]
[URL=http://s240.photobucket.com/user/NOTATA/media/The%2014%20Car%20Performance%20Therapy/009_zps5a249ca2.jpg.html]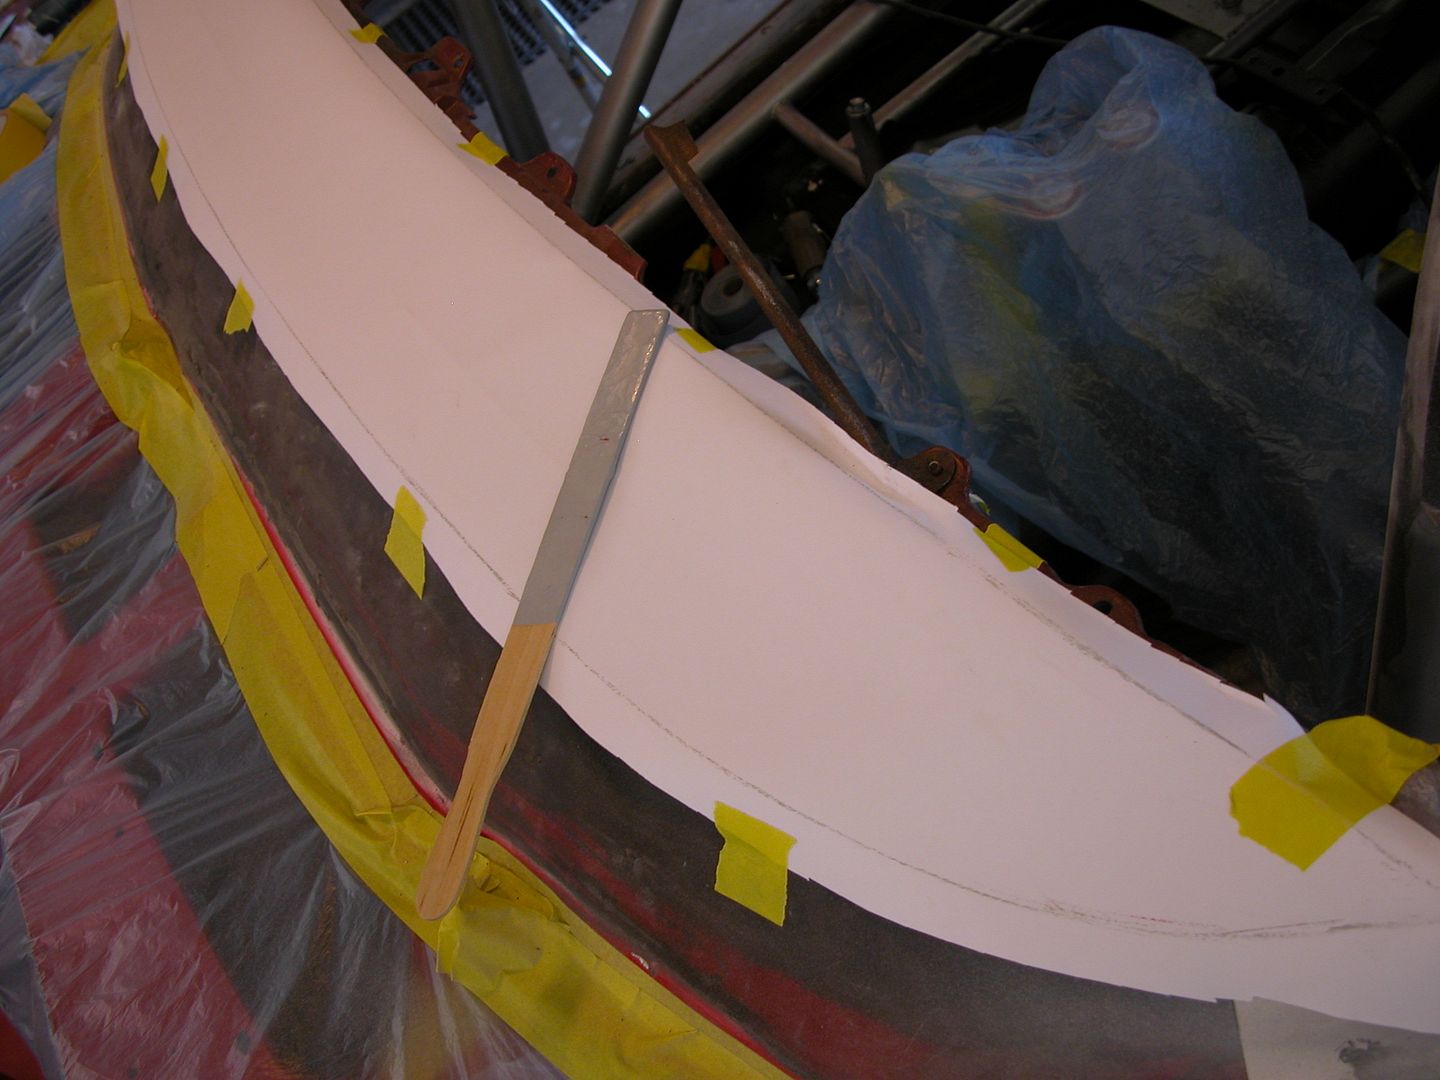 [/URL]
[URL=http://s240.photobucket.com/user/NOTATA/media/The%2014%20Car%20Performance%20Therapy/015_zps770bb7c8.jpg.html]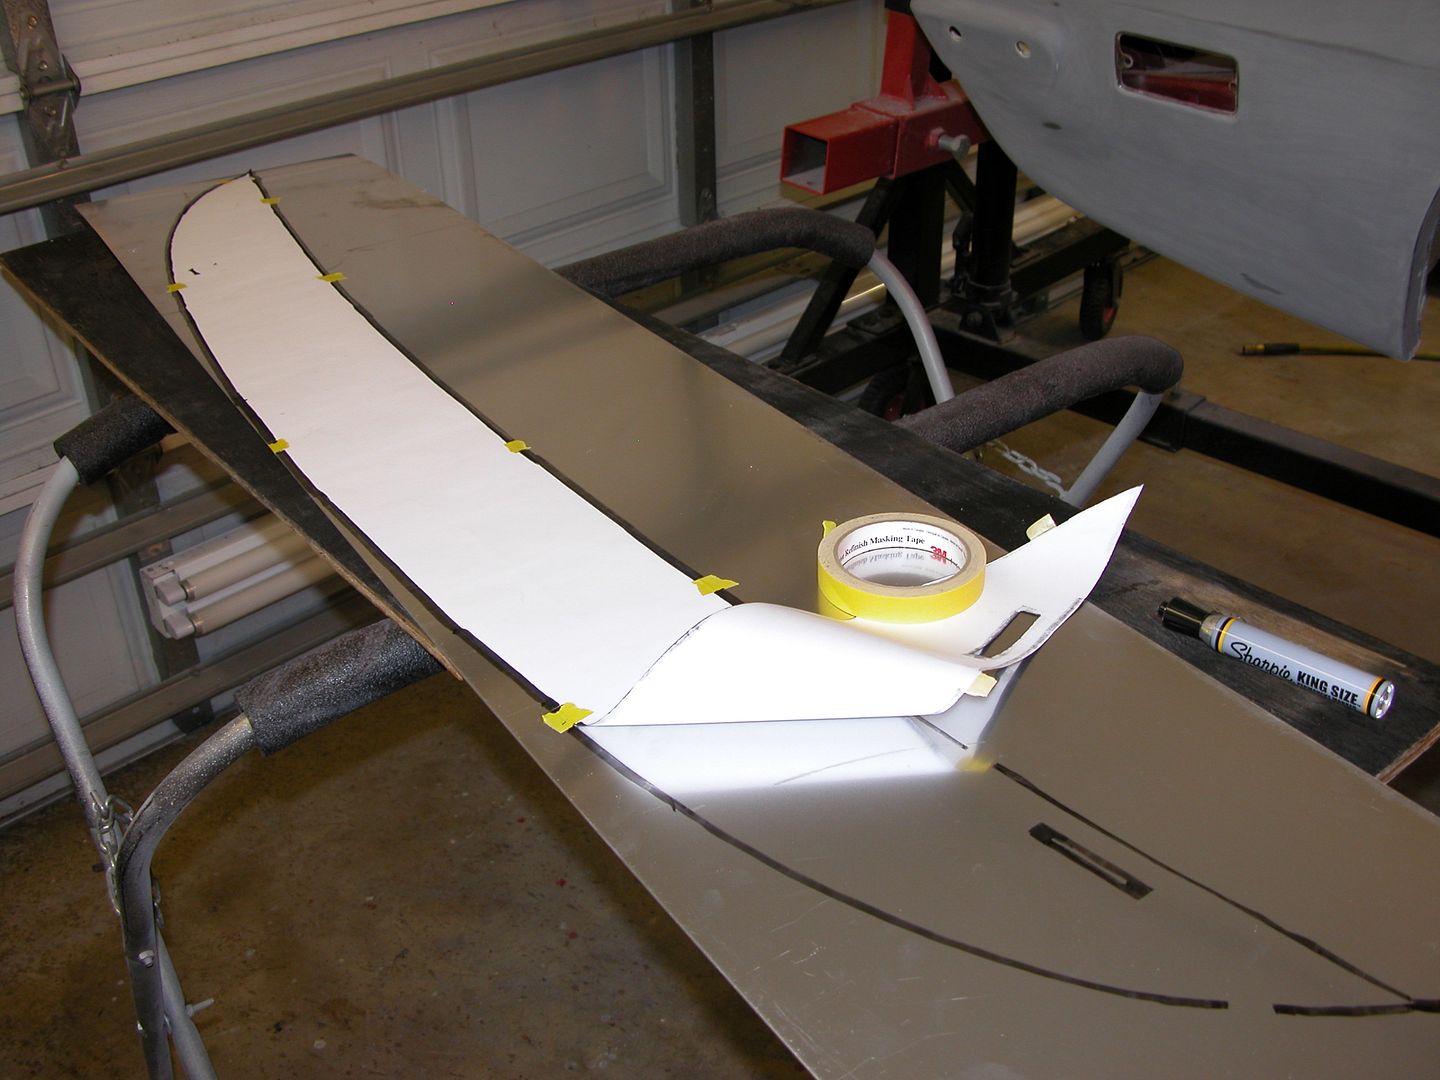 [/URL]
[URL=http://s240.photobucket.com/user/NOTATA/media/The%2014%20Car%20Performance%20Therapy/016_zpsf5b4c986.jpg.html]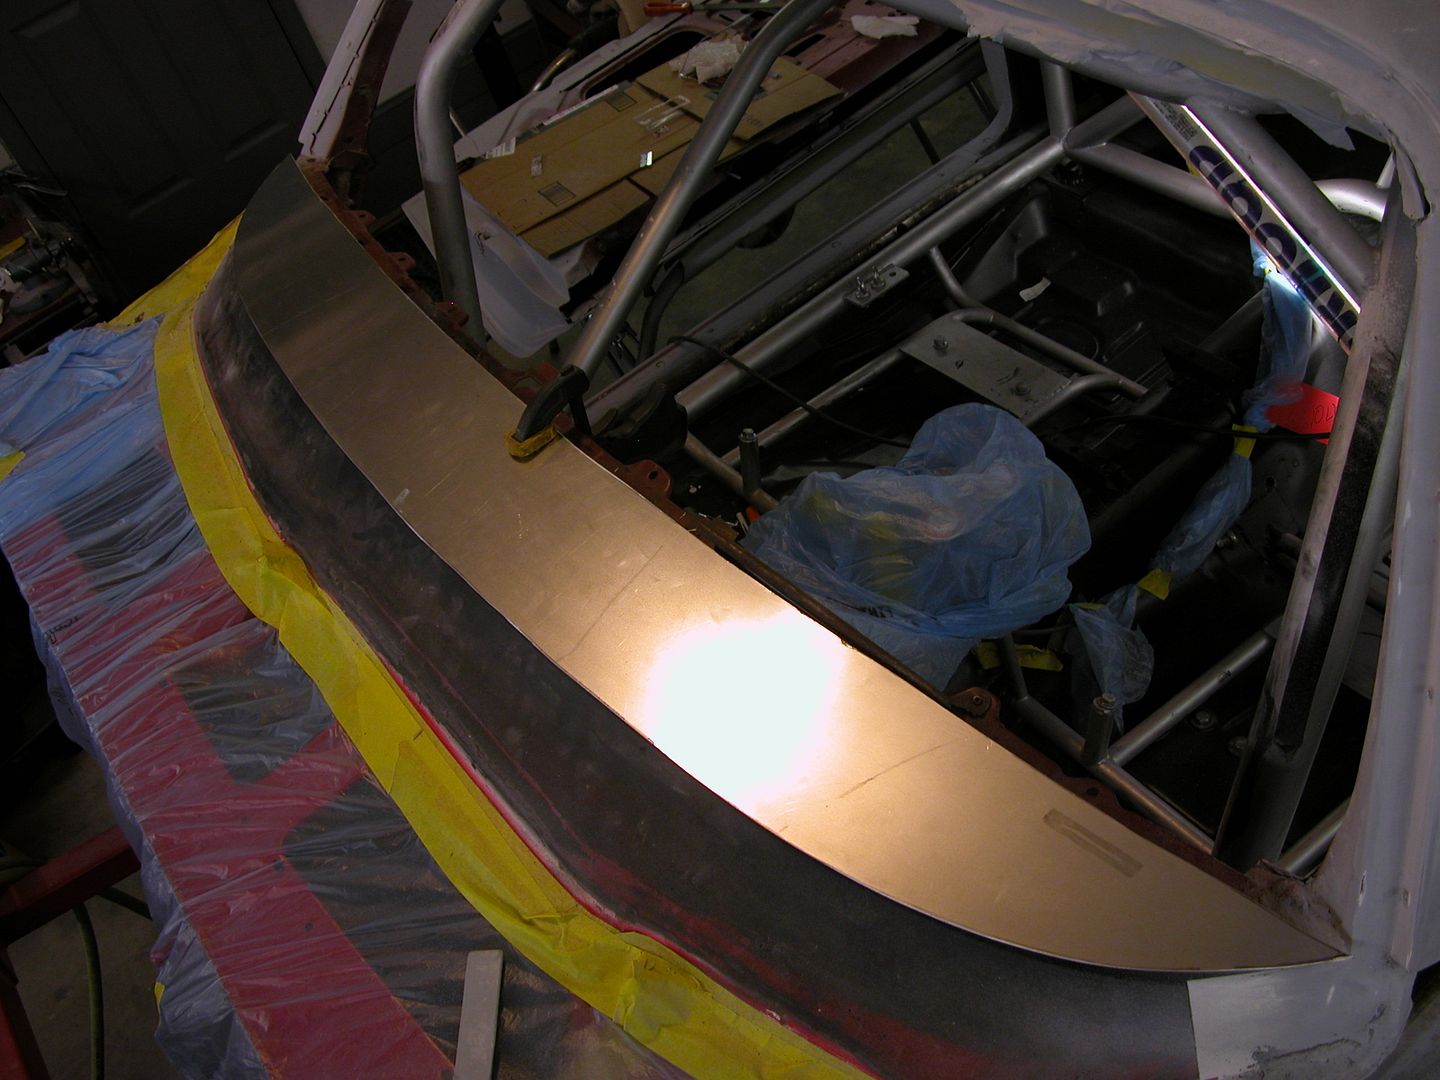 [/URL]
[URL=http://s240.photobucket.com/user/NOTATA/media/The%2014%20Car%20Performance%20Therapy/020_zps575a5317.jpg.html]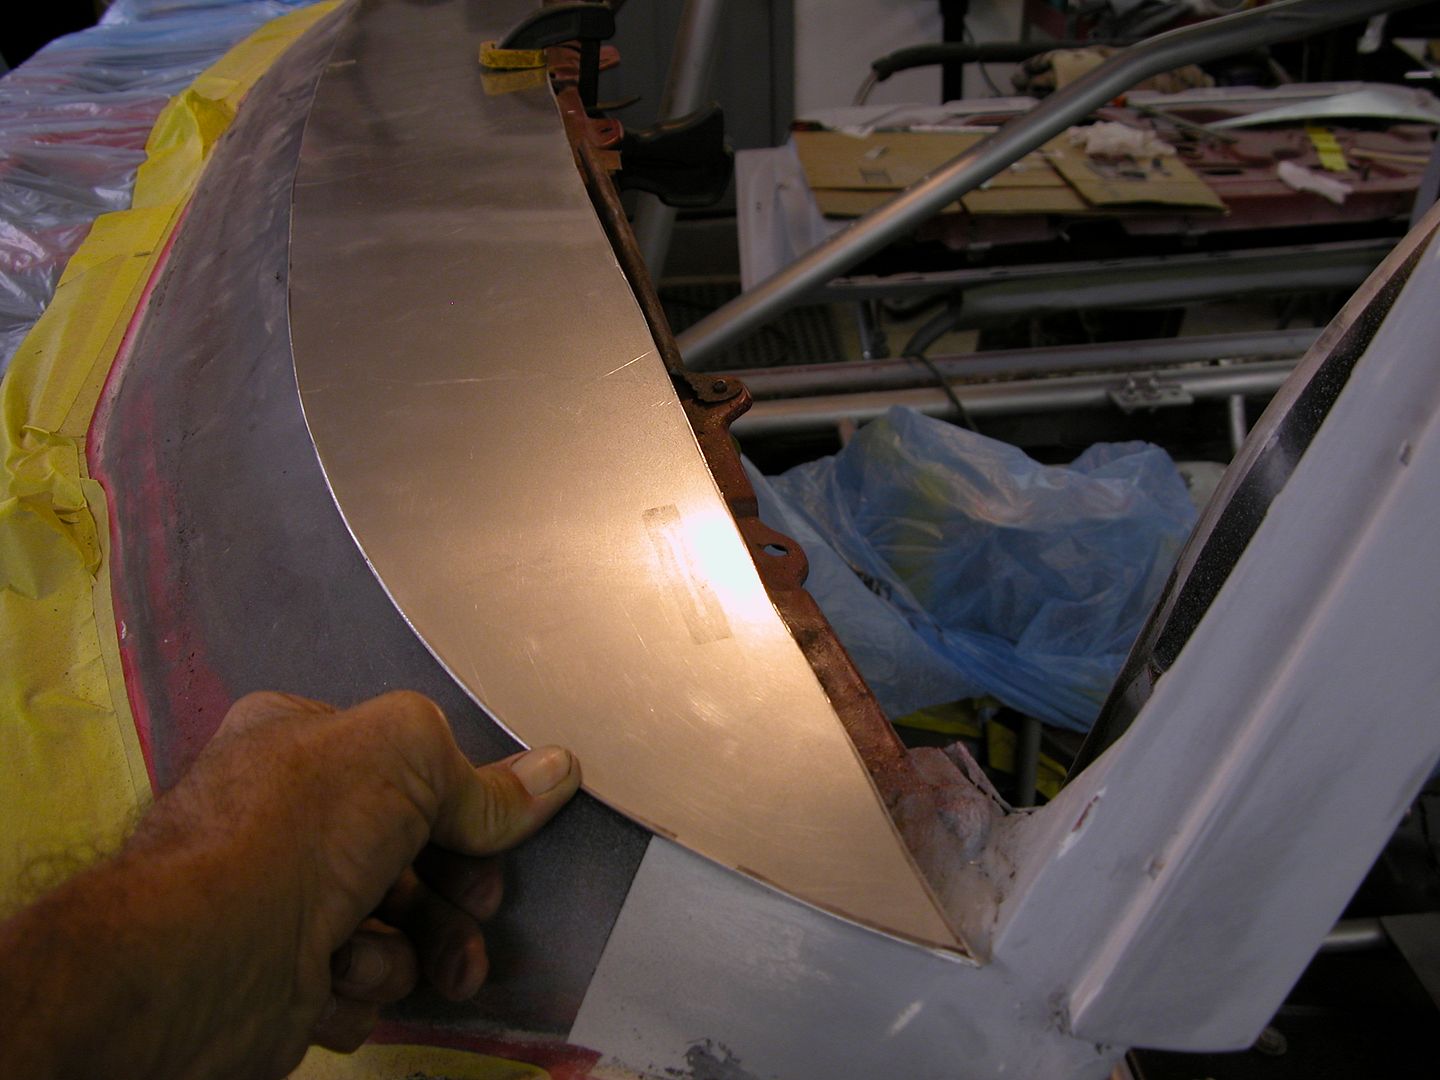 [/URL]
DILYSI Dave wrote: I love that kind of attention to detail.
Thanks Dave, still haven't found boxes for speakers yet. May have to make them.
After making the opening for the VIN I roughed up both surfaces to be bonded with 36 grit and modified a bondo spreader to spread the panel bond evenly in cornrows like you would installing bathroom tile .
I used a few clamps to press the pieces together and hold them for 24 hours. The top of the dash being covered is concave and there's compound curves on the ends so I formed the panel as well as I could before bonding and clamped it well.
Filed off the extra 1/16" overhang I'd left around the edges of the aluminum panel and cleaned out the original spot welds on the angled part. Then scuffed the whole area with 180 on a palm sander and primed. Followed that with a skim coat of filler and blocked it out with 180. Will prime and block again before final paint.
Thanks jimbob!
2nd gen F body doors are long and heavy. Worn out hinge bushings and pins are common now that they're 35-45 years old. Mine were in good condition still because it was a low mileage car (42,000) when I got it and painted it the first time. Even now at 45 YO only the drivers side hinges showed slight wear when lifting up on the rear of the door. However I figured now's the time to replace them so there's no need to do it once painted and take a risk of scratching/chipping something. The original lower hinge bushings are plastic (really GM?) so no telling when they might split and fall out. Might be the day after paint. I'm sure there's a ton of How To's on hinge repair around the web so I'll skip the instructional rhetoric and just show a couple pics some might gain tips from.
With the hinges replaced it was time to get the doors on and aligned. I was then reminded of the door gap anomaly on the drivers side of almost every early 2nd gen Firebird I've seen. It appears that the door skin wasn't shaped quite right to the fender curve above the door handle part. Welding a piece of rod to the edge of the door and filing/smoothing to create the curve didn't seem like a good use of time to me so I used a little filler in the rear quarter door jamb to even the gap a bit and then did some filing, sanding, priming, etc. to get the gaps on both doors good enough for me on this car. Are they perfect? No, but they're acceptable to me and probably better overall than when the car was new. After final priming/blocking they will be a little better than you see in the pics below.
Yes, I know the horizontal body line is off in the pics below. Previous blocking was done with the door just roughly in place with the old hinge bushings. It'll be straight after some more blocking and final priming/blocking.
Since this was an AC car and I've removed the HVAC the vacuum operated fresh air air duct on the passengers kick panel is no longer functional. I will be blocking off the upper cowl where air is supplied to increase downforce so there won't be anything to feed the duct. I'm also trying to recover the 200 lbs. I added with the roll cage so every little bit helps. The vent duct housing/door/vacuum canister assembly probably weighs a couple lbs. more than the aluminum panels I made to seal off the duct opening and it will get seam sealed when installed so I won't get any wind whistles etc. Drivers side duct opening was sealed by the factory with seam sealer to the plastic kick panel and is getting sealed with an aluminum panel also to increase fire protection. I know the aluminum isn't as much of a fire block as steel but risk of fire entering there is low and so I just figured the aluminum would be better than plastic.
Thanks Harvey!
I'm at the point where I'm starting on the Aero pieces. Certainly nothing like the engineering that goes into new Corvettes or F1 cars but here's the poster board version of what I've come up with as a combination tire dam & wicker bill for the rear wheel wells. I'm planning on side skirts of some kind and I'm adding the foilers behind the tires. Will decide how far the tire dams hang down once the car is assembled but I want to make the pieces, drill holes, make brackets, etc. before paint.
The early 2nd gen Trans Ams had cool looking front air dam fender flares from the factory. Most got smashed eventually on tall curbs, steep driveways and other road hazards so they usually need some repair and both of my front wheel flares were cracked in the usual locations. They were cracked when I got them 20+ years ago and I used some type of epoxy to "fix" them as well as I could with what was available to me at the time. They lasted probably 10 or so years before the cracks reappeared. Now we have other methods available so here's my 21st century repair.
Sanded the flares down to plastic. Hot stapled the cracked areas. Clipped staples off and ground down the stubs below finish level. Applied adhesion promoter and then 3M hard plastic repair material and let cure 24 hours. Sand plastic repair material and prime, fill nicks, then sand/prime till ready for sealer.
Been a little while since I updated this so I'll play catch up on posting the next few days.
Once most of the wheel flares were in final primer I moved on to some of the (many) other exterior pieces that needed to be prepped for body color. Early 2nd gen TA's have a lot of small parts that get paint and is why shops want more to paint them than many other cars from the late 60's -early 70's. On top of that, the first time I painted a lot of the parts that were chrome from the factory and now they all needed to be strripped and prepped as well. The fiberglass rear panel needed some structural repairs as well.
You'll need to log in to post.