
Tunawife wanted another date last night instead. Who says no to that? I'll get something done tonight.
So I finished up the bed mount modifications, but it was really boring to show you. So then I played with the gas tank mount. Arg. I bought the straps from the Jeep which the tank is for (1976 and earlier CJ5) and it came with three. One big one like I expected, and two little short ones that I didn't understand. I now think the two shorter ones go around the sides/perimeter of the tank and the big long one goes underneath. Is one really enough to hold it up? I guess it should be, it doesn't weigh that much, even full. With the other two straps holding it side to side it might work.
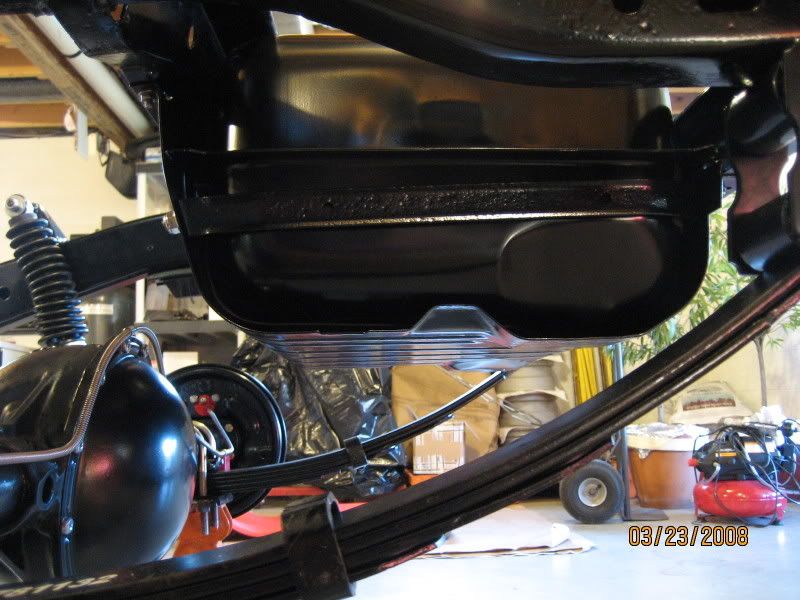
In addition, I mounted the new crossmember that I cleverly made from the old crossmember. This sits directly under the lip of the tank on the front edge, helping hold it up. The tank will be help up against the bottom of the bed sill.
One more point, the one long strap has a spring pin which obviously is intended to pivot in/out and be easily removable. I intend to open up one end of a pair of washers and weld them on to the new crossmember. The other end has a threaded rod end. It happens to go directly through the hole in the flange. Now, I can't tighten the nut against this because it will pull the tank -out- of the truck. Perhaps it's meant to go through the hole to capture it and then attach upwards of there? Assuming I use only one strap beneath the tank, that's the plan. The pictures are not that great, but here they are.
Here it is bungee corded to a 4x4 sitting on the frame. Please note that the crossmember is clamped to the bottom of the top frame rail here, and that is not where it ended up. It is now bolted to the bottom of the bottom frame rail allowing the lip to sit on it.

Here it is without the 4x4, with a floor jack.

The two lower straps are the ones I want to put on the sides of the tank.

Here is the side strap, partially installed, running forward from the rear of the tank.
Thoughts?
Alright, I figured it out. The Jeep application has a skid plate which holds the bottom of the tank. That strap goes over the top. I'll get another one and use them on the bottom. Tw of them on the bottom and two of then side by side will definitely be enough.


In reply to tuna55:
as far as i can remember from years of working on CJs the tanks sit on a skid plate and the straps wrap over the top of the tank
didn't see that last post...
solfly wrote: In reply to tuna55: as far as i can remember from years of working on CJs the tanks sit on a skid plate and the straps wrap over the top of the tank
That's what I got for the big center strap, and I may still use it for that. What about the two little ones in the picture? They are too short to go into the skid plate, as they stay on one side of the flange if you try to arrange it like that. When I put them on the side of the tank, they seem to hug the contour of the tank better and the bolts, which are tacked into the holes, would make a lot more sense like that. Putting the two side ones in going front-back from the two crossmembers would create a little cage, and the big strap on top (holding it up using the big hole in the rear end of the flange) and the two normal straps beneath (ordered them for a 1975 K5 Blazer today) would hold it up. I think that will work, even perhaps a little overkill.
The smaller straps wrap around the sides about halfway up the tank.
Perfect! Thanks for the picture. Mine are going above the flange. I figured that's what they were for. So mine will have those two, the top strap, which will essentially hold the tank up through torsional stiffness of the crossmember, as well as two "normal" straps going front to rear from the Blazer - when they get here.
Satisfied now. Sweet.
Any suggestions for how to run the fuel lines?
Spent a ton of time out there. I drilled two holes. It doesn't sound like much, but now I know exactly where I am going to mount those side straps. Yup, that's pretty much it. It actually felt pretty productive despite that.
id run steel line inside the frame rail for the fuel lines, use as little rubber as possible
solfly wrote: id run steel line inside the frame rail for the fuel lines, use as little rubber as possible
That's my thought as well, stainless tube (anyone know where to find good/cheap fittings and tube?) and a small rubber bit at the tank and up near the carb where the filter will be. I'll need a flaring and bending tool, too, and some cool line clamps.

Dont waste your effort on the stainless lines; expensive, hard to flare and not worth it in the long run.
I like to make billet hold downs like the ones in this picture. Most of the time, they just clamp the tube flat to the surface, so I don't have a lower piece. All you need is some alloys stock a file and some drill bits. Aluminum cuts just fine with a bi-metal wood blade. I use my band-saw. If making ones to clamp to a flat surface, drill the holes for the tube (Not on a common center) then cut the bottom of the alloy bar off right at the edge of the hole. finish with a file.
If you don't need to be fancy. I like the simple clip style hold downs in either single or multiple mode. Also something that you can make yourself with a form and a vice as a press.
the copper nickle coated stuff is nice, that's what we use for all the brake lines in the shop

tuna55 wrote: Spent a ton of time out there. I drilled two holes. It doesn't sound like much, but now I know exactly where I am going to mount those side straps. Yup, that's pretty much it. It actually felt pretty productive despite that.
It's always better to spend all night drilling two holes in exactly the right spot than drilling 22 holes all over hoping to find the right spot ![]()
Well that sucked.
The fun part was welding the new tabs in the old crossmember and attaching the new gas tank side straps. So I did that, and it looks great. I am quite happy with that.

At that point, I dug into my goodies. Today I got a delivery of the small bore tube for the fuel filler, the rubber fuel elbow, the dampers, the sender, and the add-a-leaves.
I started with the dampers. I took off the placeholder Monroe's, intending to mock up the new DJM units, and I immediately ran into a problem. The axle is moved around a bit, and the frame has been raised and lowered, and I essentially didn't know where the rear end was supposed to go. So I raised, lowered, shuffled, nudged, played and generally tried to get the axle in something close to the right place. I eventually came to the idea of throwing the leaf pack back on there and aiming close. But the front spring hanger isn't where we left it, remember? The leaf also didn't just bolt in naturally at full droop, so really I had no idea. I took (way too long) to stuff the bushings in the new dampers, and mocked the top portion into place, hoping that the front leaf mount roughly aligning with the front eye would be good enough to fully weld the new damper mount that has been tacked in place for a year. They looked too short. I panicked a bit until I remembered that the rear end was going to be in a different place when I was done - I planned on lowering it, after all. After an hour of deliberations, I decided to jump in and see what I could do with the leaf spring pack, maybe I could figure out a way to decrease the arch and add the add-a-leaf and get it back together for real.
That was the plan.
.
.
.
.
.
.
.
.
.

.
.
.
And Tunawife and I had just discussed that I wouldn't spend any more money for a while. Nice. Anyone want a set of add-a-leafs?
![]()
Bad news indeed. I am shopping for some 3" drop leaf springs now. It looks like $400 is the bogey, and it's going to take a while to save that. I guess I'll work on the fuel filler for a while.
Crap.

Got a link to the part you need? I'm just curious what all they look like.
Any idea why it broke like that? Just rusted through?
I feel for you, man. manhugs
GMC Pauls sells one that's a 3" drop that would work pretty well, but I don't have a specific one in mind yet.
The leaf pack was startling, because it looked GREAT. I've never seen such pristine looking springs, seriously. The instructions in the Add-a-leaf kit even tell you to grind the head of the bolt off, and I was able to wrench it off without breaking it. As soon as it pulled apart, the crack was there. When I looked harder, the spring immediately above that had the same fatal crack that I could easily open up by standing on it. The upper leaf looks fine, but I can't trust it now. I can't trust the other side, and frankly, I can't trust a used leaf pack on Craigslist that was overpriced anyway.
Bad news.
Like this?
http://www.tuckersparts.com/Leaf-Springs-B-L672.html
Add to Cart!
Since I went to the (somewhat wasteful, now) trouble of raising the front of the spring 2", giving me a drop of 1" already, I was thinking more like 3" drop, so these guys:
http://www.brotherstrucks.com/prodinfo.asp?number=LRL6372
http://www.performanceonline.com/1963-72-CHEVY-TRUCK-GMC-TRUCK-C10-REAR-MULTI-LEAF-SPRING-SET/
Now, I bought an add-a-leaf kit that I have to figure out how to return, as well as bushings that were bought for no reason now. boooo

In for $50 towards the "Buy Tuna some new leafs so he can continue to inspire me" fund. Anyone else?
In reply to DILYSI Dave:
You're crazy.
A note: I now understand why my axle wrap was so bad. That bottom leaf above the overload, and likely the one above it as well, we not doing very much. It also explains why my apparent spring rate was so low. The bright side of all this is that I would have been driving on broken, dangerous springs when I was done had I not taken apart this spring pack. Weird, though, that the pack could look so perfect from the outside.
You'll need to log in to post.


