Love the wagon and it's cool to see you getting it dialed in. Random question - what tow hitch do you have on the El Camino?
Love the wagon and it's cool to see you getting it dialed in. Random question - what tow hitch do you have on the El Camino?
In reply to Racingsnake :
The hitch is from an Econoline van that I modified to fit the Camino frame. Full write-up here: https://imgur.com/a/Hdglp


Cardboard fenders for lightness!
Update on the filing cabinet graveyard. These fenders hit them hard.
I left extra along the bottoms until I figure out the air dam and rocker transition
Due to the max panel size of the cabinets, each fender is actually 6 pieces stitched together very carefully.
I got one side fully welded up tonight, long after taking these pictures.
I also wrapped the steering wheel with some cycling handlebar tape. 9 bucks shipped and one pack is just enough for a Datsun steering wheel. I think it feels and looks much better.
Got the fenders all welded up
This thicker stuff didn't warp as much as the rears. Also I suck less this time.
I left extra material along the bottom and still need to form the transition to the rockers a little better. But that leaves us at the front fascia. All I have from the Datsun is the heavy ugly 80s chrome bumper, so I'm basically starting from scratch. This is a racecar, so a decent air dam and undertray may help in the drags. I don't want a splitter or front spoiler (or at least not a crazy big one) because I would rather reduce drag than improve front downforce, and anything strong enough to support downforce will likely be heavier and more complicated than a simple air dam. So to recap, goals for front are:
Over the past few months I have been gathering inspiration from everything from land speed racers to eco-modders. The eco-modders have extensively documented very cheap, very DIY-friendly ways to reduce drag. Just google image search "ecomodders aero" and take a dive down that rabbit hole. One of their preferred materials is coroplast, a lightweight yet stiff corrugated sheet of polypropylene. The same stuff all those election yard signs are made from. You can get this stuff for free after any election or by walking along the ditch of a nearby highway and gathering all the tipped-over or blown-away ads. AND benefit your community and the environment by upcycling this material. Polypropylene unfortunately is not very recyclable, so the majority of it ends up in landfills. Unless, of course, it ends up on a car...
It forms decently too. And the little metal rods can be modified to stake several sheets together and add stiffness. I enjoyed the irony of a "Cash for Junk Cars" sign in my garage, and the appropriate shamrock for this weekend.
I could really use some feedback on design. Nothing is set in stone (or hot glue) yet. How do we feel about the shape? Stay flat or bulge out forward more? Angle of attack? Does it need a small bumper-like feature? Am I going insane for screwing yard signs to my racecar?
From an aesthetics point of view I really like it, maybe there would be a benefit to angling it out but I think it looks really good flush and straight up like that.
Simple, clean and it seems to work with the rest of the car.
Adam
At the least, I would add a front “bumper” to match the rear.
And a small lip of some sort would look awesome.
In reply to jfryjfry :
I still have more rain gutter left over :) I could make both out of that aluminum and rivet on.
Try to add a little shape to the front panels to give them some small amount of bending strength otherwise they will blow in to the radiator support (or off the car).
I have made racecar aero out of corollary. For not much money, circle track roll plastic is much better and also very easy to work with.
In reply to maschinenbau :
Nice! I actually did that with my c5 wheel and lizardgrips. Looks "meh", but I got to keep my air bag, which isn't possible with any kits (of a reasonable price).
Yours looks great, and I love the whole build!
maschinenbau said:In reply to jfryjfry :
I still have more rain gutter left over :) I could make both out of that aluminum and rivet on.
I second the 'matching front bumper' idea
and... assuming there'll be a slot cut for radiator flow... I'll suggest you use the bottom edge of the bumper as the cut-line for the radiator opening. and, since you've got the materials, consider actually building ducting from that slot to the radiator. doing that means you'll be able to have a smaller opening, and if you get it out to the radiator surround steal, it'll help add some front stiffness to that big flat sheet
In reply to stafford1500 :
Second.
Truly flat panels will also show every flaw compared to a something with a tiny bit of a crown in it.
Flat section on the front will also stick out too much IMO.
First off, if you want to go flat, add some details. Also+1 on a lower grill opening.

Maybe bring it just a touch out from the grill for strength and appearance.
I'm having a hard time finding appropriate images.
I like this idea.

Just because I think its cool, but also for the kick-out at the bottom. Also, brake ducts for looks, if not functionality.

I'm done armchair quarterbacking (for now).
wheelsmithy said:First off, if you want to go flat, add some details. Also+1 on a lower grill opening.
Maybe bring it just a touch out from the grill for strength and appearance.
Oooooooh I like that one. I like that one a LOT.
Thanks for all the feedback everyone. It really is helpful. Here are the turn signal "eye sockets" I did last night.
The eye sockets are proper.
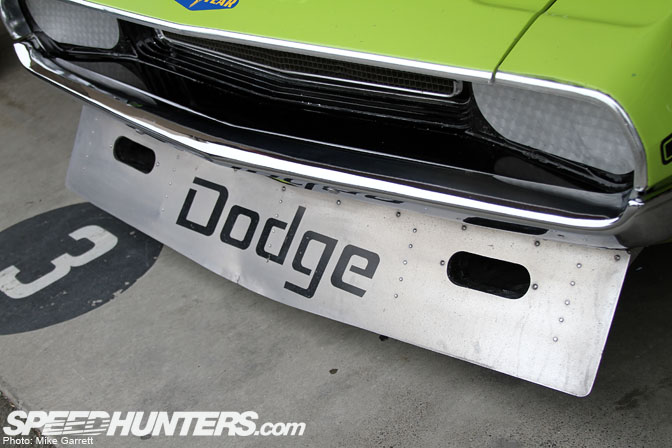
Here's some inspiration you may not need, and are likely aware of...

This guy did a maybe 1/2" square tubing frame. Might facilitate bolting on/off. Cover with whatever.

I like 70's -0-Tastic stuff like this.

Performance and style, in one little package. Nice progress. I really like the use of sign board for fab work.
I am no means an expert, so here's my 2cents worth. First, for some drag reduction cover the grill,remove the roof rack and wing mirrors and maybe extend the roof rearward (like a "sporty"suv or with added down force WRC) and if your budget can take it; belly pan. Second, duct air at the working surface of your radiator. (with fences or a cook top hood vent) And vent it away. ( LC's untested hood modification) While enclosing the space under the car; infront of the engine (axle line might be optimum) and tires behind your air damb. With the added benefit of giving you somewhere to support everything.( There has to be a formula to find the area of the radiator inlet.)
Great tips guys. Here's where we left off last time, with the eye sockets finished.
Here is some broken rain gutter I have been hoarding for months.
It's a bit...boxy
I cut some curve into it, riveted it back together, and cut tabs into the bumper. I also cut some slots into the valence/under-grill metal piece, so it goes together really easily.
Should all blend in together nicely. Also I have this piece that went under the original bumper, but not sure it has a place here. It's pretty mangled on the corner where this car was wrecked.
But maybe it could work
You'll need to log in to post.