I will jump around once again and move to the rear suspension. As Insight owners know that rear suspension on these cars suck. The travel is minimal and it has a tendency to hit the bump stops constantly. That is very true with my car because like the front, the rear springs were cut by the previous owner. They were literally doing nothing.
Here are stock springs next to the cut ones....
Thank you sketchy previous owner.
Along with the cut springs the shocks we blown and no longer being useful.
I needed new shocks and springs. I decided to go with GAZ shocks from the UK as they are one of the only people that make a performance shock for an Insight.
These shocks have adjustable compression damping which will help when I am trying to match the front for best performance. The quality on these looks very nice. These are simple units but the added control and poly bushings should help the Insight feel a little more sporty.
For the springs I decided to go with a custom spring made by a gentlemen named Scott on the Insight boards. He had a bunch of springs made that were similar to a Daewoo Matiz. These should be close to a 2.7K spring if I remember correctly. With the GAZ shocks this should stiffen up the rear a little and help keep the car off the bump stops.
Here are the custom springs next to the stock stuff and the cut spring that was in there.
Its really easy to get all this stuff installed so here it is.
I have driven a bunch of stock Insights and I am excited to see how much this changes the car.
Total noob question, but what are the changes in what the rear suspension has to accomplish, when you've removed all that battery weight?
interesting build, very detailed. great work on this. would love to see more of what' going on here.
EvanR wrote: Total noob question, but what are the changes in what the rear suspension has to accomplish, when you've removed all that battery weight?
The rear battery and associated electronics aren't that heavy, under 100Lbs. If I wanted to keep the stock soft ride I would have gone with a low spring rate, but since I wanted a little more performance and control I went with this slightly higher spring rate to ensure I keep myself off the bump stops and all the dampers to do their jobs.
I want to say thank you for the seat brackets build. You gave me the ideas I needed to make my bench to power bucket swap a whole lot simpler.
Dusterbd13 wrote: I want to say thank you for the seat brackets build. You gave me the ideas I needed to make my bench to power bucket swap a whole lot simpler.
Glad I could be of service.
Next on the list is the Transmission build.
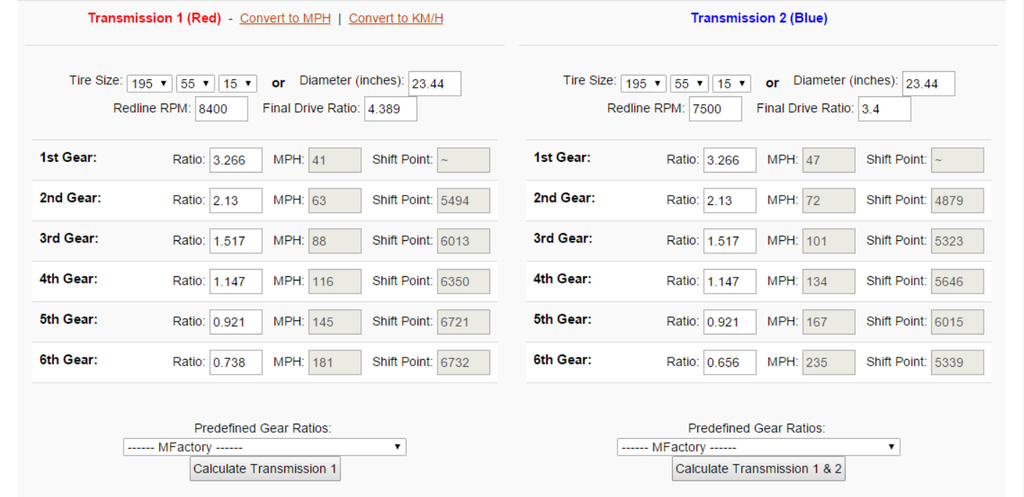
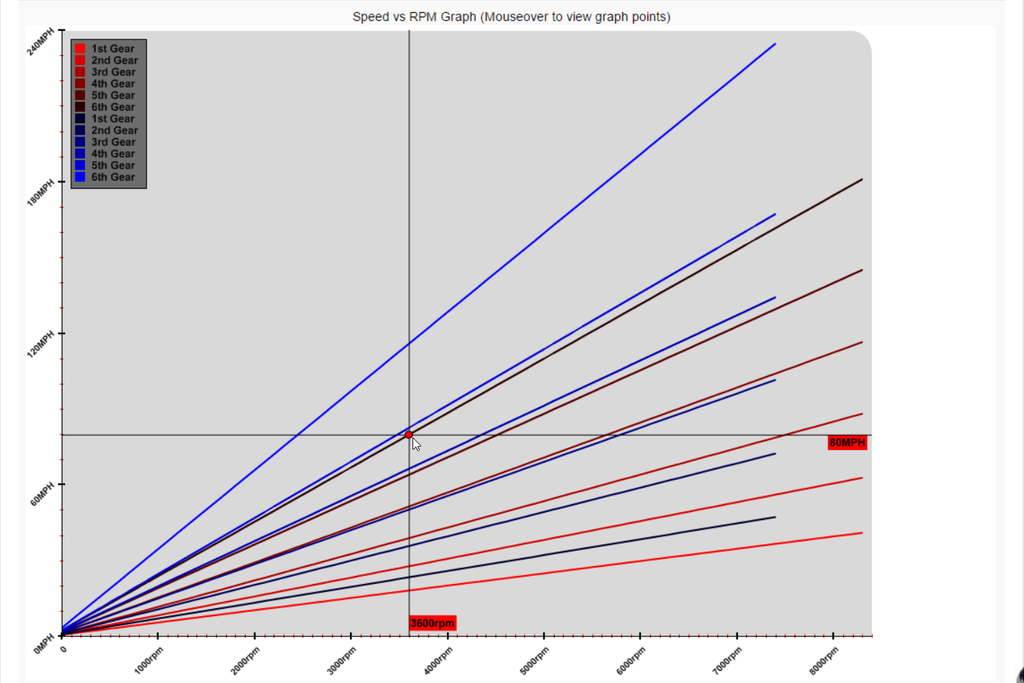
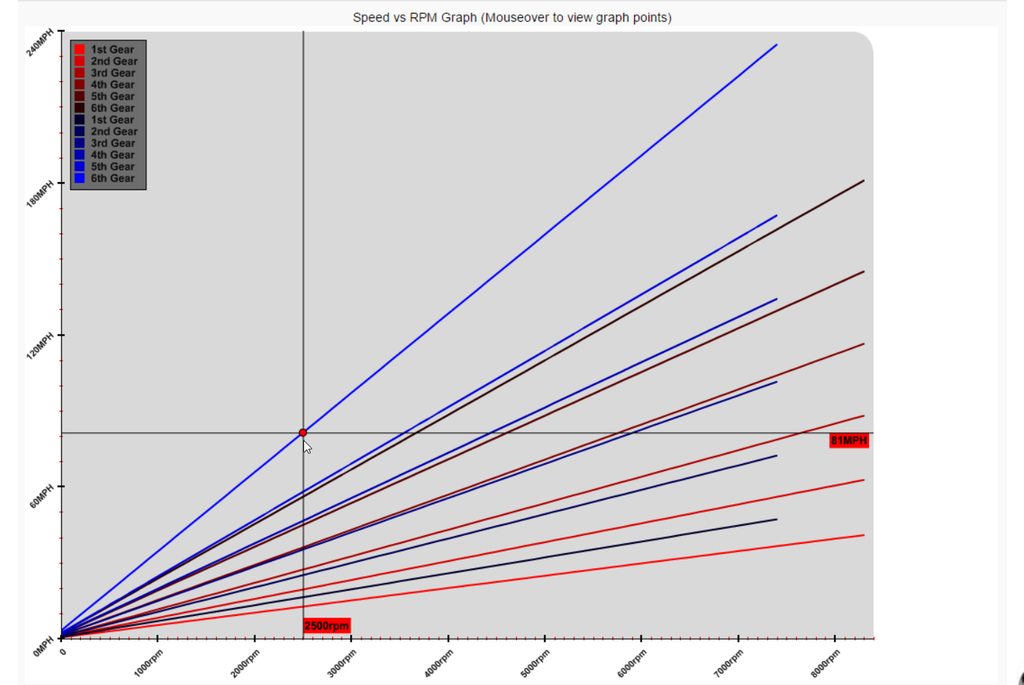
Like I said in the intro, one of the main features of this transmission compared to others was the custom final drive. The stock final drive for the 02-04 RSX transmission is 4.389. My custom final drive by Frana vehicles is 3.4. This final drive in conjunction with my longer 6th gear will take my cruising RPM from 3,600 RPM at 80MPH to 2,500 RPM. Below you can see the comparison from the stock RSX transmission to the custom ratios that I have chosen. The goal is to lower my fuel consumption and achieve the goal of +50MPG.
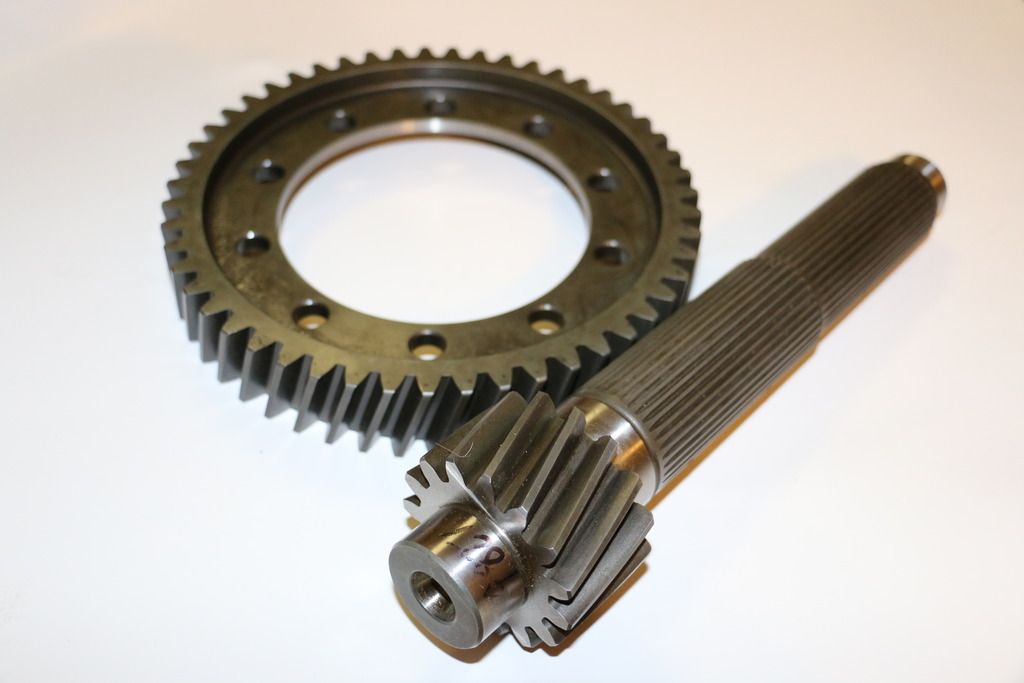
Here is a picture of the Frana Final drive. Under close inspection it is a very nice looking piece.
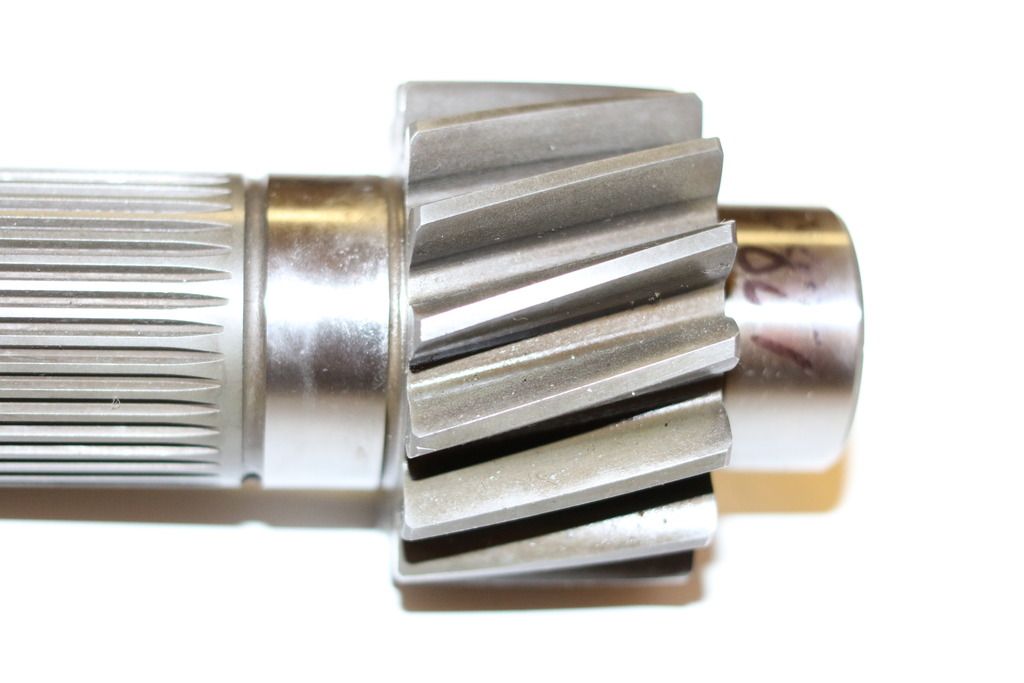
Along with the final drive I wanted to make this transmission worry free for the years of abuse to come. The most well known weak point of the K-series transmission is second gear. The dogs teeth on second wear away very quickly under spirited driving.
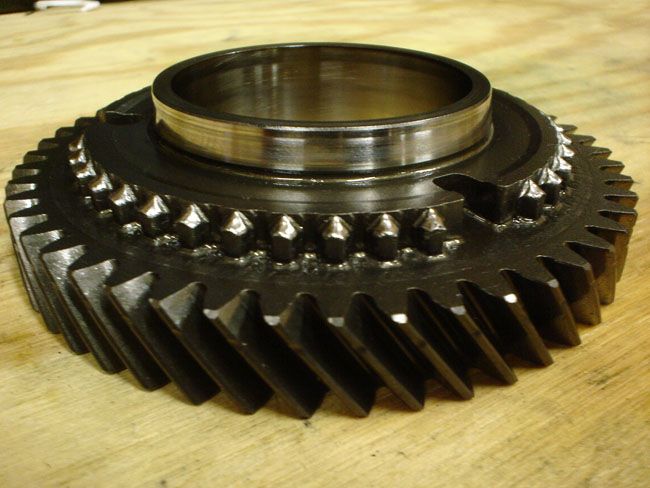
I decided to remedy this in 2 ways. First I bought a new second gear and had it custom hardened to HRC 58-60 (file hardened) with a case depth of .007-.010. I actually did this to 1st-4th just to make sure everything was good to go. This should give the gears great wear resistance but also allow for them to take the stresses of hard shifts and not crack. I also splurged on carbon synchros. These are a known band-aid when used in road race conditions because of their reduced weight and better alignment properties. With these 2 changes I hope that this trans will live a long and happy life.
Here are some pictures of the transmission going together.
Here is the 06-11 Civic Si LSD bolted to the Farna final drive.
I slid it all into the case together.
Closer look at the gear stacks.
Put the back half of the case on and mounted the shiftier ,detents and sensors.
In this last picture you can see how the edge of the case is shaved down. I had to clearance this so it didn't make contract with the frame rail. Due to the lost mounting bolt I decided to use an 05-06 RSX outer case and a 06-11 Civic Si inner case with some modifications. Both of these cases had improved webbing in the casting which will help ensure I don't blow the cases apart on my first drag launch. I will expand on the clearance issue later.
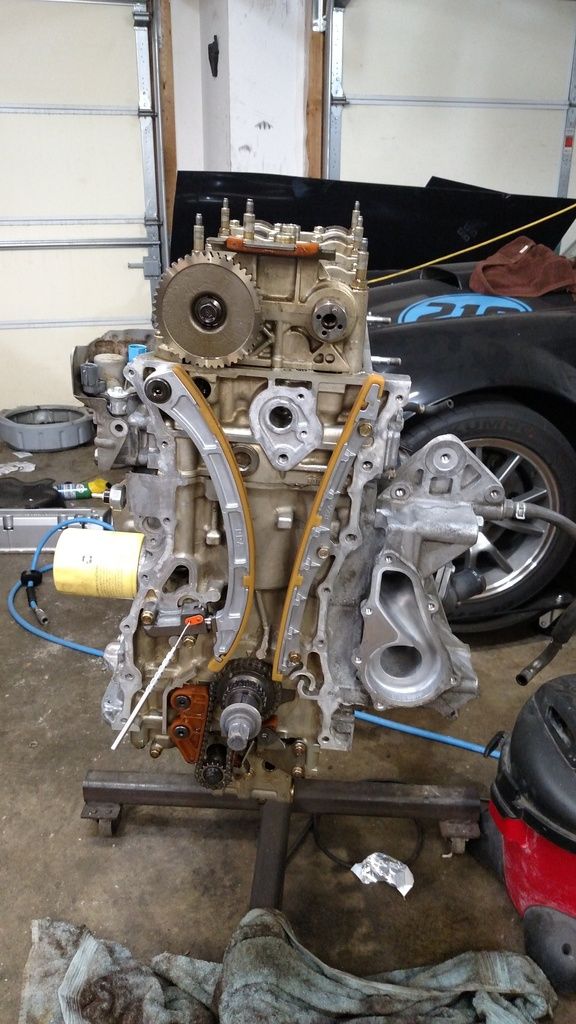
I started preparing the engine to go into its new home. I did some general maintenance and cleaned up the 80K mile engine the best I could. I put it up on an stand and sprayed down with engine greaser. I used a wire brush to get off the heavy soils and that seemed to do the trick.
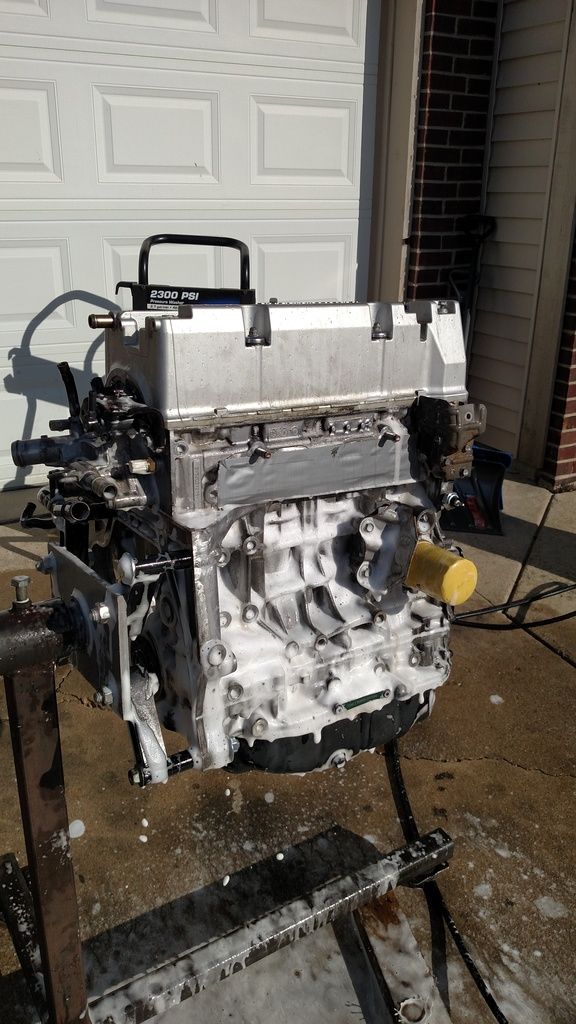
All Clean
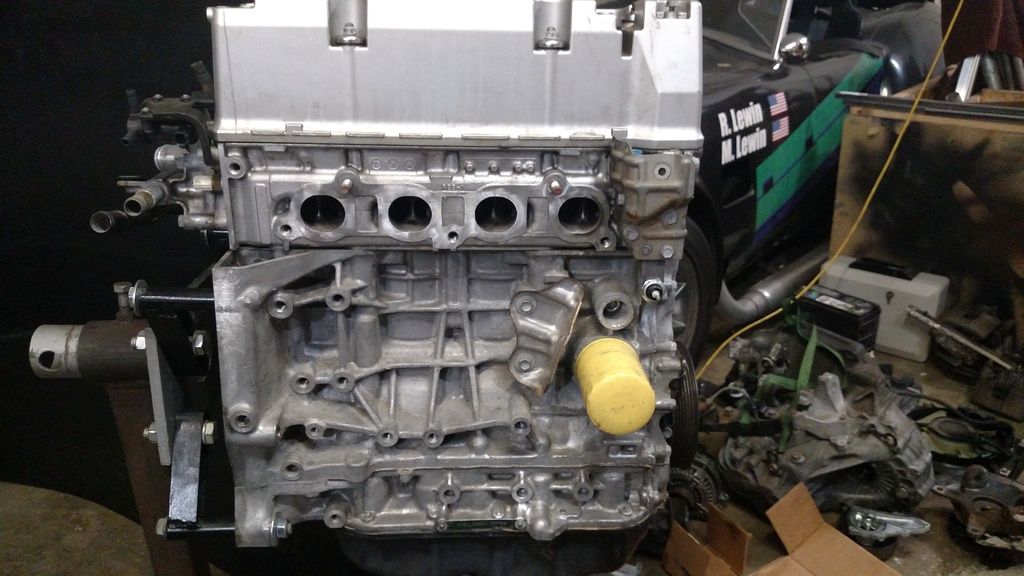
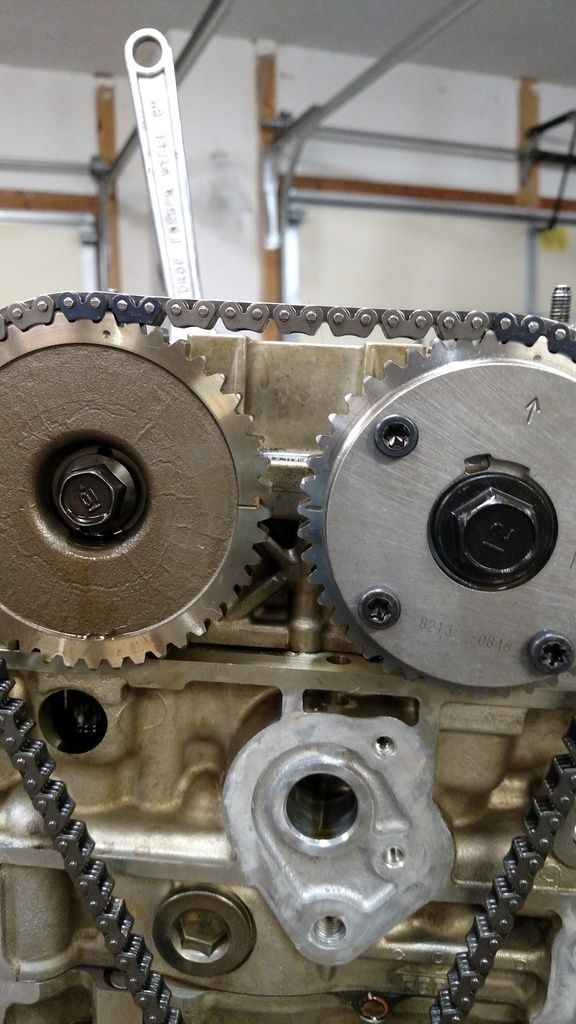
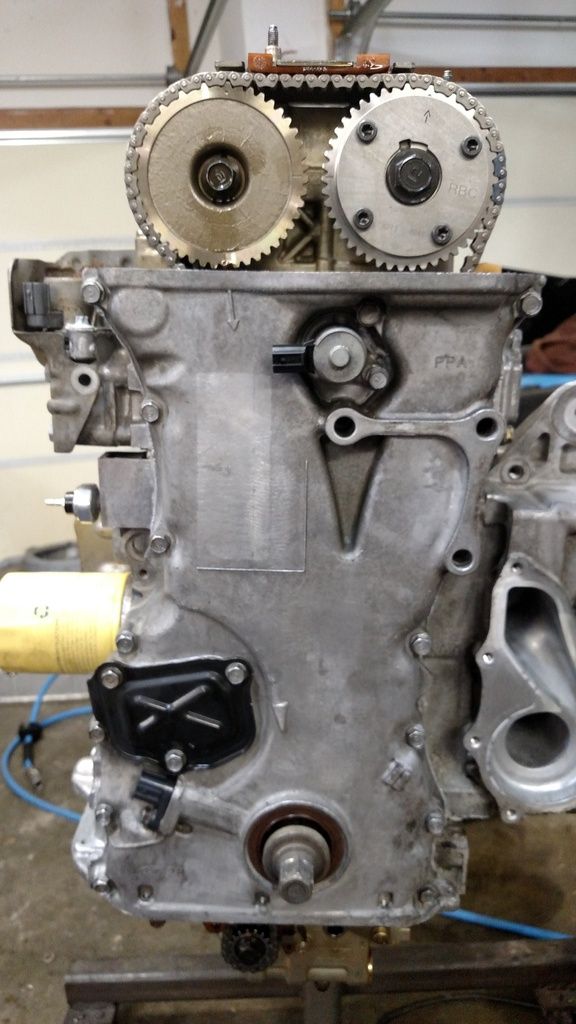
I stated my engine mods by replacing the stock K24 VTC that is limited to 25 degrees with one from a 02-04 RSX that allows for 50 degrees of actuation. This should help me make a little more power down low in conjunction with my other mods, with no determent to the rest of the system. This was as easy as swapping the cam pulley.
Pulley on and timing all lined up.
Once you are done, and I mean this totally, you should offer to build another just like it. You would get takers, probably many.
tuna55 wrote: Once you are done, and I mean this totally, you should offer to build another just like it. You would get takers, probably many.
LHT Performance will build you a K-sight. Mine just goes a little further and adds my own engineering touchs to make it a great all around car you can live with. If someone really wants one I would be open to it. This one is mine though. Haha
proawemike wrote:tuna55 wrote: Once you are done, and I mean this totally, you should offer to build another just like it. You would get takers, probably many.LHT Performance will build you a K-sight. Mine just goes a little further and adds my own engineering touchs to make it a great all around car you can live with. If someone really wants one I would be open to it. This one is mine though. Haha
You probably won't charge $20K though.
tuna55 wrote:proawemike wrote:You probably won't charge $20K though.tuna55 wrote: Once you are done, and I mean this totally, you should offer to build another just like it. You would get takers, probably many.LHT Performance will build you a K-sight. Mine just goes a little further and adds my own engineering touchs to make it a great all around car you can live with. If someone really wants one I would be open to it. This one is mine though. Haha
Yeah their car is a little expensive. Haha
tuna55 wrote: Once you are done, and I mean this totally, you should offer to build another just like it. You would get takers, probably many.
I agree. Lot's of us have the want, few of us have the capability to build/machine custom parts. Plus $20k for the LHT car is out of my budget. Somethign in the middle, that's probably doable.
Fantastic progress. I have recently purchased an insight for an efficient daily and am already contemplating kswap. What kind of money did you recoup from parting it out. Also the mounts on the market are overpriced and make keeping ac difficult. Are you building custom mounts? If so would you be willing to sell another set?
spoolin wrote: Fantastic progress. I have recently purchased an insight for an efficient daily and am already contemplating kswap. What kind of money did you recoup from parting it out. Also the mounts on the market are overpriced and make keeping ac difficult. Are you building custom mounts? If so would you be willing to sell another set?
I have recovered over $1000 for the parts I have sold so far.
I bought some Innovate mounts for the swap. I have already test fit the engine and did not like its position with those mounts. I had to modify the mounts to make the engine fit a little better. I will post about those issues soon. At this point I would not start a K series swap until a better mounting system is available.
I did some maintenance to the engine to make sure it wouldn't have to come out in short term. I threw the covers on and bolted on the intake manifold. This is an RBC from a 06-11 Civic Si.
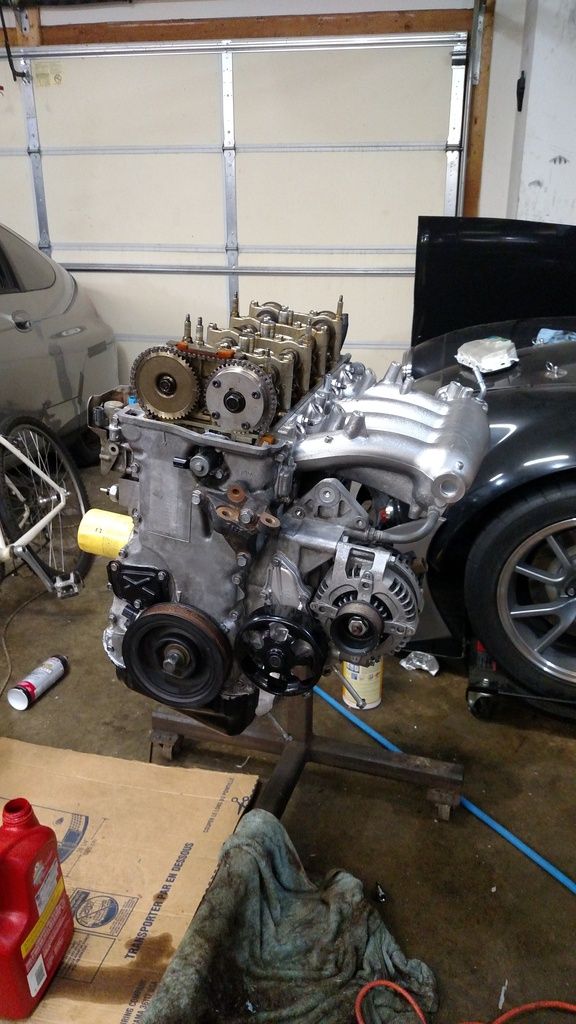
Next up was the flywheel and clutch. I decided to go with a lightweight Exedy HF02 unit. Its not a super light aluminum unit but just enough to take a little weight off the rotating assembly.
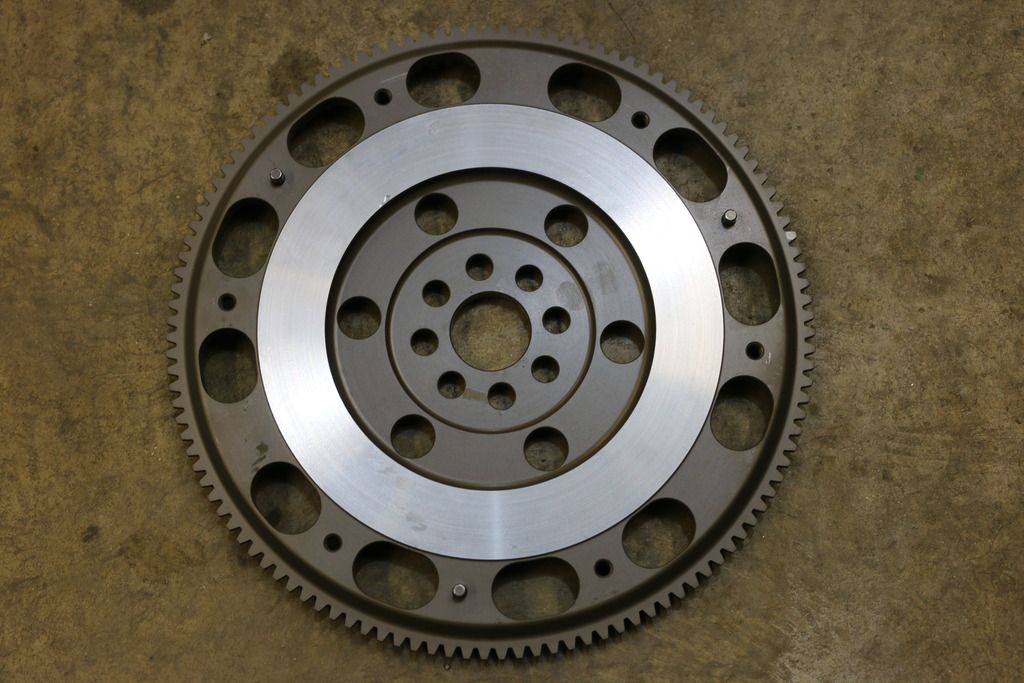
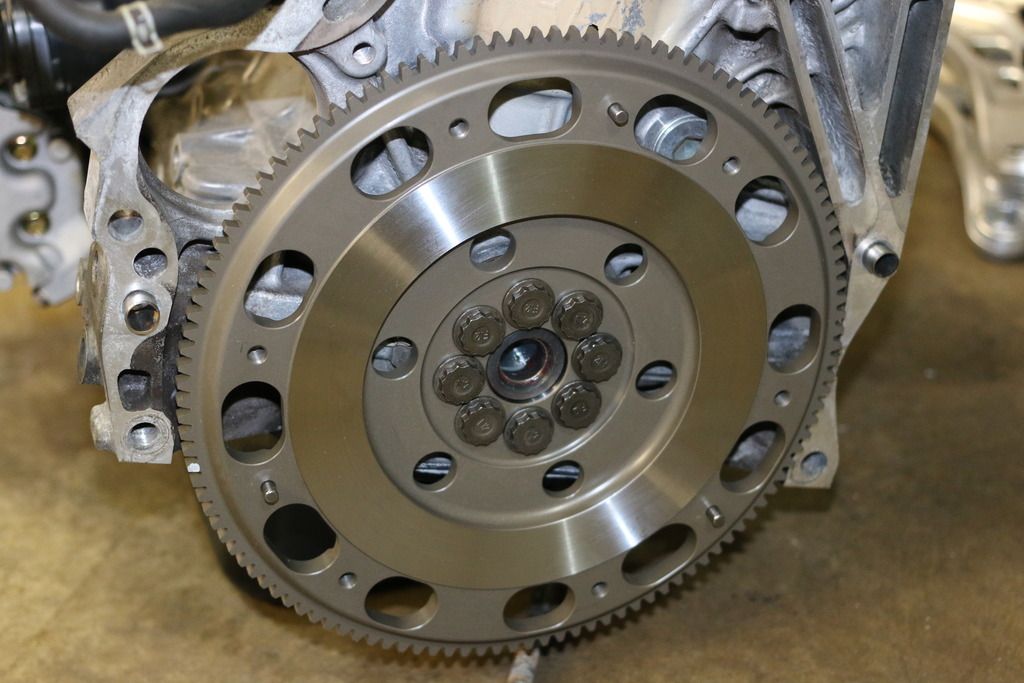
Next is a slightly upgraded clutch, nothing amazing, just a little more clamp load again from Exedy.
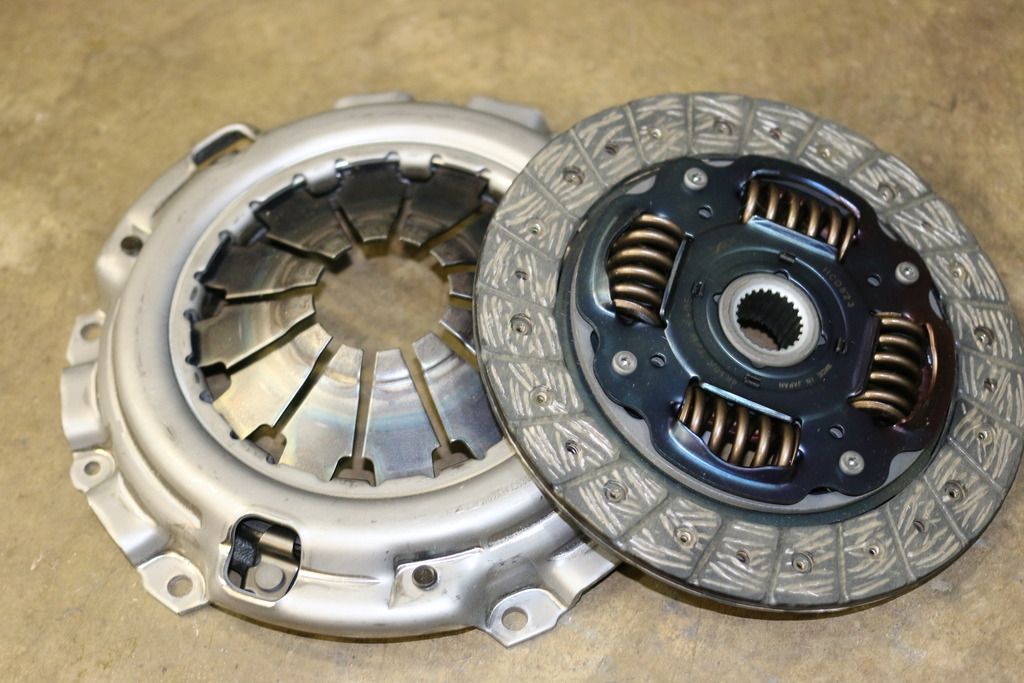
I bought all new bolts from Honda and threw it all together.
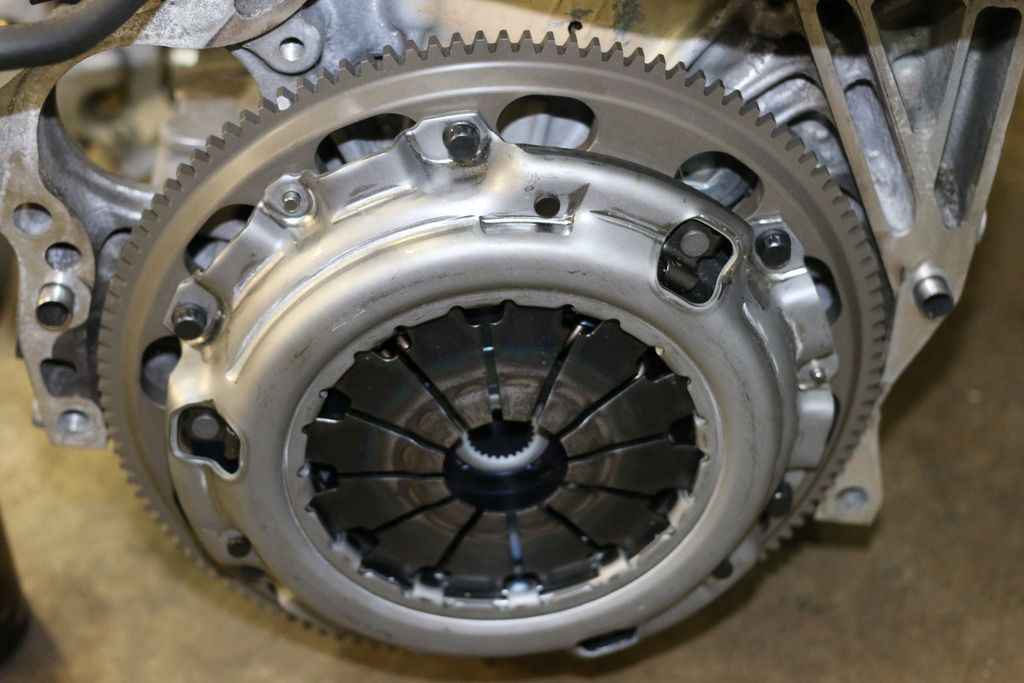
With everything ready, I bolted the engine to the transmission and but it on a roller dolly ready for its new home in the Insight.
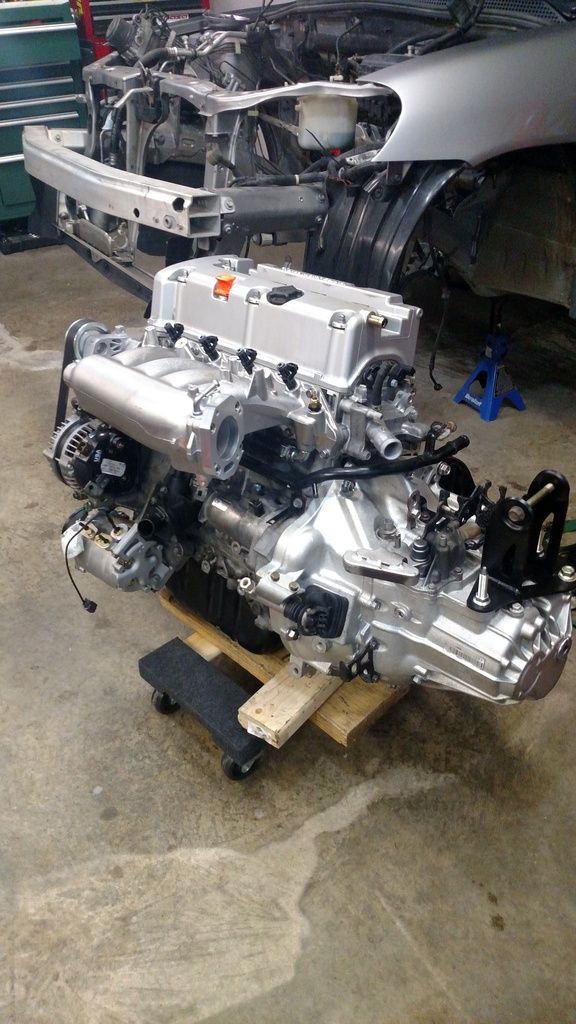
Alright now for the fun part.
Its time to put the engine in the car. I bought mounts from innovative mounts that are for a K24 into an Insight with a 5 speed. I was told these mounts would work well and put the engine in a decent position. Here are the mounts as received.
Put the mounts in place that bolt on the car side.
Found my first issue with these mounts. The bolt hole size for the passenger mount was a 12mm. The bolt on the Insight is a 10mm. This means that I will have to grind off the captive nut on the chassis and drill out the bolt hole to accommodate a 12mm bolt. That sucks but whatever.
Moving on, lets put the engine in the car. Here are some pictures on how it fits.
As you can see, the axles do not line up well. The engine was sitting very low and very far forward in the chassis. This caused the intake to hit the core support. Most people just remove it and install hood pins but that is unacceptable to me. The oil pan sat about 2.5" below the frame rails. All this would be fine if I was only going to drag race the car, but for a driver these mounts are junk. They clearly found a position that the engine fit but didn't want to make it fit well.
With the engine in a spot that I didn't really care for I had to decide if I was going to put the engine in a better location or deal with the mounts how they were. As you could of guessed, I decided to move the engine to its optimum location.
I started by taking all the mounts off the engine and supporting the engine and transmission with 2 jacks. This let me move the assembly around and find the position that would work the best. Once I got the engine in the position that I liked, I modified the mounts to fit.
Starting with the passenger side engine mount, I cut off the tab that would allow the 2 mounts on that side to bolt together. I needed to move this tab in order for the engine it sit in the correct position. Here is what the mount looked like on the engine before I started.
The tab sits pretty far back thus pushing the engine forward. It also creates large moment on the mount which I really didn't care for either. With the tab cut off I made a new one out 1/4 plate. I bolted the new tab to the chassis side of the mount and tacked the new tab to the engine side of the mount to get this.
As you can see the mounting tab has moved down and forward quite a bit compared to its original location. I was happy with its position and welded it all together.
Since the original mount had a slot that this tab slid into during assembly, it was relatively strong with just the plug weld from the back and the bottom side of the mount welded. My tab does not have this slot so I wanted to add reinforcement to make sure it doesn't fail in fatigue over time. I added a support gusset to the back side of the mount to give it a little extra strength.
This is a little overkill but that's clearly how I like to roll.
bgkast wrote: Nice work. Shame you had to do so much modification to something that was supposed to bolt in.
I agree, but it's not surprising. I am particular about most things so its really my fault in the end for making all this extra work.
For the drivers side I ran into an issue. There are 3 bolts that hold the mount to the transmission, but now that I moved the assembly rearward and up so much, the 3rd bolt was hitting the frame. Its an aluminum frame and I didn't want to jeopardize its strength so I decided to clearance the mount and the transmission case.
Here is the mount before I started cutting. That jagged line is a semi guide of what I need to cut off.
Next the vertical portion of the mount needed to be cut off and 2" removed.
Again, I put the mount back in the car and tacked it into its new position.
I don't have a good finished picture of that mount so we will move onto the rear one.
Here is how it started.
Then I had to cut a bunch out of it.
Filled in the big hole.
Made it pretty
When I was putting this mount in place for the last time I noticed that the hole through the mount was not straight. So I had to fix that.
Here are all the mounts finish welded before paint.
wow, I wish I had HALF the fab skills you have, truly impressive work. With all the extra engineering you put into this, it would be great if you could sell these updated mounts or the plans to make them so that others could benefit from your additional work. I've been wanting to do this swap forever but I'm not good at fabrication. This looks like the perfect do everything car, I've always wanted a CRX but now they are so old you are replacing everything and scared to drive it in the winter, with the insight you could do everything with it and not be too afraid of finding replacement parts. Great work!
proawemike wrote: Found my first issue with these mounts. The bolt hole size for the passenger mount was a 12mm. The bolt on the Insight is a 10mm. This means that I will have to grind off the captive nut on the chassis and drill out the bolt hole to accommodate a 12mm bolt. That sucks but whatever.
I would think that it'd be easier to make a 12mm OD, 10mm ID sleeve instead, that way you can use the stock bolt and not have to cut up the car.
RX8driver wrote:proawemike wrote: Found my first issue with these mounts. The bolt hole size for the passenger mount was a 12mm. The bolt on the Insight is a 10mm. This means that I will have to grind off the captive nut on the chassis and drill out the bolt hole to accommodate a 12mm bolt. That sucks but whatever.I would think that it'd be easier to make a 12mm OD, 10mm ID sleeve instead, that way you can use the stock bolt and not have to cut up the car.
Honestly that is what is in the car right now. Haha. I planned to make the change to the larger bolt in the future if I had any issues with the smaller bolt.
You'll need to log in to post.