
here is a good illustration. the drivers side sits nice and straight like all the others (2 per corner) except for the one on the passenger side at the bottom of the pic. I little prying at it seems to confirm my broken assumption but i need to block up the body and remove it to be sure.
anyone ever have luck welding a coil spring?? ![]()
In reply to 2K4Kcsq:
Yeah! I'd bet it's a standard from an industrial application. Might see if something at McMaster might work.
34" in the last 48 hrs. It's awesome. ![]()
Even if you can't find one off the shelf (or a longer one to cut down) coil springs are easy enough to make custom that it shouldn't be stupid expensive to have done. It does look like something McMaster would sell though, pretty normal straight closed end compression spring, just match one up from your measurements.
I found some good dimensions from a guy who posted on the kristi forums. . . maybe i will look it up and try to order one. then i can just swap out once its here.
"The spring's free height is 1.830" and its OD is 1.879". It seems to be wound out of 3/8" square steel rod and is flat finished on both ends."
That sounds weird enough you might have to get a machine shop to wind you a new one. Closest I'm seeing from McMaster is 9595K17.
In reply to BrokenYugo:
The standing free height is a mis print. I'll probably pull it out today and measure everything for myself to be sure but that measurement alone is closer to 4-4.5"
the other day I noticed in some pictures that the KT7 had a larger diameter spring made from round bar. I wonder if availability was the reason for the change or if it was just a better heavier spring.
Just wanted to thank Franz and KCW for helping with parts this morning.
 hooked me up with a spare condenser, points, cap & roter, plug wires and a spare distributor clamp & body so I can play with different ignition options or just to have a built points distributor as a backup.
I could have ordered the stuff needed online this morning but it obviously pays to shop local. All this for less than a set of plug wires
from a parts store. cant beat that ![]()
I'll make a long story kinda short.
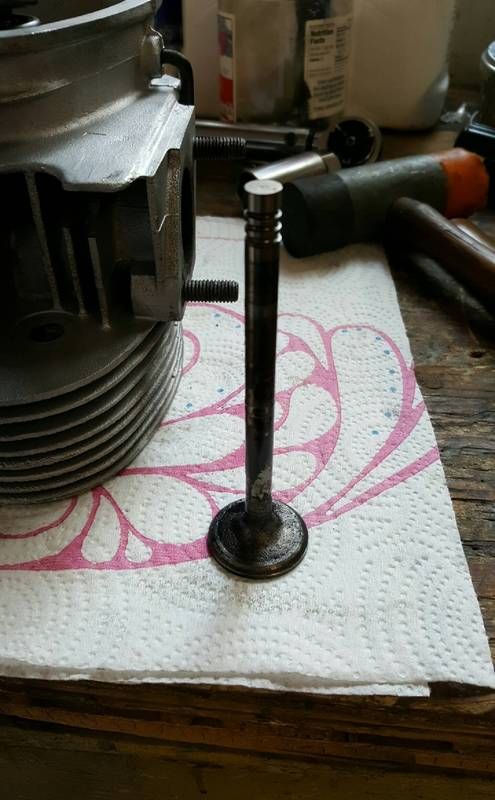
a few days ago I went to fire the kristi engine up for the second time and it was not a happy camper. went to adjust the valves and had 2 bent push rods on intake #2 & #4.
conclusion?? took a couple days to figure this out but I believe the old varnish smelling fuel tank ruined my fresh 5 gallons of 91, despite bieng flushed multiple times. the varnish material made its way to the intake valve stems and once cooled, completely locked down #2 taking out the pushrod and tube when I tried to start it cold.
valves and guides are fine. my solvent wouldn't touch this stuff, had to use acetone to clean it all off but all valves are free again. everything is back together. still need to remove that tank and give it the por-15 treatment before I fire this thing up again. what a day ![]()
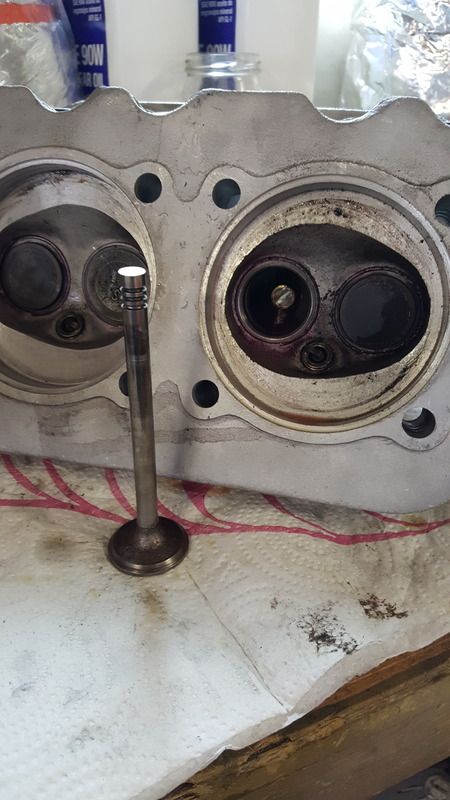
That's an impressive failure mode, you might want to check the valve lash a few hours after you get it back together to make sure the cam didn't wipe a lobe from the increased pressure.
In reply to BrokenYugo:
I have been worried about exactly that but I think Im lucky that the low hp stock pushrods are so weak. may have saved the cam. I just edited my post because im certain nothing happend till it tried to start cold. it was running too good during the break in to have any bent push rods.
I guess better to have this happen in the shop rather than way out in God's Country with 3 feet of powder and no way home.
NOHOME wrote: I guess better to have this happen in the shop rather than way out in God's Country with 3 feet of powder and no way home.
Here's to appropriately timed failures.

You might consider running a ream thru the valve guides, Mcmaster Carr sells them, if the fit is to tight, then oil won't get in there and the problem could happen again.
In reply to TED_fiestaHP:
I lost sleep before taking it apart, fully expecting everything to be welded together but the clearance measures good. . . once it was clean again anyway.
going to run some BG 44k thru it once the tank is clean.
its worth noting that I could smell it as soon as I started taking things apart. then I found this thread and it all started to make sense. I find it very interesting that this guy kept flushing his tank with solvent. like I said, my solvent had nothing for this goo. . . if anything it made it stickier. but acetone took care of business quickly. I plan on using a gallon of acetone and a length of chain as my first step in the tank cleaning process.
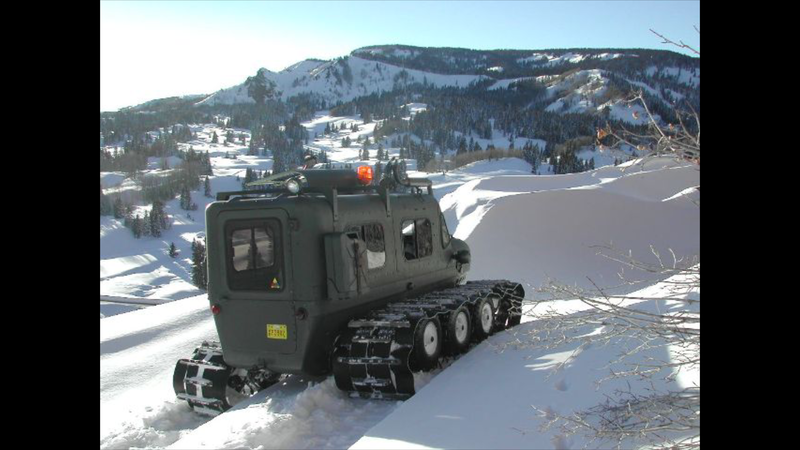
In reply to NOHOME: there is a saying that goes with snowcat ownership. . . "dont drive it further than your willing to walk. . . in the snow" hahaha but on a serious note, split board, skis or snowshoes and an avalanche beacon will be required to ride this ride. I have also started a box of spares that will stay inside the machine wherever it goes.
got the tank out yesterday

here was the last gallon or so the pump wouldnt pump out very fast ![]()
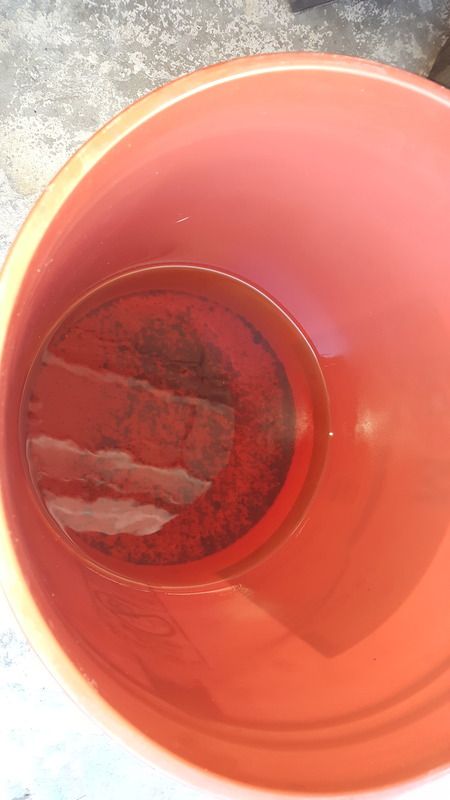
having the tank out is the best opportunity to remove and replace the 3/8 plywood floors. also a good chance to inspect the fiberglass belly for hidden damage

before & after a scrape and a shopvac.
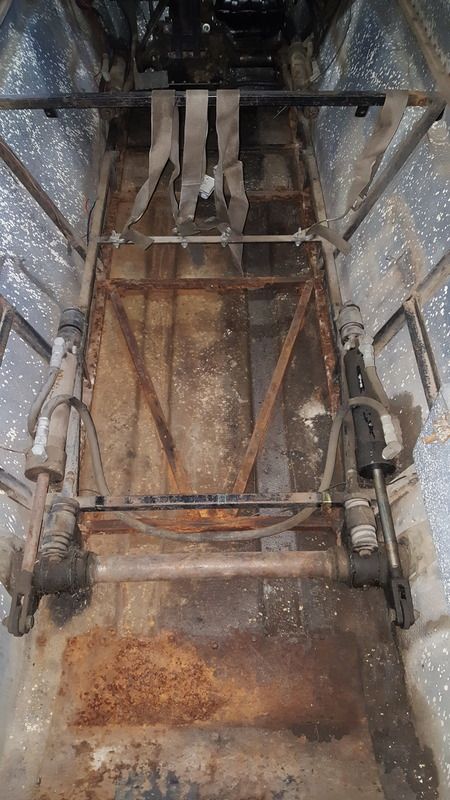 going to give it a power wash and maybe a little paint on the frame. today I will be making new treated wood floors and covers for the rear suspension.
I would really like to separate the frame and tub one day. . . maybe next summer would be a good opportunity for that.
I keep telling myself to leave it original (not sure why) but I think a spray in bedliner on the interior walls and floor would be a welcome improvement over that 60's splatter paint. I have also decided to ditch the stiff throttle linkage in favor of a cable setup. the restomod is sinking in further. ![]()

Face it, your never going to sell it once its running, just do what you want. ![]()
And yes bedliner would be nice, and comes in many options other than black these days.
I have a Fiat that was last run in 1988, wonder what that fuel is good for? I keep attempting to run it thru the lawn tractor, but sadly there is gallons and gallons to get rid of, wonder if it will help to kill bamboo....
In reply to TED_fiestaHP:
The stuff I pulled out of my bugeye was a fantastic weedkiller, so it might stand a chance...
TED_fiestaHP wrote: I have a Fiat that was last run in 1988, wonder what that fuel is good for? I keep attempting to run it thru the lawn tractor, but sadly there is gallons and gallons to get rid of, wonder if it will help to kill bamboo....
Napalm like substance for a homemade flame thrower?
2K4Kcsq wrote: I keep telling myself to leave it original (not sure why) but I think a spray in bedliner on the interior walls and floor would be a welcome improvement over that 60's splatter paint. I have also decided to ditch the stiff throttle linkage in favor of a cable setup. the restomod is sinking in further.

I think the bedliner for the insides is a great idea. Some mods will only make it worth more.
In reply to TED_fiestaHP:
Mis it with diesel, antifreeze, rock salt, and Roundup.
Cut bamboo just below the node, fill the resulting cup with the mixtutr. Gets drawn into the roots and kills the node.
java230 wrote: Face it, your never going to sell it once its running, just do what you want.And yes bedliner would be nice, and comes in many options other than black these days.
D2W wrote: I think the bedliner for the insides is a great idea. Some mods will only make it worth more.
I appreciate that. I dont want to change it so much as modernize and make it more enjoyable. but I do have an appreciation for those who preserve something rare and original. That bieng said, the coolest KT3 out there in my opinion is also one of the most modified. love this build kristi #093
You'll need to log in to post.