Thanks for the great explanation.
I'd like to add my one cent to your bearing comments. As an engineer, I recognize that sealed bearings have a finite lifespan whereas pressurized journal bearings last forever assuming proper design and oil supply volume and pressure. I suppose it's typical for Germans to decide that a journal bearing was not complicated enough and add a roller bearing.
Additionally, for an application like this, a roller bearing is a pretty poor choice. A needle bearing and a (if needed) thrust bearing would be a better choice. I wonder if some thrust on that shaft is causing the balls to wear prematurely in some situations.
As for the hollow shaft, why would they not bother to cap both ends? Did I miss something in the description?
At any rate, I agree with your actions. I'll be interested to hear final numbers when you're all done and it's back on the road.
tuna55 wrote: Thanks for the great explanation. I'd like to add my one cent to your bearing comments. As an engineer, I recognize that sealed bearings have a finite lifespan whereas pressurized journal bearings last forever assuming proper design and oil supply volume and pressure. I suppose it's typical for Germans to decide that a journal bearing was not complicated enough and add a roller bearing. Additionally, for an application like this, a roller bearing is a pretty poor choice. A needle bearing and a (if needed) thrust bearing would be a better choice. I wonder if some thrust on that shaft is causing the balls to wear prematurely in some situations. As for the hollow shaft, why would they not bother to cap both ends? Did I miss something in the description? At any rate, I agree with your actions. I'll be interested to hear final numbers when you're all done and it's back on the road.
Tuna - it's an honor. Your thread gave me the confidence to start welding sheet metal.
The only loading on the IMS shaft comes from the timing chains. In my mind, it's hard to visualize how these would generate appreciable thrust loads without causing heavy damage to the chain side plates. It's pure supposition on my part, but maybe we're seeing some stress cracking in that narrow band of contact between the ball and the race from radial loading? The nasty aggressive oil would probably attack those areas pretty quick. Then you get a fissure, a chip, and the bearing goes away pretty quick.
Roller bearing spreads the load, metered oil flow from the pump keeps it lubricated. Biggest concern I have is that roller bearings aren't a good choice for high rotational speeds.
I did a baseline oil analysis on the car before I swapped the bearing. Going to be watching future analysis results VERY closely.
In reply to Jerry From LA:
Jerry - such kind words, and most appreciated.
My writing style has mostly been stolen from long-time posters on this board.
I've also been heavily influenced by "Ratfink" on the Adventure Rider motorcycle forum. His thread "Zen and the Art of Motorcycle Negligence" is the perfect example of how to keep an internet forum entertained.
mrap1000 wrote:tuna55 wrote: Thanks for the great explanation. I'd like to add my one cent to your bearing comments. As an engineer, I recognize that sealed bearings have a finite lifespan whereas pressurized journal bearings last forever assuming proper design and oil supply volume and pressure. I suppose it's typical for Germans to decide that a journal bearing was not complicated enough and add a roller bearing. Additionally, for an application like this, a roller bearing is a pretty poor choice. A needle bearing and a (if needed) thrust bearing would be a better choice. I wonder if some thrust on that shaft is causing the balls to wear prematurely in some situations. As for the hollow shaft, why would they not bother to cap both ends? Did I miss something in the description? At any rate, I agree with your actions. I'll be interested to hear final numbers when you're all done and it's back on the road.Tuna - it's an honor. Your thread gave me the confidence to start welding sheet metal. The only loading on the IMS shaft comes from the timing chains. In my mind, it's hard to visualize how these would generate appreciable thrust loads without causing heavy damage to the chain side plates. It's pure supposition on my part, but maybe we're seeing some stress cracking in that narrow band of contact between the ball and the race from radial loading? The nasty aggressive oil would probably attack those areas pretty quick. Then you get a fissure, a chip, and the bearing goes away pretty quick. Roller bearing spreads the load, metered oil flow from the pump keeps it lubricated. Biggest concern I have is that roller bearings aren't a good choice for high rotational speeds. I did a baseline oil analysis on the car before I swapped the bearing. Going to be watching future analysis results VERY closely.
I am glad you liked it! Hopefully soon my finances will stop draining and we can get on to inspiring people to paint their own cars.
So from where I am sitting, never having seen the inside of this engine other than your pictures, it is difficult to understand. Both ends of the shaft are connected to things, and those things have their own priorities and the chains are probably under load in different direction, so that the shaft wants to bias itself towards one side of the other, though I cannot be sure how much force we're talking about here. I am confident that an engine designer would calculate and design for this load, but it may have been underestimated. Ball bearings are great because they can also laterally locate a spinning member, but that's not really what is needed here. If the ball bearing is working, the chain won't ever contact the side plates.
I thought you had said once that these bearings were sealed. If so, that's not a great idea in an environment where we have plenty of clean pressurized engine oil to use. A decade or more later, we can't redesign the oiling system to direct oil the bearing without a very large amount of guessing, but that also may have contributed to the large failure rate. So you switched to an unsealed bearing? I think that is a great call.
Now, if I was designing the engine from scratch, I would not allow the oil to have free access to the inside of the shaft. I may use it as a handy place to keep an oil passage, but what you're describing here is coking, basically stagnant oil exposed to air and heat, and it indeed makes a nasty stinky mess that's not good for anything other than ruining parts. I know this very well from my current career, and am working on solutions for coking in valves right now. The easy answer is to keep oil flowing, or not, and nothing between. Leaving one end of the shaft open, which is what it sounds like Porsche did, leaves an excellent place to form coke. If the bearing is on the end which is open, then perhaps that's the biggest contributor to this failure, coke will very quickly destroy a bearing due to its far higher friction and tendency to gather solid particulate.
So again, I am one layer removed from your excellent and humble suggestions, and Porsche may have made some fatal errors here, but they had access to lots of math that I do not. I could be terribly wrong.
It sure is interesting though. It gives me more hope that I can grab one of these for Tunawife one day when I actually have money without also buying an LS6 to go with it.
EDIT: Yeah I re-read what you did there, and it's very good. You ensured constant oil flow, preventing coke formations. Good work. Also the seal installer is pure genius. It's incredible how cheap some things are and minor modifications can make them exactly what you need. Now paint it red and get a logo for it and sell it for half of what Porsche charges for their special tool.
I think I need to steer someone towards this thread. He's basically a design engineer for precision bearing systems. Well, that's my understanding of what he's been doing for the past 10 years, he can clarify.
Hey folks, wanted to make one thing perfectly clear:
The bearing and oil feed modification I've installed is a commercial product. I don't want to leave the impression that my research into the failure made me "froggy" enough to come up with something on my own. At the present, over a thousand 996's and Boxsters are running the IMS bearing kit I selected. And the vendor I used is a relatively small player in the IMS bearing market - there's another vendor claiming over 10,000 installations.
What I found interesting is that the IMS issue has been out there for almost a decade and the Porsche community is still arguing over what causes the failure. And how they've split into different "camps" to champion the best solution.
And since the official position from Porsche is that the IMS bearing cannot be replaced without a complete engine disassembly, I'm not entirely sure they know either.
Why can't you plug the other end of the shaft?? I'm sure there is a clear reason that I just can't picture
jfryjfry wrote: Why can't you plug the other end of the shaft?? I'm sure there is a clear reason that I just can't picture
Or my first thought was to fill it with something to prevent oil from entering it. Wonder how much of a difference it really made to the efficiency of the engine to make it hollow? I'm sure there is an advantage, but it seems like it would be minuscule.
Fantastic writeup, btw! I've always liked the Boxster, but the IMS failure stories made me shy away from them. You're post is inspiring to us GRMer's that maybe it's not quite the ticking time bomb it's made out to be. Or, at least, we have the schematics to disarm it before it goes off.
-Rob
mrap1000 wrote: The bearing and oil feed modification I've installed is a commercial product. At the present, over a thousand 996's and Boxsters are running the IMS bearing kit I selected. And the vendor I used is a relatively small player in the IMS bearing market - there's another vendor claiming over 10,000 installations.
What is the brand? We understand you are not associated with them and if it goes well, GREAT! If it goes horribly, well now we know where not to go. you have plenty of documentation to show how it was installed so if that defense comes up if the part fails, you are covered.
I wonder if filling the shaft with closed cell foam would help with IMS issues. I'm not going to be the one to volunteer my money for the experiment, though!
dculberson wrote: I wonder if filling the shaft with closed cell foam would help with IMS issues. I'm not going to be the one to volunteer my money for the experiment, though!

and right after start up...

I would say a small cap in the shaft would fix it, but the oil supply to an open bearing is by far the best solution (of the ball type). Bearings like fresh lube.
dculberson wrote: I wonder if filling the shaft with closed cell foam would help with IMS issues. I'm not going to be the one to volunteer my money for the experiment, though!
It's probably not a terrible idea. I would not want to weld on it, but some plug which you could ensure not to move nor change the OD or concentricity of the shaft would likely help a lot.
mrap1000 wrote: Roller bearing spreads the load, metered oil flow from the pump keeps it lubricated. Biggest concern I have is that roller bearings aren't a good choice for high rotational speeds.
What is the definition of "high rotational speeds?" The IMS spins at 1/2 crankshaft RPM. So the upper limit realistically is about 3,500 rpm and only for a few seconds at a time. More common might be 2,000 rpm. If that's considered a high rotational speed, we better retrofit the millions of cars on the road using roller bearings in the wheel hubs.
I'm thinking someone already worried about the rotational speeds involved with a Porsche Boxster engine and found they were well within the limits of a roller bearing this size.
The bearing RPM is of no concern in that application.
SKF rates their replacement double row bearing at 10,000 RPM with static splash lubrication.
@mrap1000: Beautifully written how-to. I've spent plenty on automotive books that could learn a thing or two from what you've written here.
Thanks for sharing your research and thoughtful, humble words. Like others here have said, your frugal mechanic approach makes me think that P-car ownership might be more manageable than I thought. Time to go test drive a first gen Boxster S!
Oh and dolet us know if you decide to become an automotive author. ![]()
Jerry From LA wrote:mrap1000 wrote: Roller bearing spreads the load, metered oil flow from the pump keeps it lubricated. Biggest concern I have is that roller bearings aren't a good choice for high rotational speeds.More common might be 2,000 rpm. If that's considered a high rotational speed, we better retrofit the millions of cars on the road using roller bearings in the wheel hubs.
A wheel hub turns less than half that speed on the highway. As an example, a 25 inch tire spins the hub about 800 RPM at 60 miles per hour.
In reply to Flight Service:
I used the EPS "Eternal Fix" roller bearing and IMS shaft oiling modification. Sourced through Vertex Automotive in Miami, Florida.
I apologize for being reluctant to mention brand names in my postings. I've seen other bearing replacement threads on the internet degrade into flame wars as soon as a particular brand is mentioned.
Unfortunately, there are actually folks out there who search internet postings of IMS "fixes" that they don't like and then drop in to pick fights.
I'll be happy to let the group know how my choice works out long term. As I mentioned previously, I'll be monitoring this via lube oil analysis.
In reply to mrap1000:
Thanks for the heads up. As you have seen on the board the 911/Boxster/Cayman is getting into the grassroots range with physically presentable version in the $5k to the $15k range. They are becoming a real bargain if you can do the work yourself and catch the catastrophic stuff pre-catastrophy.
This was one hell of a "hey I'm new here, Hi!" post. As said by others your write up is great. I have read worse from paid schmucks. You doing this as a volunteer schmuck is awesome.
Don't worry about trolls. Especially in the quality of a post like this. You may have noticed we take that stuff kind of seriously here.
Just out of curiosity, which oil testing company are you using? We always used Blackstone and I never was impressed.
Keep it up, Welcome to the board. You are among friends here.
Flight Service wrote: I have read worse from paid schmucks. You doing this as a volunteer schmuck is awesome. Don't worry about trolls. Especially in the quality of a post like this. You may have noticed we take that stuff kind of seriously here.
Isn't this the exact truth? We have a thread on how we can never trust the news. JB has a post on TTAC about how you can't trust the automotive media (present company excluded, of course), and there are pretty much zero no BS places to go to read anything.
That's what makes this board so valuable. Thanks for doing well more than your fair share keeping it that way!!
Thanks so much! Lurking here for most of the last decade, I've watched a procession of New Readers making their first posts. This forum has always been welcoming and enthusiastic. This place is special.
I'll post the remainder of my first repair sequence this weekend. After that, I have some experience to share on replacing the dreadful, long-throw shifter that Porsche used in the early Boxsters. Doing it frugally (of course).
JB has a post on TTAC about how you can't trust the automotive media (present company excluded, of course), and there are pretty much zero no BS places to go to read anything.
I cant get Porsche to send me a test car to review with absolutely no quid pro quo, and i won't trust the opinions of anyone else who cant either!! ![]()
Love the thread, btw. Very relevant to my interests...
Welcome back to the Frugal Mechanic. Let’s put this car back together again.
Porsche uses a Dual Mass Flywheel in the Boxster. The internals are pretty complicated, but the most important subcomponents are springs that can weaken over time. There’s a Porsche TSB floating around providing a go-no go test for this component. Basically, you put matching marks on the outer edges of the clutch face and the toothed tone ring and then measure how much you can “twist” the flywheel.
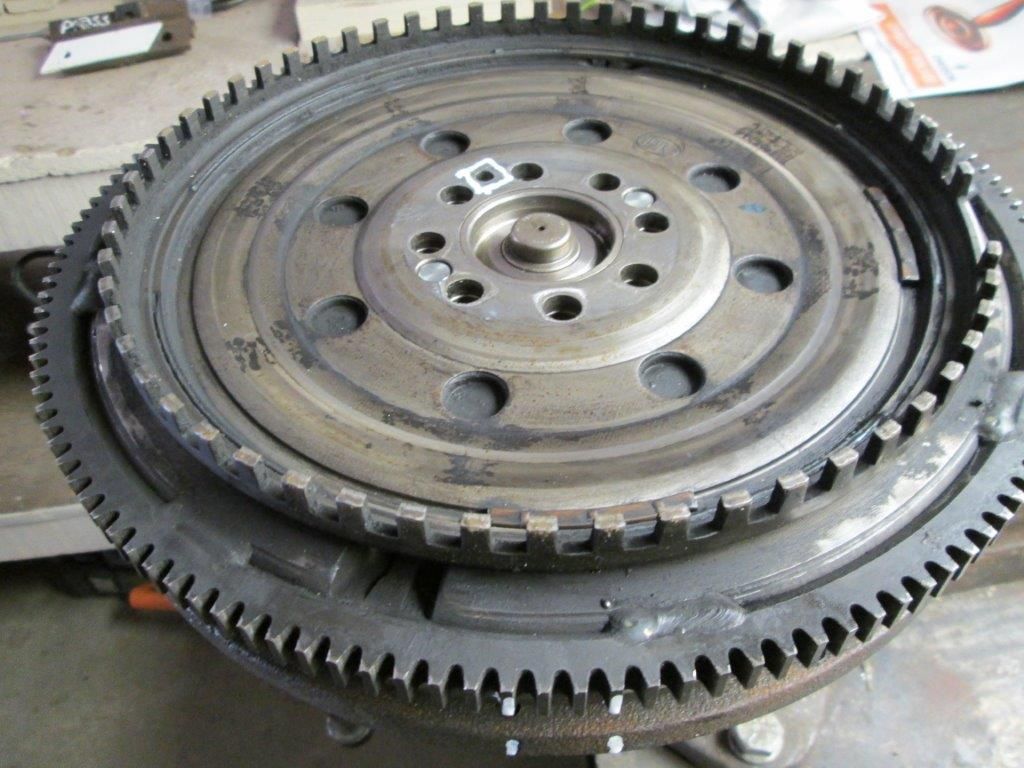
Picture isn’t mine. The process takes two hands and I’ve had mixed luck snapping my camera shutter with my tongue. I got around 5 mm of twist on my flywheel in both directions – well under the 15 mm limit in the TSB. Porsche also requires the flywheel to snap back to center after twisting, but mine didn’t do that. There are Youtube videos with the test performed on brand new flywheels, and I noted they didn’t snap back to center either. Displaying the deep respect that one must show for fine German machinery, I tipped the flywheel on its side and pounded it several times on the concrete floor. About two tablespoons of clutch dust sifted out and the internal springs started “springing” again. Called it good.
New flywheel bolts. Torque spec calls for tightening to 19 ft-lbs and then though another 120 degrees. Some folks go to the trouble of actually affixing a degree wheel to the bolts to ensure the heads are tightened the full 120 degrees. Since the cavity for the Torx drive already divides the bolt head into six equal segments, I made a mark on the bolt, counted down two segments and marked the flywheel. I threaded in a transmission bolt, a pressure plate bolt and used a heavy-duty tie wrap to restrain the pressure plate. Used my biggest breaker bar and went to town.
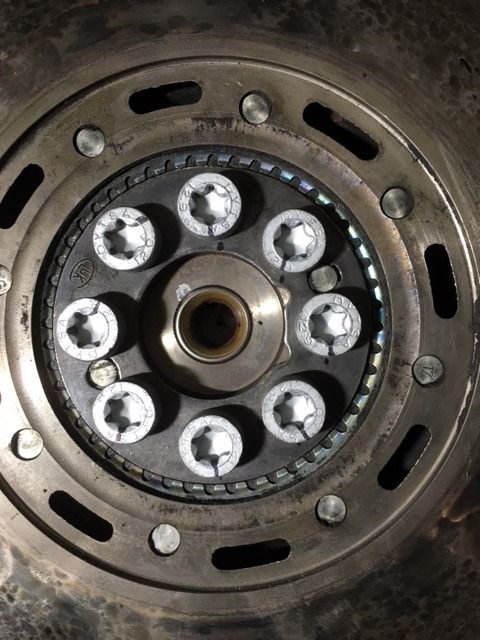
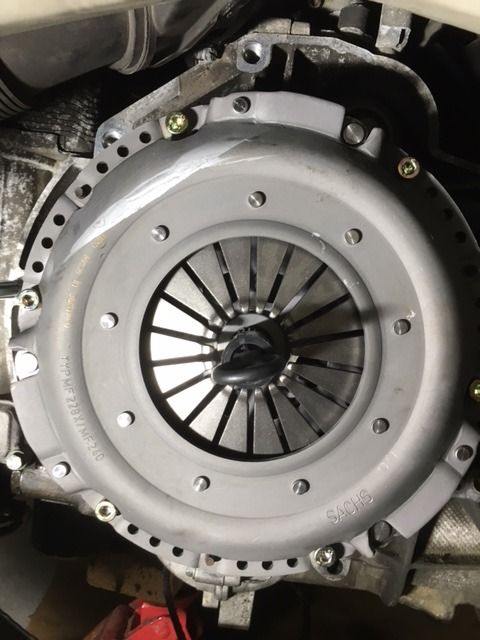
Thread in the clutch alignment tool (my clutch kit came with one) and the clutch disk, then bolt down the pressure plate. Should be good for another 30,000 to 60,000 miles.
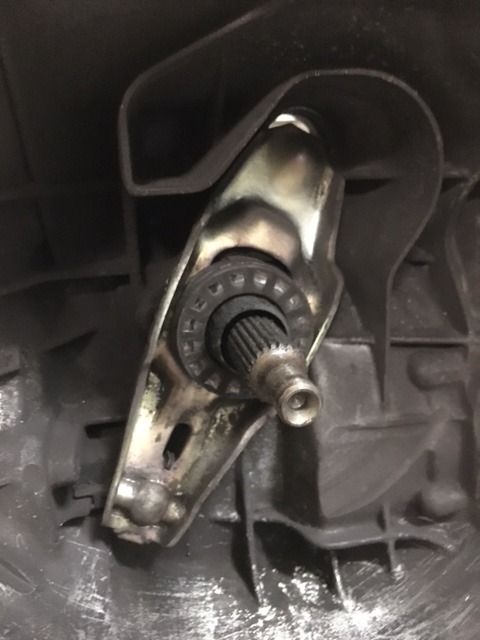
The original throw-out bearing showed great reluctance to slide along the shaft and the bearing sounded like the wheel on a matchbox car when spun. Replaced, with a few dabs of Lucas pressure grease in the right places, and it’s time to move on to reinstalling the transmission.
And here’s where I hit a wall. Up until now, I’d moved pretty quickly through this job. But stabbing that transmission shaft? Oof. I spent about four hours trying to get the pilot shaft to mesh with the splines on the clutch plate. Just….wouldn’t…go. I’d work for a half hour, fire up the computer and consult Youtube videos, and then try some more. Finally, I rolled the transmission back and disassembled down to the clutch plate to see what was hanging up. Turns out my ham-fisted attempts had buggered up the spines on the clutch plate. Pondering the situation, I realized the car wasn’t level – my jack stands at the front of the car were a few inches lower than the rears. As a result, the engine and transmission weren’t on the same plane and would be nearly impossible to mate.
I was able to salvage the damaged clutch plate by chucking a grind stone in my Dremel and lightly dressing the damaged splines. Then I flipped the clutch plate over, and using the transmission shaft as a makeshift die, worked the plate over the shaft from the undamaged side. I’m ashamed to admit that a hammer was involved, but in the end, the splines were restored to a relatively undamaged state.
With the car and engine perfectly leveled, I also shimmed the transmission into alignment. That’s my biggest issue with the Harbor Freight Transmission jack, which is only adjustable for fore and aft alignment. However, similar to my experience with finding a spouse and rearing children, dumb luck trumped my meager skill set, and things went back together. My experience was similar to others on the interwebs – the Boxster transmission and engine casing don’t go back together with a satisfying “clunk”. Rather, with an inch of separation, they have to be “drawn” together by installing a bolt on either side and alternating one turn at a time. As I said during disassembly, I really appreciate the access to the transmission bolts on this car. The bolts are an assortment of M10 and M12 fasteners, readily available at the local home improvement store. Next time I’m in here, I’ll pick up a few in longer sizes, chop the heads off and screw them in as alignment pins to skip all this hassle.
The new bolts on the CV joints installed without incident. The boots and the grease all looked good, and I was happy I didn’t have to replace them. Re-installing the clutch slave cylinder was a struggle. The clutch arm was now in a new position and I couldn’t get the mounting bolt in without opening the bleed valve to retract the pin. That requires the clutch hydraulics to be re-bled. Oh, bother. The Boxster clutch and brakes share the same fluid reservoir, and at least it uses standard European threading on the cap. I hooked up the Volvo adapter on my Motiv pressure bleeder and burped out a few bubbles.
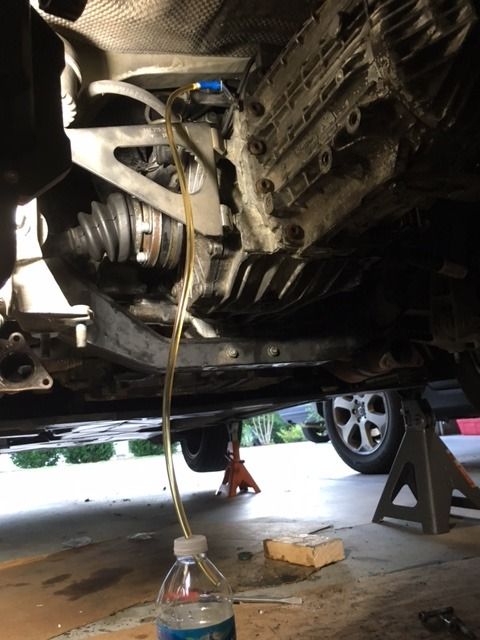
Because I’d just removed a bracket and set screw, the shifter cables went back into place without fracturing the uber-expensive ball joint ends. The muffler and exhaust also bolted back into place with brand-new stainless steel hardware. Finally, I installed the straight aluminum braces and the large aluminum plate and bracket. I was done with everything under the car.
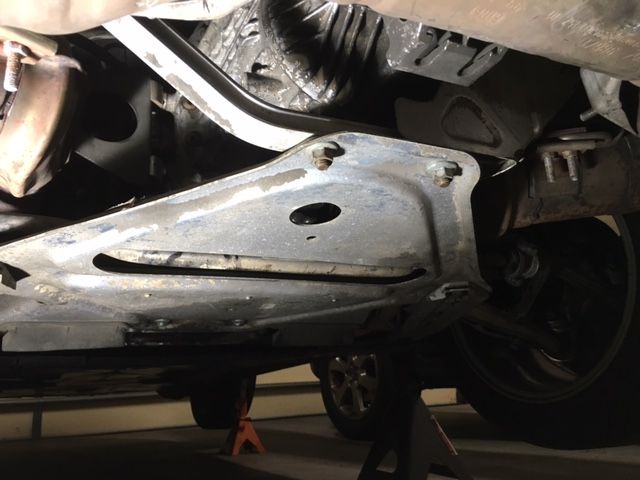
I had a checklist of work steps required for re-assembly, so I sat down and double-checked everything. Made sure the timing lock tools had been removed and the tensioners re-torqued. Forgot about oil. The sump had been drained before the tensioners were removed and hadn’t been re-filled. I’d stored the 10 quarts I’d drained in a clean, covered pan because the oil only had few hundred miles on it, and I’m frugal. As I was dumping the oil into the filler tube, the old crush ring in the bottom of the oil pan uncovered. Certainly, I’d installed a new crush ring when I re-torqued the drain plug? D-OH! A reminder of why I don’t do this for a living. Re-drain oil and install crush ring.
It’s time. Really getting nervous now. Key in the ignition. I anticipated chain clatter as the tensioners refilled with oil. What else would prompt me to immediately shut down the engine? My brain imagines my new bearing making a noise like a chain saw cutting sheet metal, or oil pouring out from the rear main seal. Ok, happy thoughts…happy thoughts.
Turn the key….two seconds of chain clatter….then nothing but the sewing-machine hum of a happy engine. I got a chill up my spine like the dang car was actually smiling at me. I said a quick prayer of thanks.
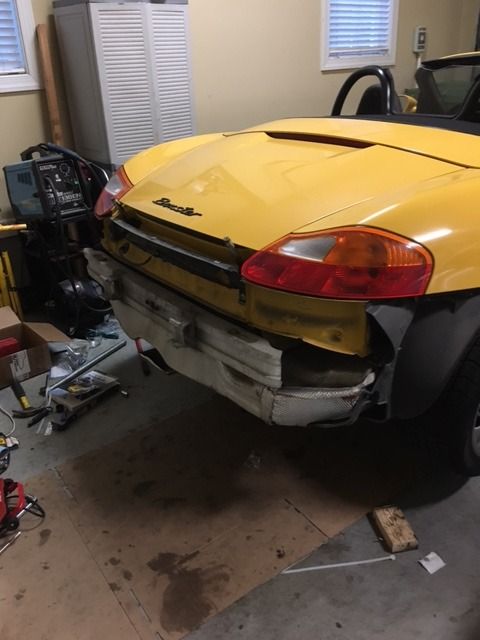
I really wanted to drive it, so I hauled the bumper cover into position and fumbled with the fasteners and screws. I’ve pulled a few bumper covers before, and anticipated a struggle getting the holes aligned with the rear quarter, but it all fell perfectly into place. New, black-oxide bolts on the actuators for the rear wing and snapped the painted cover back on. Dropped the car down off the jack stands and pulled it out of the garage. The clutch action was feather-light, with a nice progressive feel at the actuation point. Some of the message board debates on using the IMS shaft as an oil supply had mentioned the possibility of vibration or weird harmonics from the presence of oil within the shaft, but the engine felt smooth as silk. I put around 20 miles on it, and pulled it back into the garage. Shut it down, and there’s the reassuring sound of tick…tick…tick…as the engine starts to cool down.
So – a few thoughts from my project: R & R’ing a Porsche Boxster clutch is pretty straightforward, and is easily done without a lift. With a little pre-planning, it’s do-able over a weekend, and there are several IMS bearing replacement options that can be installed “while you’re in there” in less than two hours.
I’m a frugal mechanic, and so far, I’m really glad I bought this car.
I've always heard about the IMS bearing and how much of a nightmare, avoid at all costs, problem it is. Your write up makes it appear that it's not all that much more than a clutch job. It appears that this repair is nothing really scary at all, assuming one buys a car with a currently good engine. Are people really blowing these things out of proportion this much?
You'll need to log in to post.