I have a friend's project that needs customer headers. MGB with a 95 LT1 and T56. We had to place the engine/transmission where it needed to go and this will necessitate custom wheel well headers that will exit at the back of the wheel wells. I know this is similar to what the factory did with the Rover V8 engines in the MGB V8 and MGB RV8 versions, but our application will require we build our own headers.
After going back and forth with purchasing the plastic header mockup kits ($$$) and then sending the "lego" header to a header fabricator, the final cost is over $2,000. I am debating just purchasing a complete kit to build custom LT1 headers from a reputable company such as Stainless Headers Manufacturing or similar. It looks like I can get a kit that the flanges, preformed stubs, mandrel bends and slip in collectors for less than $1,000. I figure I can tack it all together and then get someone to to tig weld it professionally. What do you all think?
2nd question is should we do stainless steel or mild steel and just have the set jethot coated when they are done?

Dunno about coatings or material choice, but I appreciated this photo enough when I saw it that I figured I'd repost it in case it helps you or somebody else. Hell of a lot cheaper than the mockup kits. 1/4" rod welded to a rough flange with holesawed wooden discs threaded on to check tube clearances.

I've done a few headers, including LS1 headers for an MGB.
#1 was done with blue plastic pool tubing. It was about the right diameter, so I cut it to length and used that to work out my routing (over this chassis member, under this one). Then I used welding wire to come up with the shape, similar to what John posted but without the discs. I was careful to use constant radius bends and keep distance from other "tubes". Then it was a matter of cutting and welding using chunks of old exhausts (a Bob Boig E-Prod header was sacrified) as well as mandrel U bends from a local muffler shop. I MIGed this one and I wasn't very practiced at the time. It's never had a problem.
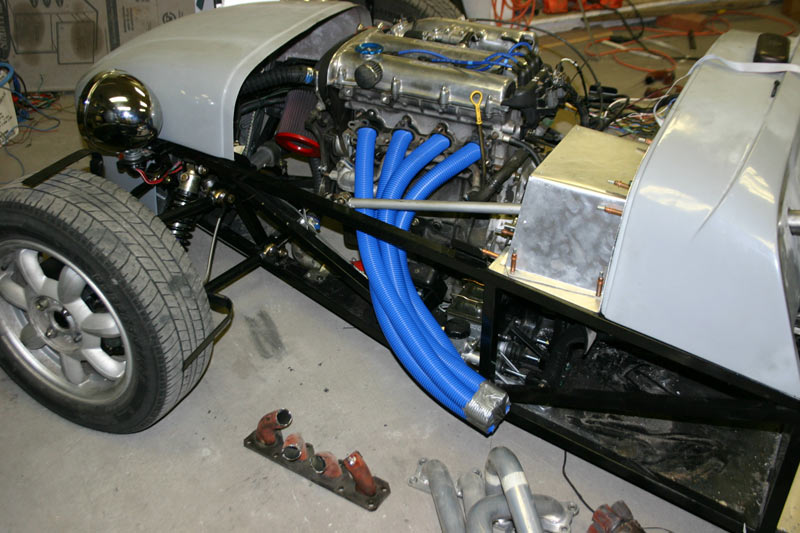


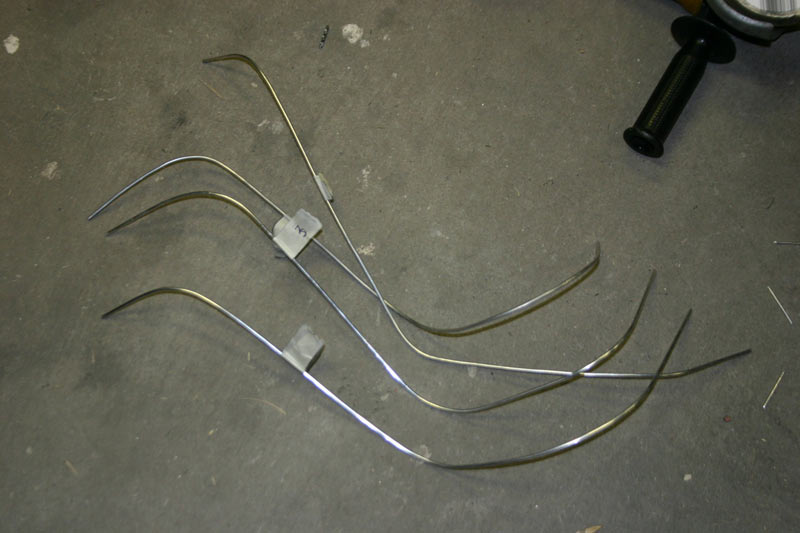
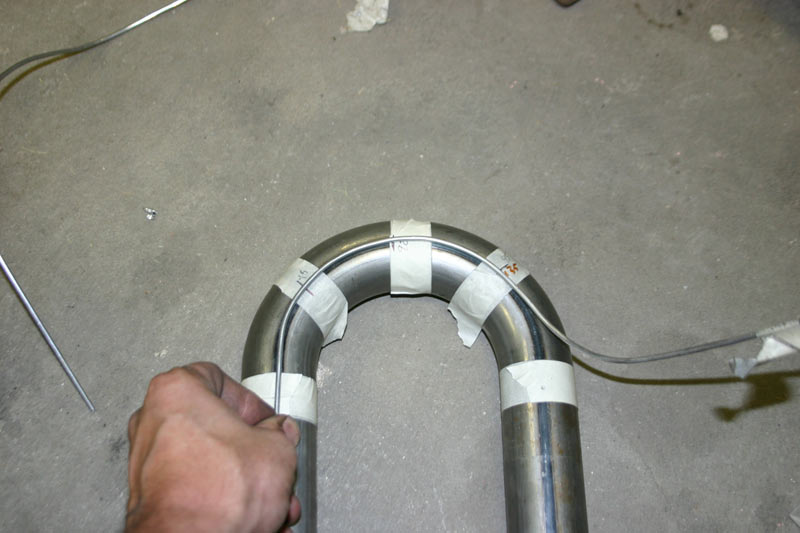
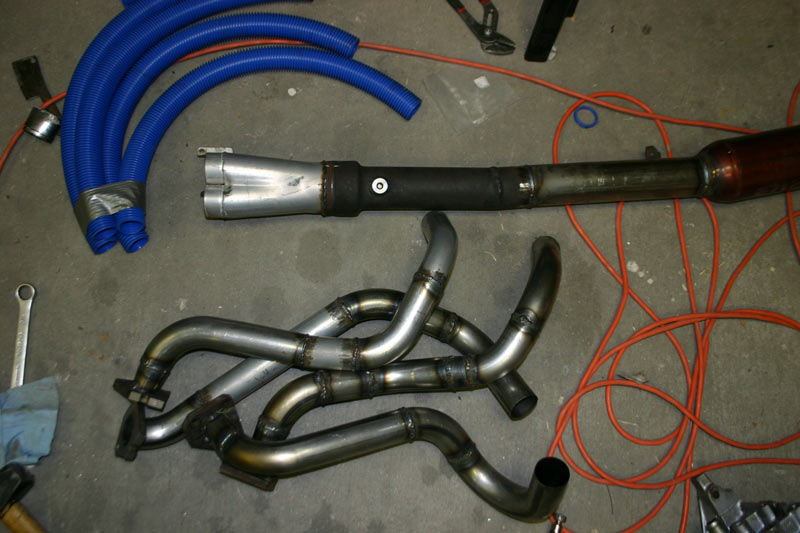

Second one was a little more ambitious. We got a set of the header Lego (aka ICE engine works) at work, and I needed to package some really long tubes in a small space. I got a little carried away, but the dyno says it worked.
I started with my pool tubes again to get a general shape.
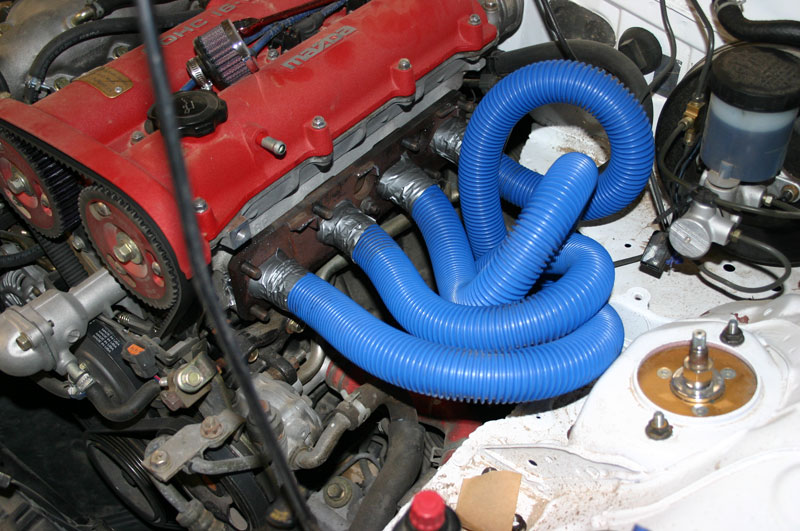
Nope.
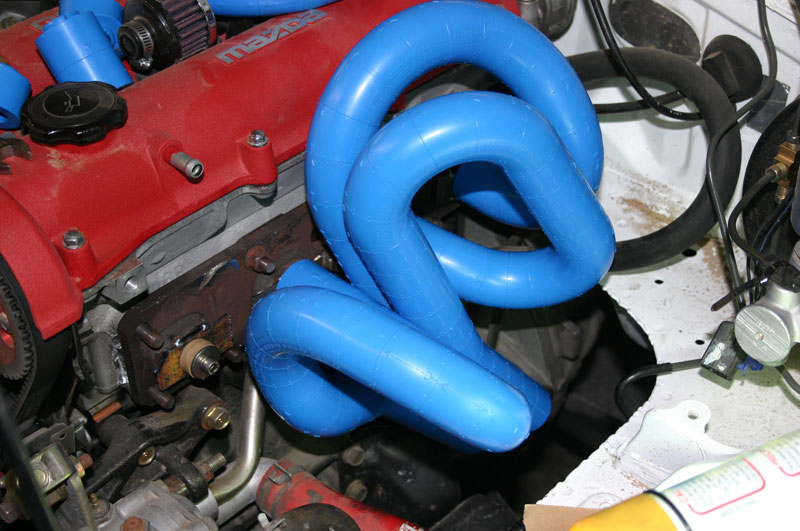
Hmmm
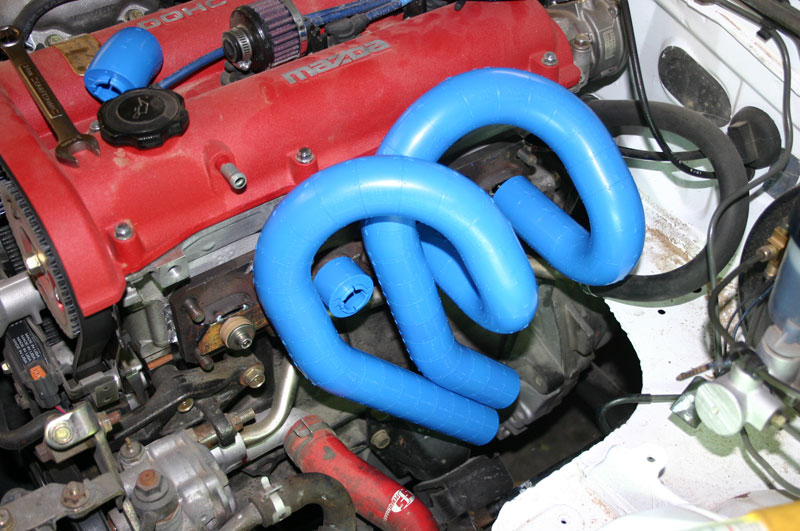
Crazy but just might work...
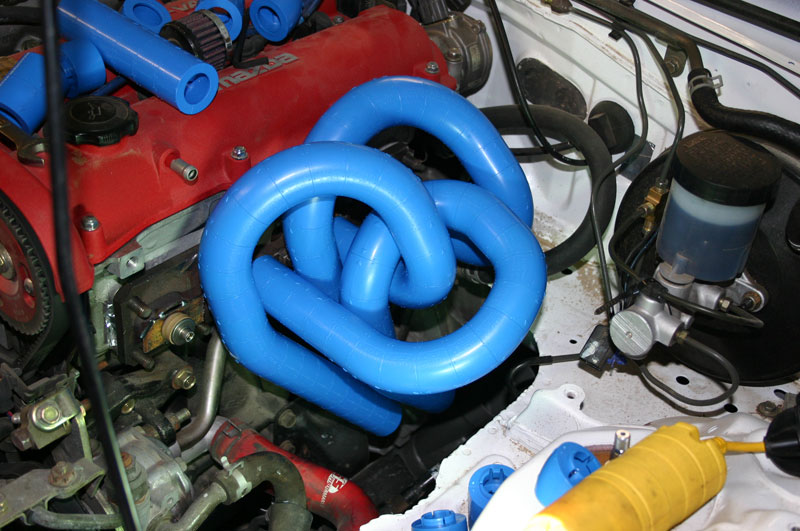
Turning into steel and teaching myself TIG at the same time. I tacked with MIG and then switched.
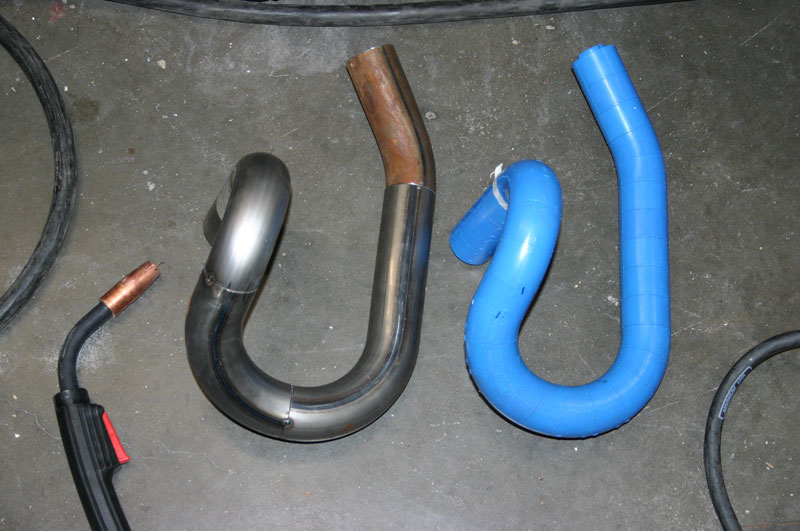
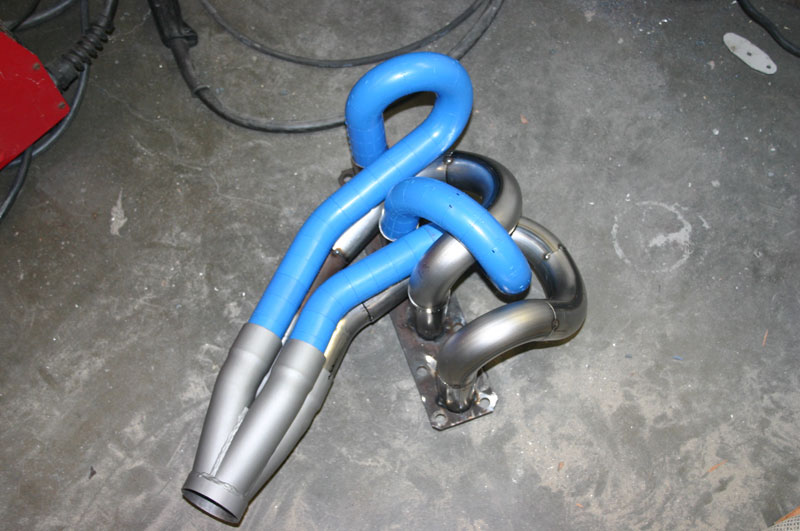
Welding was a little tricky so I didn't end up with an inaccessible joint.
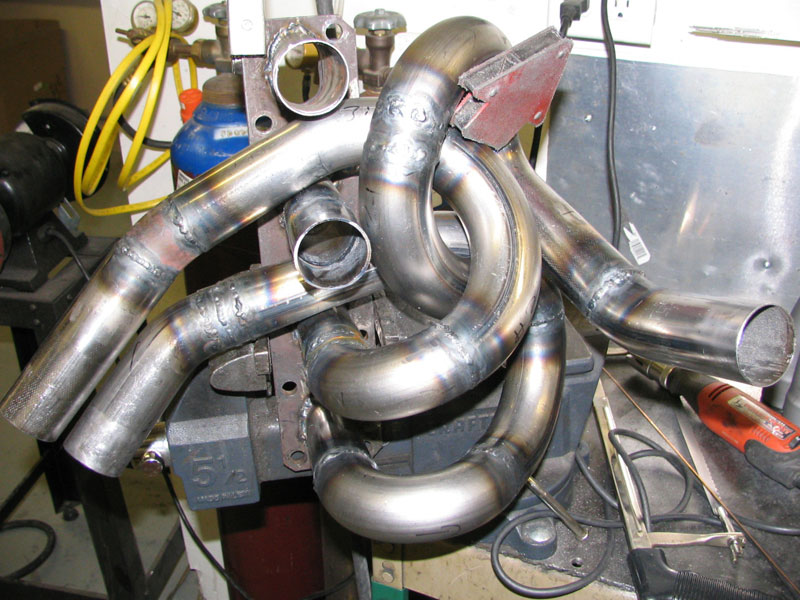
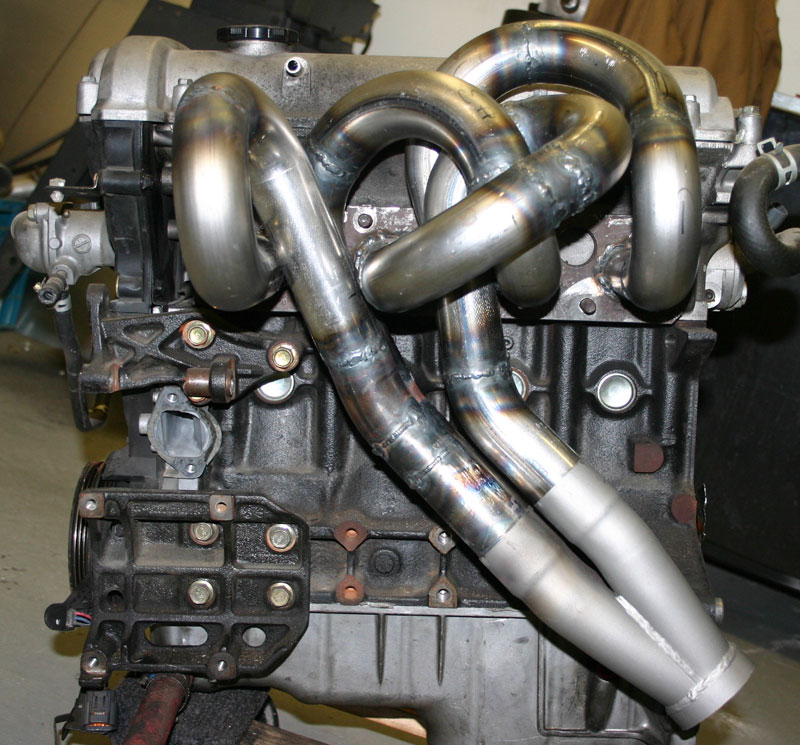
Then heat treat, just in case it helps.
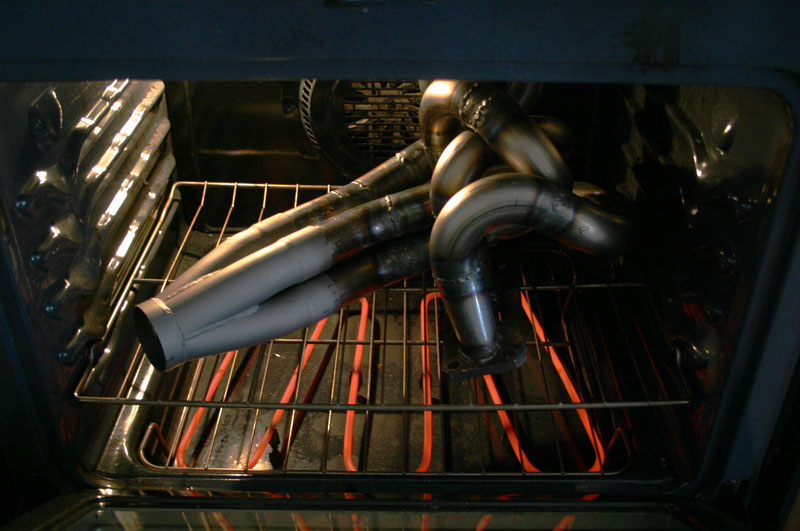
Cool.
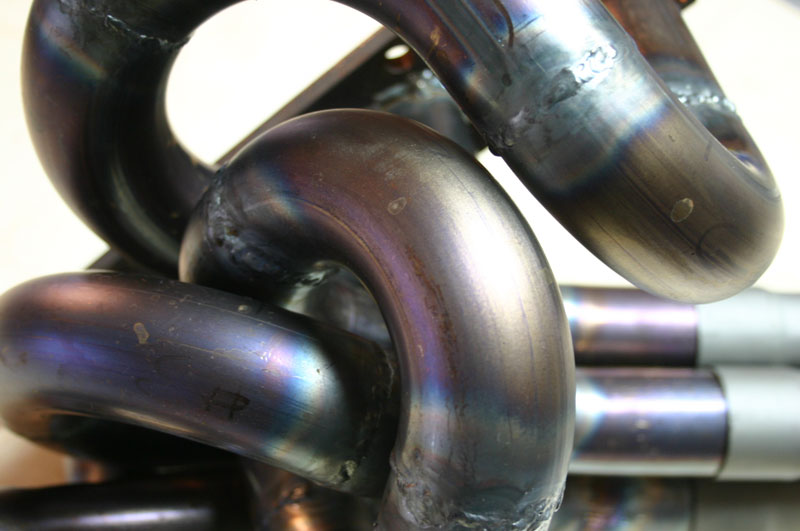
Finishing the rest on a jig.
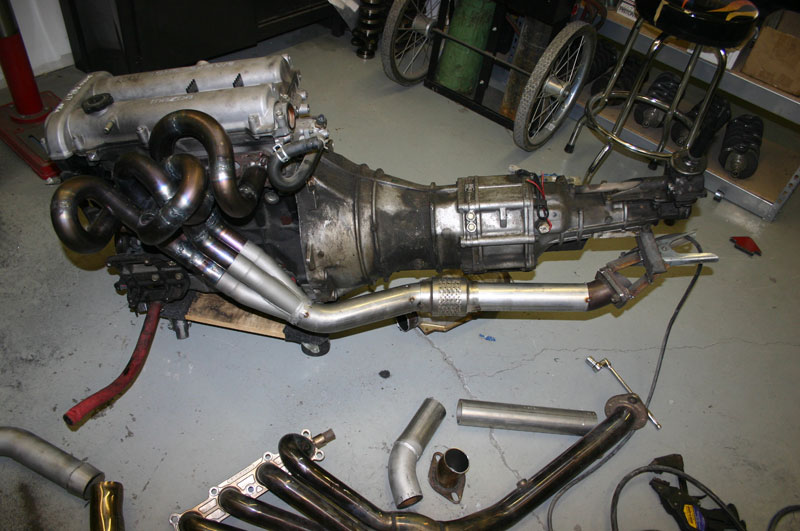
I ran that thing for several years hard, including the Targa Newfoundland, a cross country trip and a bunch of track and dyno time. Only problem I had was the slip joint at the collector fell off in the middle of Nevada so I had to put it back on. There's no reason I couldn't have tacked it, really.
Total cost was about $600, I think.
Third was the MG.
You can imagine where I started. In this case, packaging was more important than flow.
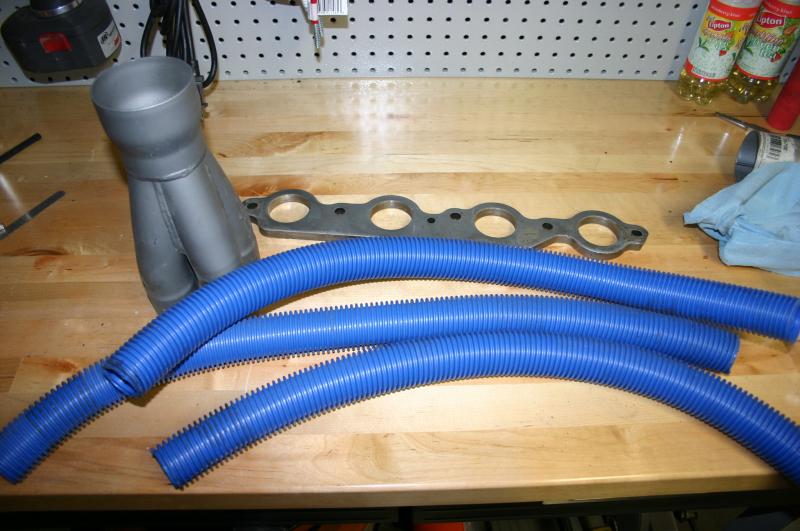
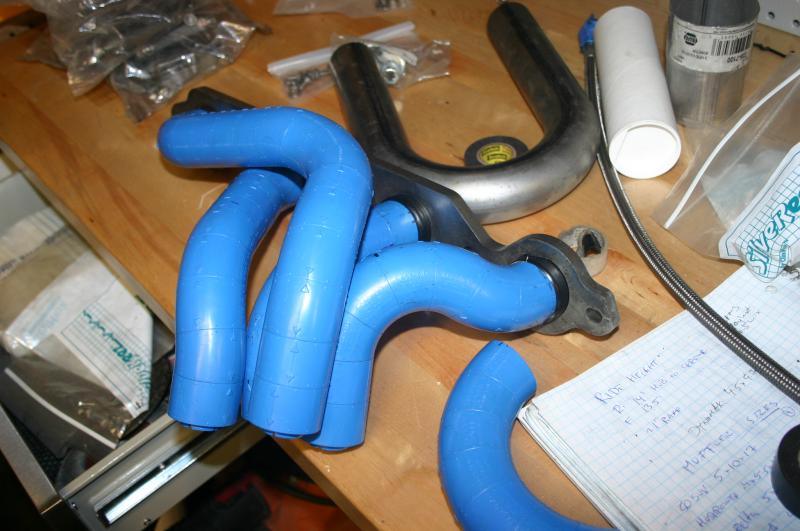
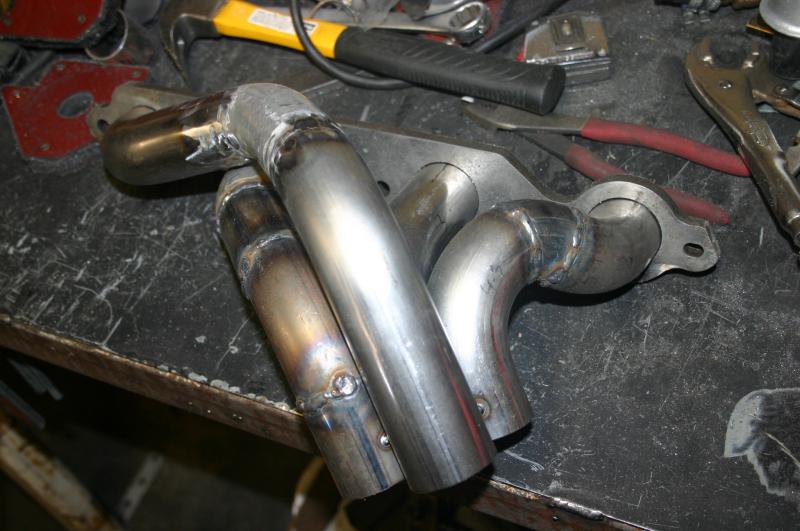
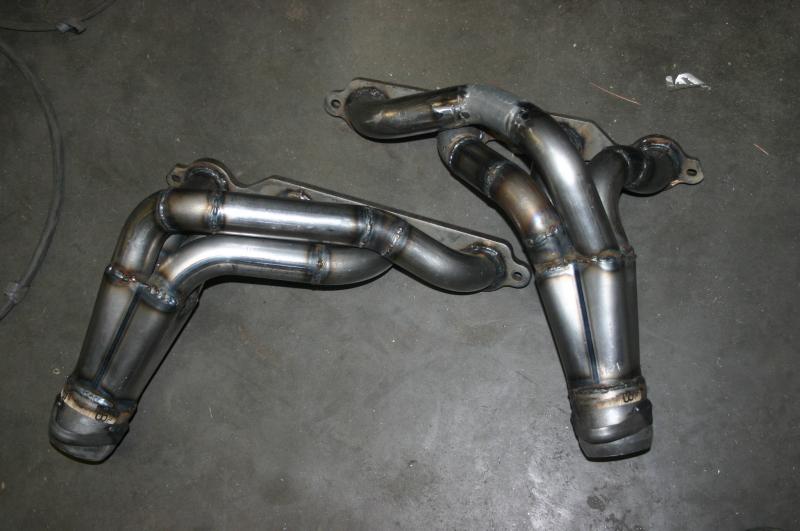
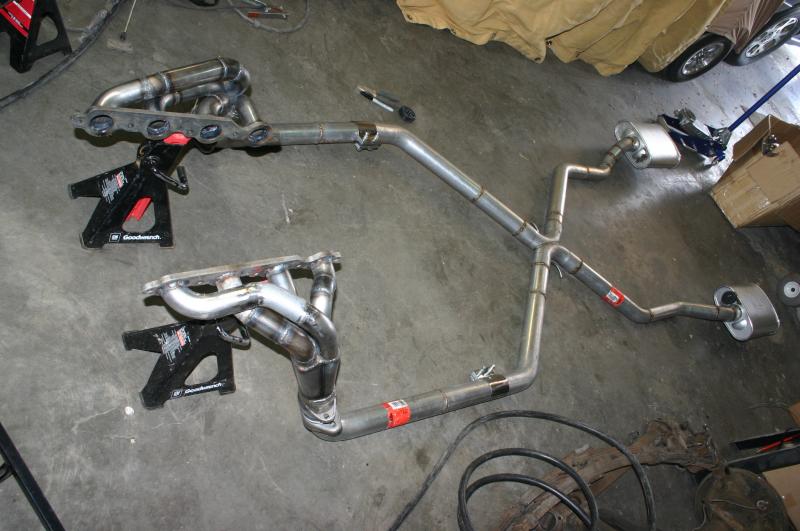
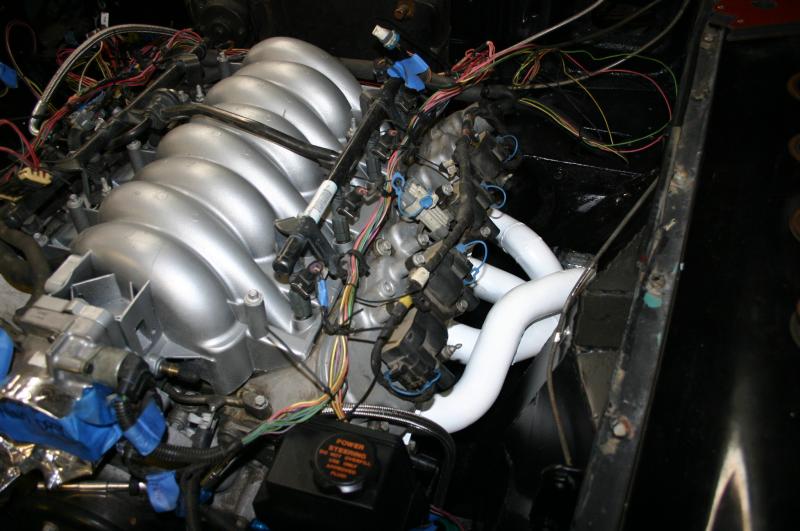
I've probably got a shot of it through the wheel well, but not handy right now.
Whew, that was a data dump. Short version: the lego is amazing stuff, especially if you design intelligently with it. Do your own welding, you can MIG it easily enough.
I've had headers ceramic coated at a local powdercoater (almost immediate failure), Swain coated (you can melt that stuff with a naturally aspirated V8, it turns out) and rattlecanned with white exhaust paint from NAPA. The latter is by far the most affordable and has been the most durable. I would consider Jet Hot if I wanted to do anything further than the rattle can in the future, it's pure ceramic instead of the ceramic-covered aluminum used by Swain.
It would seem the lego kit would be worth having if you might build more than one set of headers. Or if not I would think it wouldn't be too hard to sell and recoup most of the purchase cost.
I wonder how expanding foam would work for freezing the pool tubing shape once you have everything where you want it?
You'd have to find some way to hold it in the exact shape you wanted while it set. That could be challenging. You'd also have to be careful not to flex them and crack the foam.
The ICE header lego used to be REALLY expensive. We've used it to come up with custom coolant hoses and even some turbo hoses I think. At the current price point, it's well worth it if you're trying to build anything complicated. It'll probably save you more money than you'd spend.
In reply to Keith Tanner :
When the computer spits out something like 27/32 for tubing diameter fo you go under or over size to get to a workable size? And how far?
Second, When are anti reversion headers justified?
Ian F said:It would seem the lego kit would be worth having if you might build more than one set of headers. Or if not I would think it wouldn't be too hard to sell and recoup most of the purchase cost.
I tend to agree with that logic. We bought a plastic V8 to use for the mockup, which I bought here on this board and will sell for the same 1/2 price we picked it up for to help the next person. Shame we don't have a means to have a swap program where we can pass something like this out to people to use for their "one off" projects and then it goes to the next person.
Oversize tubing lets you run slightly shorter primaries for the same resonance, IIRC. This is the sort of thing that can get you into design paralysis. Chances are packaging is also a priority so sometimes you have to balance skinny long tubes vs shorter fatter ones.
Chasing every single horsepower has never been important enough for me to deal with the hassles of anti reversion packaging.
In reply to Keith Tanner :
Very helpul Keith, thanks for spending the time, this has me really rethinking that the ice kit is worth the cost. I have used jet hot coatings in the past, they do hold up well, but are not inexpensive.
frenchyd said:In reply to Keith Tanner :
When the computer spits out something like 27/32 for tubing diameter fo you go under or over size to get to a workable size? And how far?
Second, When are anti reversion headers justified?
Always go down to the next tubing size unless it's a race car that's mostly at high rpm. Anti-reversion is good if you have small exhaust ports and the next up tubing size gives you this for free. 2 and 3 step headers can increase the width of powerband but I have not seen it help enough for the trouble. It seems to smooth out the resonance peaks a bit, similar to having slightly uneven pipe sizes. Generally gains nothing up top vs using hte largest tubing of the step set.
I drew up the flange in CAD and had it waterjet cut from 304 plate, bought some sanitary tubing, some sanitary tubing bends (beyond mandrel, formed that way as near as I can tell), bent some of the tubing with sand, made the collector from a piece of restaurant counter top (304 16ga,) cut, tacked and then subbed out the TIG welding to the chicken plant manufacturer that did the waterjet work.

My #1 goal was "it has to fit." #2 was "try to keep them the same length."
This was a similar process as far as the CAD and waterjet work, but I had to make a jig. Even 1/4" off almost anywhere would mean the manifold would not work:


This was 3/8" 304 plate and schedule 40 304 pipe. Again, I tacked it together and subbed out the TIG welding. I am pretty sure the manifold was the only useable part to survive the fire.
In your case, flanges have got to be readily available. I mean, SBC <> 4AGE20v and SBC <> Lotus 910.
The flange for my first header came from a stock unit that I cut apart. FYI. Obviously doesn't work so well with a cast manifold.
1SlowVW said:Why not just build some simple log manifolds ? Using weld elbows and t's?
What is your goal? Just have something that runs? A log manifold is a solution that will work. Want a certain antique appearance? That will work?
Going racing or where fuel mileage is important?
Nope. Won't work.
Okay you all talked me into ordering a kit, pretty sure we can do this. I am going to see if we can get the flanges with the welded stubs and also use a slip in merge collector to reduce the fabrication to just the individual header pipes. Quote to Jet Hot coat was about the same as the Stainless steel price, so I should be able to do the welding with my MIG and that will also save us some money.
For coatings, I'd look at Finish Line, even if you go stainless:
http://finishlinecoatings.com/
I've not had any issues with their ceramic coatings on my manifolds and they stand behind their products.
One of these days I may try some of their other coatings for other products.
Think about the spark plugs and wires while designing.
Had a LT1 build where the #7 tube crossed right in front of the plug. A right angle boot was almost in hard contact. You couldn't unthread the plug all the way without it bottoming on the tube, so you had to remove the Y pipe and jack the header over to do plugs.
Not all cylinder heads have the same plug angle, this was one of those cases where an aftermarket head was designed one way and the header was designed the other way...
Ordered the kit today. With welded header flange stubs and a merged slip in connector, our welding will consist of each branch to the collector, so should reduce our build time. We have the plugs and wires in place, so thanks for the tip, we will be building and tacking in place so will be able to account for clearances as we build them.
I built this set for my GTM the exact way you mention. I bought some bends and a flange, cut, fit and tack welded in place. I then sent the tubes out (no flange) for welding, then refit to flange and had those welded as well. I then had them Jet Hot coated. In hindsight should of just done stainless and skipped the Jet Hot. One last thing,, I bought a bunch of U and J bends as well as what they call Misc. Bends from Schoenfeld Headers. The Misc Bends are left overs/rejects from their headers. I ened up mostly just using the Misc bends

One of the first things I plan to make with the 3d printer I just acquired is my own set/version of the "lego" header pieces, sized for my project.
Doc Hess, is that turbo manifold build documented anywhere? The manifold I need to build is for a turbo, and I'm right in the middle of balancing the flow/sizing/length considerations. I'd love to hear about how you landed where you did, and especially about why the 1/4" change in lengths would ruin it from working as desired.
You'll need to log in to post.