
Capz, I get so excited when I see it's you that's updated the thread.

so full of win. I love this thread!

Thanks guys!
After getting the closet/bench area ready to use I moved on to installing the other vices in various places. While I was doing it my mind drifted to all of the vices I've used at other peoples places and how poorly many of them worked and how many were not properly installed. Reminded of the installation mistakes I'd made as a young guy and foibles of various vices I've owned, sooo..... I thought I'd add this post for general vice info. I already explained about the manufactured wood bases I'm using in my last post on the previous page so I won't rehash their purpose.
A vice that works well goes unnoticed, it performs it's function when asked and is generally ignored. Here's a few tips so if you are installing a vice, or already have one you never set up correctly or maintained, you can get the most from it. You can eliminate squeeking, chattering, groaning, notchy rotation etc. with a few minutes work. It will have more clamping force with less effort, more utility, and last longer.
New vice prep or maintaining old vice.
Unscrew the clamping jaw section from the body of the vice by turning the handle until it is free. Clean/grease the threaded rod and squirt some triflow or other lube in the part of the jaw where the handle rotates the threaded rod to tighten/loosen the jaw.
Clean/grease the points on the vice body and the bar of the clamping jaw that slides in and out of the vice body as the vice is used.
Unscrew the locking lever(s) that allow the vice body to turn on the vice base and remove the base from the vice body. On a new vice, check the rotation of the mechanisms. Many times there is casting flash that prevents the vice from achieving full rotation, file any casting flash smooth and check for full smooth rotation. Clean/grease the parts that will slide on each other as the vice is rotated on the base.
Reassemble base to body and reinstall the clamping jaw section. Mount vice to bench.
Installing a vice.
Make sure the bench is solid and heavy enough for the use you expect to give the vice.
Be sure the benchtop will be able to withstand the clamping force of the bolts used to hold the vice to drill holes for bolts to mount the vice to the bench. Reinforcement with additional wood/metal etc. might be necessary. (I crushed a sheetmetal covered soft core bench once.)
Be sure the vice is locked in the middle of the rotation movement before deciding where you're going to mount the vice and keep in mind how much rotation it allows. (Ummmm, I had to drill all new "extra" holes once! lol)
If you're mounting the vice on the edge of a bench. Clamp something straight in the vice and make sure that it clears the edge of the bench. It's no fun working sideways on things just because they hit the bench.( ya, BTDT also, felt like Homer, "D'OH!")
Look at where the bolts that will hold the vice are going to end up on the bottom of the benchtop. They may interfere with something. (Uh huh, Have made this mistake also. Drawer slider mechanisms don't work so well after a 1/2" drill hits them!)
I like T nuts for mounting small/medium size vices because they can be set up so the bolt does not extend below the bottom of the benchtop and they hold better than lag bolts. Big vics use some big heavy duty nuts/bolts/washers.

So my bud Stewart (a hardcore Ford guy) stopped over one day and checked my shop build. A few days later I heard noises out in my driveway late at night and found this when I went out.

Turned out he was cleaning/reorganizing and consolidating warehouse space and his shop areas and had this one as an "extra" since he has a bunch of newer, fancier ones. Old school drill press will come in handy! Then as if that wasn't enough, a couple days later I heard noises out in the driveway late at night again, and THIS showed up!

How cool is THAT! Like the press, he had more than one benchtop cabinet and has a big freestanding one so this one was an "extra"! The window's missing so I'll make one, and I'll need to get some media for it, then I'll be set! Hope my compressor can provide enough air to make it work well.
Meanwhile I've been finishing up some little details and starting to get settled in to the new shop. A bit of leftover black spray paint on the outlet and switch plates will coordinate them with my white/black/grey color scheme.
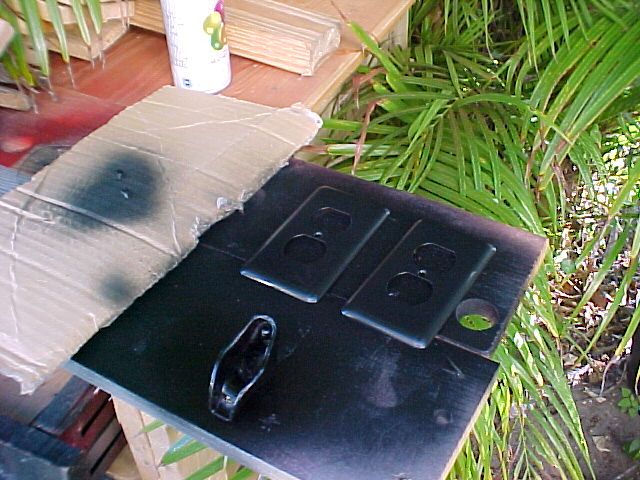
Steve Strope from Pure Vision was at PRI handing out posters with the SEMA winning 69 Mustang he built on it so I got an autographed copy. I'm a PT / G machine kinda guy so it works for me! Outlet cover blends well with it.

Another rocker arm gets the call for a hook to hang my race numbers on. I don't know about anyone else but I find race numbers a pain to try and store without damaging them. I use my car on the street a lot and sometimes don't want numbers so I buy the stickers a few sets at a time to reduce costs but then find storing them a real pain because they're so big and need to stay flat. The LSR numbers in the back are 4 digits and long. A few clothing hangers from my old store work great to keep them straight and out of the way.

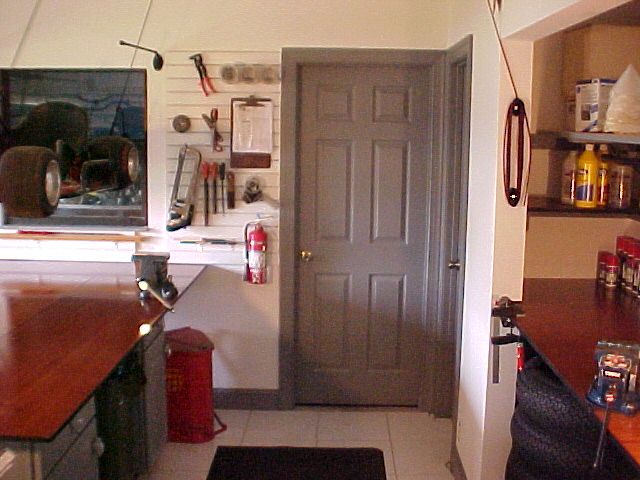
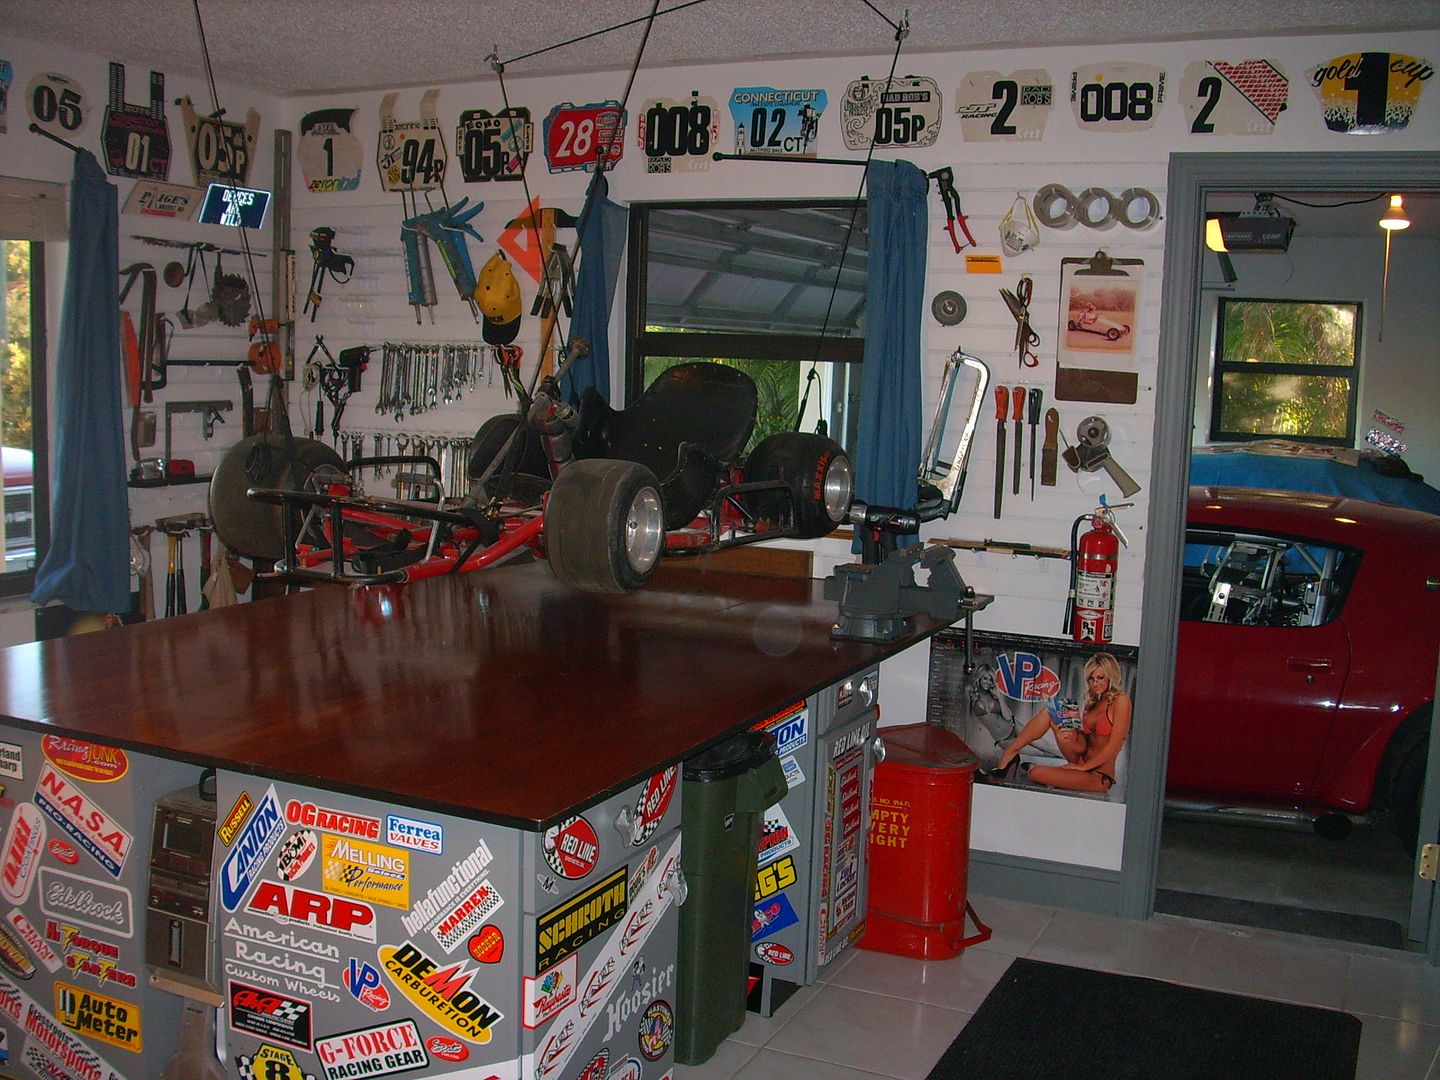
As you can see from the pic above I'm doing a little decorating. I found the acoustics weren't very good with nothing to absorb sound so I put up some denim curtains leftover from my old house. Worked perfect to get rid of the echo. Posters, some of my old BMX plates, and a splattering of stickers add some color! Before and after pics of one side. I've got a few things to finish up on the other side so I'll show it later on in the thread. Now I'm on the hunt for cheap/free lighting.

Wow, that is awesome.

I concur!

Ya Like you are really going to move again LOL Great work!!!!!
dean1484 wrote: Ya Like you are really going to move again LOL Great work!!!!!
Thanks! I probably won't really have much of a choice about moving at some point. I look at this shop/garage makeover kinda like moving into a dorm room or your first apartment/house. You know it's not forever but it makes you happy now.

There is no part of this build, this thread, your resourcefullness, your buddies backing you up or your attitude that does not reek of awesome.
Mental wrote: There is no part of this build, this thread, your resourcefullness, your buddies backing you up or your attitude that does not reek of awesome.
Thanks! Been fun building and now I get to use it!
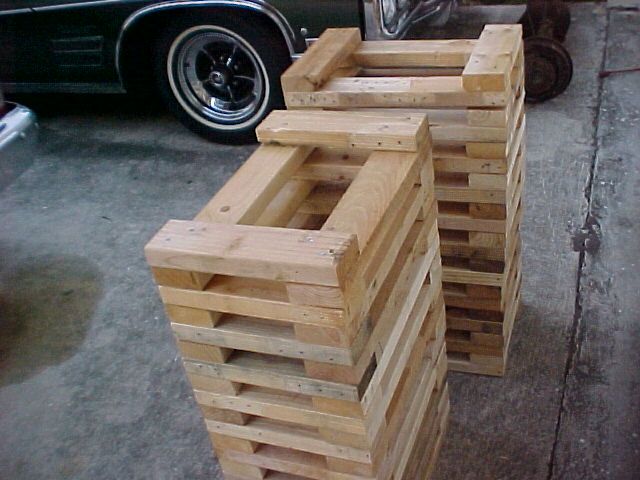
With the shop now operational, I've been working on cars more and continuing to organize, clean, etc. Meanwhile I've been stopping by my favorite appliance store for skids made with 2 X 4's so I could use them for this wood project. I've got a couple projects in line where I need a car up higher in the air than traditional jack stands will allow safely. So I built wheel cribs that will raise a car about 2' up from the floor. I don't like working under cars on jackstands anyway, so I'll use them whenever possible. Many shops and people have these, here's my version.
All wood used for this project was obtained from disassembling skids. Each stand section is 13" X 20" to provide stability at the heights I need to raise the car up to.
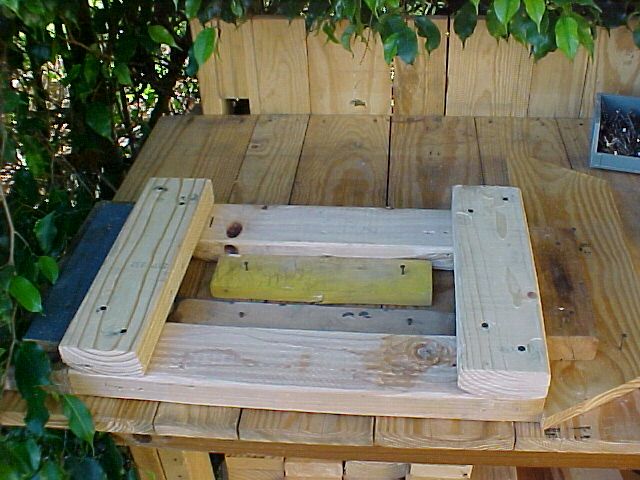
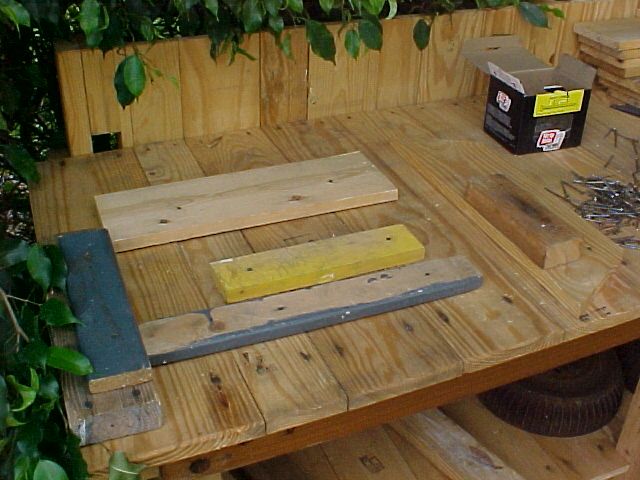
Cut a piece 13" and another 20" to be used as patterns. Nail a small block of scrap wood to the end of each. This way you just use a pencil to mark boards to cut rather than measure every board. Saves time and every piece will be almost exactly the same length if you cut the actual line off each time.
Assemble one section using 2 pieces of each length and make sure it's square by using some type of right angle tool or measuring corner to corner and adjusting as needed. Lay the assembled section on a bench, board, or whatever flat surface you can nail to.
Lay scrap pieces of wood against the sides of the 2 X 4's you made the 1st section out of, and nail them to the flat surface creating a jig which will hold the pieces square while you nail or screw the 2 X 4 pieces together to create each section. I used 3" bright common nails which will just stick through 2 - 2 X 4's if nailed straight. The pointed part that protrudes helps keep the sections from sliding around too easily when stacking them. I would have used the nails removed from skids but a bud bought me a box of new nails as a thank-you after I helped him install some gridwall I gave him. There's no need to get carried away with expensive fasteners or glues. There's nothing trying to pull the boards apart during use, they're in compression. If you have to leave the stands outside, coated nails will last longer.


My inner MacGyver is very, very jealous.

Gawd that firebird is hot.

have to share this.... i and my spouse both have been known to work on things in the house. she built her 4g63 and tranny in our living room. and when i had my escort the engine was actually assembled in the bedroom. currently the spare bedroom (our 3 month old sons room that he will prob never get) is filled with extra tools and body parts and who knows what else. i know there are a few turbos in there just gotta dig them out. yes we are both women. girlfriends come over and wonder wtf is wrong with us. had to share tho.

KATYB wrote: girlfriends come over and wonder wtf is wrong with us. had to share tho.
Not a single thing wrong that I can figure out.
KATYB wrote: have to share this.... i and my spouse both have been known to work on things in the house.
Awesome!
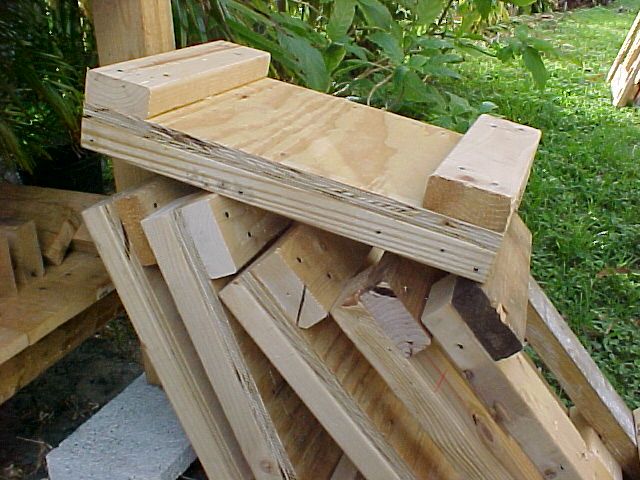
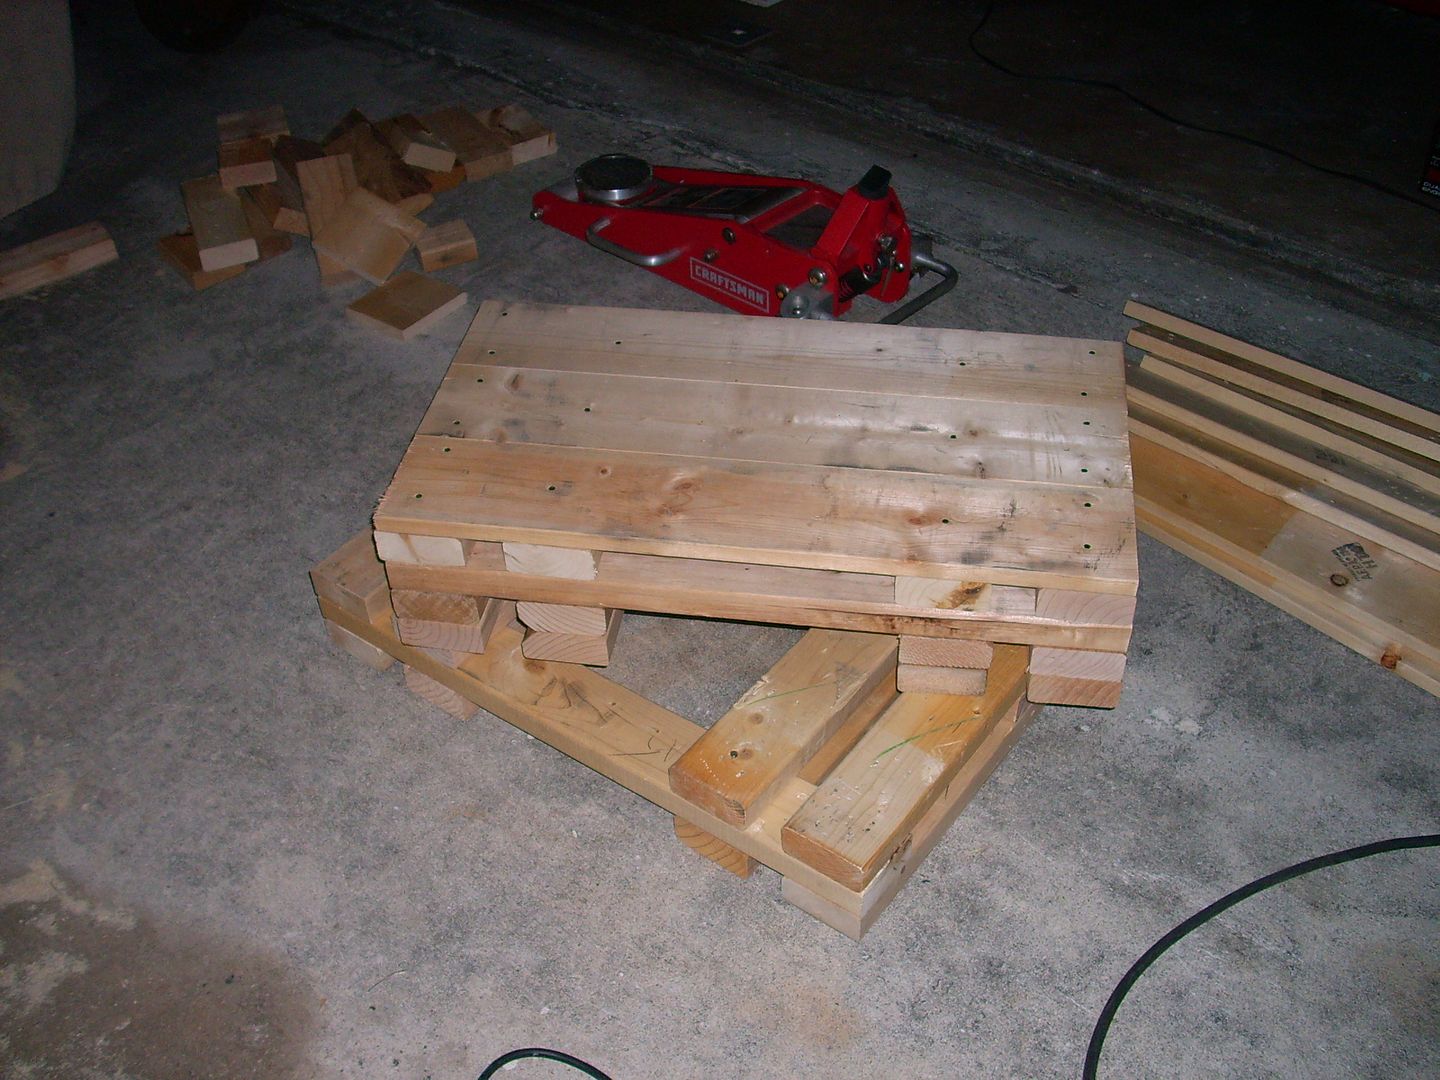
Now that I have cradles to hold a car a couple feet up in the air I need a way to get cars up that high! I don't want to stack 4 X 4 blocks one on top of another on the floor jack pads, soI figured I'd build some sectional platforms I can put under the floor jacks. This way I can raise the car a little at a time, adding sections of wheel cradles and sections of jack platforms.
15" X 28" worked out well to be a little wider and longer than the jacks. Since the weight of the car will be transfered through the jack wheels to the areas on the ends of the platforms there's no need for lots of support in the middle. I doubled up the 2 X 4's on the end areas since these will have to support a couple thousand pounds when raising the engine end of cars.
The platform sections were built with more wood from disassembled skids and the top wood will get dented from use so the jack won't move around much. Once again, since they're in compression when being used there's no reason to go crazy with fasteners. 10 D common nails for the 2X's and reused coated nails from the skids to hold the pine on the top.


I can't tell you how uneasy that makes me. Are they locked together in any way? Wood on wood is pretty slippery. And be careful of your center of gravity. It's awesome to be able to get a car up that high, but I would hate to hear that it came crashing down on you when you were really wrenching on something!
dculberson wrote: I can't tell you how uneasy that makes me. Are they locked together in any way? Wood on wood is pretty slippery. And be careful of your center of gravity. It's awesome to be able to get a car up that high, but I would hate to hear that it came crashing down on you when you were really wrenching on something!
I'm a Mr. Safety kind of guy which is why I built the stands. They keep a car much more stable than jackstands because the points of support are under the wheels instead of closer to the center of the vehicle. While you might be able to tip a car off of jackstands placed under the frame or suspension components, it would be much more difficult to tip the car off of the wheel cradles if they were the same height.
I've never heard of anyone sliding the individual sections while wrenching on a car on the cradles and 2 X 4's are not very smooth compared with some other types of wood, however because I considered the possibility of sliding occuring under extreme conditions I used nails long enough to dig into the adjoining section. Copied from my earlier post about the construction of the cradles. "I used 3" bright common nails which will just stick through 2 - 2 X 4's if nailed straight."
As I raise a car up I will keep testing the stability as I add more sections to the wheel cradles. If I have any doubt, I will go back down a couple sections. Also, although I didn't mention it in the post about building cradles, I have taken the slope of the garage in consideration when I use the cradles in there and will compensate for the pitch of the floor corresponding to the approximate wheelbase of the cars I will use the stands for.
I work alone and although I have people check up on me a few times a week to be sure I'm alive, it might be a day or more before the next person checks. The idea of being pinned or crushed doesn't appeal to me.
I replaced a power steering pump in a Suburban today. When I do any power steering work on the old GM products I raise the front wheels off the ground and bleed the air out of the system by manually turning the wheels back and forth. This provided an opportunity to test out my new jack support since I wouldn't need to work under the truck, I just needed the wheels off the ground for a few minutes.
Rather than having to crawl under the truck to balance blocks on top of the floor jack or carefully roll the jack under with some blocks already balanced, I tested the new stand. I slid the wood stand under, put the jack on, and raised it up. It worked out awesome! Much more stable than blocks.

I have come to the conclusion that this thread should be required reading for any "significant other" of those that frequent this place... . .
Or maybe not as it would give away what I am really thinking when my wife asked me to "redo" the kitchen.
"Ya honey, we need the parts washer next to the wine rack. Its for.. .. . . . .. Cleaning the bottles before you open them.. . . "
Keep up the good work!!! I think many are living vicariously through you!!!!
Cool, glad to hear you're not just "winging it" with the safety aspect. The jack setup looks really, really handy, unfortunately my cars are all so low that I'm lucky to get a jack under there to begin with; one on a platform wouldn't have a chance.
dculberson wrote: Cool, glad to hear you're not just "winging it" with the safety aspect. The jack setup looks really, really handy, unfortunately my cars are all so low that I'm lucky to get a jack under there to begin with; one on a platform wouldn't have a chance.
My cars are also very low which is why I have really low jacks. One of them I have to drive onto 3/4" boards first just to get a 3" jack under it LOL! The jack platforms are primarily for using when I need cars up high on the wheel cradles. I just happened to decide the truck thing would be a good time to test one.
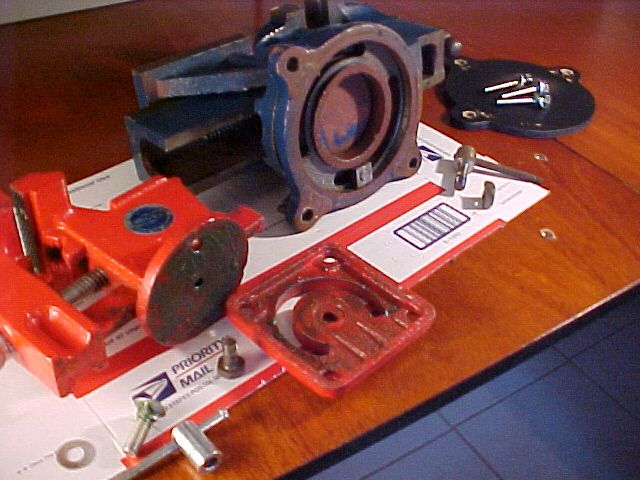
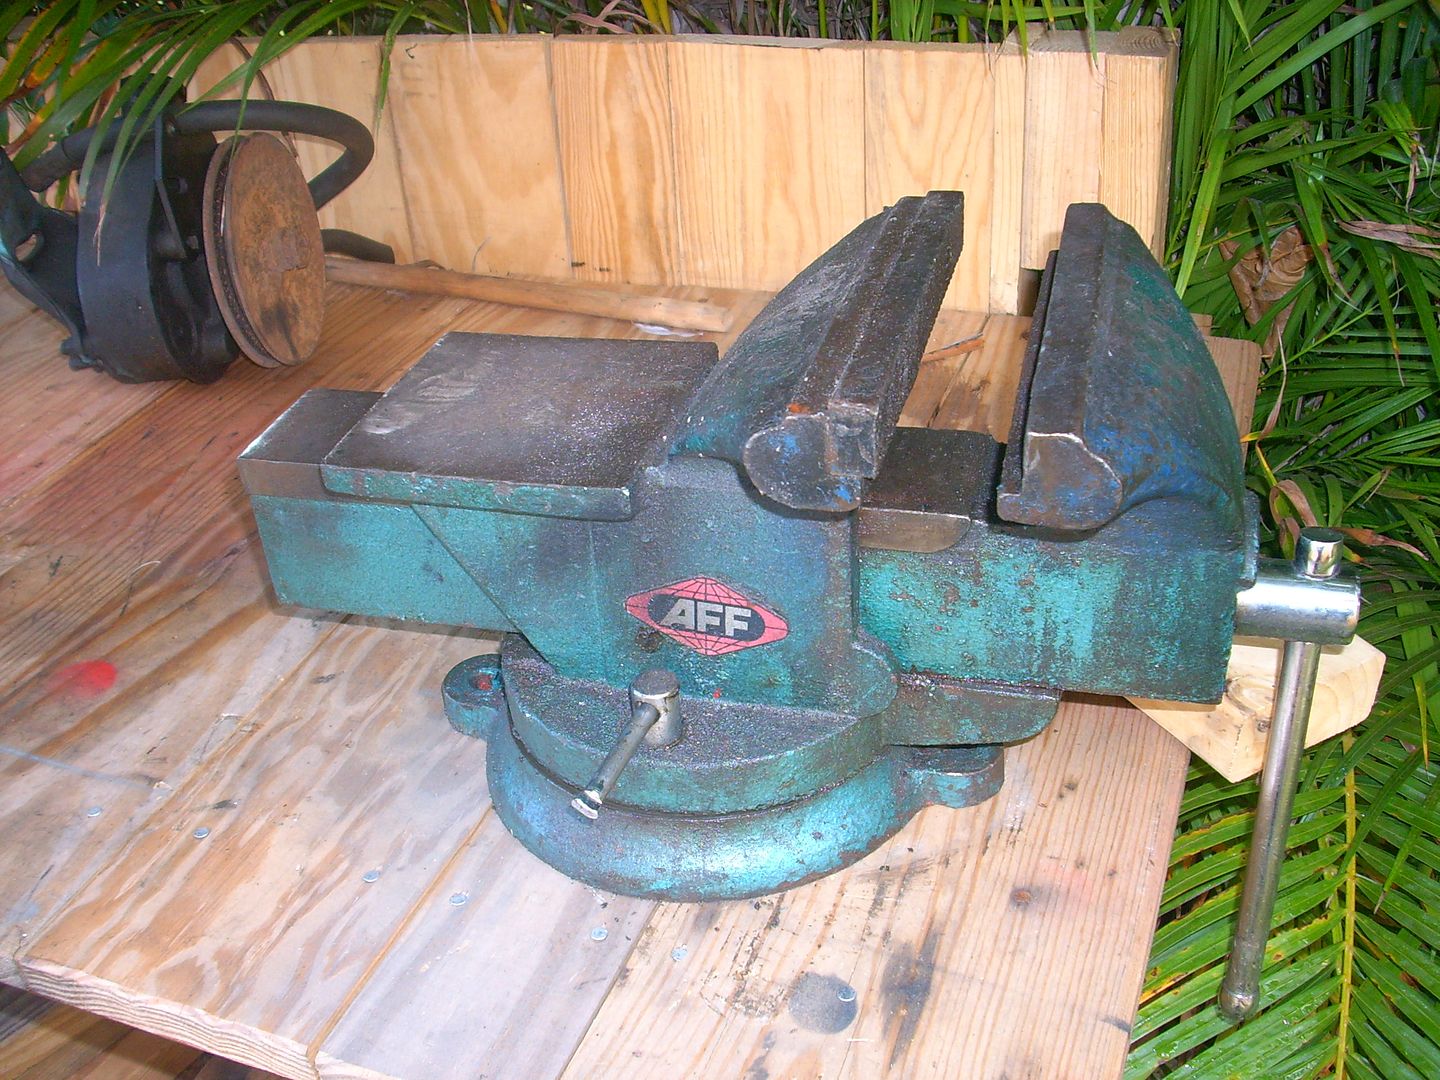
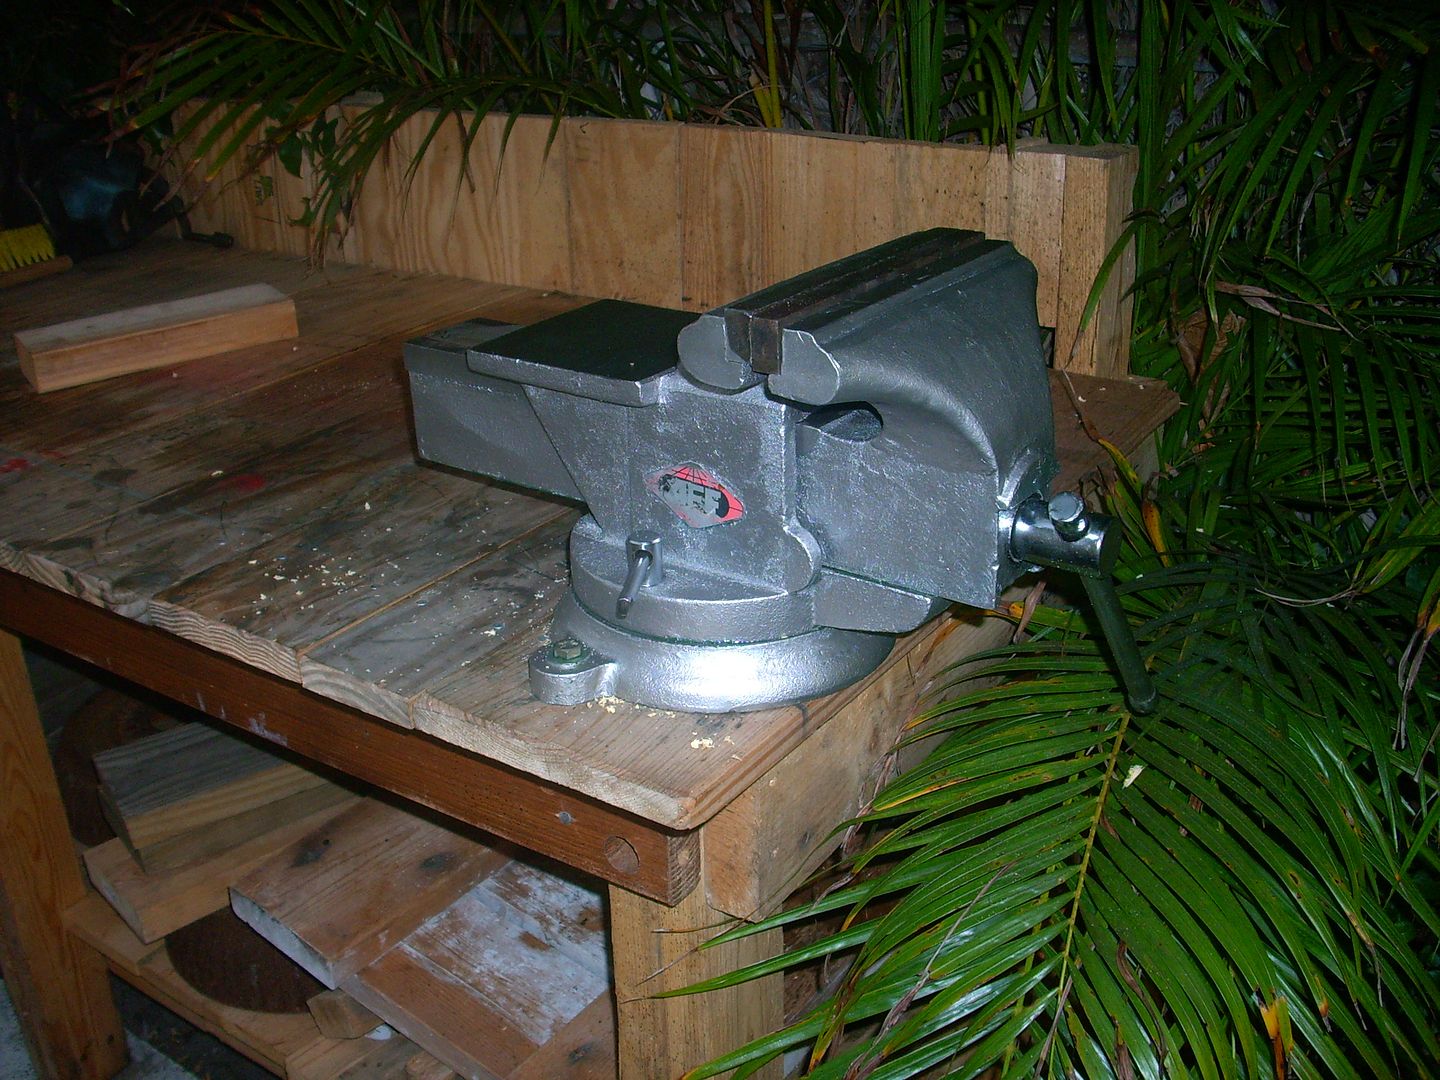
While helping a buddy in his shop try to get a little more organized by cleaning up and finding places for stuff I come across (stubbed my toe on) a couple of big bench vices covered with grime etc. laying on the floor under piles of crap. "Hey, where ya want these vices? " Then I get a story "My uncle blah blah, worked blah blah and made vices for military blah blah" So again I ask "Where?" "Oh, over there for now. You want one? I've got a bunch of them and already have mounted ones and plenty of spares." .............
So I drag this one home for my outside bench. Obviously it had been used and abused judging by the dents in it and the dents in the handle from hammering on it to make it really tight holding things. I figure if it held up to that abuse so far it can probably withstand anything I can dish out. A can of brake clean, a stripping disc, grease, and a can of leftover spray paint from a truck grill makeover worked out well to get the vice cleaned up and working well. I've got a GTO driveshaft to get the U joints out of this week so I'll put the vice right to use. Being an outdoor vice it will be in the elements so I coated everything unpainted with grease and the chrome was polished and waxed. I'll try to keep up with the wax to keep rust from starting but if it does, Oh Well..... LOL

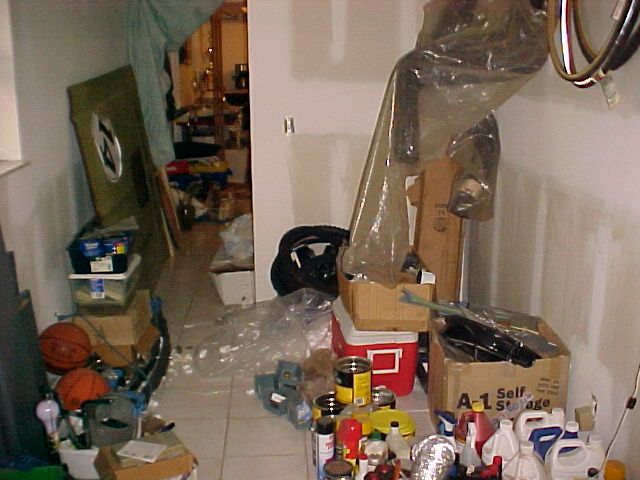
Well I've been using the shop and garage but there's just not quite enough room. As a result the drill press has been living in the dining room, the sand blast cabinet in the living room, the...., well you get the picture. several machines and tools aren't usable where they are and are in the way. So I've decided to make a shop annex. There's small room which I have no clue what it was supposed to be other than storage that I'm making into an additional shop area for sandblasting, grinding, polishing, fabricating, etc. First thing was to collect materials to work build with and then clean up the room.
The room as a junk collector.
Cleaned out and put some shelves up I had leftover from my store.
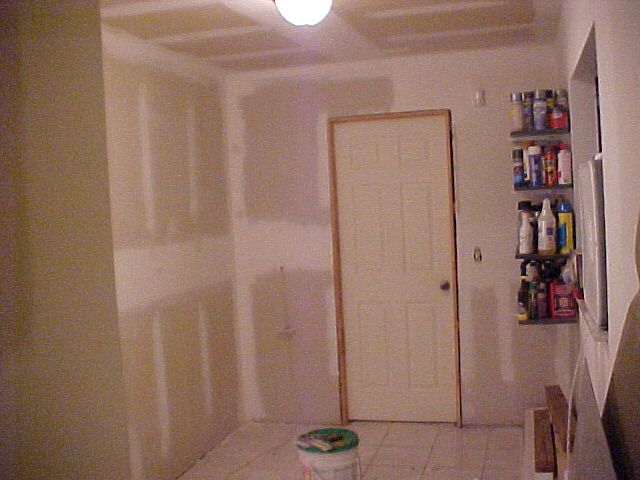
1st coat of paint on the walls and ceiling brightened it up. I mixed up the rest of the misc white paints I had around and used it instead of buying primer.

At the time I got my first small bench for the main shop through my neighbor who's work was getting rid of it the neighbor also got a bench. They told me they were going to use it outside. I warned them that although it was a Formica top that the particle board part of the top wouldn't hold up. They thought I was wrong and put it outside anyway......So they asked me if I wanted what was left of the bench a short time ago.
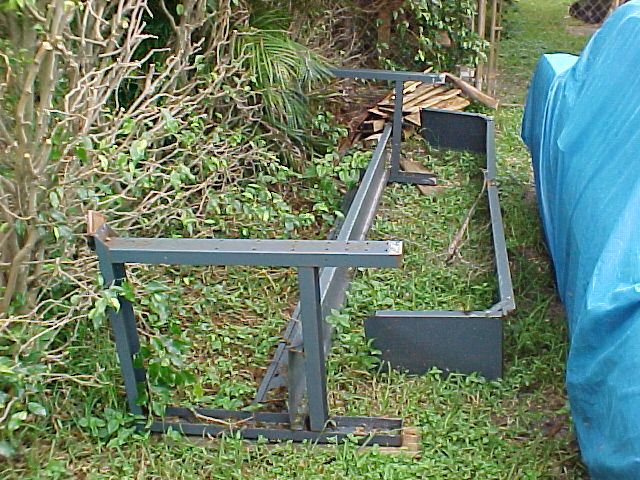
I disassembled it and gave it a quick bath. It rusted in a few places so I scraped off the loose stuff. It's good enough for what I'm doing. Maybe I'll hit the rusty spots with some gray paint at some point. Ceiling and walls are finished except one wall I've got stuff leaned against, will paint that wall last.
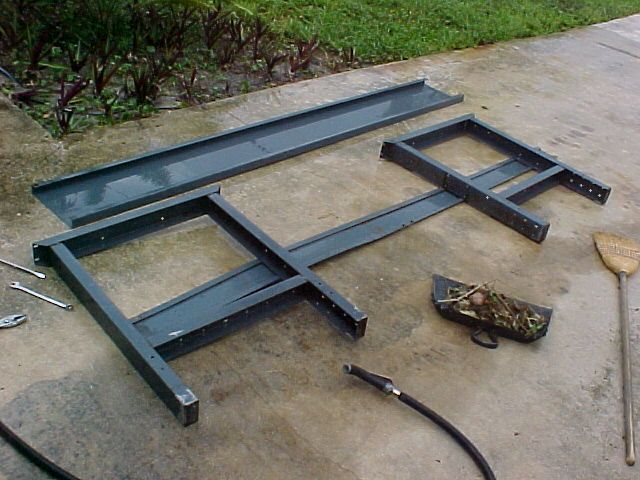
Brought it in and assembled with some better nuts, bolts, and washers, since the ones I took off were all rusted. Then put a piece of wood on for a top, forget where the wood came from. I'll fix up the top so it's sturdier and do something about it not being as deep as the original top.

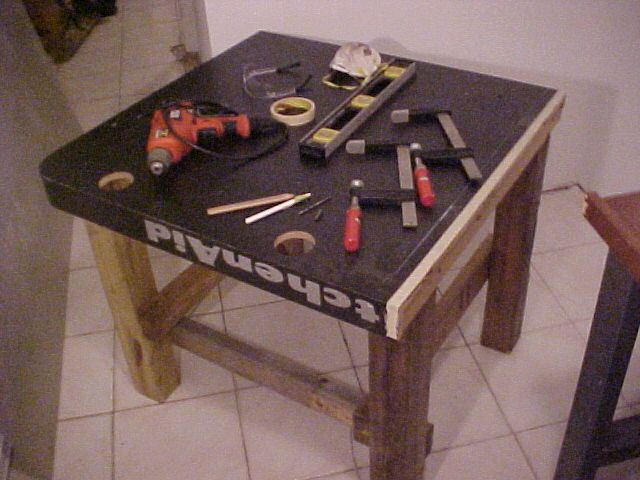
Next up is a table for the sand blast cabinet. I picked up a KitchenAid display from my favorite appliance store a while back when they were tossing it out. I decided the top of the display would make a good bench top if flipped. It's made of particle board and covered with some type of kitchen counter type surface. Combined with some screws, 4 X 4's, and 2 X 4's from disassembling skids, I made a free bench for the blast cabinet. The bench a little lower than a regular bench because I'm not tall and a blast cabinet on a standard counter is a little high for me.
Materials to work with, all refuse.
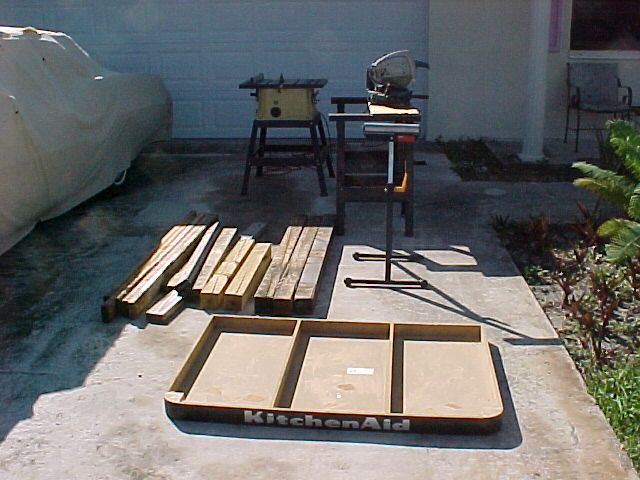
Table and tools required to assemble. I cut the KitchenAid piece so the bench wouldn't take up too much space. The tape is to keep the Formica type surface from chipping when cutting on the table saw. Always cut things like that so the saw blade is pulling into the Formica instead of pulling it away from the particle board or disaster may strike.
Last pic is the bench with blast cabinet in place. I'll paint the exposed wood Grey when I get a chance. Table was designed to allow loading pieces into the cabinet in the end that opens and so a vacuum would be easy to get in out from under the bench. The cabinet has a light inside so even though I'll be standing by the wall the cabinet is bright inside. Vacuum was leftover from my store.

When the interior was trashed, was the exterior kept unharmed? Is this a shop that is still disguised as a house?
You'll need to log in to post.


