Please explain how to hang a light fixture from a garage door track. And a picture is worth a thousand words. ;-)
David
Please explain how to hang a light fixture from a garage door track. And a picture is worth a thousand words. ;-)
David
Petrolburner wrote: Of all the awesomeness in this post that I just read from beginning to end, the first thing I'm going to try to duplicate will be mounting my fluorescent lights to the garage door tracks. Awesome solution, keep up the good work!
i didn't know which page of this thread had the garage door track light mounting info, so i did myself a favor and started with post #1 and read the entire thread. brilliant stuff, many ideas i'm going to copy. tonight i raise a glass to you, RadCapz!
DWNSHFT wrote: Please explain how to hang a light fixture from a garage door track. And a picture is worth a thousand words. ;-) David
it's on page six
Regarding hanging lights from the garage door track:
It appears that there is another metal piece hanging below/behind the garage door track? I don't have such a thing in my garage... Any chance of an explanatory photo showing how the bracket mounts to the track?
David
I used some 4" electric box cover plates I had hanging around. Drilled a couple holes & bent them.
[URL=http://s240.photobucket.com/user/NOTATA/media/Garage%20and%20shop/003-2.jpg.html] [/URL]
[URL=http://s240.photobucket.com/user/NOTATA/media/Garage%20and%20shop/008_zpsb63e73e0.jpg.html]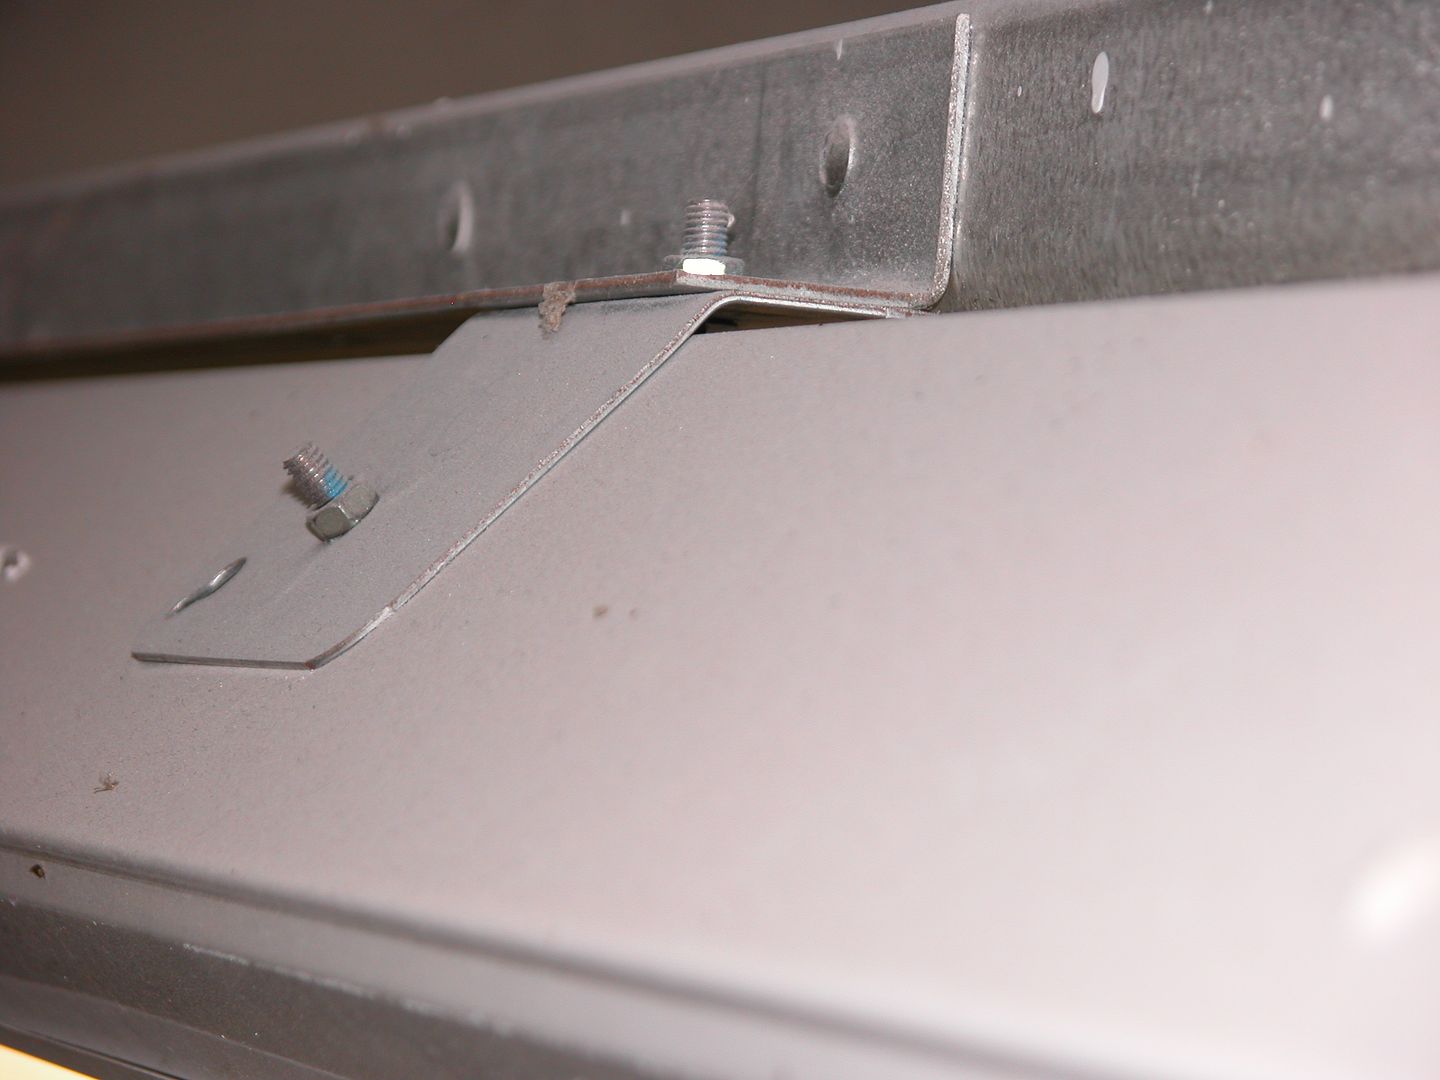 [/URL]
Hey, thanks for the photo. I don't think my door track has that horizontal angle-iron-type piece but my brain is cogitating on this one...
On traditional overhead doors the roller track is bolted to the 90 degree support to keep the roller track from twisting. Ideally it goes to the rear support but the ones on mine do not.
[URL=http://s240.photobucket.com/user/NOTATA/media/Garage%20and%20shop/003_zps3b6056a3.jpg.html]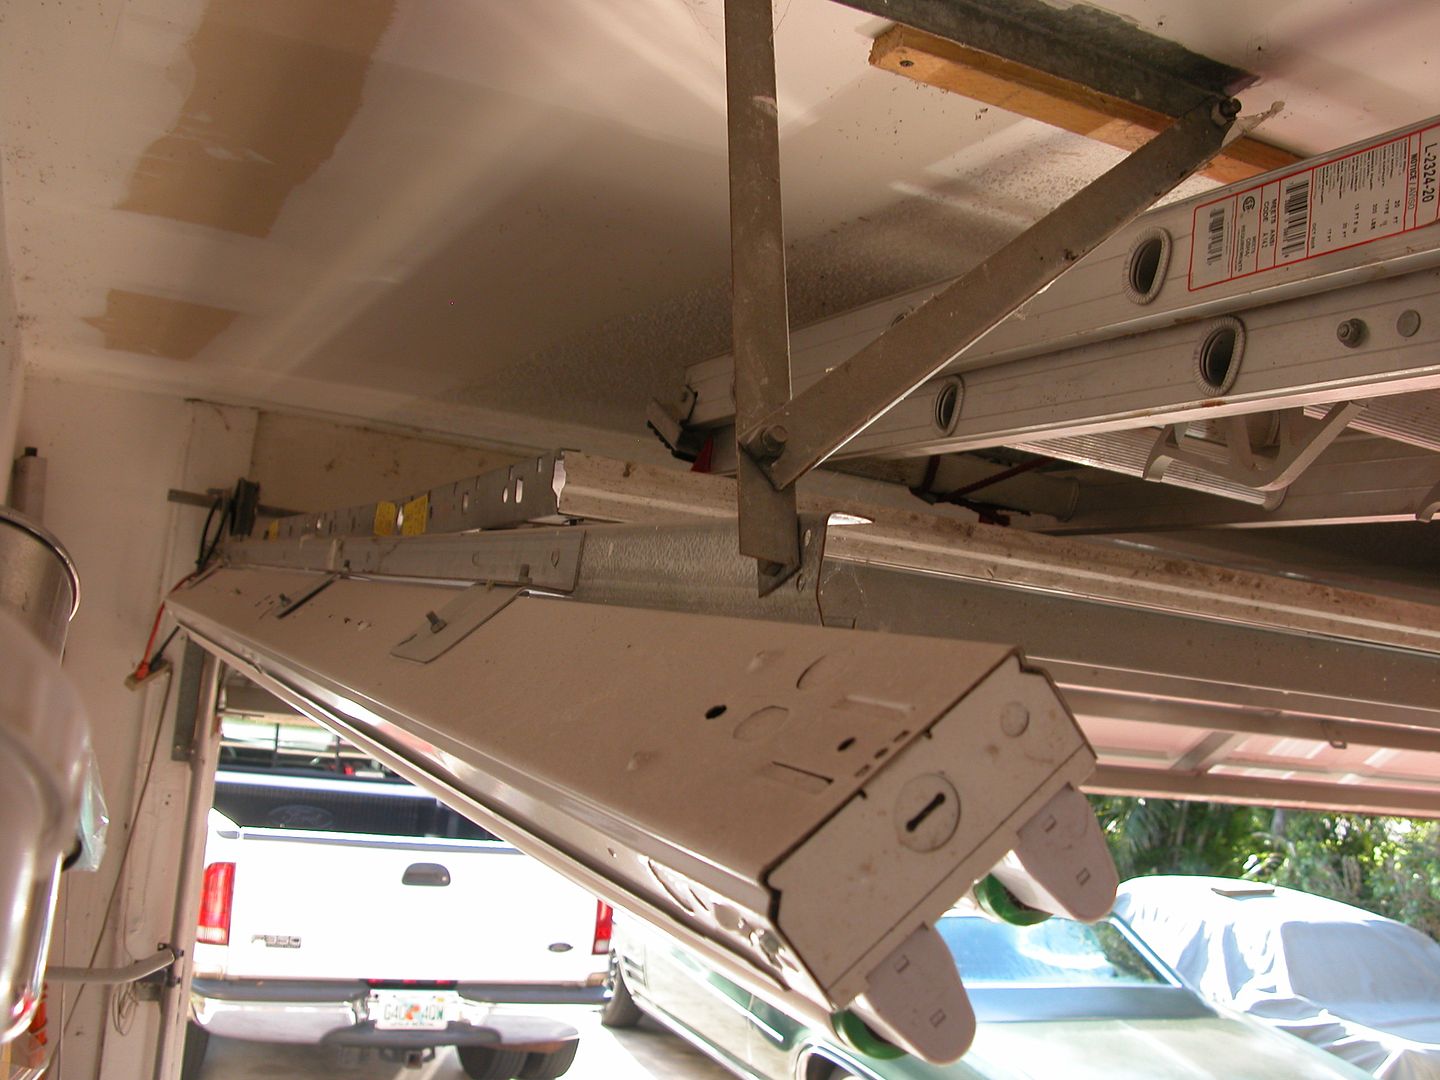 [/URL]
ah, thanks for that last photo, Rad. on my door tracks, that angle on the back of the track is even shorter than yours. mine will still work out OK because I'm only using 48" fixtures. following in your footsteps as much as possible, i was able to install three used single-gang boxes and three used duplex receptacles, and i was able to do all the wiring with the longest "too long to go in the scrap bin" romex i've saved from other jobs over the years. i did have to buy six new 48" 2-tube T8 fixtures and two 10-packs of 32W 4100K T8 tubes, so i'm still in the job about $160.
Rad:
I think you are going to want some sort of strap around those bulbs to keep them seated. The vibration from the door will shake the bulbs loose eventually. Also - you might want to pick up some plastic tubing from Grainger that slips over the individual bulbs. I got a nice glass shower from the naked 8' light over my bench grinder when it chucked a chunk of something.
I've just read through this whole thread over the last couple of days. What an amazing inspiration it is.
I saw a few pages back that the balloon payment on the mortgage was due this year (the post was 2012 I think). Here's hoping that the house has appreciated enough for RadCapz to have been able to re-fi into a regular mortgage.
Found the thread with the wheels cribs I was asking you other guys about. Thanks John, Mr. NOT A TA! I've built 6 so far with nothing but scrap 2x lumber pulled from the construction dumpsters in the neighborhood. Too cool for school. ![]()
NOT A TA wrote:Mental wrote: There is no part of this build, this thread, your resourcefullness, your buddies backing you up or your attitude that does not reek of awesome.Thanks! Been fun building and now I get to use it!
With the shop now operational, I've been working on cars more and continuing to organize, clean, etc. Meanwhile I've been stopping by my favorite appliance store for skids made with 2 X 4's so I could use them for this wood project. I've got a couple projects in line where I need a car up higher in the air than traditional jack stands will allow safely. So I built wheel cribs that will raise a car about 2' up from the floor. I don't like working under cars on jackstands anyway, so I'll use them whenever possible. Many shops and people have these, here's my version.
All wood used for this project was obtained from disassembling skids. Each stand section is 13" X 20" to provide stability at the heights I need to raise the car up to.
Cut a piece 13" and another 20" to be used as patterns. Nail a small block of scrap wood to the end of each. This way you just use a pencil to mark boards to cut rather than measure every board. Saves time and every piece will be almost exactly the same length if you cut the actual line off each time.
Assemble one section using 2 pieces of each length and make sure it's square by using some type of right angle tool or measuring corner to corner and adjusting as needed. Lay the assembled section on a bench, board, or whatever flat surface you can nail to.
Lay scrap pieces of wood against the sides of the 2 X 4's you made the 1st section out of, and nail them to the flat surface creating a jig which will hold the pieces square while you nail or screw the 2 X 4 pieces together to create each section. I used 3" bright common nails which will just stick through 2 - 2 X 4's if nailed straight. The pointed part that protrudes helps keep the sections from sliding around too easily when stacking them. I would have used the nails removed from skids but a bud bought me a box of new nails as a thank-you after I helped him install some gridwall I gave him. There's no need to get carried away with expensive fasteners or glues. There's nothing trying to pull the boards apart during use, they're in compression. If you have to leave the stands outside, coated nails will last longer.
- I wanted the top pieces of my stands to have a flat surface like a tire would normally sit on, so I used some of the 3/4" plywood from skids to make that surface. This allows the car to roll a little as it's raised up rather than tilt the stands and evenly distributes the weight. The 2 x 4's on top are enough of a stopper to keep the car from rolling on it's own if the cars placed on a fairly level floor. If only 2 wheels are up on stands for work you're doing, set the E brake and chock the wheels that are on the ground also to be safe. Do not attempt a steep angle.
In reply to Rad_Capz:
Check around, each state and a lot of localities have different rules and you might be able to be very creative with regard to legally keeping your house.. A whole variety of techniques work but bottom line is you need to find the local group that protects homeowners.. Around here it's Take Back. They have Pro Bono (free) lawyers who can help you stall foreclosure..
This is one case where as long as you are in your home and keeping the outside appearance acceptable banks might work with you.. It's easier for them if you move out so they will threaten all sorts of things but that's where a Lawyer can help.
You also have other legal help available to you, depending on your economic situation..
Sometimes if the house is far enough under water Banks are willing to rewrite loans to reflect new values. Better for them to have a performing loan that they wrote down than a non-performing loan on an underwater house they have to write down anyway to sell (and probably pay a brokers commission on)
Petrolburner said:Any updates here? Do you still have the keys?
I accidentally clicked "leaderboard" in the drop down menu the other day only to realize this thread was still listed as one of the top threads even though I hadn't updated it in years. So I figured I'd update and answer posts I didn't realize people had made then write posts to bring the thread current.
Yes, I still have the keys. It came down to the realization that it'd cost me more to rent a place suitable than continue paying on the
I changed my screen name from Rad Capz to NOT A TA as I was/am known on most other forums. Rad Capz was the name of a small company I'd started making center caps for A.R.E. wheels. I've since added a number of products and changed the name of the company because as Woody pointed out Rad Capz sounded like radiator caps. New company name is Laboratory Fourteen and goes by Lab-14. Current products are for 2nd gen GM F body cars as well as the wheel center caps. Link to online store is in my sig.
The top of the outdoor bench made out of disassembled skids rotted out over the years. I had some cut offs of 2 X 6 pressure treated wood from a job I did repairing someone's house so they got put to good use replacing the bench top. Unfortunately the giant vice wasn't up to my abuse and I broke it beyond repair so I've been on the lookout for another big vice.
[URL=http://s240.photobucket.com/user/NOTATA/media/Garage%20and%20shop/005_zpsdc6evpdw.jpg.html]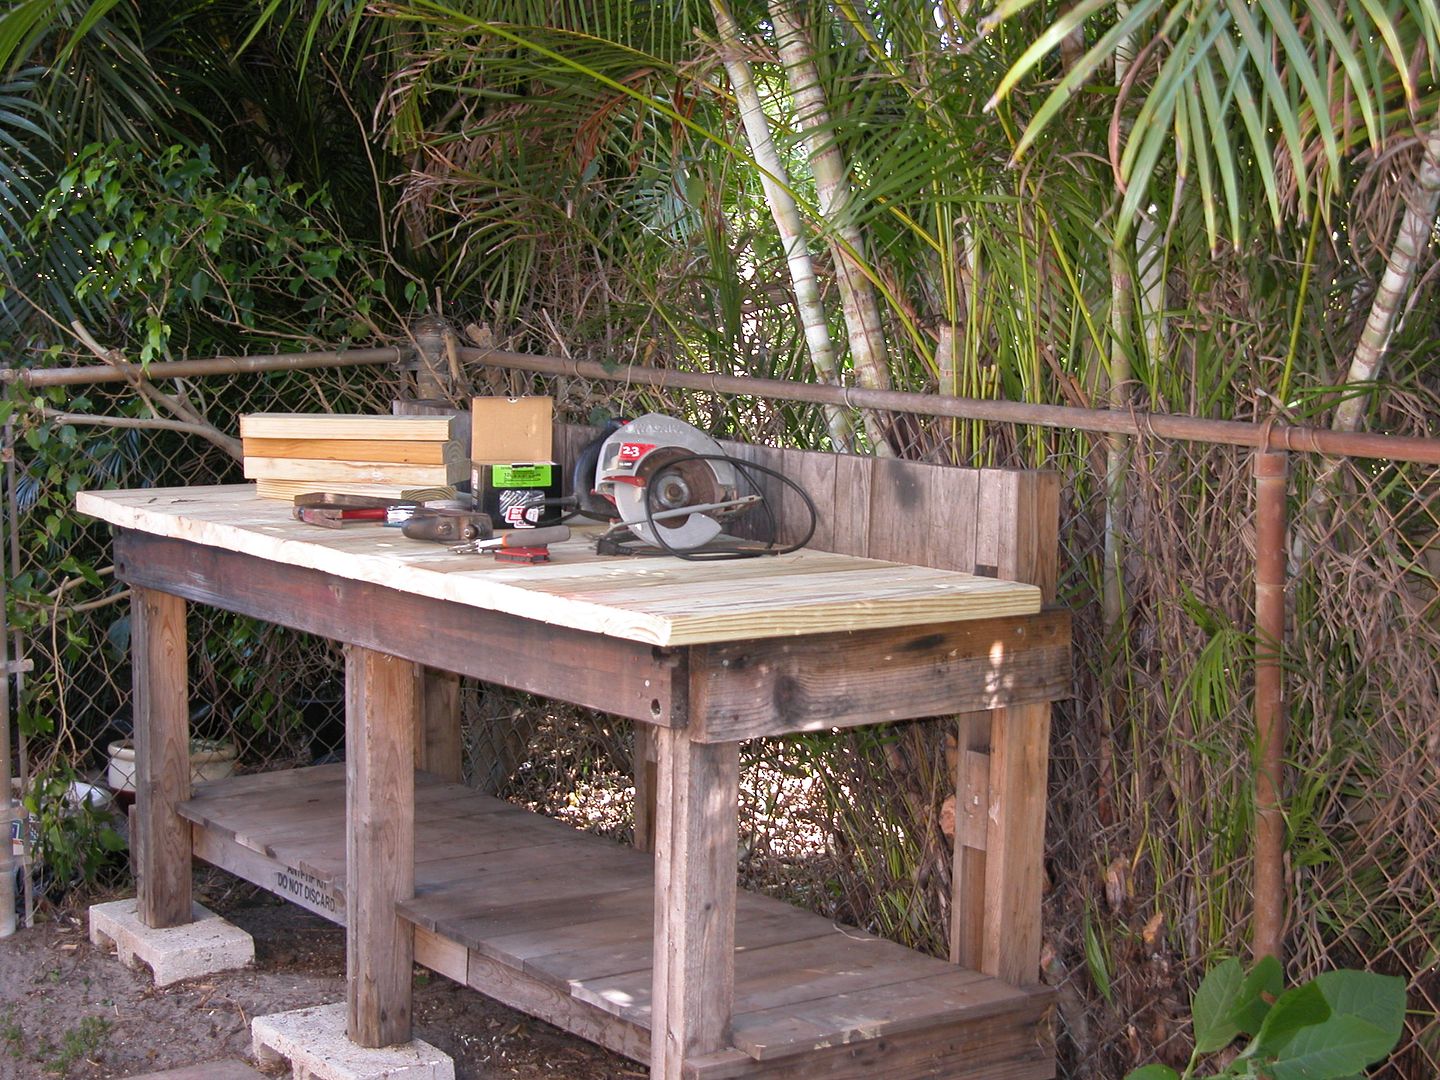 [/URL]
On a side note, 48" LEDs that go in fluorescent fixtures are cheap at Costco and amazing. They would probably be happier on the garage door than fluorescents.
In reply to NOT A TA :
I thought Rad Capz was the name of the bmx dice/etc. valve stem caps & knowing your background it seemed to fit.
Flourescents are holding up fine after a couple years even with door being opened/closed several times a day.
Rad Capz was indeed the BMX valve cap company that made good quality caps. They got copied by others and eventually went out. I looked to see if they were still around before using the name.
DWNSHFT, I will add some posts.
Some wondered what would happen with the living area of the house. The house had been gutted after the burglary/flood/mold so the kitchen was just a room with outlets and a couple pipes sticking out of the wall. So when I moved in to the house I installed a tub sink and with a piece of plywood and couple stacks of tires I made a makeshift kitchen that stayed a couple years.
[URL=http://s240.photobucket.com/user/NOTATA/media/house/House001.jpg.html]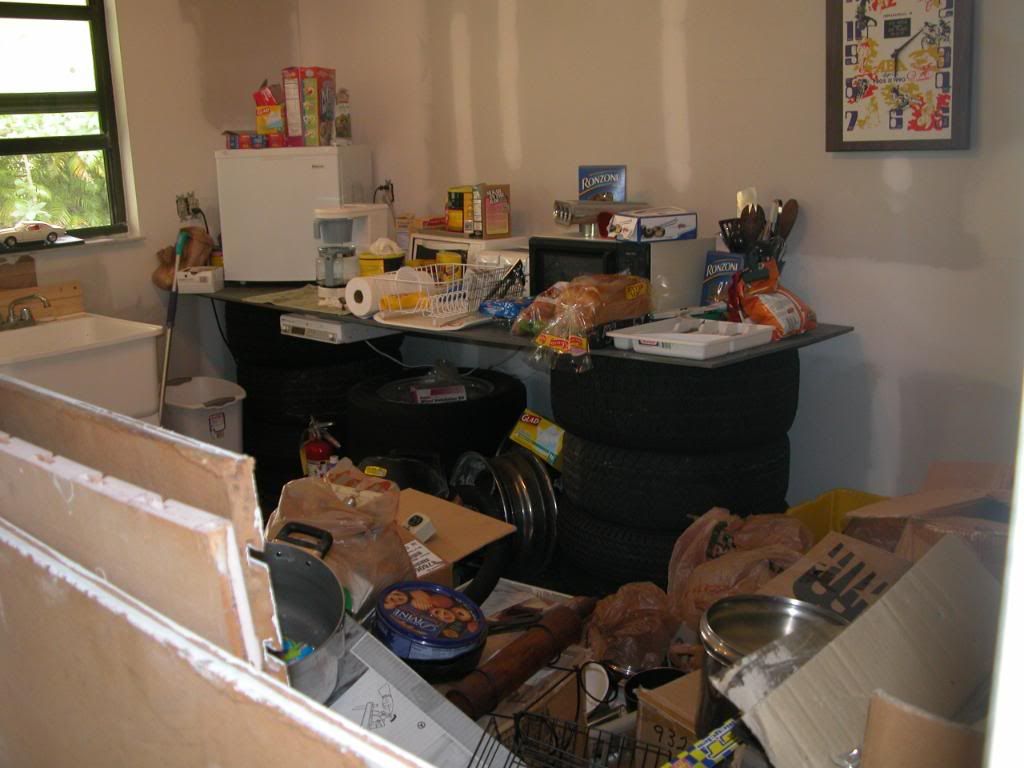 [/URL]
My favorite appliance store had sold cabinets in the past and when they stopped selling them they piled the displays in their warehouse area where they sat a couple years which eventually led to them disposing of them. They were piled behind the store one day so I inquired and they said "Take them if you want". So I did. Then sorted through to figure out what I could do with them. Nothing matched since they were intended for "Display". Every door/drawer was a different design and various colors of wood grain were used.
[URL=http://s240.photobucket.com/user/NOTATA/media/house/008.jpg.html] [/URL]
A neighbor heard I didn't have appliances and had an old small range/oven for a mobile home or something on their back porch and donated it. A friend replaced his fridge due to pressure from the wife and asked if I'd like an old full size refrigerator, "yes please!" and he even delivered it.
[URL=http://s240.photobucket.com/user/NOTATA/media/house/008-1.jpg.html] [/URL]
A buddy who knew I was trying to build a kitchen without spending money (at the time wasn't sure if I'd just give the house to bank) called to tell me he saw what looked like a kitchen countertop in a dumpster by his shop. There's also a kitchen remodeler that occupies an adjoining commercial space to his shop. So I headed right over and went dumpster diving. Got these pieces.
[URL=http://s240.photobucket.com/user/NOTATA/media/house/001.jpg.html] [/URL]
[URL=http://s240.photobucket.com/user/NOTATA/media/house/002.jpg.html] [/URL]
Refrigerator donators wife decides they need a new sink a few weeks later so he asks if I want the old stainless sink without faucet, "Of course! I'll make it work!"
[URL=http://s240.photobucket.com/user/NOTATA/media/house/003.jpg.html] [/URL]
This thread is awesome and I just want to say that everyone is screwed if you ever decide to enter the $20xx Challenge (assuming that you haven't).
EastCoastMojo said:In reply to NOT A TA :
With friends likw yours, who needs Lowe's?
Here in Merica there's always stuff available for essentially nothing. I was reading the thread here about granite vs. quartz counter tops where one of the members smashed a granite top so it could be moved more easily so they could install a new quartz counter. Meanwhile there's probably other members who would have loved to get the granite and would just paint their kitchen to go with the granite. The thing is you have to be willing to compromise. The particular color granite might not have been exactly what another would like but for free they would have gone right over and picked it up.
Opportunity is another thing. One of my garden hoses has been failing. It was a really good hose when I bought it 20 + years ago and I certainly got my moneys worth out of it. However a failed nozzle caused me to keep folding it to pinch it off when washing vehicles etc. instead of just letting it run. The consistent folding of a old rubber hose caused it to develop pinholes. So I've been looking at new hoses and nozzles. Bought a carbon fiber look nozzle at the Orchard Hardware going out of business sale Sunday but balked on buying a hose.
Yesterday I was driving home from a job and there was a hose in the road people were swerving around. As I drove around it I thought "Hey, I need a good new hose. If it's in the road it must have fallen off a work truck, and they usually have good hoses!" So I took a chance and circled back. Divided road 3 lanes each side with rush hour 50-60 MPH traffic. Pulled off on a side street, walked behind guard rail up to hose, hopped the rail & SCORE!!! An almost brand new Zero G 100' hose. I waited about 10-15 minutes with it draped on the guard rail to see if someone came looking for it but no one showed up, so off I went with my new lightweight hose with cool features. Needed a rubber washer (which I had) but otherwise it's perfect. Looked it up last night and it's about 70 dollars on the web. Yay Merica!
[URL=http://s240.photobucket.com/user/NOTATA/media/Garage%20and%20shop/20180925_152458_zpso0imgjox.jpg.html]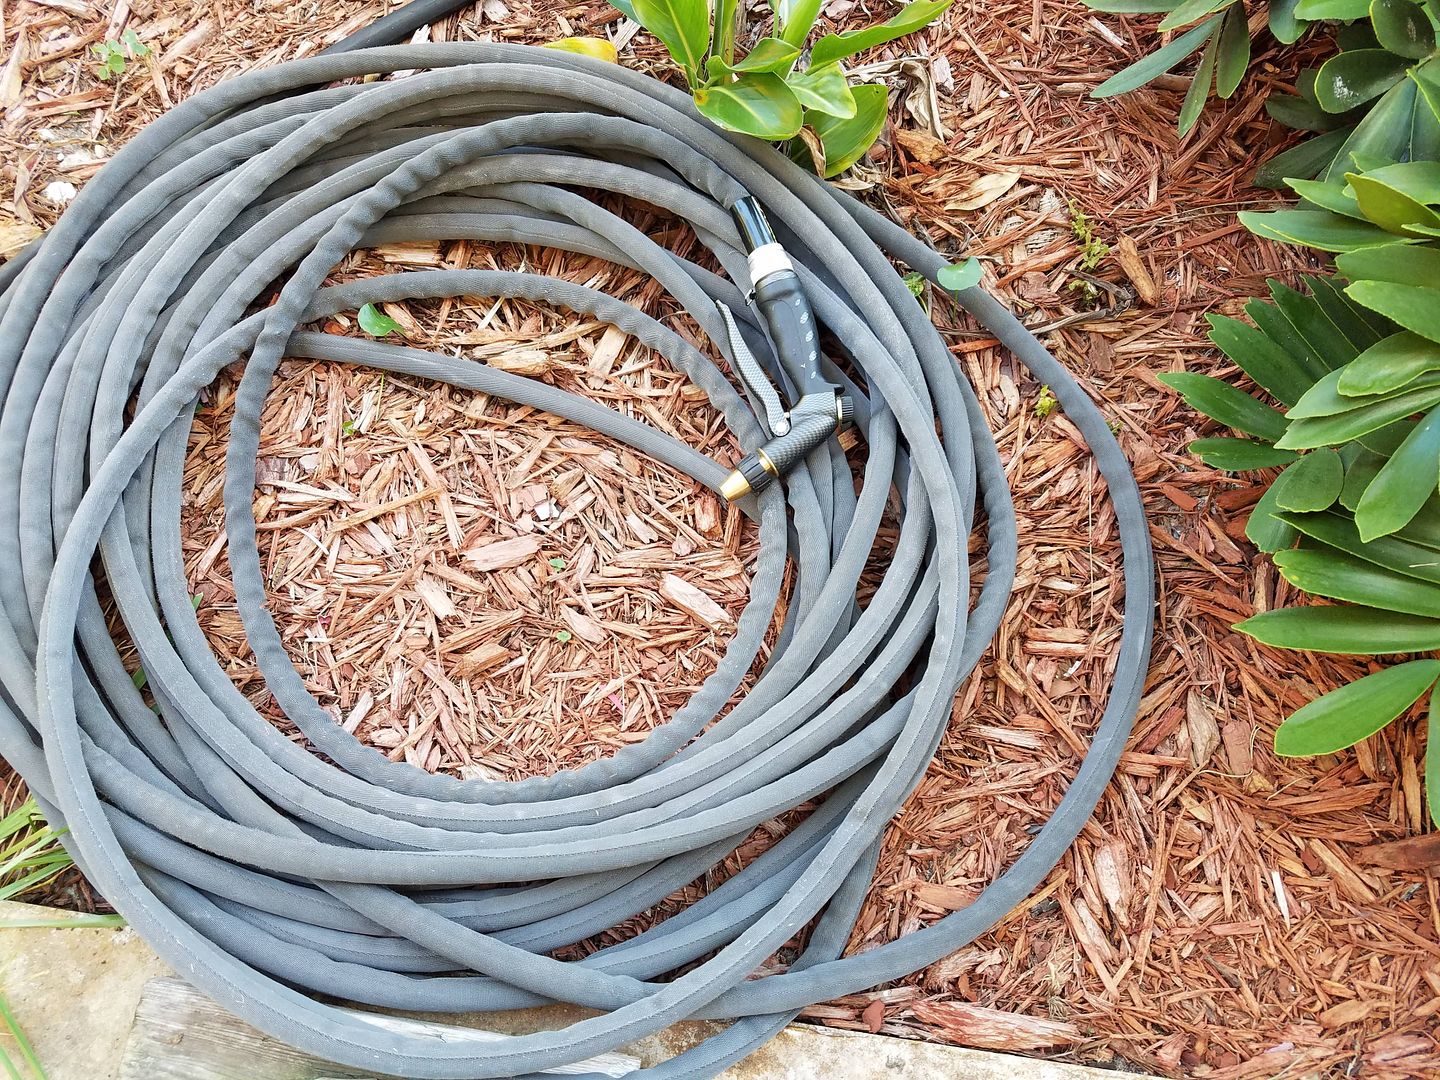 [/URL]
You'll need to log in to post.