
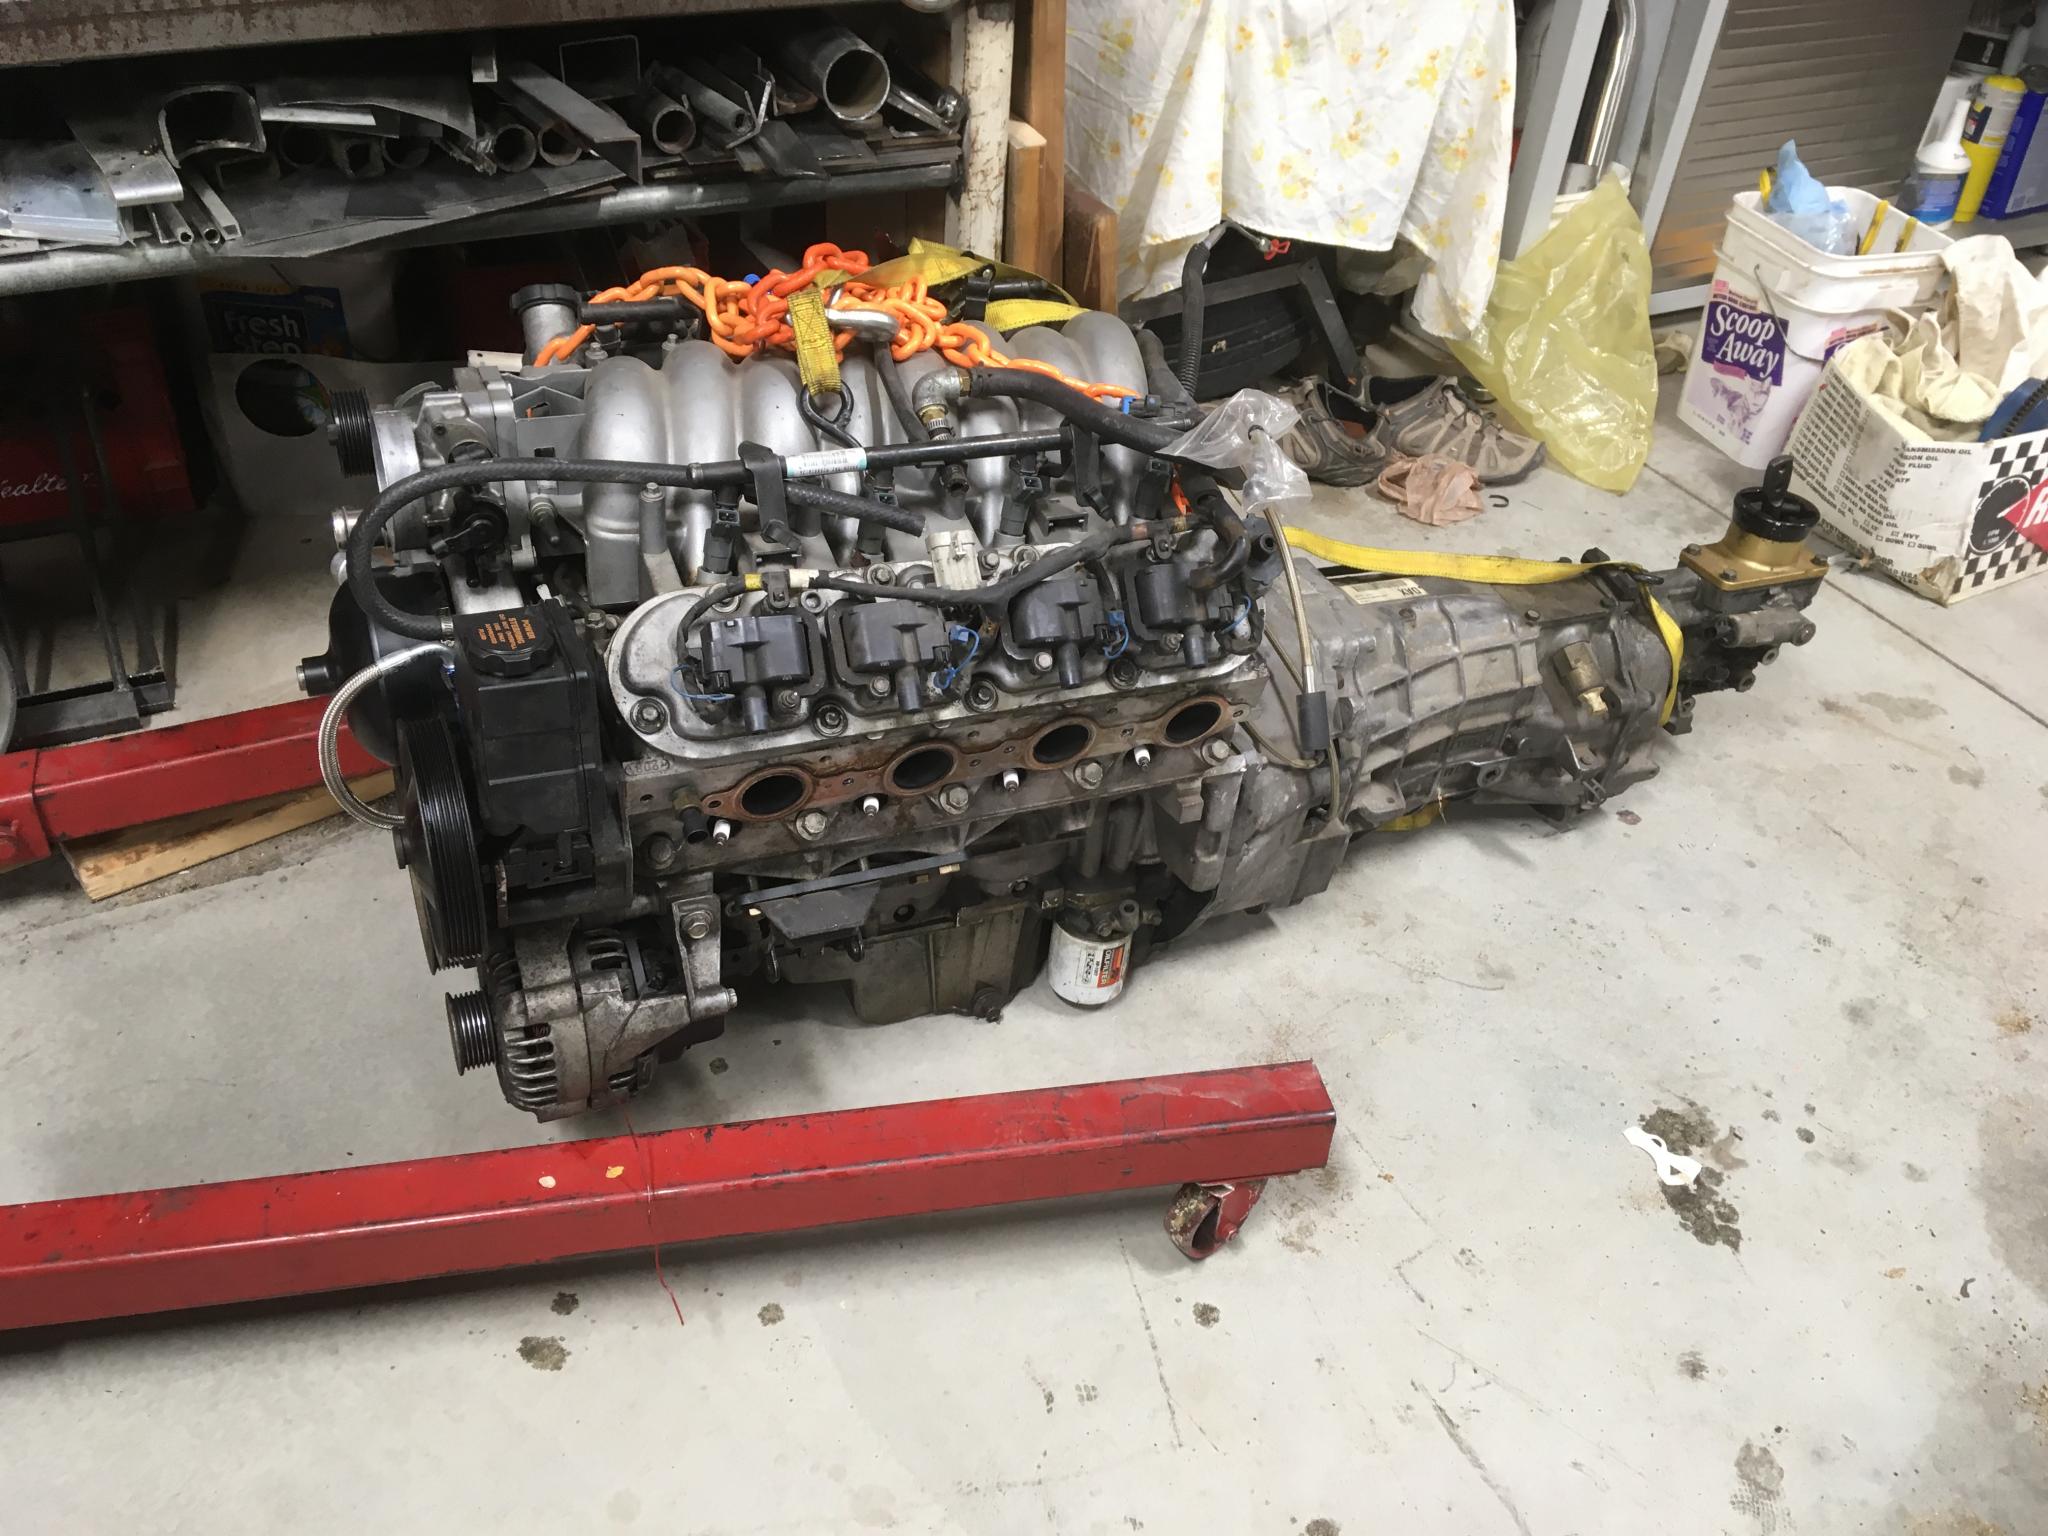
Some may remember that I got a little carried away a decade or so back and stuck an LS1/T56 in an MGB GT. First one in the world to be completed, as far as I know. This was back before LS engines were being put in lawnmowers - but even today, an LS in an MGB is fairly rare because the classic SBF or Rover is a more bolt-in option. The MG makes the Miata look enormous, so an LS swap is not an easy thing.

Well, I got mine up and running and painted and then just kinda never did that last finishing that makes a car really good. One of the problems is that the T56 from the donor tends to pop out of reverse. I thought I could just adjust the shifter but these 1998 Tremecs have the tendency to bend shift forks occasionally. The trans was also making slight contact with the tunnel under load so I had NVH problems. The water pump was also leaking because the car had sat for a while, and the fuel delivery system has given me occasional headaches.
So I decided it was time to deal with these problems. And looking at the car, I figured it would be easiest to yank the whole engine and transmission together. The trans is a tight fit in the tunnel and it wasn't going to want to move back much to disengage the input shaft. This will also give me the chance to give the entire car a thorough going-over to see how this science experiment is holding up. A little foreshadowing: there are some surprises.
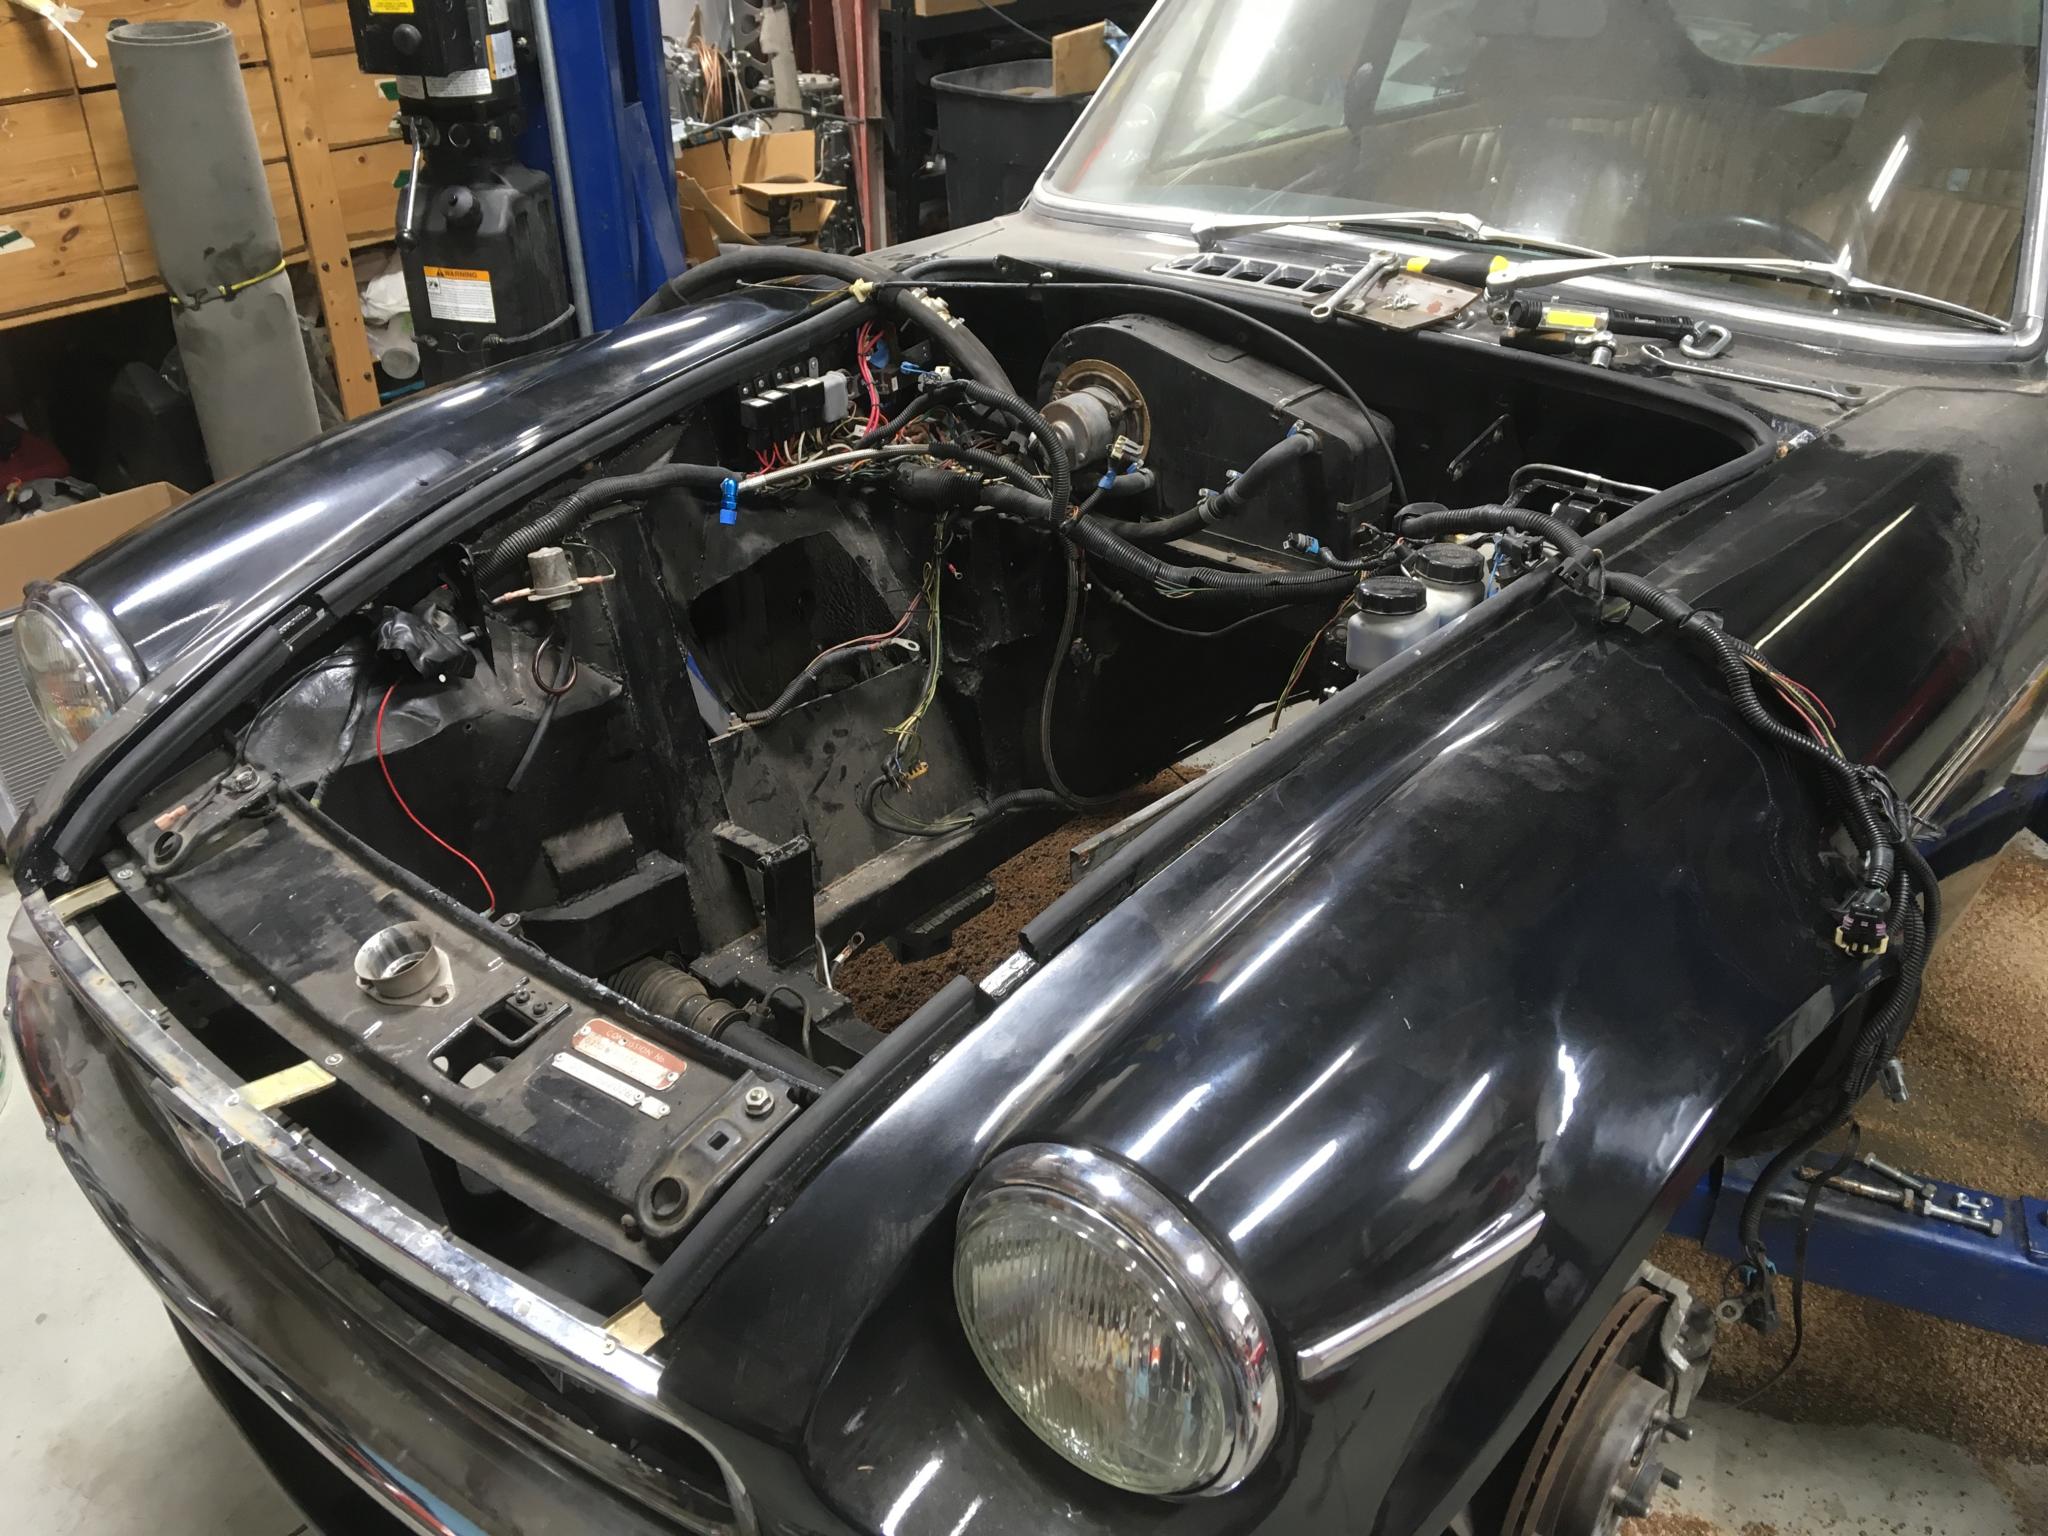
So today, this happened. It wasn't pretty at times and there was one connector that made the ultimate sacrifice because I didn't see it down there in the tiny little tunnel, but we have a start. This is how far I got today, tomorrow I'll inspect the car further and swap that trans.

NOHOME
MegaDork
12/5/19 8:59 p.m.
Be interesting to see where this ends. The GT kind of faded away after the first few drives. The fire while driving around the track was memorable.
My GT with a stock engine is a sauna in the summer, cant imagine what a V8 in front does to the situation.
Pete
What system are you using to run an LS in such an old car?
Honestly, the MG faded away because I got deep into the Targa Miata (again) and when I wet-sanded the paint, I basically ruined it. It went from having gorgeous black paint with a few runs in the clear to instant patina. It was also fundamentally evil, and it took a while for me to get the handling under control. It's good now, although it's still a car that demands respect. If you're an idiot, it will take you out.
The V8 doesn't add a lot of extra heat. I put a layer of heat control material under the carpet and that ram air system into the footwell helps a lot. With our low humidity, as long as you have airflow and are out of the direct sun it's quite survivable.
The car is running off the stock PCM from the 1998 Camaro donor. Some of the controls are Miata, so the wiring harness is an interesting mix.
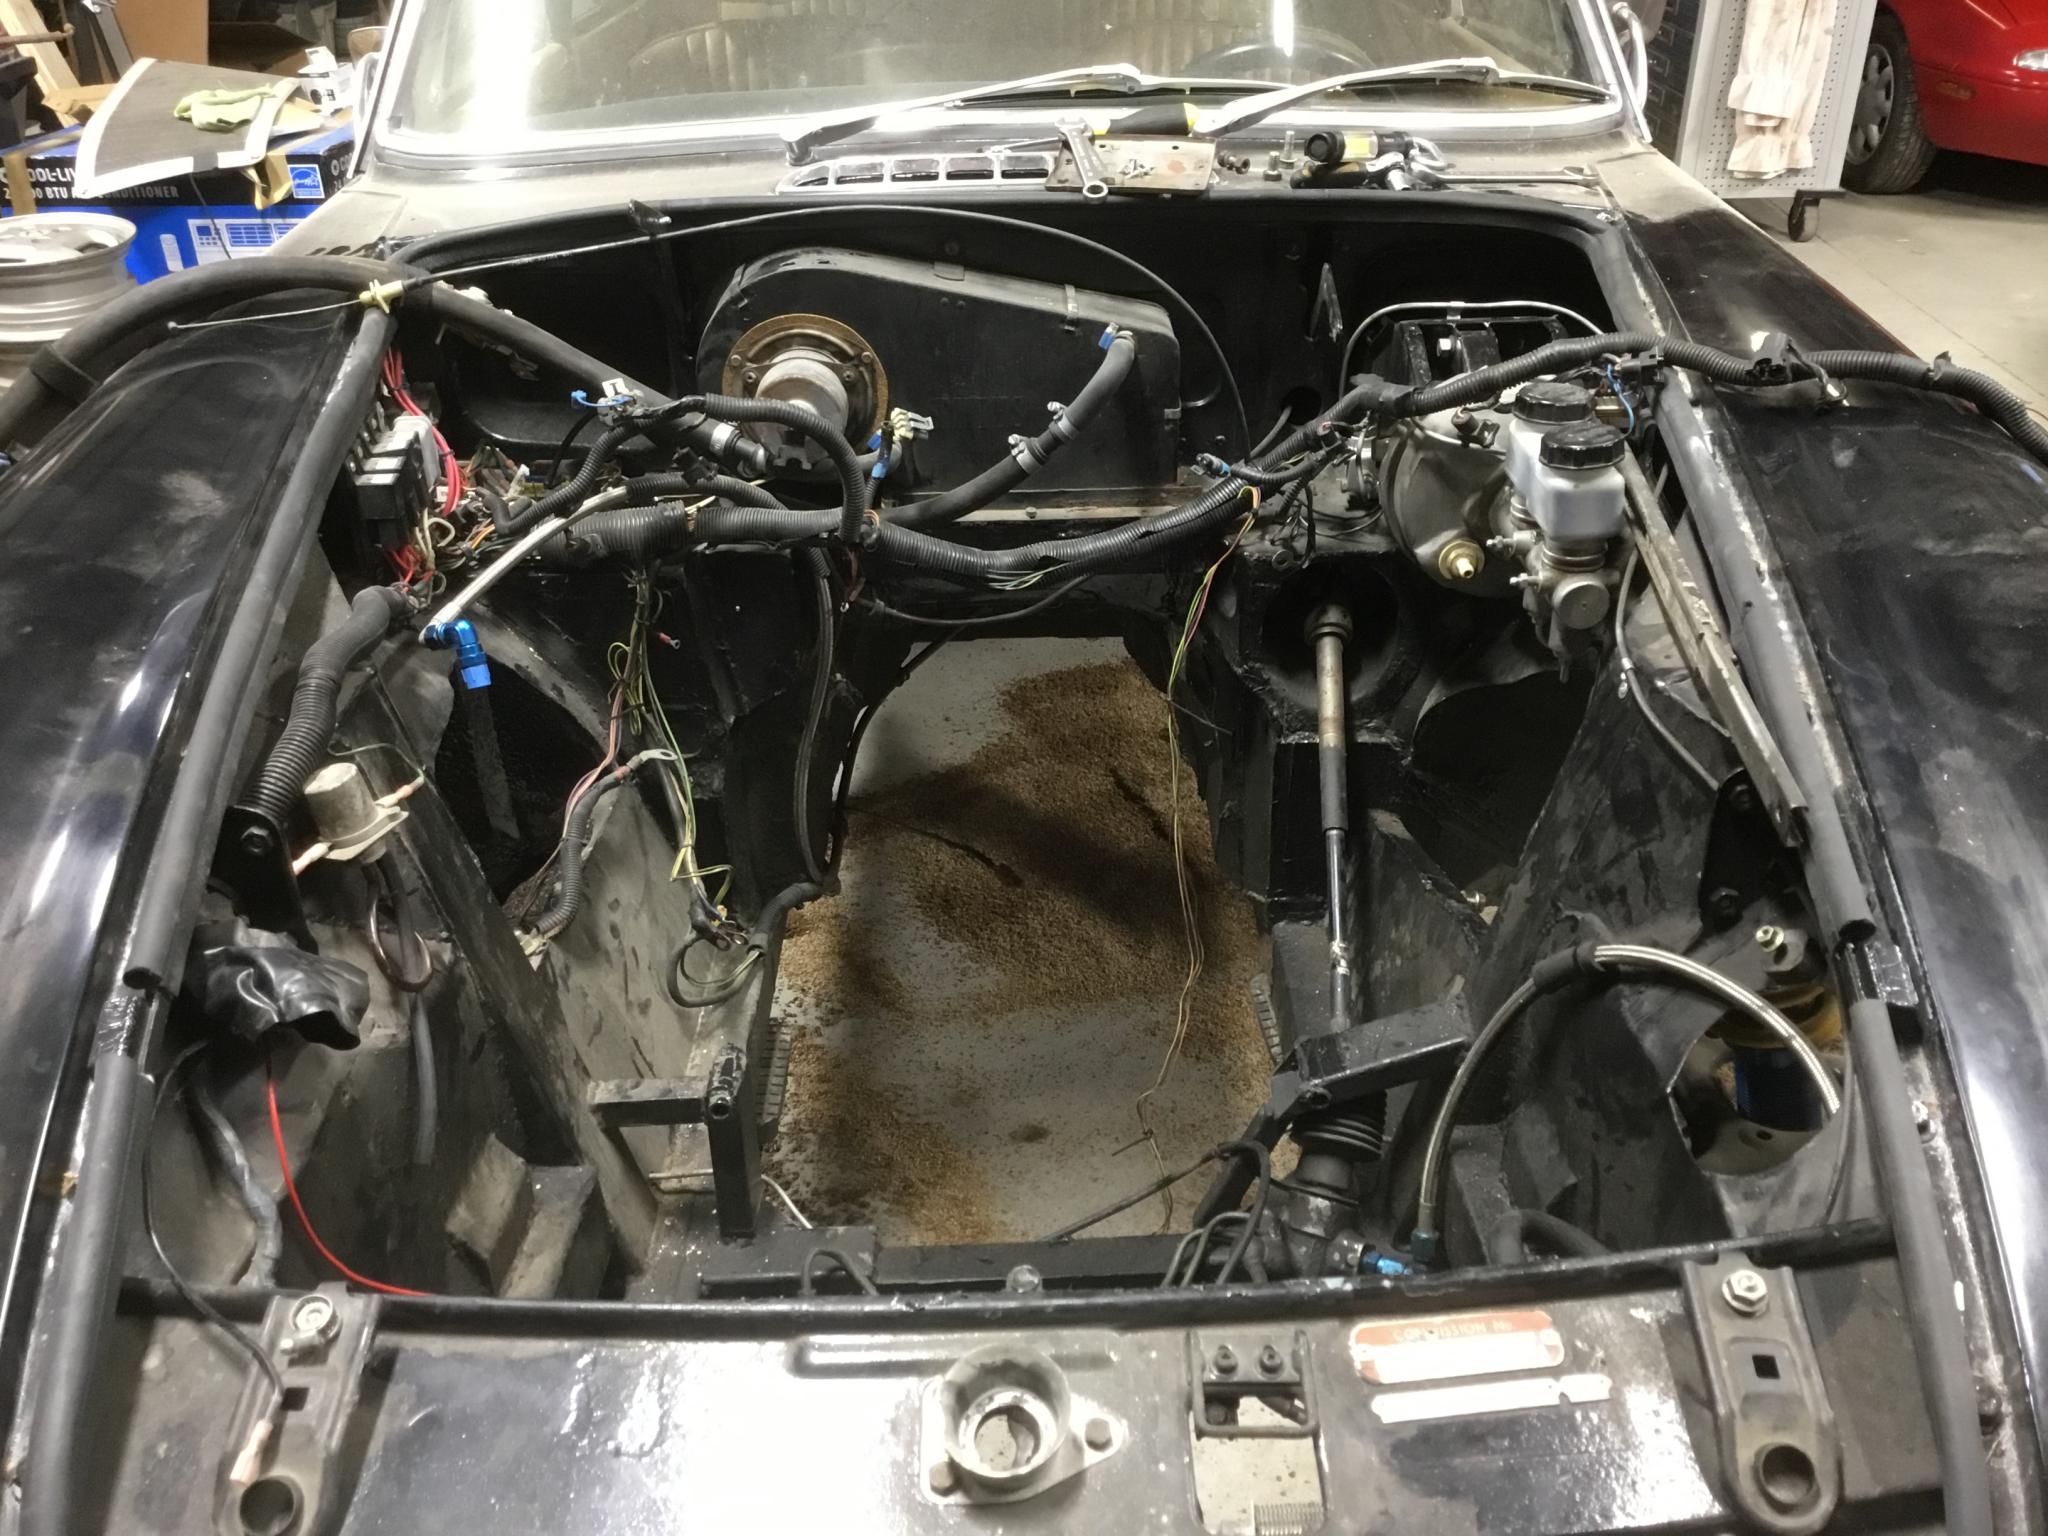
Oh I'll be watching this like a hawk. Can you post some photos of the empty engine bay?
This is one of my all-time favorite builds. Glad to see it (almost) among the living again.

Cotton
PowerDork
12/5/19 10:59 p.m.
I've always loved this car. Very cool.
From what I remember, your tires aren't too wide on that car. How do you keep traction? Have you thought of trying to stuff something wider underneath, or are you at the widest you can get without more modifications?
In reply to infinitenexus :
When you have a big v8 in a little car, traction is overrated and sometimes you just need to make yourself smile by leaving rubber everywhere
I use what’s called organic traction control. Never ask more of the tires than they can give. It does require the driver to have an installed and functional brain.
Yeah, it’s undertired if you want to be able to WOT everywhere and all the time. But that’s no fun. In a tire vs engine battle, the tires should lose :)
If I shorten the rear axle, I can squeeze in a bit more rubber. But I’m okay with it. I’ll leave 275s to the Corvette guys.

java230
UberDork
12/6/19 11:30 a.m.
Oh very very fun! Cant wait to see it resurrected.
Keith Tanner said:
I use what’s called organic traction control. Never ask more of the tires than they can give. It does require the driver to have an installed and functional brain.
No sale! 
Jeez, I am going to have to look back for build info. I worked on a 302 engined MG and it had negative clearance everywhere. Like, they had to saw off part of the oil filter pad, and thread in right angle AN fittings for external oil filtration.
I had to go to a smaller diameter steering column to clear the head bolts.
My own site is down right now, I’ll put it back together tonight. I thought there was a GRM build thread but I’m not sure. There’s one on BritishV8.
http://forum.britishv8.org/read.php?2,20868

NOHOME
MegaDork
12/6/19 12:15 p.m.
In reply to Knurled. :
The 302 is a well trod path in the MGB world with kits availble to do engine/gearbox install and headers all off the shelf.
The LS is becoming more common, but seldom ends up as a stealth instal that fits under the hood.
Pete
I wonder if it was a Midget. It had been a while.
I do remember that the pedals all were shifted so far over to clear the new trans tunnel that I depressed the accelerator thinking it was the clutch.
I remember going through the entire forum post on another forum, I believe. Such an amazing build had me looking at MGBs myself, until I quickly remembered I lack the skill.
what's the part number and source for the Pierburg external fuel pump?
As a man that is elbow deep in "the last 10%" on two radical and long term builds, i feel your pain.
Are you seeing things you think you could do differently and better, but are leaving because they are functional and fine if not as elegant? Cause i sutmre as hell am.....

bluej
UberDork
12/6/19 3:36 p.m.
Count me in the super stoked to hear this is back and getting polished camp. I'm also very happy to hear you're getting the old site back up. I had meant to ask about it when I recently remembered that it was down last time I tried to visit. I want to look back up re: your experience with ITB's.

AngryCorvair said:
what's the part number and source for the Pierburg external fuel pump?
Source was Flyin' Miata a decade ago :) I'll see if I can get the part number on Monday, but I think it's OEM off an Audi.
I am not the guy to build a perfectly buffed Most Beautiful Roadster, but I'd like to think my solutions are reasonably elegant. I'm not planning on any significant re-engineering unless the car indicates that is necessary. I just want to get this thing back in full operating condition. Then I can start worrying about the lack of carpet under the floormat on the driver's side. This is just a good opportunity to check for trouble points.
Bluej, the Targa Miata site is back. But the MG one isn't.
So, today I donned my wrenching apparel and dove in.

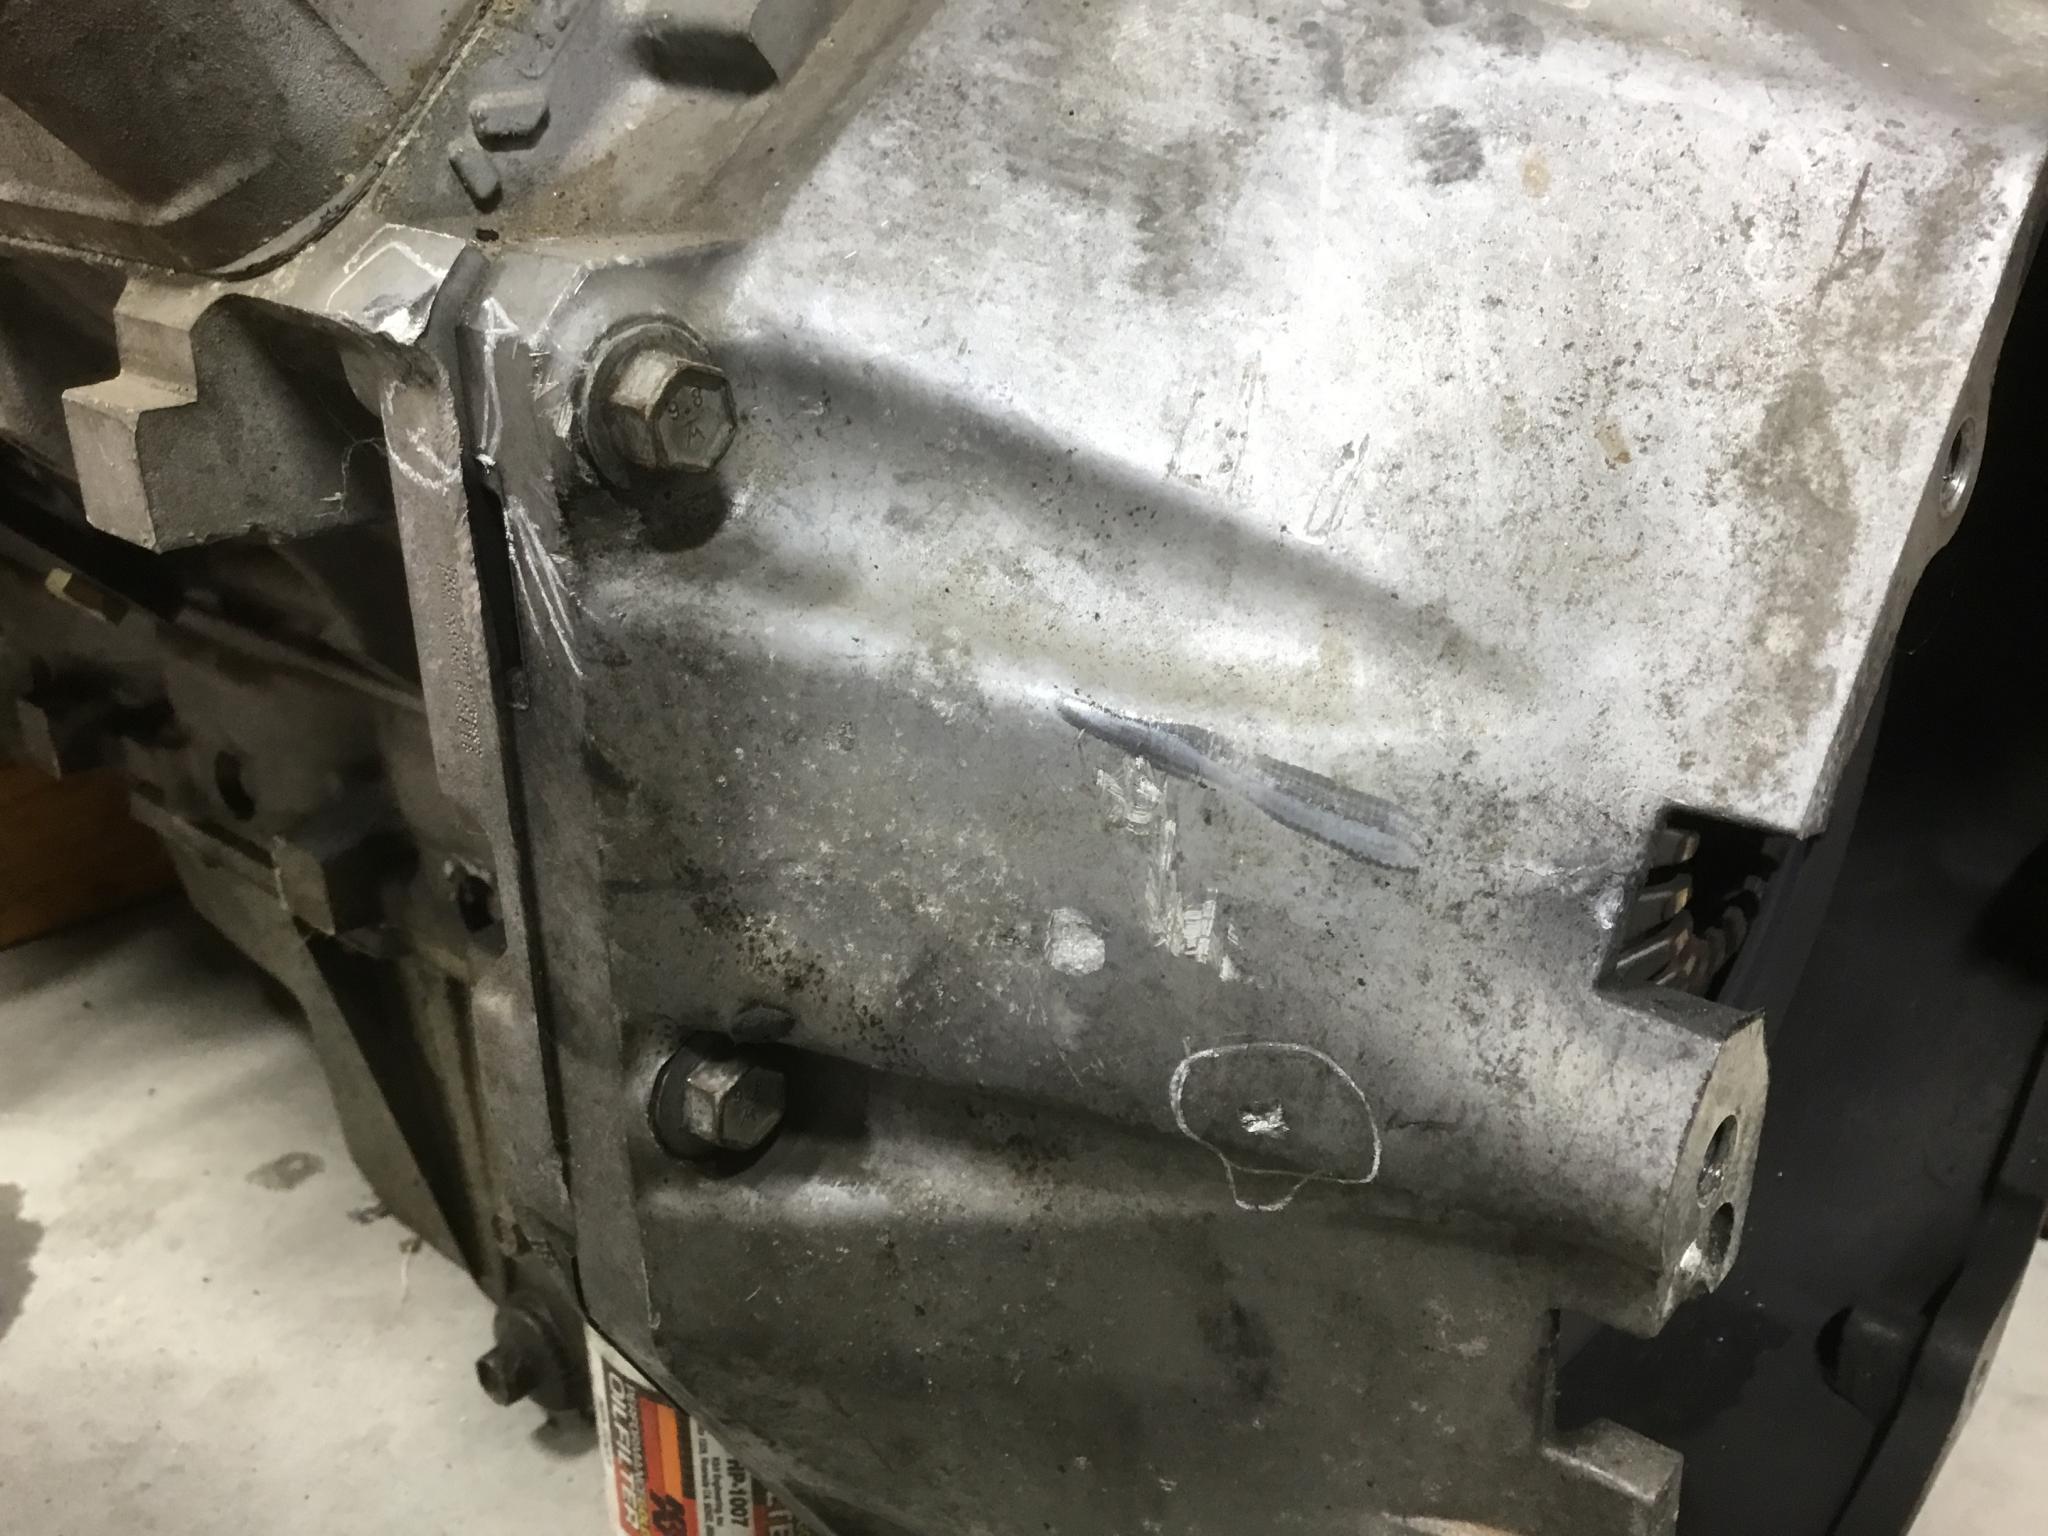
The drivetrain tells the story of multiple interference points. This install was a game of millimeters, I may have been a little too tight in a couple of spots. You can see the circled hard contact points as well as some shiny bits on the bellhousing. There's another one on the top.
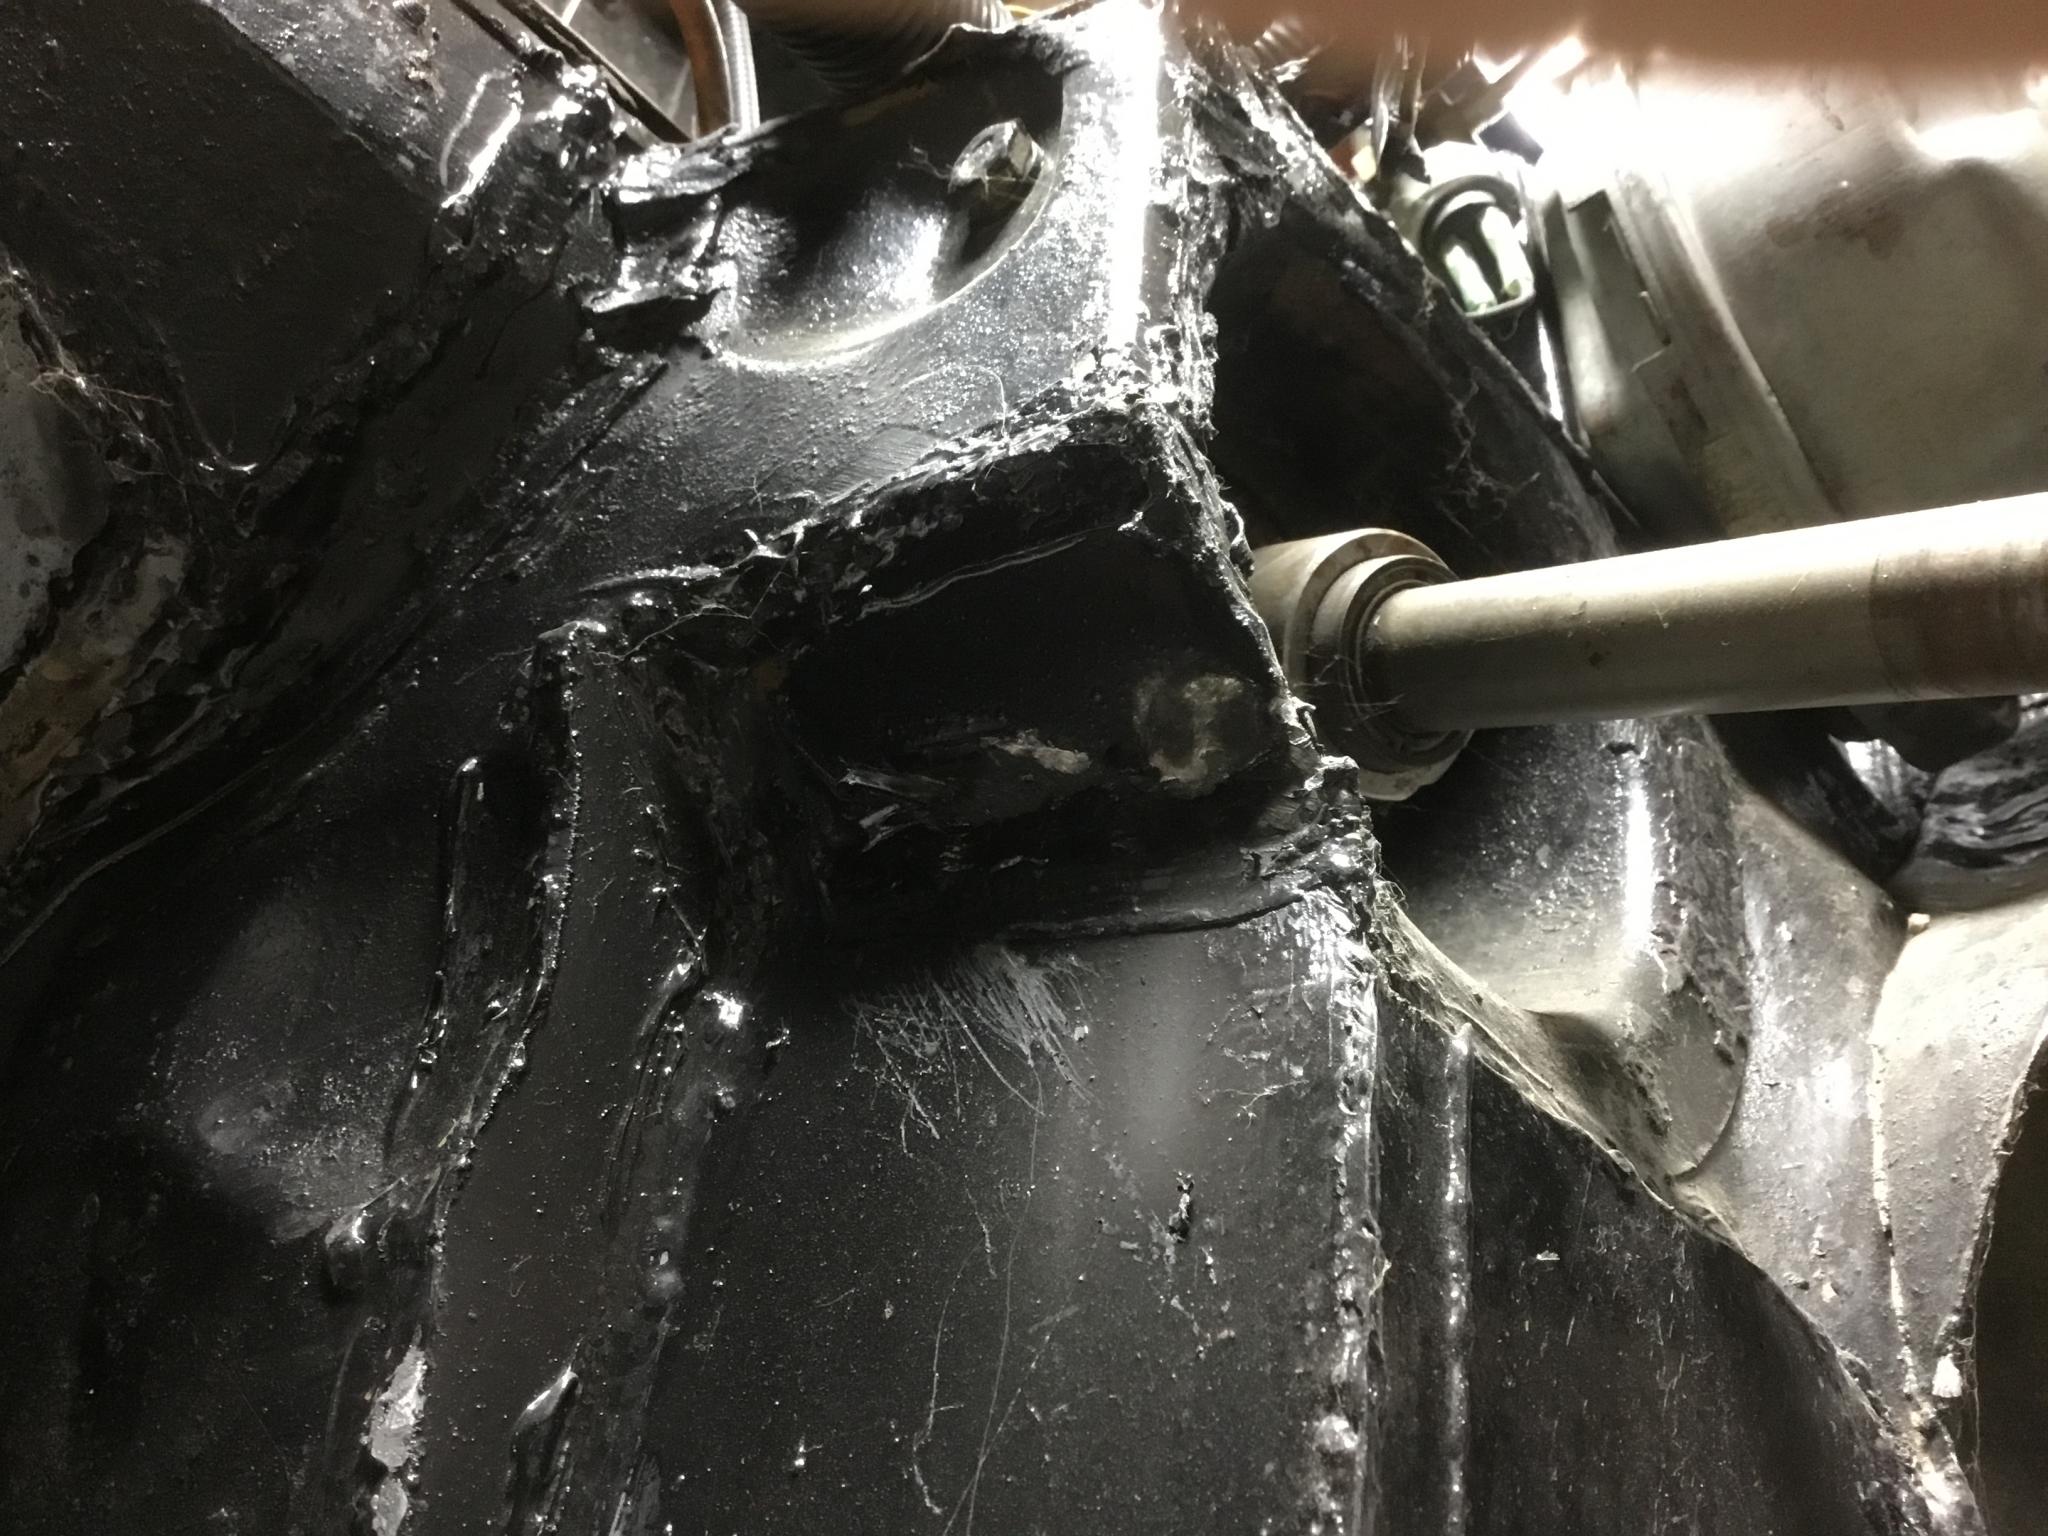
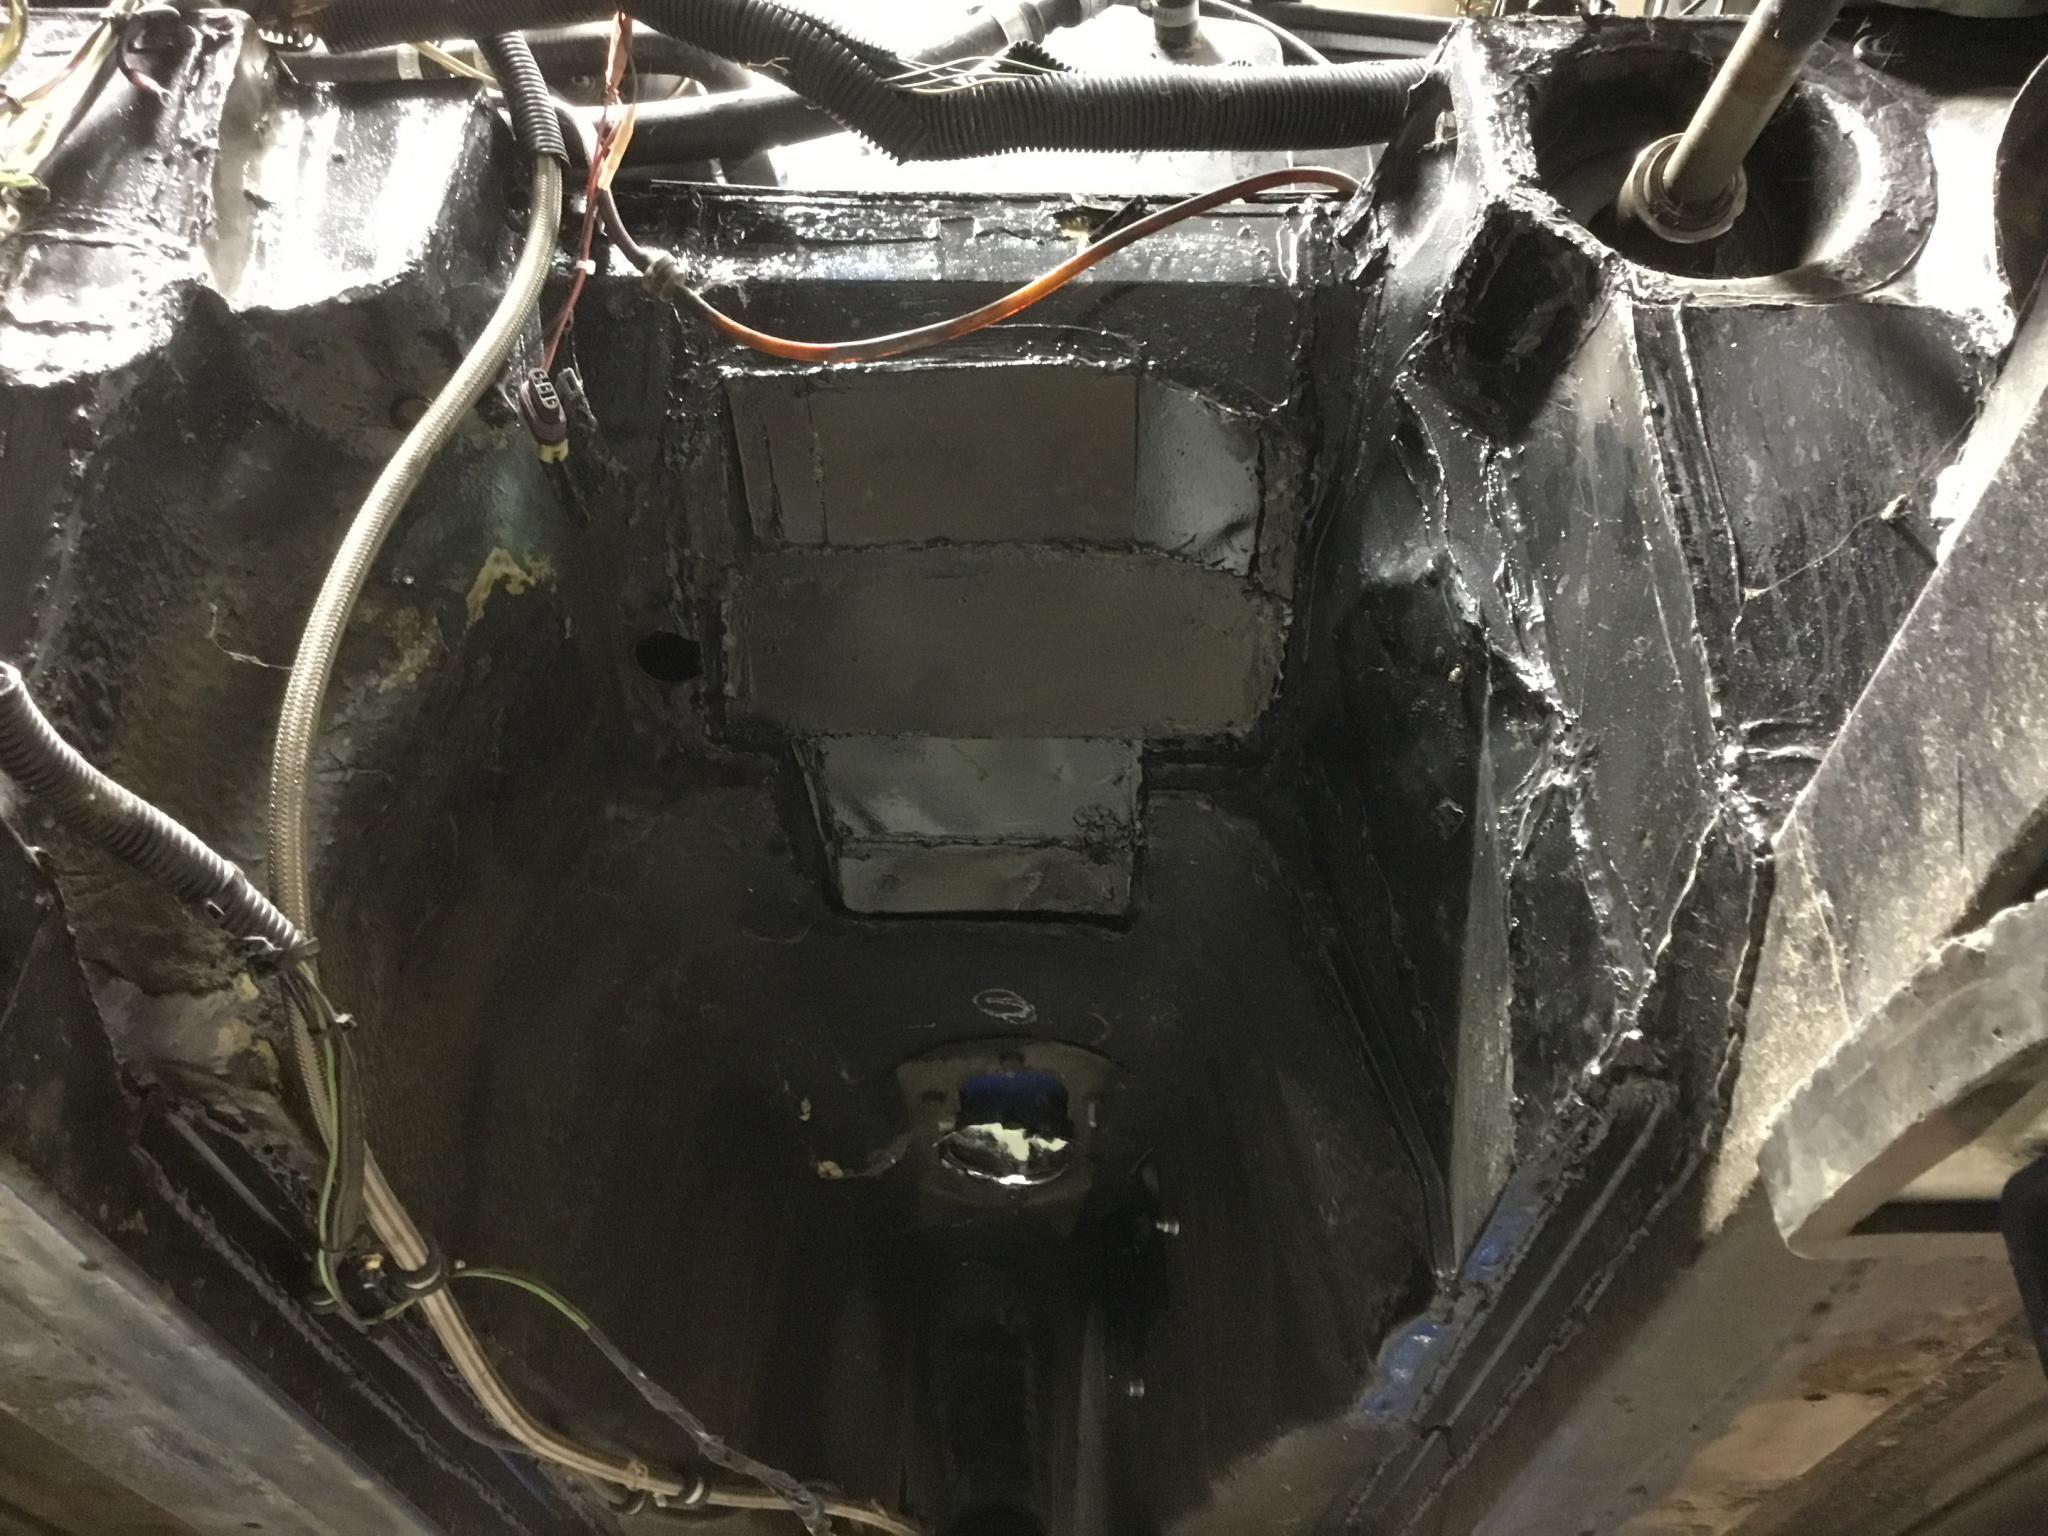
 And the corresponding spots on the car. Some of these I'll fix with grinding on the drivetrain - one boss on the engine block in particular - some with a #1 Land Rover Adjustment Tool (aka BFH). BTW, I think I smeared seam sealer all over the place and then topcoated with POR-15, leaving a less-than-concours finish.
Here's a shot of the overall tunnel along with an engine bay shot as requested. I basically cut this car off at the firewall and rebuilt everything ahead of it. It's running Miata geometry and steering column up front, a change that is NOT a bolt-on.
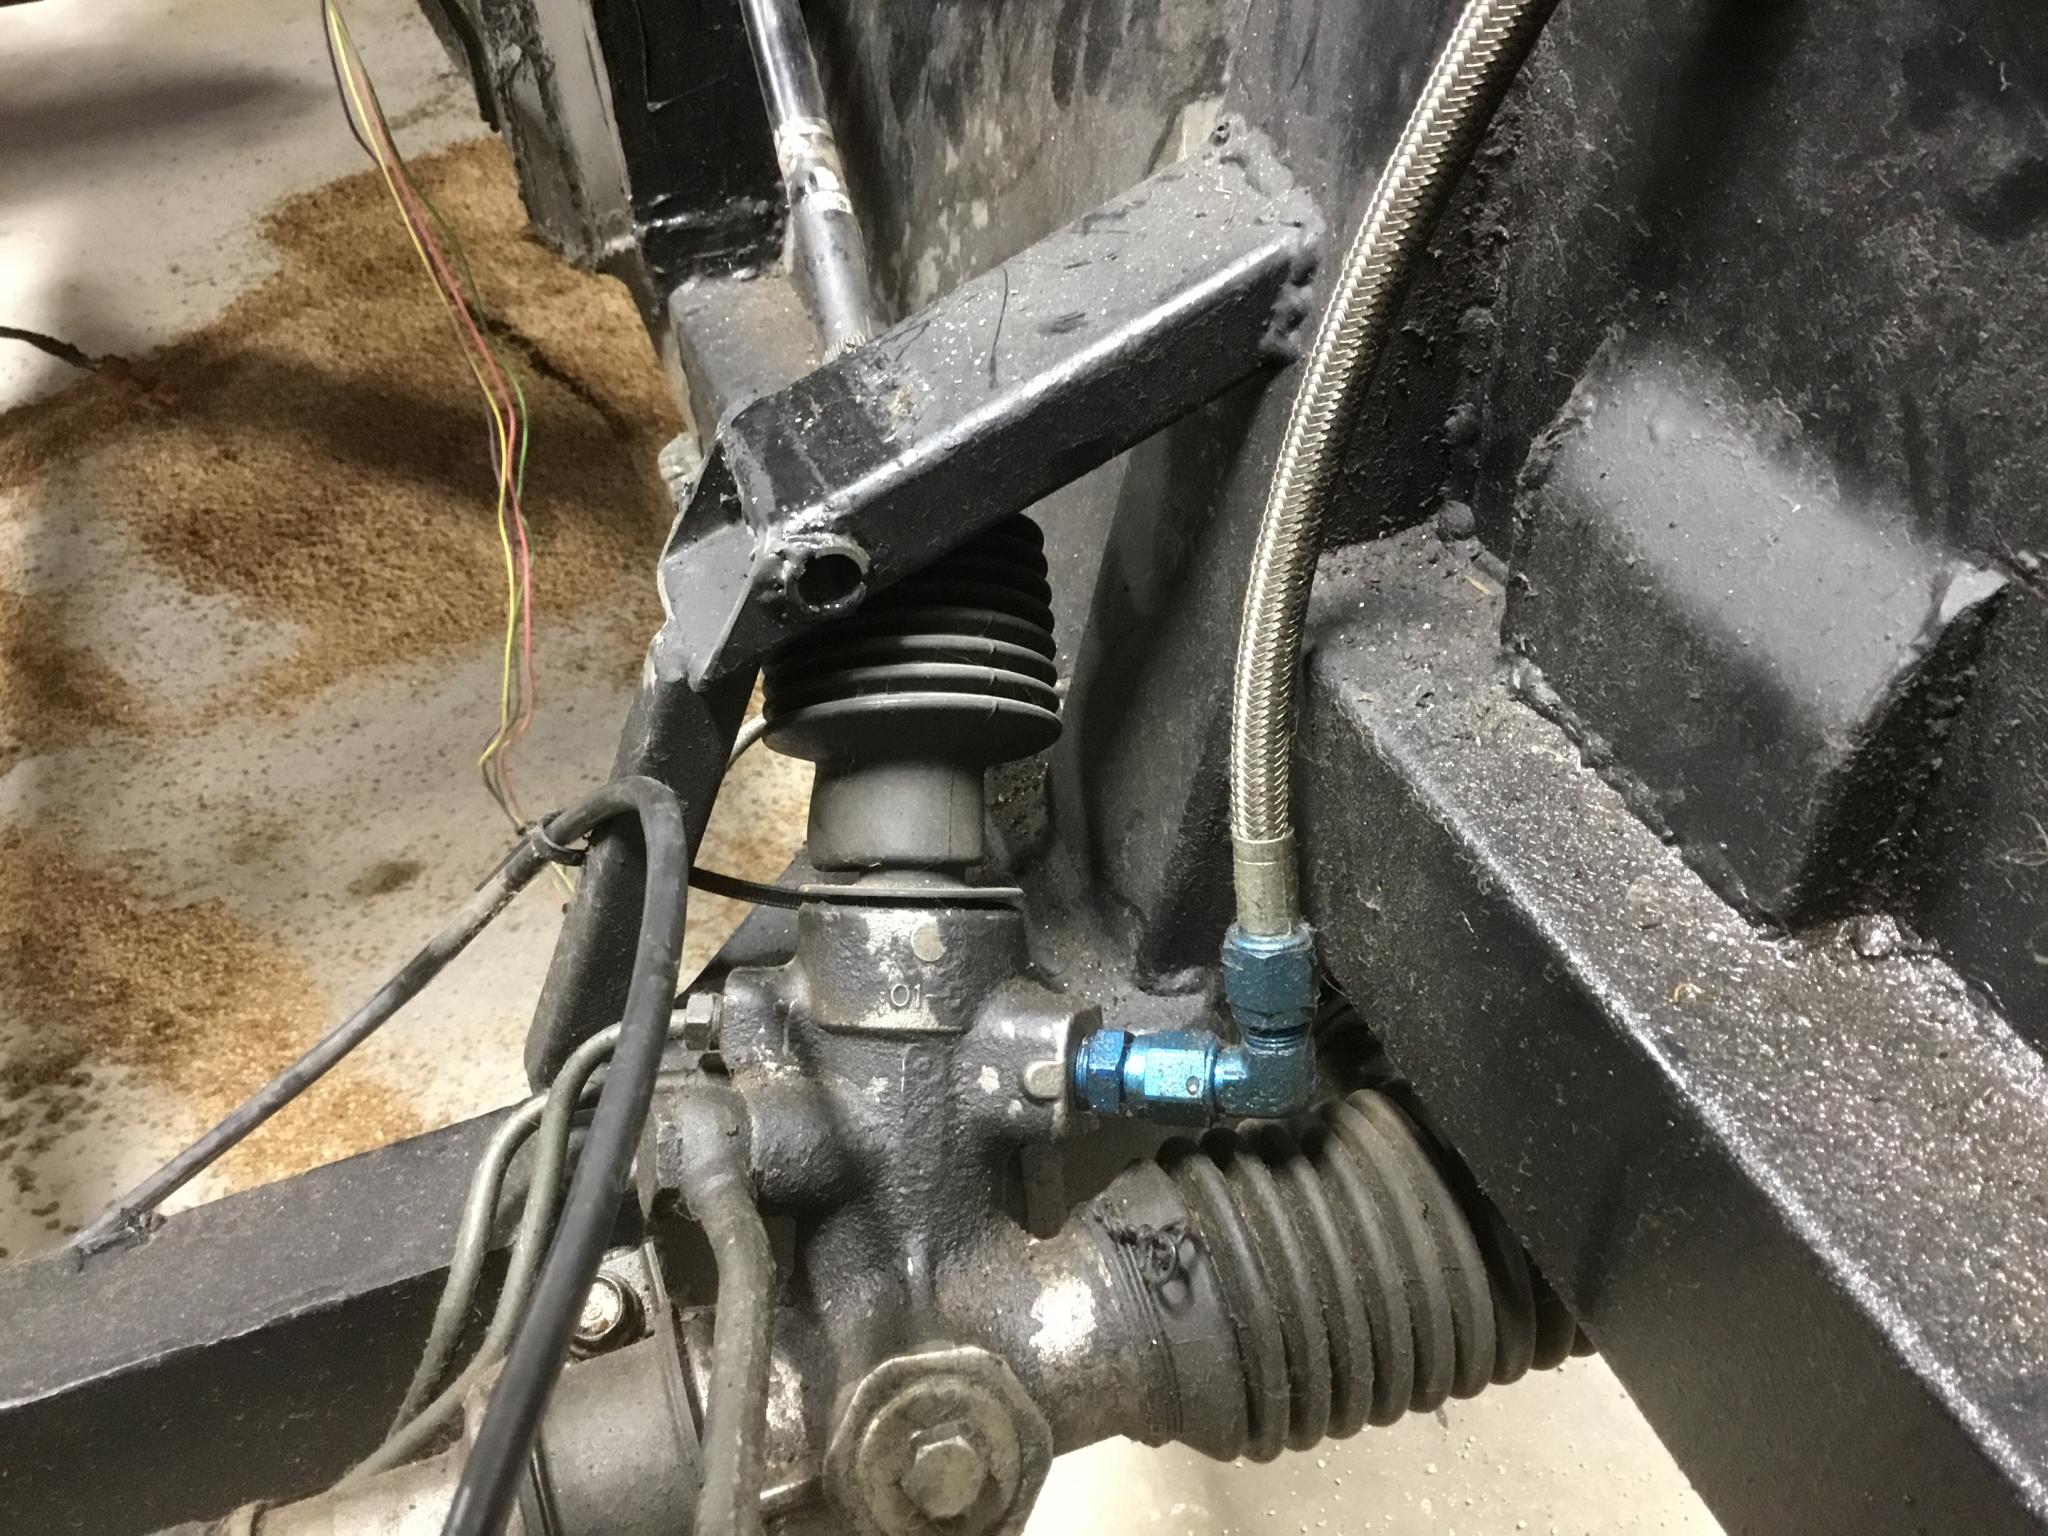
More inspection around the car. Looks like my low pressure PS lines weren't the right spec, they've been sweating and making a mess. I am satisfied with that motor mount. It could be prettier if I had a bender, but I don't think it could be more effective while still letting the Miata steering column through.
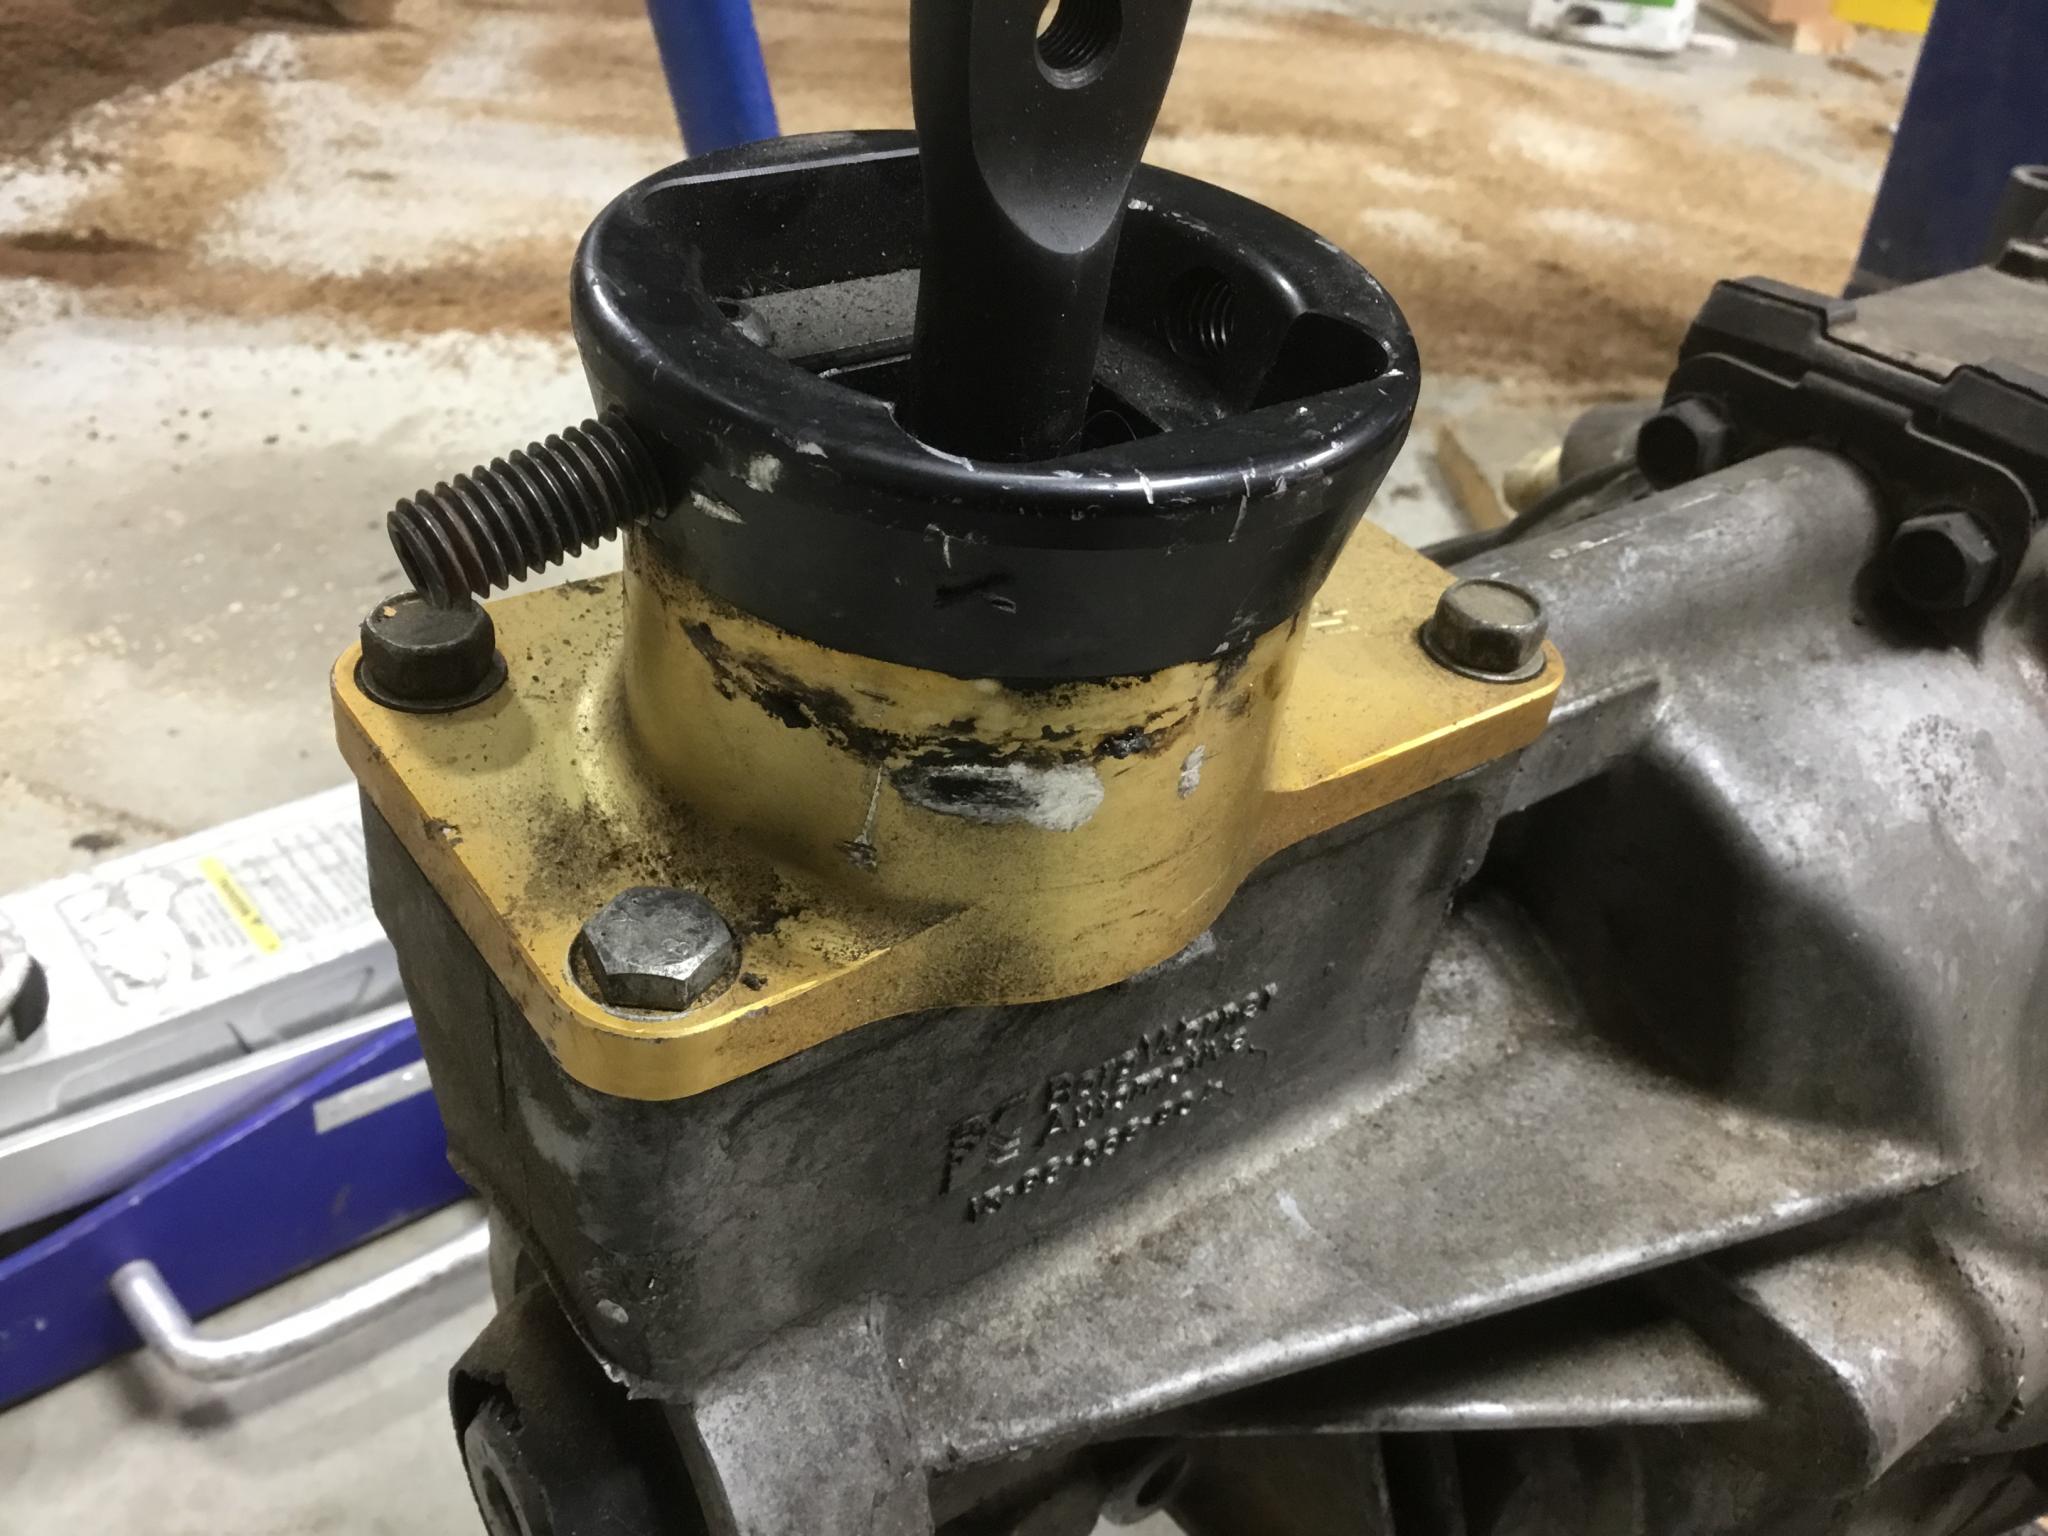
Found another rub point on the shifter. It'll be easy to open this up a little.
Here's the most interesting thing I found while dismantling. That's the differential end of the driveshaft.
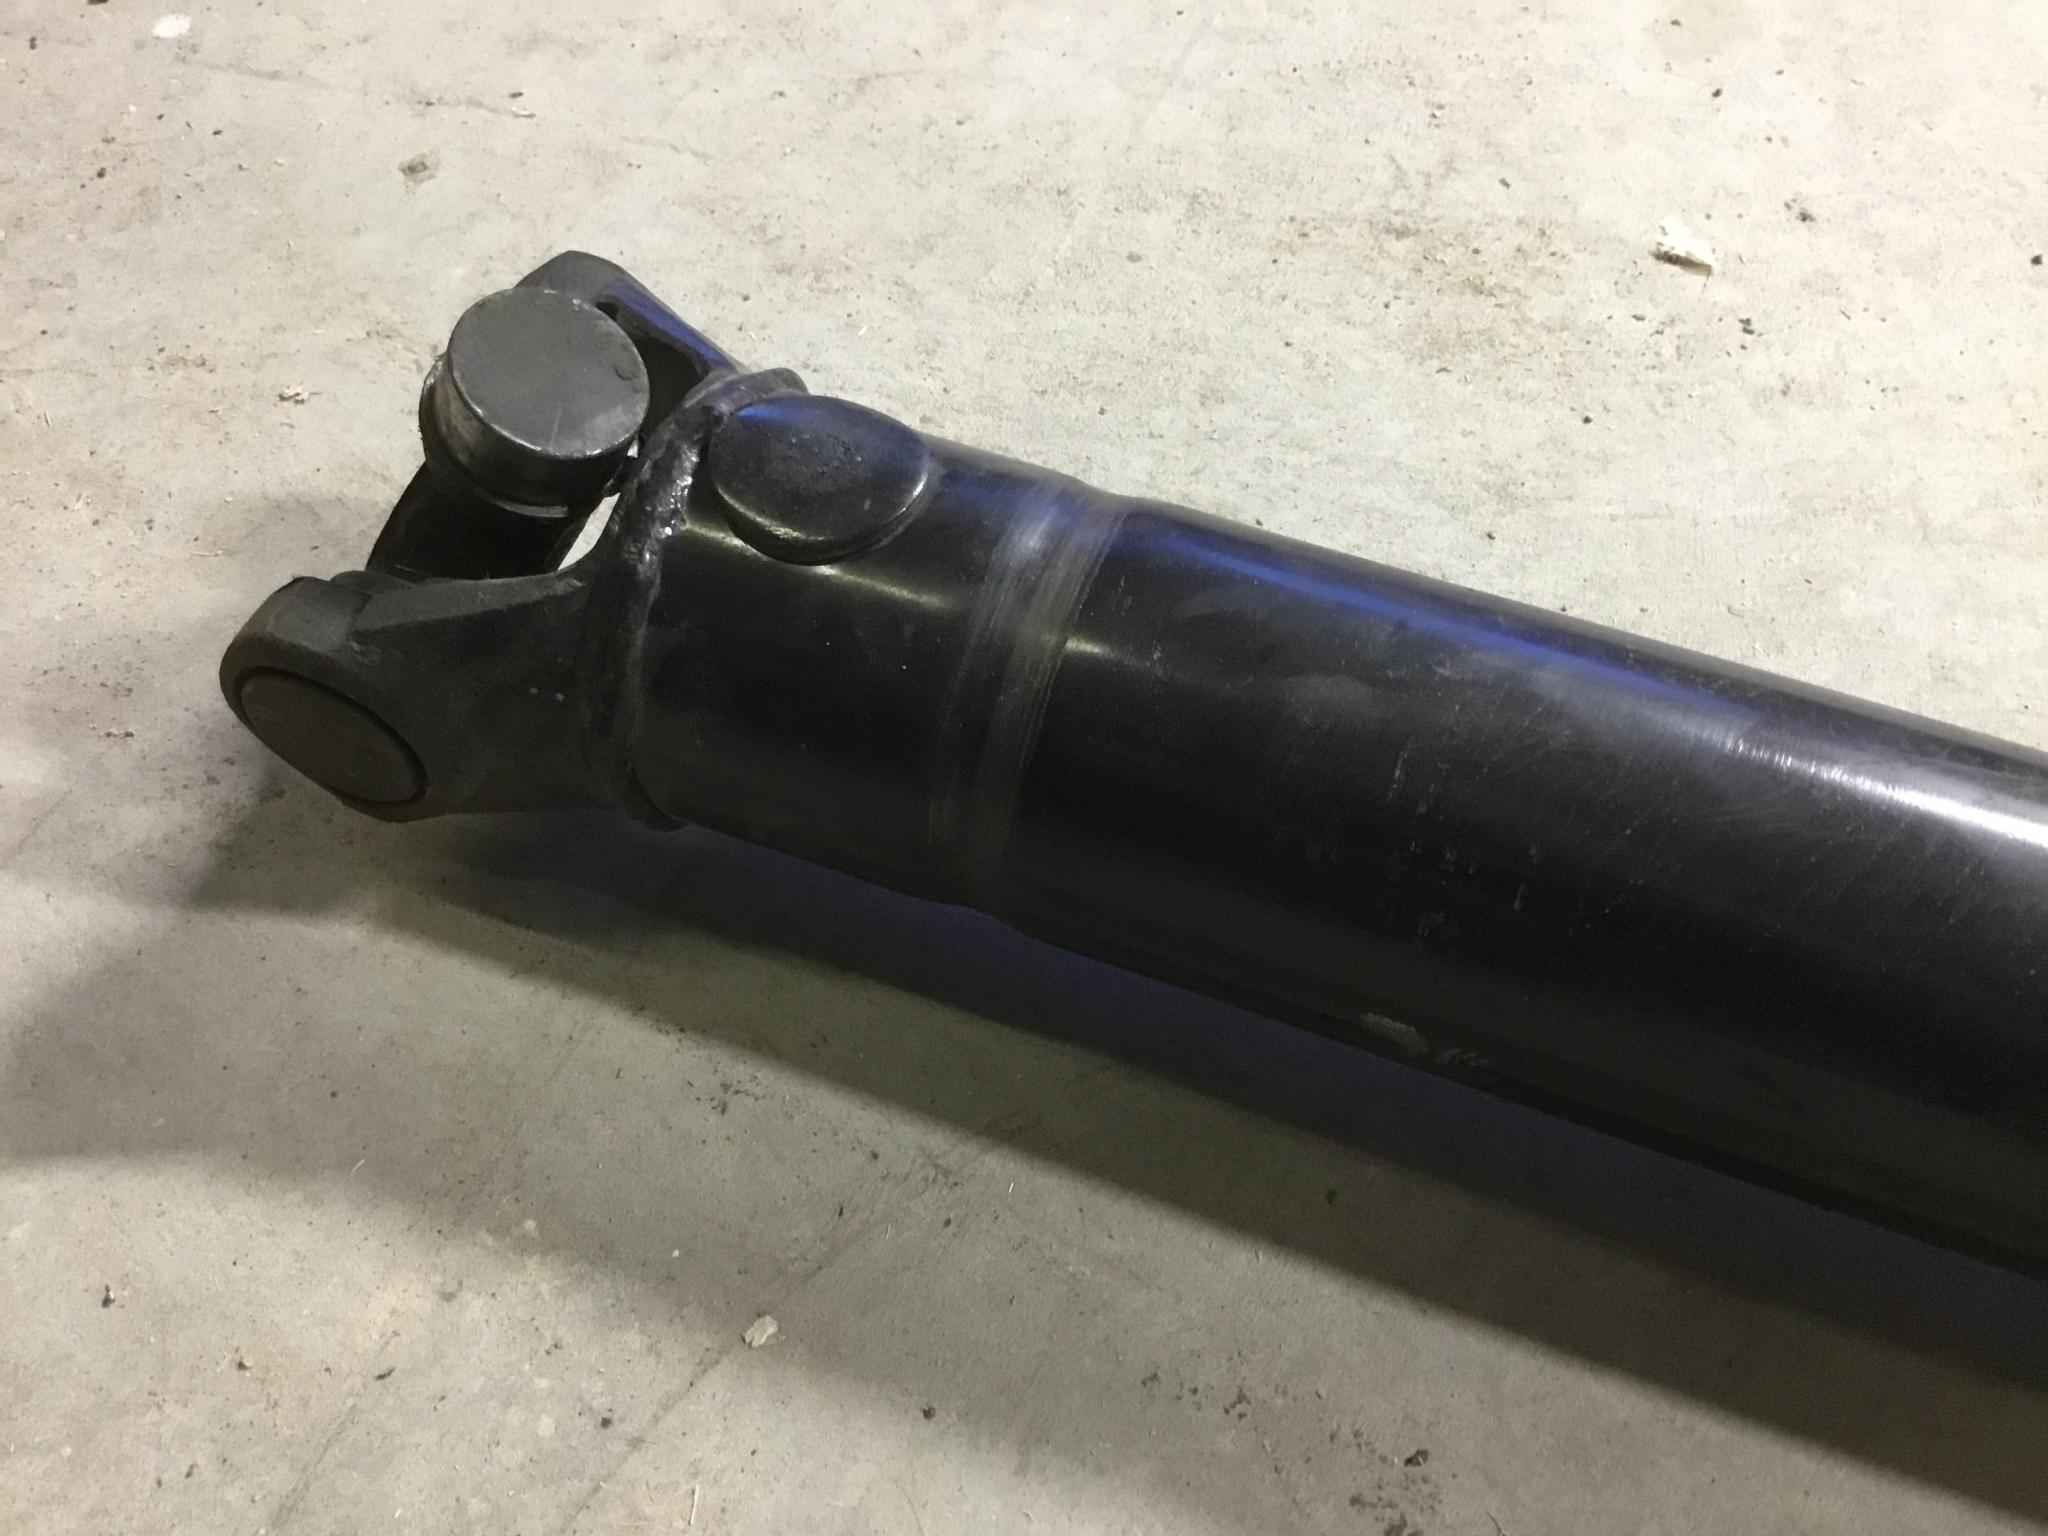
It was making contact with the upper arm of the three-link under compression. I'll pull the rear shocks and do some range of motion testing to find out how soon.
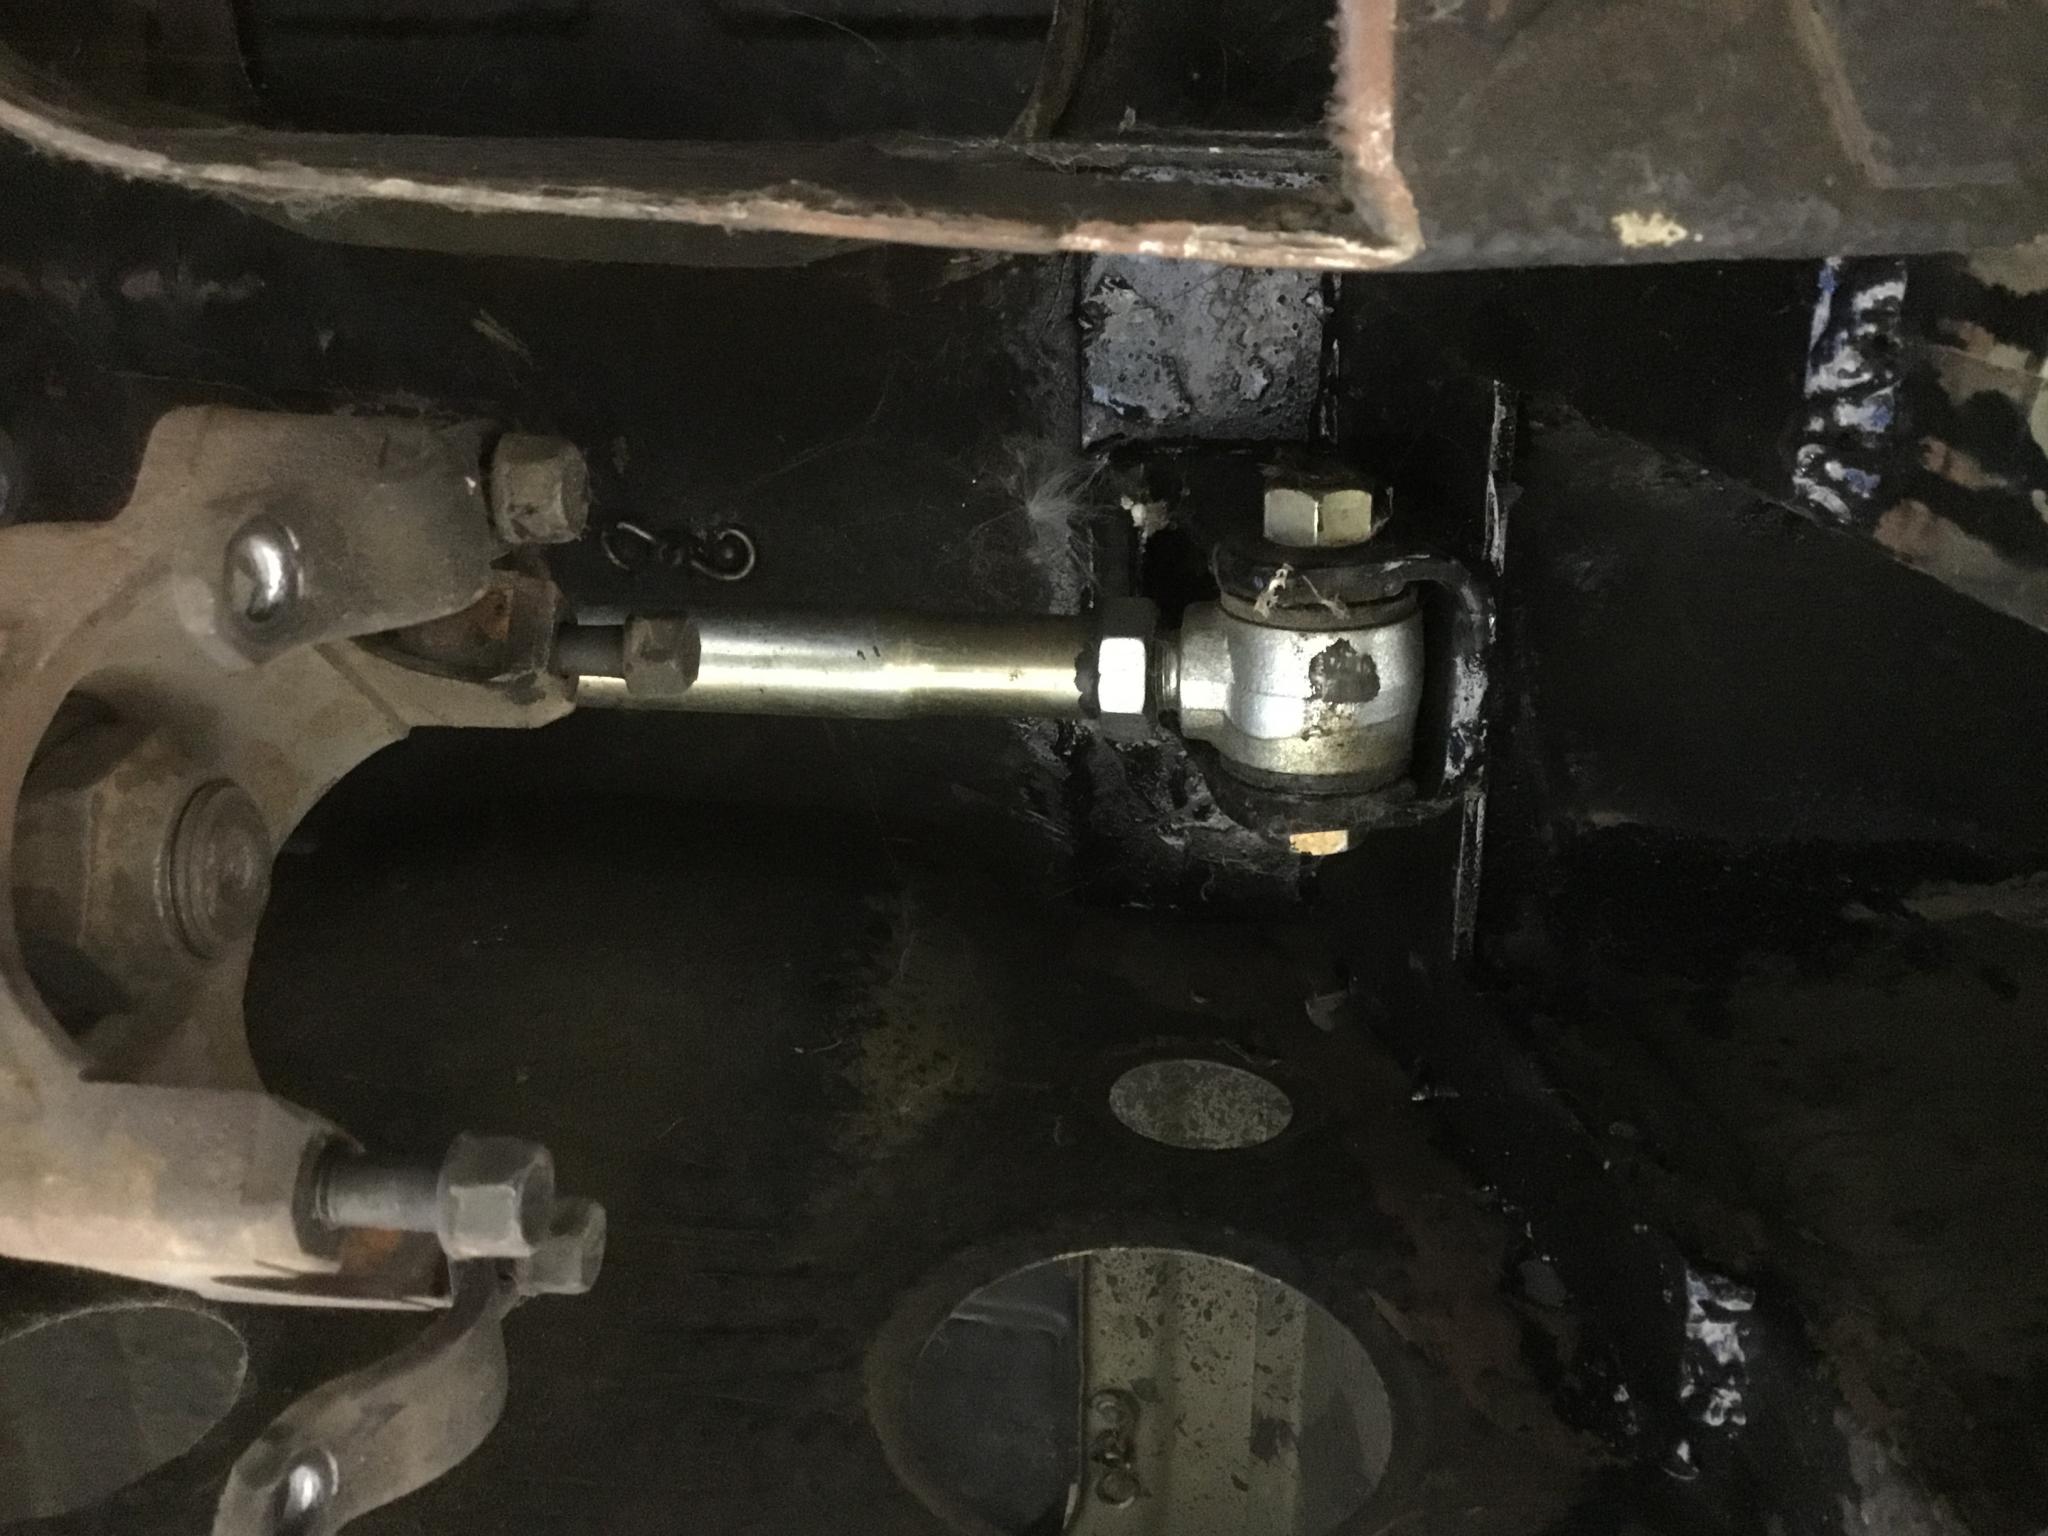
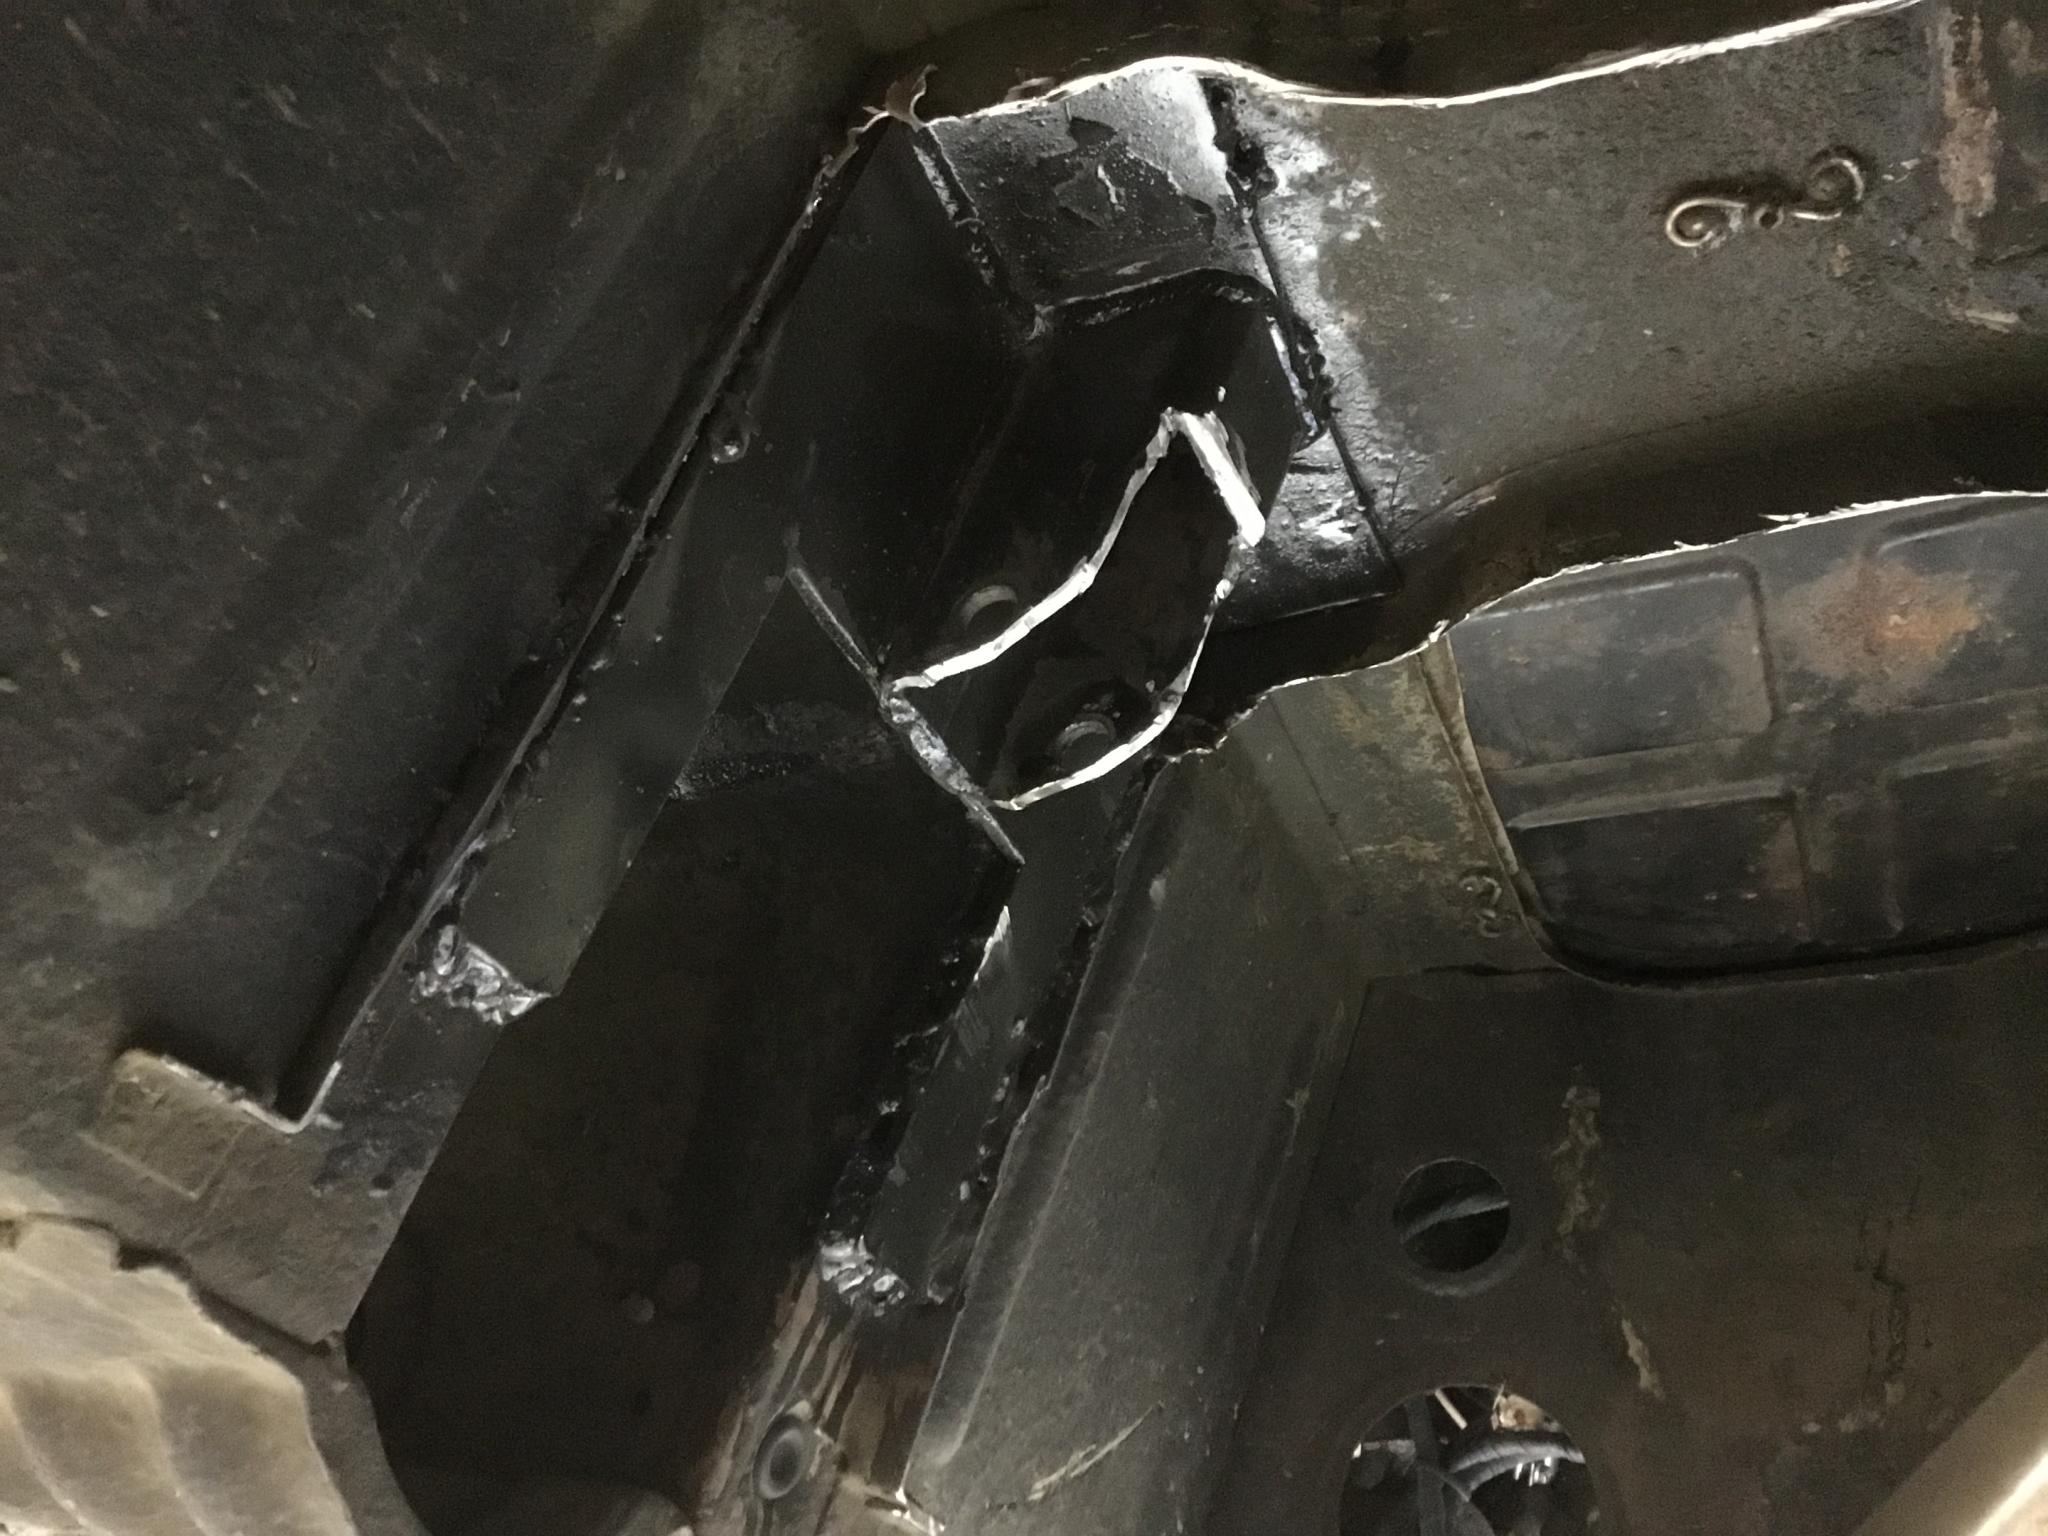
But I also decided to take action. I'll move the pickup point up by an inch or so. I started by cutting out the remains of the battery box (why were they still there?) and then chopped off the bottom of the mounting point. A new hole and I'll be good to go. This is the initial rough cutting, I'll make it prettier. This will do something to the suspension geometry but honestly I'm not sure exactly what. A bigger change in diff angle under suspension compression?
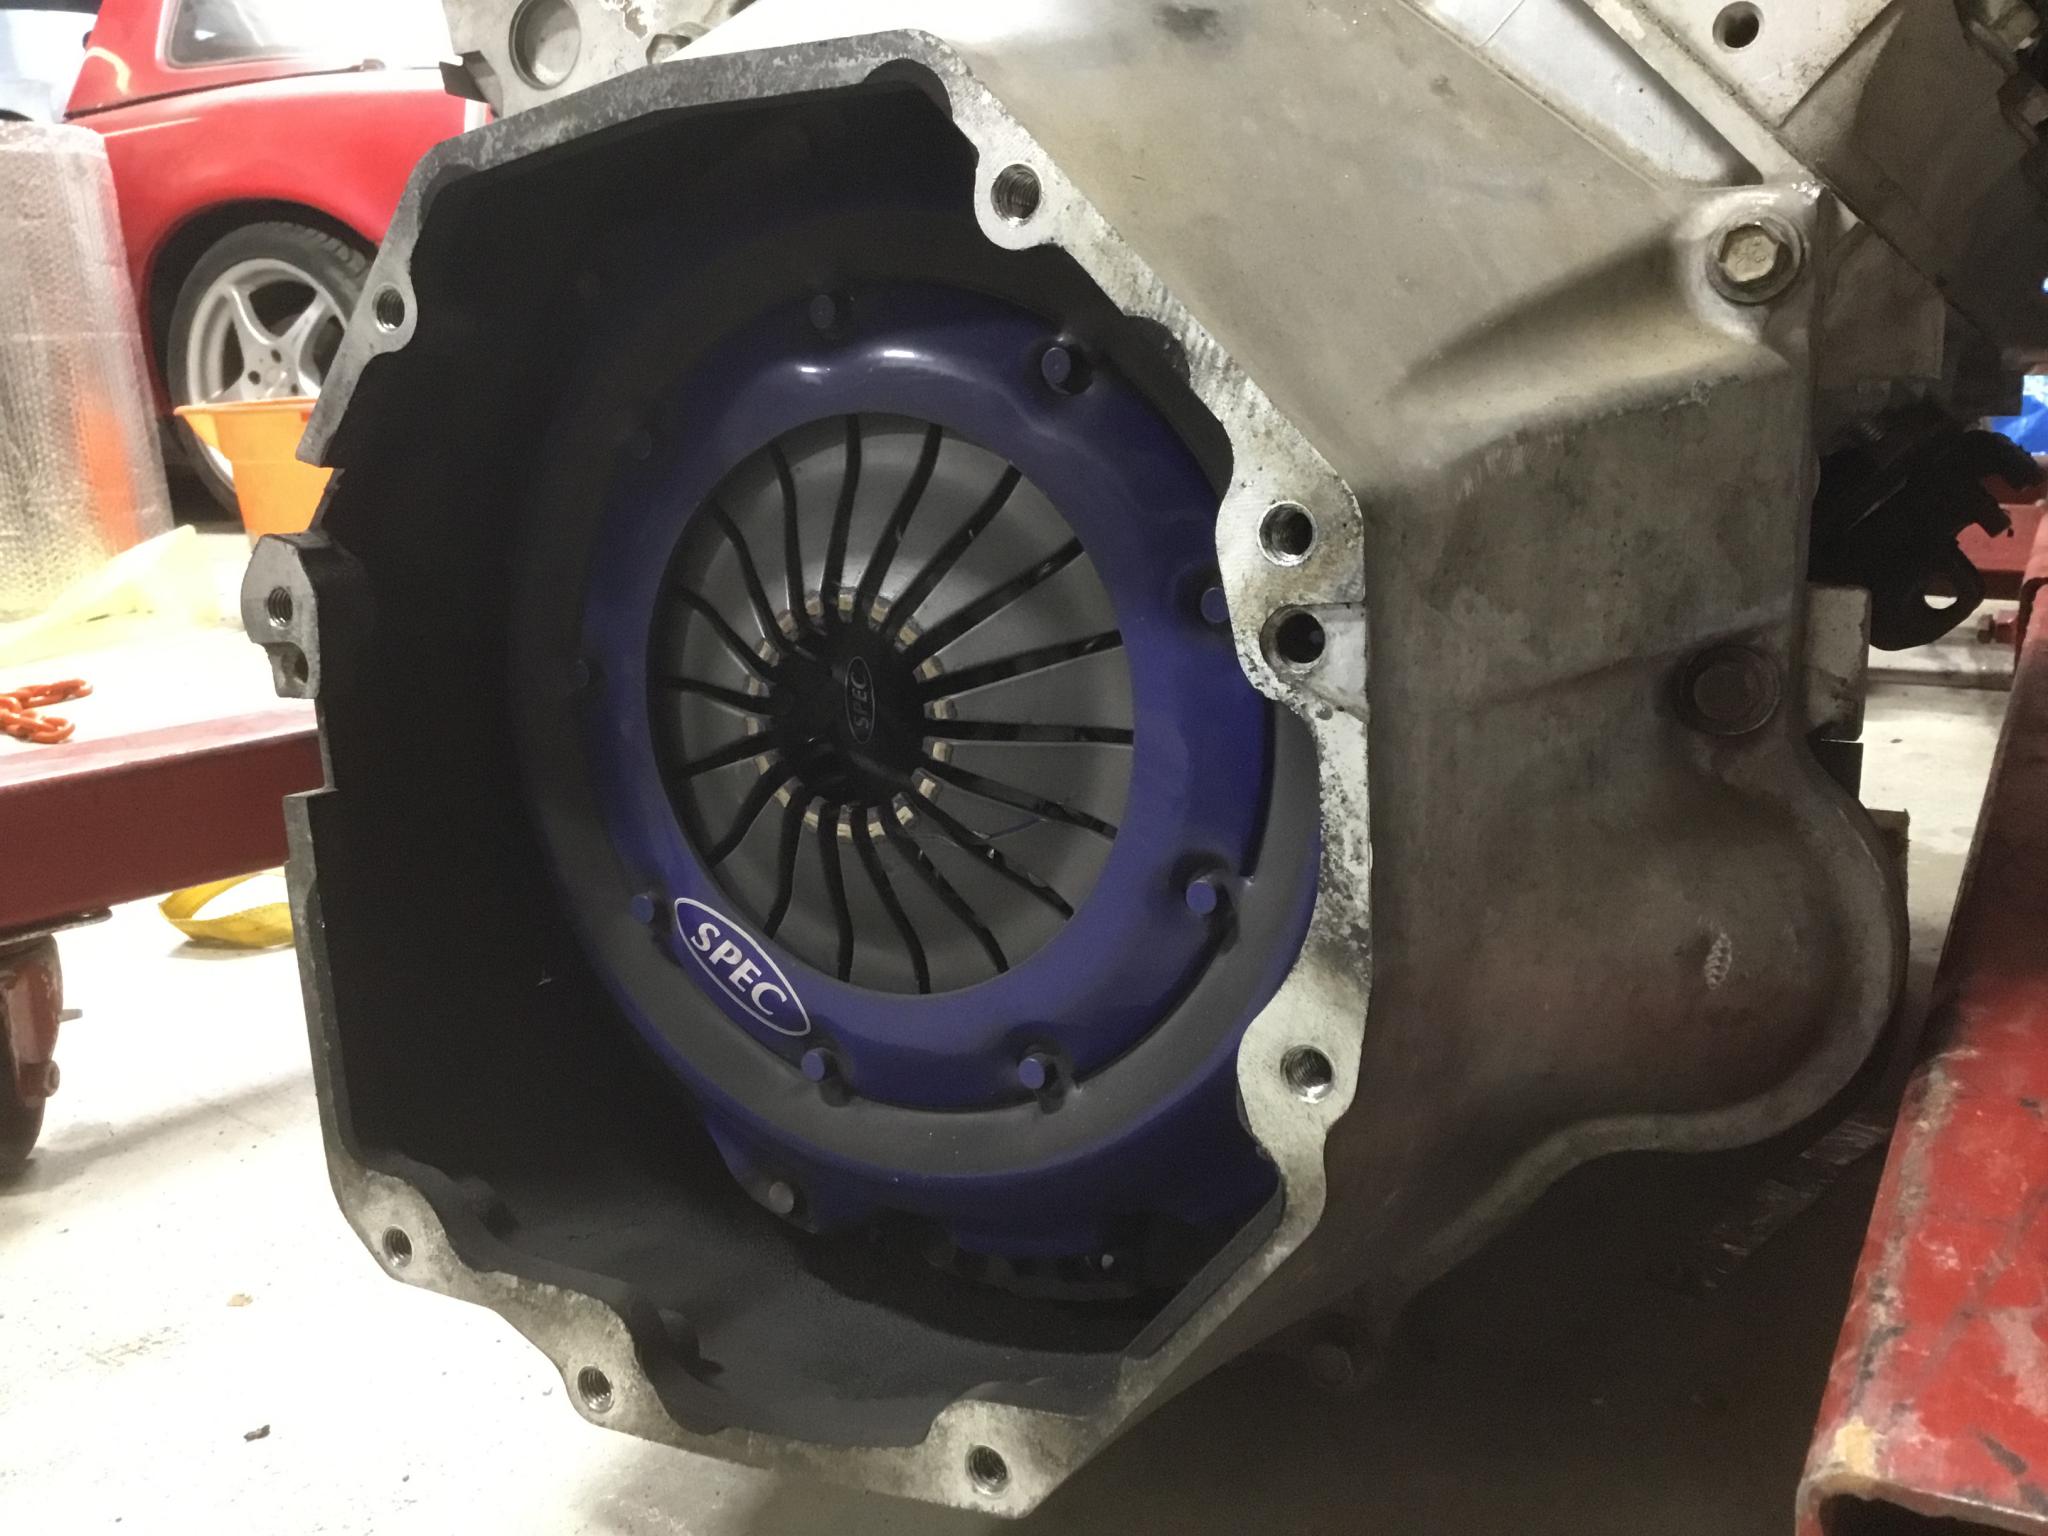
I also swapped out the transmissions. Look at that, a Spec clutch. Huh.
With the new T56 in place. This is a Rockland Gear trans from 2013 or so if memory serves. And it has a stock shifter on it, which I may keep in place of the Hurst that was on the other one. We'll see how it fits.
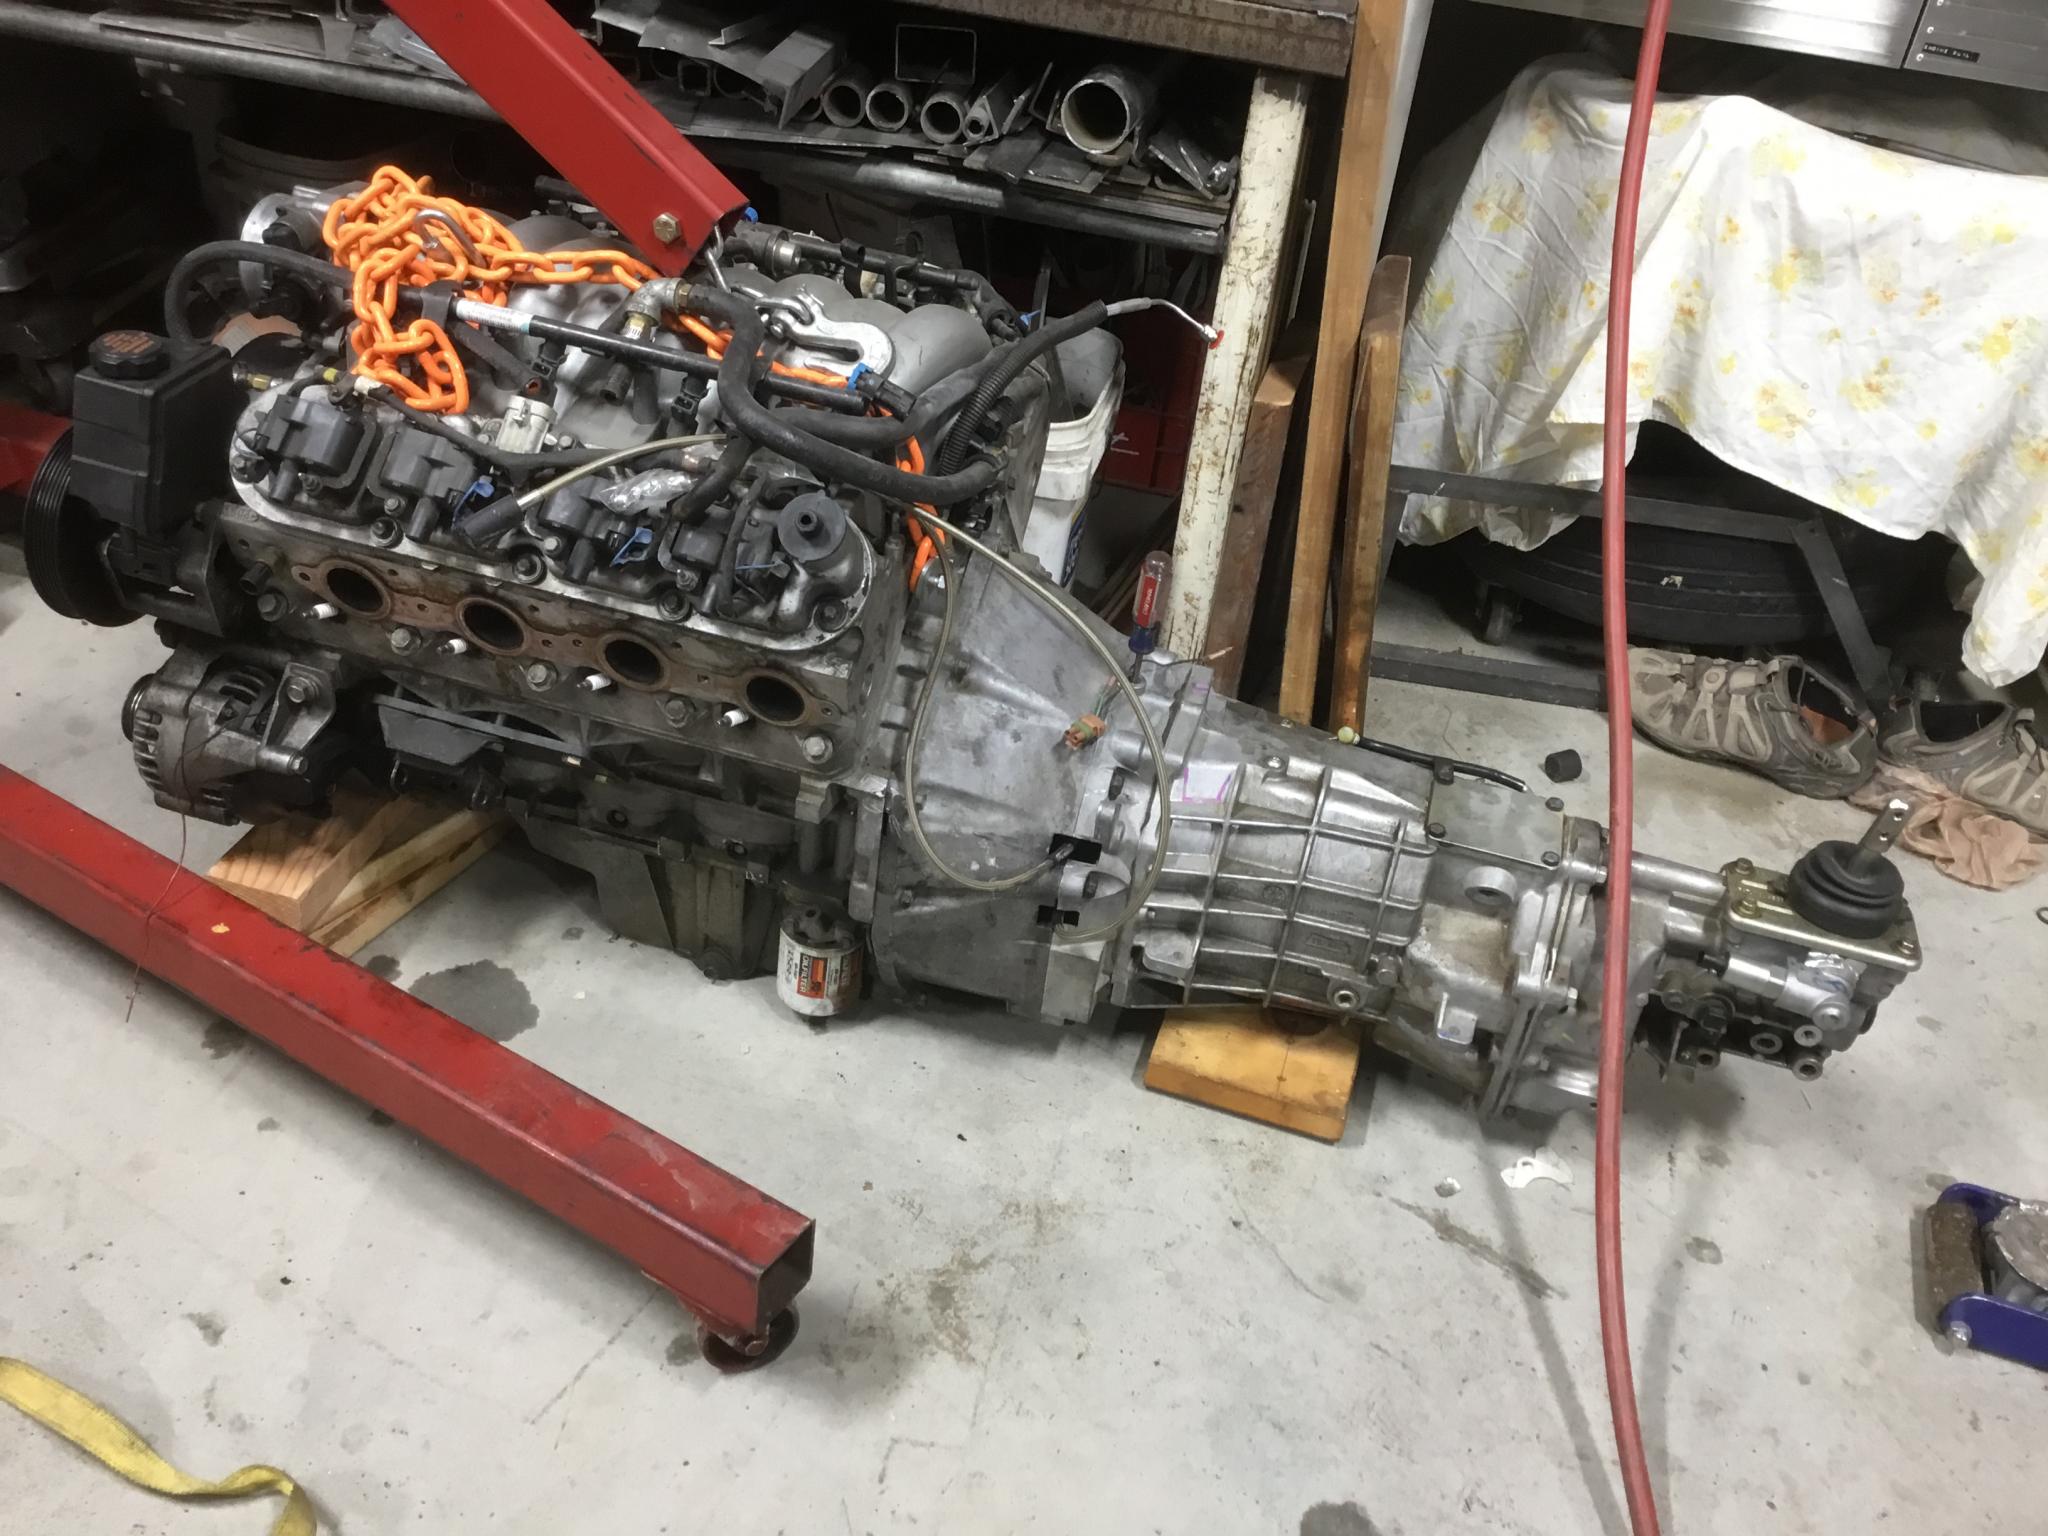
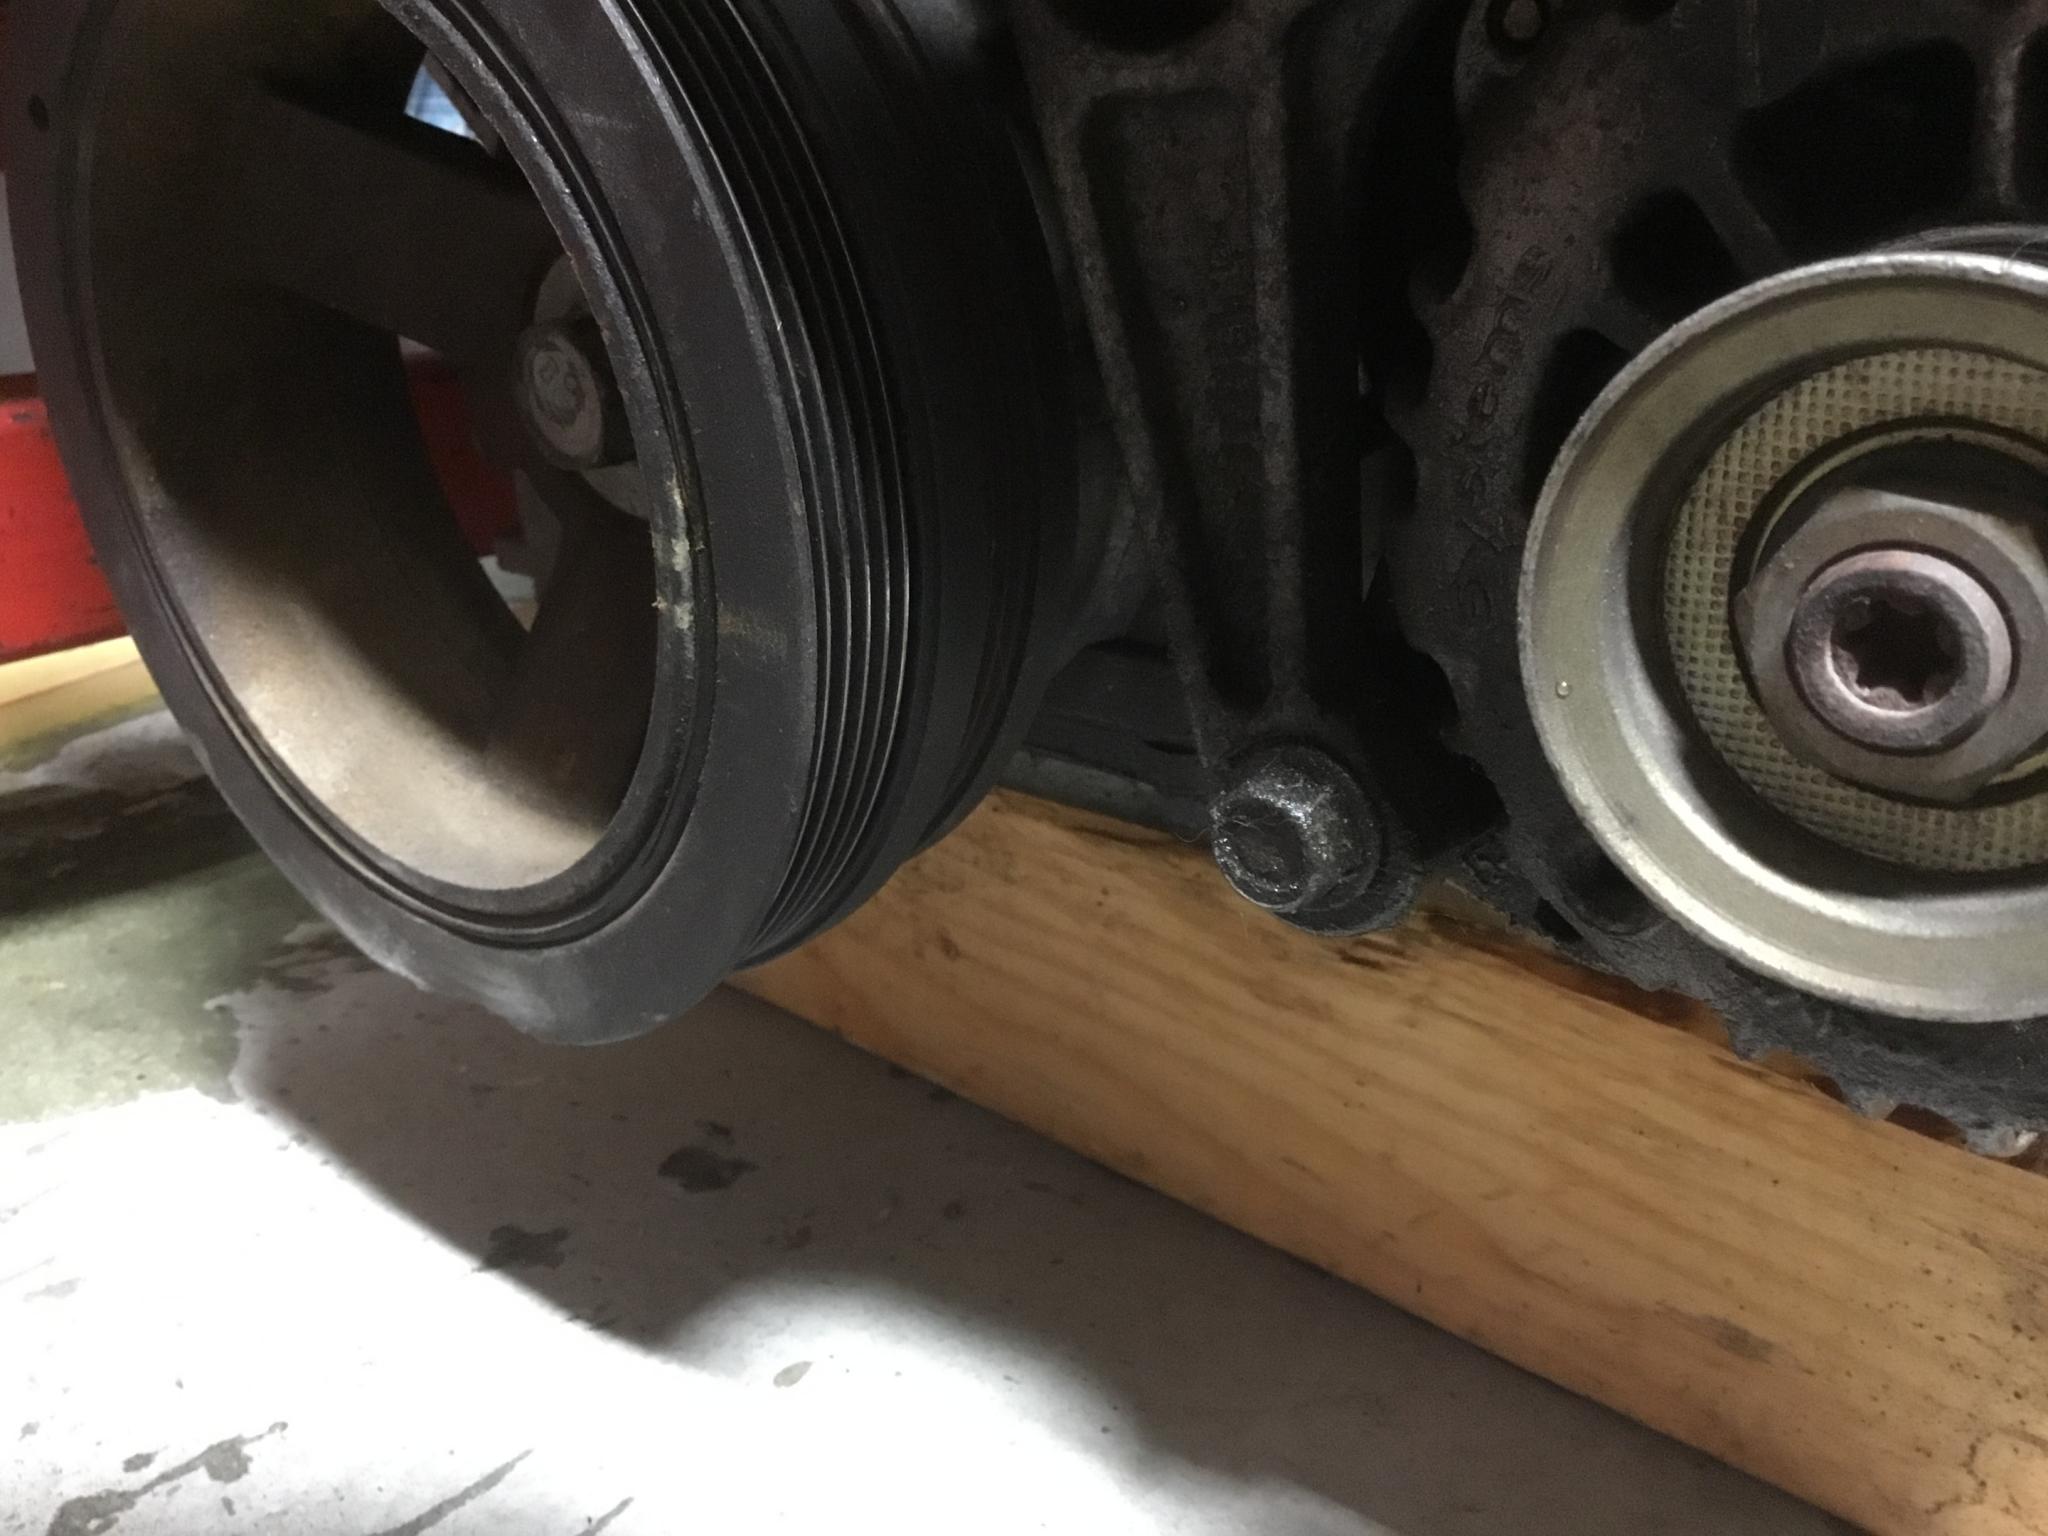
I did screw up when I pulled the trans off. I had the engine sitting on a furniture dolly and, well, when you pull 140 lbs off the back you change the balance point. The engine fell down and went boom and peed coolant all over the place. But more importantly, it did this to the front damper. Damnit. A little chunk is missing from the face of the accessory belt drive. I don't think it's going to matter, but it still didn't make me happier. Oh well. In happier news, I found I had a spare of the connector that got trashed during the engine pull so there's one thing I don't need to source.
In reply to Keith Tanner :
Raising the forward end of the upper arm wil reduce the anti squat in the rear. Not good if you have acceleration traction issues. Is there room to raise the axle end an equal amount? At static ride height the upper arm should not point down towards the axle. You can mitigate the change by making the upper arm shorter, but also consider moving it off center to remove the interference point. The upper arm on a 3 link has no need to be in the middle, just parallel to the center line.


 And the corresponding spots on the car. Some of these I'll fix with grinding on the drivetrain - one boss on the engine block in particular - some with a #1 Land Rover Adjustment Tool (aka BFH). BTW, I think I smeared seam sealer all over the place and then topcoated with POR-15, leaving a less-than-concours finish.


