Mezzanine wrote:
So what remains on the punchlist aside from getting the engine back together? This is a great build!
Besides the engine it's mostly electrical and interior. I have 3 wiring diagrams, one in italian, and none are completely accurate for my particular car. The PO removed all the pollution control and other silliness that plagued the car when new, but I'm left with a lot of random wires in the engine bay. I also need to buy and install all new weatherstripping as all the old stuff was toast. After that it's the normal "sorting" process which could be a multi-year endeavor with an old Fiat.
In case any of eyetalian nerds need parts:
http://row52.com//Vehicle/Index/RNDdSZOnljmyGQuwswCxbg7sb
(There's an 80 Exxie at the Portland South PickNPull)
Today I received the first part of my "resurreXtion" plan. The Fiat cylinder head has a separate cam box that obstructs half the head bolts. There are a set of factory tools for this, but they can be difficult to find (and expensive). However a helpful fellow over at the xwebforums put me on to some obstruction wrenches at Aircraft Spruce.
This arrived in the mail today for $25 shipped:

The head bolts are 19mm so the 3/4" wrench should fit nicely. My rebuilt cylinder head, headgasket, cam belt and thermostat are all slated to arrive on Wednesday so I may be able to to some black Friday wrenching.
Fedex dropped off this bundle of joy today:

Hopefully black Friday will be wrenching day.

slaab
New Reader
11/26/15 1:51 p.m.
Loving this build.
Looking forward to the post turkey day update. All the best.
Thanks for the kind words. First update of the day:

Deconstruction has begun.
Annnnd the old head is off. Now I get to start cleaning.
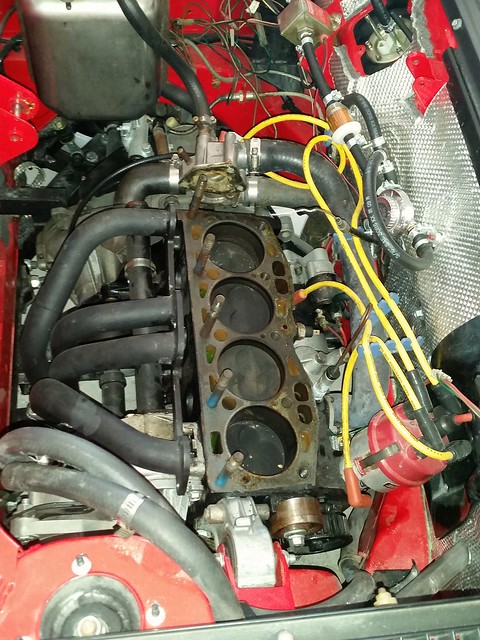
New head is in place and all torqued down! I've decided to take the intake, cam pulley and cam belt guard into work and beadblast them. I also might as well rebuild the carbs.
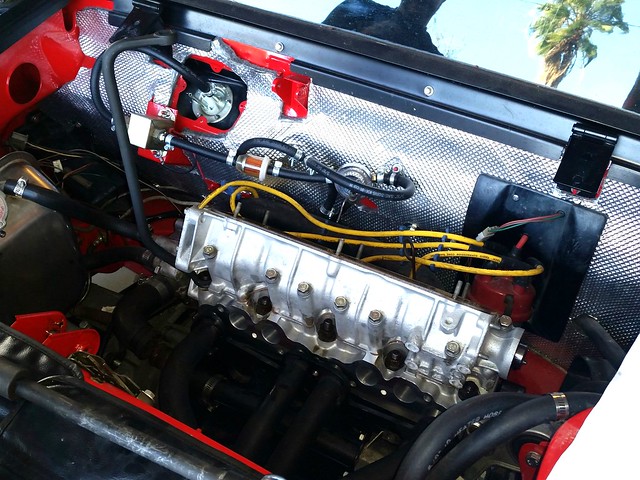
You can also see the A.S. obstruction wrench in action here. It worked rather well.

Wow, time flies. Three weeks since my last update.
After I got the head bolted on I started working on getting the cam timed to the crank and getting the timing belt on. I budgeted a couple hours, but that was a big mistake. I knew I was in trouble when the closest I could get the crank to the correct spot was about 10 degrees BTDC. At first I assumed one of the pistons was contacting one of the valves. But, after talking with the nice fellow that built the head for me and looking over the factory manual I was pretty sure that was not the case. So, off with the head. Again. Not a huge deal since I have the right wrenches.
After rotating the engine to TDC and putting the dial indicator on my worst fears were confirmed:


Crap. The pistons were .050" above the deck at TDC. This was fine with the lower compression combustion chamber stock head because the entire cylinder diameter had a relief. Not so much with the new Yugo head. No wonder the engine wouldn't turn over. At this point my mind was racing. Would I have to send my new head back and have the lower compression casting built instead? Would I have to have my lower end rebuilt with different pistons? How much is this gonna cost?
After an email to Midwest Bayless I received a quick response with a divine Christmas miracle: thicker head gasket. The regular gaskets crush down to about .045" but they sell a thicker HD gasket the crushes down to about .075". Problem solved. I ordered the thicker gasket and called it a day.

chiodos
HalfDork
12/20/15 8:47 p.m.
Good deal, I was about to post and suggest a thicker head gasket but saw your last paragraph you got it sorted out. I bet you can't wait to get this baby going
Yeah hopefully the thicker head gasket will save the day. 
In the meantime I took my dual DCNF intake in to work. I beadblasted it to remove 30 years of "patina". I also checked the flatness of the flanges on the surface plate and it was no bueno. So in my spare time I threw it up on the mill and skimmed the head and carb flanges about .015" to make 'em nice n' flat:
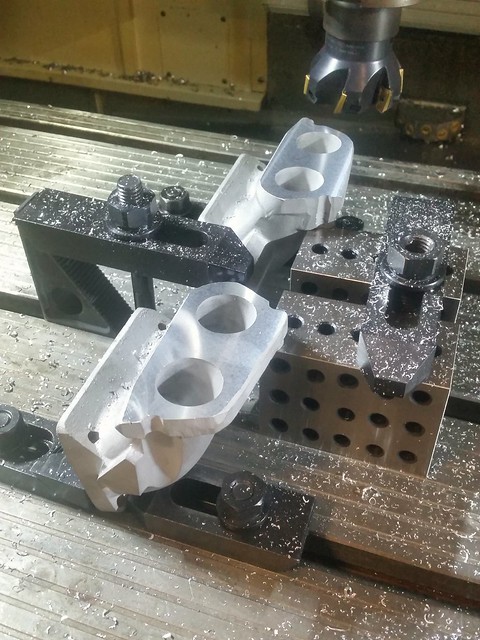
Wow, that intake looks brand new again!
I'm enjoying following along with your progress. This is coming together nicely!
GREAT SUCCESS! New head got bolted back on today with the HD 2mm thick head gasket. Cam aligned, cam belt slipped on, timing marks lined up; turn the engine over by hand and YIPPEE no interference and both marks are in the same place after full rotation.
Today I started on rebuilding the DCNF's. I guess I'm lucky in that I have two of them so I can tear one down and use the other for reference. I'm also lucky because some dude that knows more about DCNF's than I do (which isn't hard) posted on youtube about how to reassemble one.
So here's the mayhem that ensued:

I covered my workbench with left over Xmas wrapping paper flipped over 
Great call on the wrapping paper. It sure makes finding tiny parts easier than the bare plywood I've got for my workbench tops.
Did you get them both back together?
Still working on the first one. The main body has a lot of little orifices that were full on gunk. I've been carefully cleaning them with laquer thinner and Q-tips. I'm almost done cleaning the first carb's parts. Hopefully I'll start the reassembly tomorrow.
You know what sucks when you are rebuilding a carb with a million little parts? When one of those little parts flies across the shop propelled by the brass wire brush attachment on your dremel tool.
At least carb #1 is back in one piece. Now I'm waiting on parts for carb #2 and then I'll need to fabricate the linkage between them because the POS that was there before was horrible.
I got both carbs rebuilt as best as I could. I temporarily bolted the intake on with the carbs so I can start to fabricate a decent linkage using as much of the factory setup as possible.
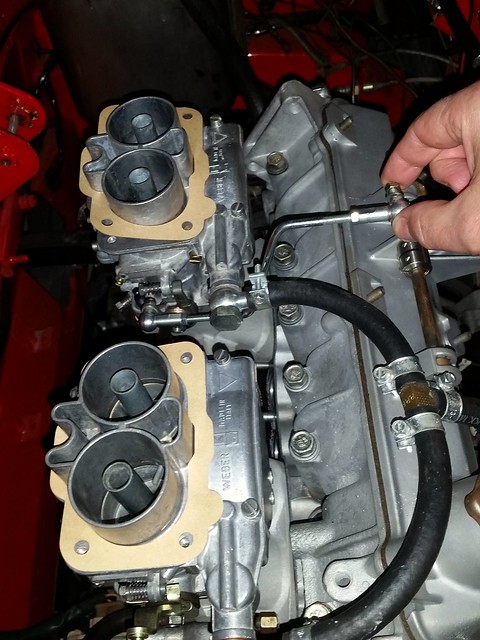
I started with a prefab straight linkage that has 8mm ball end links on each end. On the factory shaft the runs on top of the valve cover I have an extra wide stainless shaft collar. I need to make a lever out of 304 and TIG it to the shaft collar and I should be in business.
I'm pretty sure there is suppose to be a little linkage piece between the carbs. It has the adjustment screw to sync the butterfly valves in the carbs. That's how it was on my 124.
brad131a4 wrote:
I'm pretty sure there is suppose to be a little linkage piece between the carbs. It has the adjustment screw to sync the butterfly valves in the carbs. That's how it was on my 124.
You're right. I have those pieces, but they aren't in the picture. Unfortunately the Weber pieces that are widely available don't work with the spacing of the carbs on the manifold so I'll have to modify them to work. From what I've found the parts used with the back two DCNF's on a Ferrari 308 would work, but finding those parts has been tough.
These are the two pieces:

I'll have to extend this one by about 1/2 inch to make it reach:
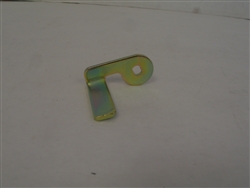
mblommel wrote:
You're right. I have those pieces, but they aren't in the picture. Unfortunately the Weber pieces that are widely available don't work with the spacing of the carbs on the manifold so I'll have to modify them to work. From what I've found the parts used with the back two DCNF's on a Ferrari 308 would work, but finding those parts has been tough.
Any reason why you wouldn't just fabricate your own? You've got the skills and tig welder to do it! You just need to pick up some fine thread screws and a few springs and you're in business.
Yup those are it. Was going to offer up a set of mine if you needed them. Last I looked on the PBS website they had these parts available. Also I had a few other weber carb sites that I can't find on my bookmarks had them as well.
Oddly enough there is a older vw shop about 30miles from me that has a lot of nos weber parts on there walls. They are also priced fairly nice as well since it's mainly vw parts but can be used for our application as well.
My X is up for sale. Looking for $4500 firm. See more information on my Xweb for sale post.
![]()


