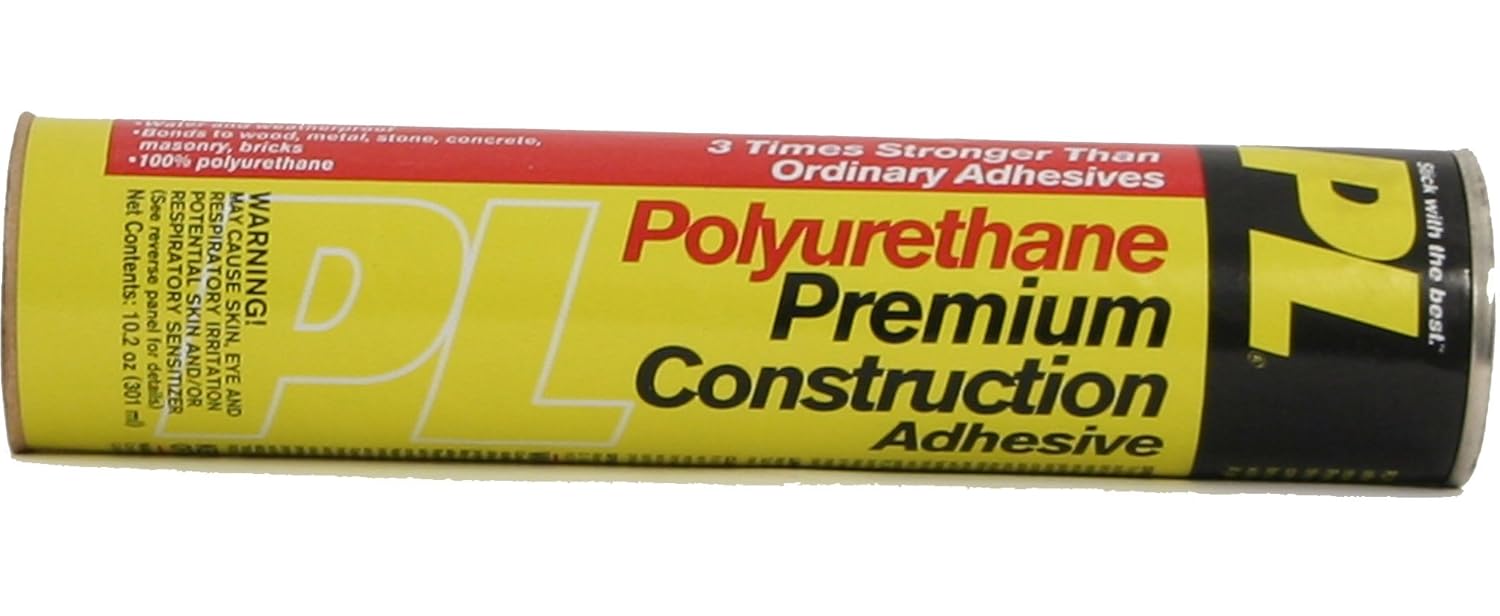
Rufledt wrote: In reply to NOHOME: Awesome, thanks! Looks like that's in stock at my local menards. excellent.
Pretty sure it comes in a smaller size also. Might be worth a try to see how it adhered to your plastic. A scuff with some 80 grit or so might be a good idea.
Ok picture time.
Here's how I removed the flares:
It's pretty straightforward. The thin kerf of the pull saw allowed me to zip right through the flare almost flush against the body of the jeep. The remaining nub left in some places was easily removable with a block plane, actually. That was before i took the blade out to use as a tape cutter. The lights came off with screws.
I also had to trim down the front of the tub to clear the model. I don't think i removed too much stiffening structure, but the front of the tub is getting noticeably flimsier.
I also notched out the tub a little to fit the box tubing in the model. The model had the bracing mostly to keep it stiff, but i think i'm keeping the tubing locations that were there (all 3 of them) and adding a little more later. These might be good mounting points later, as well.
It mounts pretty nicely now.
though the front is getting droopier. The more i move the paper model around, the less stiff it is.
To make the back, i used the combination square to mark where the axle lines up with the body:
I then used sketchup to work out some details:
and mounting:
The top of the body in the rear is exactly the top of the body of the jeep tub. That was shockingly not planned in the least. I expected to be 1" above it. Oh well, it worked out! The wheel well also lined up nicely with the tire location. I was worried about too much fender gap, but i'm totally ok with the way it looks.
This pattern will change a bit:
Basically, i'm going to raise the bottom up by 3/4 to make a flange on the bottom, but also to shape it a bit more accurately.

There's the actual jeep grill, you can see the grill slats make a shape that's wider than it is wide, and my pattern does not. The actual jeep guy says it's fine, but the obsessive guy (me) says it needs adjustment. also another flange on the bottom can't hurt.
Here's the steering mechanism:
Looks quite simple actually. I'm pretty sure the metal bits come off by removing the 2 plastic nobs and the metal clips underneath:
This is part that might need to change slightly:
It depends on clearance and the angle the steering rod will have to go up and the length so it can be used by a 3 year old in the driver's seat. We will see how that works later. I'm going to get the front worked out and mounted before i figure out the steering. I mean, how hard can it be?
Looks like this Friday I will get off early enough from work to stop by the local metal supplier. Any tips for what to get? I'm a newbie, but I do plan on shaping, welding, and painting this body. From what I read that means I should go for cold rolled mild steel, right? I was thinking of going with thinner 22ga to save weight, but as a kids toy it might need a bit more strength. Thoughts? Is 20 or 18ga significantly more impact resistant?
They only have steel so that kinda rules out aluminum, though with my recent discovery that my torch can met aluminum I may end up with a few aluminum castings for parts here and there.
Good ol' scope creep rearing its friends head again.
I went to the metal place i often drive by today! :
Learned some stuff while I was there. The guy behind the counter (owner? maybe?) was into jeeps, used to have an old military willys jeep. He now has a wrangler. He wants to see pictures when i'm done. Also, they sell in very limited sizes. By that i mean the 20 gauge sheet i bought was 4' x 10' and that is the only size they sell 20ga cold roll in. Good thing i drove a big van. also, the 3/4" box tubing on the floor there, they sell that in 20' sections. only. They do, however, cut it in half for free. The guy in the walk-in area and the guy in the warehouse area were both very friendly and helpful. The price was very good and it was a great experience all around. Had i not driven a box van, i might have had an issue, but thankfully i had just enough room. VERY glad i went there, i will definitely go back when needed.
You've officially fallen down the rabbit hole. ![]() What are you planning to do to finish the exposed cuts?
What are you planning to do to finish the exposed cuts?
When you redo the steering you'll have an opportunity to correct the Ackerman. Lol
This is going to sound insane, but it would be really cool if you machine polished and clearcoated all the metal instead of painting it. That would be beyond gorgeous.
polished steel would look pretty sweet, but i'm worried about hot metal scalding my children. also ther'es no way it would stay looking decent. Cool idea, though.
Crackers, do you mean the edges of the panels that will be exposed? Most will be tucked away but the exposed ones like around the fender wells i'm planning on maybe a rolled wire edge or something similar. One of my books has a cool technique for doing it that looks possible. Failing that maybe just roll it in slightly. I don't know that far ahead yet, but i'm going to give myself some extra metal around those edges to play with. Also since i got roughly 4' x 3' of extra steel, i have plenty of practice pieces if need be to refine rolling the edge around a curved fender. Most of the body panels like the sides and front fenders and stuff the patterns have a flange underneath bent inwards to add stiffness and prevent sharp edges from connecting with legs.
Any other suggestions i'm all ears. ![]()
Rolled wire edges? Have you been reading armoury manuals? Lol that's a skill I'd practice on some smaller uh - less enduring - projects first.
Trying to do a rolled wire edge on a concave section like the fender openings in 20ga is likely to lead only to tears... ...of both pronounciations. Anything more than a simple 1/4-3/8" 90° lip will make for loads of panel distortion, and or tears. 20ga is easy to work with, but will tell on you via distortion when you have to manipulate it excessively.
We used to use u-shaped edge trim on our circle track cars tacked on the inside every couple inches. Probably wouldn't be too expesive to have a few feet shipped. We used to rough shape it with a leather mallet over a wood table/block. Just use gentle hammer taps from the inside of the radius. Bend it in a slightly larger arc then tap it on with a mallet and tack it on the back side.
Your template looks like you're going to try and fold the end down to make the bendy bits at the "door". That's going to be really hard to pull off without wrinkling the hell out of the side, even with a lot of experience and the right tooling. I'd try to fabricate a channel or tube from 3-4 pieces of flat plate cut from a template. Or depending on tools/skill set, split the tubing lengthwise and each half should be relatively easy to bend then weld them back together.
If you must try folding that section, allow an extra 1/4" length and an inch longer on the ends beyond the bendy bits. You will lose a little material making the bend and it will save you some stretching work.
then no wire edge! It didn't look too tough in the book, though the guy did have a couple tools specifically for it. 1/4" 90° lip it is, then!
For the 'door' opening i like your idea. How about taking a strip of the 20ga, bending it into a L shape and using the stretcher on one side to make the curve, then welding it in place?

Seems like a primary use of a shrinker/stretcher and i really want a good excuse to buy one of those. it also seems like it would be easier than the double 90 degree fold i was planning originally.
The primary problem with wire edging here is the size of the radius and how thin your base material is. The smaller the radius the more the metal has to be stretched to wrap the wire.
I'd definitely get a shrinker/stretcher set if you can swing it.
I guess I mistaken about your design. I was assuming you were making a top rail and welding skin to it. I'd be concerned about your top lip pointing towards the occupants with how you're going about it, or am I missing something?
If I had to choose between the shrinker/ stretcher and the e-wheel, I would keep the shrinker /stretcher.
i'm probably not explaining it properly, in my mind the edge up the lip points down. I'd make the L-shape piece, welt it to the side so one face of the L-shaped piece would be perpendicular to the side. The L would then point downward, creating like a box shape on the top, pointing the cut part downward. i suppose it would still be nice to add the u-shaped edge trim you linked just in case. can't be too careful!
edit: to be most clear i'm thinking of a small 90 degree lip bent in the side piece around the door opening to facilitate welding. Good idea? unnecessary?
What about building it out of fiberglass? You could make panels out of divinicell or something similar and wrap with fiberglass.
I tried to make the door swoop with a piece of 16ga scrap.
This was how it came out of my scrap pile plus a little sharpie work about 1" from the edge.
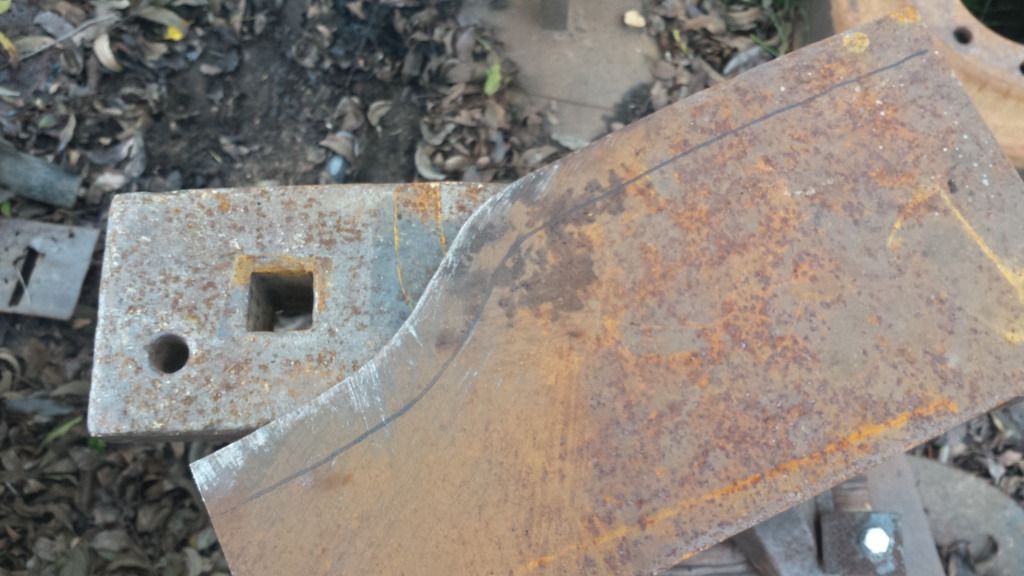
If you're doing this all by hand start hammering with the anvil edge only about 3/4" of the way in. The metal will bow up between the anvil and your hand a little bit so don't go straight to the line or you'll have to do more work to fix it.
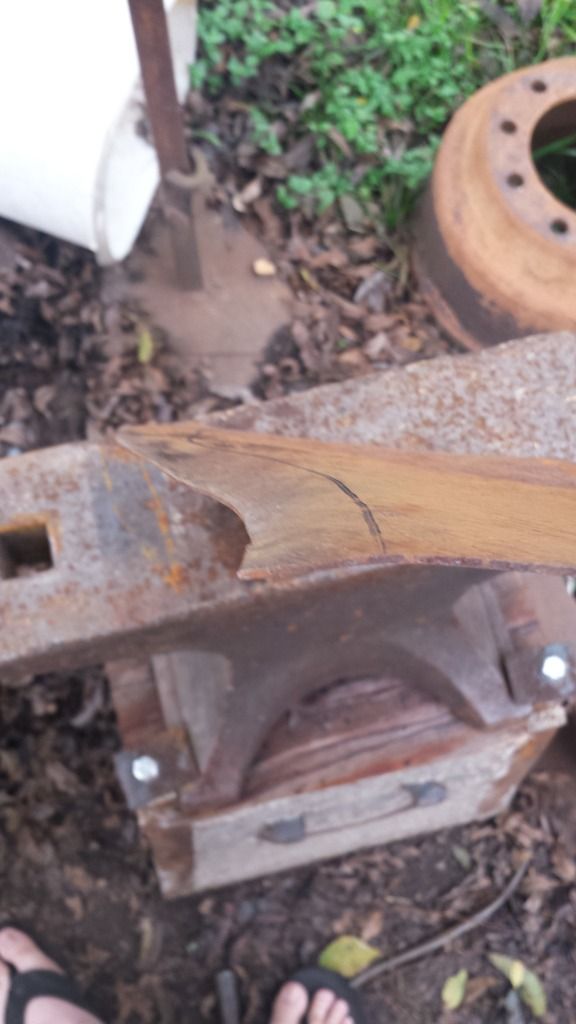 (note my custom safety flip flops)
You can see here on the right side where I wasn't listening to my own advice about not going straight to the line.
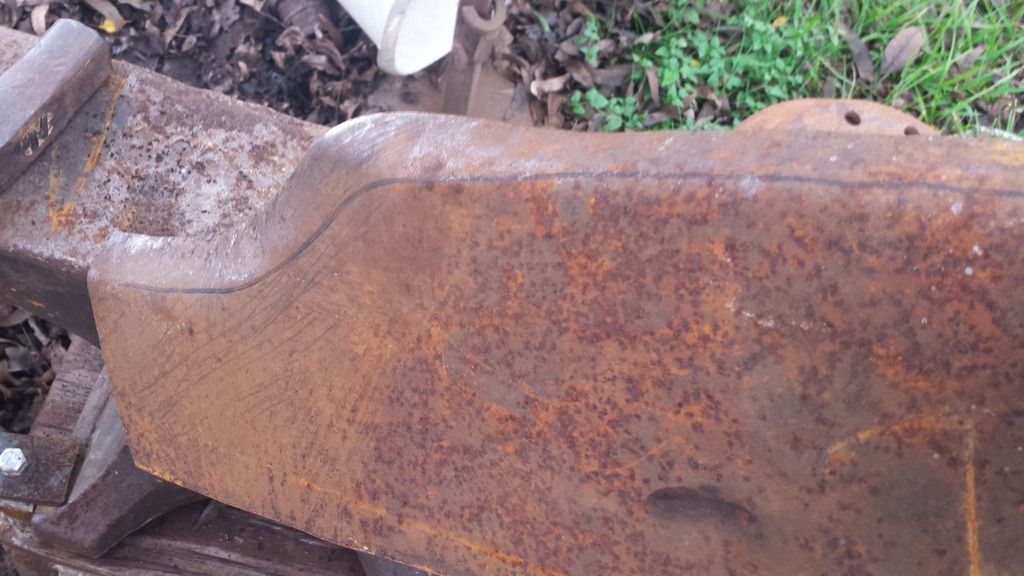
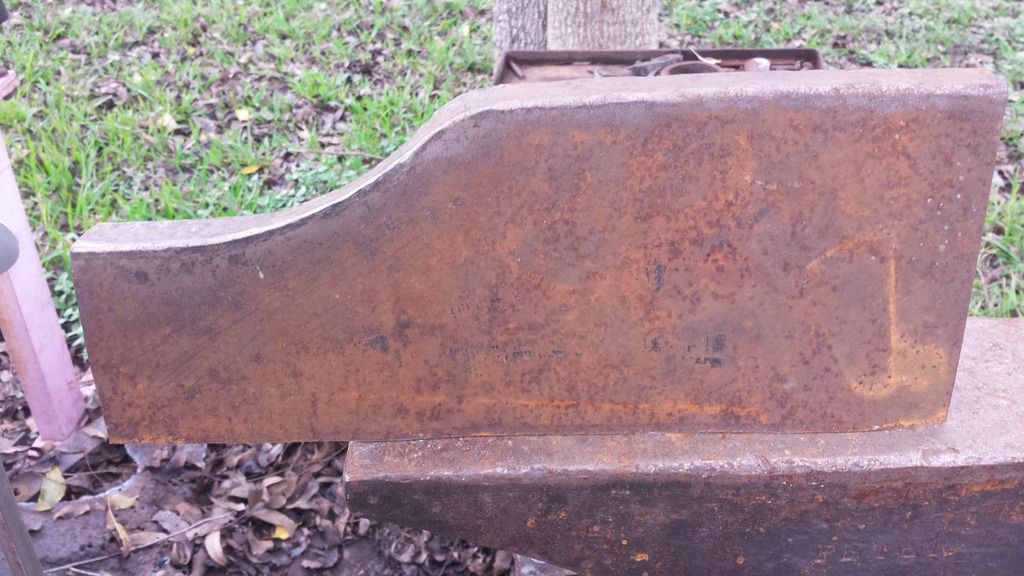
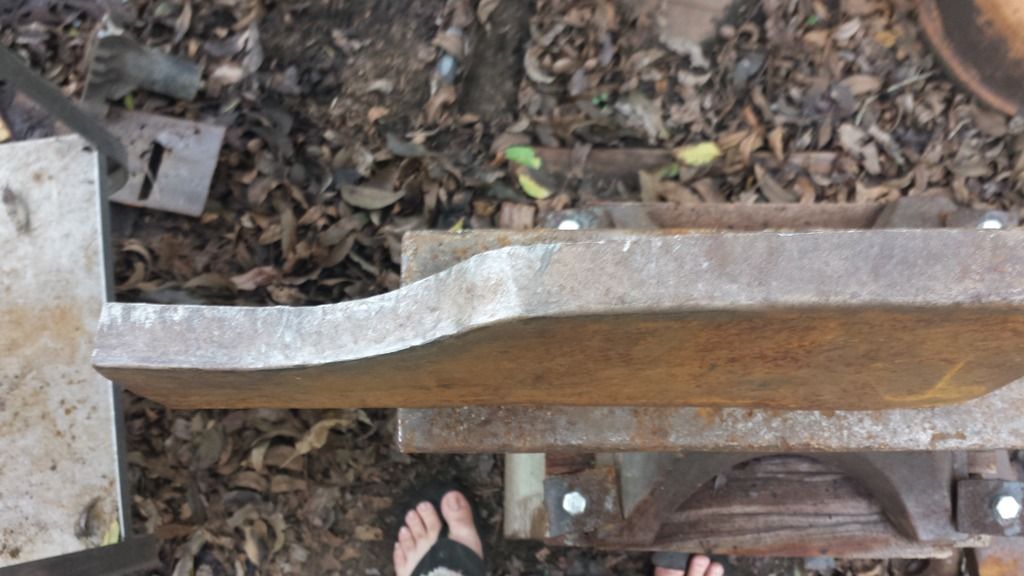
You can see what folding over the concave section does to the panel. I usually bend the flap well beyond 90° to stretch it. Straighten it out to 90° then bend it back again, and so on. Every time you bend it the panel should straighten a little.
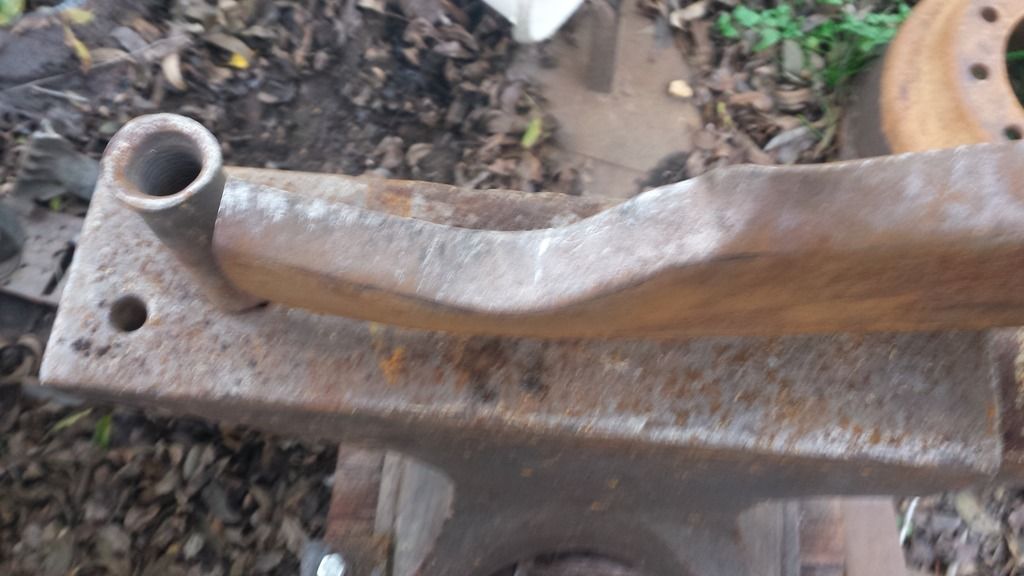 That picture also shows the tool I used under the piece to establish the corner around the convex curve. It's not really the right tool for this, but it was handy so I just rolled with it.
After a couple rounds of that it should be a little straighter. I stick it in the vice to do some hammer/dolly work. You can see I put almost no work into trying to shrink the flap here because I didn't have the right hardy tool on the anvil. This would have been much easier on the anvil, but its admittedly not common (or cheap) tooling. (or even practical for most people)
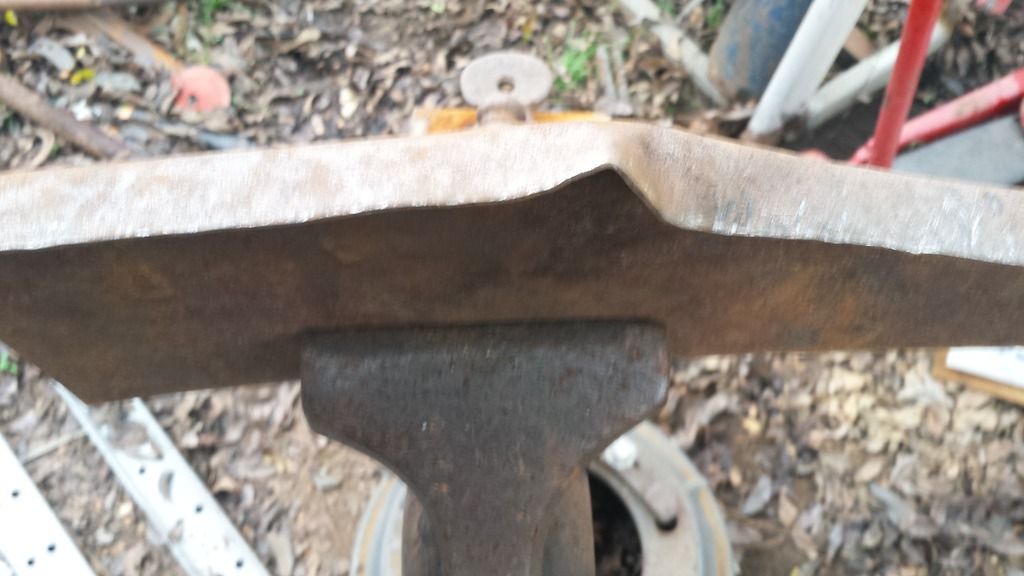
Here most of the shrinking is done but there's still a wave in the panel. Basically just keep making puckers and working them back down until the panel straightens back out.
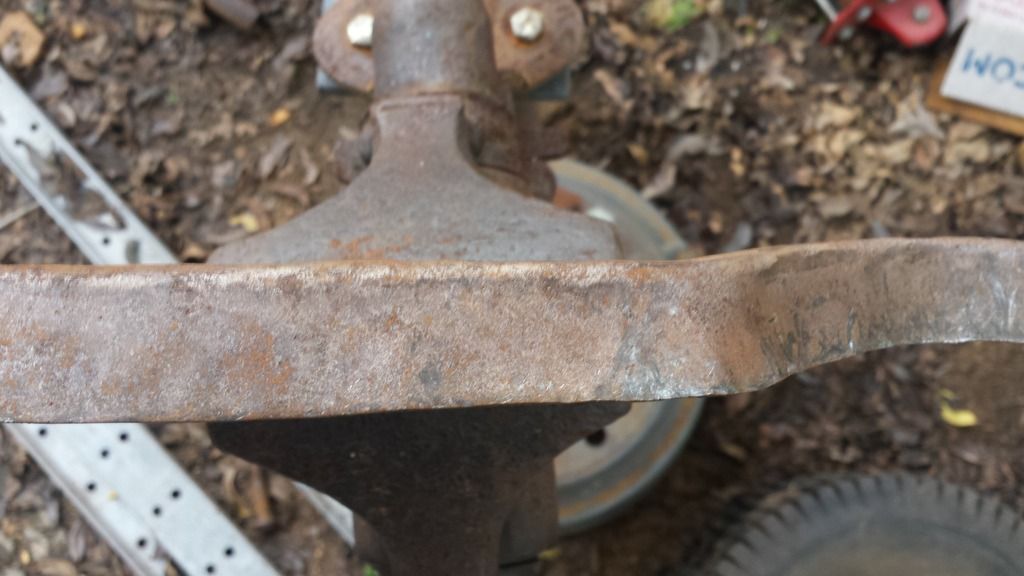
I actually switched to a smaller hammer to do some more aggressive shrinking. Here you can see how it shrunk down and straightened the panel.
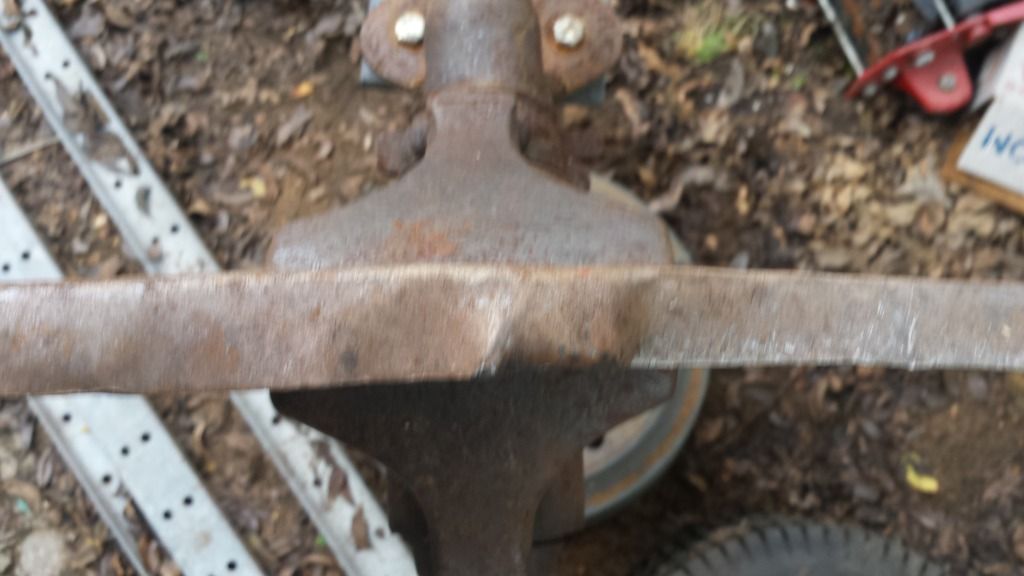
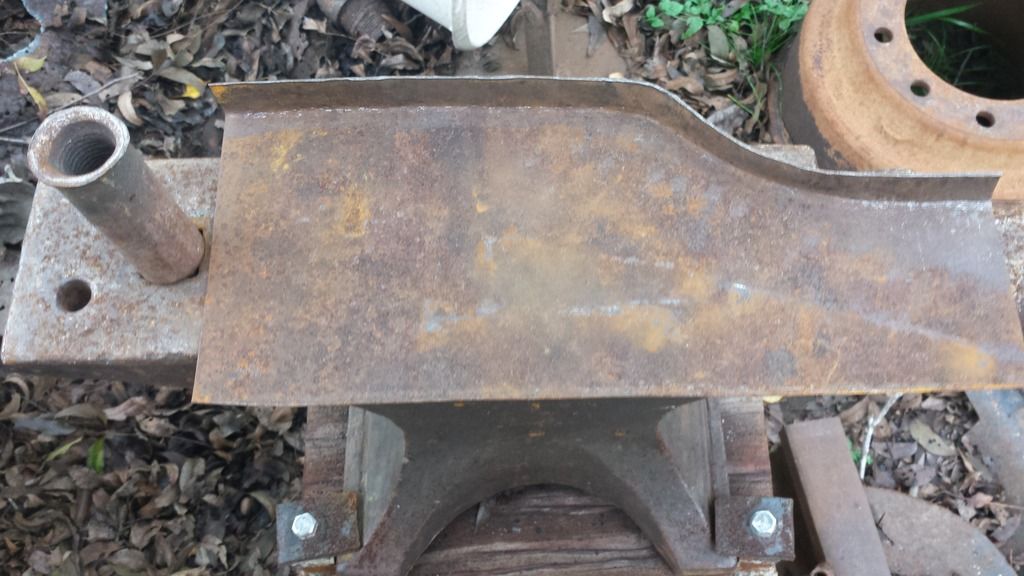
I couple rounds of that and some half assed planishing and this is where I stopped. Took me about 25 mins to make this panel with stopping to clear workspace around the vice and taking pics.
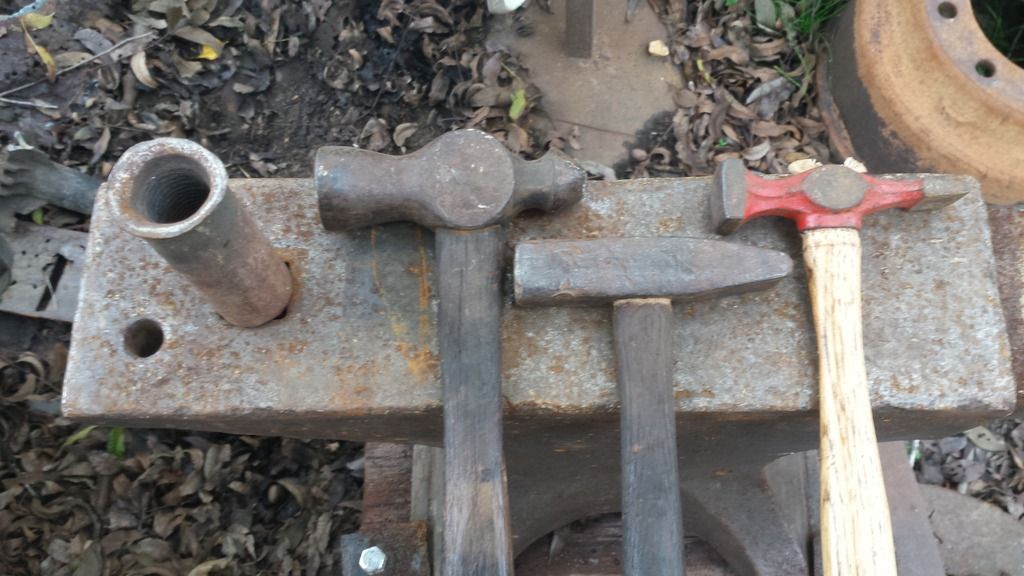
Cast and crew I used making this. A Home Depot 24oz ball pien with a convex shape ground in the face and an odd grind on the pien. An old 1LB Heller Bros. cross pien, and a rehandled Harbor Freight cross pien from their 7pc auto body kit. (Not shown is the all purpose dolly from said kit I used for the fine tuning/shrinking) The anvil is an antique Peter Wright, and my hardy tool is a piece of oilfield scrap I forged out for another project. (Specifically, a sucker rod coupler.)
Overall I'm happy with it for a quick demo with improvised tools. (and starting with a warped scrap piece to boot) A little more time and I could get a nicely defined corner throughout, but that wasn't the purpose for this. If I had taken the time to preserve my sharpie line I probably would have followed the original shape a little better.
Hope this helps.
Rufledt wrote: i'm probably not explaining it properly, in my mind the edge up the lip points down. I'd make the L-shape piece, welt it to the side so one face of the L-shaped piece would be perpendicular to the side. The L would then point downward, creating like a box shape on the top, pointing the cut part downward. i suppose it would still be nice to add the u-shaped edge trim you linked just in case. can't be too careful! edit: to be most clear i'm thinking of a small 90 degree lip bent in the side piece around the door opening to facilitate welding. Good idea? unnecessary?
Gotcha. I'd run at least that all the way around the top. 20ga is not going to be very sturdy across the sides at the top. I'd run some square tube personally, but I also tend to over build stuff so take it with a grain of salt.
Awesome! so it IS possible to make that piece! Thanks for the step by step, that will be very helpful!
Today i've just been cutting pieces out of the massive sheet i got. more to come when i get it cut.
The angle piece is only for around the door opening and the 'swoosh' thingy. For the whole rear end (behind the swoosh), the angle on top actually lays directly on the original tub, so it's going to be reinforced by that and attached there.
Oh, ok. I'd probably just make a door card then too. LOL
If that's how you're attaching, I'd use 3/16" rivets with a backing washer underneath. That way you can still have some give without the faster coming loose. Adhesives will eventually break down in that application.
That's a good idea, I think I'll use the adhesive NOHOME suggested and some rivets. As someone mentioned earlier the tub has some flex to it so the security and flexibility would be nice.
Enyar wrote: What about building it out of fiberglass? You could make panels out of divinicell or something similar and wrap with fiberglass.
I actually considered making it out of carbon fiber ![]() which is another skill I want to learn. Metal fabrication is going to be a more needed skill though when I start on the actual car project next though. Maybe my second kid will end up with some CF and fiberglass add ons to this Jeep
which is another skill I want to learn. Metal fabrication is going to be a more needed skill though when I start on the actual car project next though. Maybe my second kid will end up with some CF and fiberglass add ons to this Jeep ![]()
You'll need to log in to post.