1 2 3 4 5
esuvee
esuvee New Reader
2/3/21 1:21 p.m.

5/26/19:

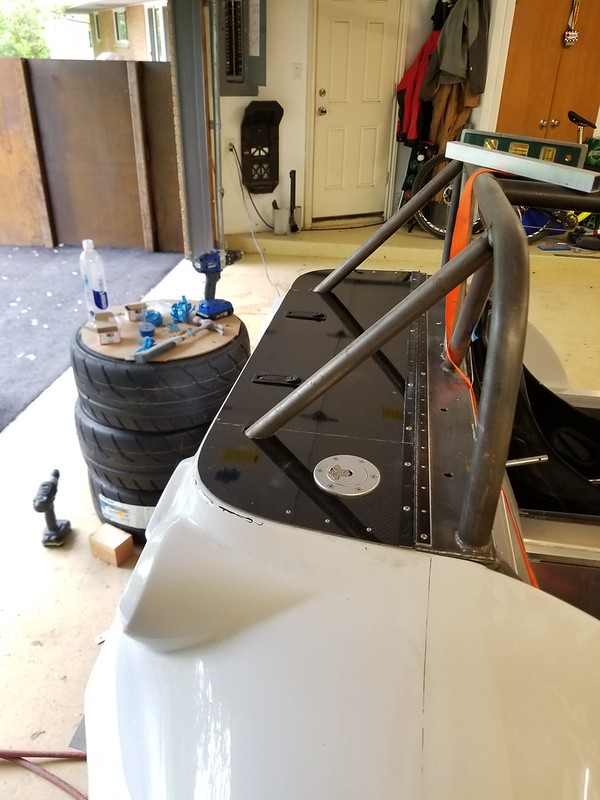
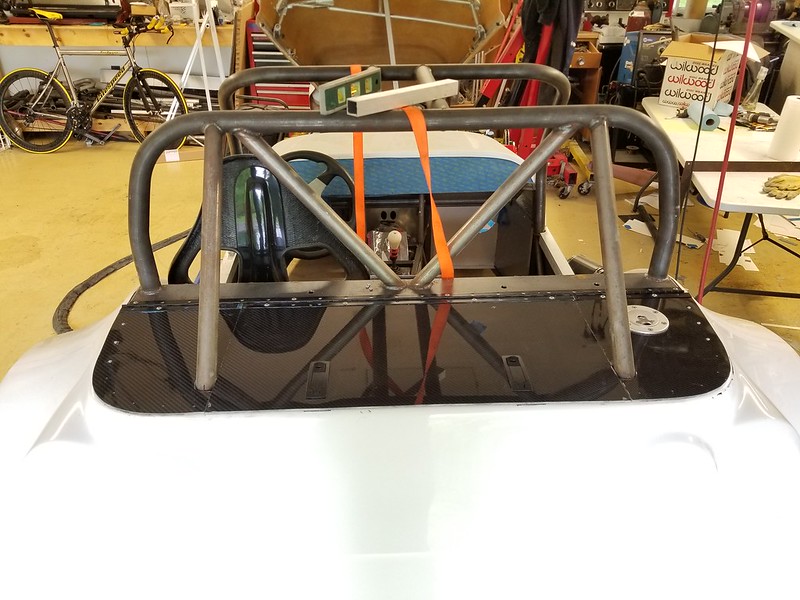
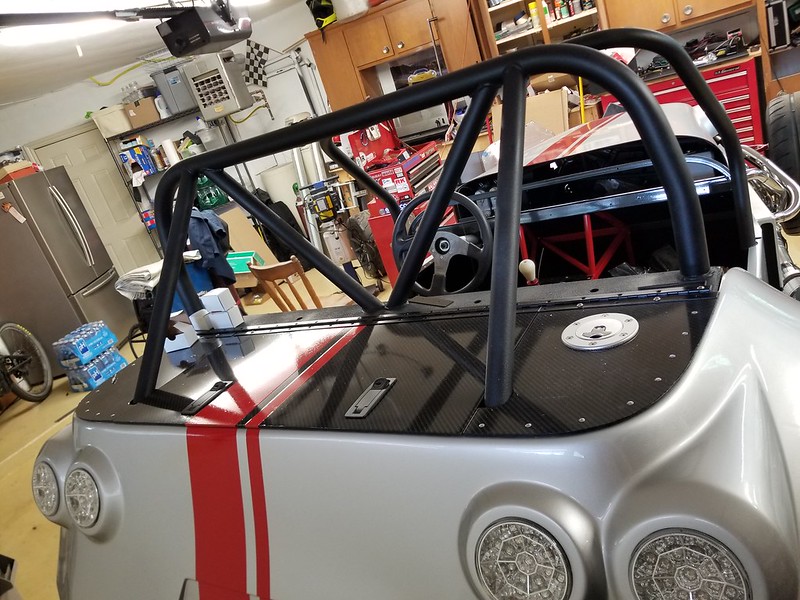
Finished the trunk, a frustratingly slow chunk of the car.  I spent a lot of time way back at the start of the project moving components around to make sure I could have a trunk that would hold at least a couple helmets and a weekend bag.  I didn't realize how much effort would be required to actually make it into, you know, a trunk!  There are probably 11 individual panels back there and 4 of them have to be removable for service.  Nothing is square and there were few fixed pieces to take dimensions off of at the start.   It turned out really well but it sucked to work for 6 weeks in a row and only finally see progress this weekend (trunk lid and fuel filler).  This is way too many pics for this project but after 6 weeks of work I had to have something to show for it. angry

Ever have a bad tank of argon?  It's a first for me but screwed me over on about 3 aluminum mandrel bends for the radiator plumbing.  I thought the first set of bends was just crap chinese aluminum so I bought from a different company.  I was encouraged that this company advertised "good metal, OK to weld."  Made me think the problem with the first set was common.  Those didn't weld any better.  Literally foams up with any rod.  I thought it was the metal because I could switch to just laying a bead in the middle of a piece of known good aluminum and it started gross but I could eventually get a decent bead so I thought it was just contamination working out of the Tungsten from the crap aluminum. I gave up on using aluminum thinking all the small tubing was coming from the same place and bought thin wall stainless instead.  Fast forward to welding the filler neck on the gas tank today and I finally realized it was not the metal.  Switched argon tanks and it was instantly back to perfect welding.  Now I need to go argue with Airgas.  (postscript update: Airgas was awesome, didn't even quesion it, just swapped me a new tank for that nearly full one)
 

esuvee
esuvee New Reader
2/3/21 1:24 p.m.

9/22/19:

Been super busy with work this summer but also plugging away for a few hours each weekend on the Stalker.  

Brake and clutch plumbing are 100% done, a bunch more aluminum panels are done, hood latch cables are done, some other stuff I'm sure.

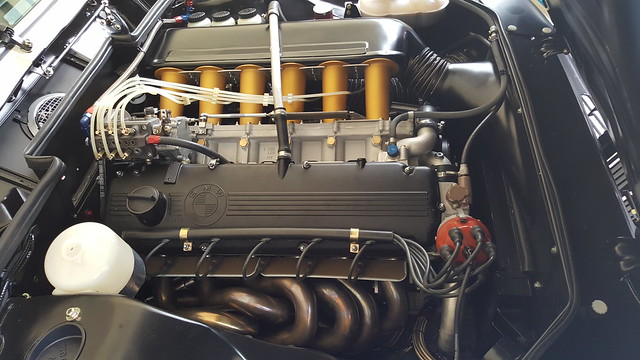
I am going for a 1960's look on the engine with the ITB's.  To give the look of fuel lines to each "carb" I'm doing the idle air circuit out of hard line.  So far I'm thrilled with how it's turning out.  Should look awesome when the ITB's are painted carb color and the velocity stacks are polished.  Just need to spend a ton of time on the valve cover eventually to make it look less plastic.

This engine from Goodwood is my rough inspiration.  Obviously a *lot* of differences but sort of a conceptual guide.

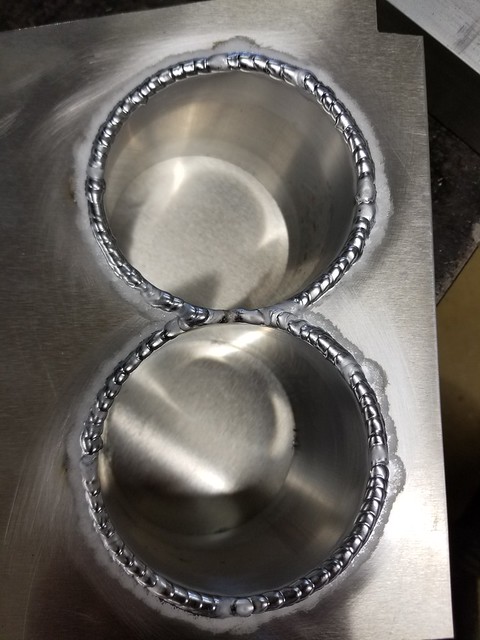
Also finished the cup holders (I know! gasp.).  I try to avoid visible welds since I'm not that great at it but I couldn't figure a way around these so I just held my breath. They turned out good enough to be visible under some textured black paint that I plan to use on the aluminum interior panels.

Getting close to being ready to blow it apart and start over like a regular kit car!  Still mounting a few fuel system components and I need to swallow the big bill for oil plumbing.  Trying to decide where in the process electrical fits.  I think I'll hard mount everything now but wire it on final assembly?  

Alex

Teh E36 M3
Teh E36 M3 SuperDork
2/3/21 1:26 p.m.

That's awesome. Probably why my aluminum tug welds are terrible. Hahaha

esuvee
esuvee New Reader
2/3/21 1:27 p.m.

12/01/19:

Lots of progress since last time.  It's basically a kit car now with everything fabricated and loosely bolted together.  This is the way you would hope to receive a real kit so maybe just arriving at the starting line but pretty happy with where it's at.

I thoroughly cleaned the garage this afternoon getting ready to start taking it back apart to finish and paint everything.  It came together at the end a lot faster than I expected.  I've got a LONG time before it's back together in finished form but having no parts left to bolt on feels pretty awesome!  (minus a few small things that will be easier with everything apart, headlight install, etc.)

Passenger seat is still stuck in the attic.

Uh, this was [I]before[/I] the garage cleaning.

Still loving the home powdercoat kit!

Small heater for the footwells and a basic defroster:

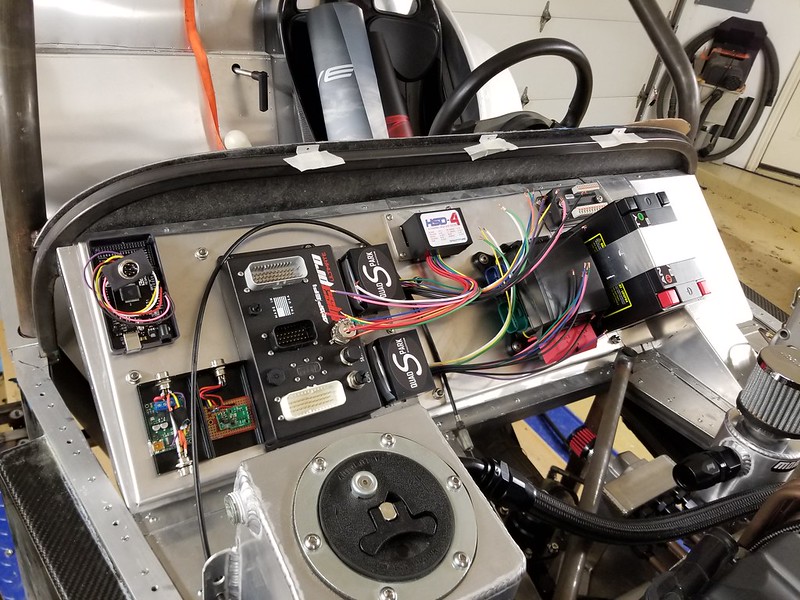
Electronics hardware mounted, no wiring yet, I'll do that on final assembly.  The panel is mounted to the frame on rubber isolators and pretty easy to remove, I'll put some bulkhead connectors so it can come out for any major repairs.  I was sweating how to get the battery down low and then it showed up in the mail. It probably weighs less than the megasquirt controller so right on the board is way easier.  

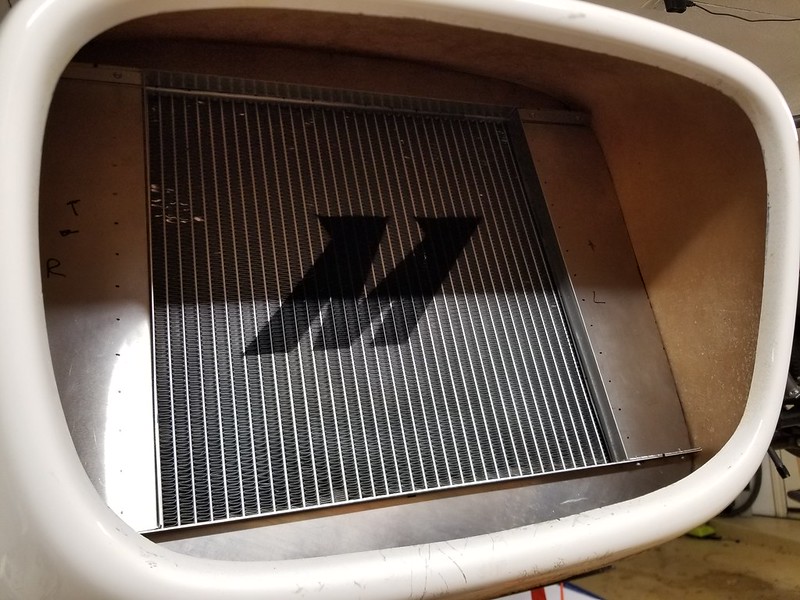
Ducting for the radiator, glassed into the hood now.


So, now I need to pick finishes for everything (not trivial), finish weld a lot of things I couldn't reach except to tack (including the whole header), paint and put it all back together...and wire it (300ish circuits, ugh.)

Mostly relieved that there's not too much to worry about anymore, all major 'will this work/fit?' challenges are behind me.   Windshield will be a struggle but it's not complicated, just fussy.  Dash is pretty easy but I need to go through the motions of mounting everything.  The roof can wait until I'm on the road.

I'm still a full year away from when I planned to be done so feeling pretty optimistic at the moment.

Alex

esuvee
esuvee New Reader
2/3/21 1:29 p.m.

12/16/19:

Some fun progress on the dash this week.  

I'm doing a 'floating' dash panel since: 1. I've got space between the dash and wheel, 2. I want to preserve the cross car structure I added behind the dash rather than cutting it up to shove gauges through, and 3. I think it will look cool with a layered effect rather than the typical flat panel.   The whole thing will sit about 1" away from the dash surface. 

I need a computer screen for megasquirt info and thought about just using it for gauges as well but I like the look of real gauges and I want to be able to at least use the car if the computer doesn't start.  I built an on board PC for the display and megasquirt tuning with a smart powersupply that sleeps with ign off and then shuts the 5V rail down to save the battery.  Boot time is under 10s with ign on, seems to work really well on the bench so far.  When not used for tuning the screen will display gear state and other engine parameters not covered by the real gauges.   There are some cool options for great looking megasquirt 'dashboards' that will boot up automatically that fit well in the 7" display.

Cardboard mockup for ergo:

Cardboard template with gauges and switch/monitor panel.

I used frontpanelexpress.com to design and build the switch panel and screen mounting.  This is another awesome online machining company, would use them again in a heartbeat.

The Speedhut gauges are only 1" thick which allows this whole thing to work.  I'll machine some aluminum tubes to cover the back of the gauges and appear to support the floating panel.  I think it will be a cool effect.

The blue painters tape is covering more carbon, that's the standard dash panel.

Dash in carbon:

On the car:


Alex

esuvee
esuvee New Reader
2/3/21 1:32 p.m.

1/25/20:

Going to be lots of detail stuff for a while as I finish each piece.  Fun but a different pace and thought process.

I got the hood and scuttle done and ready for paint.  That meant building a prop rod (holy crap there are a lot of details on a car), some panel alignments, a little bondo and a lot of sanding.  They'll sit now until spring when I can get enough ventilation to make a good paint booth without worrying about the heater airflow in the garage.  I'd love to have them done-done but there's plenty to do before I need them painted.

I finished all the stand-offs for the gages and switches for the 'floating' dash panel. These were fun. Cosmetic machining with no real tolerances to speak of.  I then clear powdercoated the machined pieces.  Matches the gauge bezel finish nearly perfectly.  

Today was a huge stupid victory!  I have been counting on sandblasting and powdercoating the throttle bodies which means I need to replace all the sealed needle bearings.  Given that plan I haven't been at all careful with dust or chips in there so they really do need to be replaced now regardless of paint finish or sandblasting.  However, I didn't realize they were nearly impossible to get out!  they only have a clearance hole for the throttle shaft, not the bearing OD so there's no way to get a punch on the back side.  I ruined both of them on my one disposable test part and was onto trying the first one that actually needed to be used without any success on practice runs, yikes.   

I whittled out a small(really small, 8mm), expandable puller for a slide hammer. It grabs the back side of the needle cage after I pull out the backside seal with a dental pick and hopefully pulls the bearing out by the outer face.  Sucks being an hour into a tool thinking it was very likely to fail.  Pretty happy with how well it worked given how impossible it seemed using more normal methods on the first part.  I even tried drilling on that first one but the races are super hard, wasn't going to leave the aluminum in nice shape at all.

So, next up is sandblasting and powdercoating the TB's, pressing in new bearings, re-assembling, and storing them for later.  Same with polishing the intakes and finishing the valve cover.  Then header, then more body parts.  Once it's a bare frame and everything is finished on a shelf we go in reverse order, I guess.  This is pretty fun, not a ton of hard thinking.

Alex

esuvee
esuvee New Reader
2/3/21 1:35 p.m.

4/11/20:

OK, felt bad about not taking any pictures of the finishing process.  Getting pretty tired of aluminum panels so I stopped to snap a couple pics.  It was helpful to realize that this is why it seems slow right now.  There are a ton of parts that in my mind were 'done' but now need a pretty good chunk of time to be actually done.

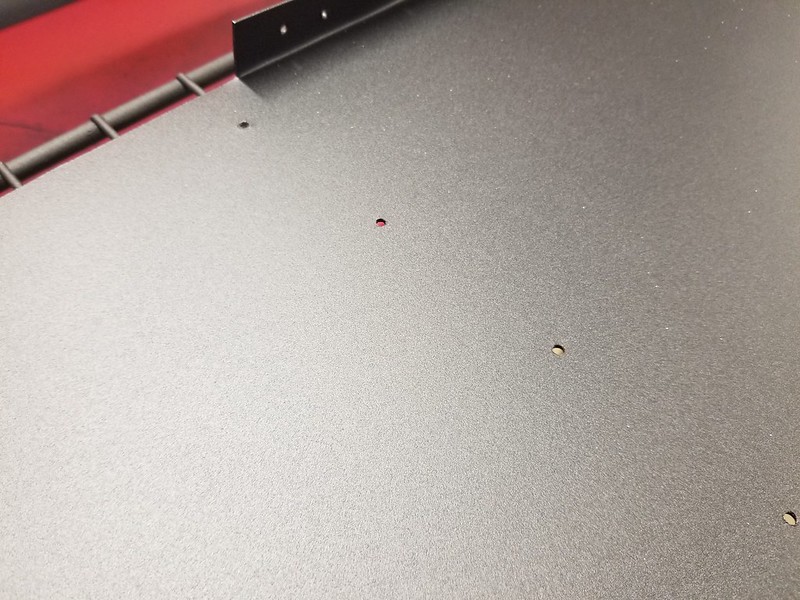
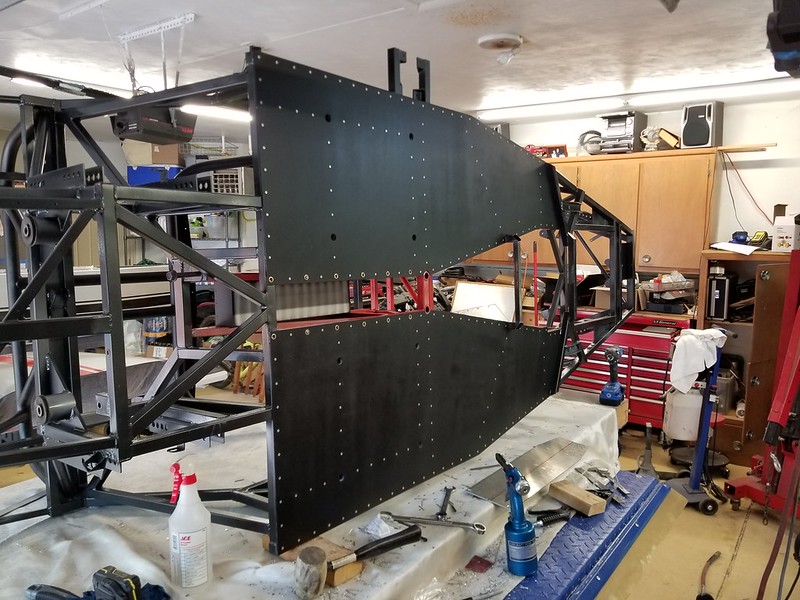
Here's a couple typical 'done' aluminum panels.  The problem is that each of the marked holes needs a rivnut installed because I couldn't get the tool in place when they were in-situ. Then they need to be de-burred, plastic peeled off, acetoned, sandblasted and coated.  

Here's after the prep and sandblasting, that looks like a paint loving surface!

[/url]

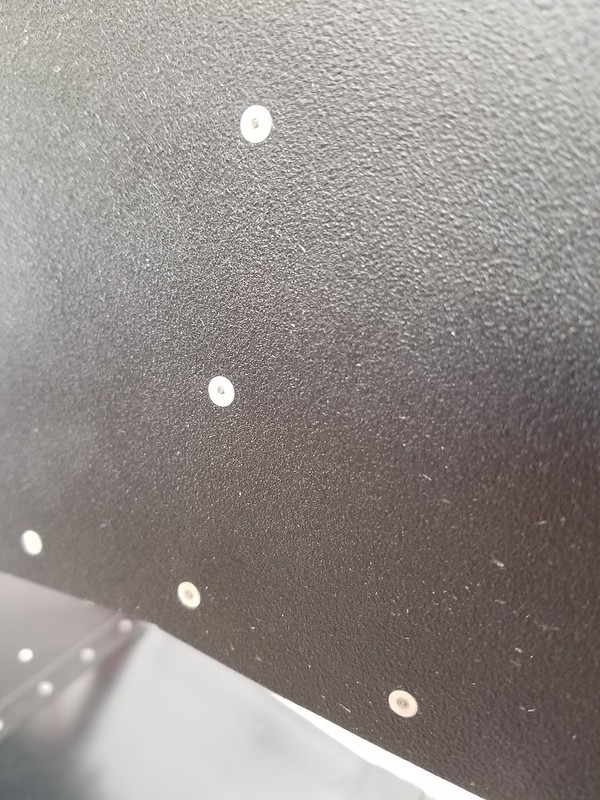
And after the 'Harley Davidson' texture black

[/url]

Here's a whole part (trunk floor, left side):

So, lots of this.  I can do about 3 oven loads in a morning or afternoon of work and then I'm tired of it.  Probably 6 more to go when more powder arrives.  I'm then waiting on the weather to warm up just a bit to paint some of the bigger parts that don't fit in the oven.  

I think the bonus is that if I stay strict about finishing every part completely as it comes off the car the re-assembly will be fast and fun.

Side projects are header welding, radiator finish welding, and eventually frame finish welding.

Alex

esuvee
esuvee New Reader
2/3/21 1:38 p.m.

4/28/20: (well into Covid stay at home time)

Moving right along with all this extra time!  

Got down to the bare frame, running about 80% on parts coming off getting totally completed before going on the shelf.  Aside from the engine and painting a bunch of parts with regular liquid paint (how old school!) everything is ready to go back together.  It's also now finish welded, that was only about 3 days of welding so really not as bad as I expected. Surprised how much more substantial it feels after finish welding, you would think good tacks would feel pretty solid but now it's like you could drop it off the lift with no issue.  Speaking of that...no, didn't actually drop it but it's pretty awkward to move around by myself in a small garage!

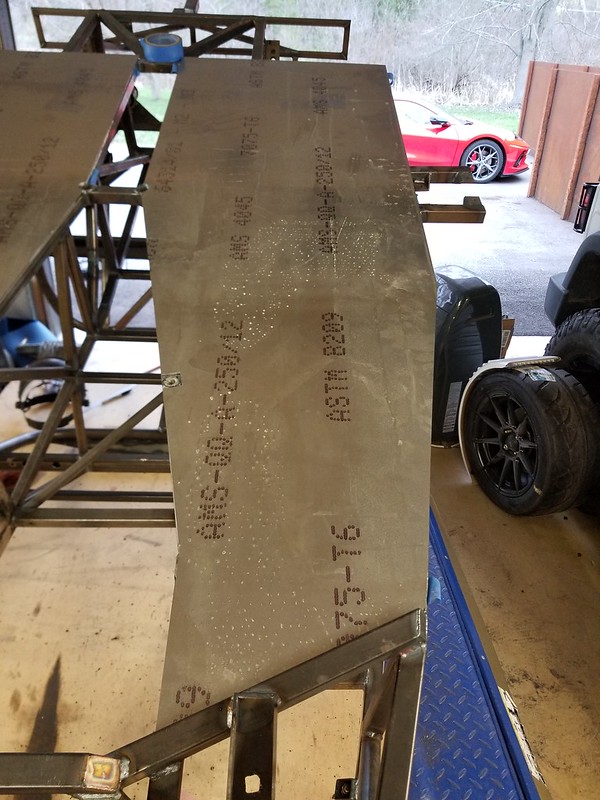
Next up were the floors.  I got myself worked up about the idea of hitting road debris and once something like that is in your head you can't ignore it.  I hate steel floors on these things for a bunch of reasons so I just $$'d up and got a nice piece of 0.1" 7075.  I've used it before and it's always remarkable how much better this material is than 6061.  73ksi is more than double the yield strength of A36 steel sheetmetal and nearly double 6061 T6.  At 0.1" that's a much stronger floor than almost any pass car on the market.  Feel pretty good about a step ladder encounter on the highway.

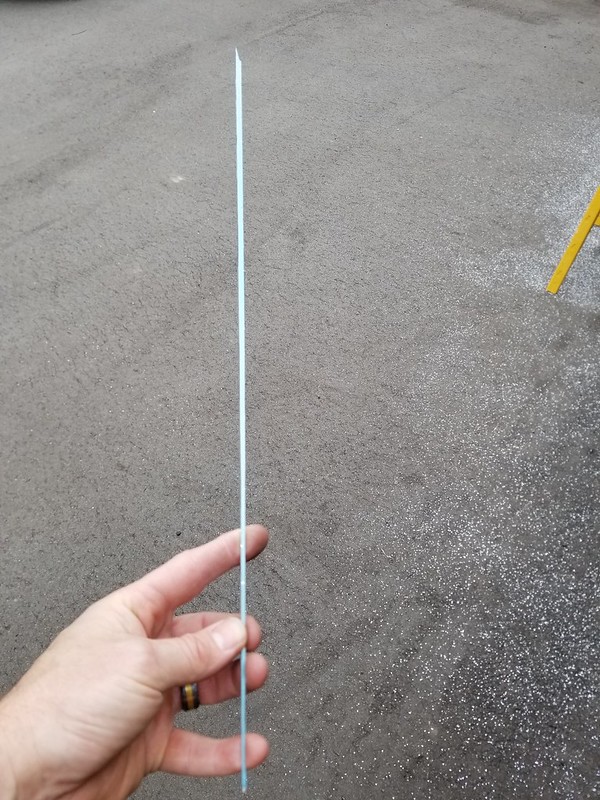
It cuts beautifully with a circular saw!  It's a little nerve wracking to touch the saw to it the first time but you can see how cleanly it cuts by the tiny sliver of material it will remove intact.

Another done, not done situation.  I thought the floors were done in this pic.  It's now been 2 days of drilling and trimming for weld bumps, etc.  NOW they're done.

Powdercoated the suspension parts as well, that was more fun than black aluminum panels.  Here's the process in pics:

sandblasted parts:

Fresh powder:

Out of the oven:

I freaked out a bit because the color was really tame and dark compared to the sample chip.  However, 15 minutes later it had brightened right up!  So don't panic if you pull parts out of the oven and they don't look right.  It's hard to capture in pictures but these are really different reds.  The brighter one really pops and is a nice highlight color which is what I wanted.  The other one right out of the oven might look good as a conservative color for a whole car but isn't anything special.

For the blasting cabinet discussion, I'm going through tips like water with the aluminum oxide media.  You can see it surprised me on this one, nearly cut the tip in half.  Minutes away from ruining the gun! Given the gun company isn't shipping right now I decided to make my own.  They advertise their tips as case hardened but mine made out of some scrap stainless last way longer.  I happened to have 12mm stainless bar on the shelf so it's as easy as cutting a piece off in the bandsaw and drilling the hole.  I have like 12 feet of the stuff so not sure I'm ordering any more TP tools tips!

Here's a great pic of 'quarantine garage.'   My wife's Jeep started death wobbling at 45mph so it finally is getting all new joints up front.  That plus the Stalker being totally blown apart has me at my limit of space!

Next up is buying paint.  Frame needs to get painted ASAP to continue.  I'm a newbie to 'real' base/clear paint so I need to have a conversation with a paint store that can help walk me through it.  That's tough to do over the phone but I'm going to try later today.  

Also a lot of engine details to wrap up, need to put some filter screens in the dry sump pan, finish welding a couple fittings that I couldn't reach with everything put together, clean and paint a lot of engine parts, etc.

Alex

esuvee
esuvee New Reader
2/3/21 1:44 p.m.

5/24/20:

So painting.  Uhg, what a GD sh!t show.  I have a massive amount of respect for people that paint well.  The part I can't stand is that nothing is ever done perfectly.  The sandpaper doesn't reach, or the filler shrinks just a touch too much, etc.  The most important skill a painter has is the ability to say "well, that should be good enough" and be right about it.

The weather turned in MI a few weeks ago so I was ready for frame painting.  I was going to just do that in the driveway but wasn't thrilled about it.  It dawned on me at some point that with nobody throwing any parties that party tents might be pretty cheap.  Turns out they are.  10x20 for $145.

This thing works great, I cut a hole for a big box fan in one corner and three furnace filters on the opposite wall.  It moves a ton of air with the seams taped up.  While not an HOA, our neighborhood definitely will not welcome my garage addition for long so I'm busting ass to get everything done.  (There's a creek along our whole back lot line so you can only see a tiny corner of the tent from the road)  My ultra tolerant wife is not loving this part either so that's double the motivation.

Frame pre-view!

[/url]

I'm new to 2 stage painting.  I did a 40' long city bus for my wife in single stage (long story) so I own a fair amount of the equipment and I'm comfortable spraying, just new to the timing of getting all the coats on in one session.  I wanted the frame to match the bodywork in Corvette Watkins Glen Grey but have red accents on the trans tunnel so the two tone is another new thing for me.  Went to a really great paint shop in Clarkston, MI (Wiltse's) and they set me up with epoxy primer, both base colors, and clear.  I went with the higher end paint since I knew it would help with my amateur mistakes.  

That was one of the hardest garage days of my life.  From start to finish was between 9-13 coats with the two tone situation and I vastly underestimated the amount of gun time to paint something like this frame.  I had a nice detail gun so it gave me the best shot at getting in the tight spaces but took FOREVER.  About an hour and half of actual trigger pulling. I thrifted some coats since it was clear that as you paint a square toob you really put on a couple coats.  Last clear went on as the light was totally gone, Lisa was gathering flashlights in case I didn't finish but I did make it.

Result is a solid B which is about what I went in expecting for my first try and the reason I did the frame first.  It's about twice as good as I expected mid-day while painting that SOB.  There are a couple dry over-spray spots of clear and a few areas where the WGG didn't cover enough.  None in any place that you can see, all issues will get covered by aluminum panels, had good luck on that.

The only real problem is that I hadn't looked at a WGG Corvette in a while and it's a lot darker than I want the body.  I went back and got some Blade Silver for the body.  They go well together and you really can't see both at the same time anyway.  Bummed that I don't have it matching but small potatoes in the end.  

Roll cage got a texture black the next day, ready to bolt parts on now!  

The red will 90% disappear under black aluminum panels, it will just be an accent to bring the outside stripe into the interior a bit.

I'm now cranking through the prep for painting the body.  Trying to get the tent down next weekend if possible.  Everything is body-worked, sanded, painted black on the B-side, and ready for primer except the front fenders which I'll do tomorrow.   Then I need to mask the backside of the hood and rear shell, move everything into the booth and clean, clean, clean.   Depending on the forecast I'll then prime tomorrow night or the next day I find with 36 hrs of good weather.

I also have a confession that I'm quite ashamed of.  I feel like I've sunk to the level of a Civic Type R engineer.  I've made a fake vent.   It's just there to expand the footwell so I don't want any more water than normal getting in there.   The same vent on the other side of the car is real, I swear!  At least I gave it some depth.  With that aluminum piece painted flat black it should look pretty real.

Those side panels were the first body panels totally ready for paint.  Masked for the exposed carbon stripe and ready to go.

Not looking past a finished paint job at this point, fingers crossed that will be next weekend.

Alex

esuvee
esuvee New Reader
2/3/21 1:48 p.m.

5/27/20:

Paint is on!  I won't say done because there's still the whole wet sanding, buff, etc but the hard part is over.

Went really well for my first paint job that mattered.  I made one run in the clear on the bottom inch of the driver's side rocker. Odd, really didn't think I put any extra on there at all. I guess that means I wasn't stingy with the thickness of the clear coats overall which I was worried about.  There's also some pin hole patches in the carbon that I hadn't seen.  Though about stopping after primer and filling them but I'm really tired of this part of the project so I'm chalking it up to Carbon character :lol:

Of course, the hood was the part in the stalled air spot of the tent, no way to re-arrange.  There's a half dozen little dust nibs and one fruit fly sized chunk of something in a 2 square foot area.  I saw the big chunk in time, pulled it out with a pick and re-cleared so you can't feel anything, just a little spot.


Lots of pictures, just an hour old so staying in the tent overnight to harden.  Super happy!

Stripe color first and masked.  I masked a little too soon and the tape left some texture.  Clear completely eliminated it but I was a little worried for a bit.

Done!

Side panel with exposed carbon stripe:

The back end turned out great, it had the best airflow.

Fender stays will get the same texture black as the rollcage eventually.

Hopefully it looks as good in the sun.  There's no mottling in the silver at all but a few areas have a bit of an orange peel look but it's definitely in the base metallic coat, the clear is really smooth.  You have to get your nose 6" away to pick it out but that's the only overall issue and it really doesn't bother me at all, I always planned on a home garage looking paint job and this is much, much better than I expected!

Alex

esuvee
esuvee New Reader
2/3/21 1:50 p.m.

6/02/20:

Short but fun update on a big milestone.  The first permanently attached aluminum panels are going in!  Happy with the look so far.  most of the top of the tunnel will get covered also so the red will turn into even more of a highlight.  I am glad I did the bellhousing area with panels on the inside to show off a bit more of the red frame, though, that's the look I was going for.  Floors are next and will get some structural adhesive as well, these are just riveted. 

Alex

esuvee
esuvee New Reader
2/3/21 1:53 p.m.

6/08/20:

Floors have been the latest project and turned out great.  One of the rare projects that in real life went exactly as I imagined in my head.  

I think I mentioned before that I got spooked about road debris so they're 0.1" 7075, stout.  No sense in that material if it's not well attached so they are held on with 3M structural adhesive and cherry structural rivets.  I painted the bottom of the floors with the same rocker texture I'm using elsewhere, trying to limit the number of finishes just so it doesn't get too busy.   Prety much 3-4 basic colors/textures.  I left the tops bare aluminum since it was really well protected with a thick film so looks pretty great when you peel it off.  I think I'll put sheets of grip tape that are short of the tubes by an inch and a half or so, should look good and keep the scratches in the bare aluminum to a minimum for a while.   Lisa wants bound all weather carpet floormats that fit in the tubes but I figure those can happen when the bare floor starts to look bad.

Bought a sweet auto countersink that makes the structural rivets look pretty pro.  They are so flush (hella flush!) you can just barely feel them and only based on the texture change.  Overall super happy. Bring on the rebar/step ladder/lumber. (don't actually)

BTW, I read after this that Caterham (and Lotus, etc) just uses 0.050" aluminum floors with rivets but no adhesive and bolts the seats right to the aluminum.  Yikes.  Probably somewhere in the middle is a good, correct engineering answer but I'll err on my side. I also wonder if that would allow enough seat movement to be disturbing.  Driver's can really feel seat stiffness, seems like not the best area to skimp on a 'driver's car.'

Painted and countersunk:

The rivets really didn't want to photograph with the phone.  They look proud here but they're dead flush.

Interior, ignore the yellow tape and blue film, just in case the epoxy spooged.

Done/not done again:

Yesterday's project, center closeout for a bit more structure.  This looks a lot like the same part on a C7 which is kind of cool.  

Tonight's project, front angles to tie in the motor mounts and seal off the whole thing.  NOW they're done (nope, needs powdercoat and final rivets tomorrow, THEN done)

Bottom side of the car had a lot left to do since it wasn't accessible for most of the time.  As soon as I drive the 12 rivets in the angle bits it will get flipped over for hopefully the final time (on purpose, anyway)

Next is brake and fuel hard lines, way easier without many panels in place.  Then carbon sides, then probably engine?  I need to think the order through some more.

Alex

esuvee
esuvee New Reader
2/3/21 1:55 p.m.

7/14/20:

General assembly is ongoing.  Random pics today since I've just been bolting it together in the order that makes access to everything easiest.

ABS, brake lines, and motor mounts:

Steering, clutch master, and paint on the engine bay bracing:

Engine in for the last time?  Ugly plastic valve cover is just for install, powder coated mag one on the shelf.

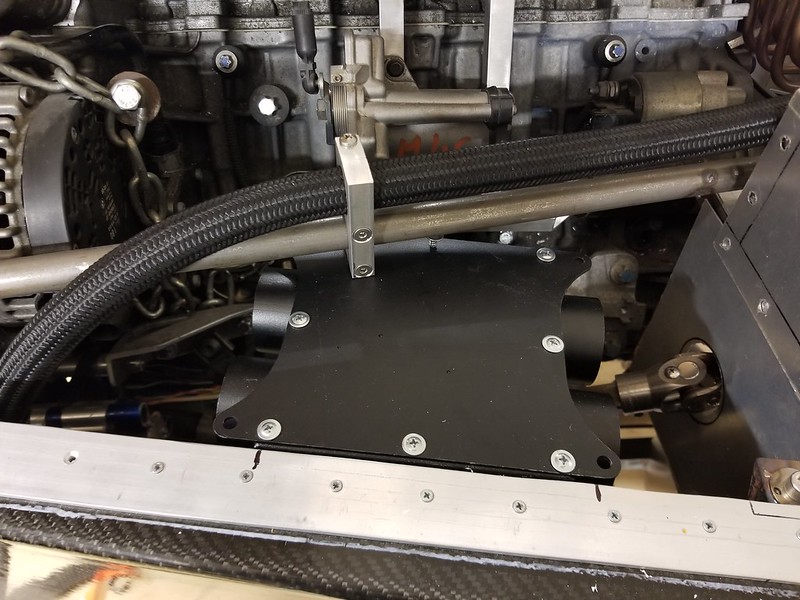
Cooling system and oil tank.  Still have upper rad hose to install and oil tank return line.

Plumbed oil pump:

Dry sump pan:

Ubiquitous kit car mini driveshaft (see the sharpie for scale).  If you live near metro Detroit this company was awesome.  Called Shaftmasters :lol: $90 with me providing the u-joints.

So, just some pics, the list is long enough for three of me to stay busy every day so no thinking, just bolting.

Alex

esuvee
esuvee New Reader
2/3/21 1:57 p.m.

8/6/20:

More random assembly.   Post is prompted by being super happy with how the rear bulkhead turned out.  Two parts wouldn't fit in my oven so got a different texture paint.  In the end it wound up looking like a sued/leather combo which is cool for that part of the interior, almost looks upholstered.  

Gas tank came first.  It went in really nice with the rubber strips glued in.  I had used wood during mockup but it's super solid feeling lined with rubber now.  I pumped it up to 10psi and went over it with soapy water about 10 times. Really didn't want to line it if possible.  We'll see, it's super hard to remove so I'm hoping I got it sealed up!

It's crammed in there!

Rubber isolation all around it.

Also pretty geeked about how this is turning out:

Whittling away on some heat shield options for where the header is close.  I think with some finishing this will end up being pretty cool.  I probably went too thin on the stainless but I didn't want to be gnawing away at thick sheet around those curves.  With the right number of rivets it should work and look good.

Fan shroud was another odd but satisfying project.

One more that I was pretty stoked about:

So, pass side body panel is riveted in place now.  Putting on the driver's side makes pedal box access super difficult so I'm spending some time making sure that's all set up first.  Clutch is bled and adjusted so just need to tie down the clutch sensor wiring and then I should be good to rivet it up.  That then lets me get the hood on and finish up the engine compartment.  One step at a time.  I'm pretty full of elephant right now but still taking a couple bites a day :lol:

Alex

esuvee
esuvee New Reader
2/3/21 1:59 p.m.

8/11/20:

Big parts going on feels like more progress than small parts.  Got both sides on, the hood, and rear body.  The major work was installing the rear suspension, park brake and trunk paneling underneath the rear body.  

The garage is a train wreck again, now that the body is off the stands I think it needs another good cleaning so Lisa can park in there again.

Not sure I'm crazy about the clear taillights.  Given they're just simple truck lights I didn't want them to look like simple truck lights.  On a darker color maybe it would work better?  They're easy to change so I'll get it finished up first but regular red and amber are likely where I'm going eventually.

Fan shroud and baffling is done, looks nice from the front, not doing a grill until something inspires me.

Couldn't handle  the hardware store fasteners that came with the kit.  They were all randomly all 0.5" to an inch too long as well, ugly.   ARP was a splurge but I'm really happy with the look.  More important on the front where it's all exposed.  Given that the fasteners were already all WAY over-sized it's now double over-strength!

Shifter looks cool with the trim panel installed.

After the garage cleaning there are a bunch of details like electrical component mounting, header and exhaust install, dash and seats, etc.  Seeing the end from here, though!

Alex

esuvee
esuvee New Reader
2/3/21 2:03 p.m.

8/16/20:

Fun day yesterday.  Exhaust is completely done and in the process wound up with the suspension bolted on.

First had to finish the back bodywork including the tonneau cover/gas filler:

Heat shielding next, on the rear two shields the header is really close to the body so I spaced them out about 1/8" for an air gap.  I like the look once the system is on.  In later pics you can see that I re-did the little duckbill upper shield, looks better now, much smaller.

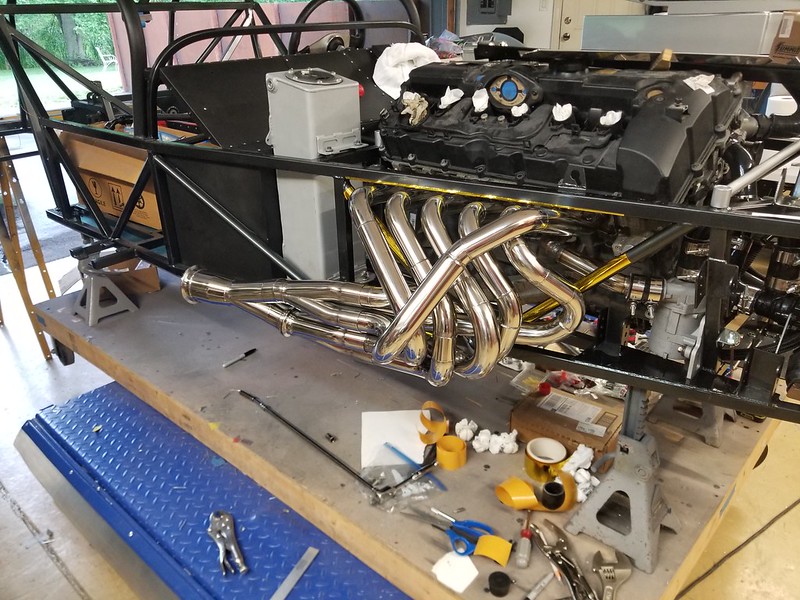
Haven't mirror welded in a long time but you feel like a stud when it works :lol:  Just before I cut into my nice collector for an O2 bung I did some reading and it seems that with long tube headers the better trade for a street car is to put the sensor the right distance from the head (~18") even if that's in a primary rather than in the full stream.  I had planned on putting it after the collector but that was WAY downstream and even a heated sensor apparently struggles at low load/RPM that far back.  Once I decided a primary was the right answer I really didn't want to take the headers off again so had to get creative with the welder.  Usually this turns out #tungstenasfiller but I guess I was feeling coordinated yesterday.

Here's the whole system in place:

Header with front suspension:

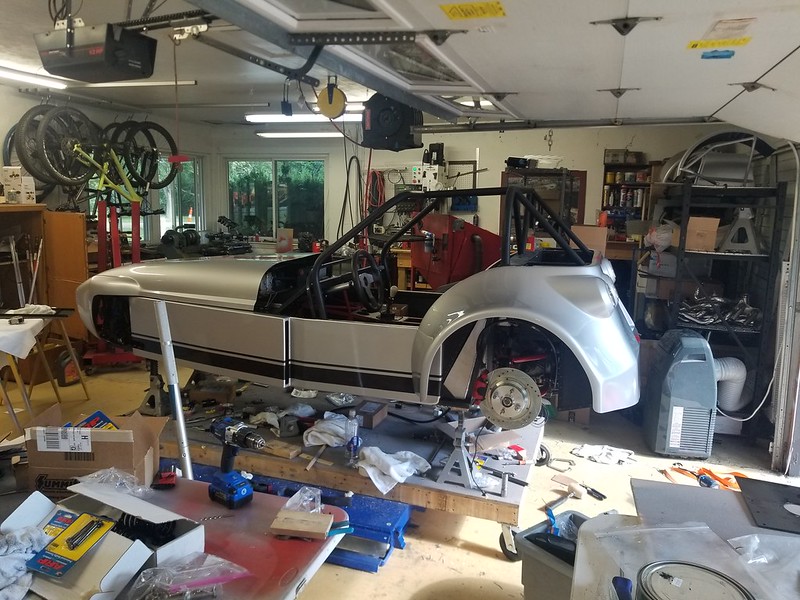
Here's the whole car as it sits right now.  Note that the scuttle is missing so the proportions are bit off but I'm pretty happy so far.  Once the wheels are up in the fenders and the scuttle and windshield are on it should look pretty cool!

Today is either interior/dash or engine dress (valve cover, ITB's, fuel system, etc).  I'll decide after coffee.

Alex

esuvee
esuvee New Reader
2/3/21 2:04 p.m.

9/14/20:

Couple more progress pics.  Ordering wiring parts has been time consuming so just a few garage projects right now.   Also re-built the garage door tracks to raise them up to the ceiling and changed to one of those shaft openers that gets rid of the big drop down center opener.  

Seats and belts installed.  Bucked up for the Schroth belts with the anti sub feature so I don't always need the 5th point.  Silver looks pretty good, IMHO.  I'll trim the excess after the cost shock wears off :lol:

Used the squeak and rattle engineer's best friend behind the seats - sticky backed velvet.

The hood and scuttle were never within 5 feet of each other during stripe layout.  I just measured from the curved edges using a cloth tailor's tape.  I was sure they were going to be off by 1/8"!  Not the most flattering angle on the car but gets the point across. 

Wiring is in full effect, I think the car is mechanically done.  

Alex

esuvee
esuvee New Reader
2/3/21 2:06 p.m.

1/23/21:

Long time since the last update but there wasn't much photogenic.  Basically wiring, some detail work, and software setup.

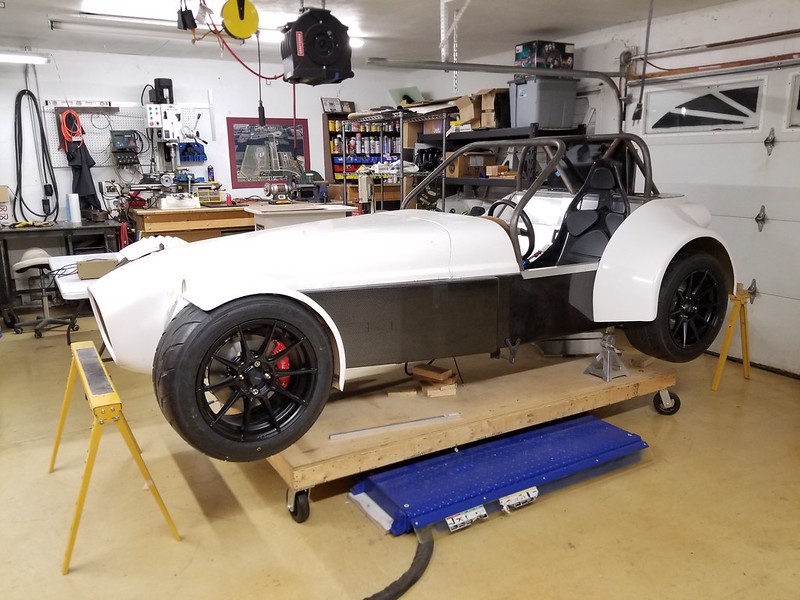
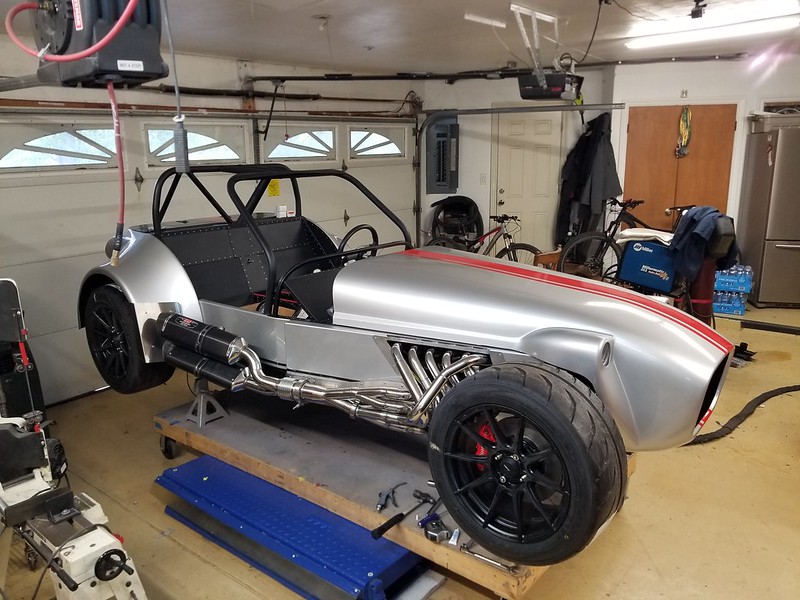
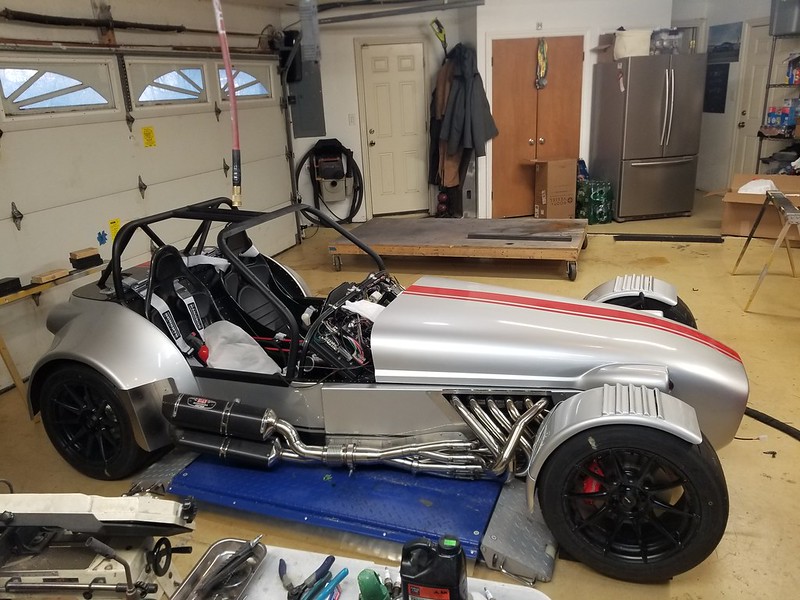
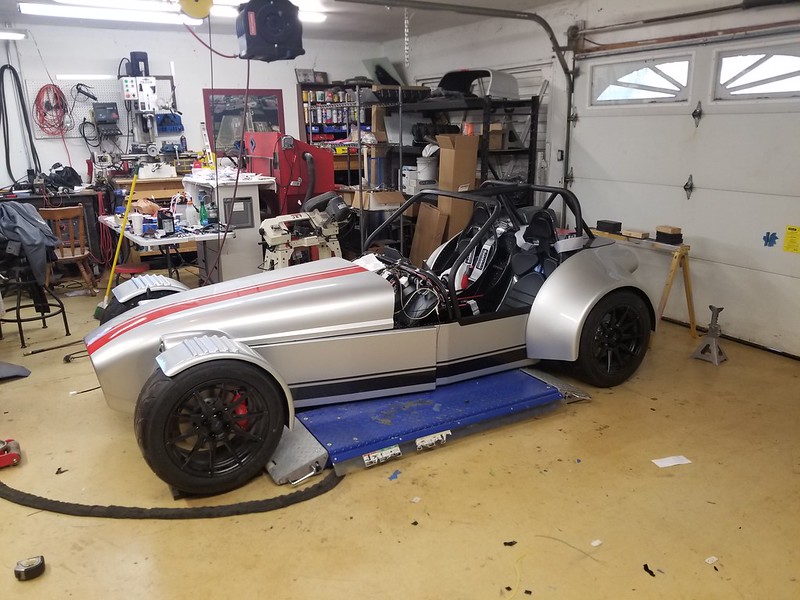
However, it sat on it's wheels for the first time this afternoon!  The build table is gone and it sits on the hoist like a grown up car! Looks about half the size now that it's on the ground, seriously tiny, kind of forgot about that part


First guess on ride height is pretty close.  Maybe needs to go up 0.5" but it *just* clears the hoist by like 1/4"

Some pics of the electrical stuff, glad that's basically over.  I need to finish troubleshooting and then loom the parts I left open but it's pretty much done.

Not sure I ever posted an interior shot.

Also, I started it for the first time on Sunday!  Had to revert back to batch fire/wasted spark.  This engine has some very odd cam wheels that somehow resulted in only firing on Cyl 1 and 3 when I tried sequential/COP.  I'll get the fuel map in the ballpark on batch fire and then start experimenting with cam synch when it isn't flooding every time.   Sounds awesome, very sport-bike ish at 2k RPM.  Should've taken a video but we were thrashing by the time it actually ran well.  Needed to back it out of the garage to keep tuning, that's what prompted finally setting it down.

SO, next is some basic tuning and megasquirt research to get it running sequential.  Once that's working reliably the cowl needs to go on, windshield in, and a few things like cheapo hand crank windshield wipers to make it legal.  Hopefully on the dyno before the weather starts to turn.

Alex

esuvee
esuvee New Reader
2/3/21 2:07 p.m.

OK, I think I'm caught up, only abandoned this for....2yrs, apparently!

Alex

EDT (Forum Supporter)
EDT (Forum Supporter) Reader
2/3/21 2:51 p.m.

Wow! Your level of detail is astounding.

esuvee
esuvee New Reader
2/3/21 2:56 p.m.
EDT (Forum Supporter) said:

Wow! Your level of detail is astounding.

Which is why my pace is lacking laugh

Thanks, though!

newold_m (Forum Supporter)
newold_m (Forum Supporter) New Reader
2/4/21 2:29 a.m.

Simply amazing..!

bluej (Forum Supporter)
bluej (Forum Supporter) UberDork
2/4/21 9:12 a.m.

I don't think I've ever seen a better example of a seven/locost homebuilt vehicle. Dang. I love how the dash turned out. How is the screen in daylight?

esuvee
esuvee New Reader
2/4/21 9:47 a.m.
bluej (Forum Supporter) said:

I don't think I've ever seen a better example of a seven/locost homebuilt vehicle. Dang. I love how the dash turned out. How is the screen in daylight?

Thanks! Not sure yet on the screen, I have yet to back it out of the garage.  I made sure that everything that would be on that screen was optional info for driving the car and not basic stuff like oil pressure, tach, water temp, etc.  It will be a big, obvious shift light sequence, a gear indicator, and auxiliary interesting info from the megasquirt.  

Mostly it is there because I always like to mess with the megasquirt cal and the car is too small for a laptop to sit anywhere.

bluej (Forum Supporter)
bluej (Forum Supporter) UberDork
2/4/21 10:03 a.m.

I love the massive shift light idea. Is that an rpi solution you have going?  I see your layout of the electronics board (and some components) evolved, what was the thinking there? 

1 2 3 4 5

You'll need to log in to post.

Our Preferred Partners
aySczix4zs8oUcjVDs2nDJ4AyTm1JlTcC49x7u7VgAyqAfU1J5N4JhEROQha8okk