


^^^See the black panels? I just cut small windows into them so I will be able to access the tops of the shock absorbers....now headed back into the garage to make rivet holes in the panels.


^^^See the black panels? I just cut small windows into them so I will be able to access the tops of the shock absorbers....now headed back into the garage to make rivet holes in the panels.
test fitting the gas tank.

Before I can mount the "seat" panels, I will need to figure out where to make the cut-out for the gas tank; the filler neck will stick straight up through the bottom.

Now in rustoleum brown


I'll probably put the battery in the back, on the passenger side like a miata. I've never done anything like that before, so I'll probably try to copy What xfactor did.
Wheels/Tires will be a bigger issue. At the moment, I'm planning on running the challenge with stock 14" steel wheels all around to keep the budget down. (That means dakota ones for the front clip, obviously, and the ones off the 810 for the back.) After the challenge, I'll look at switching to bigger wheels so I have some better options for tires. After the tire/wheel size is figured out, I'll fabricate some fenders for the car.
did some light welding tonight (just fixing a few spots I found when I started painting the back of the chassis) and started on the bracket to mount the steering
I just used the angle grinder to take the flange off the top of the sheet metal at the front of the "rear seat" area to make it fit better. the plan was to paint the freshly exposed tubes and a few other spots that I missed previously. A small drizzle of rain forced me to move everything back into the garage, squelching that plan.
I also cut one of the tubes in the dash area in preparation for mounting the steering. I am now freaking out, worrying that this might have been a premature/wrong move.

Very impressive.
Rusted_Busted_Spit wrote: Very impressive.
Thanks. That is really kind of you to say.

JoeyM wrote: I also cut one of the tubes in the dash area in preparation for mounting the steering. I am now freaking out, worrying that this might have been a premature/wrong move.
I was constantly (and still am to an extent) fearful that I will go to install something and find some insurmountable problem that will reduce my project to Trip to the scrapyard status. Your not alone.
Also How big is this relative to the origional? Just wondering as pictures of something in a garage make size hard to pin down.
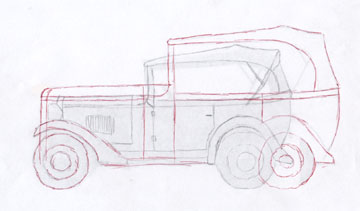
None of the dimensions match the original. The short version is that it has a miata-ish 95" wheelbase, and the original car had a much smaller 75 1/2 inch wheel base. (I have a real car vs. my car comparison of all the dimensionshere. ) It was basically one of that era's equivilent of a kei car.
The width of the back was dictated by the width of the axle from the datsun 810 donor, and wanting to keep the narrow fender look of the original car. The grill width was dictated by the rav4 radiator I used, and the length of the front end is 42 inches so that it is the same length as the 810 donor's engine bay. After I had those dimensions, I then started with a photograph and did some cross multiplication. Here is an earlier explanation of my process:
An epoch ago, I said: I started with the best side image I could find.From the limited information available I knew the wheelbase of the car. Next, I used photoshop to measure the number of pixels of every dimension I wanted to know. With the actual wheel base and the pixels of the wheelbase, that gave me the ability to cross multiply and get the actual value of anything I measured.
The right column exists because the L24(e) engine from my donor 810 wagon needed a 42 inch engine bay, which meant that I needed to scale the entire car up in size to keep things proportional.
Cool thanks for listing that.. So basically it's a 4/3rds replica (nearly).
Keep it going it's gonna be a sweet car when your done.
nocones wrote:JoeyM wrote: I am now freaking out, worrying that this might have been a premature/wrong move.I was constantly (and still am to an extent) fearful that I will go to install something and find some insurmountable problem that will reduce my project to Trip to the scrapyard status. Your not alone.
BTW, thanks for saying this. It helps to know that feeling this way is not unusual when working on this sort of project.
productive day...put the door latch pins back in, touched up some paint, put a few rivets in a panel started trying to mount gas tank.
the tank mounting straps are screwed in place, they're holding the tank properly, an we've modified the sheet metal tat will cover this. (I cut a hole for the filler neck, and one one side I've made holes for the strap mounting screws. The other side is tomorrow)


just took an angle grinder to my finger. no gloves. I am going to give up on cars and try stamp collecting
[BTW, added photos^^^^ to show gas tank/filler neck]
I just riveted the rear quarter panels in place. The back is still held on with clecos. This is a great example of the stressful part of car building....I am worrying that I'll find something else I should have done first....not having premade plans means hoping that your forethought is sufficient for the situation.

JoeyM wrote: just took an angle grinder to my finger. no gloves. I am going to give up on cars and try stamp collecting [BTW, added photos^^^^ to show gas tank/filler neck]
During the Wartburg build this was the injury count just from the angle grinder
angle grinder division: through the knuckle(to the bone) of my left index finger 4x, knuckle of my right index finger 3x, across the base of my knuckles left hand 2x, right hand 1x
The angle grinder is evil.
Keep up the good work, its a great project and a lot of fun to see it come to life.
The back is now riveted in place...well, every cleco has been replaced by a rivet. there are a few places (mostly the lower edge) where I will be adding rivets.


JThw8 wrote: During the Wartburg build this was the injury count just from the angle grinder angle grinder division: through the knuckle(to the bone) of my left index finger 4x, knuckle of my right index finger 3x, across the base of my knuckles left hand 2x, right hand 1x The angle grinder is evil.
[giggle] I concur...fully evil. They must be the reason why B.S. Levy said, "Before any noise, heat, or speed, the blood, sweat, and oil must mingle."
JThw8 wrote: Keep up the good work, its a great project and a lot of fun to see it come to life.
Thanks for the encouragement. I really appreciate it. I'm a huge fan of your wartburg project.
I forgot to add, JThw8 put the Misfit Toys Racing logo/initials into a panel behind the seats in the wartburg. Talking to him at the challenge about how he did that with the bead roller was pretty useful....I didn't realize before that you could start and stop lines by unclamping the wheels. (I know, naive of me.) After he explained that to me, I ended up using the technique to make the raised ovals of my grill insert


In reply to JoeyM:
Haha I did that just 5 days before you did. Right index finger... 3/4 inch long 1/4 inch wide swath through the knuckle just above the finger nail. All the way down to moving parts... lol Good thing the wife wasn't home or she would have made me go to the E-Cafe for stiches. Bled like a "you-know-what"...
That's what I get for using a grinder for a sander's job. Smoothing and polishing the aluminum intake for my latest Fiero project.
Glad to see you're still making progress on your project.
-Chuck
Hey Chuck!
I didn't know you were active on the GRM board. It's good to hear from you.
Today, I trimmed a few panels for fit and comfort (smoothing a jagged edge) and cut some metal that I'm going to use to mount the fuel pump to the chassis. [...after Dad came over and we talked about fuel pump locations.]
I'm preparing to test the fuel pump from the 810 wagon. (it seemed like a good idea to do this prior to mounting the pump.) The pump has an odd little pressure regulator.
 I'll test the flow with and without it to make sure that both are working properly.
I took some wires off the wagon - about 8" of the harness used to power the pump. I'll use the battery from my geo (charging up right now) to power the pump for the test, and will have it pumping mineral spirits instead of gasoline. (less flammable, and thus a good idea when near batteries and potential sparks.)
[any good ideas contained in this post are not mine, they are the advice of friends far wiser than me.]
The fuel pump works.The mount for the external fuel pump fuel pump had three legs of different length so it fit the contours on the underside of the wagon. That mount now has three equal-length legs so it can be mounted to a flat plate.


The pump is mounted. I started a thread about roll bars to find out what's required. The diagonals cannot be less than 30 degrees from the vertical, so I mocked it up with PVC to find out where to weld to the chassis with acceptable angles.
 It looks like I can put the plates for the diagonals in either of the two easy locations and have acceptable angles.
 I'll weld those plates into place, then have to get the either have the main hoop bent or the entire thing fabricated.
You'll need to log in to post.


