What did old sparky do to the bore and piston of number 4? I think it may be the source of your woes.
What did old sparky do to the bore and piston of number 4? I think it may be the source of your woes.
I'm thinking it damaged a compression ring.
I keep going back and forth between the re-ring and just doing the heads. The part that nags me is the fact that it ran for so long after the spark plug incident. I almost want to just do the heads now and save pennies and do a full rebuild next spring...
... but that's just procrastination isnt it? (and you know what they say about procrastination)
I did check and O'reilley's has a ring ridge remover, and a cylinder hone I can rent for 24 hours. I'll just have to school myself before now and then if we go that route.
Put a good used engine in it, build this pile of questionable parts into a great motor at your own leisure.
Kenny_McCormic wrote: Put a good used engine in it, build this pile of questionable parts into a great motor at your own leisure.
This^, spend your $150-300 on a known engine and keep the original part for when you have money....or scrap.
dag gum. Looks like there's an option 4!
ok, bad news about the $200 engine. As if on cue, it's not on craigslist anymore... berkeley
On the prowl for another. There's another currently installed in a truck (ad says I can hear it run) for $600. I don't think that's going to be an option though.
I can get a "core" for $250 if that counts for anything? But I think that falls into the "questionable parts" category...
Ah hell, what am I saying?
I have a truck with 100% questionable parts, none of them seem to be doing what they're supposed to be doing regardless of which combination I install them, craigslist turns up nothing of significant use within my budget, no room in the garage or driveway, I've never lapped a valve or honed a cylinder before, I lack all the necessary and suggested tooling, aaaaaaand.... Oh, I have to do any required work with the block in the engine bay.

I got a beer in me, so cue the berkeleying music
I'm in for replacement running motor, and I wouldn't hesitate to pay more for a motor I could hear run first.
However, if you're a gambling man, and the whole length of the bore is OK on number 4, you could throw a few new rings just on that piston. Seems a lot of work for a chance though.
Don't worry to much about how it used to run after the plug incident. Do you know what the compression was at that time? The engine could have been running seemingly fine, but with that amount of blow by into the crankcase, you would have been blowing oil out of every seal... Which, um, sounds like it was the case.
I'd say screw the timeline take another month and rebuild what you have. Will be a fun exercise. I rebuilt my first engine earlier this year (Miata). Some challenges but overall an enjoyable learning experience.
Is it not possible to find a rusty Toyota pickup with a good engine in the PNW? You moved to the wrong side of the country.
In reply to Woody:
It sounds like some weird parallel universe out there, a mysterious place where old Toyotas lie neglected with rust-free bodies and dead engines. ![]()
Bill, I am enjoying the thread-thanks.
As an owner of a couple of these trucks, I can share;
To get the harmonic balancer bolt off, put a breaker bar on the bolt, and crank the engine over-works every time- unless, of course, it breaks your breaker bar![]() I would get it close, and use a zip tie to ensure it hit the sweet spot where the pitman arm mounted. It appears Toyota designed them this way, and maybe they did.
I would get it close, and use a zip tie to ensure it hit the sweet spot where the pitman arm mounted. It appears Toyota designed them this way, and maybe they did.
I had an 82 4X4 long bed, and a 90 4X4 short bed. Loved both, but I had rotten luck with both. I rebuilt the 82, and not 500 miles in, a U-joint broke at speed, and broke the horns where the bell housing mounts off the block. I was so disappointed, I parted it out. The 90, I bought with a blown up engine, and put 3 more in it before finally selling it with an annoying wrist pin slap. Various Japanese miracle 30K mile, LC engineering, and finally, built by me engines were its downfall.
I bring all this up not to discourage, just blabbing, I guess. It is funny how I can't keep the most reliable engine ever built running, but can't seem to kill Suzuki's. For some real advice, I would strongly advise against any rebuild involving forged pistons(like LCE). I did this, and regretted it. Forged pistons need a bit more clearance in the bore than hyperutectic(my recommendation), and rattle like heck. My FI did not like that last bit. Also, beware any non-Toyota parts. I broke a valve adjustment bolt while running that I swear was not over-tightened. Luckily, I found it laying on top of the head, but you get my point. I'm going to stop typing now. Again, love the build
Bill,
You mentioned a metal head gasket. You mean an MLS gasket? If so, they need a finer milling finish on both the block and the head. If your machinist didn't know you were going MLS, they would have gone for the usual surface finish that will not adequately seal. I'd put a regular gasket back on there.
Second: lap those valves. Get some lapping compound and a length of hose or vacuum tube that is a tight fit on the valve stems. Put the valves into the head all lubed up with compound and then slip about 6" of hose over the end of the valve stem. Chuck up the other end of the hose in a drill and give 'em a spin, putting very light pressure against the valve face.
I think I read that tip on here somewhere... Anyway, it doesn't take much, so don't get carried away.
Since you're going for the budget fix here, I'd do the two things I listed above, bolt it up and see if it runs. If it isn't better, then you aren't out any more money. (less cost of standard head gasket, which you could probably reuse anyway)
Day 7/8 (the weekend)
Armed with a Youtube video it's hi-ho, hi-ho off to Harbor freight I go!
I came back with a valve spring compressor, and a 6" brass wire wheel for my bench grinder. Oreilley's supplied me with the valve grinding compound and the little suction cup thingie and I went to town!
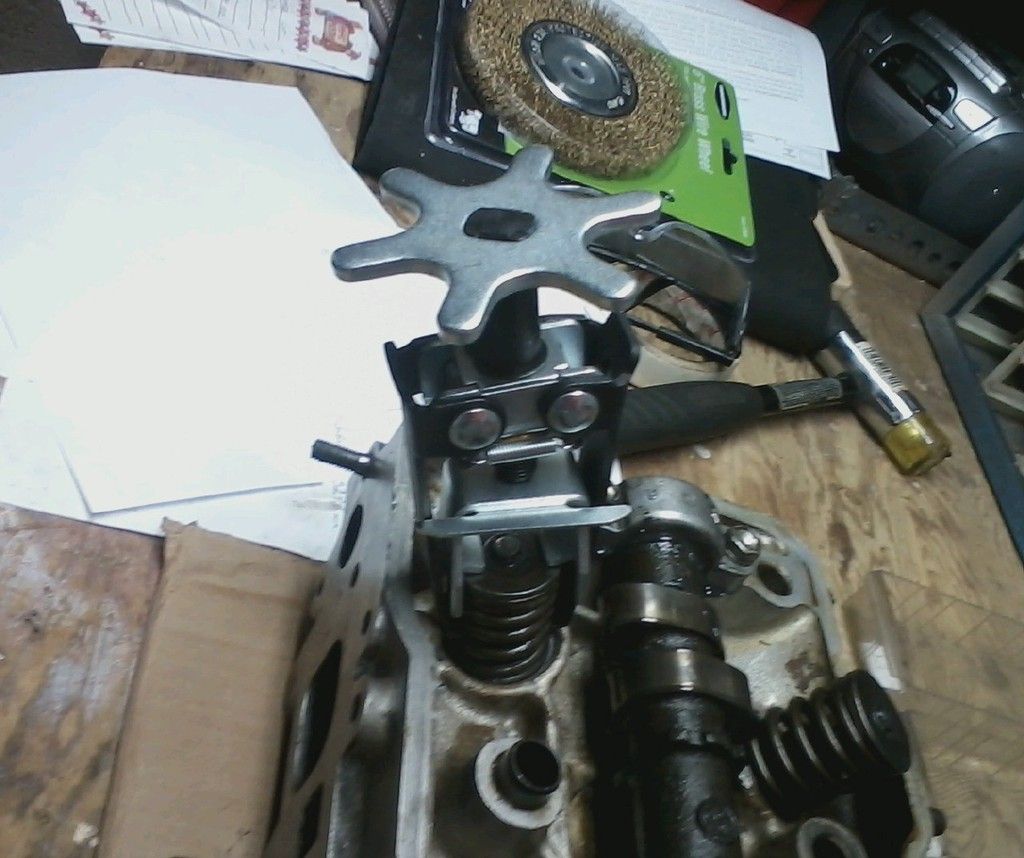
I pulled a few drawers out of my little organizer doo-dad to keep the valves situated in such a way that I can remember where they go when I'm all done
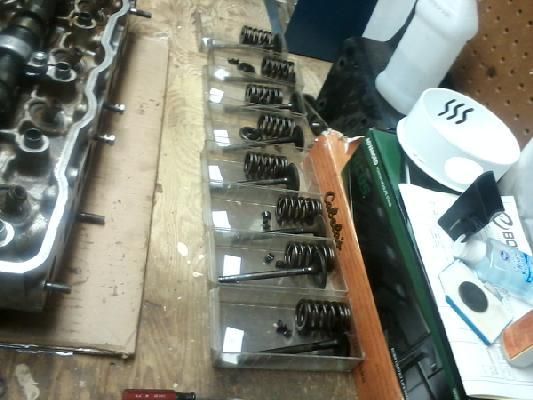
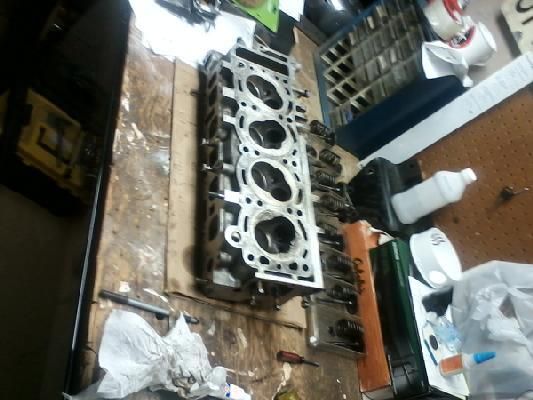
Craig: I've heard of the drill method before (ok, well I heard it mentioned in the video I just watched ![]() ) but went with the slower suction cup thingie where you rub your hands together like your making a fire to try to keep the risk reduced to a manageable level. It's slow but I'm making progress.
) but went with the slower suction cup thingie where you rub your hands together like your making a fire to try to keep the risk reduced to a manageable level. It's slow but I'm making progress.
The intakes cleaned up right away, but there was some pitting on the exhaust valves that's a bit harder to get rid of:
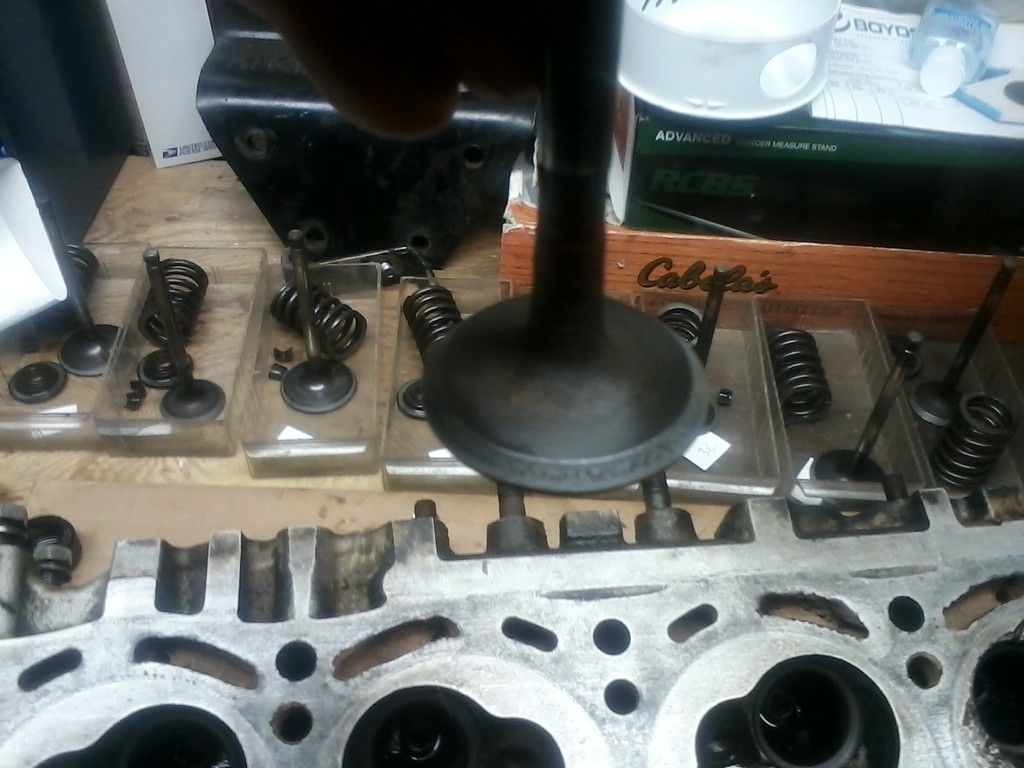
Oddly enough, (pr predictably) most of the leaks noted in the test were at exhaust ports. So that's promising.
All the work I'm doing right now is on my old head. Why you ask? Well when I removed the first valve from the exhaust of the new head it was WAY worse than anything I had going on in my old head
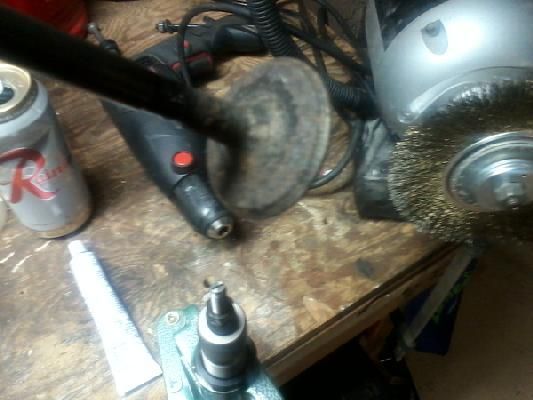
The pitting was deeper, and more abundant, plus they were dirtier not only on the back of the valve but through the entire exhaust port as well. There was also some pitting on the valve seat that I did not get a picture of.
I'm sure that will all clean up if given a chance, but the part that bothers me is the depth the valves sit in the old head versus the new head. (see Old / New below)
Old:
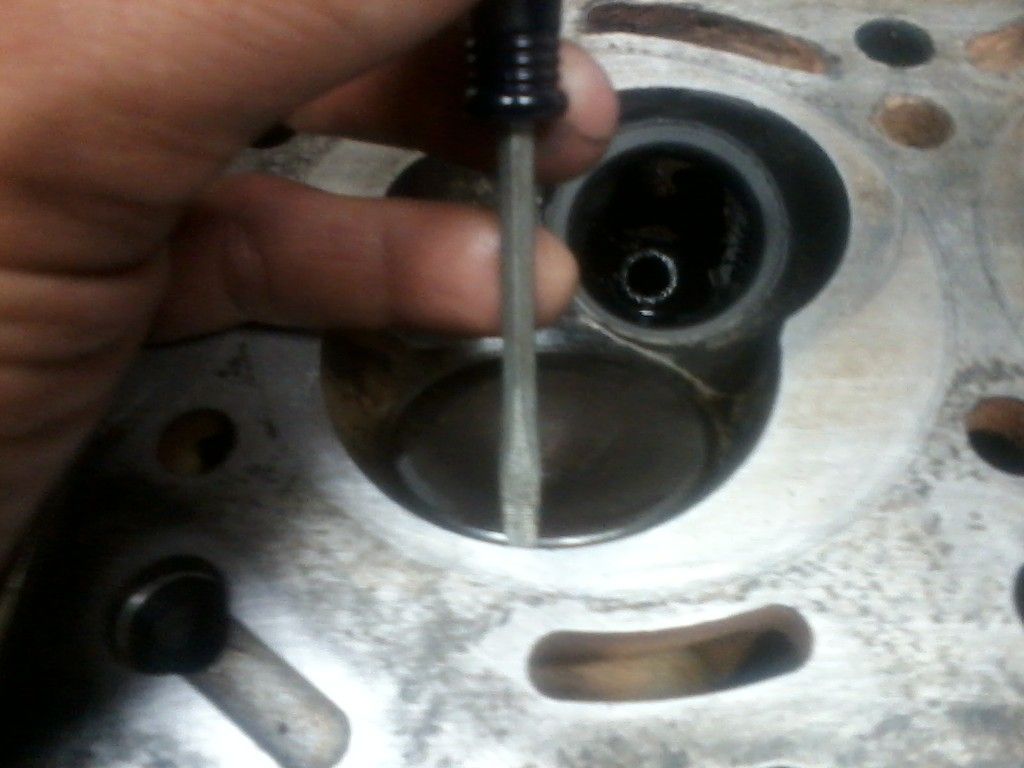
New:
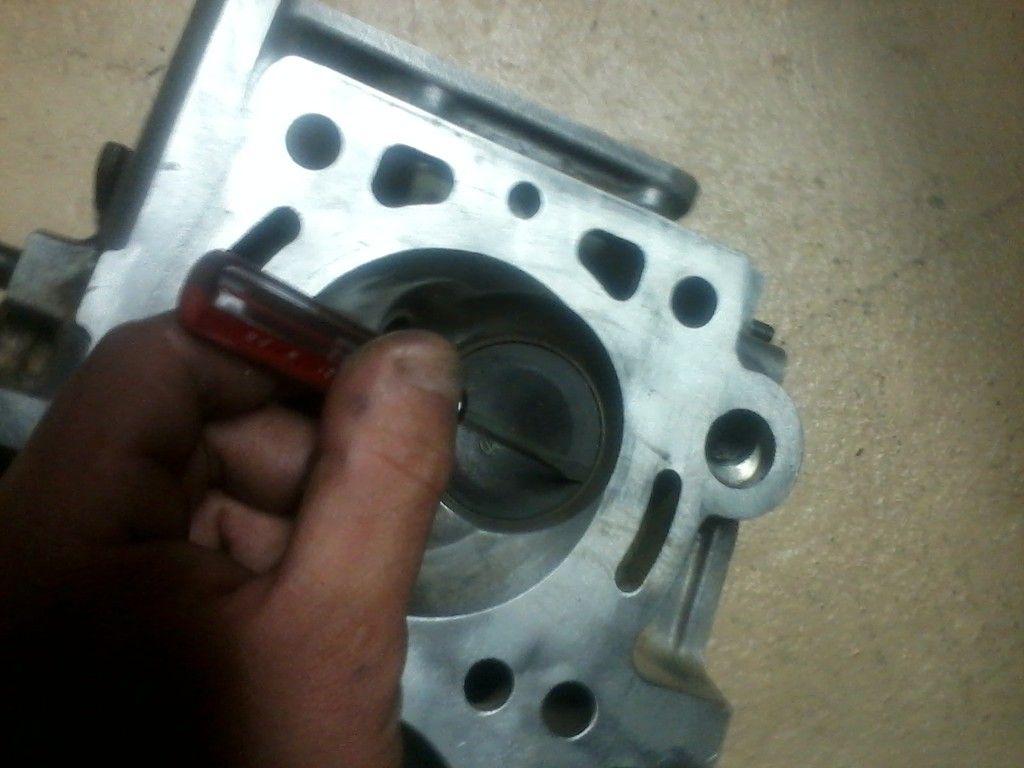
As you can see there's quite a bit of difference in how low the valves are seated. In my old head the intake is very pronounced, where in the new head they sit almost flush (if not a bit recessed). That didn't give me any warm fuzzies, and I'm getting kind of tired of working parts that are questionable only to have them not work out and then have to question why ![]()
All in all the valve lapping seems to be going pretty good. I have the #3 and #4 exhaust valves left as I type and then I hope to do a bubble test before calling them good.
All in all, kind of a relaxing way to wind down after putting the kid to bed ![]()
Good times
Day 9
Couldn't sleep again. That darn piston was nagging at me so I had to go out to the garage to see what's what.
1:30 am is kind of dark, even this far north, so there aren't a lot of pictures to go with. The skinny is: I had to raise my engine up 2" to get the oil pan off. When I went to remove the engine mount bolts I found that the driver's side was already missing. interesting...
I removed the bolts on the passenger side and raised the engine by using a 4x4 post on a jack that was sitting on cinder blocks. I then slid a 2x4 under each of the engine mounts (flat) and lowered the engine so it's resting on those. Don't worry, it's all pretty secure.
With the engine raised I got a good look at the oil pan gasket. There is definite evidence of someone being in here (in the form of orange gasket sealer). This normally wouldn't strike me as odd on a truck of this age, but if you recall correctly I had the engine replaced professionally when I bought the truck in 2003 and I've never had the oil pan off. This means that one of the three previous owners was in the bottom of the engine looking around. Quite possibly looking for what I found today:
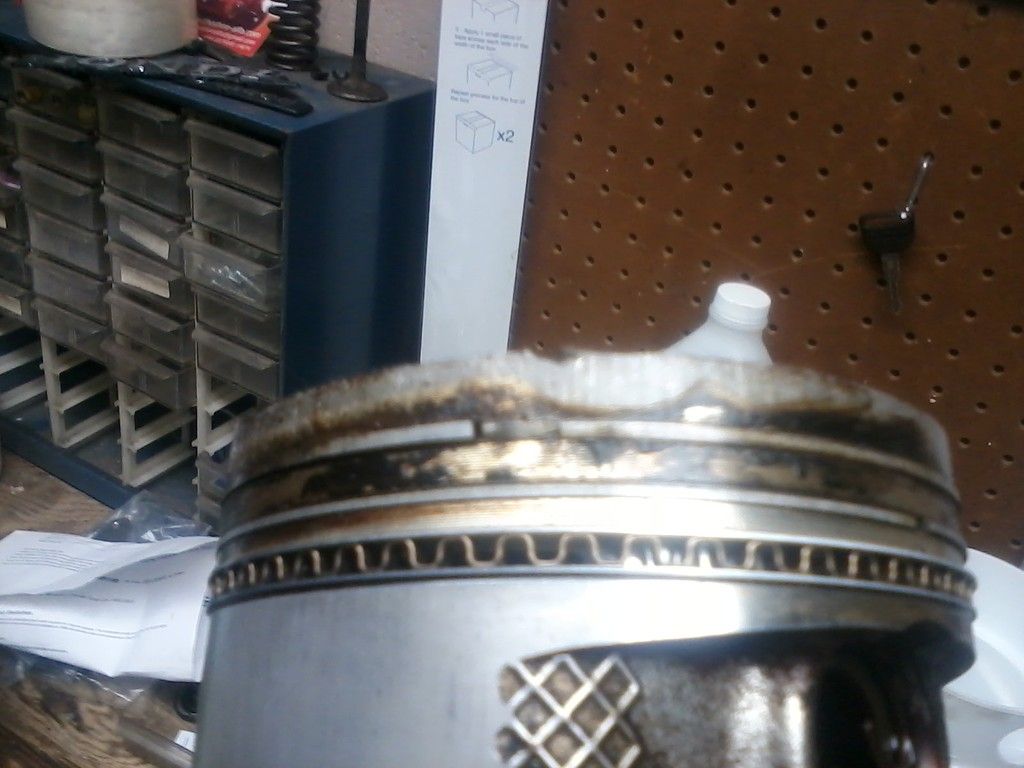
Bazinga!
Broken compression ring on piston #4.
On that note it was back to O'reilley's (after a nap. They're not open at 2am) to order a new piston, piston ring set, oil pan gasket, and rod end bearings. I went to the Stealership for a head gasket. The boards speak pretty fondly of the OEM gasket and for $100 it better have berkeleying magical powers.
Speaking of rod end bearings:
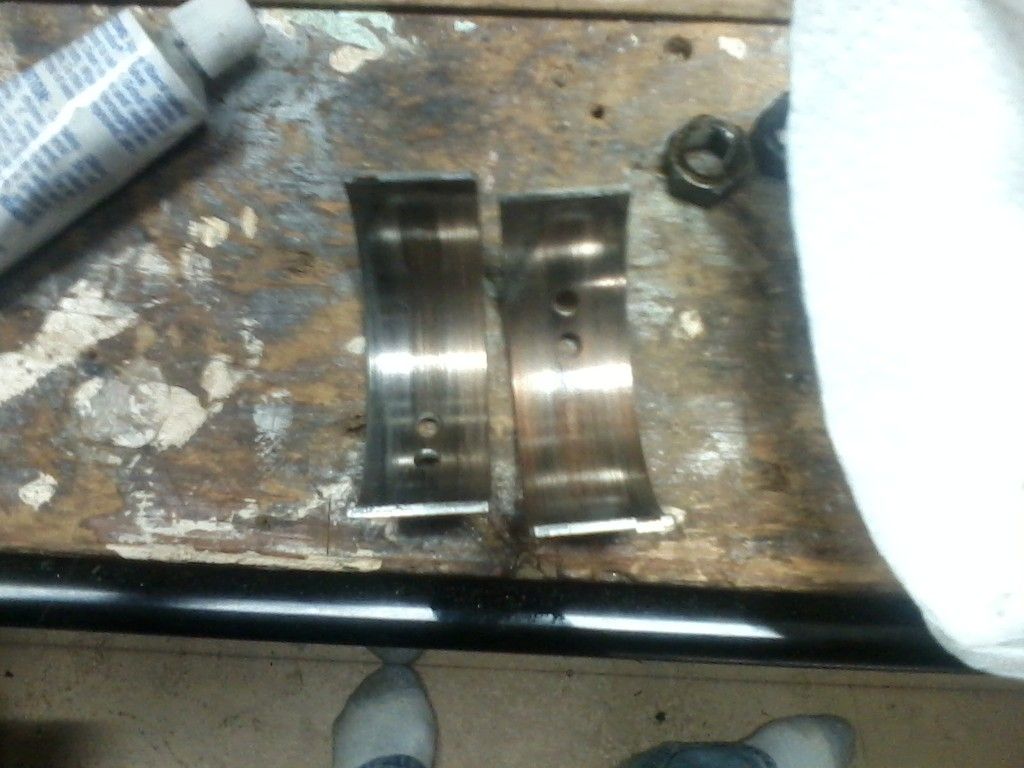
So the question becomes:
All four, or just #4? Thoughts?
I realized very quickly that I'm going to have to be extremely cautions when it comes to dirt contamination. In the two seconds it took me to get this out I could already hear grit between the rod end and the bearing when I put them back together for a "fit test". Yikes.
I'll probably do what I can in my clean basement, wrap it up tight, and very carefully install in the garage.
In reply to petegossett:
It's an odd place. Situated just north of the Columbia river and west of the Cascades, Toyotas here are preserved externally and abused internally. You'll find pristine examples for sale for about $6000, or wrecked up woods rigs for $2500.
Toyotas usually start life in the cities (From Everett to Olympia) and then go further out to die. It seems that as soon as you break the "north of everett" or "South of Oly" limits they get ugly quick.
Any Toyota 22R/ RE exported out of this area is punished by the toyota gods accordingly. ![]()
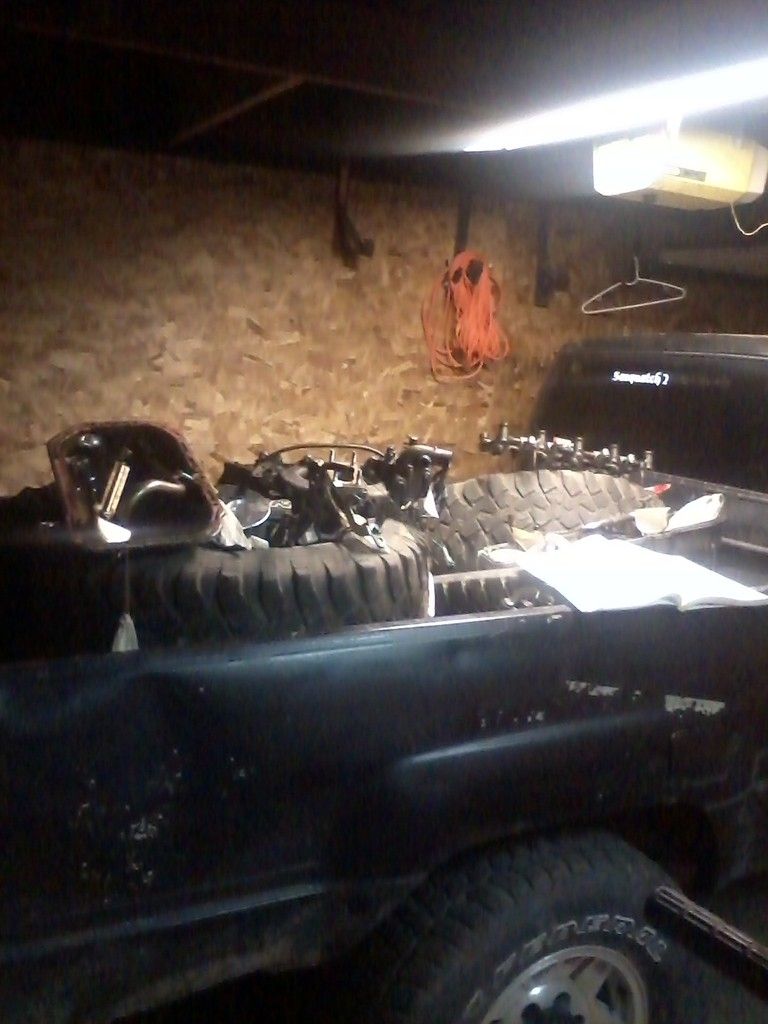
We can rebuild her. We have the technology. We can make her better than she was. Better, stronger, faster.
Day 9 (cont.)
The lapping is officially done, and the build (back) up can begin.

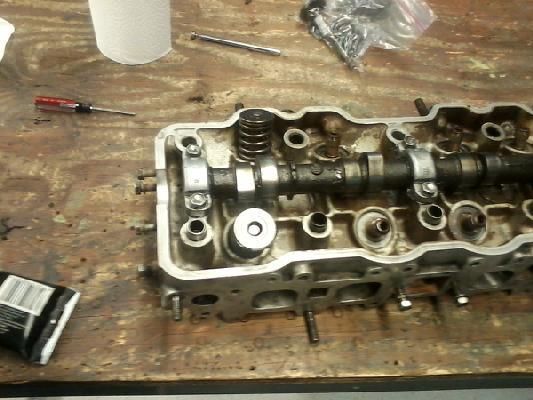
I tell ya, next time I'm going to take Mezzanine's advice and use power tools. My hands cramp any time I make a motion like I'm trying to rub them together. Washing hands? Cramp! rub them together to add effect to an evil sinister laugh? Camp! Thinking real hard at your desk and lose track of what your hands are doing? CRAMP!
I couldn't wait to get the bubble test going so I flipped the head over and grabbed what I thought would be enough water. The idea is I'll fill the combustion chamber with water and blow shop air into the ports (int and exh). If bubbles blow past the valves and through the water in the combustion chamber then I screwed the pooch royally.
Ready?
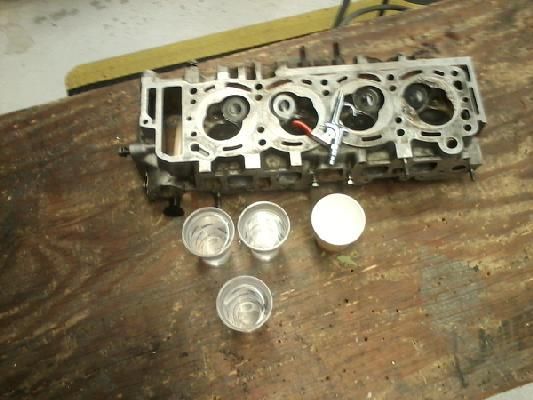
Well, there's just one teensy-weensy problem: I forgot to bring my spark plugs. It's not going to do me much good trying to look for leaks if there's a big hole in the combustion chamber where the spark-plugs should be. Looks like I'm just going to have to wait till tomorrow. ![]()
To be continued...
So this testing procedure was scheduled to occur at work? You aren't kidding about being bored there, are you? ![]()
feast or famine, gotta kill the slow hours somehow ![]() Officially, it's a team building instructional exercise that happened on our lunch break
Officially, it's a team building instructional exercise that happened on our lunch break ![]()
Day 10
Crap, we just hit the double digits didn't we?
Today I had a dentist appointment so not a whole lot got done before work. I was able to get the hydro test and bubble test done.
Since I was working inside I decided it might be a good idea to substitute water as the testing media instead of gasoline. I figure water's higher flammable ignition point, less hazardous vapors, and easy disposal procedures made it a suitable substitute in this environment. Of course water is the #1 cause of drowning, so if the leak is sufficiently large I may run into that issue...
Vigyazz, Celoz, Tuz!
(Ready, Aim, Fire)
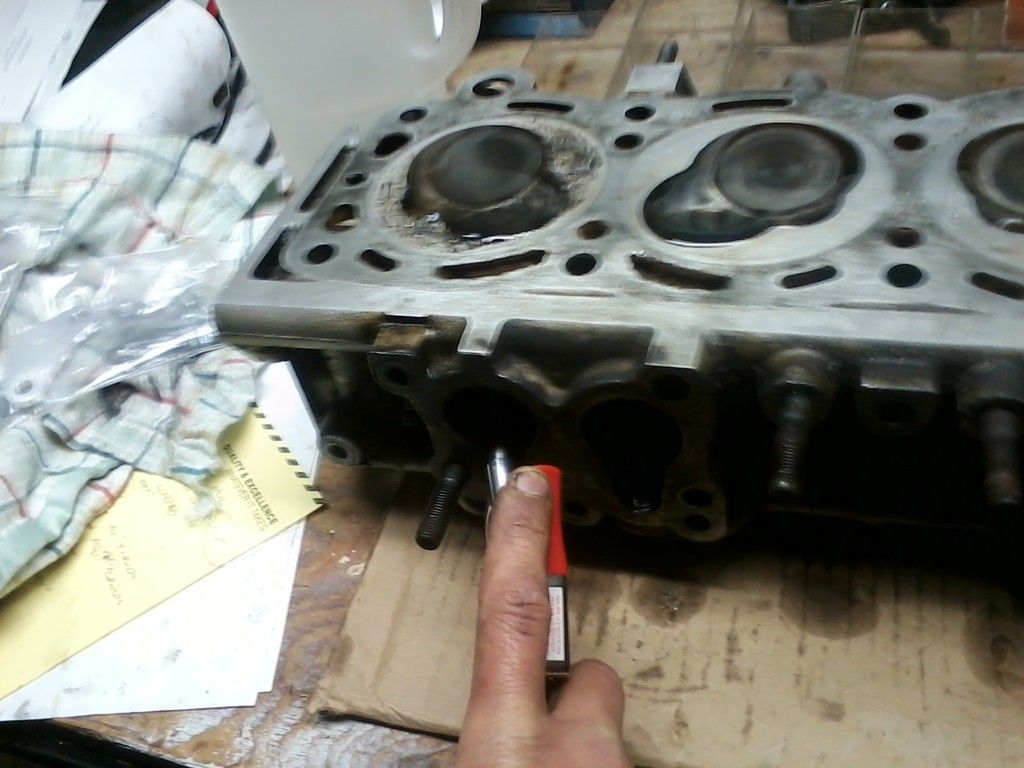
My first shot at each valve was at 60psi. I was nervous as crap, but alas no leaks! (dance a little jig here). I lined up my second shot at closer to 100psi. Unfortunately my air compressor only operates at "trickle charge" so I could only get about three valves tested before I had to do something else to kill the time...
so I figured, now would be as good as time as any to install the LCEngineering blank off plates I ordered:
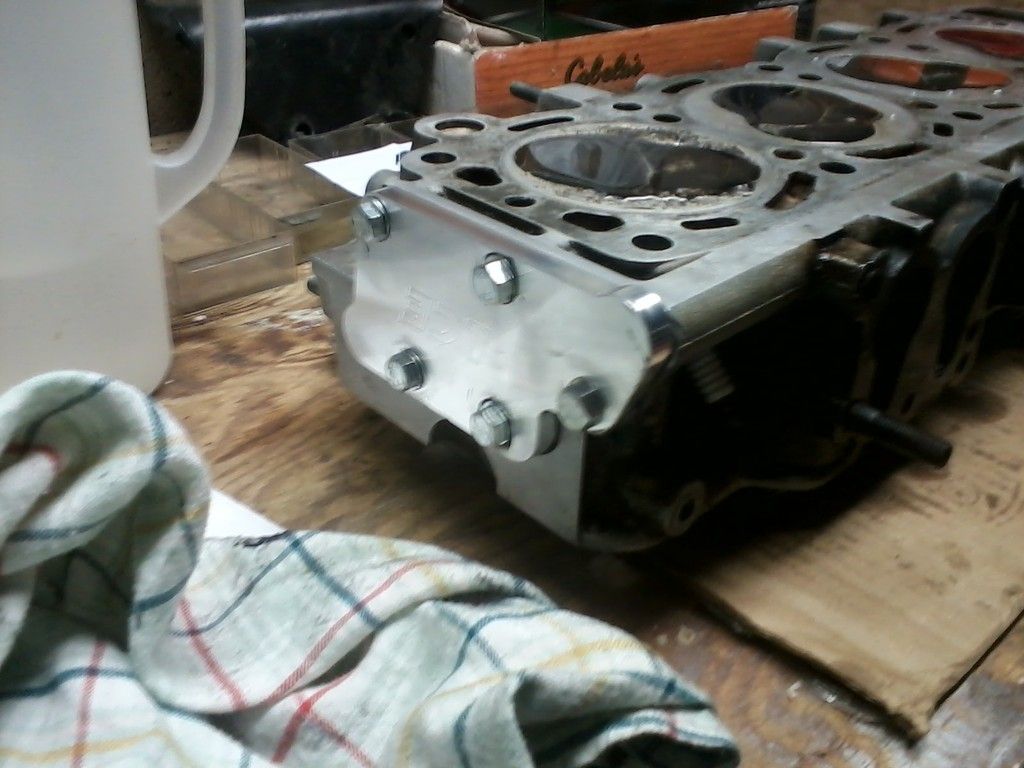
The big one blocks off the head's water jacket so I wet installed all the fasteners. There's another little one that isn't really holding anything back anymore, and that one got some sealant anyways (oh by the way, this Mega-Black high temp is some good stuff so far! Very happy with it.) That little bit of work was good for about 3-more valves before it was another wait for a recharge.
Eventually (about 15 minutes later) I noticed a little drip on the underside of exhaust #4. I hit it again with the air and did the best I could to block as much of the port as I could (to build pressure behind the valve) but I never could get it to bubble.
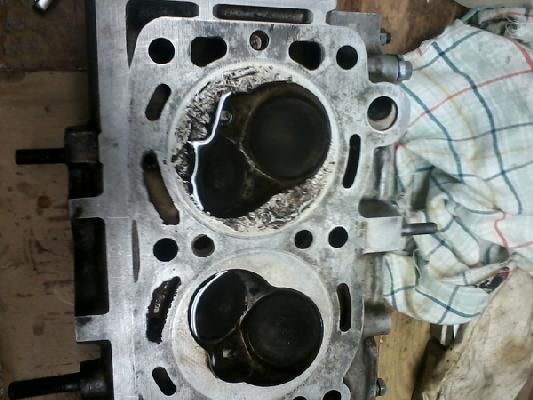
There was never a noticeable change in the fluid level, but after an hour or so there was a little water in the exhaust port:
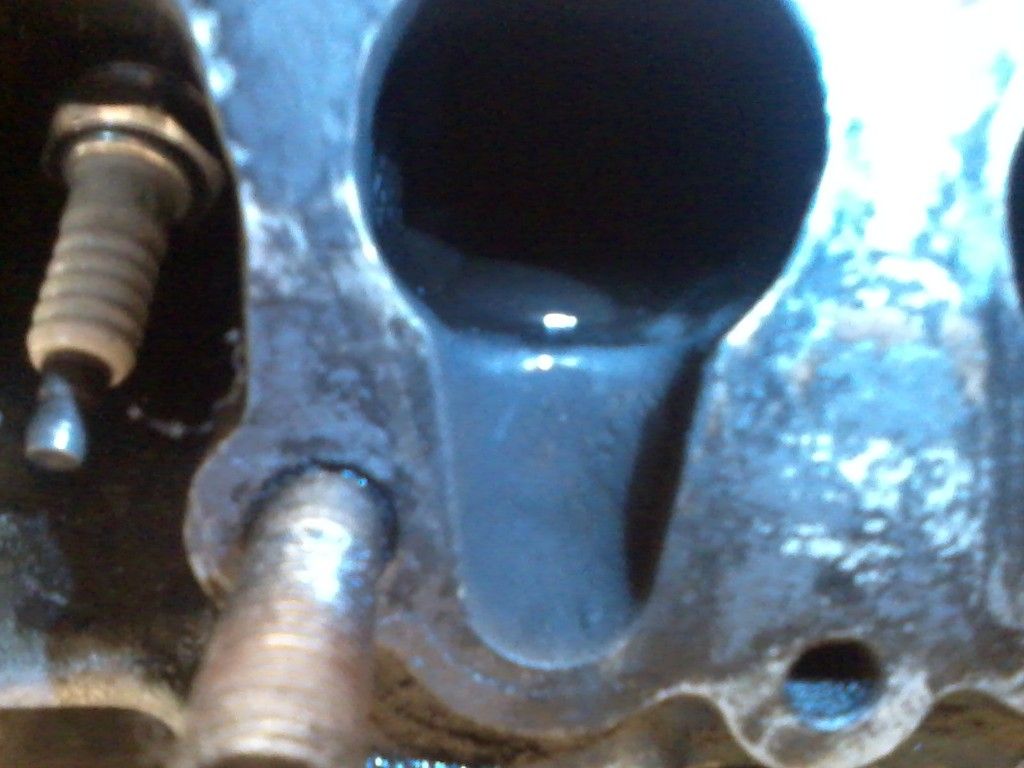
What you see there is actually smaller than a dime. It figures #4 exhaust would be the one to leak, it was the last valve I did and I was getting a little complacent. I'm sure that little guy wouldn't stop me from getting this beast running, but I spent a lot of time with these heads apart and it'd be a shame to put it back on like that. Tonight I hope to pull #4's exhaust valve and give it another good lapping.
Good times.
On my way to work I needed to stop by Oreilleys to pick up the parts I ordered yesterday along with a cylinder ring ridge remover, and a cylinder hone (both rented). It'll be my first time to do either procedure so with me luck (I only plan on working #4 as I noted no issues with the other rings).
Since I had a little extra time to spare after the parts store run I swung by the junk yard in search of a 22r to rob parts from. There was only one in the entire yard but all I needed were two bolts to the water pump (both MIA). While there I came across an '86 4-runner that was picked down to the bone (seriously, it was a skeleton) but luckily it still had its hood release latch.
One drunken night in my garage around 2004 I decided hood pins were the thing to have and drilled holes in my perfectly perfect hood to make them fit. Not needing the latch anymore I decided to promptly lose it. (honestly it probably went in the trash with the empty 16oz red dogs I was drinking then). I think it was one week before the shiny new hood pins started showing orange rust. Serves me right ![]()
Either way, the trunk of my Impala is starting to get a little full:
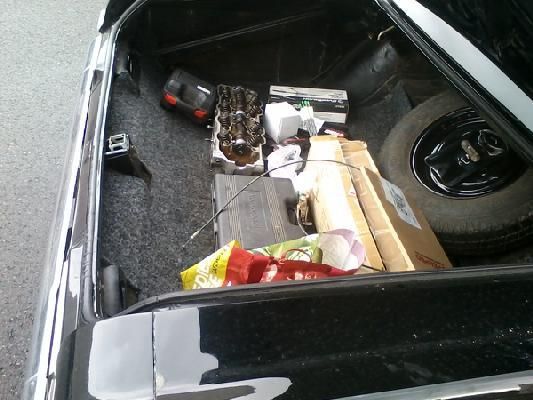
Oreilleys sends you a $5 gift certificate for every $150 you spend. Today I received $10. See? This Toyota is paying for itself already! ![]()
As the great poet warrior Ice Cube once said "Any day that does not require an AK, is good."
Day 10 (cont.)
I was able to take an hour or so and give #4 exh. the lovin I thought she needed.
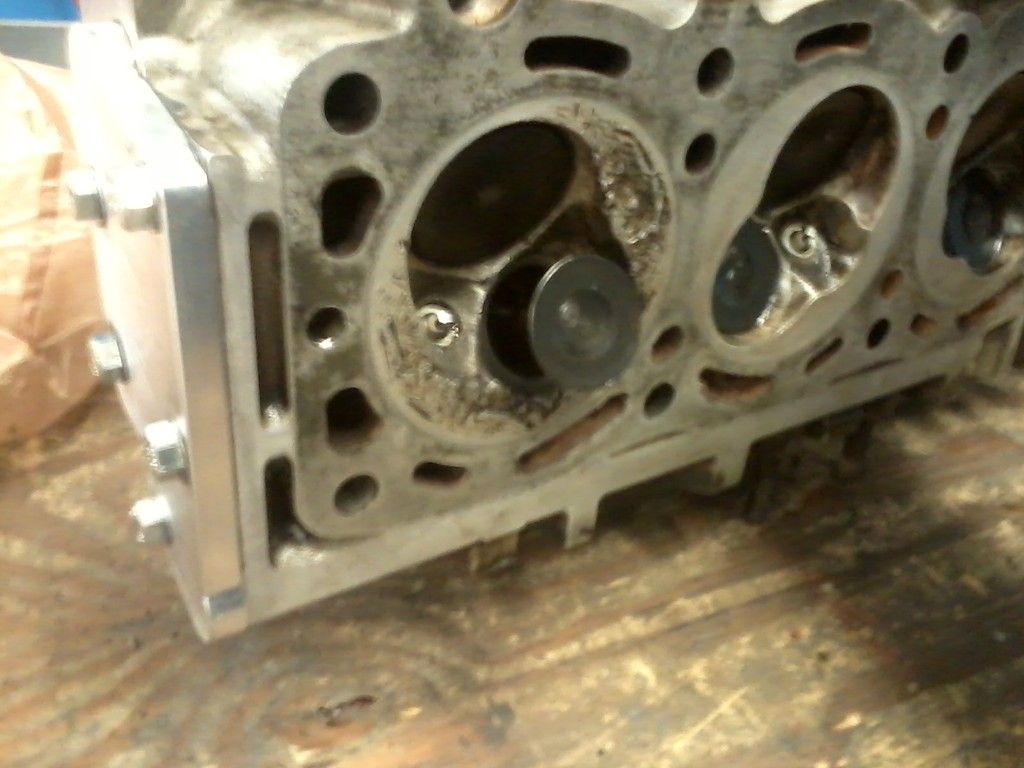
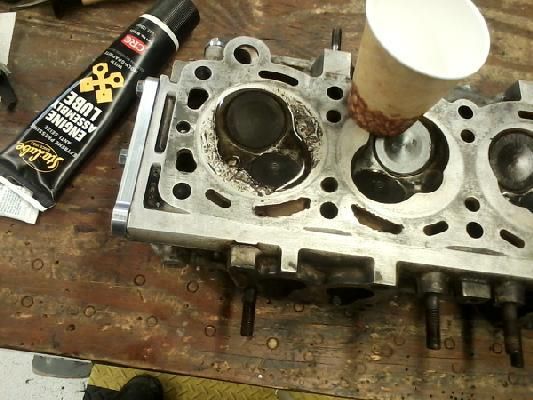
Was it good for her though? Only time will tell.
Hydro test in progress, clock starts one hour from my mark.
Ready....?
Mark!
Time test now started, will reconvene in one hour for results. (if you've got fingers, I'd appreciate it if you'd cross them).
bgkast wrote: Slap that puppy on and make it RUN!
YES SIR!
Day 11
We start today with a rag down the cylinder. I'll be running a hone in there in a second and I don't want to smack anything important:
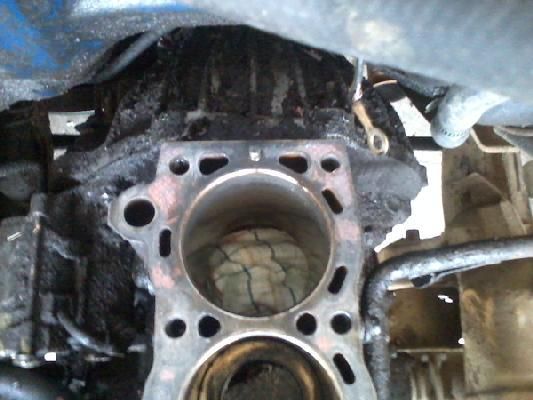
I had the worst time getting the ridge ring remover to center properly, but I figured it was because it was a rental "powerbuilt". (so a harbor freight equivalent that's been used by people who don't own it...). In the end, and with some creative wrenching tension, we were able to get it "good enough".
Oh yeah, I had a buddy looking for something to do so I invited him over.
Anyhoo, eventually we got the cylinder gouged and honed to our satisfaction and in went the piston. You know these puppies mean business when they have a lightning bolt on the front!
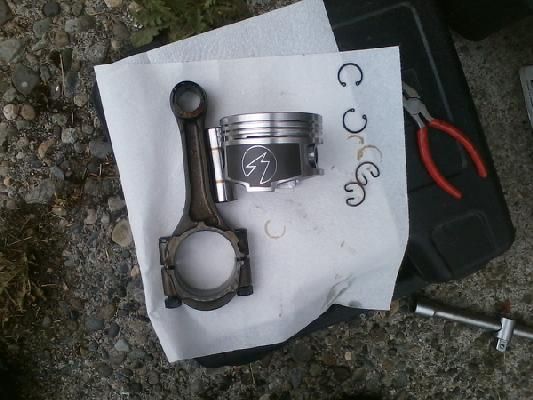
After that bad-boy was installed lightning quick (nyuck nyuck) it was back up on blocks to install the oil pan. I felt kind of bad not getting a picture at 1:30am last time, so I thought I'd make up for that now. This is how the engine was raised:

The jack and post are there only for looks, they get removed before I crawl under (cinder blocks too)
After that it was back down a well traveled path for me by now. Heads, timing chain, and all that good stuff was stuck back on at warp speed. I need to get ready for work about 12:00 noon, and we were pushing 11:30am easy by this point. Lucky for us I'm getting to be quite the Toyota head professional. By 11:45 we were able to turn the engine by hand (barely).
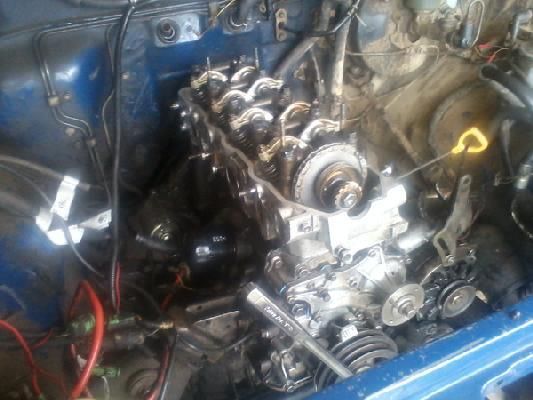
This baby was tight as a drum!!! So tight (especially at TDC for #4) that we decided a breaker bar should be used in place of our socket wrench.
I was getting worried. The spark plugs have been removed so there should be no reason it'd build any sort of compression... Is that new piston hitting the head? are those bearings too tight? E36 M3, how WAS that ring gap really?
In the end I decided it was probably best to just shoot some used oil down the plug hole and let it soak while I went in and got ready for work. After about 30 or so minutes the engine was noticeably easier to turn.
Shwew!
It still gets a bit "tight" when #4 gets close to TDC, but I attribute that to the ridge ring gouging we did in that area. Must still be pretty rough at the top, even after the honing.
Man, again I find myself about a valve adjustment away from spinning this beast with its own starter, and as much as I hate to do this... This is where I end day 11:
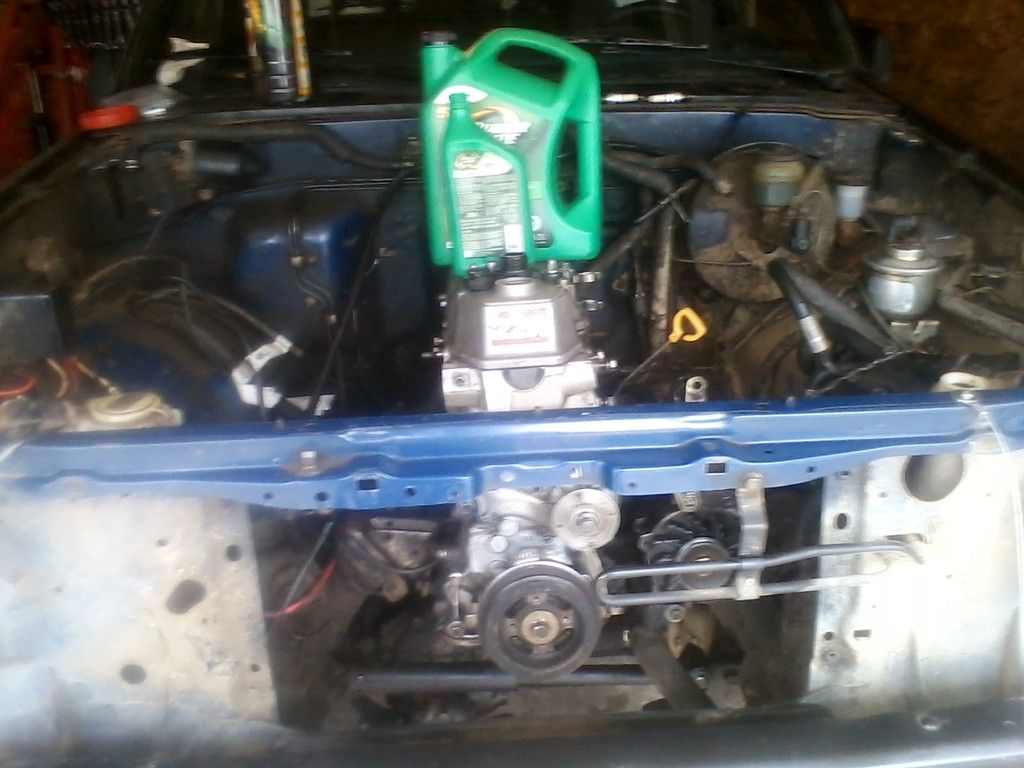
The oil pan is filled to about 1/2 capacity. Tomorrow I hope to prime the oil pump, and start working on ancillaries. I was wondering though: Is there any point to doing a compression test? Or should I go straight for the proverbial throat and try to fire this puppy up?
Good times.
You'll need to log in to post.