1 2
XLR99
XLR99 GRM+ Memberand HalfDork
12/5/15 4:52 p.m.

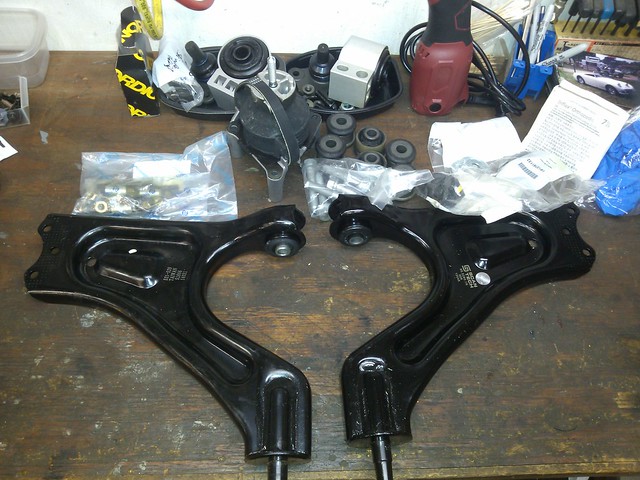
My '04 9-5 Aero Wagon is about to hit 175k. It was about time to take it down for maintenance for awhile: the subframe bushings were shot and creaking and the front end was pretty loose overall with most of the bushings being the ones that accompanied the car out of Trollhattan 12 years ago. I had been slowly collecting up pieces for awhile, but had deferred doing anything after messing my back up again this summer. I figured I should get all this stuff done before winter, which could happen any time between Sep and Jan.
\Shiny new parts\\" />

The tipping point came when the coolant bypass valve started leaking.

I figure that some VW engineers were on loan to Saab/GM when this idiotic piece of over-engineering was created, or they were experimenting to see if Colin Chapman's grave would show any seismic activity. I guess the idea is to bypass the heater core while the AC is on to slightly improve AC function, for the US market only. Here's the offending valve and 436ft of hoses on top, replacement hoses on bottom: <img src="2015-11-27_08-38-41"
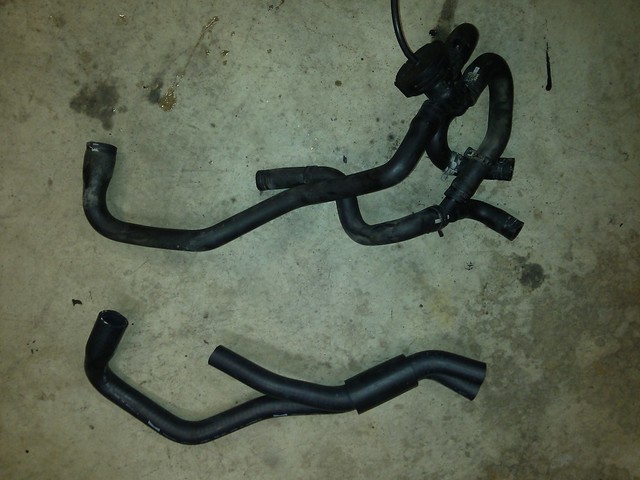
I noticed the reservoir was a bit low while shooting PB blaster on some fasteners, filled it up, and started off for work. Halfway there, the car informed me that more coolant would be needed. I managed to get home after taking a gallon of sterile water from work, and stopping to buy several gal of distilled water. Three stops and ~2 gallons later we were home.

When my wife got home, she says "Oh, the SID told me the coolant was low yesterday. I forgot to tell you." Thanks dear...

XLR99
XLR99 GRM+ Memberand HalfDork
12/5/15 5:08 p.m.

So, being the idiot savant I am, I figured I'd do both the subframe/suspension stuff and a quick update of the cooling system in one easy project. What could possibly go wrong?

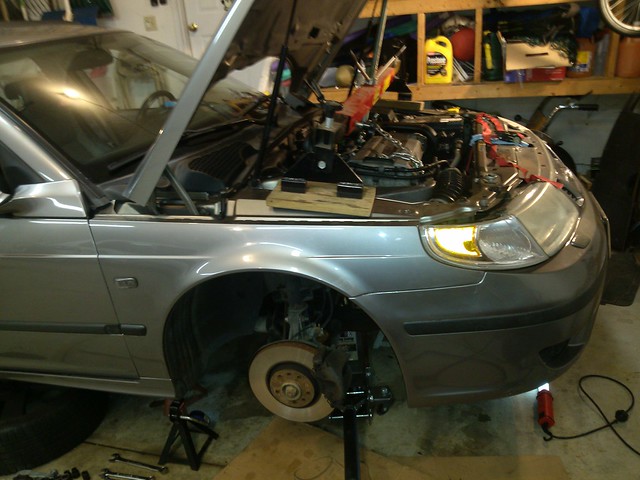
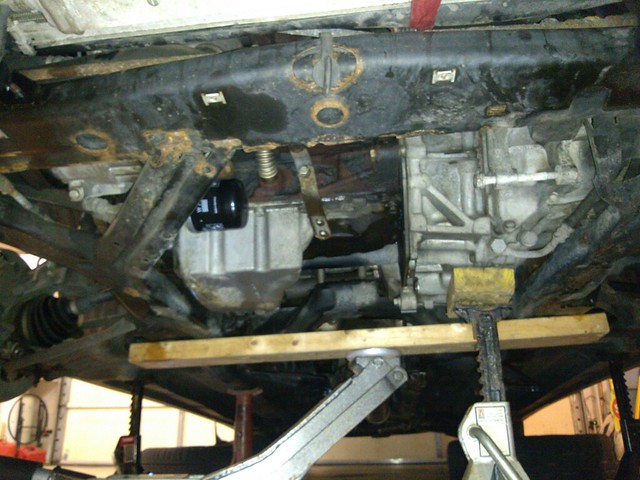
The following morning, I dragged my decades-old HF engine supporter thing off the wall, and the car ended up looking like this: <img src="Setup for Subframe Removal view from above" />

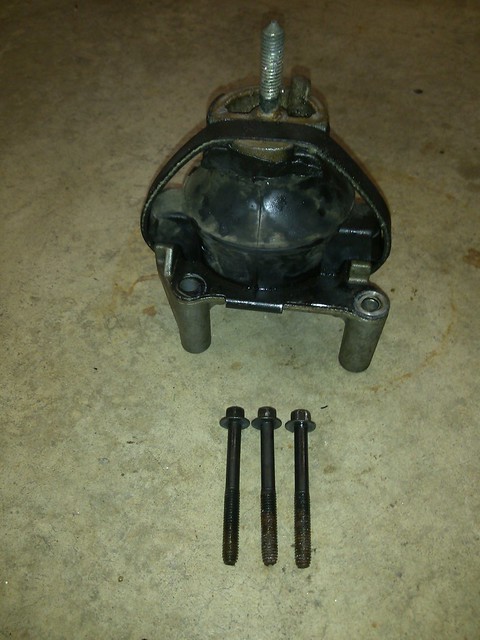
Dropping the subframe on this car is pretty easy with one exception: the rear motor mount. It is carefully crafted to wrap around the steering rack, held in place by long M6 bolts with 10mm heads that are virtually impossible to get to.
Seems innocuous sitting there on the floor: <img src="1114151642" />

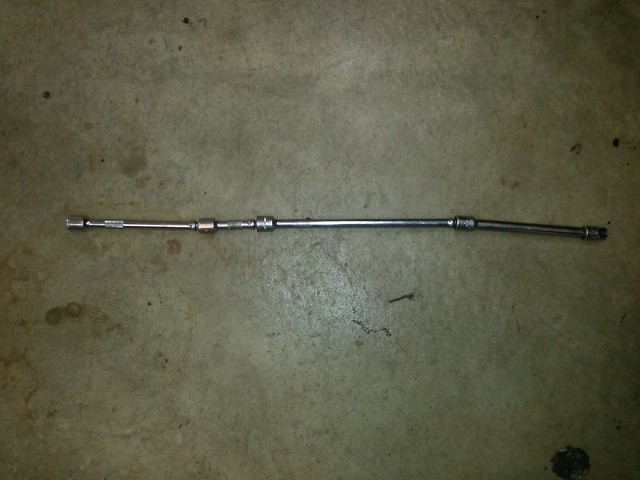
So, three bolts. One is easy to get to. The rear one can't be seen, but you can feel it; can't quite get it from under the car either. It requires this concoction of 3/8dr extensions to reach from above: <img src="Create this first" /> Which looks like this when trying to loosen it from above: <img src="Removing Rear Motor Mount" />

The other bolt was equally fun to get to. Here's a view from below, looking almost straight up showing the steering rack above the subframe and rear motor mount. Black tube at the top is the center driveshaft. I discovered that a breaker bar could 'just' fit in there to pop the bolt loose with some heat and 3 days' worth of PB blaster.
<img src="Motor Mount bolts" />

Good times...

XLR99
XLR99 GRM+ Memberand HalfDork
12/5/15 5:19 p.m.

Having finally defeated the evil rear motor mount, we set up to drop the subframe. Being a belt, suspenders, and duct tape kind of guy, I put a stand under the trans just in case. The long 2x4 goes between the A-arms to lower the subframe down.
<img src="Setup for Subframe Removal"

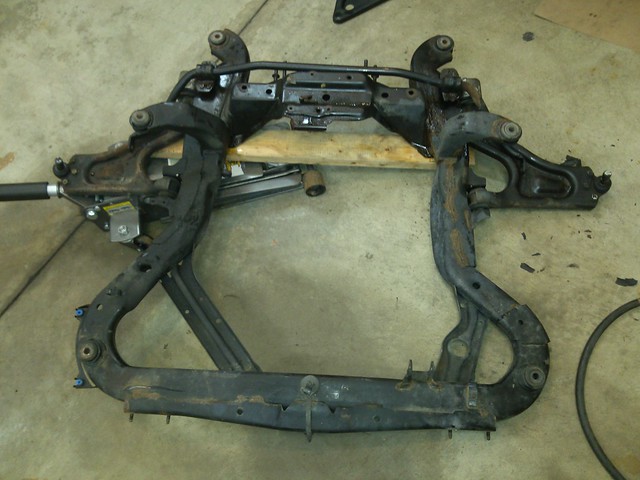
So a few minutes of loosening big bolts, and we got this:

<img src="This just fell off..." />

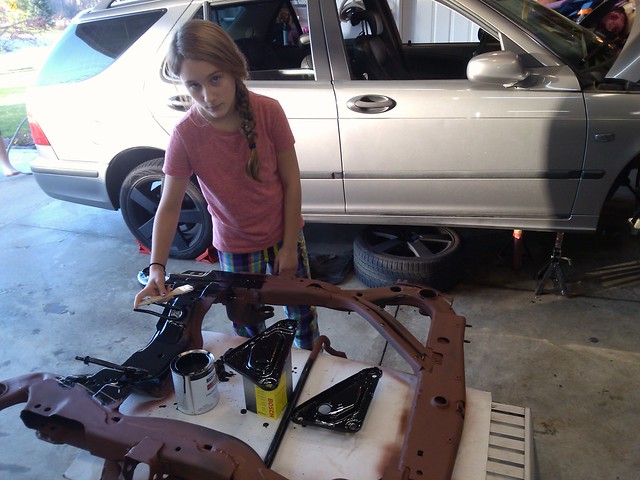
Because I have OCD, it's obvious that we couldn't put a rusty piece back in the car. So, next phase involved some time with a wire wheel, Rustoleum rusty metal primer, and semi gloss black (brushed on to get maximal coverage, we also used spray for touch up). Add some joyful child labor:

<img src="2015-11-22_10-29-46"

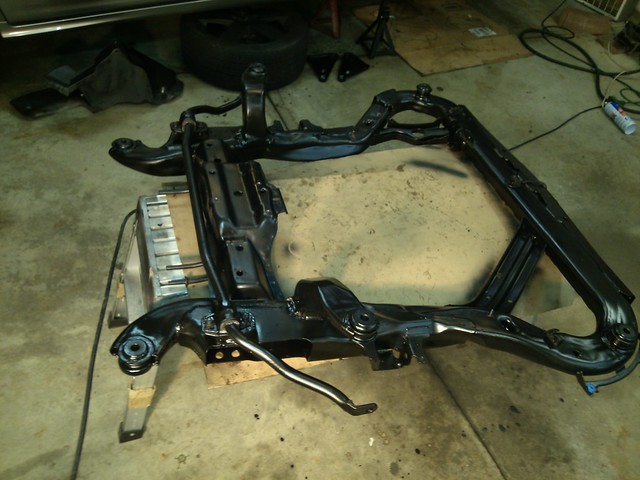
And bazinga: <img src="Subframe after paint" />

XLR99
XLR99 GRM+ Memberand HalfDork
12/5/15 5:37 p.m.

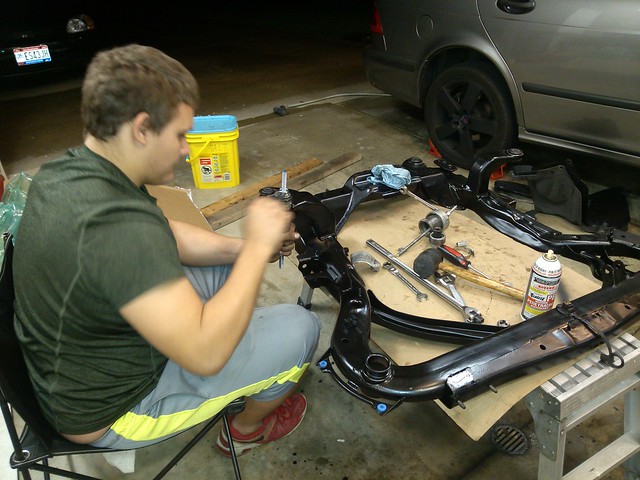
The rear bushings were so shot that my daughter pulled the centers out by hand. I discovered that an air chisel could carefully blow the old outers out in a few seconds apiece.

For pressing new ones in, the front and rear bushings are conventional with steel outer collars. We got these pressed in pretty easily using 1/2" threaded rod, a big 3/4" drive socket, and a bunch of thick washers. The middle pair have plastic outer collars that were less fun to press in. They tended to randomly pop out, deform, refuse to conform, etc. We finally were able to wrestle them in using a hose clamp around the collar, and two people to engage in hand to hand combat with the damn things.
<img src="Battle of the Bushings" />

I think next time we may try dry ice to make the collars less likely to deform and pop out; also maybe the clamp-it safety wire tool may help.

Here's the subframe with new bushings, repainted sway bar with new bushings. My son chased all the tapped holes, and shot FluidFilm into all the subframe tubes and voids before we hung it back on the car. <img src="Bushings and Sway Bar Installed" />

We hung the new A-arms after the subframe was back in place. New ball joints and tie rod ends completed that phase of the job.

Edit - should anyone else do this job: put some tape over the hole on top of the right side of the subframe prior to doing battle with the serpentine belt idler pulleys. Just do it, don't ask questions. Fortunately we had two spare engines to steal hardware from .

XLR99
XLR99 GRM+ Memberand HalfDork
12/5/15 5:56 p.m.

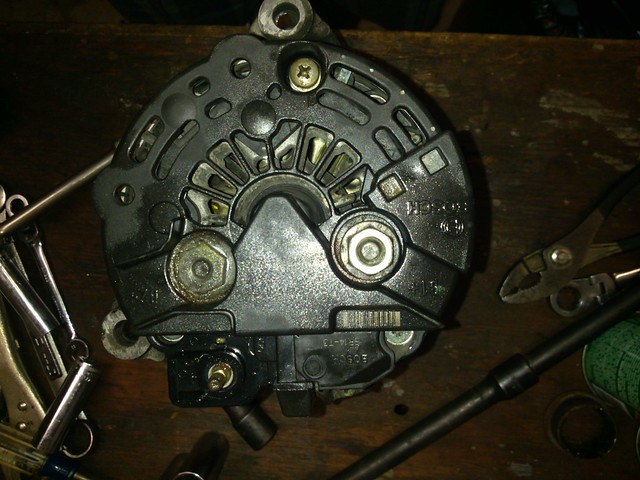
While the subframe was on the floor, I took advantage of the access to pull the alternator out the bottom. Two 8mm allen bolts, easy peasy, or not. There's about 1.5" clearance between the timing cover and frame rail, making alternator, pulley and serpentine belt replacement a bit sporty for those of us with fat sausage-like fingers. Because I'm poor, I decided to replace the voltage regulator and brushes for $40, rather than buy a refurbed alternator for 185-200. The bearings still spin freely, so why not? Alternator on the bench with the rear cover on. We soaked the bolts and screws in PB Blaster overnight first. <img src="Back of Alternator" />

A hand impact is the perfect tool for popping those screws loose.
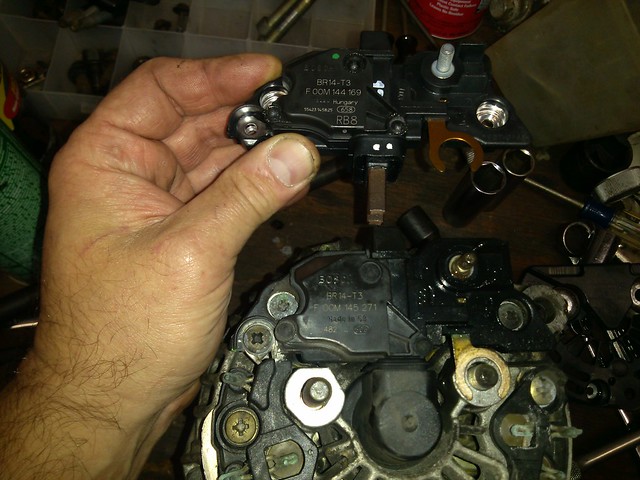
Old and new VRs: <img src="New Voltage Reg/Brushes" /> <img src="Old & New VRs" />

Next came the cooling system. I didn't take any pics because it was basically an exercise in misery. To change the water pump, the PS pump has to come off, then after several hours of battling with various hose clamps and bolts, the old water pump is out. Reinstallation is also aggravating, due to the banjo bolt connection for the turbo on the bottom of the WP.

Swapping out the stupid coolant bypass valve was also painfully annoying in terms of the hose clamps. There's a solenoid that must remain connected to avoid dropping CELs; and we replaced the vacuum line and T connector with a new line to clean things up.

To complete this phase, we replaced the serpentine belt and all of the pulleys.

I've come to do idlers with the belt after an incident many years ago where an idler failed and destroyed the alternator mount. On Christmas Eve. When it was 5 degrees. (Fortunately a local machine shop with big enough tools was able to have a guy repair it on Boxing Day. Thanks again Cardinal Machine!)

XLR99
XLR99 GRM+ Memberand HalfDork
12/5/15 6:16 p.m.

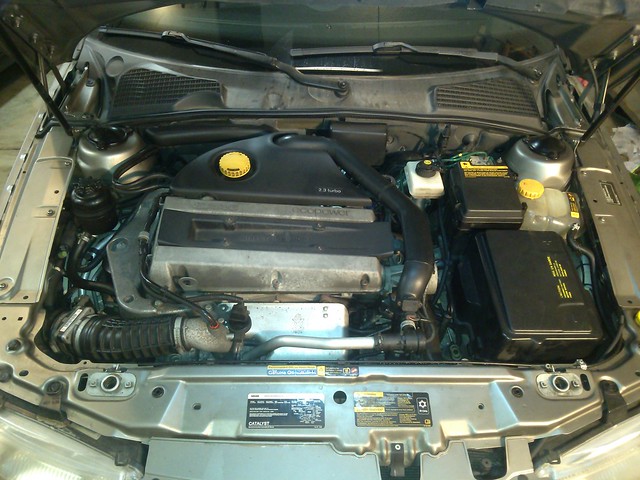
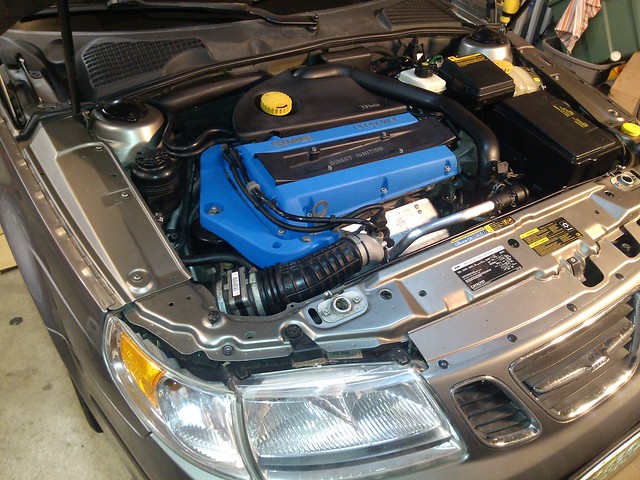
Final phase. From this: <img src="1107151906" />

To this: <img src="1205150845" />

-Painted the saddle bracket and valve cover with VHT self etch primer and wrinkle paint. Baked for an hour at 200deg. For best results, do this part while spouse and opinionated, vocal kids are not at home; even though I have an old oven in the basement I still got crap about it.

I used a 2" spin-on sanding disc set to get the paint off the lettering on the valve cover and DI; then clear coated with this Eastwood clearcoat I found in my paint cabinet.

The valve cover bolts are from Eeuro, but their cost was a bit lower than Grainger.

I very lightly blasted the saddle bracket bolts to not blow off the galvanized coating, then sprayed the Eastwood clearcoat on top. It actually makes a cool dark silver/gray finish coat that I like.

The cobra intake tube was blasted, run thru the dishwasher (again, admit nothing if kids start asking questions; they love nothing more than seeing dad get crap for stuff like this), and sprayed with the clearcoat. I also de-hazed and polished the headlights so we can see better now that it gets dark at 5:00 .

Robbie
Robbie SuperDork
12/5/15 8:25 p.m.

Awesome work, you have a totally new car.

Did you update the alt and water pump because they were falling or just because you had access?

Also, love that you are getting your kids involved! Mine are still a few years away from helping.

XLR99
XLR99 GRM+ Memberand HalfDork
12/6/15 7:32 a.m.

I did both as PMs due to the car's age. The alt is far easier to get out with the subframe off, and I was trying to remove possible failure points in one fell swoop, hence the rad hoses and water pump. Regarding kids - my son has a vested interest because he's low man on the transportation totem pole ; he did not like me using his car while this one was down.

wheelsmithy
wheelsmithy GRM+ Memberand HalfDork
12/6/15 8:21 a.m.

This is a great read. Thanks for sharing.

thestig99
thestig99 HalfDork
12/6/15 9:22 a.m.

Nice work, those cars really appreciate that particular project.

jfryjfry
jfryjfry New Reader
12/6/15 10:08 a.m.

Does it live again??

Stealthtercel
Stealthtercel Dork
12/6/15 11:03 a.m.

I LOVE your photo of "joyful child labor."

"Good job, Sweetie! Remember, in a few years YOU can drive this car!"

"Back in your day, Father, did people use the expression 'Get a life'?"

XLR99
XLR99 GRM+ Memberand HalfDork
12/6/15 12:22 p.m.

It does live again; I'm still running distilled water thru it to get rid of the dexcool after flushing it. I think one more cycle with water and it'll be good. I also shot 3 cans of FluidFilm in and under the car to seal out the evil brine salt.

In reply to Stealthtercel, she was more aggravated that I was 'wasting time taking pictures' than helping her get it painted, hence 'The Look'. I pity the poor boy who tries to marry her someday, between her and the big brother.

Nick (LUCAS) Comstock
Nick (LUCAS) Comstock UltimaDork
12/6/15 2:33 p.m.

Add some joyful child labor:

I LOLed

bgkast
bgkast GRM+ Memberand UberDork
12/6/15 7:29 p.m.

Great work

Rusted_Busted_Spit
Rusted_Busted_Spit GRM+ Memberand UberDork
12/7/15 9:13 a.m.

Nice job. I almost the same job over Mothers day weekend this year to my 03 with one glaring exception. AT 230K miles or so I did not do anything with the alternator and I am now not very happy with myself at all. Oh well, live and learn.

Did you go with SAAB bushing in the subframe? I went with the Poly ones and the cars feels so much better, but the old ones were so shot that it may just be in my mind.

XLR99
XLR99 GRM+ Memberand HalfDork
12/7/15 5:27 p.m.

In reply to Rusted_Busted_Spit: I just used the stock rubber ones; the poly may not have been an option when I bought them last year. Also, my wife drives this car a lot and I didn't want to run the risk of adding any NVH.

Esoteric Nixon
Esoteric Nixon UltraDork
12/8/15 1:55 p.m.

I used poly bushings for the subframe on my old first gen LHS, as the factory Chrysler ones were a: expensive; and b: rubbish. I can honestly say that I noticed no increase in NVH, but of course YMMV.

XLR99
XLR99 GRM+ Memberand Dork
6/14/17 9:16 a.m.

Ugh...

It appears that I'll be doing some more major work on this car.

Yesterday morning I was rushing to get to work, as I backed out of the garage I heard a pop or something. I sort of passed it off and figured I ran over something on the garage floor. Had I been paying attention, I would have noticed that the balance chain noise thats been there for the last 75k or so was gone . I was more focused on work and planning in my mind for my workday, though.

Got about half a mile down the road, and the oil pressure light came on. Turned around, light went out. Made it home and switched cars, so now I get to drive a car without AC on the hottest week of the year to date.

Car still has oil in it, so I think the balance chain and/or tensioner failed. Not sure about the intermittent oil pressure problem though; maybe a piece of shrapnel ended up somewhere.

Good news is that I have about 1.5 spare engines, including a complete timing & balance chain set and oil pump.

I guess step 1 will be to see what's in the oil pan. (Step 0 will be to try to get some form of AC going in the Civic, cheaply).

Rusted_Busted_Spit
Rusted_Busted_Spit GRM+ Memberand PowerDork
6/14/17 10:02 a.m.

Joy. Good luck.

XLR99
XLR99 GRM+ Memberand Dork
6/15/17 4:51 p.m.

No actual progress yet; long, stressful work week which looks like it will continue thru the weekend. I've been having to serve as safety/common sense officer with my son's truck repairs this week after work . He's got a ton of energy, access to lots of tools, a shop manual, and just enough knowledge to be dangerous. I'm just proud that he actually opens the book, rather than just 'youtubing it' . Bonus for actually texting me to confirm that the torque settings in the book 'sound ok'.

Anyway...., based on how bad my back hurts before sitting under a car for a couple hours, and how little access there is to the chain case, I'm thinking about dropping the subframe/drivetrain and everything attached to it, the opposite of how the trolls installed it in 2004. That way, regardless of how berked the engine is, it will be relatively easy to work on/replace.

However, the HF 6 ton stands I have won't allow me to drop it onto casters and slide it out nicely.

So, if I were to build some cribbing to add some lift under the stands, how likely am I to end up on the news with some , with video of my wife saying 'I told him he was an idiot for doing this!'

Something like this, but with some 1x2 around the sides to add security:

XLR99
XLR99 GRM+ Memberand Dork
8/5/17 2:53 p.m.

Wow, this thing sat in the garage for six weeks .

Long story short, I just kind of walked around it and didn't have the energy to do anything with it. My son finally shamed me into getting something accomplished.

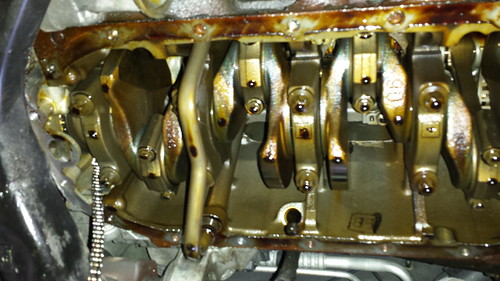
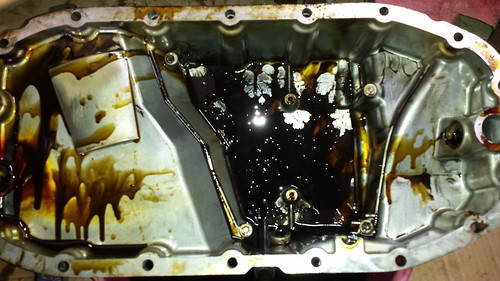
So, after some fun, wrestling off the oil pan, I was greeted with this view of the bottom of the engine:

20170805_151921

Yes, that's the balance chain, most of it, dangling down.

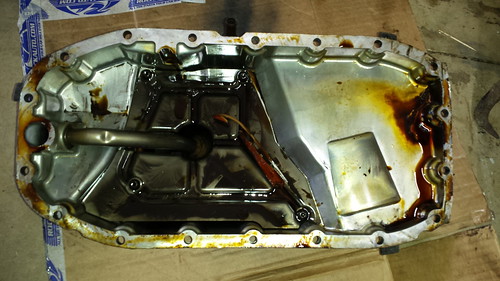
Then I looked down into the pan.

20170805_145651

Yes, that's ~75% of a balance chain guide. But wait, let's pull off the windage cover...

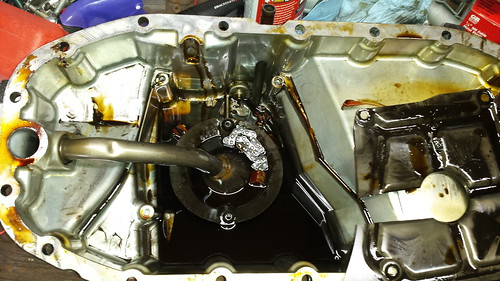
20170805_150420

So, now there's more chain, some oil, and a bunch of shrapnel.

20170805_151755

Shrapnel, some plastic, some ferrous.

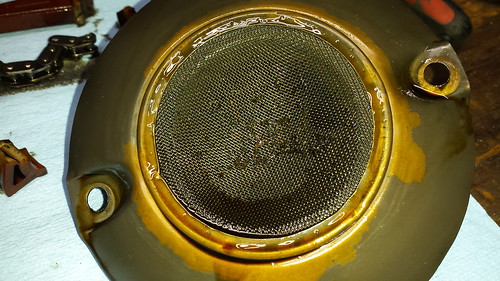
20170805_152332

Up pickup screen, also with a combination of metal and plastic shrapnel

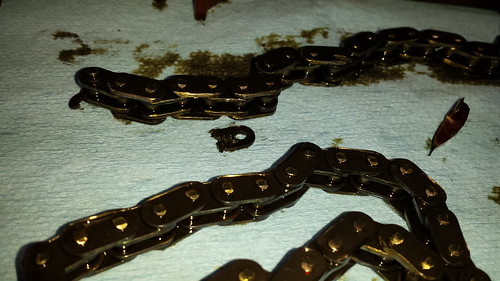
20170805_152337

CLoseup of chain, showing the wear, and, I'm guessing, source of shrapnel.

XLR99
XLR99 GRM+ Memberand Dork
8/5/17 3:00 p.m.

So now my assumption is that this engine will need to come out for a rebuild? My initial hope was that I could just pull out the balance chain guides, remove the tensioner and put a Taliaferro plug in it's place (already on site), and leave the balancers in place.

However, the shrapnel makes me wonder. It only ran for 3-4 minutes, maybe a mile total, at a max of 2000rpm after the failure. I' guessing that's more than enough time to distribute shrapnel evenly throughout the engine, though.

Edit, upon further reflection, and spending some time cleaning up things in the parts washer, I think I killed it by neglect. I should have delved into it like 20-30k ago rather than just assuming 'a bit of balance chain noise is OK' . I'm now thinking that the tensioner broke/wore out, which caused the balance chain to make contact with something inside the chain case, and then fail.

Interestingly, I found this pic in a google search:

Balance chain is the smaller one in front, and the tensioner is to the left, broken in half with the tensioner rod resting on the chain . Wonder if I'll find something like that in there...

XLR99
XLR99 GRM+ Memberand Dork
8/5/17 3:25 p.m.
XLR99 wrote: ... I was trying to remove possible failure points in one fell swoop...

Man, this sentence is comical now.

conesare2seconds
conesare2seconds Dork
8/5/17 9:46 p.m.

Following with interest. Sorry this happened to ya.

1 2

You'll need to log in to post.

Our Preferred Partners
amxbLU2Uk0pAFxBjKpv5dHwPPm7nG3QbSRZDjDsTHuNUzjj4mxAYtSZRTgiTVERD