
JThw8
PowerDork
12/31/14 12:15 p.m.
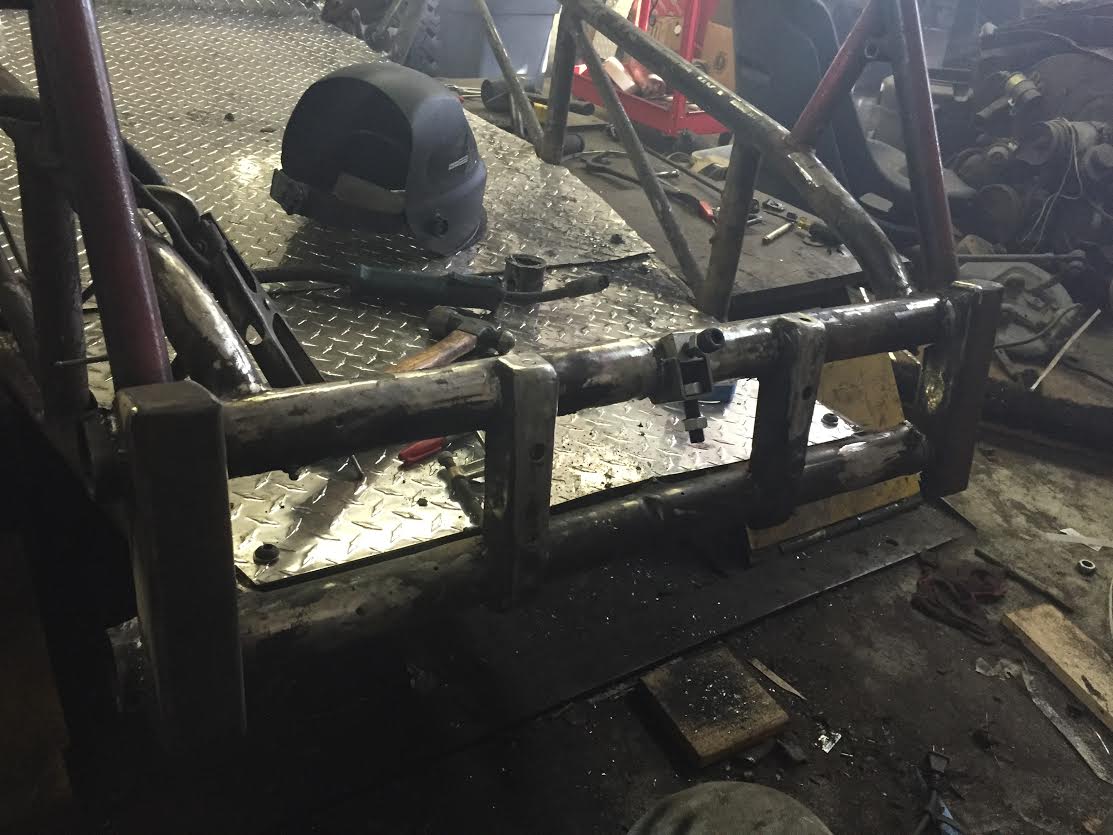
Beam cutting day. I need to install an adjuster in the top beam to lower the suspension. For the VW folks wondering why I'm only doing the top beam it's because the bottom is being converted to a sway bar which doesnt use the center bit so the adjuster wouldn't do anything. Lots and lots of measure twice cut once on this job. The instructions which are shipped with the adjusters are crap but there were some passable ones found online.
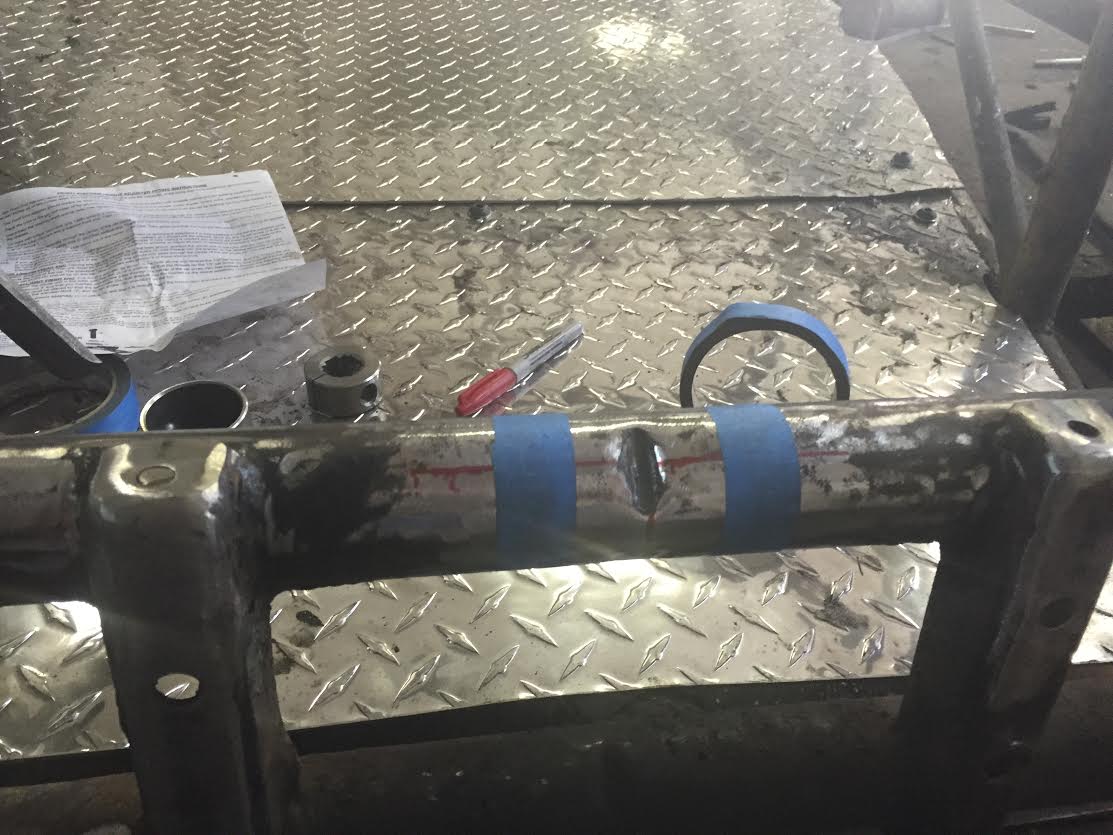
Top beam cut. Normally this is done with the beam off the car so I could put it in a chop saw and get a nice even cut but since this beam is welded to the rail I had to do it in place. Sawzall made fairly square cuts, tuned it a bit with the grinder after. You can see the beam was packed full of grease.
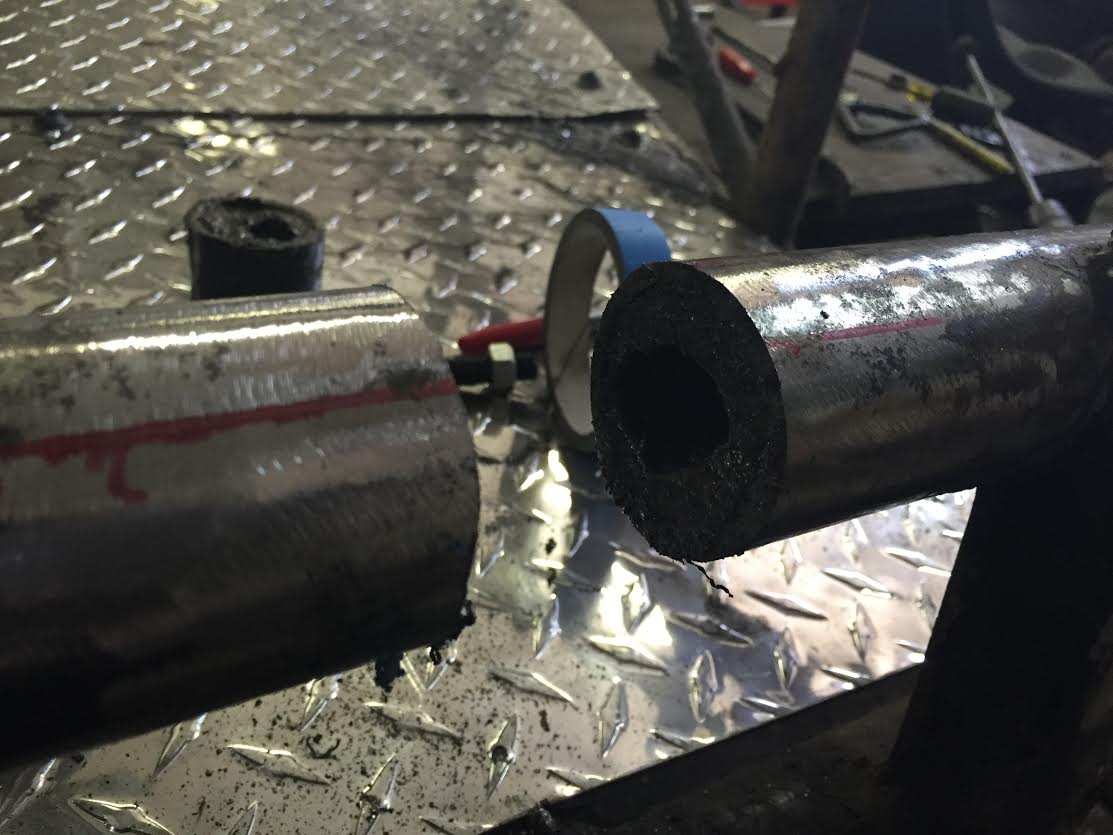
Clamp the adjuster in place making sure to align all the fiddly marks we measured earlier. I have this set to have all of its adjustment in the lowering position, we certainly wont be raising this one again. If someone wants to take it back to an offroader they'll need to replace this.
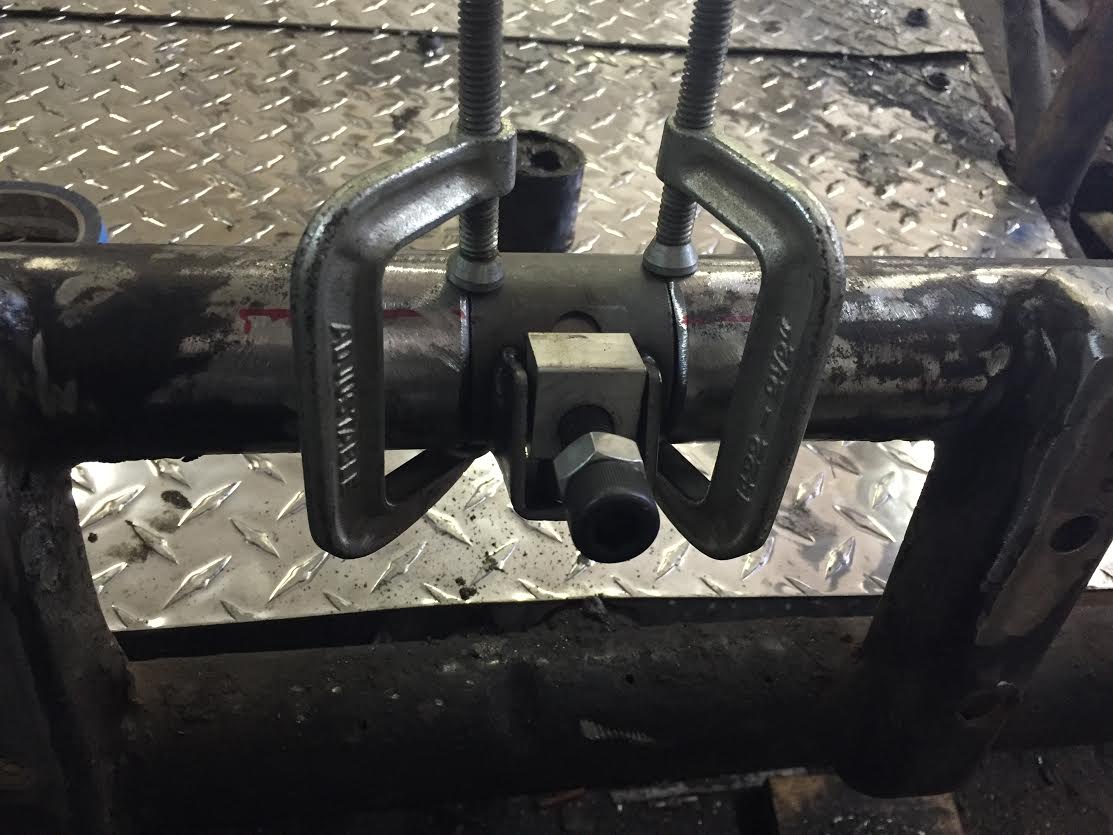
And then all welded up.
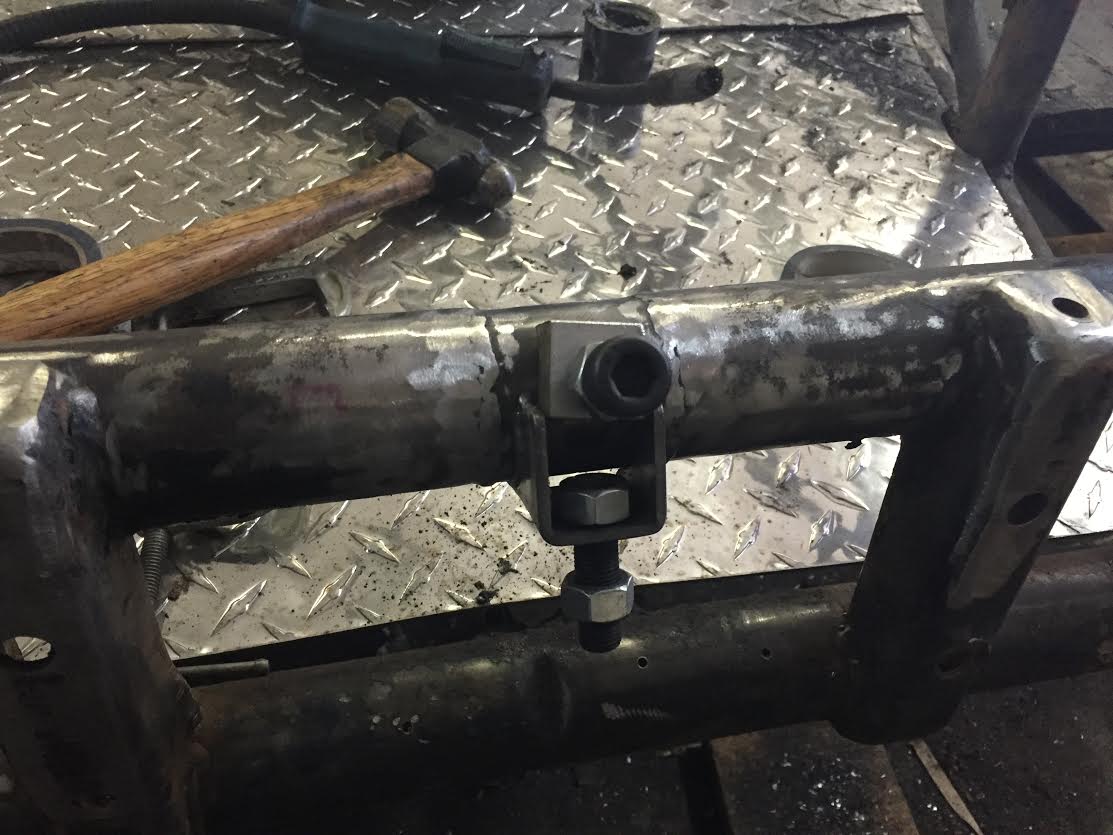
With that the front beam is just about finished in the rough fabrication stage. The list of fabrication jobs is getting small now. Almost time to paint things up and put it back together.
JThw8
PowerDork
1/4/15 1:59 p.m.
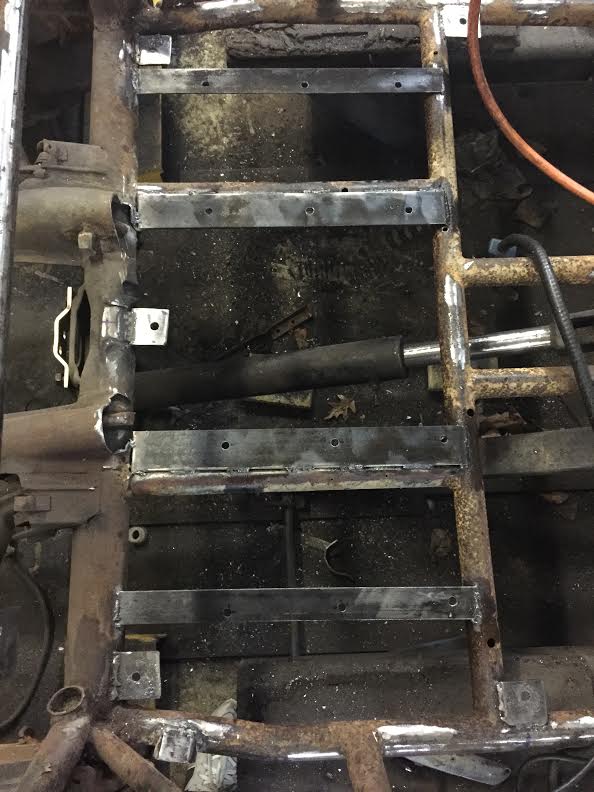
Feeling under the weather today but needed to get something done on the rail. So let's make some seat mounts. I made these cardboard templates with the floor still in so I knew where I needed things to be.

Then I just cut some pieces to go under the floor. The outer (lower in pic) mount is angle iron to give it some structure. The inner (upper) is welded to the reinforcing bar there so it was flat stock.
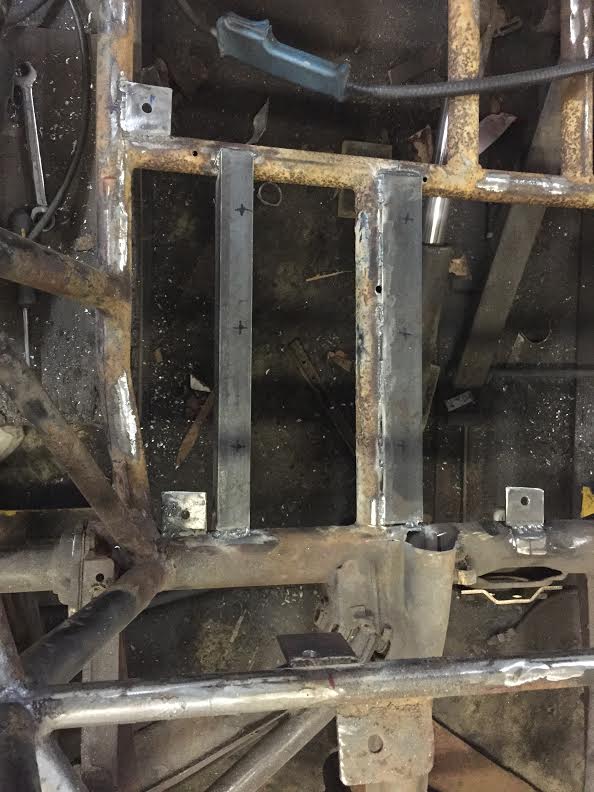
repeat for passenger side and drill holes according to template. I need to get some appropriate bolts and then I'll mount the floor and drill through from the bottom to make sure it all lines up.
before packing it in and going into a cold medicine coma I needed to test a theory on the motor. Here you see the underside with exhaust manifolds. On the left you can see the u bend to which the heat exchanger would connect and then the exhaust exits the rear (left in photo). Remove the u and the exhaust exits front (right) no good. I was hoping the mainfolds could be reversed since I wont be using heat exchangers and then the u is eliminated and everything exits the rear.
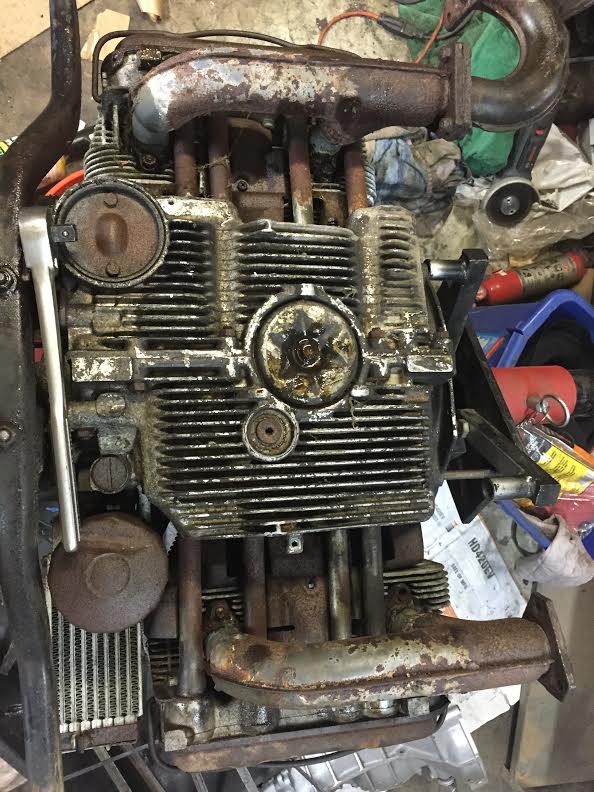
At first it seemed the idea was a no-go, flipping the manifold didn't' allow it to line up. BUT....flipping the manifold and then swapping side for side works! Yea! Now I can build some sort of exhaust off the flanges. I am a bit concerned with how close the exahust will be to the oil filter but I can make a heat shield for that.
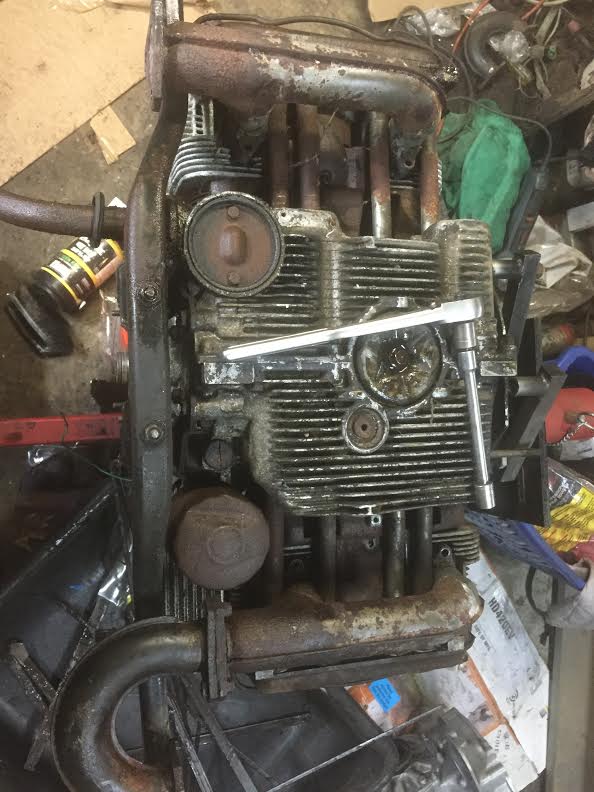
that's not as close too the filter as some of the modern stock set ups but a heat shield would be good for piece of mind since most of the modern exhaust manifolds are equipped with heat shields 
JThw8
PowerDork
1/4/15 5:19 p.m.
dropstep wrote:
that's not as close too the filter as some of the modern stock set ups but a heat shield would be good for piece of mind since most of the modern exhaust manifolds are equipped with heat shields
And keeping in mind as an aircooled engine cool oil is essential in the cooling process. A chunk of aluminum in there should do the trick though.
JThw8
PowerDork
1/4/15 5:29 p.m.
Oh, and from the "someone screwed up" department. I was ordering some brake parts for the rail and I always tend to check amazon for pricing, never know what you'll find. So the front rotors, good high quality ones which retail for $100 were marked at $11.11 BUY BUY BUY. The sale went through but the next day the price was up to the $45 price they probably meant to mark them at originally.
I keep debating going to rear disks as well. Its about $250 for a kit or I could piece it together for a little less (rock auto has the calipers pretty cheap) but the scope creep on this project has already gone out of hand. Problem is with no weight in the front I really need more braking in the back. I'll have a bias adjuster in the car but contrary to normal it will have the bias favoring the rear greatly.
Nice progress in spite of being sick. I haven't forgotten about the wheels. I started tearing down my E30 over the holiday and that got out of hand.
JThw8
PowerDork
1/6/15 6:43 a.m.
VWguyBruce wrote:
Nice progress in spite of being sick. I haven't forgotten about the wheels. I started tearing down my E30 over the holiday and that got out of hand.
No problem, I'm still a ways away from worrying about wheels, I figured the holidays got the best of all of us.
A bunch of boxes showed up last night, more parts, yea! Didn't get any work done though, feeling kind of beat after going back to work. I think next up is pulling the rear trailing arms and swapping stuff around with the new ones, pretty boring stuff but necessary.
I say stick with your hacked-up brake setup, this car only has to go and turn, and eventually come to a stop at the end of a run. You can get away with less brake heat capacity than a dedicated autocross car.
Great progress, can't wait to see it done.
As for the oil filter/exhaust clearance, Some Chevy V8 headers get closer to the filter than that with no problems. A heat shield should work quite well.
I'd think you'd want to be installing rear discs before doing anything about the front.
JThw8
PowerDork
1/7/15 5:40 p.m.
Kenny_McCormic wrote:
I'd think you'd want to be installing rear discs before doing anything about the front.
To your earlier post this will be a dedicated autocross car in addition to the skid pad challenge.
The reason for the front disk kit now is a) it only had one drum up front (it was set up for roundy round work) and b) Sean threw in the disk brake setup (off a type 3 VW) with it so it was cheaper to use that than buy all new drum parts.
I have 3 more "big ticket" items to buy (not counting wheels/tires) and I've found 2 of them cheap if no one bids on them so if those go well maybe I'll scrape up some rear disk money.
I autocrossed a Formula Vee with a 1600 engine years ago. It braked really well with the drum brakes all around. I'd be tempted to leave the drum rear and just set up the bias to suit.
JThw8
PowerDork
1/7/15 7:21 p.m.
DeadSkunk wrote:
I autocrossed a Formula Vee with a 1600 engine years ago. It braked really well with the drum brakes all around. I'd be tempted to leave the drum rear and just set up the bias to suit.
Probably what I'll do to start, I can always upgrade later if it's not working. I have a set of backing plates left over from one of my old vees with cooling ducts in them so maybe I'll put those on to help a little.
JThw8
PowerDork
1/10/15 2:46 p.m.
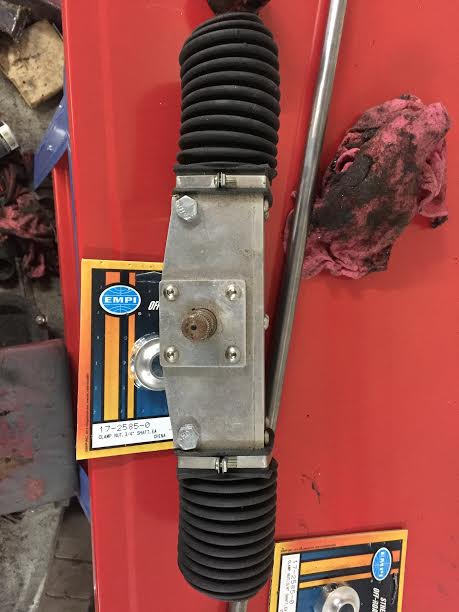
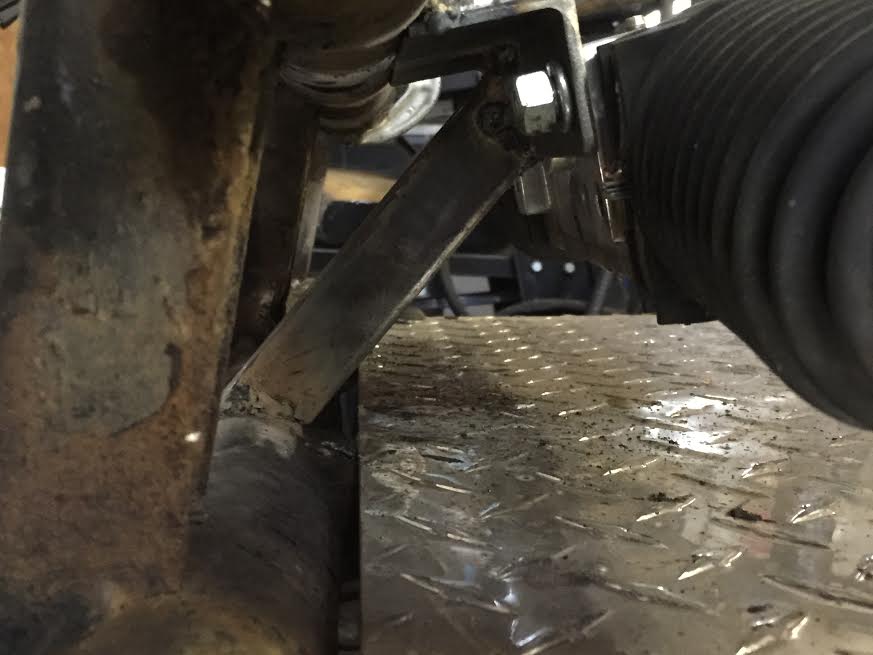
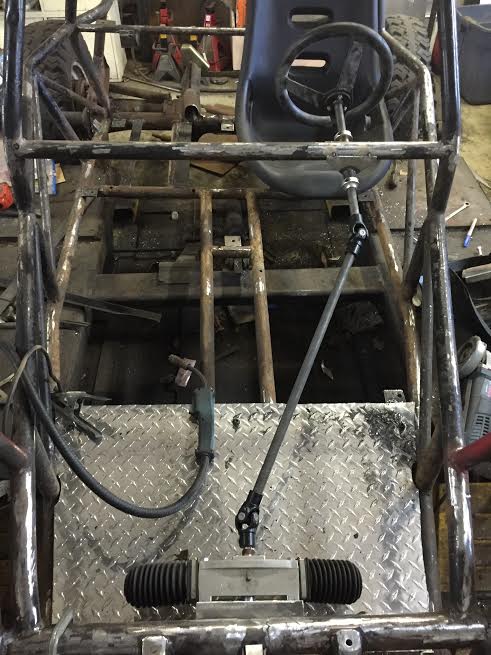
Limited time to play today so I decided to fab up the steering bits. I had this heavy duty sand rail rack leftover from the Wartburg (used a porsche rack in that instead) it was being used in the hammock go-kart but I can put a cheaper simpler steering in that.
made a few bits for a simple mount.
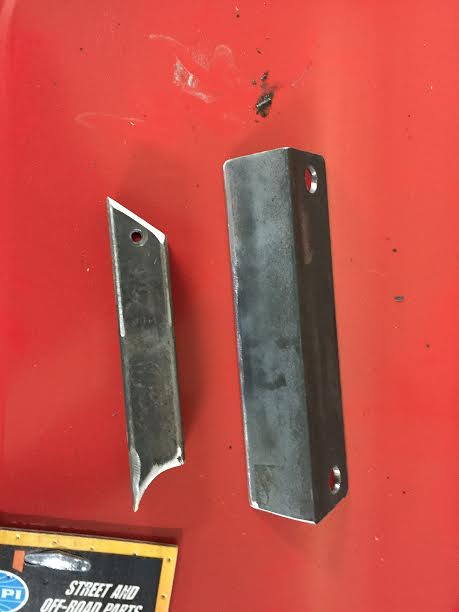
welded it all and bolted it in (I really need to clean the shop again)
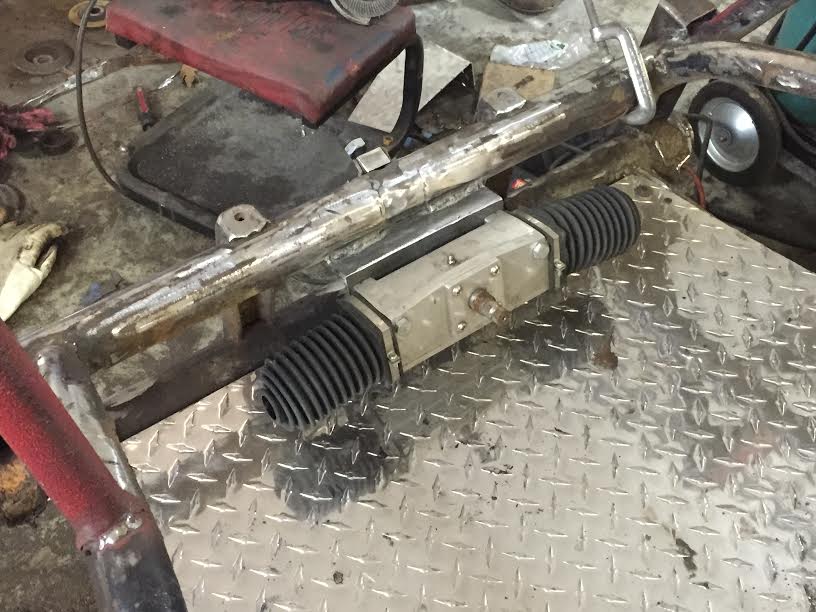
In case you were confused how those bits go together.
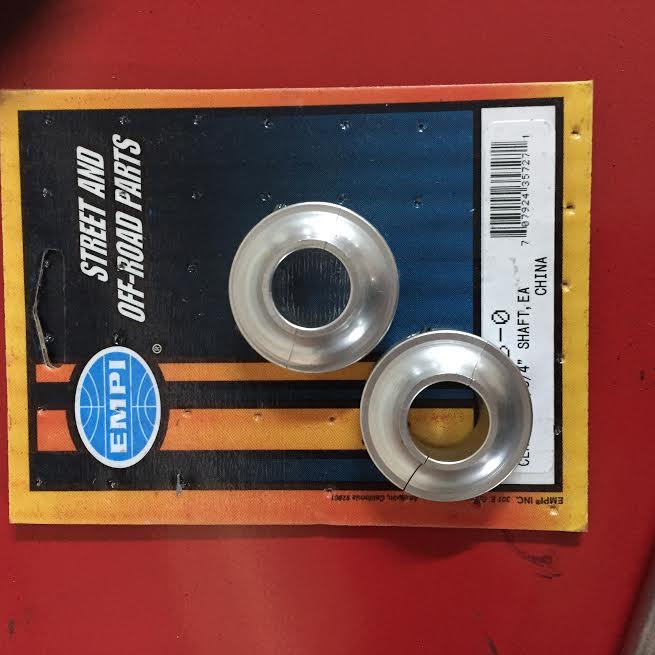
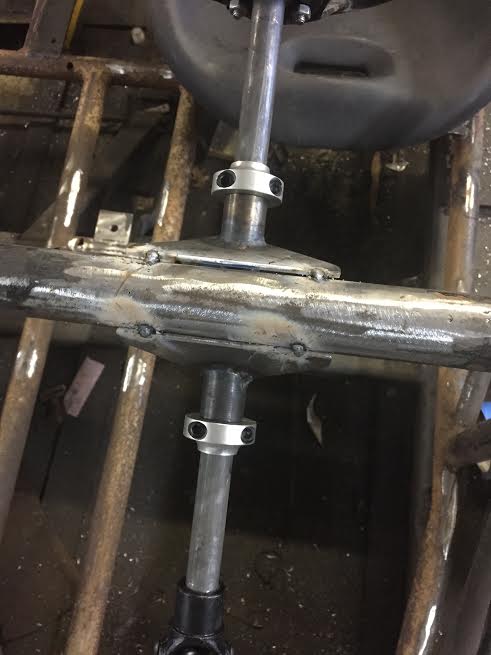
Steering column mount. Just bronze bushings in it nice and simple. I took a note from other rail builders and drilled and tapped the tube for a grease zirk. This is an off the shelf part, I didn't fab this one.

These nifty little bits are great. I was wondering what to do to keep the steering shaft from moving back and forth in the mount. These little guys clamp onto the shaft and lock it in place.
here they are doing their job.
And the rest of the system. Pretty straightforward job today. In the interest of the budget I've reused the steering wheel, there's really nothing wrong with it that some sandpaper and paint wont fix.
JThw8
PowerDork
1/10/15 3:01 p.m.
Been having a good parts sourcing week too. The $11 hub/rotors showed up so they made good on it even though they mis-priced them.
Also a few of the higher dollar items I've been holding off on buying showed up on ebay for cheap, I've won 2 out of 3 of the auctions so far for 50% of what they normally sell for. (new shifter and new pressure plate for the motor) Watching an auction for a gas tank now and we'll be doing pretty good on the parts front.
Mind sharing the source for the steering bushing and location clamps? I'm working on steering for my project right now too. Are you using a 3/4" shaft?
JThw8
PowerDork
1/10/15 4:57 p.m.
bgkast wrote:
Mind sharing the source for the steering bushing and location clamps? I'm working on steering for my project right now too. Are you using a 3/4" shaft?
Yes it's 3/4 but they sell them in 7/8 as well. I got them from different places depending on what I was ordering at the time and prices but they are standard dune buggy part so you can get them a lot of places.
Chirco (http://chircoestore.com/) and Appletree (http://www.appletreeauto.com/) are two of my usual go-to places. If you look they have other steering mounts too depeding on your budget level. You can get adjustable ones and ones with bearings instead of the bronze bushing.
JThw8
PowerDork
1/11/15 12:53 p.m.
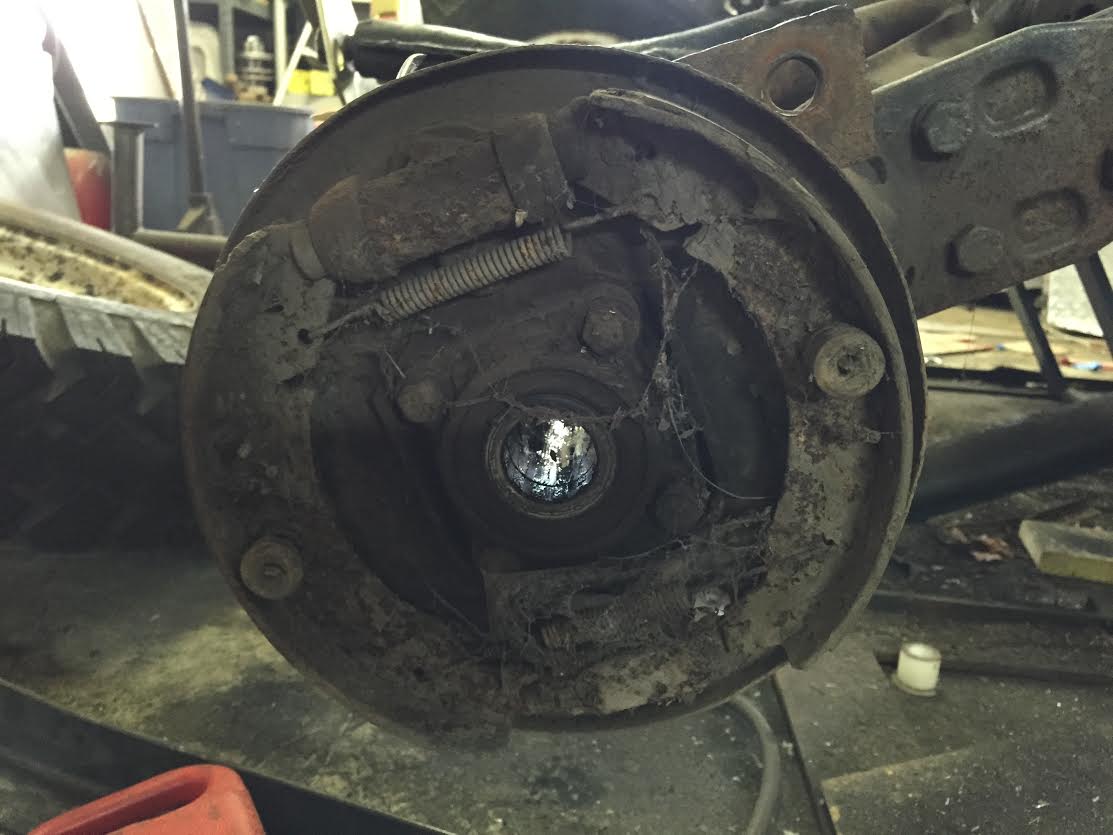
Note to self, break all wheel bolts free BEFORE disassembling the entire vehicle. Today's task was to take apart the rear suspension and time permitting start cleaning things up and swapping them to the new rear trailing arms. Well, that's gone terribly. First the aforementioned wheel bolts. I ended up using some old CV joint bolts on the stub axle so I could wedge a bar in them to keep the wheel from spinning. Of course when I tried the same thing to remove the 36mm axle nut I snapped the bolts off in the stub axle...sigh. I made a holder that used the wheel bolts and broke out the VW axle bolt tool...it works well and allowed me to hit something with a big hammer to relieve frustration.
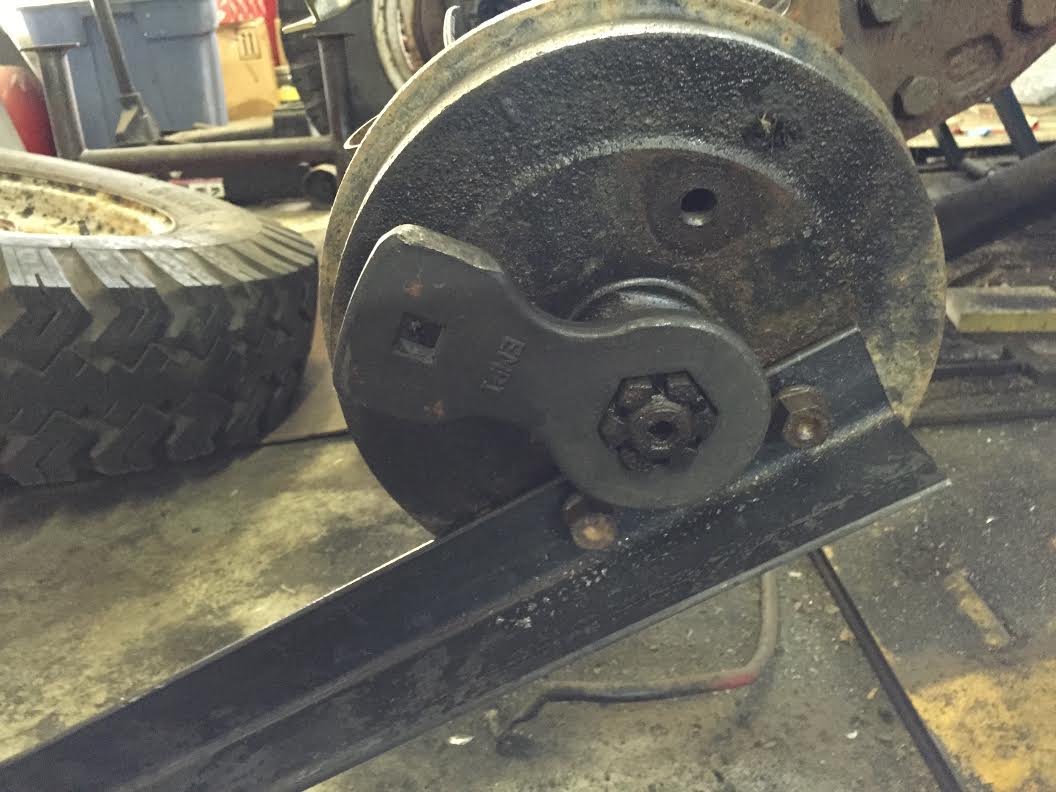
Then I unbolted it from the spring plate and pulled the pivot bolt. 17mm allen wrench required....doesn't everyone have one?
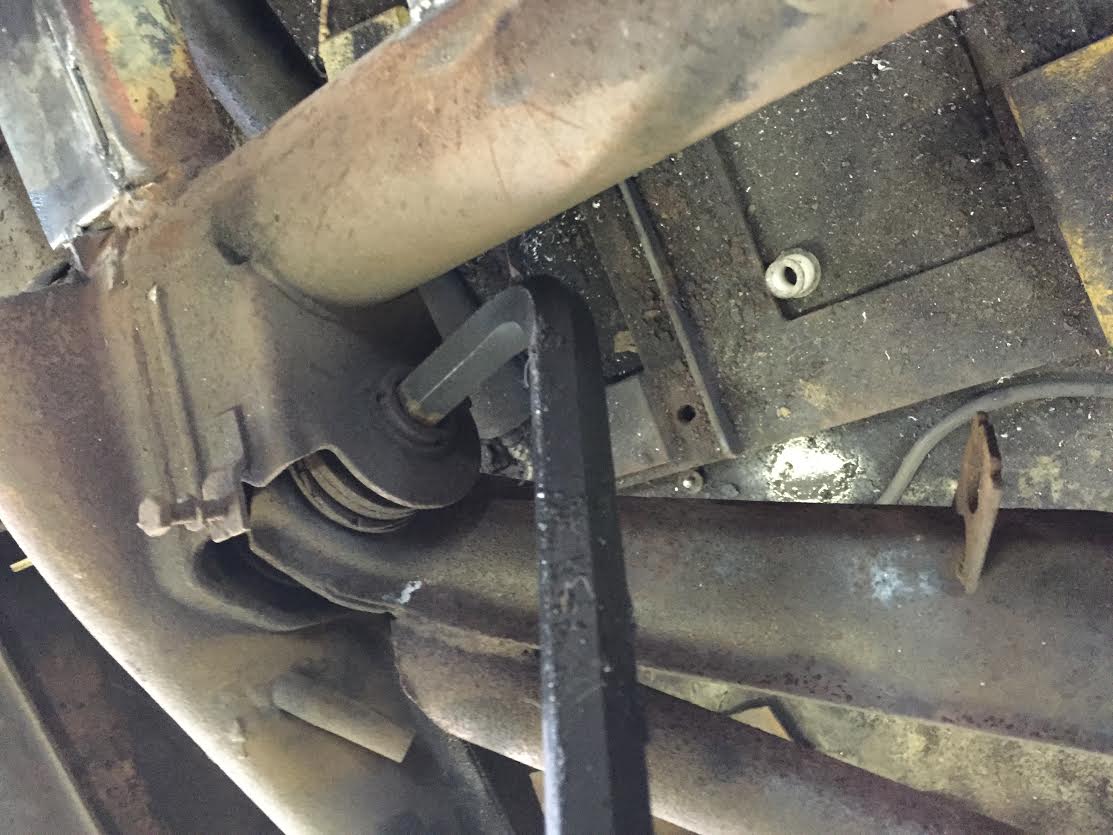
Then you need to take pressure off the spring plate to get it over the lower stop. On a fully dressed car you can just jack up the plate, but on a buggy or lighter vehicles you need to get creative. There's a tool for this, it looks like this:
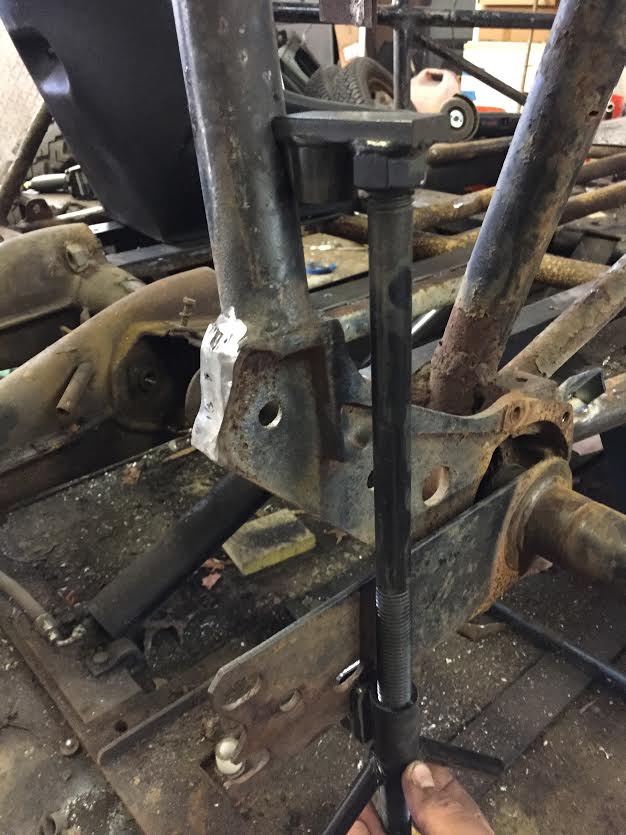
But as you can see from that photo it is supposed to sit right where that bar from the buggy frame is welded. Normally there's a body mount bolt there for it to anchor to. So I had to improvise.

The alternate version of this trick is to wrap a chain around your floor jack and the rail body so the jack cant jack the whole body up. The above picture should show you the kind of odd tools you accumulate if you play with ACVWs for any length of time.
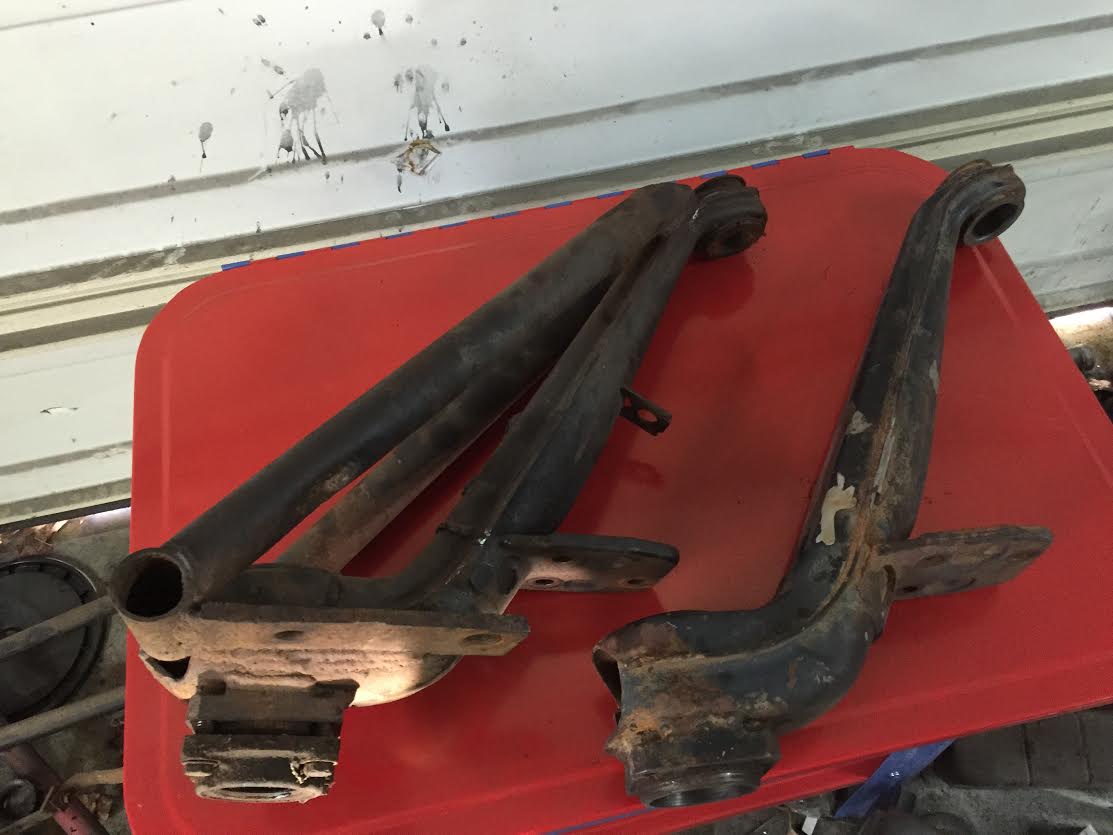
Here you can see the stock trailing arm (right) and the bubba's backyard modified one (left) The theory is sound for adding strength but it was a pretty ugly job of it and the stock ones are plenty strong for what Im planning.
I'm thinking I may accelerate the rear disk brake plan....by the time I make this right I'll have almost the same money into it.
Here's another casualty of previous owners not really knowing what they are doing. They raised the rear by re-indexing the torsion bars but they didnt put limit straps on it. The constant hammering and extra torsion against the lower spring plate stop have bent and cracked it (lower right). This is the GOOD side, the other side is completely wasted and was actually resting the spring plate against one of the housing bolts (mangling it too).
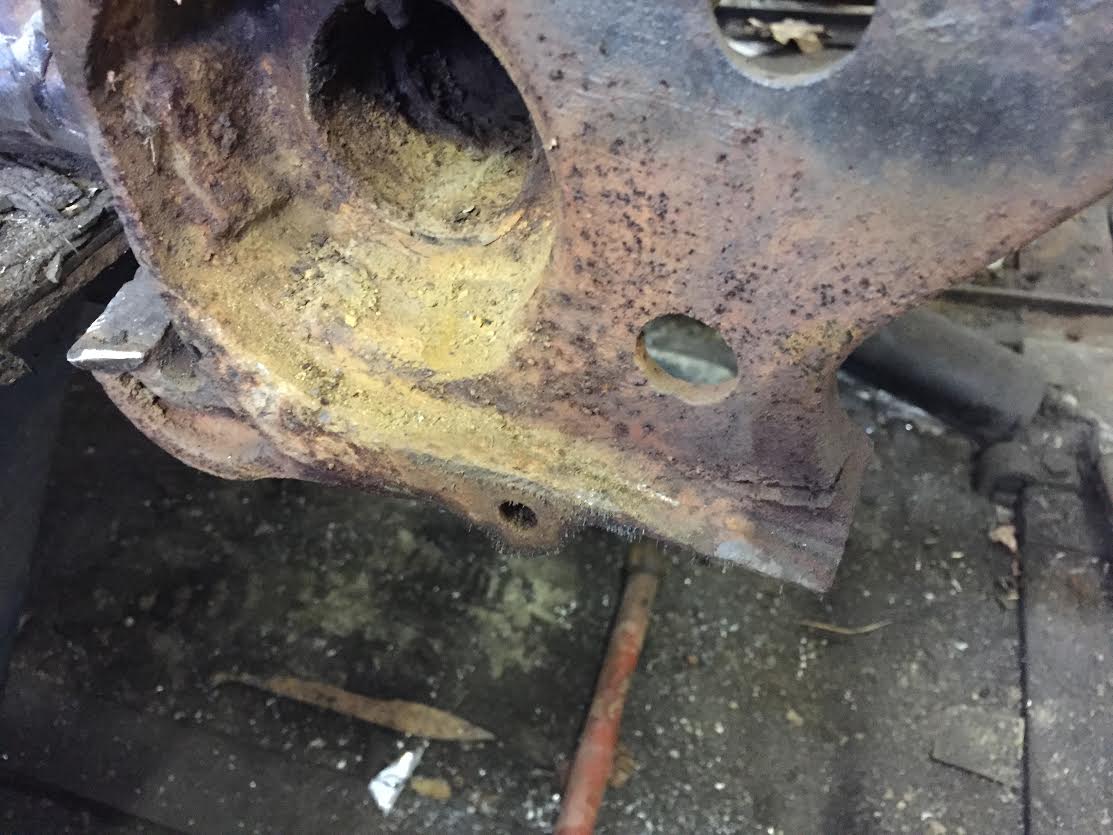
Since I am lowering the rear this shouldn't be much of an issue (maybe I'll put limit straps in to be safe) but since I have a set of heavy duty coil overs which can support the rear on their own Im tempted to eliminate the torsions entirely. Its easy enough to do but adds more cost to the project to buy or build these:

JThw8 wrote:
I keep debating going to rear disks as well. ... Problem is with no weight in the front I really need more braking in the back. I'll have a bias adjuster in the car but contrary to normal it will have the bias favoring the rear greatly.
for a given wheel diameter, the drum brake that packages inside it will generate 2 - 3x more torque than a disc brake. mechanical advantages and all that. so you might be closer to OK than you think.
In reply to JThw8:
in place of 17 mm hex key, you could use a bolt with a 17 mm hex head, with a couple of jam nuts cranked together on the threads, with a socket to drive it.
JThw8
PowerDork
1/11/15 2:24 p.m.
AngryCorvair wrote:
In reply to JThw8:
in place of 17 mm hex key, you could use a bolt with a 17 mm hex head, with a couple of jam nuts cranked together on the threads, with a socket to drive it.
BTDT, bought the right tool instead. Due to the angle of the IRS pivot there's not a lot of space to get a socket in there, and there's either never a good 17mm bolt around when you need one or its a low grade bolt that ends up snapping under the pressure. One time investment in the right tool and I never have to worry about it again :) I have the 17mm in a socket too but it wont back the bolt the whole way out without the ratchet fouling on the torsion beam.
In reply to JThw8:
no doubt, the right tool is right. i was just throwing that out there as a super-ghetto possible workaround if you happen to have a bunch of metric hardware laying around.
JThw8
PowerDork
1/11/15 2:57 p.m.
AngryCorvair wrote:
In reply to JThw8:
no doubt, the right tool is right. i was just throwing that out there as a super-ghetto possible workaround if you happen to have a bunch of metric hardware laying around.
Indeed it is a great (and often used) improvised solution. If this was my only VW build I'd probably go that way with stuff like this but most of these tools I've had around forever, I keep trying to get away from VW and keep getting sucked back in :)
My 17mm allen was used once in 1989, back when there were ACVW shops around that had them on the shelf. VW's keep calling me back as well. 
JThw8
PowerDork
1/11/15 8:00 p.m.
VWguyBruce wrote:
My 17mm allen was used once in 1989, back when there were ACVW shops around that had them on the shelf. VW's keep calling me back as well.
There are still a couple of VW shops in the area but I'll be honest unless its a "must have now" thing I just buy online. I should support them more I suppose but "in the area" is not exactly local or convenient.
I don't think you ever get away from VWs. As the Wartburg showed if nothing else I like using them as building blocks for other things :) My young cousin really wants to fix up a bug but has zero tools, skills or know how so I have a feeling some day I'll be restoring a bug with him. I still owe the wife another Thing one day too, probably not until we move south though.


