
JThw8
PowerDork
1/14/15 6:42 p.m.
Back at it again tonite. I wanted to get back into the motor a bit. Pulled the heads and cleaned a bit of crud out of one of the bores, the engine now rotates smoothly.
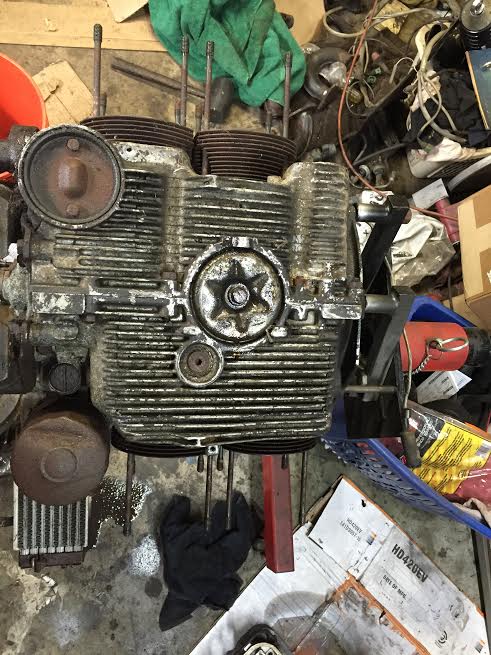
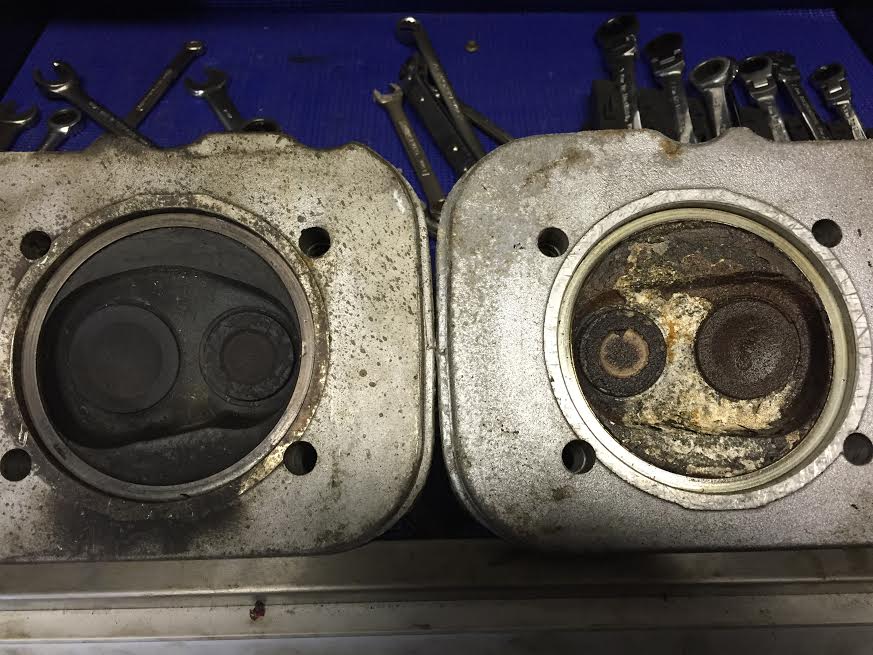
Conventional wisdom says when putting carbs on a 2000 FI motor it is best to swap to 1800cc heads as they have larger valves. Im not much on conventional wisdom but when I look at the 2 side by side and the difference in valve sizes is visible to the naked eye then yeah, its swap time.
The new pressure plate arrived. NOS sachs unit.

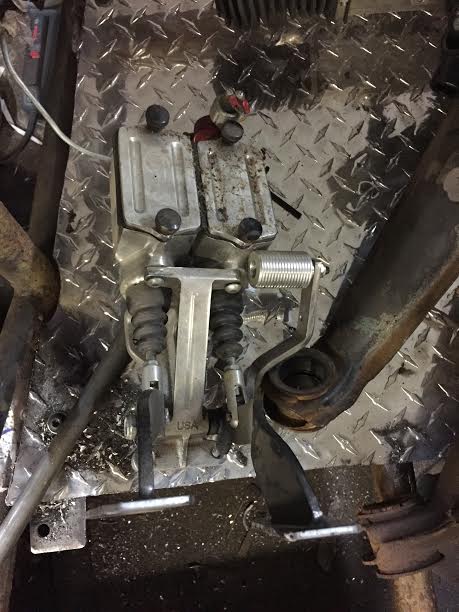
The "new" pedal cluster pilfered from the Wartburg. A decent Jamar setup. Right now the throttle pedal is reversed because that was the only way to fit it in the wartburg
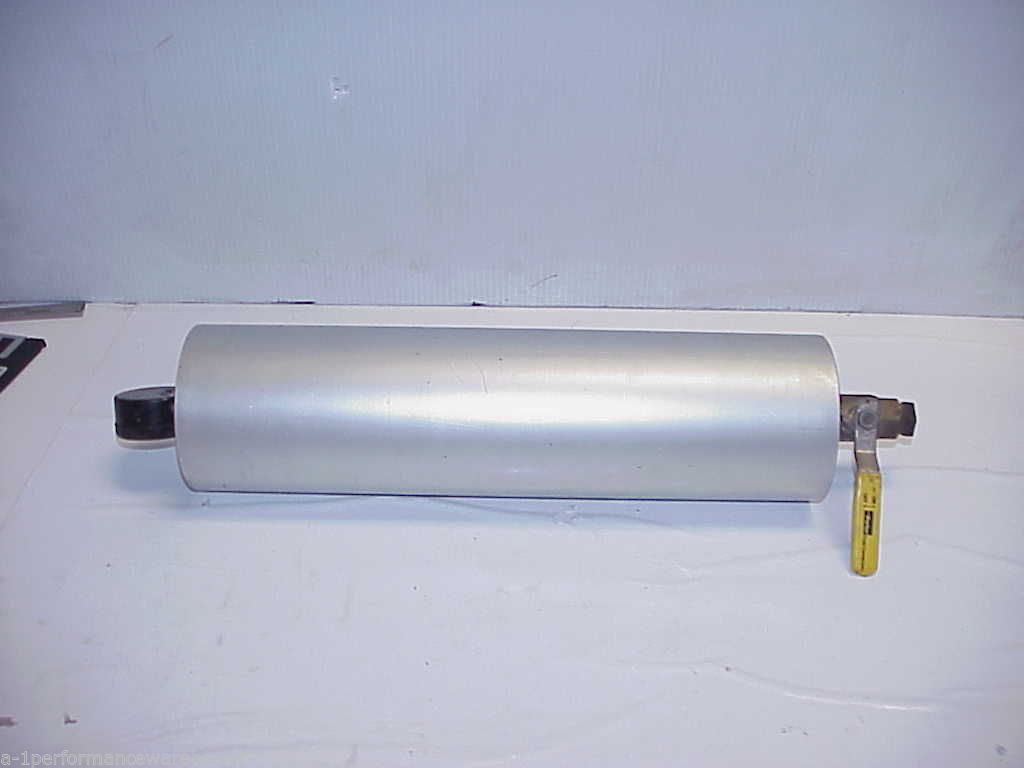
Another sweet ebay buy, 3qt accumulator (accusump) to keep the engine healthy during the high g cornering on the skidpad.

Ian F
MegaDork
1/15/15 7:53 a.m.
In reply to JThw8:
Collecting odd tools seems to happen whenever you spend a lot of time working on one particular model of car. In my case, it's (new) MINI's.

RossD
PowerDork
1/15/15 8:05 a.m.
How much 'oilin' will you get out of the accumulator? I mean you've got 3 quarts. You'll put some amount of pressure to it say 60 psi. Do you get all of the 3 quarts to come out close to 60 psi? or How long will that last?
My understanding maybe limited on how a normal accusump works but I thought it just delivered a single blast of oil into the passages.
Are you forcing the oil through a orifice to limit flow so you can get your 3 quarts over a the 30 seconds or however long a run is?
JThw8
PowerDork
1/15/15 8:37 a.m.
RossD wrote:
How much 'oilin' will you get out of the accumulator? I mean you've got 3 quarts. You'll put some amount of pressure to it say 60 psi. Do you get all of the 3 quarts to come out close to 60 psi? or How long will that last?
My understanding maybe limited on how a normal accusump works but I thought it just delivered a single blast of oil into the passages.
Are you forcing the oil through a orifice to limit flow so you can get your 3 quarts over a the 30 seconds or however long a run is?
Since I can't explain it any better than the manufacturer here is a snippet from their site which should explain what's going on.
Accusump said:
How does an Accusump Oil Accumulator Work?
Accusumps Oil Accumulators are designed collect pressurized oil from your engine and store it so it may be discharged later. At the time the engine is shut off and the Accusump valve closes any oil pressure in the Accusump is held there. On engine start-up when the valve on the oil side is opened the pressurized oil is released into the engine and therefore pre-lubricates the engine prior to start-up.
After the engine is started and the oil pump has taken over, oil is pumped back into the Accusump. This moves the piston back and pressurizes the Accusump until it equalizes with engine's oil pressure. While driving, if the engine's oil pressure is interrupted for any reason, the Accusump releases its oil reserve again, keeping the engine lubricated until the engine's oil pressure comes back to normal. This release of oil could last from 15 to 60 seconds, depending on the size and speed of the engine. In racing or hard driving conditions, the Accusump will automatically fill and discharge when needed as you corner, accelerate and brake.
accusumps work by pressurizing the oil in the accusump to the normal working pressure of the engine. If the pressure drops off in teh engine (due to the oil pump not getting any supply), the pressurized oil in the accusump will "make up" that pressure.
In other words, the accusump will not usually just "dump" all of the oil in it into the engine. It will "suppliment" the oil pump. This helps to get through variations in pressure.
In this situation, I could see the oil pressure getting low due to oil pump starvation. Then, the accusump will re-pressurize the system. This extra oil in the pan (from teh accusump) will then ALSO help cover the oil pump pickup. This helps the system regain its pressure.
The system now re-pressurizes the accusump. This process will probably continually repeat durign a run until it gets close to a pressure and volume in the accusump and oil pan that the car will be happy with.
This is my theory on how this will work on a skidpad.
Rob R.
JThw8
PowerDork
1/15/15 5:56 p.m.
A slight sidetrack tonight, pardon me while I build thread my parts washer....
And on tonights "Dumb things Jim does in the garage" episode we butcher our brand new parts washer! These washers are meant to be used with water based cleaners not solvents. Better for the environment and my health but not quite as good at cleaning. But you get them up to 110 degrees and then you've got something, so lets mix water and electricity and add heat.
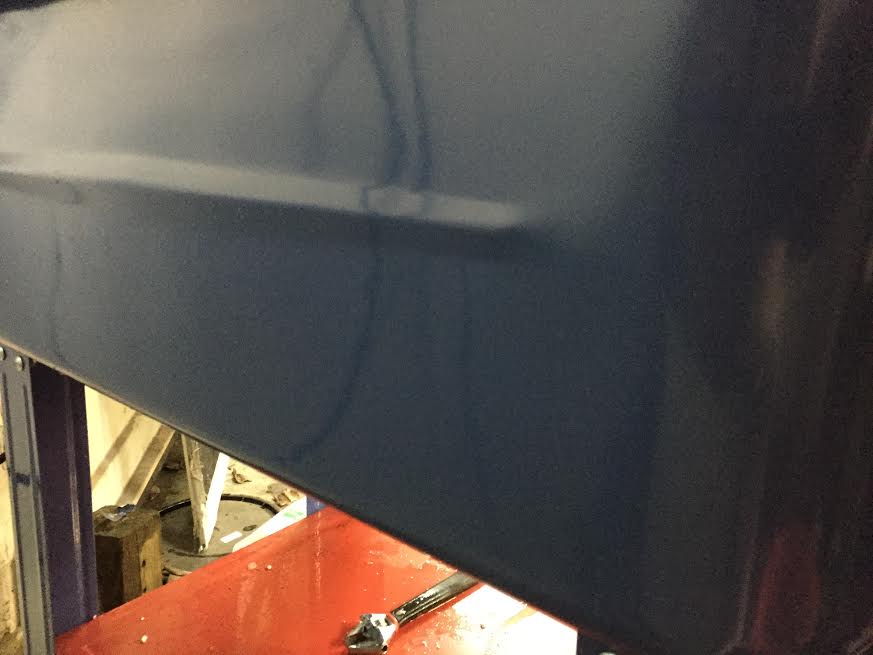
In the beginning, a nice new parts washer.
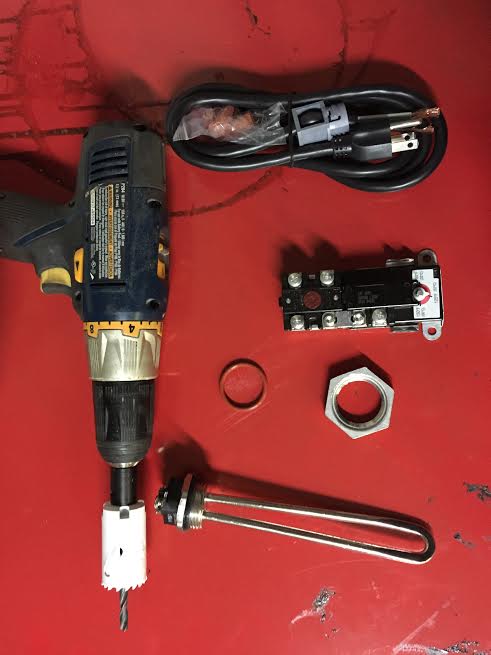
And our parts. A 2000w water heater element, thermostat, plug, a nut that fits the heater element and an o-ring for sealing.
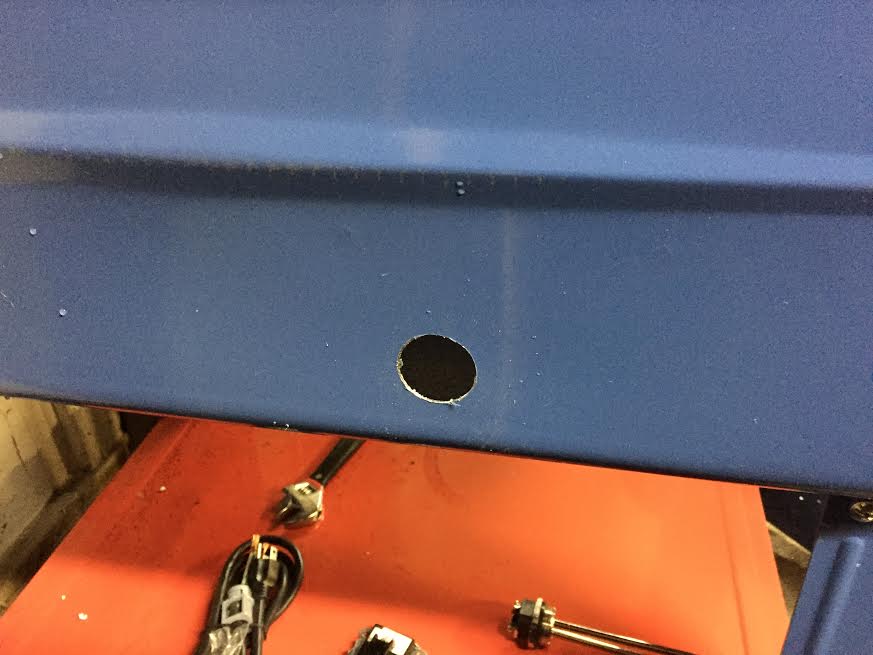
Step one, make a hole in the box....wait, that's something else
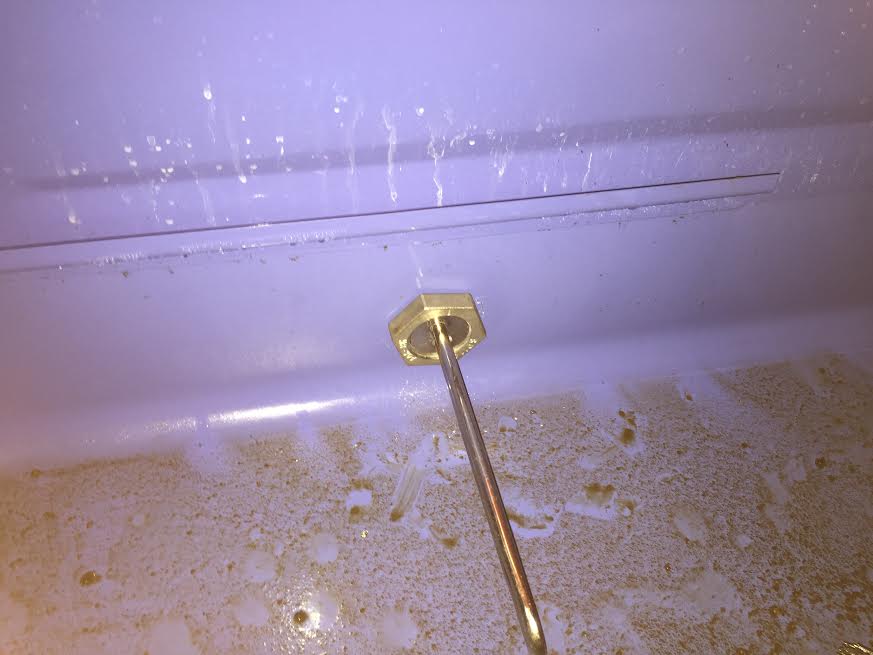
Insert heater element.
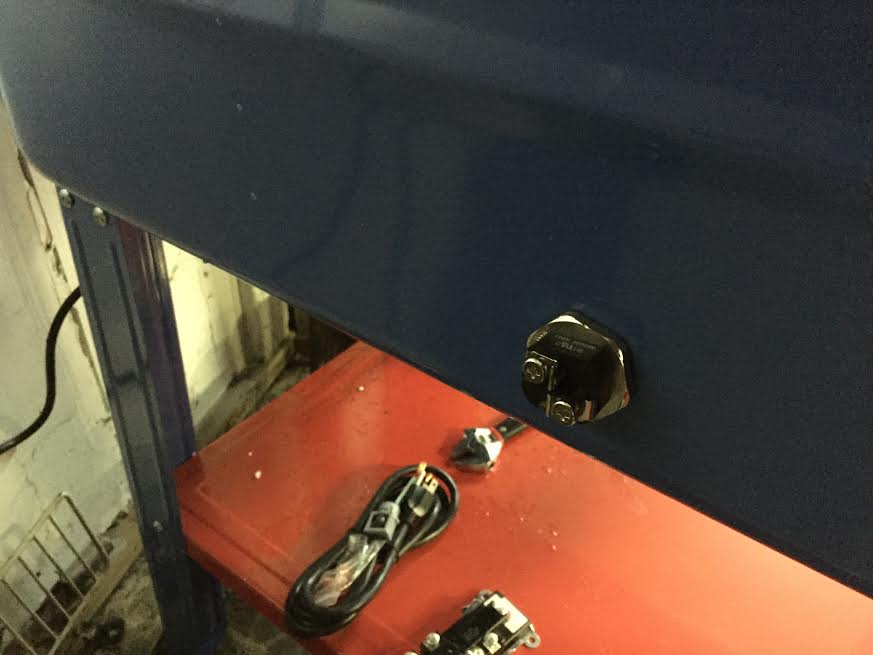
Feed o-ring over the inside part and then thread the nut on and tighten it down.
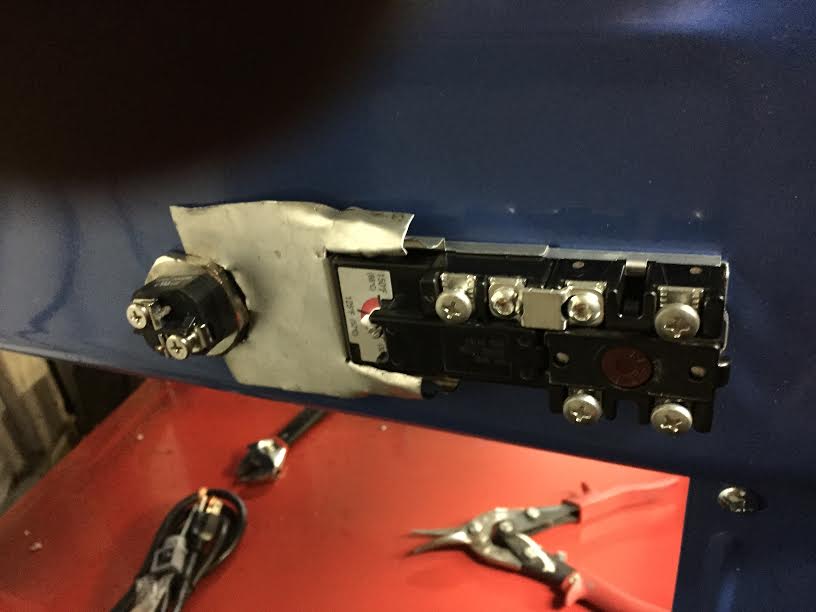
They make a cool bracket that holds the thermostat in place....I couldn't find it at the home depot so I made my own, its ugly but functional.
Wired it up. The box I bought to put over it and seal around the edges was too small so I have to get another one. I covered all the terminals with electrical tape for now.
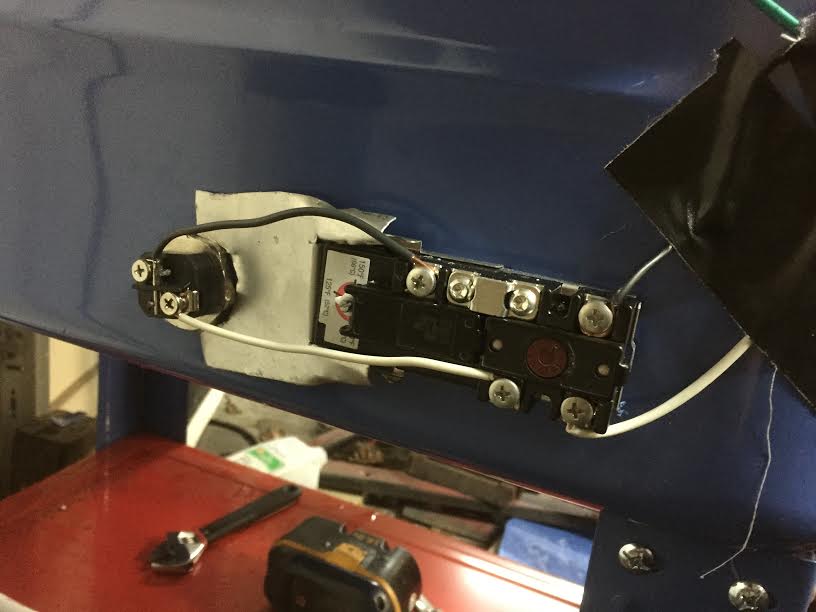
Next up, better filtration, but waiting on parts for that.
doesn't everyone have a 17mm half inch drive allen socket? ive worked on two air cooled vw's in my life and own that one 
JThw8
PowerDork
1/15/15 6:42 p.m.
Took about 40 minutes to get to "cant keep my hands in there" hot. Turned the pump on and the circulation brought it down to just right. Cleaned up some engine bits, works great! Cleaning mix is 3 parts water 1 part Oil Eater.
JThw8
PowerDork
1/16/15 4:22 p.m.
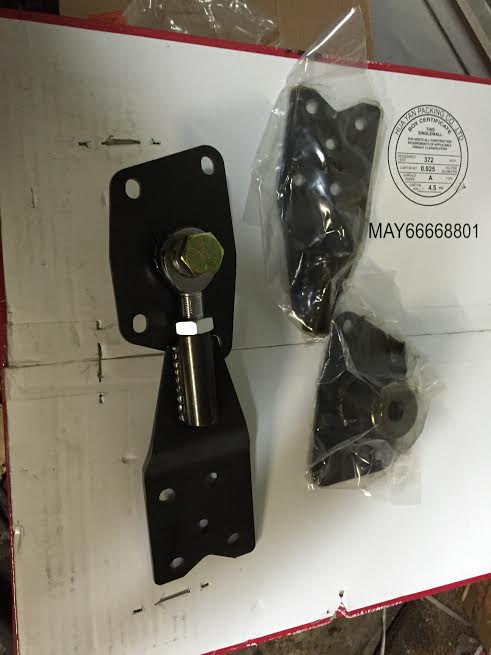
Today was like 2nd Christmas. Lots of parts flowing in now, I should be busy for awhile. Parts to make a shift linkage, new clutch, parts to install the accusump, engine gasket kit, etc etc. But this photo my friends is about scope creep. Those are torsion bar eliminators to convert a IRS torsion bar VW to coil overs....my easy project has jumped the shark. FWIW I already had the coil overs making this option slightly more cost effective.
JThw8
PowerDork
1/17/15 2:22 p.m.
@$%# - sigh...I was going* to swap all the bearings and other gubbins from the old rear control arms to the new ones today....except it seems bubba the backyard builder hacked together these arms out of whatever was close. Its a mix of early and late IRS pieces inside the housing. I could probably make it work like he did but I hate to half ass things...more parts on order, different plan for the day.
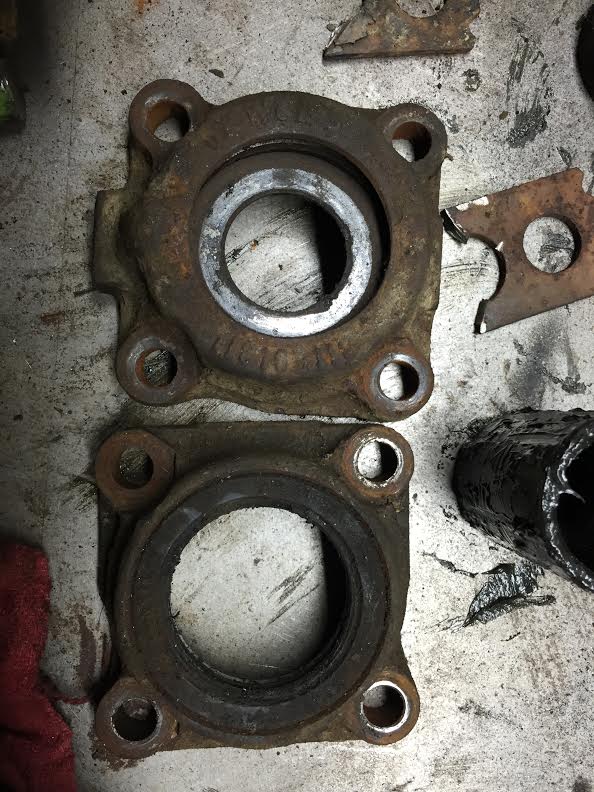
Of course when I discovered that I came inside to order parts. No sooner did I go back out to the garage when I damn near tripped over one of the parts I had to order. Funny thing is it was with my old FV parts (swingaxle) and it was a late IRS axle housing bearing cover. No idea where it came from but it was just what I needed. Still had to order some seals and bearings but it saved me $30
Here you can see the difference between the two, the upper is an early style bearing cap and the lower is the later style. This mixing and matching made me very uncomfortable with re-using anything in the old arms so I got new bearings and spacers for the whole setup. In truth the old bearings were pretty nasty anyway so its probably better this way.
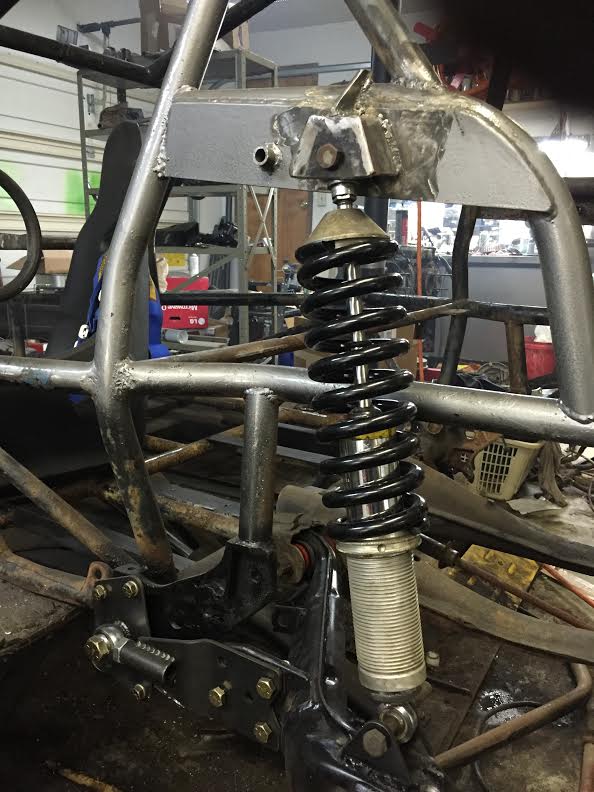
So I turned my attention to installing the torsion eliminators. The torsion bars go into the rear torsion tube and spline into the center.
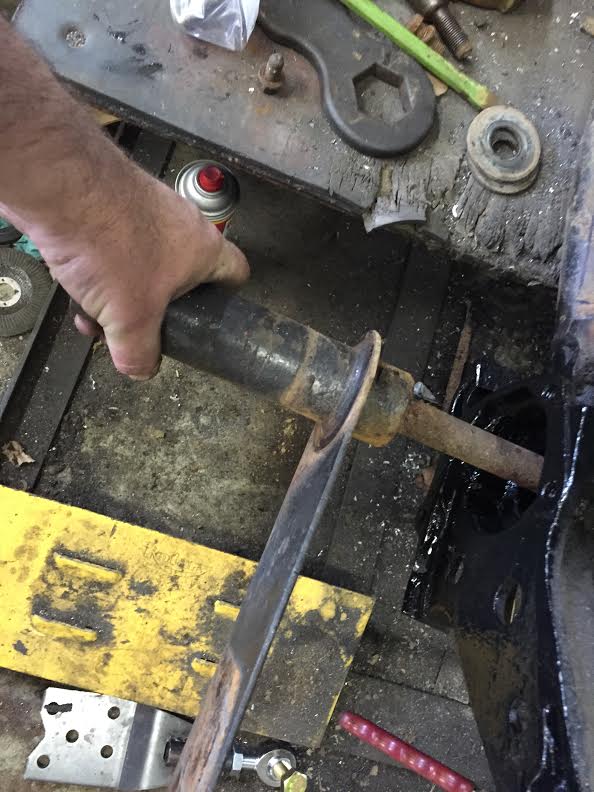
The eliminators bolt onto the tube, they have a stub which fits very snugly in the tube so its not just the bolts taking all the pressure here.
I had to drill out and tap all the bolts to the next larger size because they had been so mangled previously.
Then I spent the next hour and a half noodling shock mounts and locations. I think I have it sorted. After going round and round I realized if I use the existing shock mount then when the control arm bottoms out on the upper stop I still have about an inch of travel left in the shock...good dont want to bottom out the shock. But at full droop I should have somewhere between 7 and 10 inches of ground clearance. I really need more bits together to verify all this but its a good working theory.
Lower shock mount
Upper
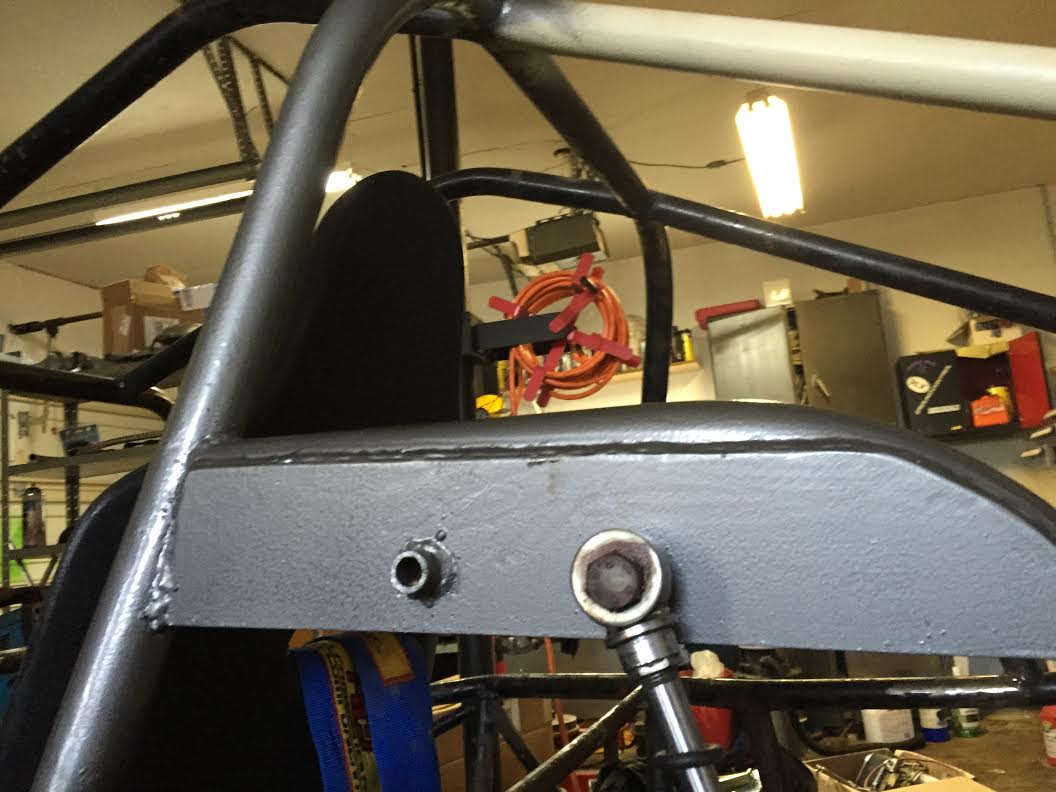
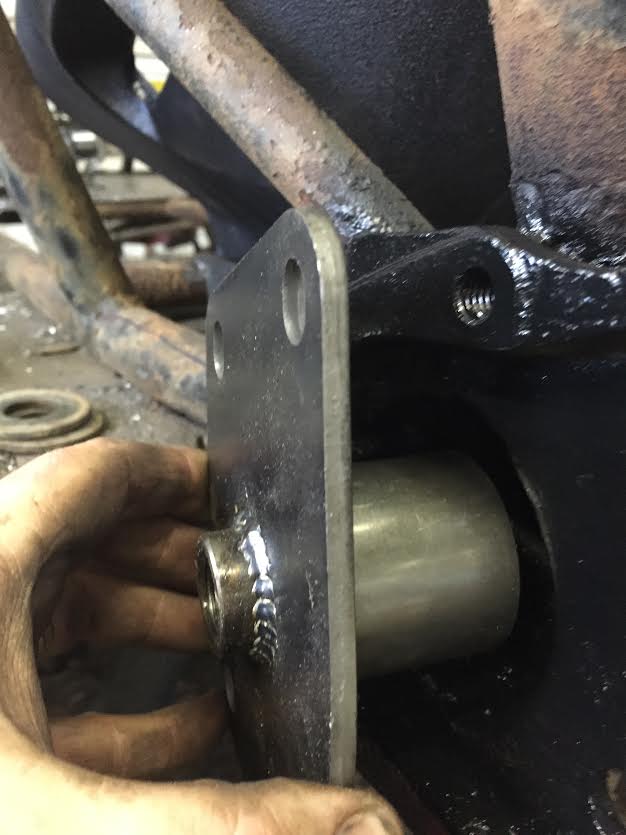
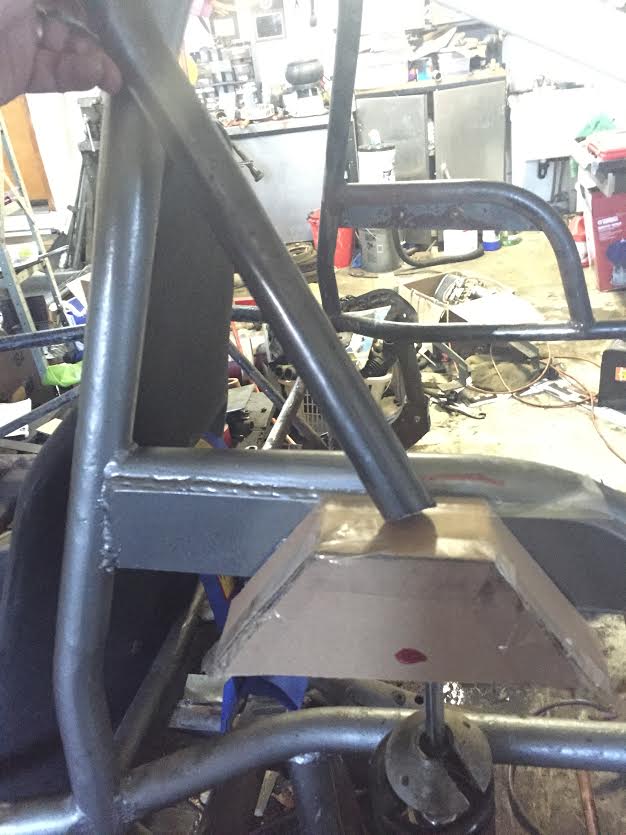
Of course since this is now a mount for a coil over, not just a shock that single shear, not triangulated mount isn't cutting it. My hour long noodling session leads me to something like this

The red lines indicate a "box" I'll make out of 1/4" plate. The top of the box will be level with the existing tube and the new triangluation tube will trianglulate to the top of this box. The front of the box will be plated as well to provide double sheer. I guess it will make more sense when all the pieces are there but I feel fairly confident this will work well.
That's all for today, gotta clean up for dinner with the inlaws.
JThw8
PowerDork
1/17/15 2:54 p.m.
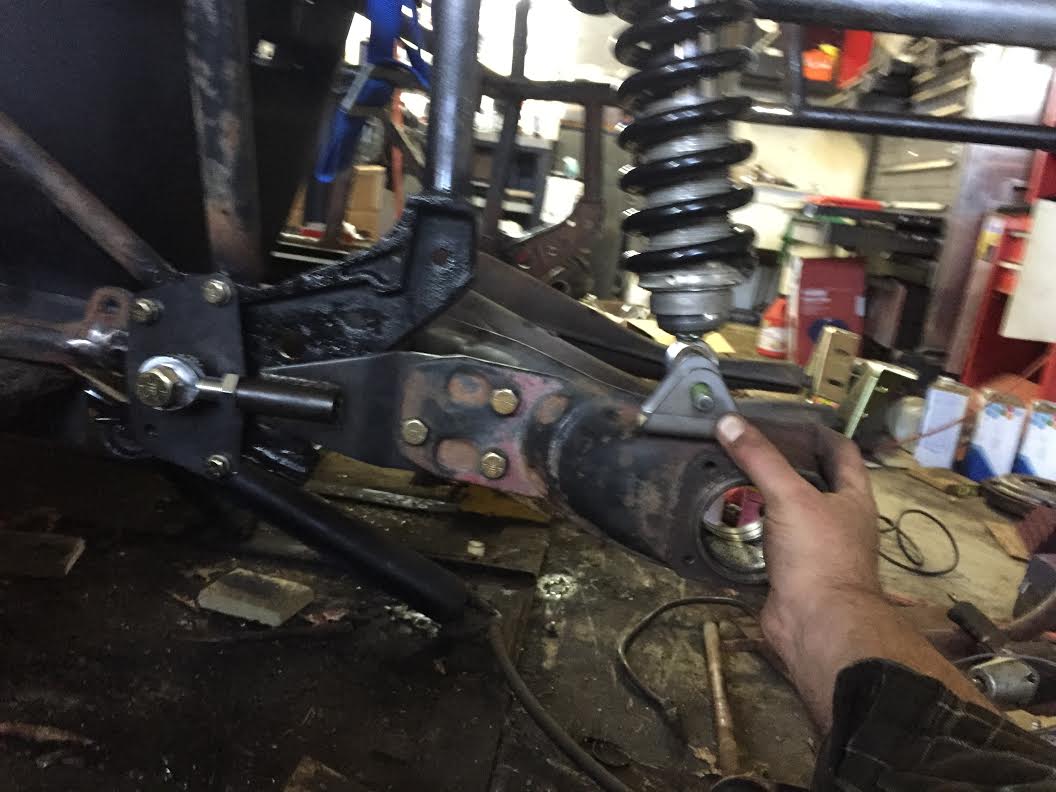
Quick mockup of the double shear mount just to put a picture behind what Im trying to describe. It would be a little smaller than this but the concept is the same
Those of you who are way smarter on this stuff than me a question. Is it better to triangulate to the top of the mount box as shown or to the tube behind it that everything mounts to?
Or to the tube but with a gusset from that to the top of the box?

NOHOME
UltraDork
1/17/15 6:48 p.m.
JThw8 wrote:
Quick mockup of the double shear mount just to put a picture behind what Im trying to describe. It would be a little smaller than this but the concept is the same
Those of you who are way smarter on this stuff than me a question. Is it better to triangulate to the top of the mount box as shown or to the tube behind it that everything mounts to?
Or to the tube but with a gusset from that to the top of the box?
I was going to go with your last thought. Four gussets in an X shape should be ample overkilll.
Id tube to the rail and gusset.
JThw8
PowerDork
1/17/15 7:39 p.m.
Dusterbd13 wrote:
Id tube to the rail and gusset.
Yeah, the more I run it through my mind the double sheer "box" can and will be A LOT smaller. The design I have now really makes more sense and better strength to gusset it and let the triangulation remain in the tubes where it belongs.
JThw8
PowerDork
1/18/15 1:33 p.m.
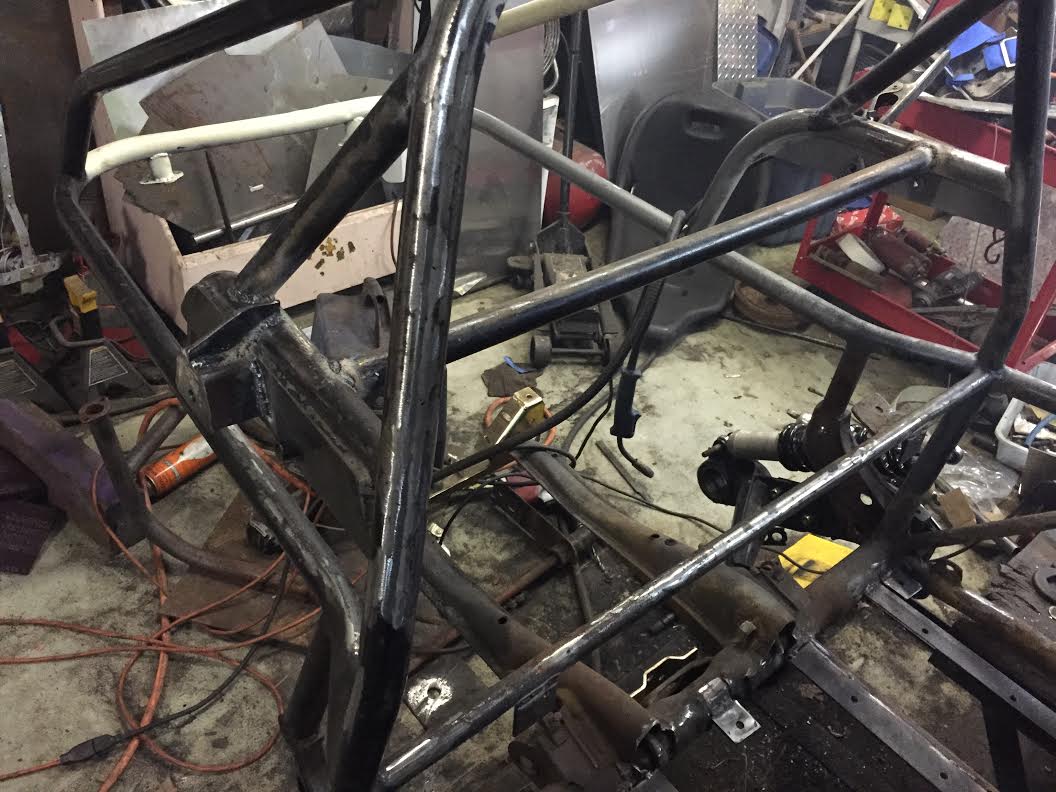
Another day of things taking twice as long as expected but I think I have something to show for it.
Here's what I came up with
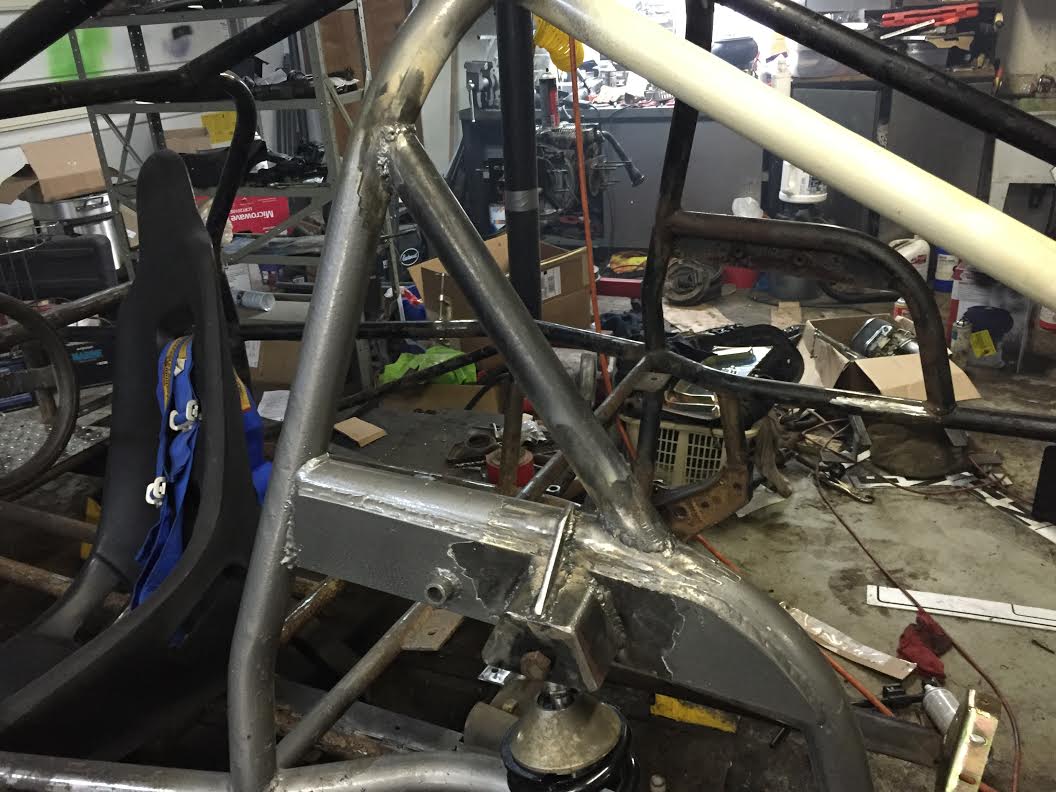
My only concern right now is I may have everything set too low. I'm really not going to know until I get it together and see how it sits. If that happens I may....well hell, I don't know what I'll do fingers crossed it's going to be ok.
JThw8
PowerDork
1/18/15 3:02 p.m.
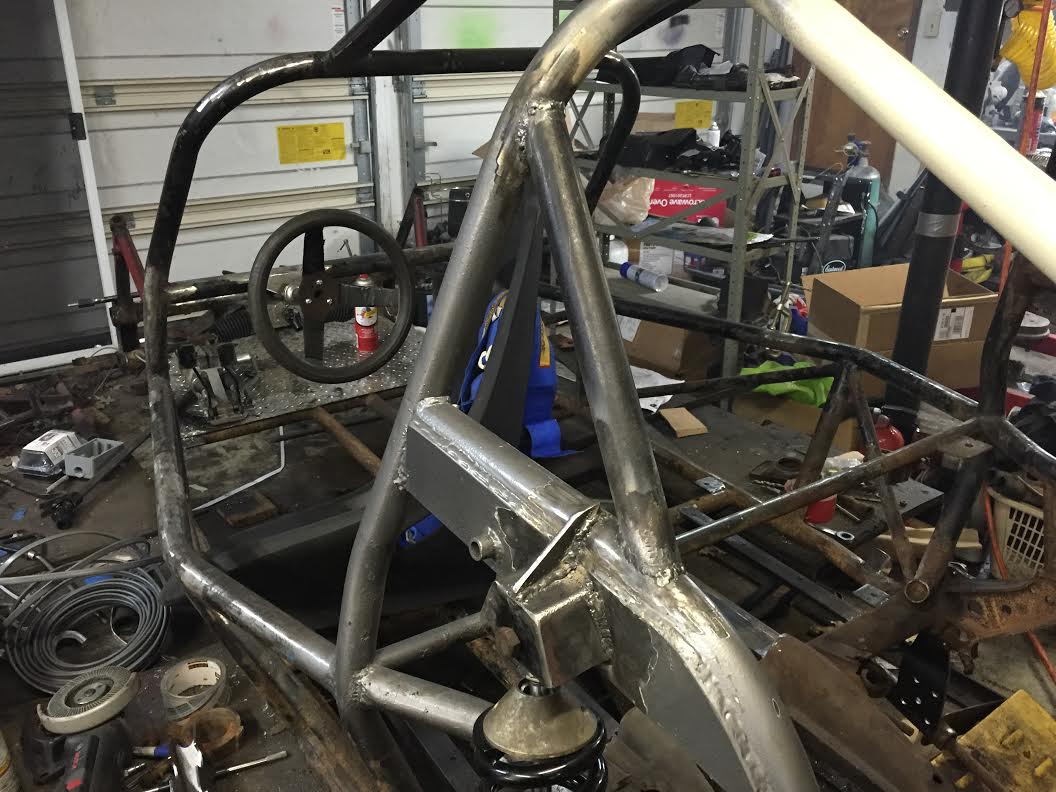
Finished up the other side and then ran a horizontal bar between the 2 shock mount areas. Mostly because I needed a harness bar but I figured tying them together couldn't hurt either.
theres no such thing as too low, unless the oil pan gets drug through when you hit a dip in the road.
JThw8
PowerDork
1/18/15 4:04 p.m.
Dusterbd13 wrote:
theres no such thing as too low, unless the oil pan gets drug through when you hit a dip in the road.
I like the way you think and that's what I keep telling myself. I will have a skid plate under the motor anyway and its all smooth autocross courses. I'm gonna keep one of the sets of really tall offroad tires for when I put it on a tow dolly to keep it up in the air.
JThw8 wrote:
I hope you put some gussets on the back side of the plate to the tube above, or the whole plate will flex to the left and right.
JThw8
PowerDork
1/19/15 10:03 a.m.
GameboyRMH wrote:
I hope you put some gussets on the back side of the plate to the tube above, or the whole plate will flex to the left and right.
I haven't yet, but I will be looking for other places to brace it up so I will throw some in there, but honestly if I am putting down the kind of forces that would flex that top mount the bottom mount and control arm would rip off the car first.
I would have continued the box down to the bottom of the plate along the interface to reduce the stress riser of the corner between the box and the plate at the bottom. Just angled it down there to complete the interface instead of squaring it off.
You are probably free and clear though.
I really can't wait to see this thing running. Spent some thought on doing similar and have a friend considering trying it.
JThw8
PowerDork
1/19/15 1:04 p.m.
Apexcarver wrote:
I would have continued the box down to the bottom of the plate along the interface to reduce the stress riser of the corner between the box and the plate at the bottom. Just angled it down there to complete the interface instead of squaring it off.
You are probably free and clear though.
I really can't wait to see this thing running. Spent some thought on doing similar and have a friend considering trying it.
If I had I would have needed to make the box much larger as you can see it just barely clears the top spring mount. I would have needed to make the box big enough to go around the whole spring.
edit: doh, no you can't see that because in the photo the spring hat is not in it's correct position. When the shock isn't at full droop like that the hat is just barely under the bottom lip of the box.
Here's a few pics of one of the wheels. The other just needs wiped off like this one. Sorry it took so long. My fedex buddy said we could ship with his 75% off discount as well.


JThw8
PowerDork
1/19/15 1:36 p.m.
Perfect Bruce, funny thing is I had the matching pair to those and sold them a year an a half ago 'cause they just kept getting in the way. But the guy is selling them on the Samba right now. For double what he paid me. Think Im gonna offer him the chance to make $25 for holding my wheels for a year and see if he bites.
I'll shoot you an email :)
JThw8
PowerDork
1/19/15 9:02 p.m.
No visual progress to report tonite but there was some progress in a way. Some guys from the local VW club stopped by to raid all my take offs and unused parts. I now have more space in the shop and I have recouped the purchase price down to $0 yea!


