As low as it will be going, all layed out:
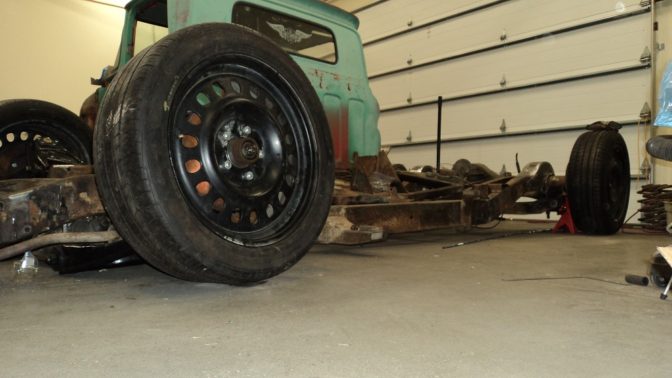
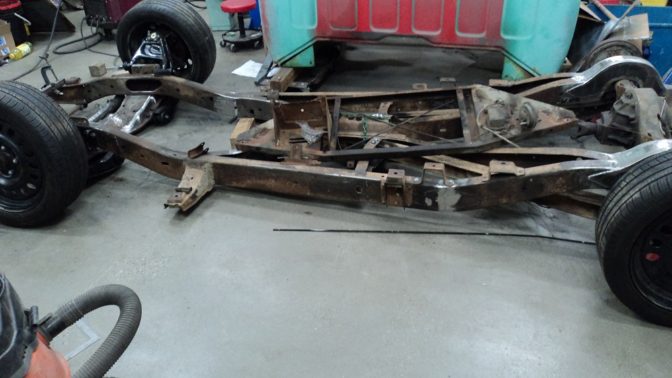
Looks to me like this baby will be slammed and bagged...
It only seems right since you have gone to great lengths to get it this low.
It keeps options open.
My '77 Silverado is 3" spindles and cut 1-ton coils to match a flip kit on Big-10 leafs. Maybe a 6/7 drop? The pumpkin is only a couple inches away from the bed floor, and the front tires skim the inner fenders at full bump, plus there is lots of stuff that hang below the frame. I cannot go lower without major surgery. I want to go lower....
Since I'm doing major surgery on the '61, including fabricating deep inner fenders up front for more clearance, I have the opportunity to run bags. And if I have the opportunity to run bags, might as well build it to put the crossmember on the ground (though I will not - I'll run bumpstops so it'll still roll).
I'm still on the fence about it, but building to be able to bag it.
Bag it! If your building it to be low enough, might as well just do it and bag it. Ride hight is still low, but can drive it, and slam it completely when desired.
I must confess, I have been spending quite a bit of time looking at how to build a cheap but quality basic air ride.
The Accuair e-level system is amazing, but that's well over $3000cdn for novelty.
Check out Pacbrake. They make overload systems for trucks but their bags are great quality and a reasonable price. You can probably make or repurpose everything else you need.
In reply to ShawnG :
Cool. I think considerable $$$ can be saved by not having all the E36 M3 controlled by your I-phone.
Pulled one of the axle shafts out of the 9", removed the bearing, seal, and plate, pressed the new studs into the new East Coast Gear Supply 5 on 5" axle shafts, and installed new bearing et al as well and then the axle. Now have one wheel properly bolted on on the back. We'll see how far I get on the other tonight.
Axle appears to have about 3.50 gears (3.55 if Ford???). Perfect for boost! And saves money, as I only have to buy a limited slip, not that and gears.
Front shock mounts are done. I used the '61 brackets, just relocated. Shocks are OEM squarebody. I set the chassis up at full droop, and positioned the bracket with the fully extended shock 1" away from the upper a-arm shaft threads. My thinking is this would make shock replacement easier, and in fact, there is still about 1" shock travel left at full bump.
I also picked up some Energy Suspension bumpstops (ES 9.9101 2.125" tall) for the front, which will set the chassis a tick over 1" off the ground fully dropped (you can see one just sitting in a hole on the far frame rail while I fit the shocks).
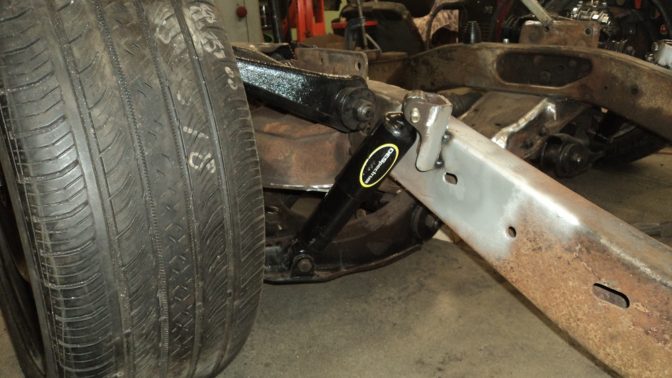
These will be fully welded later.
SkinnyG said:I must confess, I have been spending quite a bit of time looking at how to build a cheap but quality basic air ride.
The Accuair e-level system is amazing, but that's well over $3000cdn for novelty.
You can't really avoid buying the bags, but everything else in an airbag project seems like a perfect opportunity for some junkyard/hardware store fab! I'll bet that a repurposed AC compressor would WAY outperform the very best noisy 12-volt compressor in the overpriced kits, anyway.
Rear shock mounts kicked my butt. Repeatedly.
I'm not really sure why, but Oh My Gosh.
I finally got something figured out. I like the double-shear factory mount, which I had cut off and tentatively moved forward about 5". But because I want it to ride low, and I want the axle to bottom before the shock does, and because I want the shock to stay reasonably upright, and because I notched the frame 4", the mount went forward AND up.
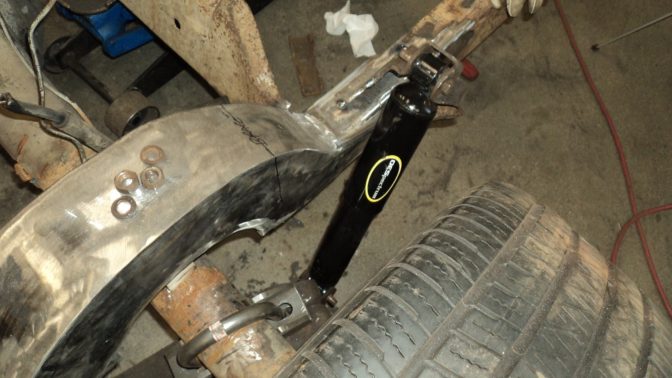
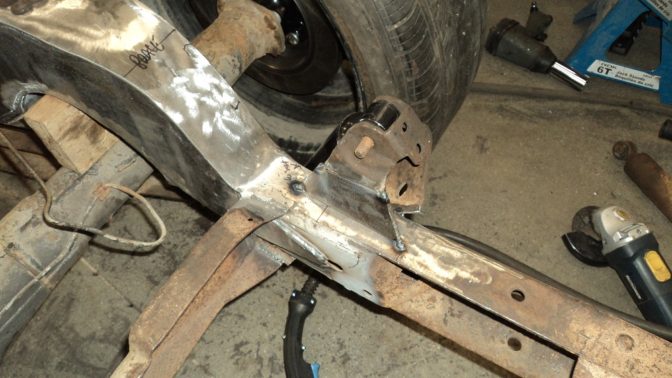
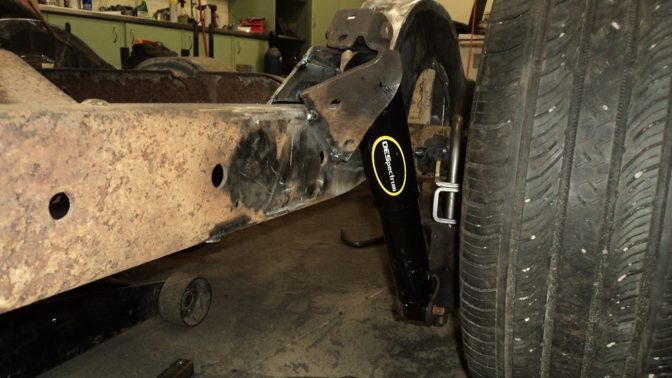
Yes, these shocks are leaning back, but this is how the factory did it. In 63+ GM put the shocks ahead of the axle, angled inward at the top, and angled forward. There are many people who alter the 63+ bracketry to get more travel and less angle out of the shock mounts, as well companies that will sell you the same thing. One company (No Limit Engineering) sells brackets that essentially duplicate the 60-62 mount, and everyone who has installed the kit has loved the improved handling, so, I'll give keeping it a try.
I was all giggly that I was using shorter 73-87 4wd front shocks for rear shocks. Turns out they are the same as the 63-72 rear shocks anyway. Figures.
Once I had the rear shock mounts done, I started second-guessing myself. I have ride height set with the front crossmember 5" off the ground, and the frame at the back of the cab 6" off the ground. This puts the axle (with 2" blocks) about half an inch into where the frame used to be. This is not where my 5" drop springs are going to put the axle, so honestly, my springs will be too tall. Instead of cutting it all out again (there were four or five versions of shock mounts, each one kicking my bruised buttox in the same place), I'm going to leave it for a bit. Once I have the body back on and can see how it sits with actual springs in it, I'll decide if I leave it, run 6" drop springs, or do a 3" block. If I change the spring, the shock mount stays. If I do blocks, the shock mount has to come down.
Front end Friday:
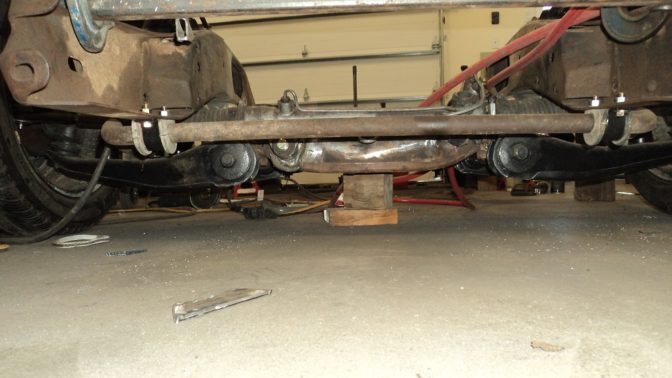
I picked up another set of 18" Grand Cherokee wheels, this time for $50. Good for winters.
I also placed the S10 Blazer tank on the back of the frame, and it looks like it will work great, and I can still run a hidden hitch!
Test fit of the cab on the "finished" chassis. This is ride height (bottom of crossmember 5" off the ground), and about as low as I can go and still steer.
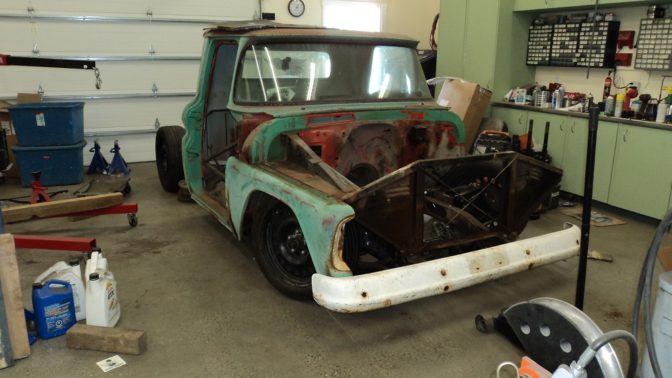
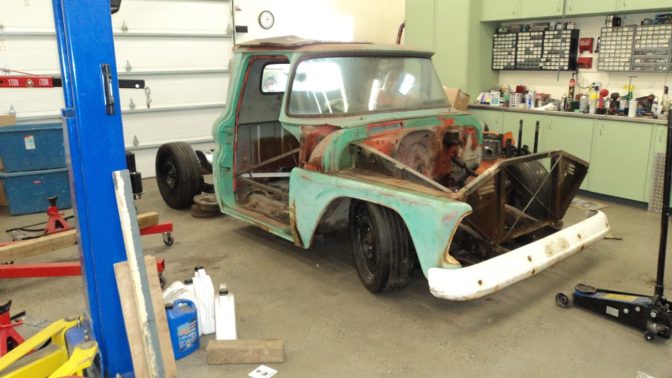
The tire hits the fender, but that fender is actually pushed in, so it might just clear once I fix the fender.
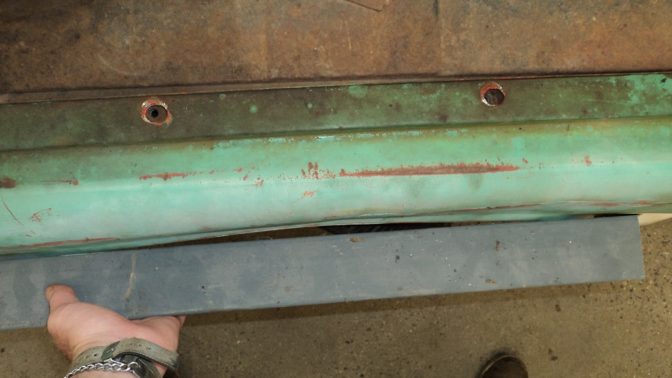
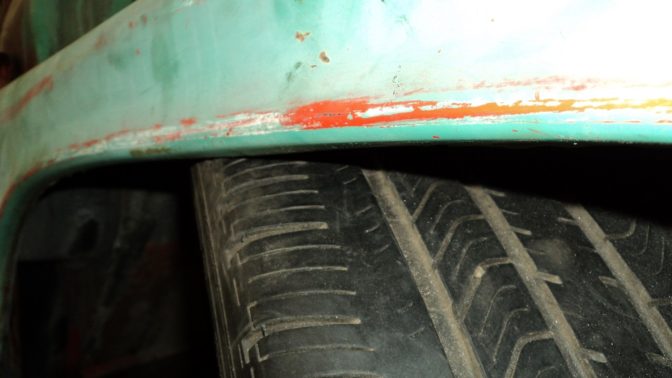
And, assuming I go air ride, this is sitting on the bumpstops (un-trimmed ES9.9101). Control arms are about 1" off the ground.
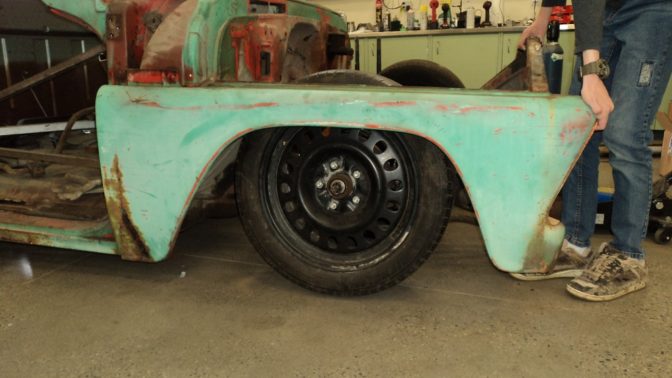
I'm very pleased with how the control arm modifications, spindle adaptations, and Jeep wheels all worked out. Modern rims, modern geometry, good clearance, low ride height, yeah!
Whatever i said about this build elsewhere on this thread I stand corrected ,this is nothing but North of the border AWESOMEness...as usual from YOU!!!
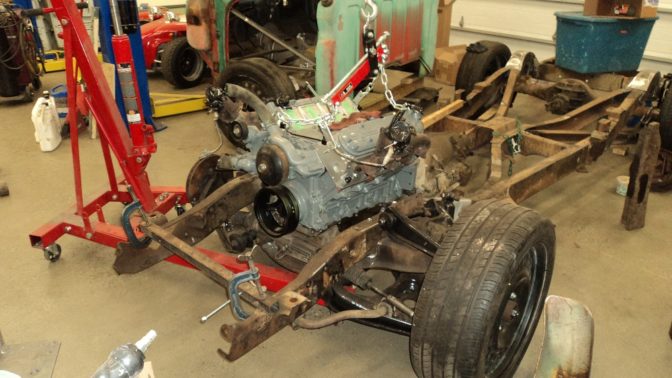
Trial fit the engine and trans into the frame. Yes, I will have to shorten the oil pan about 1.5", or spend $200+ for a F-Body pan, assuming I can't find one at the wreckers.
holy E36 M3, "bench vise on pedestal" is my new lust. how have i made it this long without one? i feel like i've been living a lie.
You're joking. Really?
There are times I wish it was fixed to the floor for sure, but for the most part I like the convenience ob its mobility. I have thought of buying another vise and fixing it, but then I'd be choked that it's less mobile.
For even more "on a pedestal" fun....
Sheet Metal Brake on a Post:

Bench Grinder on a Post:

Bead Roller on a Post (bandsaw in background also on wheels):

Also have a couple of Exhaustholderupinators (one shown):

As well as the Weeholderupinator for the Horizontal Bandsaw (and Metal Chop Saw, not shown), complete with obligatory Death Table:

I don’t need all of those.
I don’t need all of those.
i don’t need all of those.
I’m gonna start with the vise, and move on to the grinder. Neither will happen until after this Challenge, but at least now I’ve got goals.
Picked up a bit of 3/16" plate aluminum to shorten the oil pan to match the trans pan height. Probably get to that on the weekend.
Second week of school is over, and I'm not getting anything done in the shop. Exhausting. I usually start picking the energy back up some time in October.
You'll need to log in to post.