1 2
frenchyd
frenchyd Dork
1/14/18 10:24 a.m.

Had a big discussion last night with car guys.  There seemed to be two extremes with regard painting.  Aside from the one guy who insisted repainting should never happen no matter what. It’s only original once——— 

But I think he’s just scared by the expense.  $10,000 floated around like it was buying a loaf of bread.  A few said the original job was a repaint but once apart the multiples of $10,000 came like the next beer.  Oh and while I’m——— 

i digress,  the two opinions.  First want to strip it down to the bare metal and use expensive two part high dollar cost stuff.  Somehow believing that if they spend enough the first time nothing bad will ever happen and they won’t need to go to that expense again.  

The second group felt they could do it themselves and would only touch up the areas that really need a repaint and buff everything together to make it all match .  We all agreed that the original Lacquer was perfect for this.  

The real arguments started once we said it’s possible to repaint faded paint.  Of course by then more than a little imbibing had occurred.  

I guess the point is open. On a repaint would you go modern paint and have it done or would you do original and just touch up as needed?  

Streetwiseguy
Streetwiseguy UltimaDork
1/14/18 7:22 p.m.

Paint is a terrible pain for me.  I want old paint, but I want rust free, and that is a problem.  If I see a fresh paint job, it needs to be perfect, and that pisses me off.  I was at a car show, looking at a lovely Challenger, and all I could see was a little bulge in the vinyl roof seam above the driver's door.  I would accept that from a factory paint job, or a 15 year old job,  but it drives me nuts on a fresh build.

I don't like being that guy, but it's who I am.

frenchyd
frenchyd Dork
1/15/18 3:04 a.m.

In reply to Streetwiseguy :

I agree. We want nice, perfect even, but perfect comes at a cost.   Either we obsess about every detail and the finish job carries on forever.  Or we pay someone else to obsess about it for us and the cost approaches the national debt.  

Then once it’s finally finished we try to protect it.  Either by locking it in a cocoon and never using it. Or by rarely using it on perfect days under perfect conditions.  Dying with the first stone chip or scratch. 


Dirtydog
Dirtydog GRM+ Memberand Reader
1/15/18 8:37 a.m.

Personally, I prefer a nice looking vehicle that you can enjoy using.   A trailer queen, is like looking at fine art.  You look at it, and then look at it some more.   I suppose there is joy in that, but not for me.

Rufledt
Rufledt UberDork
1/15/18 10:57 a.m.

Just my opinion, but I think original is best, even imperfect, followed by original with loads of patina, but I draw the line at rust holes.  Patina is really cool but when I see a hole it’s like a cancer patient who doesn’t want the tumor removed because the surgery will leave a scar.

i get what you’re saying about repaint, though.  Perfect looking jobs require a home equity loan, and cheaper looking jobs make me think the whole project was done at beater-quality.  

A friend of mine had an S2000 that had a little rust.  Not visible, but underneath.  He found it, cut it out, welded in new steel, and did a full repaint on the car, during which he shaved some emblems and slightly altered the color to a black with just a hint of dark blue in the sun.  It looked damn good.  I found myself upset when I noticed 2 specs of dirt in the clear coat, and I immediately thought the whole job was suspect.  It wasn’t, though.  It looked great.  This guy is a professional welder, so I know the patch was done right, and the painting was done by a pro body shop with a full booth and everything.  2 specs isn’t bad, but I had to force myself to think 2 specs is better than hidden rust. It looked far nicer than any of my cars, that’s for sure!

frenchyd
frenchyd Dork
1/17/18 10:49 a.m.

In reply to Rufledt :

You can do a perfect job cheaply even without a lot of experience or equipment.   I won a number of awards with my first paint job and today 43 years later and 10’s of thousands of miles including about 50 races it still looks good

   It’s a lot of work but it really helps if you have someone talk and walk you through the process because it’s daunting.  Plus you don’t know what’s good enough, what can be done better,  and what’s not worth doing in the first place.  

frenchyd
frenchyd Dork
1/17/18 10:53 a.m.
Dirtydog said:

Personally, I prefer a nice looking vehicle that you can enjoy using.   A trailer queen, is like looking at fine art.  You look at it, and then look at it some more.   I suppose there is joy in that, but not for me.

I think that’s why patina has become so acceptable. Those chips and scratches are part of the car’s history and help tell the story.  

I’d rather have a race winning car with the scars of battle than a painted and polished version.  

Chris_V
Chris_V UberDork
1/18/18 7:11 a.m.

As a custom painter for many years, I have a middle ground position. the factory paint is usually the best adhered to the car, so using it as the substrate is desirable, once the topcoat is sanded away (and in a BC/CC situation where the clear is fading/delaminating, it needs to be all gone, but not down to/past the primer). I tend to use 320grit on a DA or 400 grit wet on a block to sand down the paint surface to prep it for respray, as that's enough bit that it hooks in good, but not enough grit that the sanding marks show.

Modern material are the best for durability/gloss/and ease of spraying, so ude them. But they can be pricy (a gallon of unmixed metallic paint can run in the hundreds of dollars, then you need the reducers and catalyst AND the clear paint with ITS reducers and catalyst).


Of course, there's always MAACO.

Actually, you can get good results at Maaco, if you do good prep work before hand. Prep is almost all the labor cost in a high quality paint job (true, the materials themselves are more expensive: Real urethanes rather than the synthetic enamels with urethane catalysts that Maaco uses), so if you're careful, you can get a good job for cheap with Maaco and your work. (You may not go, but others reading this might, and this will help get the best job possible).
A good shop will often have to go over the car anyway, so you won't save too much by doing work yourself, unless you are confident enough in your prep work just to have them spray over it... But there are still steps you can take to save some labor and time.

Remove as much trim as is possible. Removing trim means 1) not having tape lines, and 2) someone else isn't responsible for loss or damage. It also means that the prep work can be done right under where the trim was, for a higher quality finish job (and edges around trim is where jobs usually fall down when economizing. Lack of sanding right next to trim can cause paint to peel later). If you're changing color, also remove door panels and carpet edge trim in the door jambs. Do a thourough job of cleaning the jambs (even if you're not changing color. This keeps dirt from coming back out into the new paint. A good shop will do it, but it's labor, and you can save time there.) On the same lines, clean the engine compartment thoroughly. Get a good degreaser/wax remover, and go over the whole car. Especially the door jambs, as years of Armor All can accumulate and cause problems (Armor All and the like are silicone sealants. Paint doesn't stick to silicone, and usually has serious reaction problems to even a drop of the stuff...).
If you are doing the engine compartment, degrease everything, and pull back as much wiring as you can, or completely mask everything (an easy trick is to use aluminum foil to wrap intricate bits...)

These are basics that can save the paint shop a bit of time and hassle. It may not save much money, but the job will be better, which ends up the same thing. If you want to go farther (or go to Maaco), you can do much of the sanding yourself. On areas where no bodywork is necessary, get a sanding block and 320 grit wet-or-dry sandpaper, of good quality (3M or Mirka Gold). Carefully wet sand the body with the block (taking care around edges, so as not to sand through) until all trace of gloss is gone, and you have a nice, even, dull finish, getting as close to the factory primer level as you dare (remember, electrostatically applied, baked alkyd enamel like the factory uses is the absolute best substrate for new paint there is... bare metal requires serious chemicals to make it so that airborne applied paint sticks and doesn't have corrosion problems later. And NO "baked" paint afterward is truly baked like the factory paint is. For one, when painting at the factory, there are no glass, trim, or interior parts installed to be damaged by high temps.) Sand in linear motions, but alternate directions to keep the sanding even and level. In the jambs (if painting them) use the 320 by hand in as much as you can reach easily. Then get 3M Scotch Brite pads (the red ones) and go after them again (the Scotch Brite gets into all the crevasses regular sandpaper can't). Use the Scotch Brite on the body crevasses that are hard to reach with sandpaper (especially around edges of panels)

Any areas where bodywork is necessary (door dings, minor dents) need to be hit quickly with 80 grit paper. Door dings need to be shown up so they can be attended to (if you want, you can do the work yourself with a high quality filler. I use USC's BaseCoat/ClearCoat, as it spreads smoothly in very thin layers, is easy to work, extremely easy to sand, and doesn't stain through the top coats. It is also light and durable (I had a customer get hit in the same spot that I had done serious bodywork on and the filler that was there not only didn't crack, it didn't separate from the body surface)). If you are going to be doing the bodywork (say before going to Maaco) try to always hammer and dolly out most of the dent, so the filler is only a skim coat to fill the minor hammer ripples left. Filler is better when thinner (anything under an eighth inch should last a lifetime). And again, try NOT to remove factory paint if at all possible, because filler sticks better to paint than to metal, and there is little chance of trapping water or corrosion that way. Just scuff it well with 80 grit (don't use 36 or 40 grit, as it tends to leave scratches that show up later after the paint and primer shrink up...) before applying. Apply filler at the exact level you need it at, so to reduce sanding later. Feather well to the outside of the dent. Use a long board or longer block sander to make sure it's even and level (waves are for beaches...).

You can get good primer results on bodywork or edges that have been sanded to metal with Krylon sandable primer, believe it or not. Just spray a couple light coats, let dry thoroughly (24 hours is best), sand lightly with 320, then spray it lightly again to level it out. Major primer areas should be shot with a catalyzed urethane primer, like PPG K200 (or the flexible version for urethane bumpers). Again, let cure completely (24 hours is best, even a couple days is good). Block sand wet with 320 before taking it to the paint shop. A good trick to make sure the surface is level is to lightly spray a spray can of color (like Krylon flat black) over the primed areas, letting it dry, then hitting it with the sanding block. This guide coat will show up imperfections that can be attended to, either by more sanding, or more bodywork if necessary.

After all is completed, clean completely again with a wax and grease remover.

I noticed I didn't say anything about masking and taping... ALWAYS use a good masking tape. Cheap tape is no savings ever. 3M or American Performance automotive masking tape is all you want to use. If masking needs to be done, take your time (this is why you remove the trim... so making perfect edges isn't as critical, and there are more "natural" places to mask to...)

After this, it's ready to paint.

If you do go to Maaco after this, get their catalyzed paint (otherwise it will NEVER get repainted without completely stripping everything....), and if you go metallic or pearl, definitely get the clear topcoats (clearcoat is merely unpigmented paint, regardless of who does it). If you go solid colors, clear isn't necessary. Just have them put an extra coat on it.

After you get it home, let it cure for a couple days to a week. Then, hit it with 1000 grit wet sandpaper until all "orange peel" and dirt nibs are gone (be very careful of edges. In fact, stay a quarter inch or so away from the edges to start with). Hit it lightly after that with 1500 grit. then either a pro detailing shop OR even you can use rubbing compound and a foam pad, and polish the paint. Top it off with Meguire's #9 on a foam finishing pad for a deep gloss. But do NOT wax or treat your paint otherwise for 90 days! Regardless of where it comes from. The paint needs this time to cure properly, and waxing will inhibit that, and could possibly damage the paint for the long term. (Top show car guys do it right off, but top show cars never stay the same color for decades, so longetivity isn't as important...). Do these steps right, and you'd be surprised that a Maaco paint job can look considerably better than factory... (of course, it's still cheapo synthetic enamel with urethane catalyst, but if you're on a serious budget, it can still look like you spent good money...)
 

Chris_V
Chris_V UberDork
1/18/18 7:13 a.m.

remove all trim if possible, and prep them separately (door handles and mirrors). If the bumper strips are removeable, do so, and refinish them separately. If not, prep as I indicated, get the main paint done with them unmasked, then mask and refinish the strips (unless you want them body color...). Any plastic parts to be painted need to be cleaned and degreased as I described, then a special plastic primer (available from Mortons or SEM at your local autobody/paint supply store) needs to be applied about 10 minutes before actual painting. This keeps it from peeling. You can also use a product from Morton called Jamb-It or from SEM called Sand-Free as a way to open up the pores of the plastic and lock the first fog coat of primer in place (also good for those areas that you simply can't sand. But it's NOT a substitute for good prep otherwise.

Questions:
1) Do you know what MAACO does as far as prep? Should I assume their's is weak and that I should do yours on top of buying there's? They do have several classes of prep and paints and clear coats.

Minimal prep. And once you ask for "real" prep, the same $7/hr guys who scuff the cars attempt to do real prep. They simply don't get paid enough to take much time or do good work.

Again, clear coat is just paint with no pigment (and UV inhibitors). There are cheap clears and quality clears, but they are the same as the paints. Since Maaco uses cheap paints even in their top of the line jobs (unless a particular shop contracts out with name brand paints, like PPG, DuPont, etc), the only ones to use are their catalyzed urethanes.

2) I can't imagine MAACO sanding the whole car to a dull finish (price). Do they have some kind of chemical treatment that's 1/2 as good as a sand job and basically just aids in the base coat adhering? Is that adviseable?

Yes, they can use solvents like I described above. But really, the only thing those are good for is in hard to sand areas, and then only sparingly. They are not substitute for good prep, unless you like the 3D tearaway look..

3) I bought a new front fascia for my car. How are those properly painted and can MAACO deal with that without flaking in a year? My rear fascia needs REpainting. What is done to prep that?

On flexible parts, you first need to clean and degrease them 9even and especially new parts). Then the scotch brite pad I talked about before is gone over thoroughly to scuff it up. Then use a fog coat of the Sand Free to open the pores of the urethane, and a flexible urethane primer is applied. When done properly, the primer is thus locked to the urethane. Scuff the primer completely (after proper cure... again, I always give 24 hrs). Then the part is ready to apply paint. If using a urethane base coat/clear coat paint system, the base coat goes on as normal, then the clear gets a flexible additive added. IF using a single stage paint (no clear) the flexible additive is put directly into the color (and use the same paint as for the rest of the car. the flex additive won't negatively affect the paint on the metal bits...)

Prep is the same on the rear bumper, just as on the rest of the car. Finishing is done just like the front bumper described above.

4) I'd like my door bump trim strips to be painted body color. What kind of prepping is involved in that? I bought some spray stuff that supposedly aids in paint adherence to plastic pieces. Is that good? When I talked to MAACO, they seemed hesitant about guaranteeing painting those plastic pieces.

Prep is the same as desribed for a new urethane bumper, above. The spray you have may work, though usually that is for ABS plastics... and no, Maaco doesn't like to guarantee anything outside their normal scuff and shoot process.

5) I've talked to (2) body shops and they told me, "You don't want us to do it kid. You don't have the money. Go to MAACO." Evidently body shops are busy enough not to need paint business alone and that the labor in the dent repair would kill me. Also, there are no places that just paints primarily... other than MAACO. Should I not even pursue body shops given my price limit?

Mainstream bodyshops are like that. They DO have too much work usually just in dent repair (where 90% of income is labor, and profitable). Complete paint jobs simply don't profit like crash work on small panels. I know of shops that simply won't DO completes. But there are also smaller shops (and the ocasional hobbyist) that you can go to, with the caveat: look at their other work and talk to other people who have had work done by them. Some are definitely shady, some are total flakes. Some are craftsmen. Some are guys like you and me, but doing this on the side with regular jobs and lives taking up most of their time, so the work might take longer, but come out better.

I've seen work out of carports and back yards rival top shops, and usually exceed factory or crash repair shops. I've also seen serious hack work by guys who have been at it for years. The only way to find out is talk to satisfied customers. Always be involved in the process. I actually hated it when people dropped of their cars and say "call me when it's done." In non-crash repair and custom work, constant contact is important. And in the case of a place like Maaco, mandatory to getting a good job. If you know what you're looking at and how to achieve it, you can get good enough work on a budget.
 

frenchyd
frenchyd Dork
1/18/18 7:32 a.m.

In reply to Chris_V :

Excellent report on the requirements of painting. 

I like using Lacquer for it’s fast drying and ease of repair but mostly because it’s durable!  

I know!  Insert objections here!  I’ve seen wonderful paint jobs done by complete  novices.  You’re right, hi tech paints are better( except for the painter) and more available. Except in the day of the internet I can find what I want on line.  Ditzler’s double deep black?  Sure! Jaguar Regency red?  How many gallons? Whatever is needed is available. OK There isn’t the same variety of Lacquer thinners but for us amateur painters we can usually wait the weather out

Plus there is that pesky 44 year old paint job in the shop still looking good.  

NOHOME
NOHOME UltimaDork
1/18/18 7:44 a.m.

In reply to Chris_V :

 Always be involved in the process

This. Anyone that I help with tin-work, I make sure that they know that they are the project manager. 


Another thing that I cant yell loud enough.....NEVER tell a shop to "Take your time" "I am in no rush" "Do it between jobs" or any words to that effect.  ALL body shops are staffed and run by people whose brain chemistry has been chemically altered by solvent fumes and they will lock your car in paint-jai-purgatory l if you utter such language. I guarantee that the work will never get done if you even hint at having a nanosecond of slack in your schedule.

frenchyd
frenchyd Dork
1/18/18 7:52 a.m.

In reply to NOHOME :

Please listen to Nohome

One of the prime reasons I paint my own cars( well let’s be honest I’m too cheap to pay others to)  but all too often I’ve sat with an empty trailer outside a paint shop waiting for them to finish 

Tom_Spangler
Tom_Spangler GRM+ Memberand UberDork
1/18/18 8:09 a.m.
frenchyd said:

In reply to Chris_V :

Excellent report on the requirements of painting. 

Seriously, good work.  This could be easily turned into an article in the magazine.

Dirtydog
Dirtydog GRM+ Memberand Reader
1/18/18 9:05 a.m.

In reply to Tom_Spangler :

I second that emotion.

NOHOME
NOHOME UltimaDork
1/18/18 9:53 a.m.

If you plan to paint a car, you need a set of these: (watch the included video or youtube it)


After you have done the metalwork, the epoxy primer and the Rage Gold filler shaping, you will be using the sanding blocks to sand this stuff until you feel like life is no longer living. I like to take this to 400 grit.


At that point you decide if you are going to have it painted or do it yourself. I like to shoot a sealer coat of primer over the feather-fill and then go to 600 grit for paint. Speak to your painter at this stage.

One of the things to realize when delivering a "ready for paint" car to a painter is that they wont be wanting to take any responsibility for stuff going wrong beyond bad spraying. If there is a chemical reaction down the road where the paint fails, it will be on you. They also wont want to be shooting your paint as they are usually comfortable with a given product.

frenchyd
frenchyd Dork
1/18/18 10:19 a.m.

In reply to NOHOME :

I use power equipment on everything except the absolute last coat.  Paint is such a large big process that everything possible to speed things up  is worth the money.  

Maybe not if you are never going to paint another vehicle, except once you’ve done one the next one will go a lot faster.  You’ll learn what needs to be done and what is counter productive.  The fastest approach to a task etc.  

i painted a rusty old beater once.  Took a grinder to the worst holes etc. ground things more or less smooth.  Put duct tape over the actual holes. Taped off the windows etc. Then sprayed old alkaloid enamel in thick gobby  coats.  If a run developed I sprayed paint until it was washed smooth 

rolled it out into the sun ( leaving a clear outline of paint on the floor). And let it dry over the weekend.  

Monday morning I was astonished by a semi decent paint job once I pulled the masking tape off. 


So the formula is fast fast and dirty 

Full disclosure?! 

I paid $50 for the car and that was probably overly generous.  The paint was discarded USNavy paint 5 gallons and I used it all.  

But there is something magic because the paint dried smooth and shiny.  Nor could you see the edges of the duct tape covering the rust holes.  

NOHOME
NOHOME UltimaDork
1/18/18 11:13 a.m.

In reply to frenchyd :

If I did this for an income or more than once every few years, yeah I would agree...I have pneumatic sanding boards, but do not like them. Since I do not make a living at this, time is not of the essence, I prefer the tactile feedback of the sanding blocks.Besides being a Zen thing, its kind of like the ultimate authority for panel flatness is running your hand over it.

I also have a bit more time to ponder on what and how things get screwed up when block sanding.

Another reason that I avoid the sanding boards is because they make a lot of noise. Even with a very well sound insulated garage, I would prefer to not risk pissing off any of the locals. I have witnessed first hand what happens once the city takes an interest in what you are doing in the shop.


Pete

JoeTR6
JoeTR6 HalfDork
1/18/18 11:32 a.m.

In reply to Chris_V :

Thanks for taking the time to write this up.  Very informative.

frenchyd
frenchyd Dork
1/18/18 12:18 p.m.

In reply to NOHOME :

I’m a racer,  not a restorer.  While I’ve done plenty of restorations in my day it’s always been a part time gig to provide me with racing funds.  ( on top of a career in sales) so time is critical. 

Now I’m old and no longer have the muscles needed. So I have to use power,noise be darned.  I do deal with that by the way my home is built (14 inch thick walls) plus I go out of my way to keep the neighbors happy.  

I’m getting more than a little hard of hearing but twin engines roaring through the aluminum of my aircraft during the worst of Vietnam probably did the most damage.  Although decades of racing and tuning engines probably did damage as well.  

Like the farmer who locks the barn after the horse gets out in the last couple of decades I have been wearing ear muffs

LanEvo
LanEvo GRM+ Memberand HalfDork
1/19/18 11:57 a.m.

In reply to Chris_V :

Your posts have been very helpful. Thanks so much for them! Should definitely be an article for the magazine.

I have been considering Maaco for my racecar. It's non-metallic black, so I figure that's as easy as it gets. It's already had one Maaco job about 10 years ago by the previous owner. Still looks pretty good, but it could use some freshening up.

A friend of mine is a professional body man and he offered to do the block sanding/smoothing himself for a fair price, then take it to Maaco for a spray. I was planning on having Maaco do the whole job, but based on your post it sounds like I'd be better off having the prep done by a pro.

What are your thoughts on color change? I'd like to move away from black (black sedan looks like an anonymous blob on track) and go for a milky grey ... something along the lines of Audi Aviator Grey or Jeep Anvil Gray.


NOHOME
NOHOME UltimaDork
1/19/18 12:15 p.m.

I would definitely do my own block sanding and let Maaco spray their paint.

Color change eats a lot of time if done to a high standard.


Pete

frenchyd
frenchyd Dork
1/19/18 2:13 p.m.

In reply to LanEvo :

You didn’t ask me. But Black is the only color that touches up easy. If you don’t like the color improve it with graphics. Probably cost less than a repaint and you can do some classic or fun stuff with black.  

The Lotus Formula 1 team went black and gold and to this day everybody remembers it.  Or  add yellow stripes and become a Bee

maybe a bit of the 70’s with Burgundy blocks surrounded by black with a gold border pinstripe( tape). 

LanEvo
LanEvo GRM+ Memberand HalfDork
1/19/18 2:38 p.m.
frenchyd said:

You didn’t ask me. But Black is the only color that touches up easy.

Good point.

frenchyd said:

If you don’t like the color improve it with graphics.

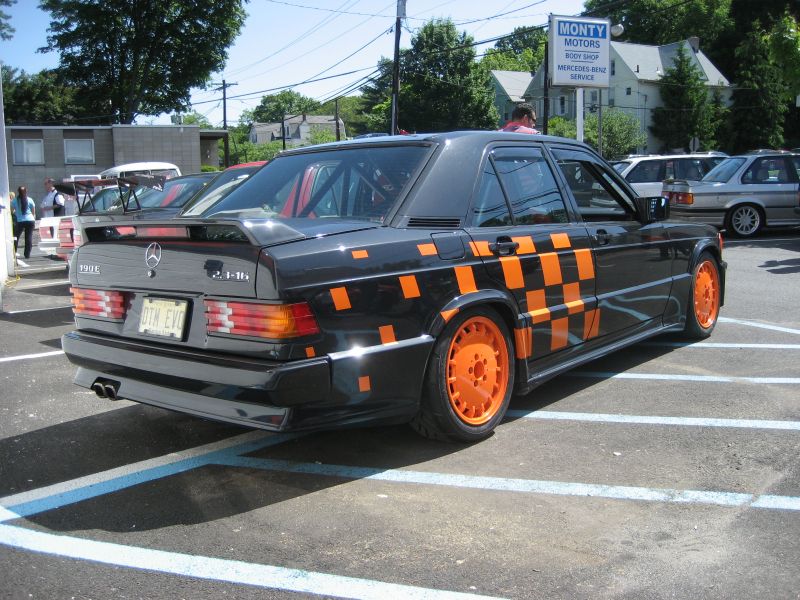
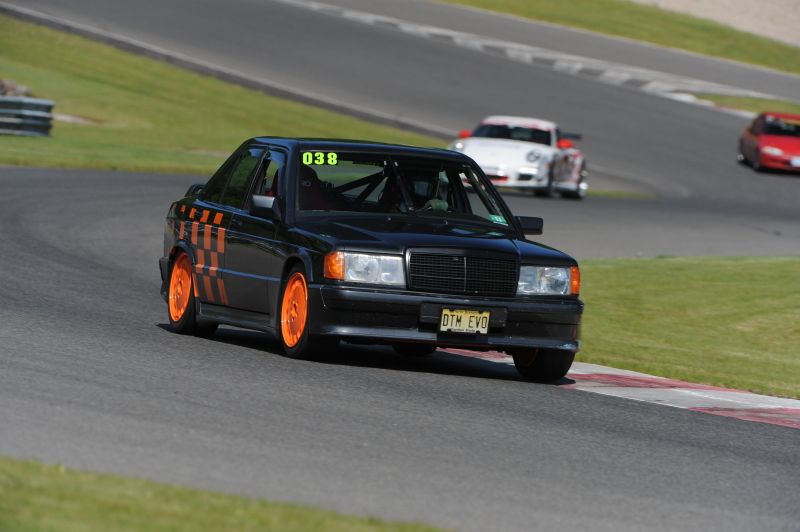
I've already done that. Originally black with GT3 Orange accents:

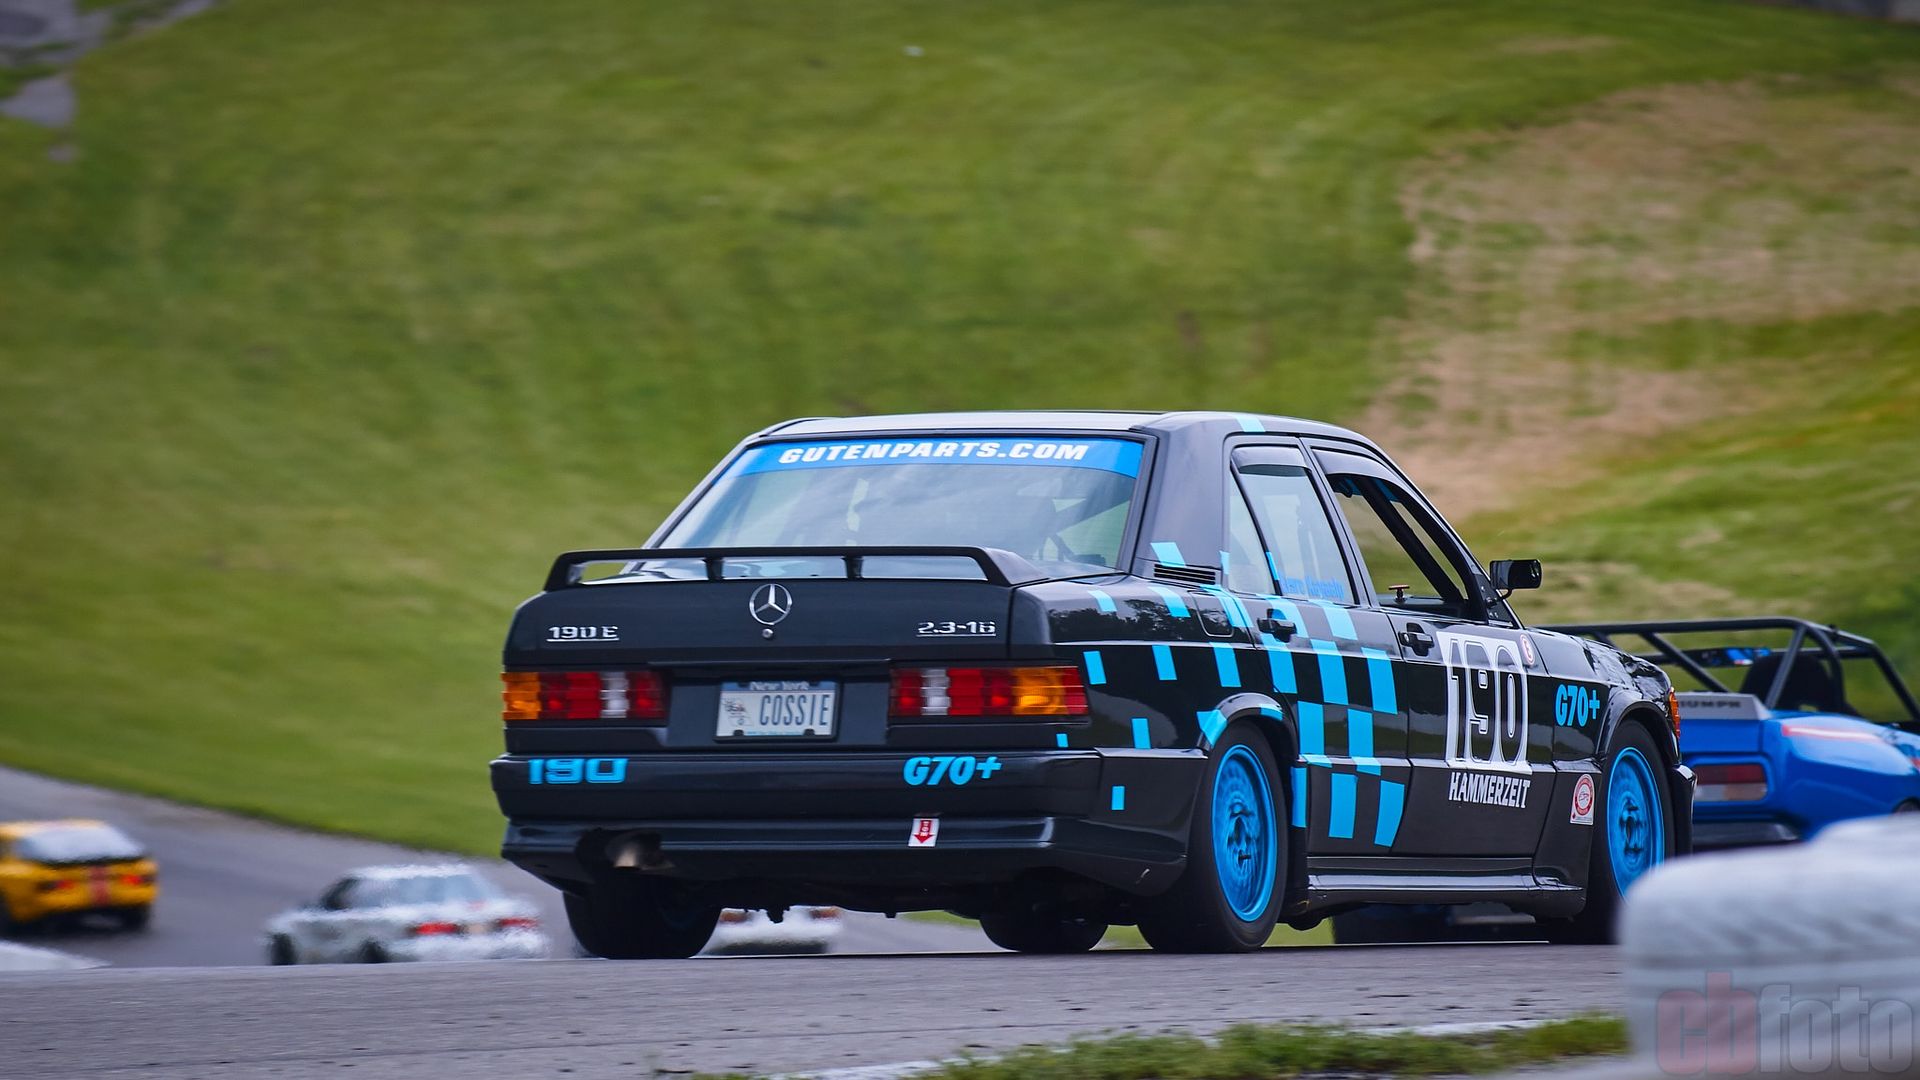
That color scheme felt played out rather quickly. Decided to switch to black with baby blue accents. Also added back the chrome grille to liven things up a little:

Thought I was pretty original. I figured no one in their right mind would do baby blue. Unbelievably (to me, at least) I'm seeing a million cars with the same color scheme these days. I need to get further ahead of the fashion curve LOL

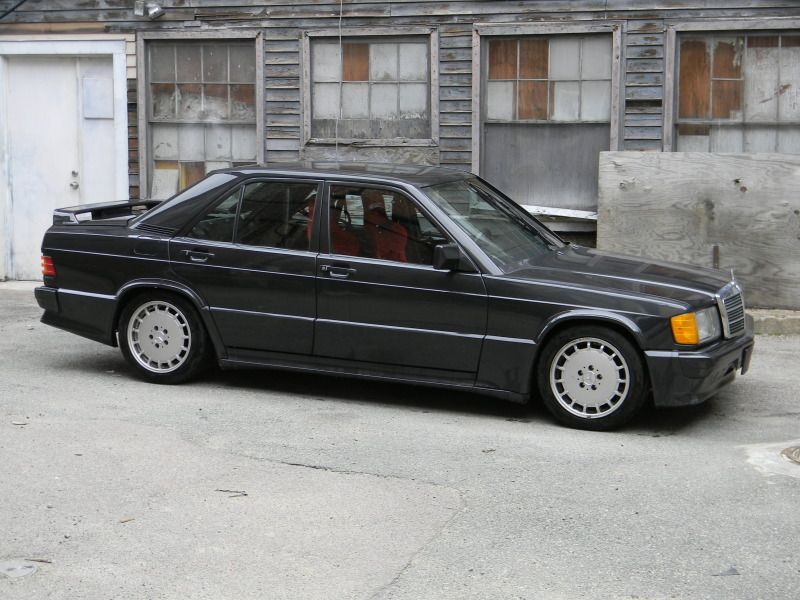
BYTW, here's how the car originally looked. Pretty boring...except for those Carlsson wheels!

frenchyd
frenchyd Dork
1/19/18 3:45 p.m.

Looks like you’ve gone that way about as far as you can. I’m just not sure a grey would do that much.  

Me?  I like the classics.  Deep rich Burgundy’s. Deep royal blue.  All with tasteful gold trim of course.  I’d say British racing Green but don’t want to offend.  

And as far as fashion,  your best clue would be women’s fashion.  What color purses are selling well?  Shoes?  Don’t go by dress color because women will change on a whim.  ( sorry ladies)  walk into a Coach purse store and ask ( oops I dated myself there).  

Tom1200
Tom1200 HalfDork
1/19/18 9:54 p.m.

Absolutely a great tutorial on paint; the first paint job on our car was done by either One Day or Maaco I can't remember; the advice above is spot on, we were on a really tight dealing and didn't manage to get all the prep work on the hood and front fenders done. The back 2/3rds of the car looked really good. The fenders and hood looked like the $139 paint job it was. 

The current paint job we did in the garage; a friend who has sprayed a number of cars did the actual painting and helped me a little bit with prep. Prior to this I couldn't fathom how a paint job cost $10,000, after doing the prep work I no longer question why paint a car costs so much.

1 2

You'll need to log in to post.

Our Preferred Partners
wvUqveY8EAngNrwjgvryyf2C7d3kv28yojC0tN1ks2oyYHzyJtYunurA5dPRJ4A1